How to Set Query Variable in Filters by Related Items
This tutorial will show you one of the ways of using the Query Variable option for filter creation using the JetSmartFilters plugin.
Before you start, check the tutorial requirements:
- Elementor (Free version), Block editor (Gutenberg) or Bricks
- JetSmartFilters plugin installed and activated
The Query Variable is a feature of the filter creation window that allows you to set the filter more precisely. This tutorial will reveal how to use the JetSmartFilters Query Variable and the post relations that can be created using the JetEngine plugin.
So, let’s look through the Query Variable customization process while creating a “Checkboxes list” filter.
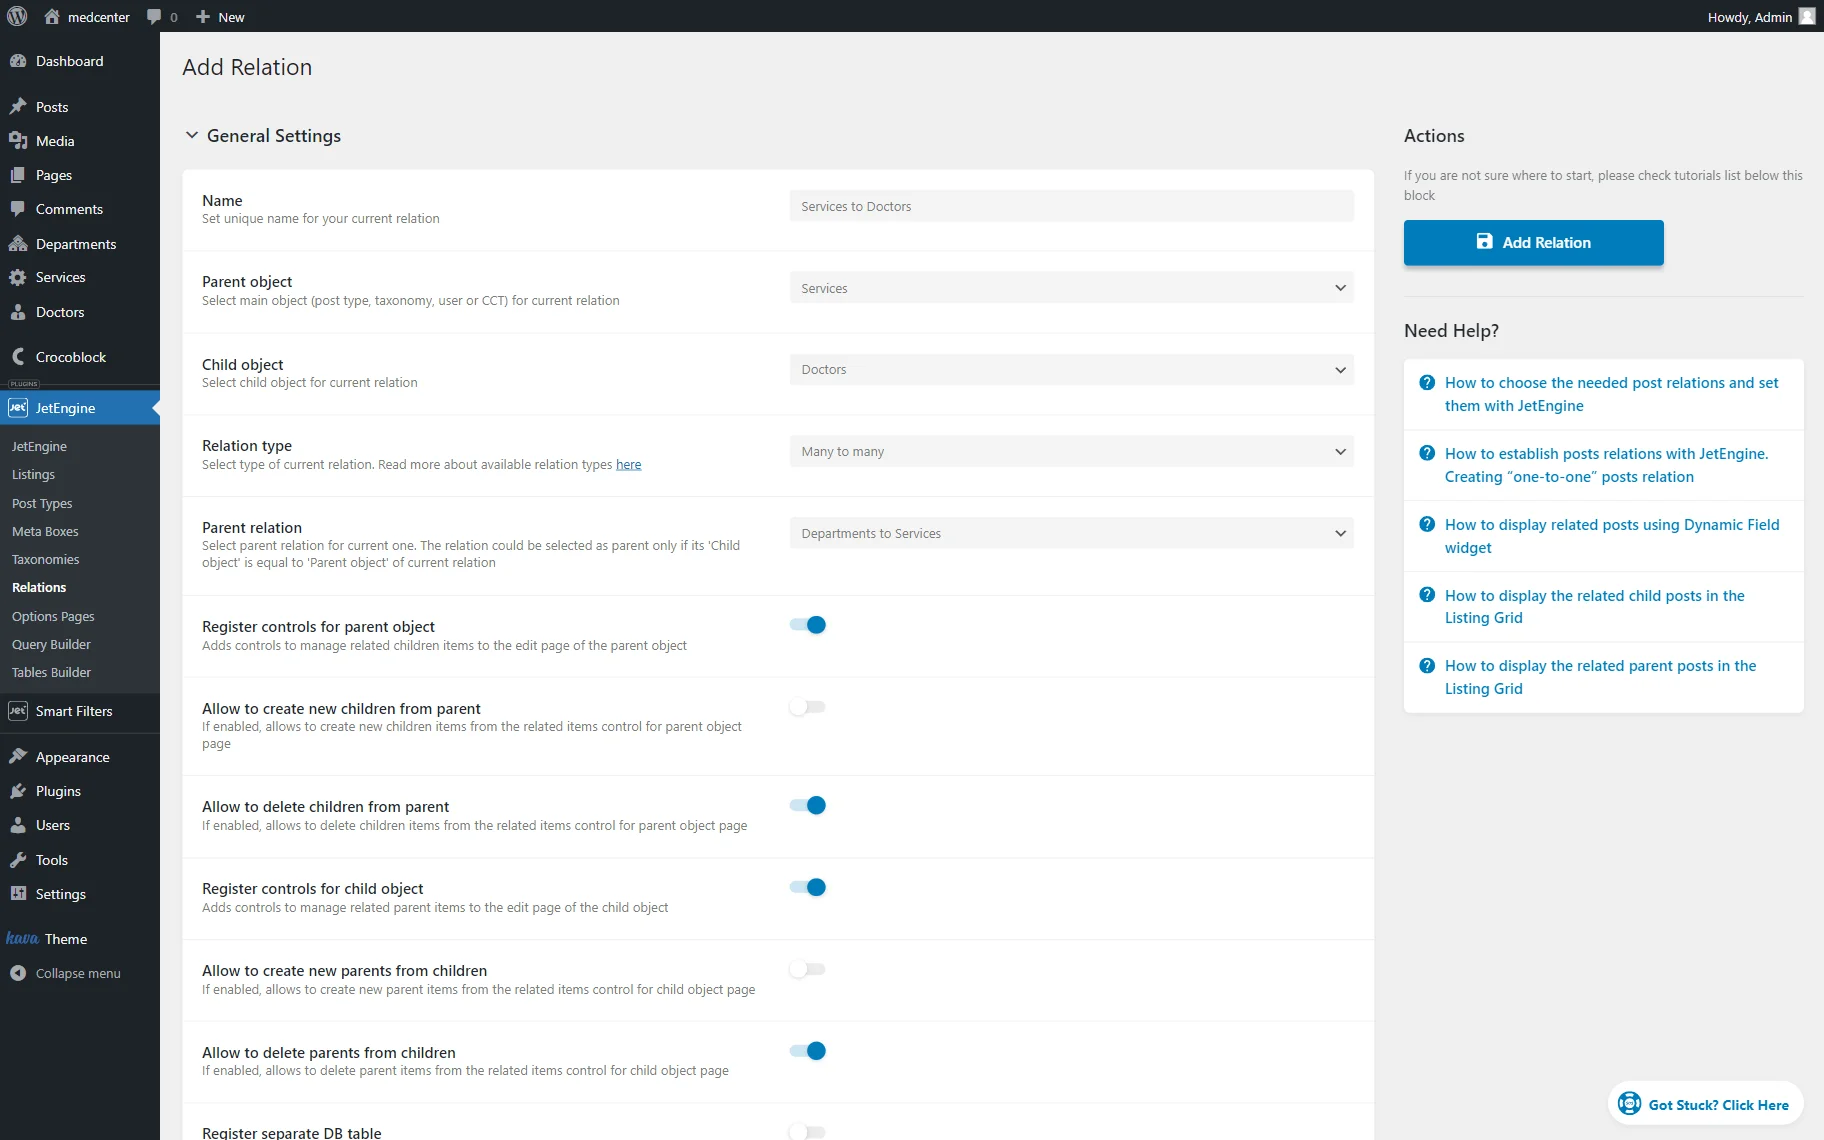
Create a Relation
Let’s assume you have created the relation between the “Services” and “Doctors” Custom Post Types.
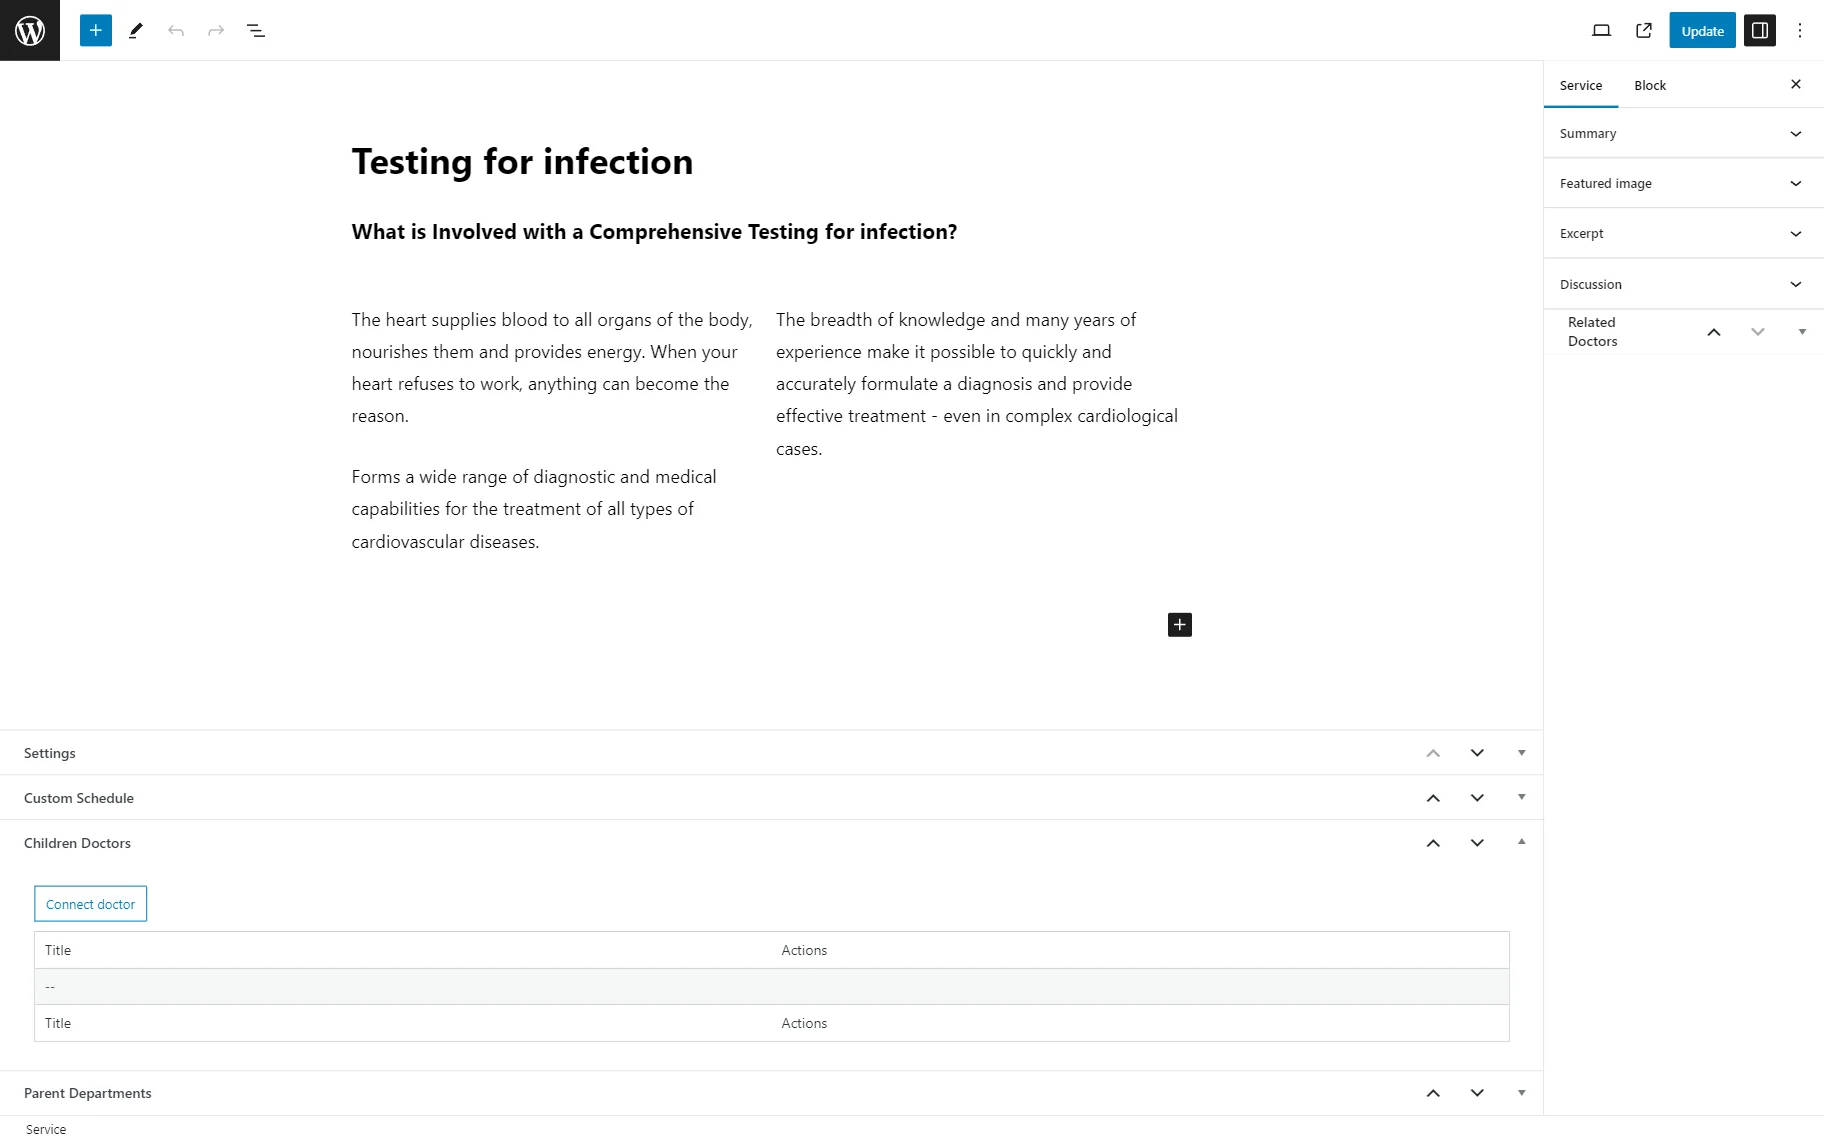
To assign children to parents, open the list of the parent posts (in our case, “Services”).
Go to one of the posts and find the Children … section. Press the “Connect …” button to attach a related post.
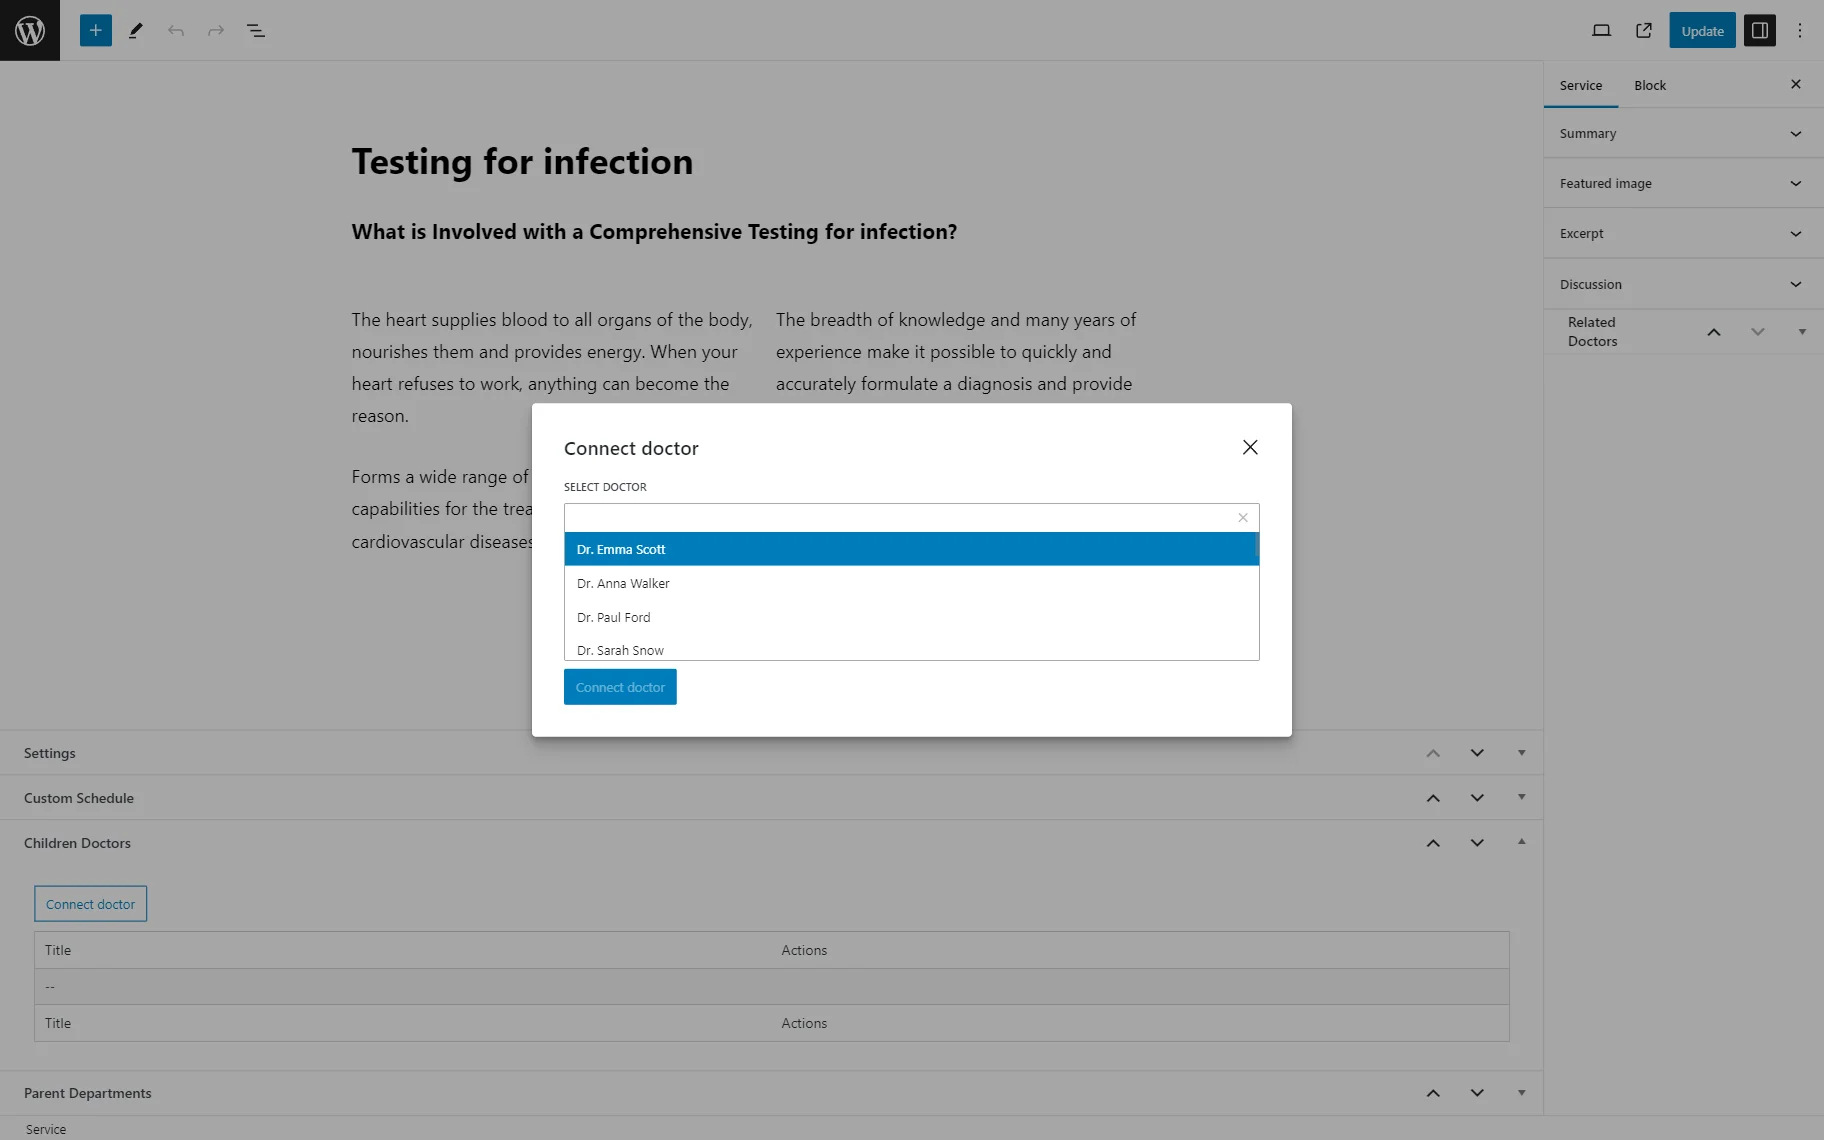
In the pop-up, press the SELECT … field to activate the search bar with all the available child posts. Select one and press the “Connect …” button to save the item.
As soon as you attach the needed items, click the “Update” button at the top of the page and repeat the procedure for the rest of the parent posts.
Create a Listing for Child Posts
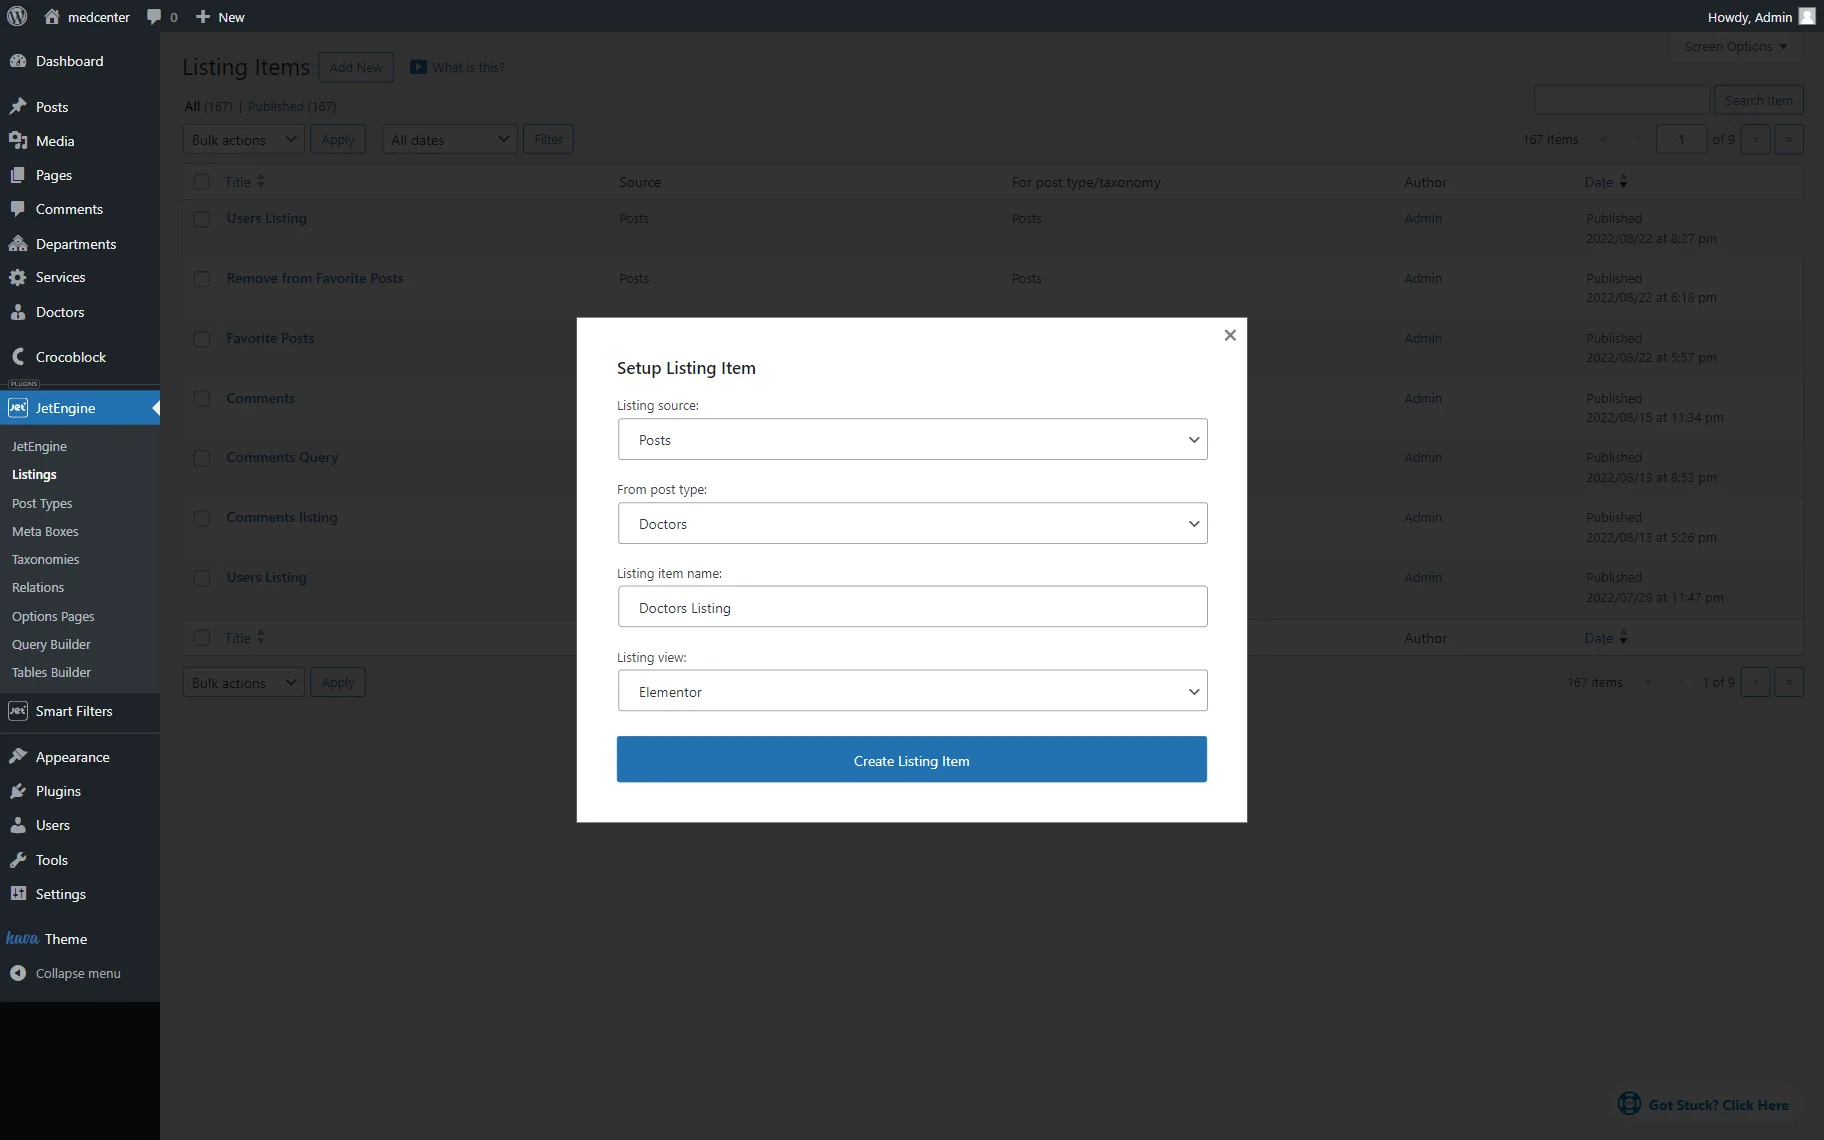
Let’s create a Listing template for child posts by moving to the WordPress Dashboard > JetEngine > Listings tab and clicking the “Add New” button.
In the Setup Listing Item pop-up, complete the pre-customization fields: pick the needed Listing source, complete the following field (in our case, From post type), set the Listing item name, and pick the preferred Listing view.
Then, press the “Create Listing Item” button.
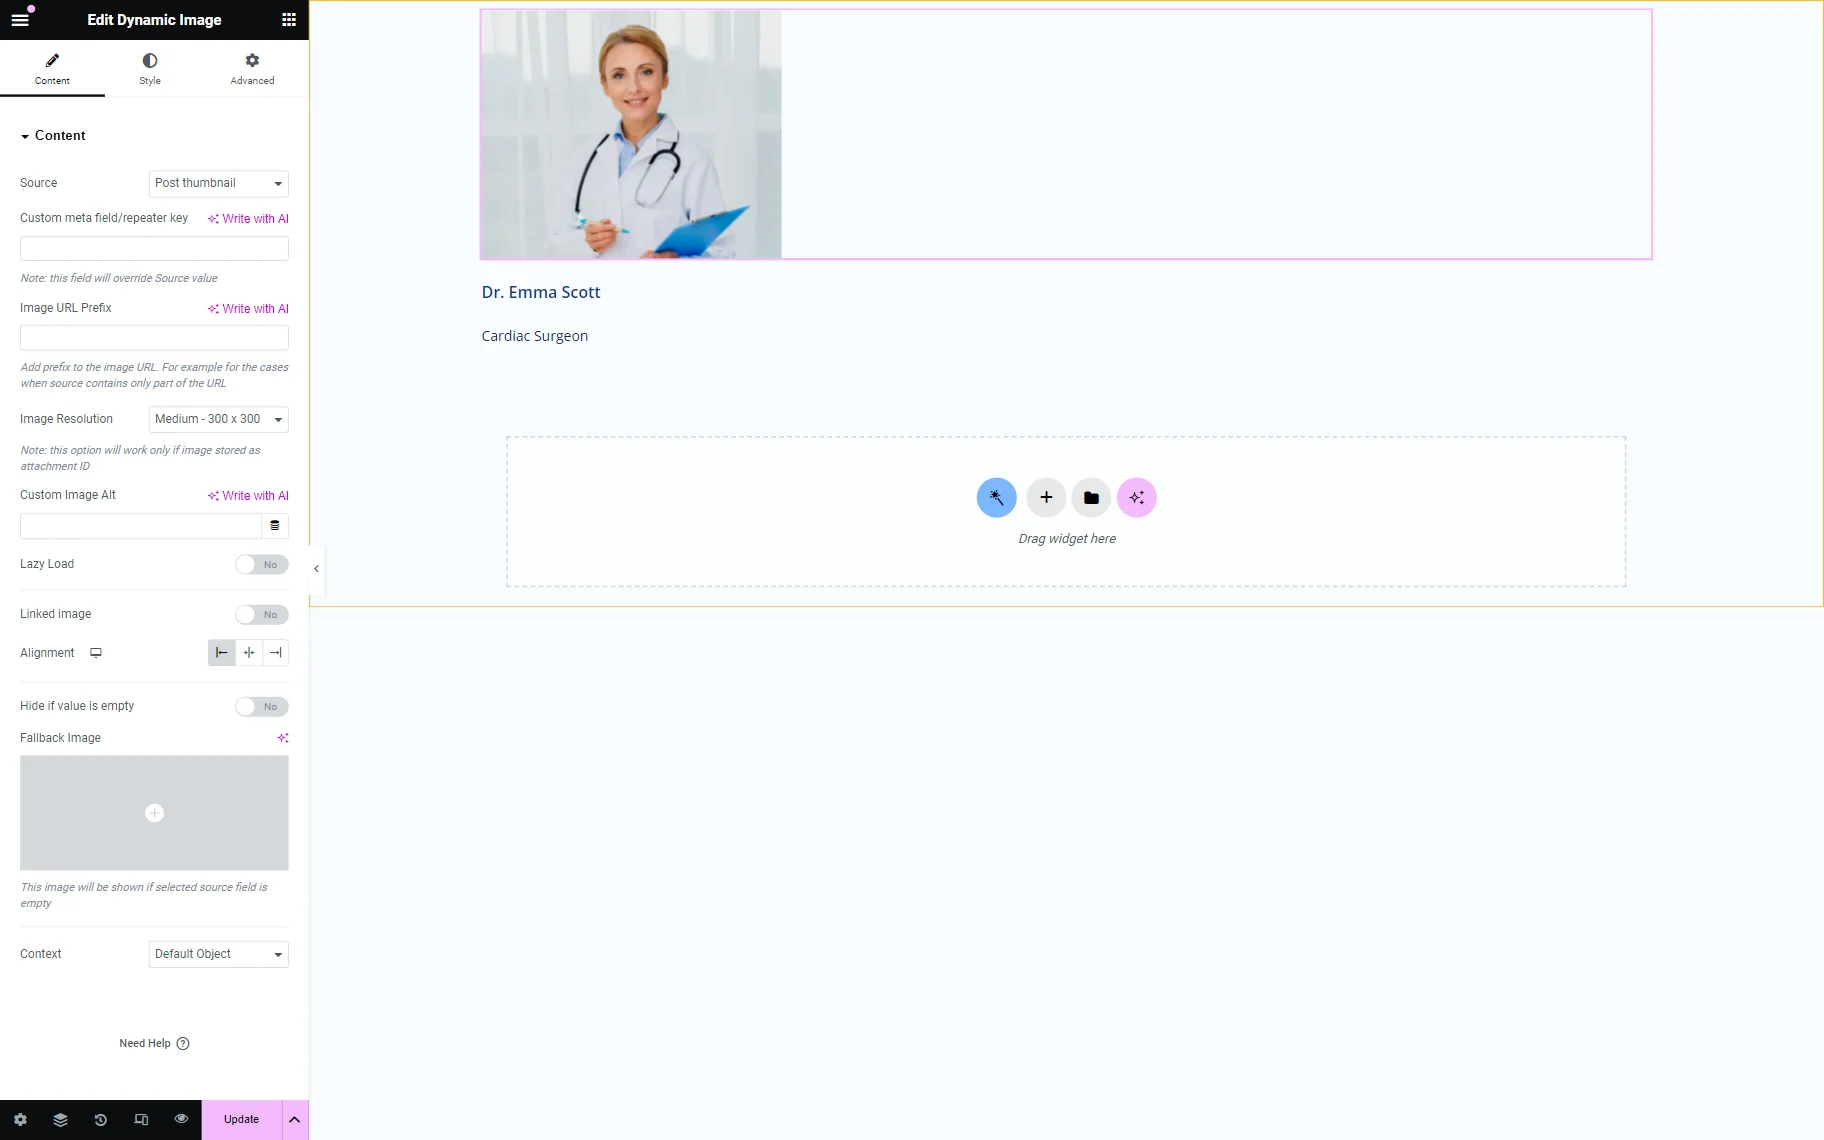
In the selected builder, add desired widgets/blocks/elements to display the dynamic content.
For instance, a Dynamic Image widget to pull out a thumbnail, a Dynamic Field widget to pull out a title, etc.
Once done, click the “Update” button.
Create a Filter
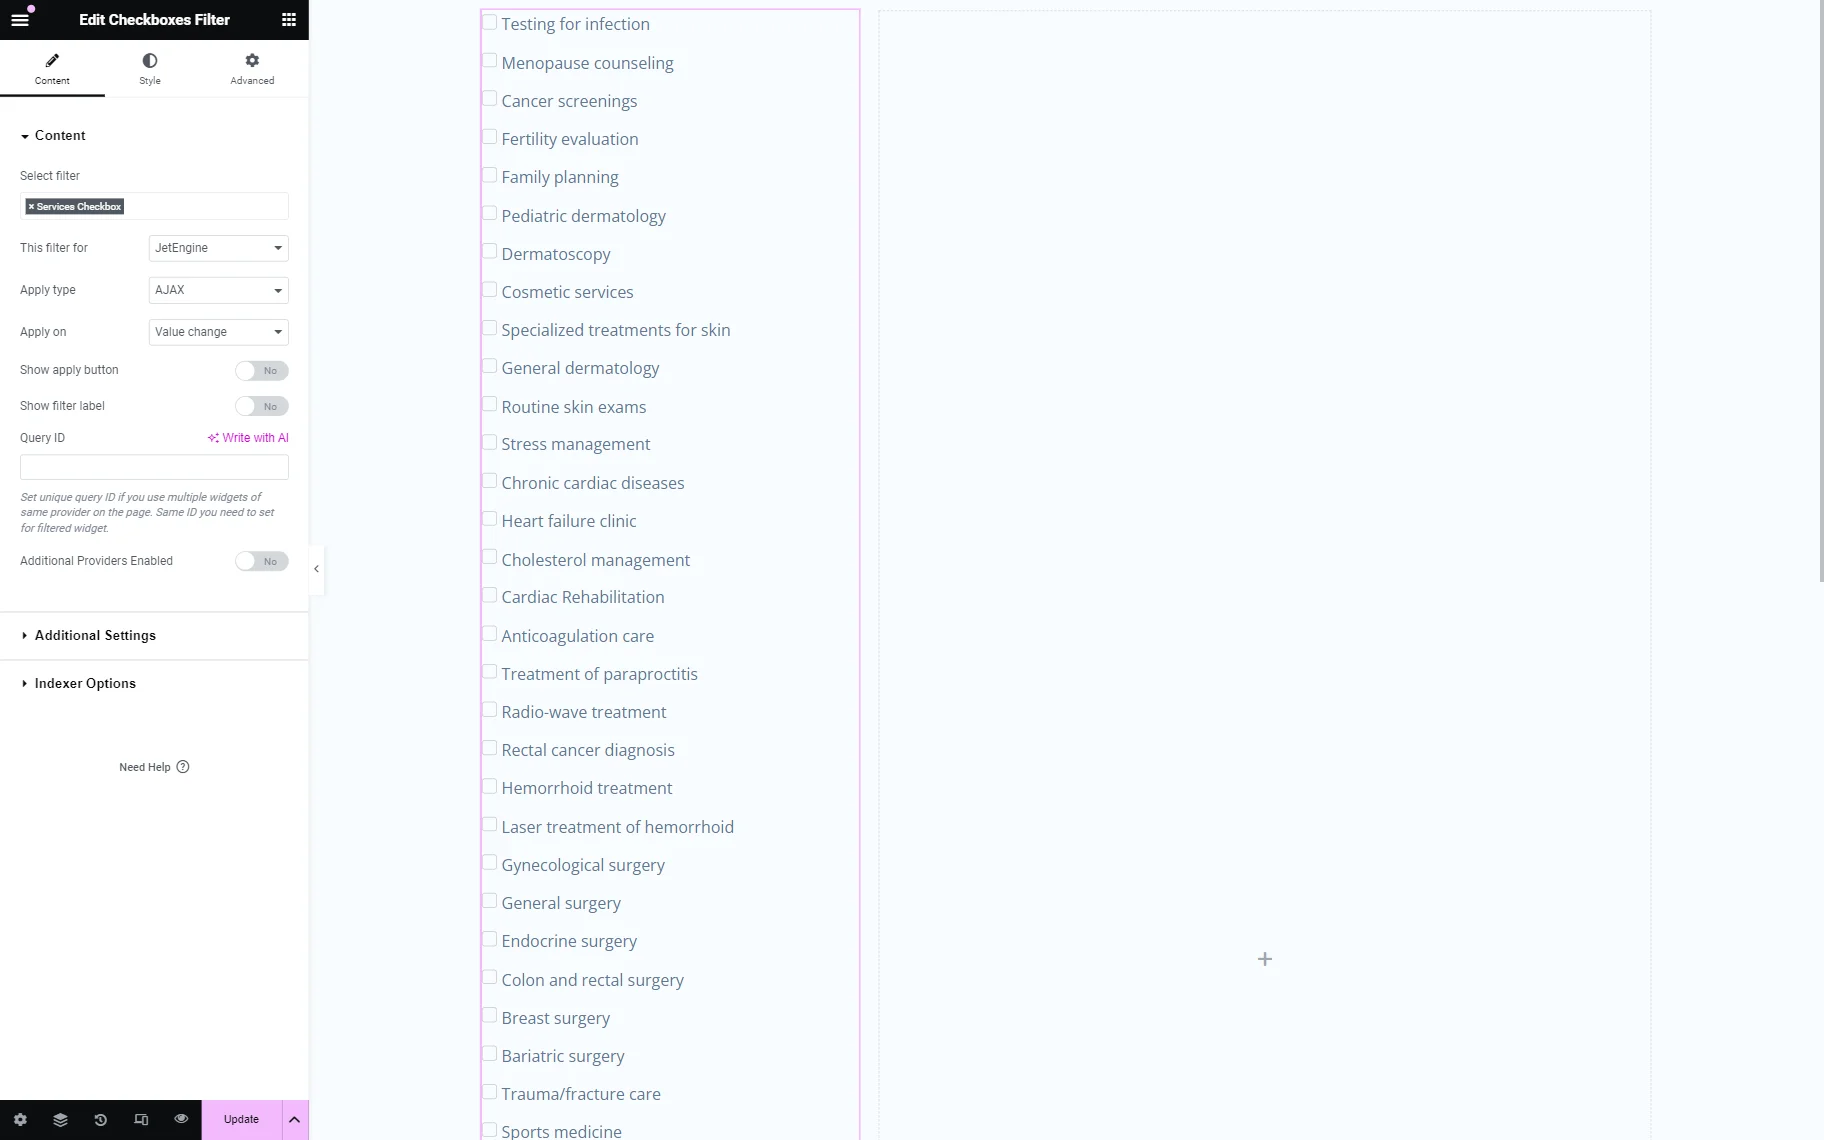
Go to WordPress Dashboard > Smart Filters > Add New to build a filter.
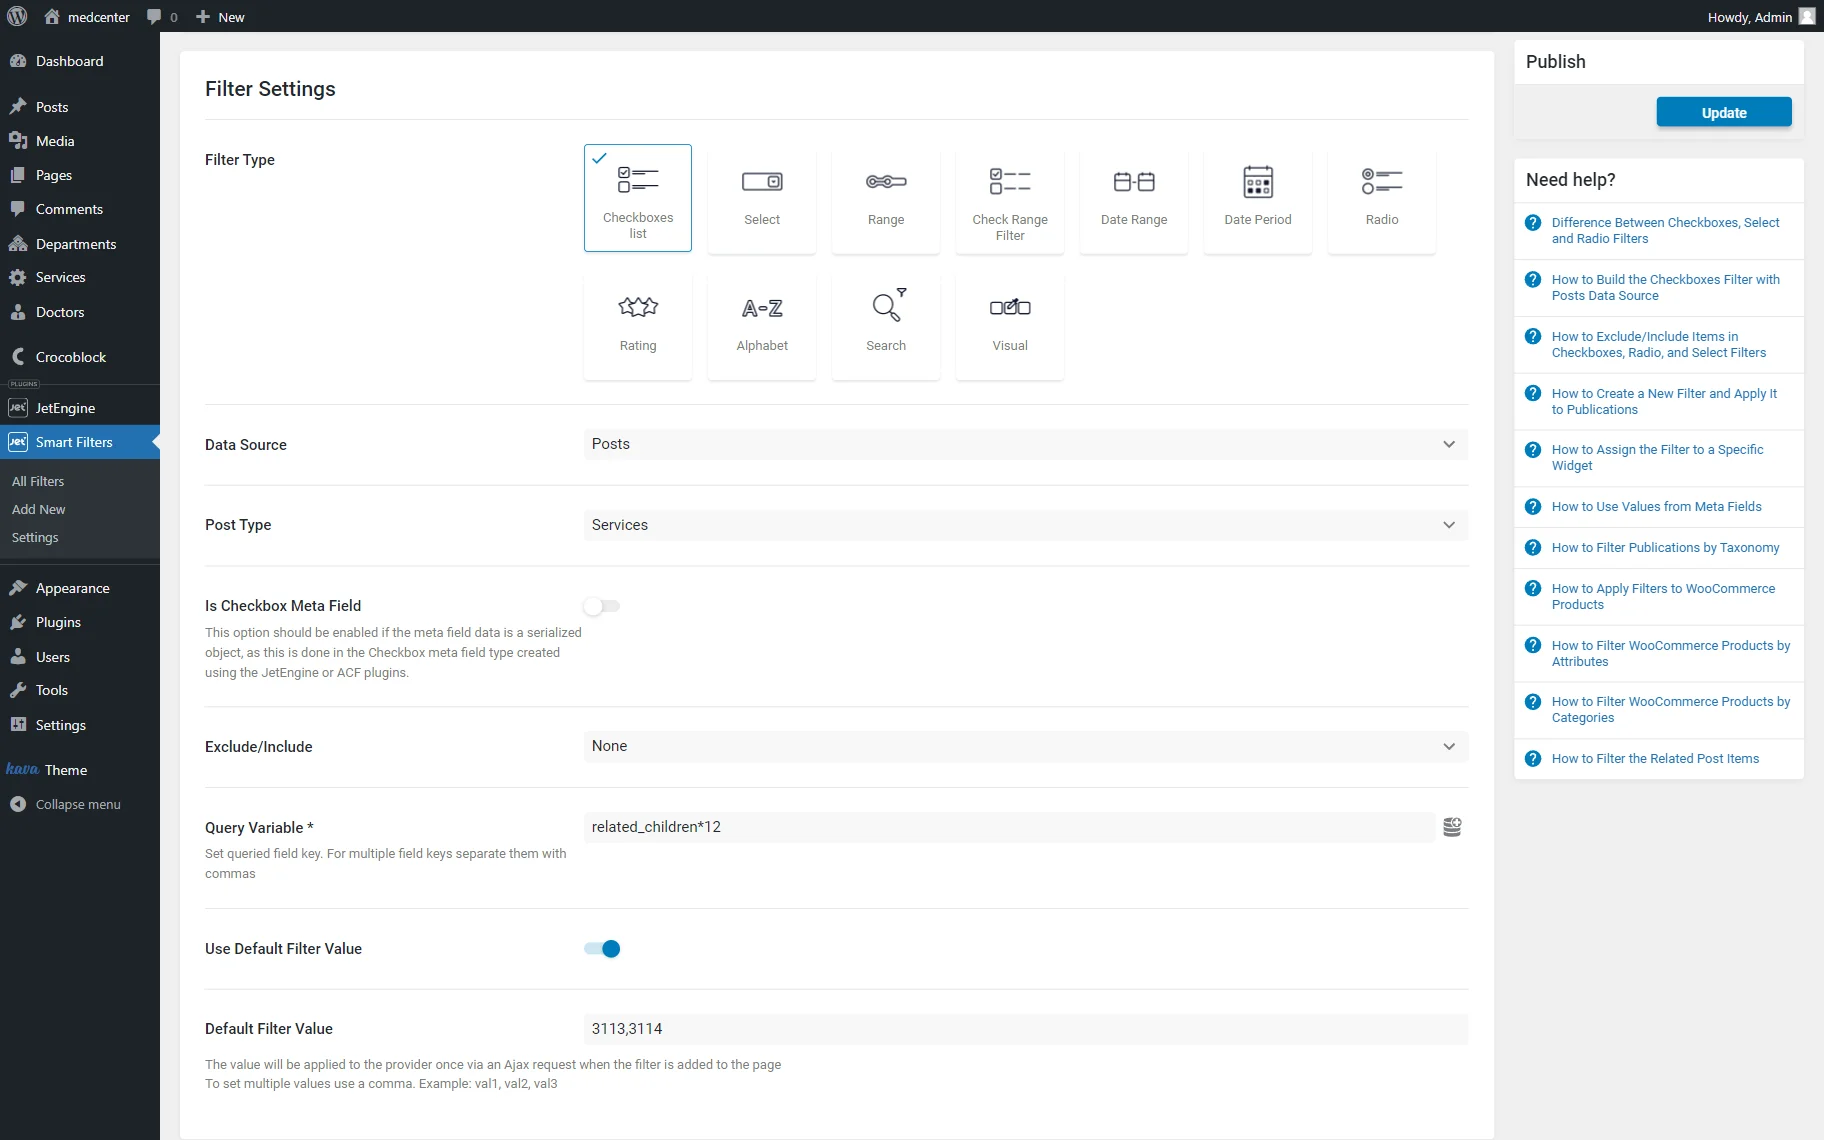
Complete the Filter Name field and choose the desired option as the Filter Type.
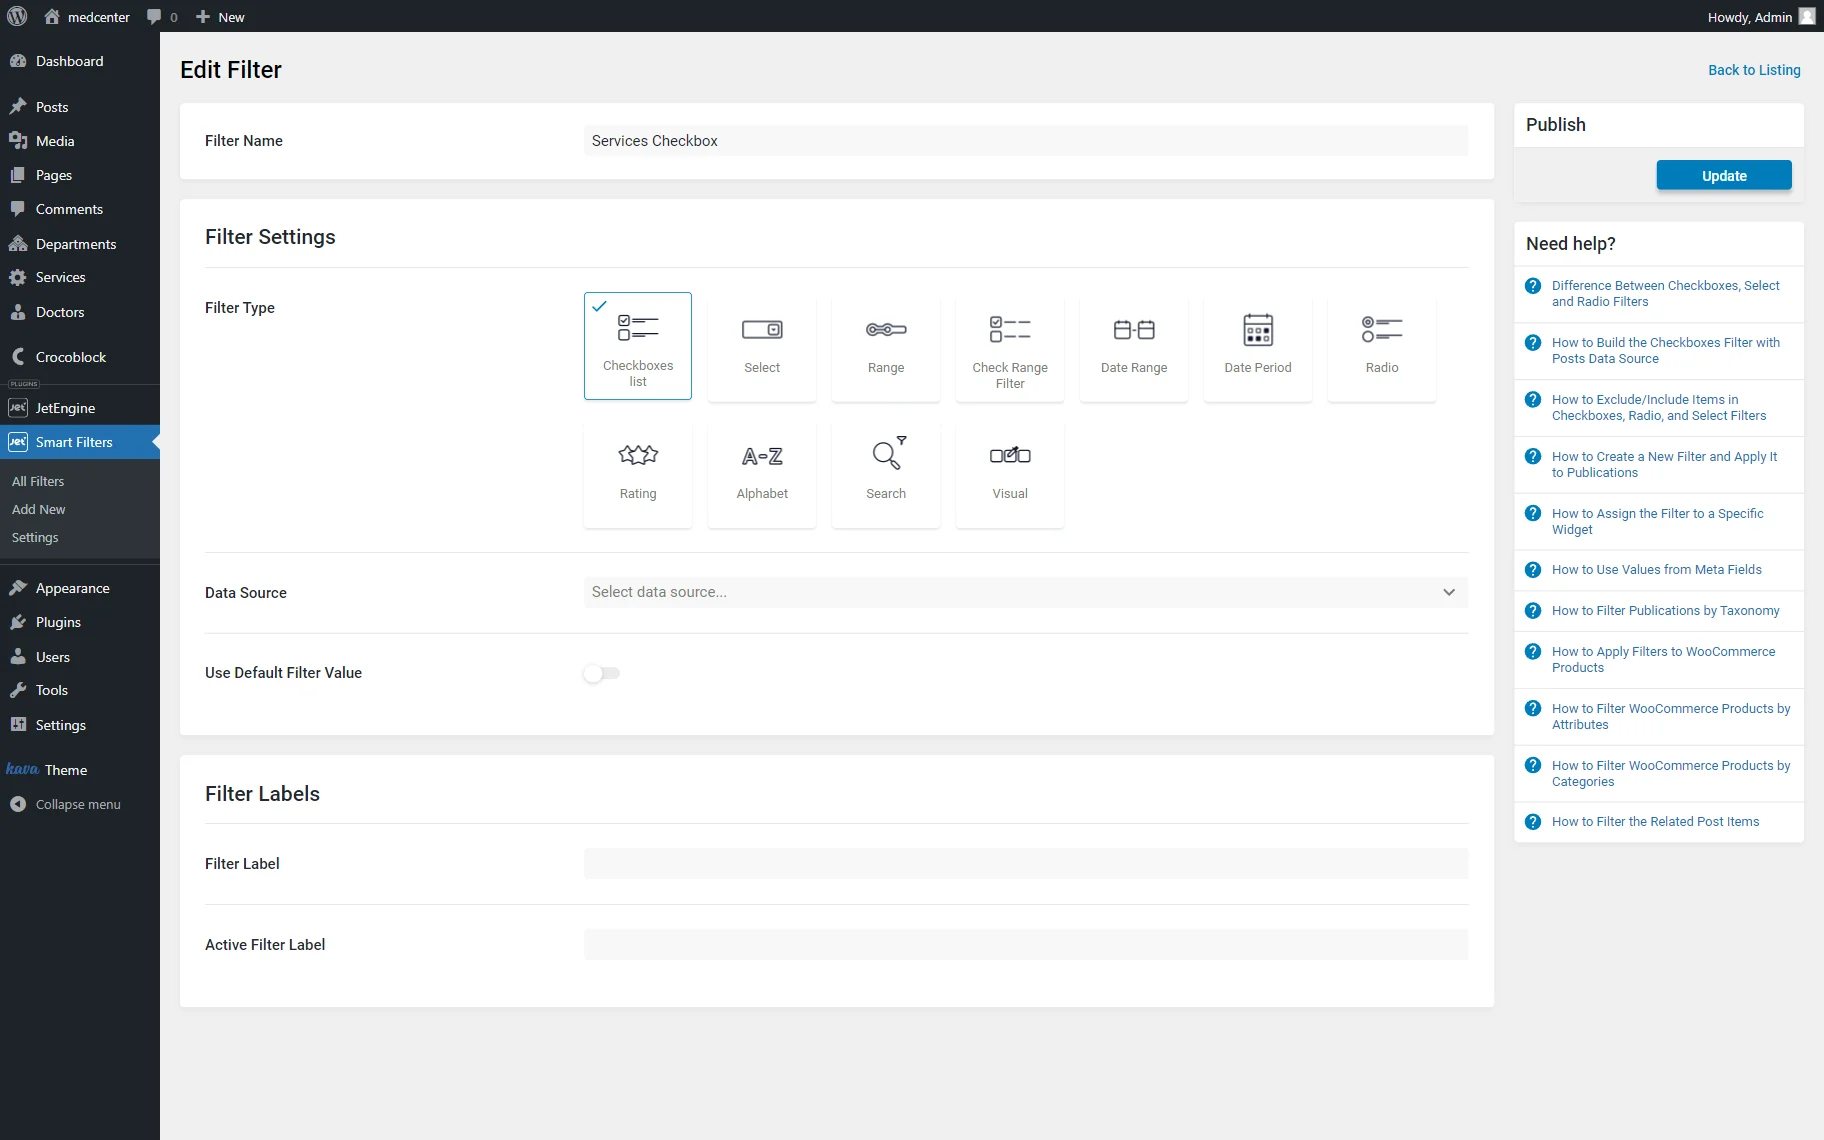
For instance, we select a “Checkbox list” Filter type and set its Data Source to “Posts.”
The Post Type dropdown contains the list of available post types. We choose the parent post type from the relation, in our case, “Services.”
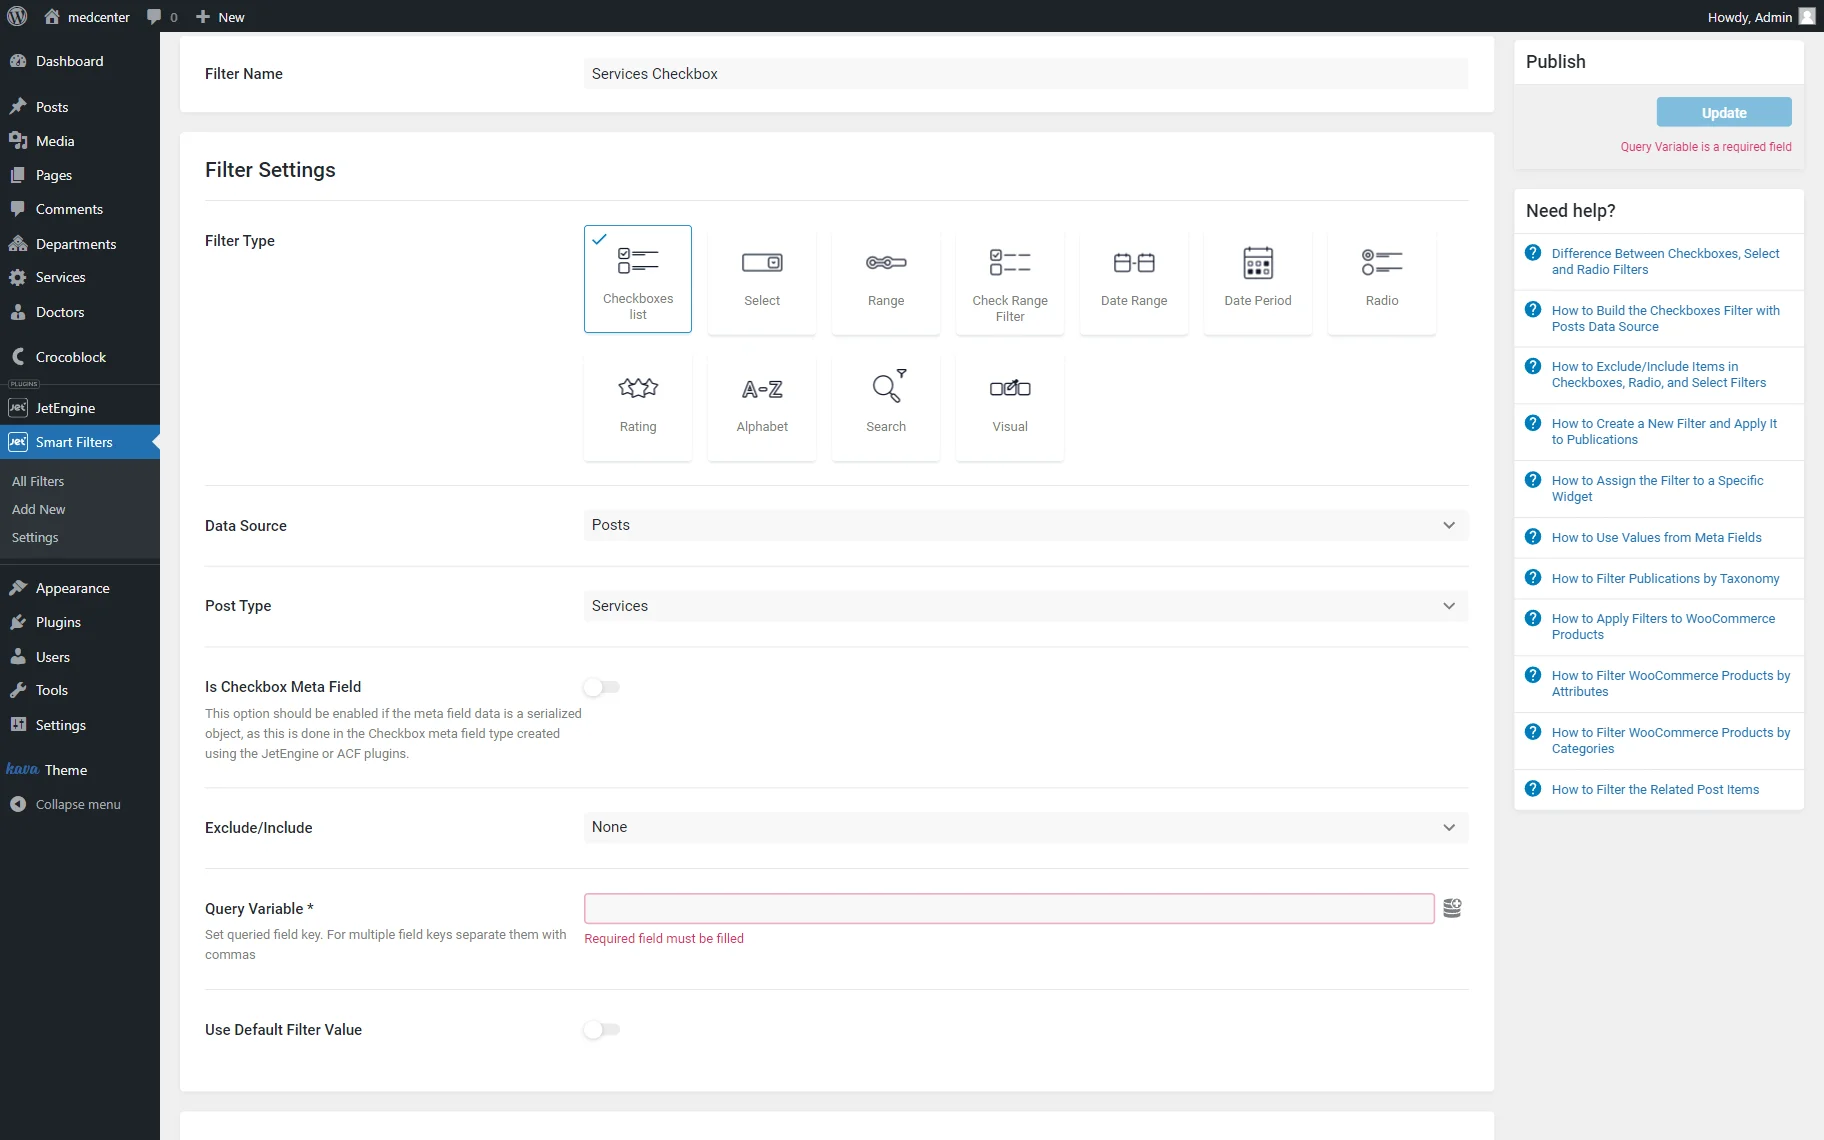
Click the “Dynamic tags” button next to the Query Variable field to open the list of the options that can be pulled dynamically to this field.
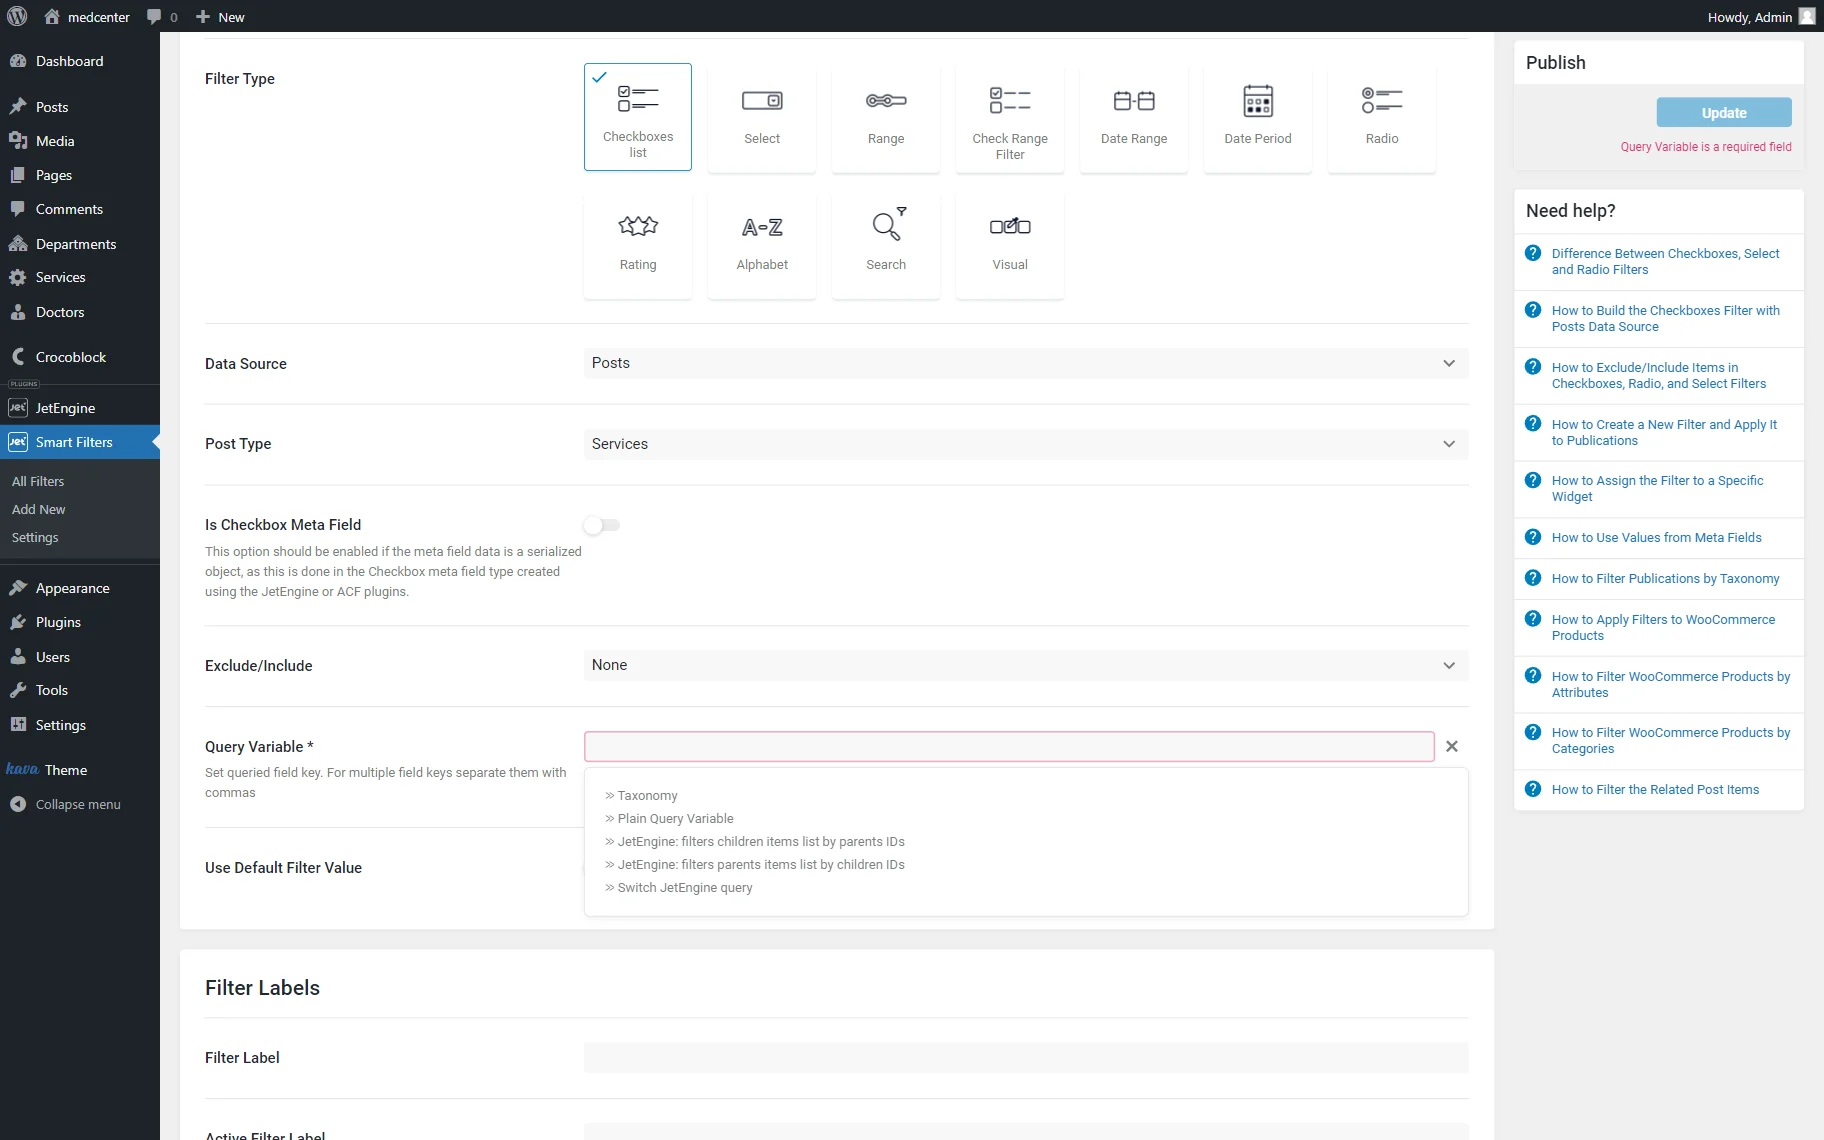
Among the options, pick the “JetEngine: filters children items list by parent IDs” option and define the Relation you are working with.
Then, complete Filter Labels if desired and press the “Update” button to save the filter.

You can also activate the Use Default Filter Value toggle, if desired, to set the Default Filter Value.
For instance, we want two options to be preselected in the filter by default. To do so, we put the ID of the corresponding posts in the following format: “3113,3114” (the IDs should be separated by a comma).
Add Filter to Page
Open the page where you want your filter and Listing to appear.
Find the needed filter block/widget/element, and drag and drop it to the page. In the Select filter field, choose the filter you have just created.
Navigate to the This filter for dropdown and select the “JetEngine” option.
After you customize the filter, drag and drop the Listing Grid block/widget/element on the page.
In the Listing dropdown, select the previously built listing item. In our case, it’s the listing with the children items.

Complete the page customization as desired and click the “Publish/Update” button.
Open this page on the front end to check the result. Now, you can observe that the default values set during the filter creation process are selected.
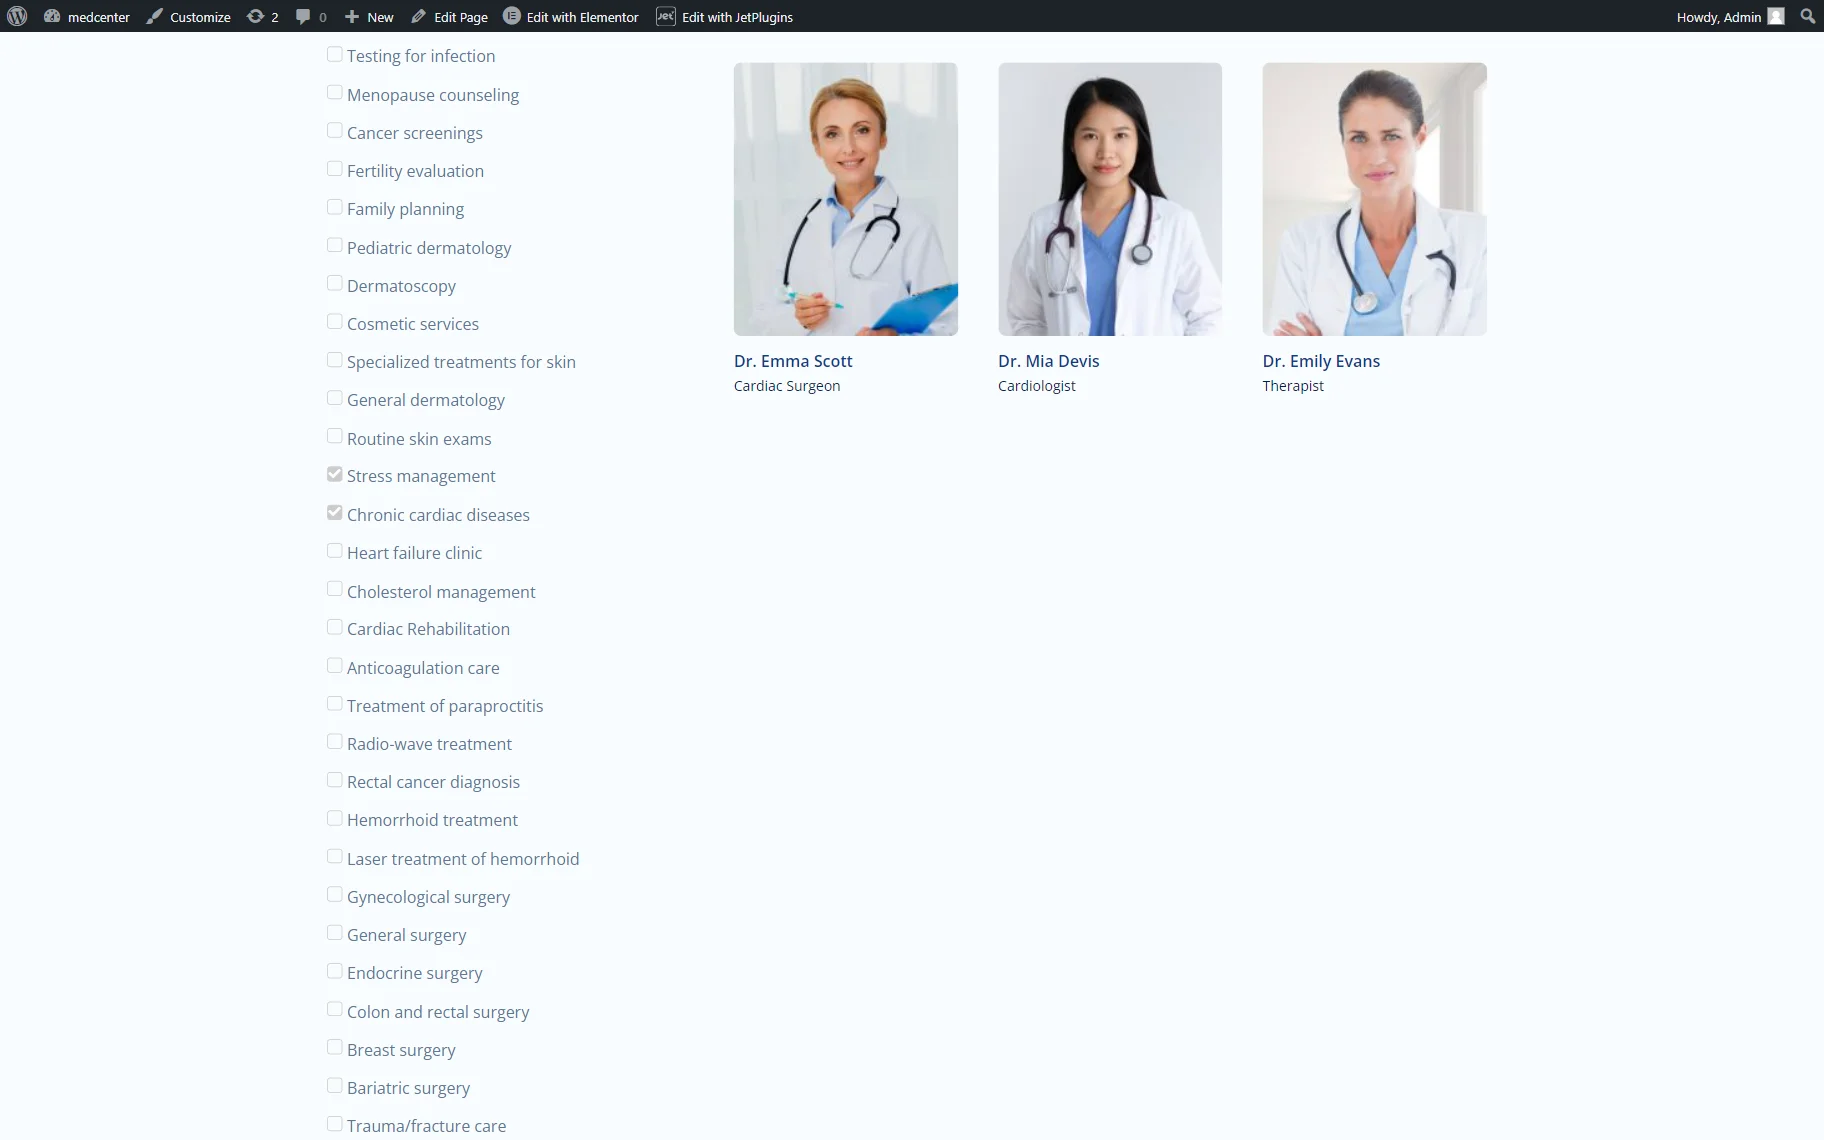
You can reselect the desired option(s) in the filter to see if it works.

That’s it; now you know how to set the Query Variable field while the JetSmartFilters filter by related items creation on your WordPress website.