Adding Badge to the User Depending on the Profile Completeness
Learn how to add a badge to the WordPress user depending on their profile completeness with the help of the JetEngine plugin and Custom Visibility Conditions add-on.
Before you start, check the tutorial requirements:
- Elementor (Free version)
- JetEngine plugin installed and activated
with the User profile page set up (template attached to the account page) and User meta box with meta fields created
- Custom visibility conditions add-on installed and activated
- JetFormBuilder plugin installed and activated
with a form to let users add info to the profile created
In this tutorial, we uncover how to notify the user about the level of their profile completeness by using JetEngine and its Custom visibility conditions add-on.
We’ll do it by triggering badges that signal the user whether their info is completely filled out on the website. So, let’s begin the process.
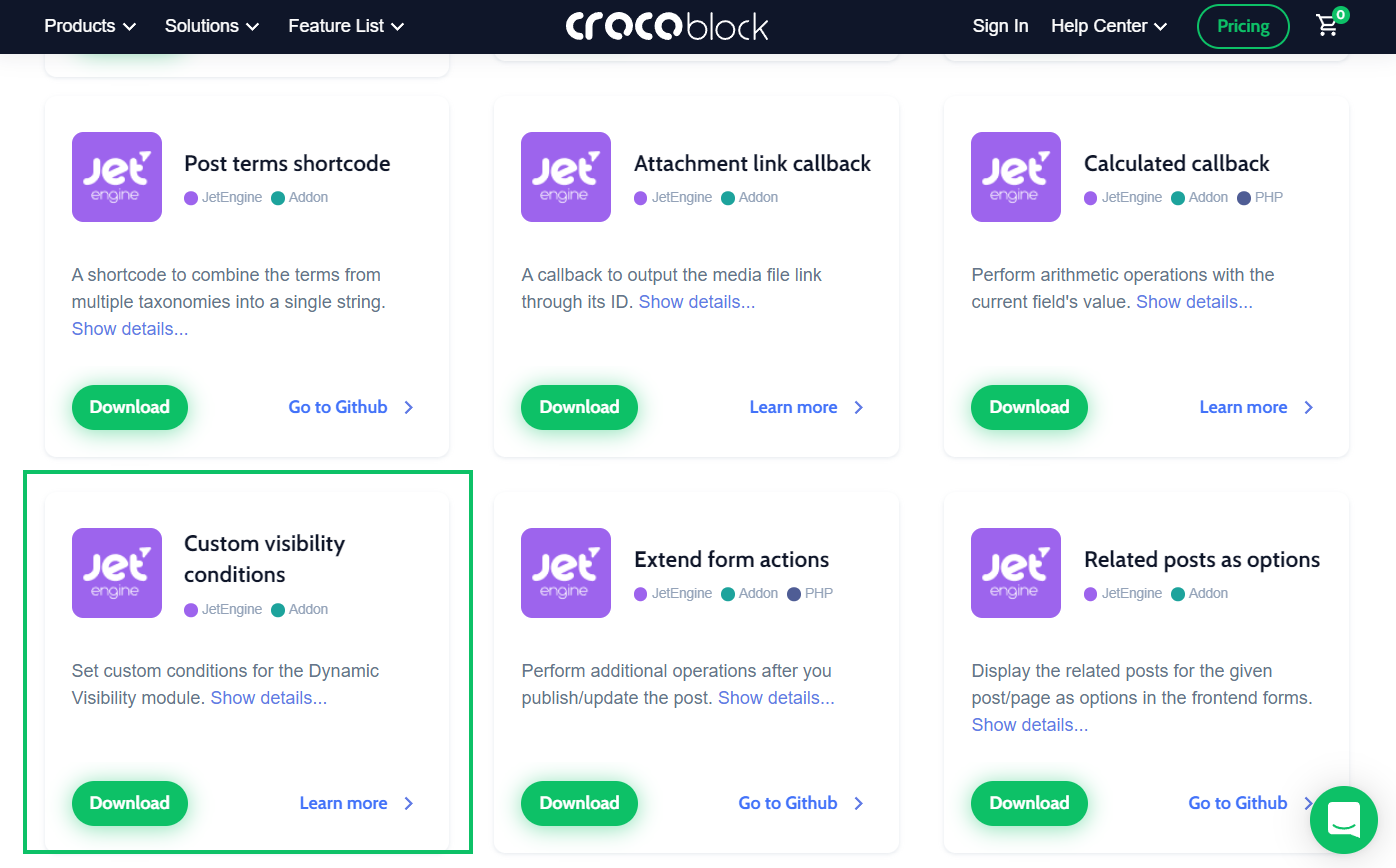
Install Add-on
Open the Crocoblock DevTools page and find the Custom visibility conditions add-on. Press the “Download” button to save the file on your computer.
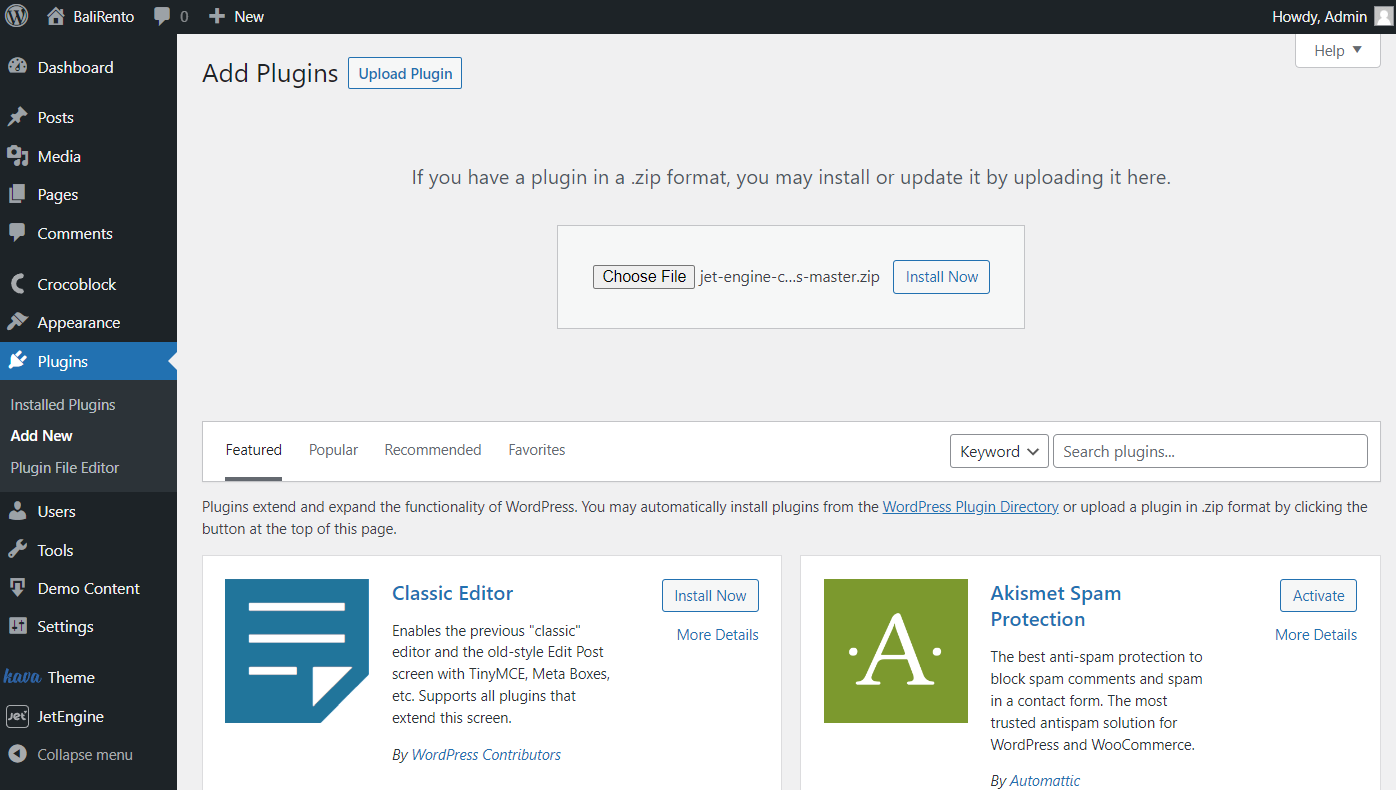
Go to your website, open the Plugins > Add New page, and press the “Choose File” button.
Once you find the needed file on your computer, click the “Install Now” button.
Then, don’t forget to activate the add-on.
Enable Dynamic Visibility
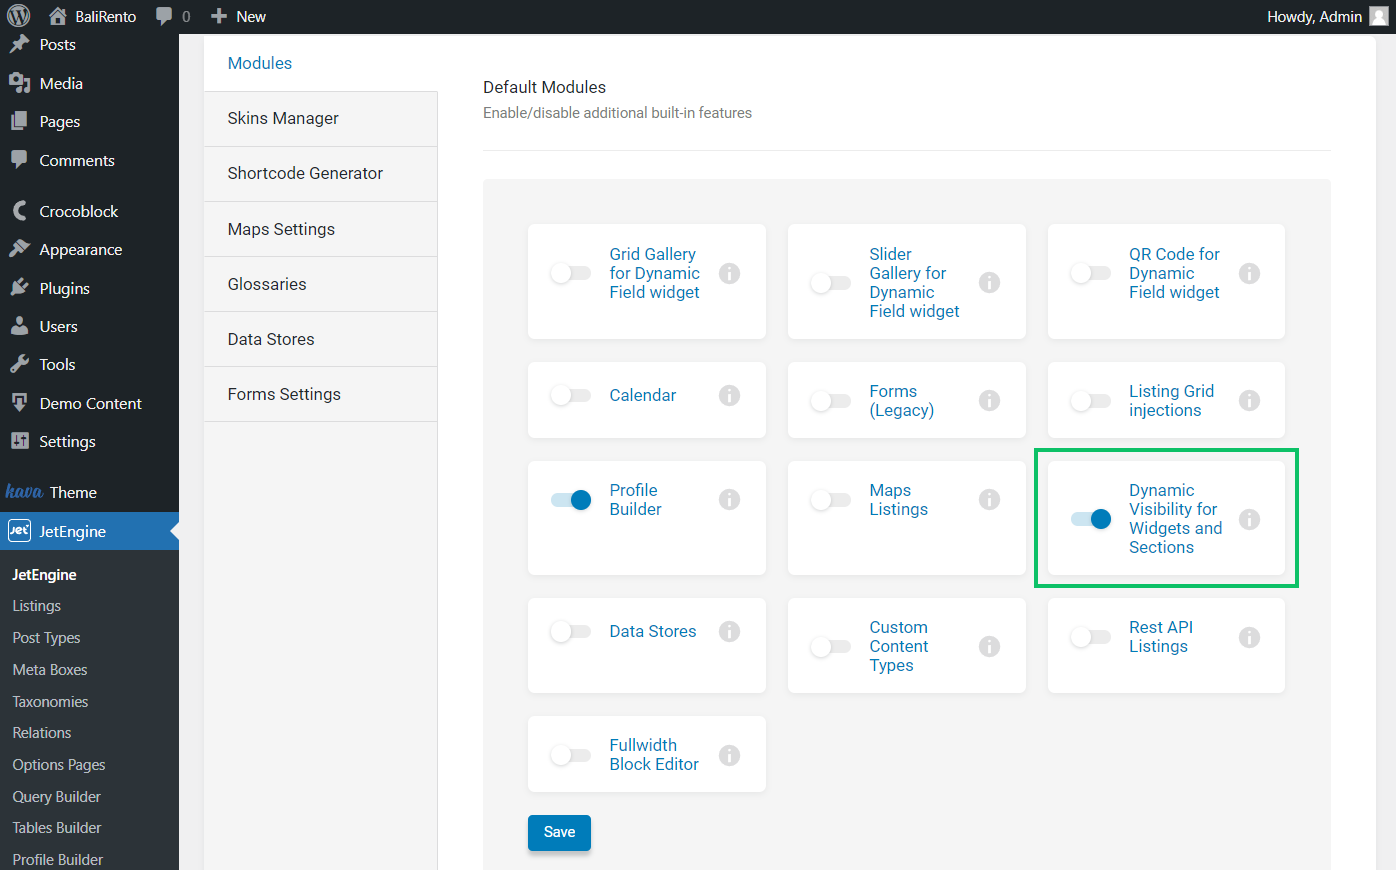
Besides, ensure that the Dynamic Visibility for Widgets and Sections is activated in the WordPress Dashboard > JetEngine > Modules tab.
Please pay attention that we have Profile Builder activated as well.
Don’t forget to press the “Save” button.
Edit Account Template
Proceed to the Elementor template (WordPress Dashboard > Templates > Saved Templates) you have attached to the account page in the Profile Builder settings.
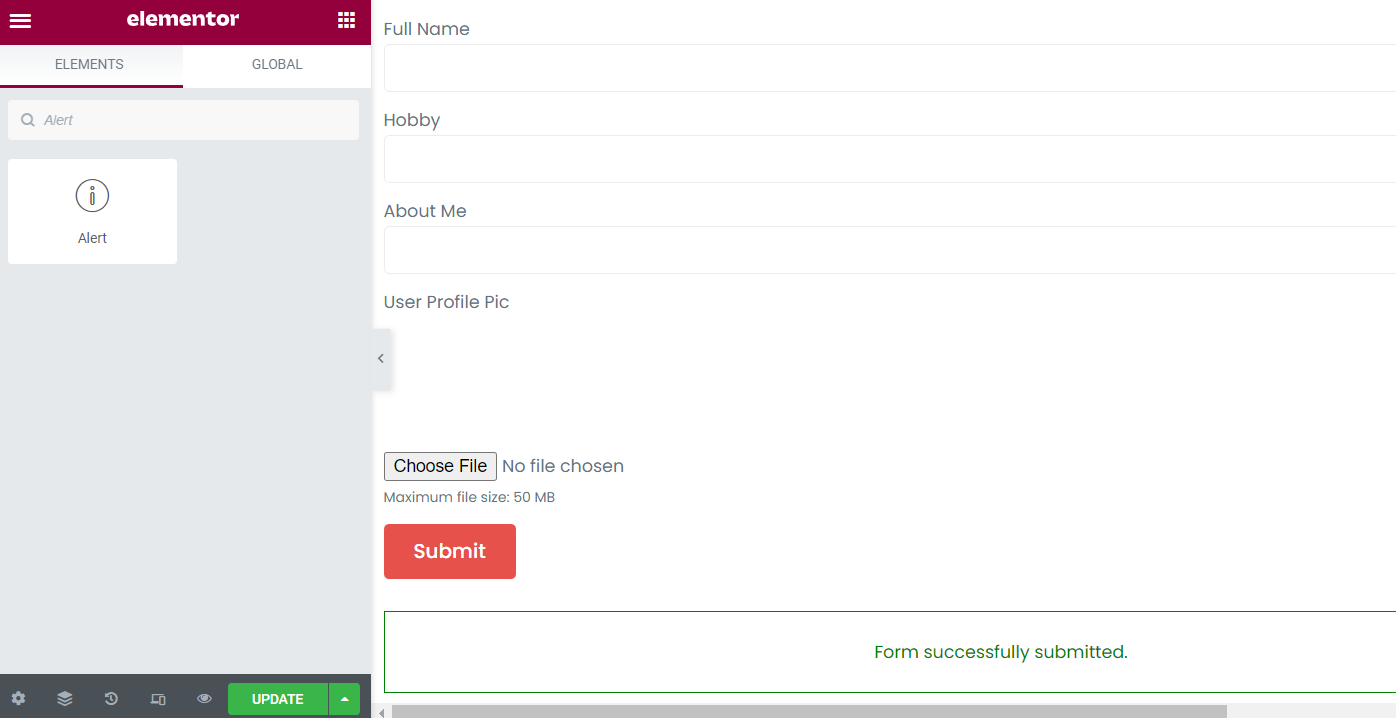
After opening the editor, we add the JetForm widget to display the form for editing the WordPress user.
Next, search for the widget that has the “Dynamic Visibility” feature. For instance, we use the Alert one.
Drag-n-drop it to the desired place on the page.
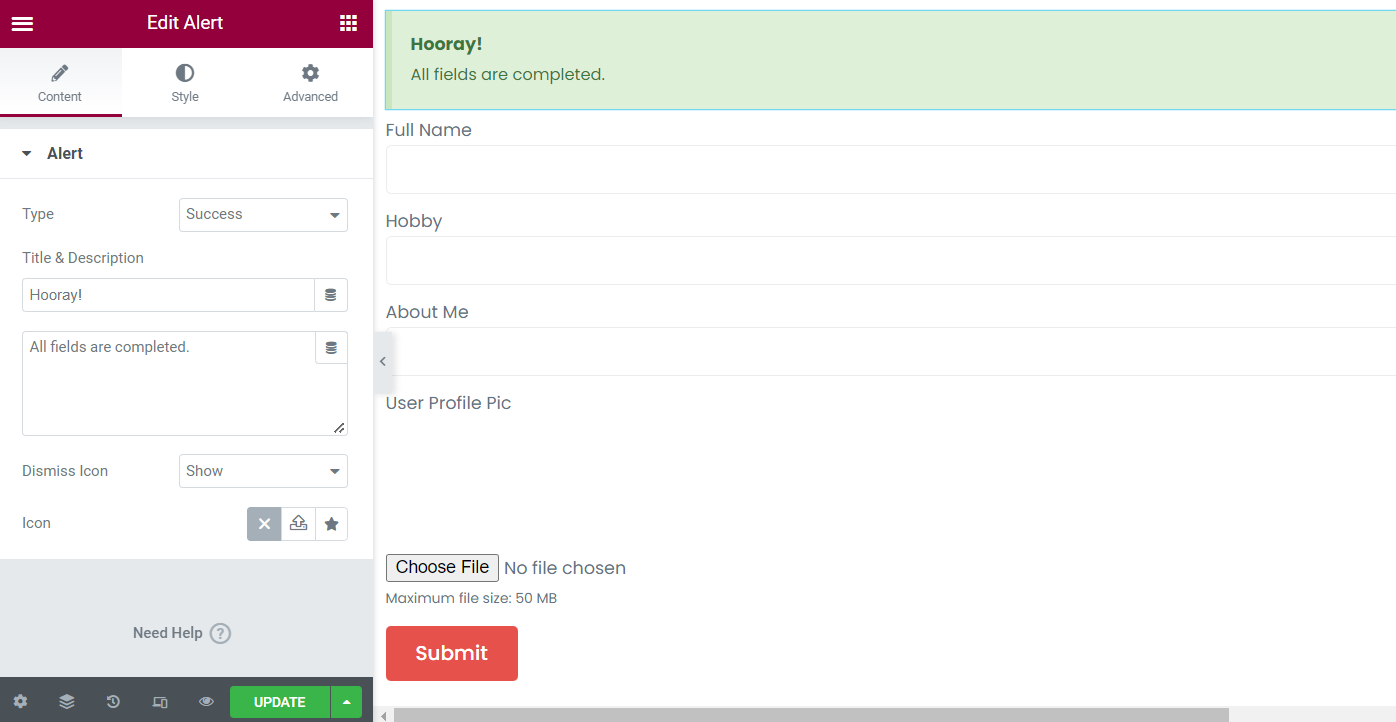
In the Content tab, set the Type of alert as “Success,” and mind changing Title & Description values into the ones you find appropriate.
Define whether you want to show or hide Dismiss Icon and pick this Icon in case you decide to leave it.
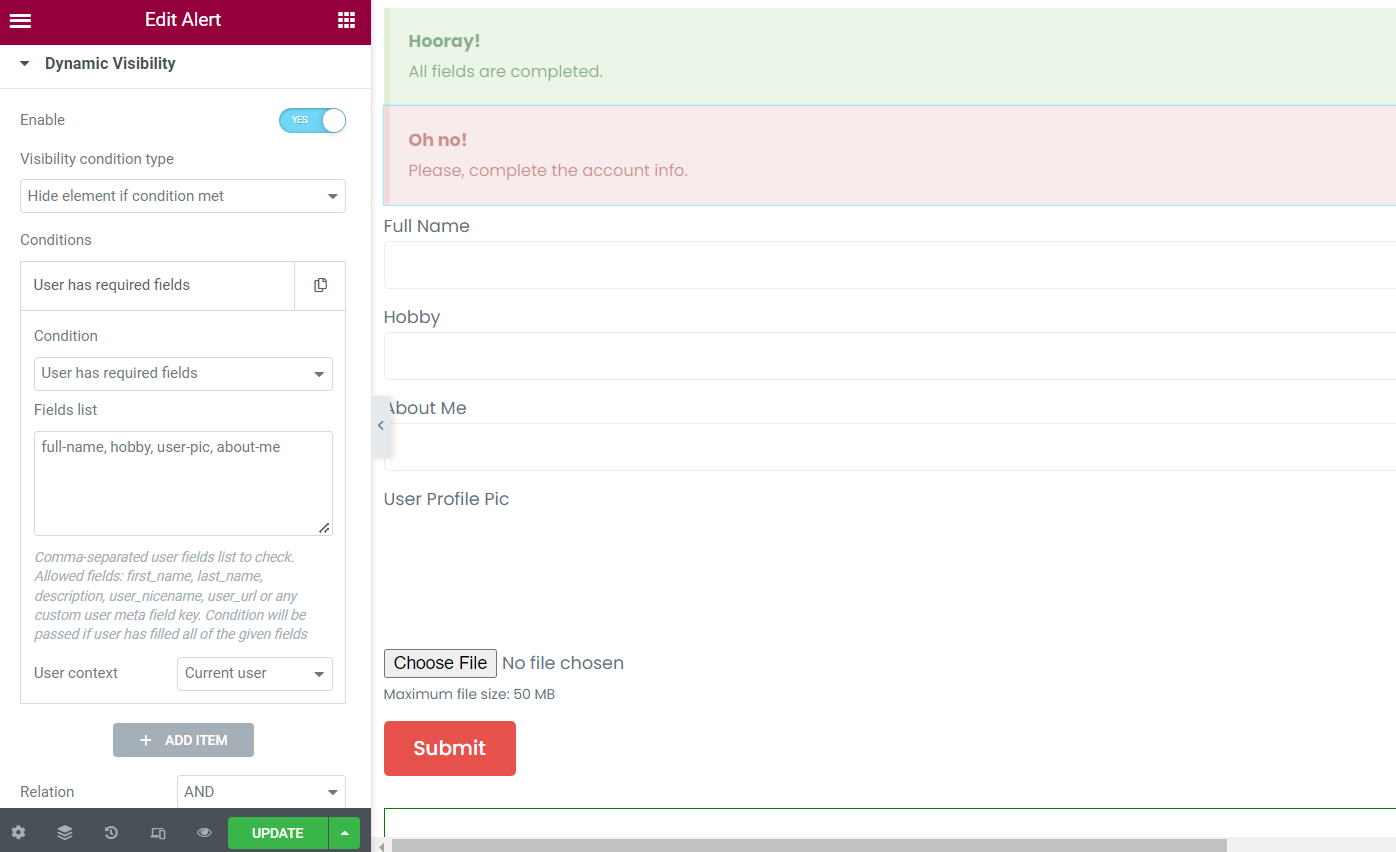
Open the Advanced tab and move to the Dynamic Visibility section.
Switch on the Enable feature, pick the “Show element if condition met” Visibility condition type, and open the first drop-down list. Choose the “User has required fields” Condition and paste the needed meta fields keys into the Fields list bar.
Leave the User context default, “Current user.”

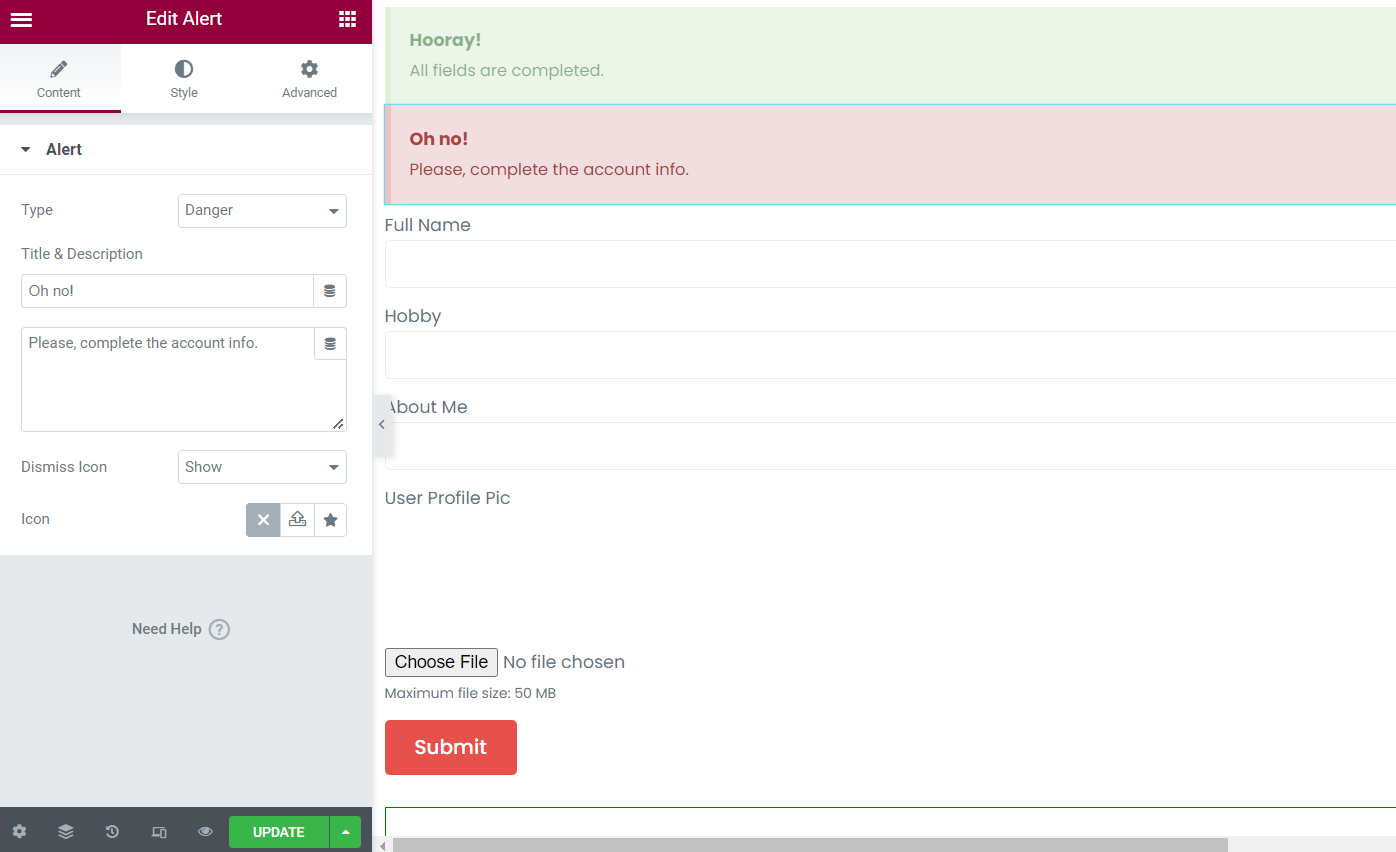
Add one more alert, this time to display it once the user hasn’t completed all fields in the account. Put the new Alert widget under the one you have just added.
Change the Type to “Danger” if you want the badge to be light red. Alter the Title & Description field info and work on the Dismiss Icon and Icon fields if desired.
Once again, open the Advanced tab and scroll down to the Dynamic Visibility section.
Here, repeat the same steps as for the “Success” banner but with the “Hide element if condition met” Visibility condition type.
After implementing the final changes, click on the “Update” button.
Check Result
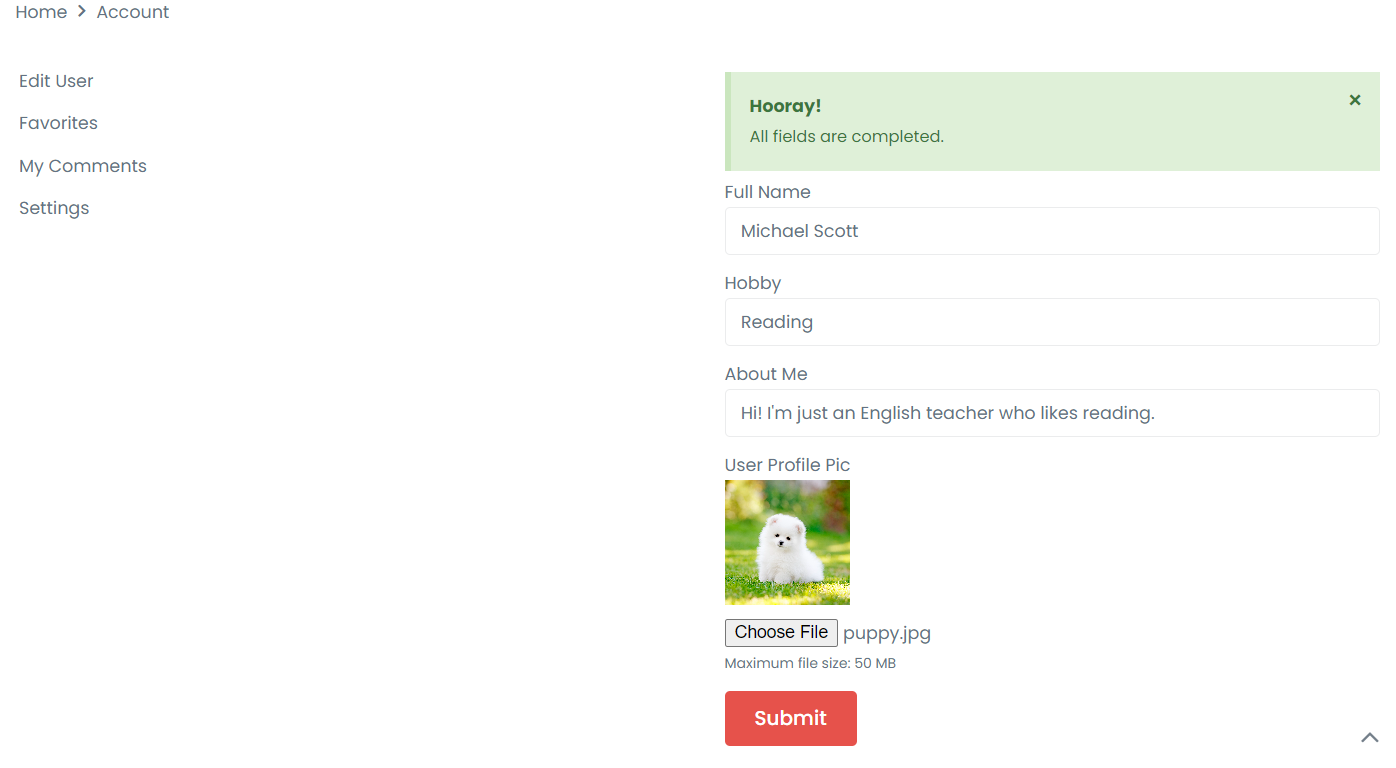
Head to the page on the front end. Let’s look at the badge shown once all profile fields are completed.
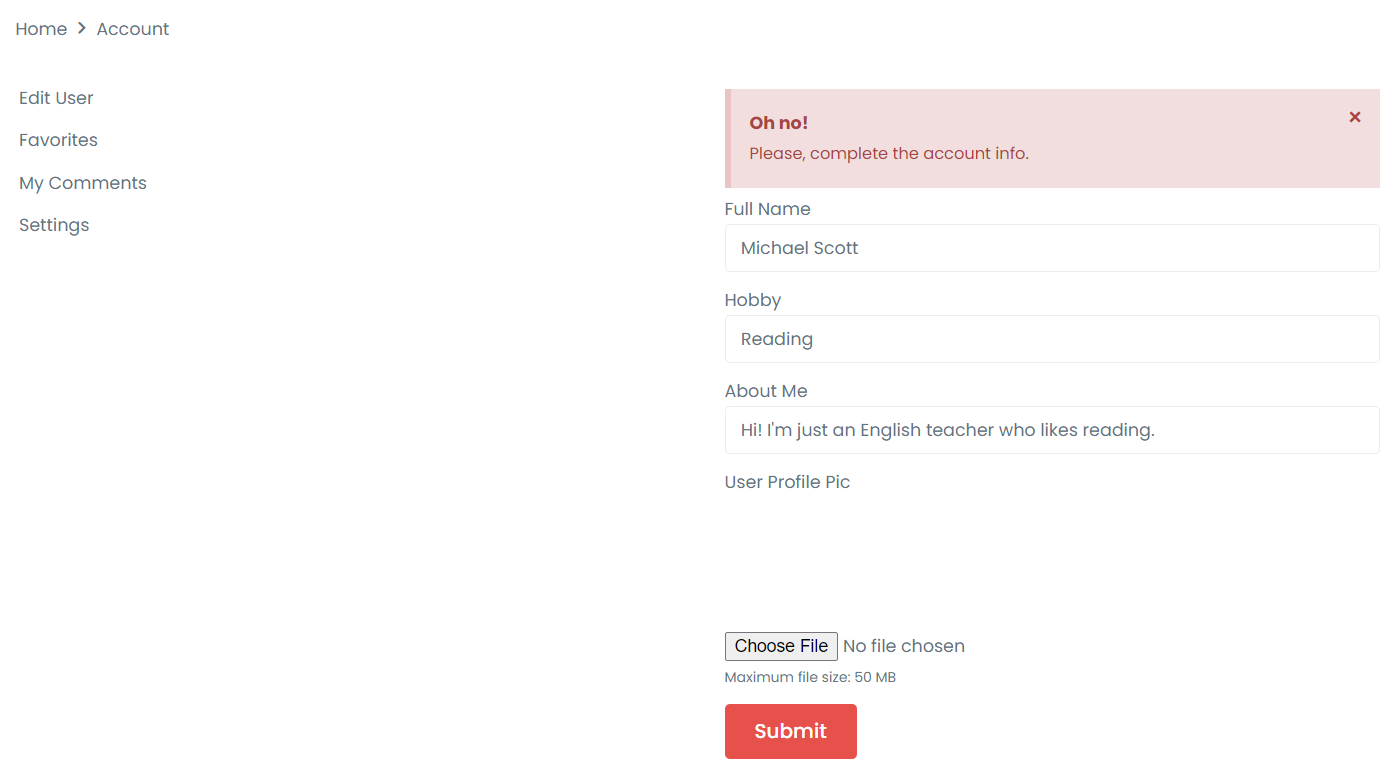
And now, we delete the user profile picture to see another banner.
That’s all for the customizations; now you can reproduce a similar system on your WordPress website with the help of the JetEngine plugin and Custom visibility conditions add-on.