Hiding Listing Before Filtering
Learn how to hide the Listing Grid before dynamic search filtering on the same page by adding style and script code to make the listing invisible unless the search is applied.
Before you start, check the tutorial requirements:
- Elementor (Free version) or Block editor (Gutenberg)
- JetEngine plugin installed and activated with the created Listing item.
If you have not done this yet, please follow this tutorial.
- JetSmartFilters plugin installed and activated
Create a Search Filter
In the described case, you can use any filter type available with the JetSmartFilters plugin. In this tutorial, we create the Search Filter.
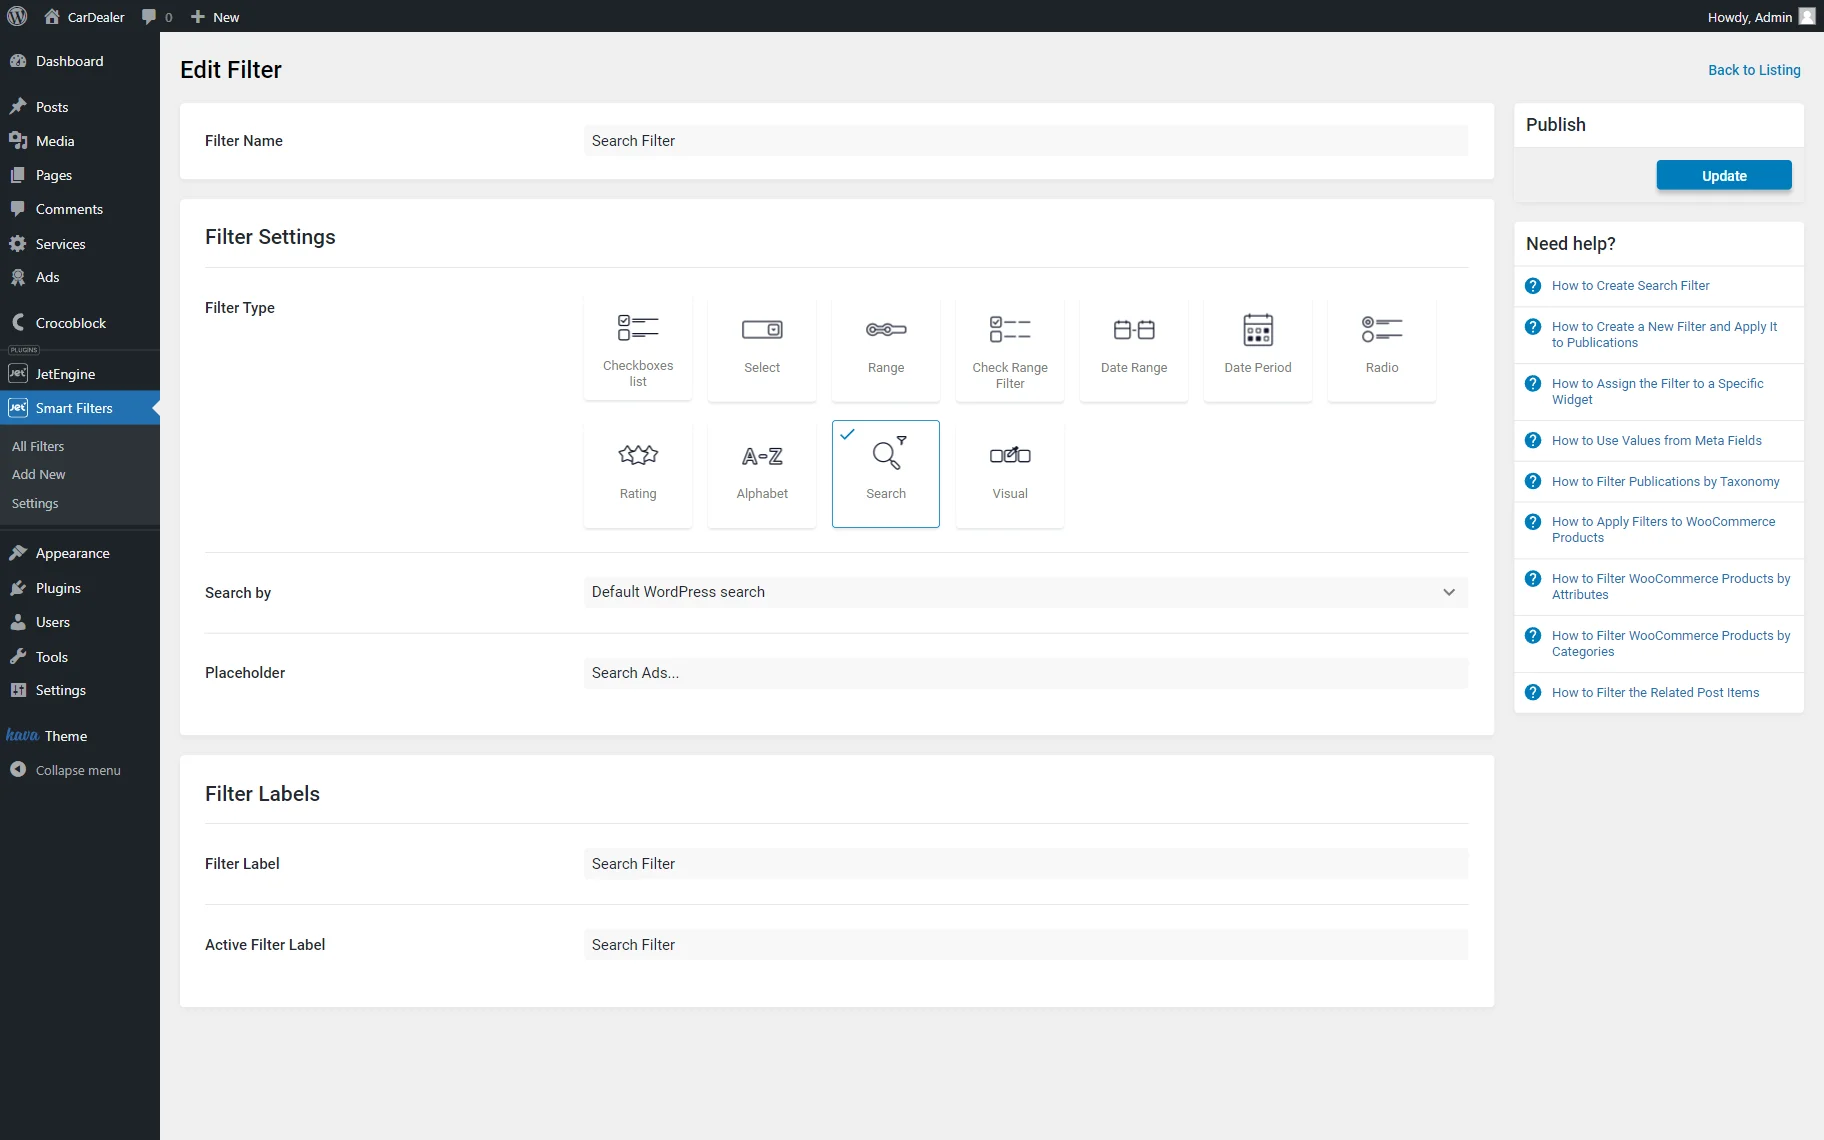
Proceed to WordPress Dashboard > Smart Filters > Add New.
Complete the Filter Name, select the “Search” Filter Type, and define the Search by option. Here, we select the “Default WordPress search” option.
Optionally, you can change the Placeholder (in our case, it’s “Search Ads…”) and complete the Filter Label and Active Filter Label.
Once done, hit the “Update” button.
Add the Listing Grid and Filter to the Page
Proceed to the page editor where you want to place the Listing Grid. You can edit it in the WordPress block editor (Gutenberg), Elementor, or Bricks.
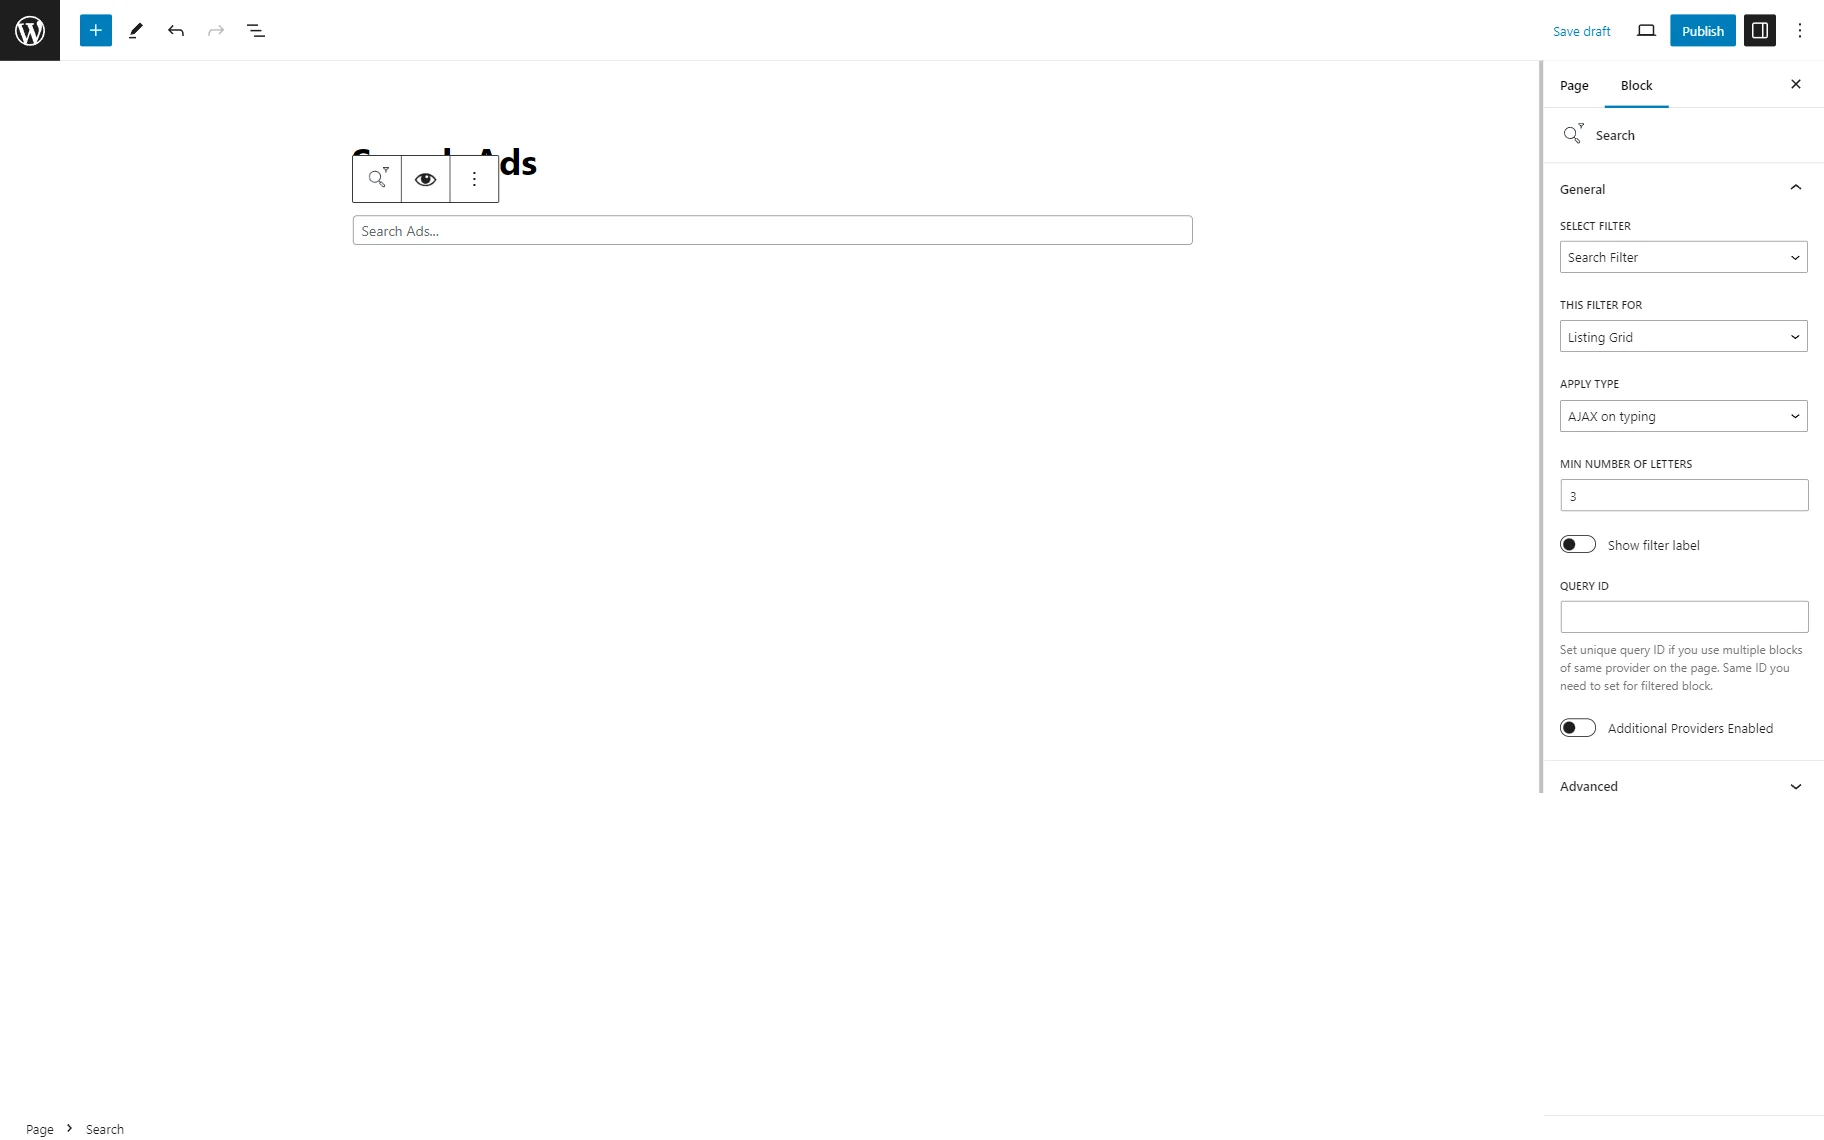
Drag and drop the filter block/widget/element (Search/Search Filter in the given case) and complete its settings.
Choose the just-built filter in the SELECT FILTER field, set the “Listing Grid” option in This filter for field, and choose the desired APPLY TYPE (the “AJAX on typing” in our tutorial).
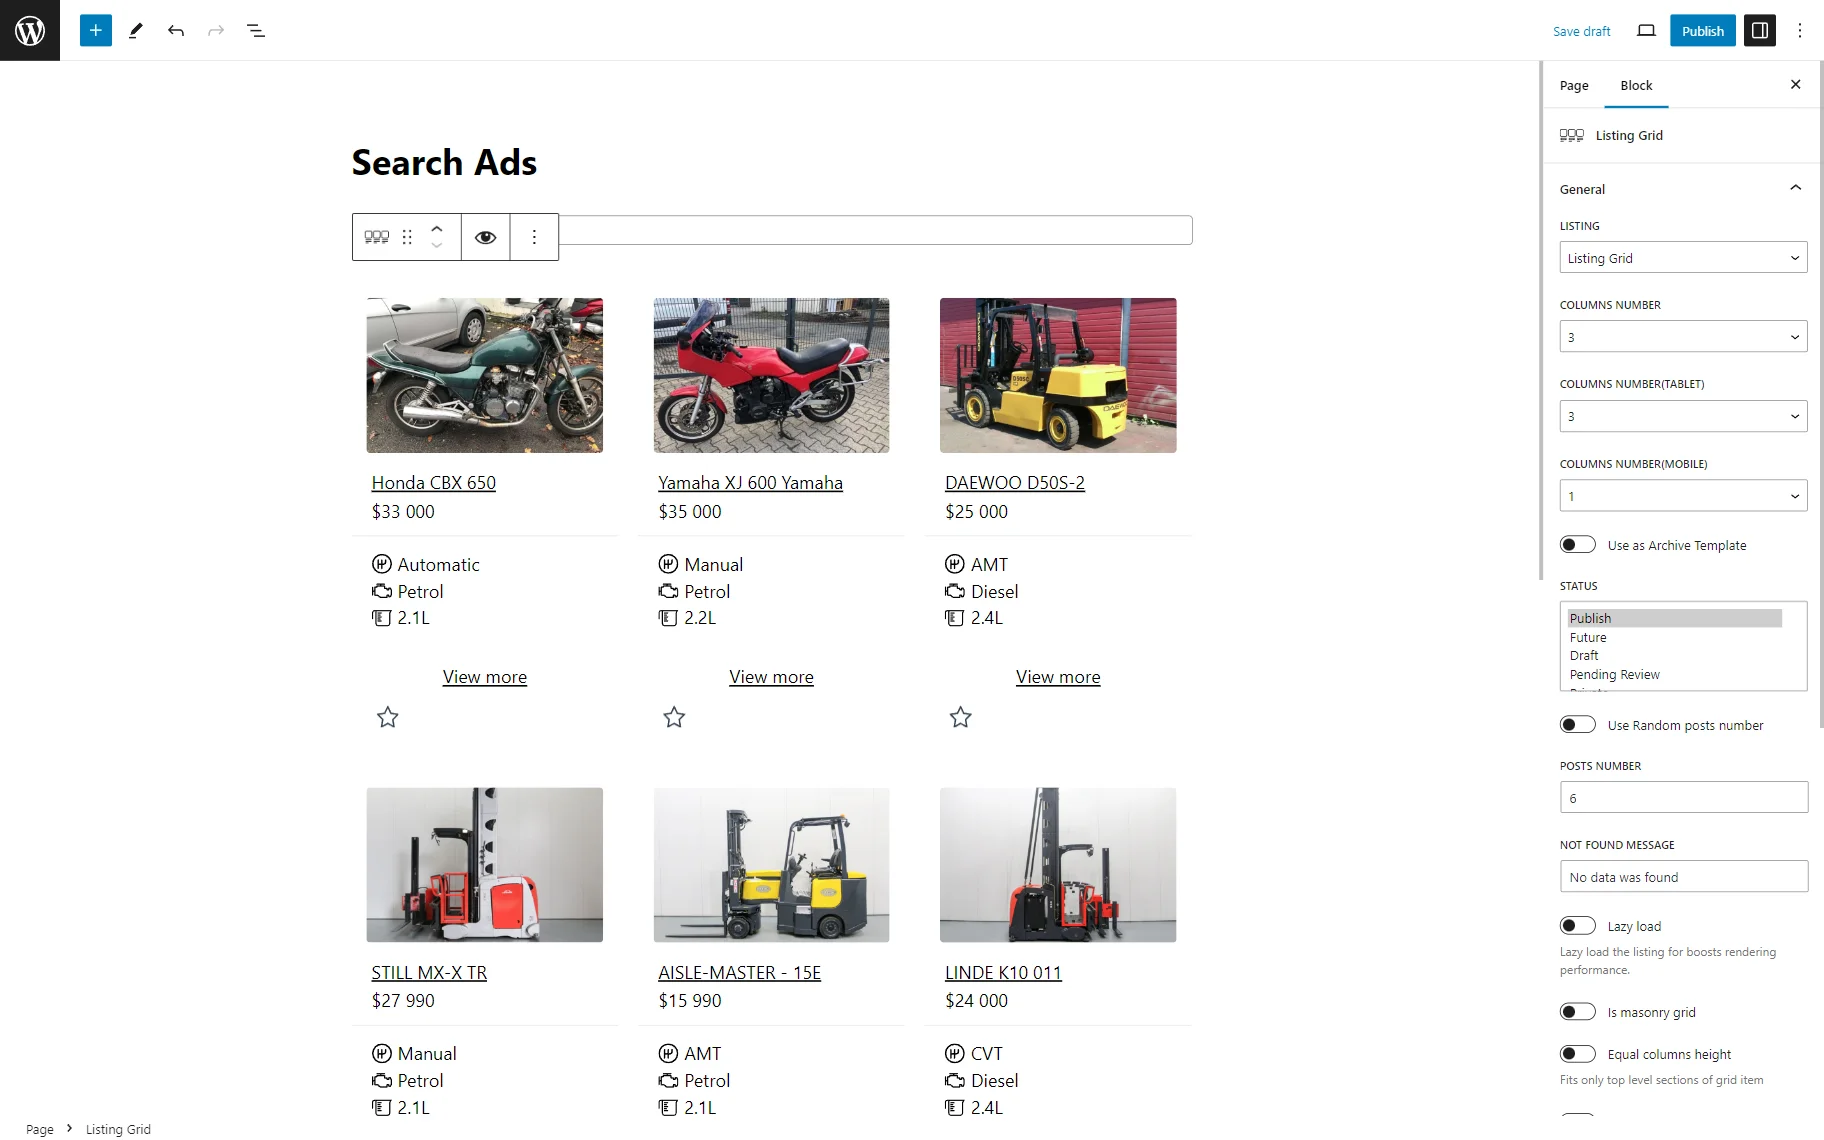
Place the Listing Grid widget/block/element and pick the needed LISTING in the General settings tab.
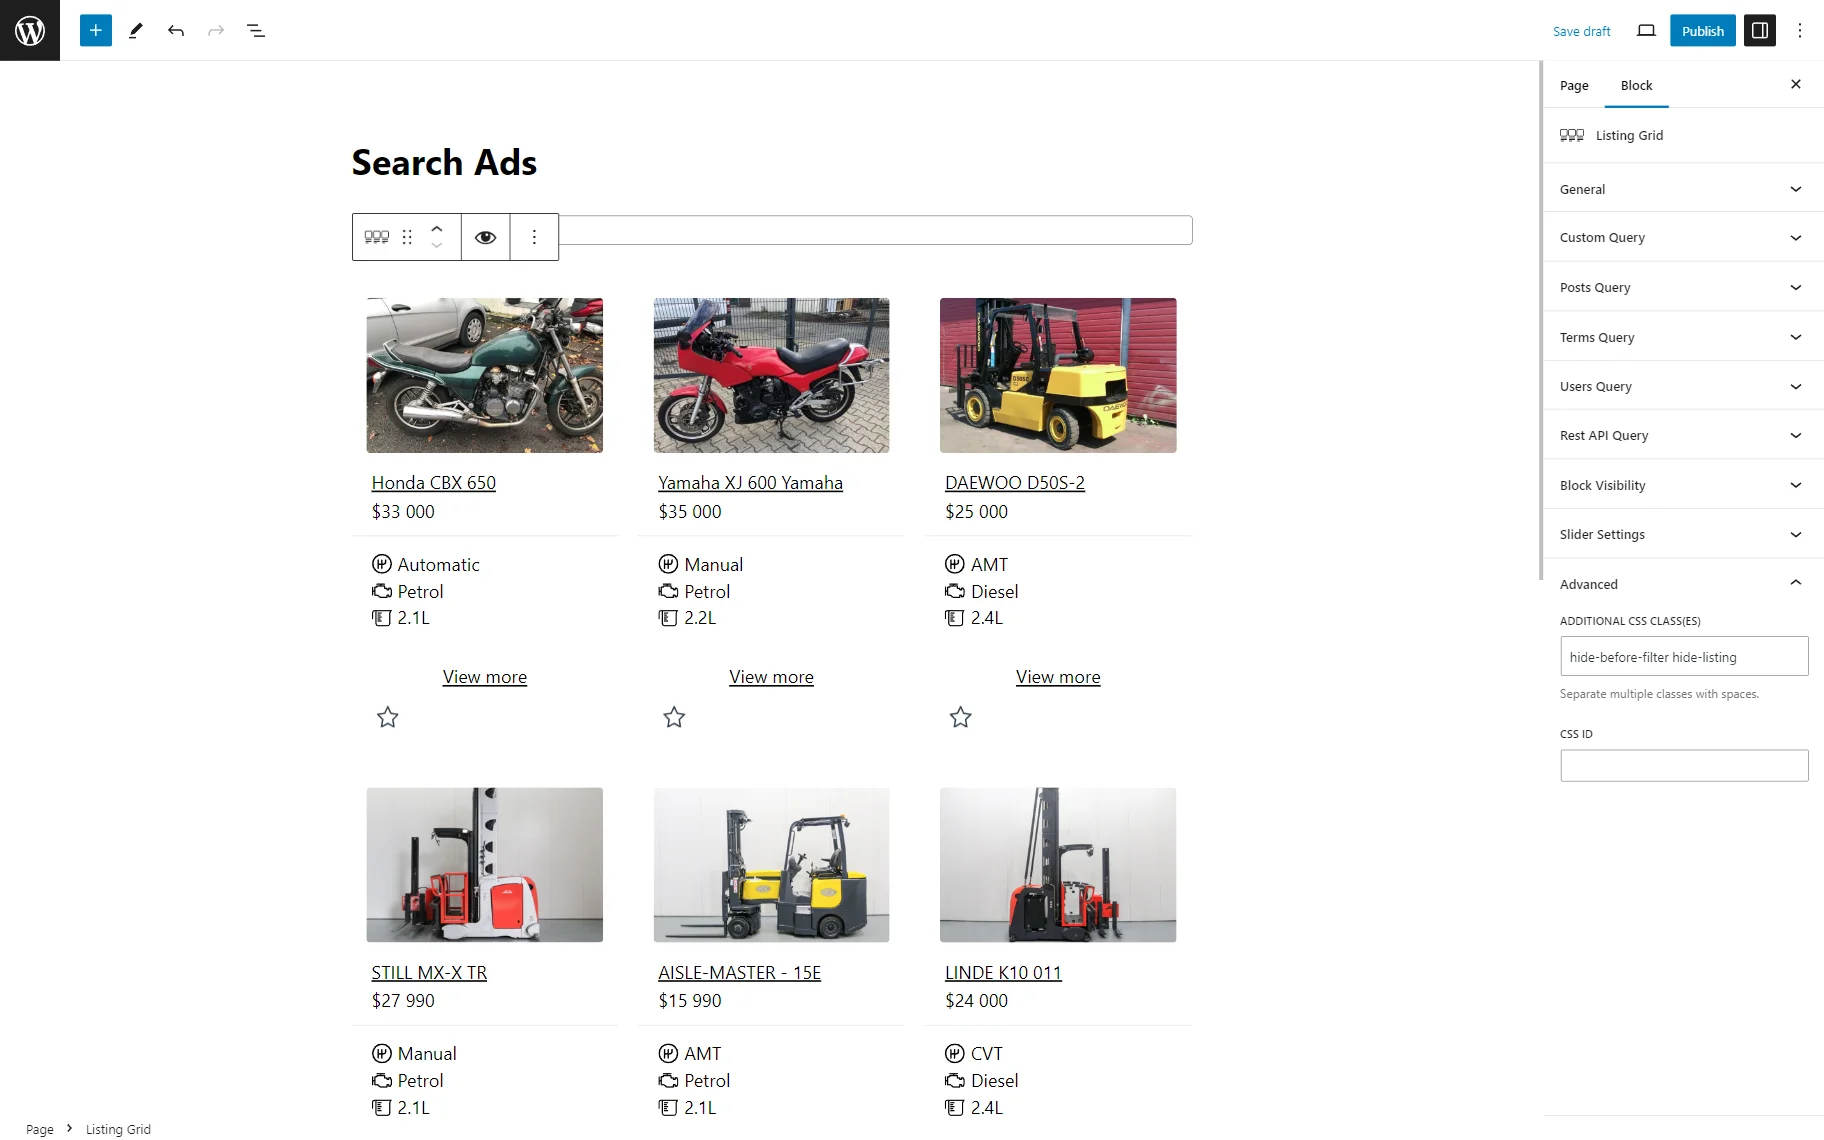
Move to the Advanced tab and enter “hide-before-filter” into the ADDITIONAL CSS CLASS(ES) field.
With this class, the content will be hidden, but not right away, so to make the filtered widget hidden immediately after the page is loaded, you can add the “hide-listing” class to the field. Separate two classes with a space.

Add CSS and JavaScript Code
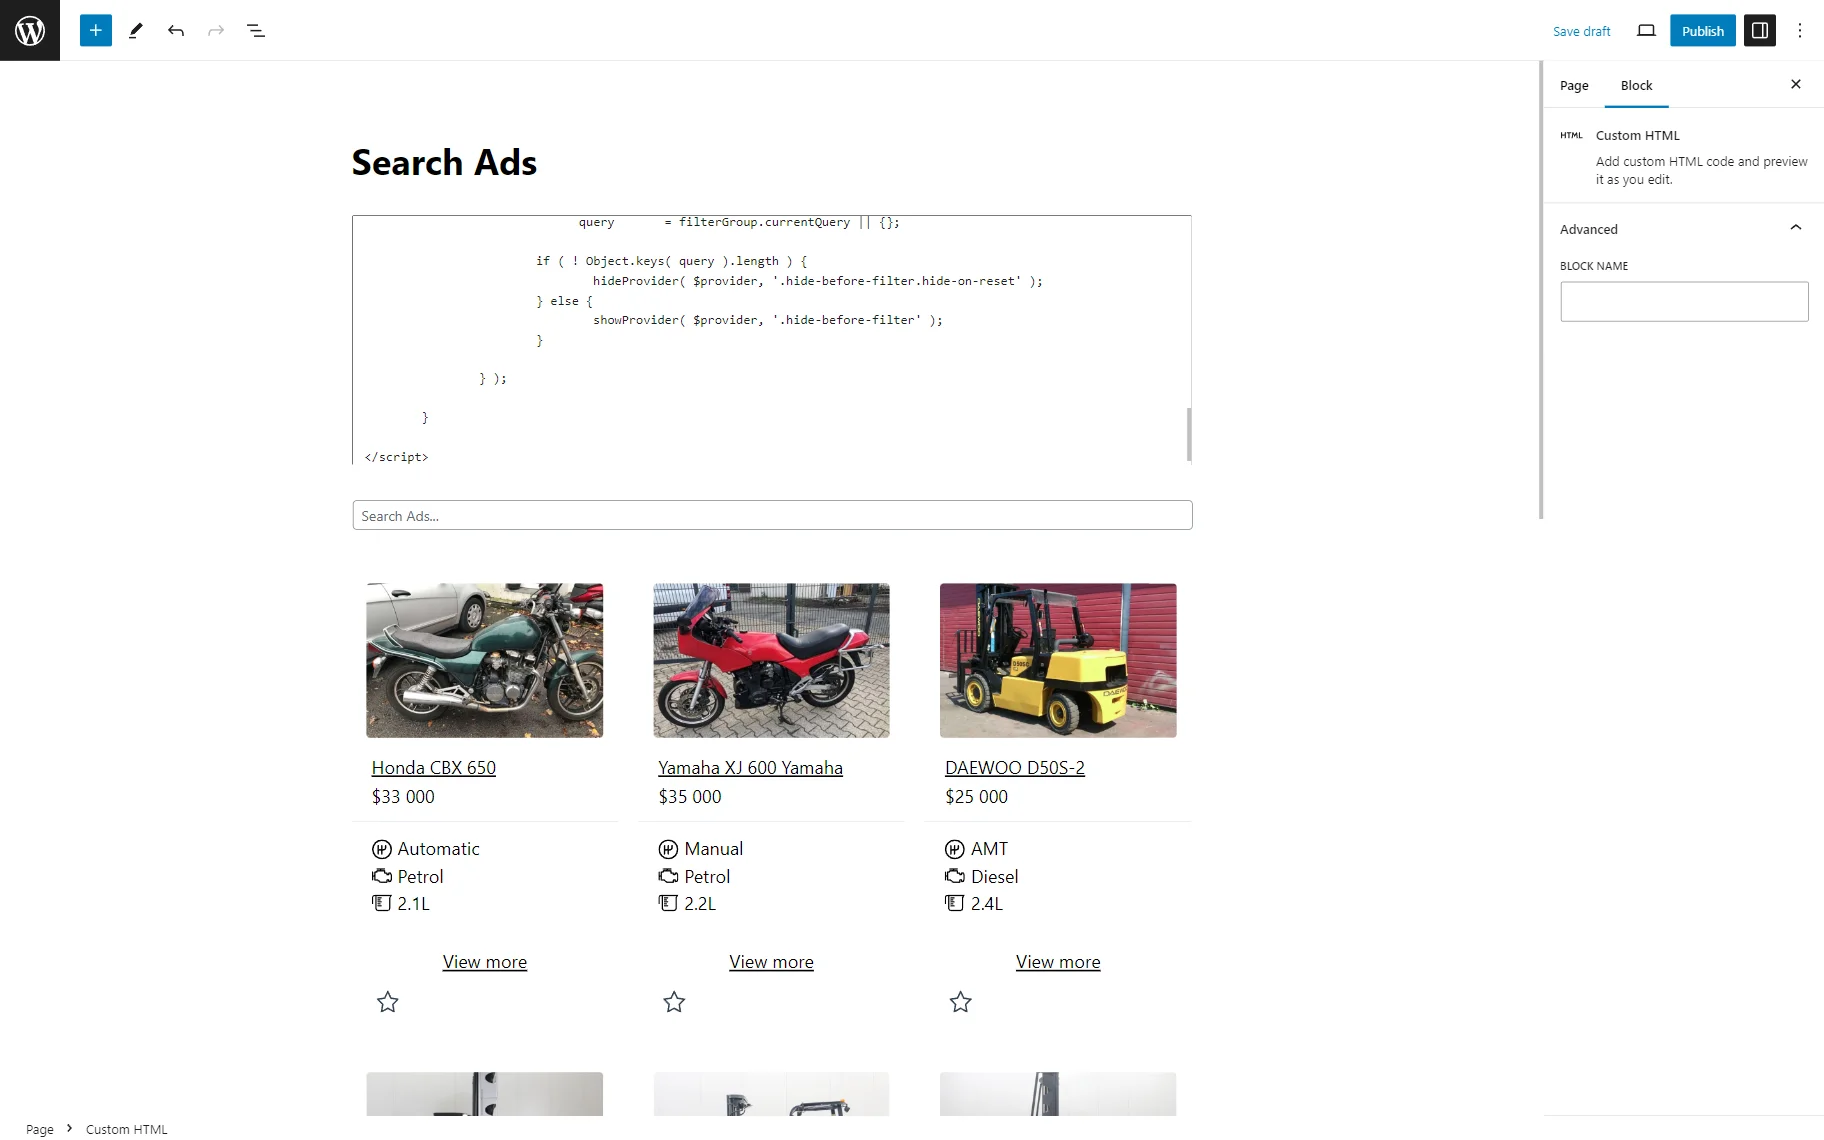
The easiest way is to add the Custom HTML block (HTML widget in Elementor or Code element in Bricks) to the page and enter such a code:
Then, hit the “Publish/Update” button to make changes live.
Check the Results
Go to the page on the front end. As you can see, there is only the Search filter, and the Listing Grid is not visible.

After typing a word, the Listing Grid appears with the search results.

That’s all. Now you know how to hide the Listing Grid before dynamic filtering with JetEngine and JetSmartFilters WordPress plugins.