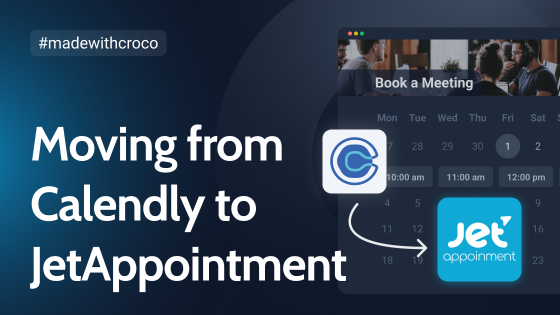
In this article, I will share the case of the Crocoblock support team switching from Calendly to our JetAppointment plugin to implement the functionality for clients to book Zoom appointments with our support specialists.
Our case will be useful to anyone running a service-oriented business who wants full control over the appointment booking functionality, making it more feature-rich, the process more flexible, and saving a considerable amount of money on third-party service subscriptions.
The Scope of Work
Crocoblock Support team offers quite a unique feature for its clients: customers can book Zoom calls with support agents to resolve their issues or answer their questions in face-to-face conversation and see the client’s screens to help in real-time.
You can find the form on this page.
At the time we launched this service, we had the following requirements for the appointment booking page:
- It should be a dedicated page where the client can pick a date and time of the meeting and fill in contact details.
- Since Crocoblock’s clients live all over the world, it’s essential that the customer selects their timezone while booking the date and time of the appointment.
- There should be a set of fields for the client to share some details about their case so the support agent can study it in advance and be even more helpful.
- Zoom meetings must be generated automatically when the appointment is booked.
- Functionality for sending details about the scheduled meeting to the client (with the date, time, link to the conference call, and a cancellation link).
- A reminder email with all the details must be sent to the client.
Also, we wanted to have full control over the settings from our side. In particular, our support team should have:
- A convenient dashboard where our support agents could easily find the daily agenda for Zoom calls, clients, and the details about the issues they want to discuss. It must be easy to navigate, filterable, and have different views.
- Full control over the agenda and the ability to change the available time slots and days for the appointment booking.
- According to our policy, each client can book a limited number of Zoom calls per month. That’s why it was important to have a functionality that automatically restricts the number of appointments per customer.
At the time when the Zoom calls with clients were introduced, our JetAppointment plugin couldn’t cover some of these requirements; that’s why we’ve used a third-party service – Calendly. It had everything we needed except the ability to limit the number of appointments per client.
Main Reasons for Moving to JetAppointment
Right after the launch of Zoom calls with our support agents, we realized that we would definitely switch to using our JetAppointment plugin. Here are some reasons why:
- The most obvious one is that we couldn’t sell appointment booking plugins while using a third-party solution. In this case, a very logical question arises – why do clients need this plugin if it does not meet our own needs?
- In terms of GDPR policies, the less data we share with third-party services, the better.
- Using a third-party solution made the whole structure more complex. First of all, we had to pay for it (and each supporter’s seat adds to the cost). Also, it falls out of the structures of our URLs, so we couldn’t see the analytics data and had no full control over the design, navigation, and functionality of the service to make the interface more friendly for the clients.
- As I’ve already mentioned earlier, the crucial aspect for us was to be able to limit the number of appointment bookings the client can have per month.
- We wanted to make a time zone field required and also double-check it with the information about the time zone in which the user has booked the appointment to ensure that it’s correct and avoid frustrating missed calls.
- Clients often lose the links to the Zoom calls, so it was important that the support agents working with tickets and chat could resend them to the customer. However, we didn’t want to give the entire support team access to the Zoom meetings dashboard.
The Process of Switching to JetAppointment
Based on the requirements I listed at the beginning of this article, we started to review the functionality of JetAppointment to understand what was missing. Another important task was to match it with clients’ requests as well, to get a perfect combination of the tools it would offer.
As a result, JetAppointment 2.0 has the following features:
- Workflows. This functionality made it possible to set various actions in accordance with the appointment booking status or the changes made to it.
- Zoom integration. The direct integration with Zoom for creating scheduled meetings automatically. It also made us implement an API for other integrations, which will be added in the upcoming releases. Advanced users can already add their own custom integrations programmatically.
- Time zone picker for the front-end calendar. This option allows users to choose a time zone (and make it a mandatory field) while booking an appointment, and the time in the calendar will be automatically adjusted according to this time zone.
- Public actions functionality (confirm and cancel appointments links). These are public URLs with security tokens. Such links can be generated automatically and sent via email or a webhook (for services like Zapier or Make), so the client can change a booking status just by clicking on that link.
How to Set Up JetAppointment
To implement the appointment booking functionality as described above, with all the perks it gives, you will need the JetAppointment and JetFormBuilder plugins.
📚 Read this step-by-step guide about setting up an appointment scheduling functionality on your website.
Additional Customization
Limit the number of bookings per month
This functionality was implemented using the Limit Form Responses add-on for JetFormBuilder. You can either limit the number of responses per form or for one user and restrict it by IP address, session or cookie value, and by the user ID for registered users. Also, you can set up the time period after which the limitation will reset (one month in our case) and write a restriction message.
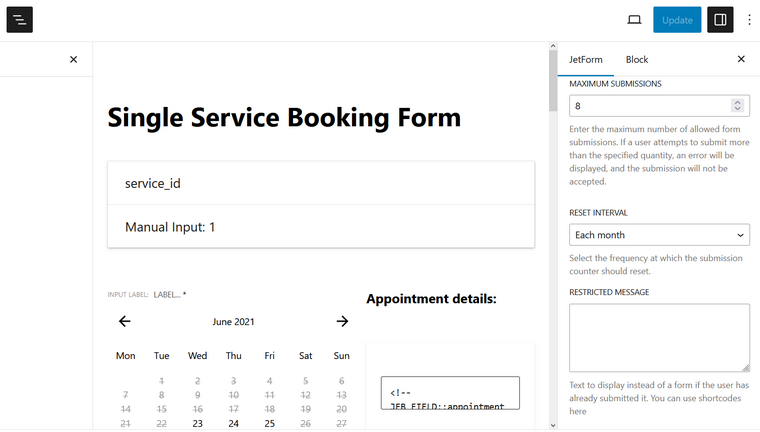
Additional fields
Using JetFormBuilder, we can collect additional information by adding fields to the booking form. Further, our task was properly displaying this data to each support specialist in the appointment agenda.
This can be implemented in two ways:
- By adding additional columns to the booking table.
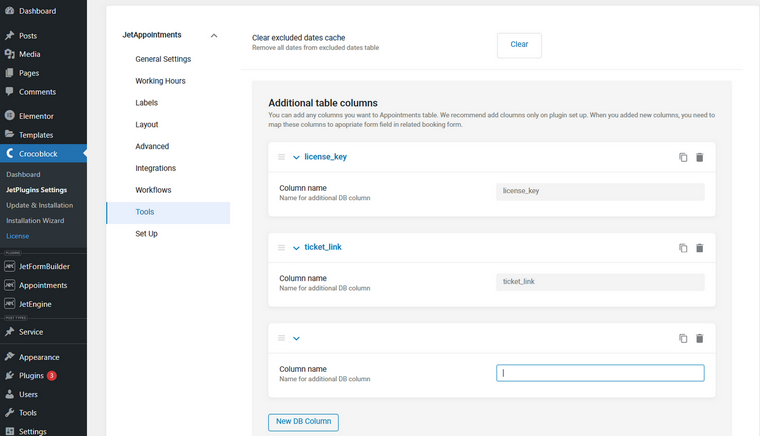
- Using a custom solution and adding meta fields.
This is what we have chosen to experiment with. By default, these meta fields are aimed at collecting service information, such as Zoom conference links, tokens for canceling or confirming the booking, connected workflows, etc. However, we decided to expand their number and functionality to store data from the form fields. Stay tuned because we will add the best experiments to our next releases.
FAQ
It depends on the plugin and the service, but in our case, it’s much better because it offers much better functionality and full control.
Yes, you can connect any services, including the Calendar, using webhooks and integration services like Zapier or Make.
Sure! Install WooCommerce first, then simply activate WooCommerce integration in Settings and set the prices per time slot. After this, set the preferred payment methods and the checkout process, just like with any other WooCommerce product. Alternatively, if you prefer an even simpler way of charging clients, use JetFormBuilder add-ons (PayPal is included in a free version, and Stripe is a premium add-on).
Bottom Line
In this article, I’ve talked you through our process of moving from the third-party service for booking appointments to the in-house solution with all the benefits it comes with. As you can see, using JetAppointment, not only can you save money but also have full control over every little detail of the booking calendar and the workflow. Other than this, you can add all the additional fields, integrate them with other plugins, and even display data on the front end if needed.
So, grab your JetAppointment plugin and enjoy using it for your service-oriented business.
