In this article, I’ll take a down-to-earth look at how to improve the checkout experience at a WooCommerce bookstore. If you’re occasionally selling collectible or exclusive editions, you might want to build a landing page to introduce a product and its benefits involving something more than a simple “add to cart.” Then, it’s smart to make the buying process as clear and smooth as possible.
Table of Contents
- WooCommerce Payment Integration Use Case Details
- Create a Landing Page
- Create a WooCommerce Product
- Create a JetFormBuilder Form
- Fine-Tune WooPayments Plugin
- Testing the Form and Sandbox Checkout
- Configure WooPayments Settings
- FAQ
- Conclusion
Using a reliable payment plugin, WooPayments, and a well-configured JetFormBuilder form that leads customers straight to the WooCommerce checkout will provide a quick, secure way for customers to get what they want and keep them coming back.
WooCommerce Payment Integration Use Case Details
My demo store, The Book Nook, is an online bookstore where users can purchase exclusive editions of novels. Instead of a standard product page, an exclusive item is presented on a separate landing page and is added to the cart through the JetFormBuilder form.

The form action Add to Cart & Redirect to Checkout ensures that once the user fills out the form, they are taken directly to the WooCommerce checkout page to complete their purchase.
To perform this use case, I need to complete the following steps:
- build a landing page;
- create a WooCommerce product for an exclusive item;
- create a JetFormBuilder form;
- install and fine-tune the WooPayments plugin.
Please note that in this use case, I will not be creating a WooCommerce recurring payments form; for this, there’s a separate guide.
As you can see, the use case is simple to build. But before I begin, I’d like to take a step back and list the WooCommerce payment plugins that can be used on WooCommerce stores.
Top WooCommerce payment gateways
- WooPayments by Woo (Free) — a first-party gateway offering major payment methods and full WooCommerce integration, enabling easy management of transactions, refunds, and disputes directly in WordPress.
- WooCommerce Stripe Payment Gateway (Free) — accepts major cards, Apple Pay, and Google Pay via Stripe’s secure and reliable infrastructure, with seamless WooCommerce integration.
- Square for WooCommerce by Woo (Free) — syncs online and offline inventory, enabling card payments and unified sales management for stores with both physical and online presence.
- Amazon Pay for WooCommerce by Amazon Pay (Free) — allows customers to check out using Amazon’s stored payment methods, reducing friction and boosting trust for faster, easier purchases.
Create a Landing Page
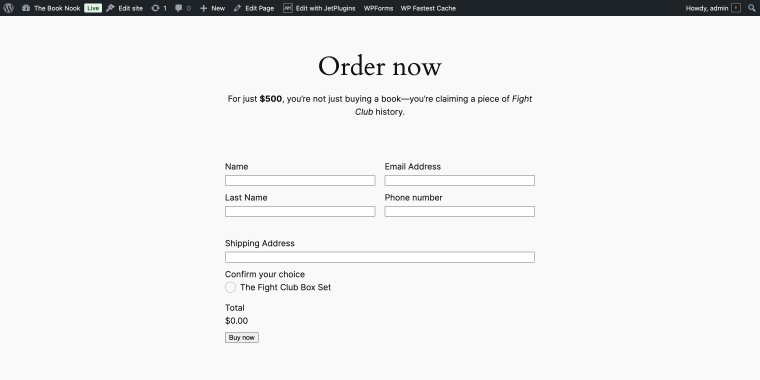
The first step in our use case is creating a landing page. The bookstore exclusives deserve a clear, dedicated page that explains why it’s worth buying.
The landing page should highlight the perks of the product and its features, explaining everything in simple terms.
This page will include the JetFormBuilder form, a concise breakdown of the product, and CTAs that encourage visitors to buy it.
📚 If you’re interested in how to create landing pages that convert, feel free to refer to our articles.
- Elementor Landing Page Essentials
- Improve Landing Page Conversion Rate with 9 Tips
- 4 Best Landing Page Examples That Convert
Create a WooCommerce Product
To ensure the bookstore’s checkout process runs smoothly, you’ll need to create a separate WooCommerce product for our exclusive item.
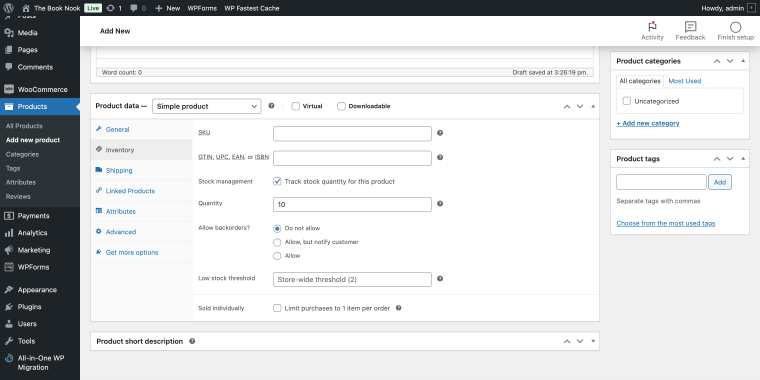
In your WordPress dashboard, go to Products > Add New, and enter the product name (e.g., “The Fight Club Box Set”).
In the Product data section, choose a “Simple product”:
- General tab — enter the price (in my case, “$500”);
- Inventory tab — since our item is exclusive, it might be limited in quantity; under the Stock management checkbox, tick the field “Track stock quantity for this product,” and in the newly appeared Quantity field, set the needed amount or available items (in my case, “10”).
Optionally, you can add a brief description, enumerate items that are in the box, and so on.
When done, click on the “Publish” button.
After this step, I’ll have an individual WooCommerce product that represents an exclusive item from the physical store. This product can now be linked to the JetFormBuilder form action, ensuring that when a customer fills in the form on my landing page, the correct item is added to their cart during checkout.
Create a JetFormBuilder Form
Now, let’s create a JetFormBuilder form that will be used on the landing page. In your WordPress dashboard, go to JetFormBuilder > Add New.
Add fields that capture the details you need from your customers before they’re redirected to the checkout:
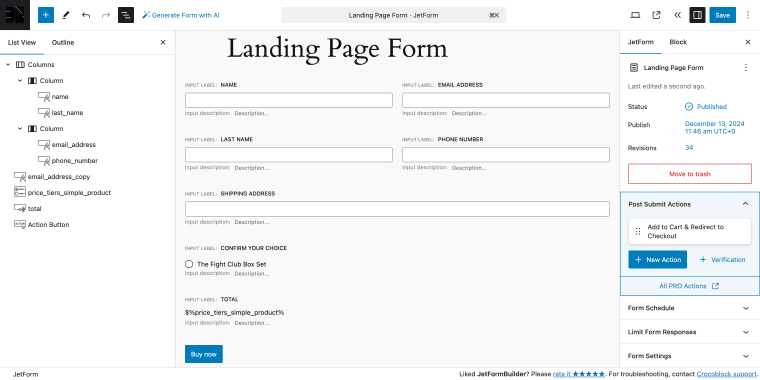
- Name — a Text Field for the customer’s first name;
- Last Name — a Text Field input for the customer’s last name;
- Email Address — a Text Field with a valid email format; configure the field’s “email” type so the form will prompt users if they enter something invalid; go to Block settings, Field section, and set FIELD TYPE to “email”;
- Phone — a Text Field to collect a phone number; go to Block settings, Field section, and set FIELD TYPE to “tel”;
- Shipping Address — a Text Field works fine, but consider adding instructions or placeholders to guide users;
- Confirm Your Choice — lets customers pick from different Book Club levels; by using a Radio Field and setting FILL OPTIONS FROM set to “Manual Input,” you can easily define, label, and price each of your WooCommerce products:
- “The Fight Club Box Set” — $500.
I need to adjust the Radio Field accordingly so that the relevant price is displayed in the Total field.
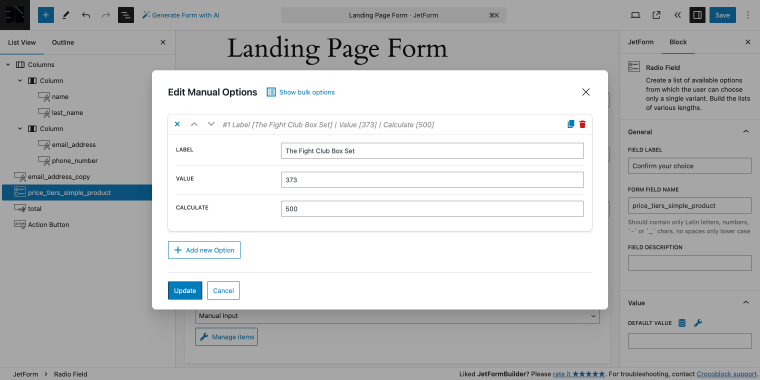
- In the VALUE field, I need to add the product ID of our WooCommerce product (in my case, it’s “373”);
- In the CALCULATE field, I need to add the price of the item (in this case, it’s “500”).
With these settings, I’ll be able to display the relevant total price.
The last two fields are:
- Total — a Calculated Field that will display the price of the membership. Click on the “wrench” icon to select the field macro that is used for calculation, then go to Block settings and set CALCULATED VALUE PREFIX to “$”;
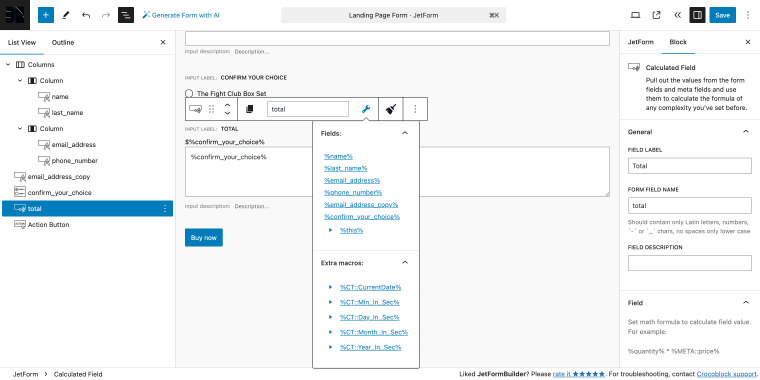
- Action Button — a button by clicking which users can submit the form; the button label is “Buy now.”
The last thing I need to do is to install the form action Add to Cart & Redirect to Checkout. This form action is a premium add-on that can be purchased alone for $49/year (billed once per year until canceled).
After purchasing, installing, and activating the add-on in the JetForm settings tab, go to the Post Submit Actions section and click “+ New Action.” In the pop-up, find and click on the same-name form action to add it to the form.
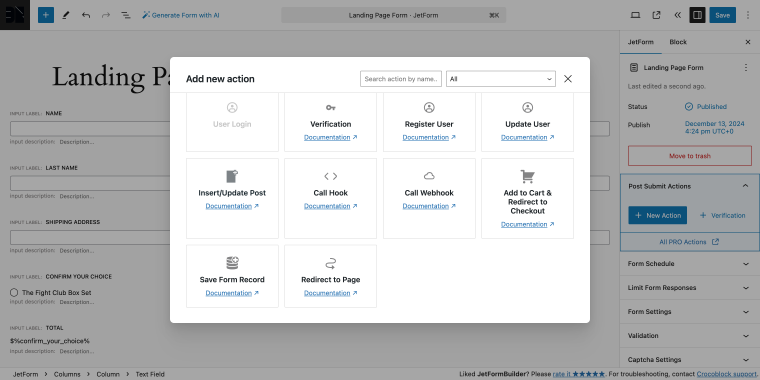
After adding the form action, I have a number of settings to fine-tune.
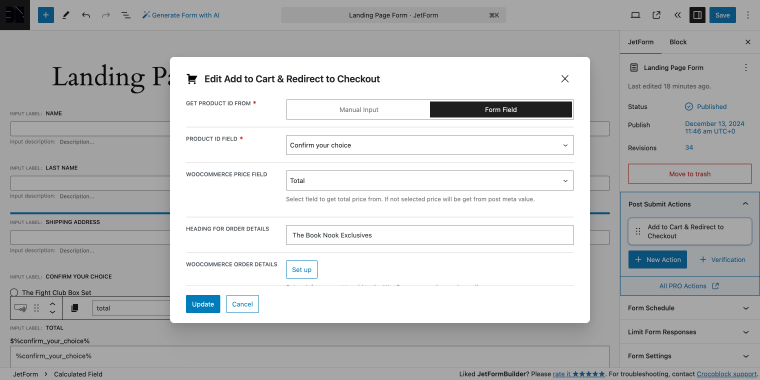
- GET PRODUCT ID FROM — this option specifies where the system should fetch the product ID; by choosing “Form field,” you’re telling the action to use a field in the form (in our case, it’s the Radio Field);
- PRODUCT ID FIELD — select the specific field in your form that lists the exclusive product; the chosen product value will be used as the product ID, so the correct one is added to the cart after form submission;
- WOOCOMMERCE PRICE FIELD — assign the form field that holds the total price of the selected product (in our case, it’s the Calculated Field);
- WOOCOMMERCE ORDER DETAILS — in this field, you can configure additional order information that you want to include in the WooCommerce order notes and confirmation emails; by clicking the “Set up” button, you can match each field from your form (like name, email, or membership tier) to appear in the order details, creating a clear record of the customer’s choices;
- WOOCOMMERCE CHECKOUT FIELDS MAP — map specific form fields to their corresponding WooCommerce checkout fields; match the Email form field to the WooCommerce BILLING_EMAIL. This ensures that when the user is redirected to checkout, their details are already filled in, speeding up the payment process.
When done, click on the “Update” button to save progress.
After editing all the form fields, click on the “Save” button to save the form for further use.
In this video, you can see the step-by-step setup process.
Fine-Tune WooPayments Plugin
Follow these steps to configure WooPayments and start accepting payments in your WooCommerce store. In your WordPress dashboard, go to Plugins > Add New Plugin, search for “woopayments,” install it, and activate it.
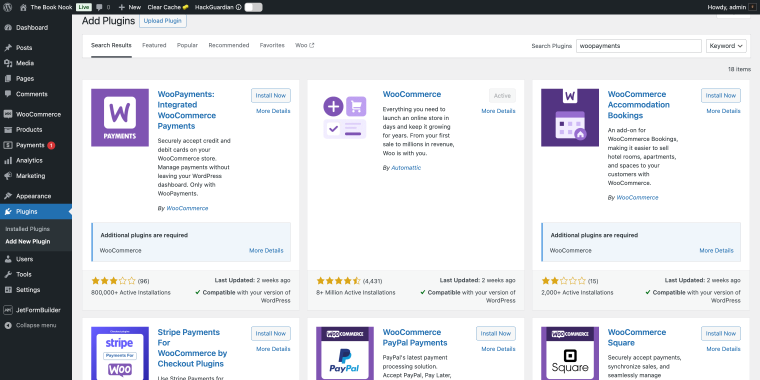
After activating WooPayments, click on its settings link.
NOTE
Please note that you won’t be able to use the plugin if you’re building a store on localhost. It requires a JetPack connection, which is not available in the local environment.
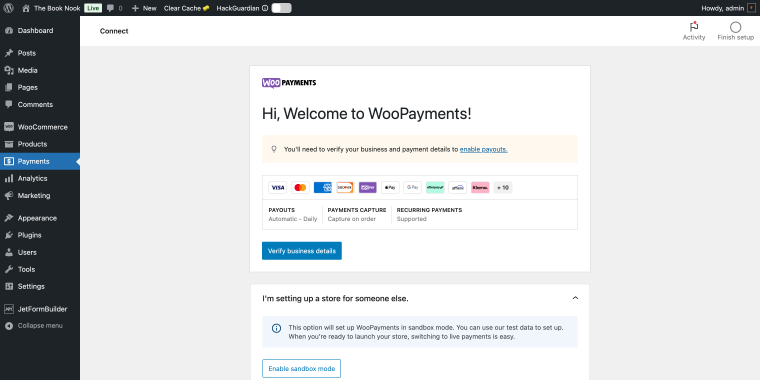
Since I have a demo store, I’ll click on the “Enable sandbox mode” button in the section titled “I’m setting up a store for someone else.” This mode allows you to make test purchases as if they were made in a live environment. When clicked, the plugin will automatically perform all the necessary settings.
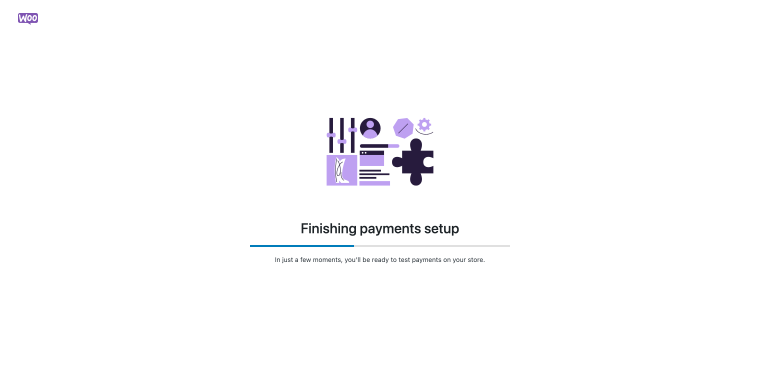
When done, you’ll be redirected to the Overview page.
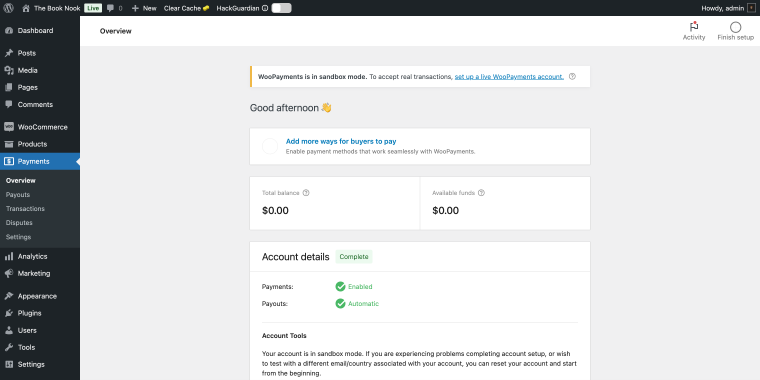
Since the sandbox mode is on, you can already perform test purchases on your store.
Testing the Form and Sandbox Checkout
After fine-tuning JetFormBuilder and WooPayments, let’s test the entire purchase flow.
Fill out the JetFormBuilder form.
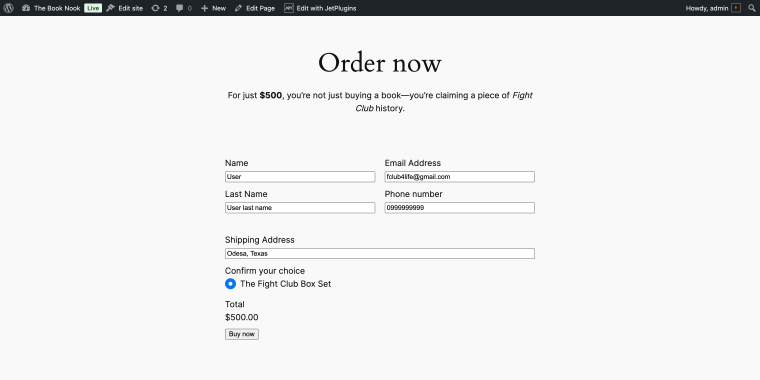
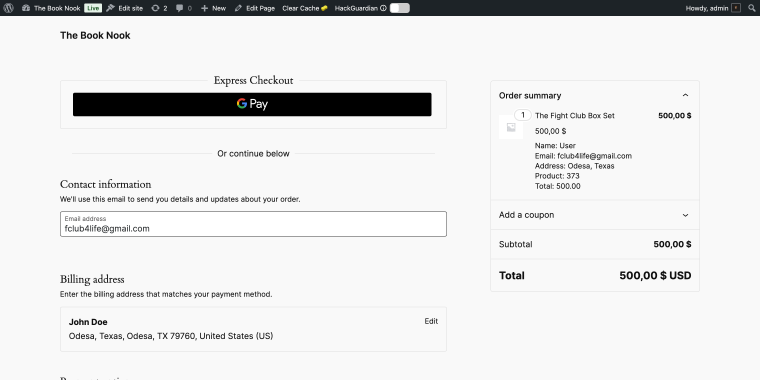
Confirm that the product has been added to the cart that the user opted for on the landing page.
Complete a test payment and verify that the order is processed correctly. Since I’m in sandbox mode, I can use the test card number. For the card expiration, I can use any future date; as for the CVC code, any three digits will suffice.
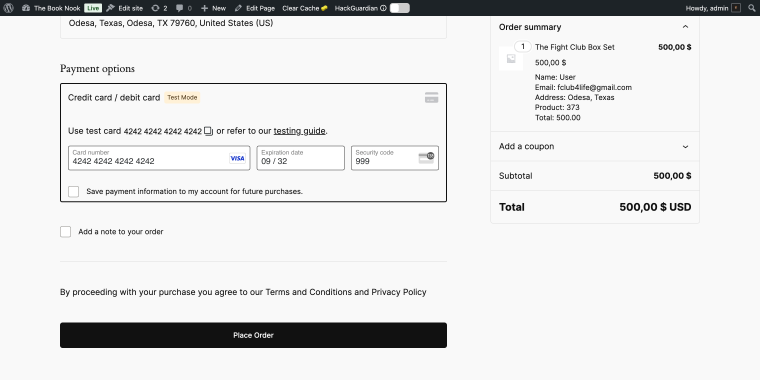
Clicking the “Place Order” button, I’ll complete the order.
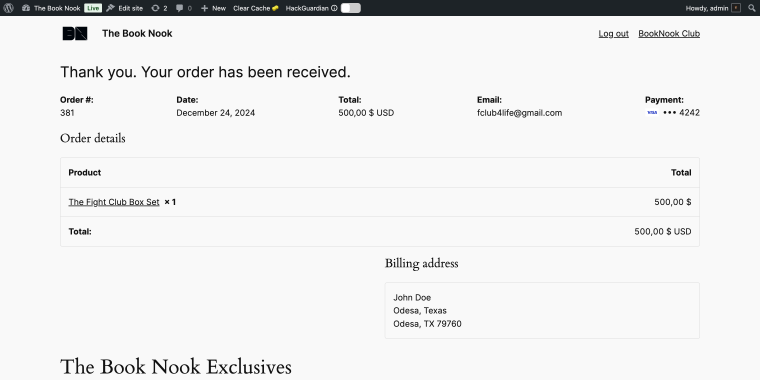
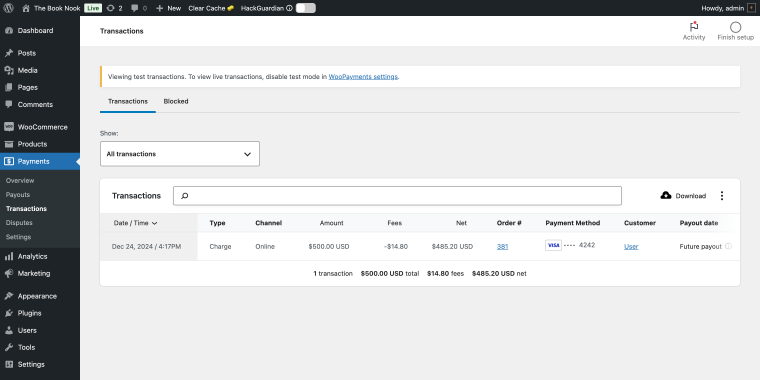
You can also use WooPayments’ dashboard (accessed via the path WordPress Dashboard > Payments > Transactions) to review transactions, refunds, and other order details.
Configure WooPayments Settings
Before your store goes live, you need to verify your business and connect it to the Stripe payment system so that you can collect payments through your store.
Go to WordPress Dashboard > WooCommerce > Settings or use the alternative path, WordPress Dashboard > Payments > Settings.
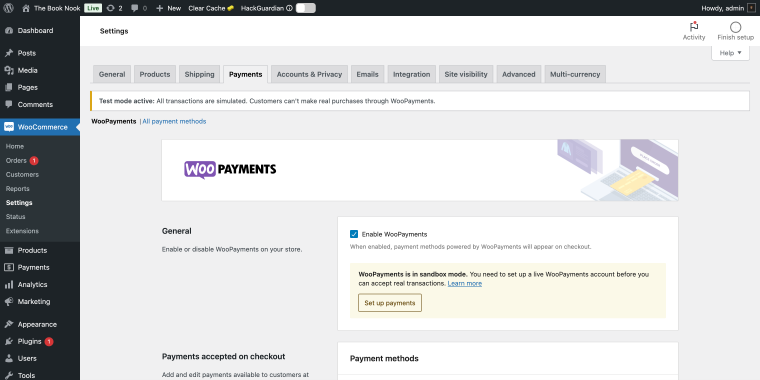
In the General section, click on the “Set up payments” button to go through the WooPayments onboarding process. If you have all your store details on hand, you’ll be able to complete this in a few minutes.
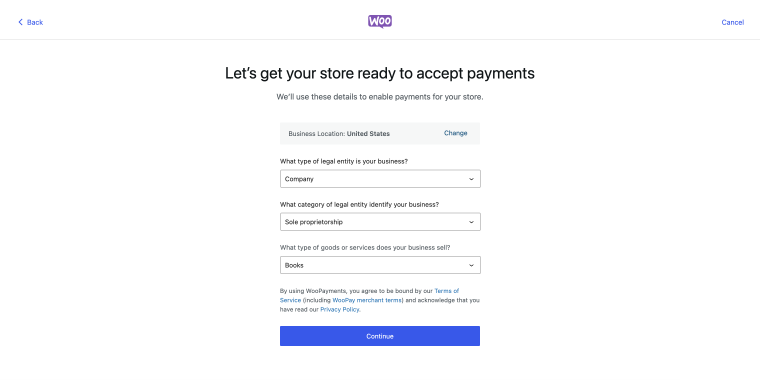
Step 1: In this step, please provide your company’s basic information.
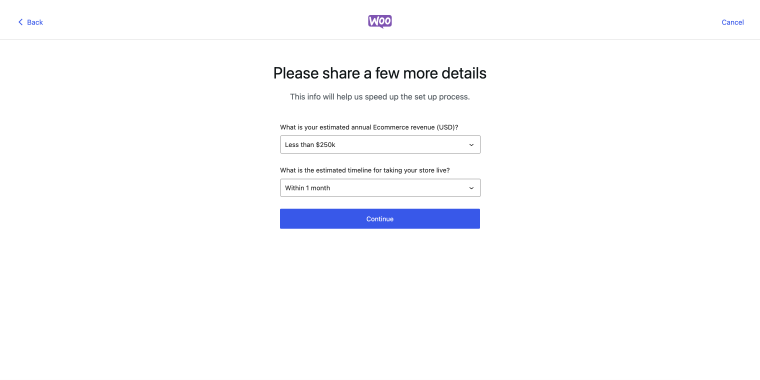
Step 2: Here, you should input your projected revenue and select an estimated launch timeframe for your store.
Step 3: In this step, you need to log into your Stripe account to go further with your store verification.
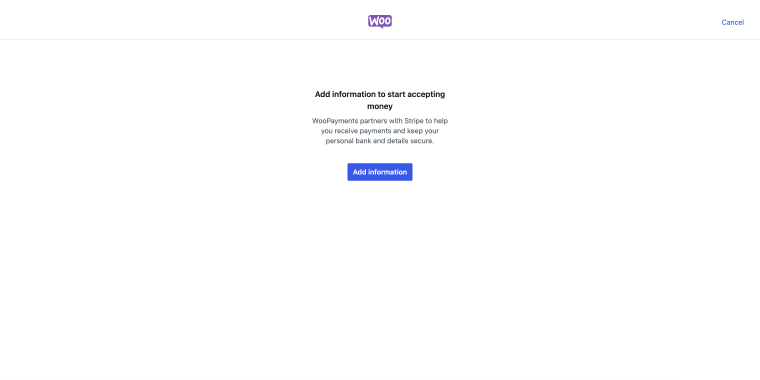
After clicking “Add information,” you’ll see a window from connect.stripe.com requesting your phone number and email. This is a standard step when creating your account.
Once you’ve entered and verified these details, you’ll move on to filling in the necessary information about your business.
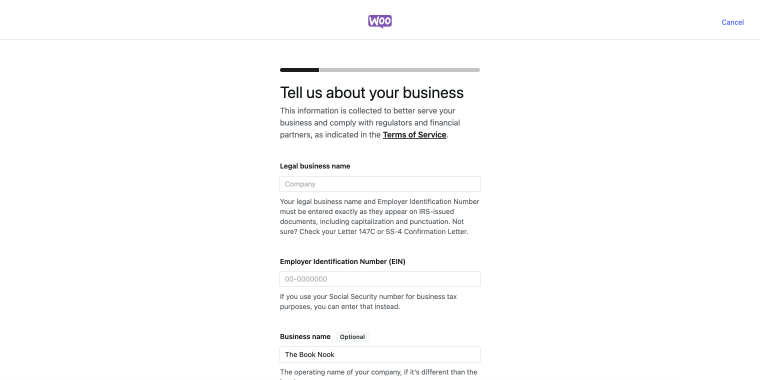
Once you have entered all the required details and agreed to the terms, click “Agree and submit.” You will then be redirected back to your WordPress Dashboard, which means that the signup process is complete.
Don’t forget to run through all the payment methods and enable country-specific payment options, or leave default settings that include:
- Payments accepted on checkout — set to “Credit / Debit card”;
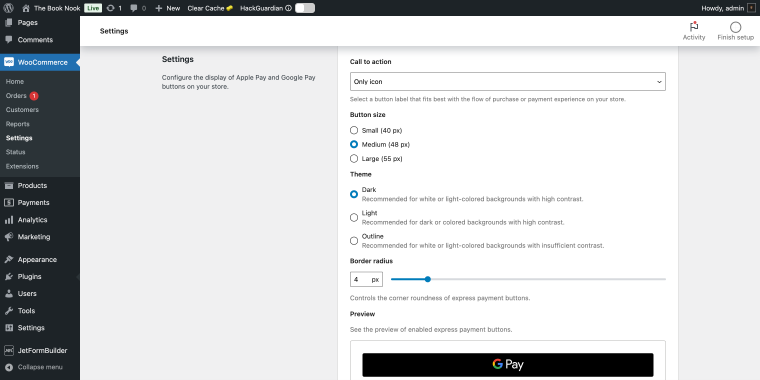
- Express checkouts — set to “Apple” and “Google Pay.”
For Express checkouts, WooPayments allows minor design alterations, such as changing the button size, theme, and border radius.
FAQ
Yes. You can enable several gateways at once, letting customers choose their preferred payment option at checkout.
Most gateways provide simple setup wizards. While some advanced features might need custom code, basic configurations are generally doable without a developer.
Use reputable payment gateways, install SSL certificates on your site, and keep all plugins updated. Most gateways also offer built-in fraud protection for added security.
Conclusion
Setting up a smooth and reliable payment process on your WooCommerce store doesn’t have to be complicated. By combining JetFormBuilder for form-based purchases and a robust payment gateway like WooPayments, you can create a seamless experience that takes customers from form submission to checkout with ease.
With the right tools and a well-structured process, you can simplify payments, enhance customer satisfaction, and effortlessly grow your store.
