I bet you know how important dynamic content is for delivering a top-notch user experience. I recently discovered that integrating JetEngine with Bricks Builder and creating reusable components is an enjoyable experience, and I’d like to share it with you.
Table of Contents
- How to Create Components in Bricks Builder
- Creating JetEngine Component in Bricks Builder
- Pros/Cons of Using JetEngine Components for Bricks Builder
- FAQ
- Conclusion
In this article, I will walk you through my process for creating components in Bricks Builder with JetEngine for my hypothetical membership website.
How to Create Components in Bricks Builder
Before getting started, I planned out what the JetEngine component should display. For example, if I’m working on a membership website, I may need reusable components, such as a pricing plan card, where content can be easily updated. The key benefit here is maintaining a consistent design while ensuring anyone can modify content (change price or features) without accidentally altering the structure or styling.
How does Bricks differ from Elementor?
I’ve used Elementor extensively, and while its vast library of pre-built templates and widgets is fantastic, here’s what I’ve noticed about Bricks Builder.
- Bricks offers a cleaner, lightweight interface. While Elementor provides ready-made elements, Bricks Builder gives me a flexible canvas to create exactly what I envision. It may seem a bit more “bare bones” at first, but that actually means less bloat and faster load times.
- With Elementor, sometimes you’re forced to work around the limits of pre-designed blocks. Bricks Builder, on the other hand, makes it easier to tailor everything from scratch. Plus, when paired with JetEngine, the dynamic content feels more natural and integrated.
- In my experience, Bricks Builder generates cleaner code than Elementor, which translates to improved performance. This is especially important for membership sites, where load times can affect member engagement.
- Finally, the editor had no lags, and it loaded almost instantly, while Elementor sometimes reminds me of a spoiled child. 🫠
Creating JetEngine Component in Bricks Builder
For my Performance Marketing Membership website, I plan to have the following section structure:

- Hero section;
- Intro section;
- Services section;
- Pricing Table section (added using a component);
- CTA section.
Let’s begin.
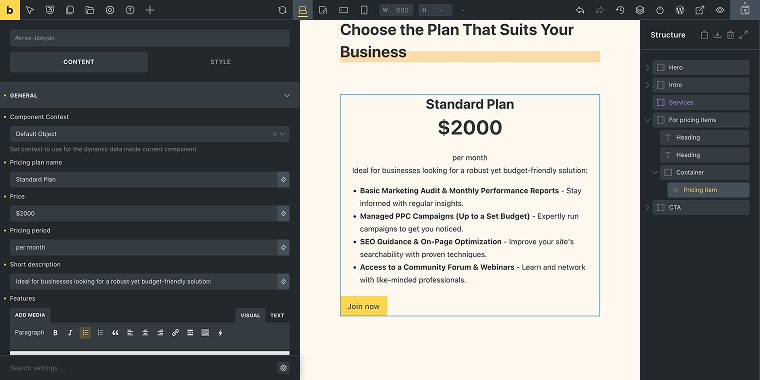
Custom pricing table component
The pricing table layout allows potential members to easily assess the differences in features and benefits, simplifying their decision-making process and boosting conversions. Here’s a comparison table that I’m planning to build.

Since we’re going to create a JetEngine Component with Bricks, we need to go to the WordPress Dashboard > JetEngine > Listing Items/Components section.
There, click on the “Add New Component” button to open the Setup Component pop-up.
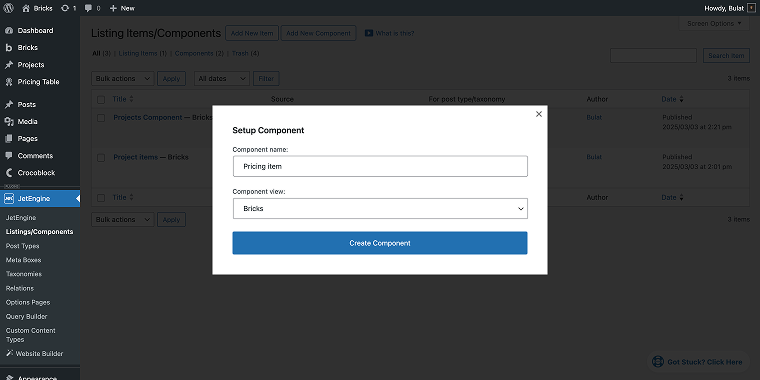
Inside the pop-up, enter the name of the component and select a type of builder; in my case, it’s Bricks. After pressing on the “Create Component” button, we’ll be redirected to the Bricks Builder editor.
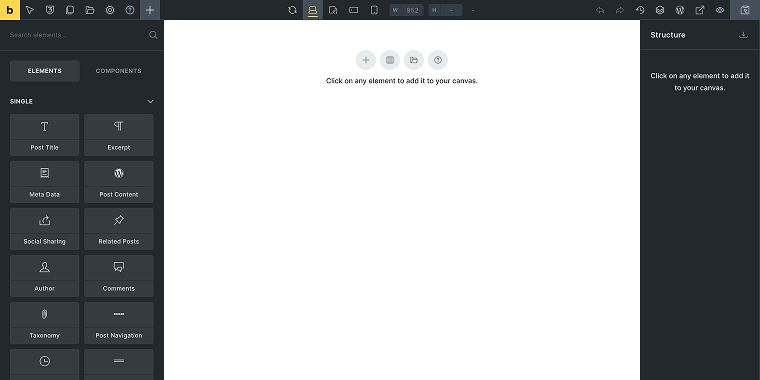
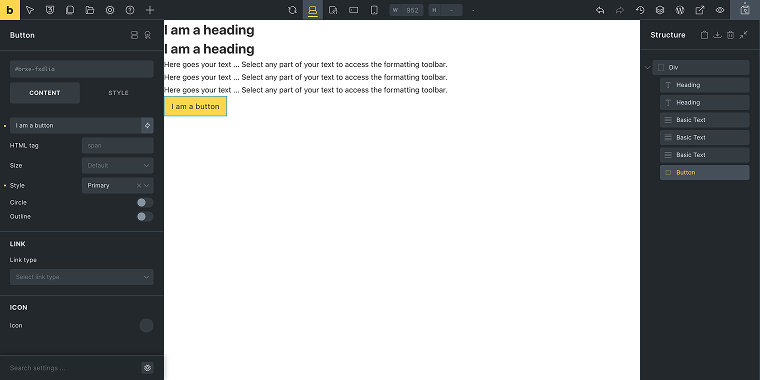
Now I need to make a basic layout with the necessary elements, including:
- Inside the Div element:
- two Heading elements;
- three Basic text elements;
- the Button element.
When combined, they will appear as something like this:
To save progress, click on the “Save” button in the upper right corner.
Component settings
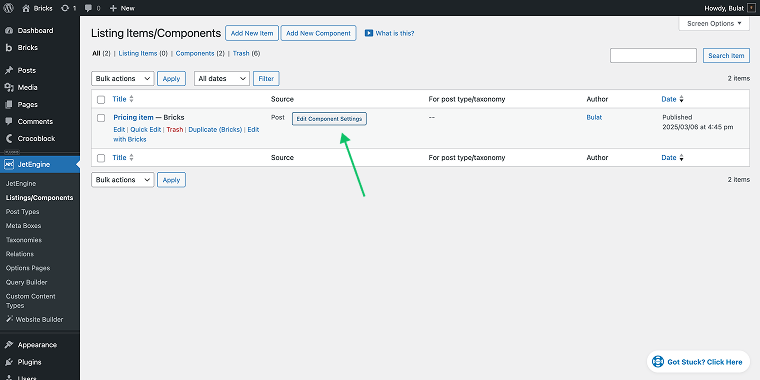
Now that we have arranged all the elements, we can add controls. To do that, we need to go back to the WordPress Dashboard > JetEngine > Listing Items/Components section and open it in a new tab.
Hover over the component and click on the “Edit Component Settings” button.
In the Setup Component pop-up, select Content Controls and then click on the “New Control” button.
Why is this section important? Here, we can map the elements we created earlier and assign controls, which can then be used to add custom content through the Content tab of the component in the editor. It might seem a bit confusing, but you’ll understand the concept in a few seconds.
After clicking the “New Control” button, a set of fields will appear that we need to fill out.
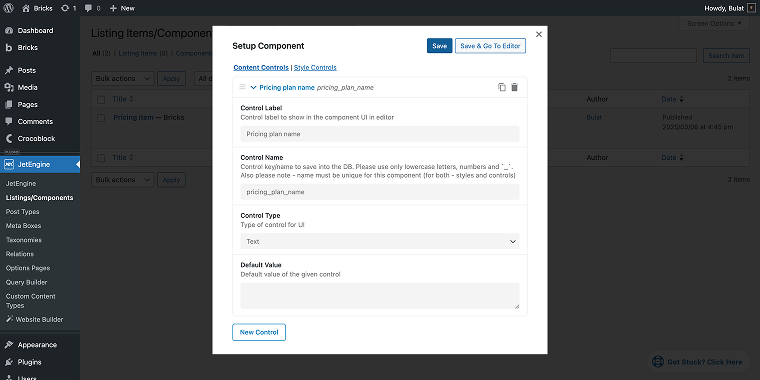
As you remember, the first two elements on my page were Heading elements:
- Heading element 1 will display the name of the pricing plan:
- Control Label field — here I’ll enter its name, which is “Pricing Plan Name”;
- Control Type field — “Text”;
- Heading element 2 will display the price:
- Control Label field — here I’ll enter its name, which is “Price”;
- Control Type field — “Text”;
- Basic text element 1:
- Control Label field — “Pricing period”;
- Control Type field — “Text”;
- Basic text element 2:
- Control Label field — “Short description”;
- Control Type field — “Text”;
- Basic text element 3:
- Control Label field — “Features”;
- Control Type field — “Rich text”;
- Button element:
- Control Label field — “Button”;
- Control Type field — “Rich text.”
When done, click on the “Save” button. Now we can return to the component editor. If you didn’t close the tab, feel free to refresh it. And let’s map the content controls.
The process is fairly simple: choose the first of your elements, go to the CONTENT tab, and click the small lightning bolt icon to open the Dynamic Data dropdown. Scroll to the bottom of the dropdown to find the JETENGINE COMPONENTS section.
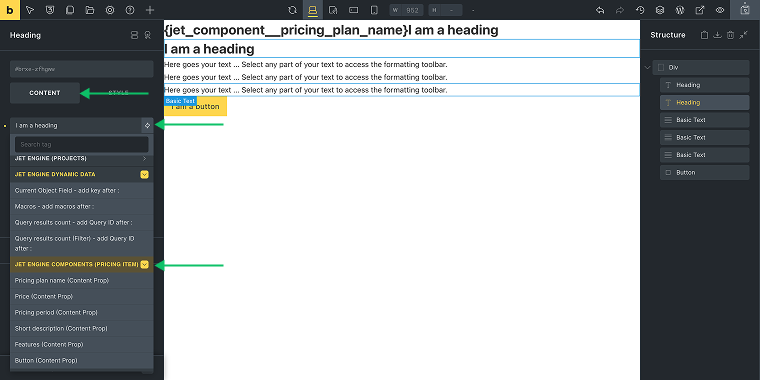
If you remember the names of the content controls, you can easily map the Content Control to the corresponding element on the page.
When you finish mapping the fields, you’ll get something like this:
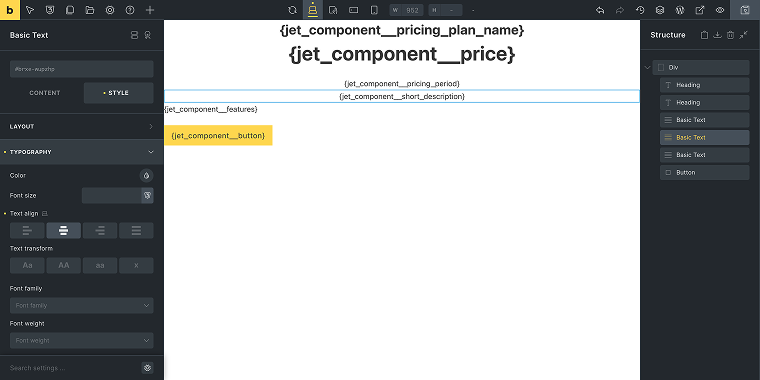
In the meantime, I’ve adjusted the margins, centered both headings and two basic text elements, and then increased the font size of the second heading to “40px.” Now, let’s see how this component works when we add it to the page.
Adding component to page
Adding a component to a live page is quite simple. First, navigate to the target page and open it in the Bricks editor. Next, toggle the Elements/Components menu by clicking the “+” button, and then scroll down to the JETENGINE section to find your component.
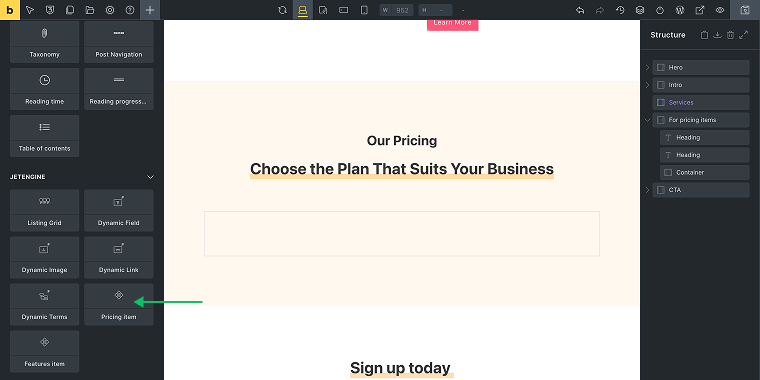
To add it, simply drag it onto your page. Once it’s there, click to open the settings panel, and then select the GENERAL tab. As you can see, here are all the fields that we’ve created previously in the Component Settings pop-up.
To add another pricing plan, I can duplicate the component. And replace the content in the second with the content of the other pricing plan.

After including the details of the other pricing plan, we can preview the entire table.

It looks quite clean.
Pros/Cons of Using JetEngine Components for Bricks Builder
Pros
With JetEngine’s Reusable Components feature, you can create custom elements with a fixed design while allowing website editors to update text, media, or select predefined options within them – whether it’s user profiles, project listings, or pricing details. When paired with Bricks Builder, you can fine-tune every aspect of your design. Using Bricks Builder in conjunction with JetEngine’s Components, you can:
- keep your website’s design consistent across all pages;
- save time by reusing components instead of repeating tasks;
- manage all elements from a central dashboard;
- combine Bricks with Block Editor or Twig.
Cons
For me, personally, transitioning from Elementor (where you may be accustomed to pre-built templates) to Bricks Builder was challenging. The interface is simpler, but it demands a deeper understanding of how dynamic content operates. Therefore:
- custom components need thorough testing to ensure responsiveness across devices;
- managing many dynamic elements can add backend complexity.
FAQ
Bricks Builder acts as the visual canvas for designing your layout, while JetEngine supplies the dynamic content. Together, they enable you to create components that retrieve data directly from your WordPress database.
Absolutely! I’ve created several membership sites using Bricks Builder and JetEngine, which are excellent for showcasing members’ profiles, dashboards, pricing tables, and more.
The primary challenges involve the initial learning curve and making sure your custom components are fully responsive. However, once you become accustomed to the workflow, the benefits greatly surpass these challenges.
Conclusion
If you’re looking to build a site that offers personalized user experiences and robust dynamic content, I highly recommend trying JetEngine and Bricks Builder. Experiment with the Reusable Components feature, test different layouts, and use the feedback from your community to continuously improve your site. Happy building!