How to Manage Guests in WooCommerce Based Booking Mode
This tutorial explains how to manage the WooCommerce guests settings and display on the Single Product, Cart, Checkout, Thank You, and My Account pages with the JetBooking plugin for WordPress.
Before you start, check the tutorial requirements:
- WooCommerce plugin installed and activated
- JetBooking plugin installed and activated
With the WooCommerce integration for JetBooking, you can enable the guest selector for various products. This guide will explain how to adjust the total booking price based on the number of guests, how this price is displayed on the Single Product, Cart, Checkout, Thank You, and My Account pages, and how it can be managed from the back end.
Guests General Settings
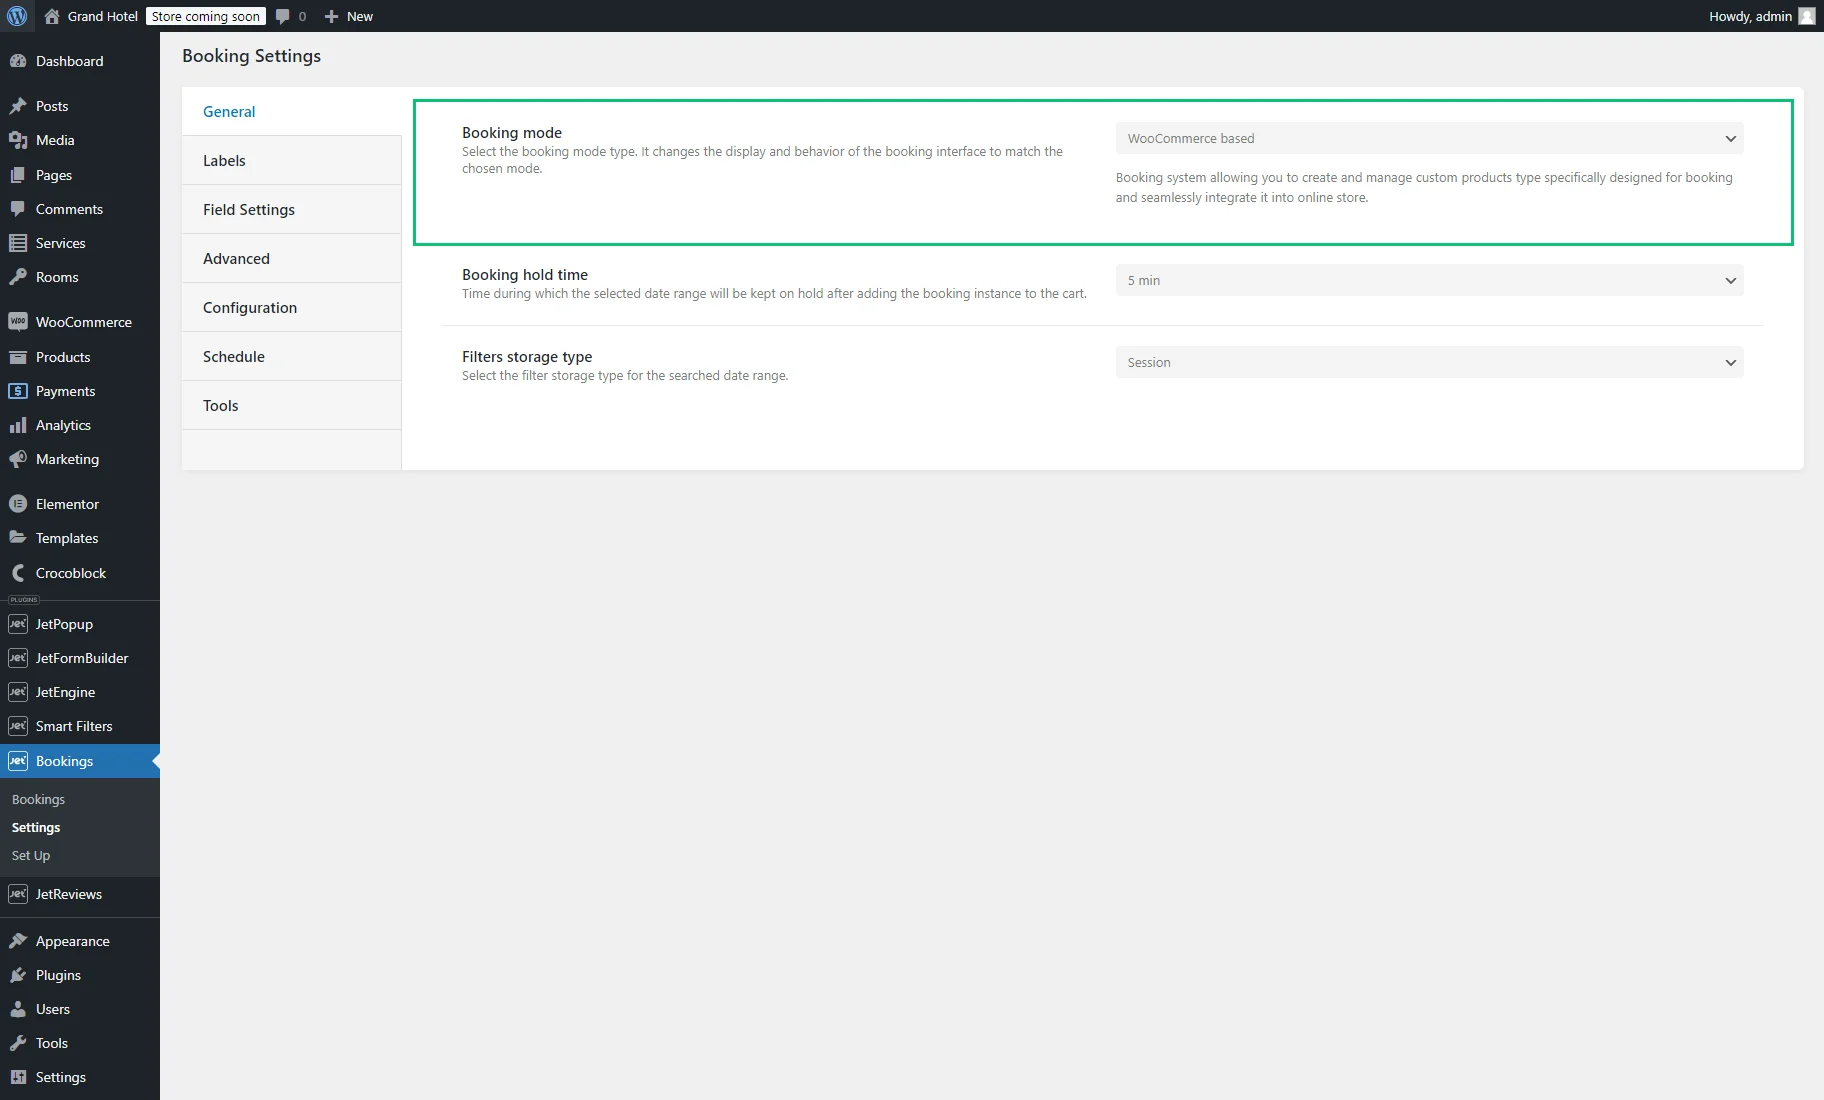
This functionality is available when the “WooCommerce based” Booking mode is set in the WordPress Dashboard > Bookings > Settings > General tab.
First, proceed to WordPress Dashboard > Products and create a new product or edit the existing one.
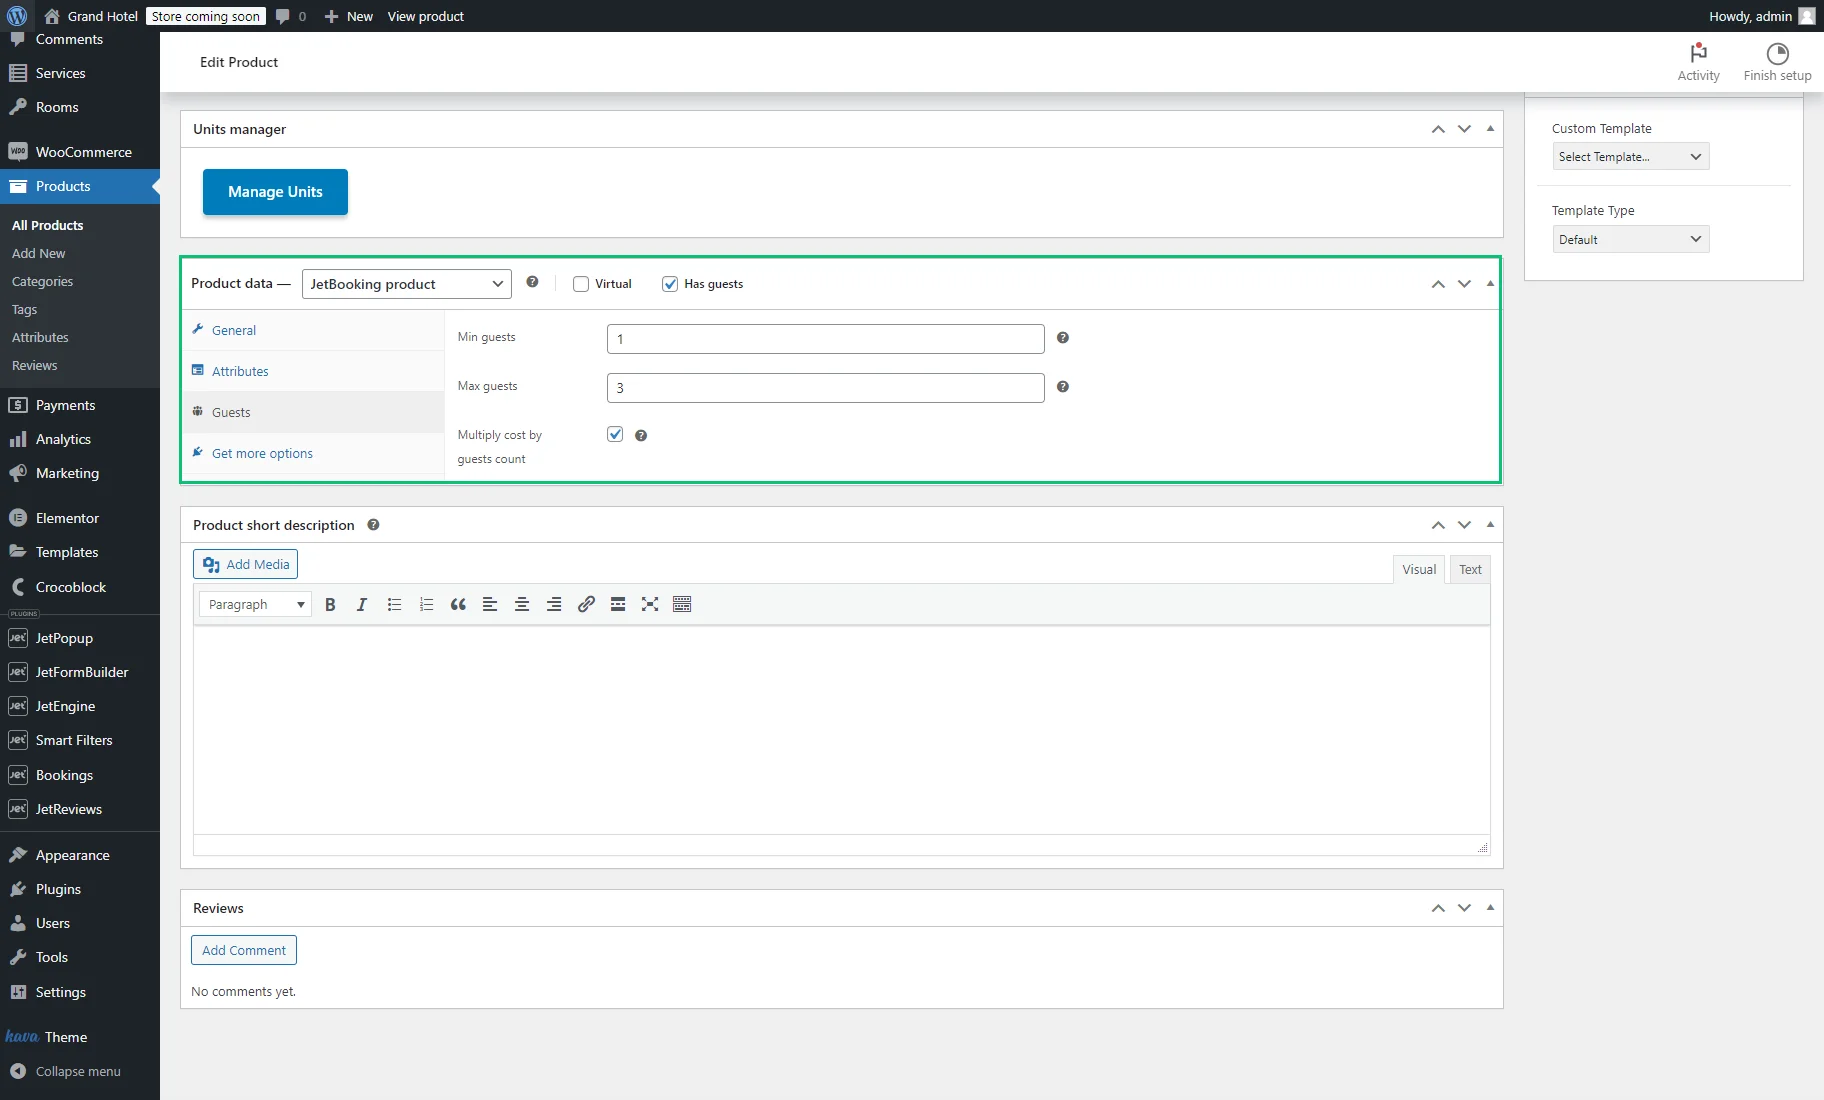
Scroll down to the Product data drop-down menu. If the “JetBooking product” is selected, the Has guests option will appear.
If this option is checked, it activates the Guests tab with such settings:
- Min guests and Max guests — two number fields that are responsible for the minimum and maximum number of guests;
- Multiply cost by guests count — if checked, the total cost of the reservation will be multiplied by the number of guests.
After managing the settings, click “Publish/Update” on the product.
Front-End Price Calculation
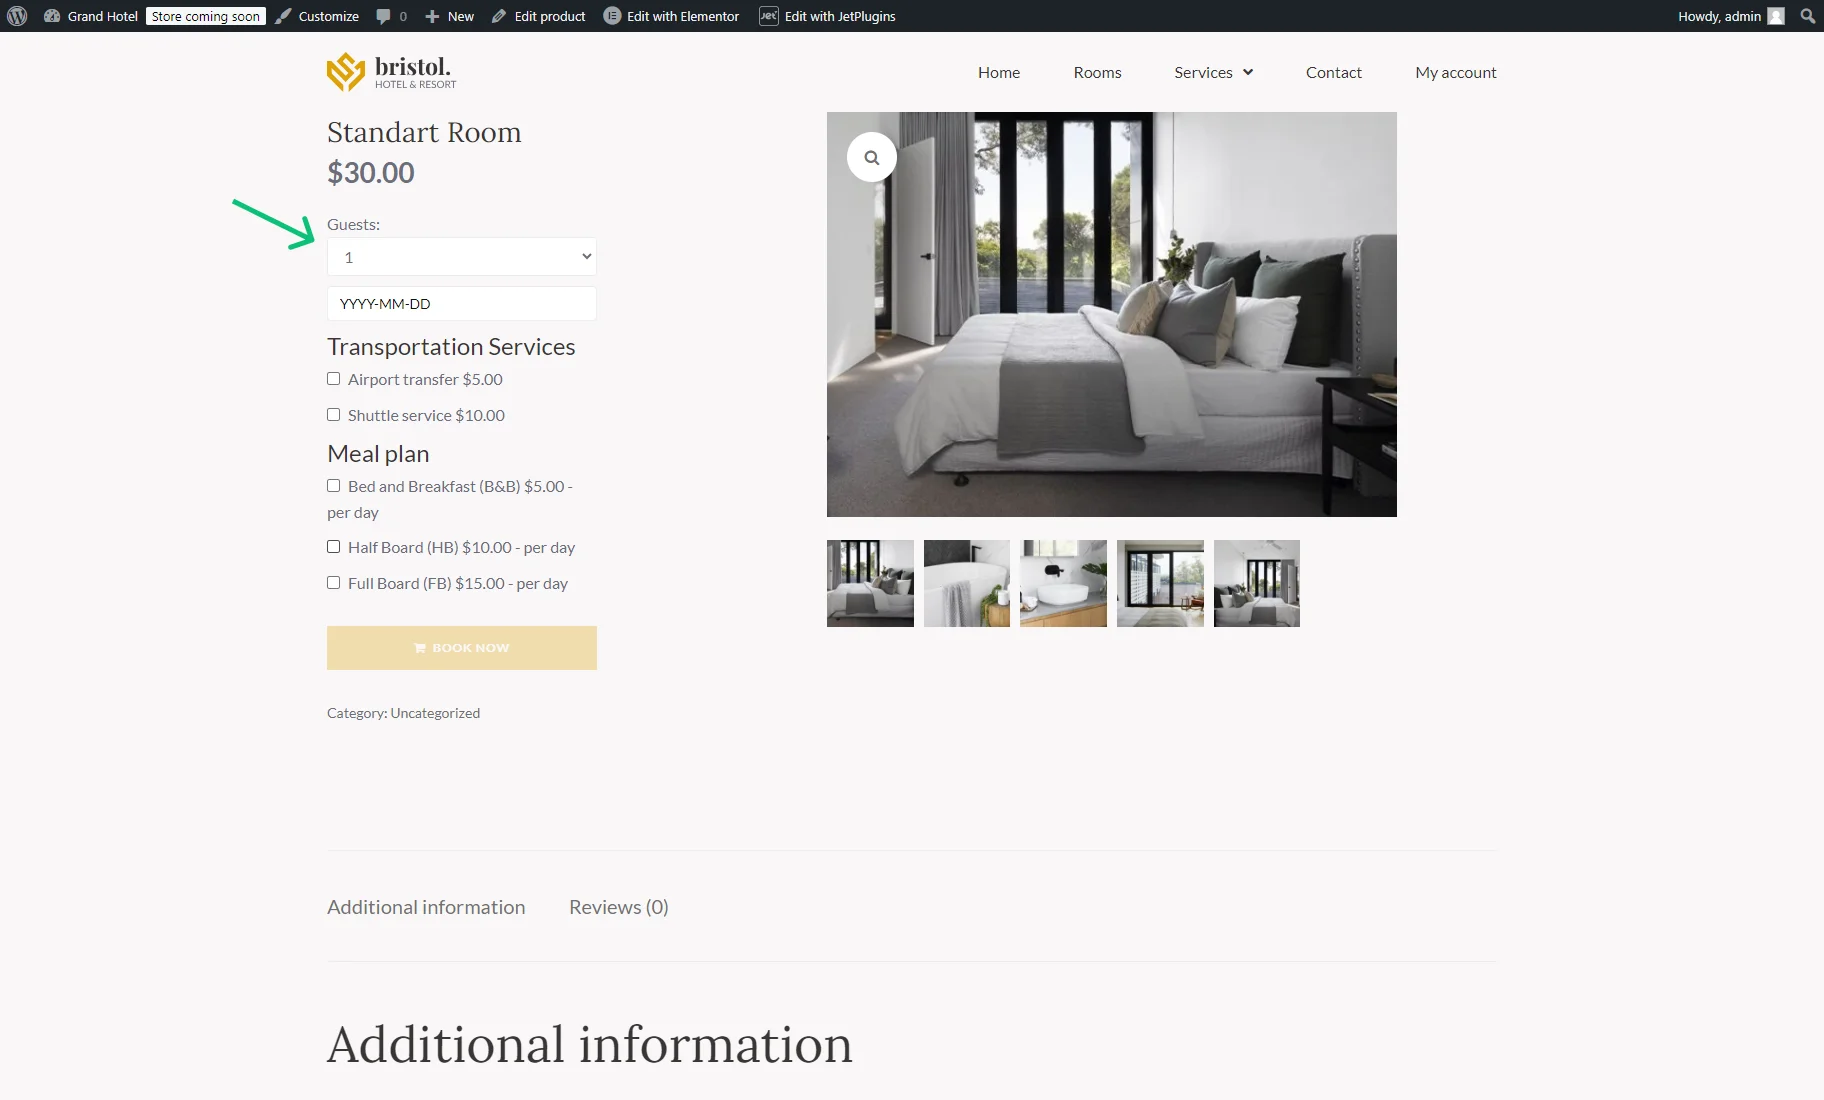
To check how the guests settings work, proceed to the Single Product page on the front end.
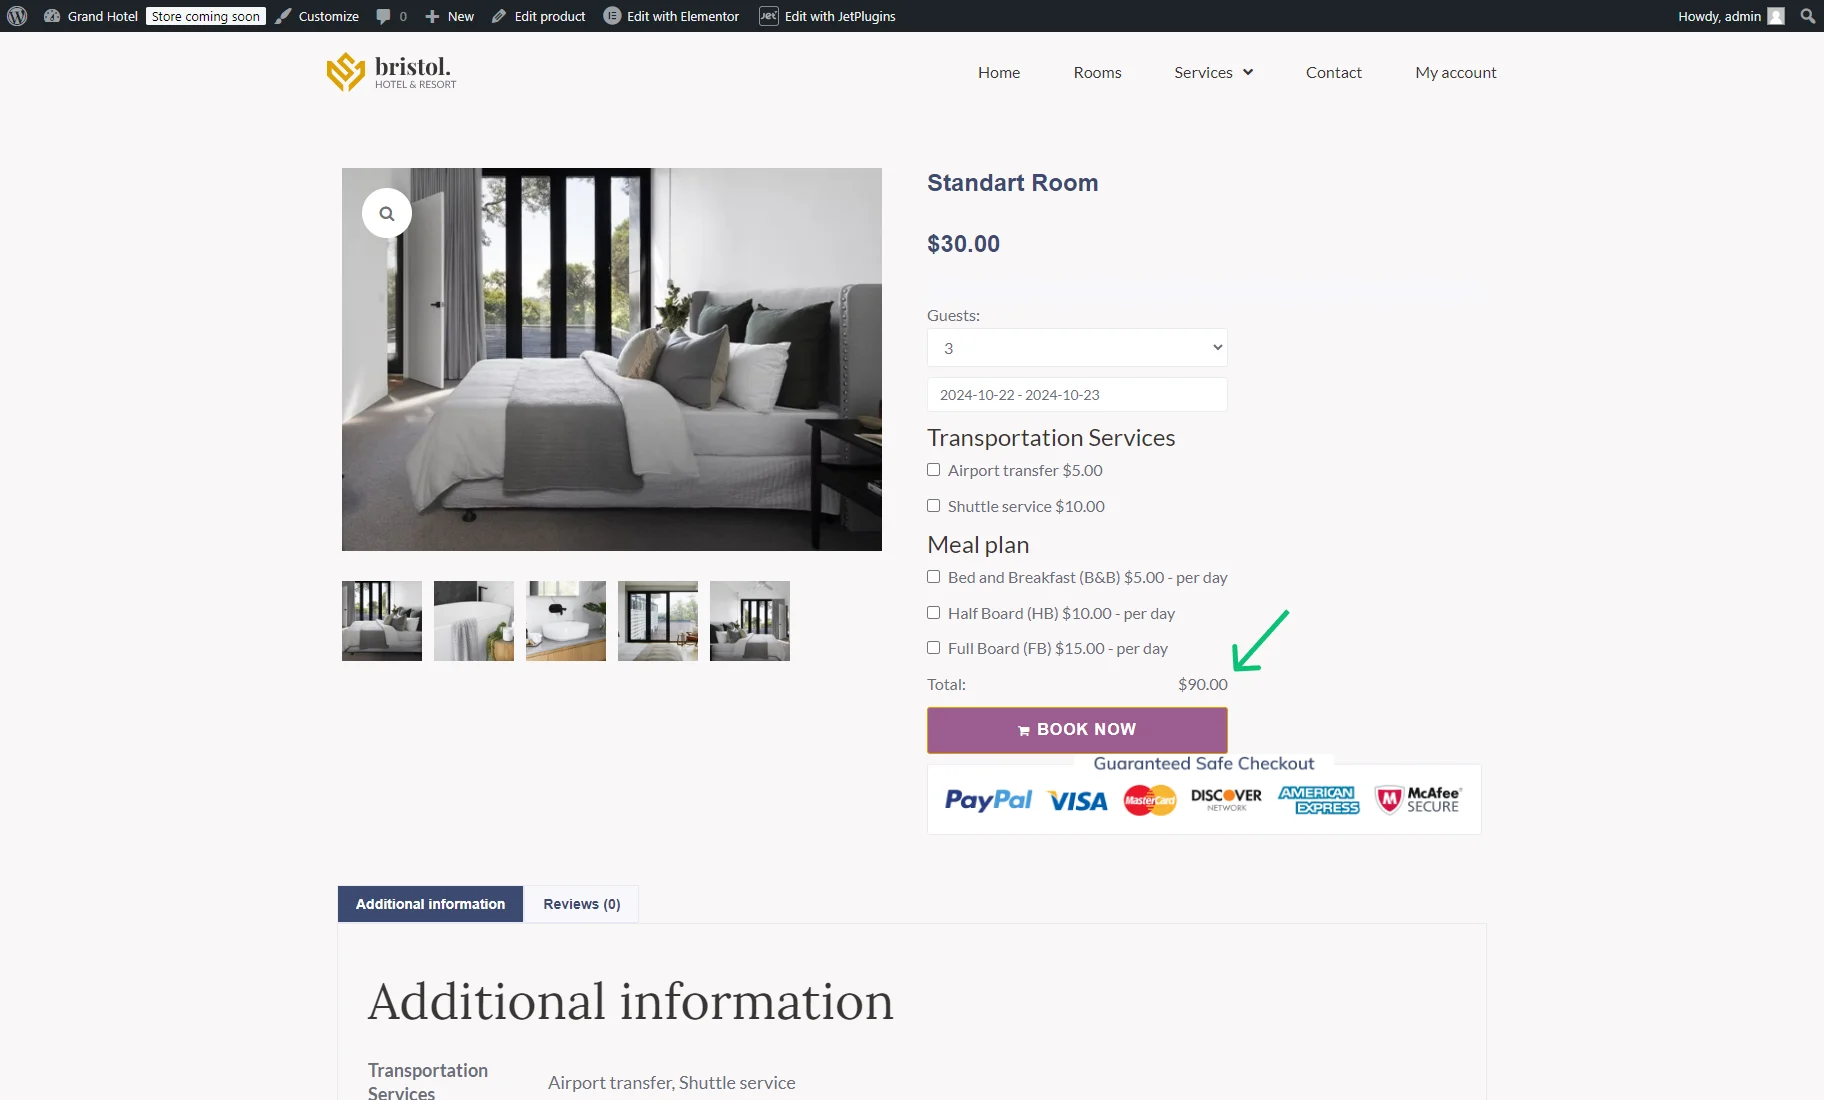
The “Guests” selector will appear above the date picker.
You can also check the How to Create a Single Product Page Template tutorial to learn how to build a custom Single Product page with the JetWooBuilder plugin.
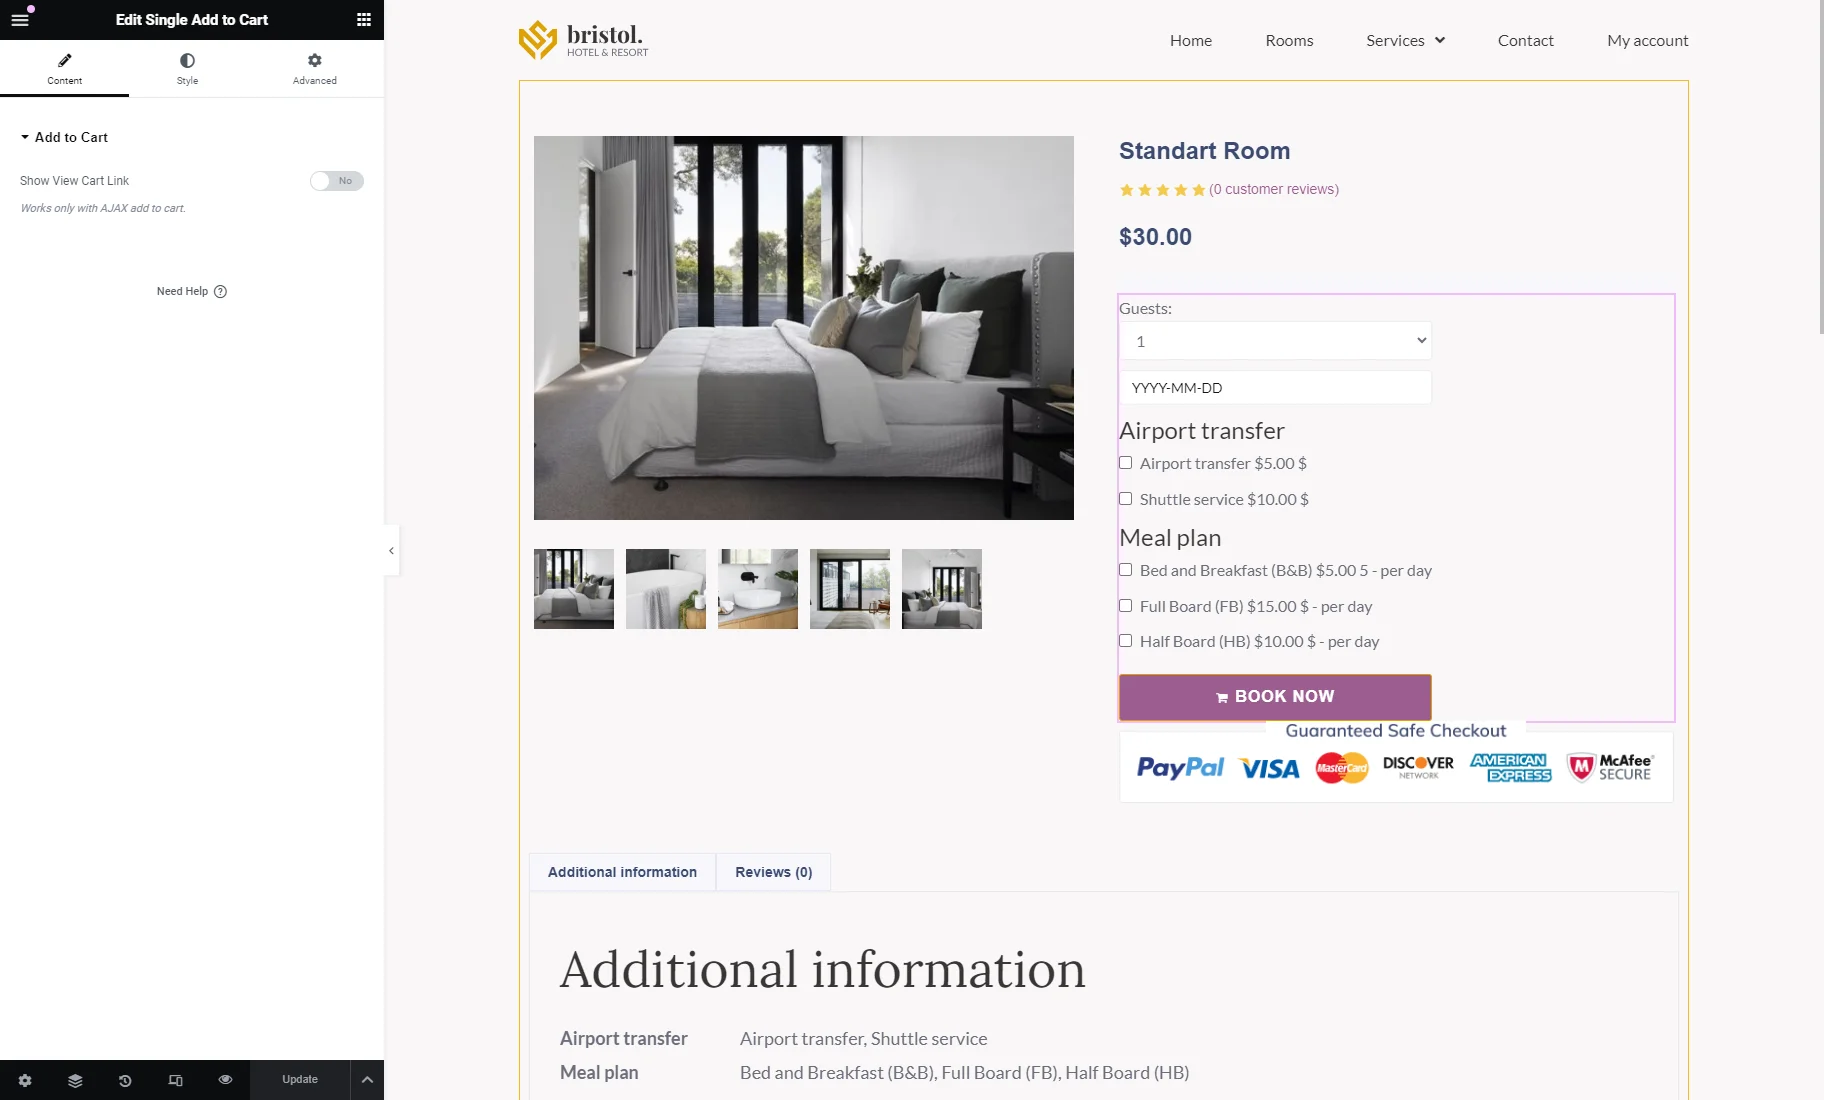
The “Guests” selector will be displayed with the Single Add to Cart widget.
The price of the room for one night is $30. If we check the Multiply cost by guests count option on the product editing page and pick “3” guests, the price for one night will be $90. If the option is unchecked, the price will still be $30.
Price Calculation with Additional Services Attributes
Proceed to the How to Create JetBooking WooCommerce Additional Services Attributes tutorial for more details.
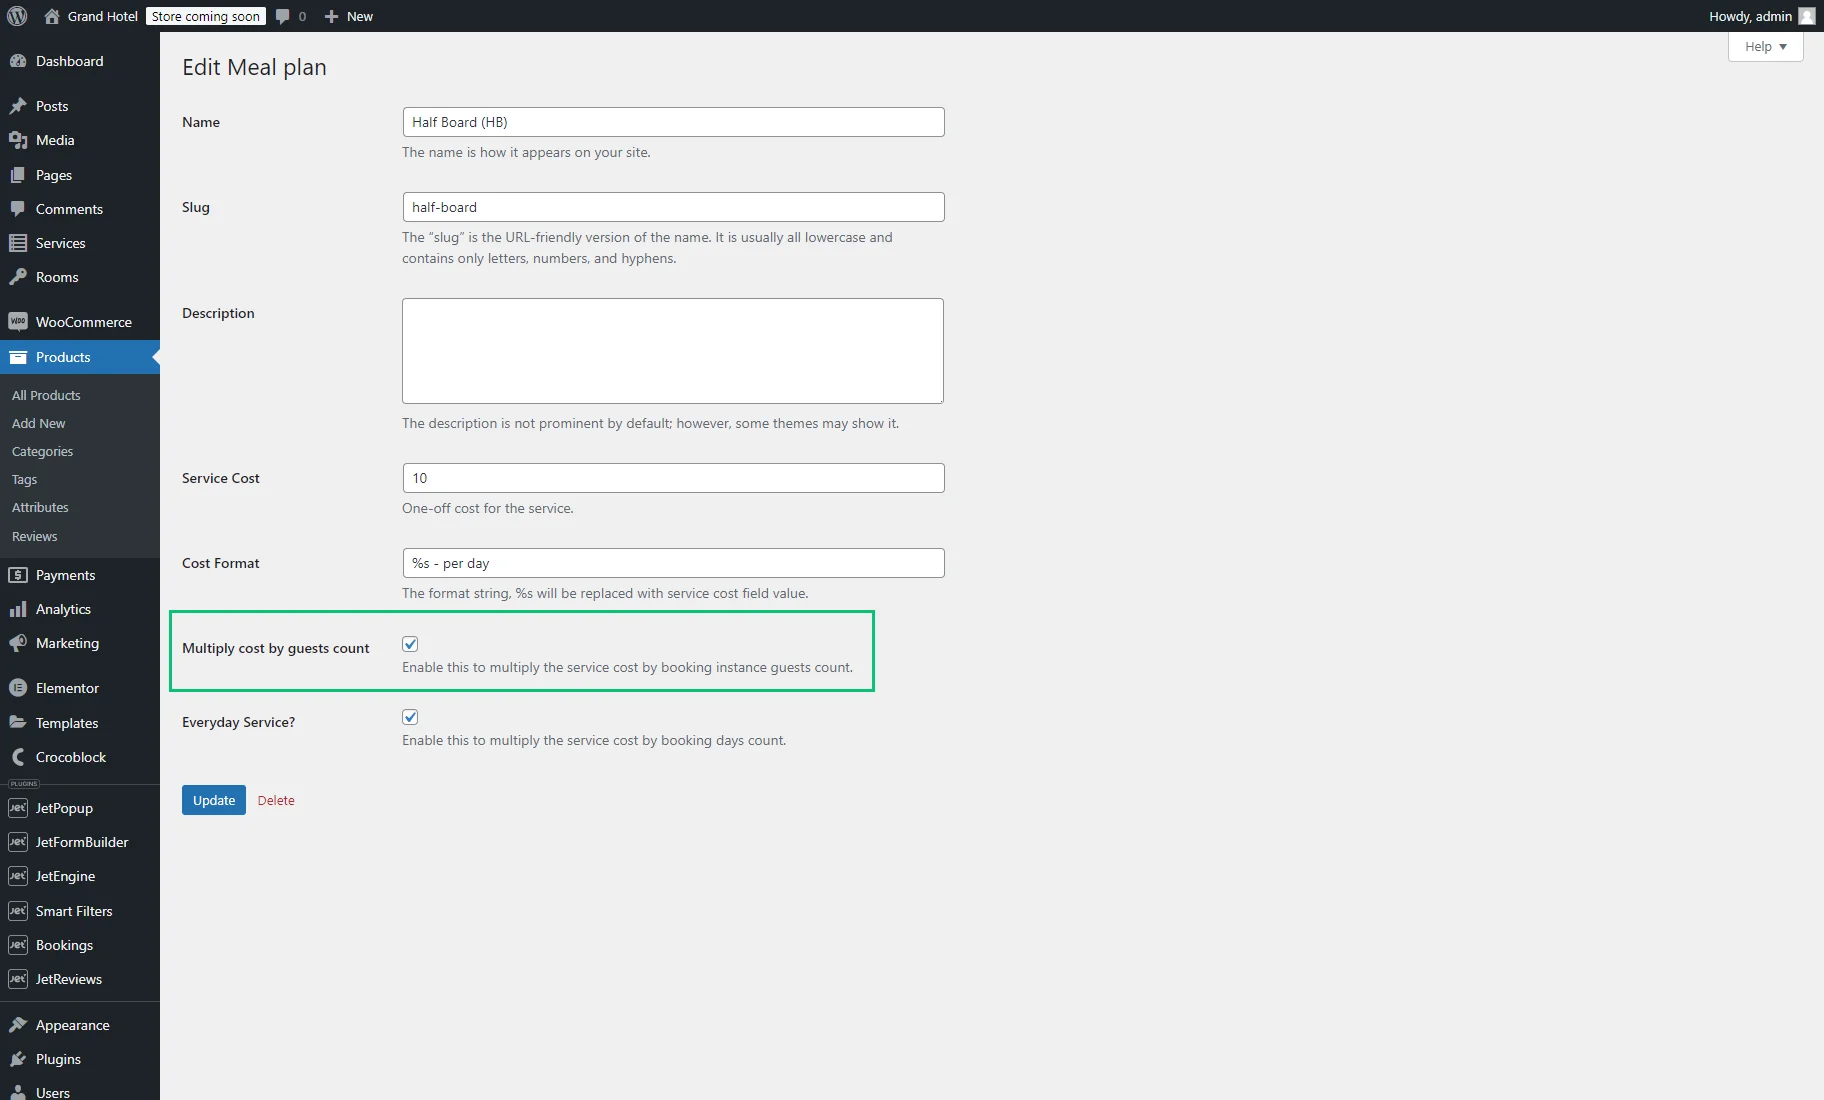
When you configure the terms of the additional services attributes, you can also check the Multiply cost by guests count option. If checked, the attribute price will be multiplied by the number of guests.
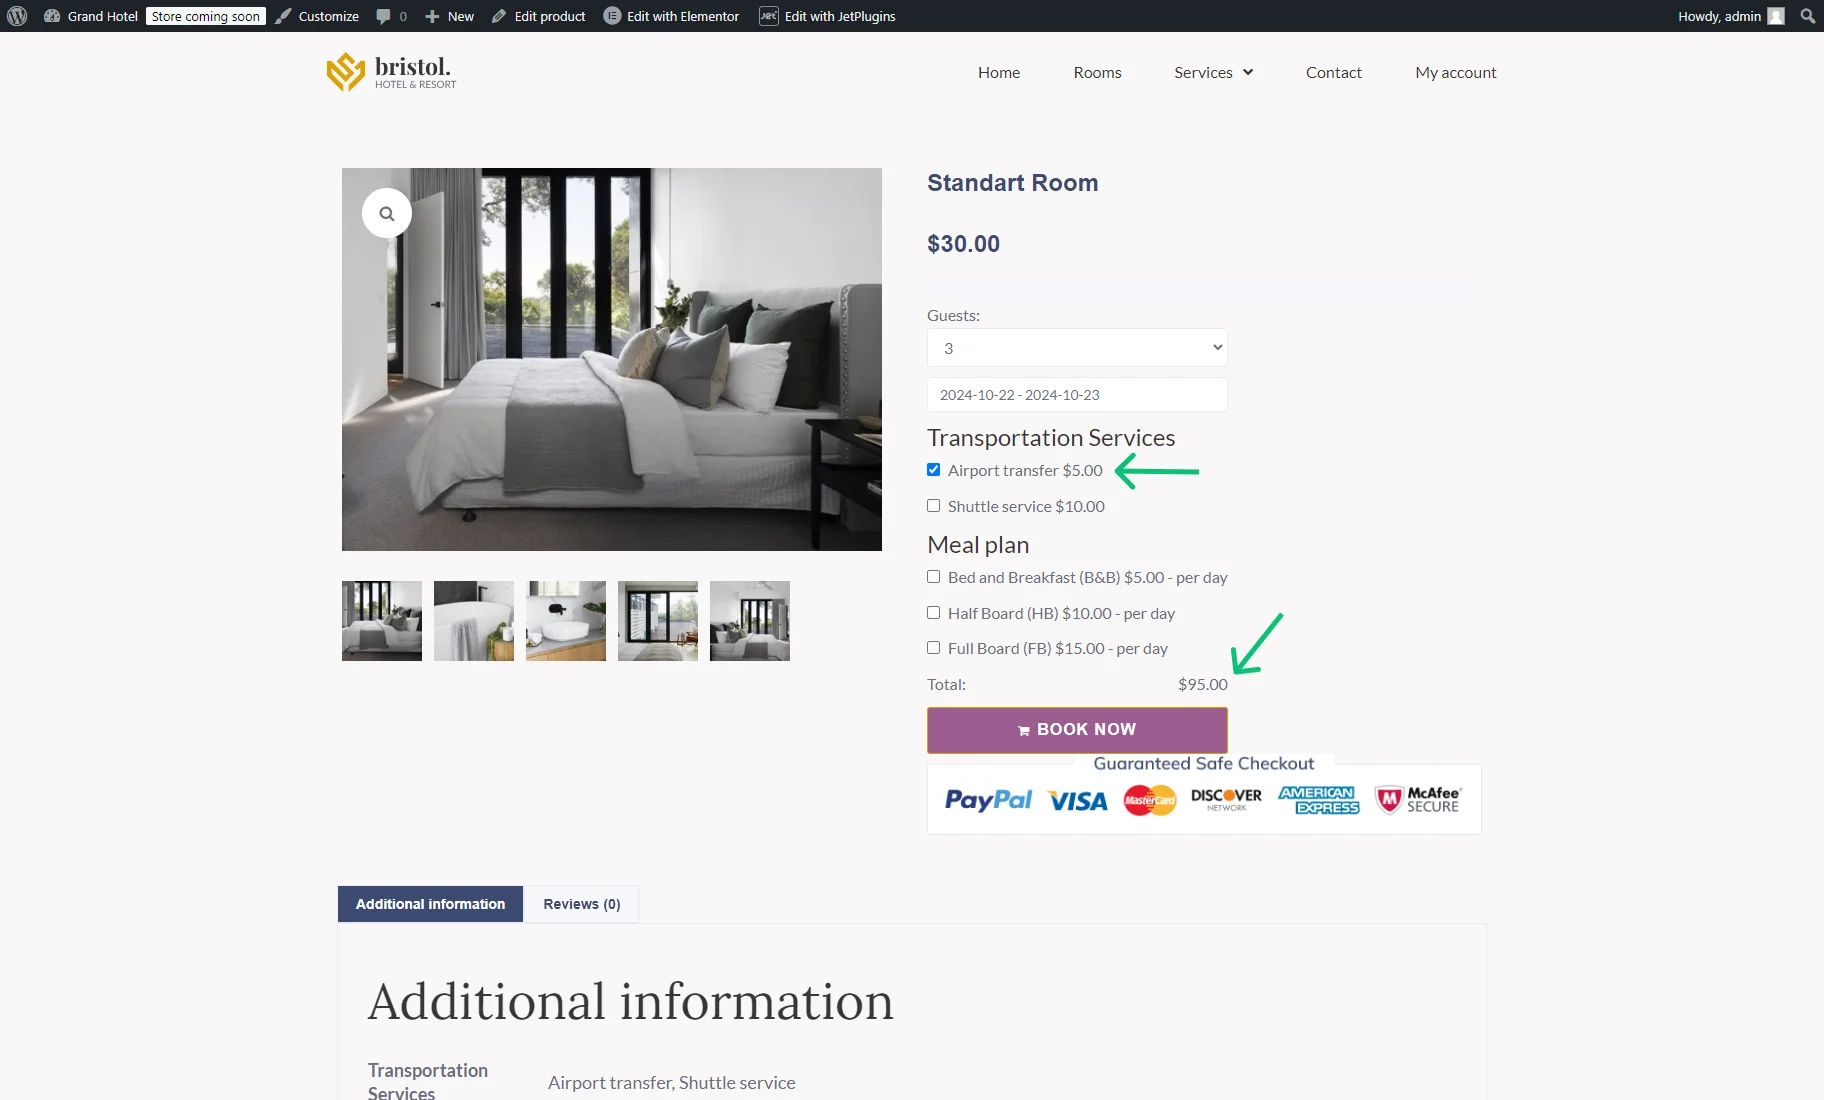
For the “Airport transfer” service that costs $5.00, the Multiply cost by guest count option is unchecked. This means that when selected, the service price is not multiplied by the number of guests. Instead, a flat fee of $5.00 is added, making the total price $95.00.
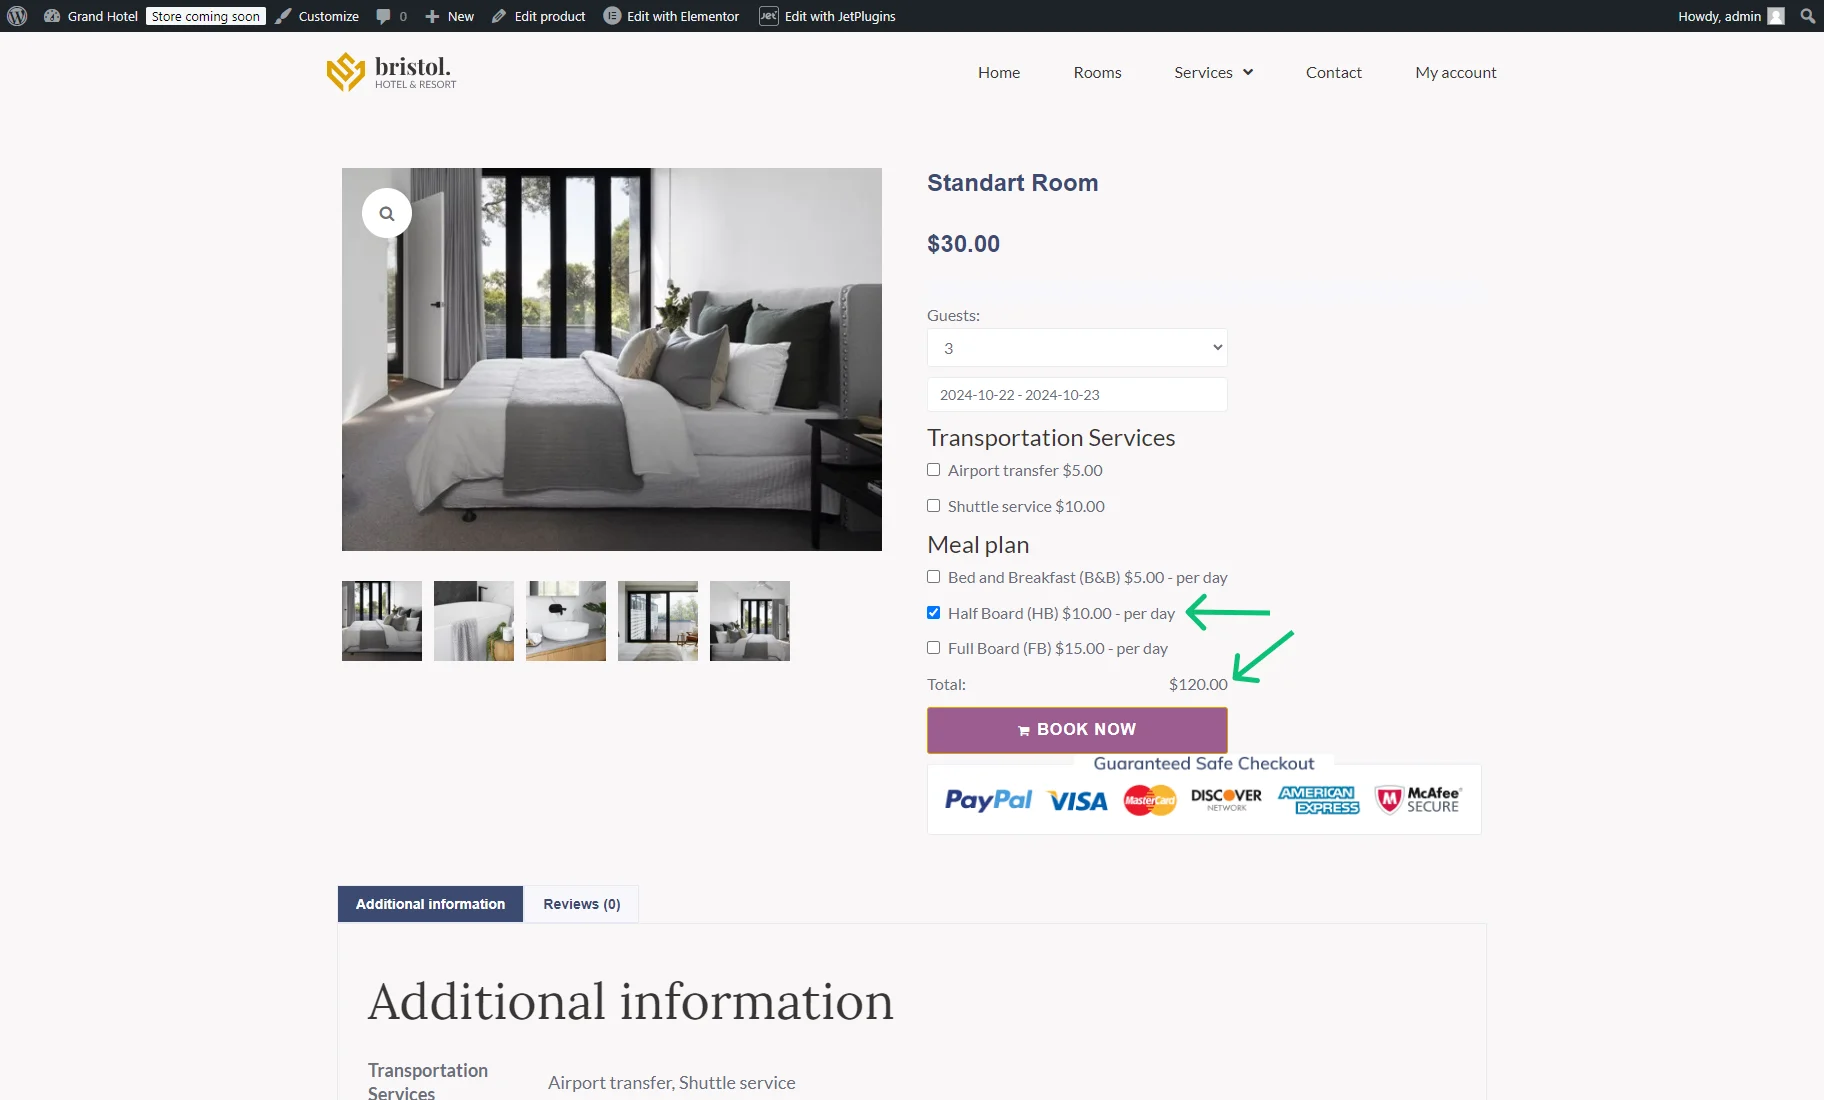
The Multiply cost by guest count option is checked for the “Half Board (HB)” service, which costs $10.00. So, when selected, the service price is multiplied by the number of guests (e.g., $30.00 for three guests). As a result, the total price becomes $120.00.
Display on the Cart, Checkout, and Thank You Pages
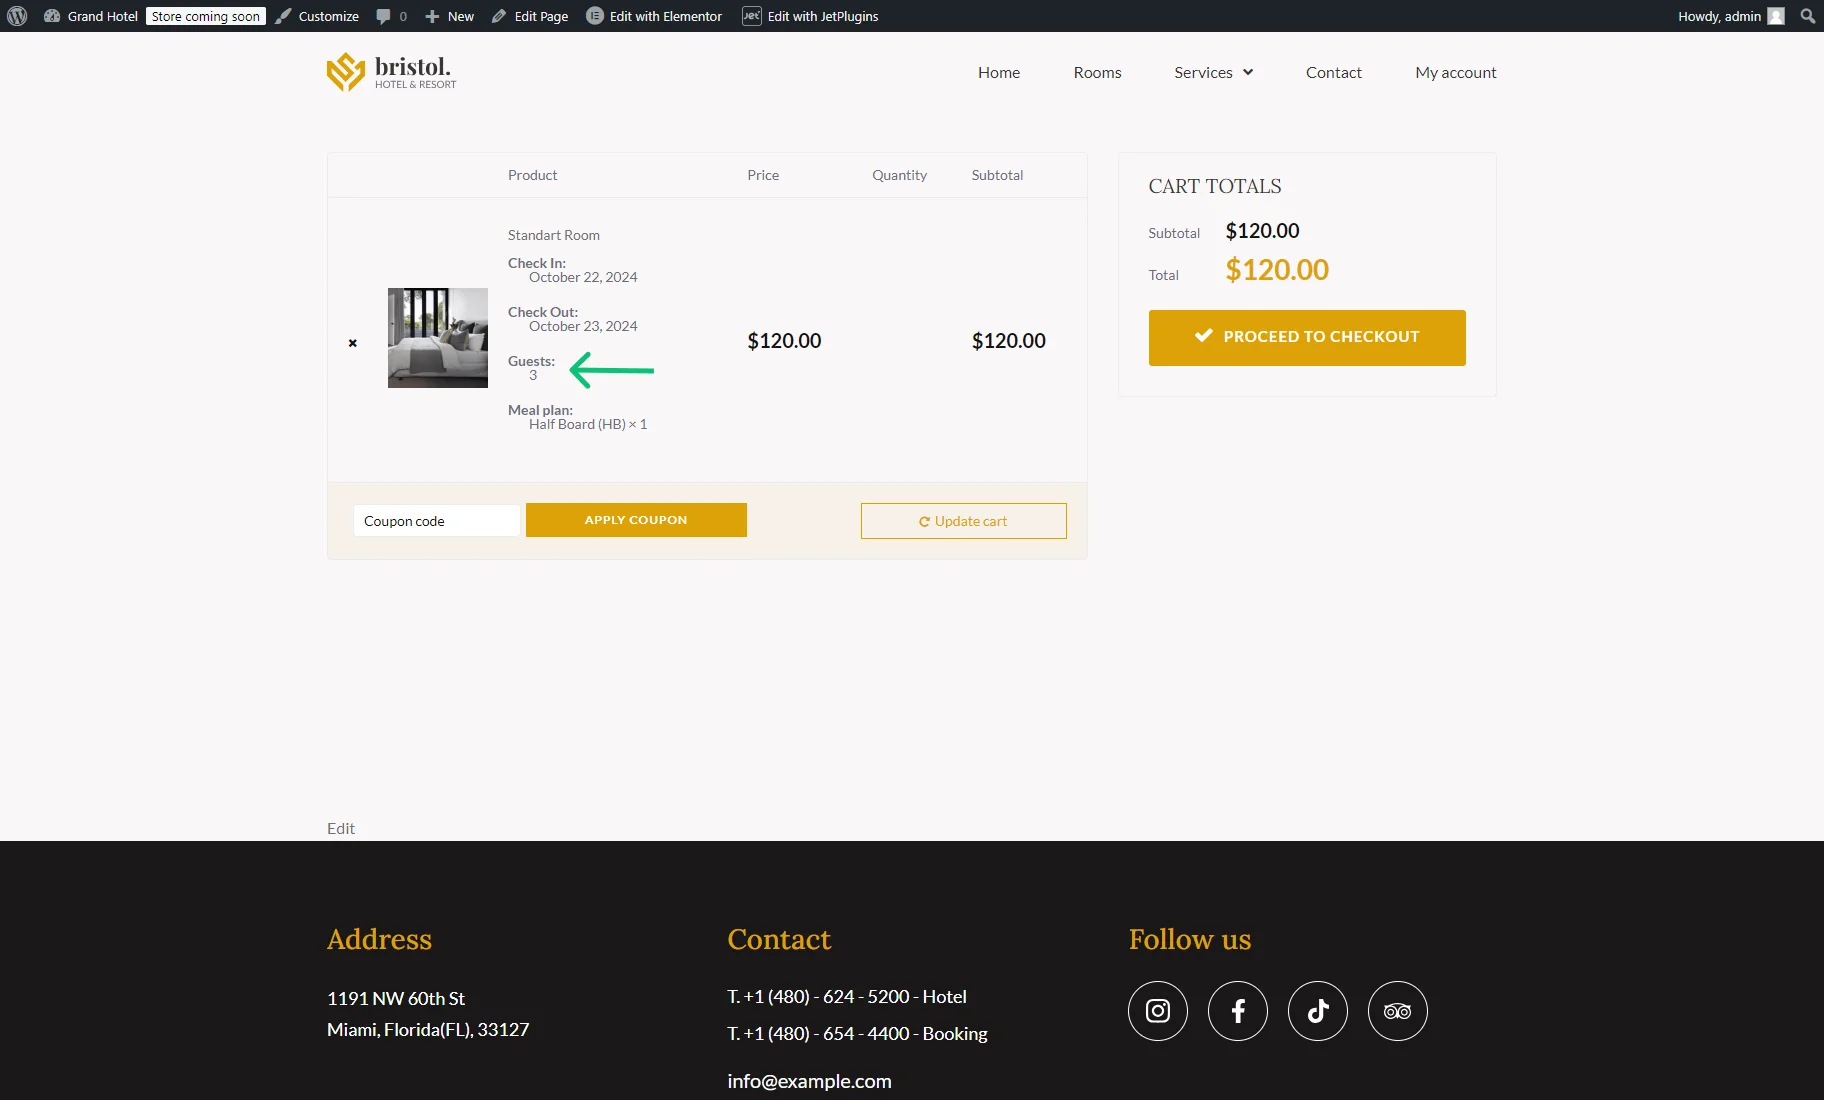
After clicking the “BOOK NOW” button, the order is added to the cart, where the number of guests is shown by default.
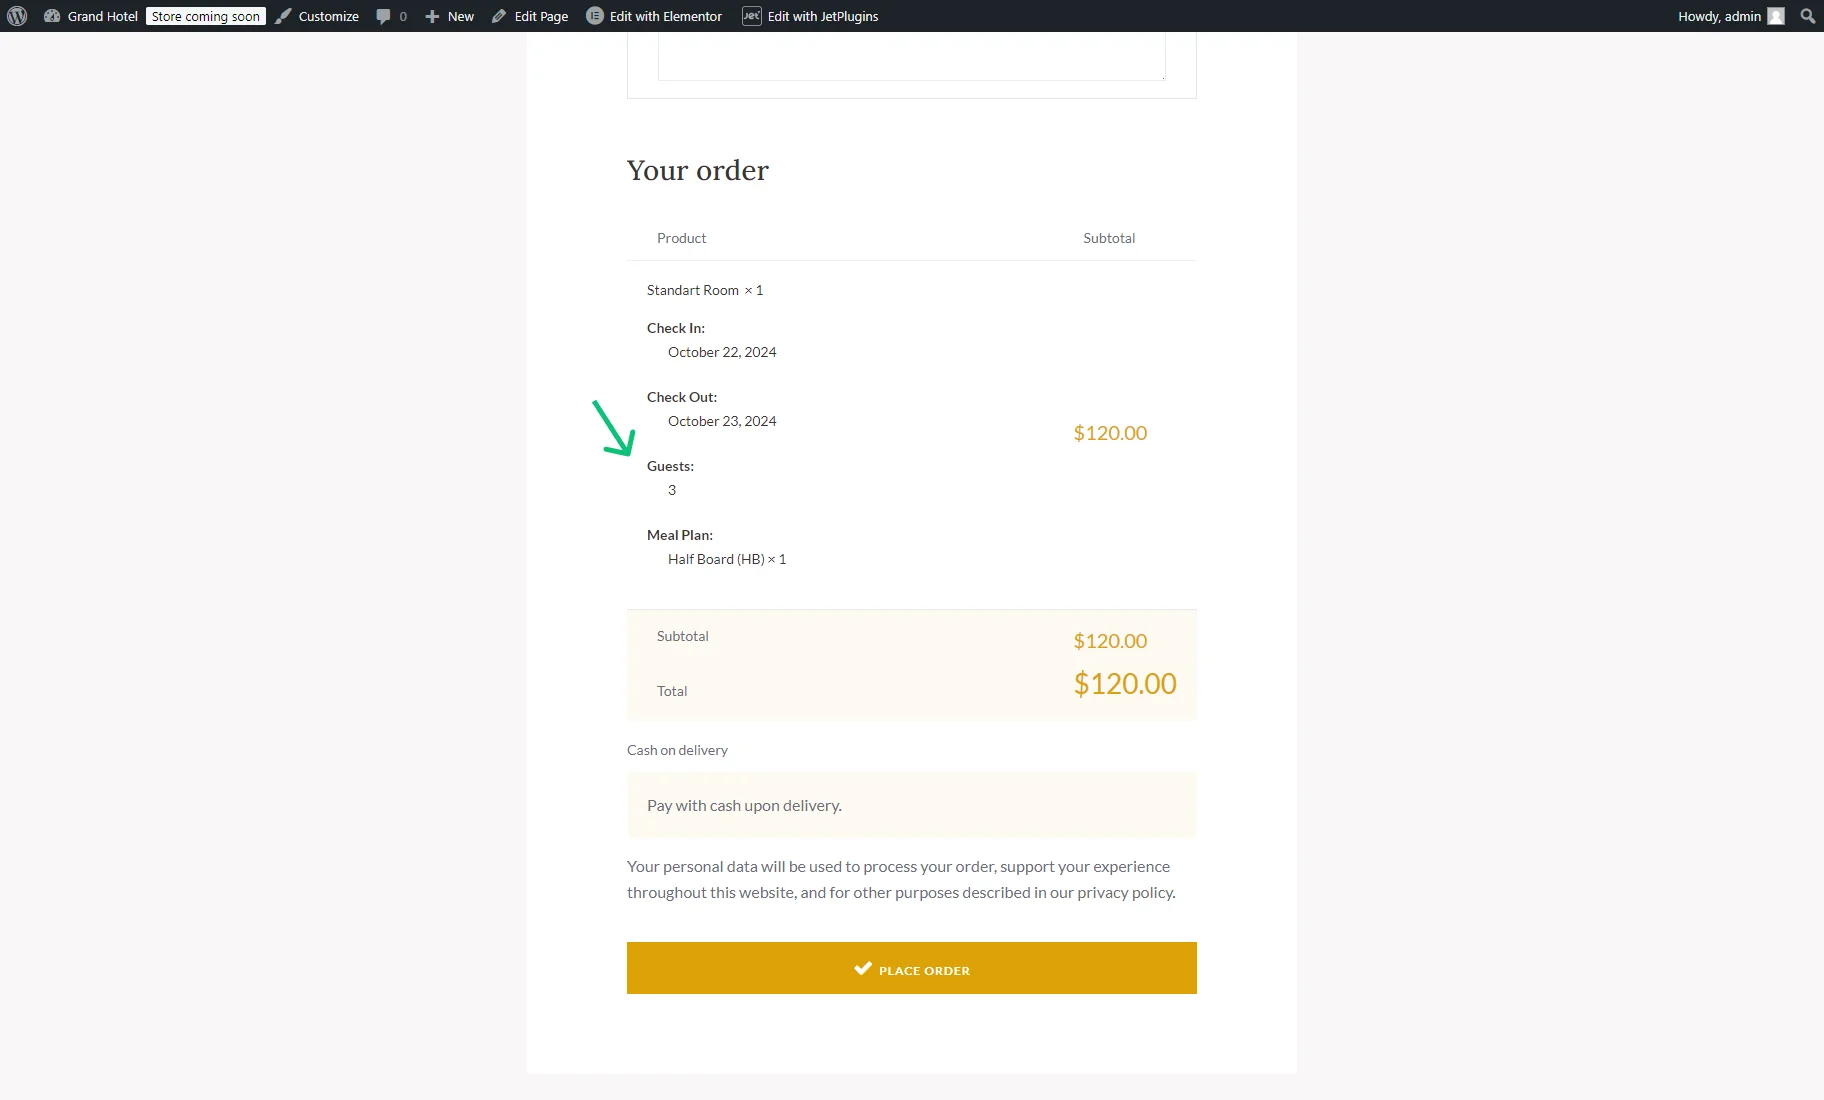
It’s also shown on the Checkout page.
It’s also displayed on the Thank You page.
Additionally, you can read the How to Create a Cart Page Template, How to Create a Checkout Page Template, and How to Create a Thank You Page Template tutorials.
Display on My Account Page
Proceed to this tutorial to learn How to Create My Account Page With Endpoint Templates.
Open the My Account page with endpoints on the front end.
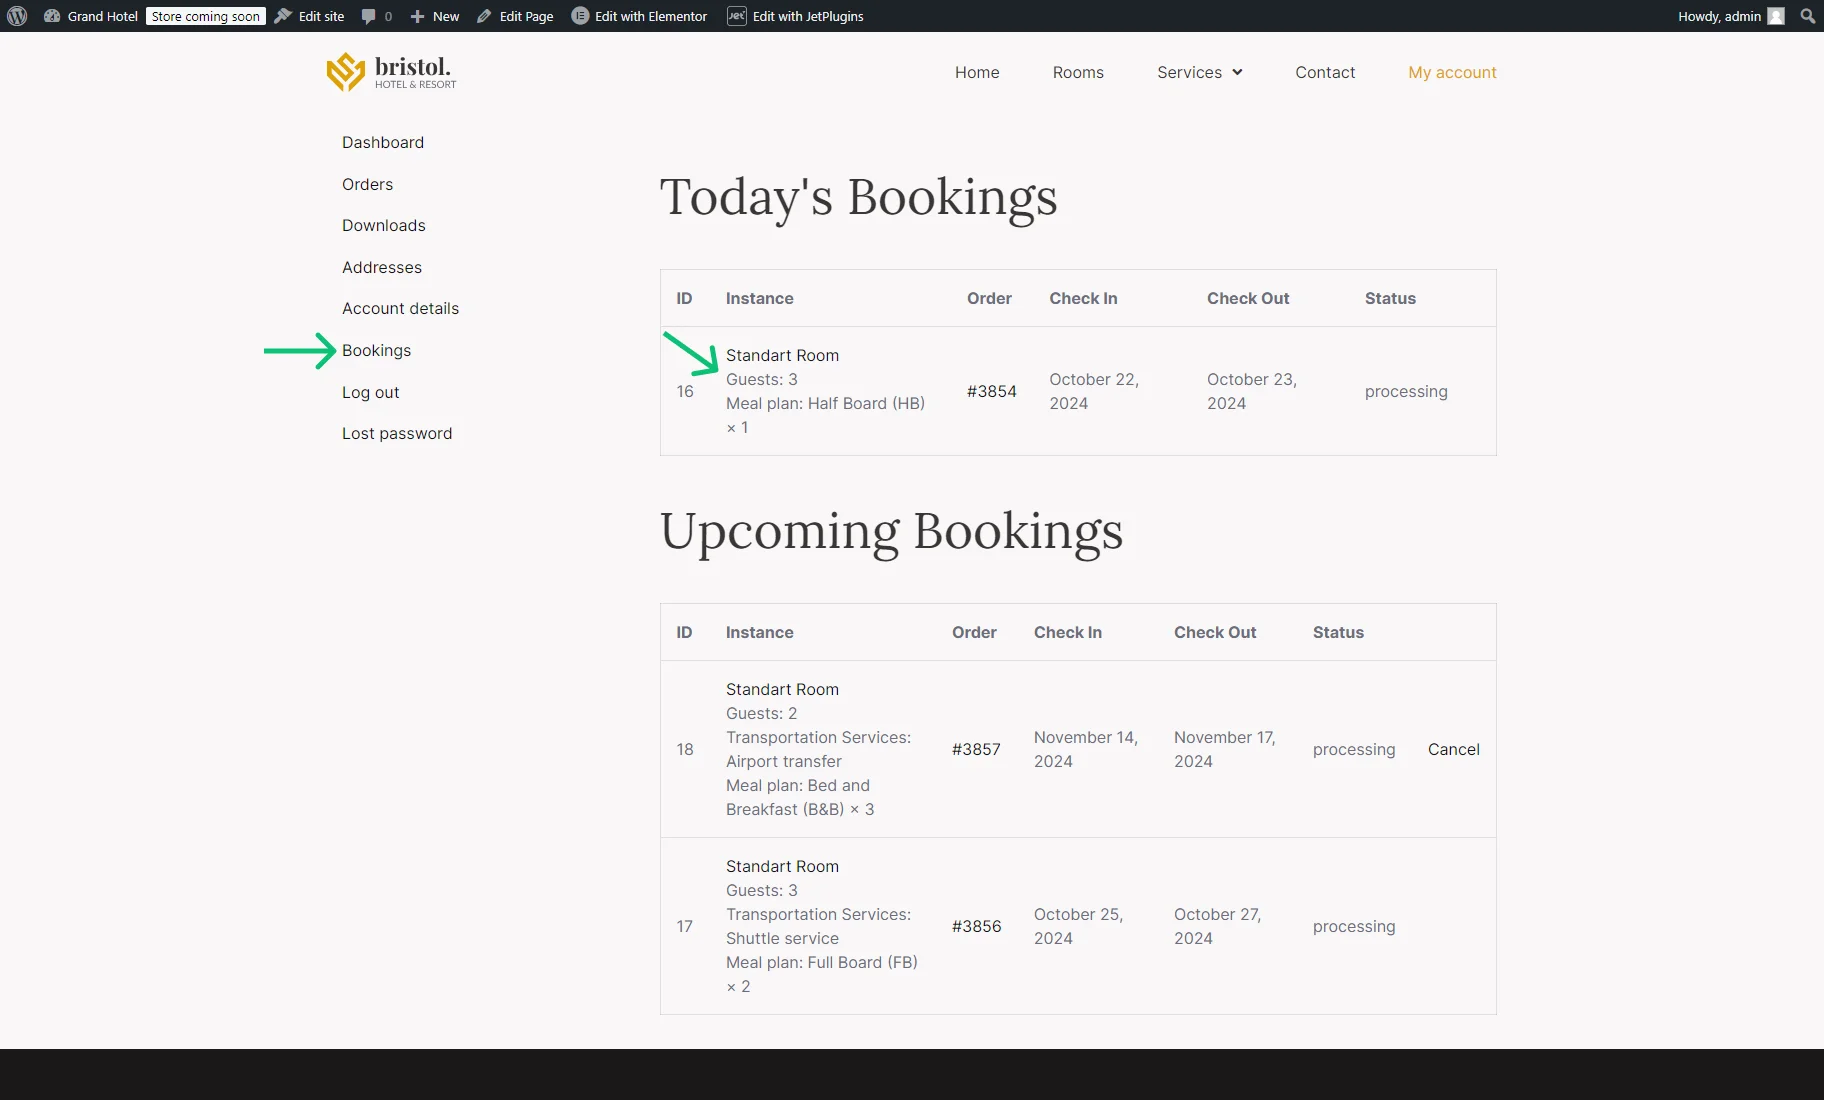
With the WooCommerce and JetBooking plugins installed and activated, the Bookings endpoint tab will be available in the menu.
The number of guests will be shown in the “Instance” column along with the additional service attributes.
Also, you can check the How to Cancel Booking with the WooCommerce Bookings Endpoint tutorial.
Guests in the WooCommerce Orders
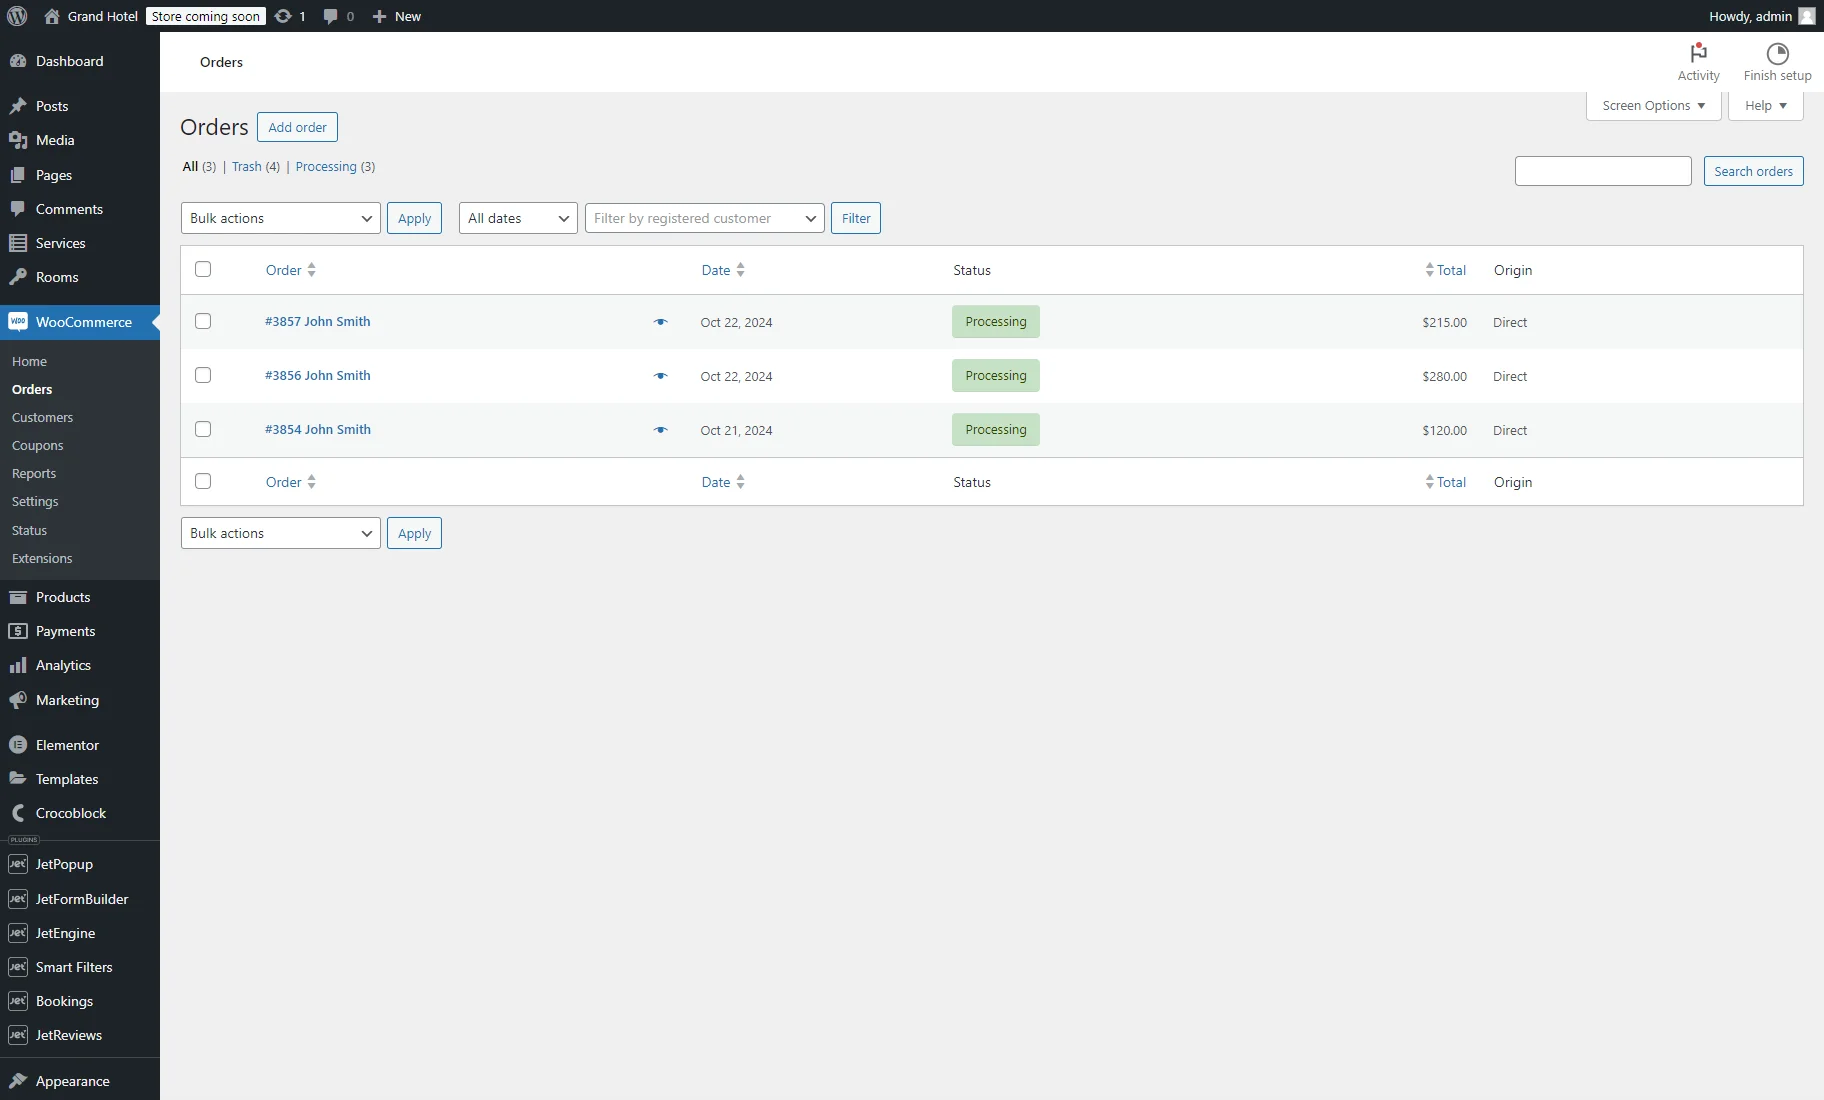
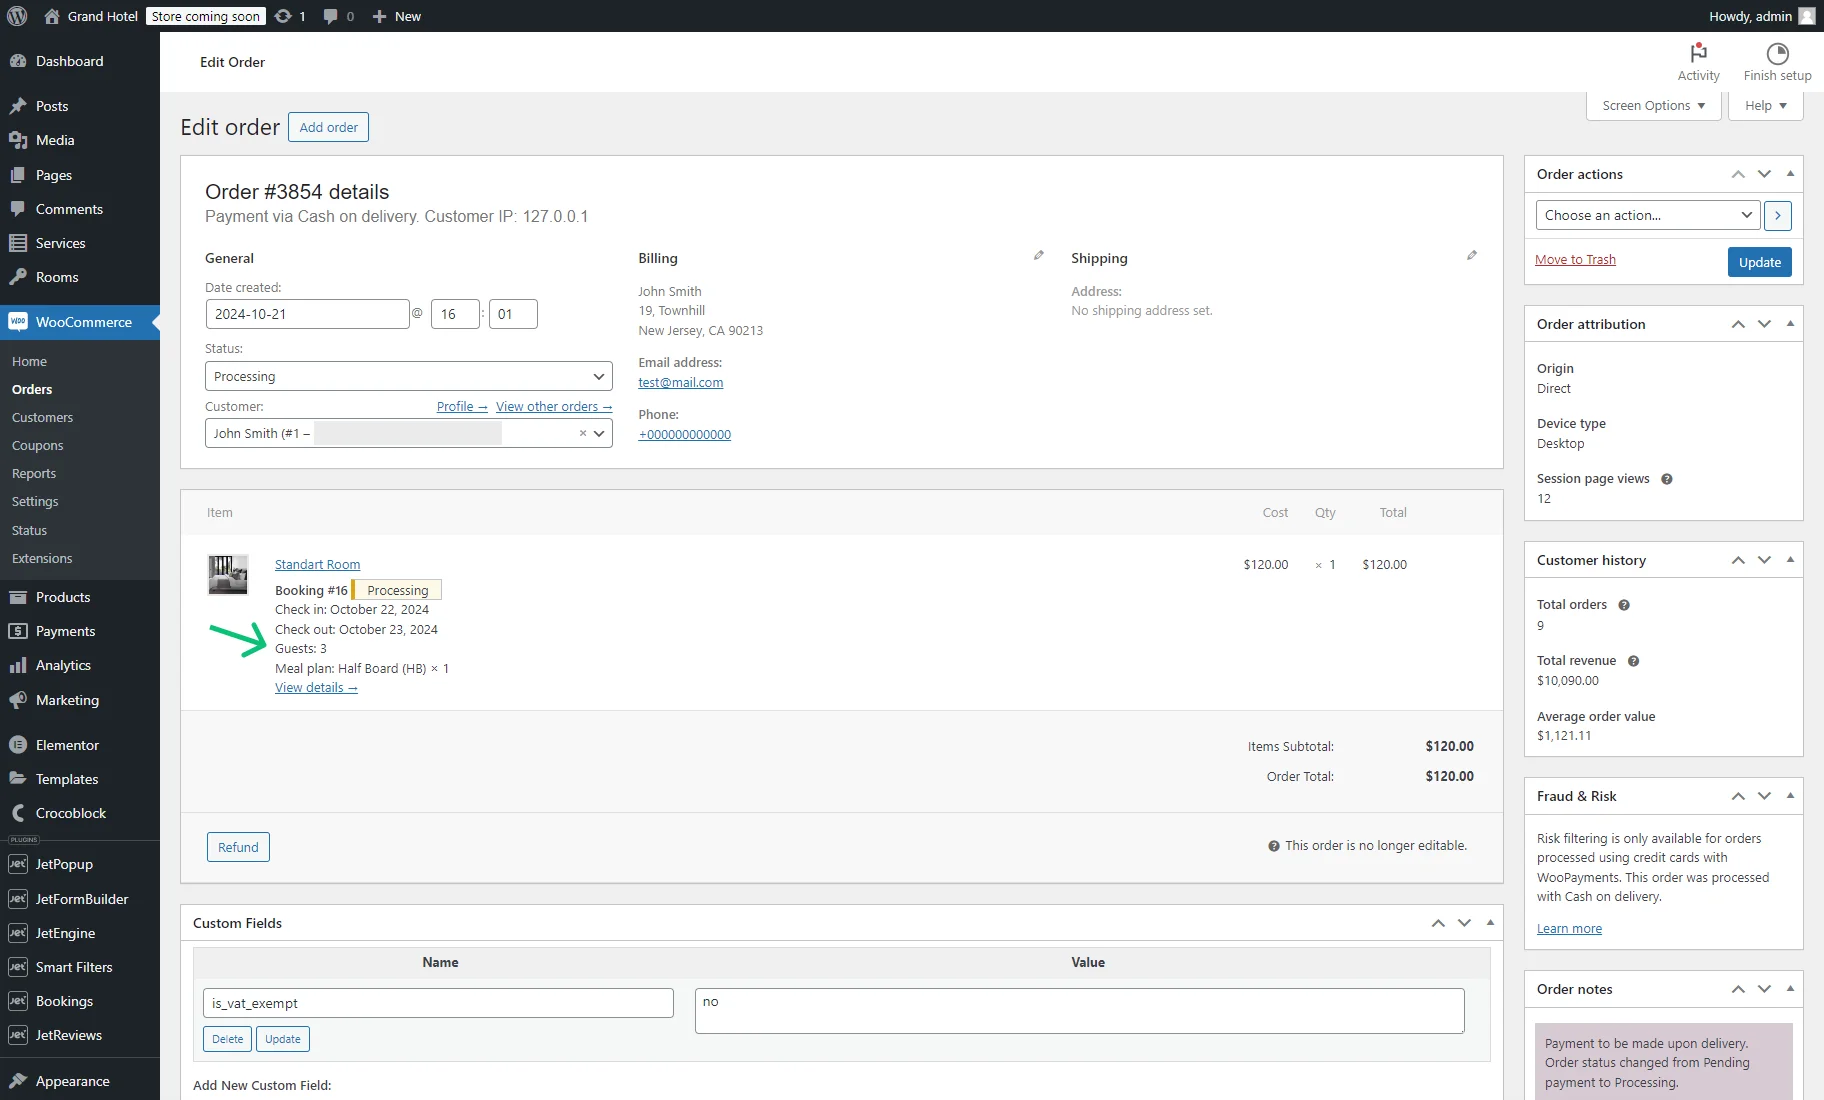
The number of guests is also shown in the WooCommerce orders. Navigate to the WordPress Dashboard > WooCommerce > Orders tab, and click one of the created orders to observe its details.
The number of guests will be shown in the order body.
Guests Managing in the Admin Panel
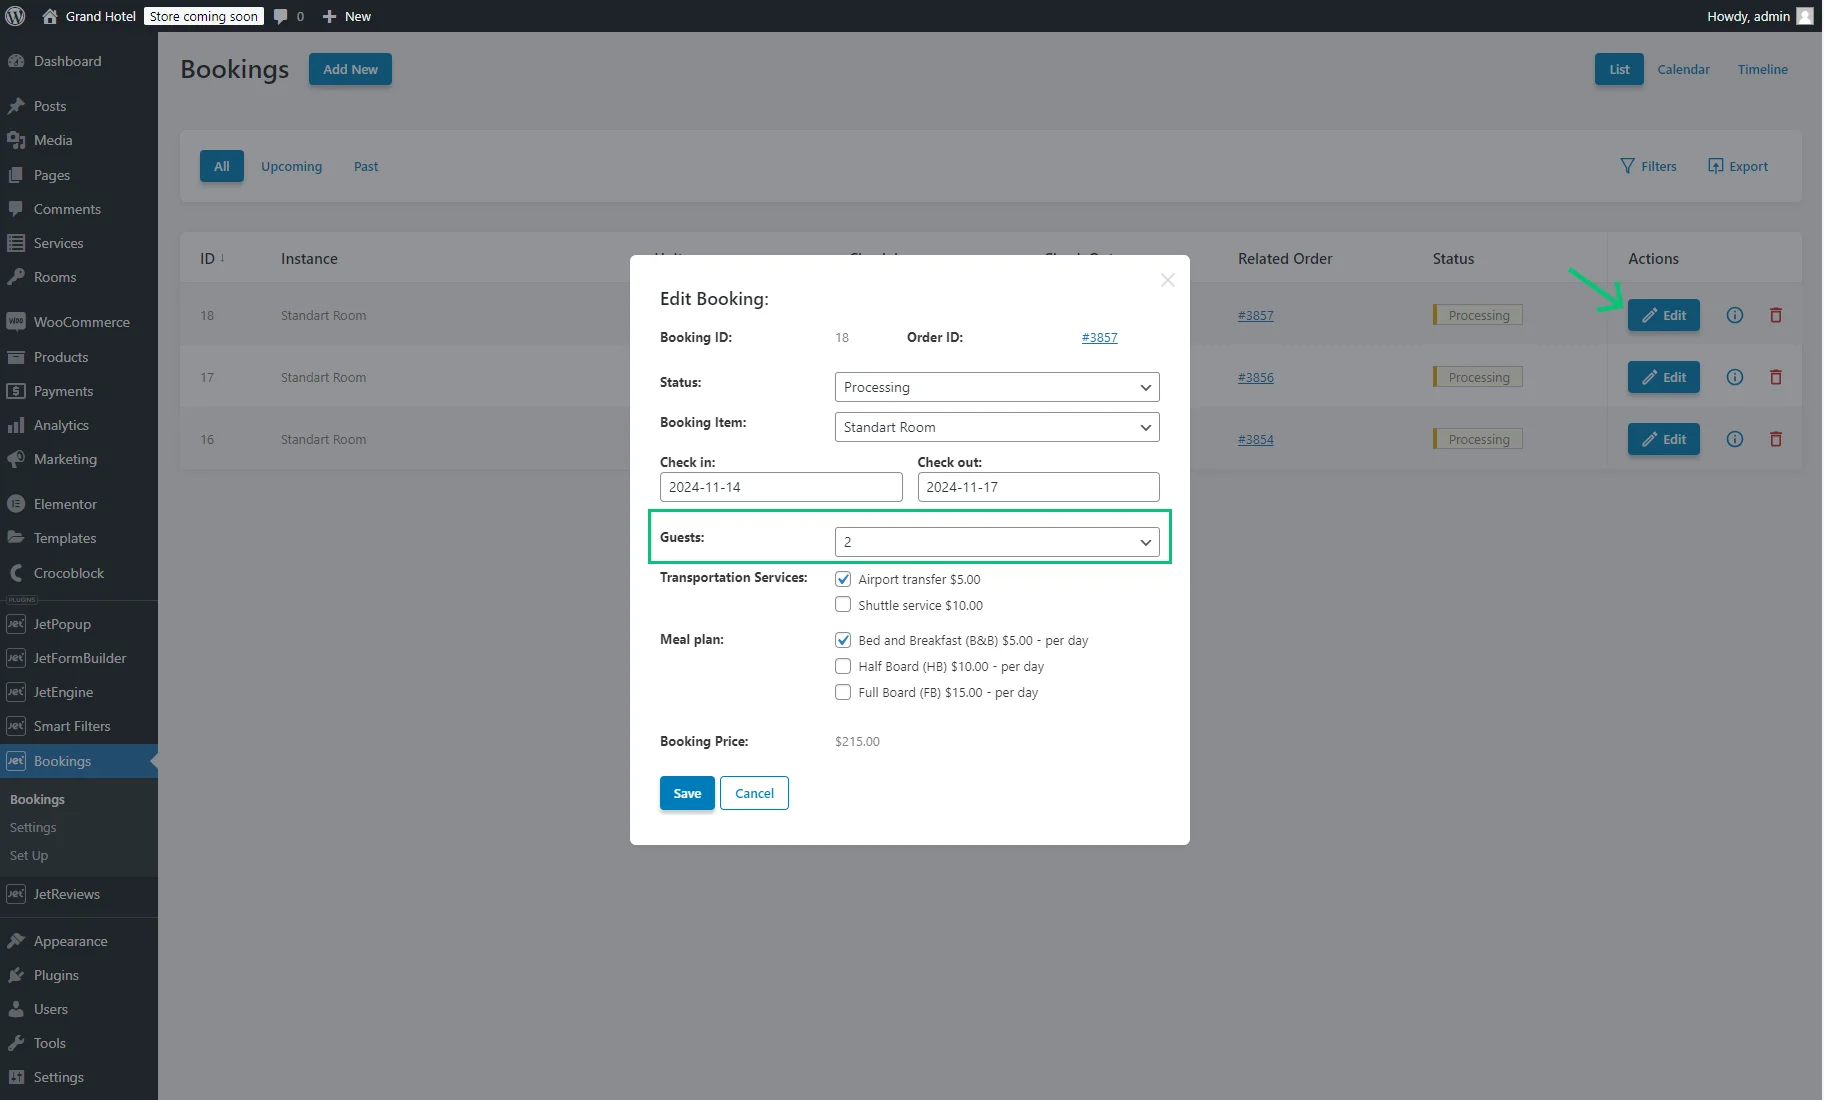
In the WordPress Dashboard > Bookings tab, the bookings data can be observed.
By clicking the “Edit” button, you can alter the number of guests and additional service attributes along with other data for separate bookings.
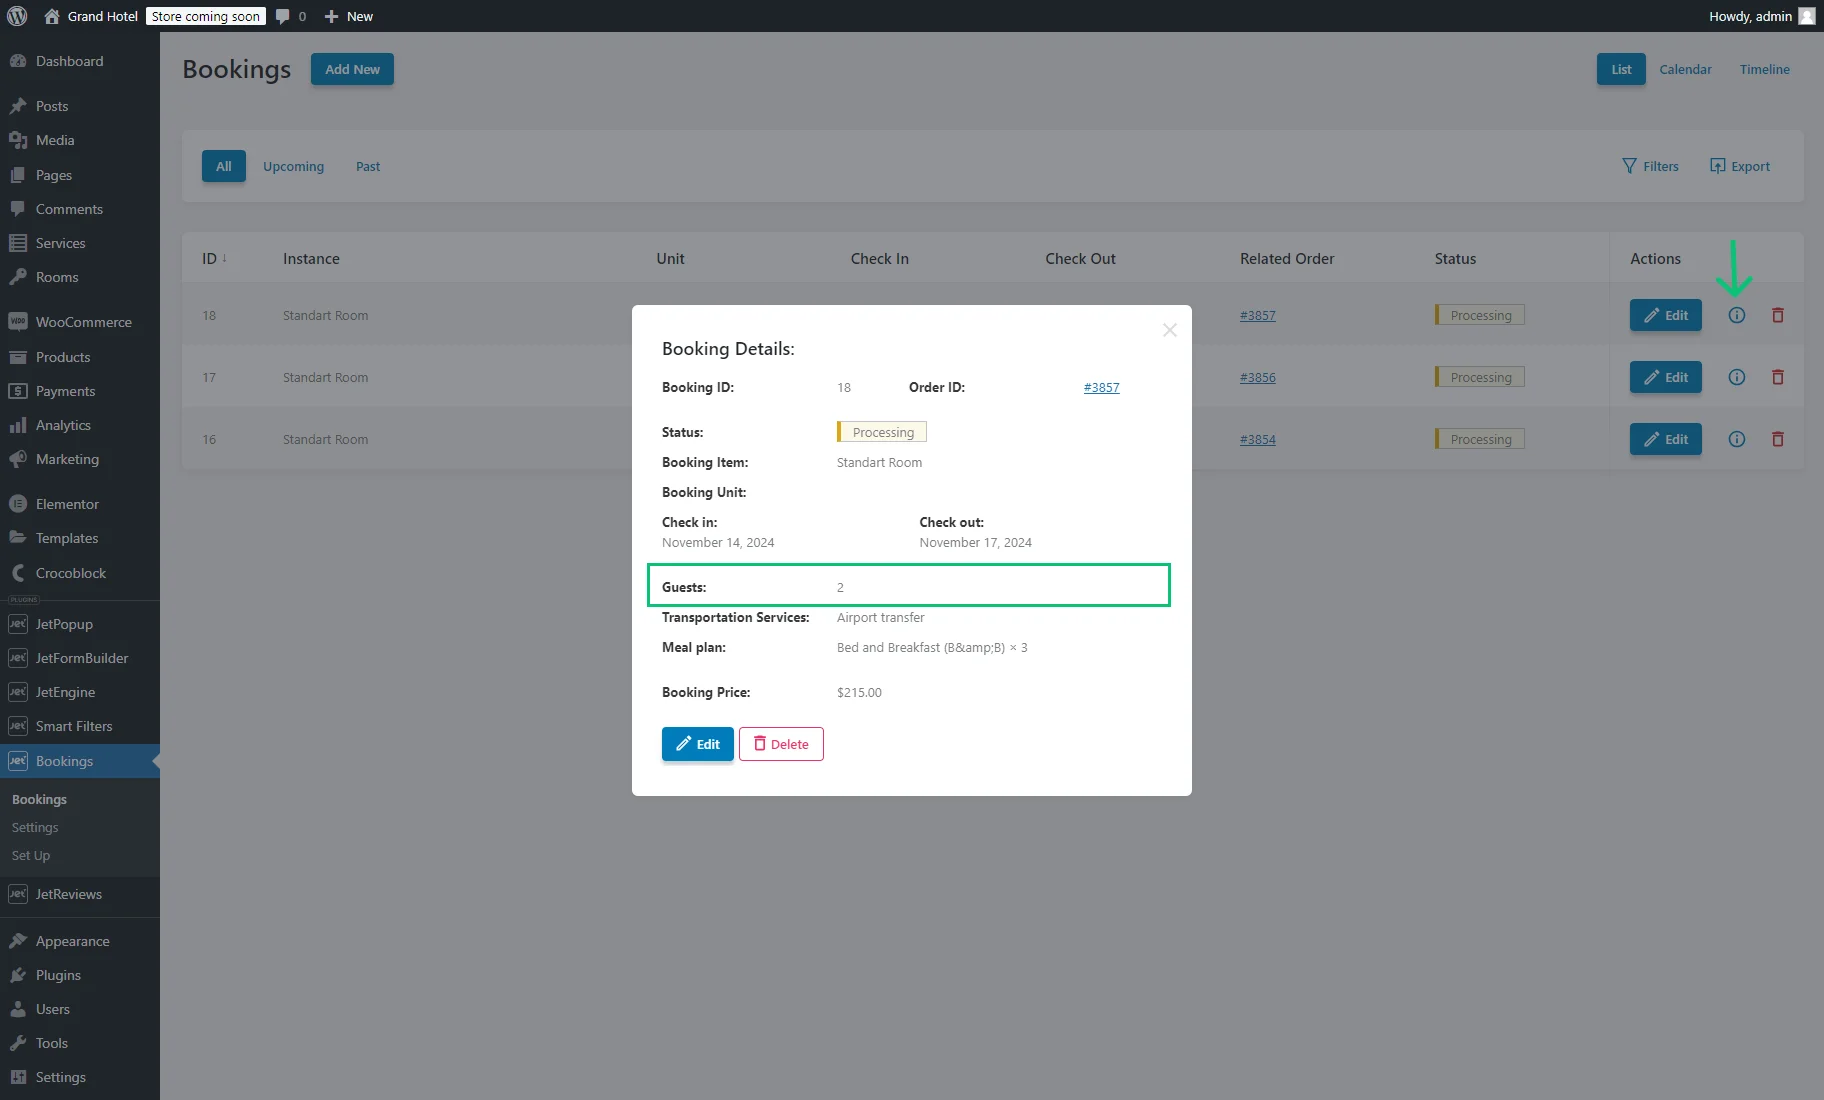
If you press the “Details” icon, you can check the booking data along with the number of guests.
Guests Display with the JetEngine Listing
To display bookings with the JetEngine plugin on the Account page created with the Profile Builder feature, complete the following steps.
Configure a custom query to display booked items
The custom query will filter bookings made by the current user and allow the display of the results as a listing.
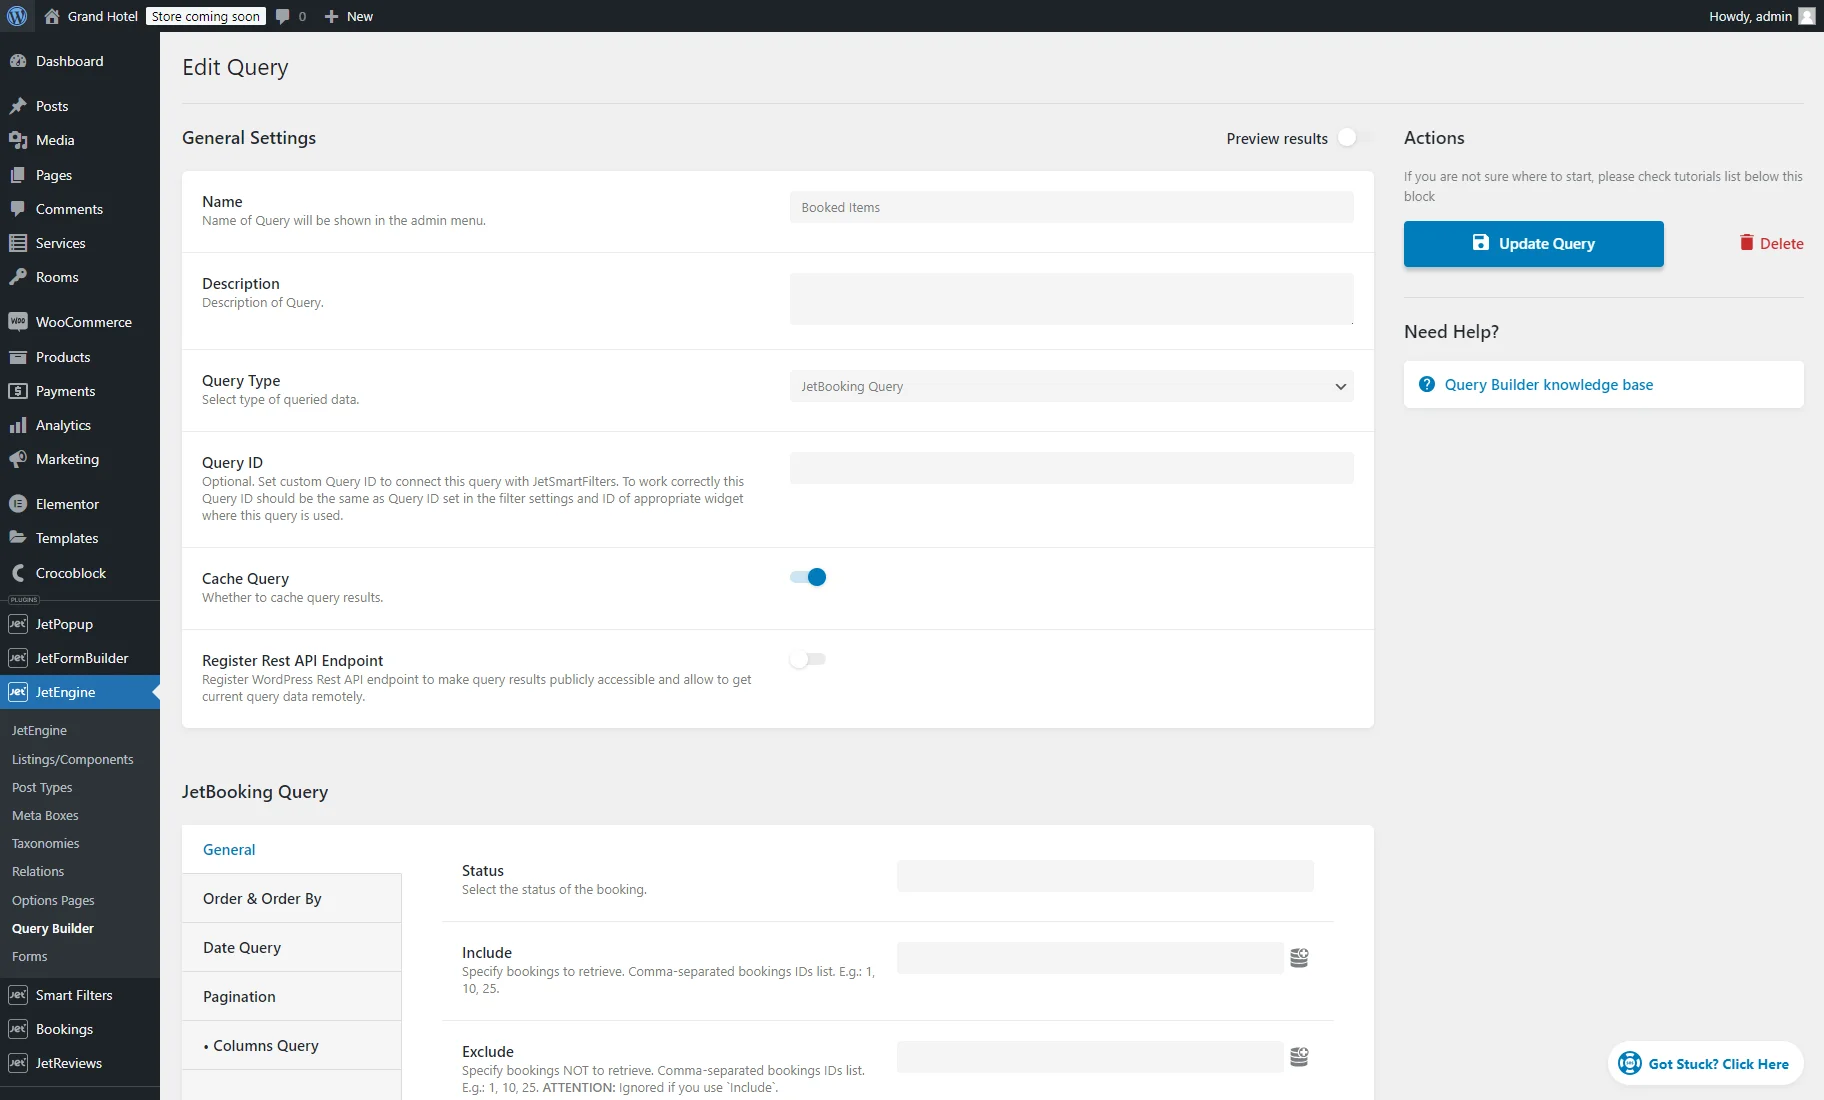
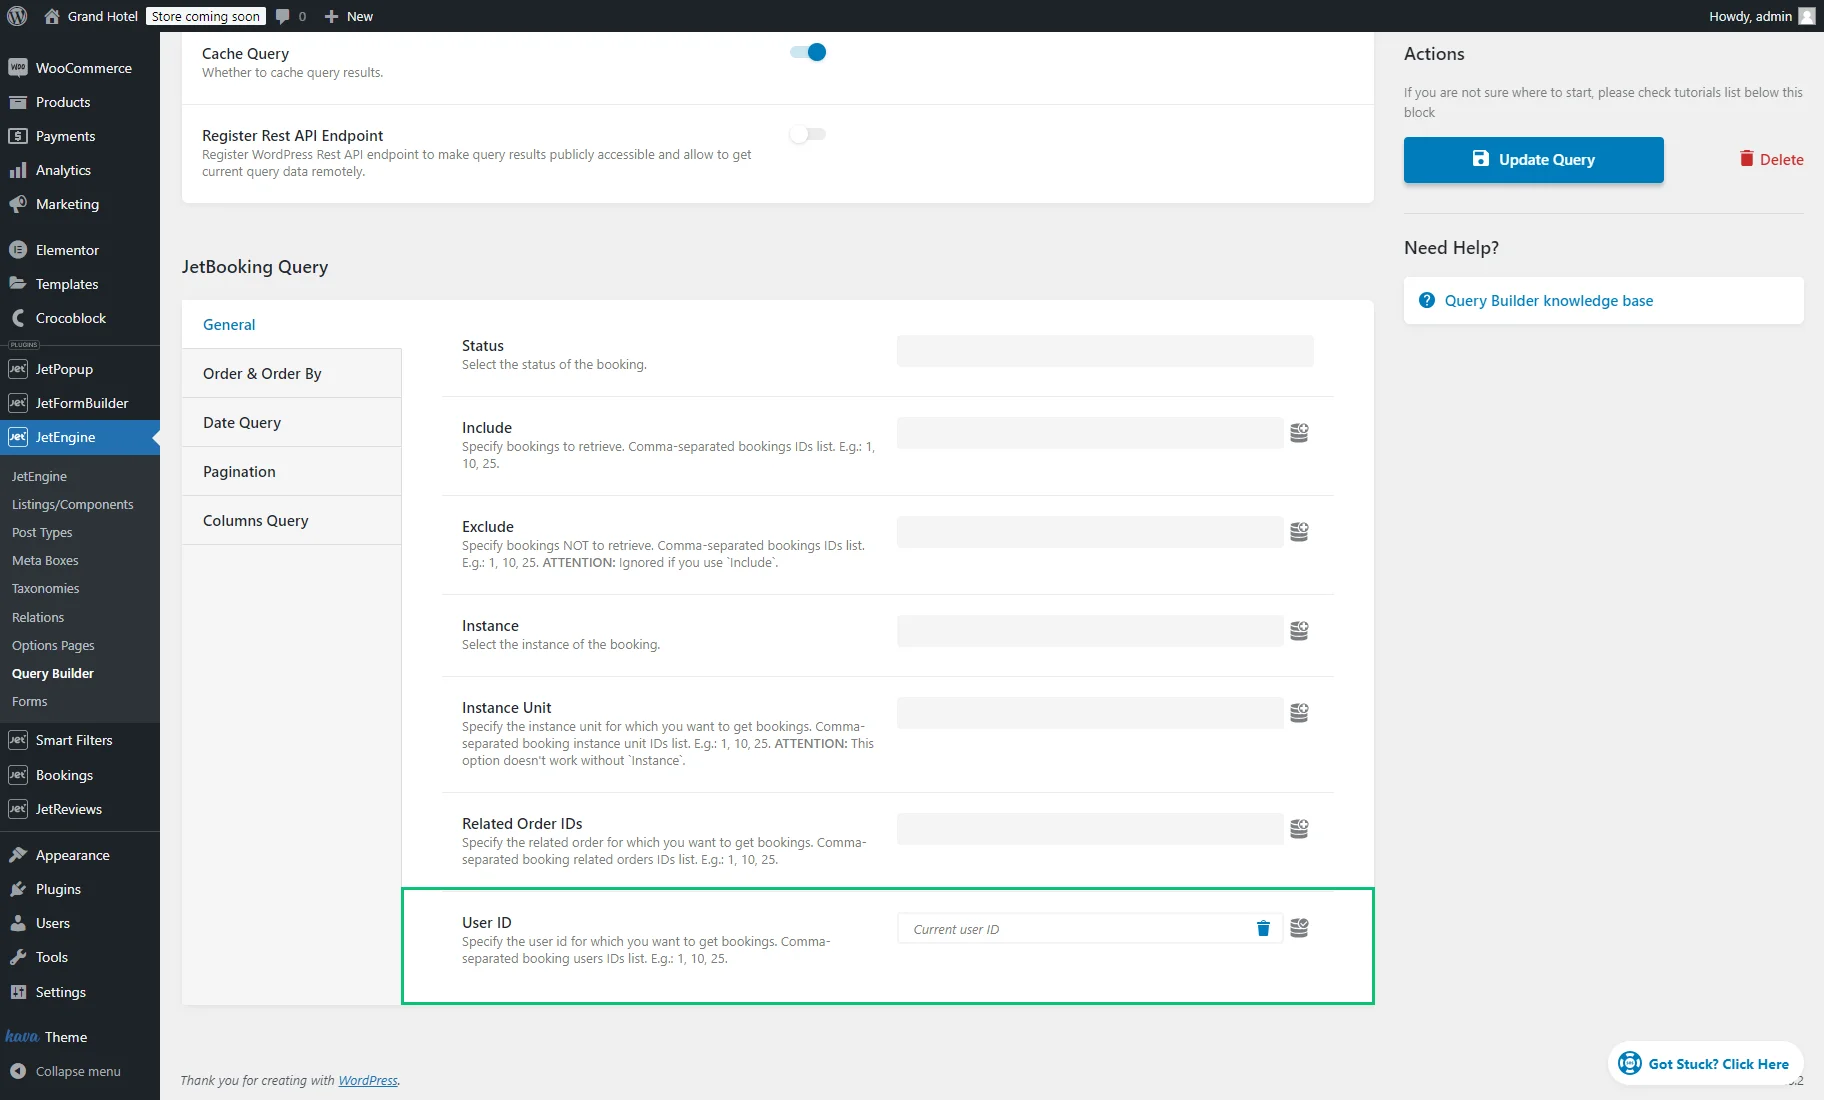
Head to WordPress Dashboard > JetEngine > Query Builder and click the “Add New” button to create a new query. Name the query and select the “JetBooking Query” Query Type.
This type of query returns all bookings created on the site. Using different query settings, you can narrow down the result. To learn more about these settings, proceed to the JetBooking Query Type in the Query Builder Overview.
To display only the list of bookings created by the current user, move to the body of the query and, in the General section, scroll down to the User ID input field, click the “coin-stack” icon, and select the “Current user ID” macro.
Now, the query retrieves only those bookings created by the current user. Configure other custom query settings and push the “Add/Update Query” button.
Create a Listing to display bookings
Follow the guide described in the Create a Listing to Display Bookings chapter of the How to Display Booked Items on the User Account Page tutorial to create and customize the Listing Template to show the bookings of the current user.
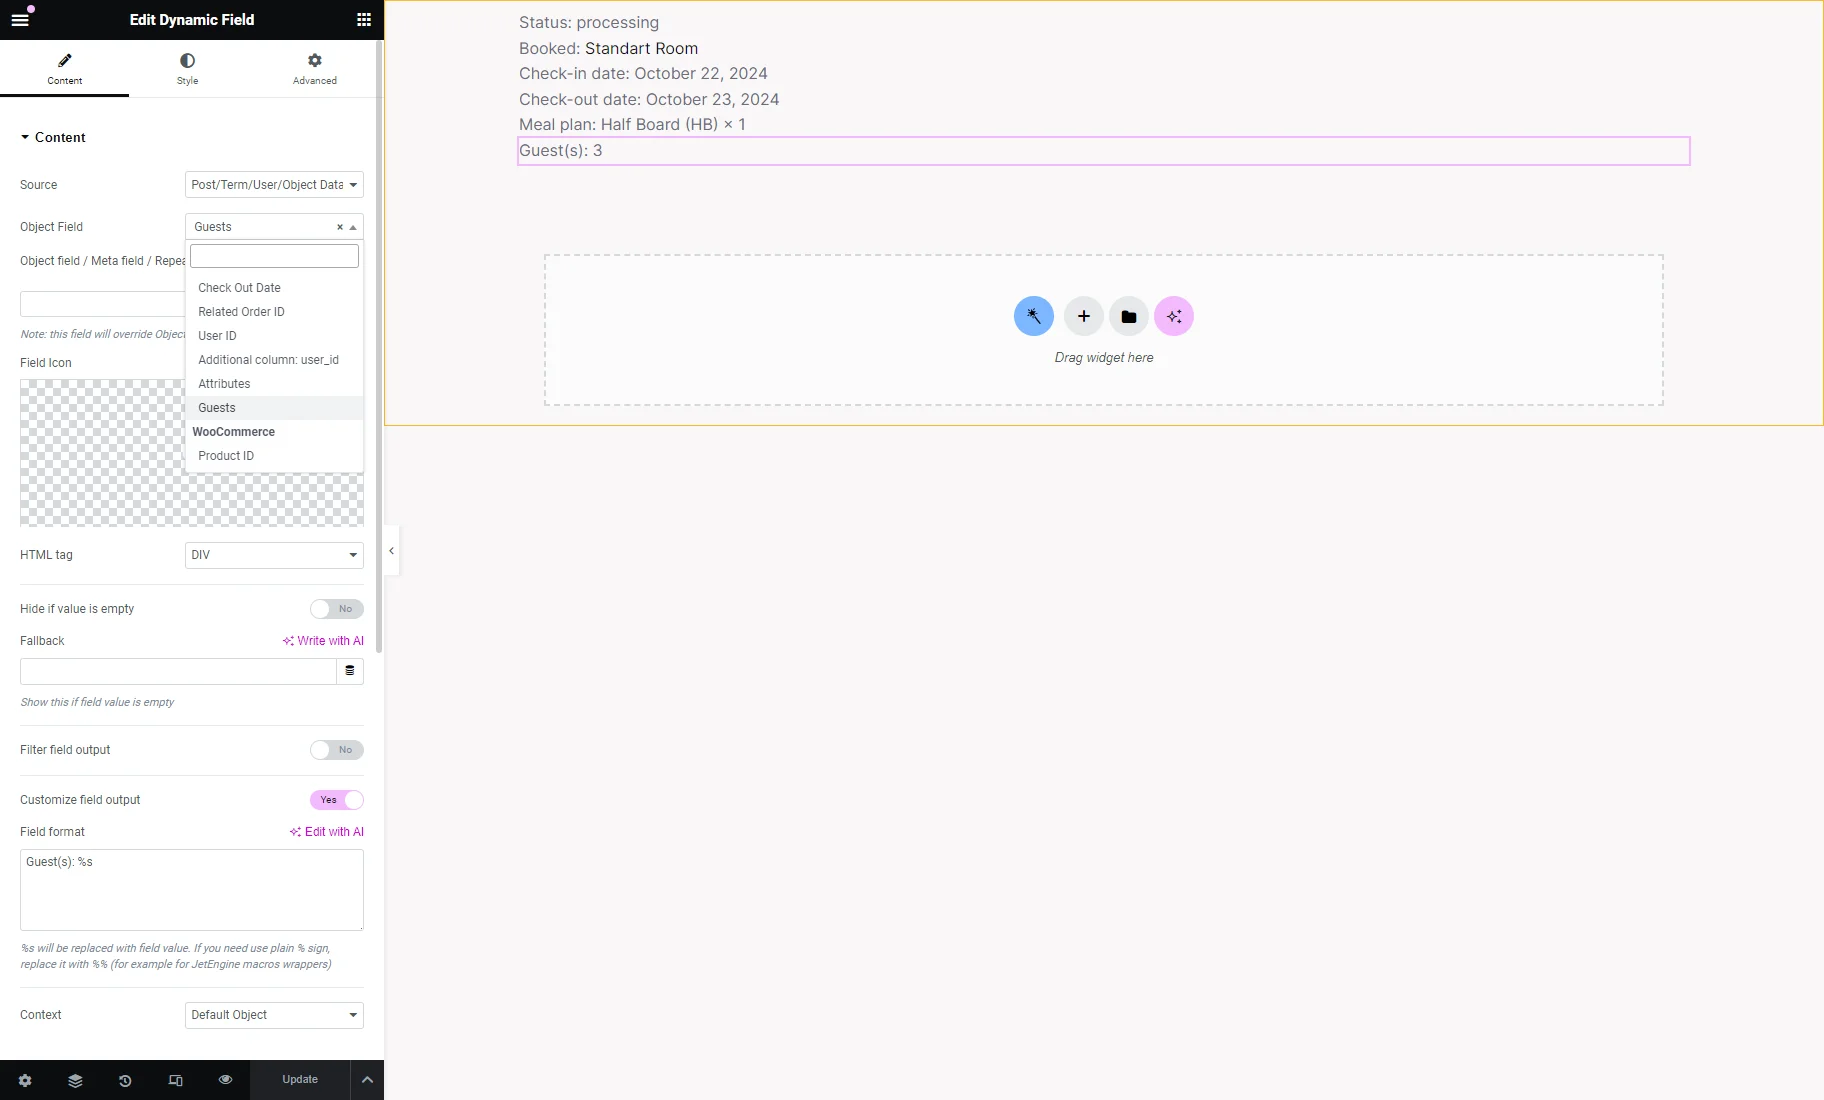
To display the number of guests, place the Dynamic Field and choose the “Post/Term/User/Object Data” as the Source and “Guests” as the Object Field.
We also enable the Customize field output toggle and set the “Guest(s): %s” text in the Field format textarea.
After adjusting the settings, hit the “Update” button.
Display the booked items in the Listing Grid
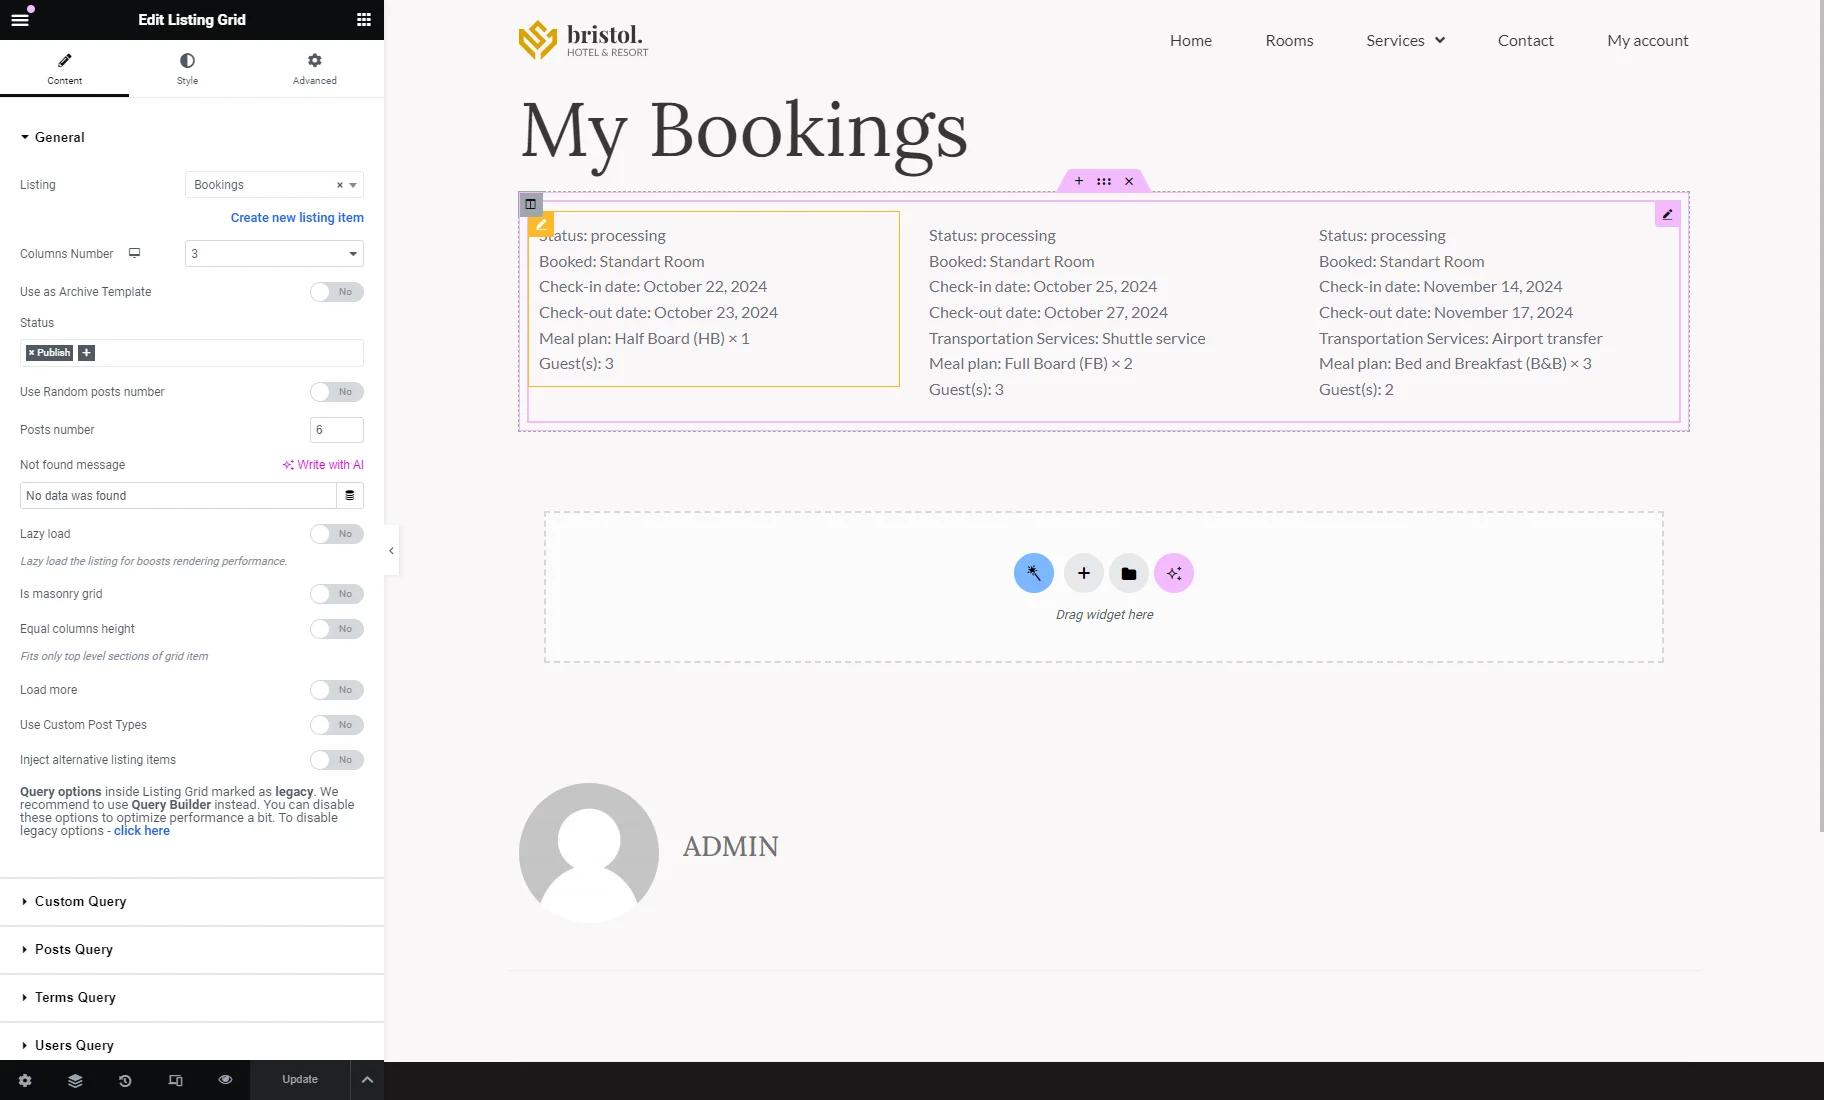
As described in the Display the Booked Items Listing on the Account Page chapter of the How to Display Booked Items on the User Account Page tutorial, we create a template and place the Listing Grid here.
Then, we choose the Listing option created previously to display the bookings of the current user as a listing.
That’s all. Now you know how to manage the WooCommerce guests settings and display with the JetBooking plugin for WordPress.
