How to Translate Custom Taxonomy Using WPML
This guide explains how to translate custom taxonomies created with the JetEngine plugin on your WordPress website using WPML.
Learn how to enable taxonomy translation, translate taxonomy slugs and terms, and ensure the translated taxonomy displays correctly across all language versions of your WordPress website.
Enable Taxonomy Translation
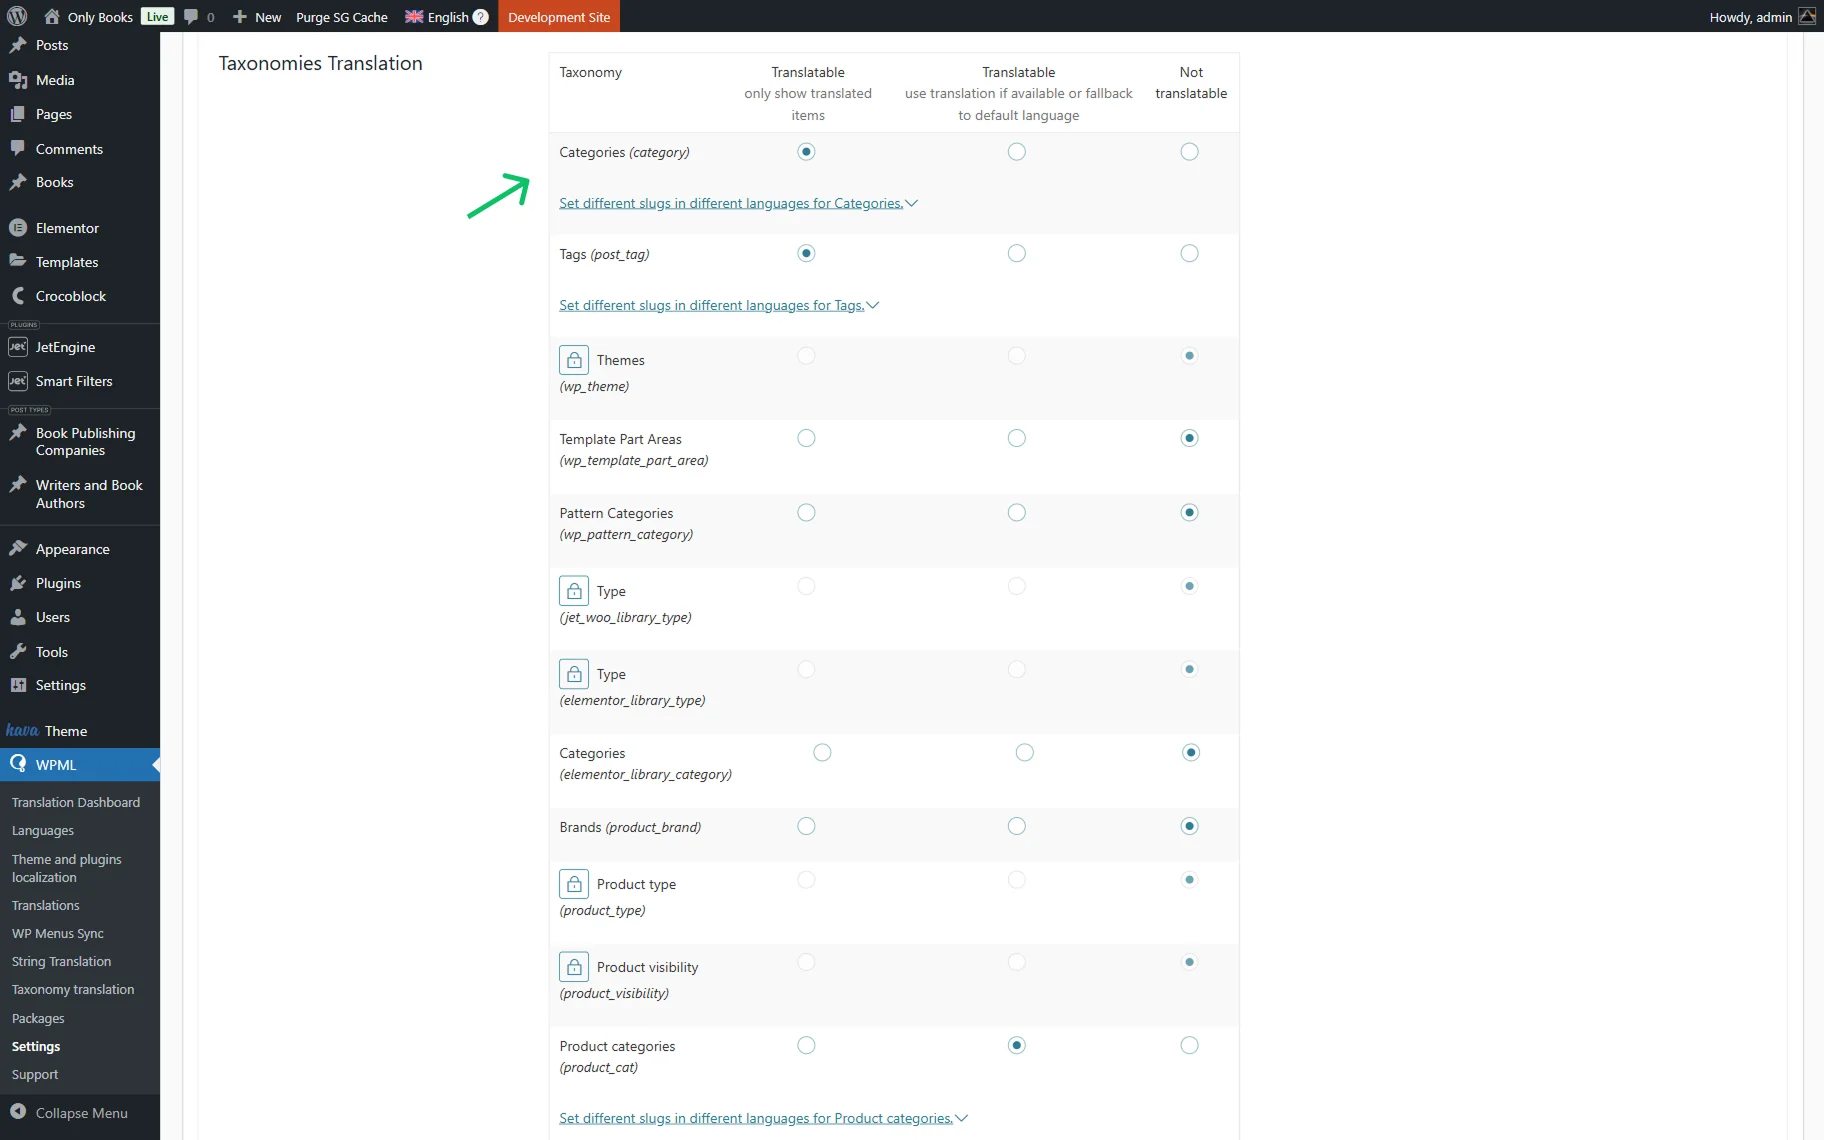
Go to WordPress Dashboard > WPML > Settings. Scroll down to Taxonomies Translation to manage the WPML taxonomy translation options.
Click the “Translate” radio buttons next to the taxonomies you need to be translatable. Press the “Save” button.
This step activates the WPML custom taxonomy translation, allowing you to manage and display translated taxonomy terms across all your site languages.
Translate Taxonomy Terms
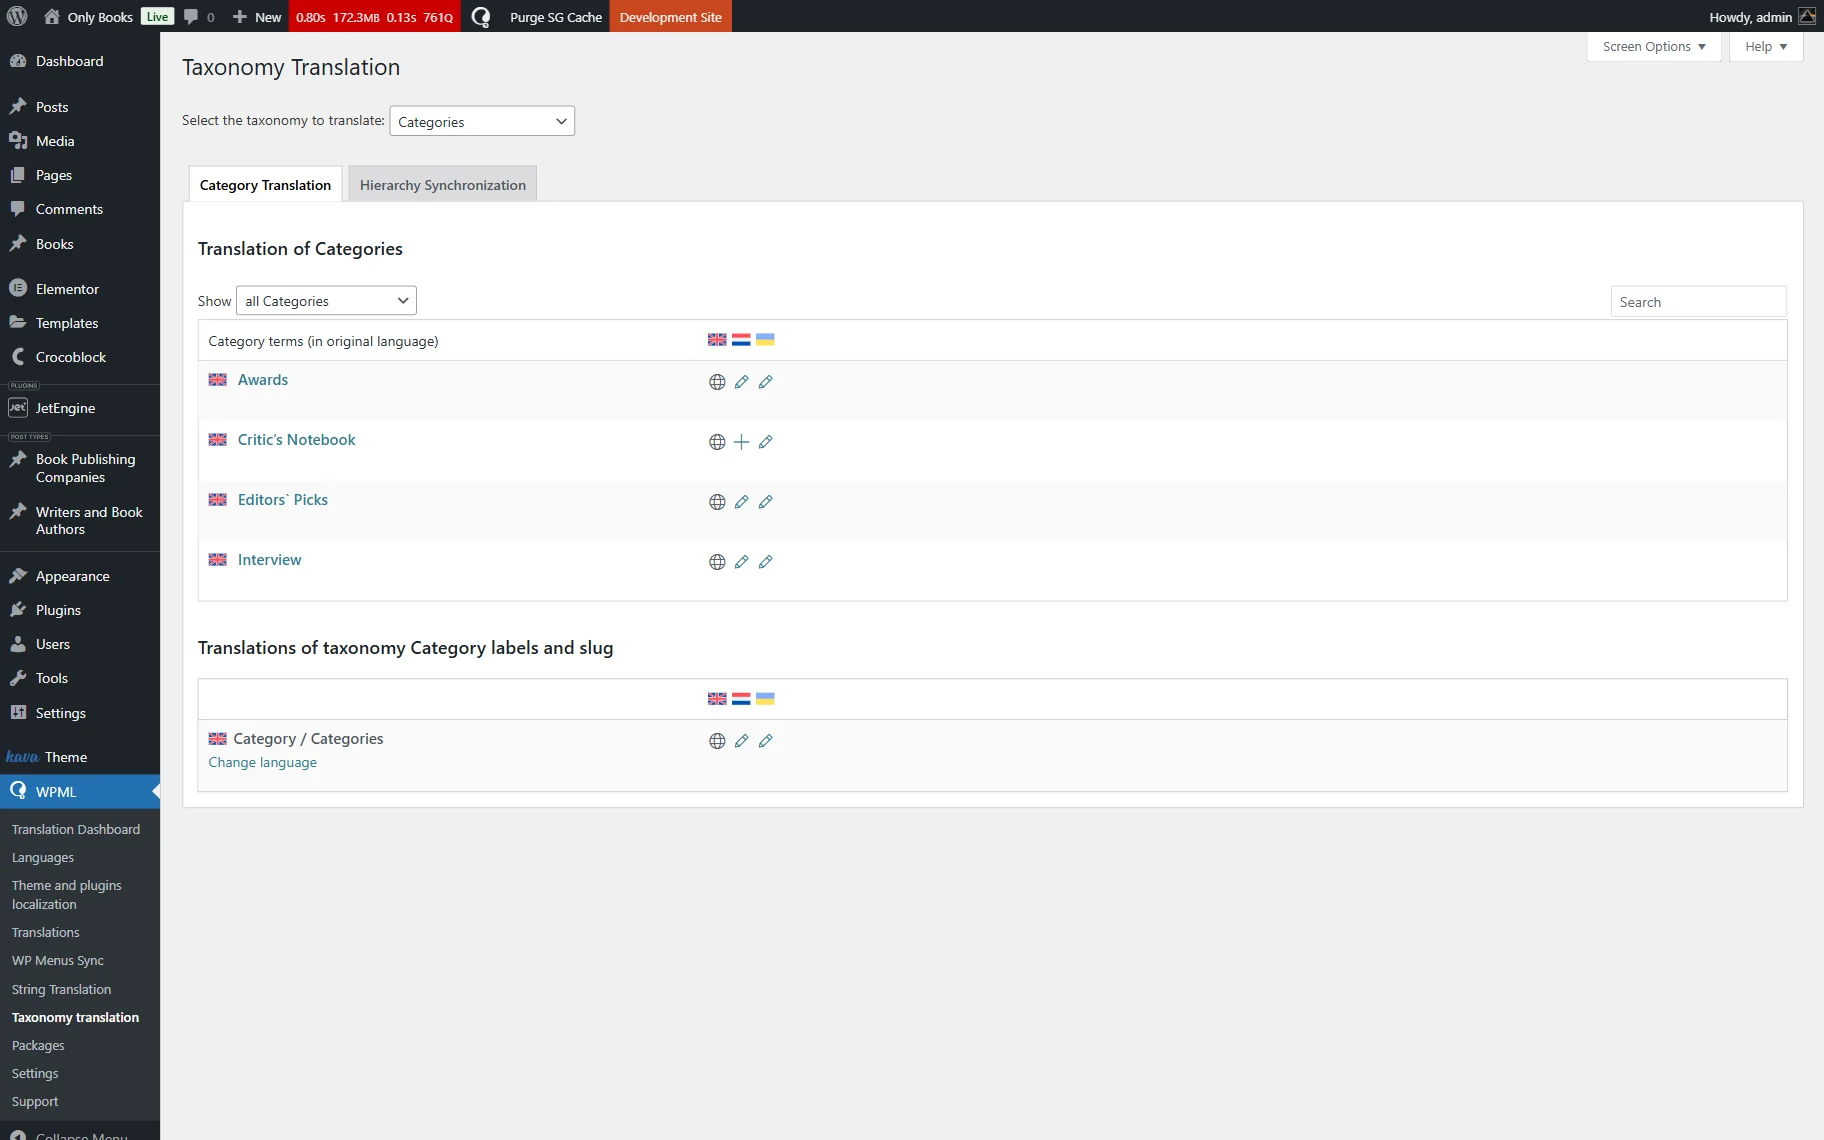
Next, follow the WordPress Dashboard > WPML > Taxonomy translation directory and choose the one to edit from the drop-down list. Here, you can see the content of this taxonomy. To translate taxonomy terms, press the “+” or pencil-shaped icon.
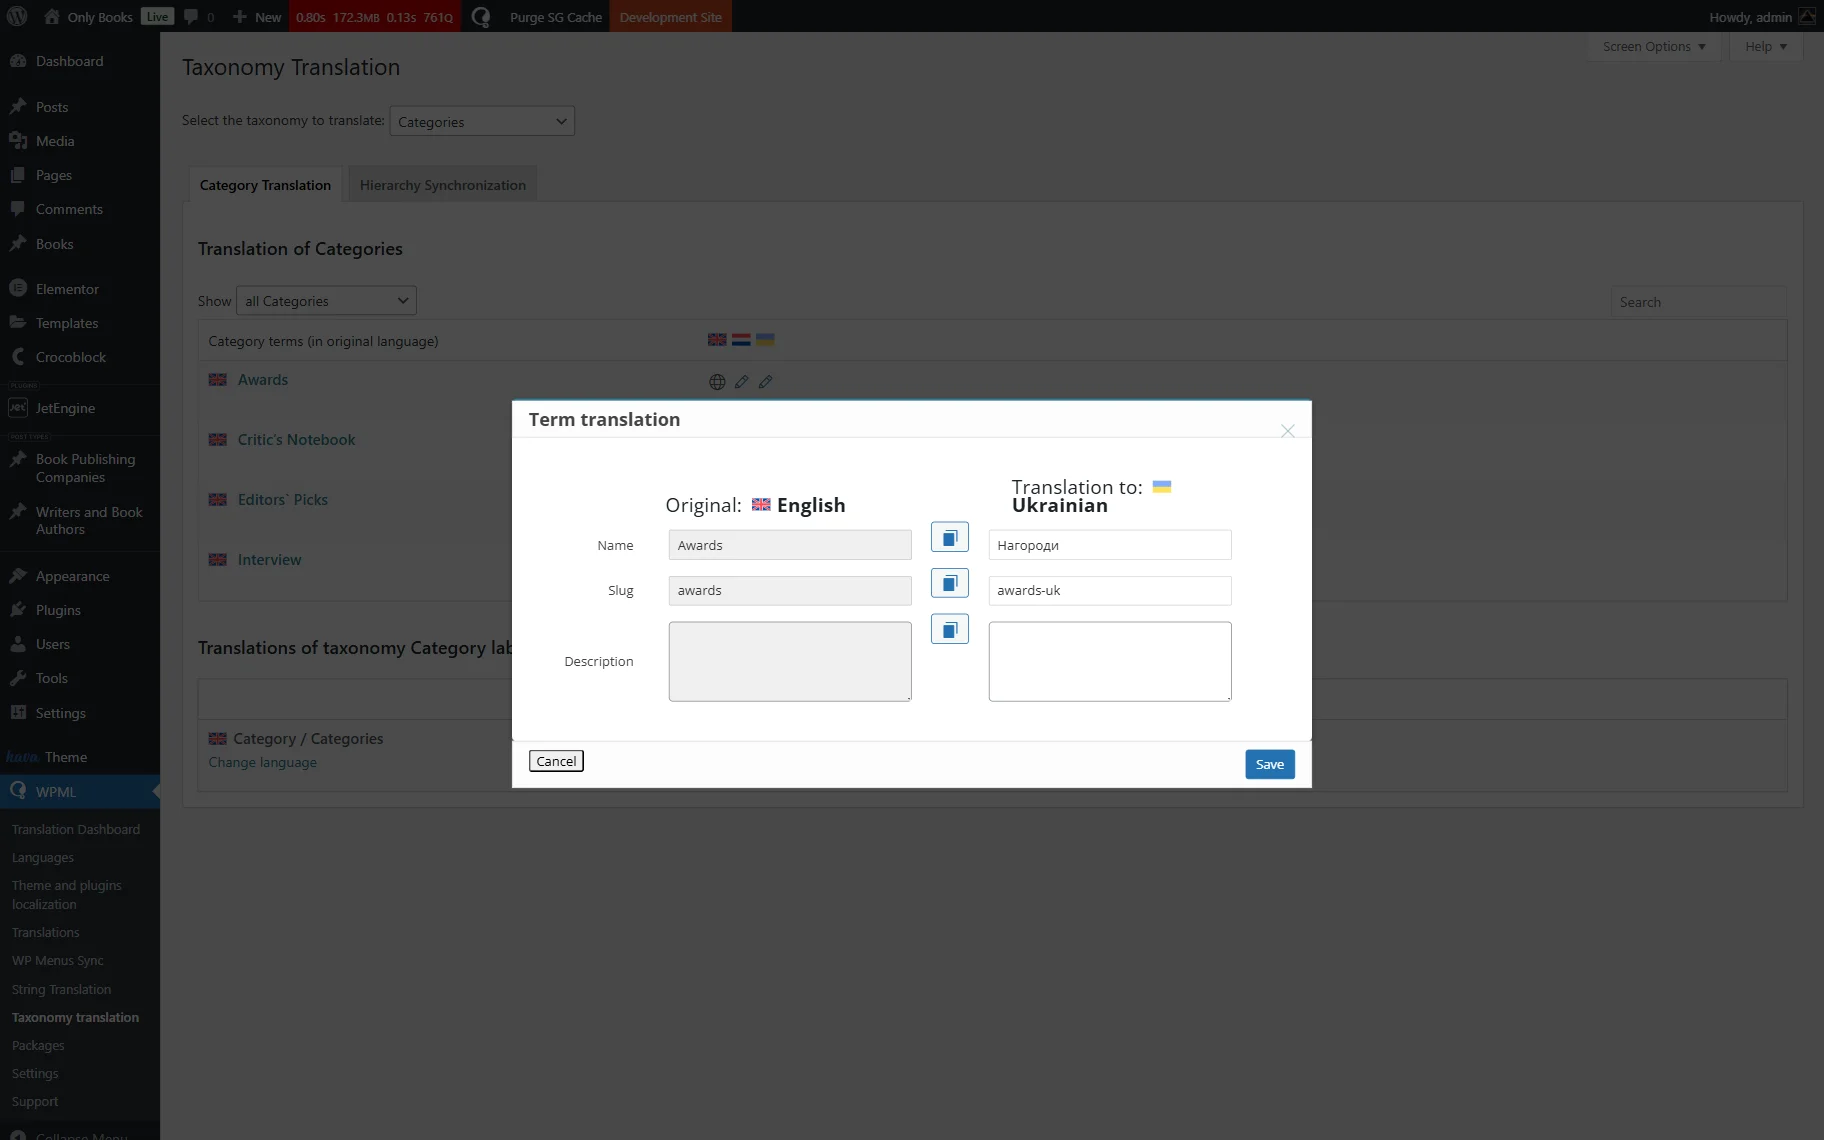
In the newly appeared window, submit the necessary translations. The slug will be generated automatically. Please keep in mind that if there are identical slugs on the website, the system will add a suffix like “-uk,” where “uk” is short for the second (third, fourth, etc.) language.
Don’t forget to press the “Save” button every time you edit the taxonomy content.
Repeat the same process for every taxonomy you’ve set to be translated.
Once translated, your translated taxonomies will be available on WPML-powered pages. This ensures smooth integration between JetEngine and WPML’s taxonomy translation.
Also, we recommend checking out our How to Make a JetEngine-Built Website Multilingual tutorial on the JetEngine and WPML integration.
That’s all; now you know how to translate JetEngine’s custom taxonomies and their terms on your WordPress website with the help of the WPML plugin.