How to Translate Glossary and Multi-Optional Fields Using WPML
In this guide, you will find out how to translate JetEngine’s Glossary and multi-optional fields using WPML on your WordPress website.
When creating the JetEngine multi-optional fields, such as “Checkbox,” “Select,” or “Radio,” you can connect them to the JetEngine glossary.
This tutorial shows how to translate Crocoblock glossary items and multi-optional field labels using WPML, ensuring that all field options are displayed correctly in every language.
To translate them, we need to use the Glossaries functionality by JetEngine.
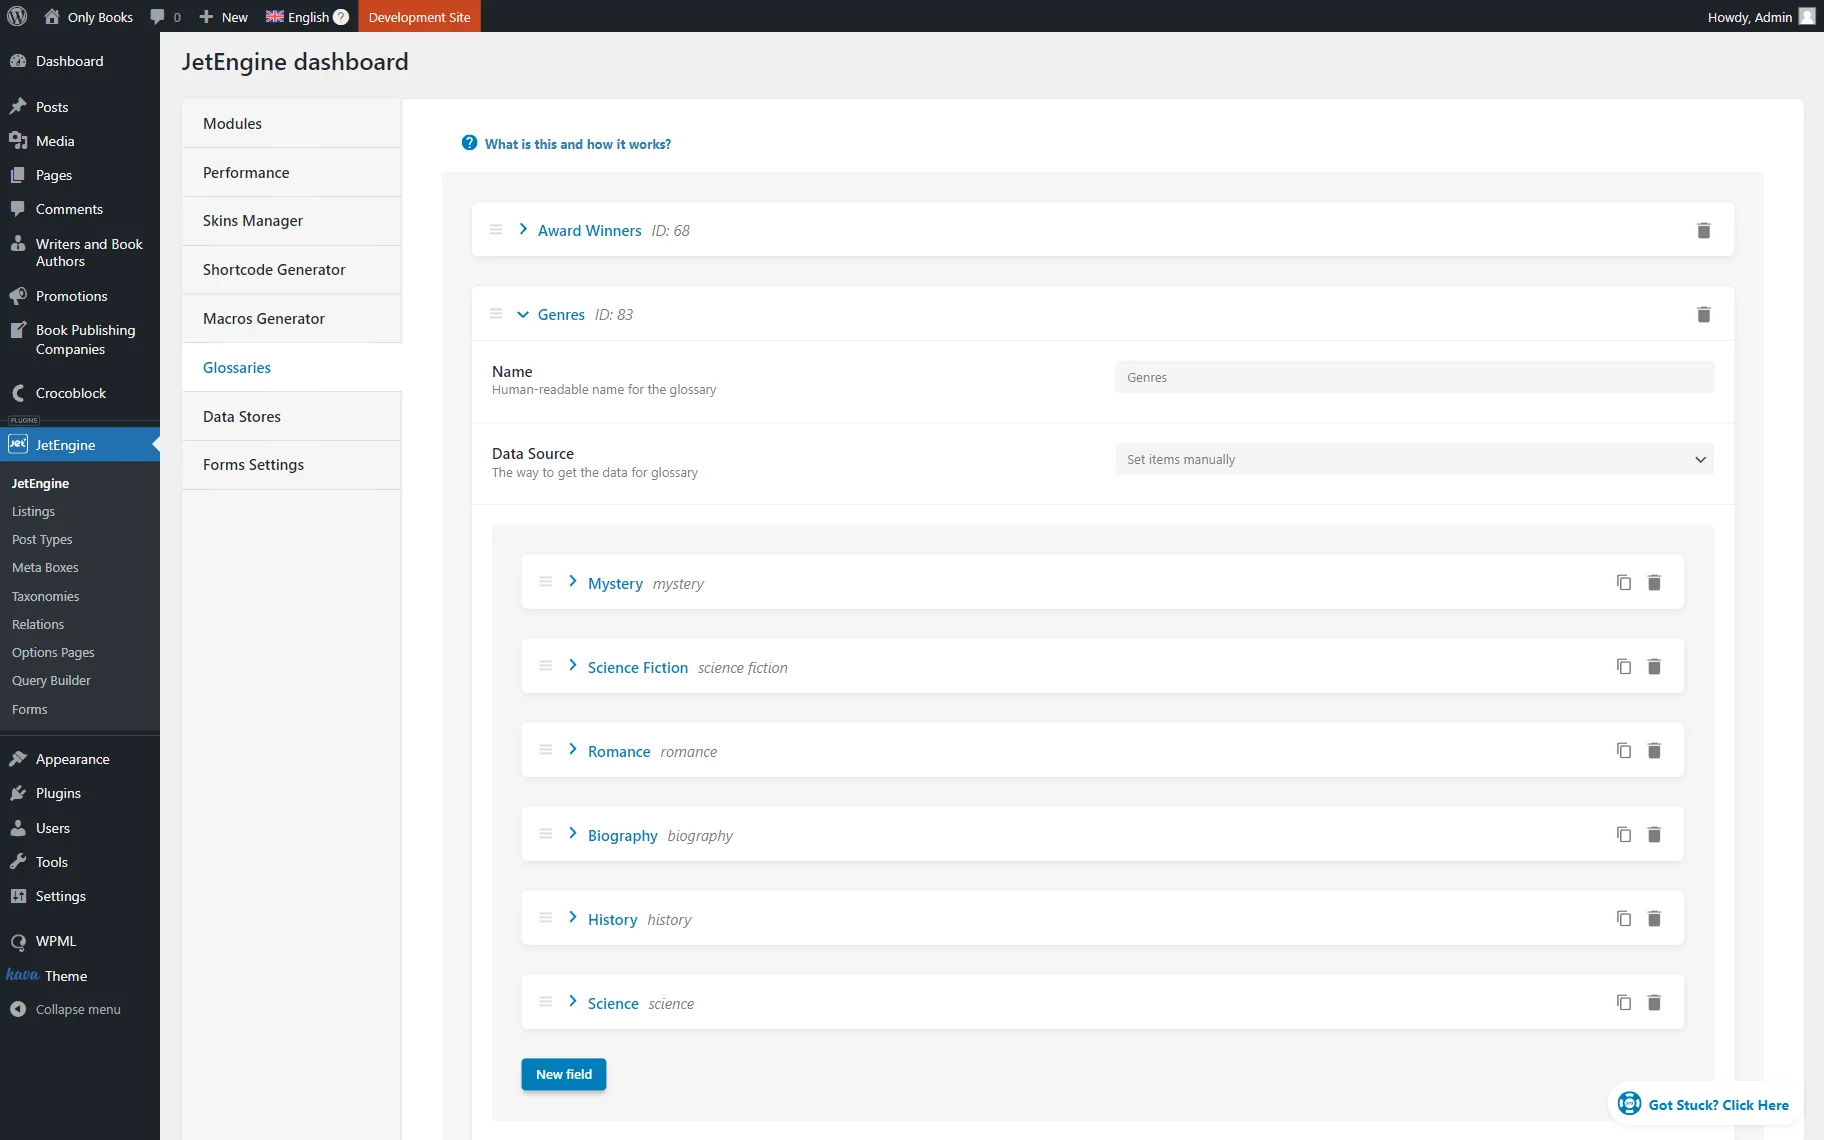
Create a Glossary to serve as the source for the meta field if you haven’t done it before. It can be done in the WordPress Dashboard > JetEngine > Glossaries tab.
Add items to the glossary and save the changes.
Go to the page where your meta field editor is located. For instance, it can be a Custom Post Type (CPT) editing page or a meta box.
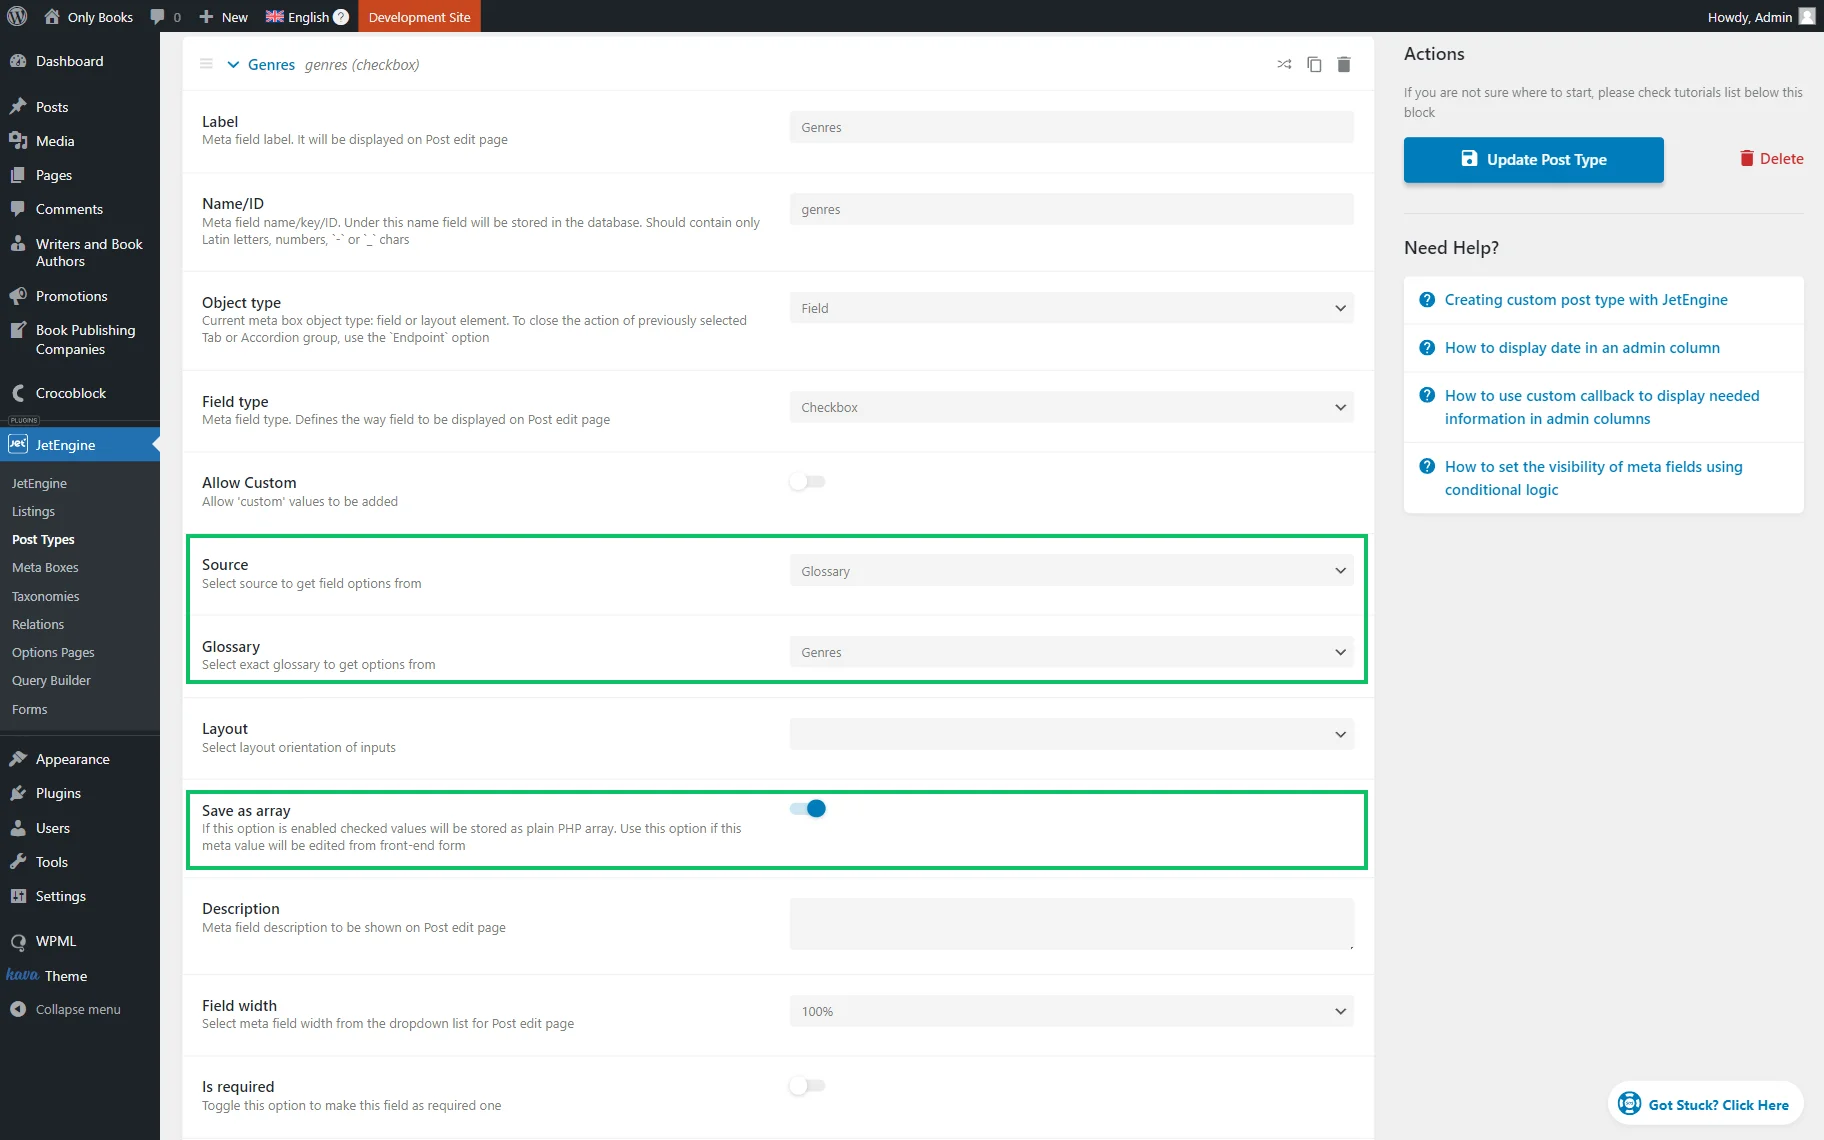
In the meta field settings, ensure that the Get options from the glossary toggle is enabled and the Glossary is selected.
Also, activate the Save as array option.
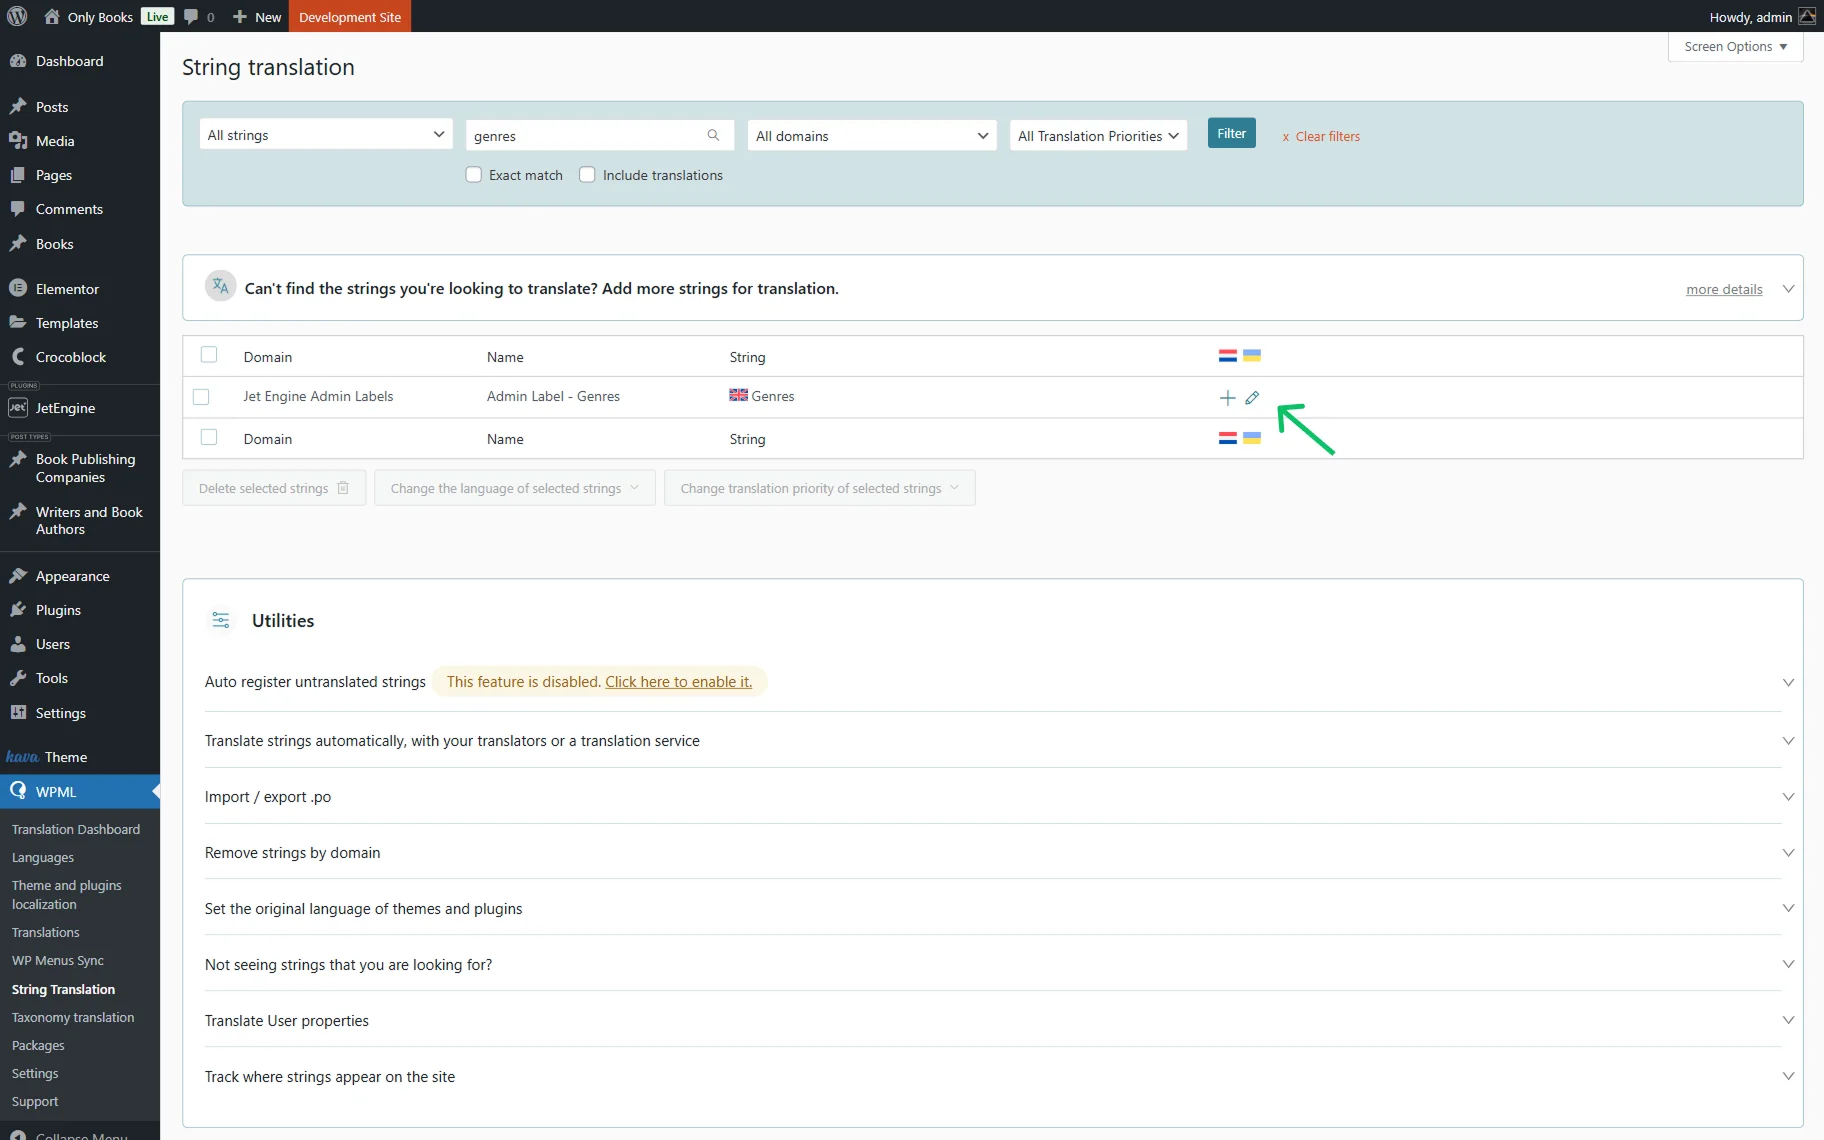
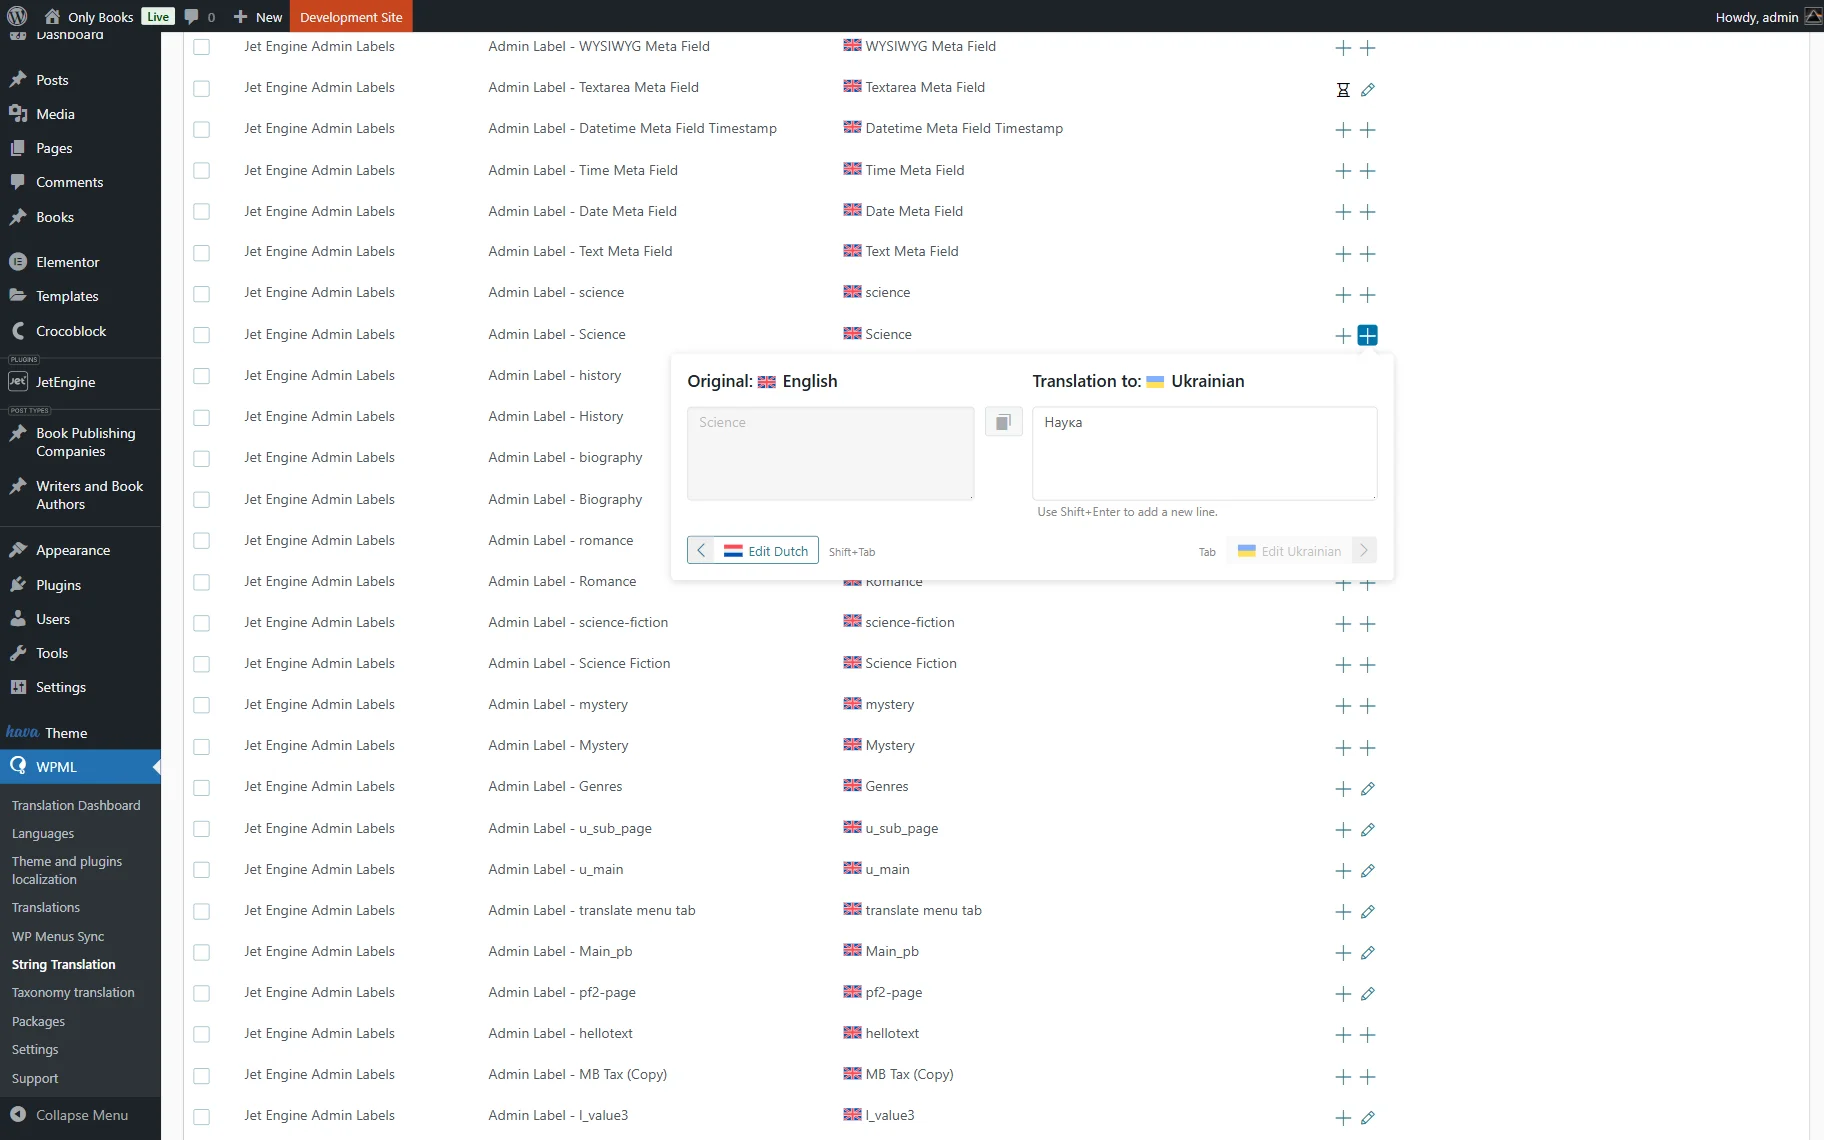
Proceed to the WordPress Dashboard > WPML > String Translation directory and locate the label of the meta you need. You can find it manually or by using the search bar located above the items.
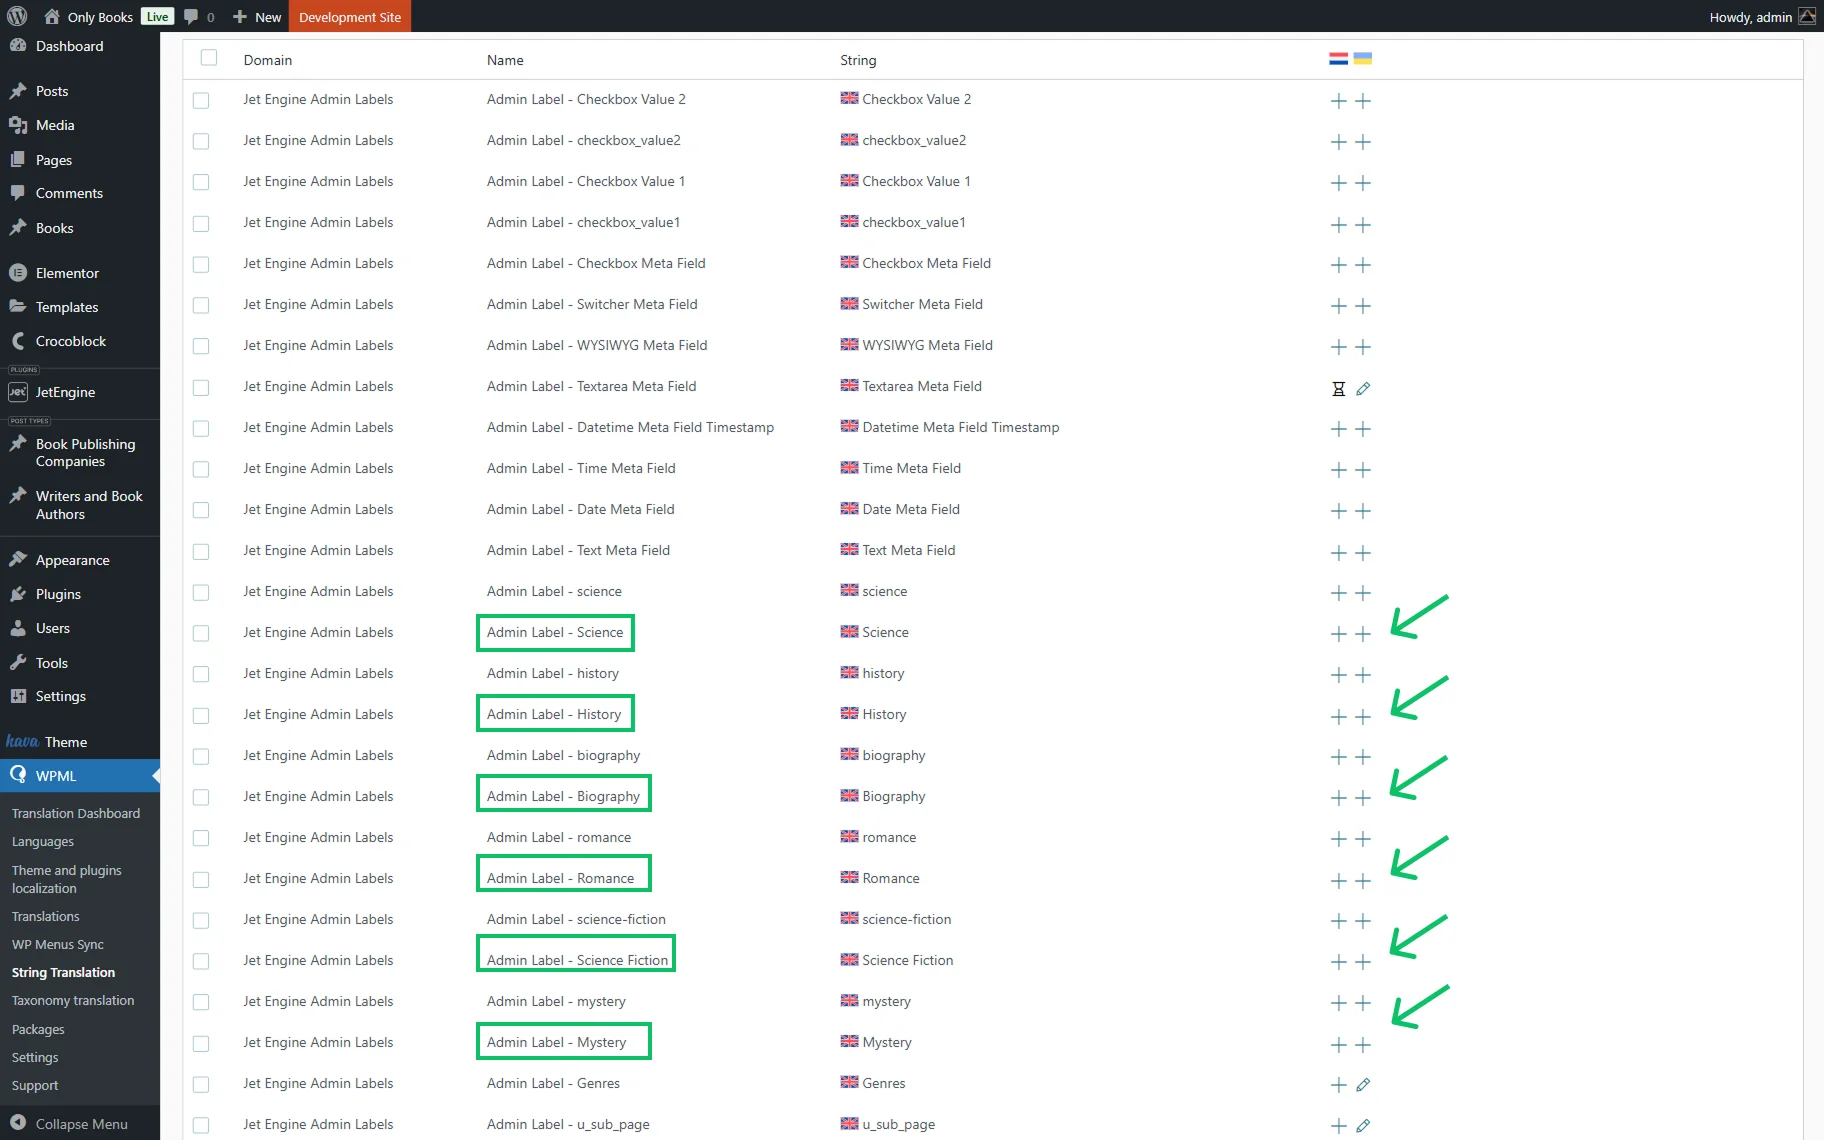
Press the “+” button next to the needed meta field Label to add its translation.
Then, add the translation to the meta field options Labels.
Now, the meta field and its options can be checked for both original and translated versions.
That’s all about the translation of the JetEngine’s glossary and multi-optional fields on your WordPress website using the WPML plugin.