How to Set Up Language-Based Header & Footer for Dynamically Generated Pages
Learn how to set up the JetThemeCore header and footer for JetEngine dynamic pages on your WordPress website using the WPML plugin.
Before you start, check the tutorial requirements:
- WPML plugin installed and activated
- JetEngine plugin installed and activated
- JetThemeCore plugin installed and activated
When creating a multilingual website, it’s essential to translate the header and footer templates, as they will always be present on secondary-language website pages.
This guide explains how to use WPML for footer translation and to translate header built with JetThemeCore, ensuring that they appear correctly on every language version of your website.
Make Theme Parts Translatable
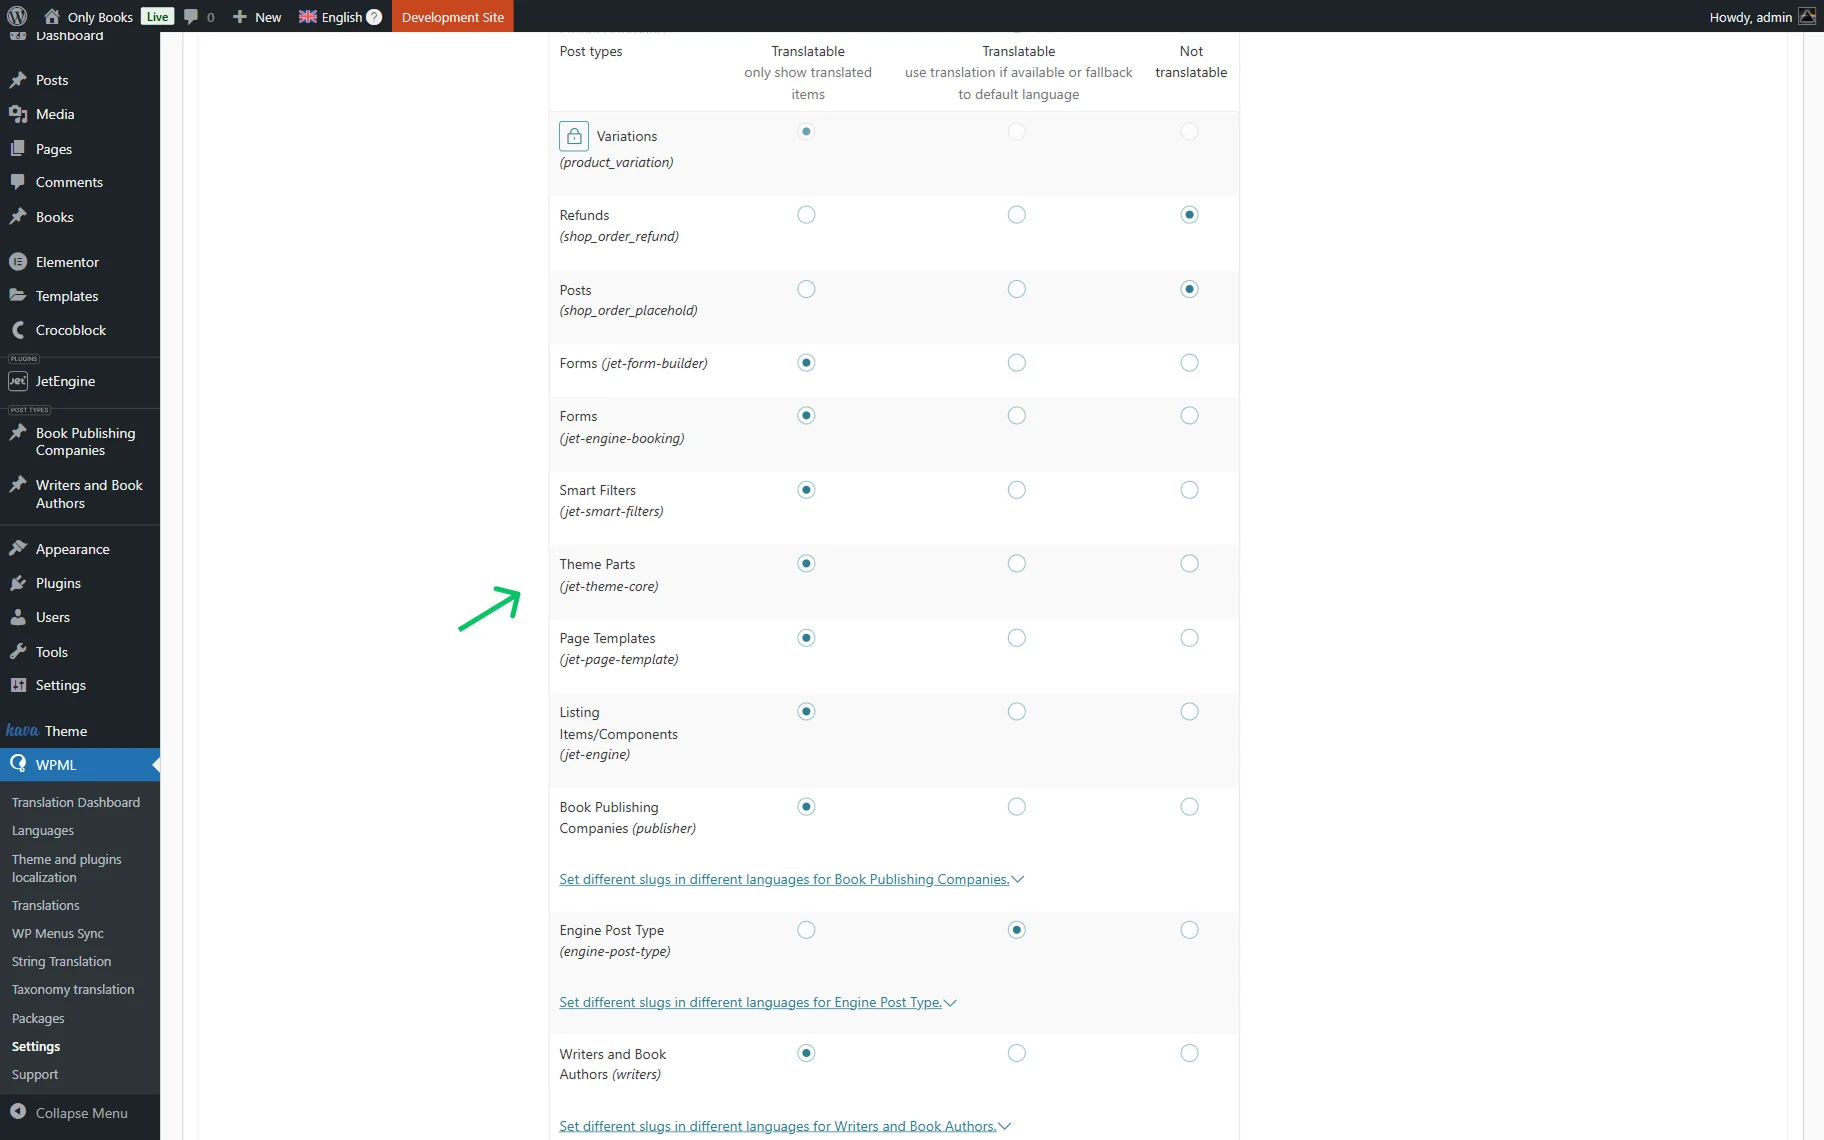
Firstly, go to WordPress Dashboard > WPML > Settings and scroll down to the Post Types Translation section. Locate the Theme Parts row and set its status to “Translatable.” Save the changes.
This will let WPML detect and process your WPML Elementor header and WPML footer templates for translation.
Adjust JetThemeCore Settings
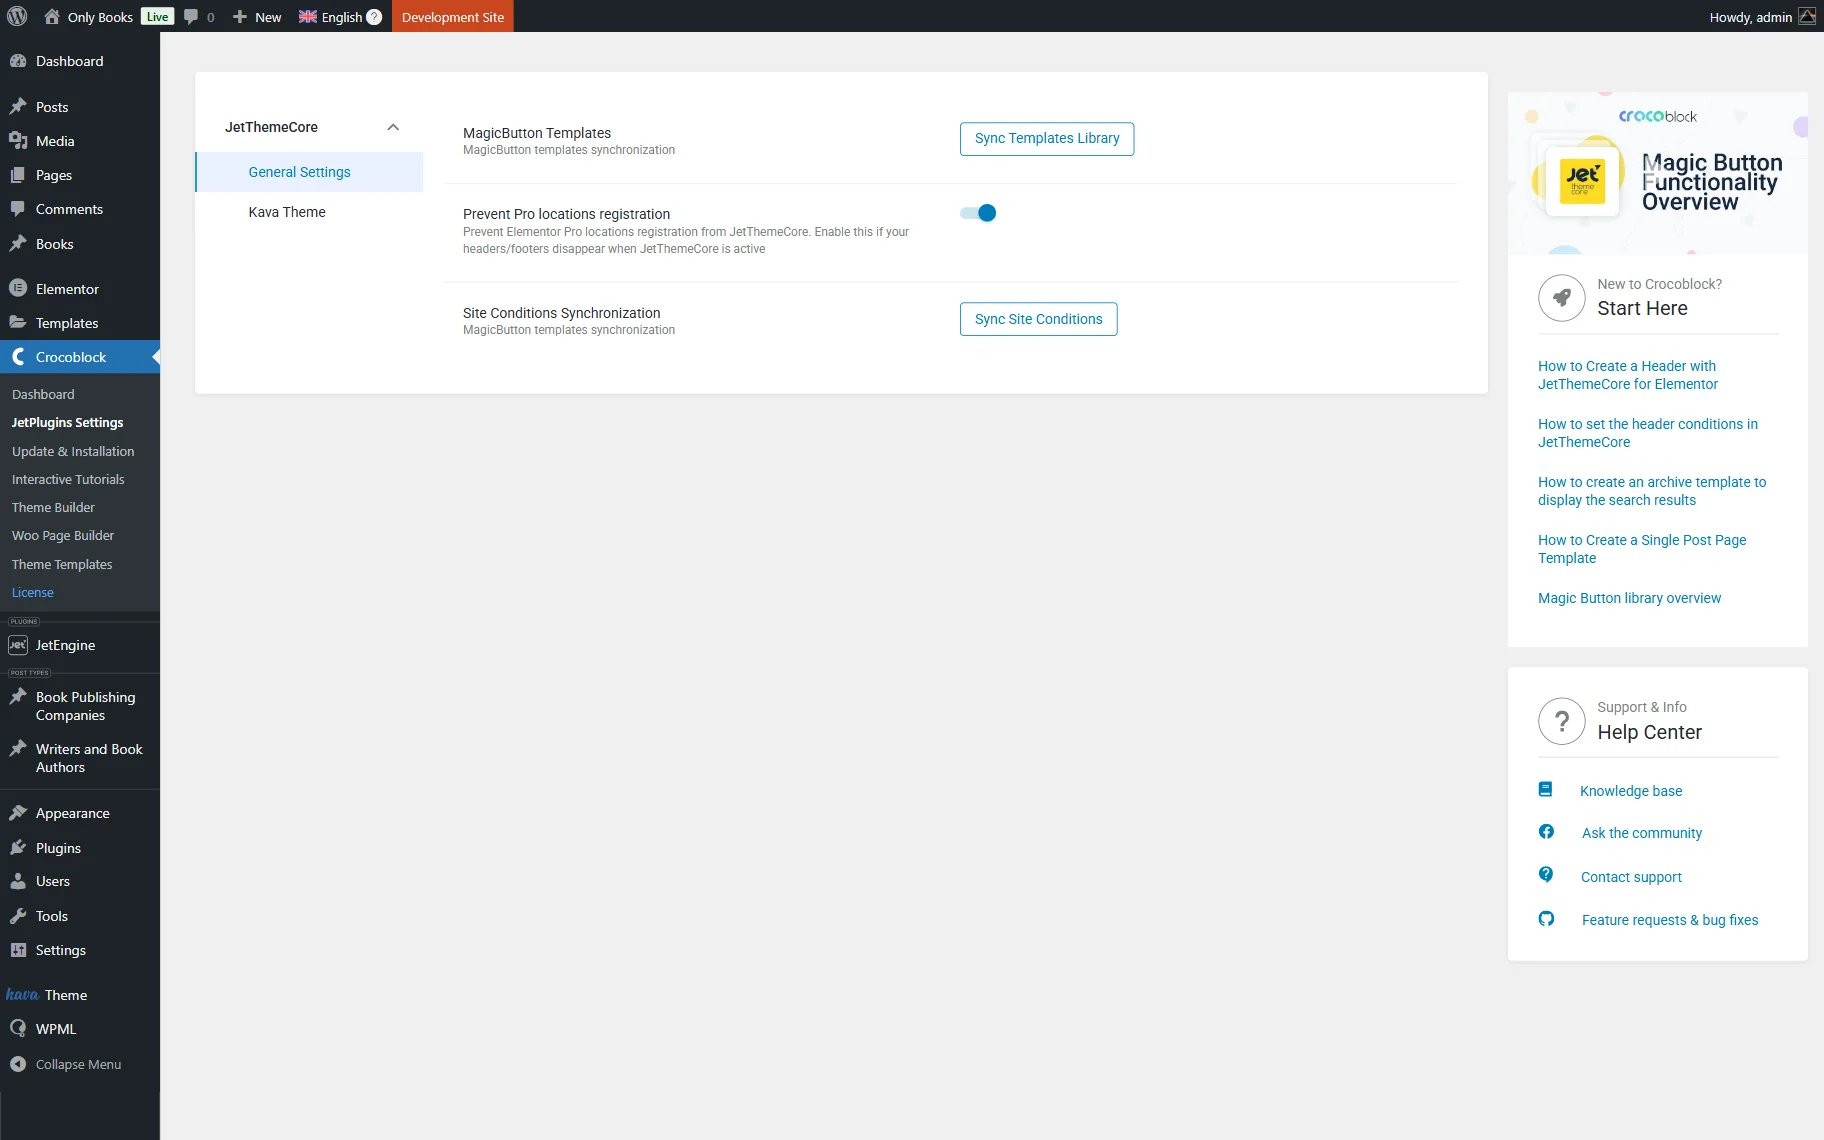
Next, proceed to the WordPress Dashboard > Crocoblock > JetPlugins Settings tab in the WordPress admin panel and open the JetThemeCore plugin settings.
Enable the Prevent Pro locations registration toggle in the General Settings tab. It will prevent the header and footer templates from disappearing on the second-language site pages.
Translate Header and Footer Templates
It’s time to translate the corresponding header and footer templates into other site languages.
To do so, follow the WordPress Dashboard > Crocoblock > Theme Builder pathway. Locate the needed template and press the “+” icon next.
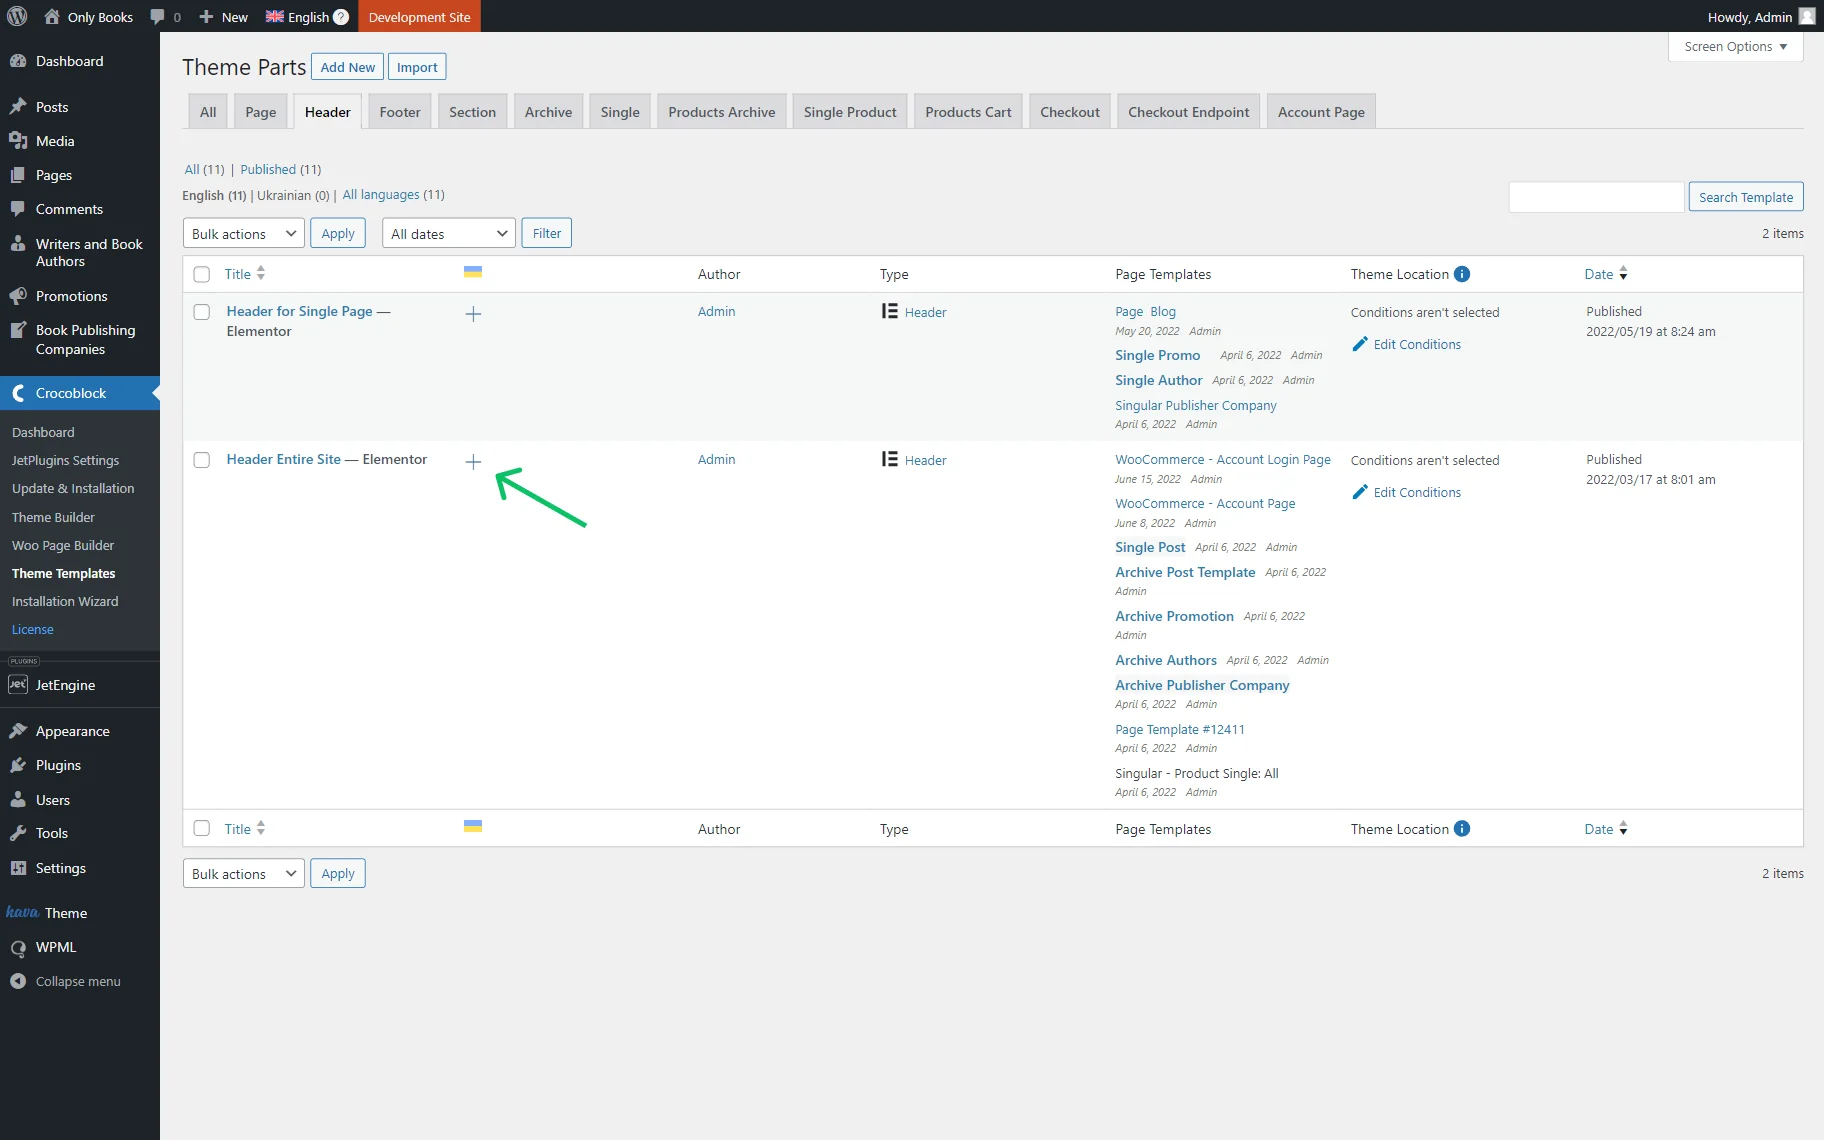
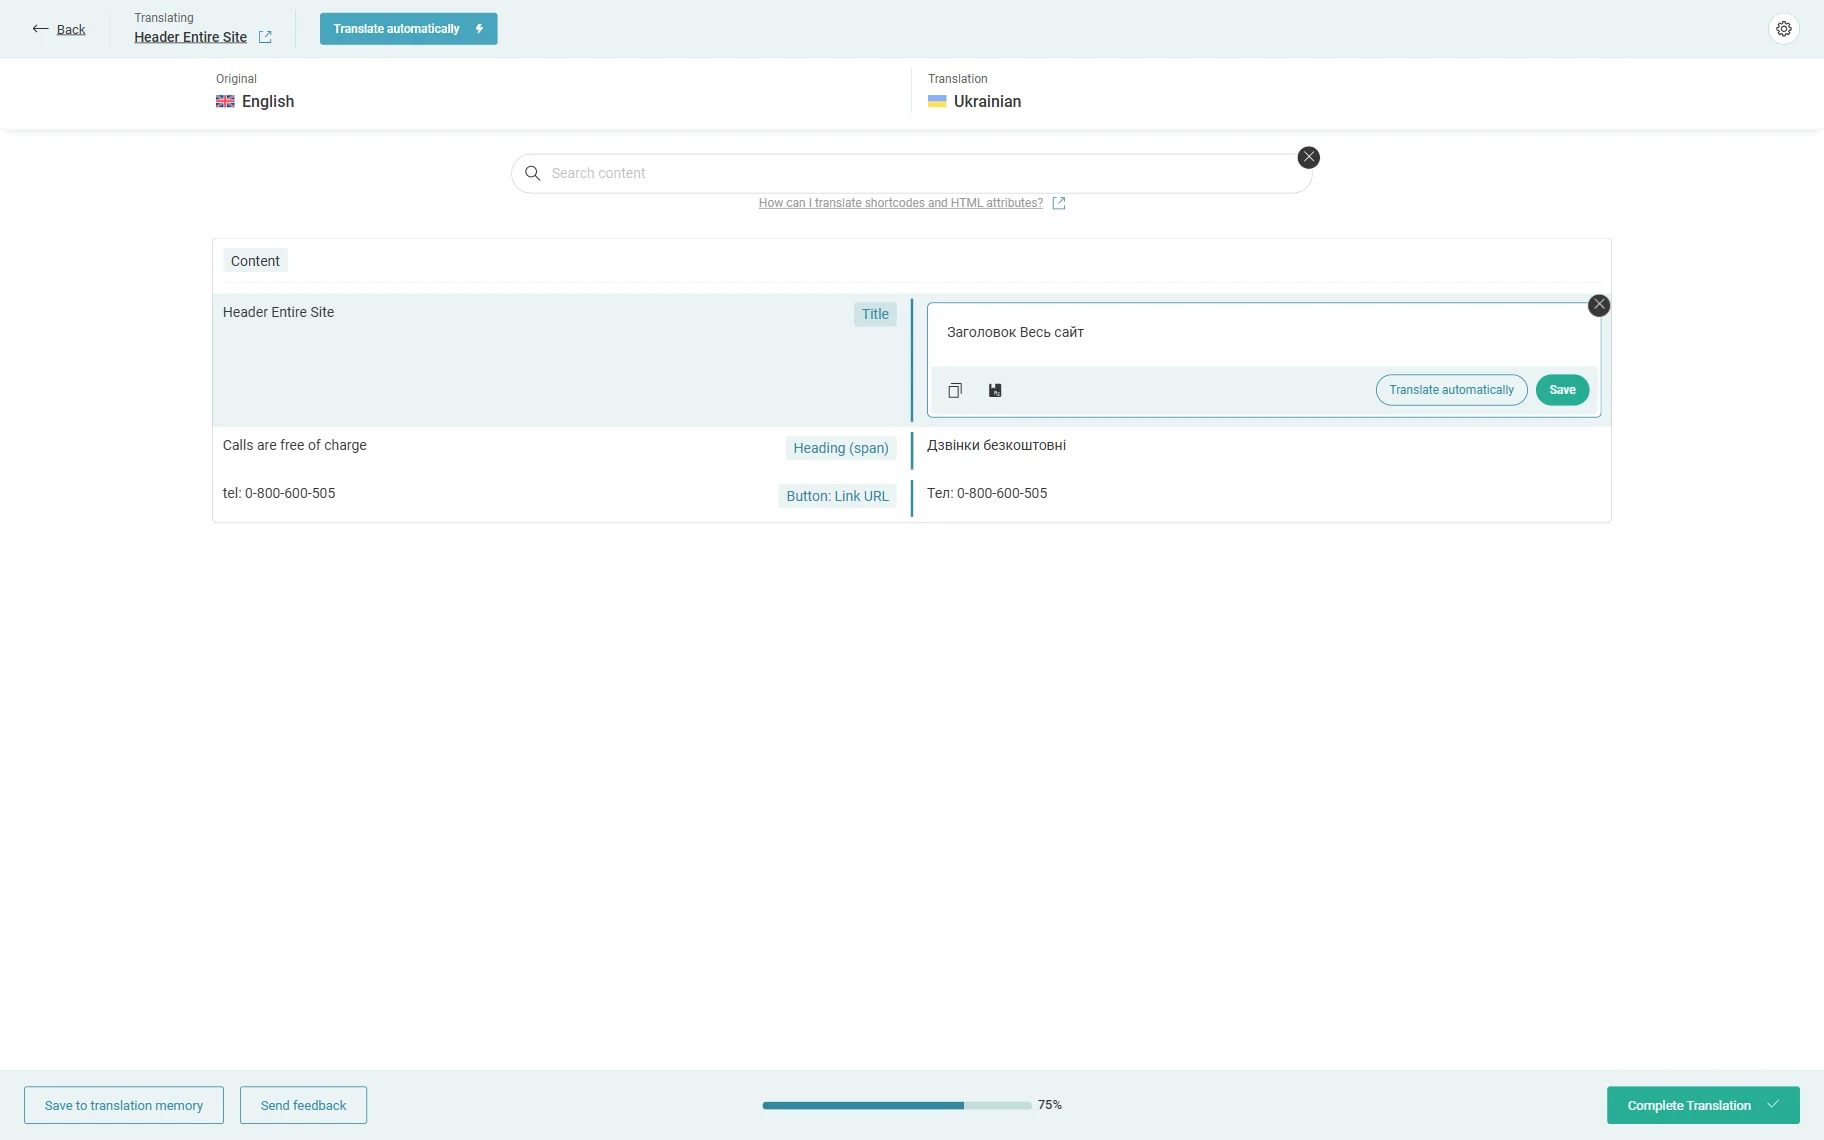
Add the translations as you normally do for a regular page template in the Advanced Translation Editor. Once done, click the “Complete” button.
Repeat the procedure for both header and footer templates.
Synchronize Menus and Links
Follow the WordPress Dashboard > WPML > WP Menus Sync pathway.
Press the “Sync” button to create a secondary-language menu first. Confirm the action by clicking the “Apply changes” button once you see it.
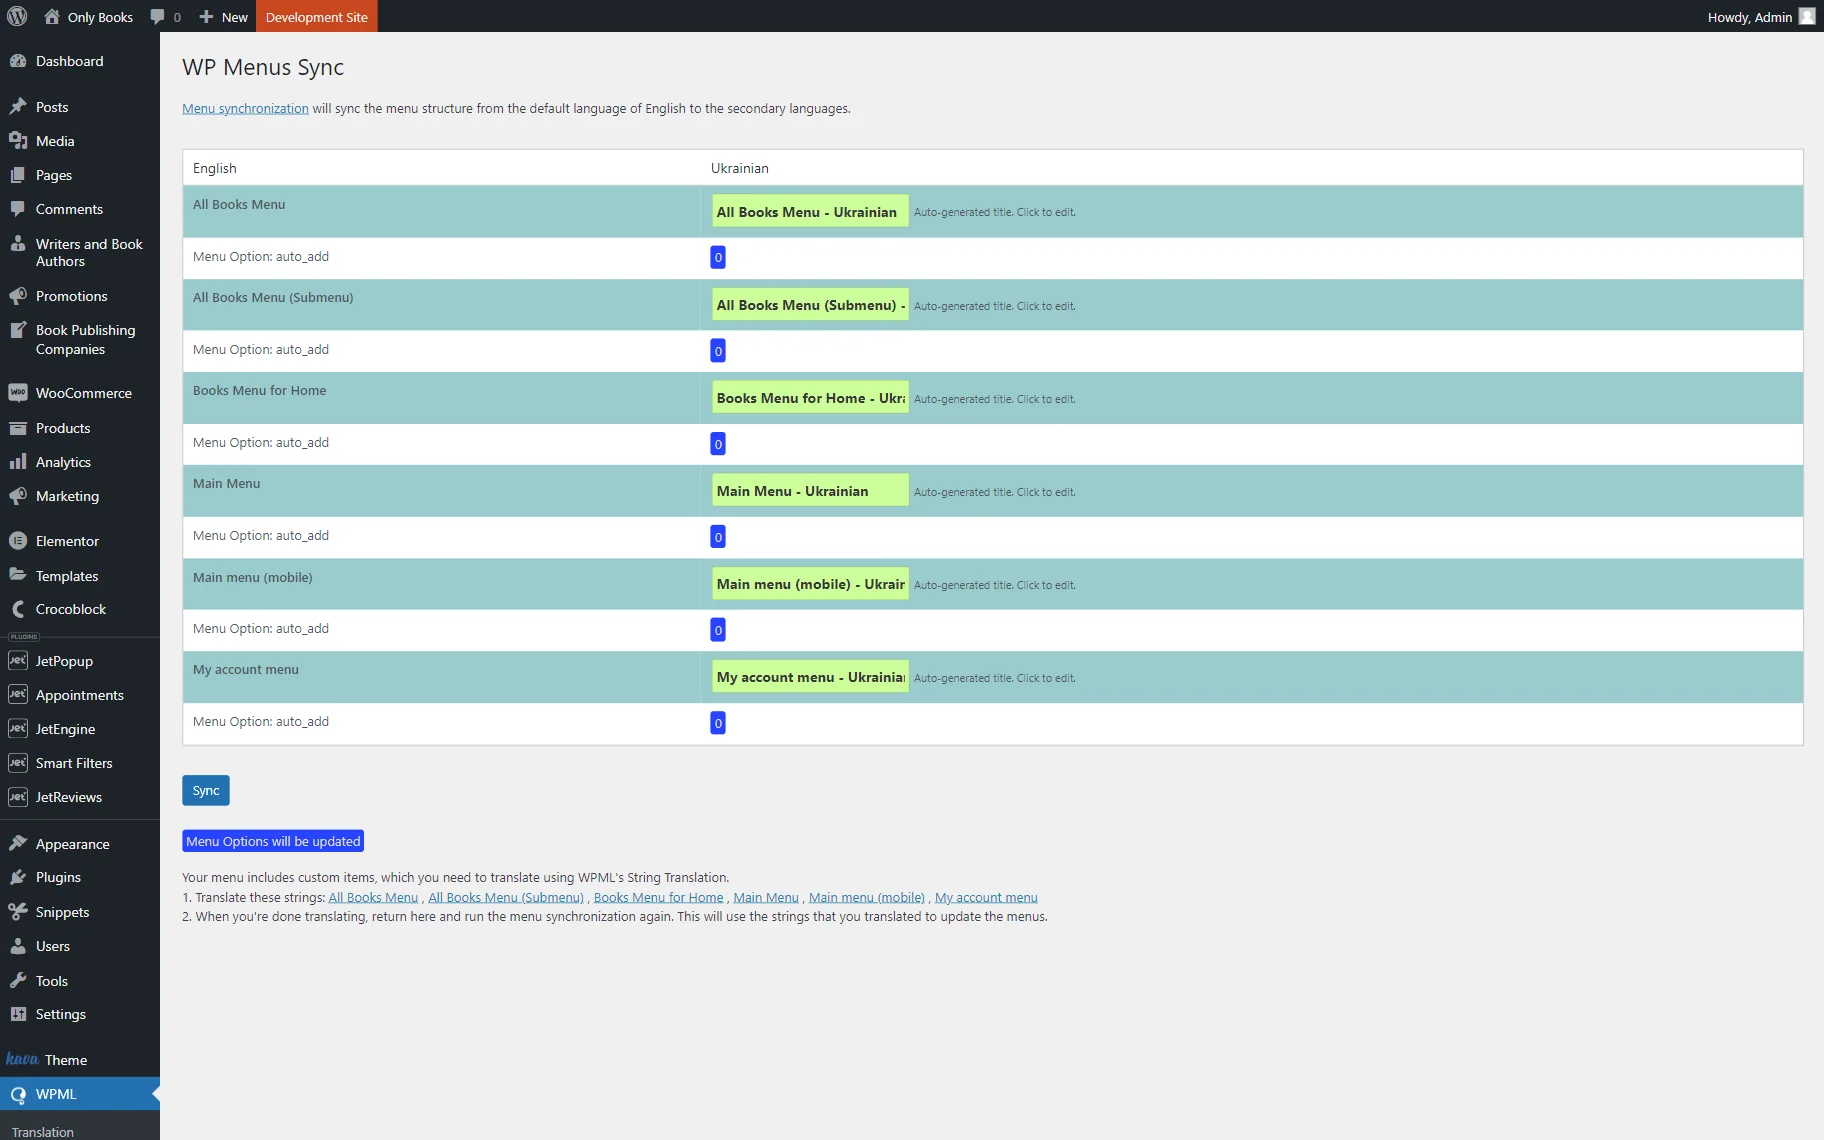
Once done, proceed to translate the menu strings. Below the “Sync” button, there is some additional information. The first point contains a link to the needed menu strings. Clicking it will take you to the String Translations WPML module. Add the missing translations one by one, including links.
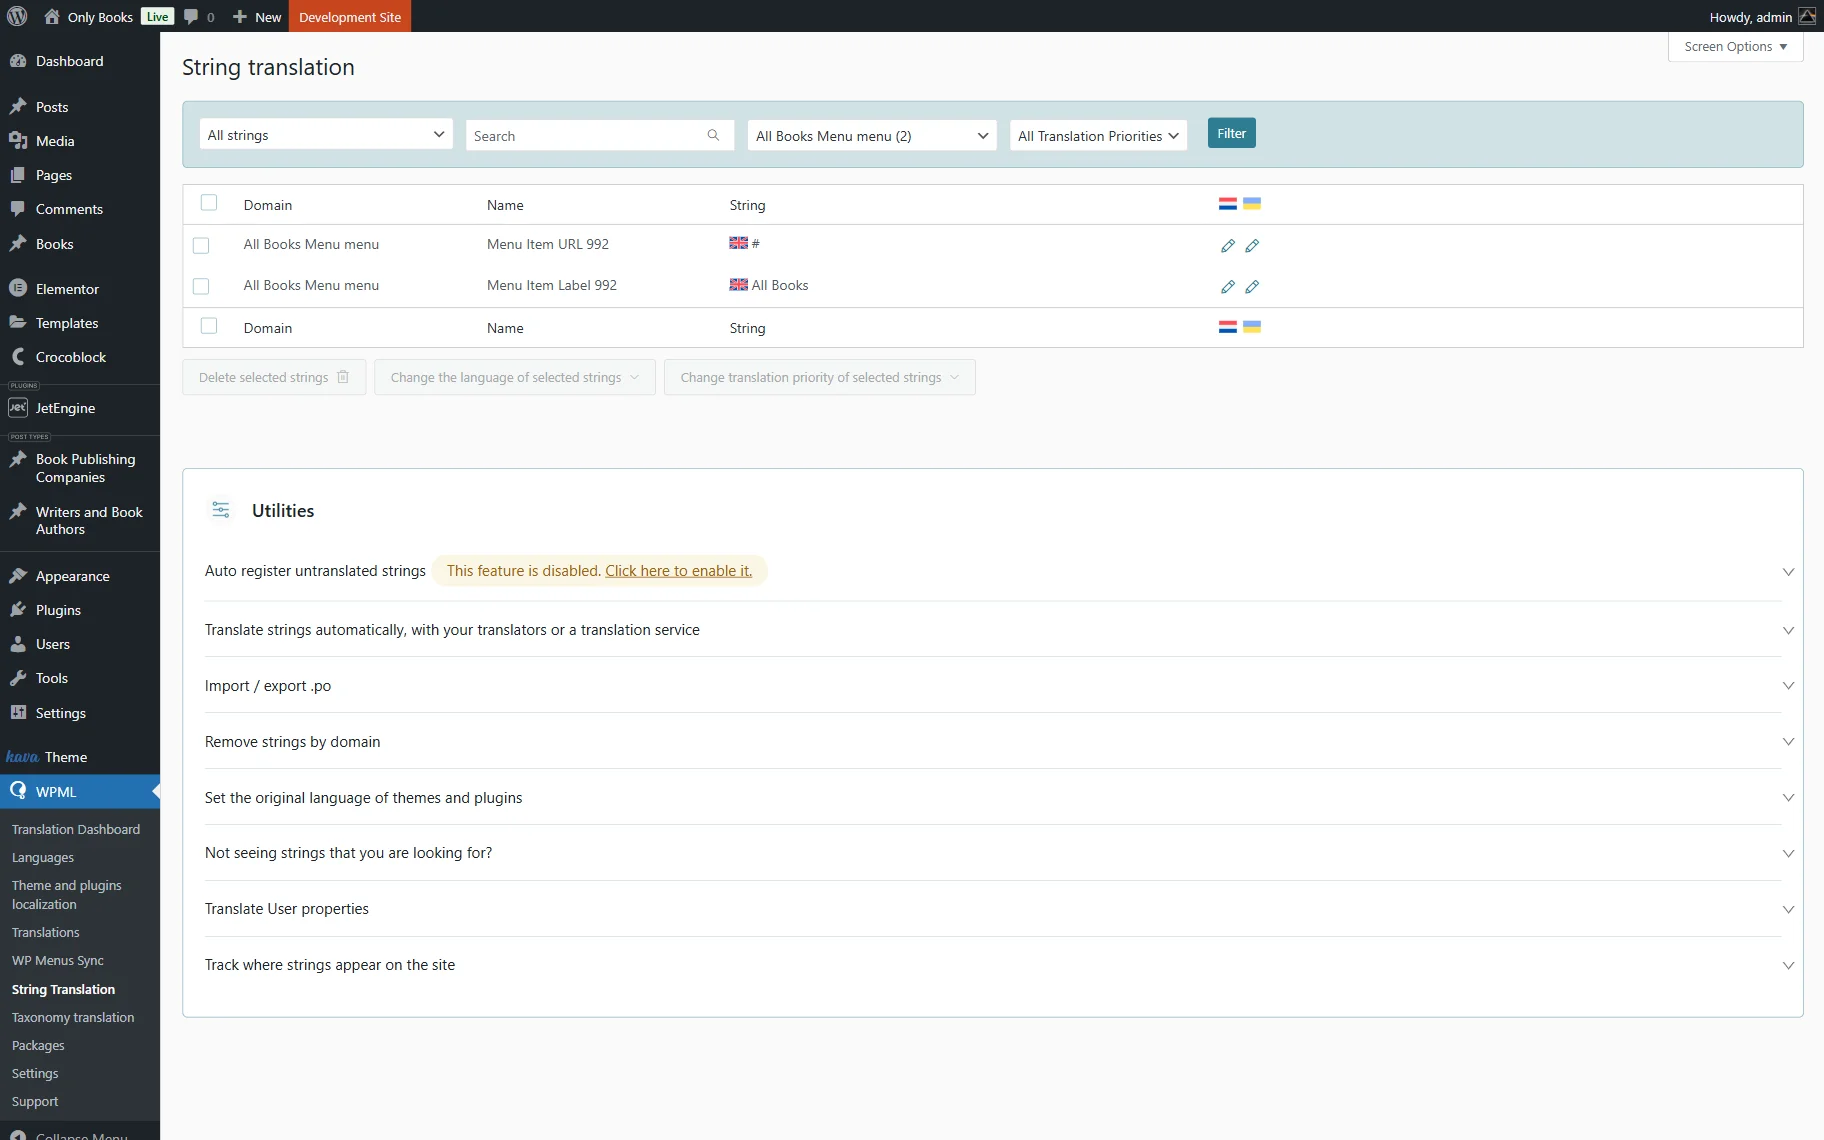
For example, the English URL slug looks like this: /properties/ocean-star-luxury-cottage/. Its Ukrainian counterpart is: /properties-uk/ocean-star-luxury-cottage/?lang=uk.
When you finish translating the menu strings, return to the WP Menus Sync tab. You will see that secondary-language translations are now available. Press the “Sync” and “Apply changes” buttons again to finalize the menu translation process.
Also, check our How to Make a JetEngine-Built Website Multilingual guide to find out more about the WPML and JetEngine integration.
That’s all about setting up a language-based header and footer for JetEngine dynamically generated pages on your WordPress website.