How to Use JetEngine Query Builder with Bricks Query Loop
In this tutorial, we will show how to create a Bricks template with a Query Loop that uses JetEngine Query Builder as a source.
Before you start, check the tutorial requirements:
- Bricks theme installed and activated
- JetEngine plugin installed and activated
This custom query setup for Bricks and JetEngine allows displaying only specific items dynamically based on the configured query conditions.
Using JetEngine Query Builder instead of the native Bricks query options is also important for compatibility with other JetPlugins features, such as JetSmartFilters, custom queries, pagination, and Load More functionality.
As an example, we will create a “Posts” query that outputs only the “full-time” vacancies and display them in a Bricks template together with the “salary” meta field.
Activate Post Types
Initially, make sure that the needed Post Types that you want to display in the Query Loop are enabled in the WordPress Dashboard > Bricks > Settings directory. For example, we need the “Jobs (Vacancies)” Custom Post Types to be activated.
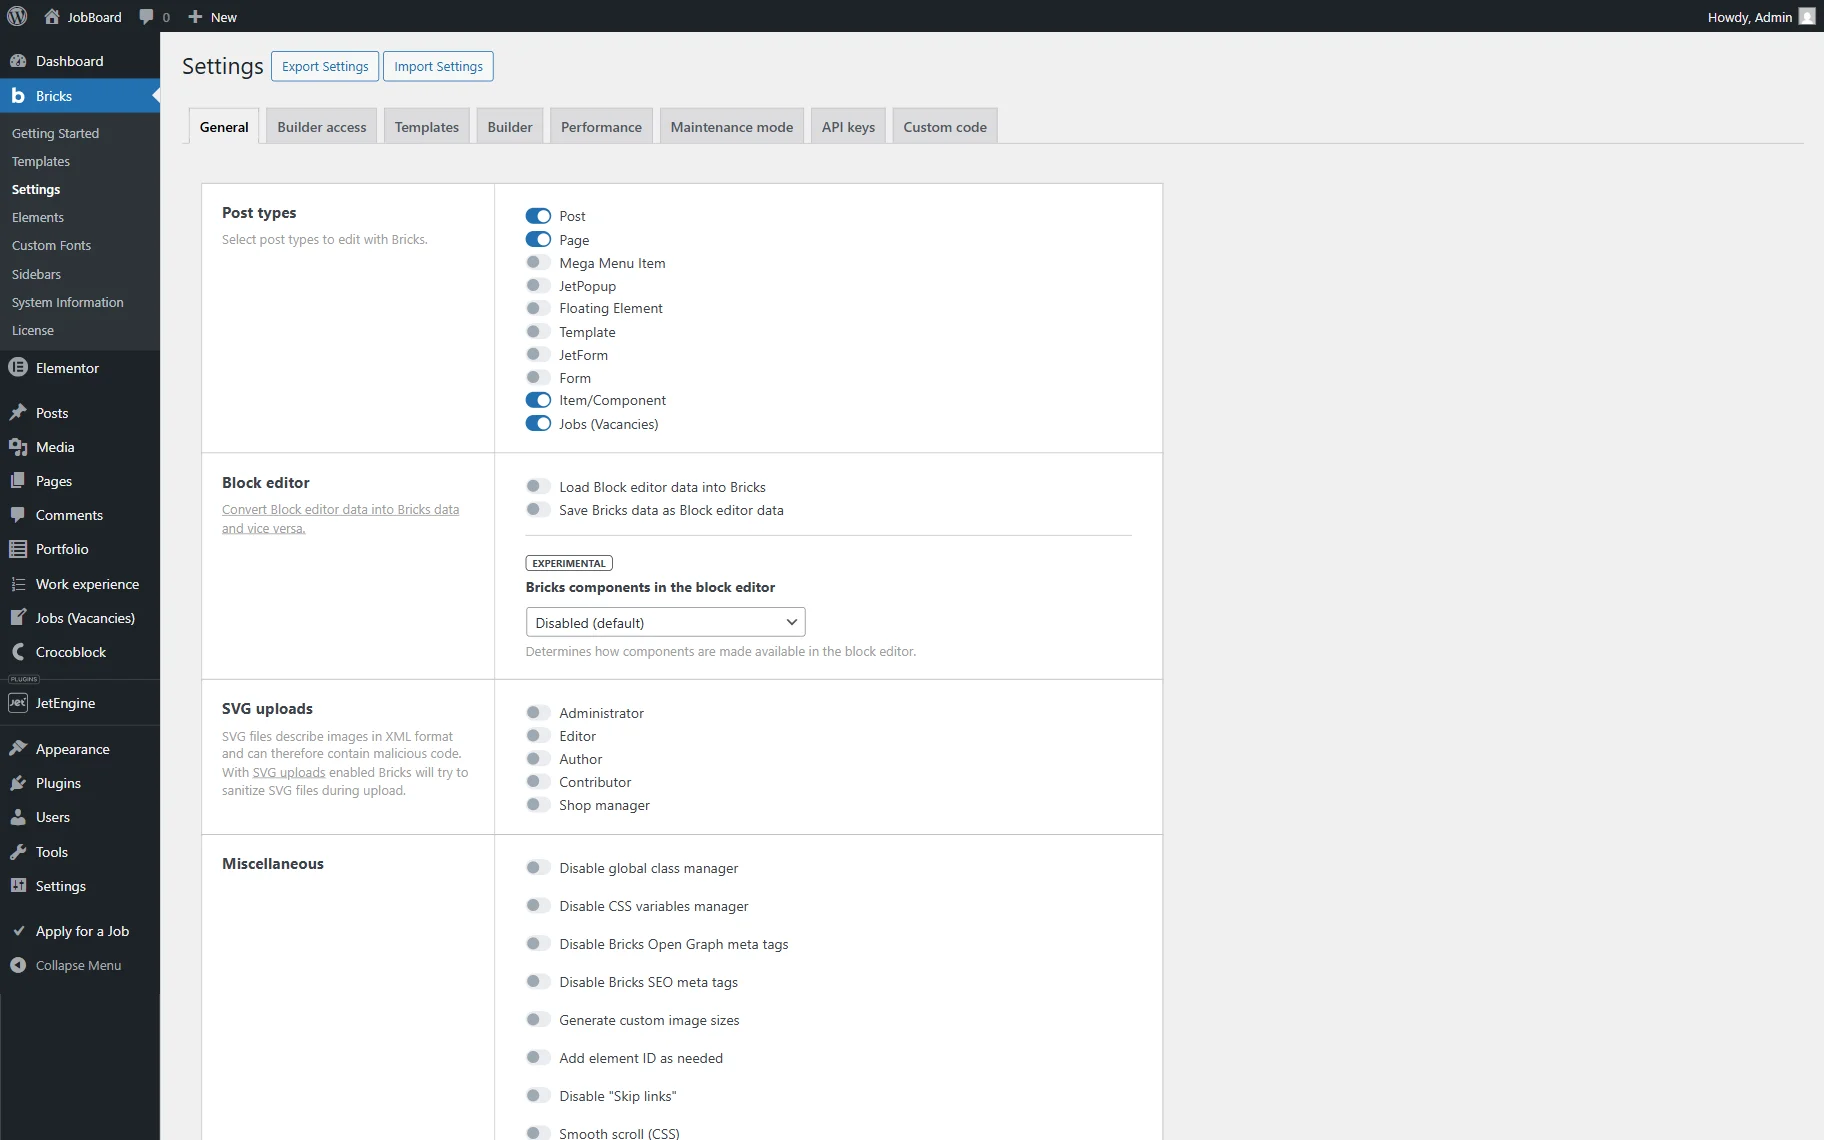
Don’t forget ot press the “Save Settings” button below.
Build a Query
In this example, we will create a custom query in JetEngine for the Bricks Query Loop. Go to WordPress Dashboard > JetEngine > Query Builder and hit “Add New.”
When the new query editor is opened, enter the query’s Name. In our case, “Full-time job query.”
Then, select the needed Query Type. In this guide, we will use “Posts Query.”

Scrolling down to the Posts Query section, we pick the “Jobs (Vacancies)” Post Type in the General tab.
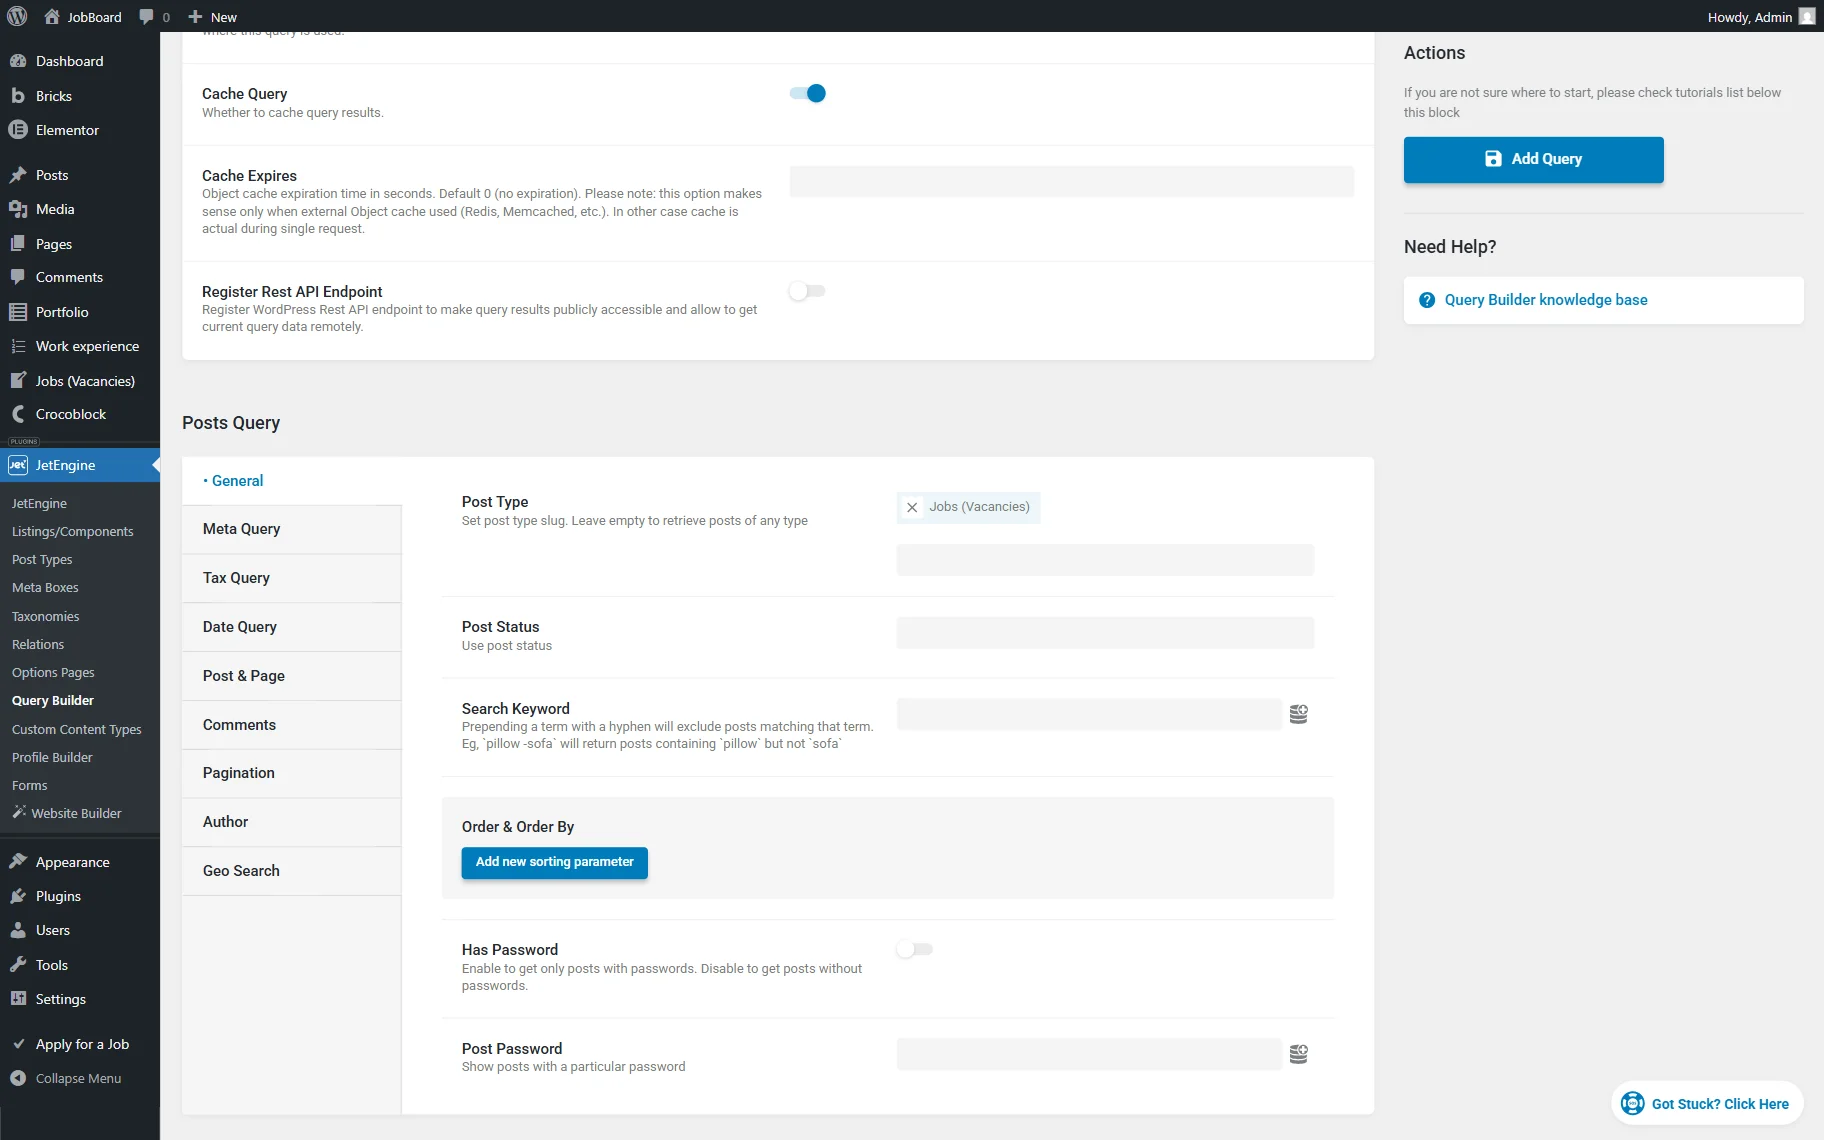
Then, we open the Tax Query tab and press the “Add new” button.
We want to filter the posts by the term of the “Vacancy Type” taxonomy, so we select it in the Taxonomy field.
After that, we select the “Slug” option as the Field so the query will search posts by the taxonomy term slug. Then, we specify the slug itself (“full-time”) in the Terms field.
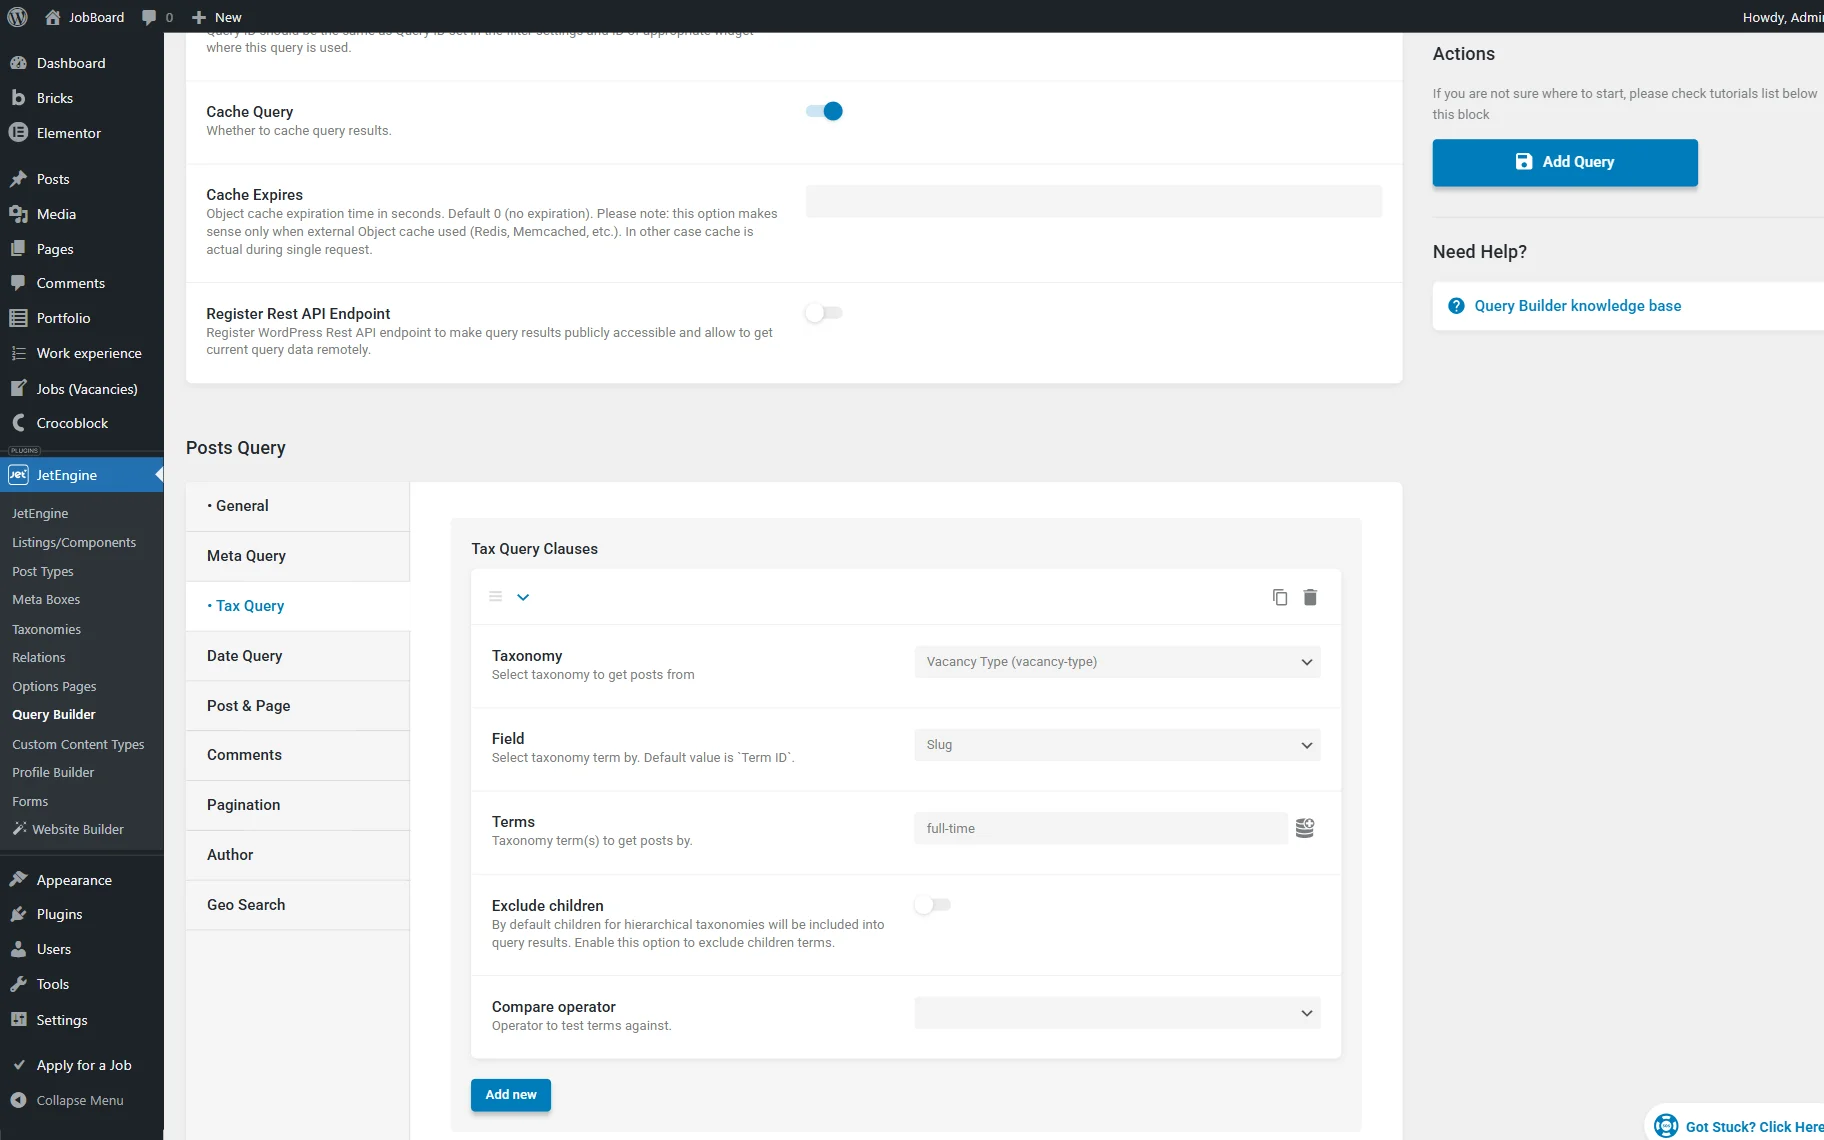
That’s all for our query customization. Make other customizations, and when ready, press the “Add Query” button.
Create a Template
It’s time to build a template with the Query Loop. So, open the WordPress Dashboard > Bricks > Templates directory and press the “Add New Template” button.
Enter the title and select the needed template type (for example, “Section”). Once done, open the template in the editor.
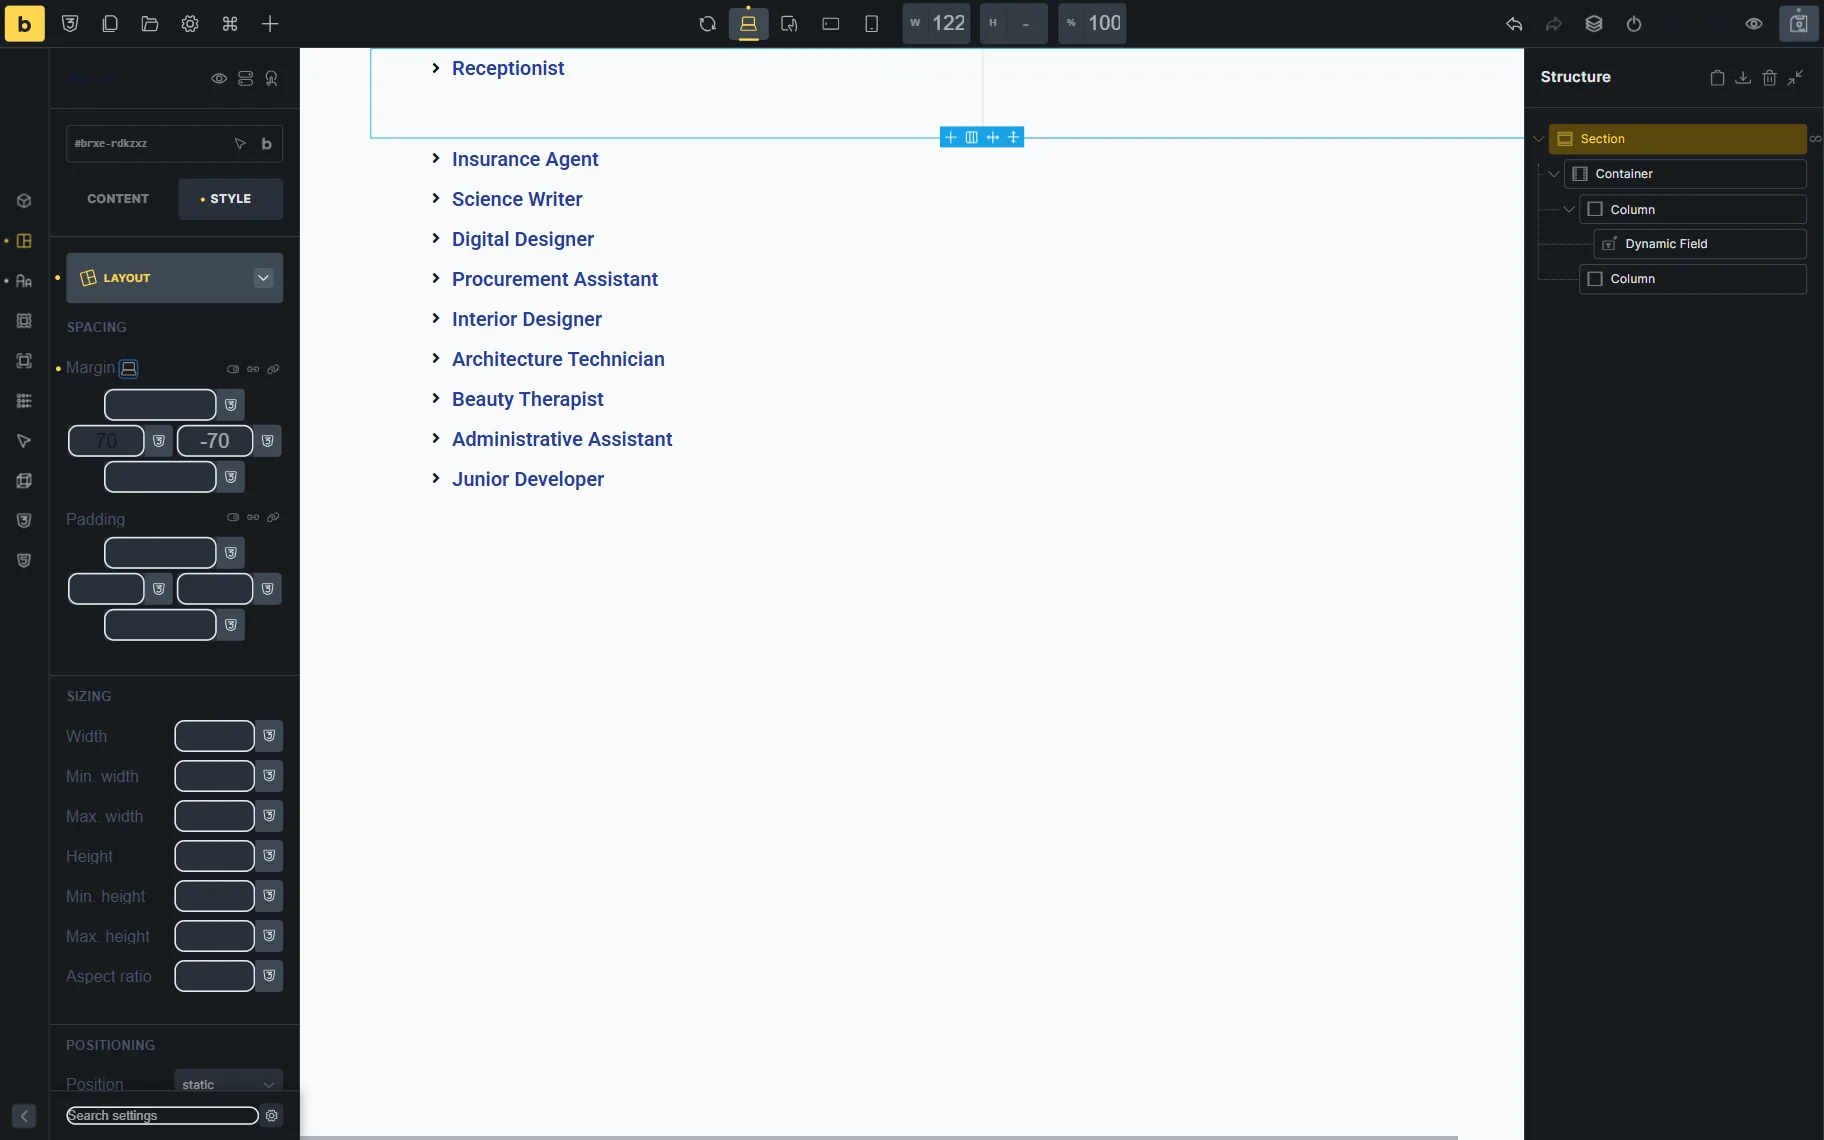
In the Bricks editor, first, we add a two-column layout.
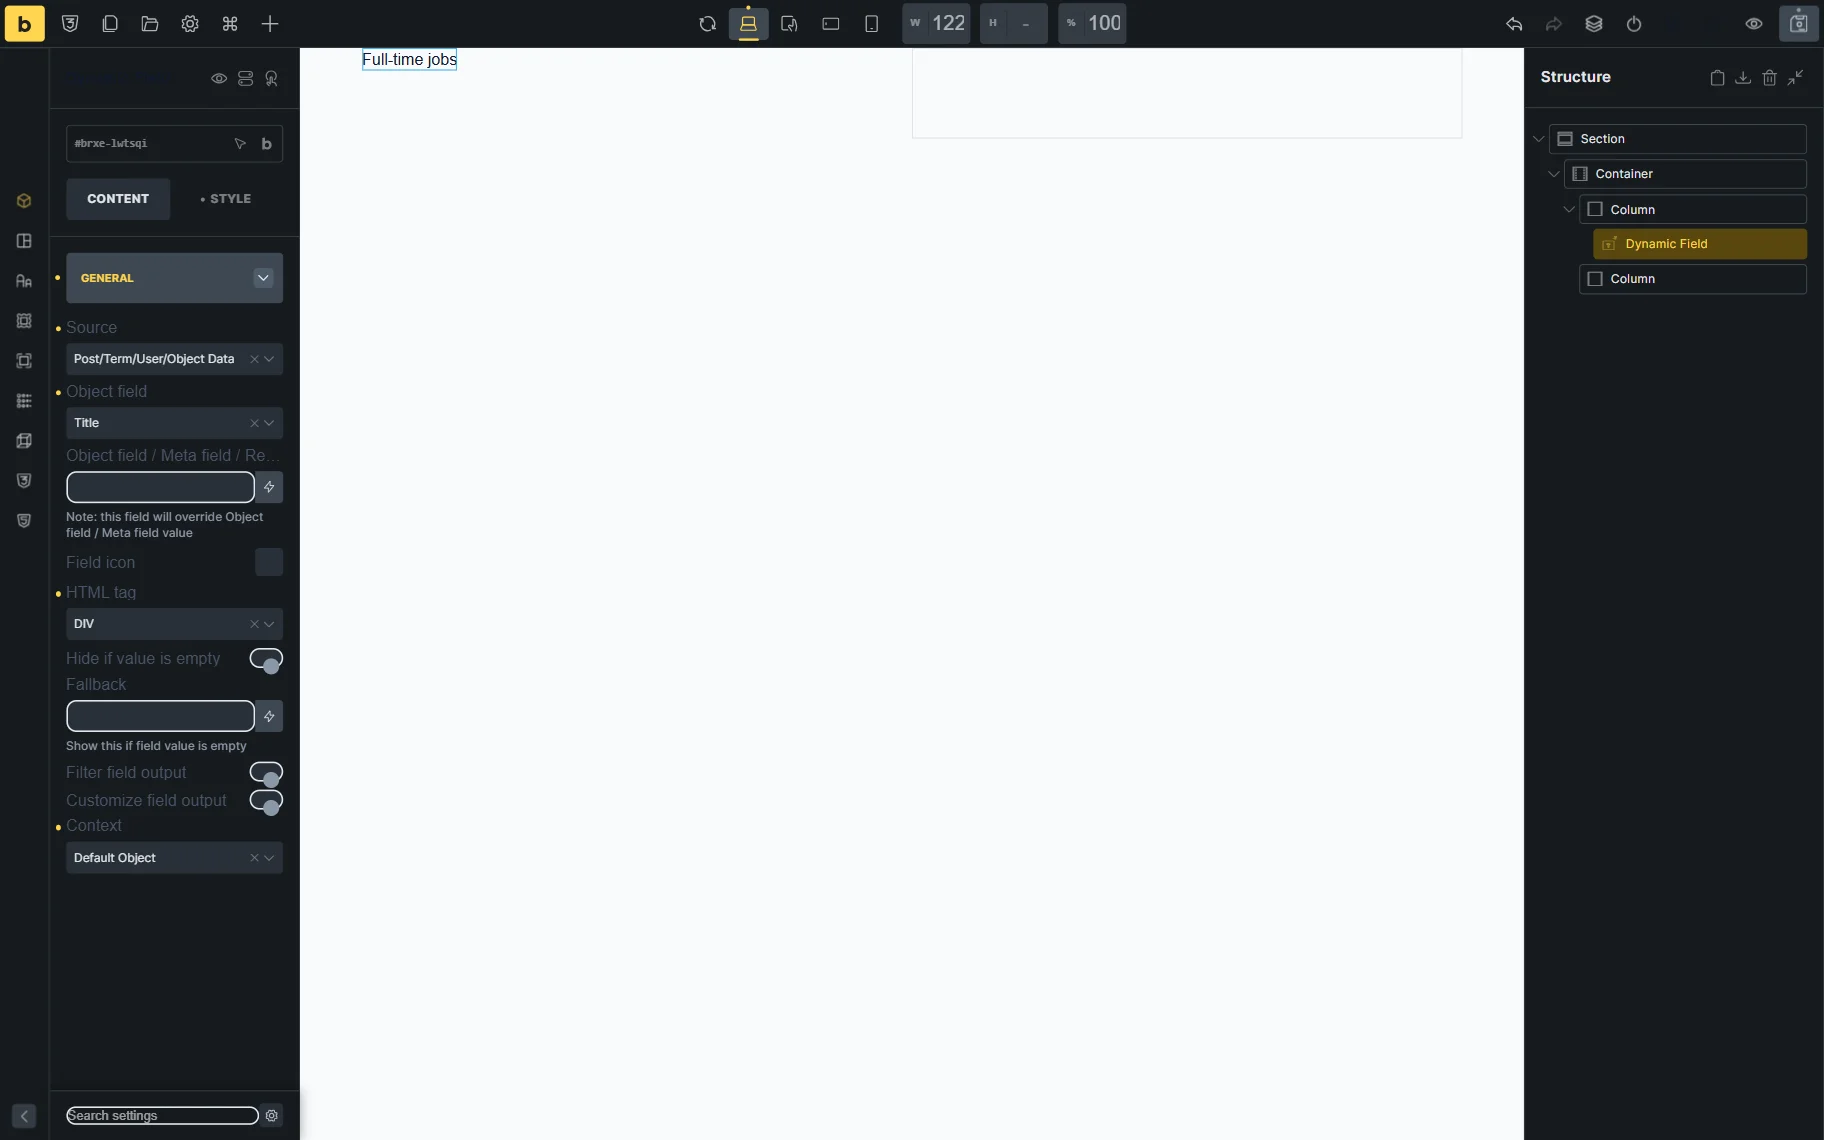
In the first column, we add a Dynamic Field element. We leave the default “Post/Term/User/Option Data” Source and the “Title” Object Field. This way, you will now see the page’s title, but it will be changed once we select our query in the further steps.
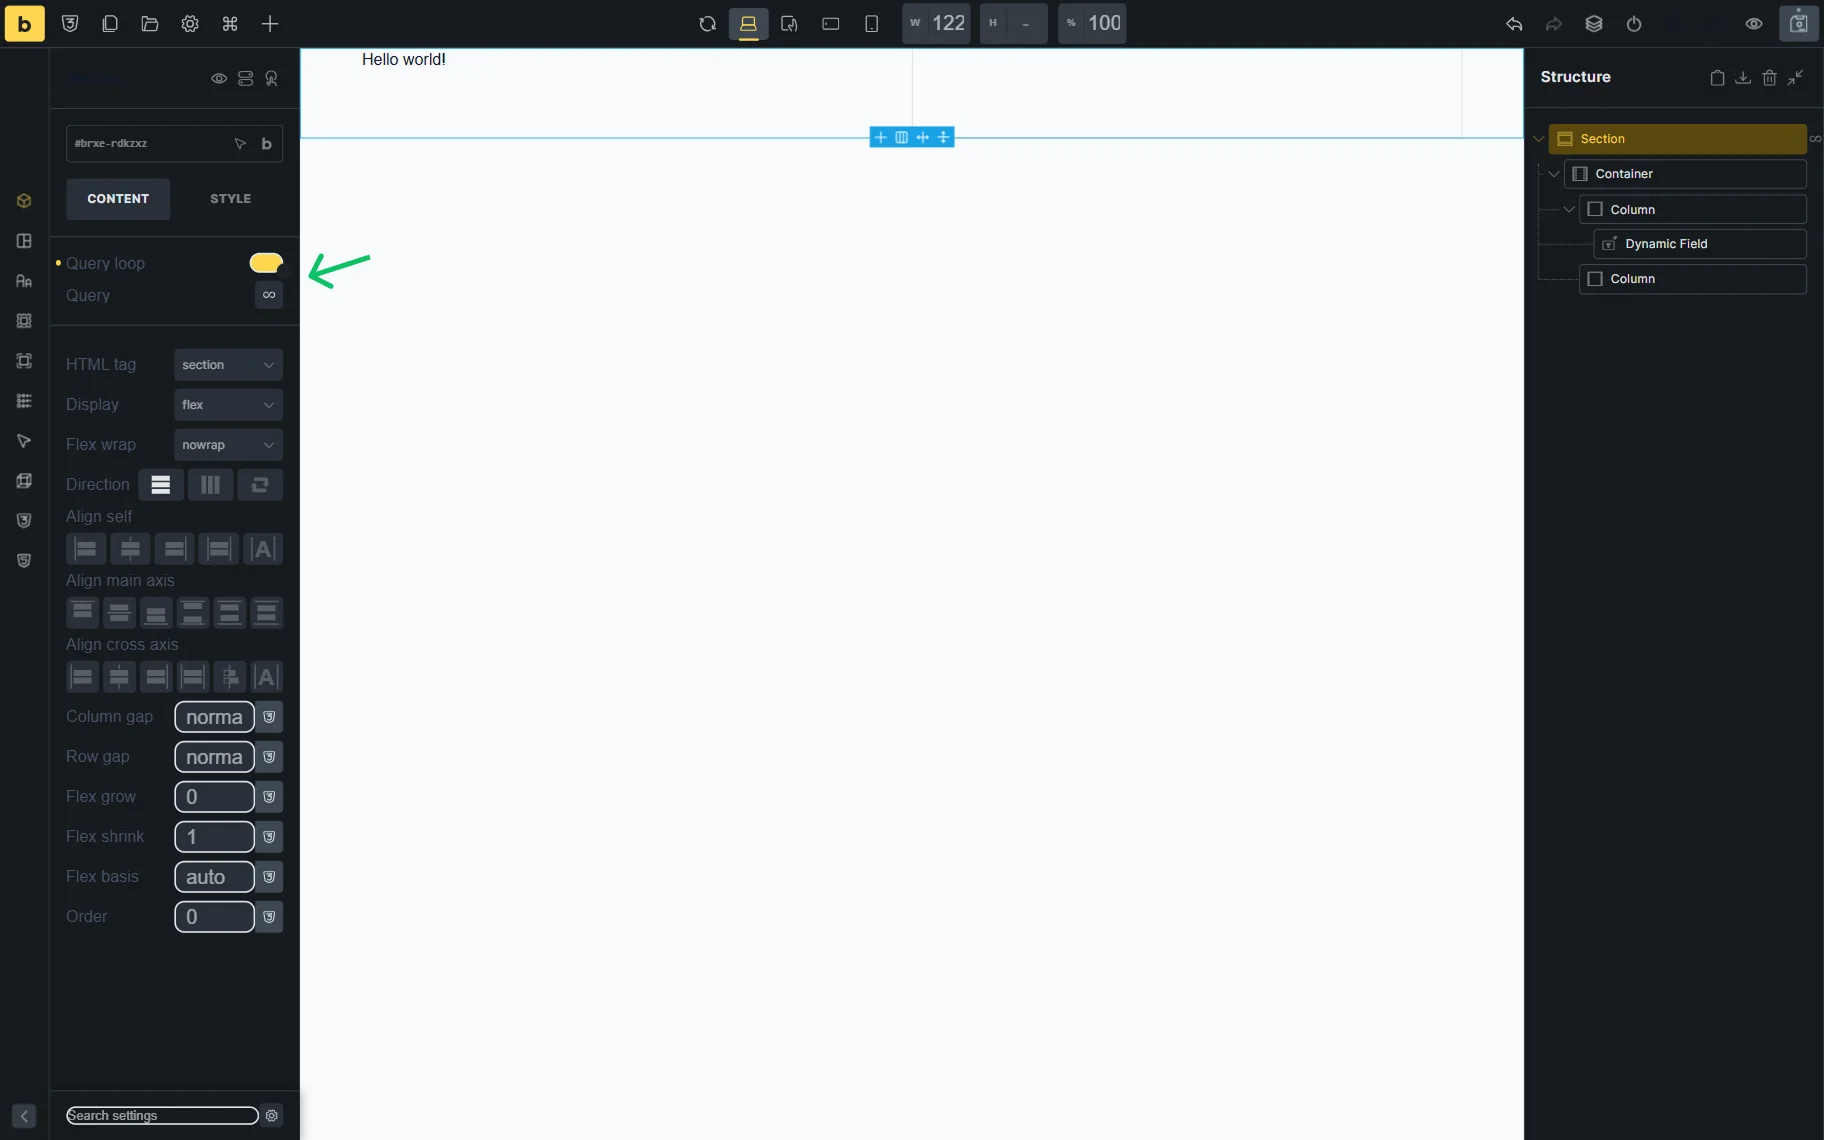
For this, click on the Section to see its settings.
Here, activate the Bricks Query Loop toggle and press the “infinity” sign next to the Query field.
In the opened pop-up, select the “JetEngine Query Builder” Type to use the custom query in Bricks. This ensures compatibility with JetSmartFilters, sorting, and “Load More” features.
Then click outside the pop-up to close it.
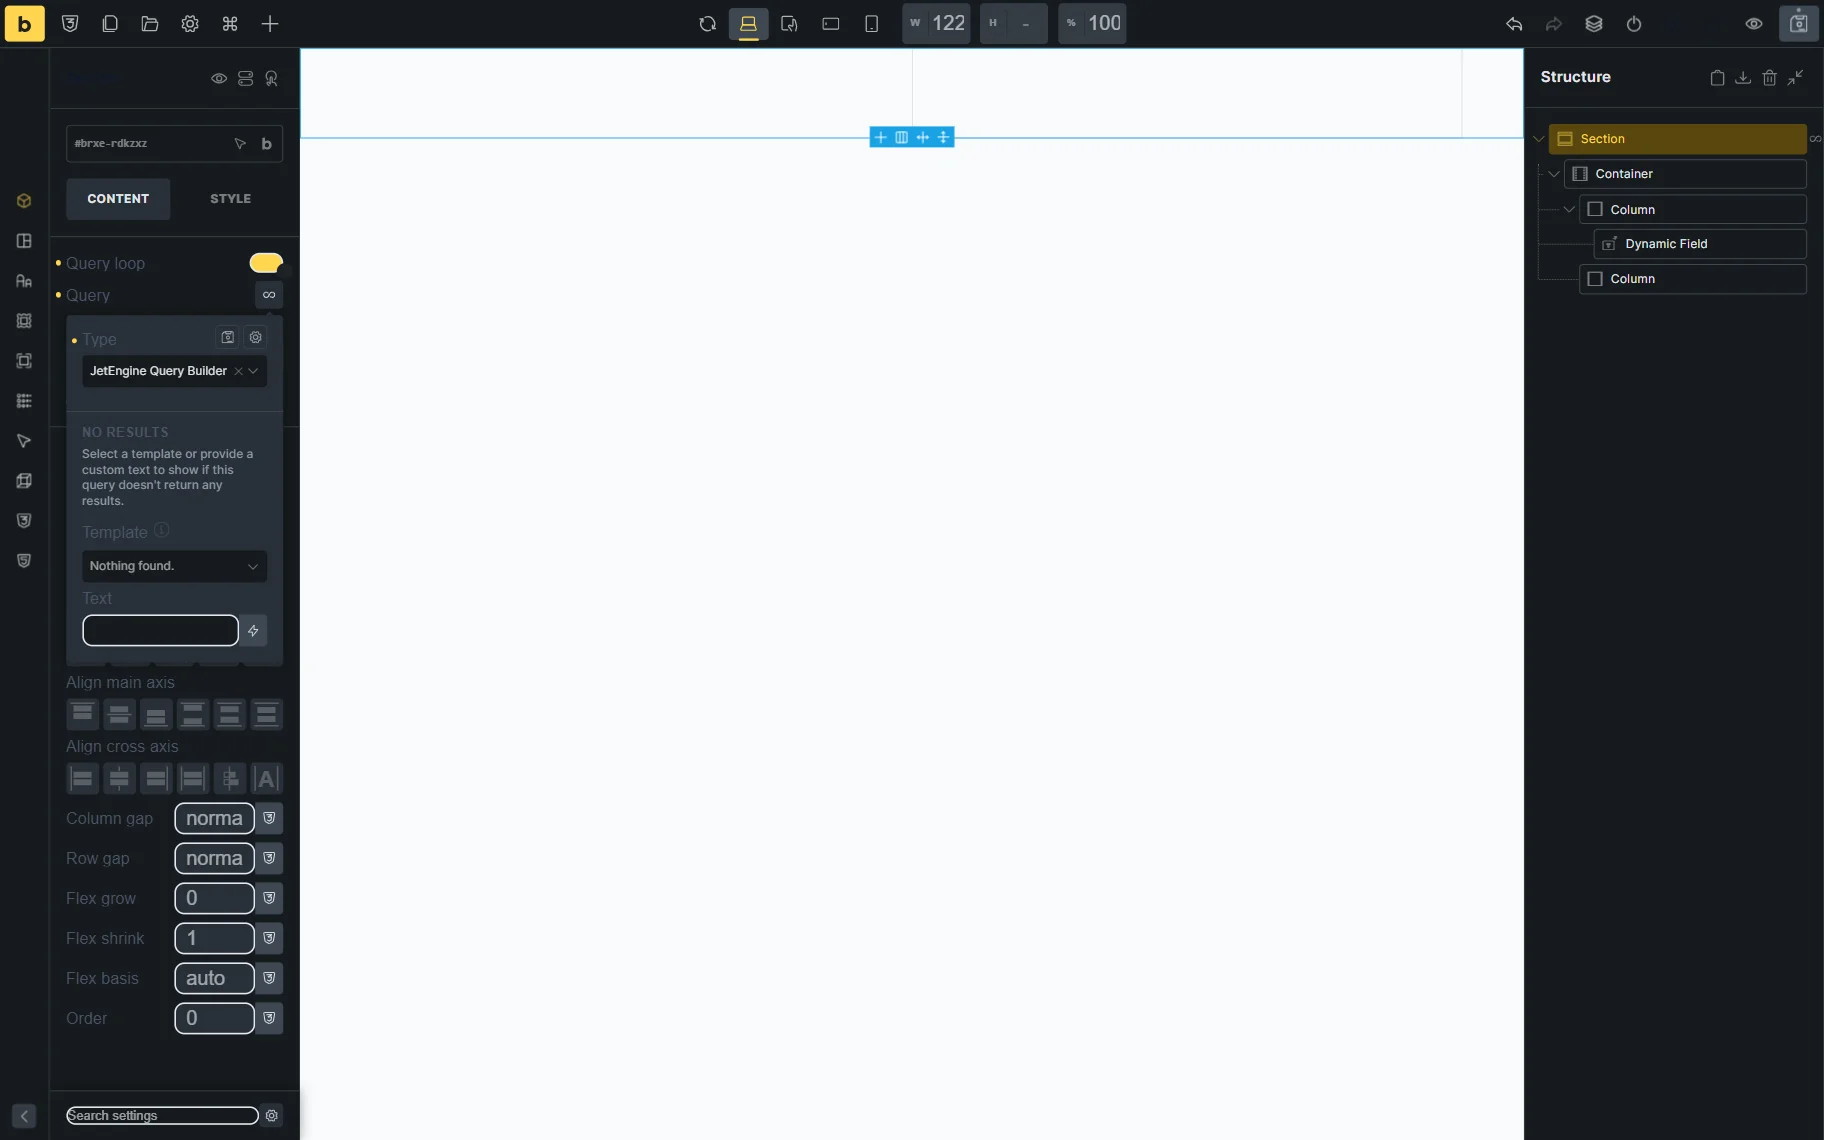
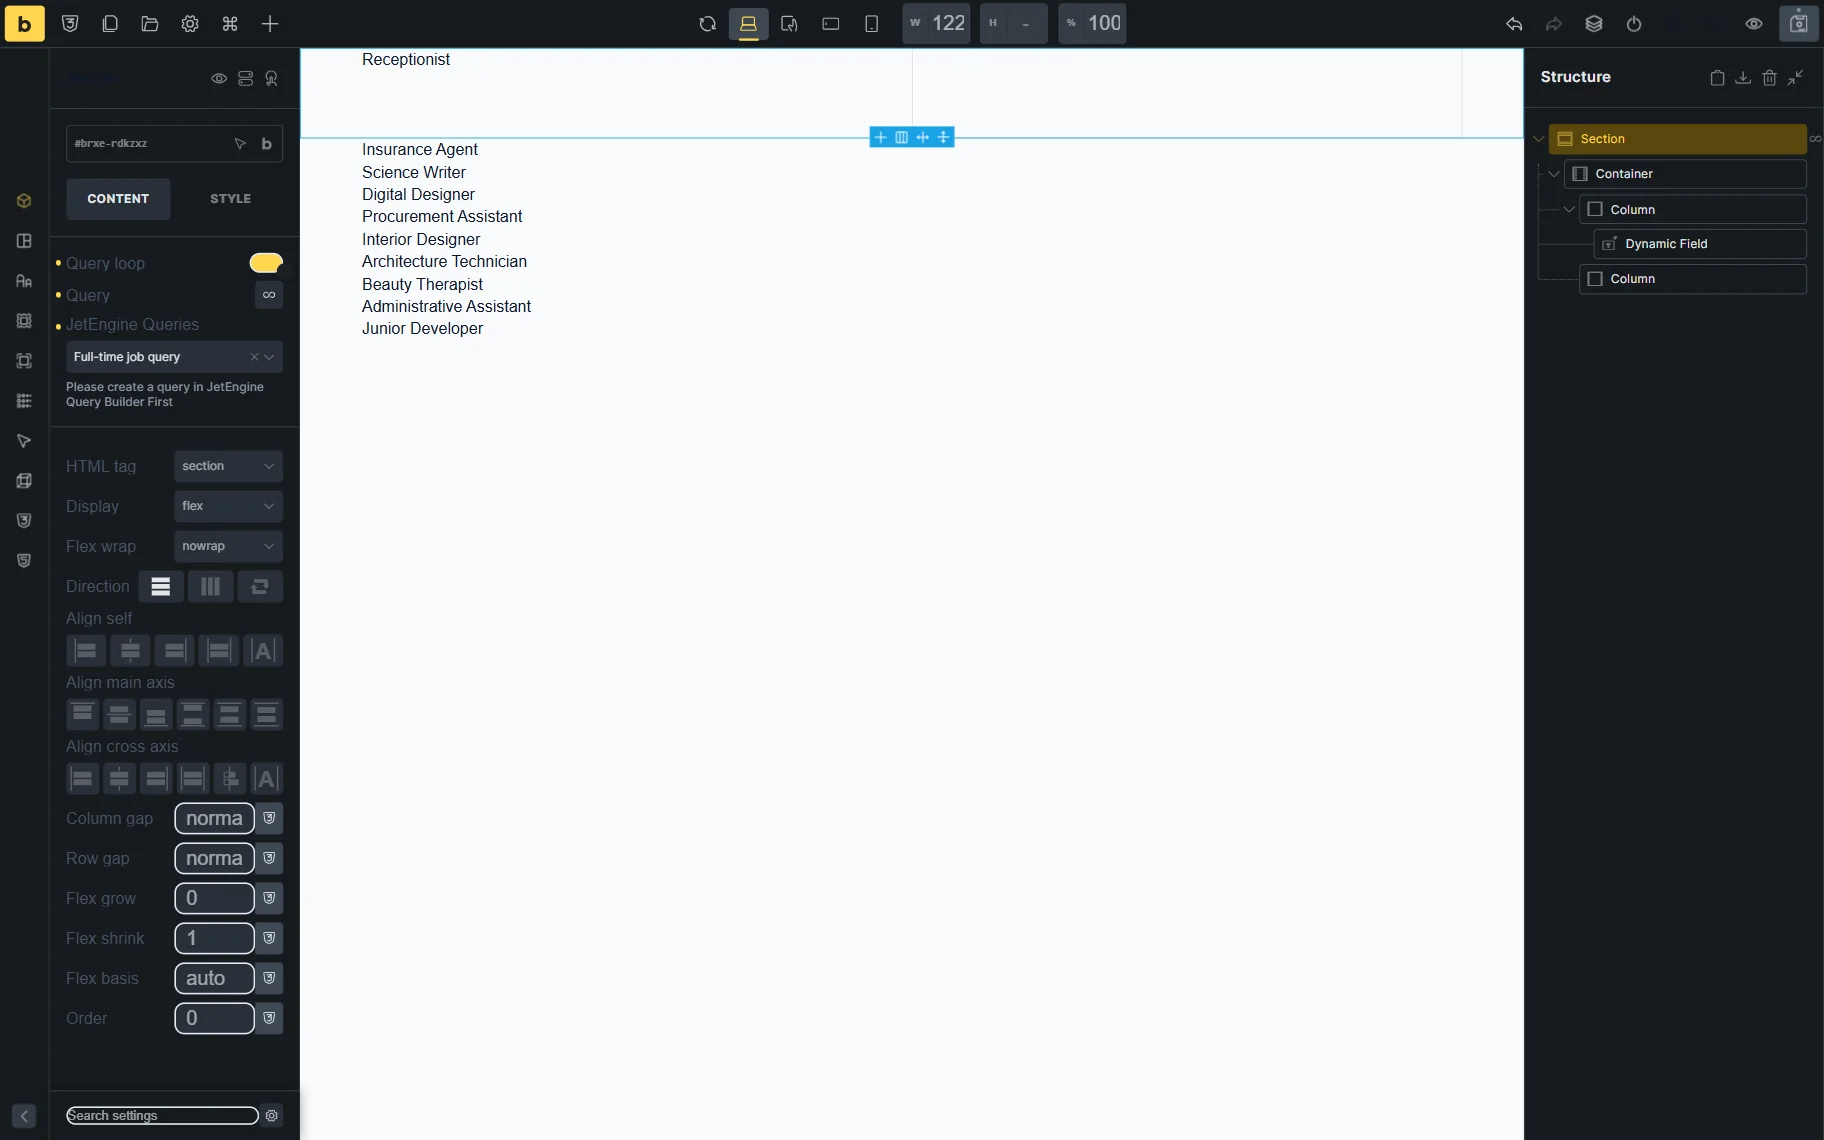
In the JetEngine Queries field, select the query you have built earlier. In our case, it’s “Full-time jobs query.”
After selecting the query, the queried items will appear in the editor preview.
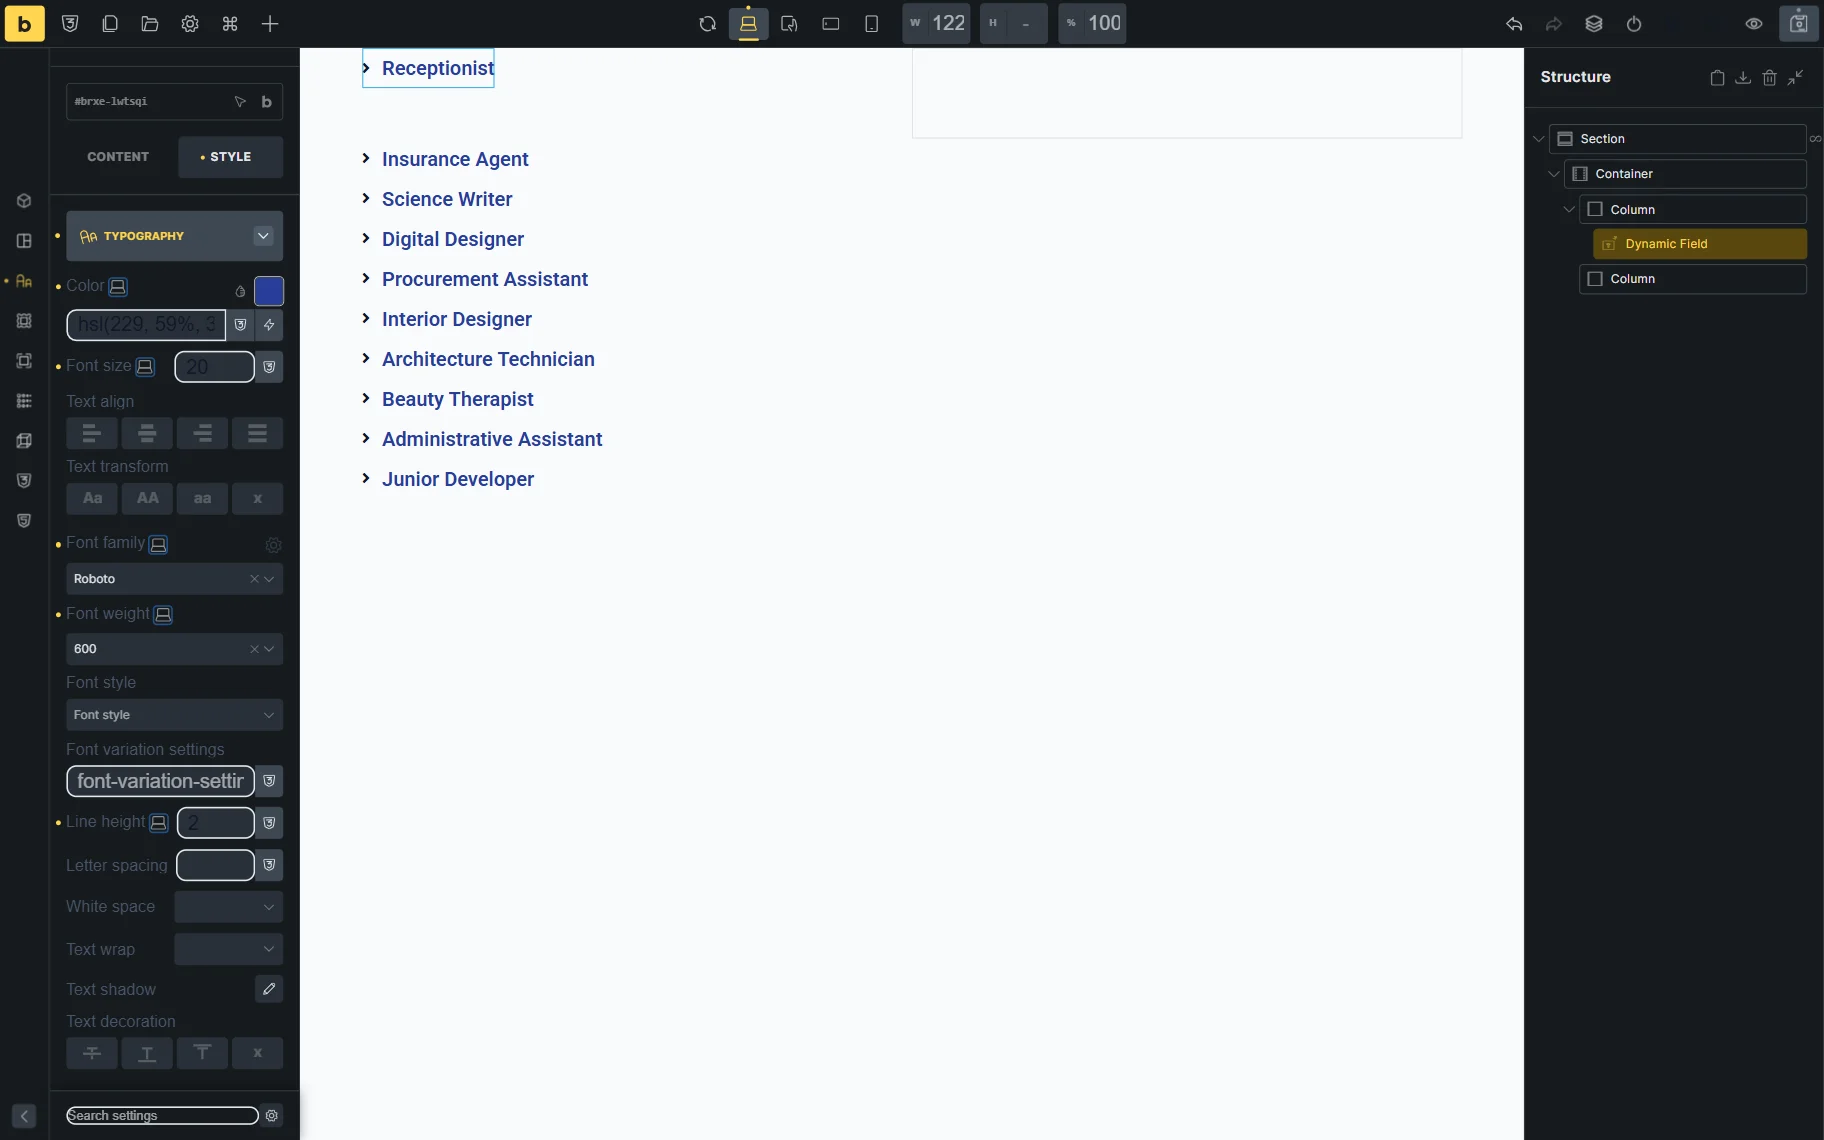
You can switch to the STYLE tab of the element settings to make some changes to the element’s style if needed.
We also change the Margin settings of the section.
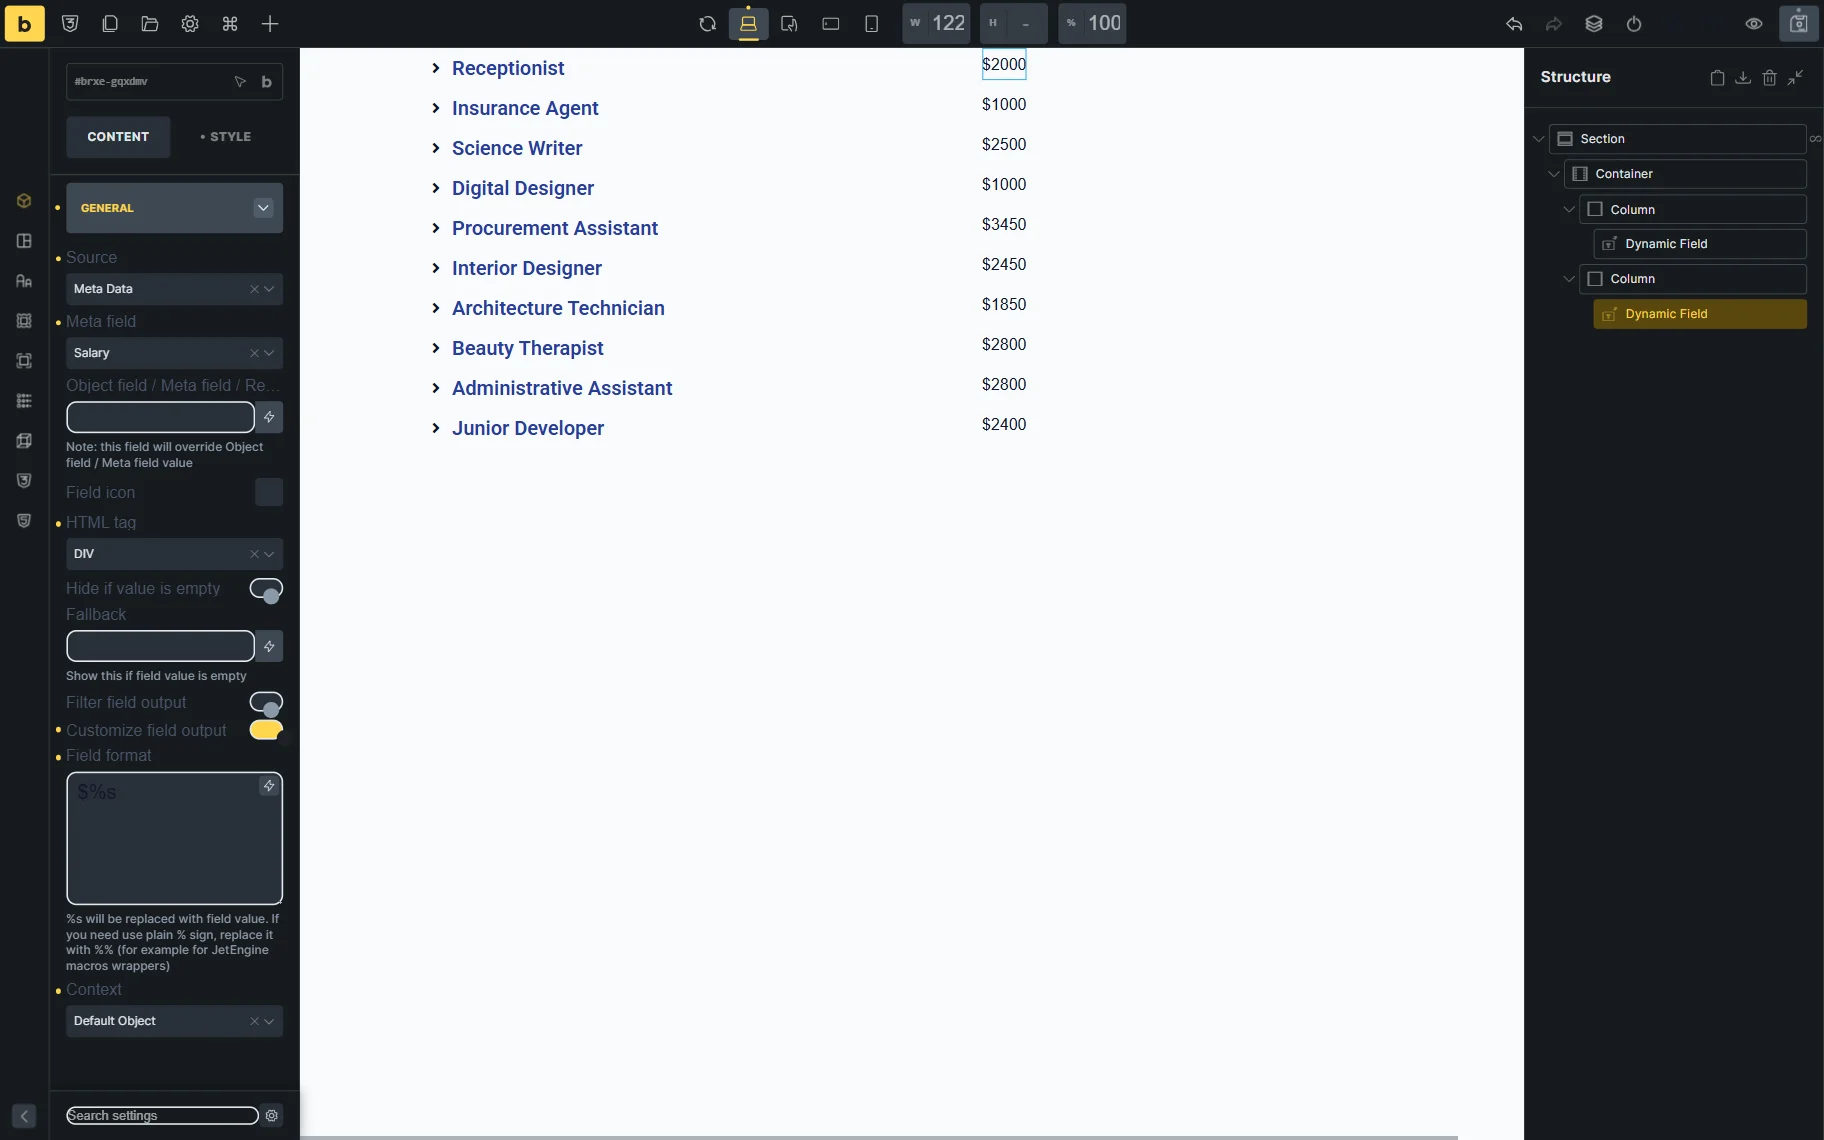
Moving to the second column, we add another Dynamic Field here. This time, the Source is set to “Meta Data” and the Meta Field to “salary.” This is a JetEngine meta field that stores the salary of the offered vacancies.
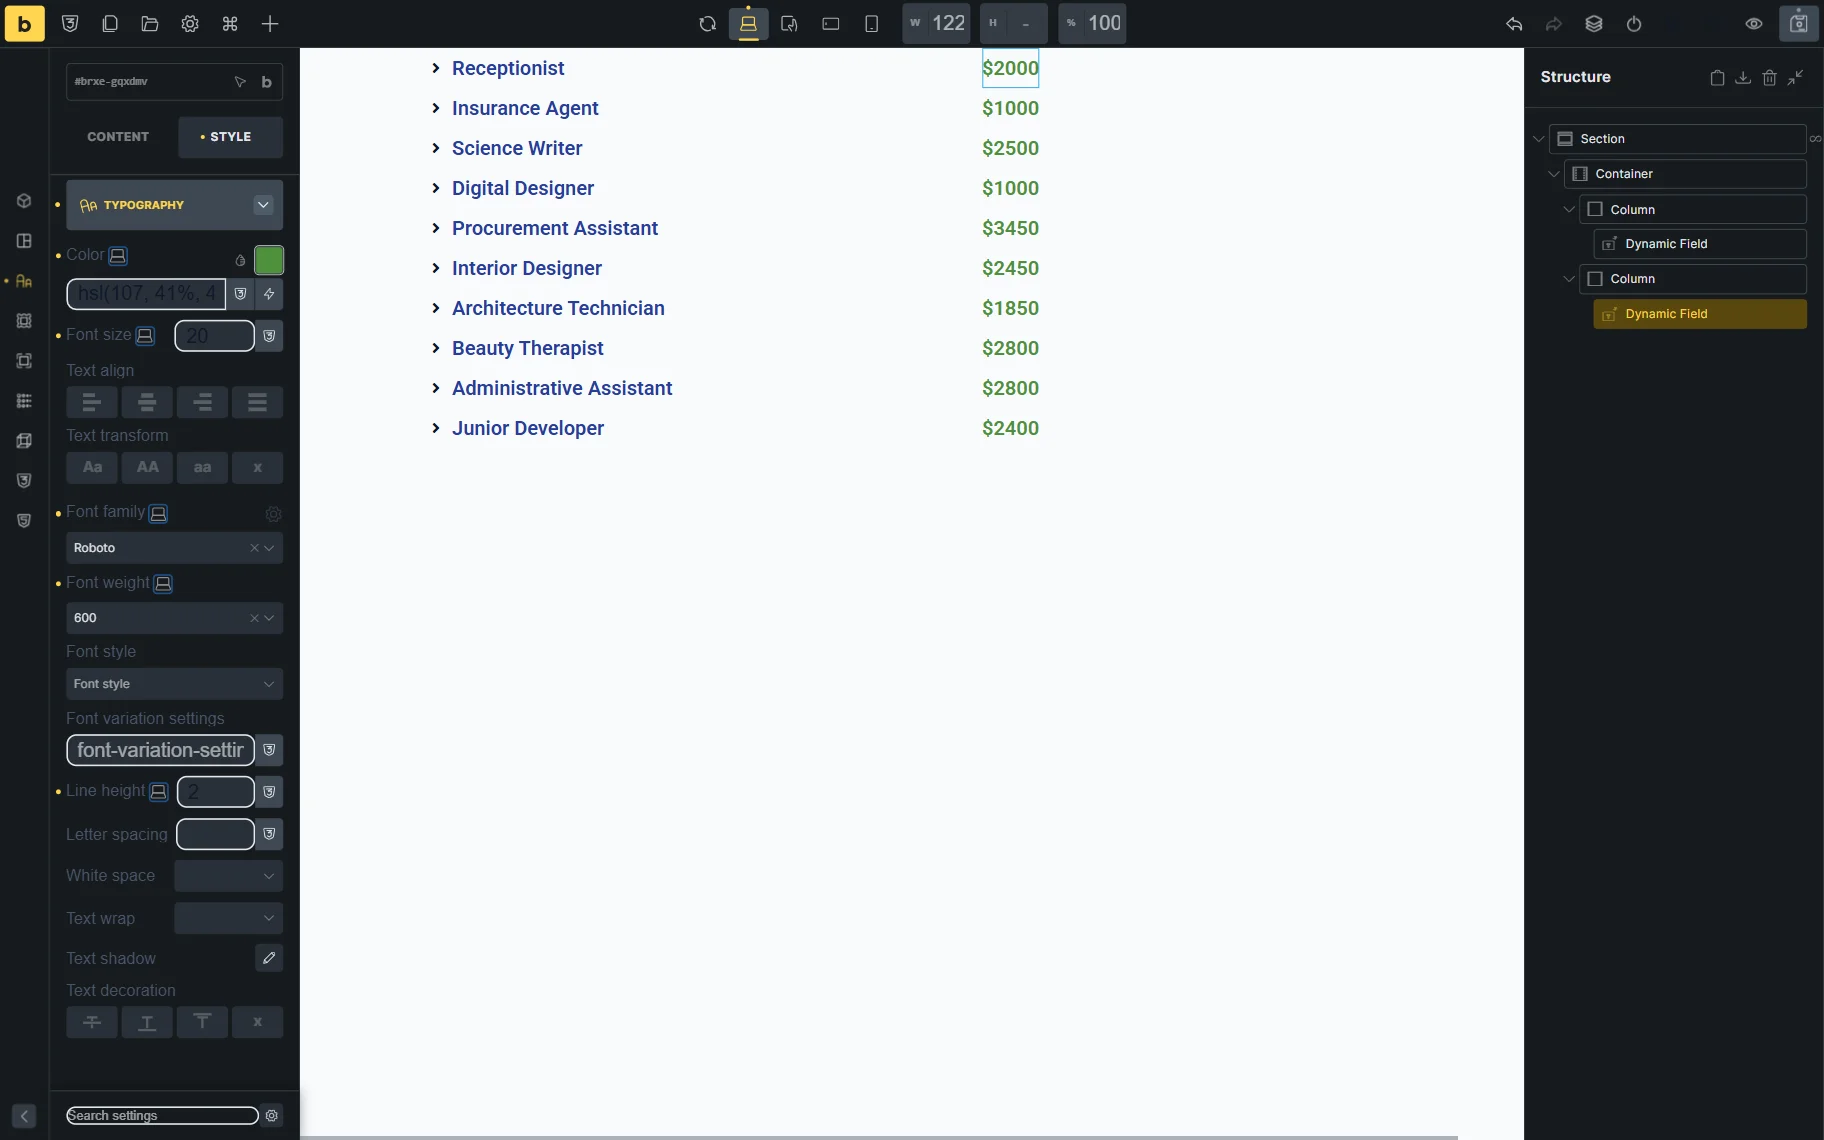
We also work on the STYLE settings of this Dynamic Field.
Publish the template when ready.
Check the Result
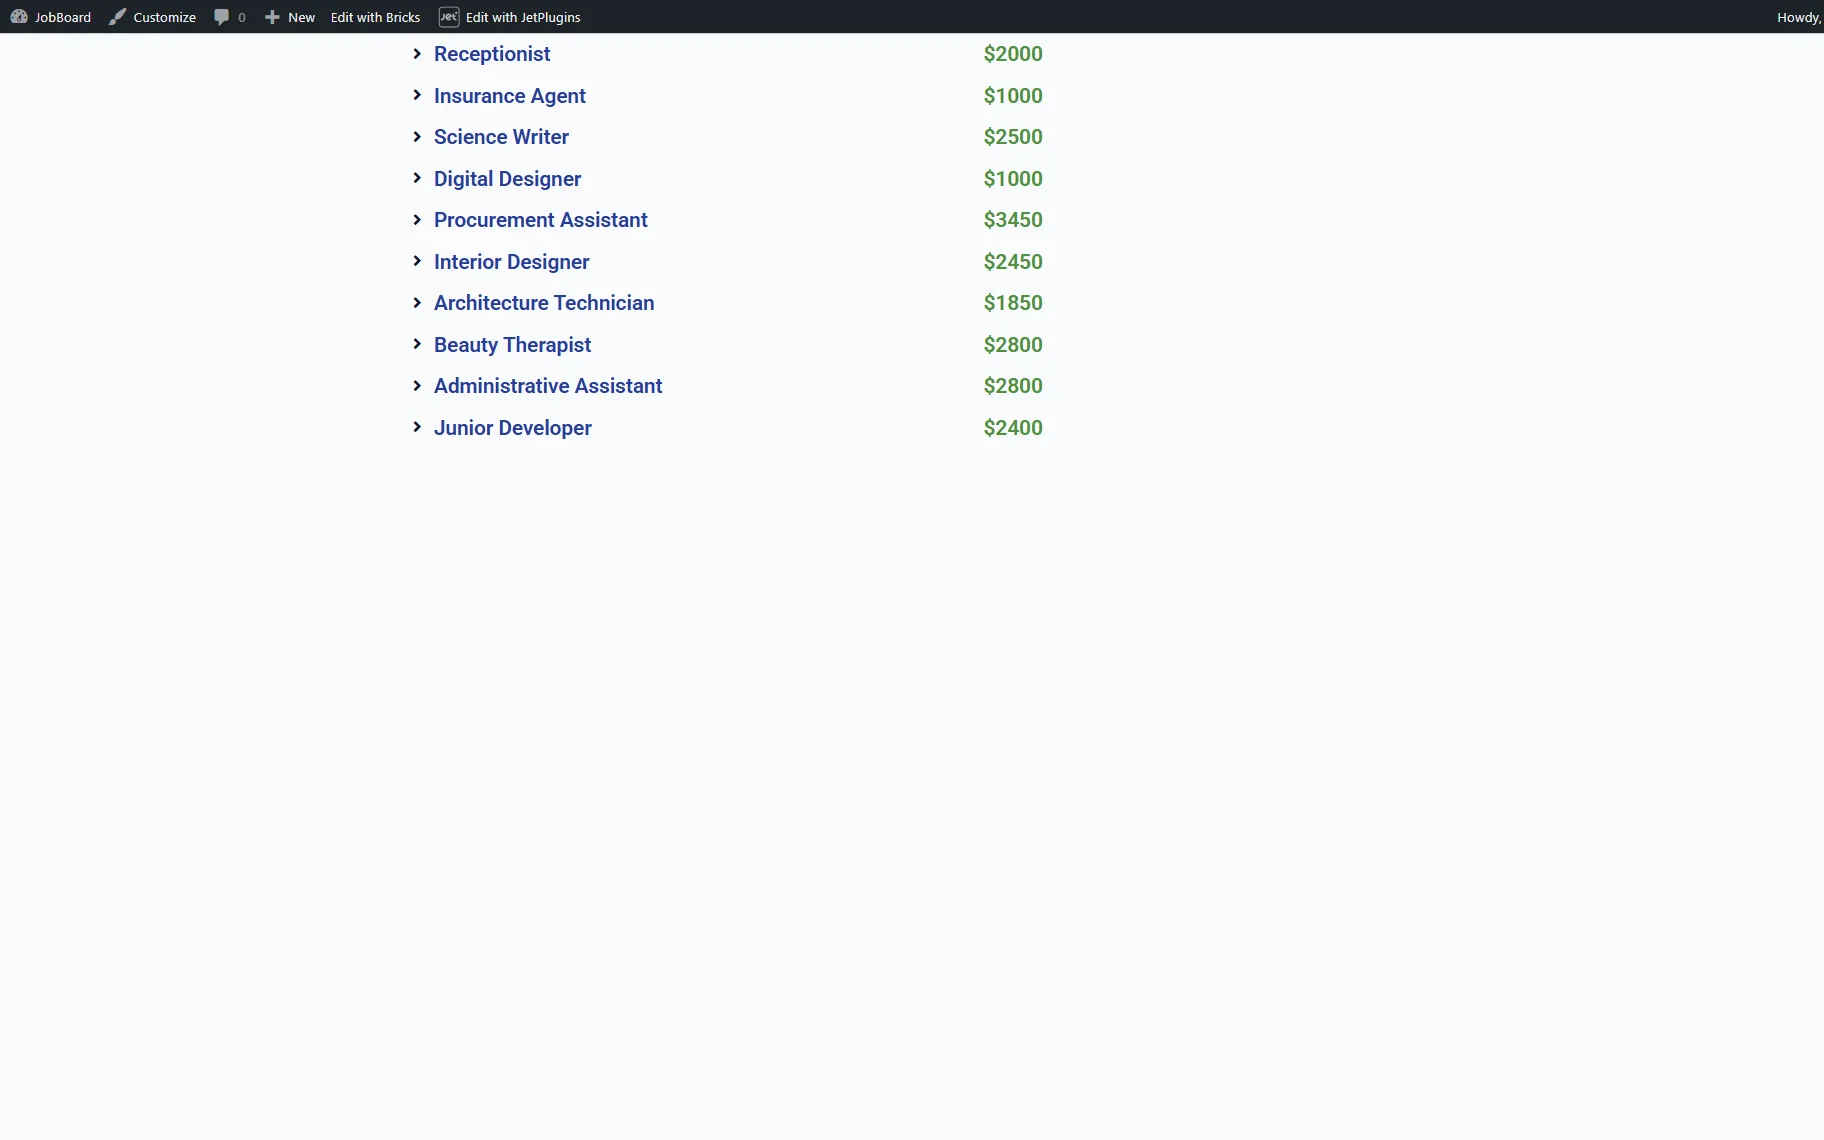
Now, you can open the front end and check the result. In our case, all the full-time jobs are displayed here, along with the offered salaries.
FAQ
This usually happens when JetSmartFilters, sorting, or pagination features are not correctly connected to the JetEngine Query Builder Query Loop.
Make sure of the following:
– The Query Loop is set to JetEngine Query Builder, not the native Bricks query;
– The correct provider is selected in JetSmartFilters;
– The Query ID from JetEngine Query Builder is used (not the Bricks CSS ID);
– Sorting and Load More elements are also connected to the same JetEngine Query ID.
The Query ID (JetEngine) controls query behavior, while the CSS ID (Bricks) is only used for styling and layout purposes. They are not interchangeable.
If you are using JetEngine Query Builder, select JetEngine as the provider. If you are using the native Bricks Query Loop, select Bricks as the provider.
Yes. JetEngine Query Builder supports different types of queries, so you can use any of them with Bricks Query Loop.
Check our Bricks Query Loop Shows No Results with JetEngine Query Builder troubleshooting guide to fix the issues that may have appeared during the customization process.
No. The JetEngine Query ID and the Bricks CSS ID are different settings used for different purposes. The Query ID identifies the custom query created in JetEngine Query Builder, while the CSS ID identifies the Bricks element itself.
Yes. Use the Dynamic Field element with the “Meta Data” Source and select the needed JetEngine meta field.
That’s all about using JetEngine’s Query Builder with the Bricks Query Loop feature on your WordPress website.