JetSmartFilters Not Working: 7 Things You Need to Check
Can’t figure out why JetSmartFilters stopped working
There are some typical cases when smart filters might not be working as expected. In this troubleshooting article, we’re going to spill the tea and cover the 7 most common JetSmartFilters issues. Read on!
Old Plugin Version
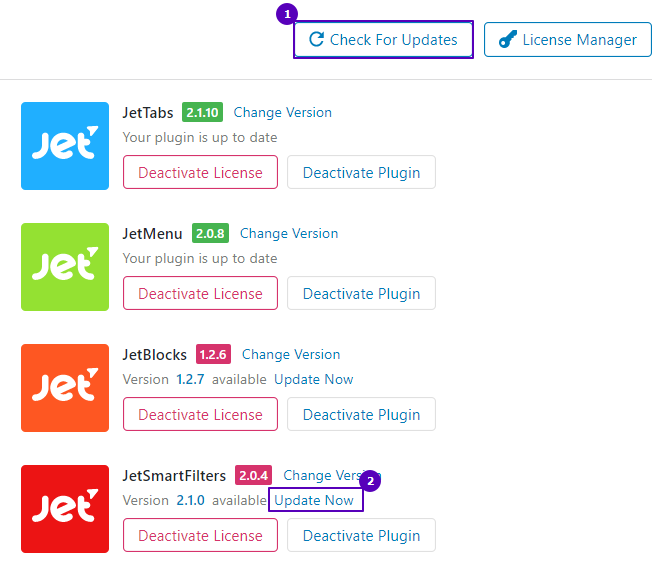
Sometimes it’s the plugin version that impedes filters from working properly. Make sure yours is up-to-date. Follow the Crocoblock > Update & Installation pathway, press the “Check For Updates” button, then find JetSmartFilters amid all plugins, and see if there’s a newer version of it. If yes, press “Update Now” below the plugin name.
Poorly Configured Settings
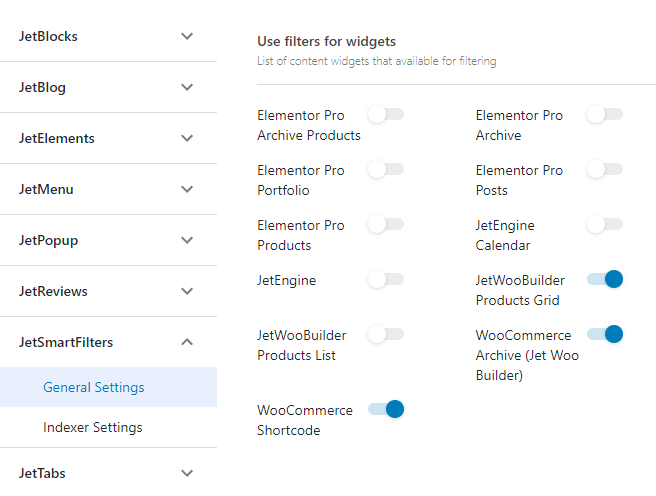
First and foremost, you need to double-check if the necessary widget is activated in the Crocoblock dashboard. To do it, proceed to Crocoblock > JetPlugins Settings > JetSmartFilters > General Settings. You will see a list of content widgets available for filtering there. Enable the toggles of those you need. The changes will be saved automatically.
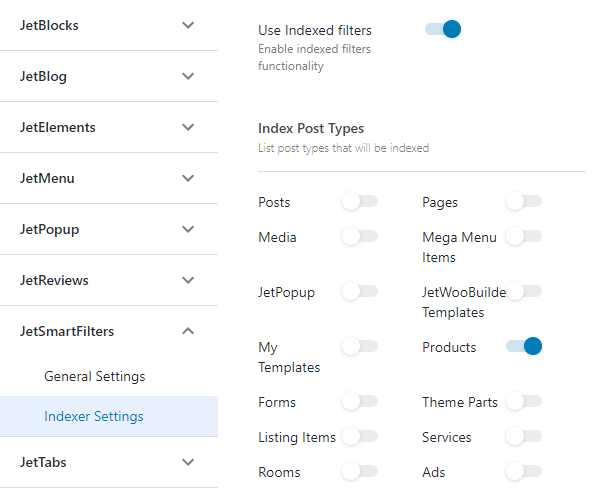
Another trouble you may encounter is the deactivated Indexer functionality. To make sure it’s enabled, open the Indexer Settings in the JetSmartFilters Settings tab. If the toggle is not active, enable it.
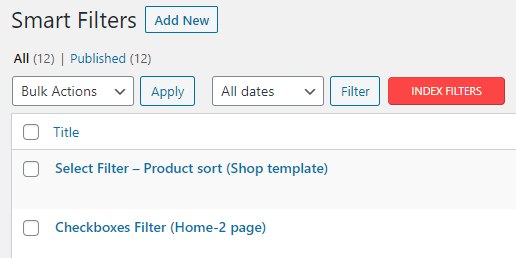
Next, proceed to Smart Filters > Smart Filters in the WordPress dashboard and press the red button to index filters.
Improper Elementor Settings
Sometimes, it’s necessary to check the filter settings in Elementor. Let’s start with the provider. In the “This filter for” drop-down list, you need to pick the right option. If we want to filter the WooCommerce archive page, it’s crucial to stick with the “WooCommerce Archive (by JetWooBuilder)” option as shown below.
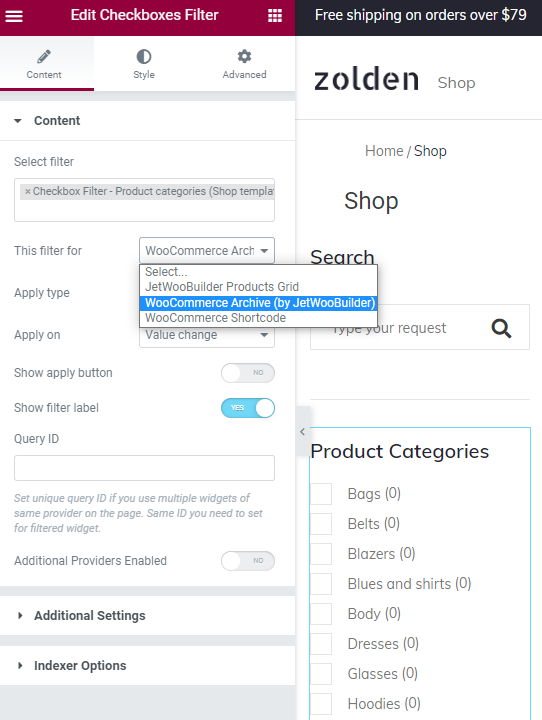
If you want to filter anything else, like Listing Grid, make sure to pick the “JetEngine” option in the drop-down.
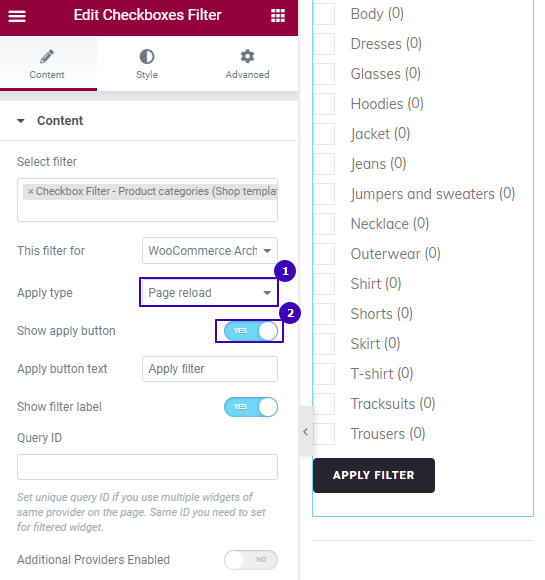
Another tricky thing is mixing up the values of the Apply type and Apply on fields. For instance, if you choose “Page reload” as Apply type, then it’s necessary to activate the Show apply button toggle switch.
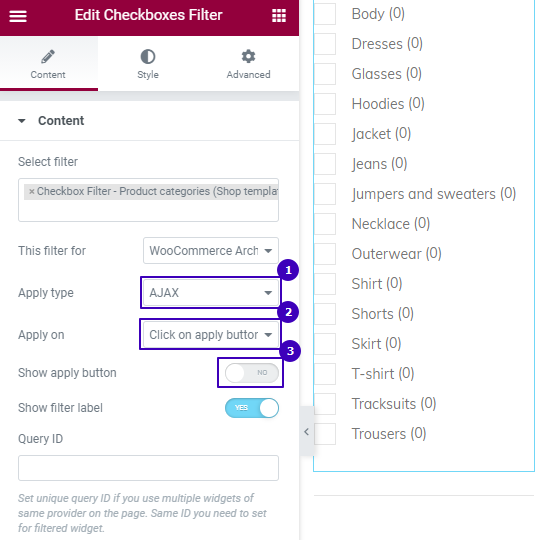
In case you’ve gone with either “AJAX” or “Mixed” as Apply type and selected “Click on apply button” in the Apply on field, don’t forget to switch ON the Show apply button toggle.
Elementor Pro Widget Issues
Does your project involve working with the Elementor Pro widgets? If positive, then you might want to know that it’s a must to link them via Query IDs. To learn more about this, go read this troubleshooting guide: https://crocoblock.com/knowledge-base/troubleshooting/how-to-set-filters-elementor-pro-posts/.
Multiple Elements on One Page
In case there are more than one Listing Grid, several posts, and product grids on a page you want to add the filters to, successful filtering may require extra effort. We’re talking about assigning filters to the widgets by adding a CSS ID to every content section. More details can be found here. Plus, we’ve done a troubleshooting video on the same issue. Check it out.
Improperly Set Checkbox Meta Field
It is fairly easy to mistake the Checkboxes filter type and the similarly named JetEngine meta field. If you go to the Smart Filters > Smart Filters and open to edit a Checkboxes field type of yours, you’ll be able to see that there’s a switch toggle named Is Checkbox Meta Field (Jet Engine).
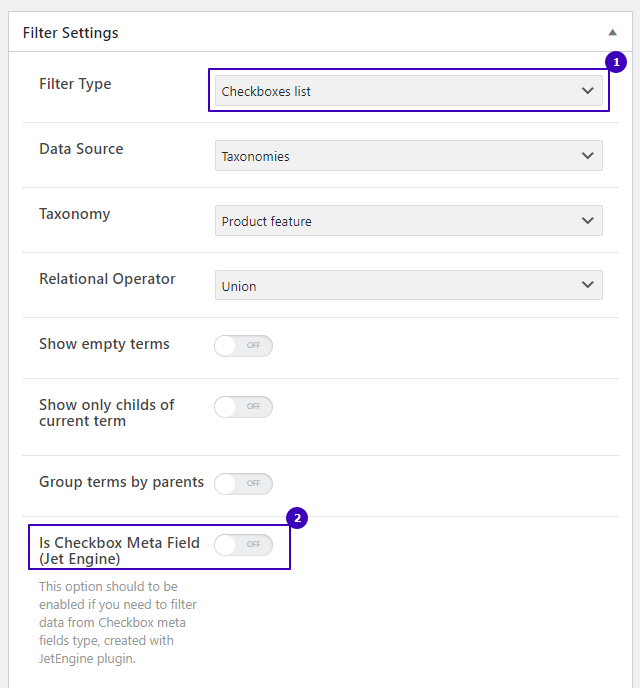
This toggle should be activated only if you’re going to filter data from the Checkbox meta field type that you created using JetEngine. Let’s sum up:
- You DO activate this toggle if the filter type is “Checkboxes list” or any other and the meta field type you want the data to be pulled is “Checkboxes”;
- You DO NOT activate this toggle if the filter type is any and the meta field type is not “Checkboxes”.
Tricky Visual Filter
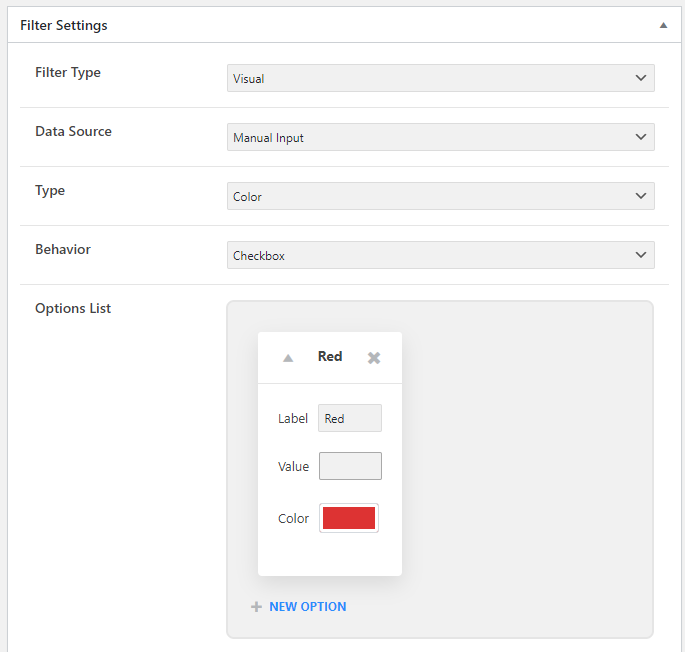
If you want the Visual filter to perform as expected, it’s vitally important to input its value at the stage of options setup.
There you have it – 7 things worth checking if filters don’t work. Hopefully, you’ll find a solution here.