
Query Builder Terms Query Type
This overview describes all the settings of Query Builder’s “Terms Query” type, which is a part of the JetEngine plugin.
With the help of JetEngine functionality, one can display listings of terms, categories, and custom taxonomies. However, Query Builder provides a much more flexible tool for listing creation. Its “Terms Query” type allows one to choose precisely the terms or taxonomies required to add to the list.
For instance, one can display related terms attached to the WordPress users using the JetEngine Query Builder functionality.
General
Here, one can adjust the general query options:

- Taxonomy — this drop-down menu lists all the website taxonomies, both default and created with the JetEngine plugin;
- Object/Post ID — if one types in the ID of posts, users, or other objects here, only the terms linked to those objects will appear on the list;
- Order By — this drop-down menu allows choosing a parameter to sort out the terms:
- Name — by the first letters of the term’s title;
- Slug — by the first letters of the term’s slug;
- Term Group — by the number of groups determined in the database;
- Term ID — by the digits of the term’s ID;
- Description — by the first letters of the description’s first word;
- Parent — by the first letters of the parent’s name;
- Term Order — by the order in which the terms appear in the taxonomy tab of the dashboard;
- By the number of objects associated with the term;
- Match the order of the “Include” param — by the order that one sets when adding IDs to the Include bar of the Include/Exclude tab;
- Match the order of the “Slug” param — by the order that one sets when adding slugs to the Slug bar of the Include/Exclude tab;
- Order by meta clause — by the meta clause created in the Meta Query tab;
- Order — it can be ascending (“From lowest to highest values”), which means from the smallest value to the biggest, or descending (“From highest to lowest values”) – from the biggest to the smallest;
- Hide empty — if activated and if the item has no defined value, it won’t show up in the grid;
- Show/Per Page Number — here, one can define how many terms will be shown in the grid simultaneously by typing in the number. If one uses the Pagination widget or block of the JetSmartFilters plugin, this will be the number of terms shown per page;
- Total Query Number — the number one put here will be visible if the “Query Results Count” dynamic tag is used on the page. If one adds the Pagination widget or block of the JetSmartFilters plugin, it will be the total number of found terms;
- Offset — a field to set the number of terms that won’t appear in the grid; this parameter will subtract terms from the beginning of the list.
Include/Exclude
With this tab, one can include and exclude the desired items to/from the query.

- Name — to insert names of the terms to be added to the list;
- Slug — to insert slugs of the terms to be added to the list;
- Include — to type the IDs of terms to be added to the list;
- Exclude — to type the IDs of terms to be excluded from the list;
- Exclude Tree — to type the ID of the parent category to exclude it and all its child terms from the list;
- Search — to search terms’ names and slugs for the words one puts into this bar, and add matching terms to the list;
- Name Like — to insert a word here, so the “Terms Query” will search for terms with names that contain the inserted word and add such terms to the list;
- Description Like — the “Terms Query” will search for terms with descriptions that contain the inserted word and add such terms to the list.
Parent/Child
This tab includes all settings concerning WordPress relations, parent, and child objects.
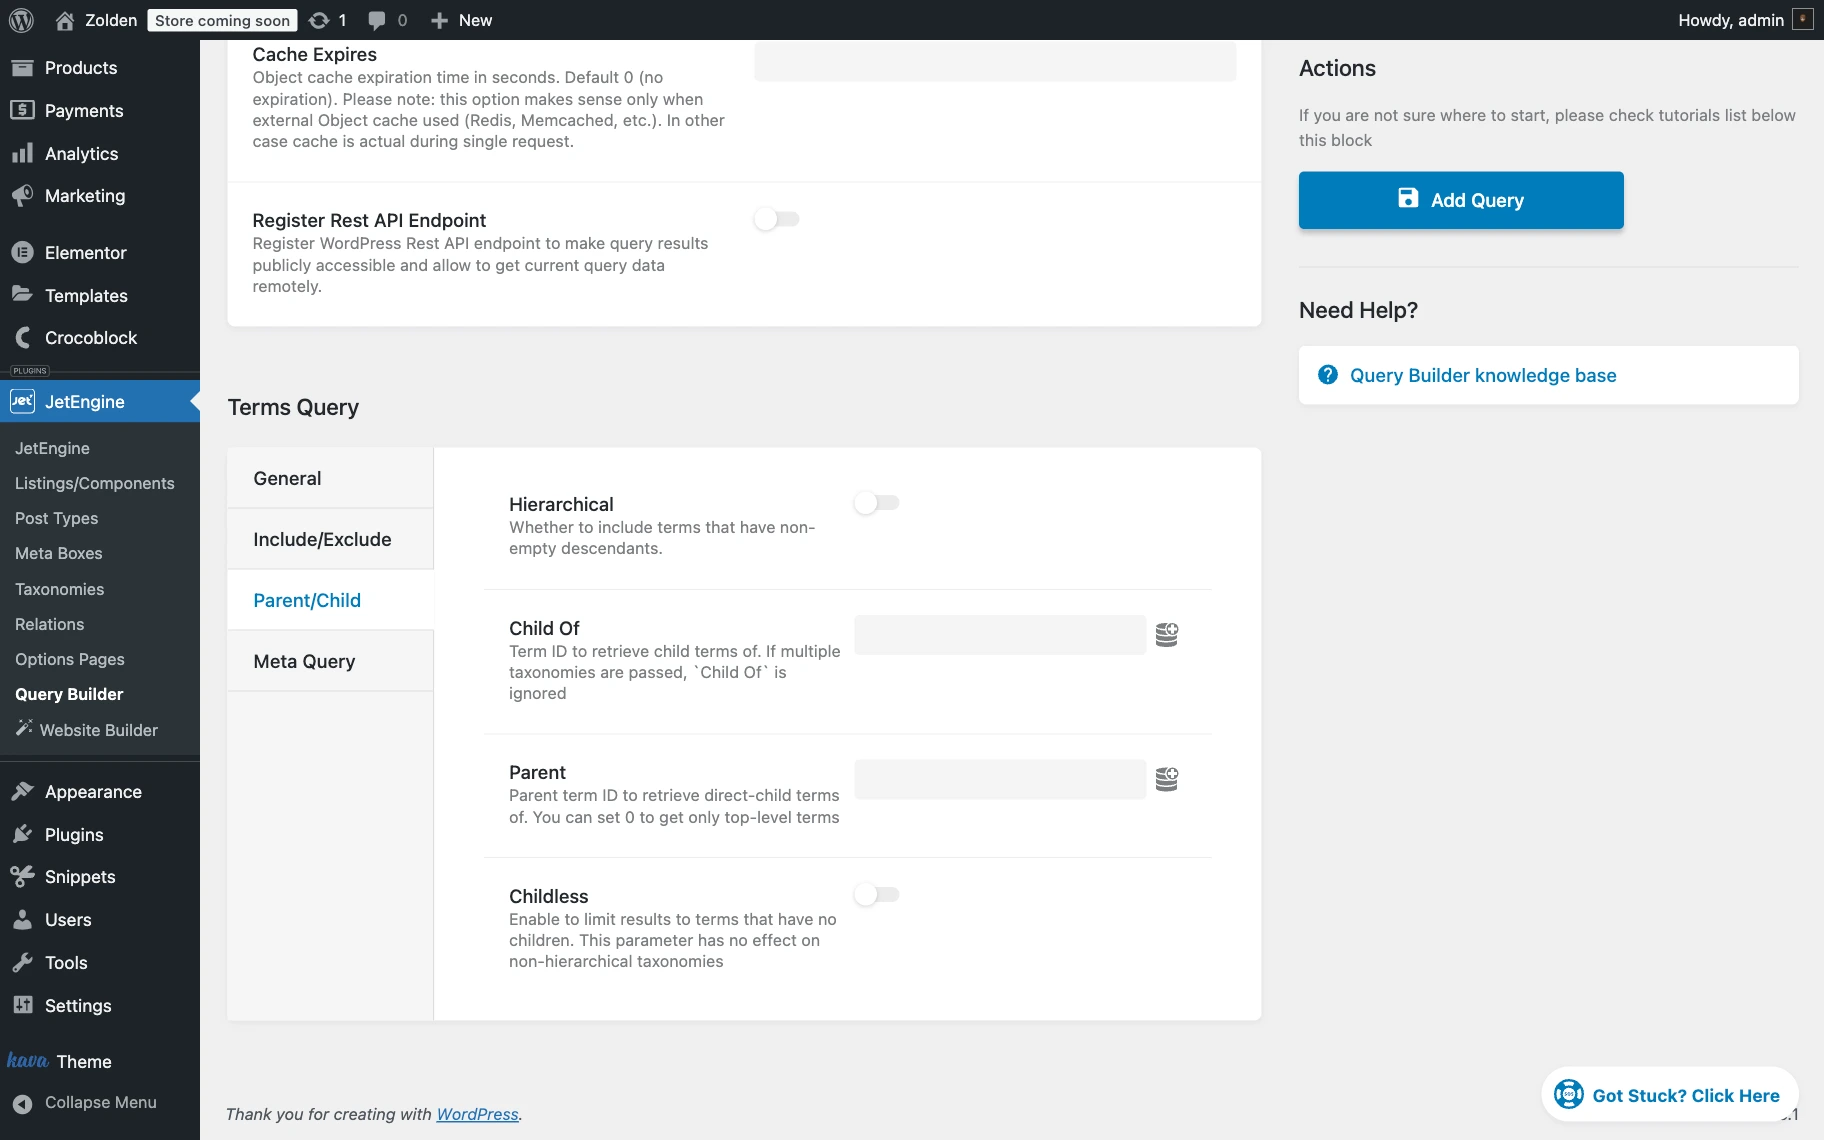
- Hierarchical — if enabled, it includes the categories that have some child terms in the list;
- Child Of — to insert the category’s ID to add all its child terms to the list;
- Parent — to insert the category’s ID to add all its direct child terms to the list and exclude all its grandchild terms. If one types “0” here, all parent categories without their child terms will be attached;
- Childless — if enabled, only the taxonomies that don’t have child terms will appear on the list.
Meta Query
This tab allows adding terms to the list based on the values of their meta fields. One can set a value in the Value text area to compare it with the data from the meta field one chooses in the Field key/name bar. If they match, the terms will appear on the list. The conditions that the value of the meta field has to meet are called the Meta Query Clause.
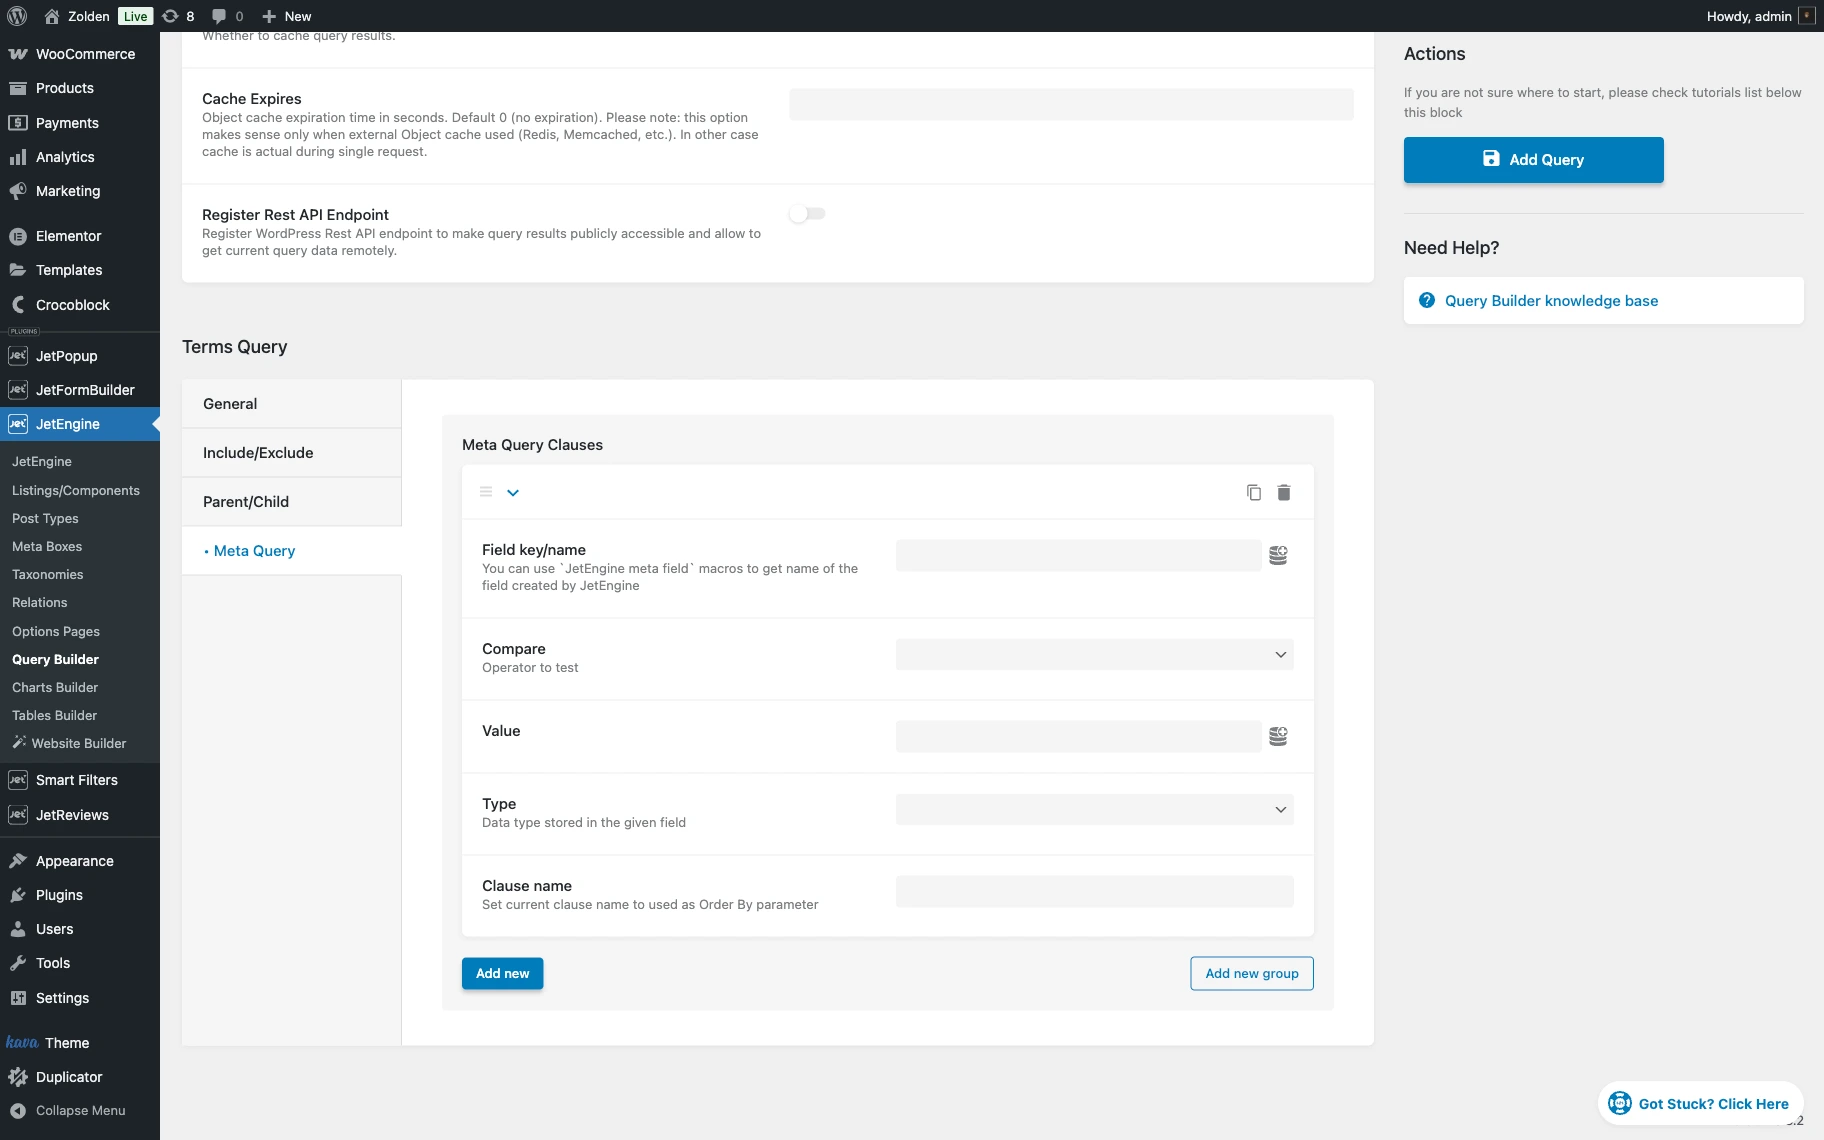
- Field key/name — a field to enter the name of the meta field attached to the taxonomy chosen in the General settings tab. Dynamic tags can also be used in this bar. If needed, the Context and Fallback (e.g., “Not found”) can be set in the Advanced settings tab;
- Compare — to select parameters for values’ comparison:
- Equal — displays terms having an equal value;
- Not Equal — shows terms that don’t have an equal value;
- Greater than — indicates terms that have a greater value; it works with numeric values only;
- Greater or equal — displays terms that have a greater or equal value. It also works only for numeric values;
- Less than — shows terms that have a lesser value. For numeric values only;
- Less or equal — displays terms that have a lesser or equal numeric value;
- Like — shows terms that have the value one sets in the Value field mentioned in the content;
- Not like — displays only the terms that don’t have the value you’ve put in the Value field mentioned in the content;
- In the list — after one adds several values to the Value field, it shows the terms that have at least one of them in their content;
- Not in the list — displays terms that have any values except the ones typed into the Value field;
- Between — displays terms that contain the value between the two values set in the Value field;
- Not between — shows all the terms except the ones that have a value that matches the set interval;
- Exists — indicates all the terms that contain the Key. The Value should not be set in this case;
- Not exists — displays all the terms that don’t include the Key. The Value should not be set either;
- Regexp — queries the items depending on the “Checkbox” and “Radio” meta field values;
- Not regexp — excludes mentioned “Checkbox” and “Radio” meta field values from the query;
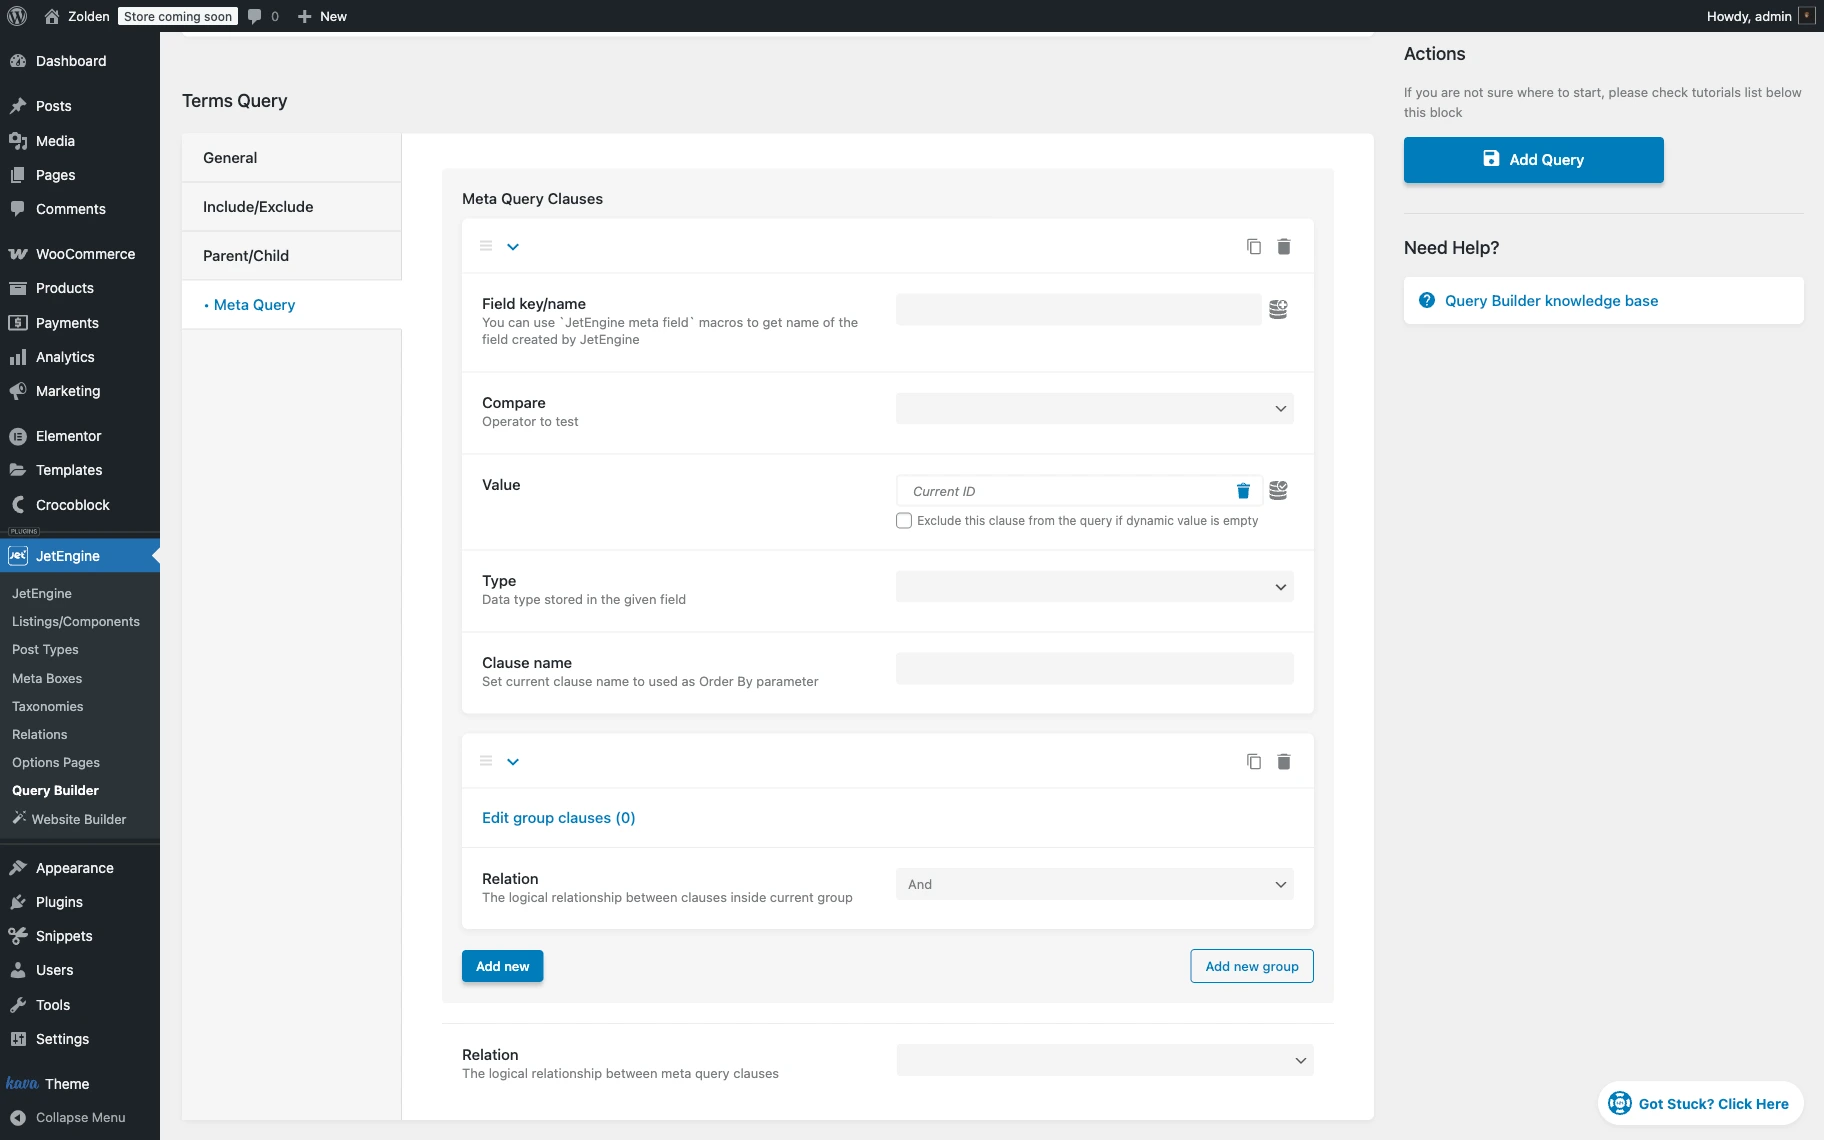
- Value — the value set here will be compared to the value of the meta field chosen in the Field key/name bar. When the “Query Variable” option is selected, the checkbox “Exclude this clause from the query if dynamic value is empty” becomes available, allowing one to conditionally include this meta query clause only when the value is not empty, preventing empty or null values from affecting your query results. When this checkbox is activated, the Fallback in the Advanced Settings of the “Query Variable” option should be left empty;
- Type — this drop-down allows one to specify what kind of data is in the chosen meta field:
- Char — alphabetic data that is not case-sensitive;
- Numeric — whole numbers only;
- Date — date values (remember to enable the Save as timestamp toggle in the fields from which one gets date values);
- Datetime — date and time (remember to activate the Save as timestamp toggle in the fields from which one gets date values);
- Decimal — fraction number data;
- Time — time values;
- Binary — data that is case-sensitive;
- Signed — whole numbers, both positive and negative;
- Unsigned — whole numbers, only positive.
- Clause name — if one gives this Meta Clause a unique name, it will appear in the Order by drop-down, and one will be able to use it to sort the terms.
One can add as many Meta Clauses as required by clicking on the “Add new” button.
Clicking the “Add new group” button allows one to create a nested group of conditions within the query. When clicked, the button adds a new condition group where one can set a logical relationship (“And”/”Or”) between conditions within that group using the Relation dropdown.
To make changes to the group clause, one should click the “Edit group clauses” button. When clicked, it reveals a pop-up window with settings similar to those of the Meta Query Clause.
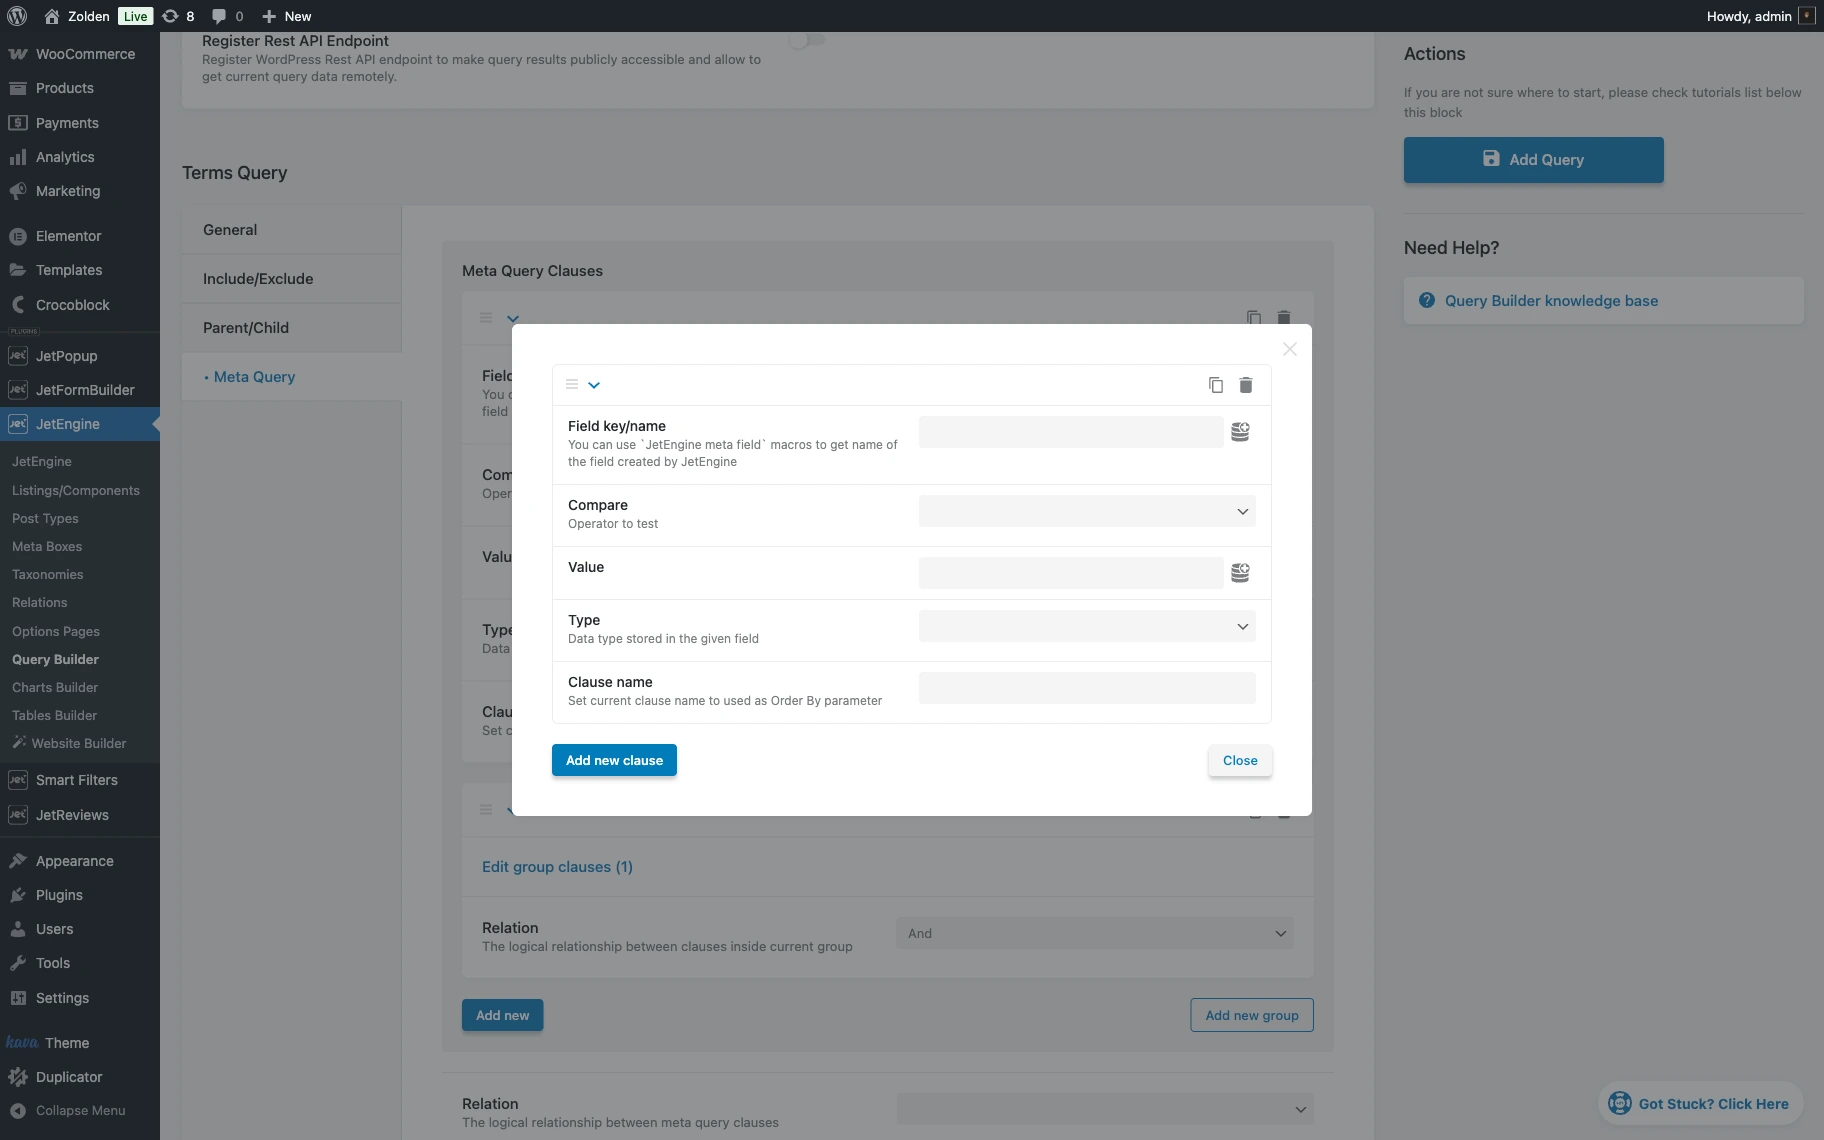
The pop-up contains two action buttons: “Add new clause,” which adds another clause, and a “Close” button that closes the pop-up.
That is all for the “Terms Query” type of Query Builder available as part of the JetEngine plugin functionality for WordPress.