JetPlugins Staging to Live: Checklist
Learn the steps to be checked when moving a site with JetPlugins from staging to a live WordPress site.
When migrating a site from staging to live or between the domains, the standard WordPress migration plugin moves files and database — but it does not move the Crocoblock license, does not update plugins applied to the domain, and does not guarantee saving JetEngine structures, filters, and forms. This checklist will lead you step-by-step to ensure that all the data is migrated correctly.
Migration Preparation
- Back up your staging site.
It can be done using third-party plugins, through your hosting panel, or manually via FTP and phpMyAdmin. You can refer to the How to Backup and Restore WordPress Website with Plugin guide.
- Note the list of active license keys.
Proceed to your Crocoblock account > My Licenses and note down or make a screenshot of the license keys active on the staging domain.
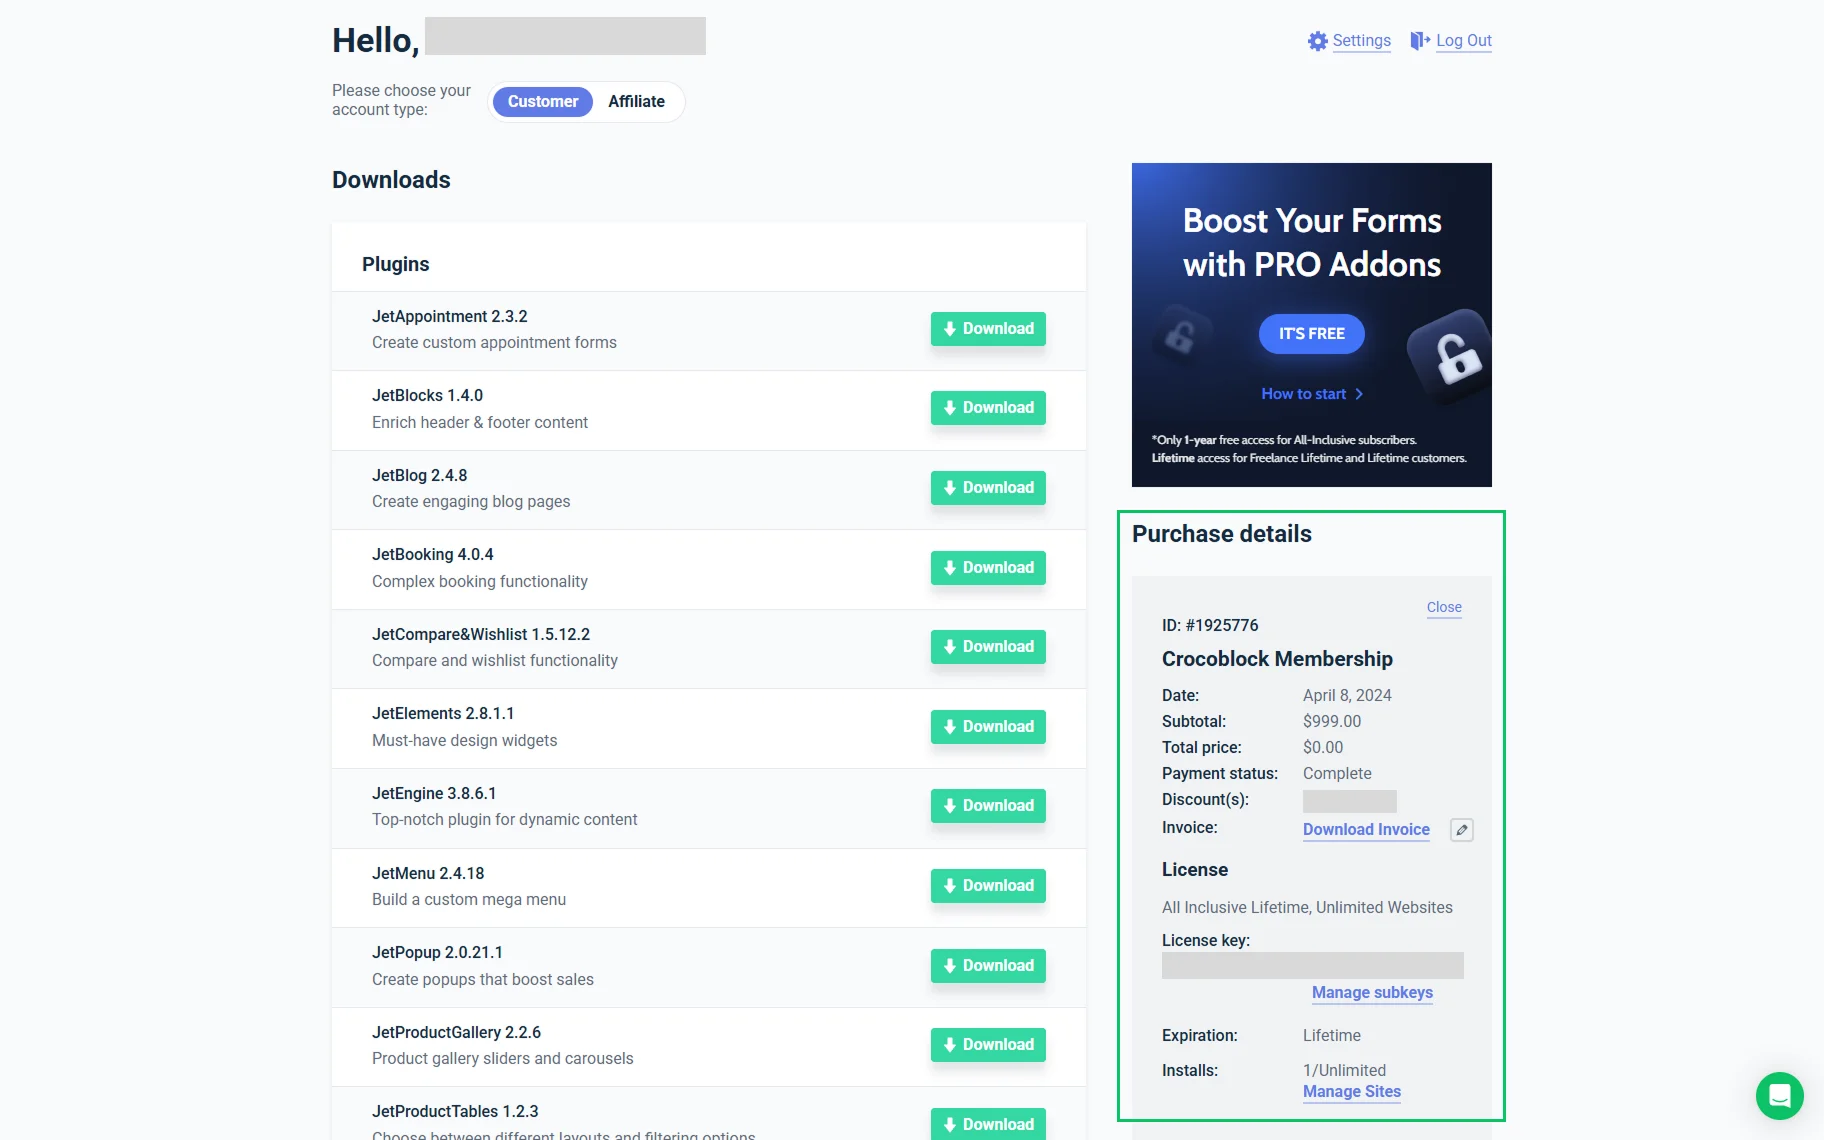
It is essential that you know for sure what licenses and how many of them are active on which domains beforehand.
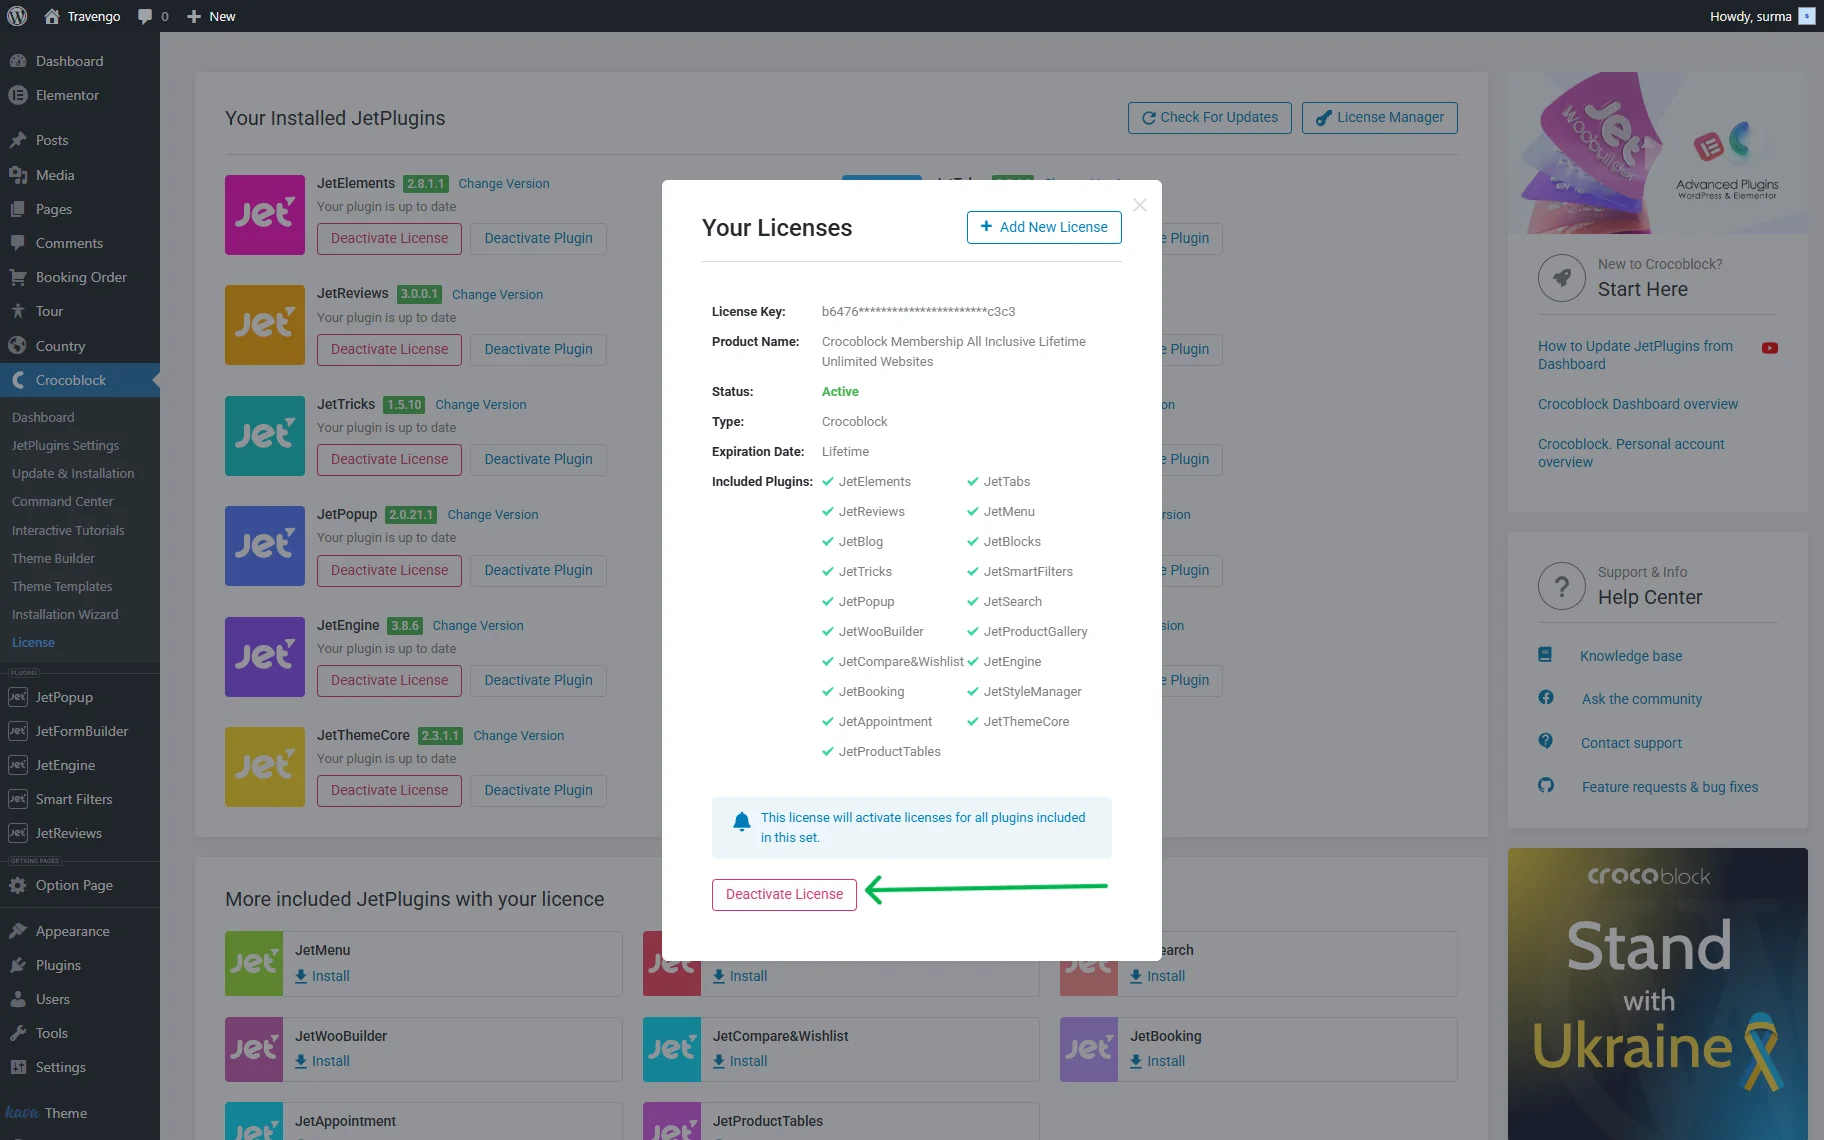
3. Deactivate the Crocoblock license key on the staging site.
It can be done while proceeding to WordPress Admin > Crocoblock > License and clicking the “Deactivate License” button.
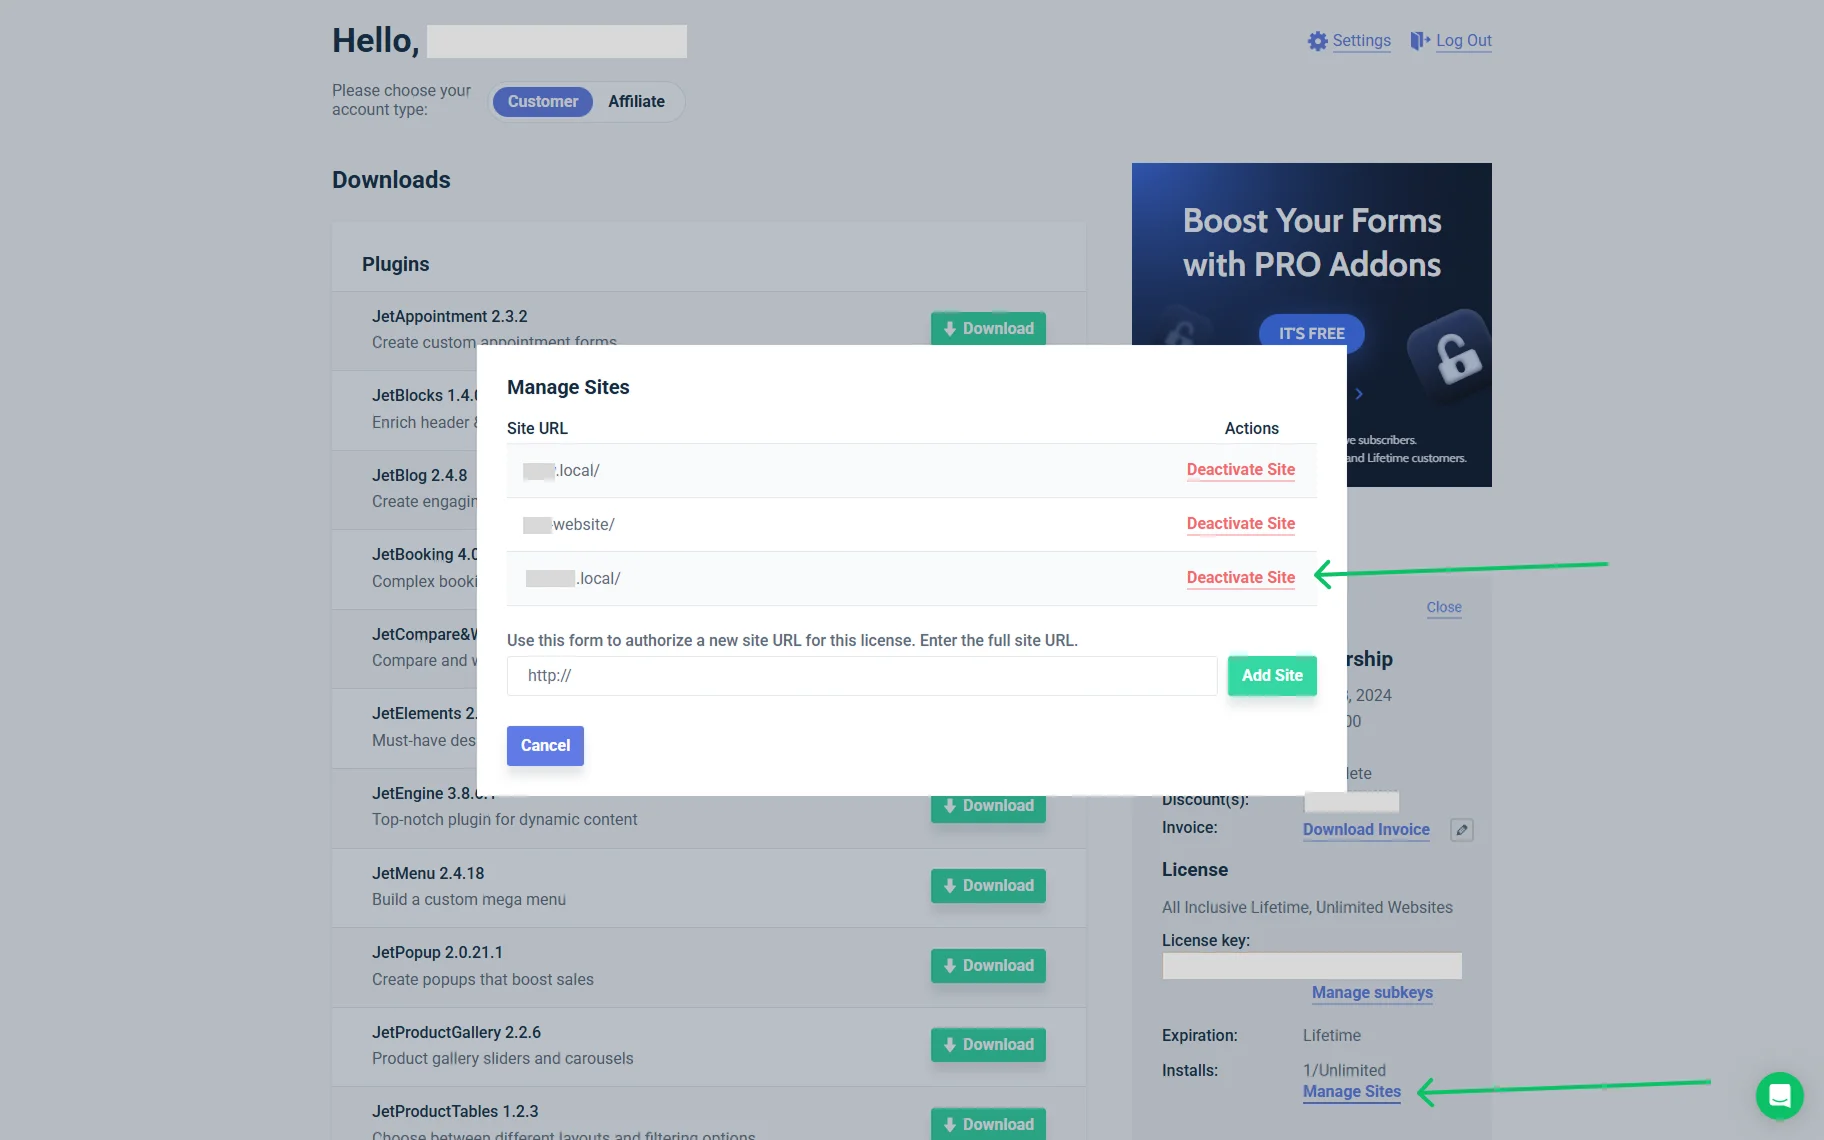
Otherwise, open your Crocoblock account and click the“Manage Sites” button next to the needed license. In the newly opened pop-up, click the “Deactivate Site” next to the needed staging domain.
If the license is not deactivated on the staging site, the live site will be counted as a new activation that can exceed the activation limit.
4. Check the activation limit of your subscription plan.
If you have a single-site plan, it means that the license key can be active on one site only at once. So staging and live sites cannot have the license key active simultaneously. You have to deactivate the license on the staging site before migration.
If you have an unlimited-sites plan, it is not necessary to deactivate the license from the staging site before migration. However, it is still recommended to remove the license key from the staging site once the site is migrated.
JetEngine Structures Export
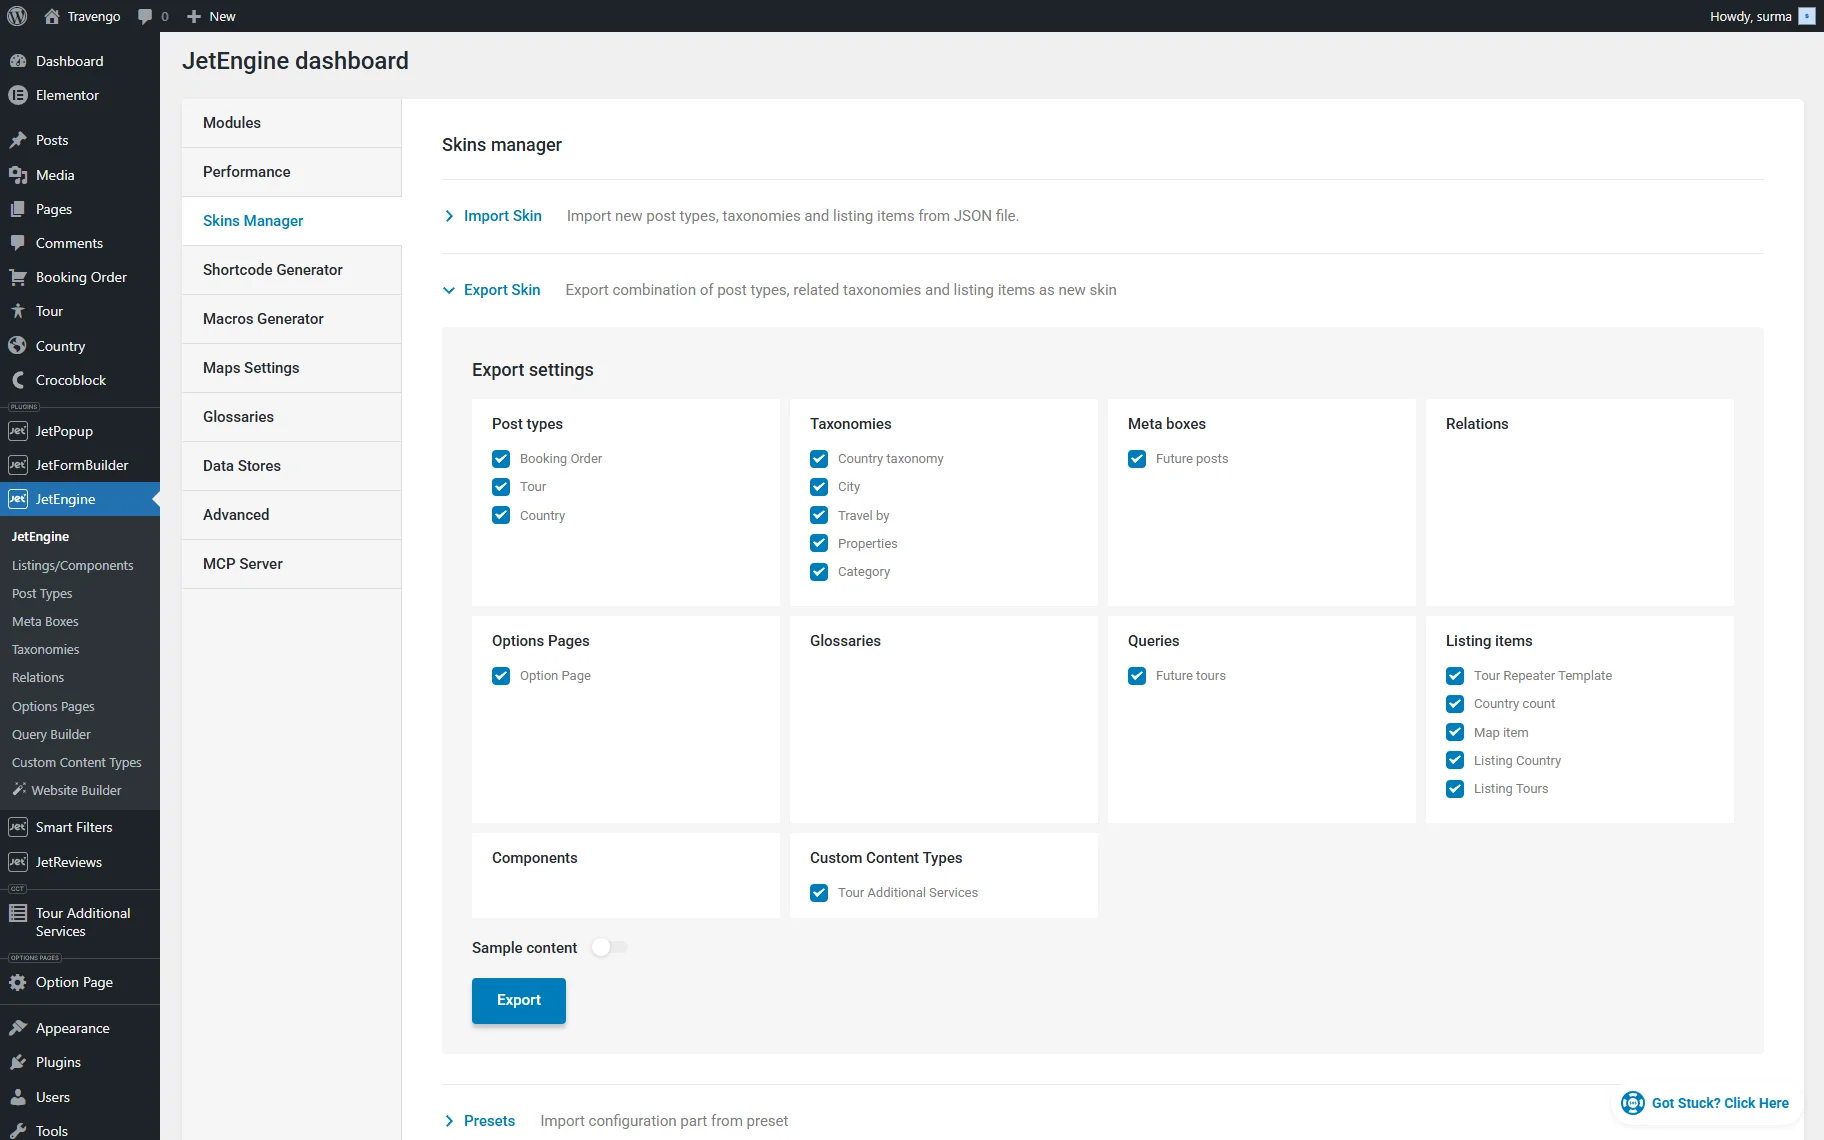
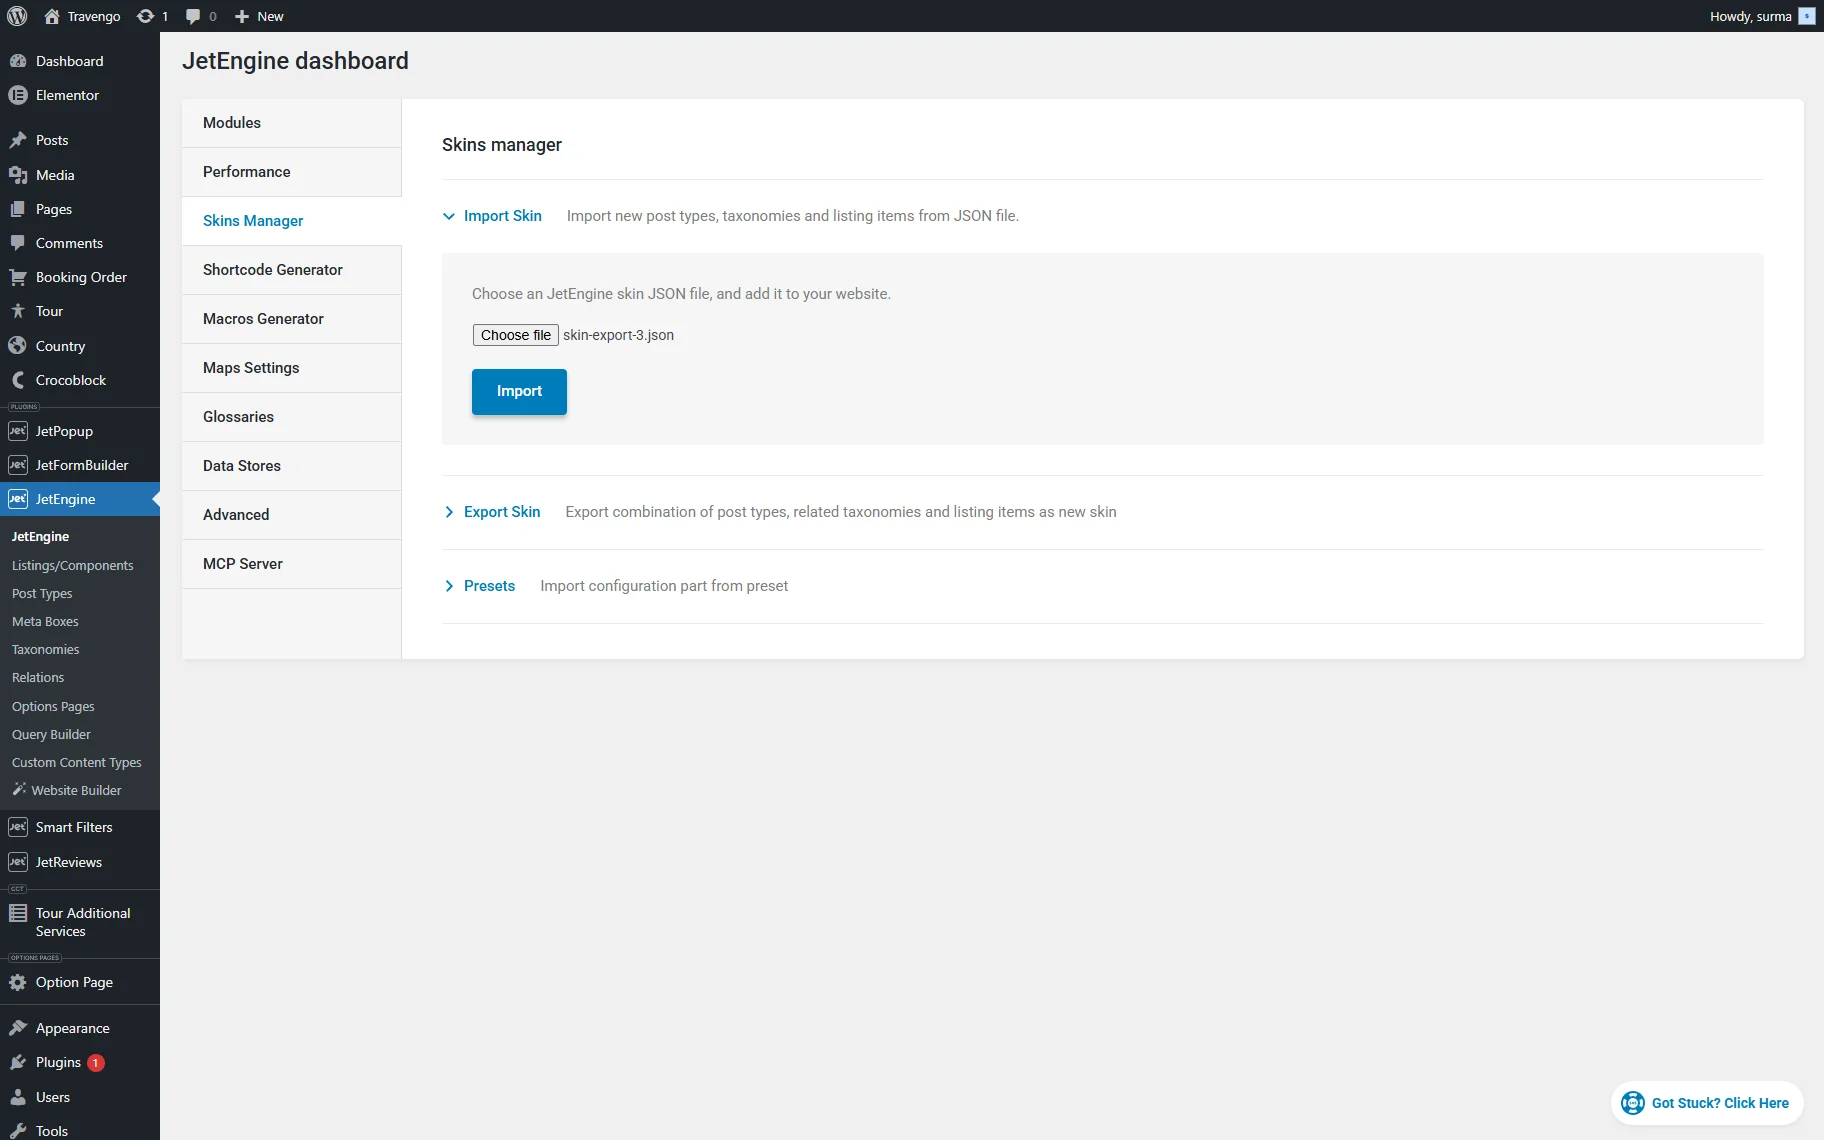
- Export all the JetEngine structures through the Skins Manager.
Proceed to WordPress Dashboard > JetEngine > Skins Manager > Export.
Follow our How to Export and Import Custom Post Types, Terms and Meta Fields guide to ensure that the Custom Post Types, Custom Taxonomies, Meta Boxes, Relations, Options Pages, Query Builder queries, Listing Items (templates), and Custom Content Type structures are migrated.
Note that the Skins Manager moves the structure (how the CPT is set), but does not move the posts themselves.
2. Export CCT items separately.
Proceed to the needed Custom Content Type, select the needed items, and click the ”Export to CSV” button. Refer to the How to Import and Export Custom Content Type guide for a detailed explanation.
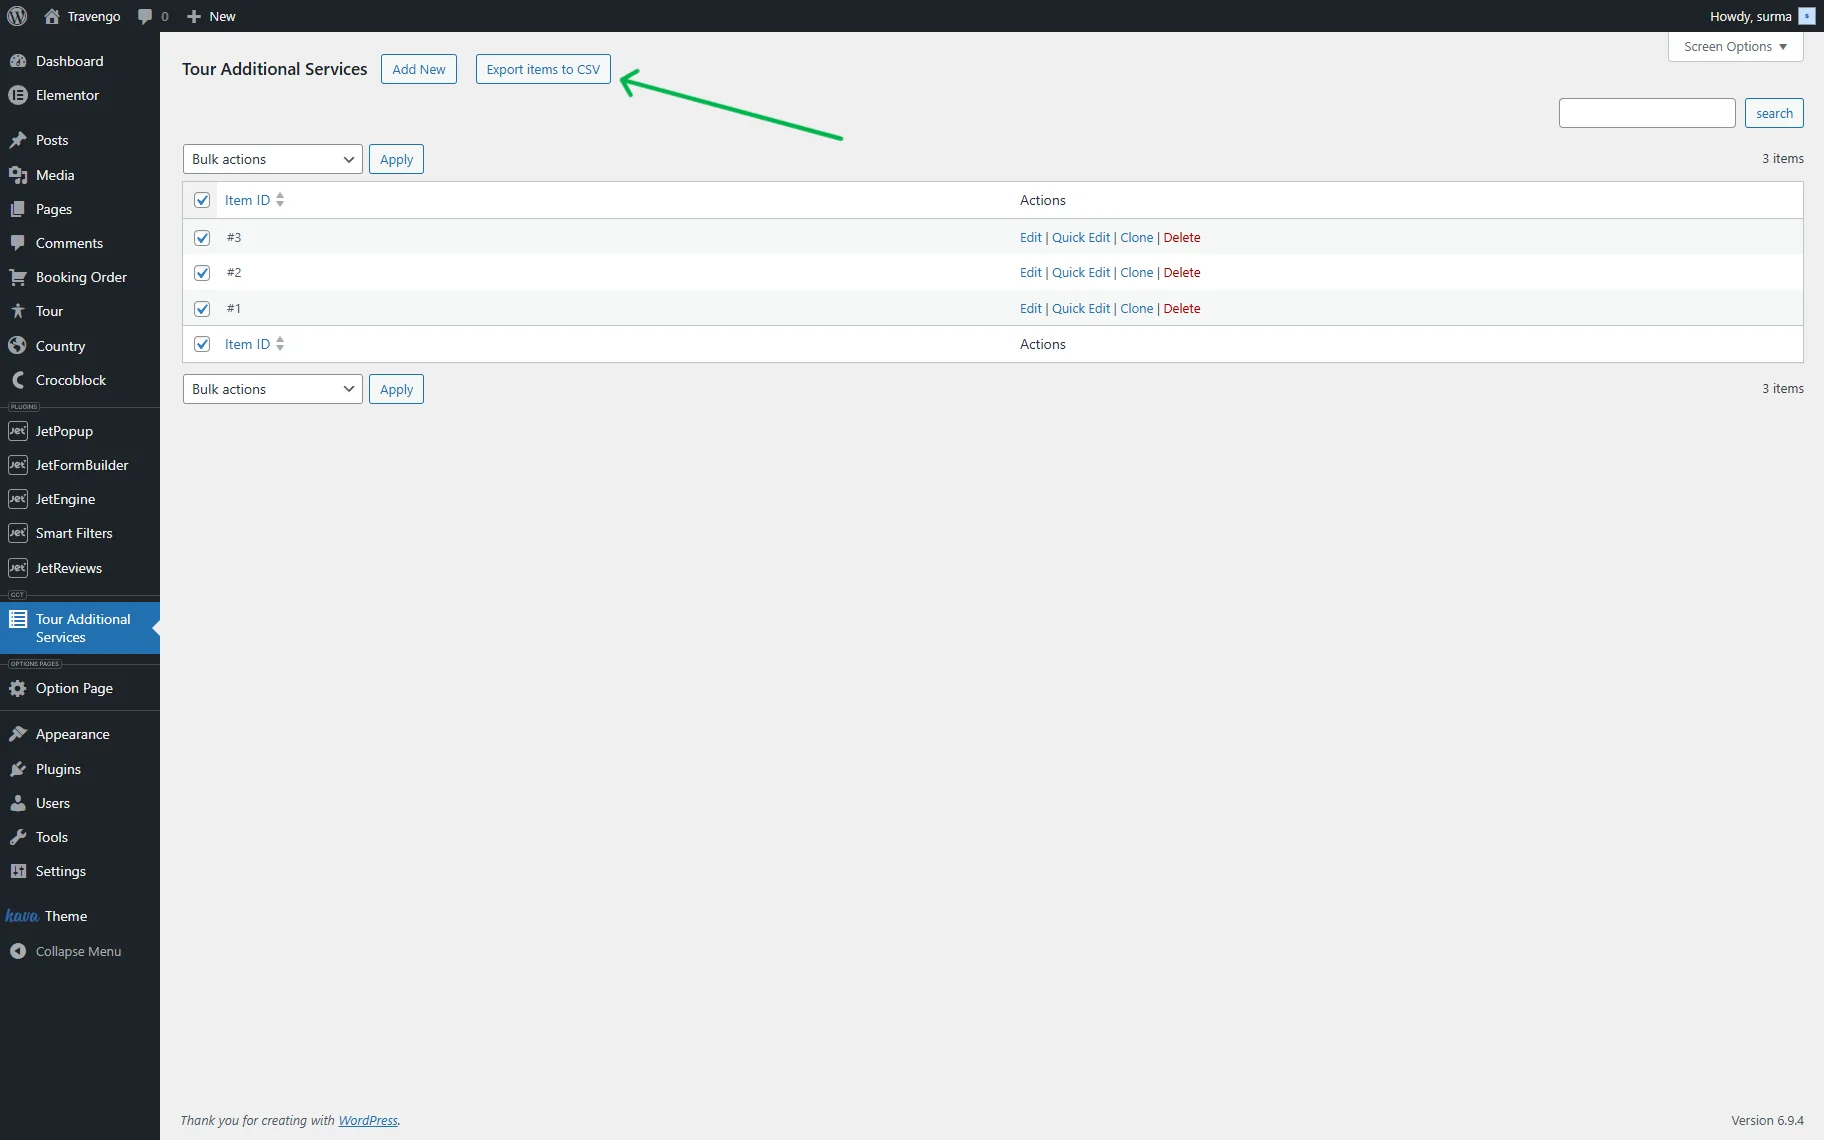
Be aware that the WP All Export plugin does not recognize CCT items because they are not WordPress posts. That’s why standard export plugins do not work for the CCT data.
3. If you have custom fields in the CPT and need to export posts’ data, use the WP All Export plugin with the WP All Import JetEngine Export add-on.
Follow the How to Export and Import Custom Fields Using WP All Import guide to know how to migrate custom fields correctly.
JetSmartFiters Export
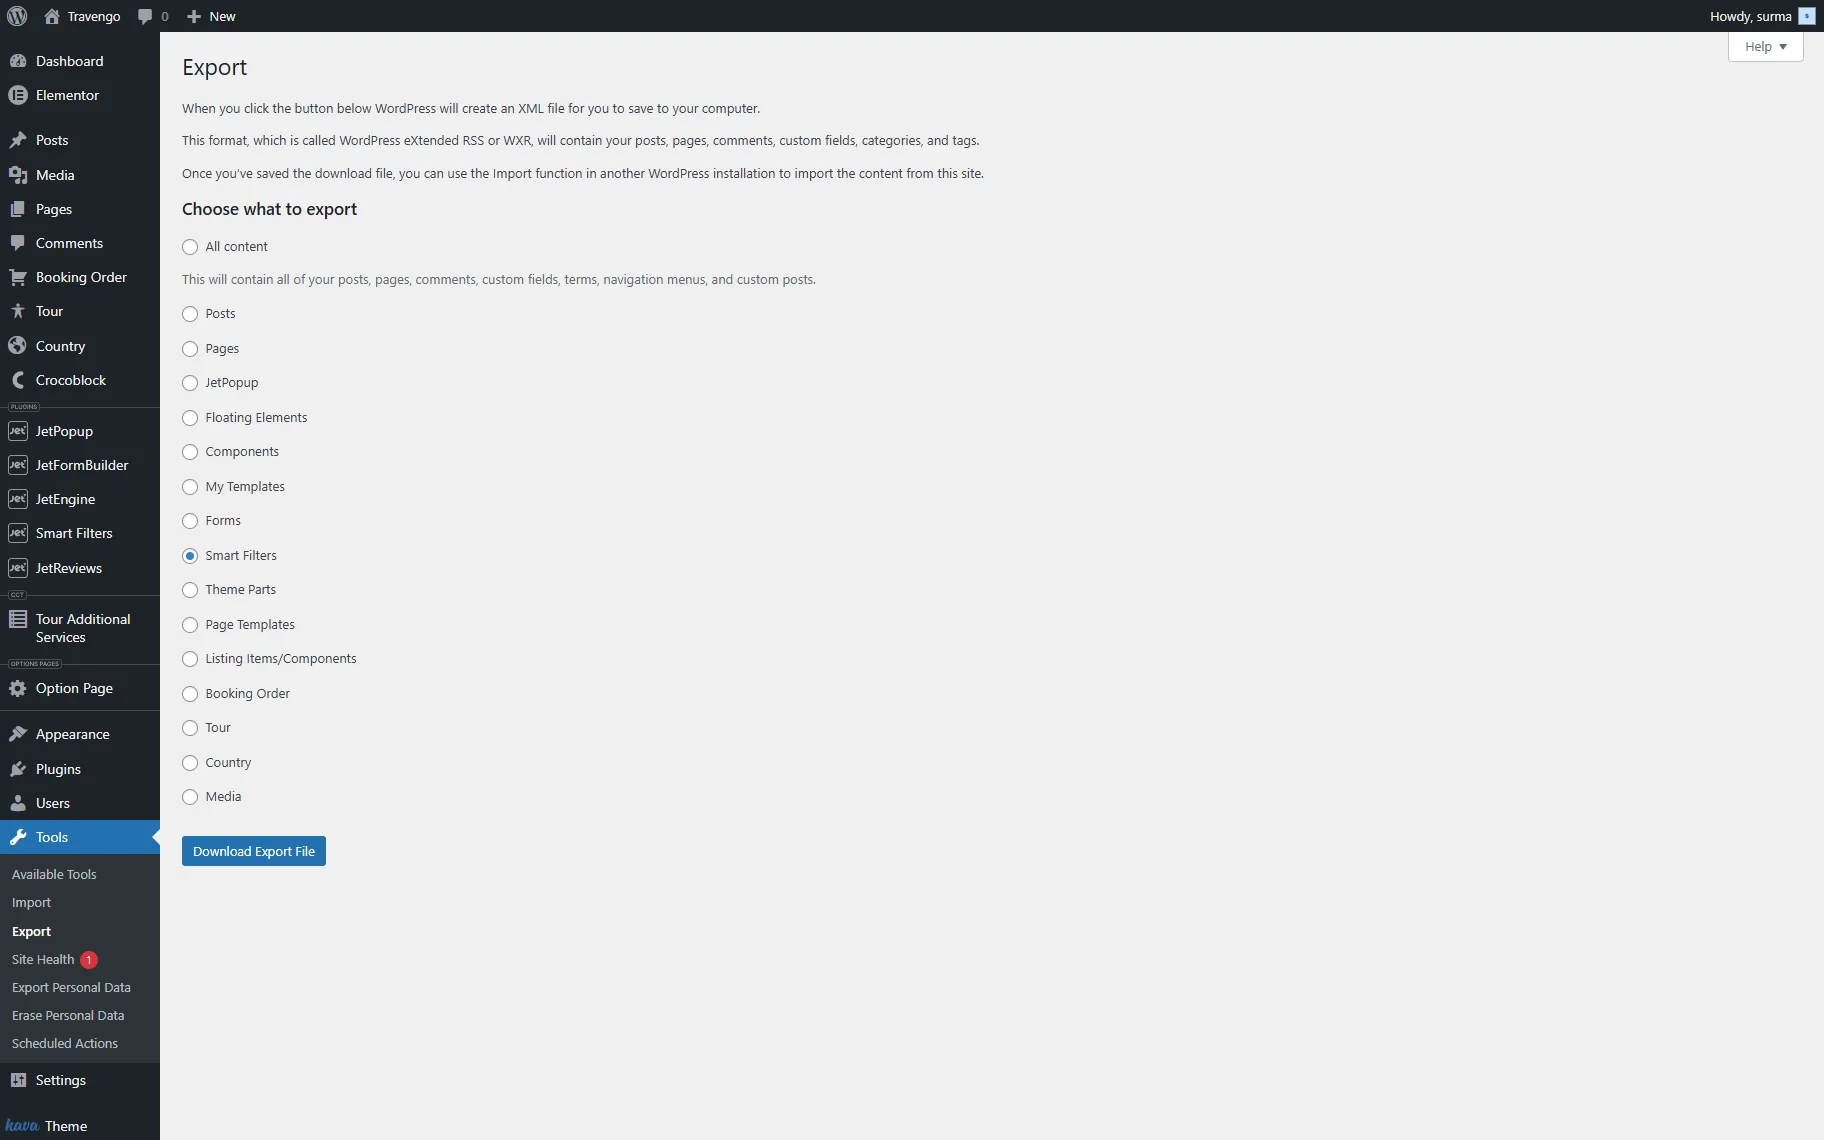
- Export filters’ settings.
You can export the filters’ settings through the default WordPress Tools tab. Open the Export section and choose the “Smart Filters” option. Click the “Download Export File” button.
2. Filters with Dynamic Values.
In case filters use dynamic values from the meta fields, ensure that the CPT and meta fields are already imported before you import the filters.
JetFormBuilder’s Forms Export
- Export every form.
Move to WordPress Dashboard > JetFormBuilder > All Forms and click the “Export” button next to the needed form.
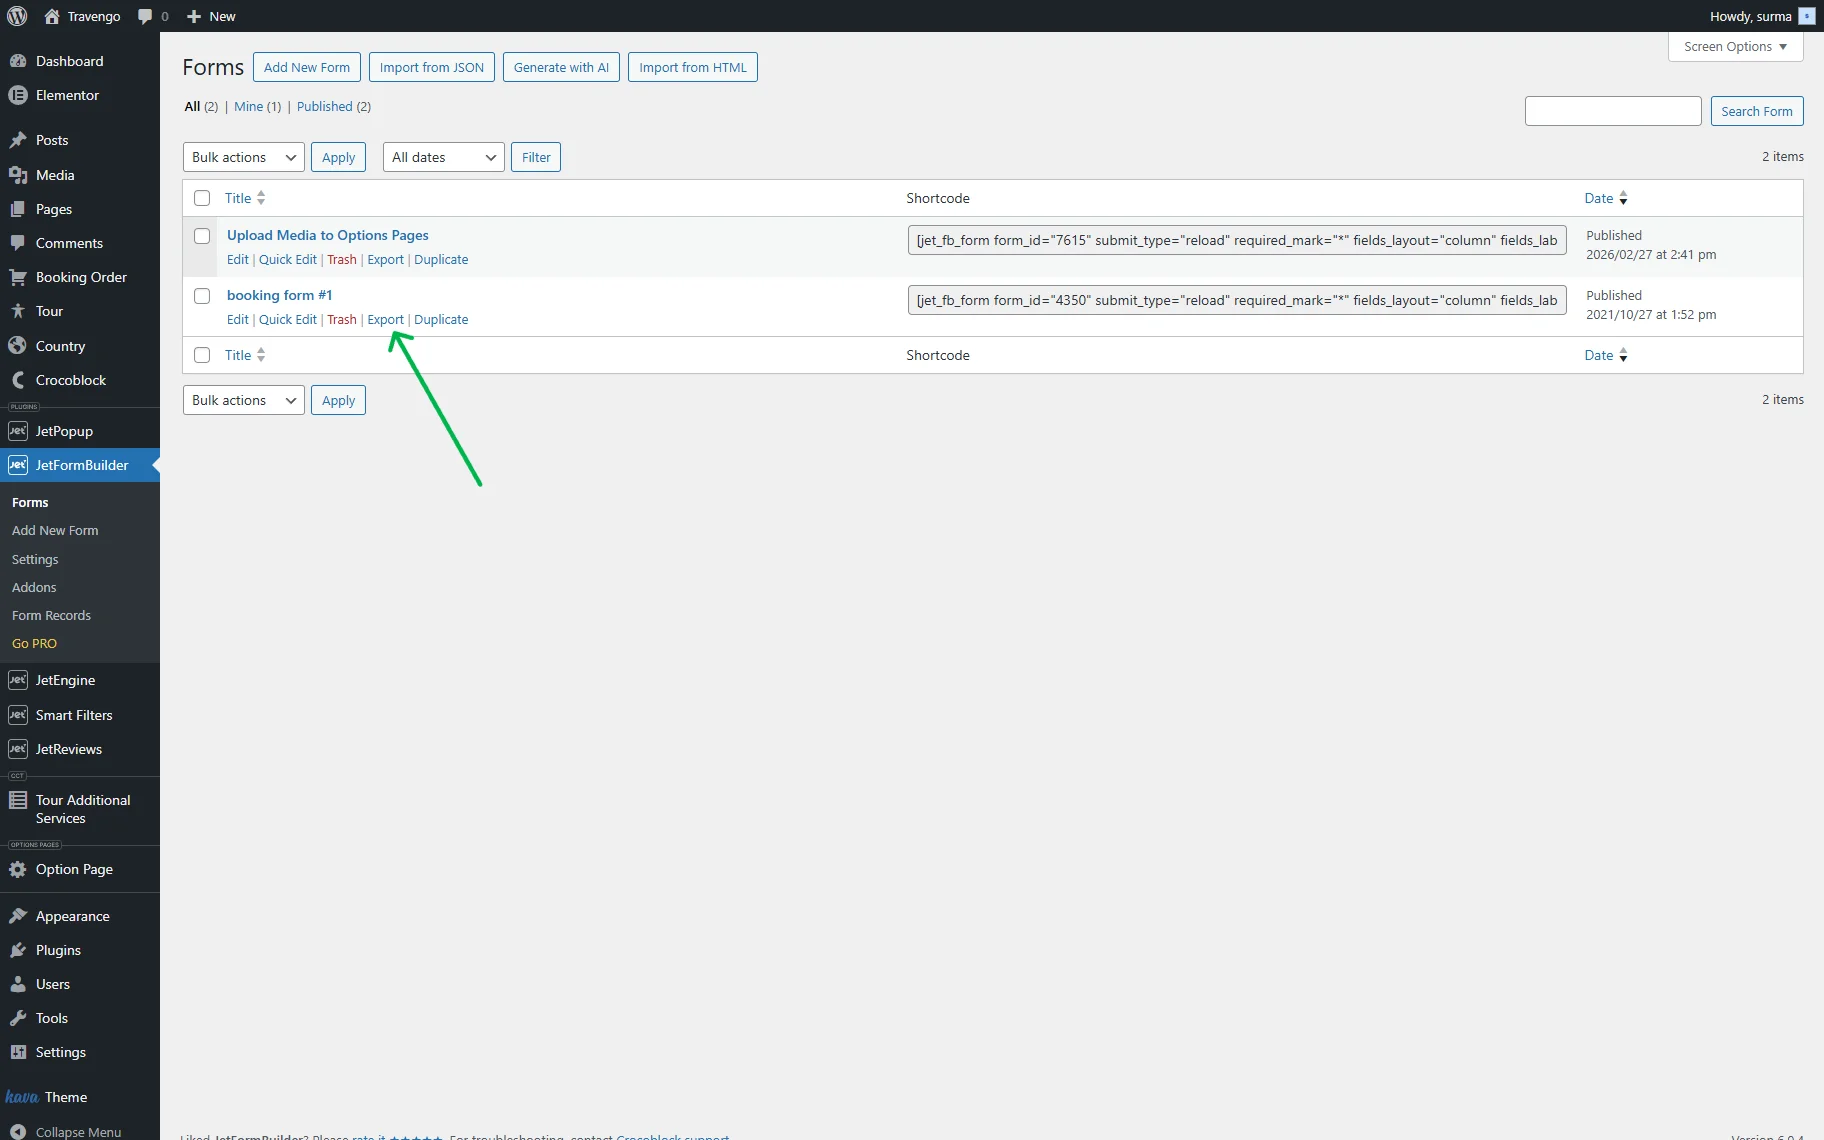
The form will be saved in the JSON format with its structure, fields, conditions, and actions.
In case you have a form with Post Submit Action, Webhook, or Send Email action, after importing, check and ensure that all the actions are set up correctly. Pay attention to the email address and webhook URLs settings.
2. If the form is connected to the CPT or CCT.
First, import the JetEngine structure (CPT or CCT with its data). Only then, import the form. Otherwise, form settings might be lost.
Site Migration
- Move the files to the database.
Use the Duplicator, All-in-One WP Migration, or Migrate Guru plugin. You can follow the How to Migrate a WordPress Website guide to ensure you are not missing any steps.
- Update URL in the database.
You can use WP-CLI to update URLs directly in the database of WordPress. It replaces every occurrence of the old domain with the new domain in all database tables. Here is an example command:
wp search-replace 'https://staging.example.com' 'https://example.com'Mind the following points:
- Use the full URL, including http:// or https://.
- Use the exact staging domain.
- Replace it with the live domain.
Otherwise, you can use the Better Search Replace plugin.
Additionally, you can find the How to Change WordPress Website’s Address guide useful.
After Migration: JetPlugins’ Restoration
- Activate the Crocoblock license on the live domain.
Proceed to WordPress Dashboard > Crocoblock > License and click the “Add New License” button. Enter the license key and click the “Activate License” button.
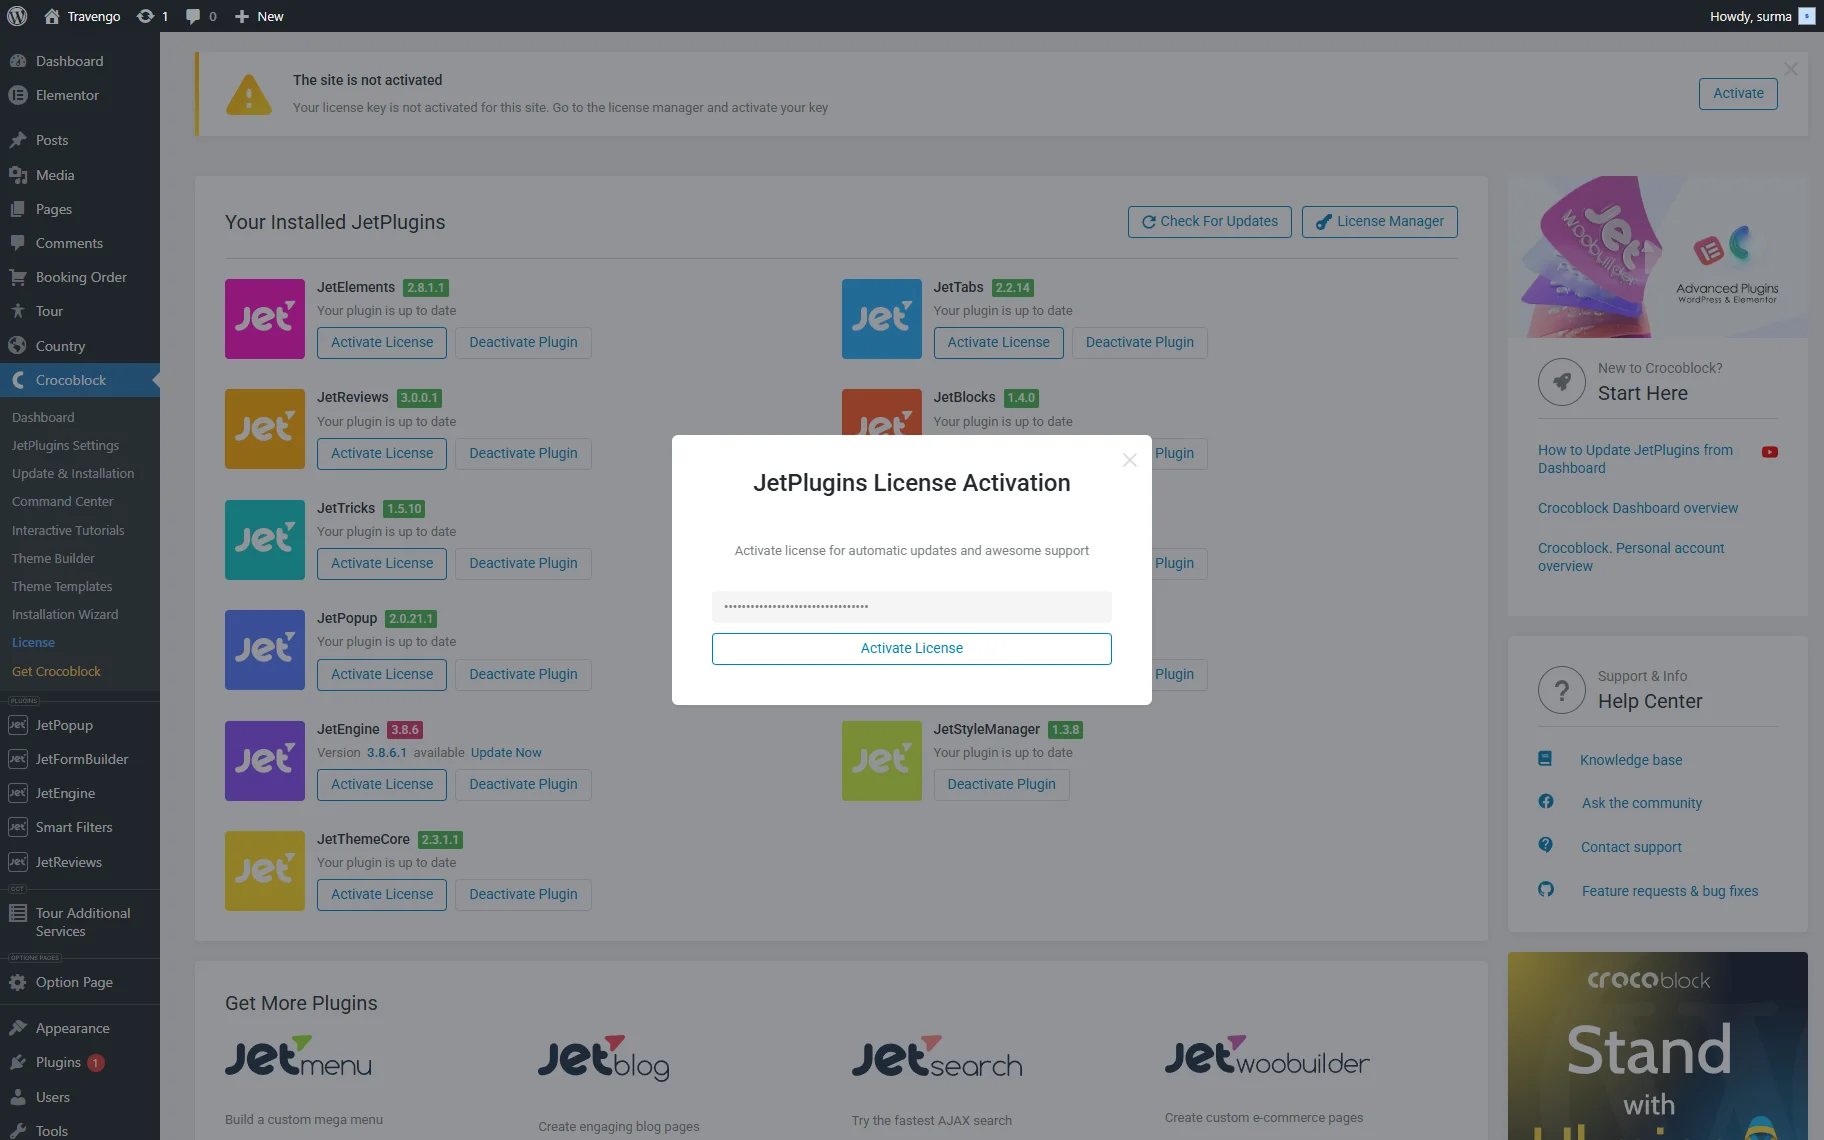
Otherwise, you can add the license with the Crocoblock Wizard.
2. Import JetEngine structures.
Move to WordPress Dashboard > JetEngine > Skins Manager > Import, select the needed JSON file, and click the “Import” button.
3. Import CCT data.
Within the Skins Manager, you can import the CCT settings, but not the items. Check the How to Import and Export Custom Content Type guide to learn how to import CCT items.
4. Import JetSmartFilters’ filters.
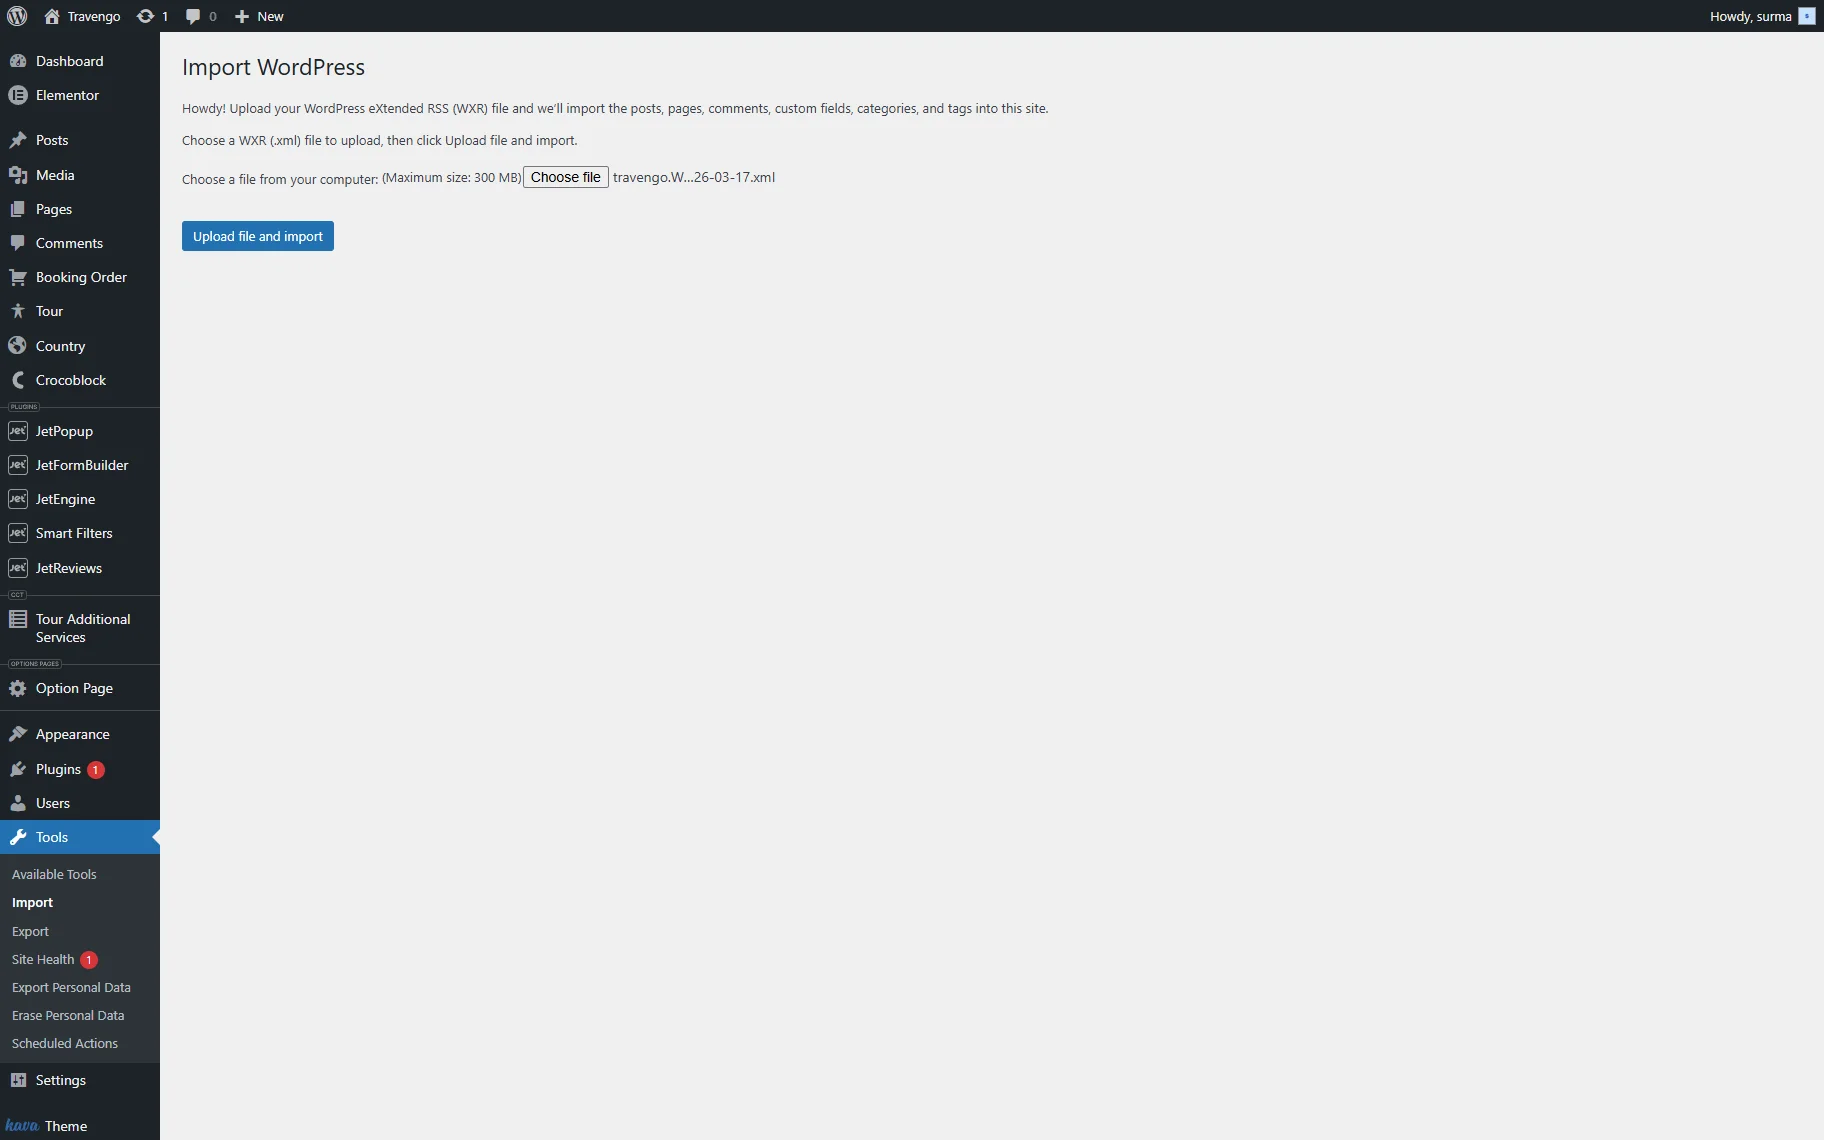
Open WordPress Dashboard > Tools > Import > Run WordPress Importer.
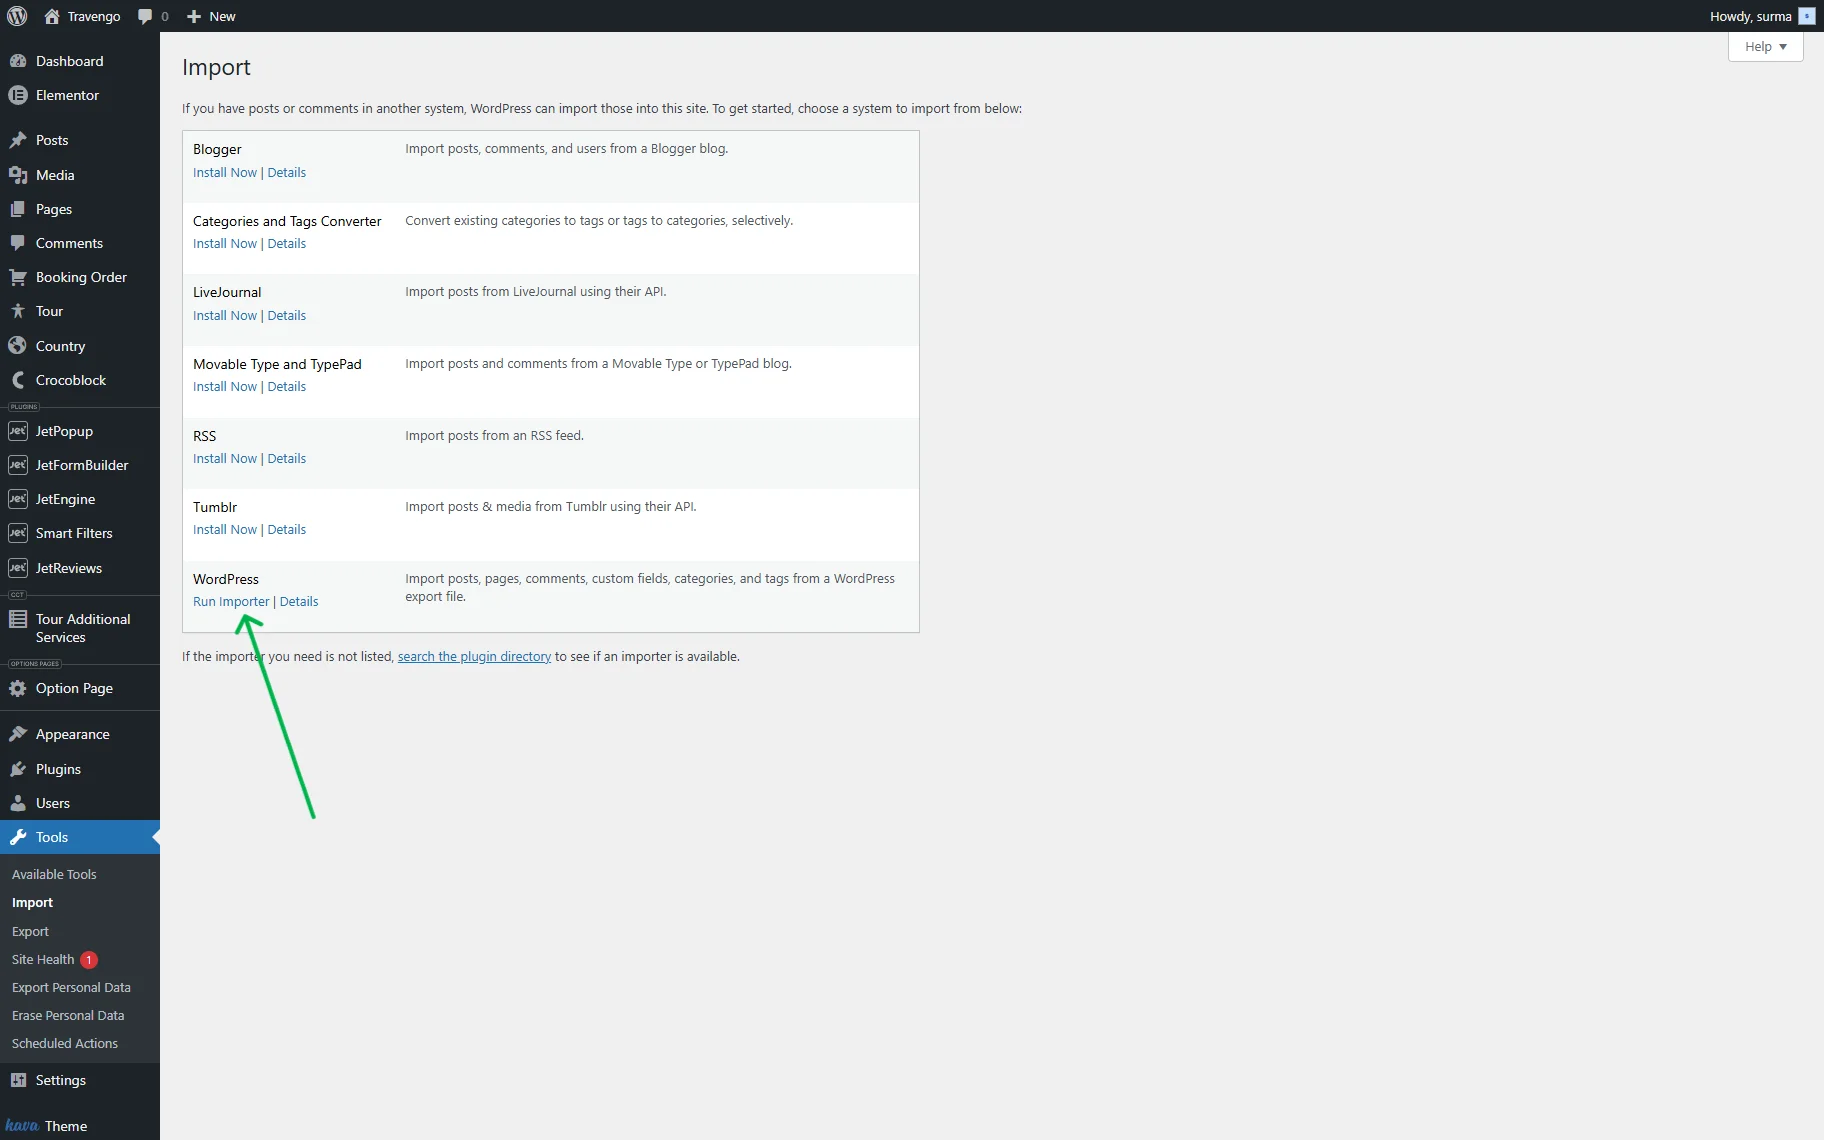
Select the file from your device and click the “Upload file and import” button.
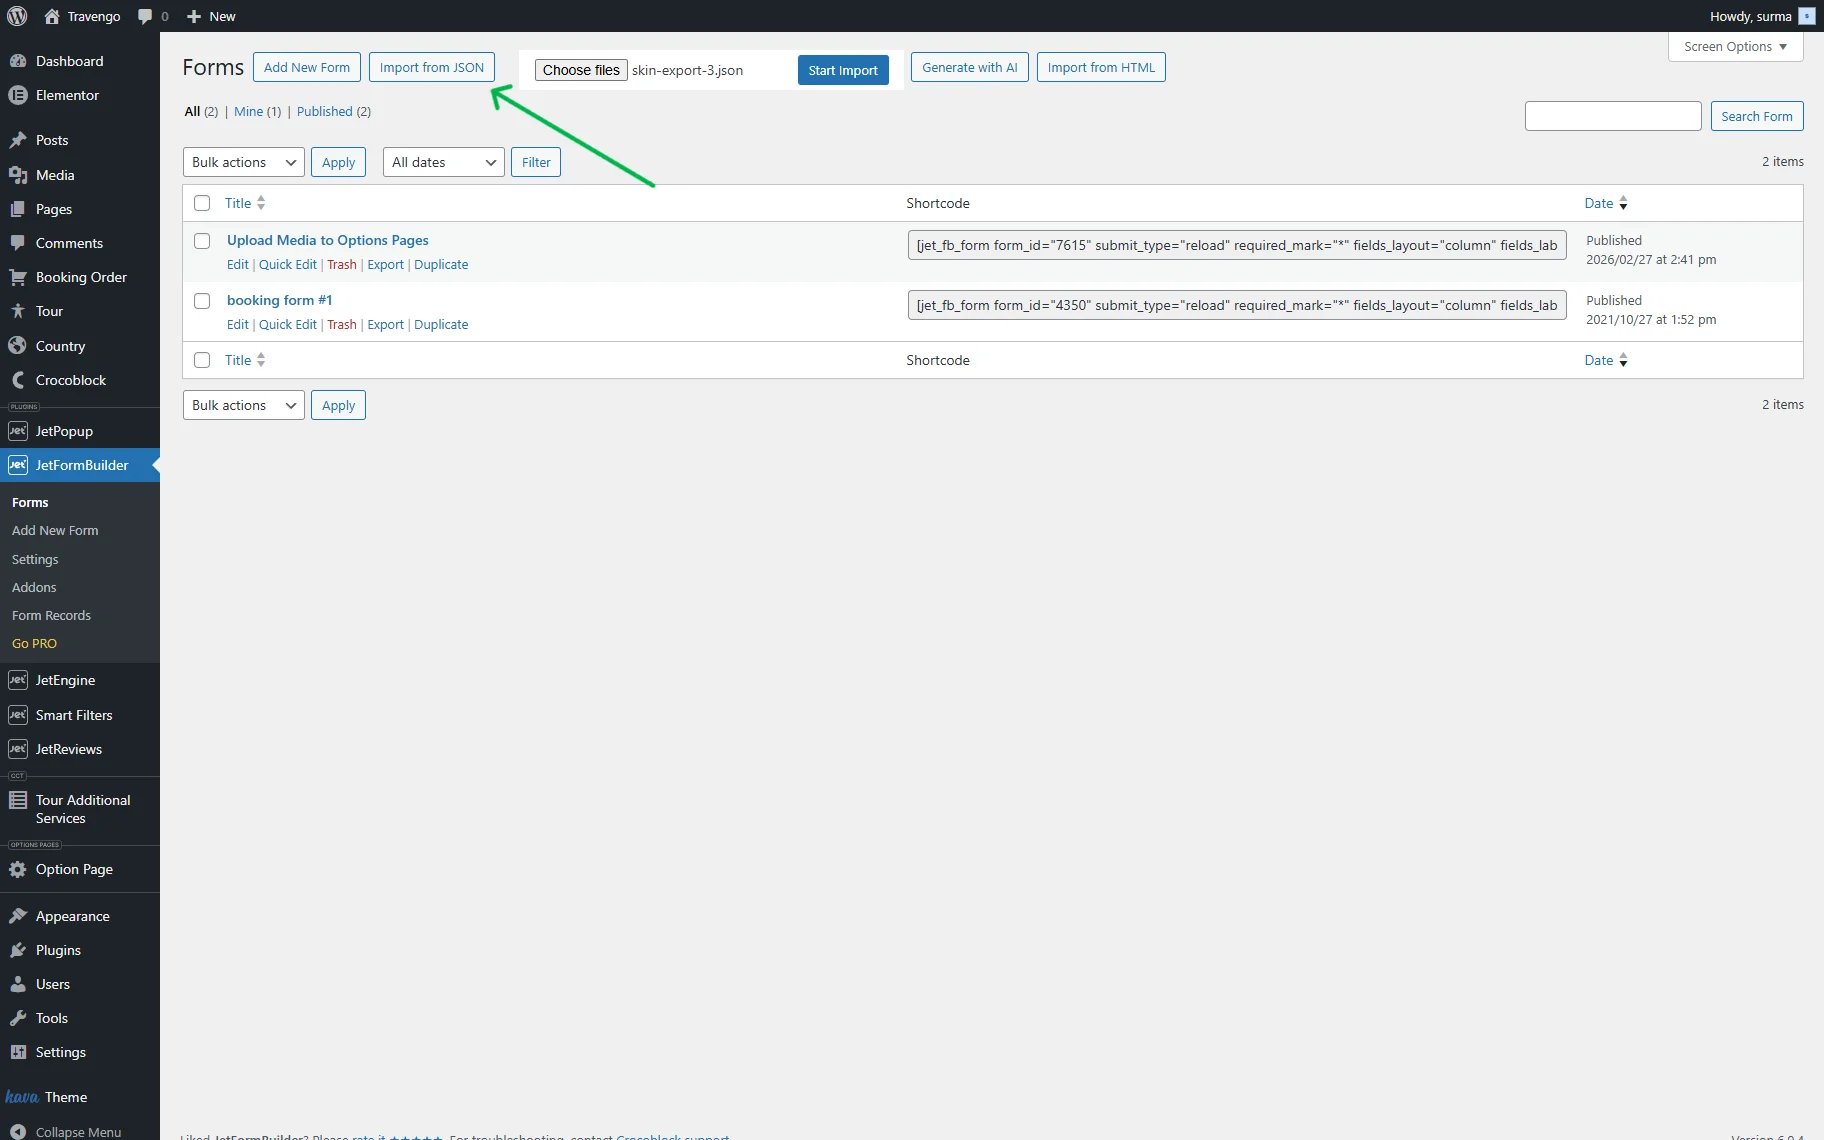
5. Import JetFormBuilder’s forms.
Proceed to WordPress Dashboard > JetFormBuilder > Forms and click the “Import from JSON” button in the top section. Upload the needed files and click the “Start Import” button.
6. Update permalinks.
During the Crocoblock staging to production phase, it’s essential to ensure that database URLs are properly updated. Proceed to WordPress Dashboard > Settings > Permalinks and click the “Save Changes” button without making any changes to the settings.
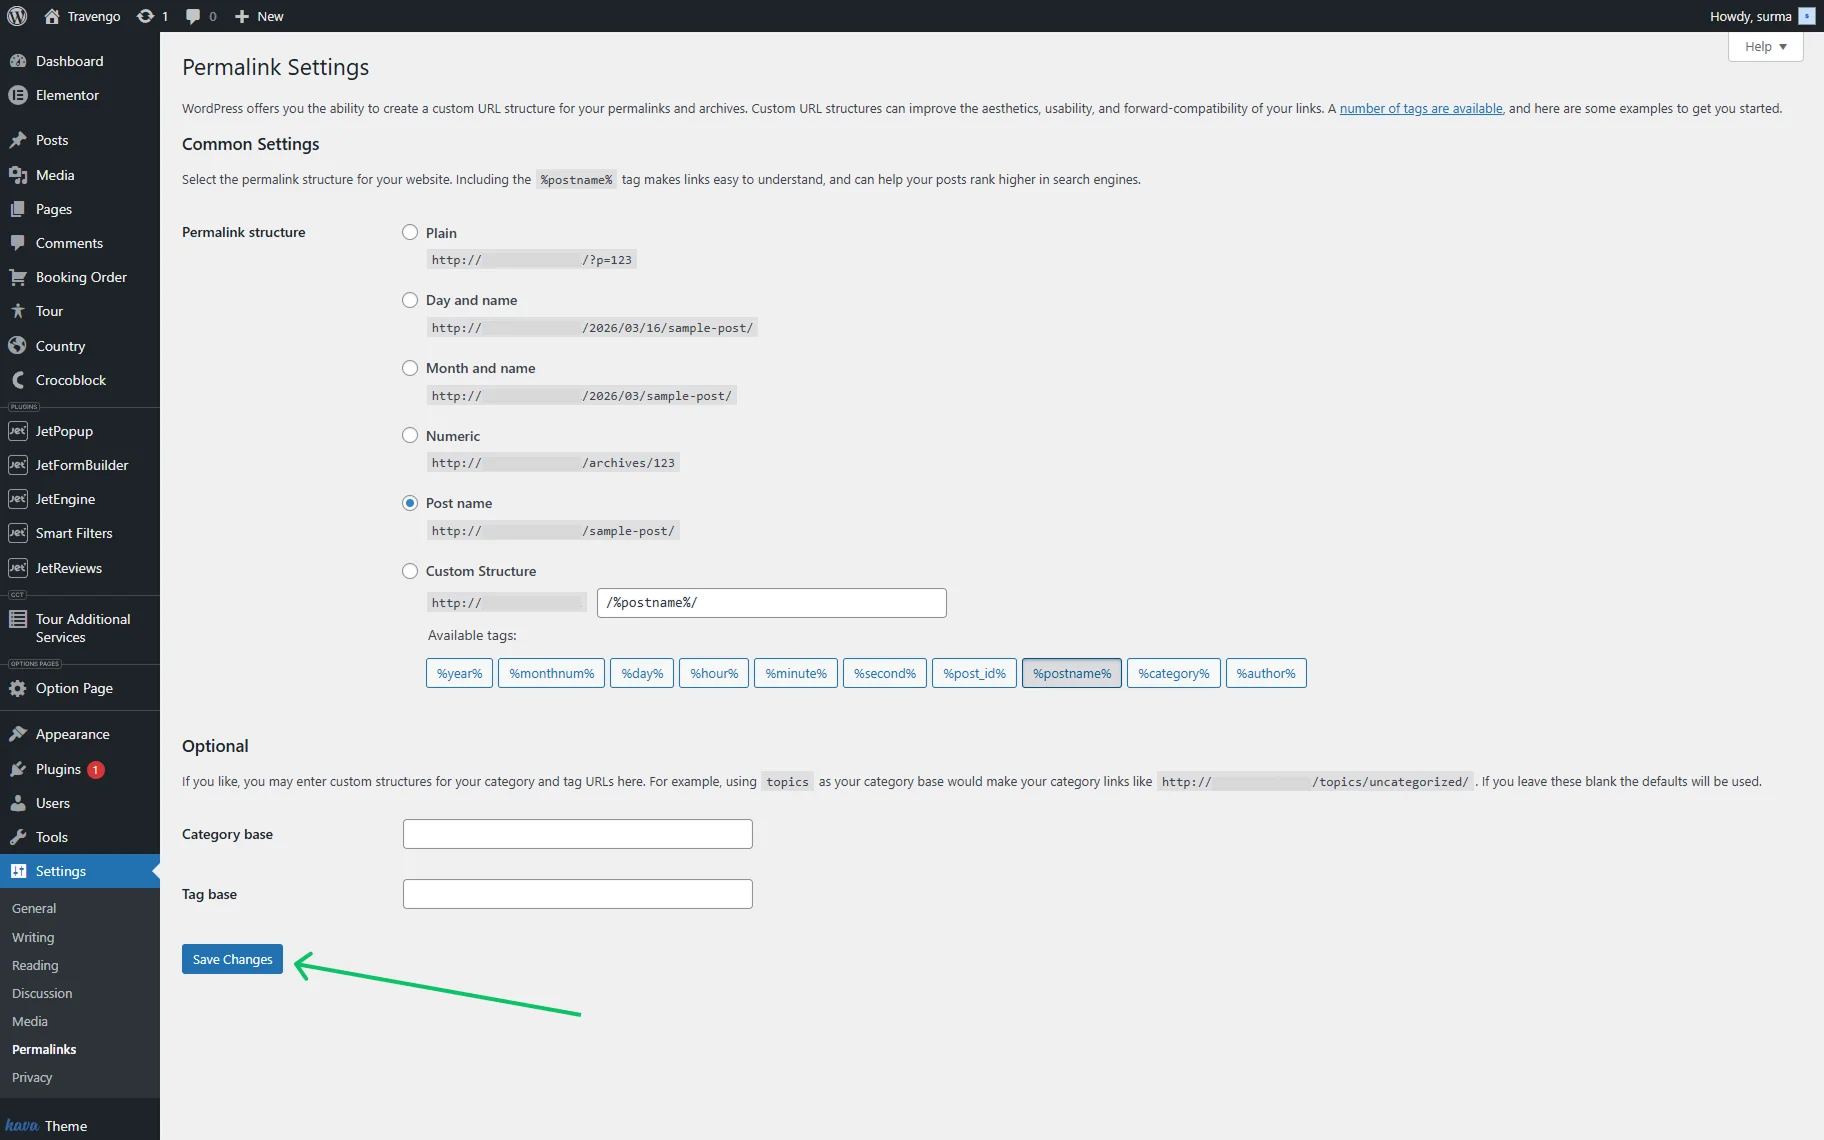
This stage is critical in any JetPlugins staging to live checklist, as it ensures that all functionality is fully restored on the live domain. Otherwise, without completing it, CPT single pages and archives will give the 404 error.
That’s it. Now you know the steps to be checked in a complete JetPlugins staging to live checklist and how to safely handle a WordPress staging to live Crocoblock migration without losing critical data.