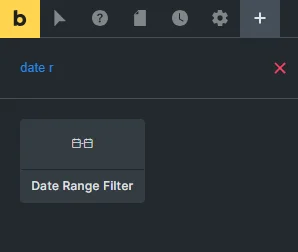
Date Range Filter Overview
This tutorial provides detailed information about using the Date Range filter of the JetSmartFilters plugin to filter publications or products on your WordPress website.
The JetSmartFilters plugin has various types of filters, and you can choose the one that best suits your goals: filtering the posts and products, selecting the events in a certain period of time, and others.
One of the most frequently used filter types is the Date Range filter, which enables filtering posts by creation or modification date or by “Date,” “Datetime,” or “Advanced Date” custom meta fields of the JetEngine plugin.
Filter Settings
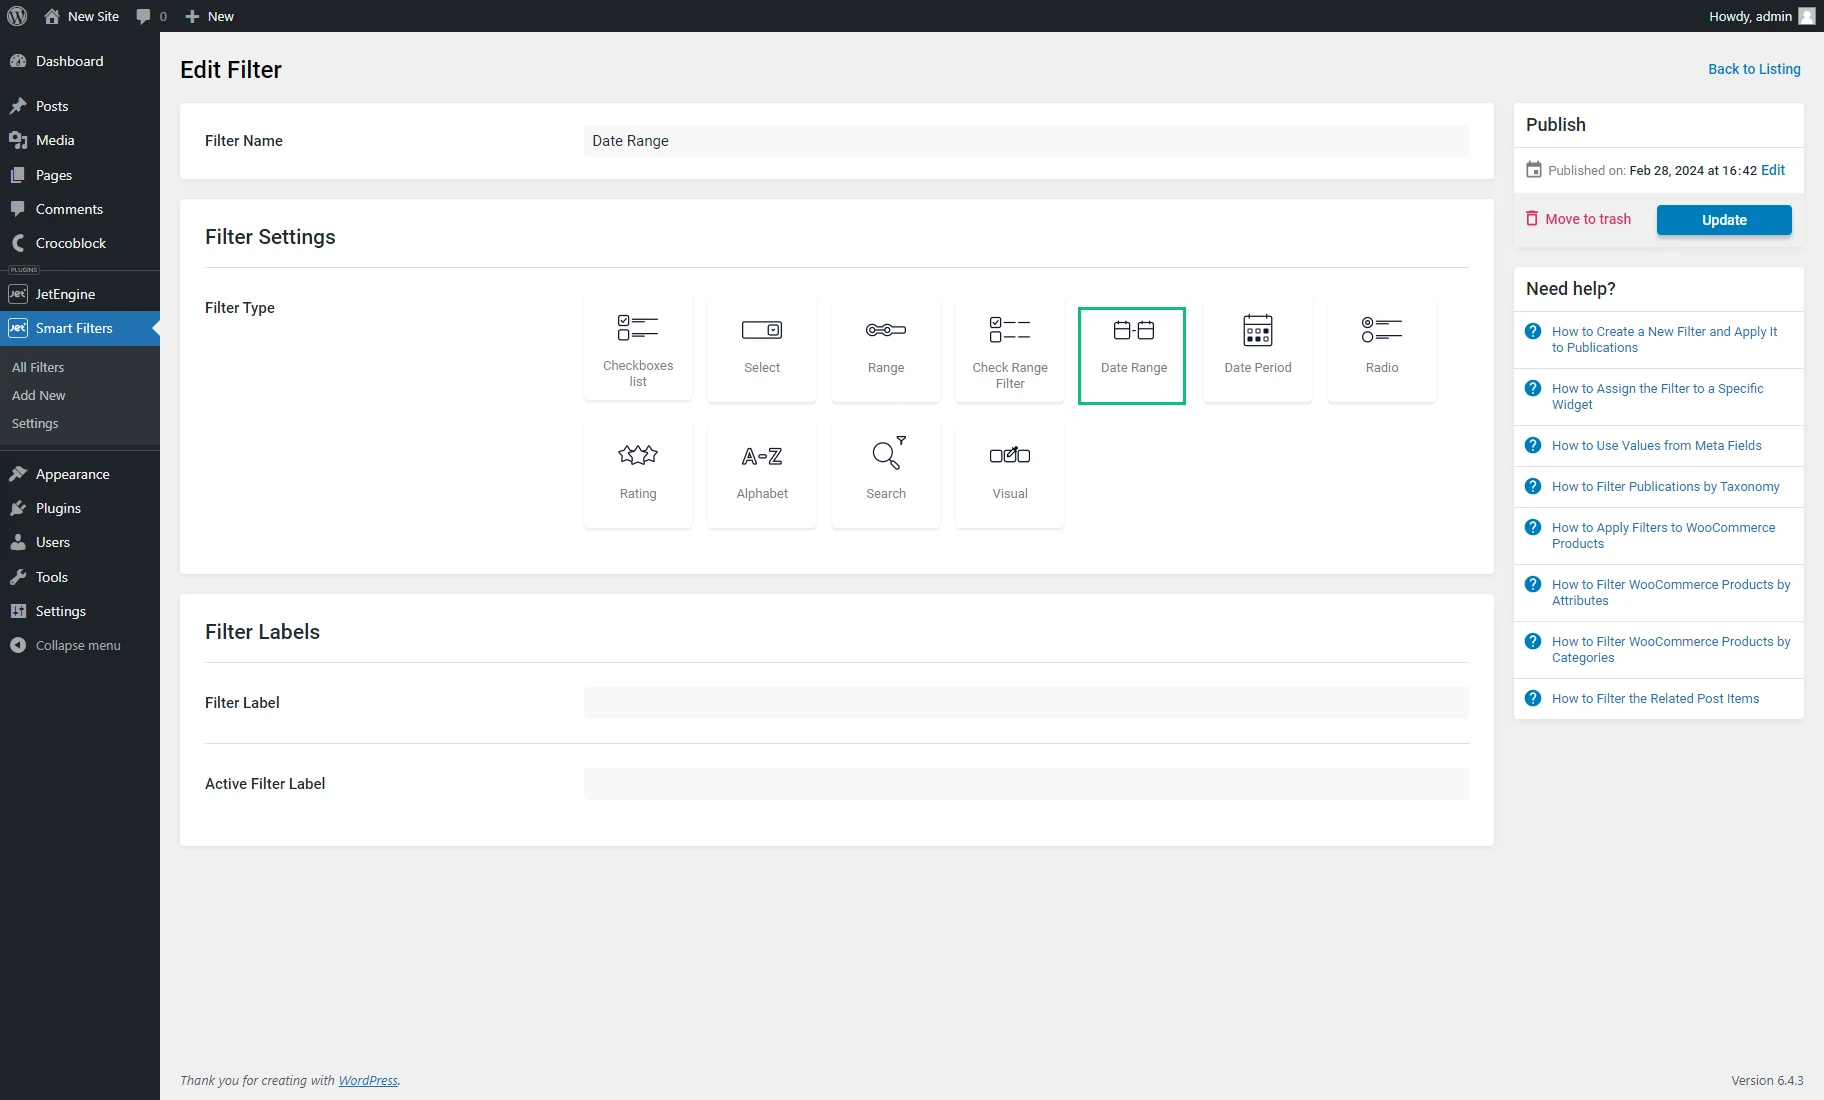
A new filter can be created in the WordPress Dashboard > Smart Filters Add New tab. Here, the creation should be started with the Filter Name typed in.
In the Filter Settings section, one should choose the “Date Range” as the Filter Type.
Then, in the Filter By drop-down menu, one of two values needs to be chosen:
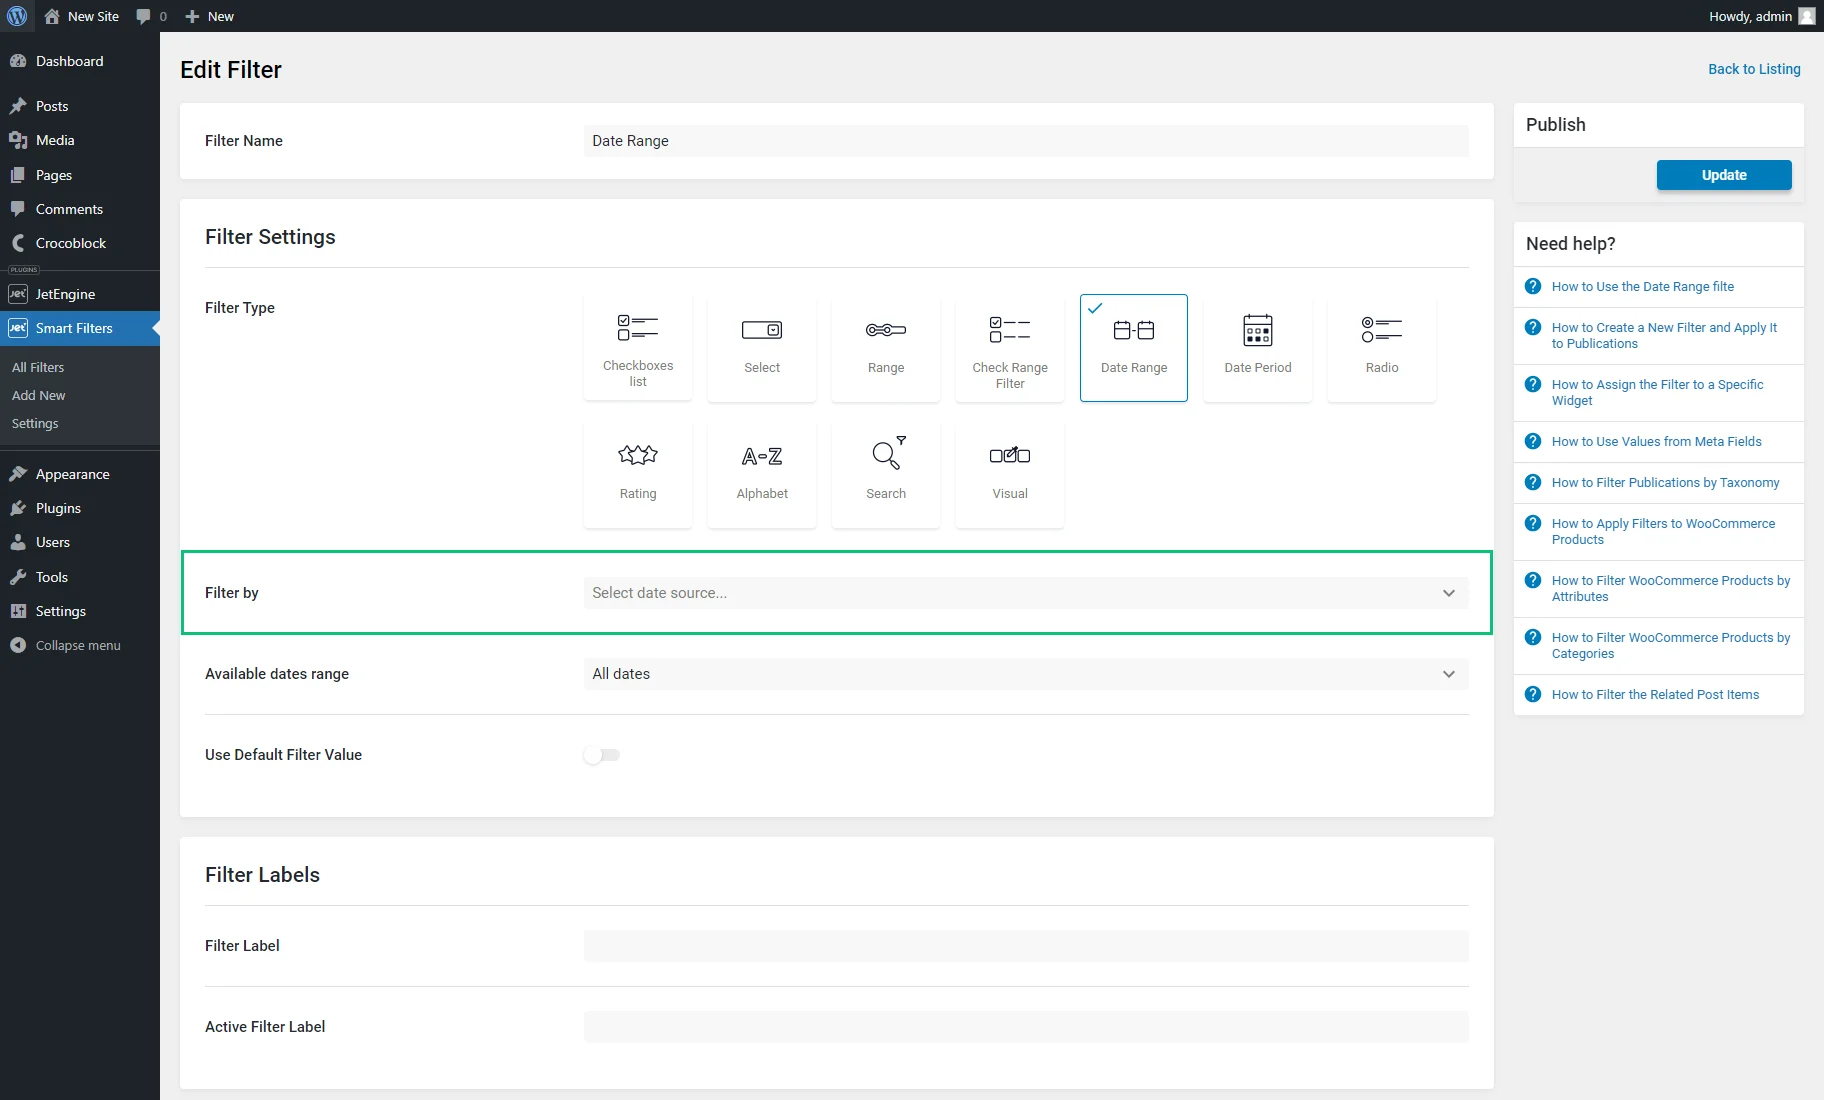
- Meta Date — an option that allows filtering the posts or products by the value set in the custom meta fields, saved as a timestamp. For example, it can be the date of the event or the expiring date of the sales. This option works with the Query Variable — a required field placed below where the “Date” custom meta field must be specified. One can enter the meta field Name/ID manually or set it with dynamic tags by clicking the “coin stack” icon;

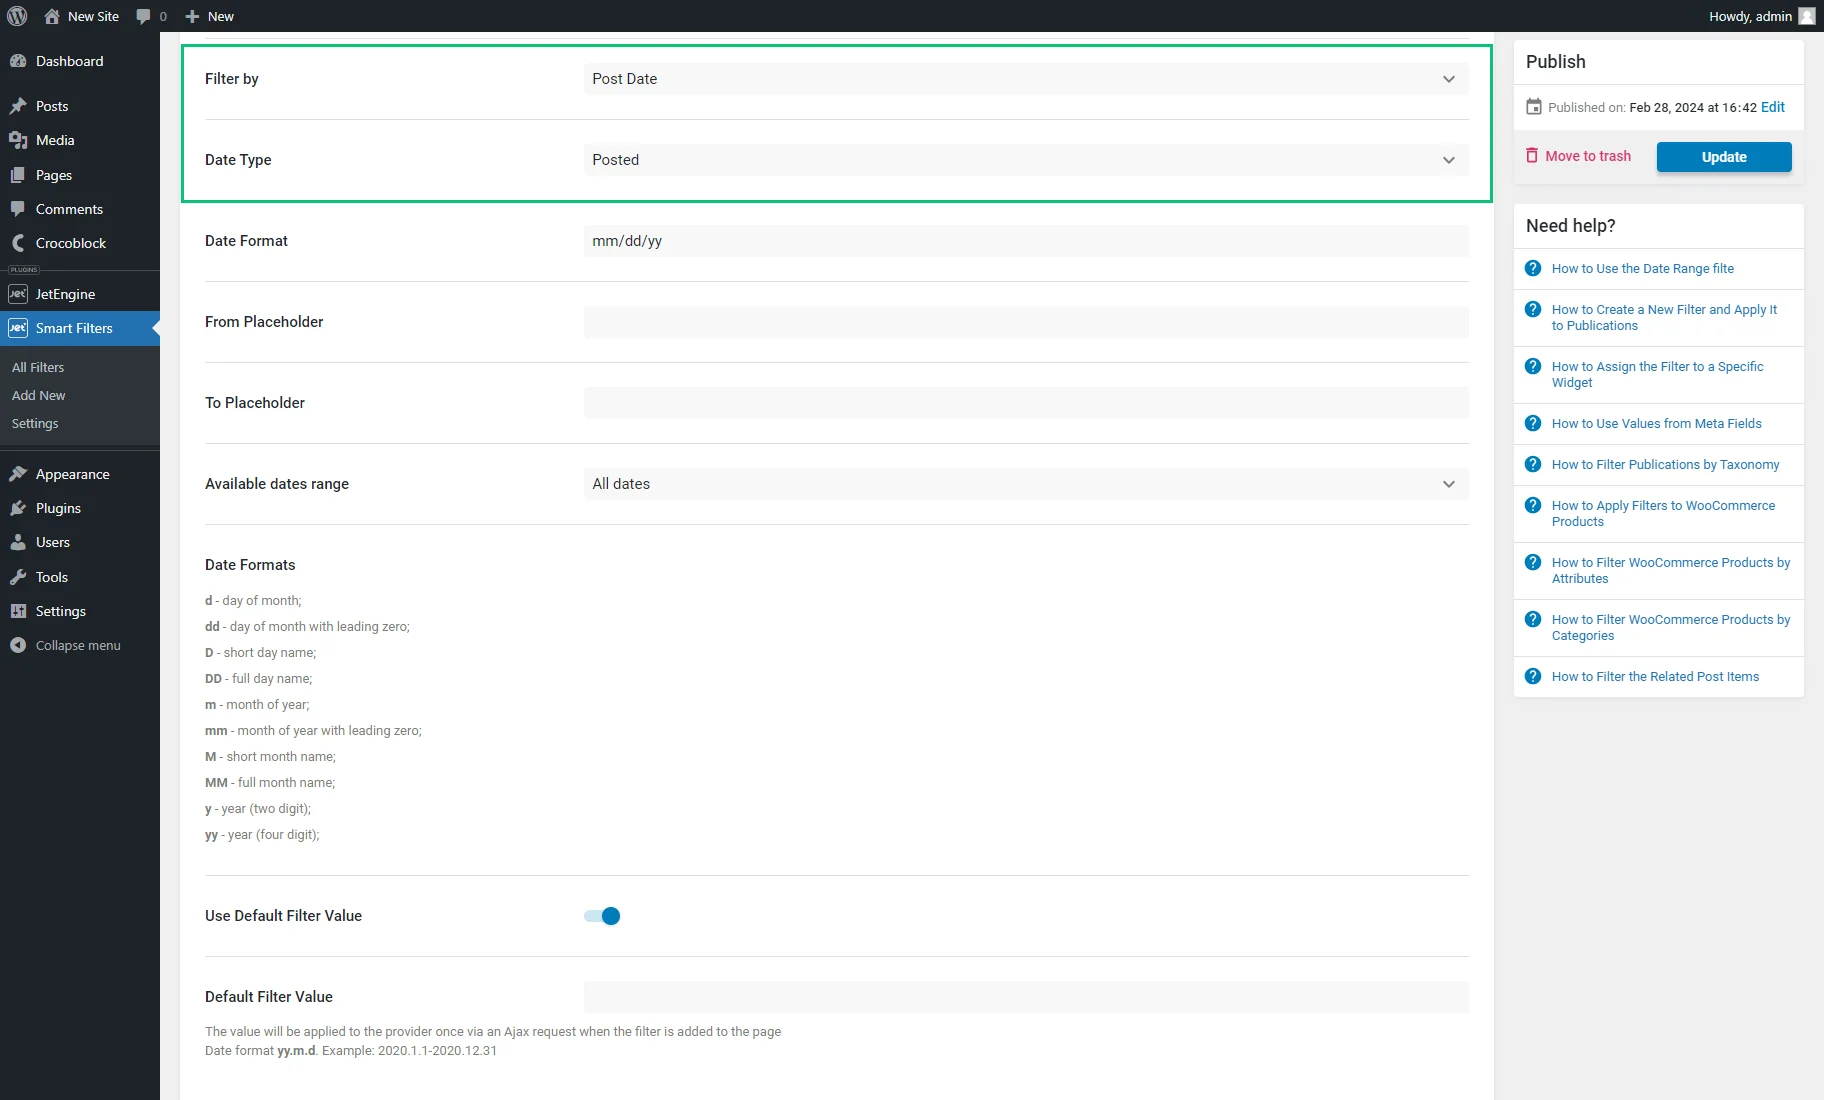
- Post Date — an option that activates the additional Date Type selector with two variants. It specifies the date by which to filter posts: when the post was posted or modified.
After the Filter by option is configured, other options can be adjusted:
- Date Format — a field that allows setting the custom date format;
- From Placeholder — a placeholder text that will be displayed in the start date input field of the filter;
- To Placeholder — a placeholder text that will be displayed in the end date input field of the filter;
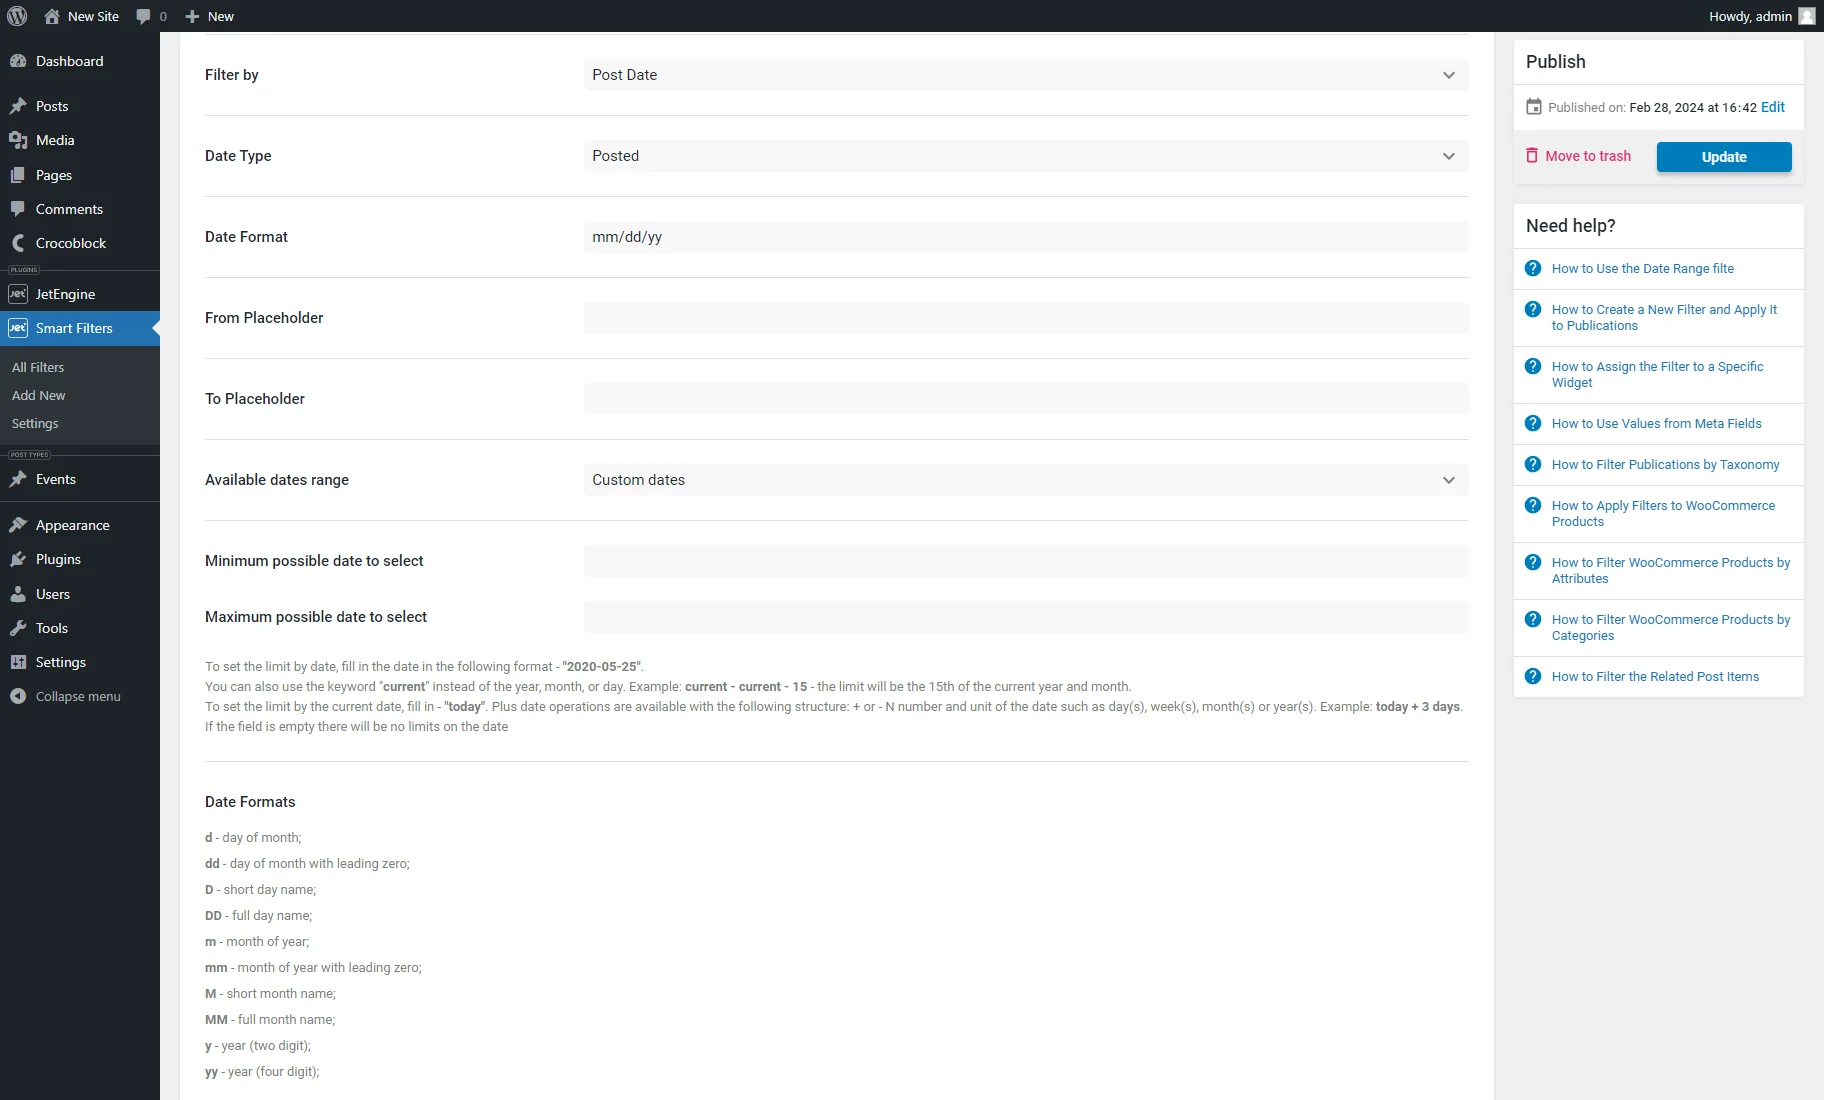
- Available dates range — a selector that allows setting the date range for users to pick. Such options are available:
- All dates — all dates are available;
- Future dates — only upcoming dates are available;
- Past dates — only previous dates are available;
- Custom dates — it allows adjusting the custom date range. If this option is selected, it activates the Minimum possible date to select and Maximum possible date to select fields. Here, the static dates can be entered in the “2020-05-25” (“YYYY-MM-DD”) format. One can also use the keyword “current” instead of the year, month, or day. For example, if “current – current – 15” is specified, the limit will be the 15th of the current year and month. To set the limit based on the current date, simply input “today.” Additionally, date operations can be performed using the following structure: + or – N number and unit of the date, such as day(s), week(s), month(s), or year(s). For instance, “today + 3 days.” If the field is left empty, there will be no restrictions on the date. Learn more from the How to Filter Posts by Custom Date Range tutorial.
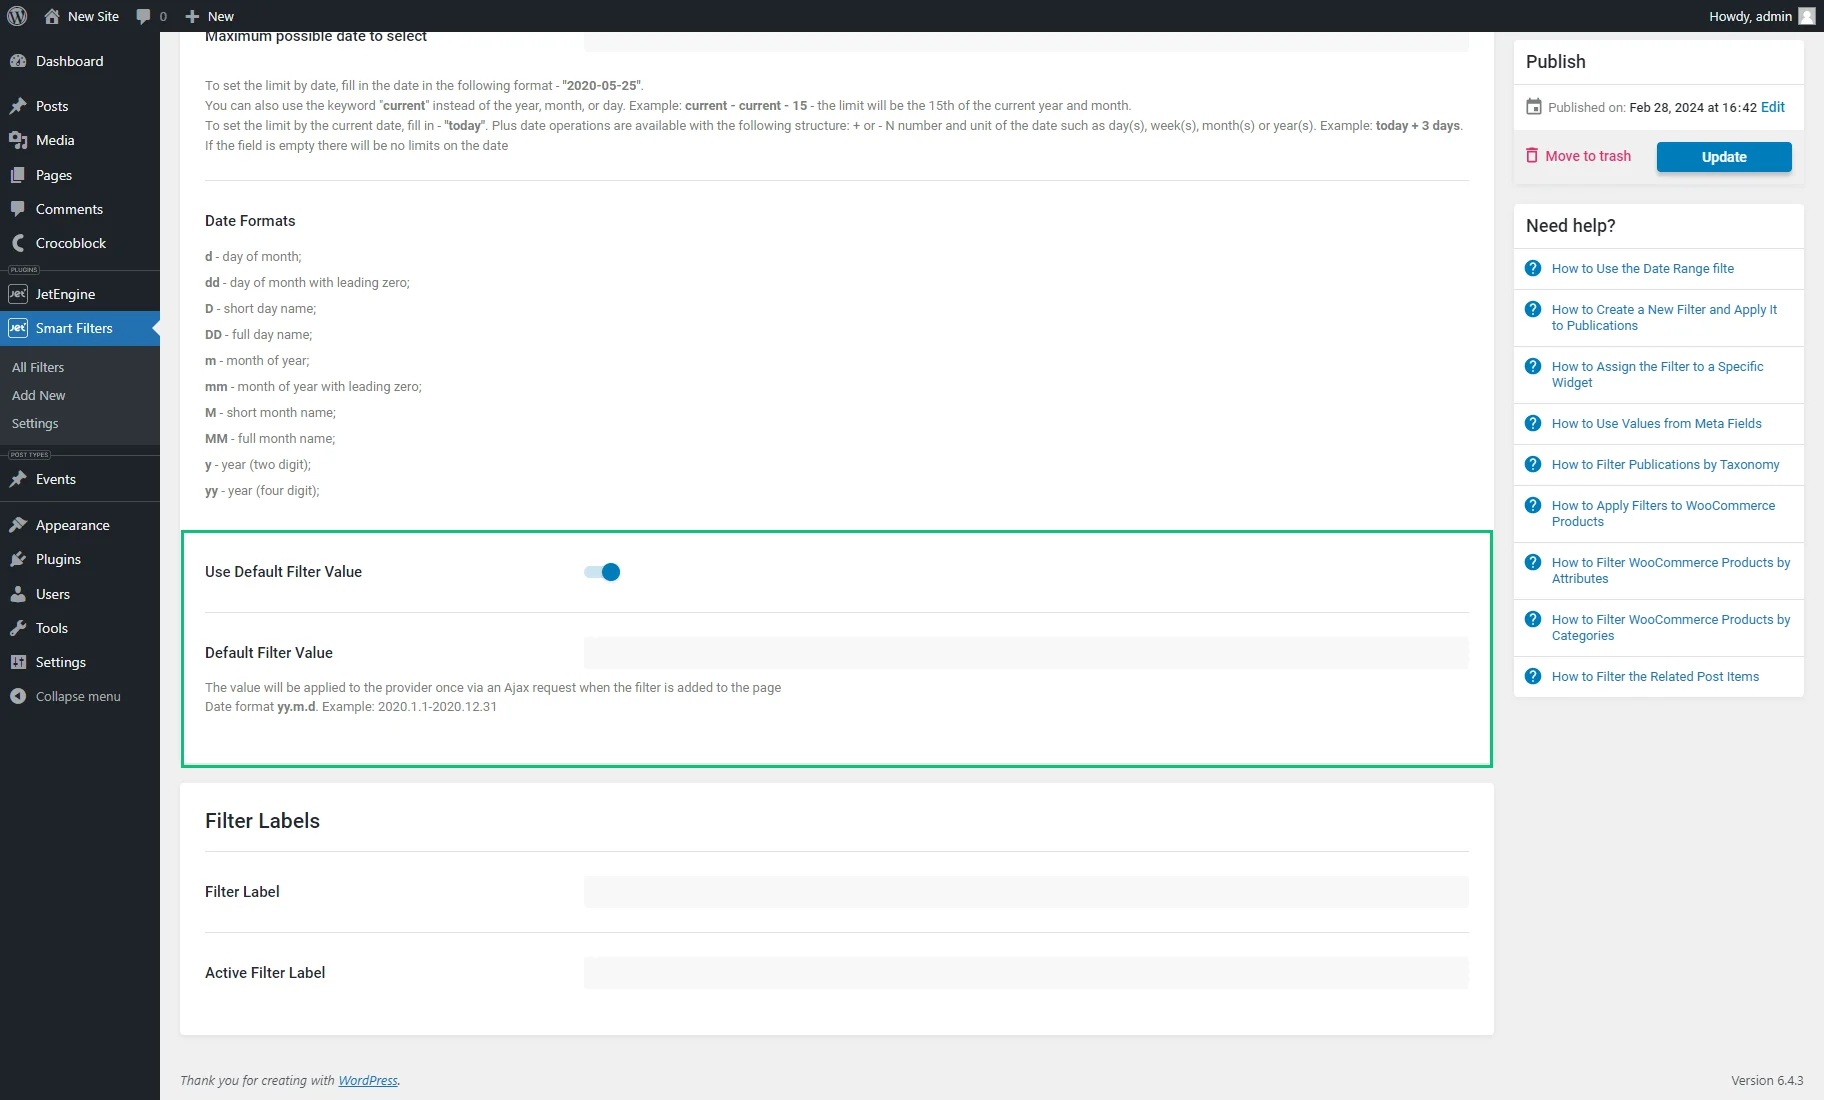
- Use Default Filter Value — if enabled, it activates the Default Filter Value field, where a value typed here will be applied to the provider once through an Ajax request upon adding the filter to the page. Dates here must be entered in the “yy.m.d” format, for example, “2020.1.1-2020.12.31.”
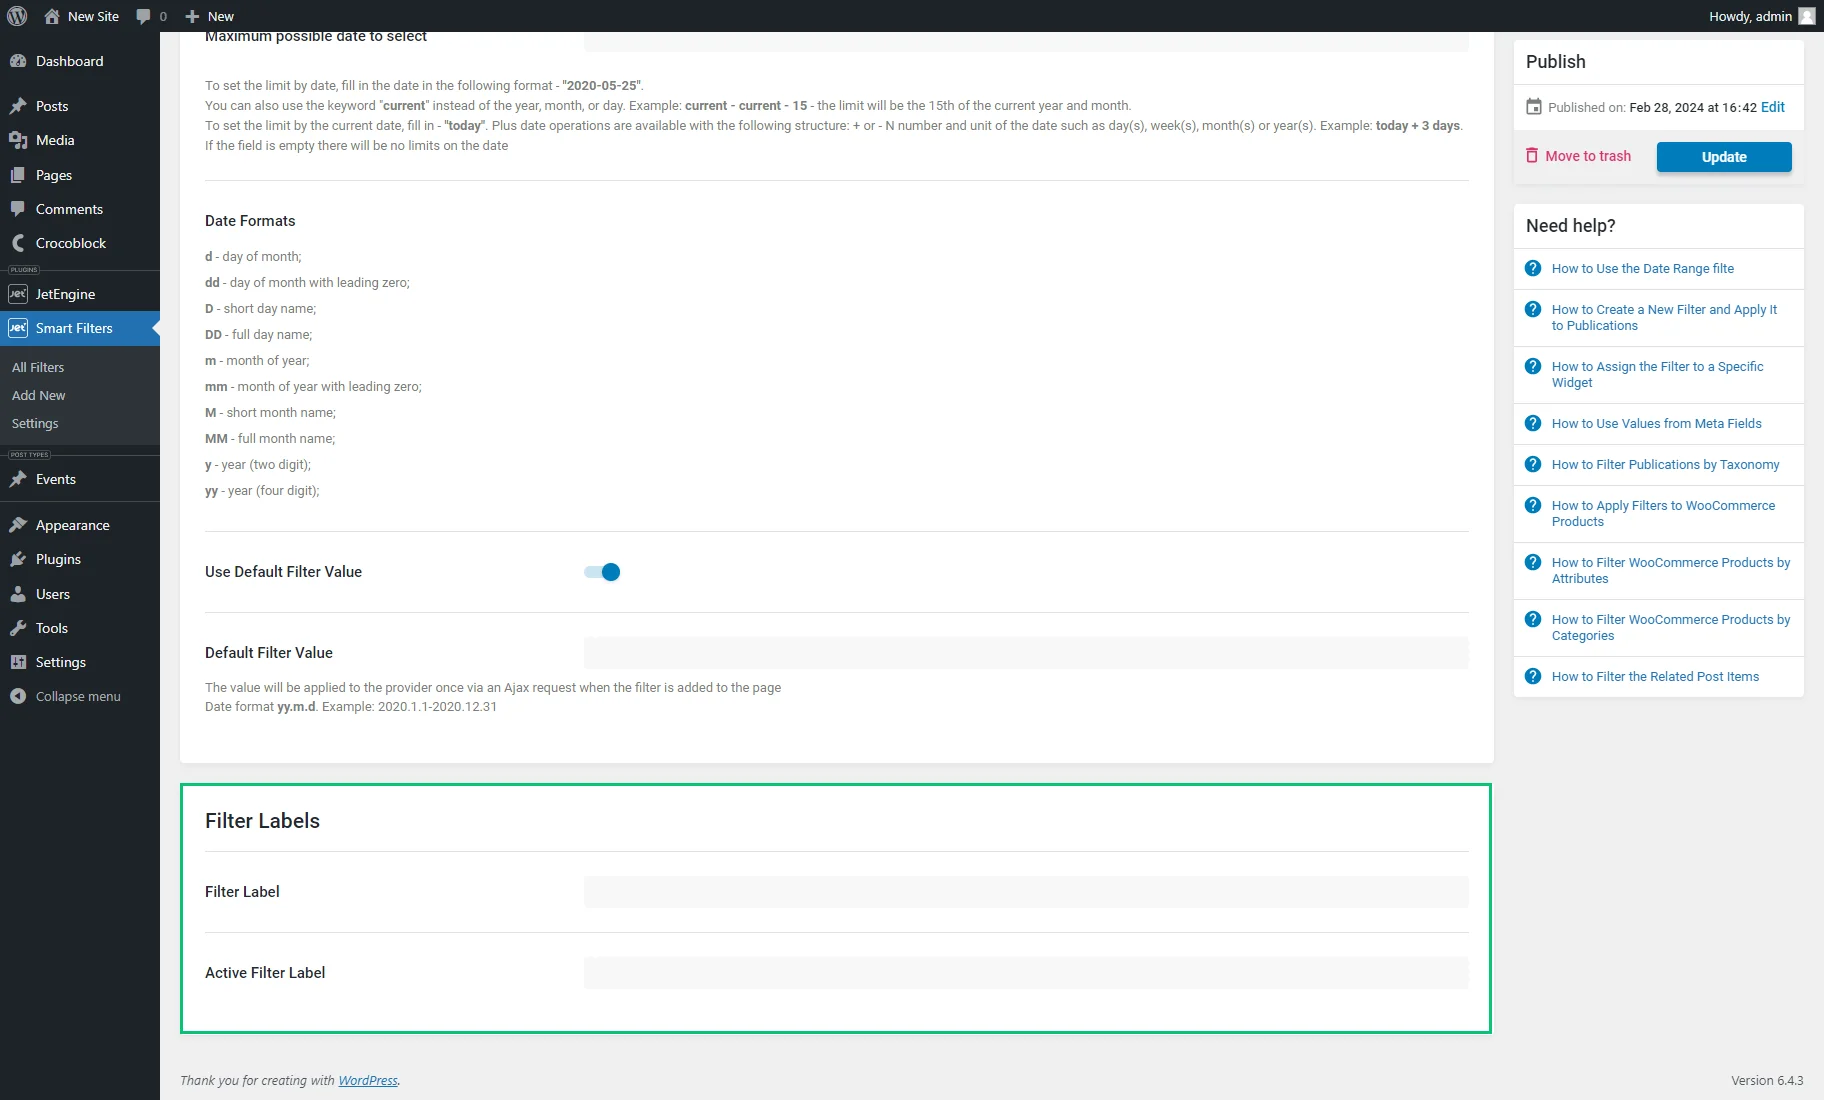
Filter Labels
In the Filter Labels section, one can enter the Filter Label that will be visible when the filter isn’t currently applied and the Active Filter Label that is shown after users filter the content and that may help users understand what criteria are currently being used to filter or refine the results they are viewing.
After adjusting all the “Date Range” filter settings, the “Update” button should be clicked.
Assigning Date Range Filter to Content
The Date Range filter is deployable on the front end via such editors as Elementor, WordPress editor, or Bricks. It should be placed with the content that needs to be filtered.
To learn what widgets, blocks, and elements can be filtered, head to the Filter Providers Overview.
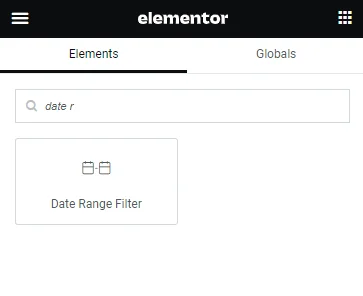
Date Range Filter widget in Elementor
The Date Range Filter widget is available in the Elementor Page Builder.
The widget contains the following settings:
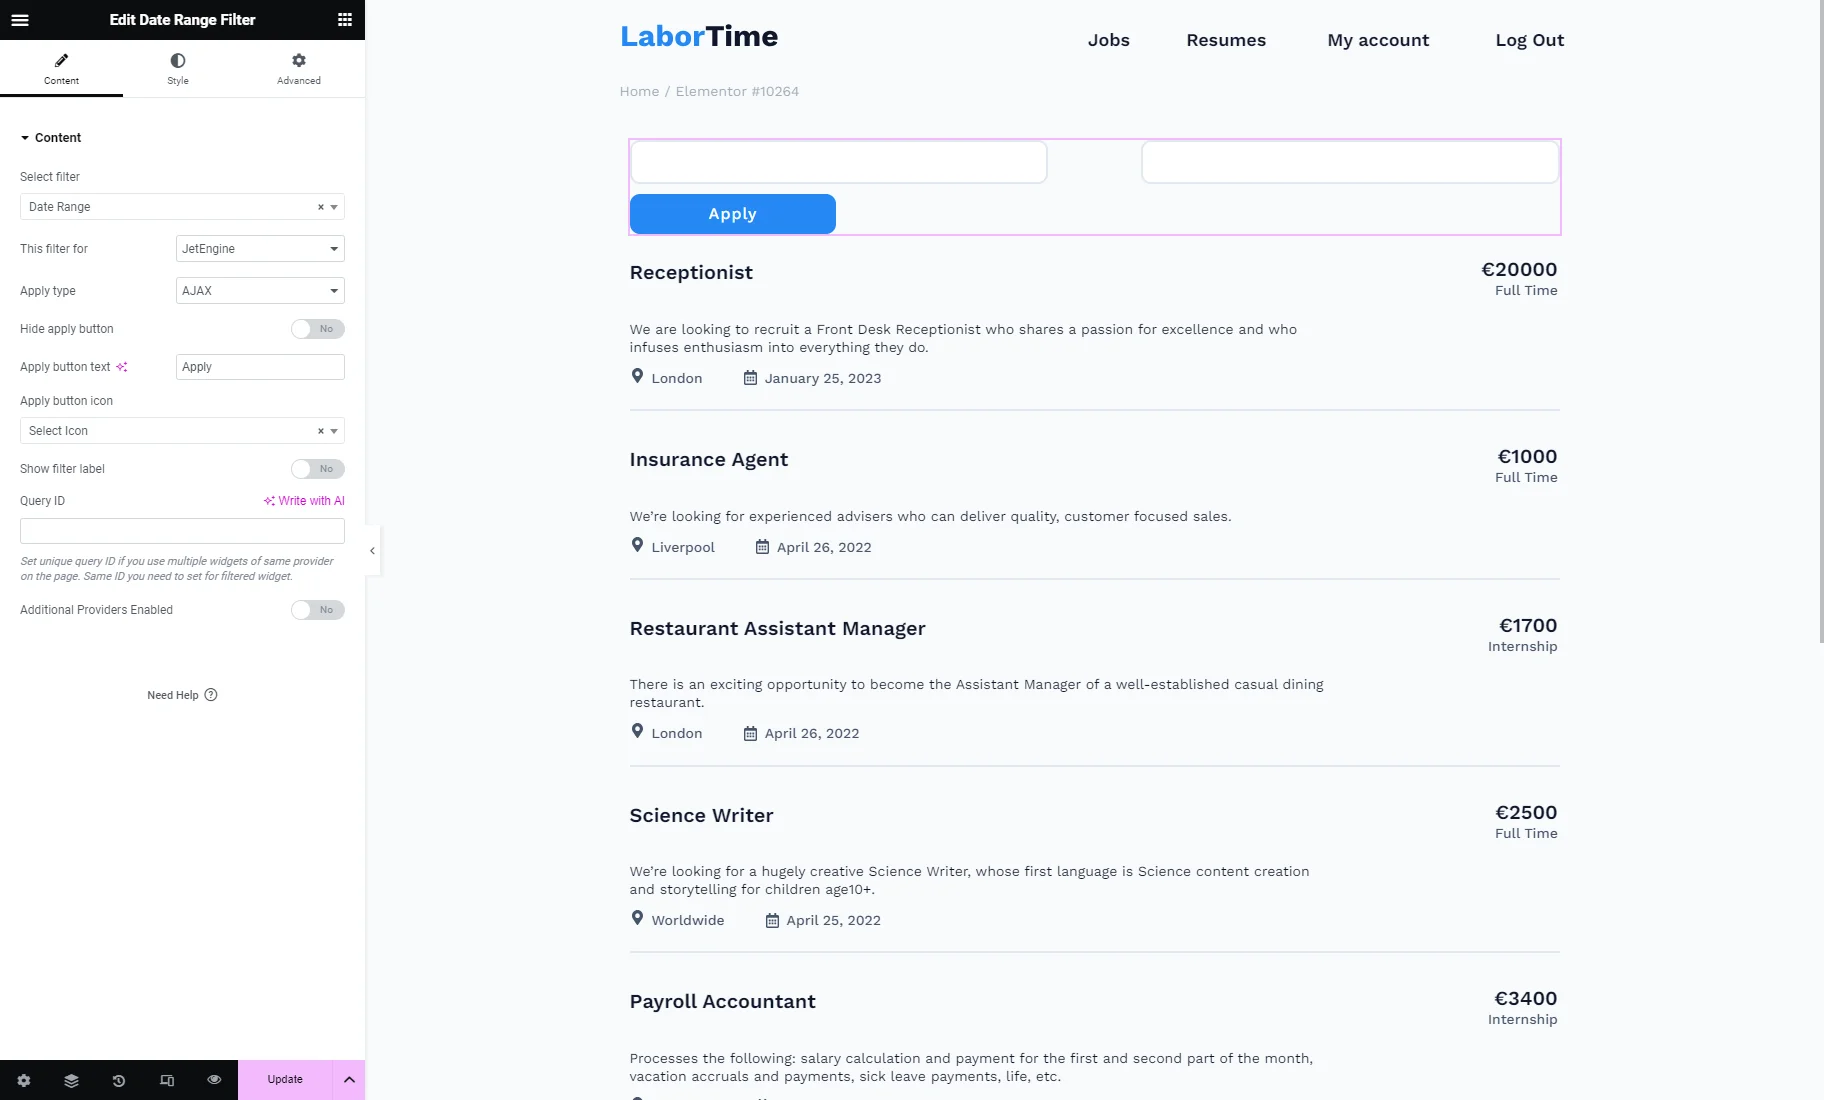
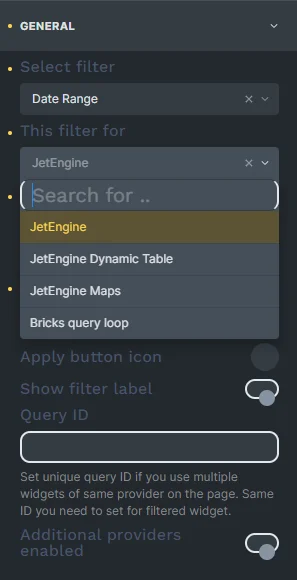
- Select filter — a bar where the filter’s name should be put so it appears on the page. Filter providers can be enabled or disabled in the General Settings tab of the JetSmartFilters dashboard;
- This filter for — a provider list to pick the widget to which the filter will be attached;
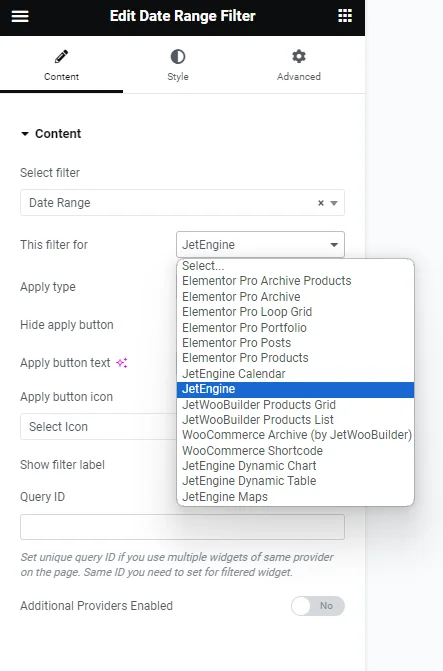
- Apply type — a field to choose a way the filter will work. Presented options: “AJAX,” “Page Reload,” and “Mixed.” “AJAX” displays results without reloading a page, “Page Reload” reloads a page, and “Mixed” doesn’t reload a page but transforms the page URL;
- Apply on — a field to pick when the filter is applied: once the value changes or by clicking the “Apply” button;
- Hide apply button — a switcher that hides the “Apply” button. If disabled, the Apply button text and Apply button icon fields are available;
- Show filter label — a toggle that shows a filter label above the filter;
- Query ID — a field that can be used if several widgets of the same type are on the same page, and one is supposed to be used as a provider. For instance, if there are two Listing Grids on the page and only one should be filtered, the Listing Grid settings (Advanced tab) should be opened, and its unique name should be set in the CSS ID field and then put here, in the Query ID field of the filter;
- Additional Providers Enabled — a toggle to be enabled if several widgets should be filtered. Read more about this option in the Additional Providers List Option Overview. You can also check the How to Apply Filters to Several Widgets on a Page tutorial.
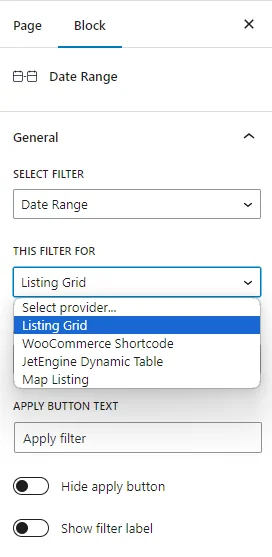
Date Range block in Gutenberg
The Date Range block is available in the WordPress (Block) editor.
In the Block Editor, the same settings as in Elementor are presented.
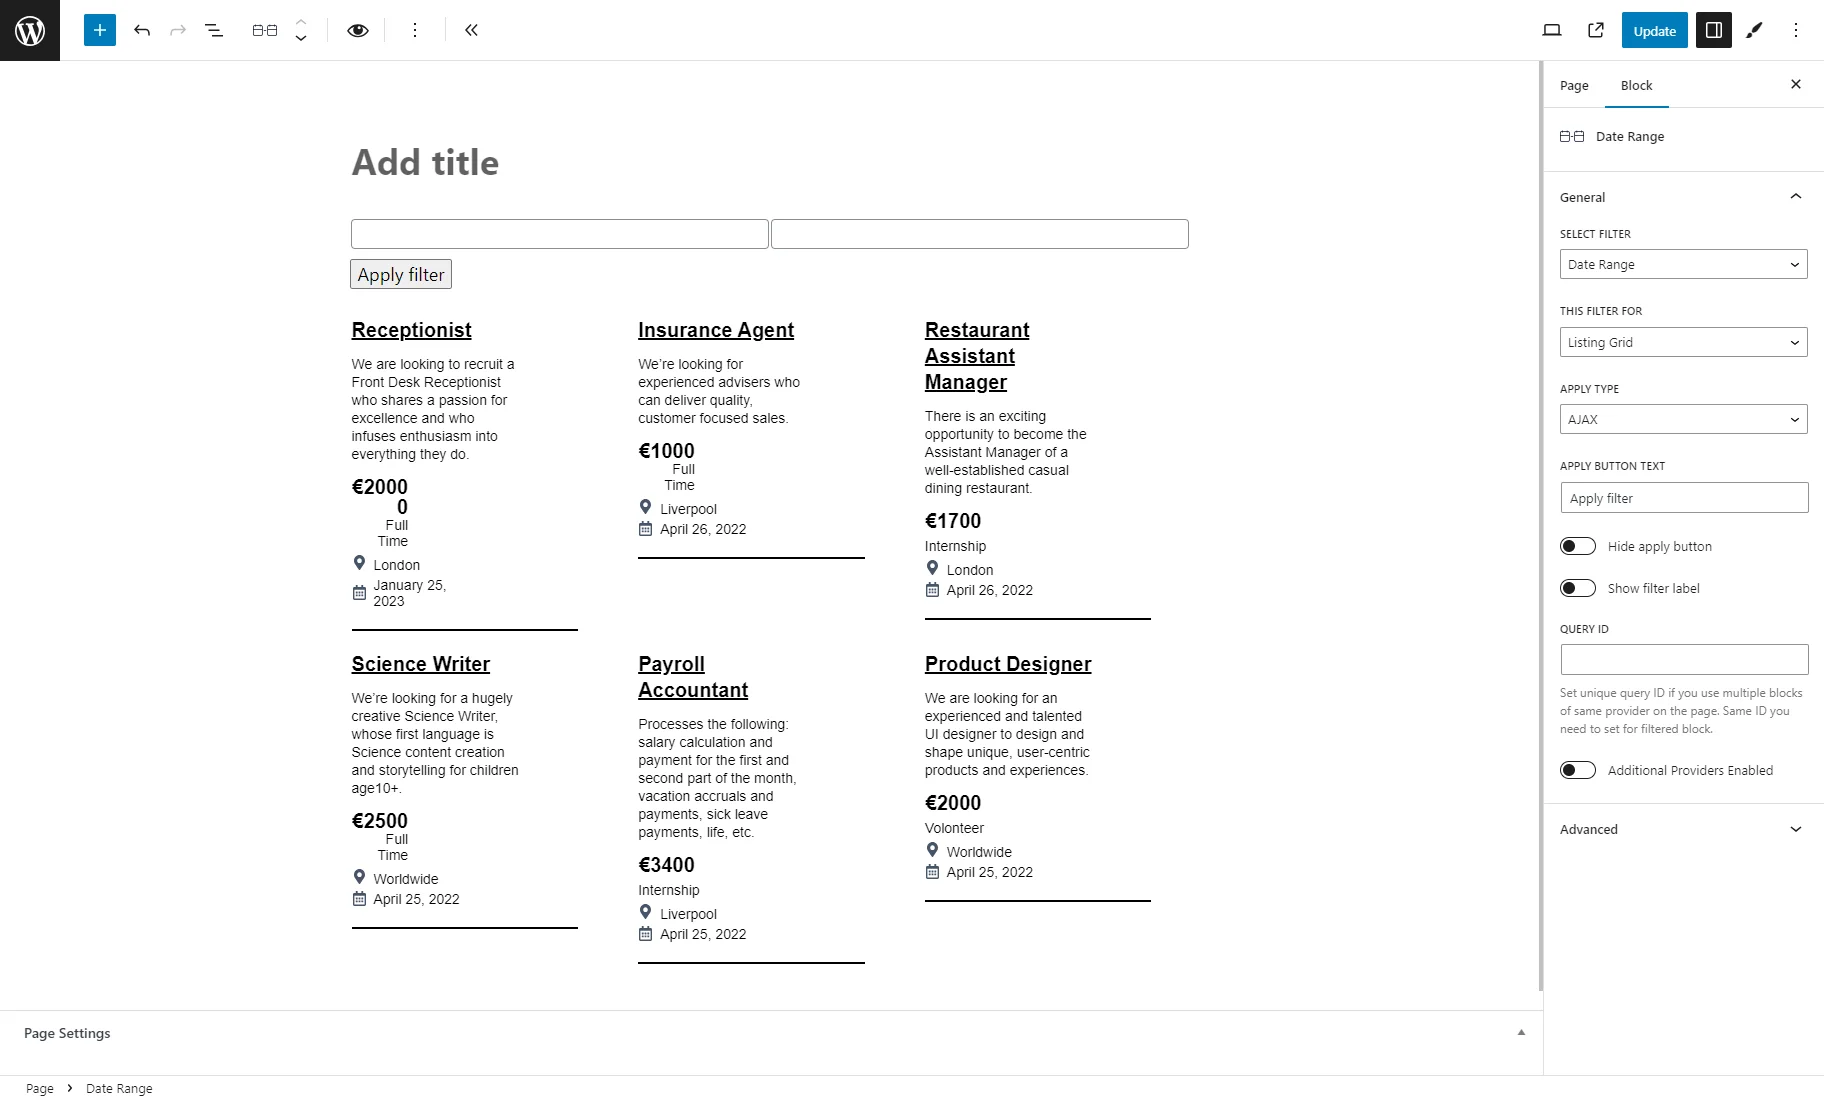
The only difference is the options in the THIS FILTER FOR drop-down list: options for Elementor and JetWooBuilder are not available, but you can pick the “WooCommerce Shortcode” variant and options for JetEngine.
Date Range filter element in Bricks
The Date Range filter element is available in Bricks.
It also repeats the settings used in Elementor.

The only difference is the options in the THIS FILTER FOR drop-down list: options for Elementor and JetWooBuilder are not available, but you can pick variants for JetEngine and the “Bricks query loop” variant. Learn more from the How to Apply Filters to Bricks Query Loop tutorial.
Result
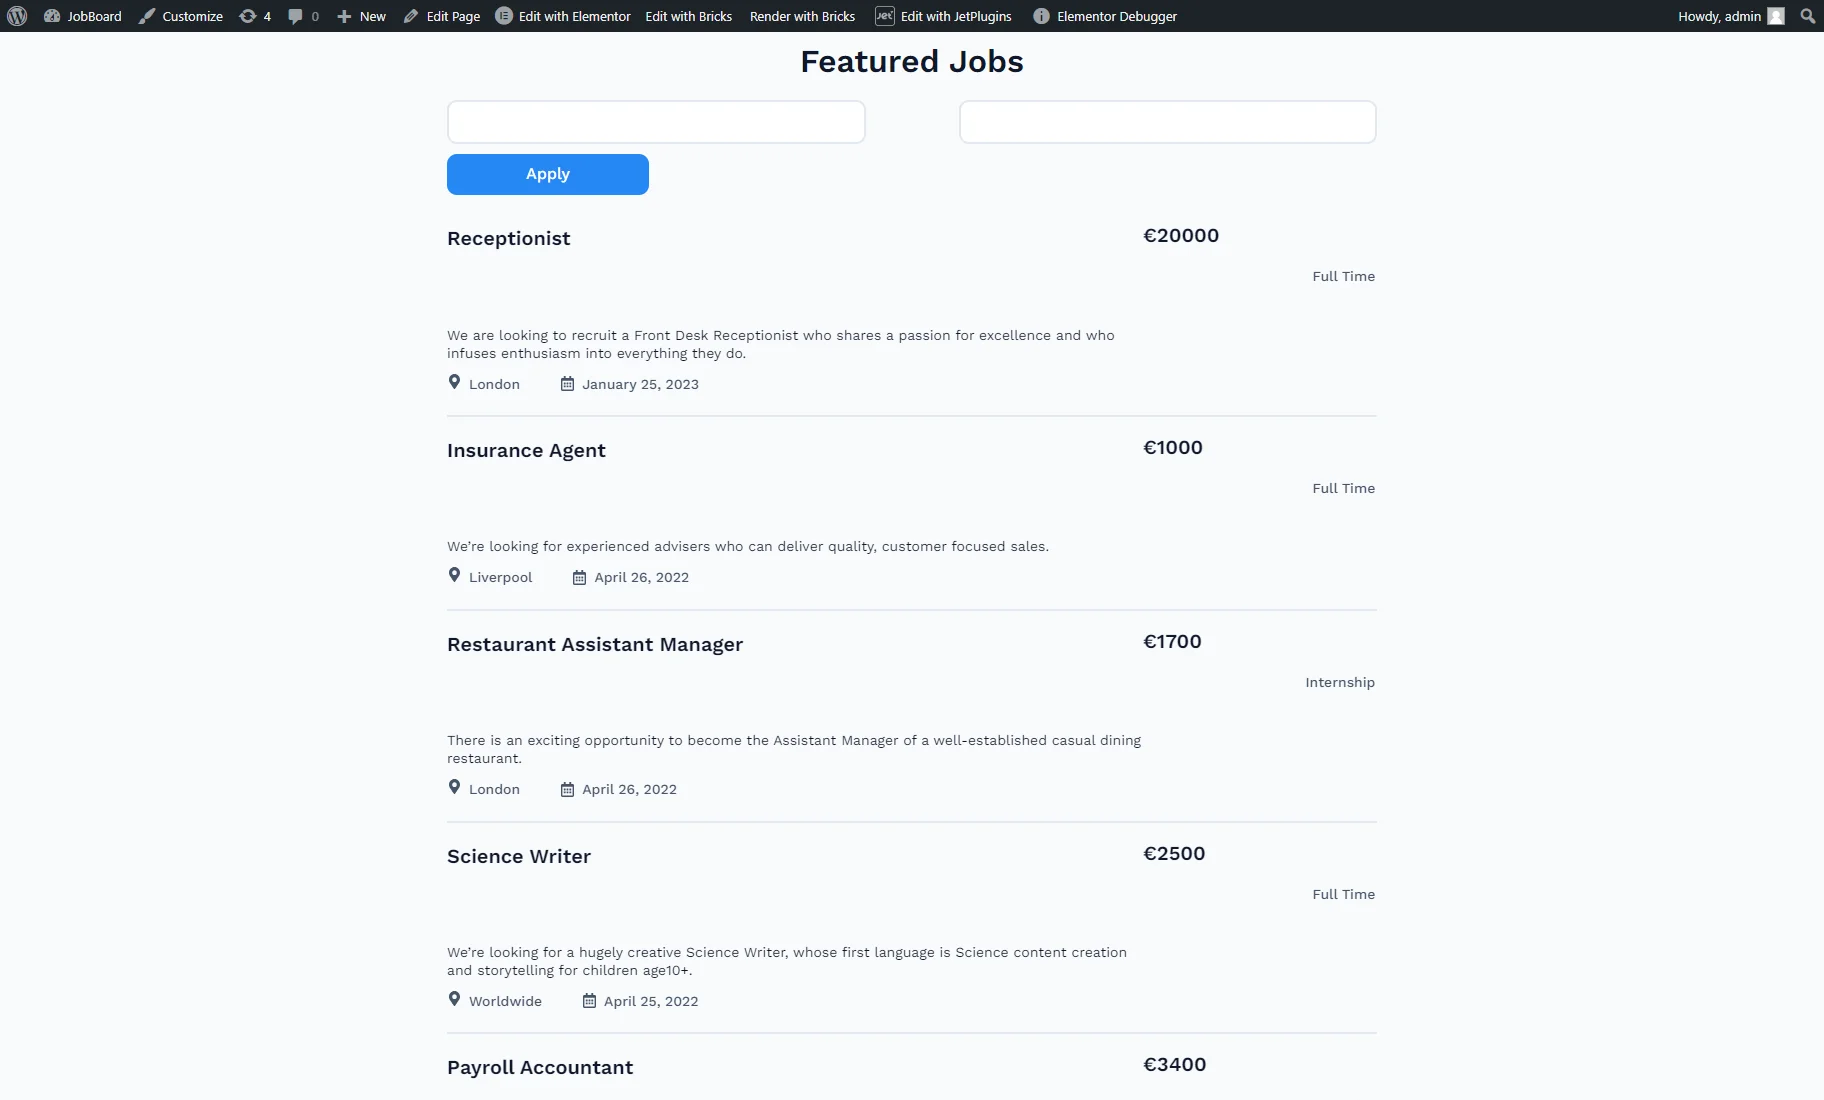
On the front end, until the Date Range filter isn’t applied, the Listing Grid shows all posts. Every listing item contains the published date.
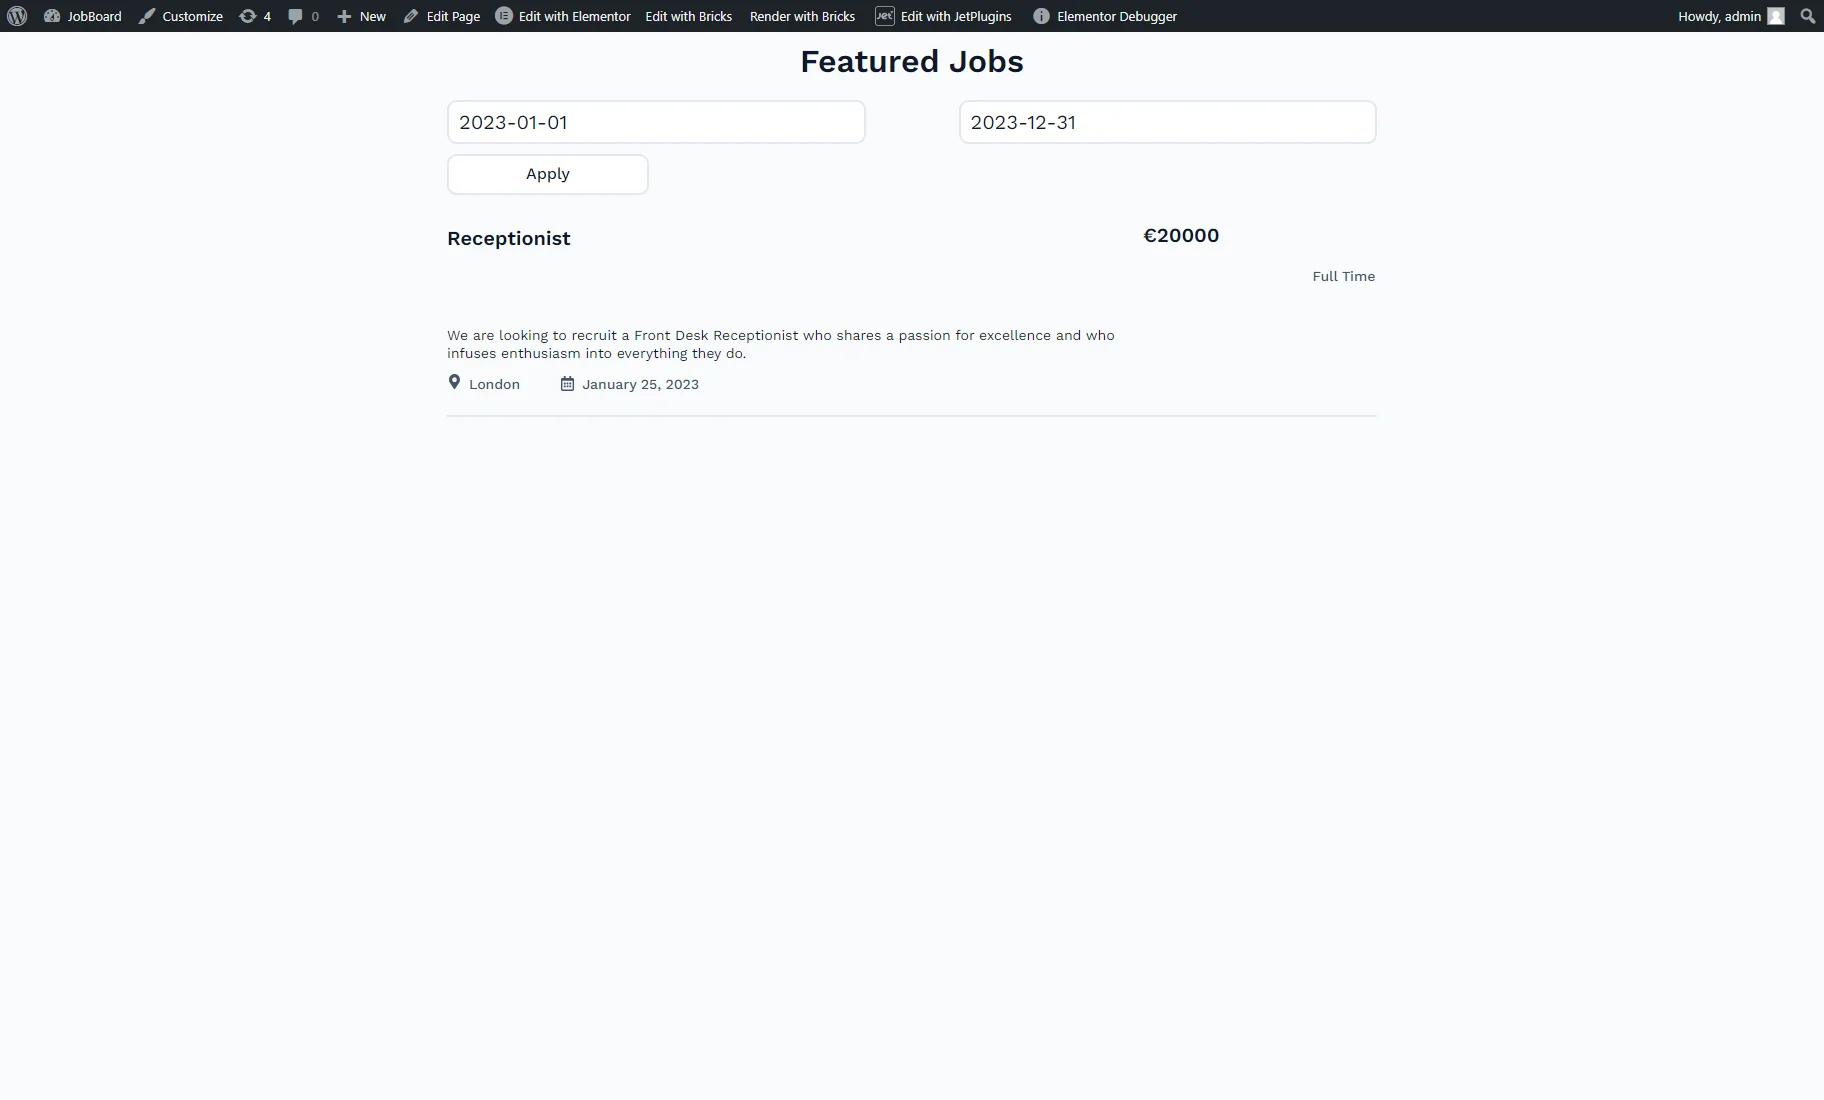
When the filter is applied to show posts published from the “2023-01-01” to the “2023-12-31” date range, the Listing Grid shows only one post published in the 2023 year.
That’s all; now you know how to use the Date Range Filter available with the JetSmartFilters plugin on your WordPress website.