
How to Create a Single Product Page Template
This step-by-step tutorial will take you through creating a WooCommerce product page using the JetWooBuilder plugin or, additionally, a page template with a header and footer using the JetThemeCore plugin functionality.
Before you start, check the tutorial requirements:
- Elementor (Free version)
- WooCommerce plugin (Free version) installed and activated
- JetWooBuilder plugin installed and activated
The JetWooBuilder plugin allows the representation of WooCommerce products and the customization of the template without coding. Also, it offers easy-to-use widgets for creating a single product template.
For the single product template, that’s enough to have the JetWooBuilder plugin, but if you want to create a page template with a header, body, and footer, JetThemeCore is required.
How to Create a Single Product Template with the JetWooBuilder Plugin
Enable the single product widgets
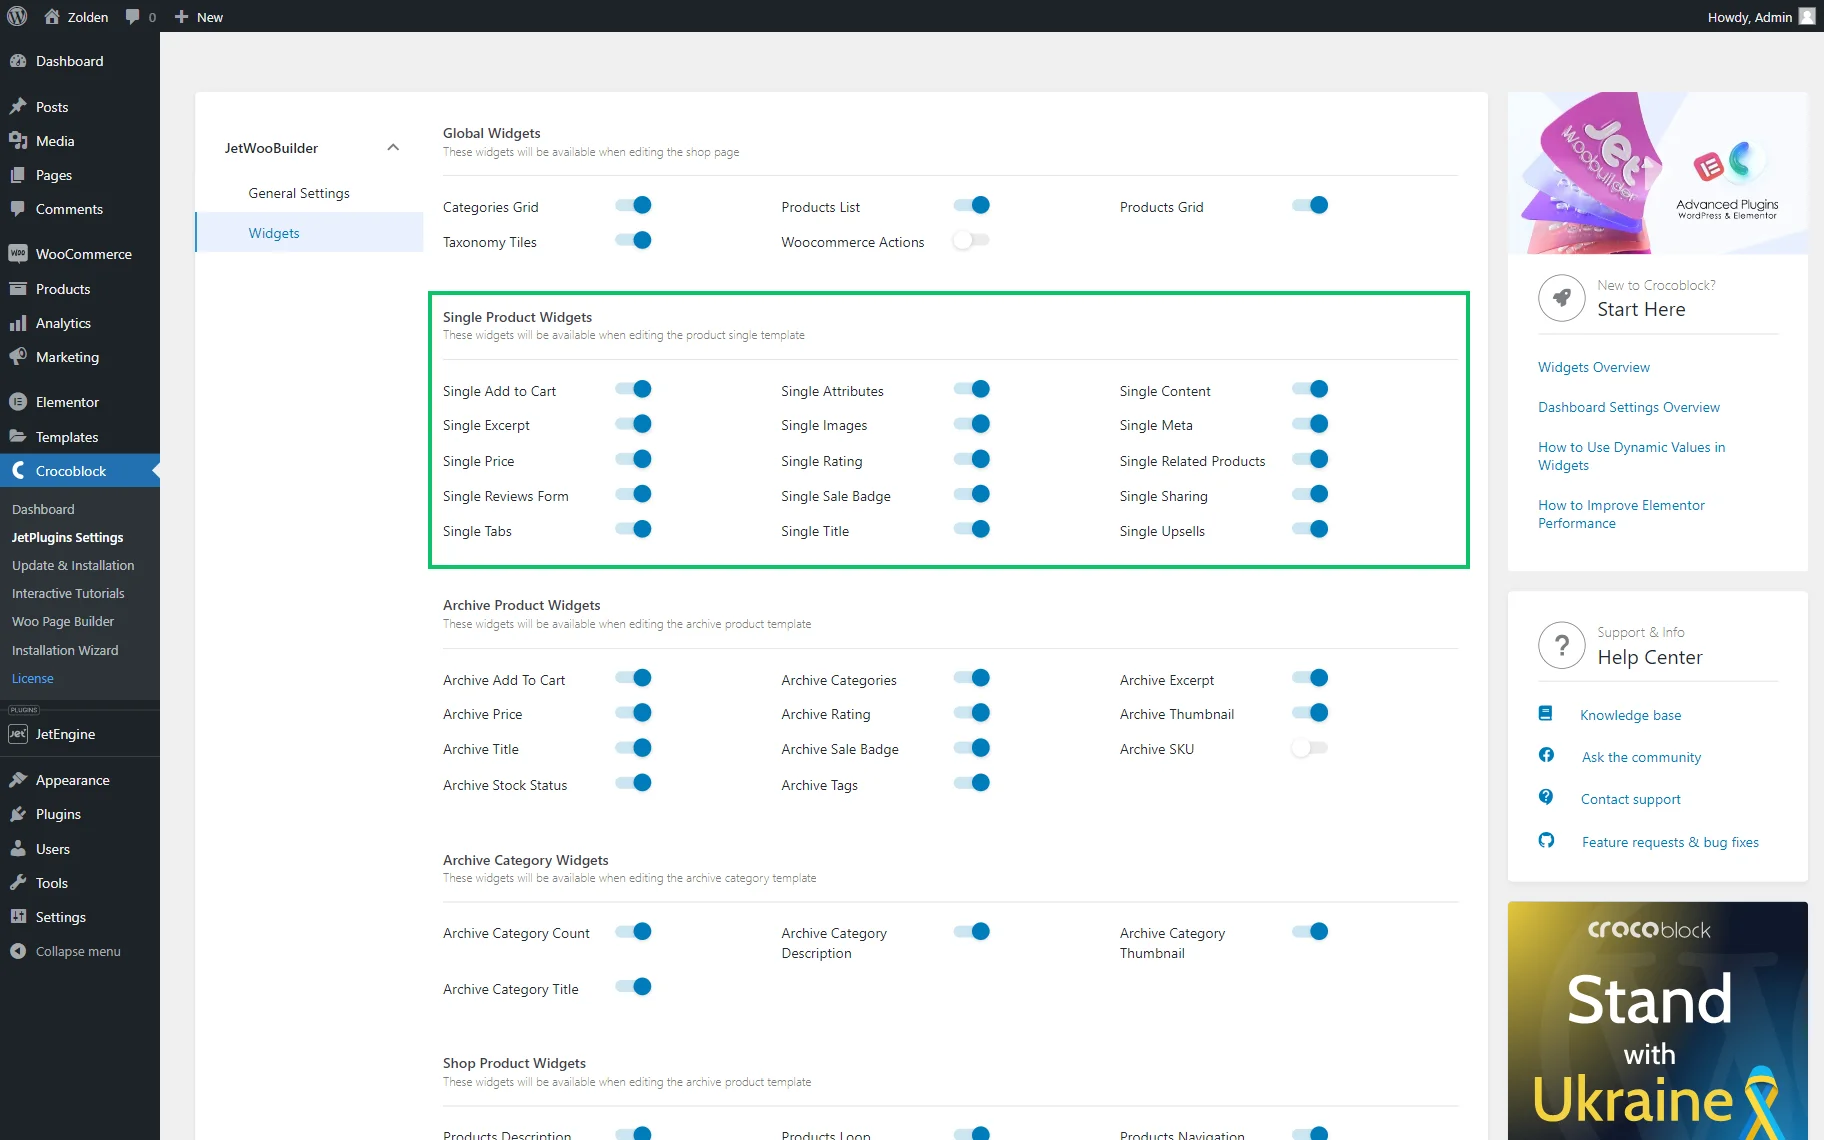
Go to WordPress Dashboard > Crocoblock > JetPlugins Settings > JetWooBuilder > Widgets, scroll to the Single Product Widgets block, and enable the widgets you will use while creating a Single Product template.

Create a template
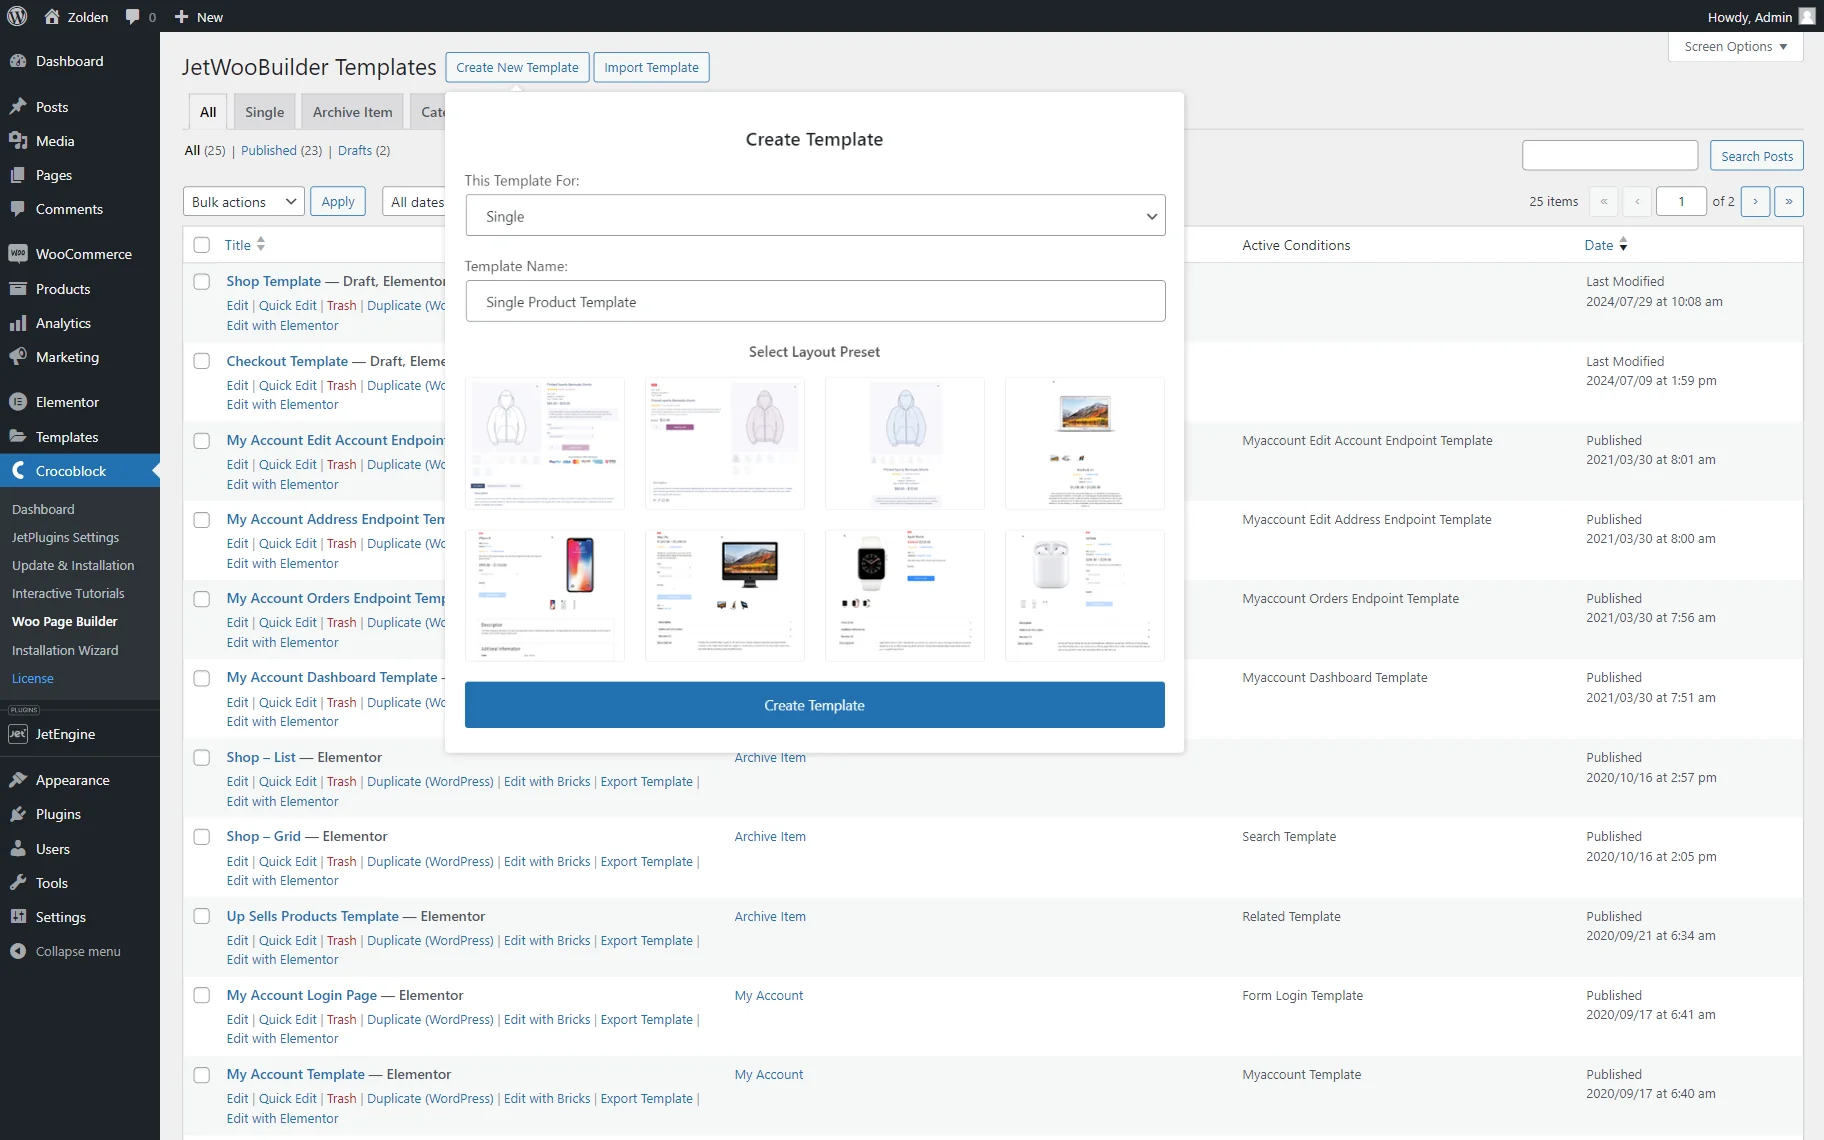
Proceed to the WordPress Dashboard > Crocoblock > Woo Page Builder tab and click the “Create New Template” button.
In the appeared pop-up, select the “Single” option in the This Template For field and set the preferred Template Name, for example, “Single Product Template.”
You can also pick the predefined template in the Select Layout Preset section.
Then, press the “Create Template” button to proceed to the Elementor editor.
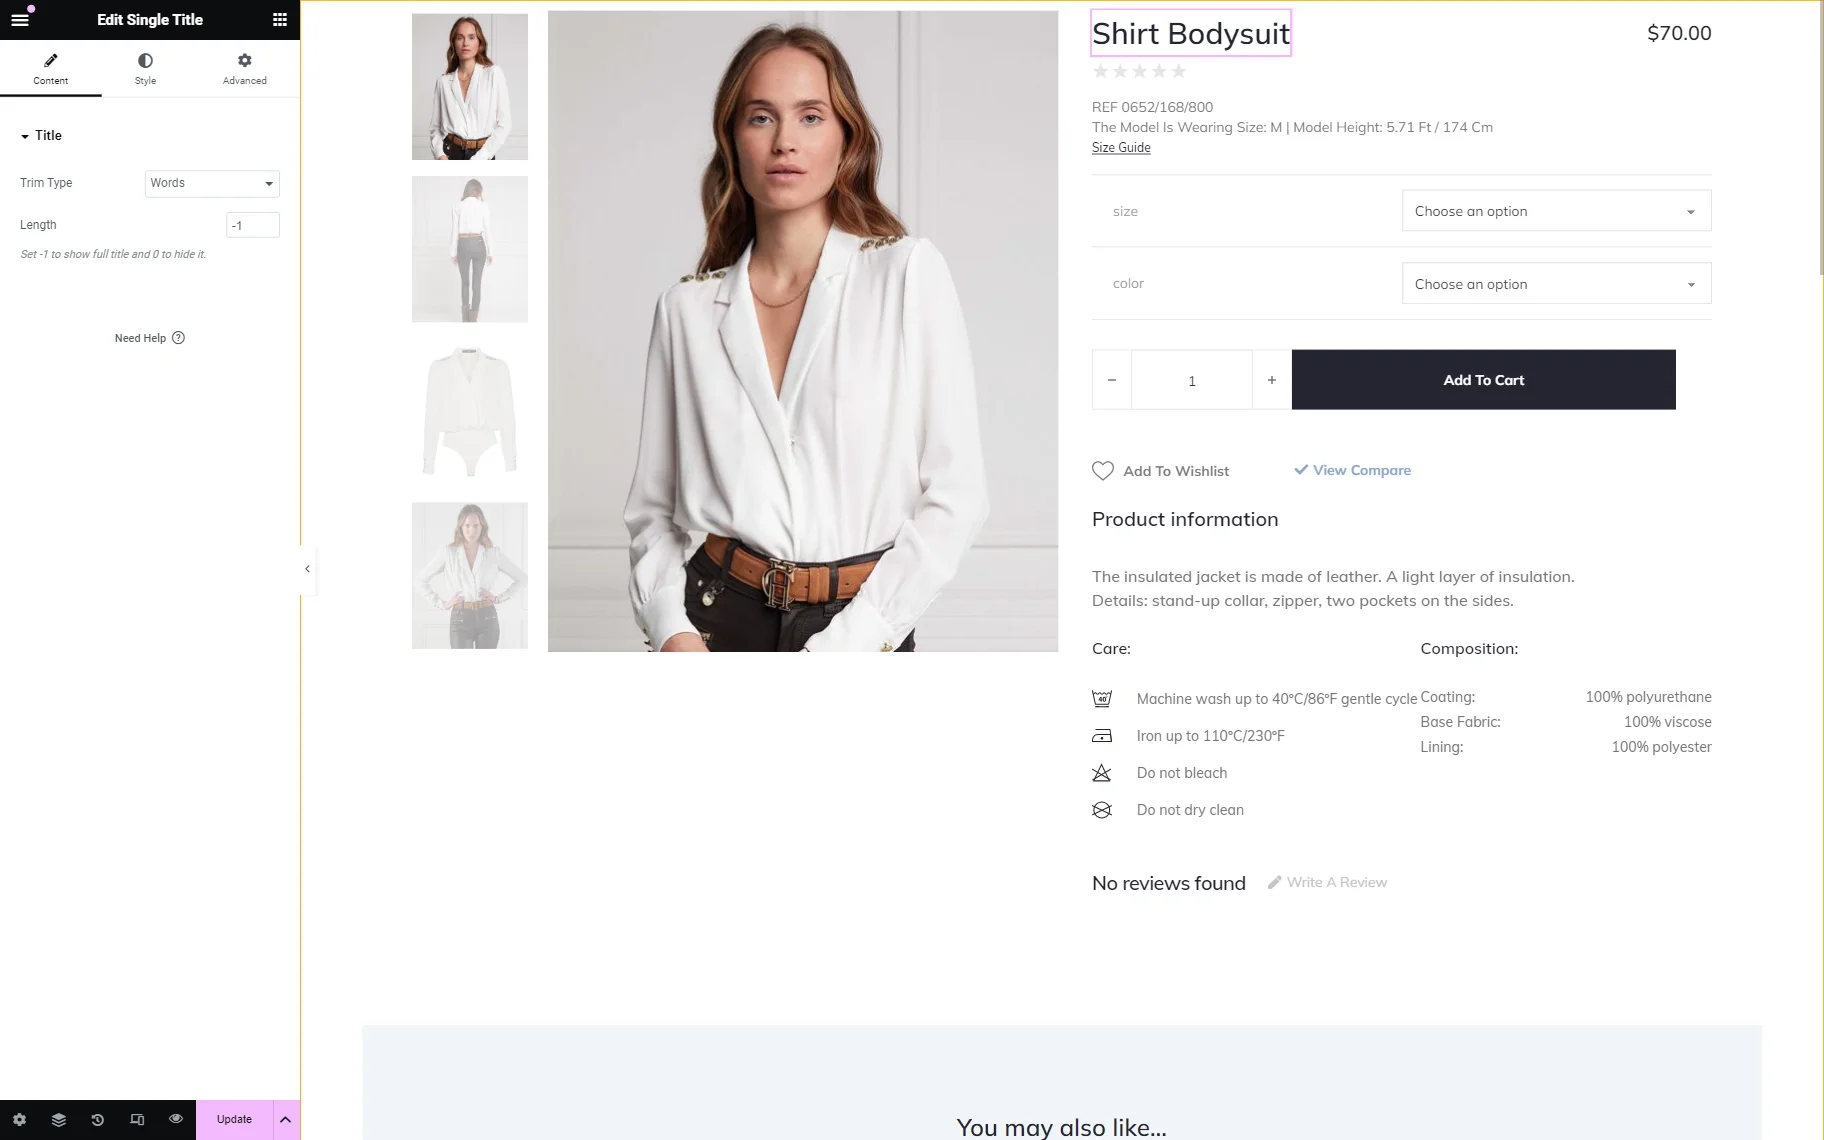
All the previously activated widgets can be found under the JetWooBuilder title.

Create a single template using the JetWooBuilder widgets and Elementor widgets board (i.e., the Single Title, Single Images, Single Add to Cart, Single Meta, etc.). Drag and drop the widgets you need to display information about your product.
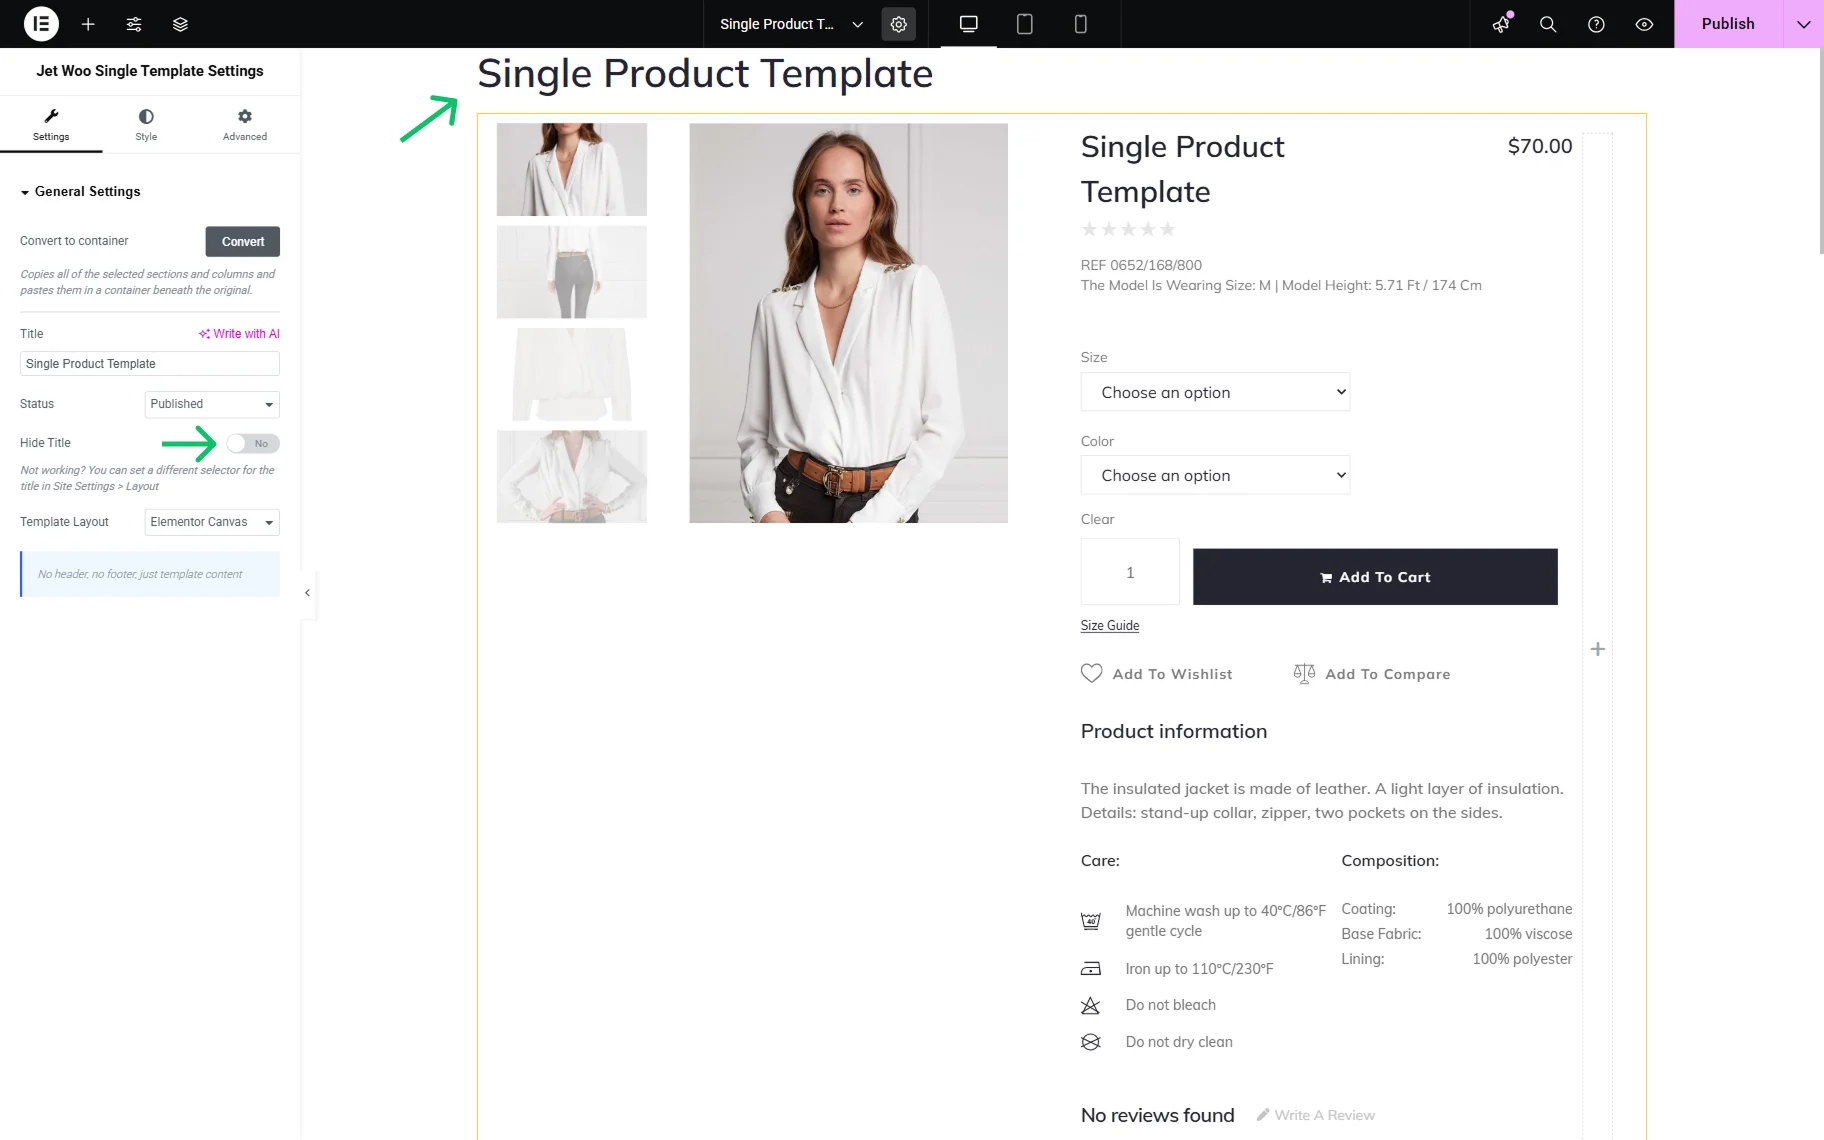
When the template is ready, click the “Update” button to save the changes.
Assign the template to WooCommerce
Go back to the WordPress Dashboard > WooCommerce > Settings submenu. Select the JetWooBuilder tab and scroll to the Single Product section to set a particular template for all products.
Tick the Enable custom product single page option and select a template you have recently created in the Single Product Template dropdown.
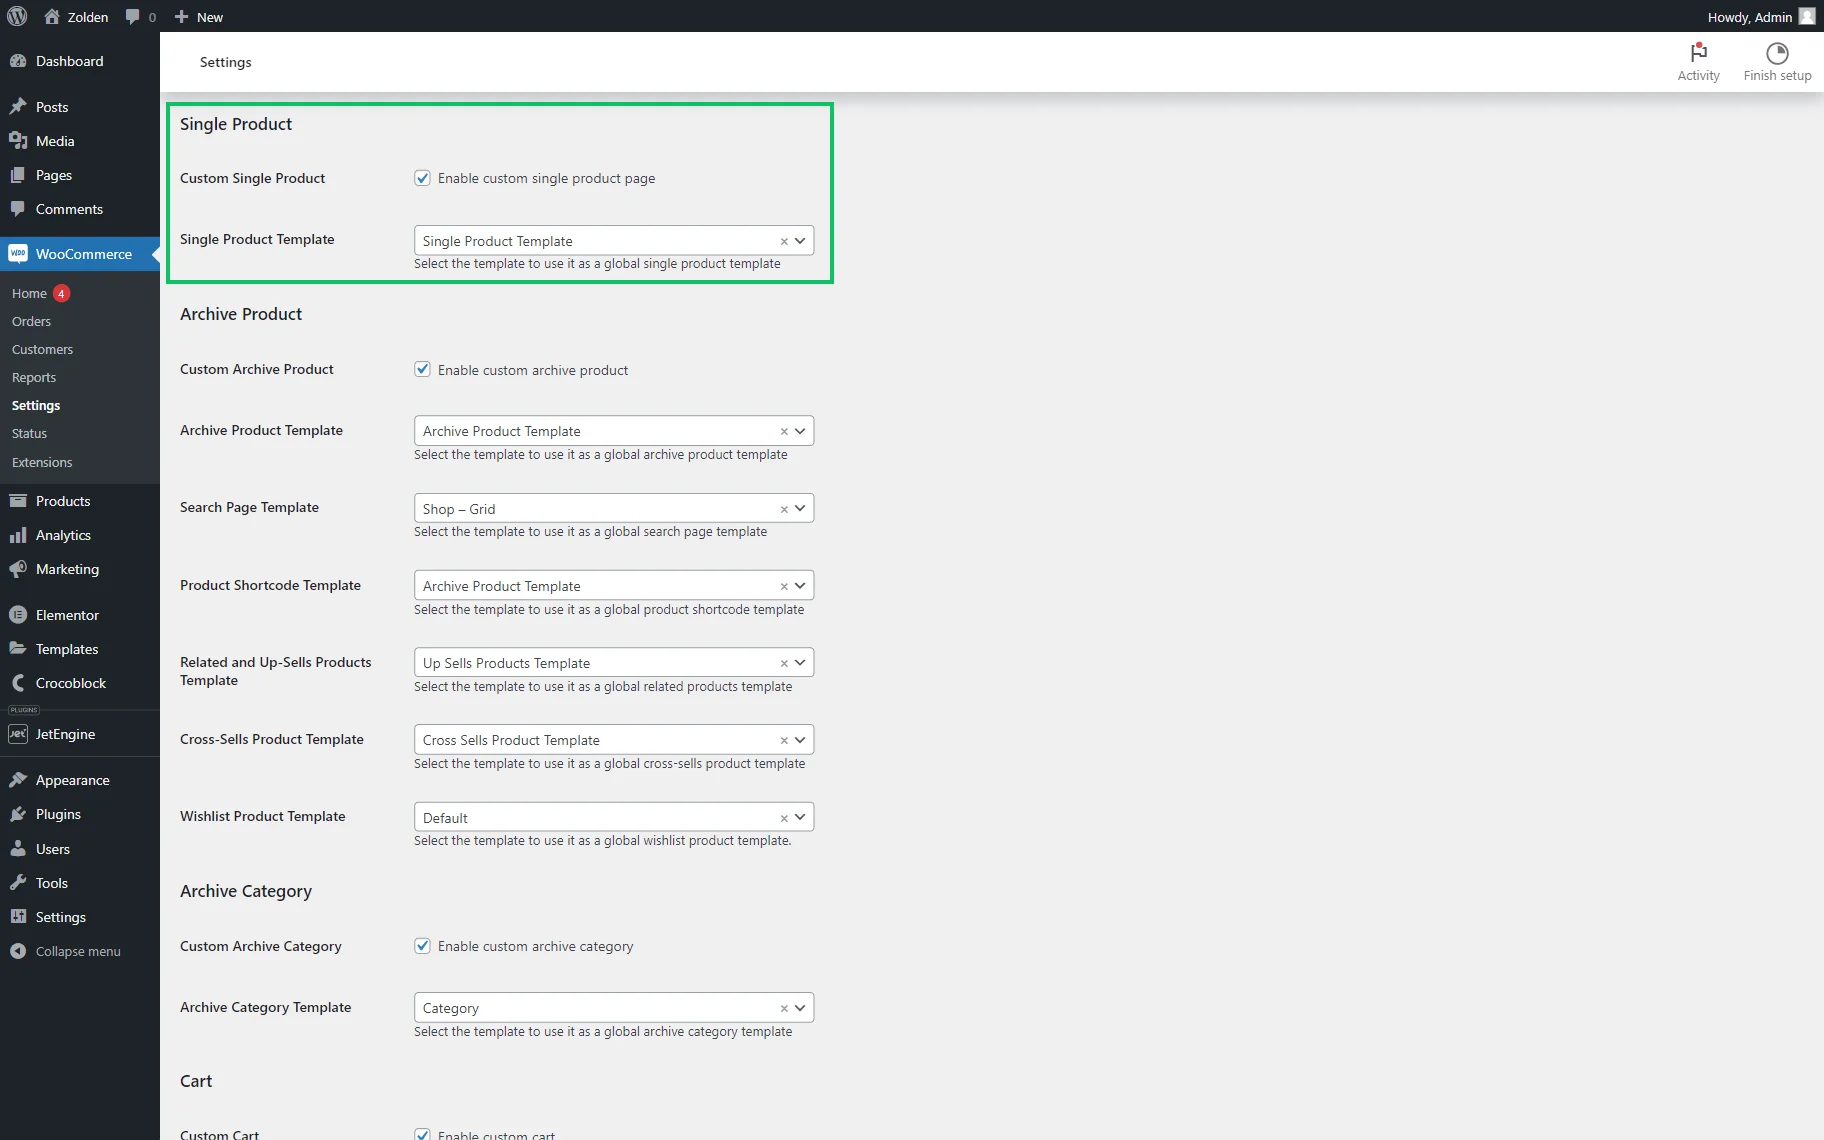
Don’t forget to click the “Save changes” button at the very bottom of the page.
Proceed to the front end and check how products look with the newly created Single Template.

How to Create a Single Product Page Template with the JetThemeCore Plugin
The JetThemeCore is the WordPress builder for the Elementor and Gutenberg editor, with the help of which you can create a page template with a header, footer, and the JetWooBuilder template as a body.
Activate the single product widgets
Go to WordPress Dashboard > Crocoblock > JetPlugins Settings > JetWooBuilder > Widgets, scroll to the Single Product Widgets block, and enable the widgets you will use while creating a Single Product template.
Build a template
You can create a template with the help of the JetWooBuilder plugin, as we described in the first part of the tutorial, or via JetThemeCore, as shown below.
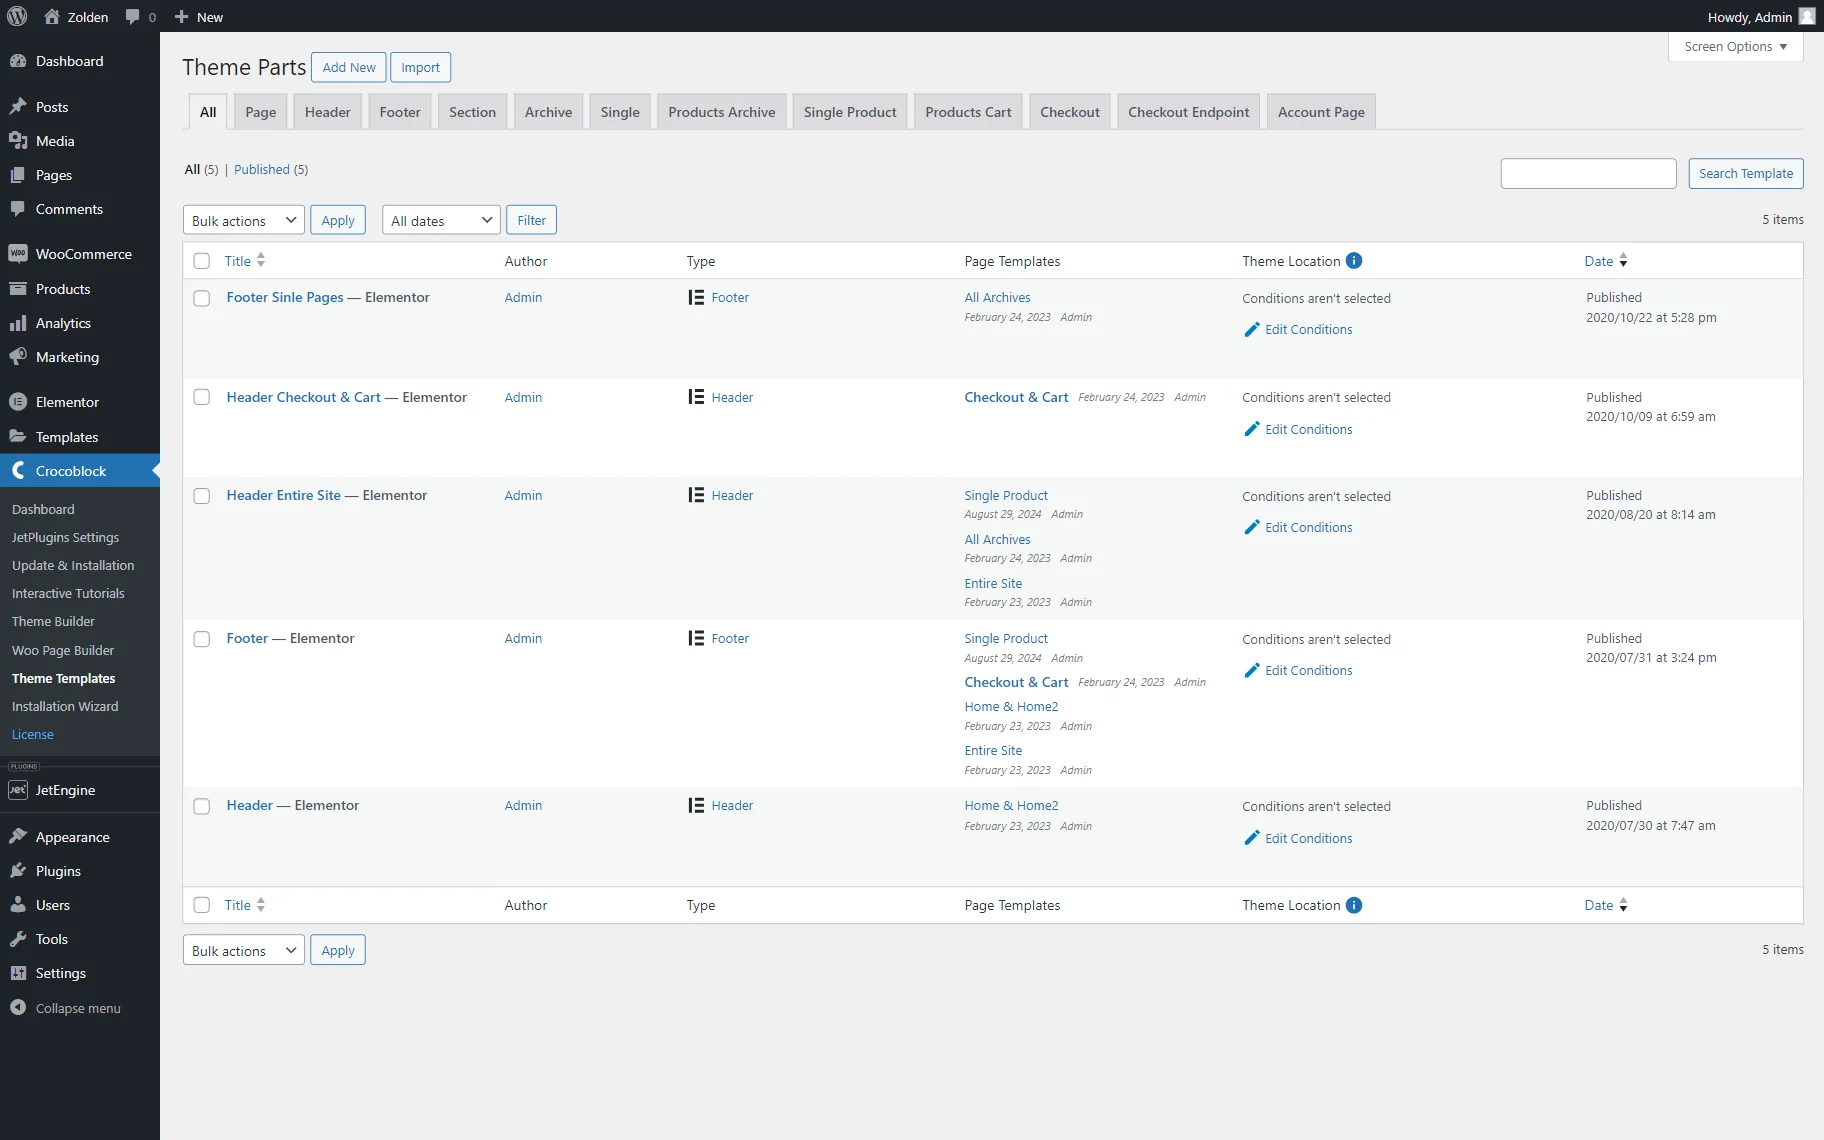
Move to the WordPress Dashboard > Crocoblock > Theme Templates tab and hit the “Add New” button.
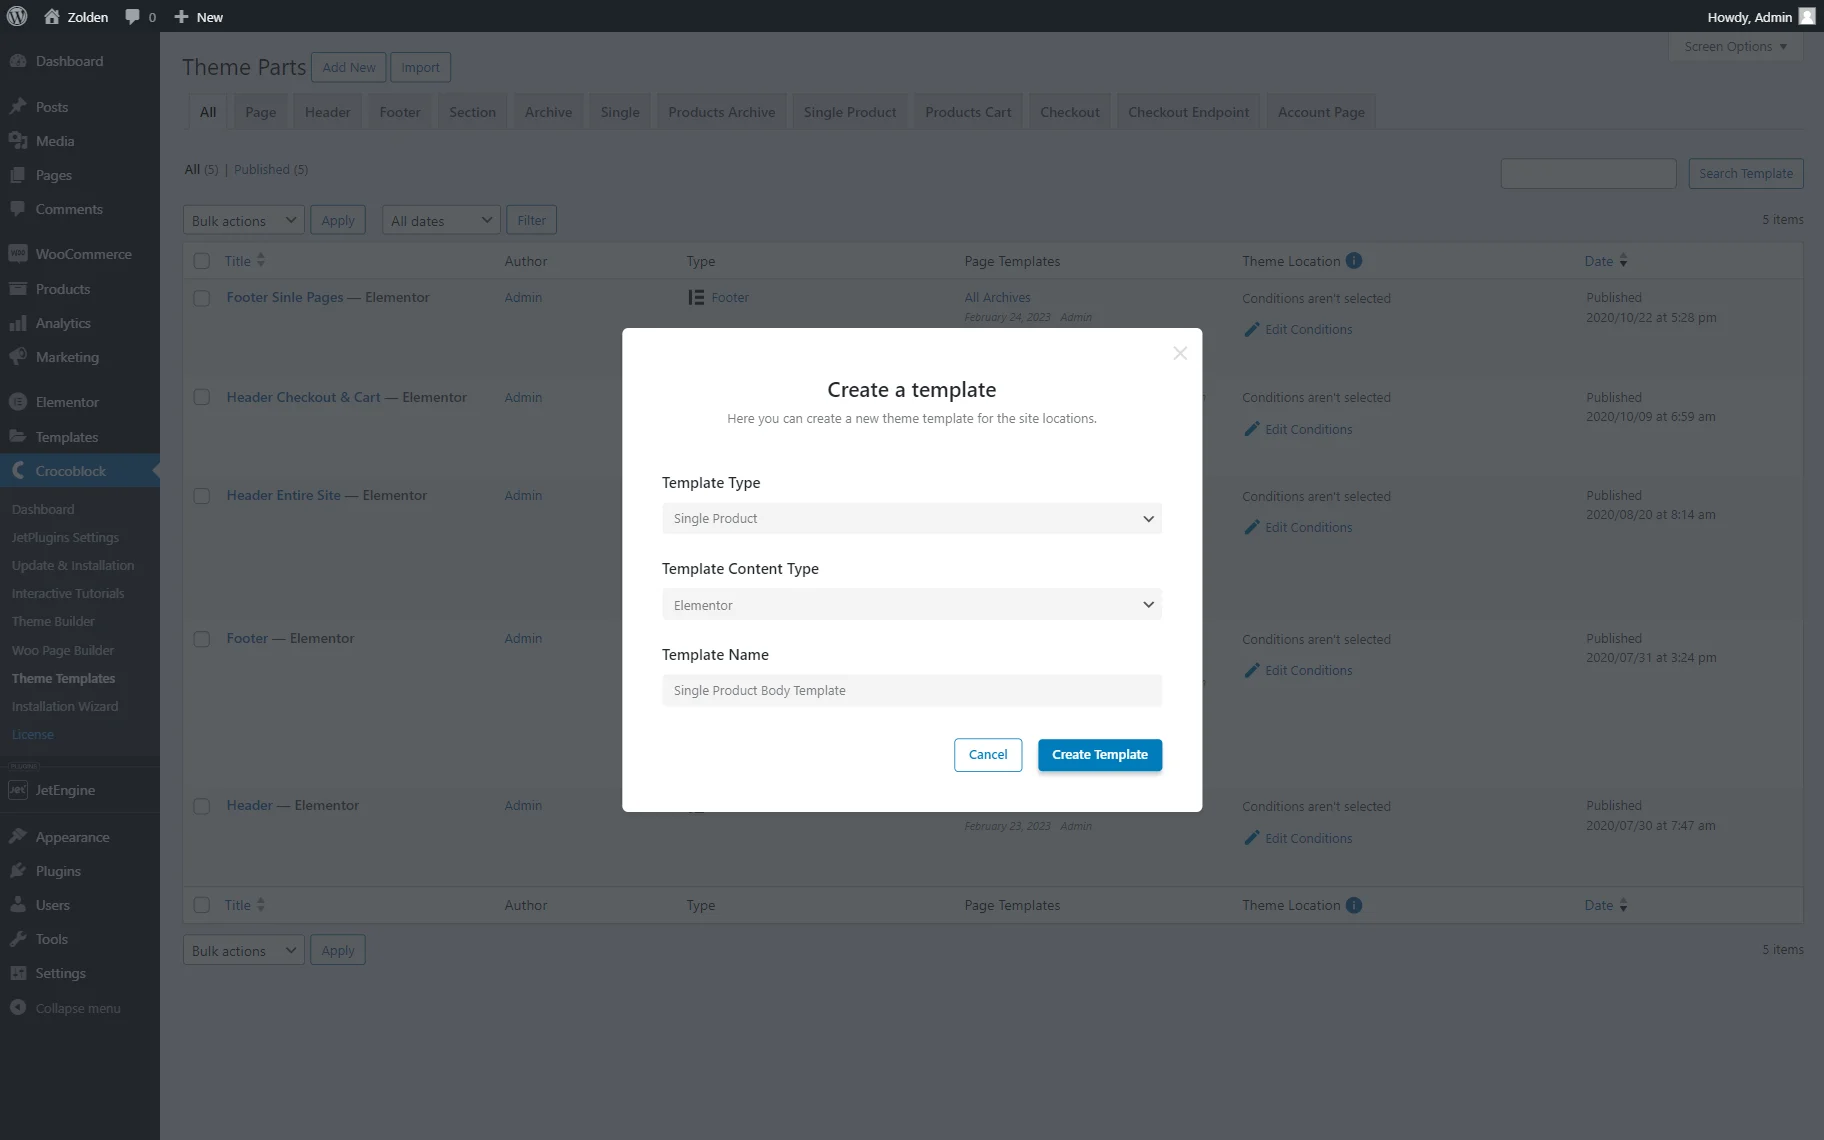
In the appeared pop-up, select the “Single Product” Template Type, choose the preferred Template Content Type, and enter the Template Name. Then, press the “Create Template” button.
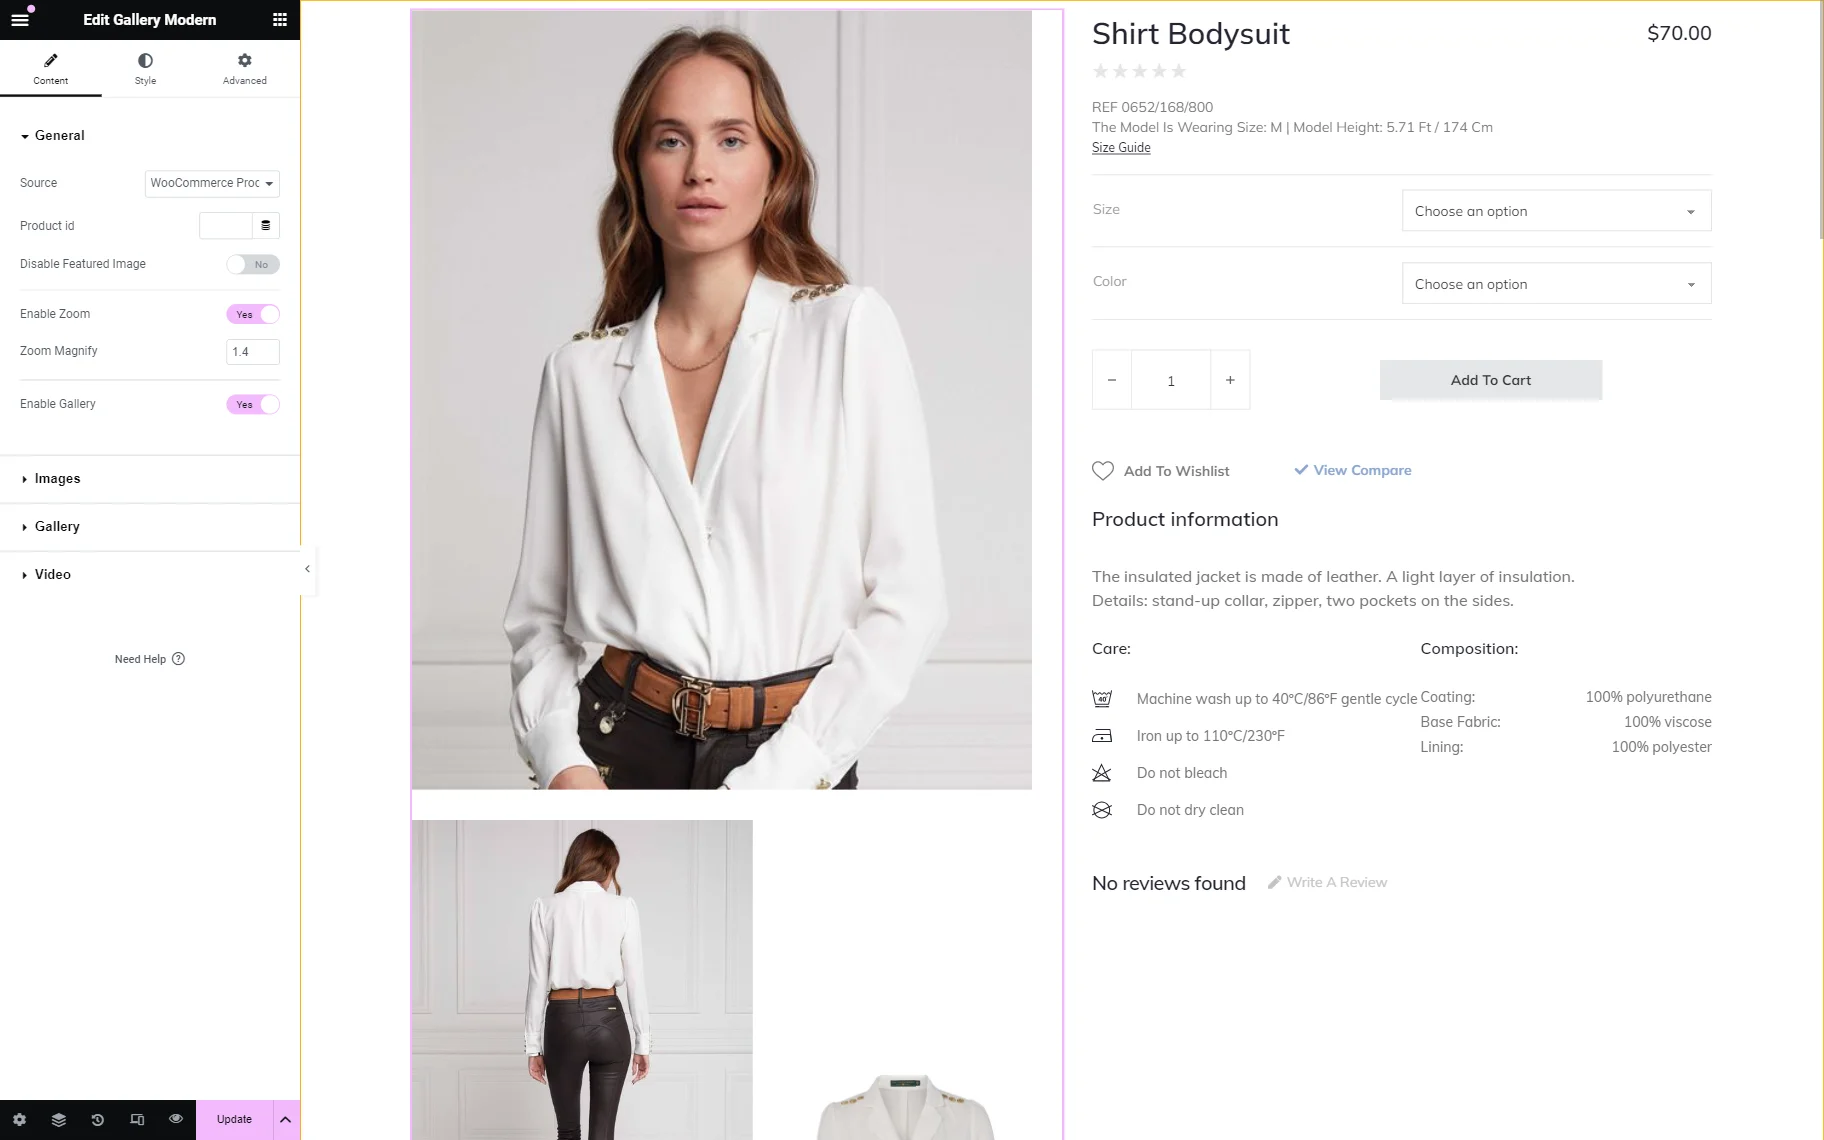
Fill the single template with the content using the JetWooBuilder widgets and Elementor widgets panel. Drag and drop the widgets you need to customize the WooCommerce product page, such as Single Title, Single Images, Single Add to Cart, Single Meta, etc.
When you finish, push the “Update” button.
Create a page template
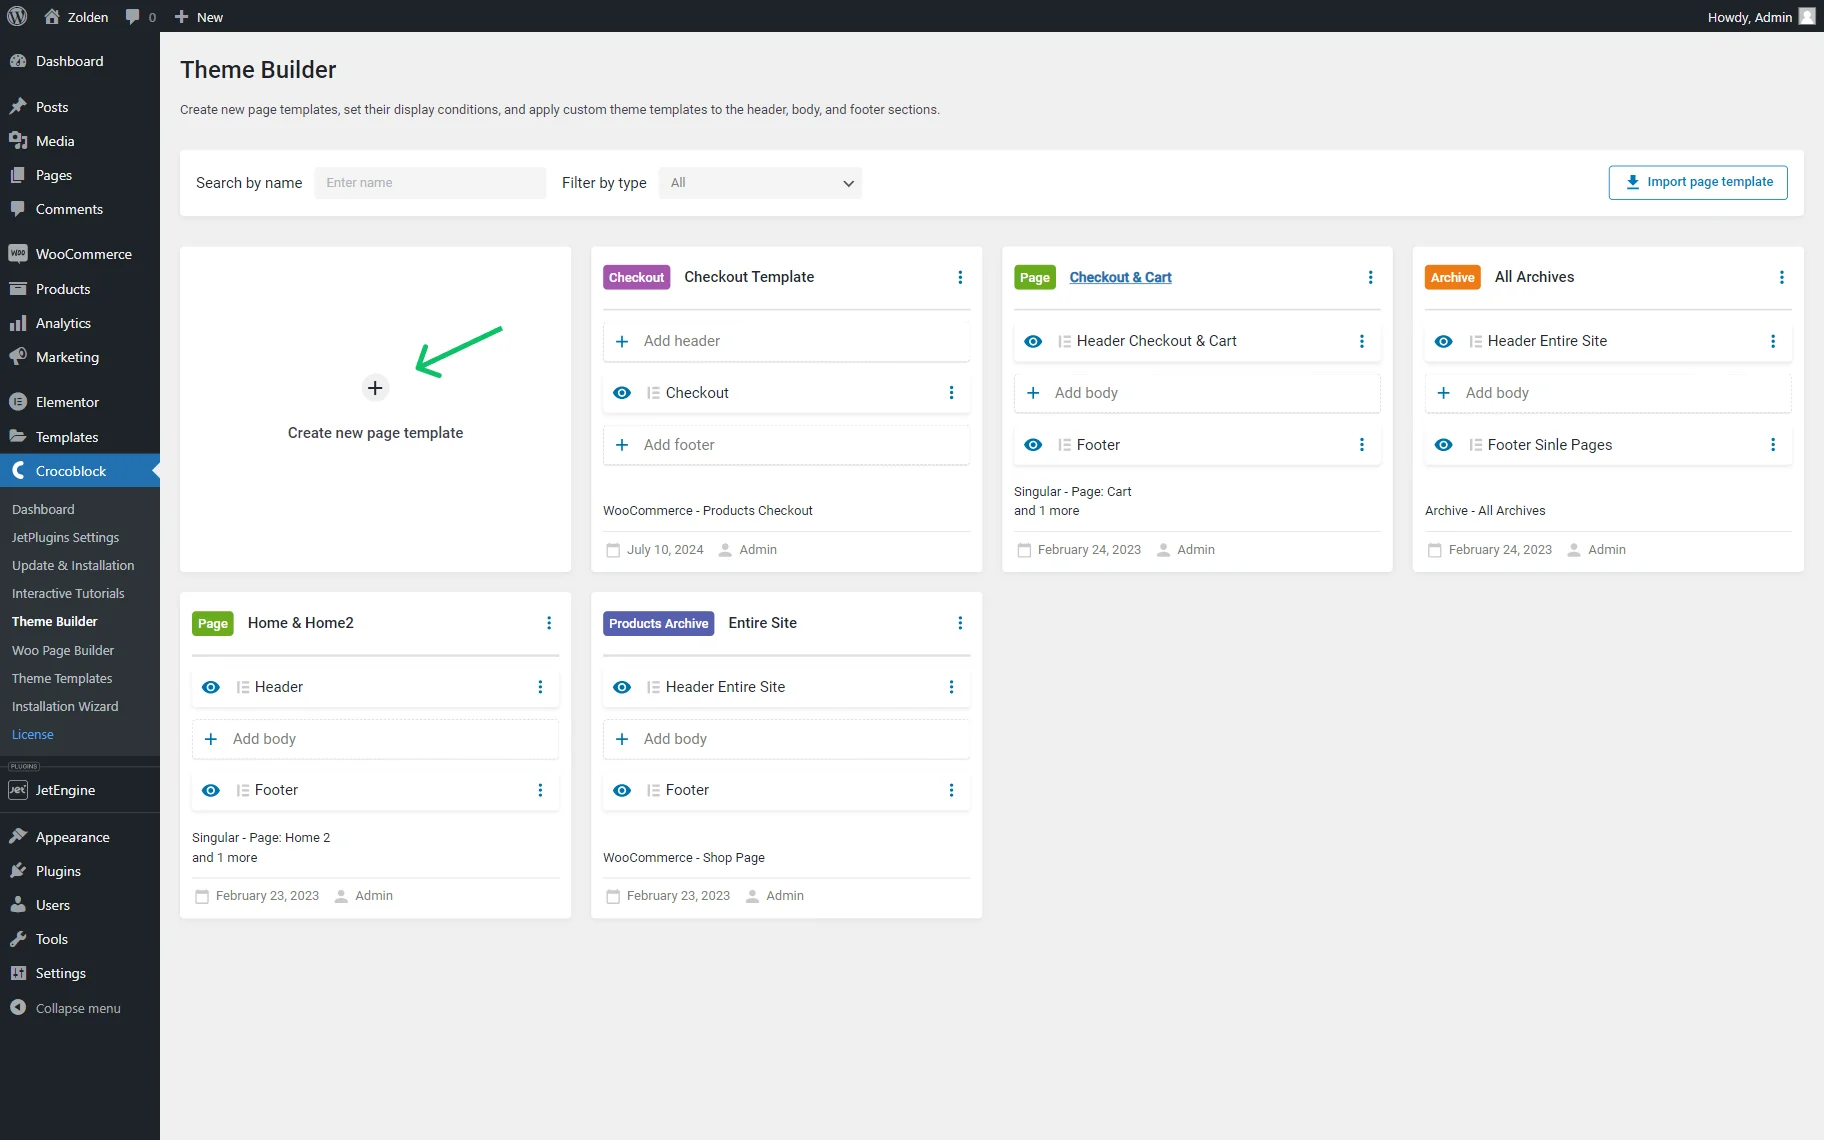
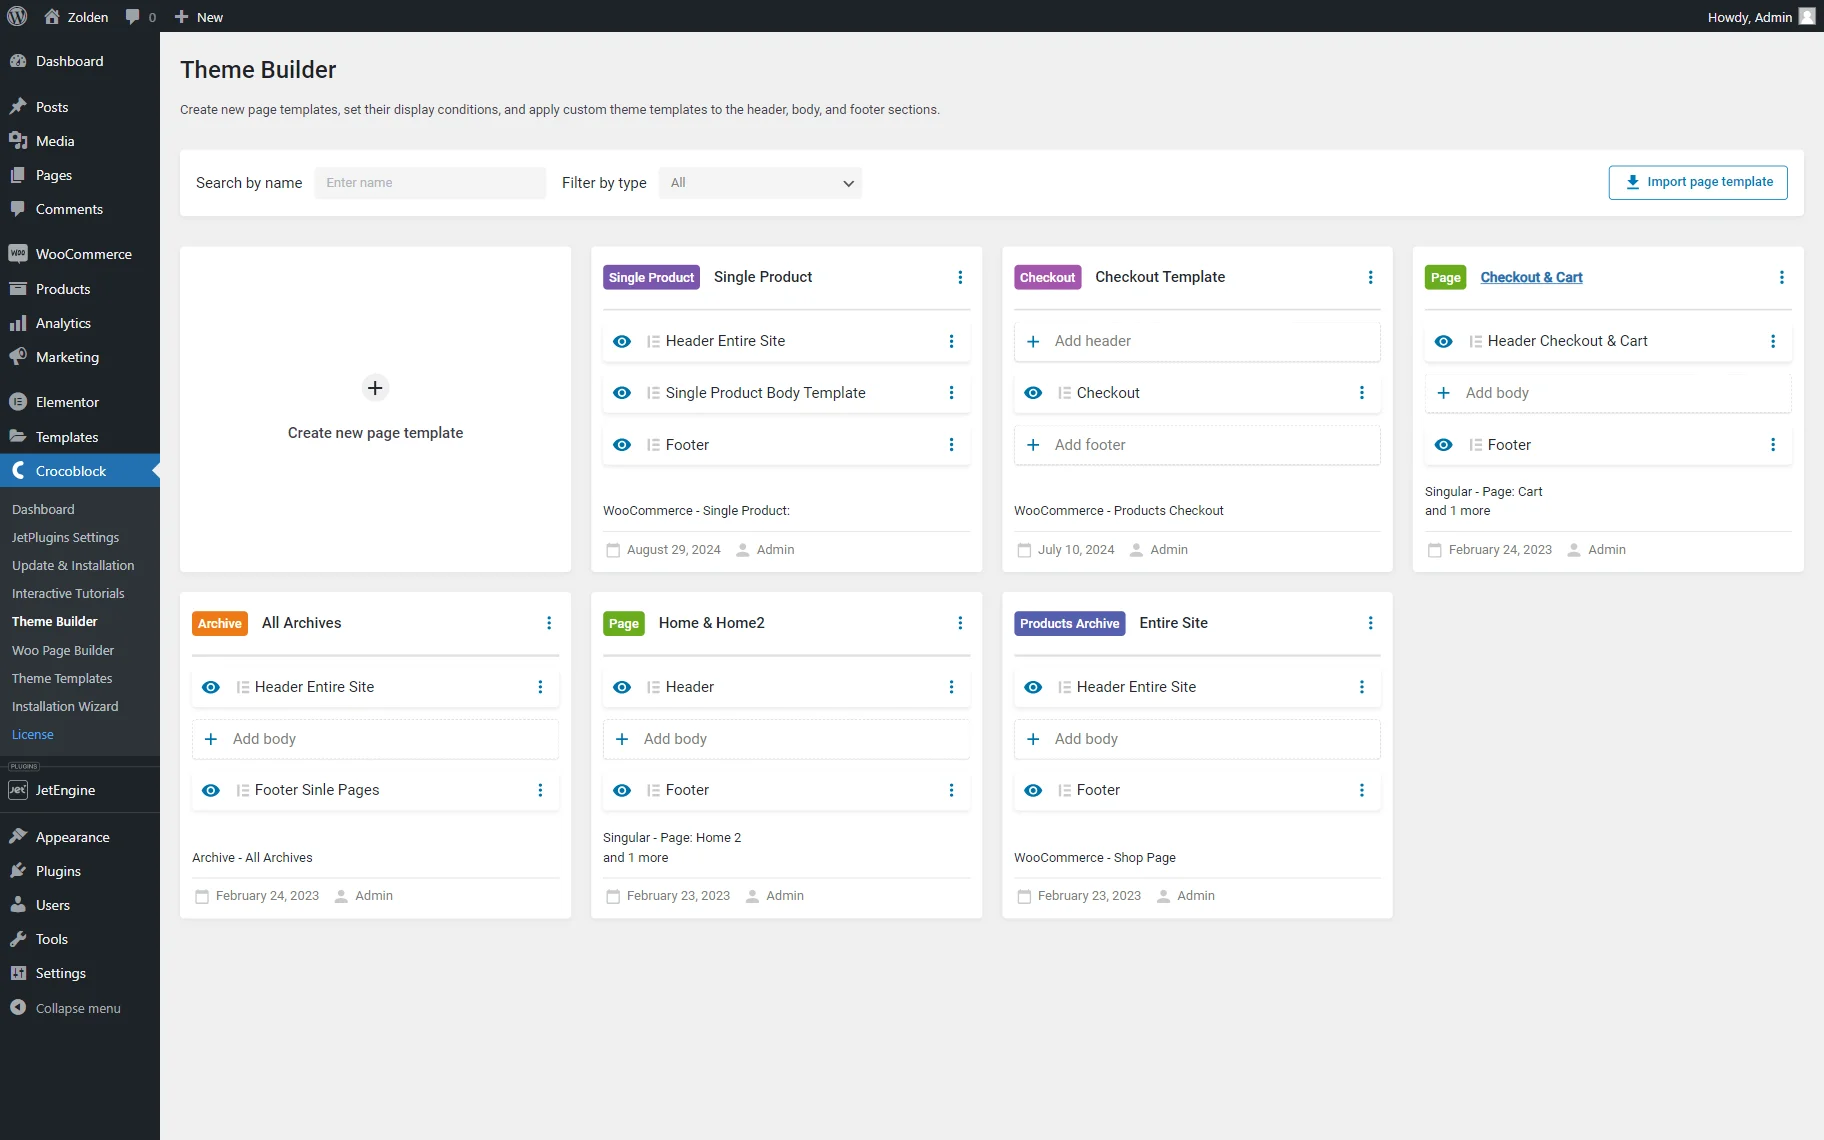
Go to the WordPress Dashboard > Crocoblock > Theme Builder tab, and click the “Create new page template” button.
In the pop-up, hit the “Add Condition” button, and choose the “Include,” “WooCommerce,” and “Single Product” options. In the last field, you may select the “All” option to attach the page template to all products or pick several products separately.
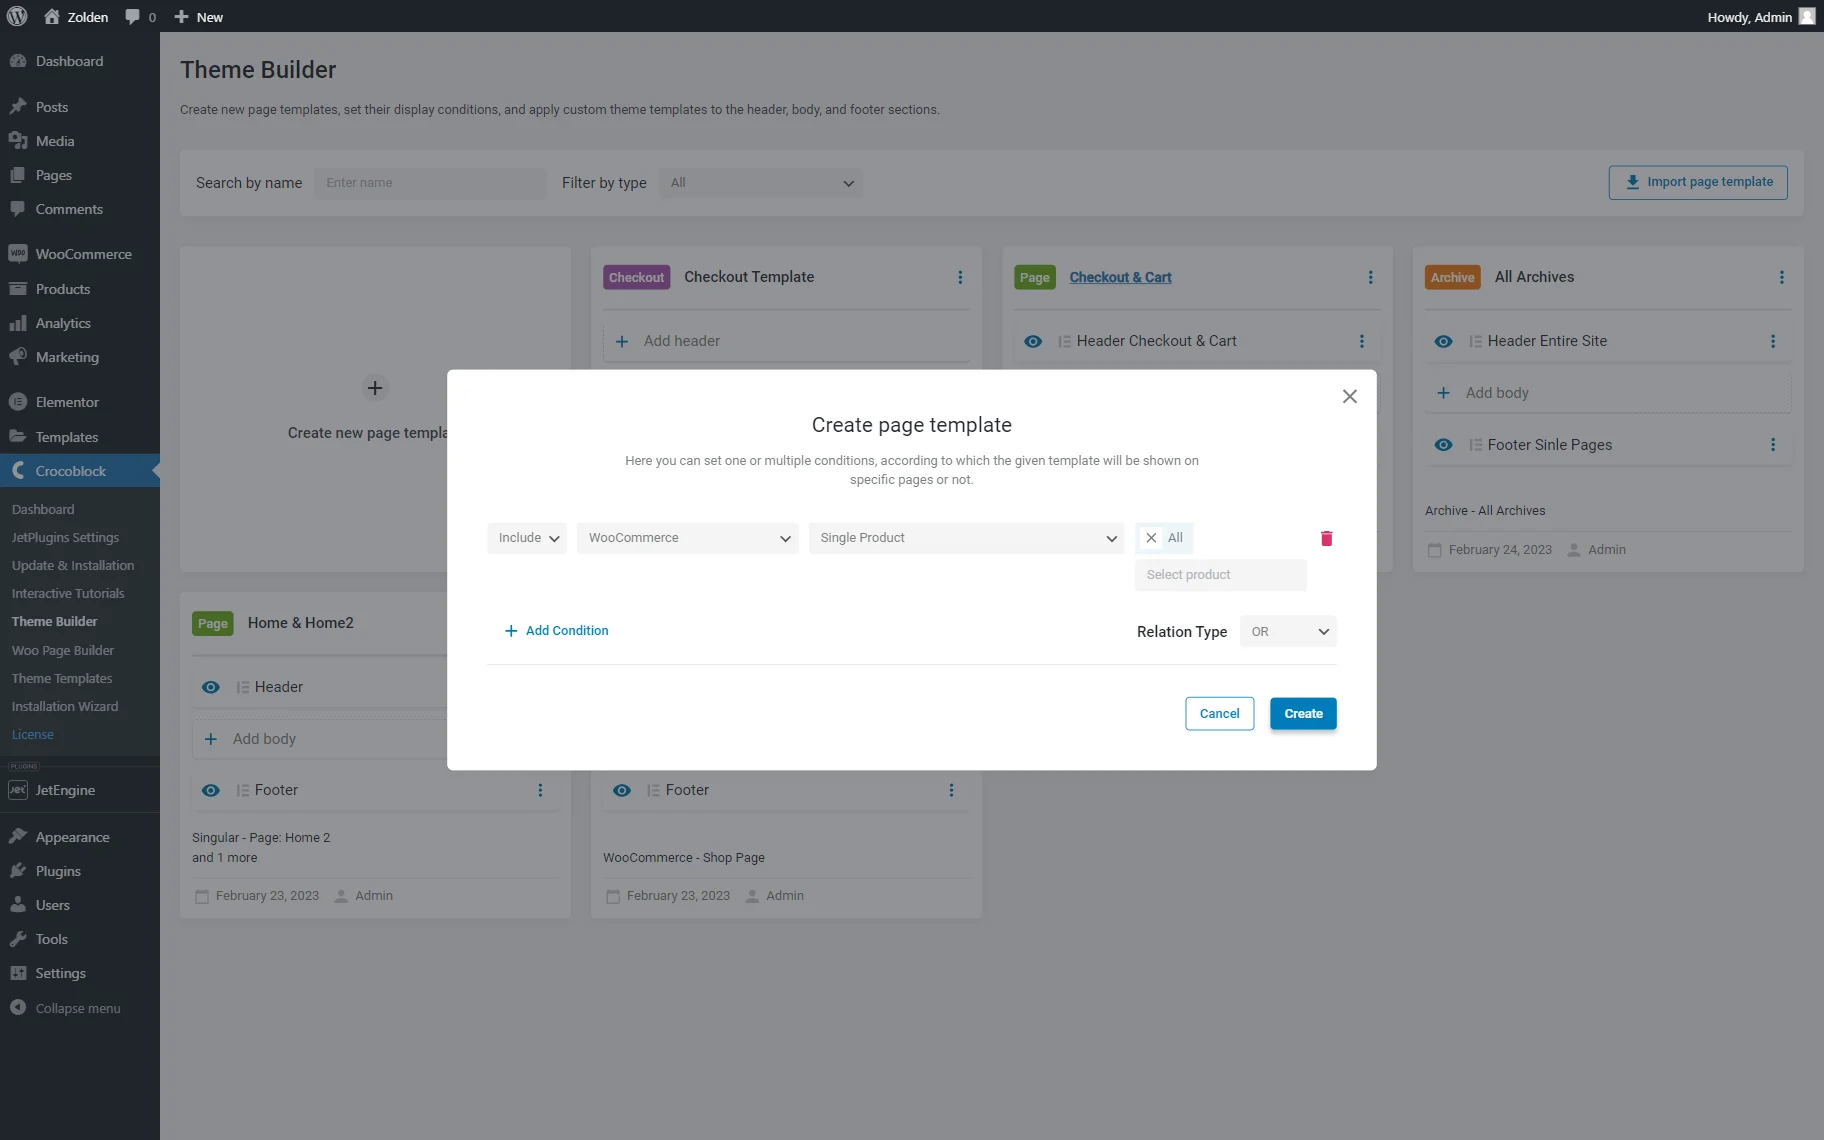
You can also add one more condition and exclude some products. For that, choose “Exclude,” “WooCommerce,” and “Single Product,” and in the last window, select the names of the products.
Proceed to this tutorial if you want to know more about the template conditions. For instance, you can create dedicated templates for different devices, user roles, and requests.
When you’re done, click the “Create” button.
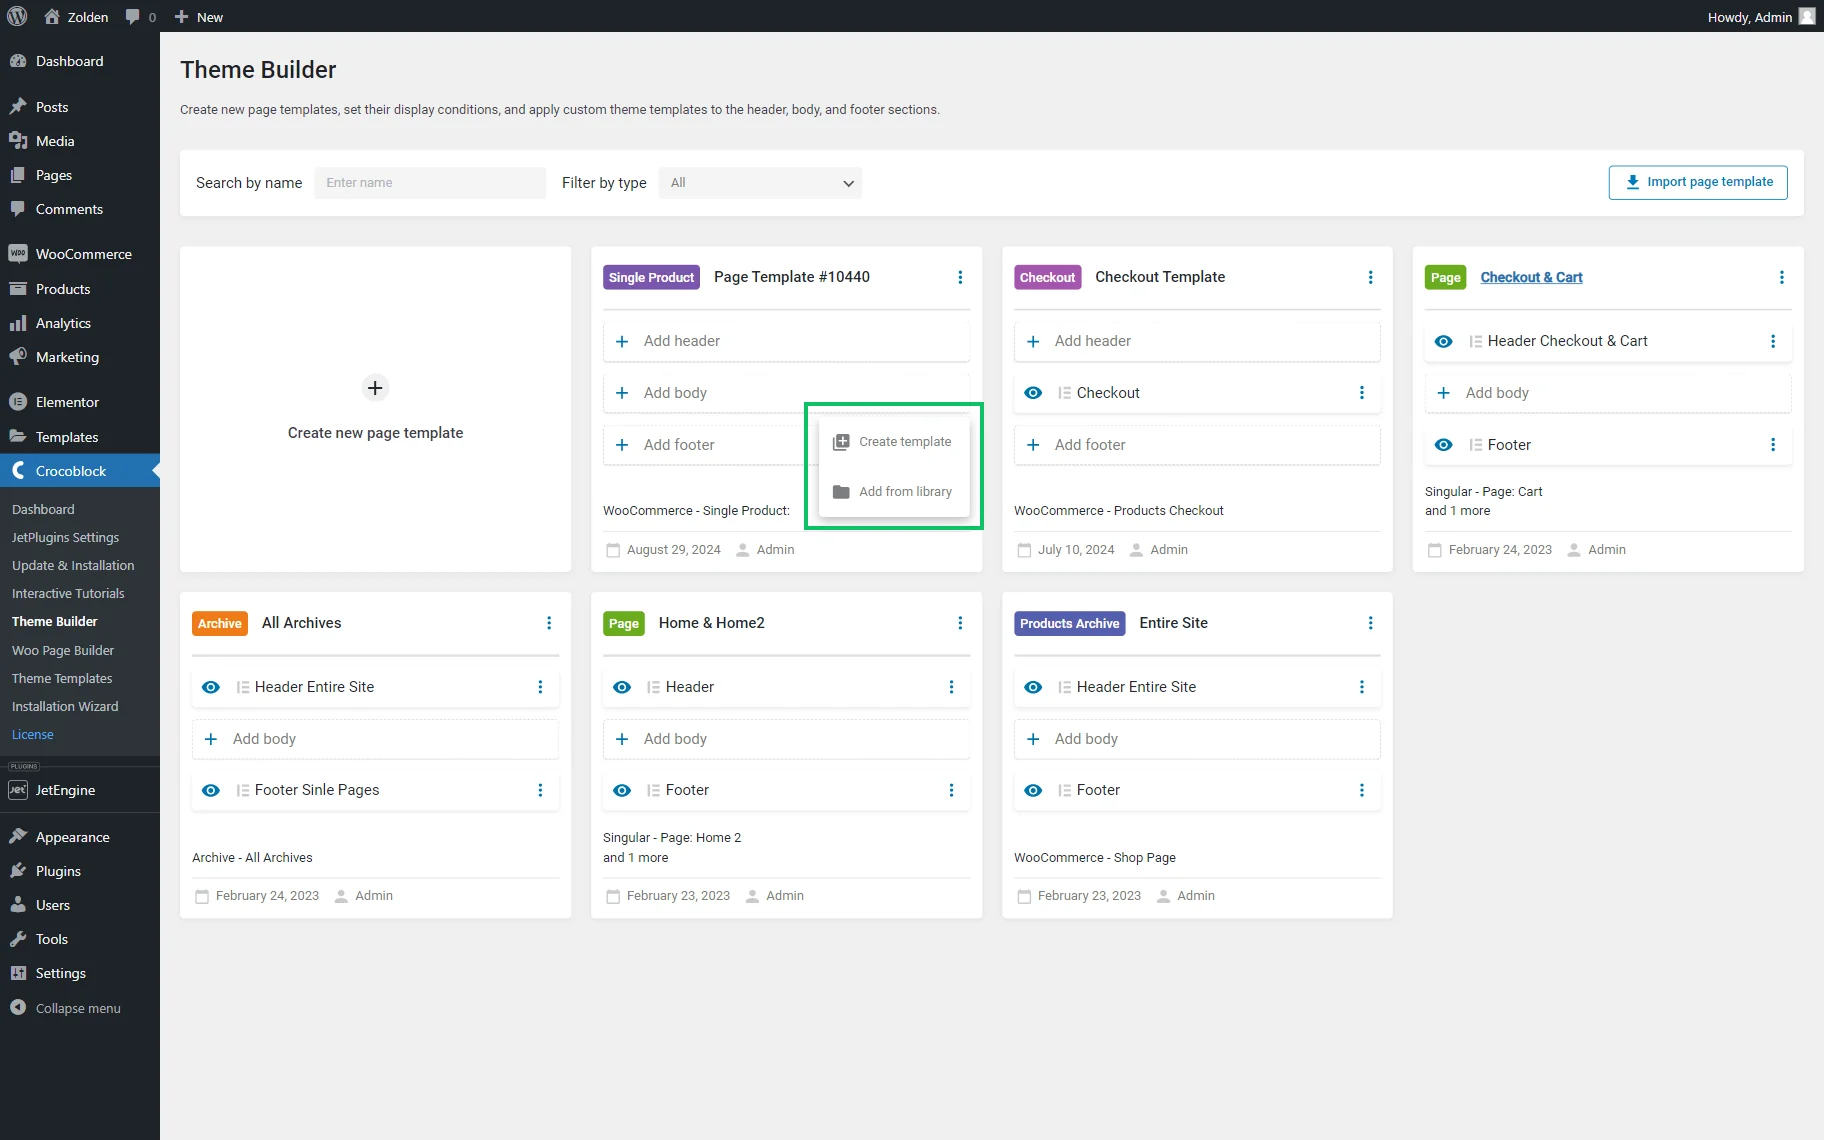
In the newly created page template, click on the “Add body” button. You can create a brand new template for the page or add the existing one. Now, hit the “Add from library” button.
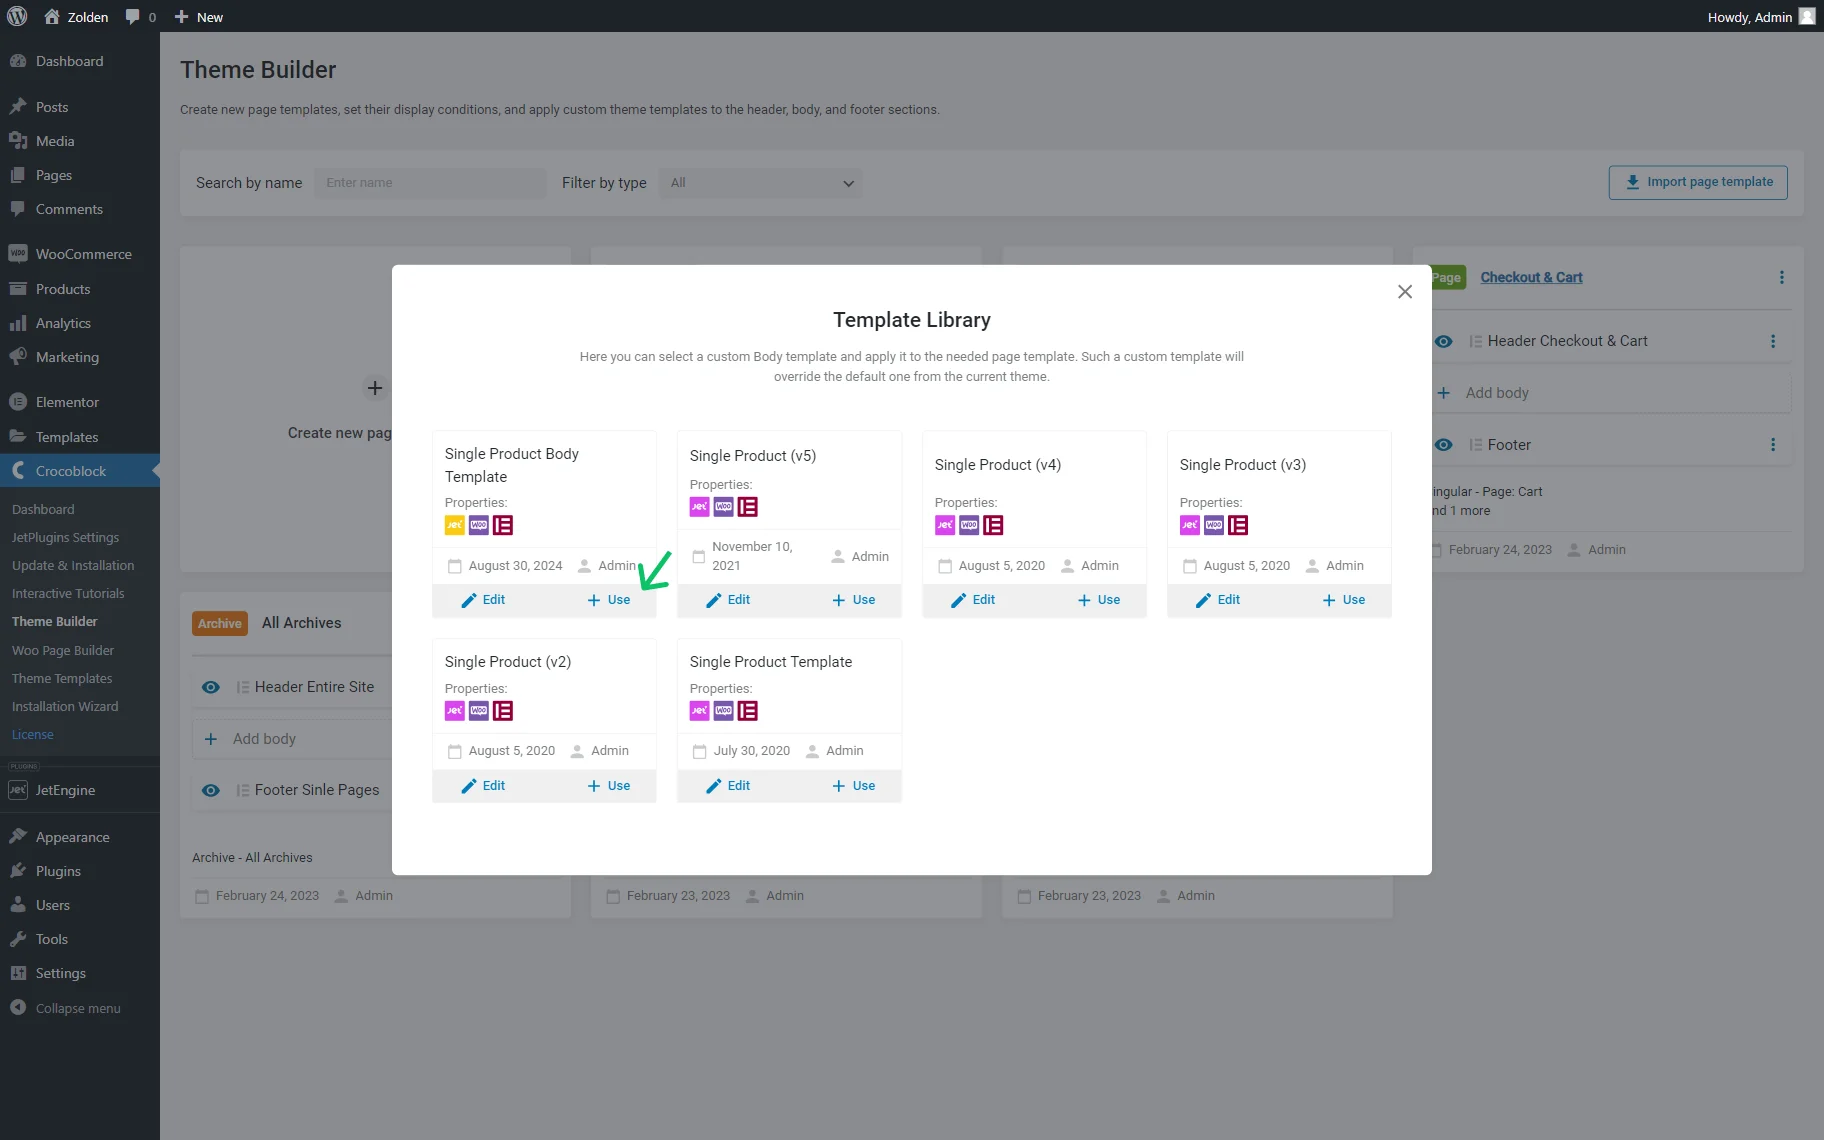
Select the previously created template from the Template Library. As shown below, you can add either JetWooBuilder or JetThemeCore templates to the page.
Then, add a header and footer from the library or create new ones. In that case, we have dedicated tutorials about header and footer creation.
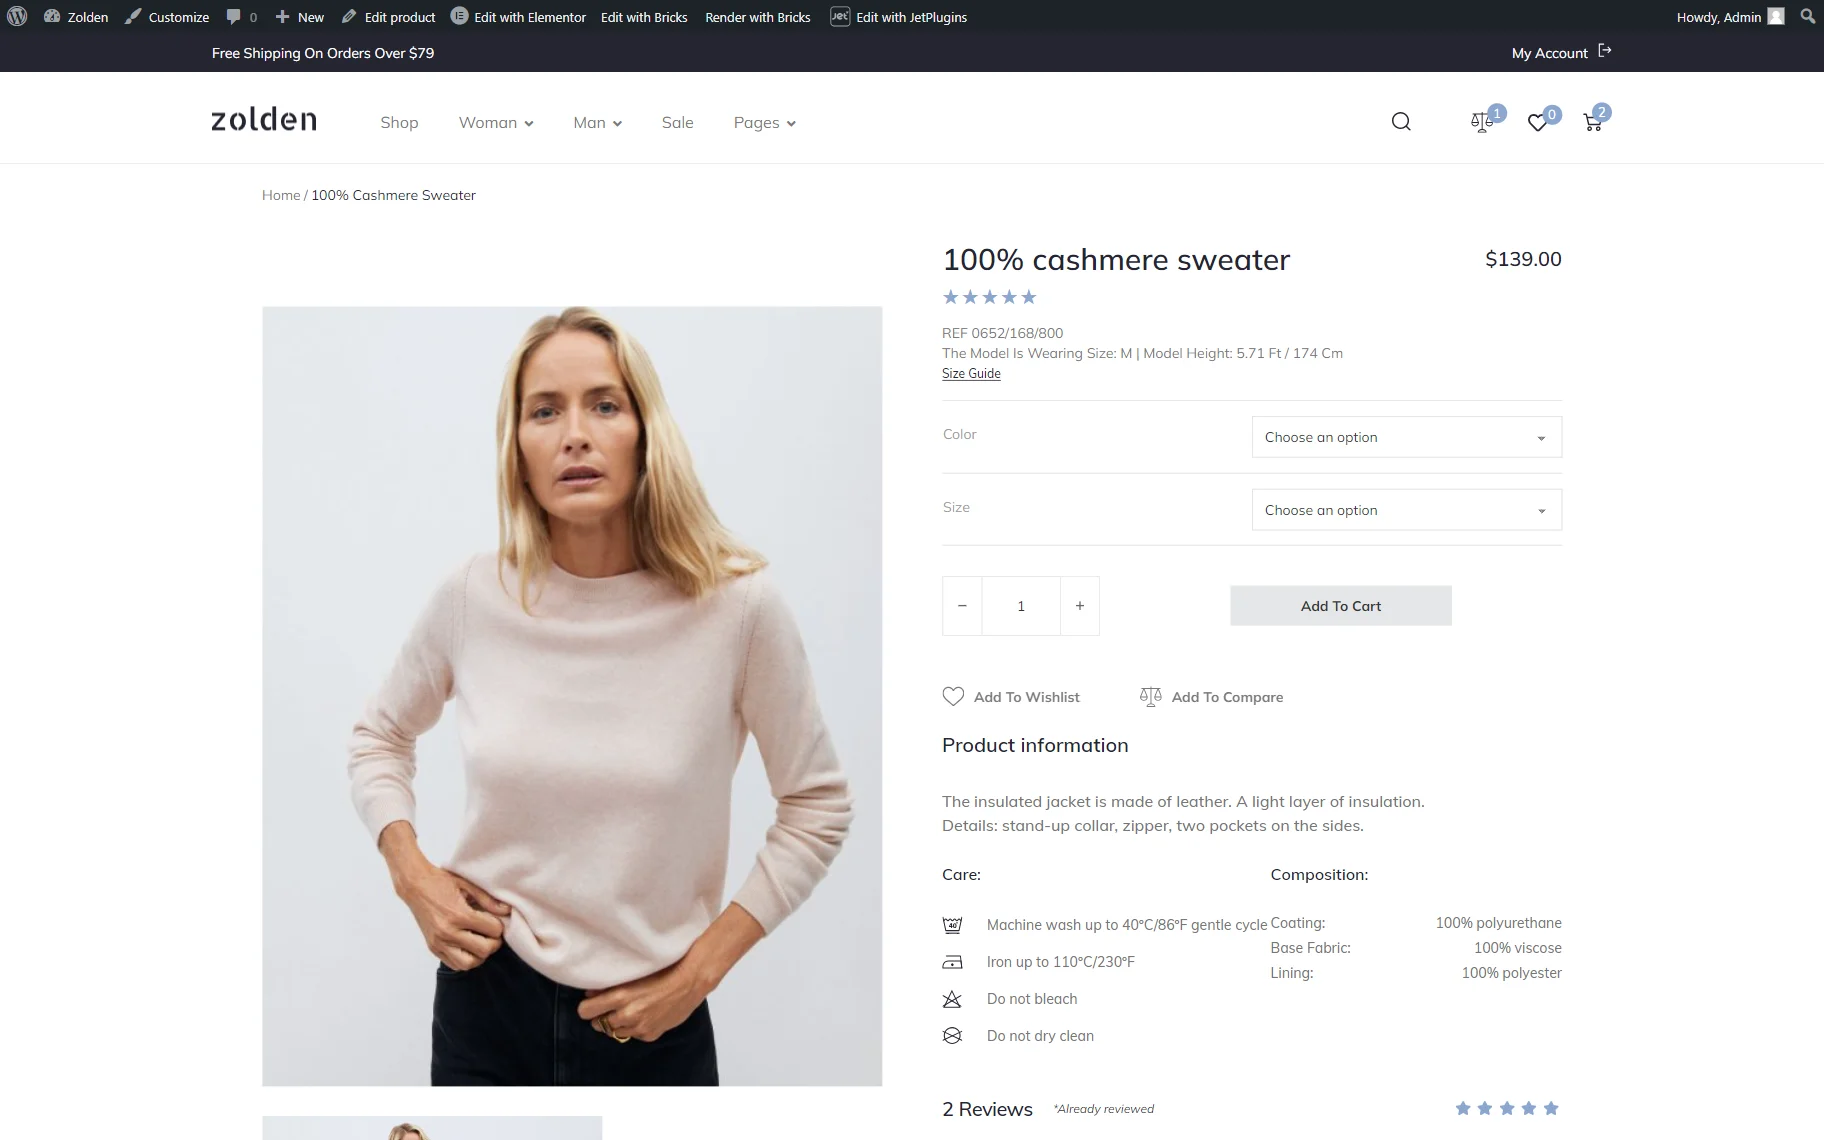
Proceed to the front end and check how products look with the newly created Single Page template.
Also, check the How to Create Products Archive Template tutorial to know how to display all products on one page.
That’s all. Now you know how to create a single product template with the JetWooBuilder and JetThemeCore plugins.