
How to Create a Custom Categories Archive Template
This tutorial explains how to create a custom categories archive template for WooCommerce products using the JetWooBuilder plugin.
WooCommerce is an open-source plugin for WordPress which helps you create and sell anything you like, from actual products to services and digital items. The JetWooBuilder plugin makes the process of creating WooCommerce templates much more effortless.
How to Display Categories on the Shop Page
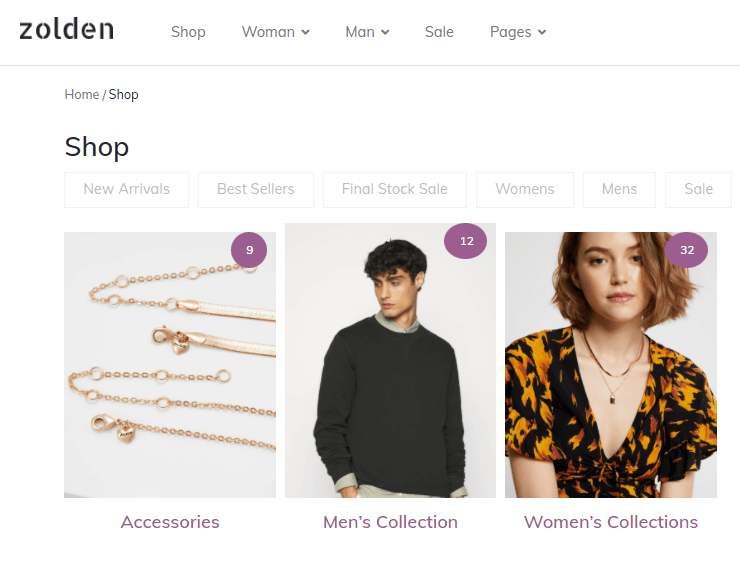
Once you’ve created several products, you’re usually good to go. But what if you have too many products to display at once, and you want to display the product categories instead of the actual products? Thus, you enable the visitors to click the specific category and access the goods that belong to it.
Styling up the product categories might be a complicated task requiring some coding skills. Yet, you can work with Elementor to create the WooCommerce Category Item template using this page builder with the JetWooBuilder plugin.
If you still don’t have the categories assigned to products, create them. Go to Products > Categories, fill in the Add new category section name and descriptions, and provide the thumbnail images representing the category to the visitors.

Create a Category Item Template
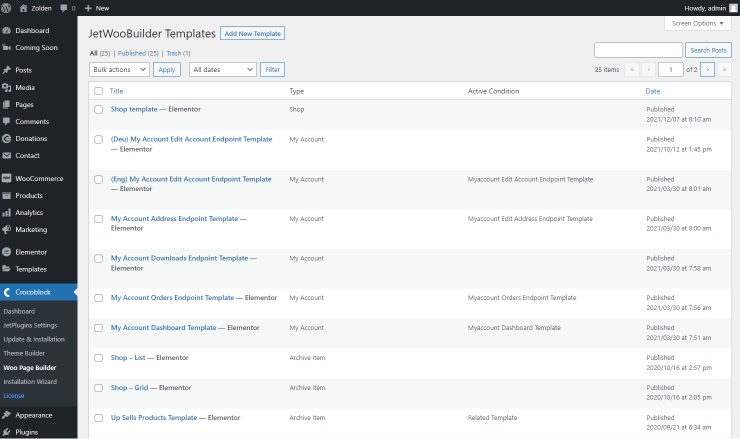
Firstly, go to the Crocoblock > Woo Page Builder tab in the WordPress Dashboard and click the “Add New Template” button.
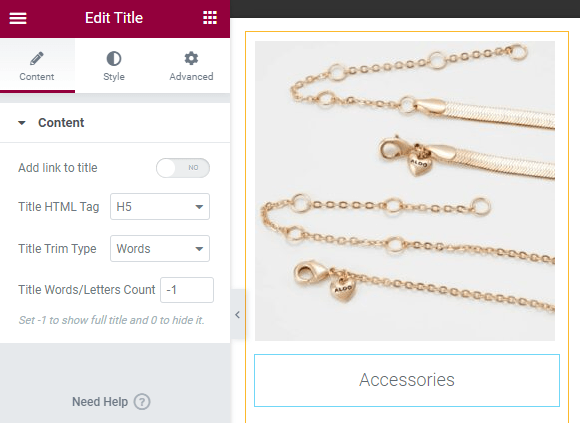
 Set the Category Item and provide a title in the corresponding field at the Add Template screen.
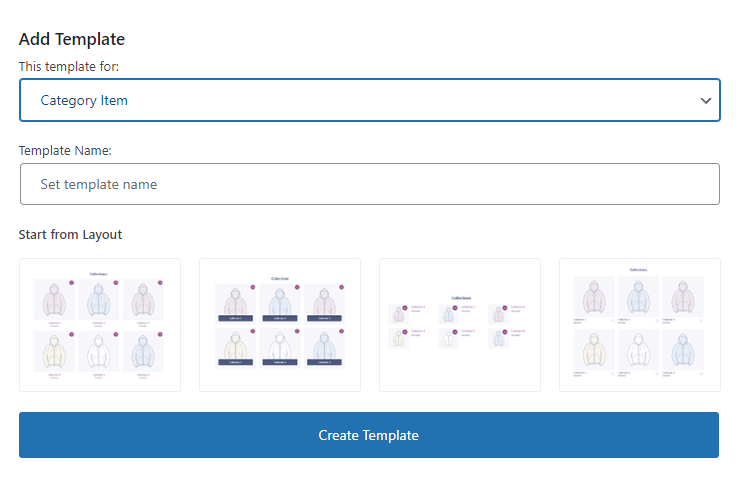
You can select one of the ready-to-use layouts to start.
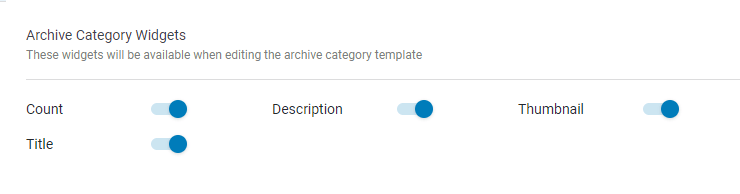
Click the “Create Template” button in the same window to proceed to the Elementor page builder. Here feel free to use such widgets as Title, Thumbnail, Desсription, and Count, which are made specifically for Category Archive templates and have extensive stylization settings. Mix and match them to get the desired category layout.
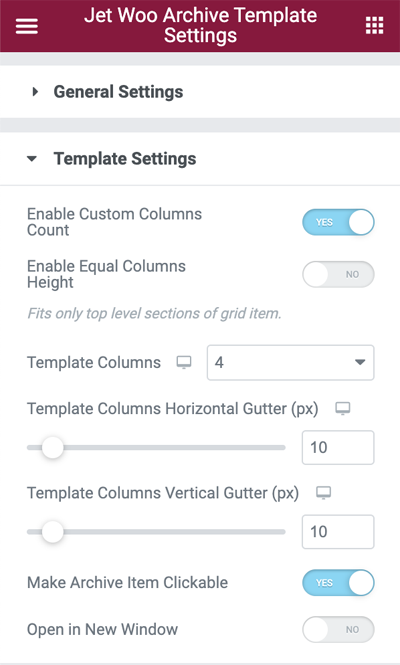
Navigate to the Template Settings tab of the Jet Woo Category Template Settings. The Template Settings tab:
- enables the Custom Columns Counts and Equal Columns Height; manages the Columns Count for different devices to define how the categories will be shown in an archive; specifies the Template Columns Horizontal/Vertical Gutter; Makes Archive Item Clickable;
- adds the possibility to Open in New Window the template.
When you are done, click the “Publish” or “Update” button.
Assign the Template to WooComerce
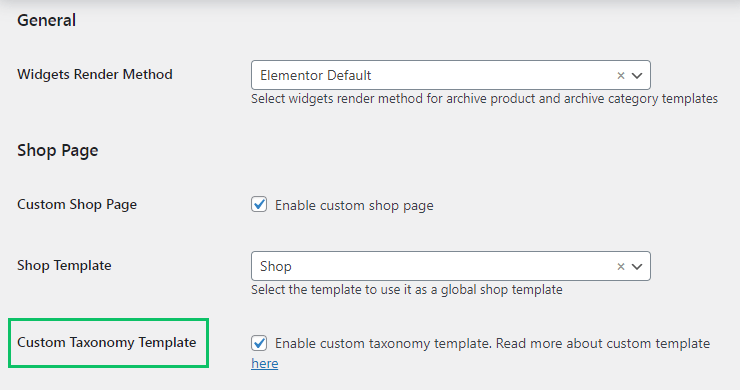
Go back to the WordPress Dashboard and open WooCommerce > Settings. Proceed to the JetWooBuilder tab and scroll down to the Archive Category section.
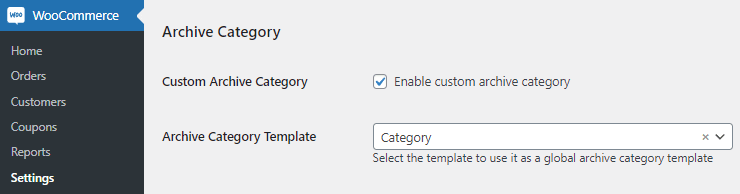
Tick the Enable custom archive category option. After that, select a template you’ve recently created to set it as a custom categories archive template. Click the “Save Changes” button.
Customize the Product Catalog
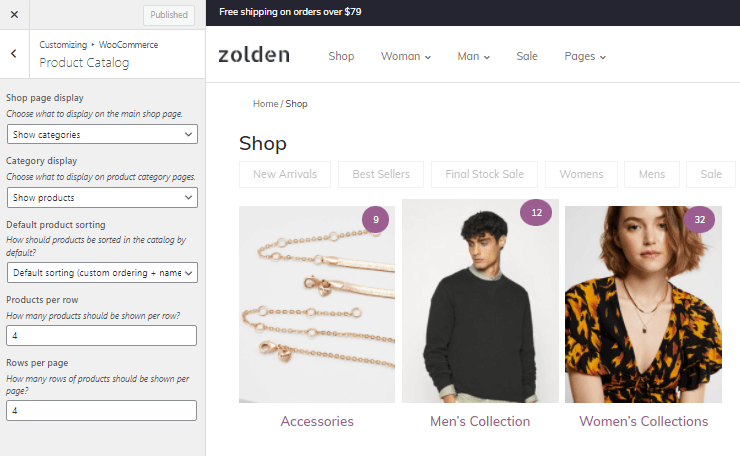
Proceed to the Appearance > Customize > WooCommerce > Product Catalog directory. Choose the “Show categories” option in the Shop page display field and “Show products” in the Category display to display only categories on the Shop page. Hit the “Published “button.
Add the Product Loop Widget to the Shop Template
Then, you only need to add the Products Loop widget to the Shop Page template without any settings.
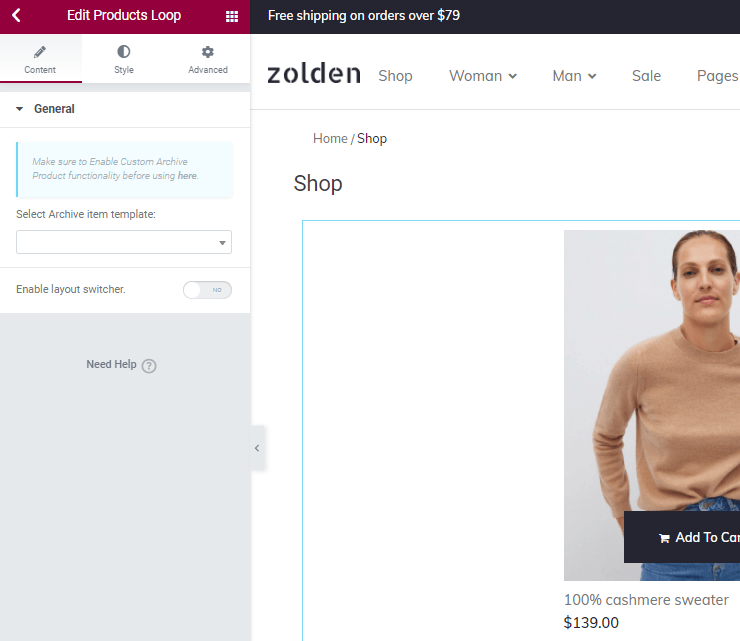
The Products Loop will show the categories on the front end by default.
How to Create and Design a Dedicated Template for Each Category
Now you can click on the category and be redirected to the page based on the global shop template with the products related to the category. If you want to design different categories individually, like women’s and men’s collections, you need to create a dedicated Shop template for each category.
Proceed to the Crocoblock > Woo Page Builder tab in the WordPress Dashboard sidebar. Click the “Add New Template” button.
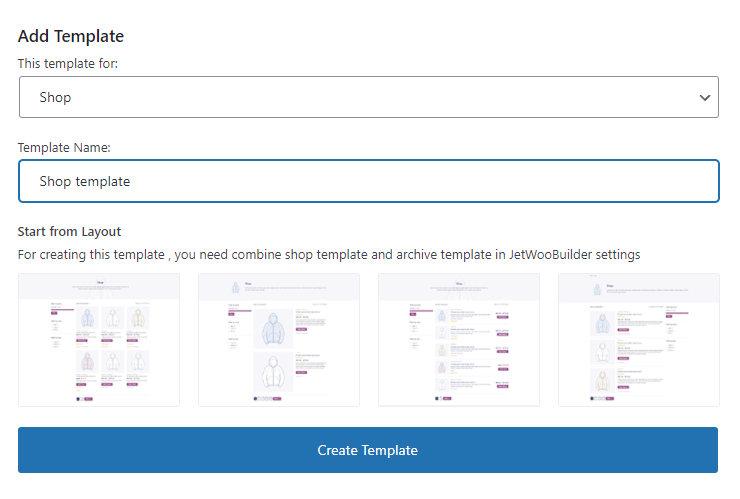
There will be a starting pop-up window. Select the “Shop” option in This template for the drop-down menu and enter the Template Name. If you are somehow confused about the shop page layout, you can choose a pre-set in the Start from Layout section. Afterward, click the “Create Template” button.
Fill new shop template with content. You can learn more about shop widgets in the How to Create a Shop Page Template tutorial.
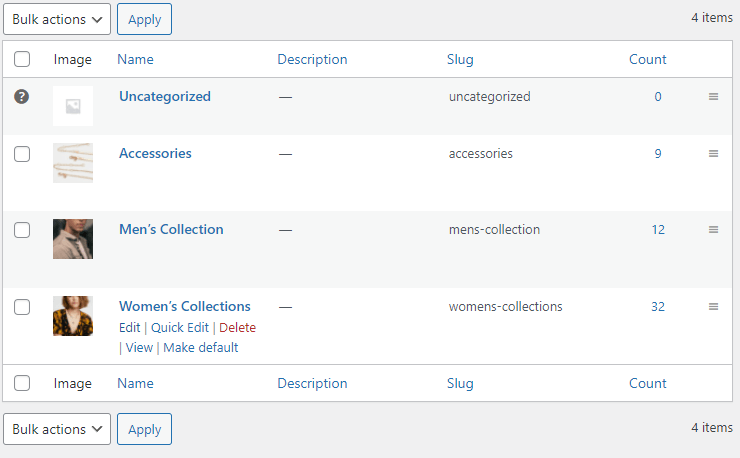
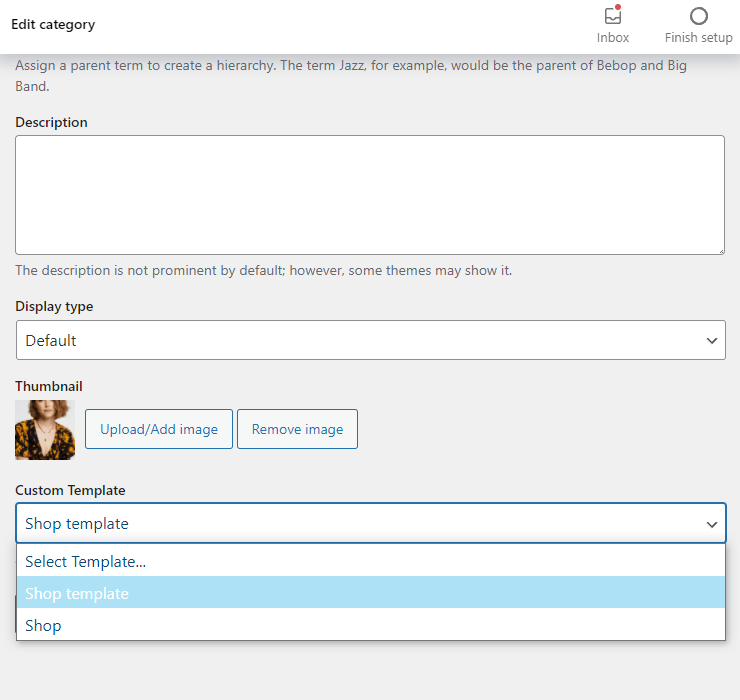
Go to Products > Categories and edit the category for which you have created the shop template.
Select the shop template for the category in the Custom Template drop-down menu.
How to Create the Shop Page Template with Categories Using the JetThemeCore plugin
The JetThemeCore is the WordPress builder for the Elementor and Gutenberg editor, with the help of which you can create a page template with a header, footer, and the JetWooBuilder template as a body.
Create a Category Item Template
Сreate a template with the help of the JetWooBuilder plugin and customize it, as we described in the 1-4 steps of the first paragraph.
If you have already completed all the steps, just proceed to the page template creation.
Create a Page Template
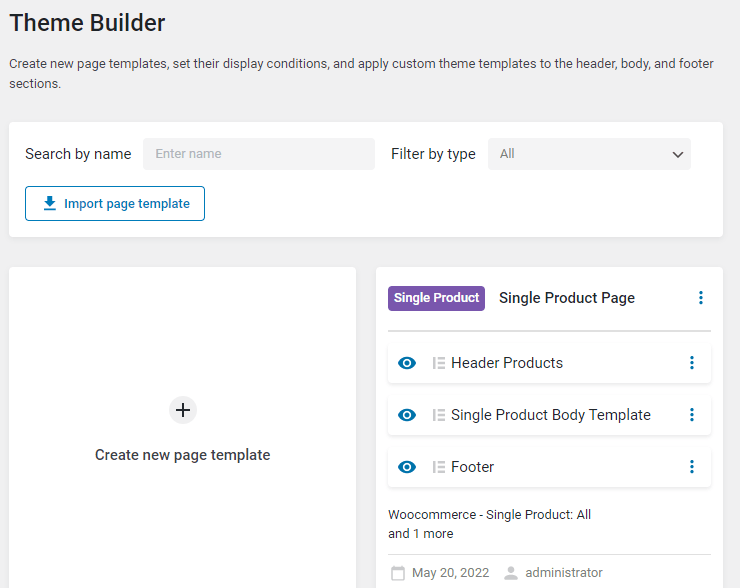
Move to the Crocoblock > Theme Builder tab, and click the “Create new page template” button.
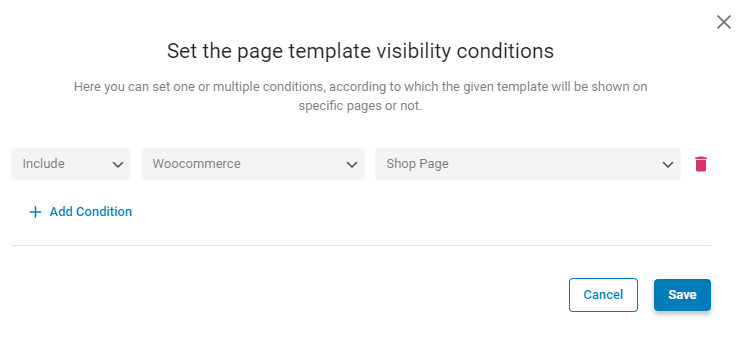
In the pop-up, hit the “Add Condition” button, and choose the “Include,” “WooCommerce,” and “Shop Page” options.
Check out this tutorial if you want to know more about the template conditions. For instance, you can create dedicated templates for different devices, user roles, and requests.
When you’re done, click the “Create/Save” button.
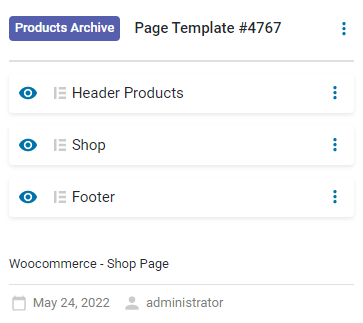
Click on the “Add body” button in the newly created page template. As you can see, you can create a brand new template for the page or add the existing one. Now, hit the “Add from library” button.

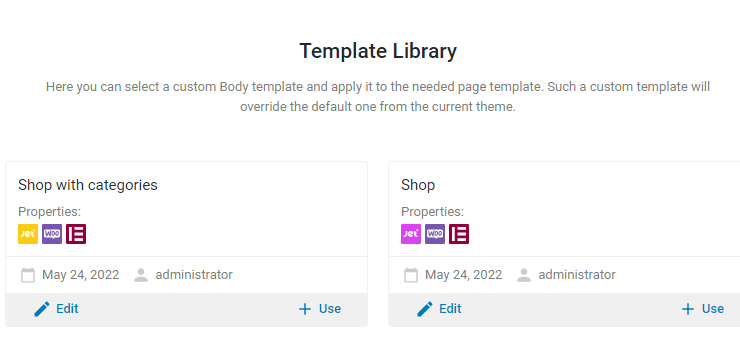
From the library, add the Shop template with the Product Loop widget for the categories displaying.
For the page template, you can use either JetWooBuilder or JetThemeCore templates.
Also, you can add a header and footer from the library or create new ones. In that case, we have dedicated tutorials about header and footer creation.
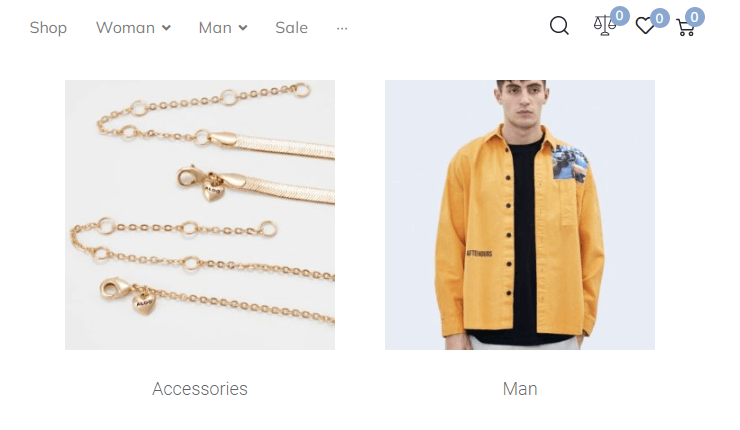
Proceed to the front end and check how product categories look with the newly created Shop Page template.
How to Create a Page Template for the Separate Category Using the JetThemeCore plugin
If you click on a category on the Shop page, you’ll be redirected to the page based on the global shop template with the products related to the category. If you want to design different categories individually, like women’s and men’s collections, you can create a dedicated Shop page template for each category.
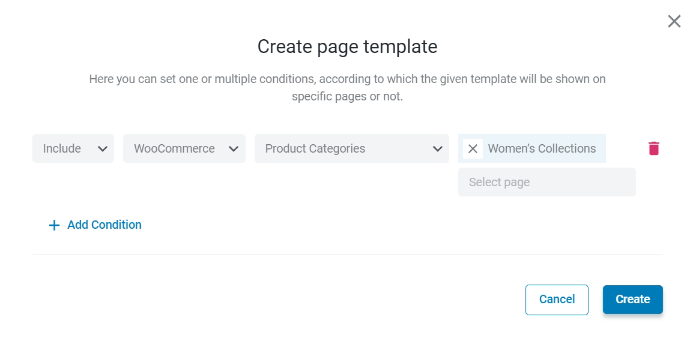
Proceed to the Crocoblock > Theme Builder tab, and click the “Create new page template” button.
Select the “Include,” “WooCommerce,” and “Product Categories” conditions, and in the last field, choose the category or several categories for which the page template will be created. Then, hit the “Create” button.
Check out this tutorial if you want to know more about the template conditions. For instance, you can create dedicated templates for different devices, user roles, and requests.
Click on the “Add body” button in the newly created page template.
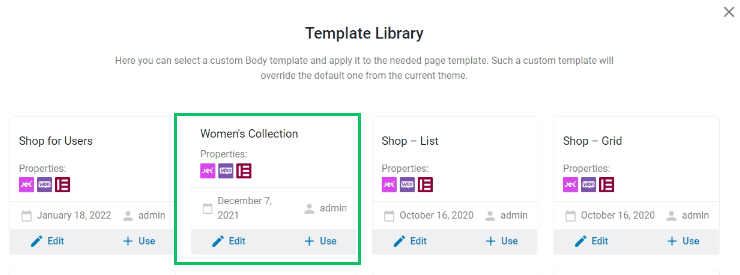
As you can see, you have two options: create a template or add the already existing template from the library.
You also can create a shop template with the JetWooBuilder (Crocoblock > Woo Page Builder tab) or the products archive template with the JetThemeCore (Crocoblock > Theme Templates tab) and add it to the page template from the library.
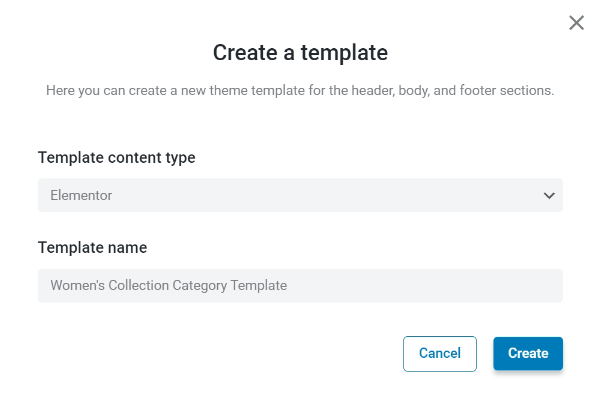
We will create the body template from scratch with the JetThemeCore plugin, so we’ve pressed the “Create template” button.
Select the “Elementor” Template content type, enter the Template name, and push the “Create” button.
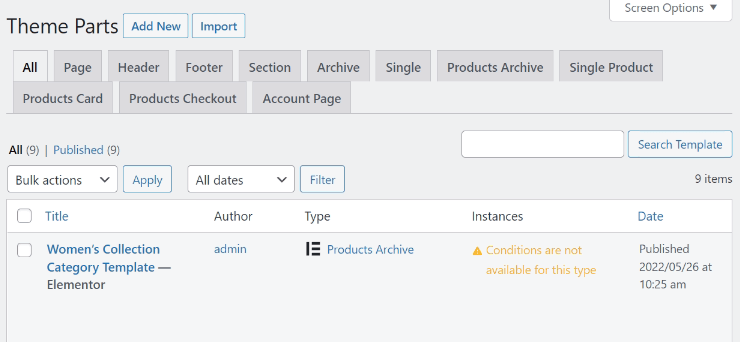
Fill the body template with content and hit the “Publish/Update” button.

If you navigate to the Crocoblock > Theme Templates, you’ll see the newly created body template was saved as the products archive template, according to the page template condition.
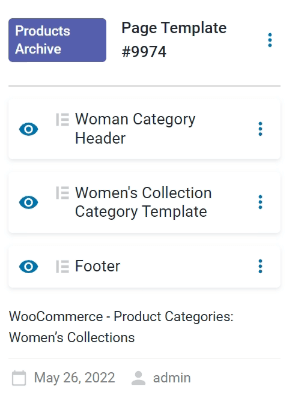
Return to the page template and add a header and footer from the library or create new ones. In that case, we have dedicated tutorials about header and footer creation.
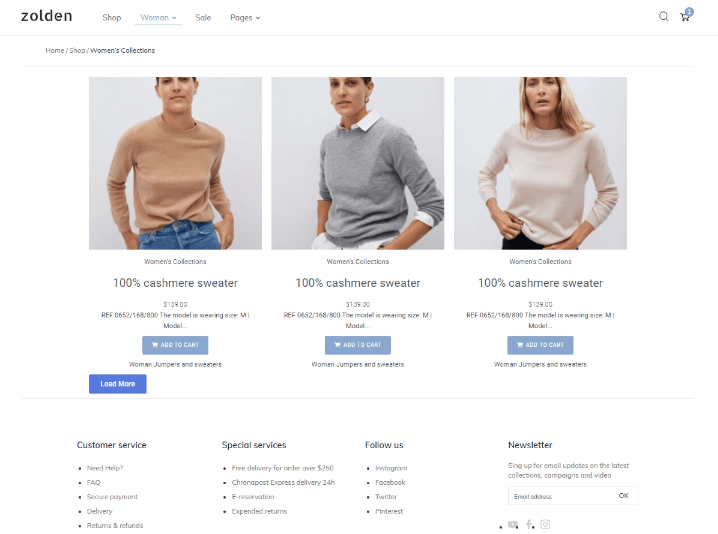
Proceed to the front end and check how the products of the dedicated category look in your shop.
That’s all. Now you know how to display categories on the Shop Page template and create a dedicated template for the separate category with the JetWooBuilder and JetThemeCore plugins.