Relations Overview
This tutorial describes the relations feature settings of the JetEngine plugin for WordPress.
Relations is a JetEngine module covering relations between CPT posts, CCT items, taxonomy terms, and users.
The relations can be created in the WordPress Dashboard > JetEngine > Relations > Add New pathway.
General Settings
The relations have such General Settings:
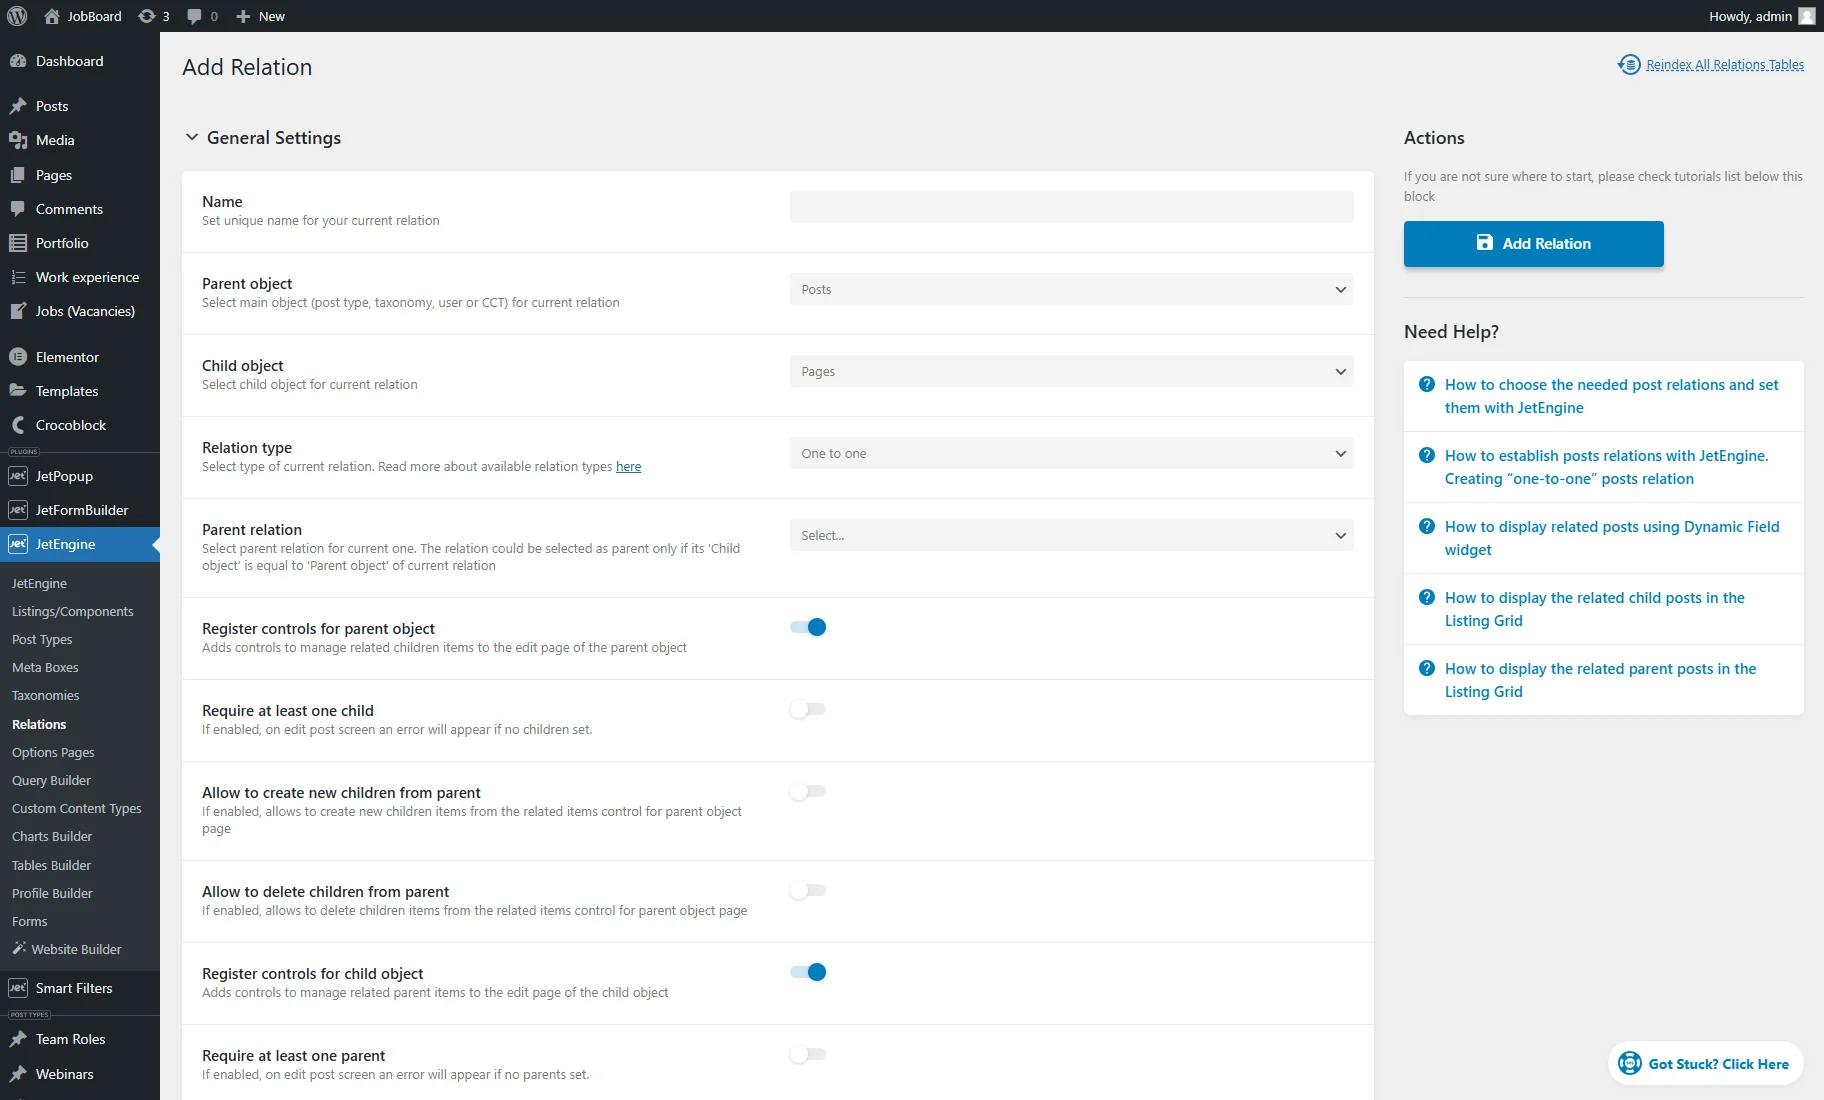
- Name — the relation name, which will later be shown in macros and dynamic tags settings;
- Parent object — a dropdown that allows picking the main object for the current relation (e.g., post type, taxonomy, users, or CPT);
- Child object — a dropdown that allows picking the child object for the present relation (e.g., post type, taxonomy, users, or CPT);
- Relation type — a dropdown that allows picking a relation type: “One to one,” One to many,” and “Many to many.” The Post Relations Types tutorial details more information;
- Parent relation — a dropdown that allows creating the grandparent relation (e.g., Continent > Country > City);
- Register controls for parent object — a toggle that adds a user interface (UI) to manage related items on the parent object editing area (e.g., on the editing areas of the post, user, term);
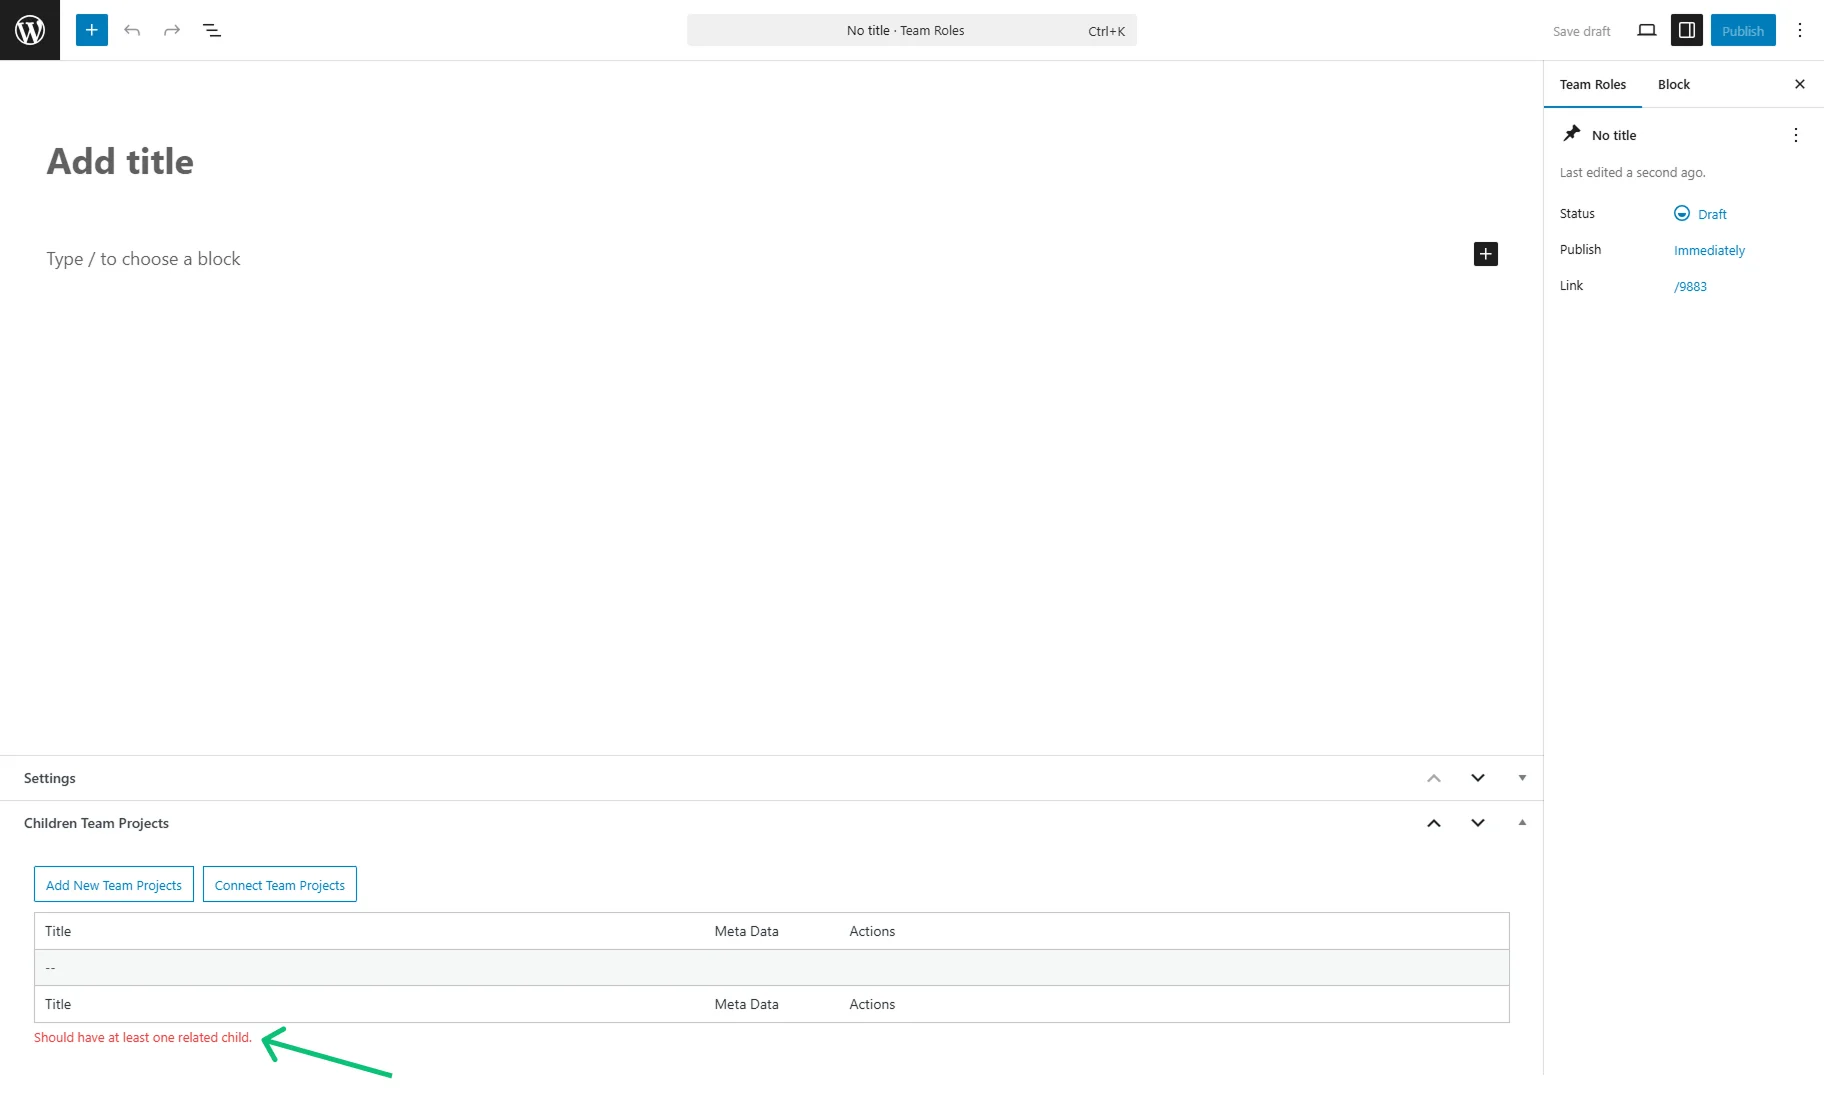
- Require at least one child — a toggle that, if enabled, requires at least one child to be added to the parent object. If this action isn’t completed, it doesn’t allow publishing the parent object, and the “Should have at least one related child.” text is shown under the children controls panel. The text can be customized in the Labels tab in the Parent Object: no children error field;
- Allow to create new children from parent — a toggle that allows to create new child-related items from the parent object editing page;
- Allow to delete children from parent — a toggle that allows to delete new child-related items from the parent object editing page;
- Register controls for child object — a toggle that adds a user interface (UI) to manage related items on the child object editing area (e.g., on the editing areas of the post, user, term);
- Require at least one parent — a toggle that, if enabled, requires at least one parent to be added to the child object. If this action isn’t completed, it doesn’t allow publishing the child object, and the “Should have at least one related parent.” text is shown under the parents controls panel. The text can be customized in the Labels tab in the Child Object: no parents error field;
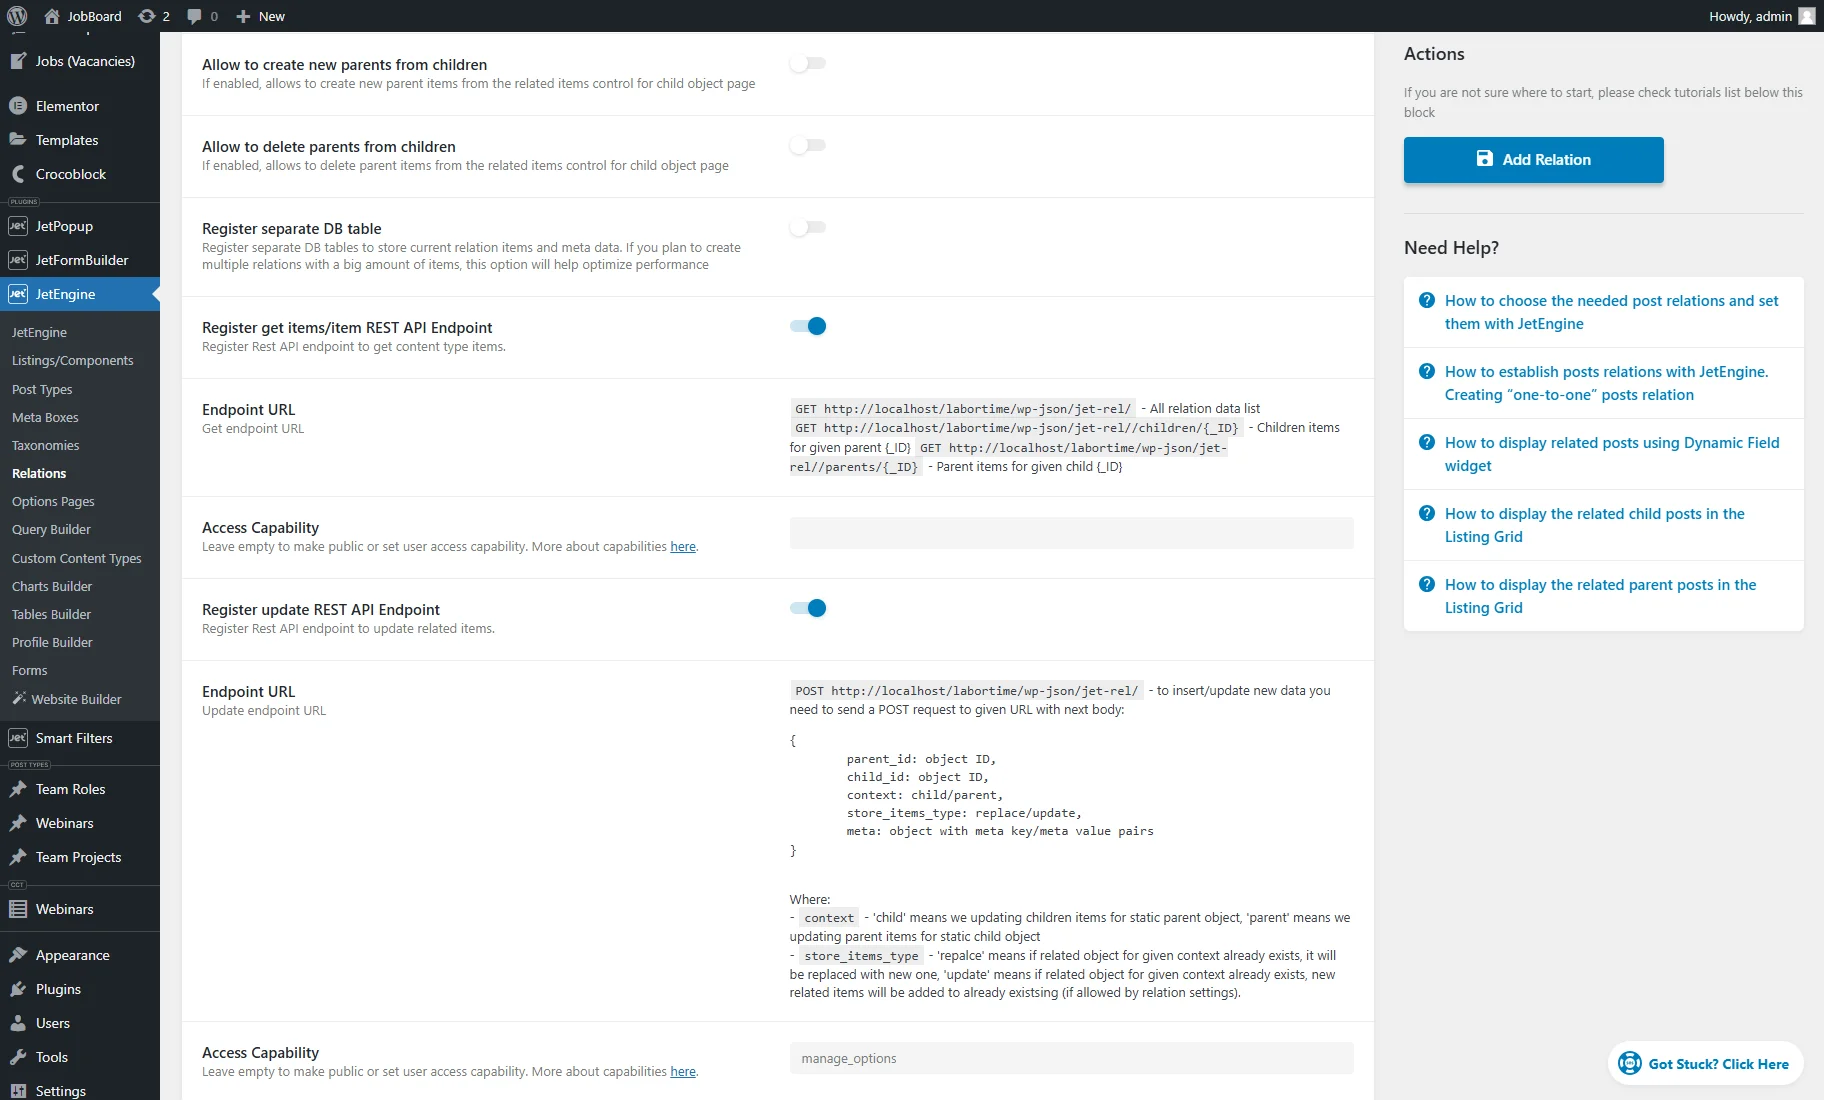
- Allow to create new parents from children — a toggle that allows to create new parents-related items from the child object editing page;
- Register separate DB table — a toggle that registers the relation to a different Dashboard table (otherwise, all related items are stored in the same table for relations);
- Register get items/item REST API Endpoint — a toggle that activates options to register the REST API endpoint to get content type items;
- Endpoint URL — an area that contains three URLs that can be copied and used for the connection between two websites:
- GET – /wp-json/jet-rel/<relation ID> — retrieve all data for the selected relation;
- GET – /wp-json/jet-rel/<relation ID>/children/<item ID> — retrieve child items for the selected item ID;
- GET – /wp-json/jet-rel/<relation ID>/parents/<item ID> — retrieve parent items for the selected item ID.
- Access Capability — a field that allows specifying user capabilities allowed to access data by the generated endpoint. This field can be left empty to make the endpoint public;
- Register update REST API Endpoint — a toggle that activates options to register the REST API endpoint to update related items.
- Endpoint URL — a field that contains such URL:
- POST http://localhost/labortime/wp-json/jet-rel/ — to insert/update new data.
The How to Get and Update Relation Data via REST API tutorial provides more information about the last options.
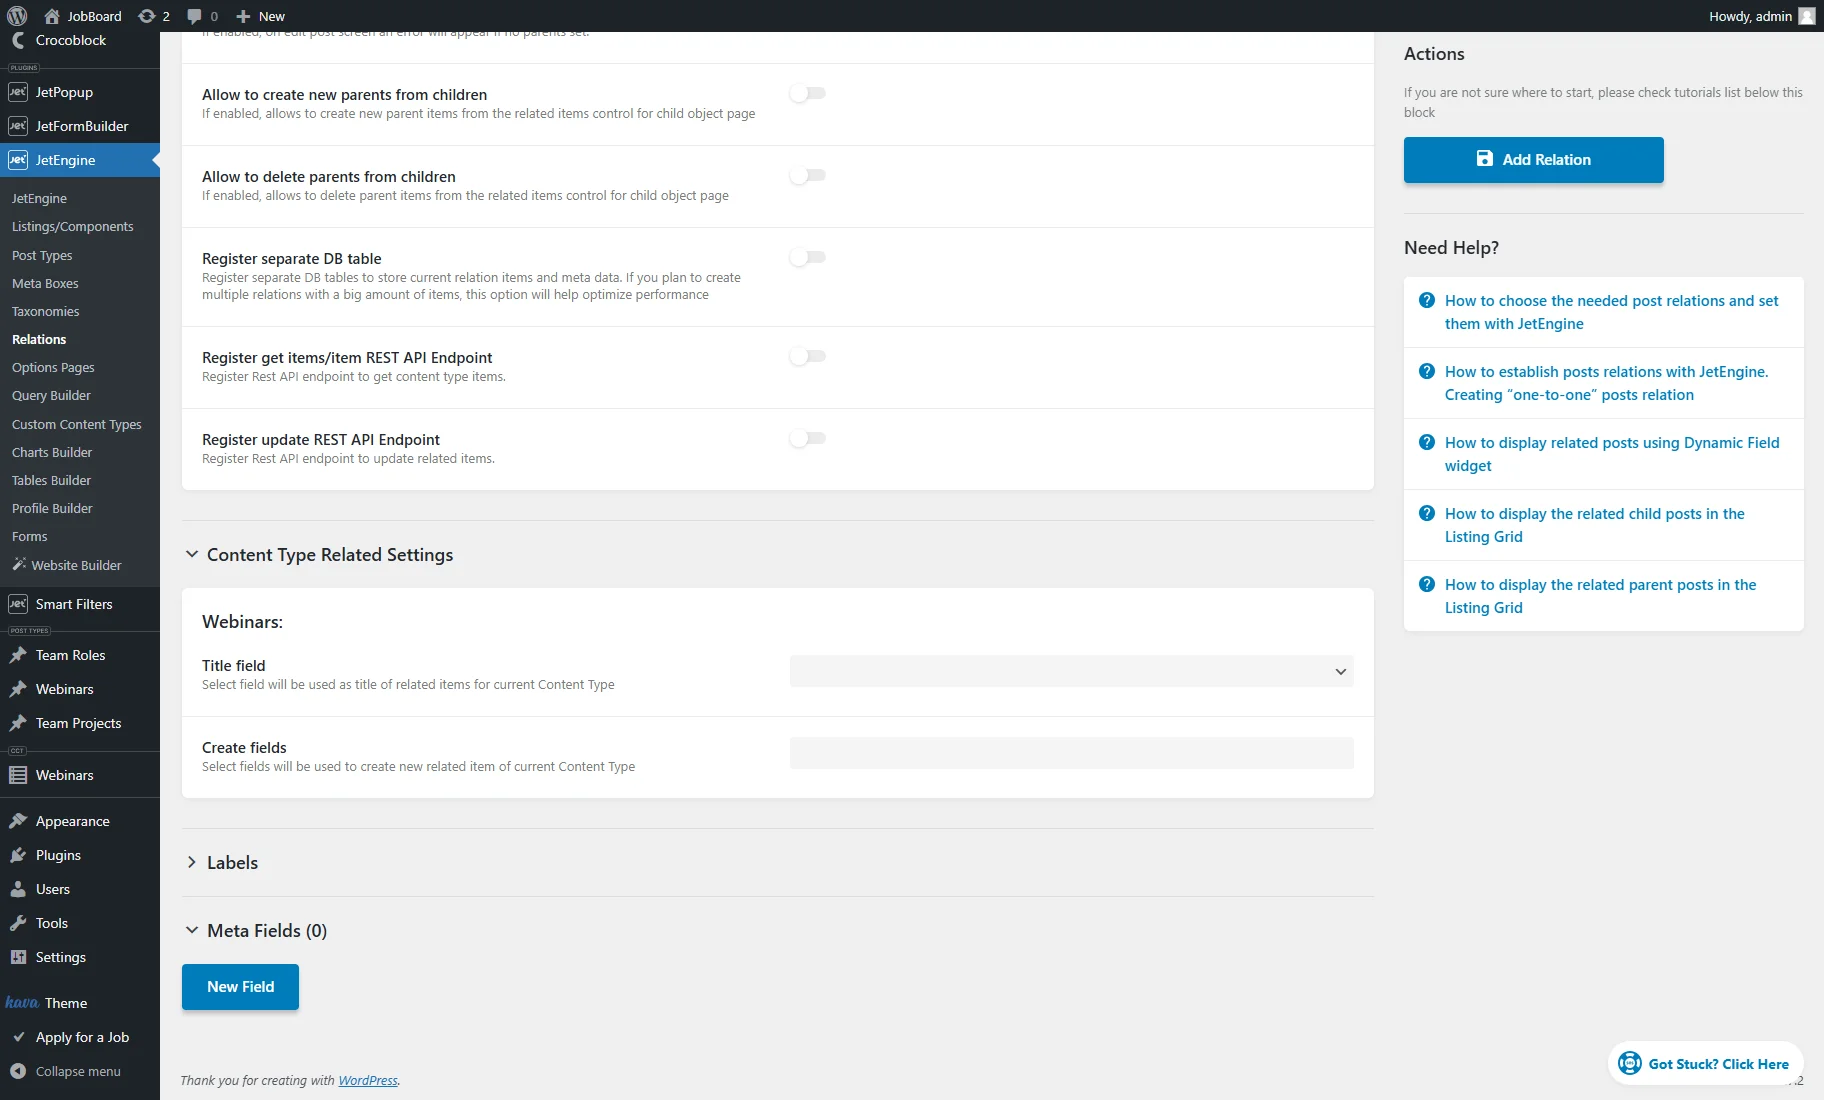
Content Type Related Settings
If a CCT is selected as a parent or child object, a block with the following settings appears below the General Settings:
- Title field — to pick a CCT field from where the titles will be taken for the related items when a new related item is connected;
- Create fields — to choose CCT fields that can be filled when creating a new child CCT item on the parent editing page or a new parent CCT item on the child editing page.
More information can be found in the How to Build Relations between Custom Content Types tutorial.
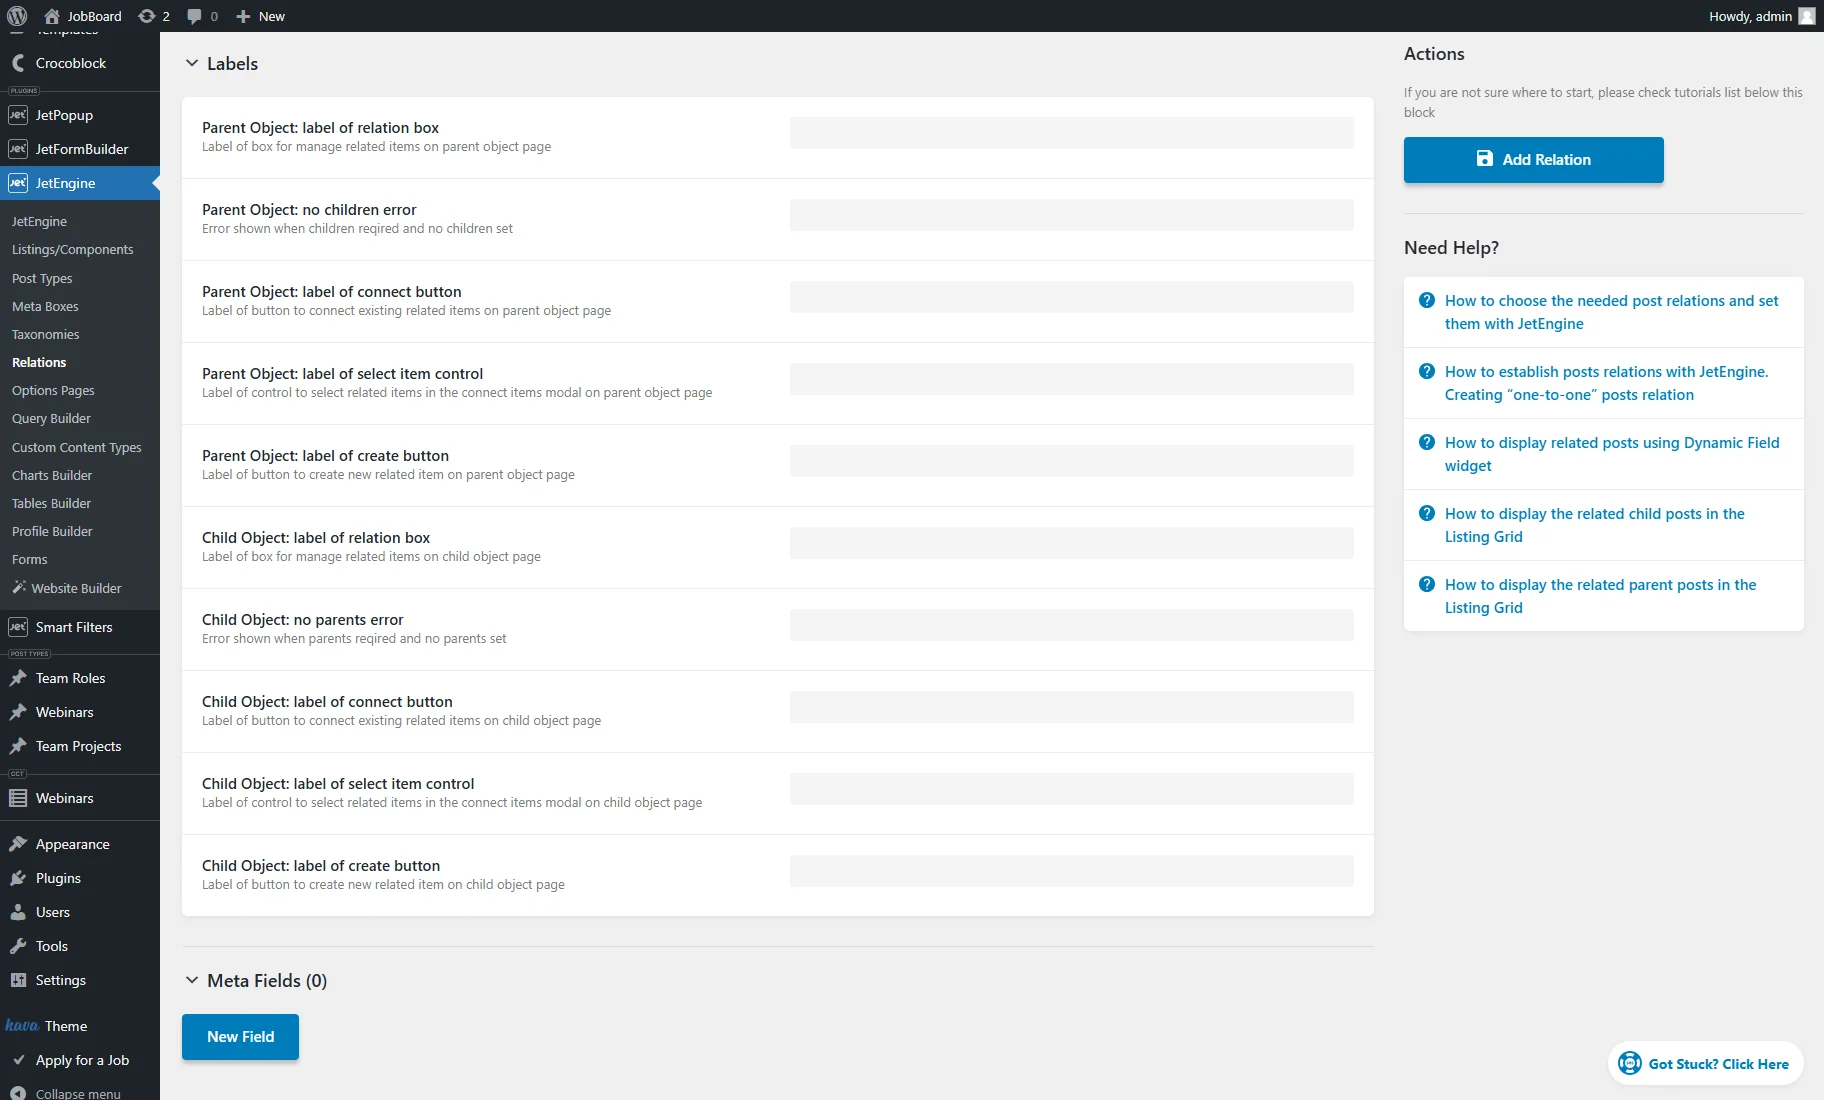
Labels
In the Labels block, one can set how relation settings labels will look in the dashboard. Labels for parent or child objects will appear if the Register controls for parent/child object toggles are activated. Some labels are also dependent on the Allow to create new parents/children from children/parent and Require at least one parent/child toggles.
- Parent Object: label of relation box — a custom label for the relation box on the parent object editing page;
- Parent Object: no children error — for the error text, if at least one child isn’t added to the parent item on its editing page;
- Parent Object: label of connect button — for the button for connecting related items on the parent object editing page;
- Parent Object: label of select item control — for the control for items selection on the parent object editing page;
- Parent Object: label of create button — for the button for creating related items on the parent object editing page;
- Child Object: label of relation box — for the relation box on the child object editing page;
- Child Object: no parents error — for the error text, if at least one parent isn’t added to the child item on its editing page;
- Child Object: label of connect button — for the button for connecting related items on the child object editing page;
- Child Object: label of select item control — for the control for items selection on the child object editing page;
- Child Object: label of create button — for the button for creating related items on the child object editing page.
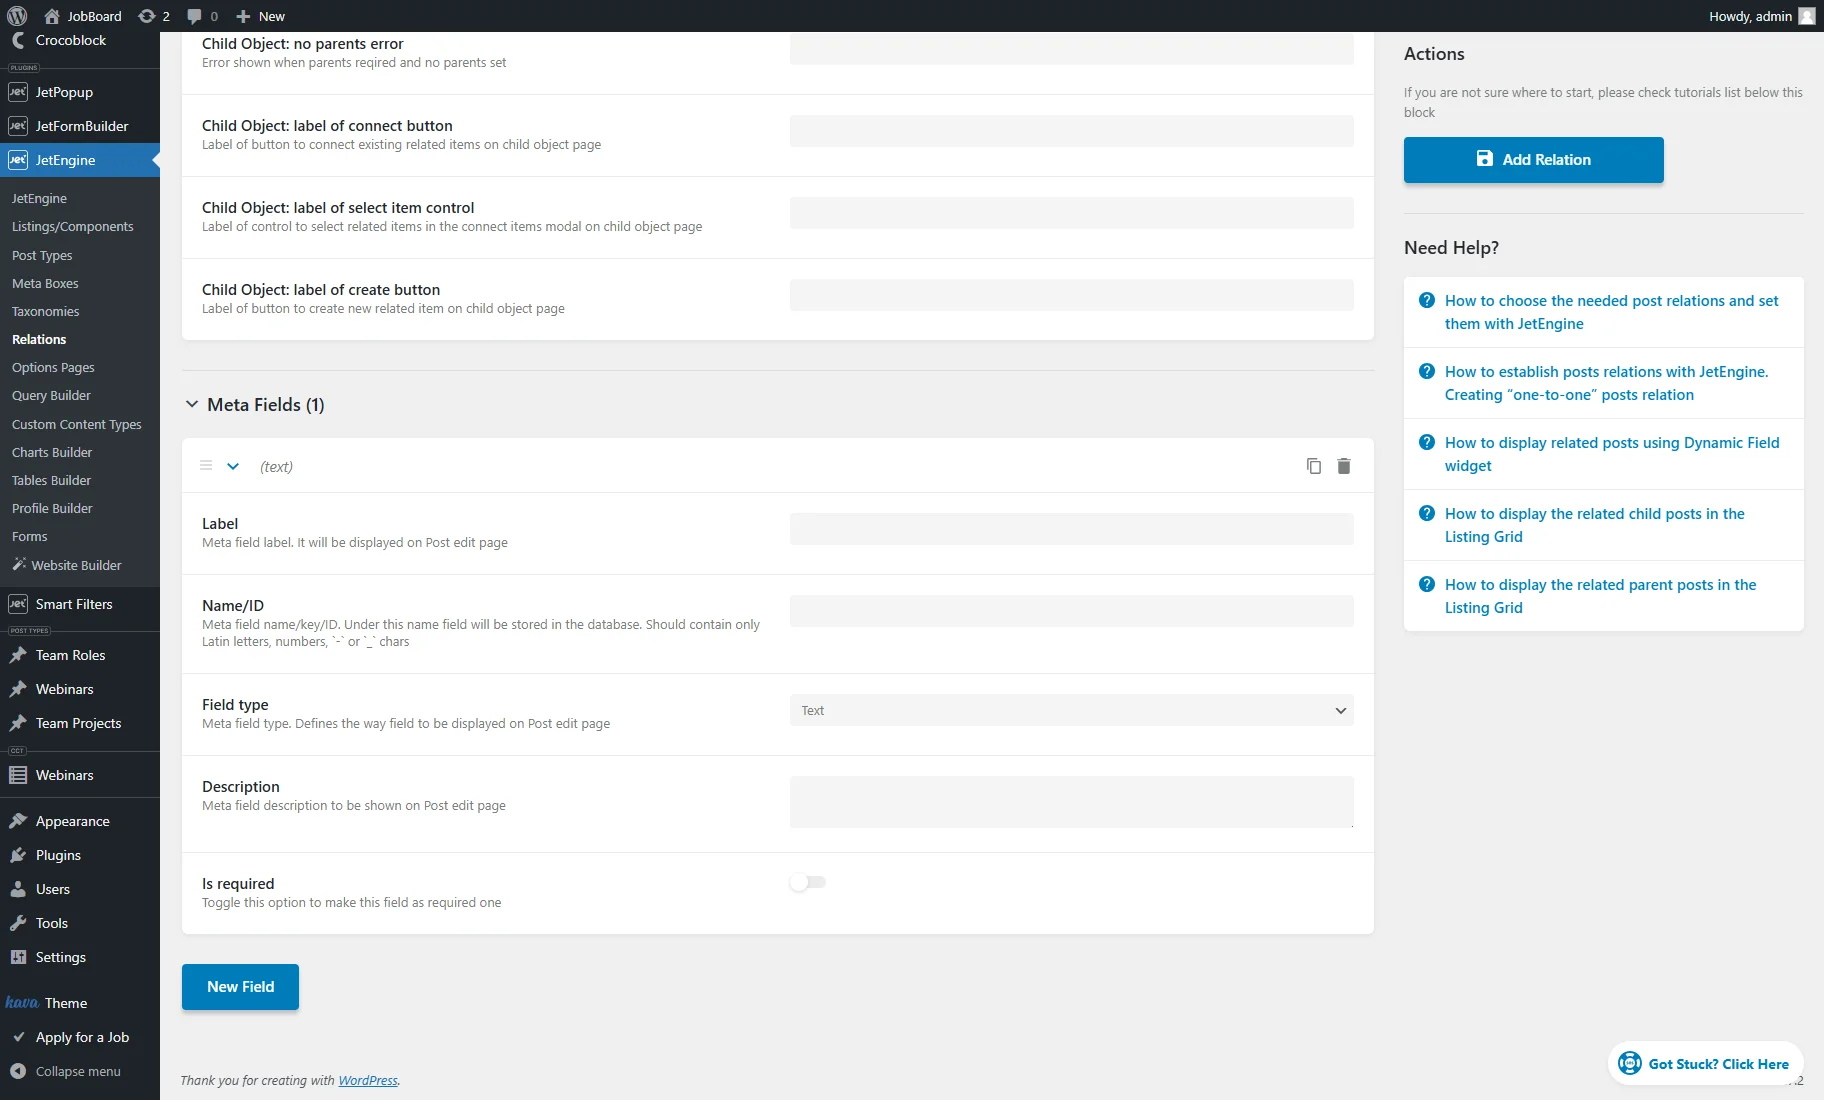
Meta Fields
In JetEngine Relations, meta fields store additional information about the relationship between connected items.
Their functionality is similar to that of post types, taxonomies, meta boxes, etc. However, after pressing the “New Meta Field” button, such settings are presented:
- Label — a title of the field;
- Name/ID — a value that is generated automatically, according to the text put into the Label bar. The ID must have no spaces and contain only Latin letters and numbers. The auto-fill feature will add a random number to the name if it is not unique. The fields with identical IDs could be confusing and cause issues if used elsewhere. If the Label bar includes Cyrillic letters, the auto-fill will transliterate them to Latin;
- Field type — defines the type of information that it can store. Due to restrictions, only the “Text,” “Date,” “Time,” “Datetime,” “Textarea,” “Checkbox,” “Media,” “Radio,” and “Select” types are available.
- Description — an additional field to type information about the meta field purpose;
- Is required — if enabled, this toggle makes the field required.
The relation meta fields can be used for such use cases:
- Gym & Fitness website: trainers offer workouts at specific times. One can create a User-to-Post relationship, linking trainers (users) to workouts (posts) with a “Time” meta field (training_time);
- IMDb-style website: connecting actors to movies with the ‘role’ meta field storing character name as described in the How to Display Relations Custom Fields tutorial;
- JobBoard website: users (employees) are linked to roles, and roles to projects using multi-level relationships. Meta fields define worker responsibilities and project participation, as detailed in the Creating a Structure Similar to a Nested Repeater tutorial.
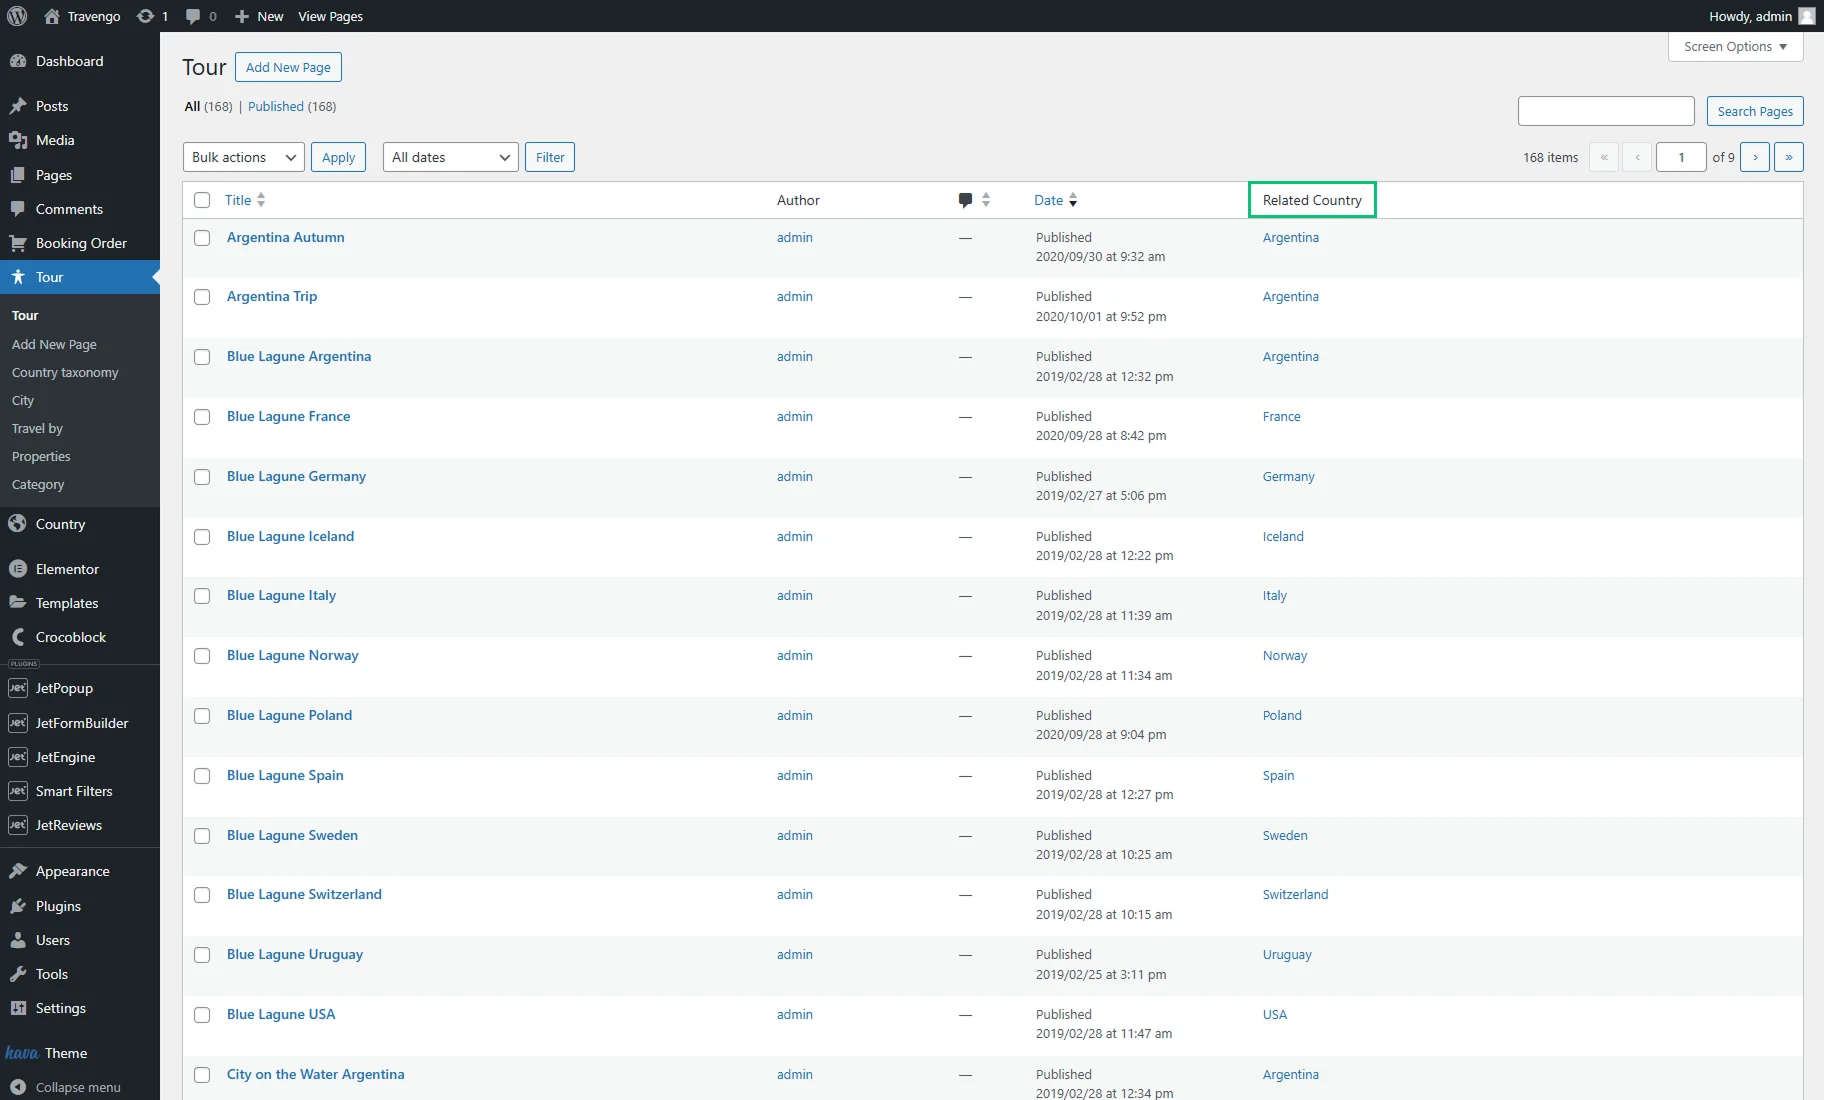
Admin Column
The related items can be displayed in the Admin Column in the CPT.
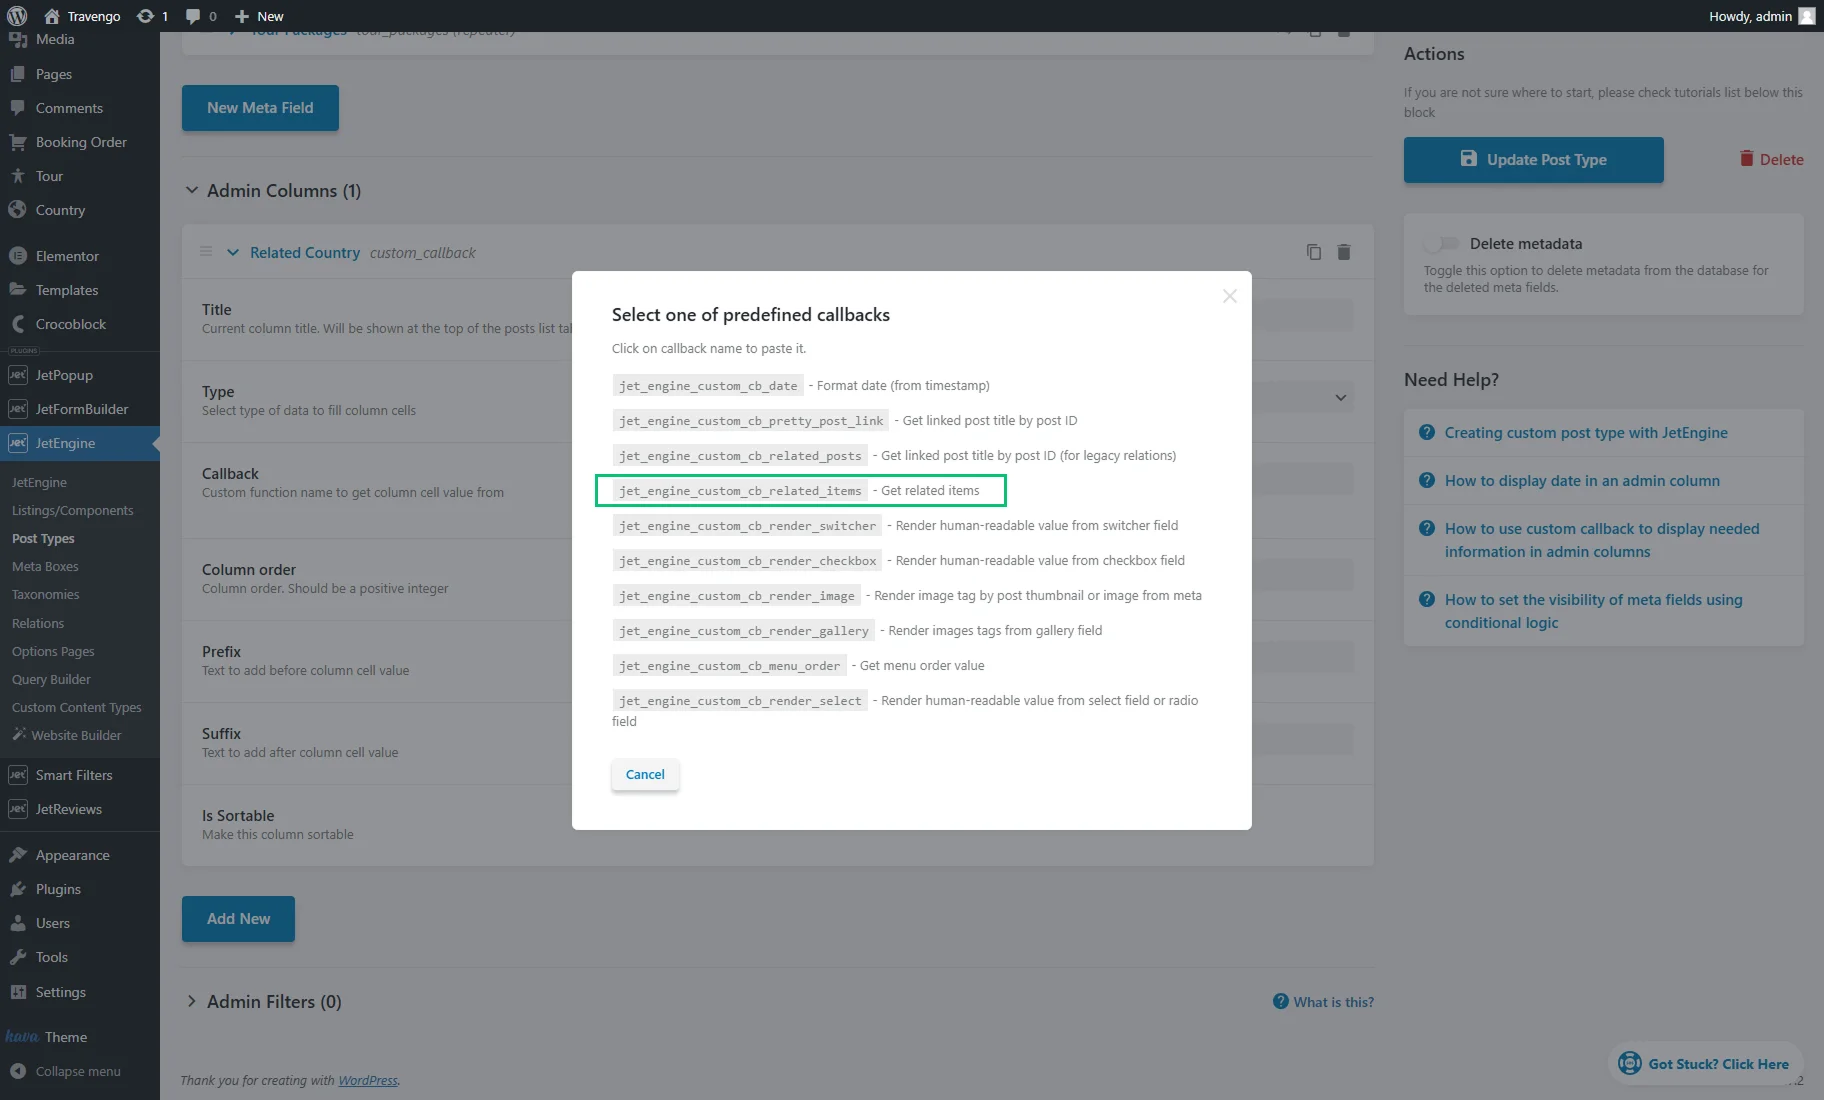
To create a column, one can go to WordPress Dashboard > JetEngine > Post Types and click the “Edit” button near the needed CPT. In the Admin Columns section, the “Add new” button should be pressed. Then, one needs to enter the Title, select the “Custom Callback” Type, and click the “Select from existing callbacks” line in the Callback field.
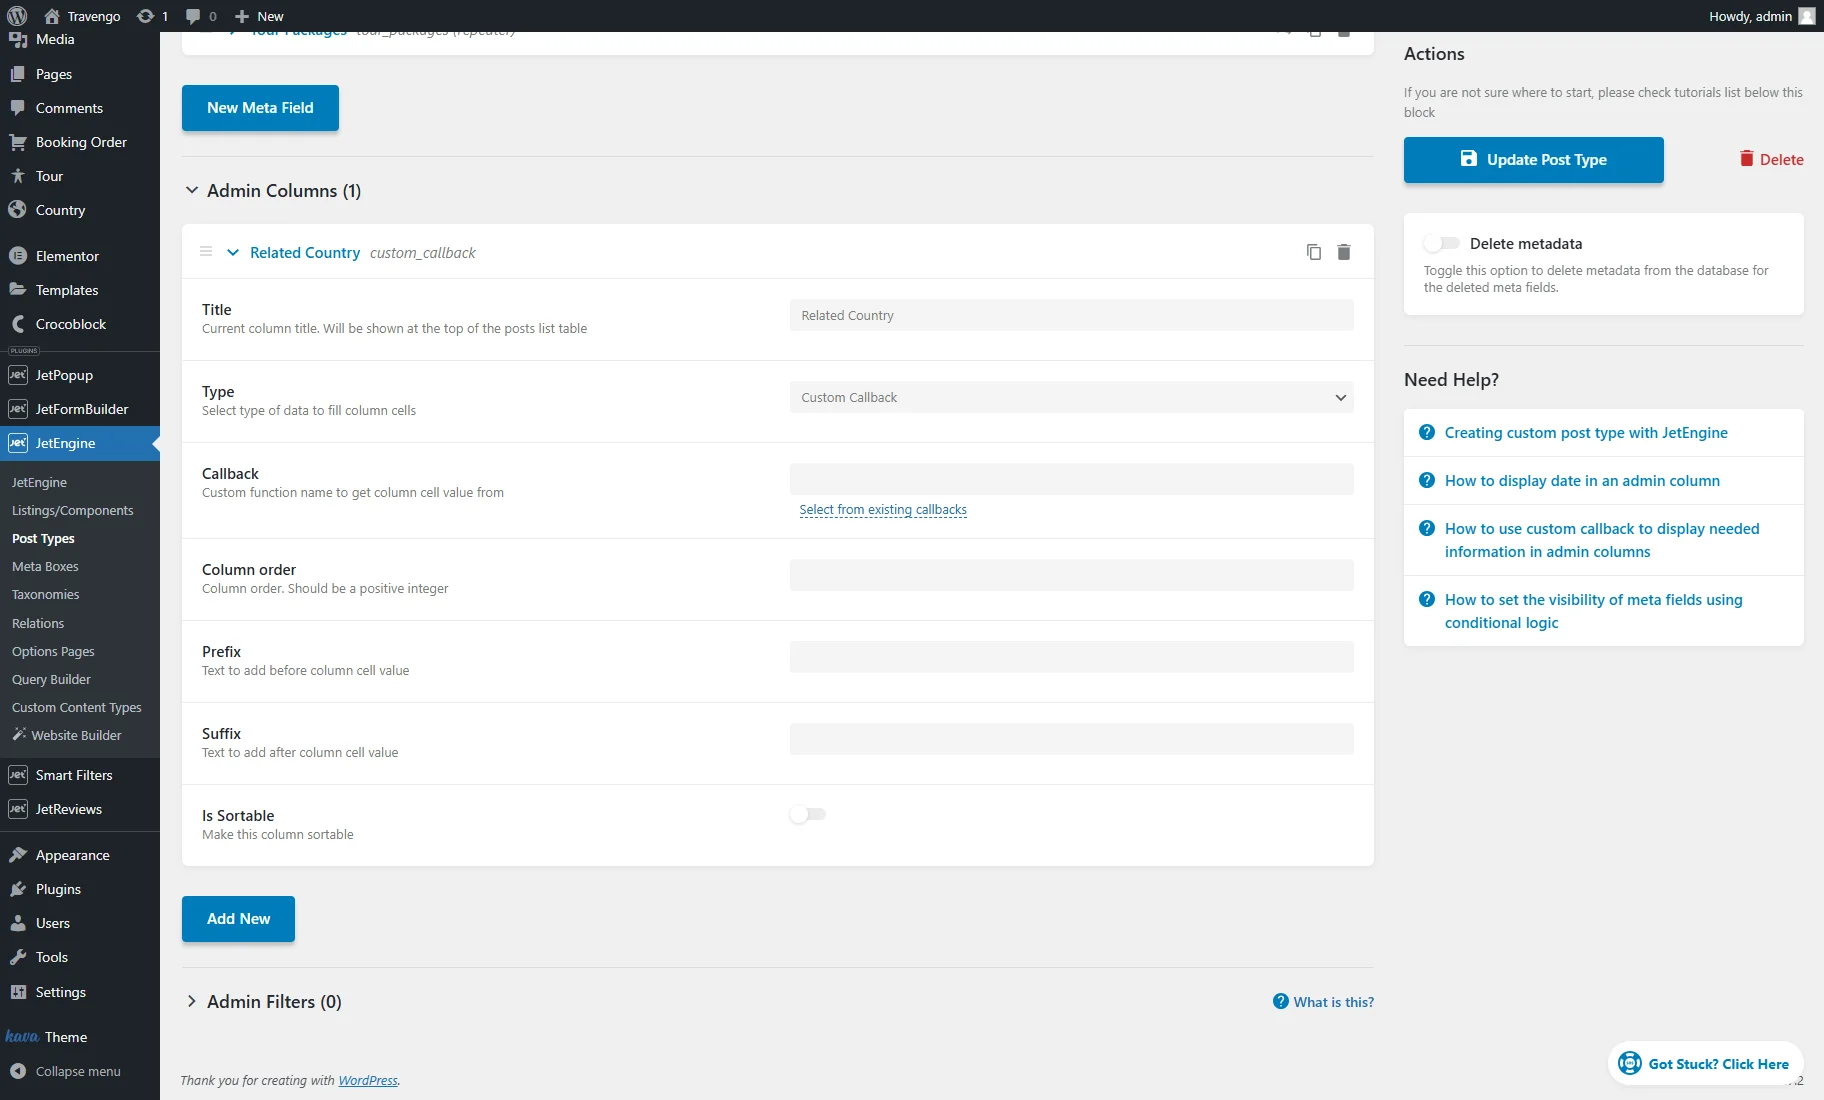
In the appeared window, one should select the “jet_engine_custom_cb_related_items” callback.
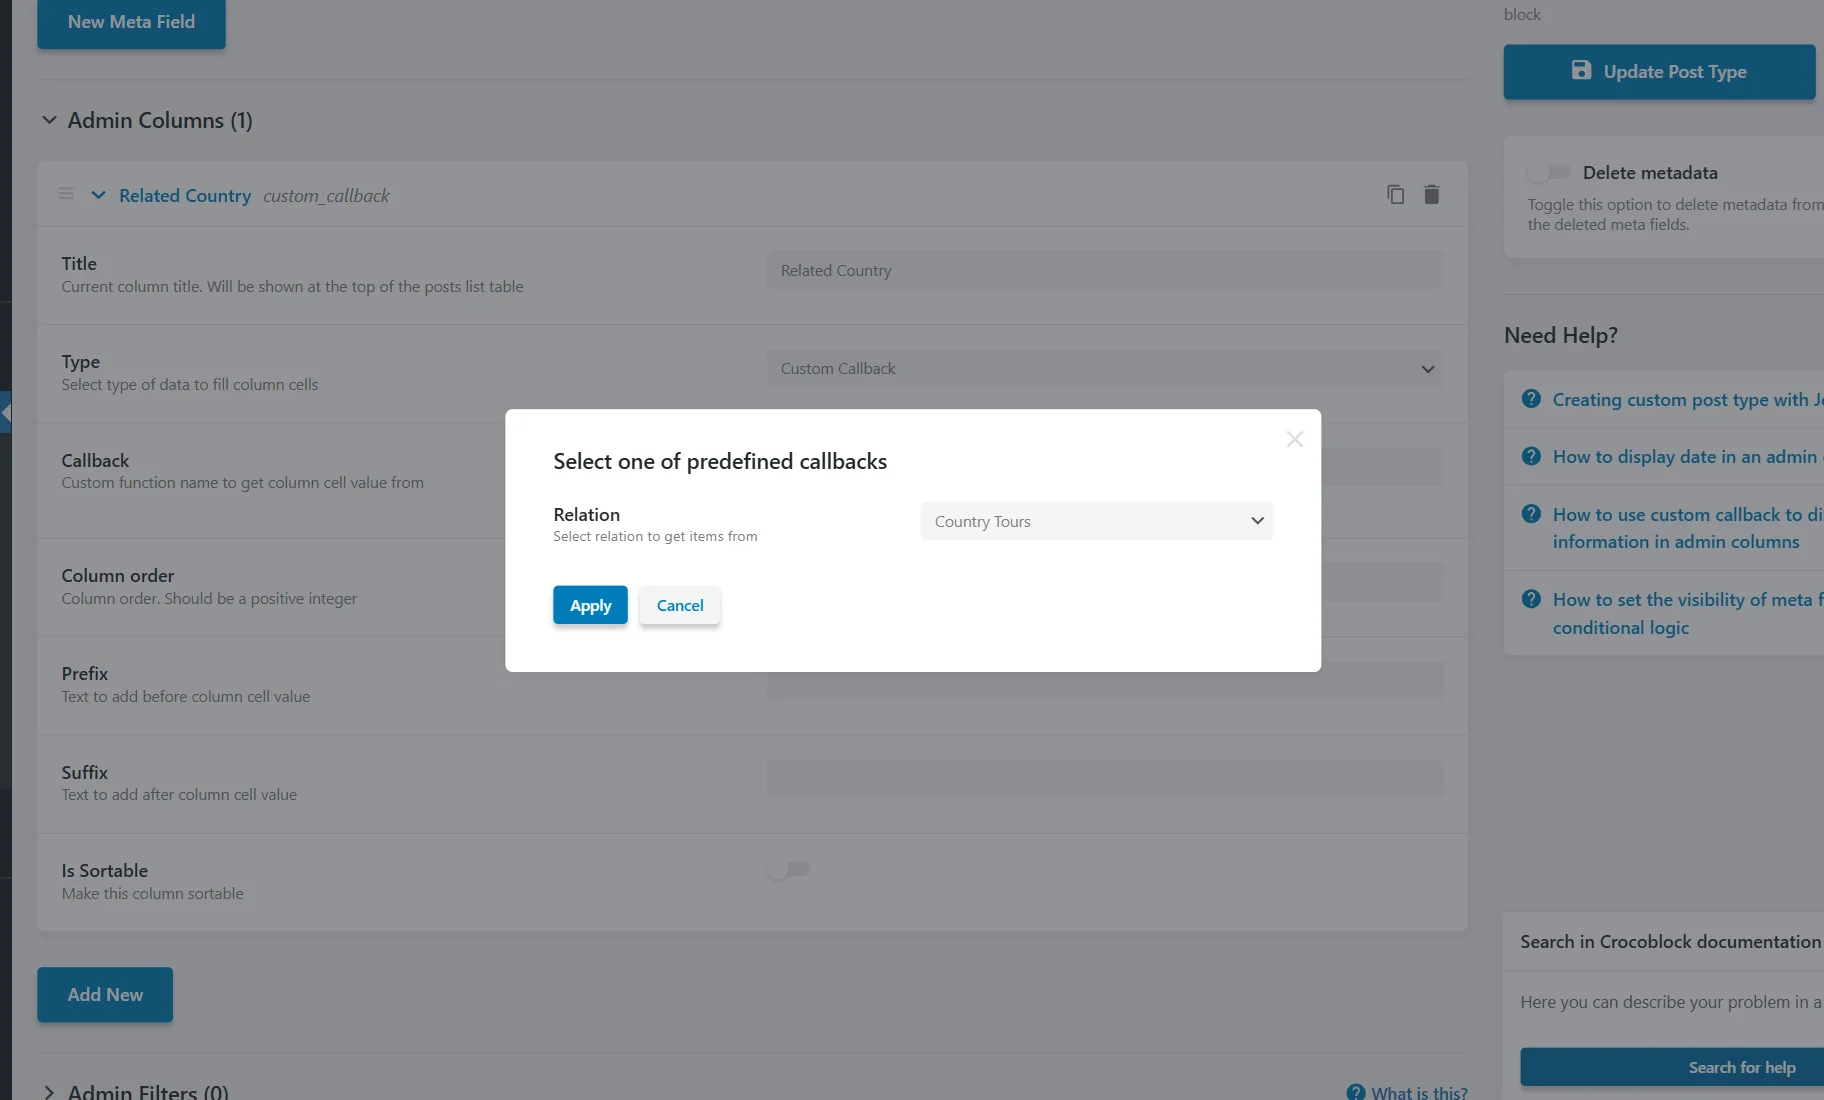
The relation should be chosen for this admin column in the next window, and the “Apply” button should be clicked.
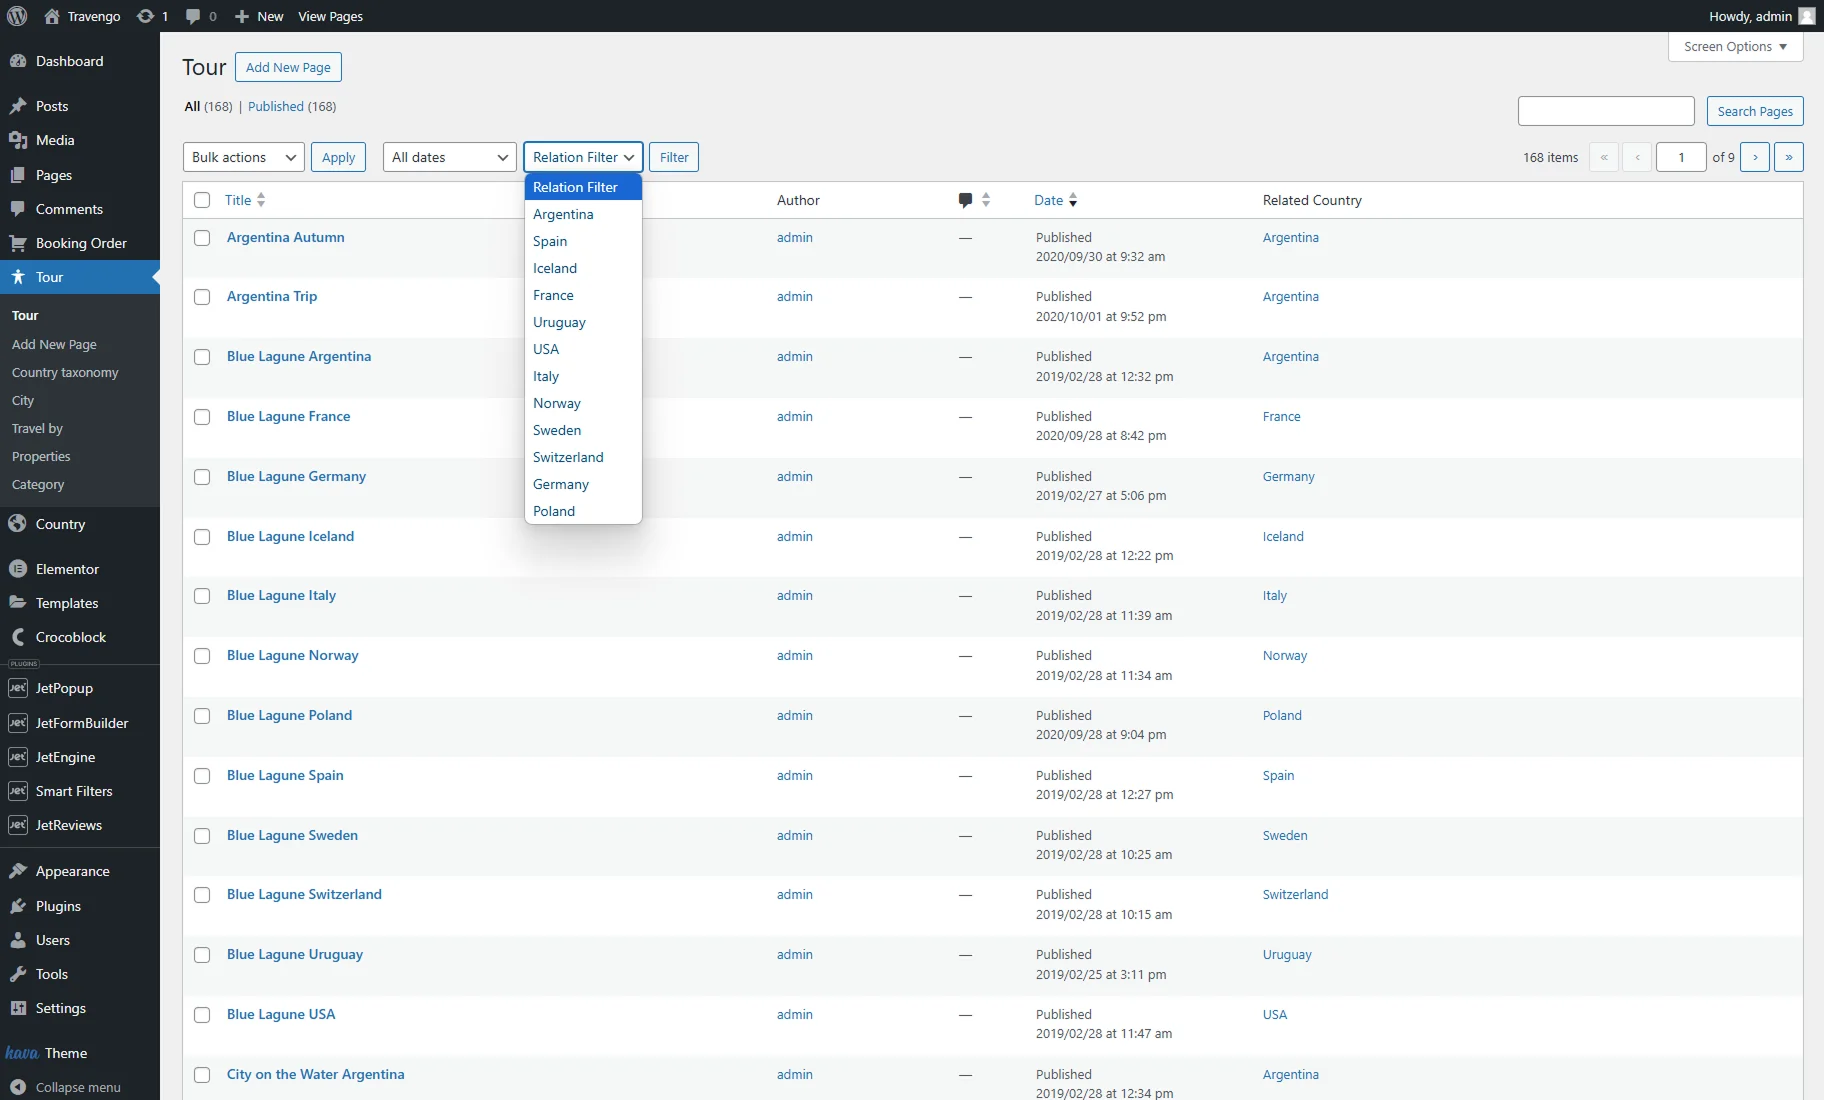
After saving the settings by updating the CPT, the related items will be displayed for posts in the CPT tab on the WordPress Dashboard.
Admin Filter
With the Admin Filters feature, one can filter the posts list by the related items.
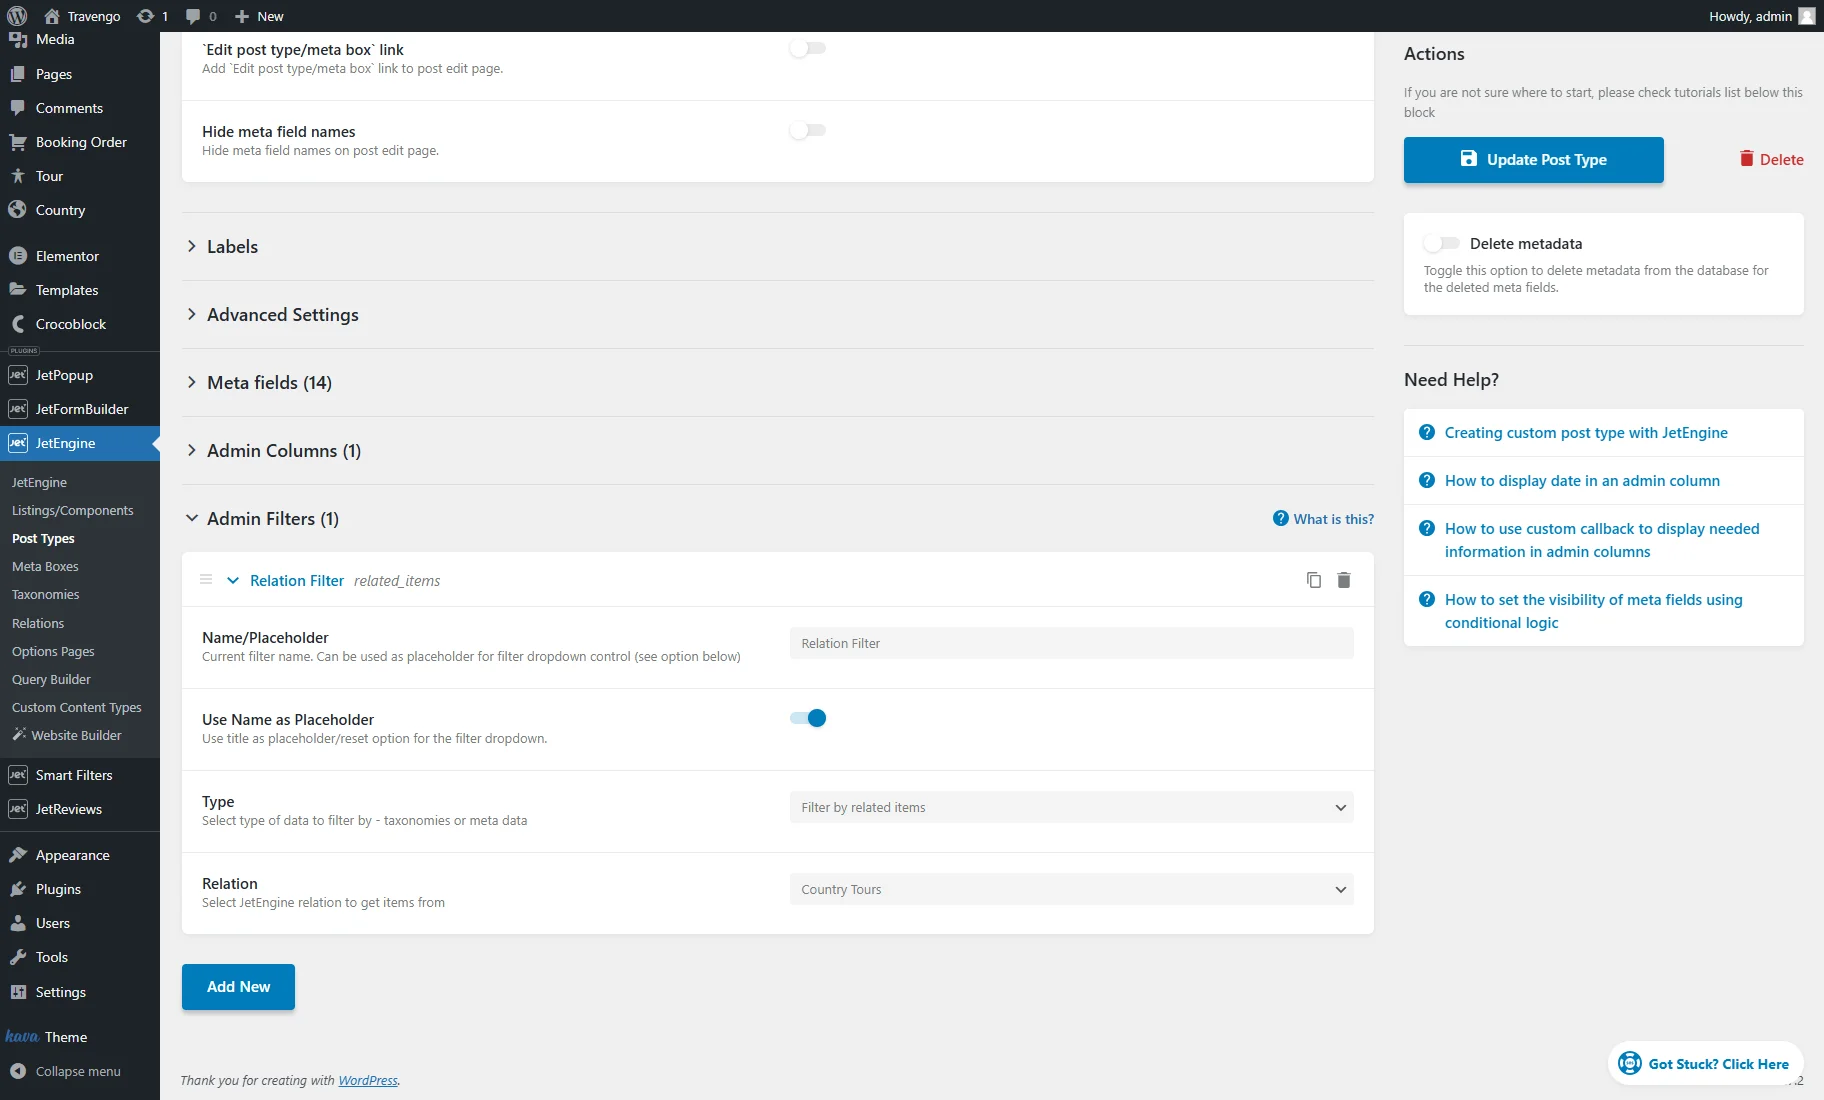
To complete that, one can go to WordPress Dashboard > JetEngine > Post Types and click the “Edit” button near the needed CPT. In the Admin Filters section, the “Add new” button should be pressed. Then, one needs to enter the Name/Placeholder, select the “Filter by related items” Type and the desired Relation.
After saving the settings by updating the CPT, the posts can be filtered by related items in the CPT tab on the WordPress Dashboard.
That’s it. Now you know all about the JetEngineRelations feature settings for your WordPress website.