How to Add Likes and Display Likes Counter in Posts
Find out how to add "Like" or "Dislike" counters to custom post listings using the Data Store module of the JetEngine plugin to automatically update the page without reloading when users like or dislike posts.
Before you start, check the tutorial requirements:
- Elementor (Free version), Block editor (Gutenberg), or the Bricks theme
WordPress Dashboard > JetEngine > Modules and enable the Data Stores toggle.
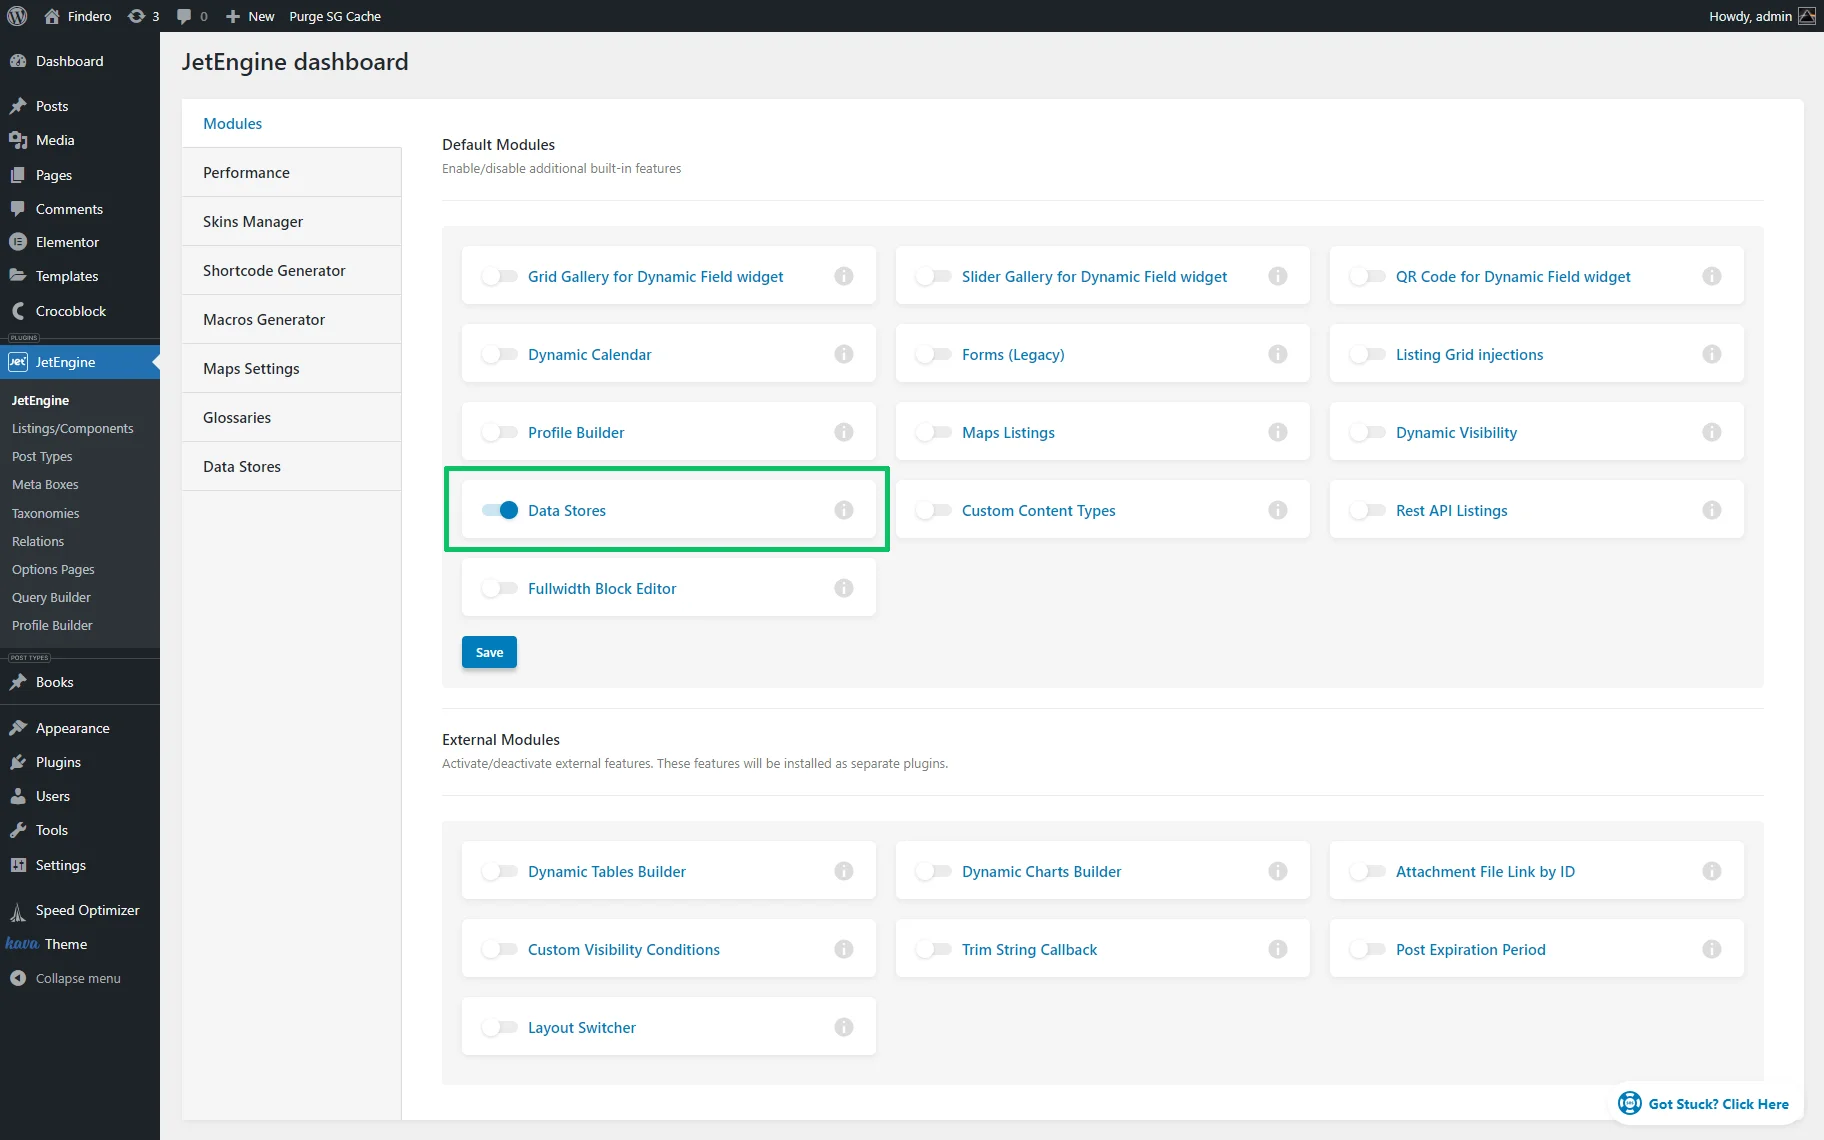
Click the “Save” button.
Create a Data Store
Unroll the Data Stores tab of the JetEngine dashboard and press the “+ New Store” button.
In this newly-appeared tab, type the Name of the data store (the “Likes” data store, in the given case), and the Slug field will be pre-filled automatically. Then, keep the default “Cookies” option in the Store type drop-down list and activate the Count items toggle.
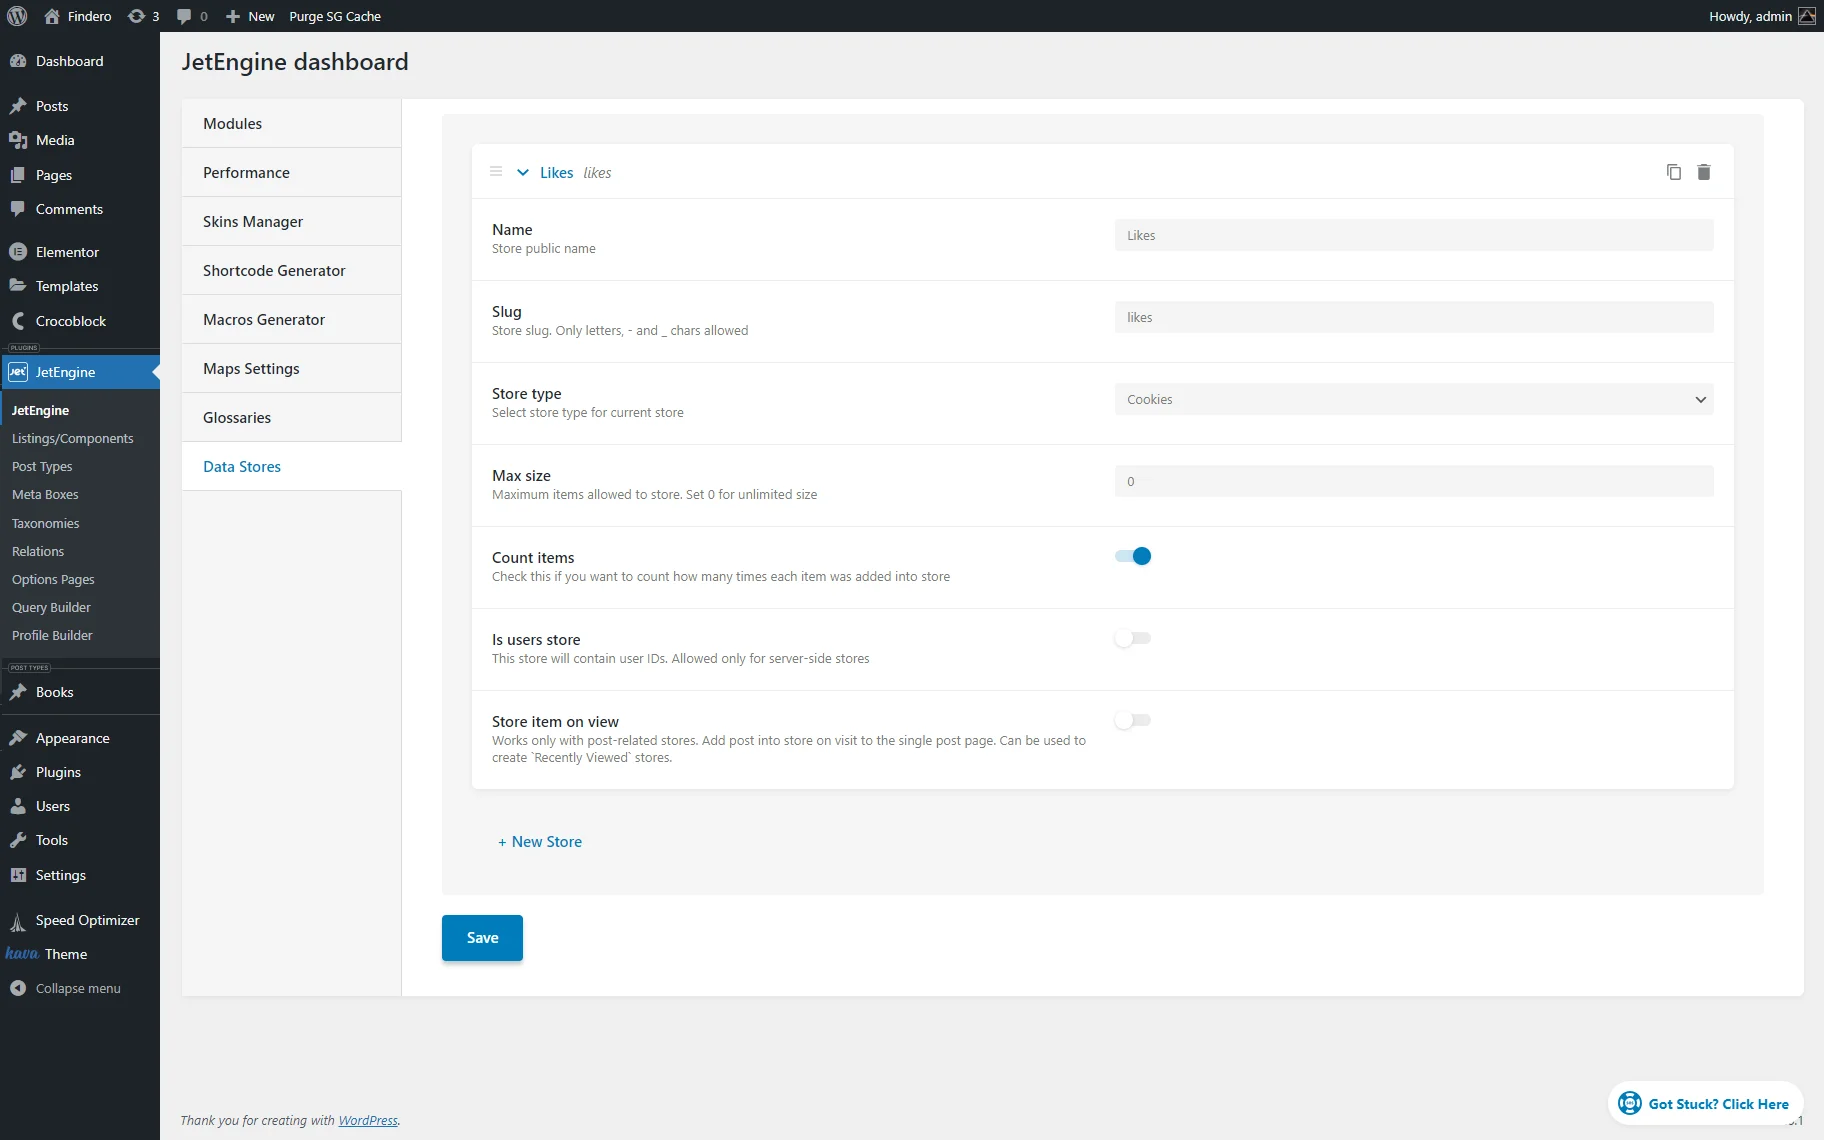
Finally, press the “Save” button.
Add the Data Store Button Widget to the Listing
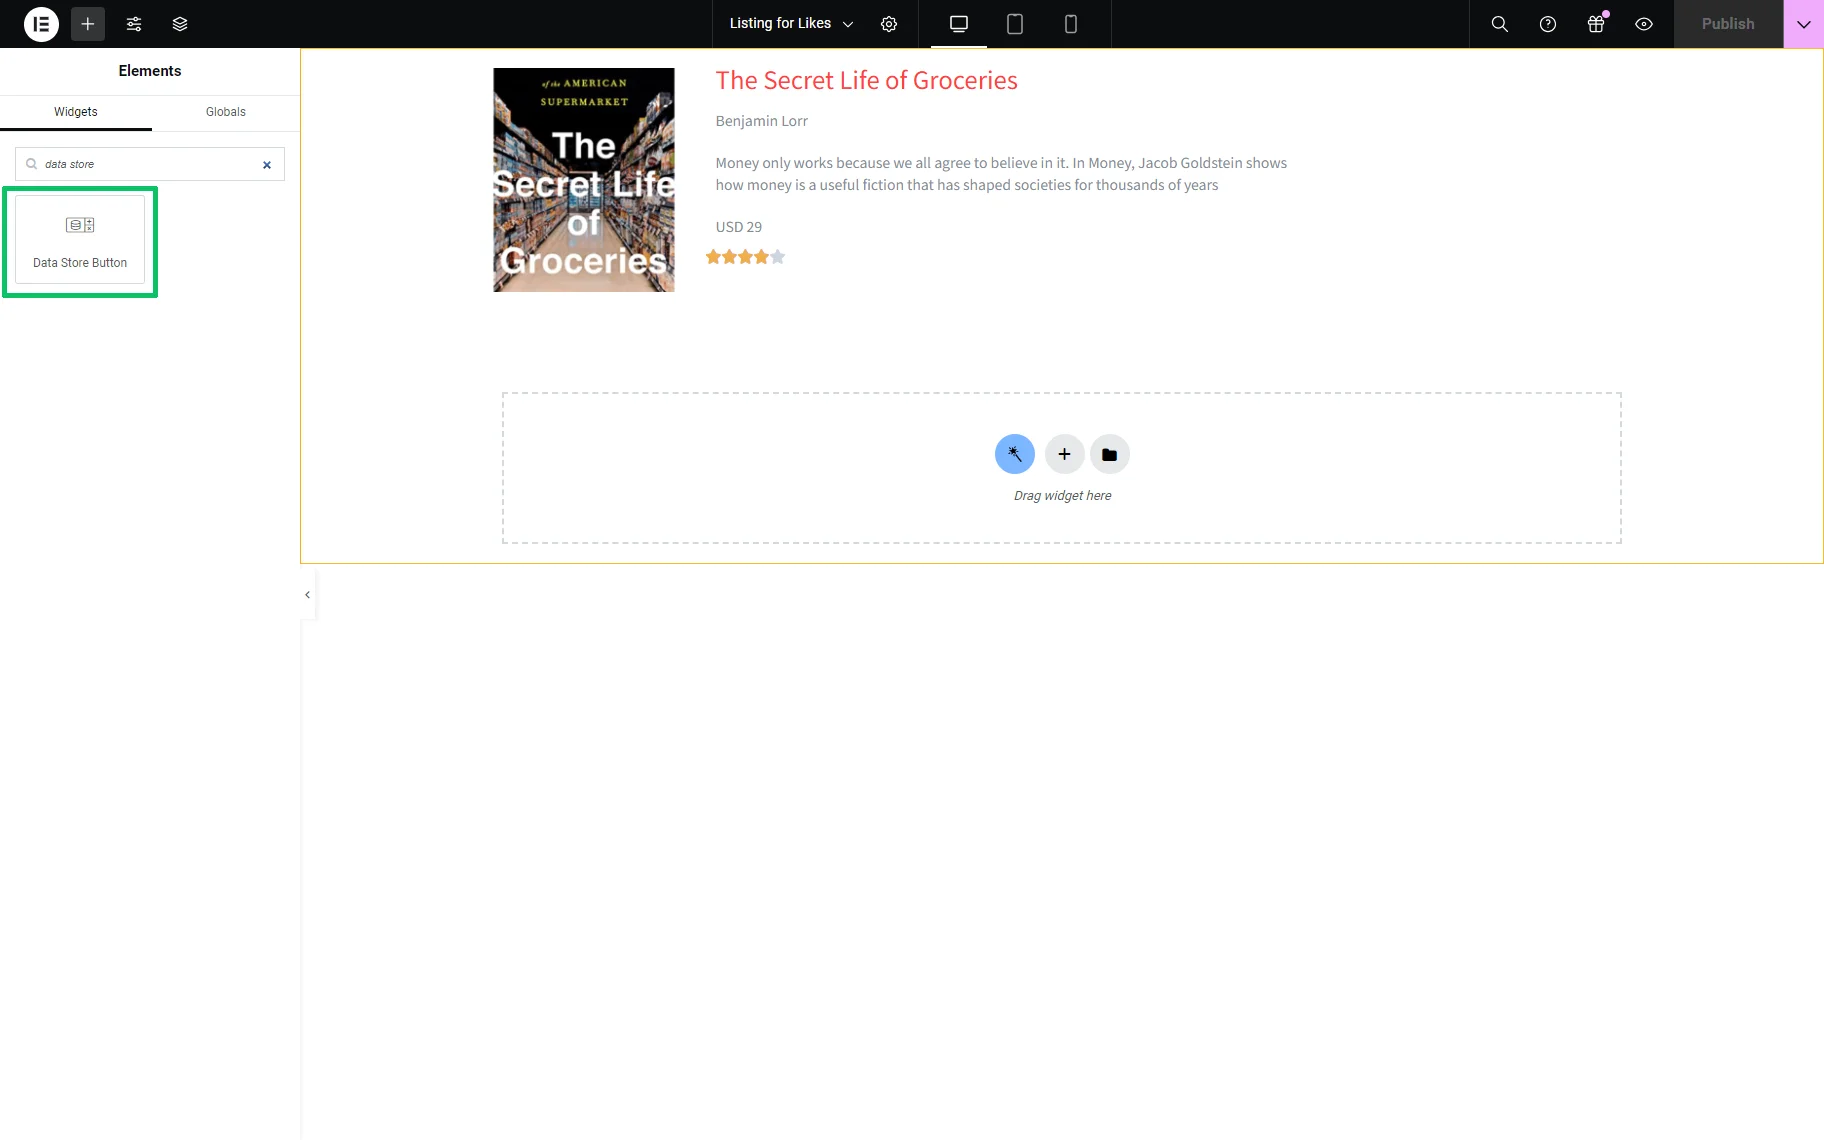
Open the Listing template built beforehand.
In this case, we divided the listing item into two parts using the Container widget.
Then, add the Data Store Button widget to the page.
Adjust the Data Store Button Widget Settings
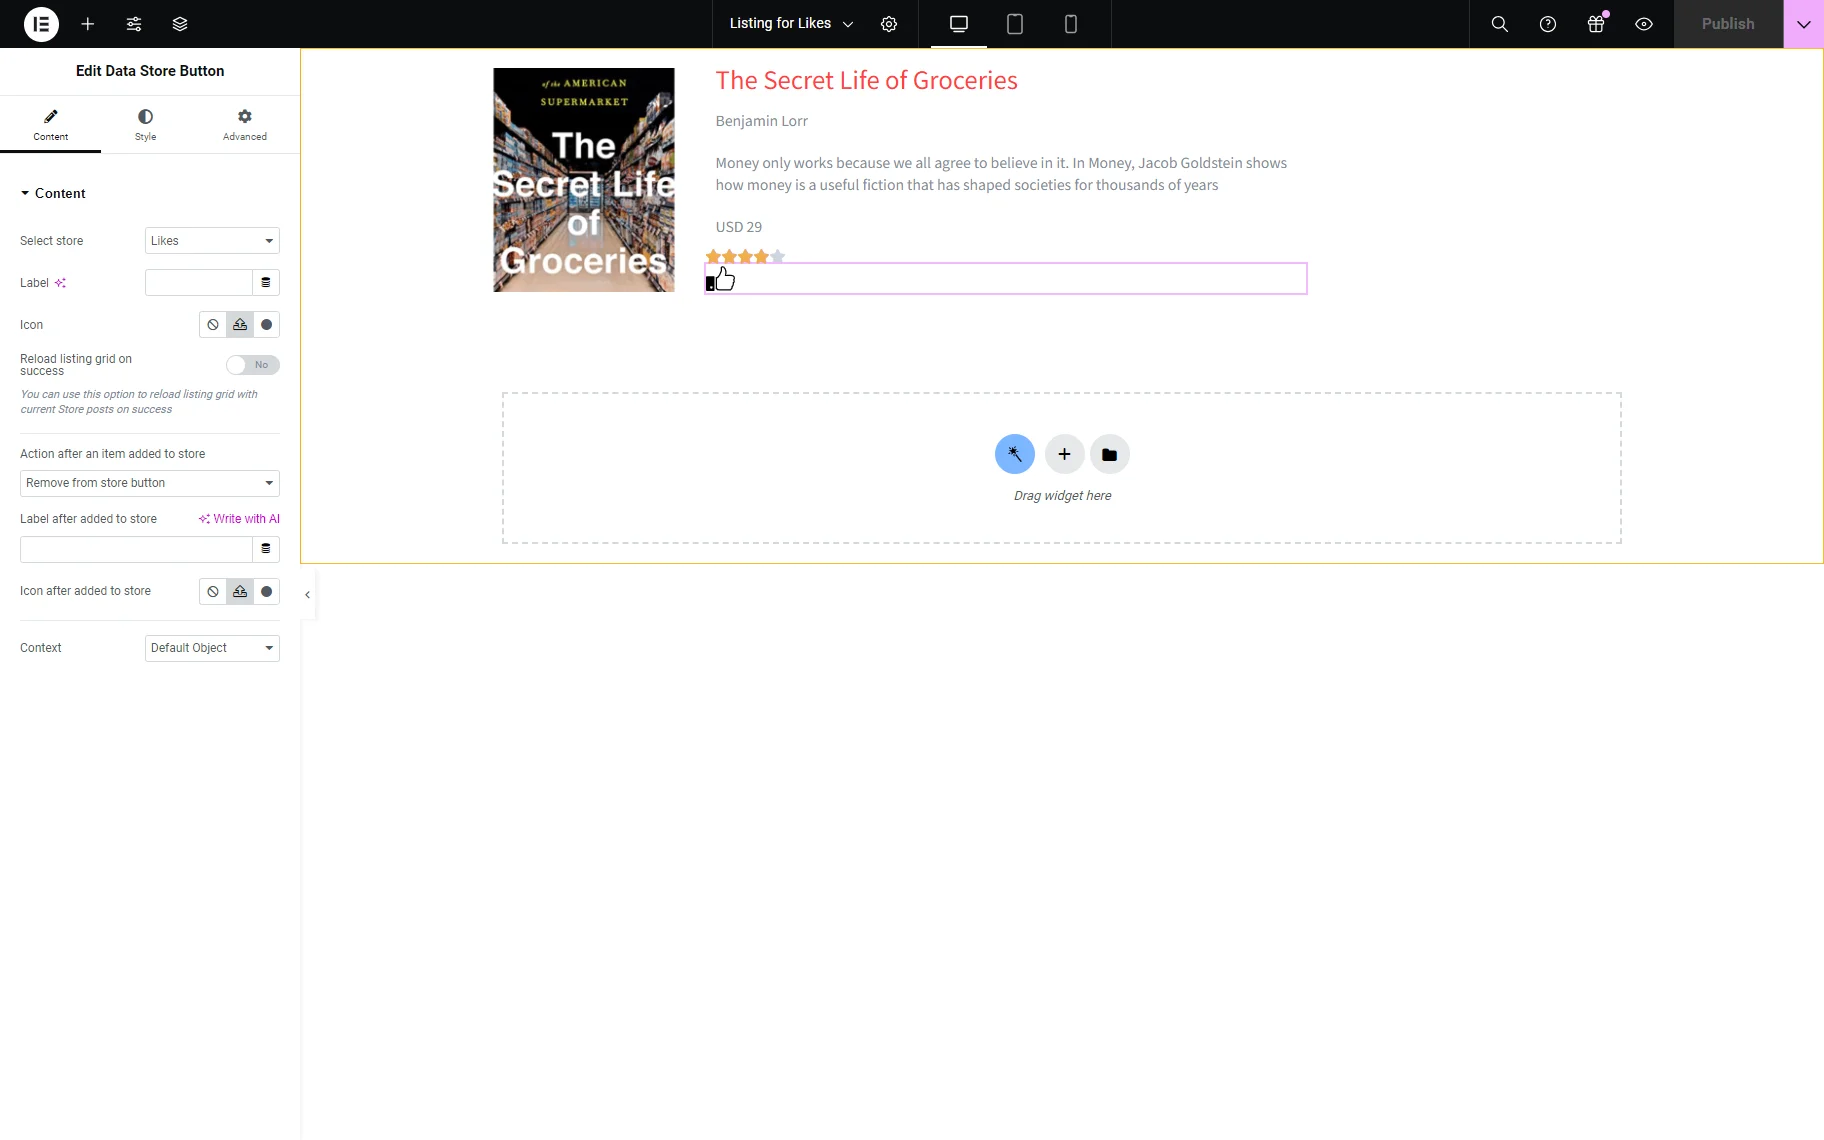
In this stage, navigate to the Content tab of the Data Store Button widget and unroll it.
Choose the data store (here, we picked the created “Likes” data store) in the Select store drop-down menu. We also deleted the default text in the Label field.
Then, we added the Icon to display likes (here, an icon from the library). If necessary, add the “Dislike” icon in the same way.
We left the Label after added to store field empty but selected the same Icon (for likes or dislikes) from the Media Library.
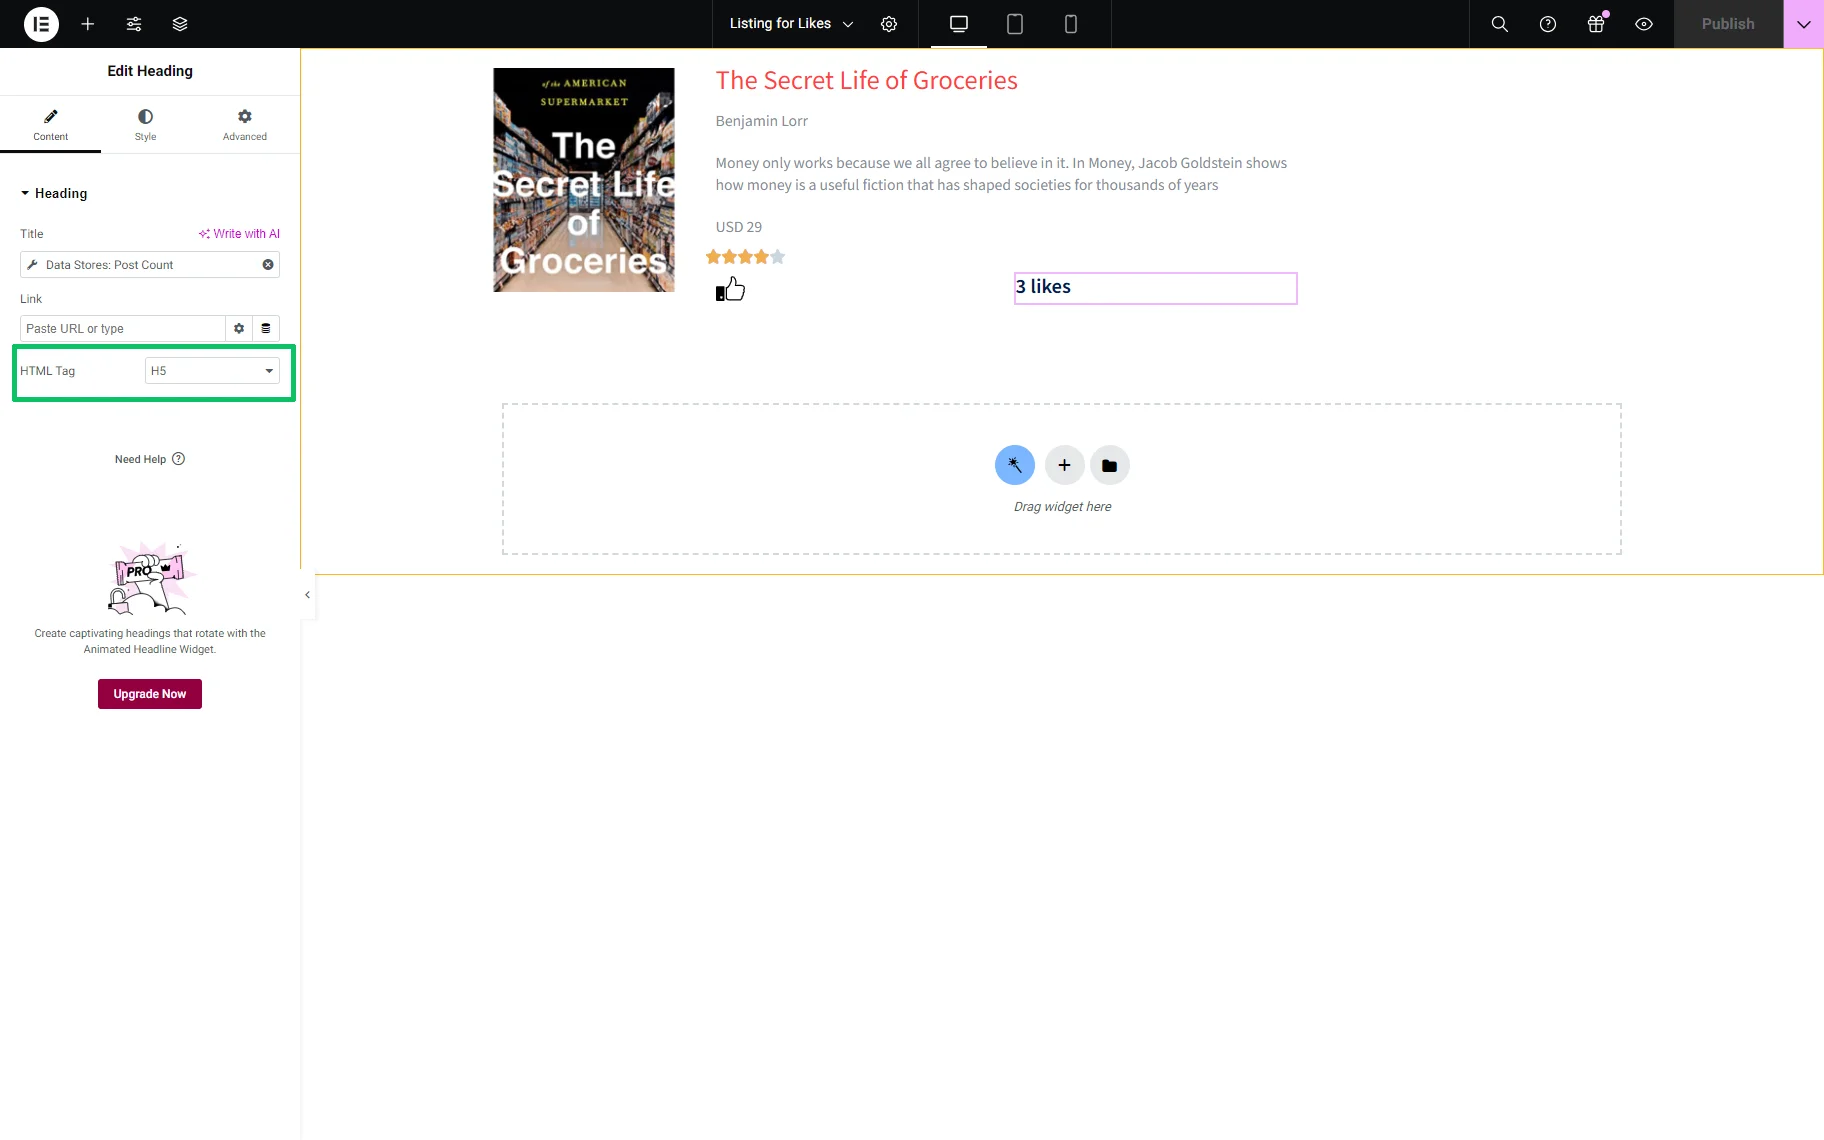
Customize the Heading Settings
Add the Heading widget to the Listing template. Press the “Dynamic Tag” icon near the Title field. Select the “Data Stores: Post Count” option from the drop-down menu. Then, select the Store (in this case, the “Likes” data store) in the Settings tab of the newly-appeared window.

If needed, unroll the Advanced tab of this window and type the text Before or After the number of likes. In this tutorial, we typed the “likes” text in the After text field.

Customize the heading by selecting its size from the HTML Tag drop-down menu.
Additionally, you can customize the appearance of the Heading in the Style settings.
Finally, press the “Publish/Update” button.
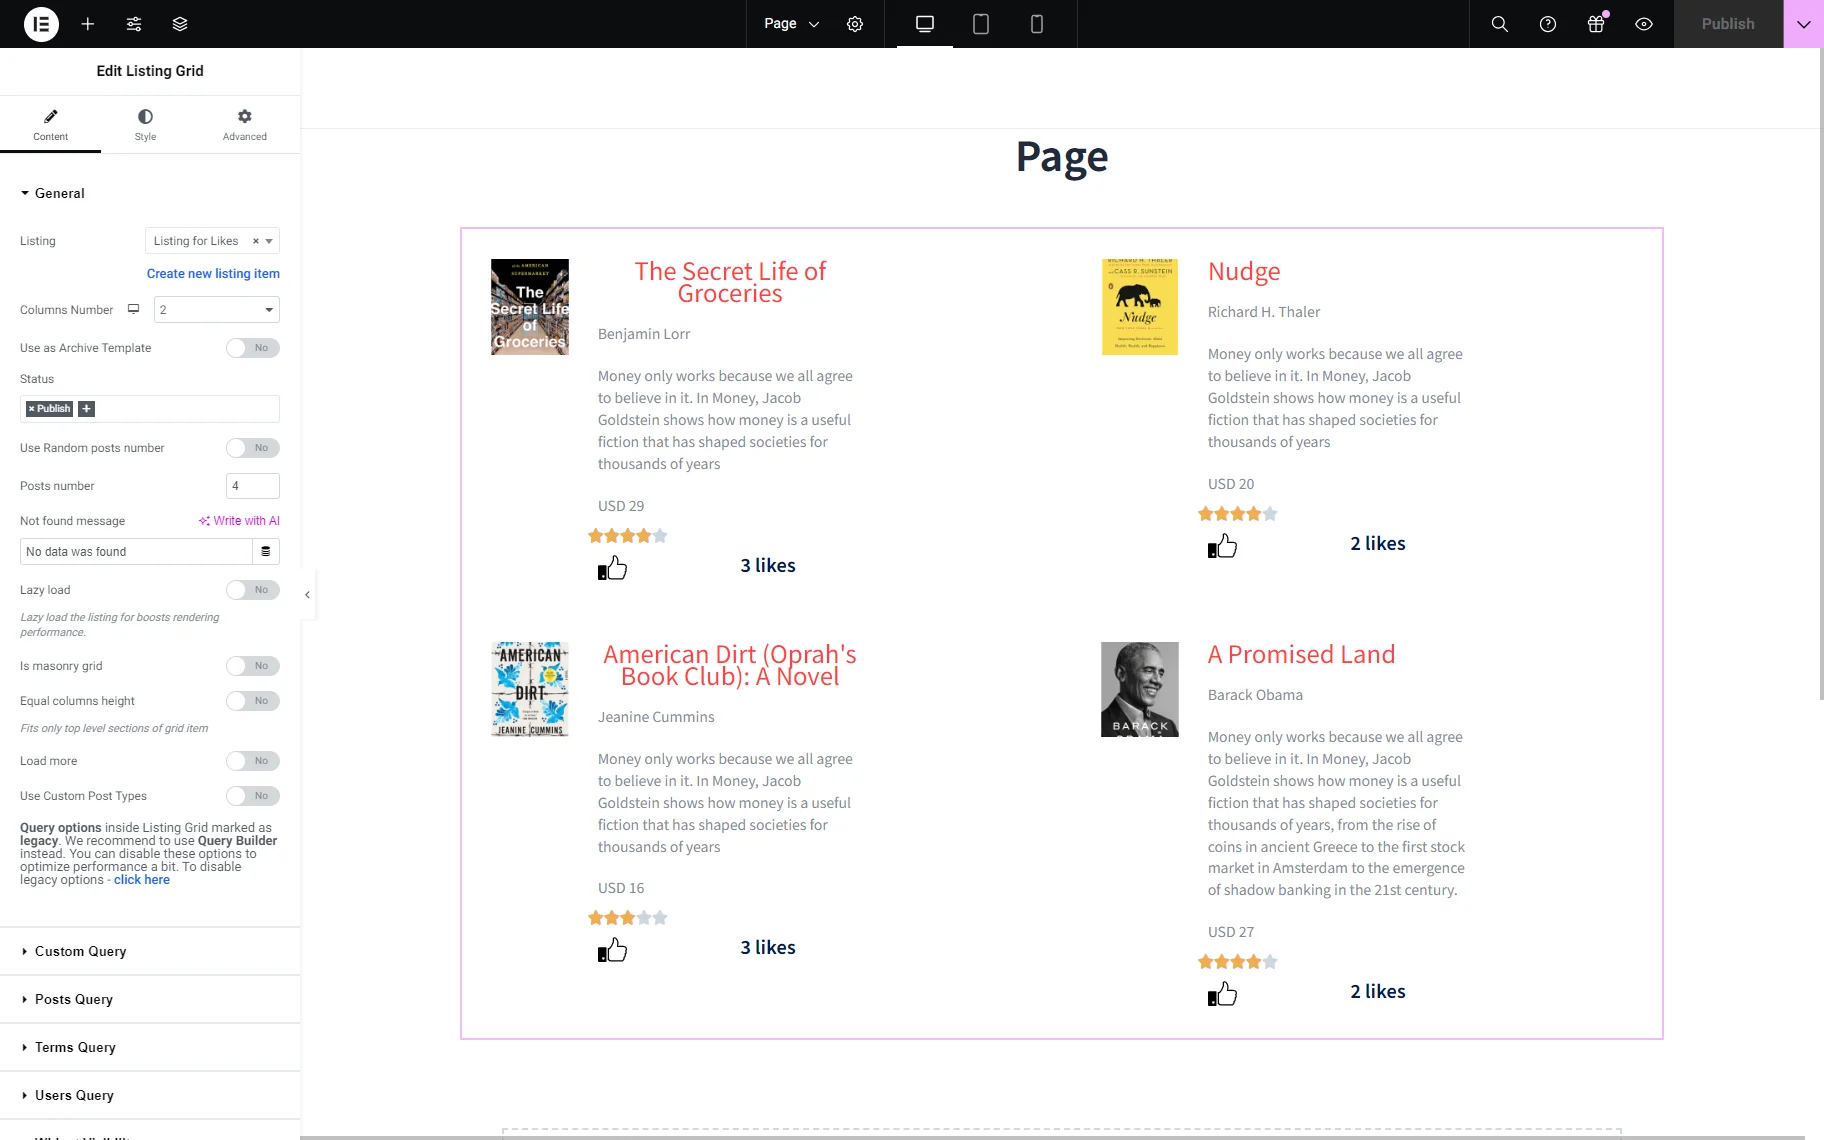
Add the Listing to a Page
Open the page in the editor you like. In this case, we used Elementor.
Find the Listing Grid widget in the search bar and drag-n-drop it to the page.
Then, select the Listing that will be shown on this page, set the Columns Number, etc.
For more details about how to add CPT posts to the Listing Grid widget and manage its settings, watch the How to Create a Listing Grid video.
Press the “Publish/Update” button.
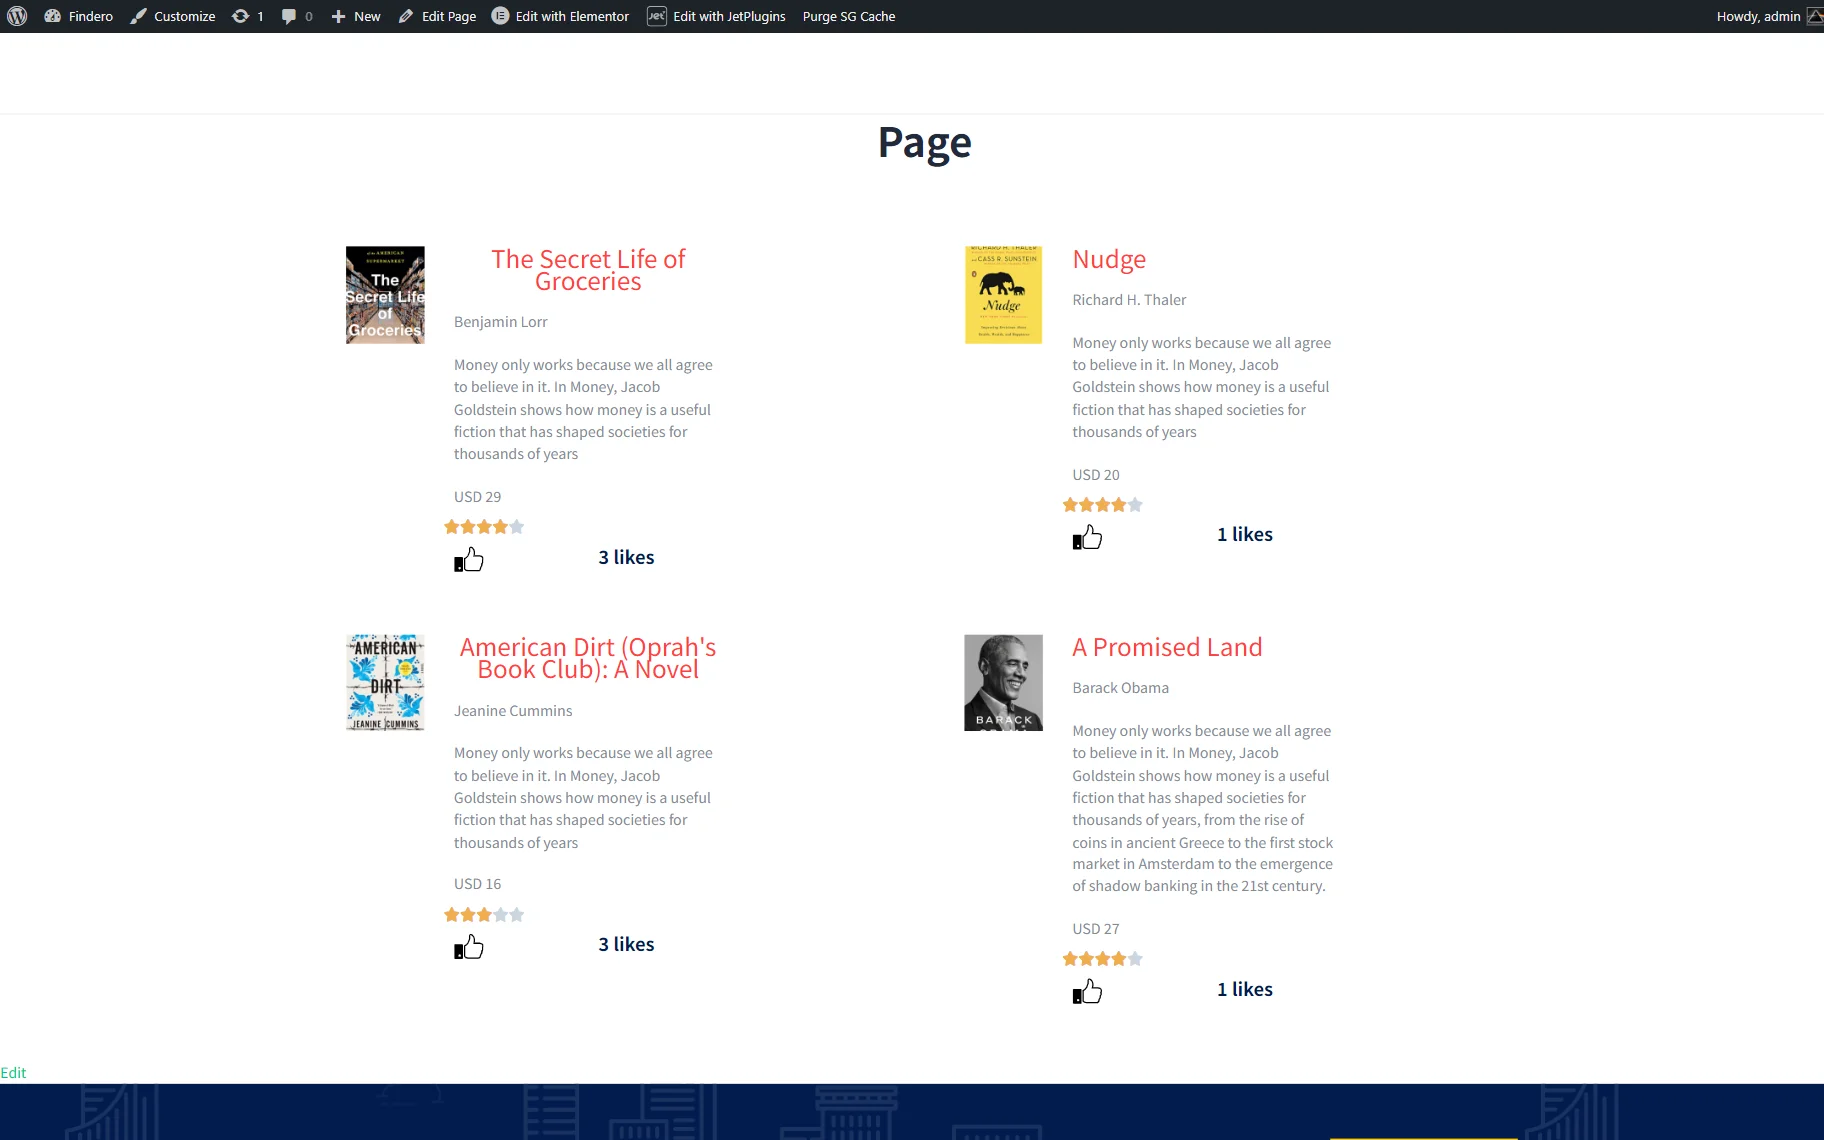
Check the Results
Navigate to the front end to observe how the Data Store works. Here, if you press the “Like” icon near the specific posts, then the counter will display the number of likes.
That’s all about adding a “Like” or “Dislike” counter to custom post listings using the Data Store widget of the JetEngine plugin for WordPress.