How to Display Images on the Front End
This article focuses on the available ways of displaying images from the “Media” and “Gallery” meta fields from the WordPress JetEngine plugin on the front end.
Before you start, check the tutorial requirements:
- Elementor (Free version), Block editor (Gutenberg), or Bricks
- JetEngine plugin installed and activated
JetEngine offers two types of custom fields for displaying images: “Media” and “Gallery.” Both fields allow storing the images as the image array, image URL (string), or image ID (integer). They allow saving graphical file formats (e.g., PNG, JPG, and WebP) and restricting the MIME types. The “Gallery” meta field adds multiple images to the posts and products as a gallery.
Both “Media” and “Gallery” fields can be used in the Custom Post Type or Meta Boxes. JetEngine provides several options for displaying images from these fields — this article explains how to make each of them work.
Create a Field for Images
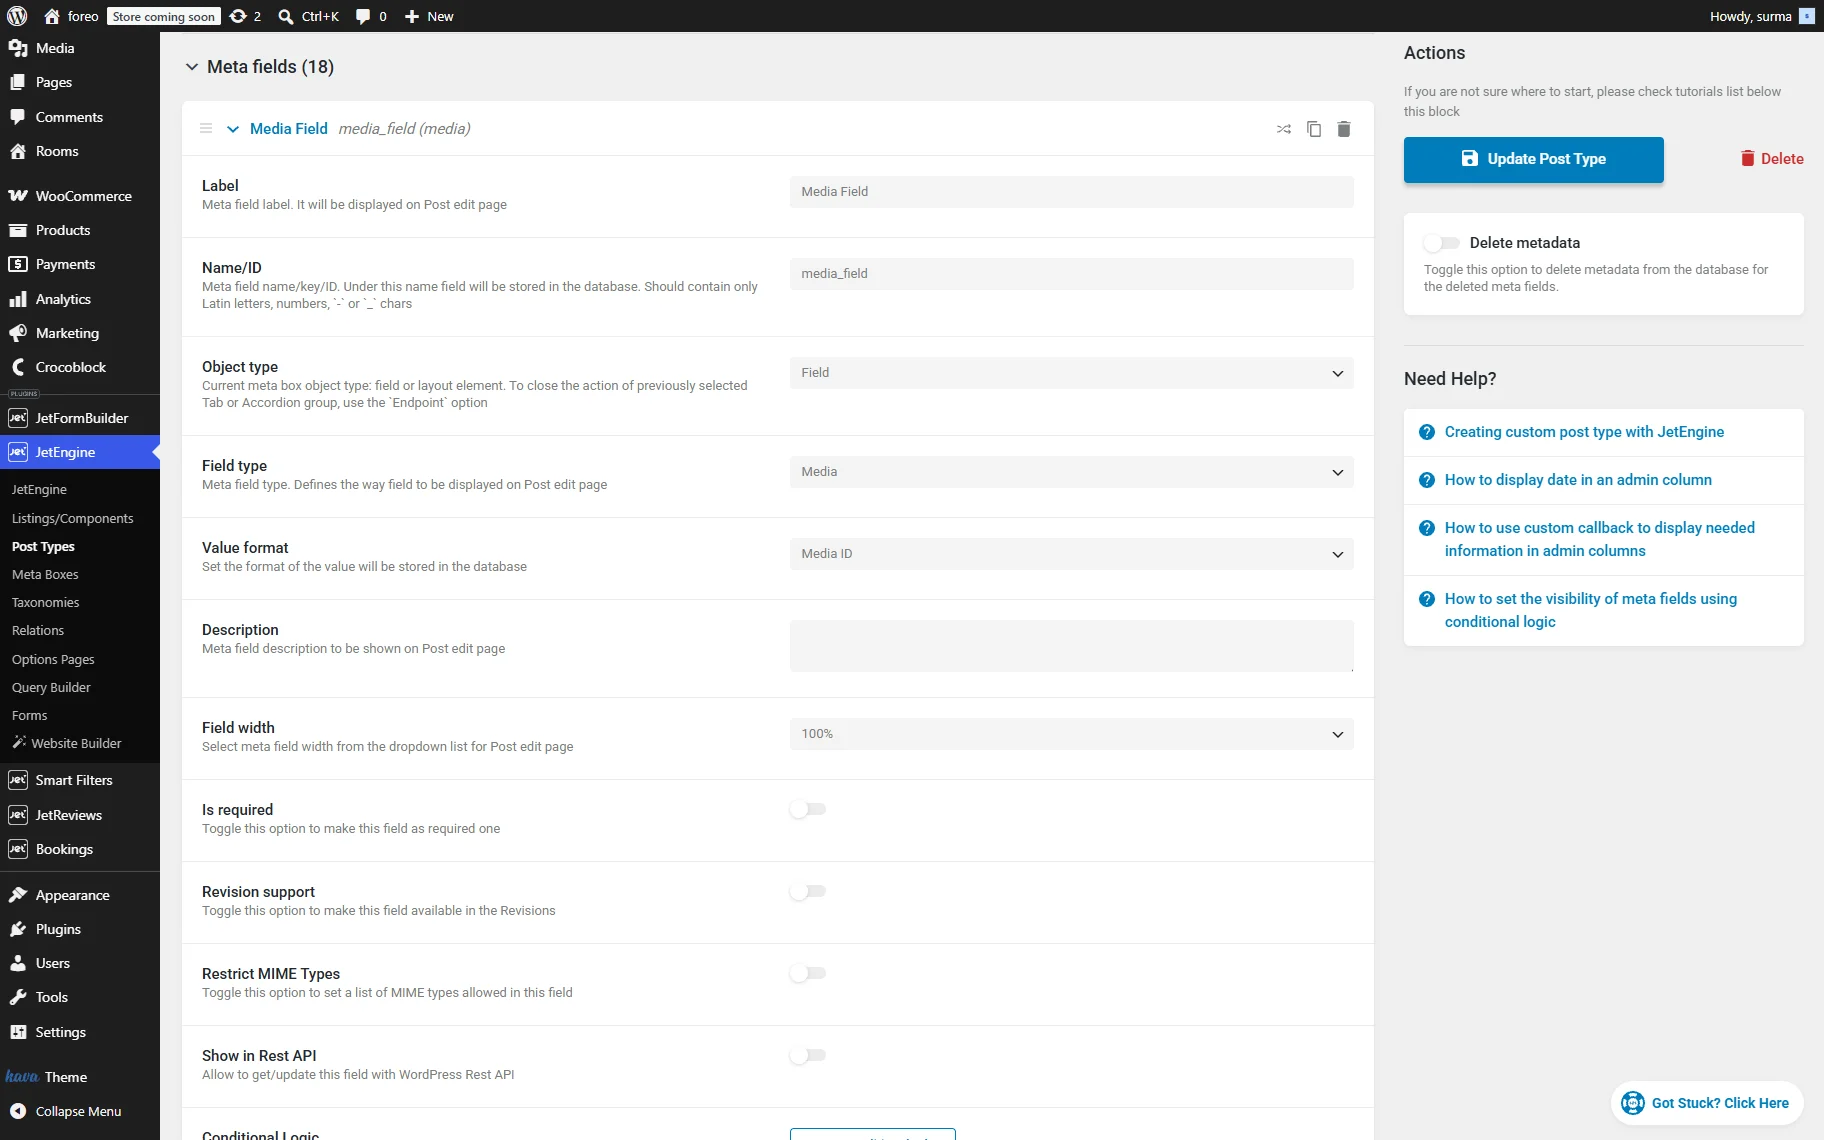
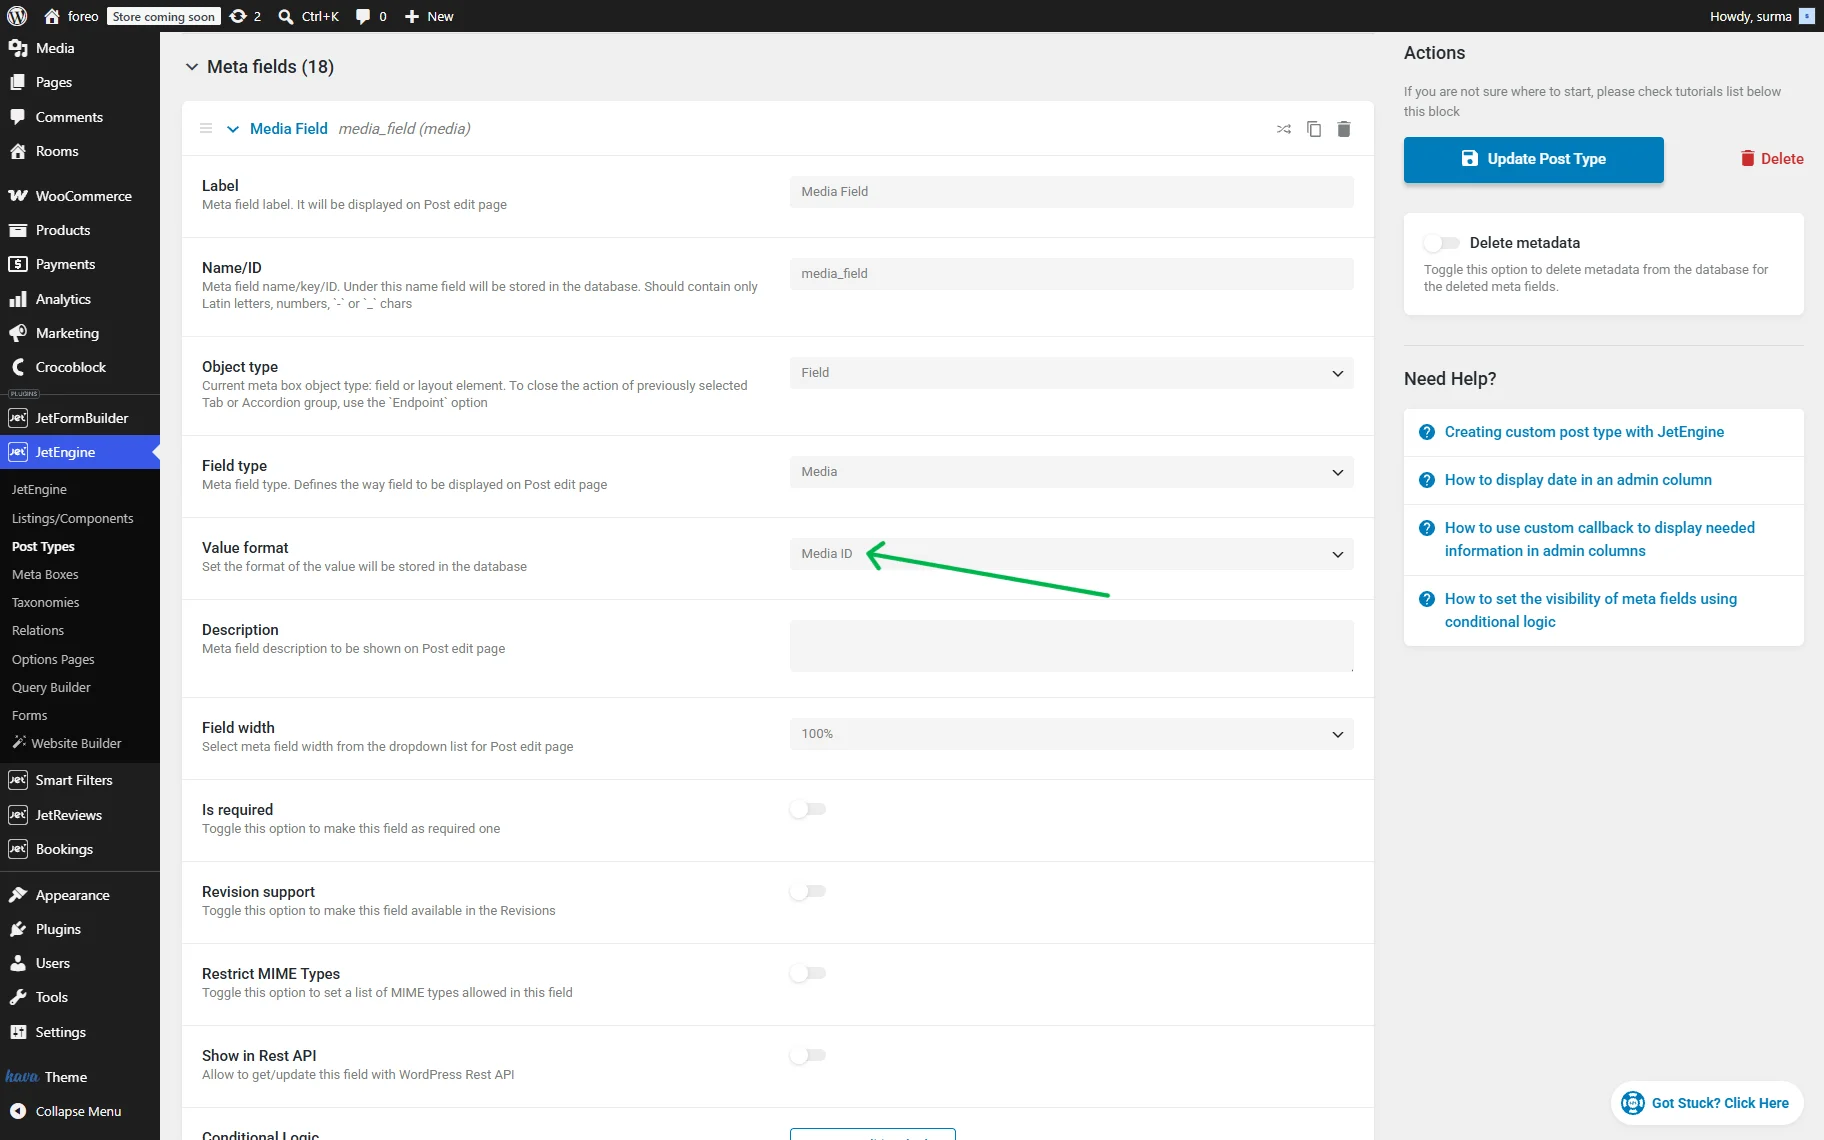
In WordPress Dashboard > JetEngine > Post Types/Meta Boxes directory, select the needed CPT or Meta Box where you need to add the field for images. In the Meta fields section, click the “New Meta Field” button.
Set the field’s Label, Name, and select the “Media” Field type. Set the desired Value format and restrictions if needed.
All the same settings are needed for the “Gallery” field, except the “Gallery” option for the Field type dropdown.
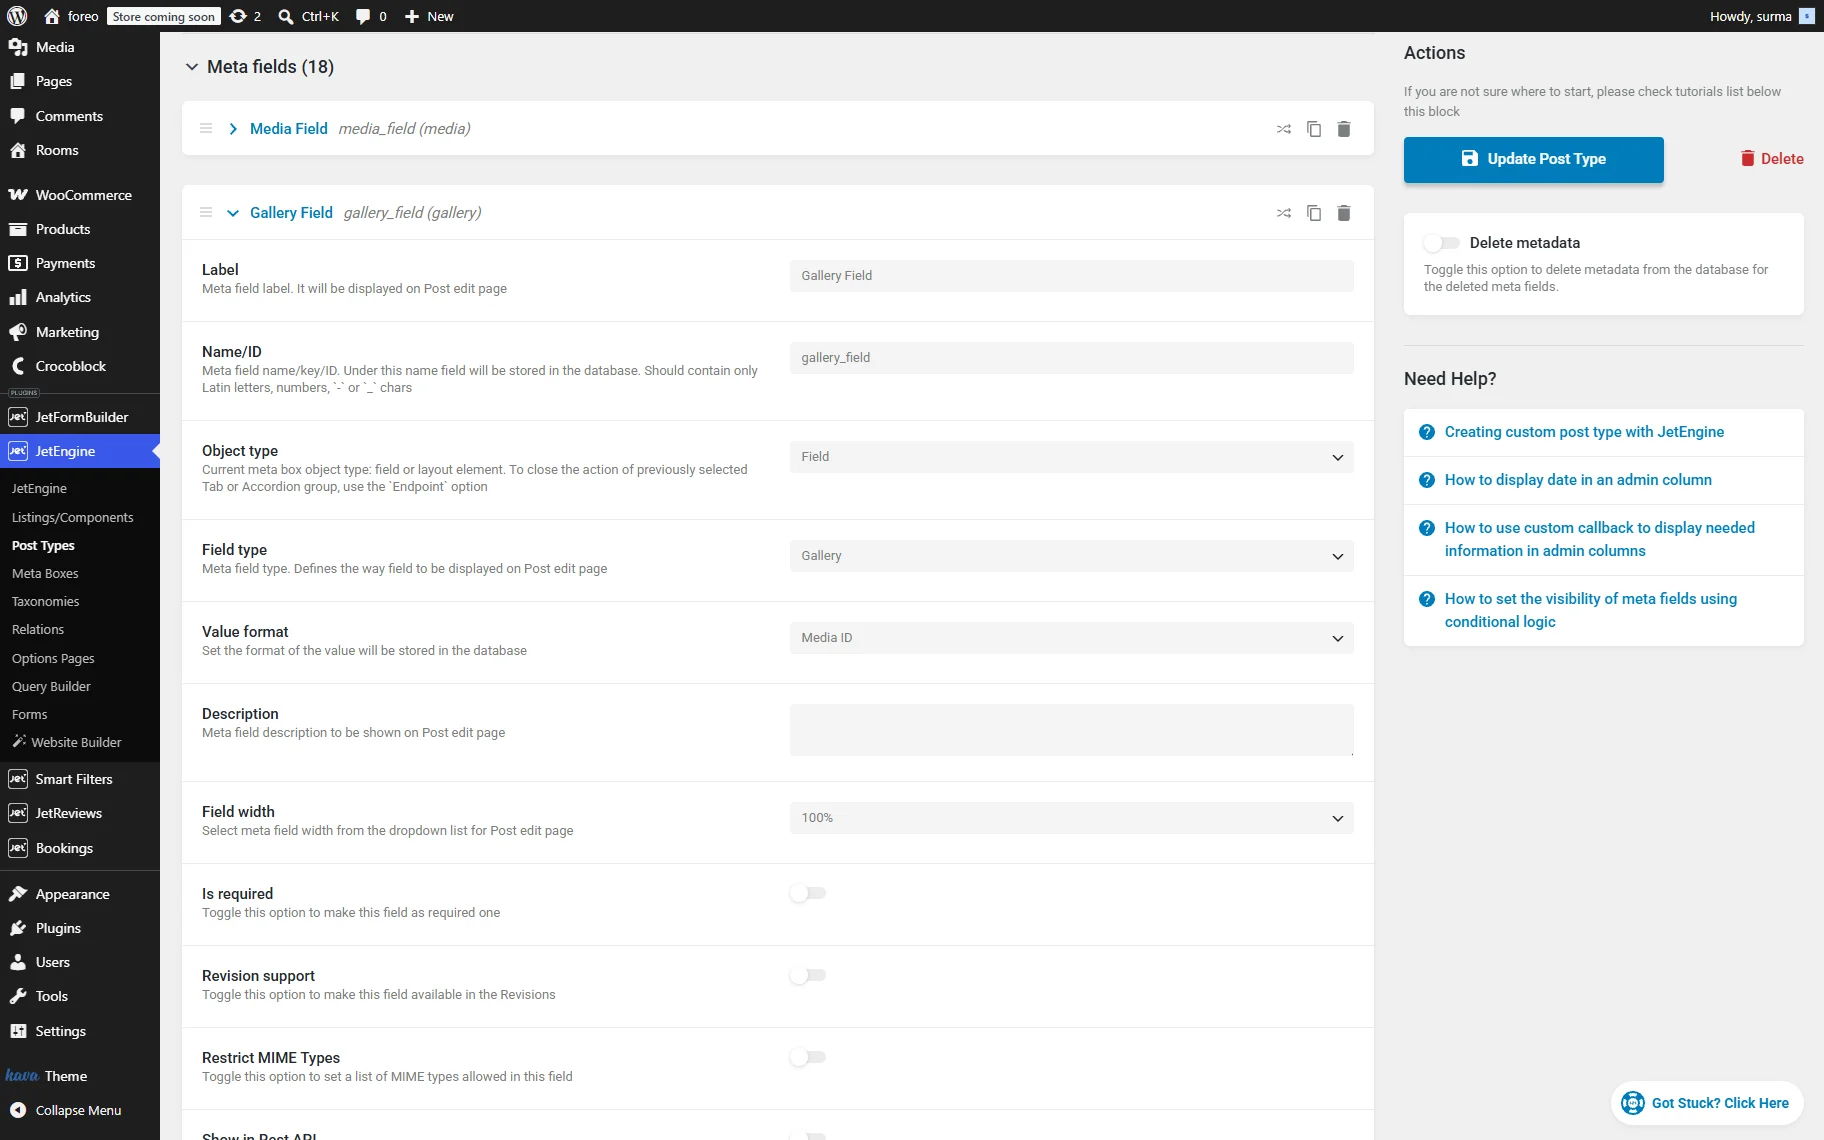
Save the changes.
Add Image to the Field
Then, proceed to the post, Custom Content Type Item, user, or product where you need to add the image. Click the “Choose Media” button in order to add the images from the Media Library or your device.
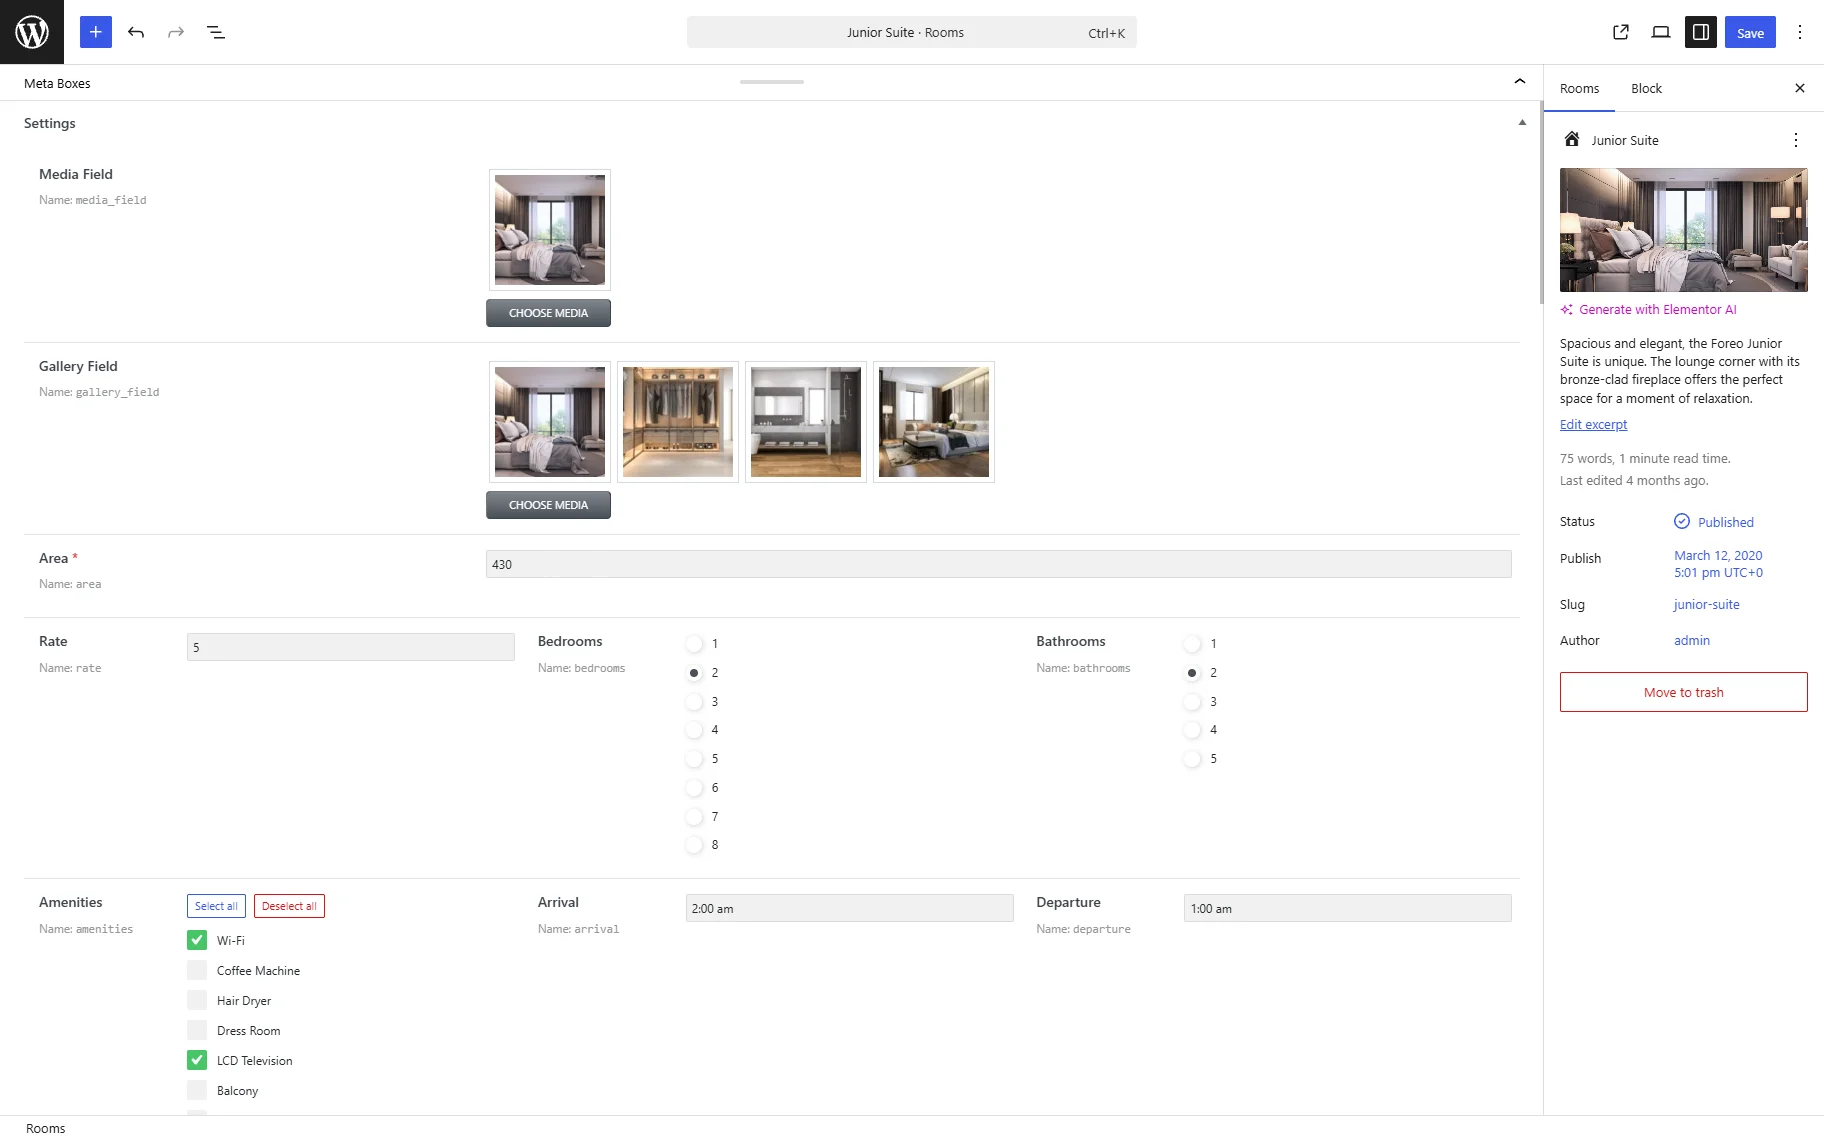
Ensure that changes are saved.
Displaying an Image
JetEngine lets you dynamically display uploaded images on the front end in several ways. The most convenient and flexible method is using the Dynamic Image widget/block/element, which is designed specifically for media output and gives full control over image appearance and behavior.
You can also display images via the Dynamic Field widget or use dynamic tags to set images as section or container backgrounds in Elementor and Bricks.
In this tutorial section, we will start with the most recommended approach for the JetEngine image field dynamic setup — the Dynamic Image widget/block/element.
Display an Image with the Dynamic Image
The Dynamic Image widget/block/element allows you to output images stored in JetEngine “Media” meta fields dynamically. This method is useful when you need full control over image size, styling, responsiveness, links, lazy loading, and other display settings.
To display an image dynamically, open the page, template, or post in the editor (we use Elementor in this case) and add the Dynamic Image widget to the canvas.
In the widget settings, open the General tab and select the previously created “Media” meta field in the Source dropdown.
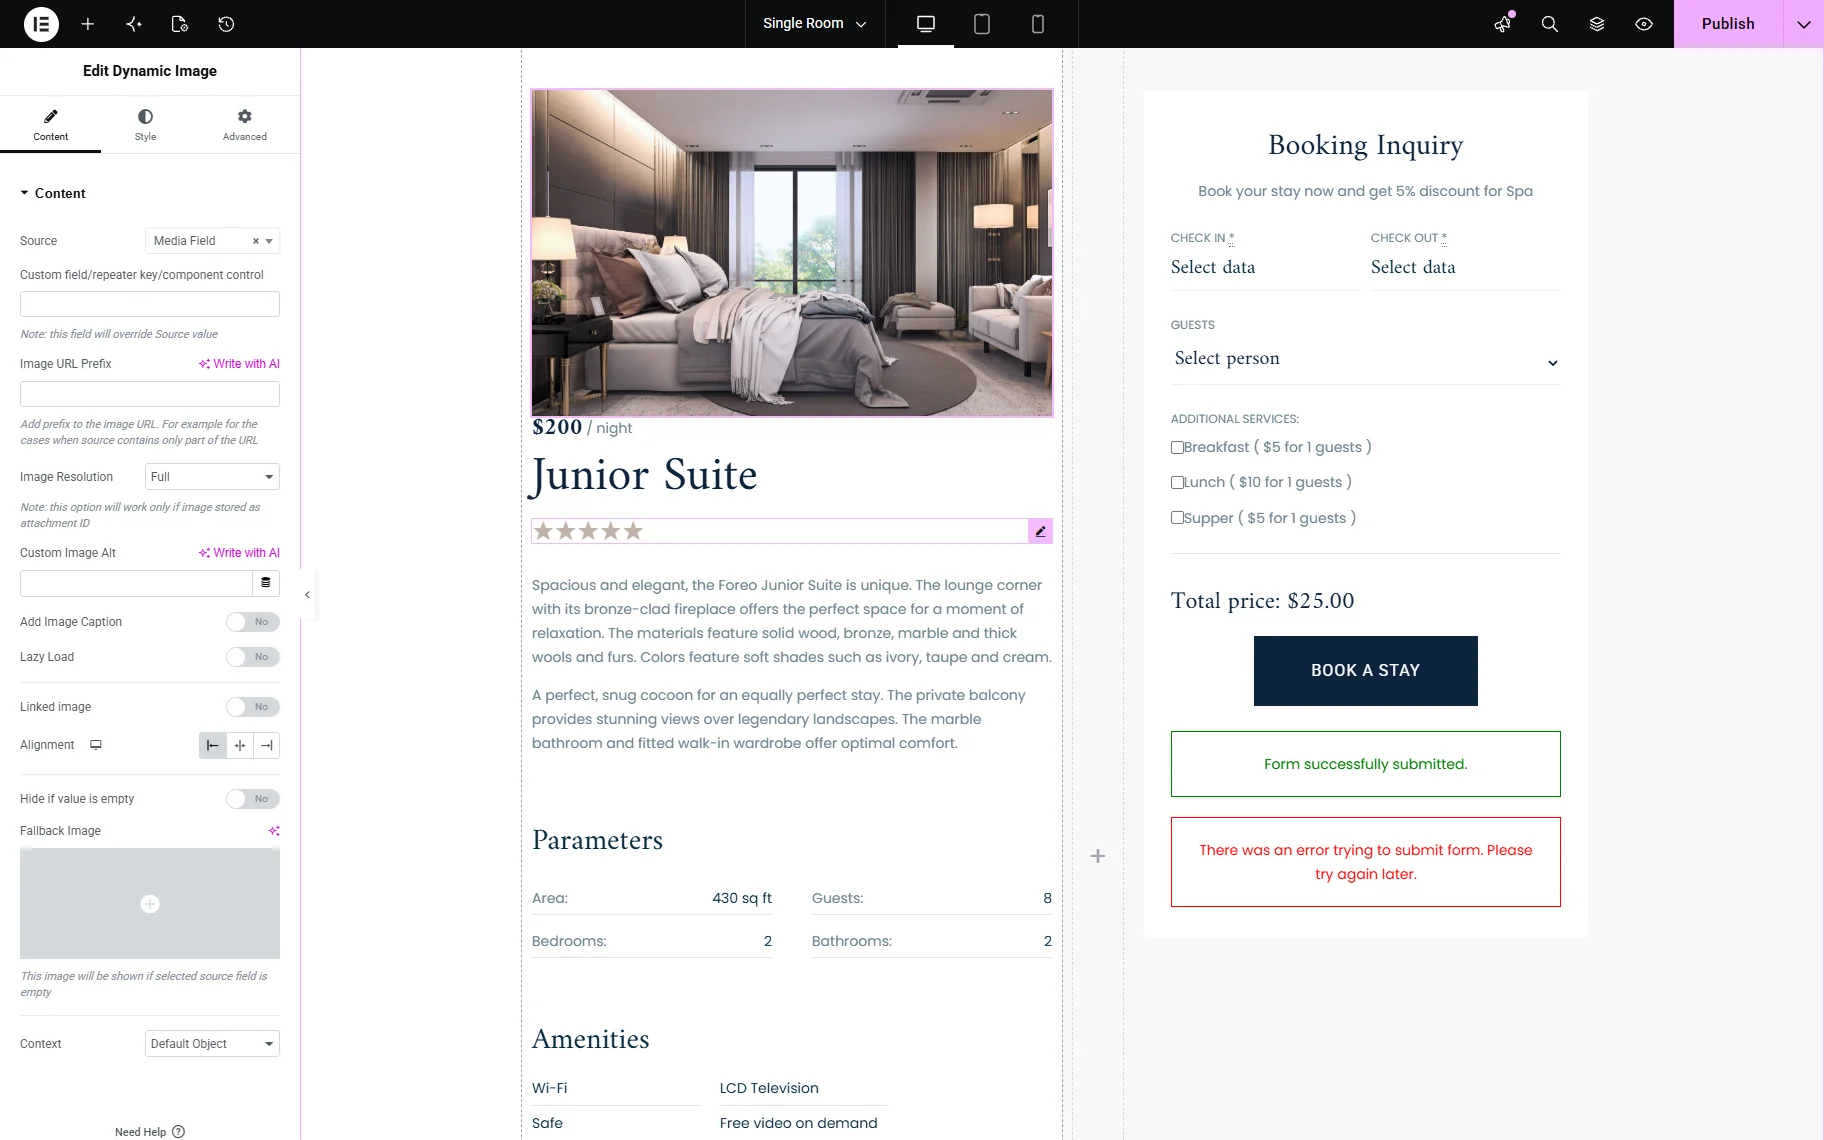
After selecting the field, the image uploaded to that meta field for the single post/CCT item/user will appear automatically on the front end.
The Dynamic Image widget also provides additional customization options, including:
- image size selection;
- custom dimensions;
- object-fit settings;
- linked images;
- lazy loading support;
- alignment and styling controls.
These settings make the widget especially useful for profile photos, featured visuals, banners, team member images, property previews, and other dynamic content sections.
You can also use the same setup inside JetEngine Listing Templates if needed.
Display an Image via Dynamic Field
Another way to display a JetEngine “Media” meta field is by using the Dynamic Field widget/block/element together with the “Get image by ID” callback. This approach can be used only if the image is stored as an ID.
To begin, add the Dynamic Field widget/block/element to the page or template in the editor (Elementor in this case).
In the widget settings, select:
- Source — “Meta Data” option;
- Meta Field — choose the “Media” field you want to display.
Since the “Media” field stores the attachment ID, the image will not be displayed correctly until a callback is applied — you will see the ID number only.
Enable the Filter Field Output toggle. After that, choose the “Get Image by ID” callback.
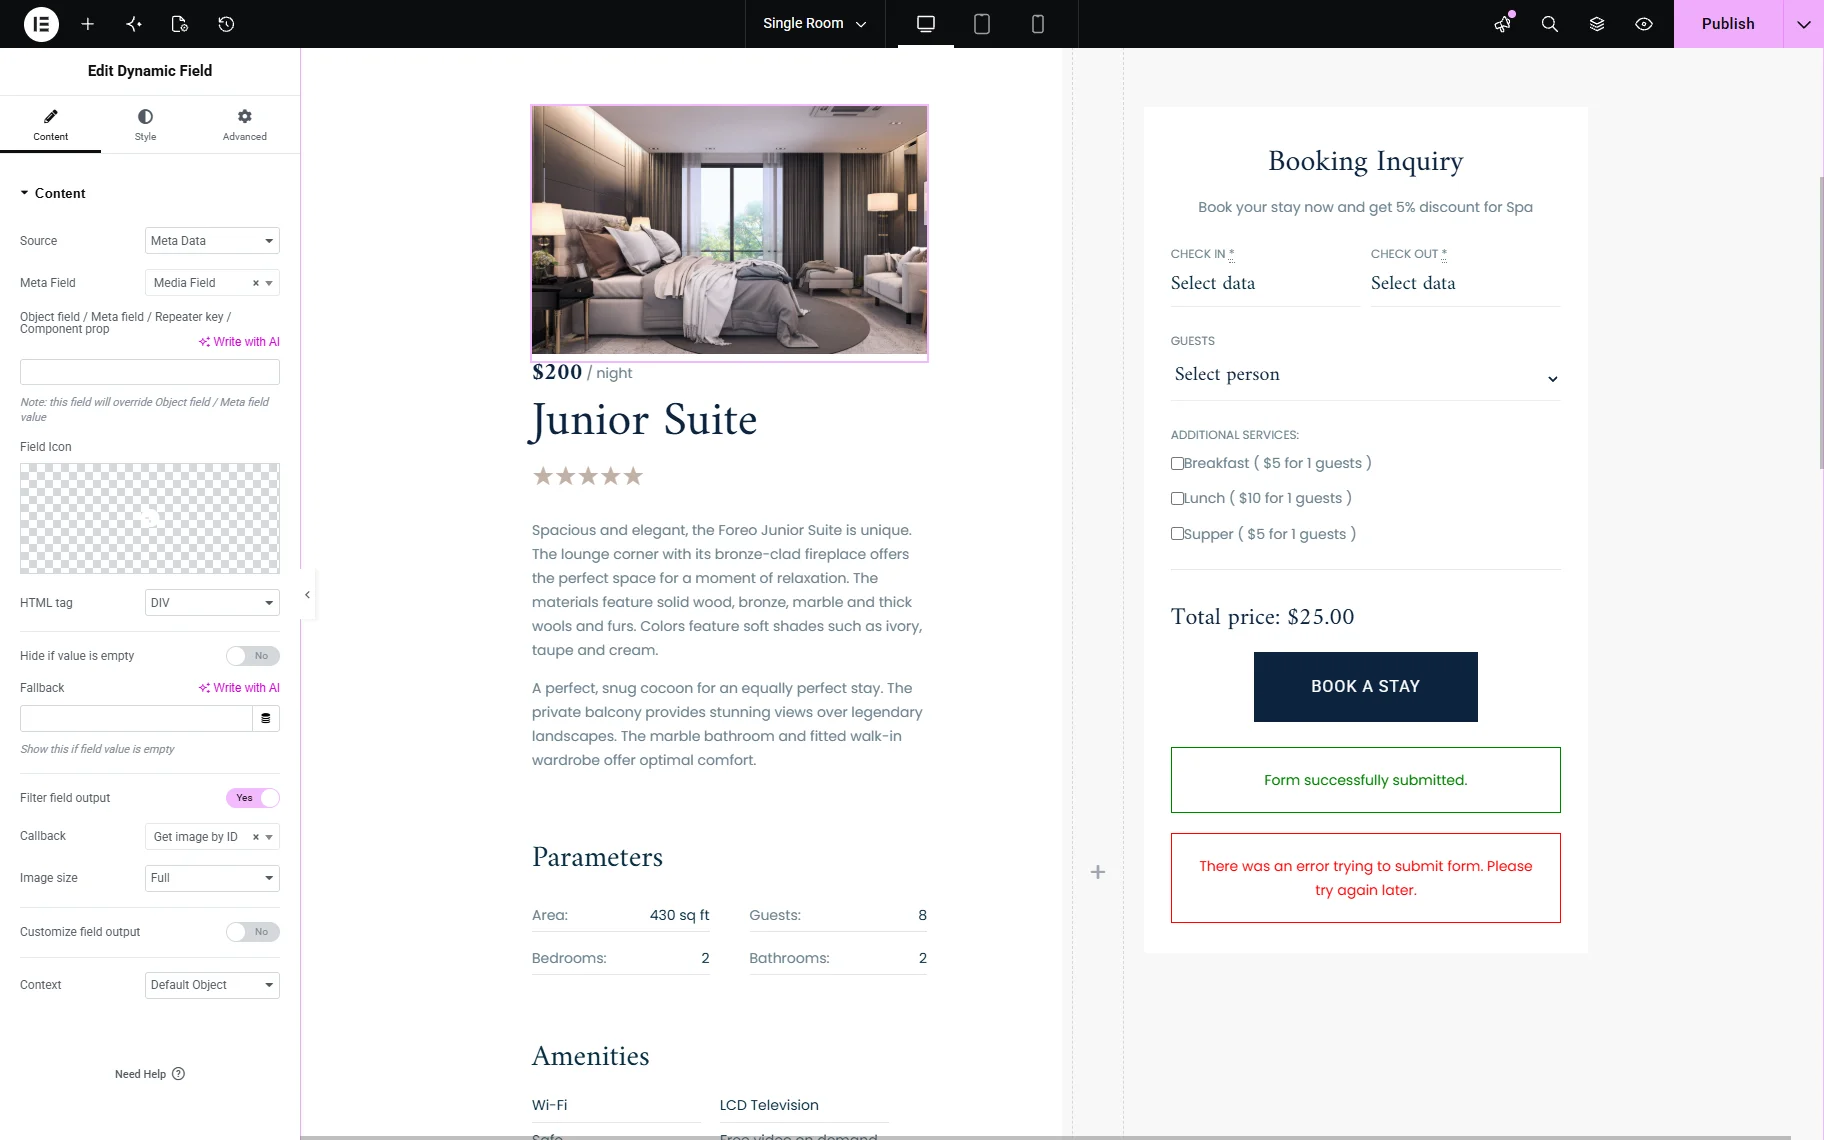
Once selected, the widget will convert the stored attachment ID into an actual image displayed on the front end.
Display an image as a dynamic background
JetEngine “Media” fields can also be used as dynamic background images for sections, containers, blocks, and other layout elements. This approach is especially useful for hero sections, banners, profile headers, cards, and other design elements that require a WordPress dynamic background image JetEngine setup.
Instead of displaying the image directly on the page, the image is applied as the background of a container dynamically. So some text or other elements can be displayed on top.
Set a dynamic background image in Elementor
To display a dynamic background image in Elementor, open the page or template in the Elementor editor and select the container or section you want to customize.
Go to the Style tab and open the Background settings. Select the “Classic” Background Type, then click the “Dynamic Tag” icon and choose the JetEngine’s “Custom Image” source. After selecting the tag, choose the “Media” field you want to display.
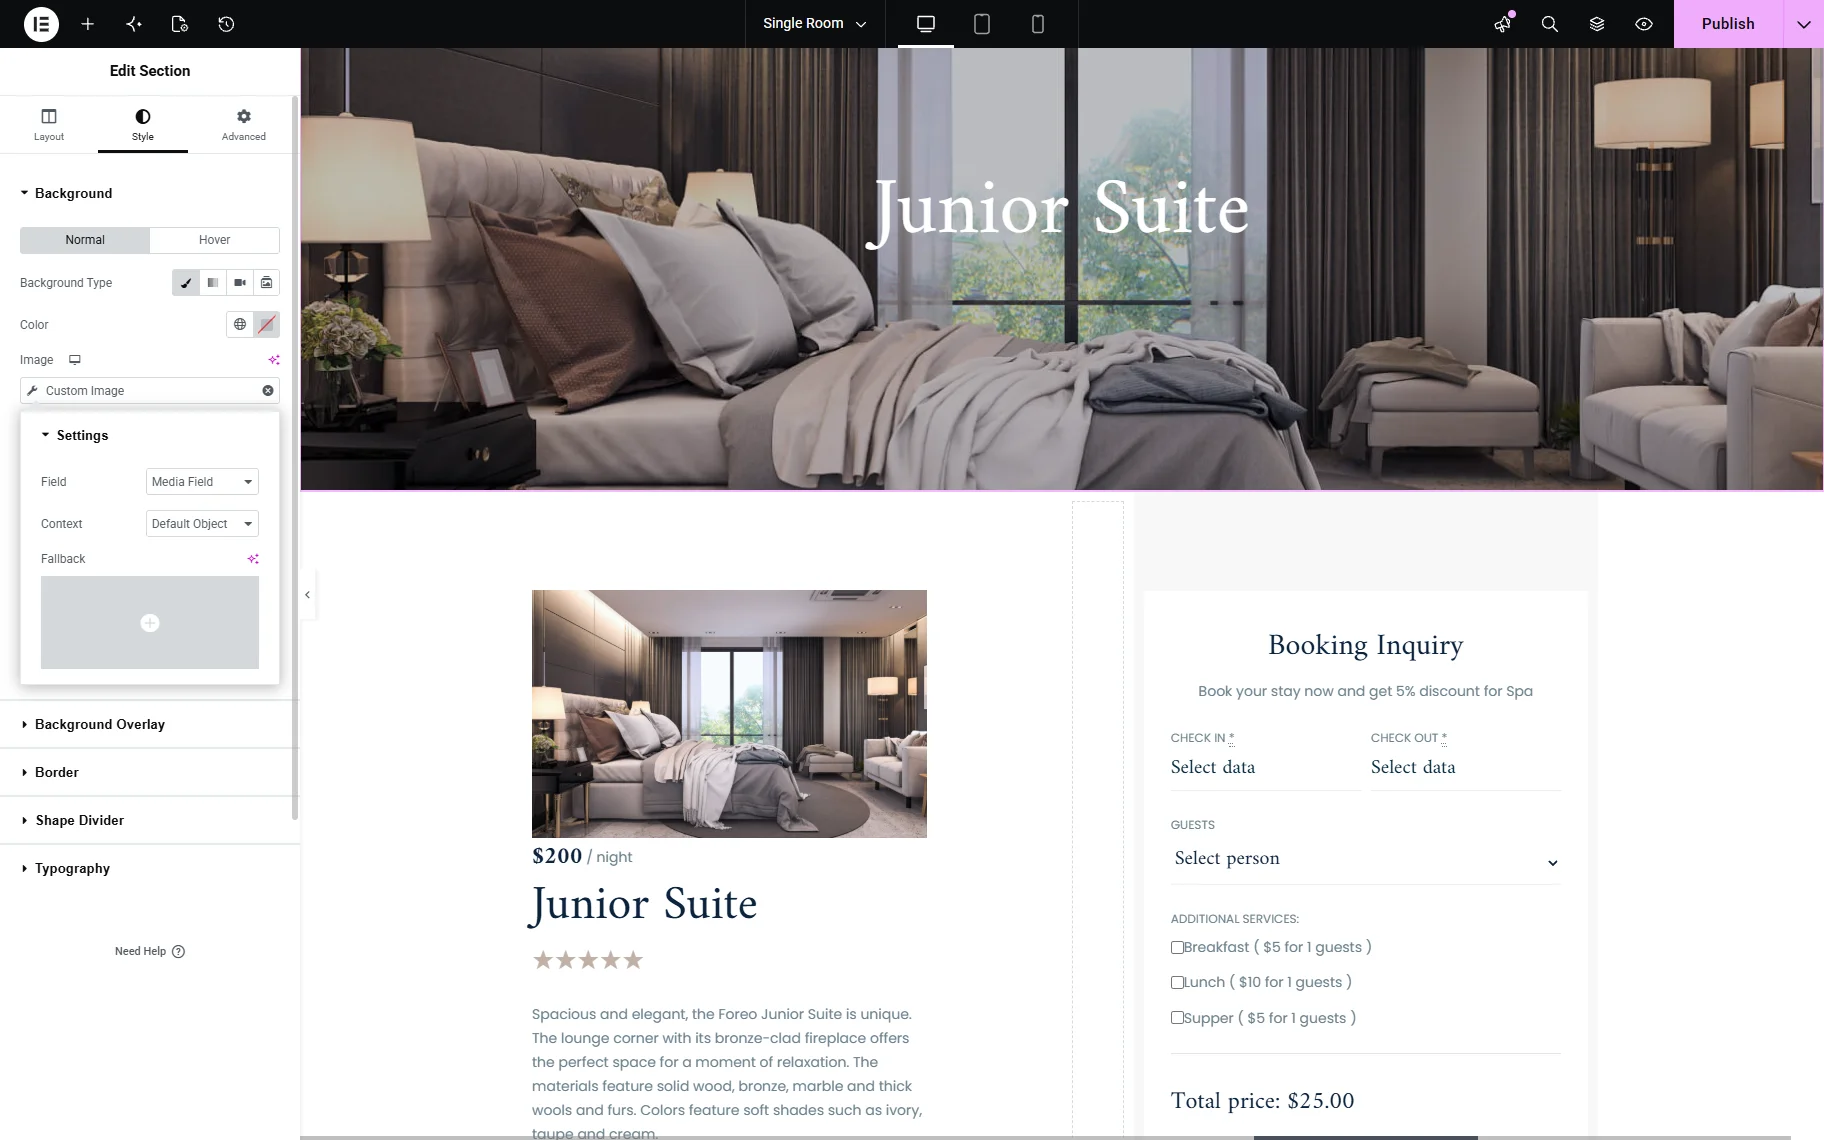
The uploaded image will now be used automatically as the section background.
Set a dynamic background image in Bricks
In Bricks, select the container or element where you want to add the dynamic background.
Open the Style settings of the required Section or Container. Open the Background settings section and click the “Dynamic data” icon next to the Background Image field. Then select the corresponding JetEngine “Media” field as the source.

After saving the changes, Bricks will dynamically load the image stored in the selected meta field and apply it as the background image.
Using dynamic background images helps create more flexible and reusable layouts without manually replacing images for each page or post.
Display a Gallery via Dynamic Field
JetEngine “Gallery” fields store multiple image attachments and can be displayed dynamically on the front end using the Dynamic Field widget together with the appropriate callback. This method is useful for creating lightweight gallery outputs without configuring additional gallery-specific widgets.
To display a gallery dynamically, add the Dynamic Field widget to the page or template.
In the widget settings, select:
- Source — “Meta Data” option;
- Meta Field — choose the “Gallery” field you want to display.
Since the “Gallery” field stores image attachment IDs, the output must be processed through a callback to display actual images.
Enable the Filter Field Output toggle. Then select either “Images gallery grid” callback or “Images gallery slider” one, depending on whether you want to display the images in the format of the grid or slider.
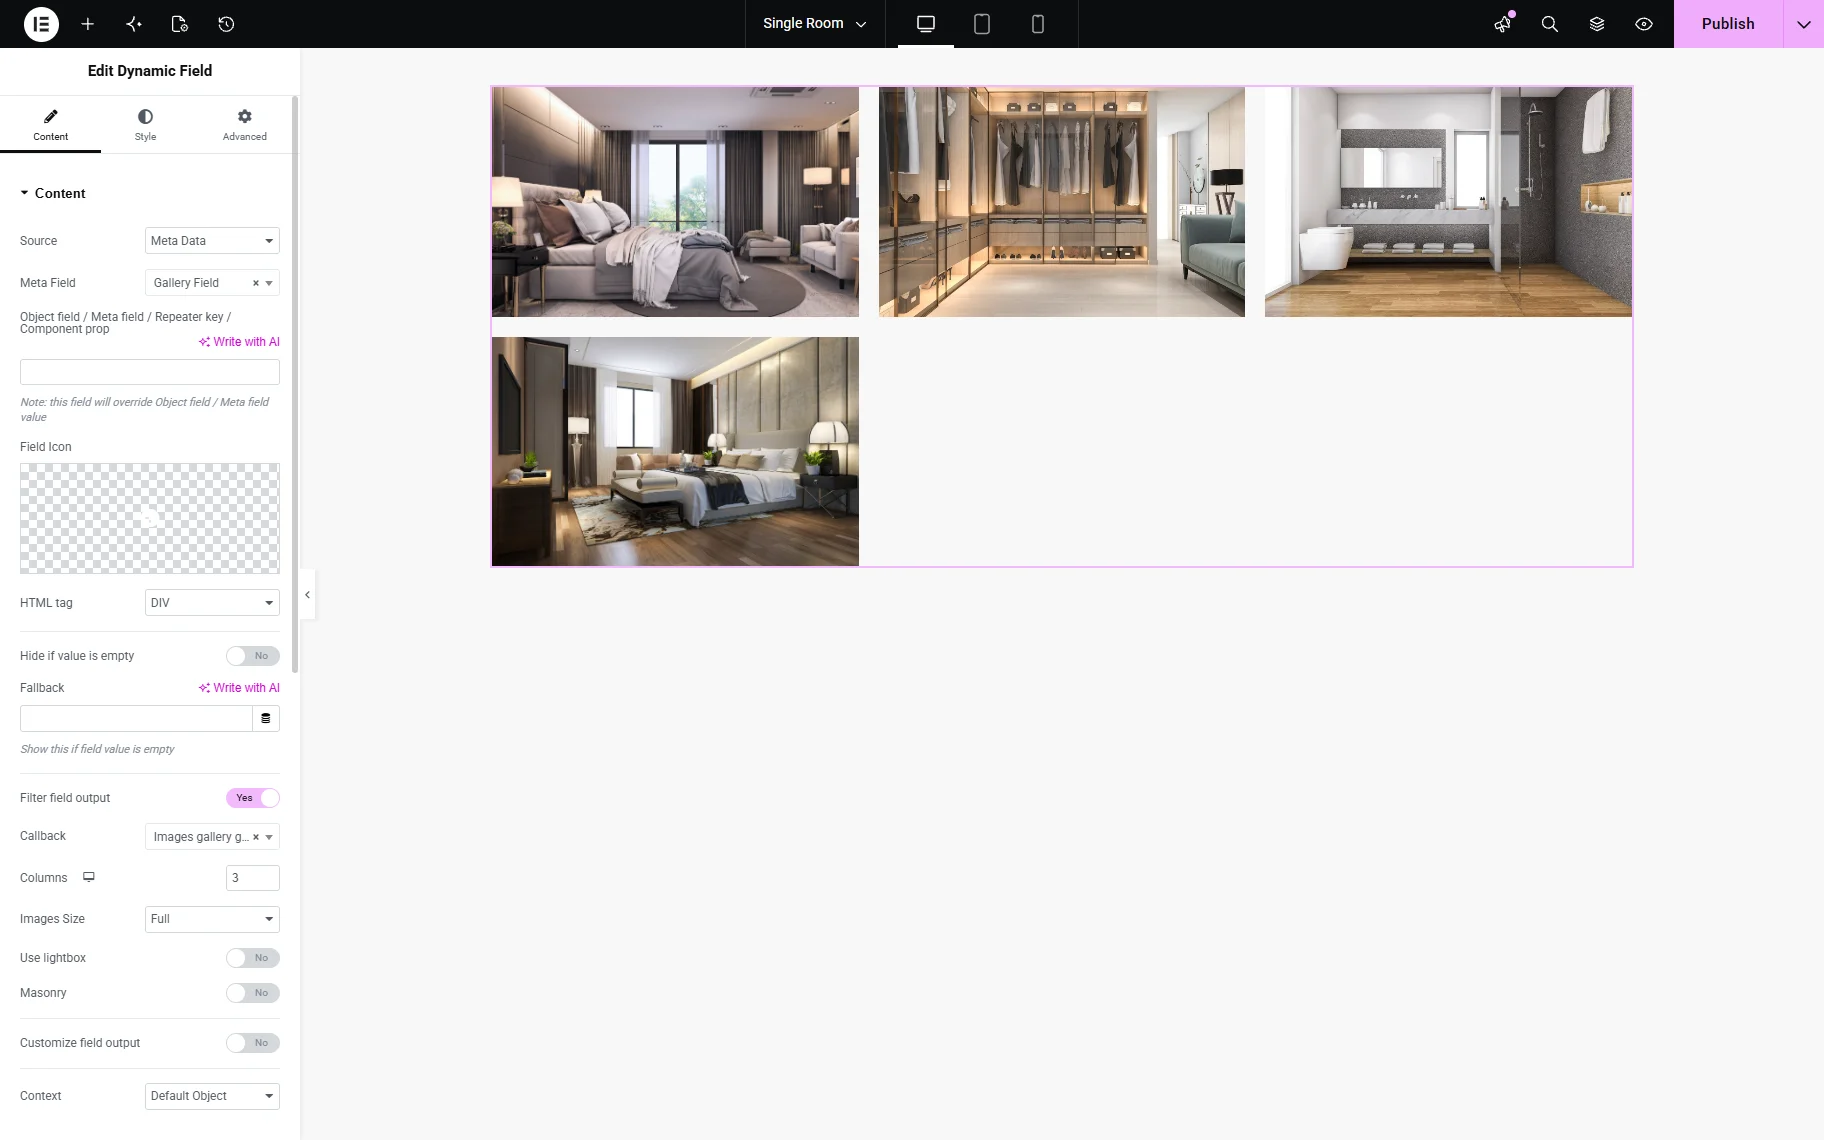
After that, the images stored in the “Gallery” field will appear on the front end dynamically.
This JetEngine “Gallery” Dynamic Field approach is useful when:
- displaying simple image collections;
- creating custom gallery layouts;
- combining gallery output with additional dynamic content;
- building lightweight templates without separate gallery widgets.
Using Media Fields in Listing Templates
The same “Media” and “Gallery” field setups can also be used inside JetEngine Listing templates. You can add Dynamic Image, Dynamic Field, and dynamic background elements to Listing Items the same way as on regular pages or templates.
This approach is useful for displaying dynamic media in:
- Listing Grids;
- profile cards;
- property previews;
- product showcases;
- team member layouts.
Once configured, the media content will be pulled automatically from the corresponding meta fields for each listing item.
FAQ
You can display images from a JetEngine “Media” meta field using the Dynamic Image widget/block/element, the Dynamic Field widget/block/element, or as a background for sections or containers with the help of the “Dynamic Tags”. The easiest method is the Dynamic Image widget because it provides full control over image size, styling, links, and responsive behavior.
The recommended method for a JetEngine image field dynamic setup is using the Dynamic Image widget/block/element with the “Media” meta field selected as the source. This approach is flexible, beginner-friendly, and works well with Elementor, Gutenberg, and Bricks.
This usually happens when the “Media” field stores the image as an attachment ID and the callback is not applied. To display the actual image, enable the “Filter Field Output” toggle and select the “Get Image by ID” callback in the Dynamic Field settings.
Yes, JetEngine allows you to use images from “Media” fields as dynamic backgrounds for sections, containers, and other layout elements. This wordpress dynamic background image jetengine setup can be configured in Elementor and Bricks using “Dynamic tags” or “Dynamic data” options.
To display images from a “Gallery” field, use the Dynamic Field widget/block/element and select the “Images gallery grid” or “Images gallery slider” callback. This JetEngine gallery Dynamic Field method lets you dynamically output multiple images as a gallery layout on the front end.
That’s it. Now you know how to display images from the “Media” and “Gallery” meta fields from the WordPress JetEngine plugin on the front end.