How to Insert and Edit Custom Content Type Items via Form
Find out how to create and edit JetEngine Custom Content Type items via a WordPress front-end form.
Before you start, check the tutorial requirements:
- Elementor (Free version), Block editor (Gutenberg), or Bricks
- JetEngine plugin installed and activated with the Custom Content Types module enabled
- JetFormBuilder plugin installed and activated
Add Custom Content Type
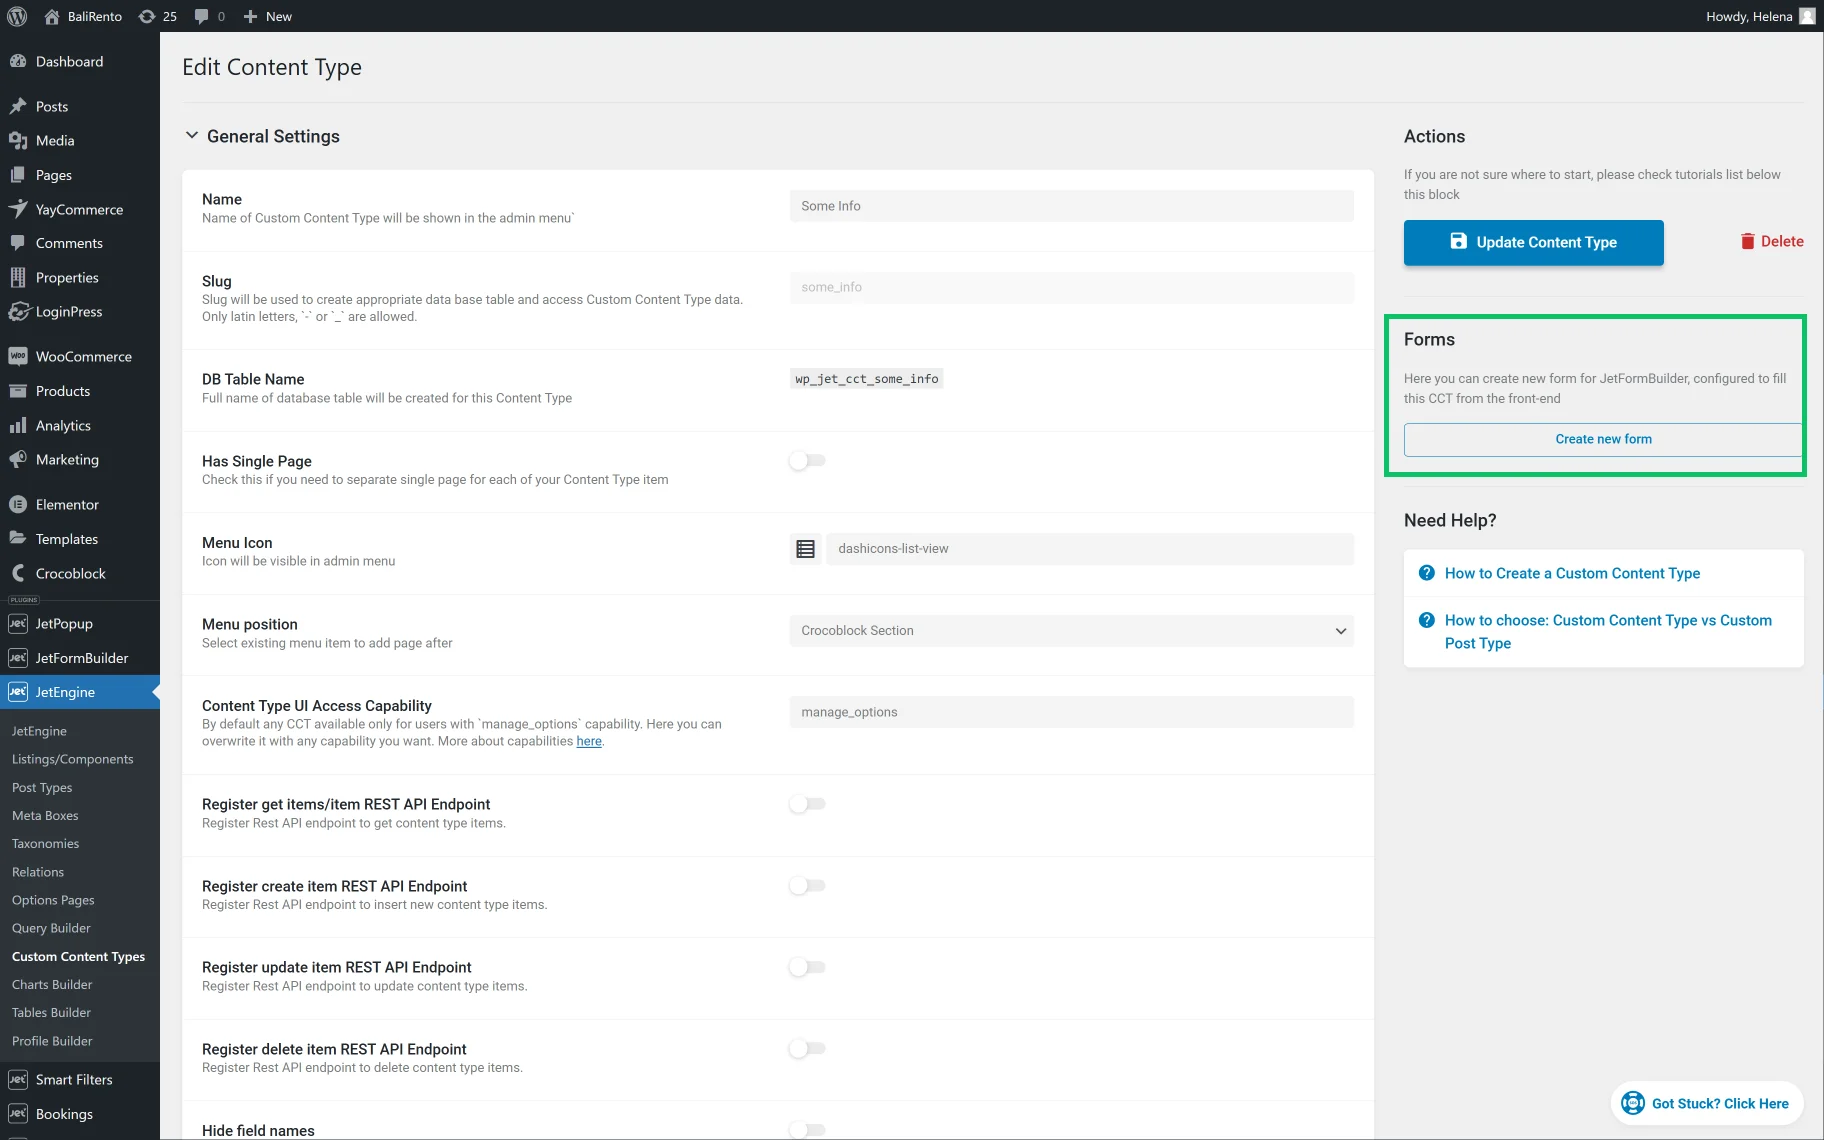
Let’s begin by creating a Custom Content Item (CCT). Head to WordPress Dashboard > JetEngine > Custom Content Types and press the “Add New” button. Create a CCT with all the fields you need.
For instance, we create a “Some Info” CCT with three meta fields: “Name,” “Address,” and “Message.”
When the “Add Content Type” button is clicked, the Forms section will appear on the right panel with the “Create new form” button.
Generate the Form
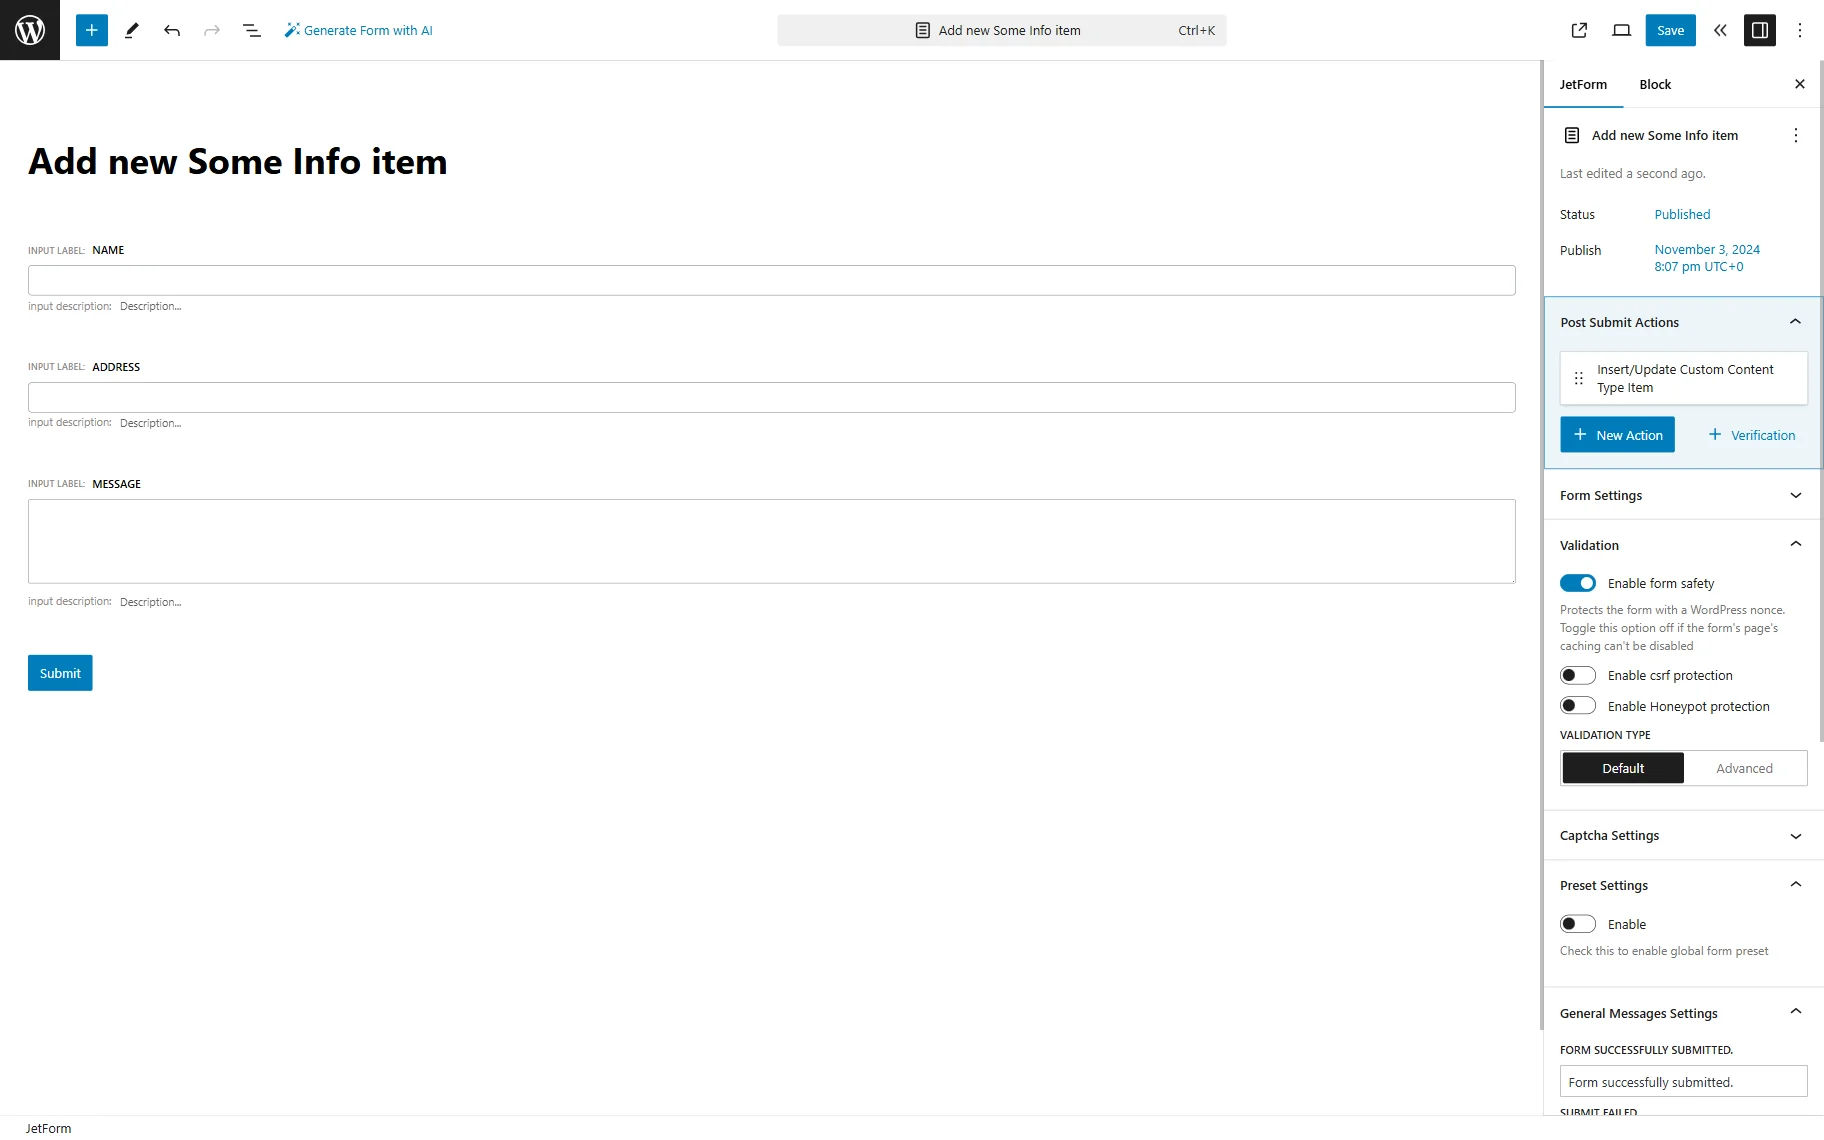
After clicking the “Create new form” button, the JetFormBuilder form will be created automatically with all the form fields corresponding to the CCT‘s meta fields.
Edit CCT Status or Fields Mapping
If you open the JetForm tab on the right panel of the form editor, you will see that the “Insert/Update Custom Content Type Item” post-submit action has been added automatically, with the fields already mapped to the corresponding CCT’s meta fields.
You can edit field mapping, CCT status, and the fallback values for the meta fields by hovering on the “Insert/Update Custom Content Type Item” post-submit action and clicking on the “pencil” icon.
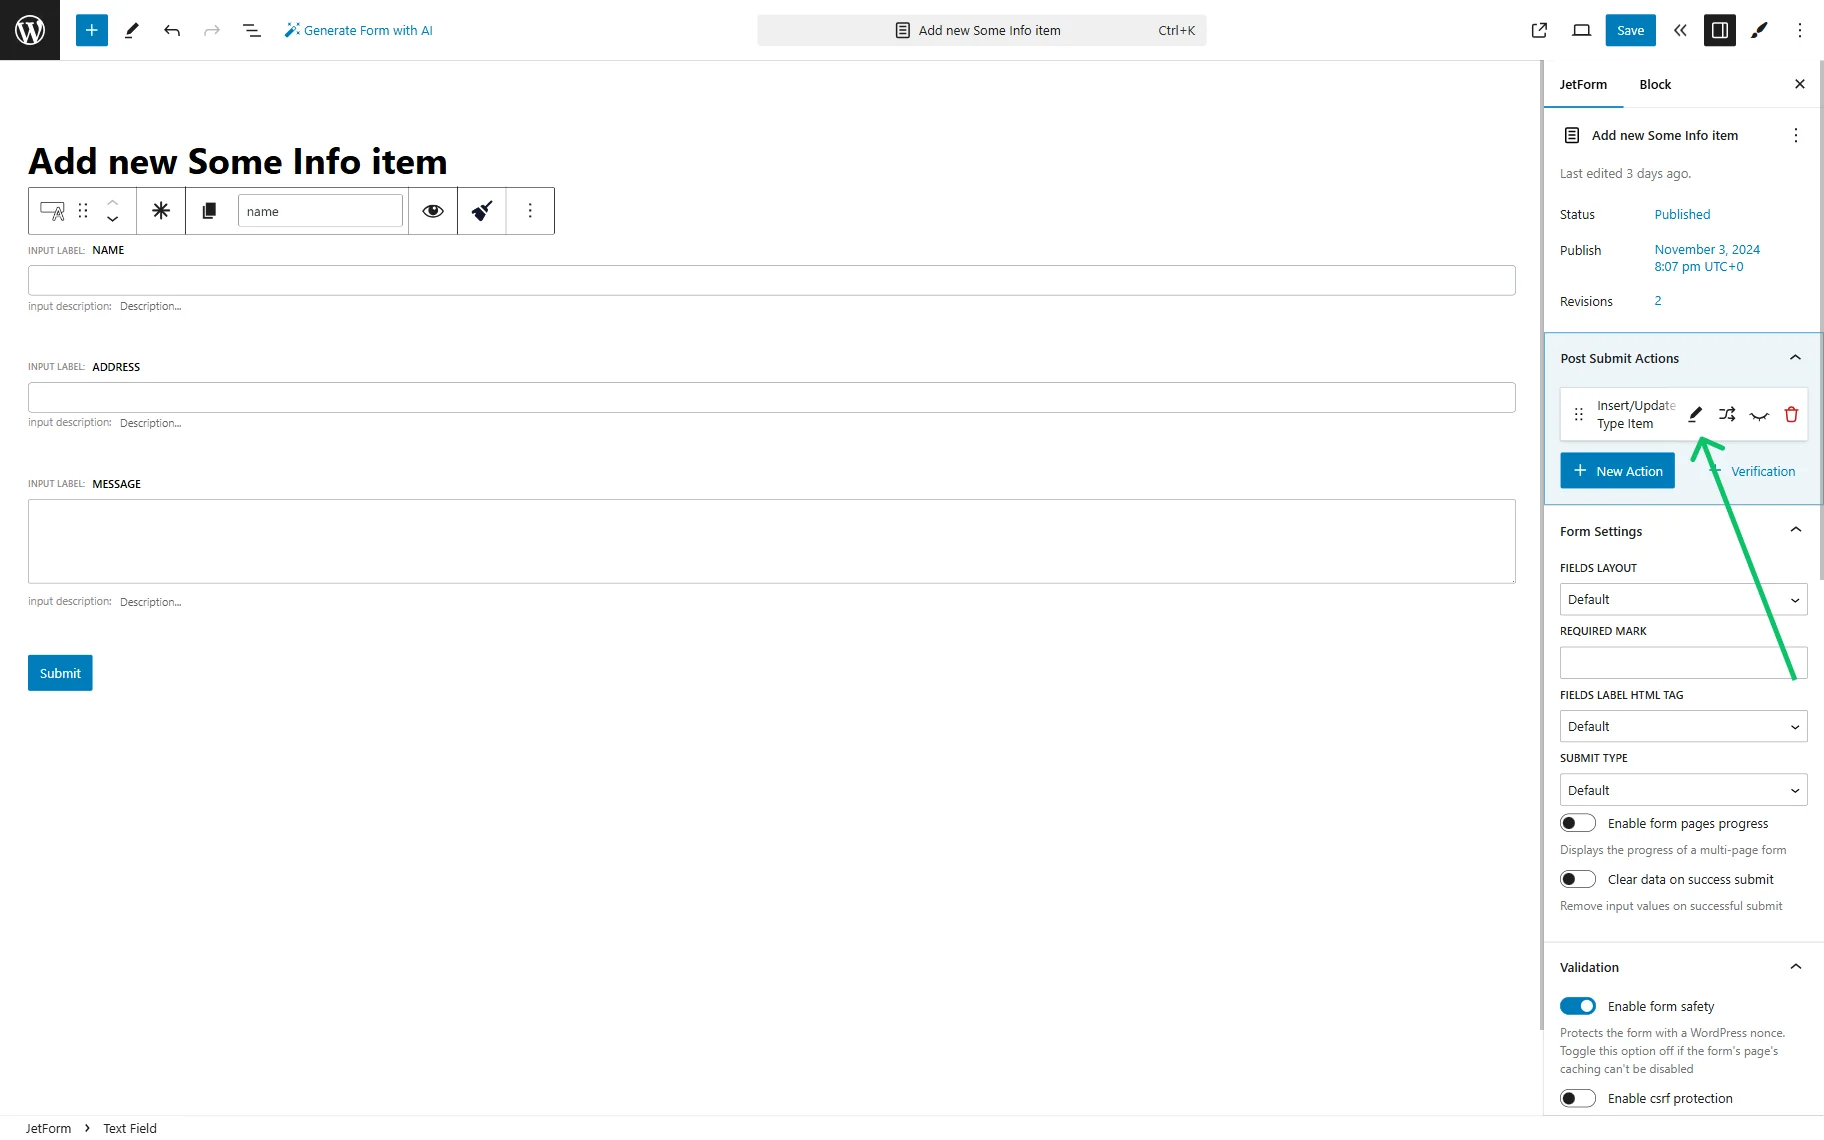
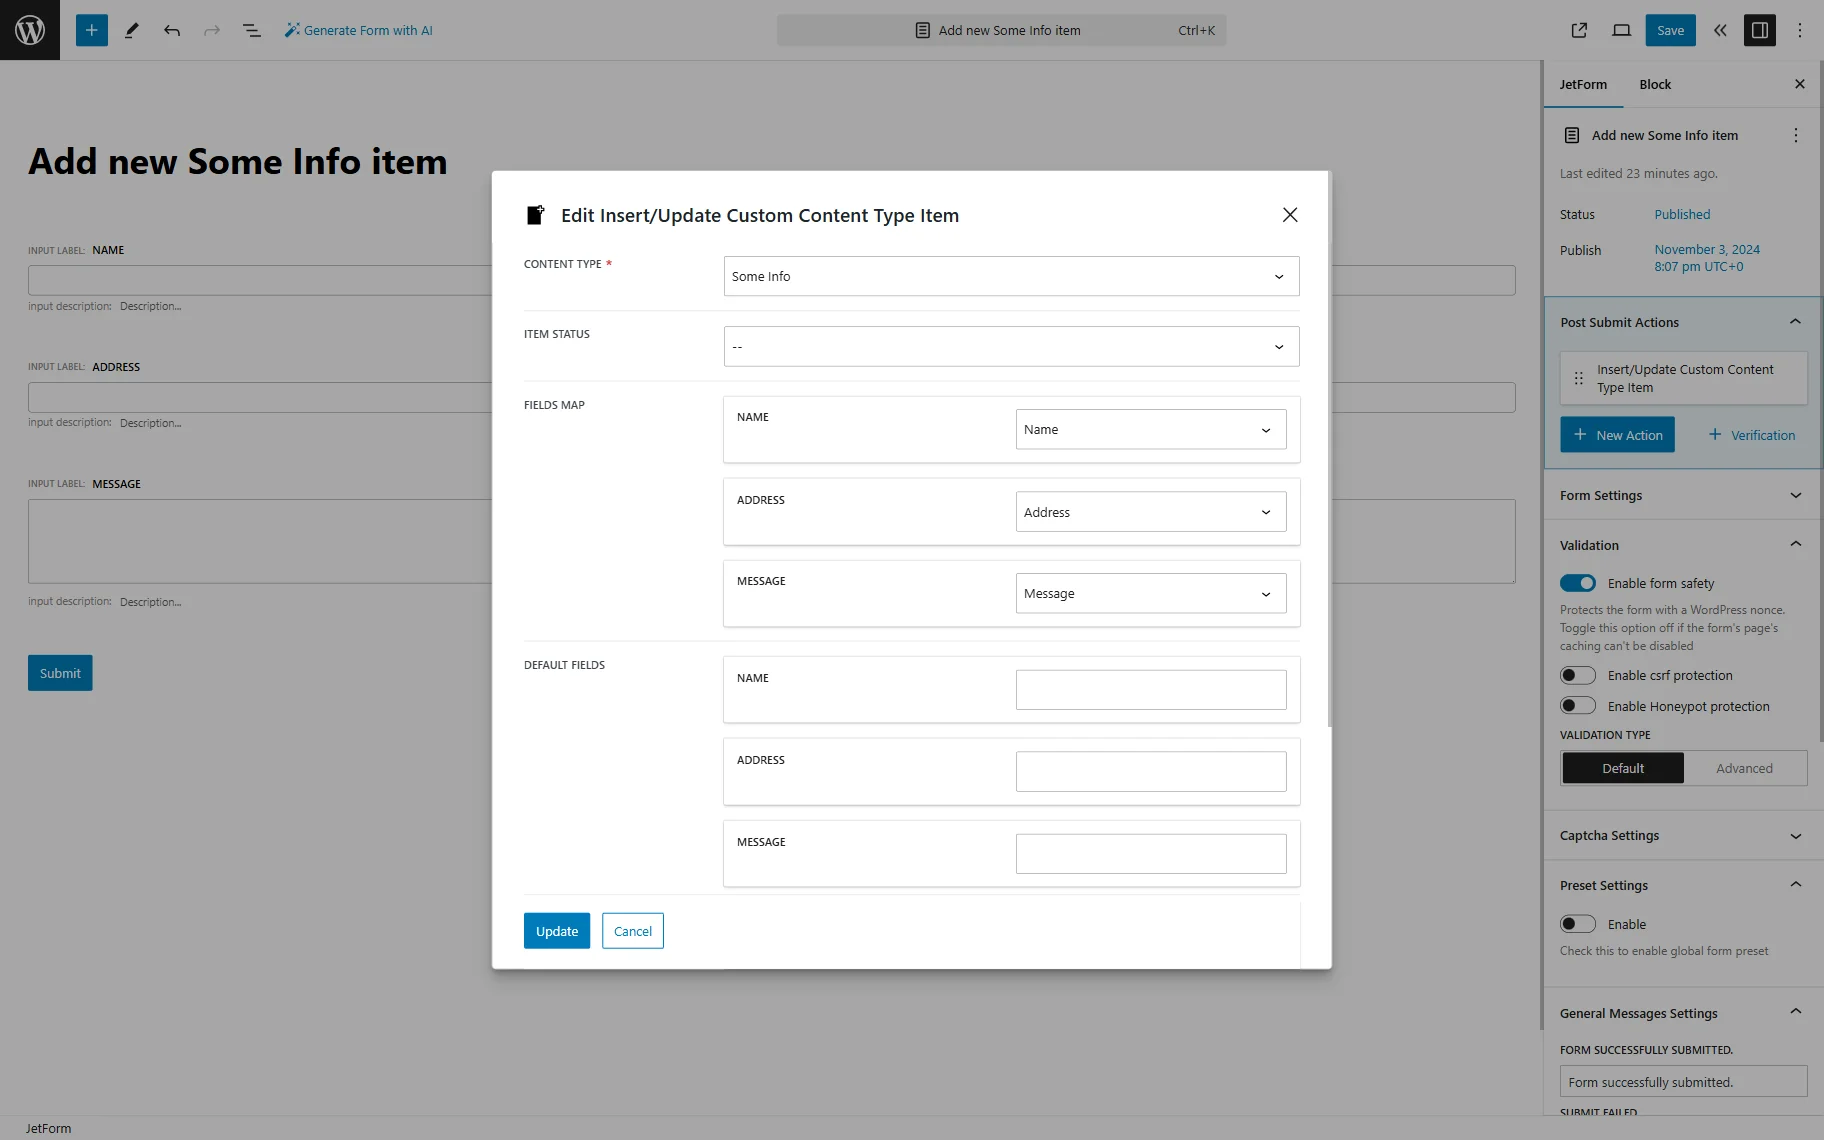
The popup with all the settings will appear.
Adjust them if needed and press the “Update” button.
You can add more post-submit actions if needed by clicking on the “+New Action” button on the right panel of the form editor.
Press the “Save” button to save the form.
Insert the Form Into Website Pages
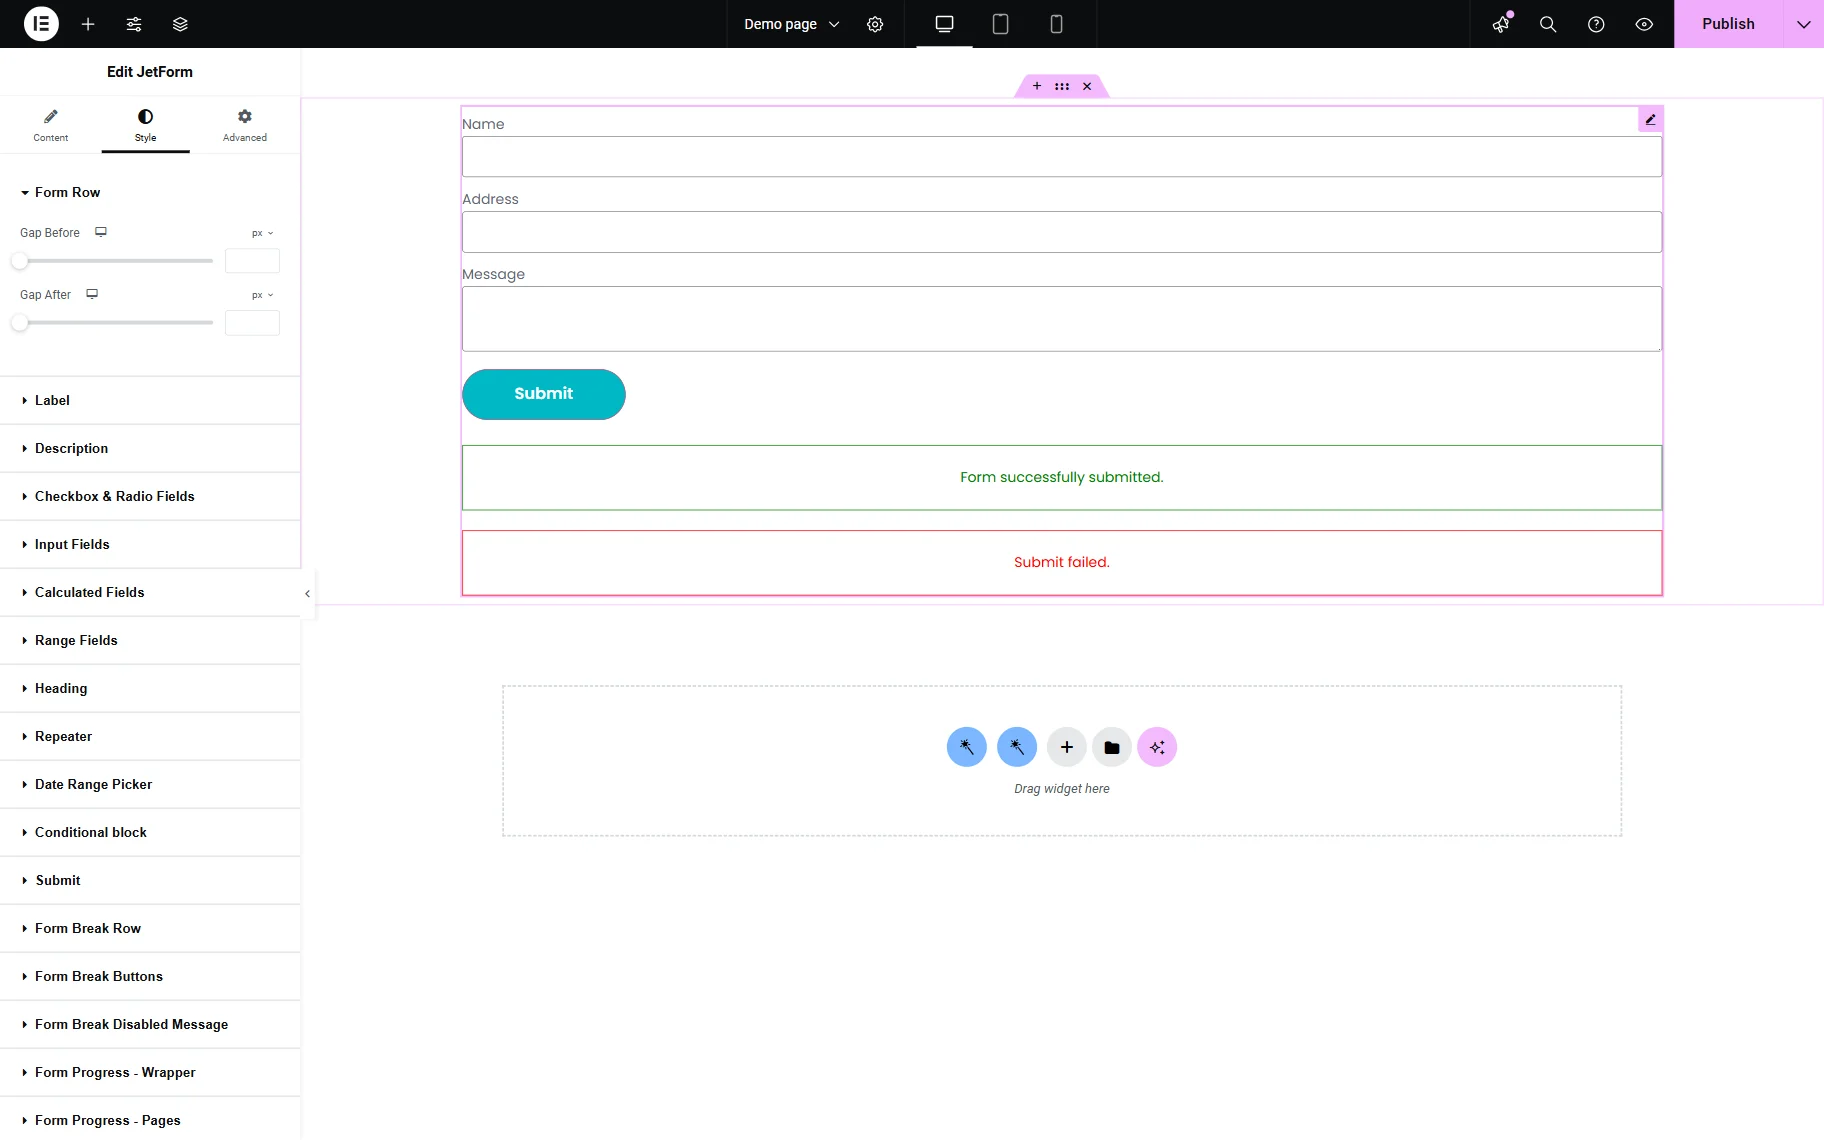
Go to WordPress Dashboard > Pages, press “Add New,” or use an existing page. There, add a form using the JetForm block/widget/element for Elementor or Bricks.
Select the form from the list in the Form Settings section. Then, add styling for the form fields, if required, by proceeding to the Styling tab.
To save changes, click “Publish.”
If you use Block Editor, Divi, or other form builders except Elementor and Bricks, you can insert the form using a shortcode and use a free JetStyleManager plugin for styling.
Check the result on the front end, fill in the form fields, and click “Submit.”

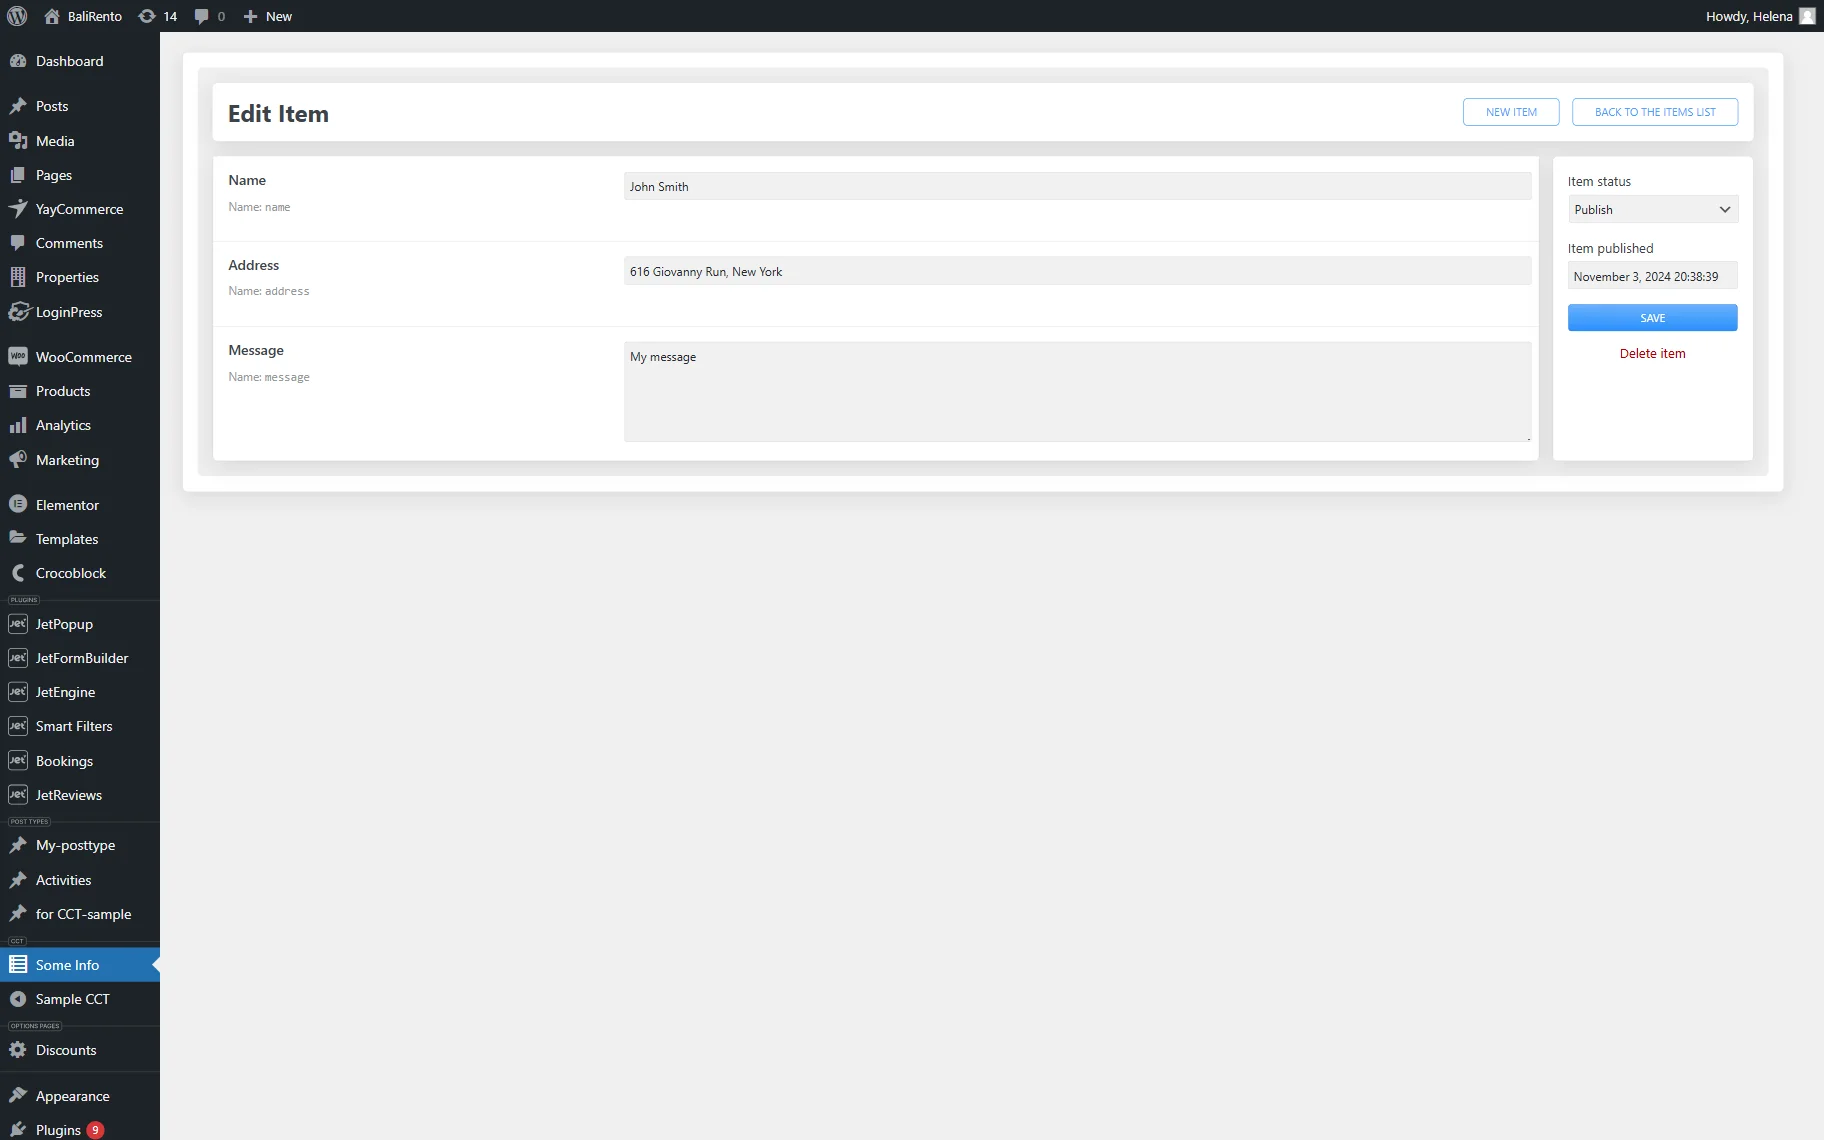
Then, proceed to the WordPress Dashboard > Your CCT name, and you will see the new CCT item added with the fields filled in the form.
Edit / Update Existing CCT Items via Front-End Form
To update the existing CCT items via a front-end form, create a form with the same fields as the one for adding fields. The best way to do this is to duplicate the form to add fields, rename it, and change some settings.
Field for items to be updated
First, set a Select Field to select a CCT item to be updated. This field should be generated dynamically following these instructions.
In short, you should create a custom query using the Query Builder.
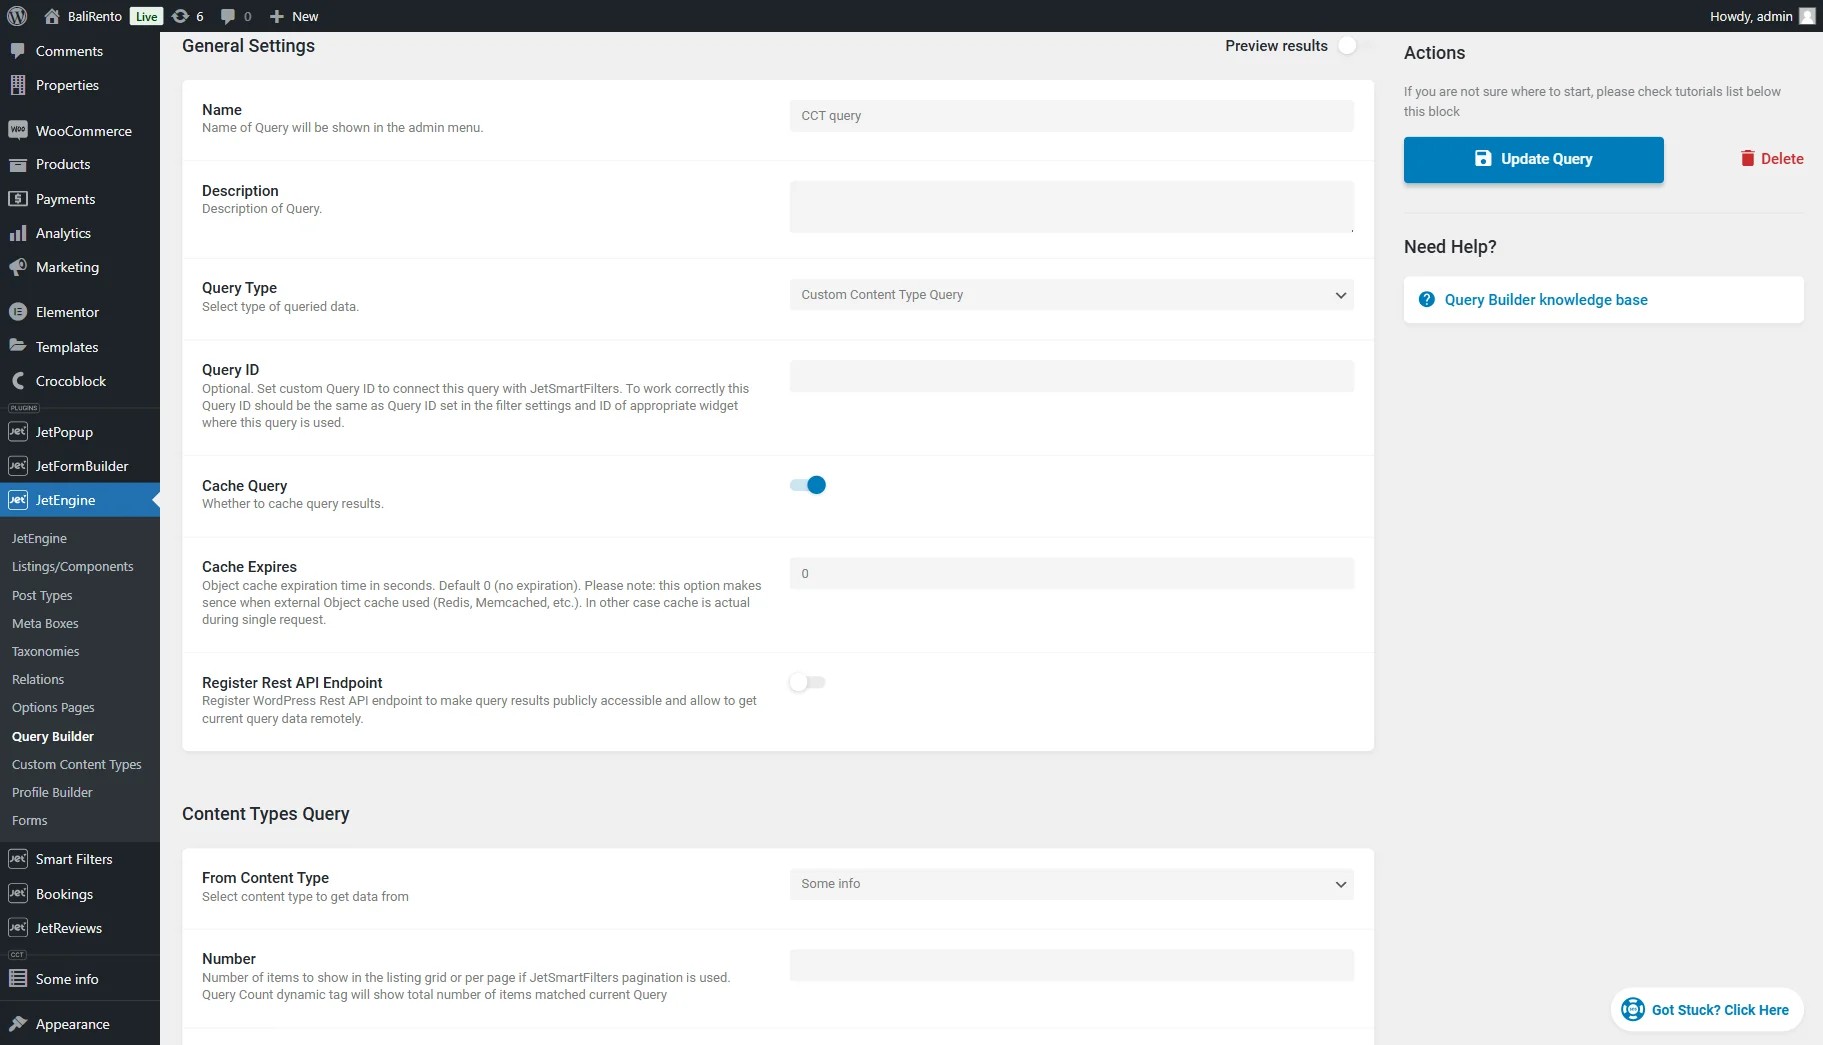
Go to WordPress Dashboard > JetEngine > Query Builder and press the “Add New” button.
Enter the Name and select the “Custom Content Type Query” Query Type.
In the Content Type Query section, select the name of your CCT whose items are to be updated from the From Content Type dropdown menu. Then, press the “Add/Update Query” button.
Go back to the form to update CCT and add the Select Field. Choose “Generate Dynamically” in the FILL OPTIONS FROM drop-down, then the “Get values list from JetEngine Query” option from GENERATOR FUNCTION.
In the FIELD NAME, write the macro for the items to be displayed. This is a format for the macro:
query ID|_ID|field to be displayed as a label
- query ID — can be found at the end of the URL when editing the Query Builder query. Replace it with your value;
- _ID — ID of the CCT item. Don’t replace it with anything;
- field to be displayed as a label — any field of your CCT item that you want to display as a label in your Select Field. Replace it with any field name you want from your CCT item.
For example:
14|_ID|name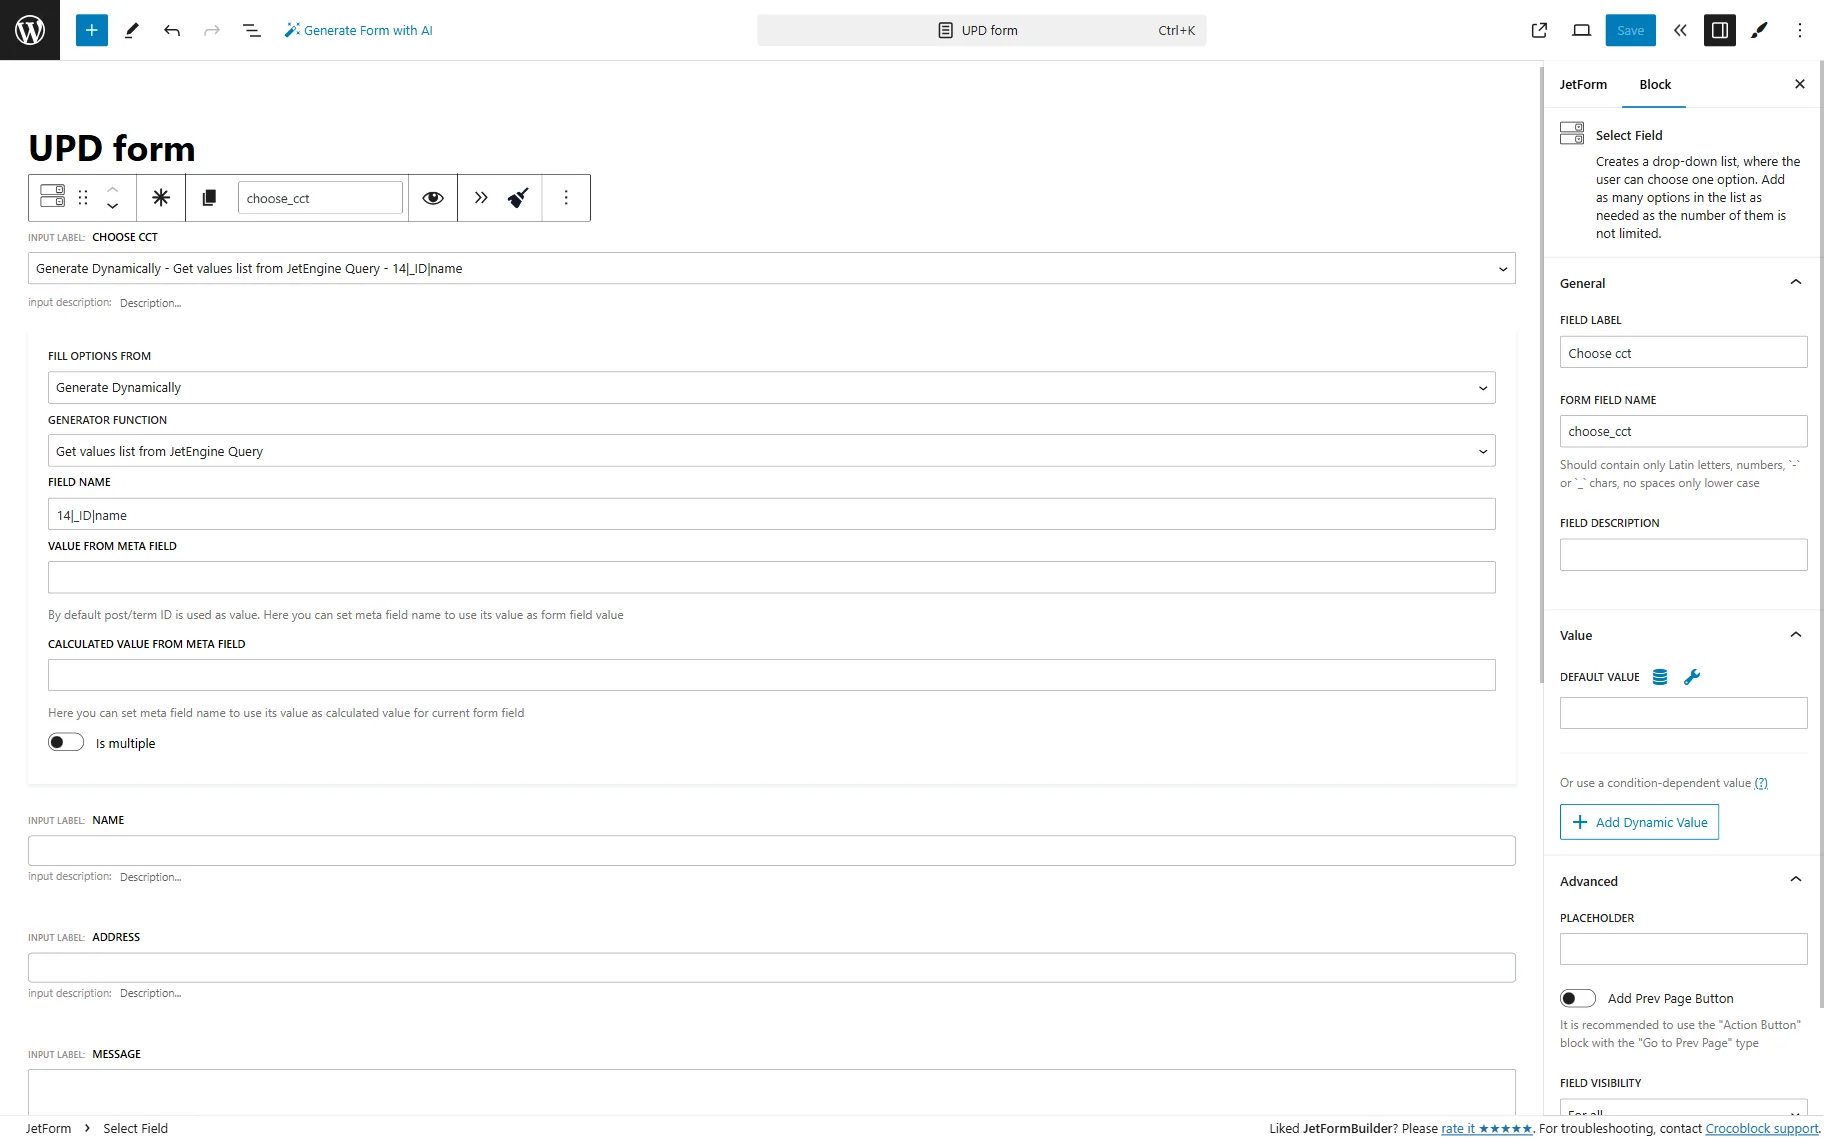
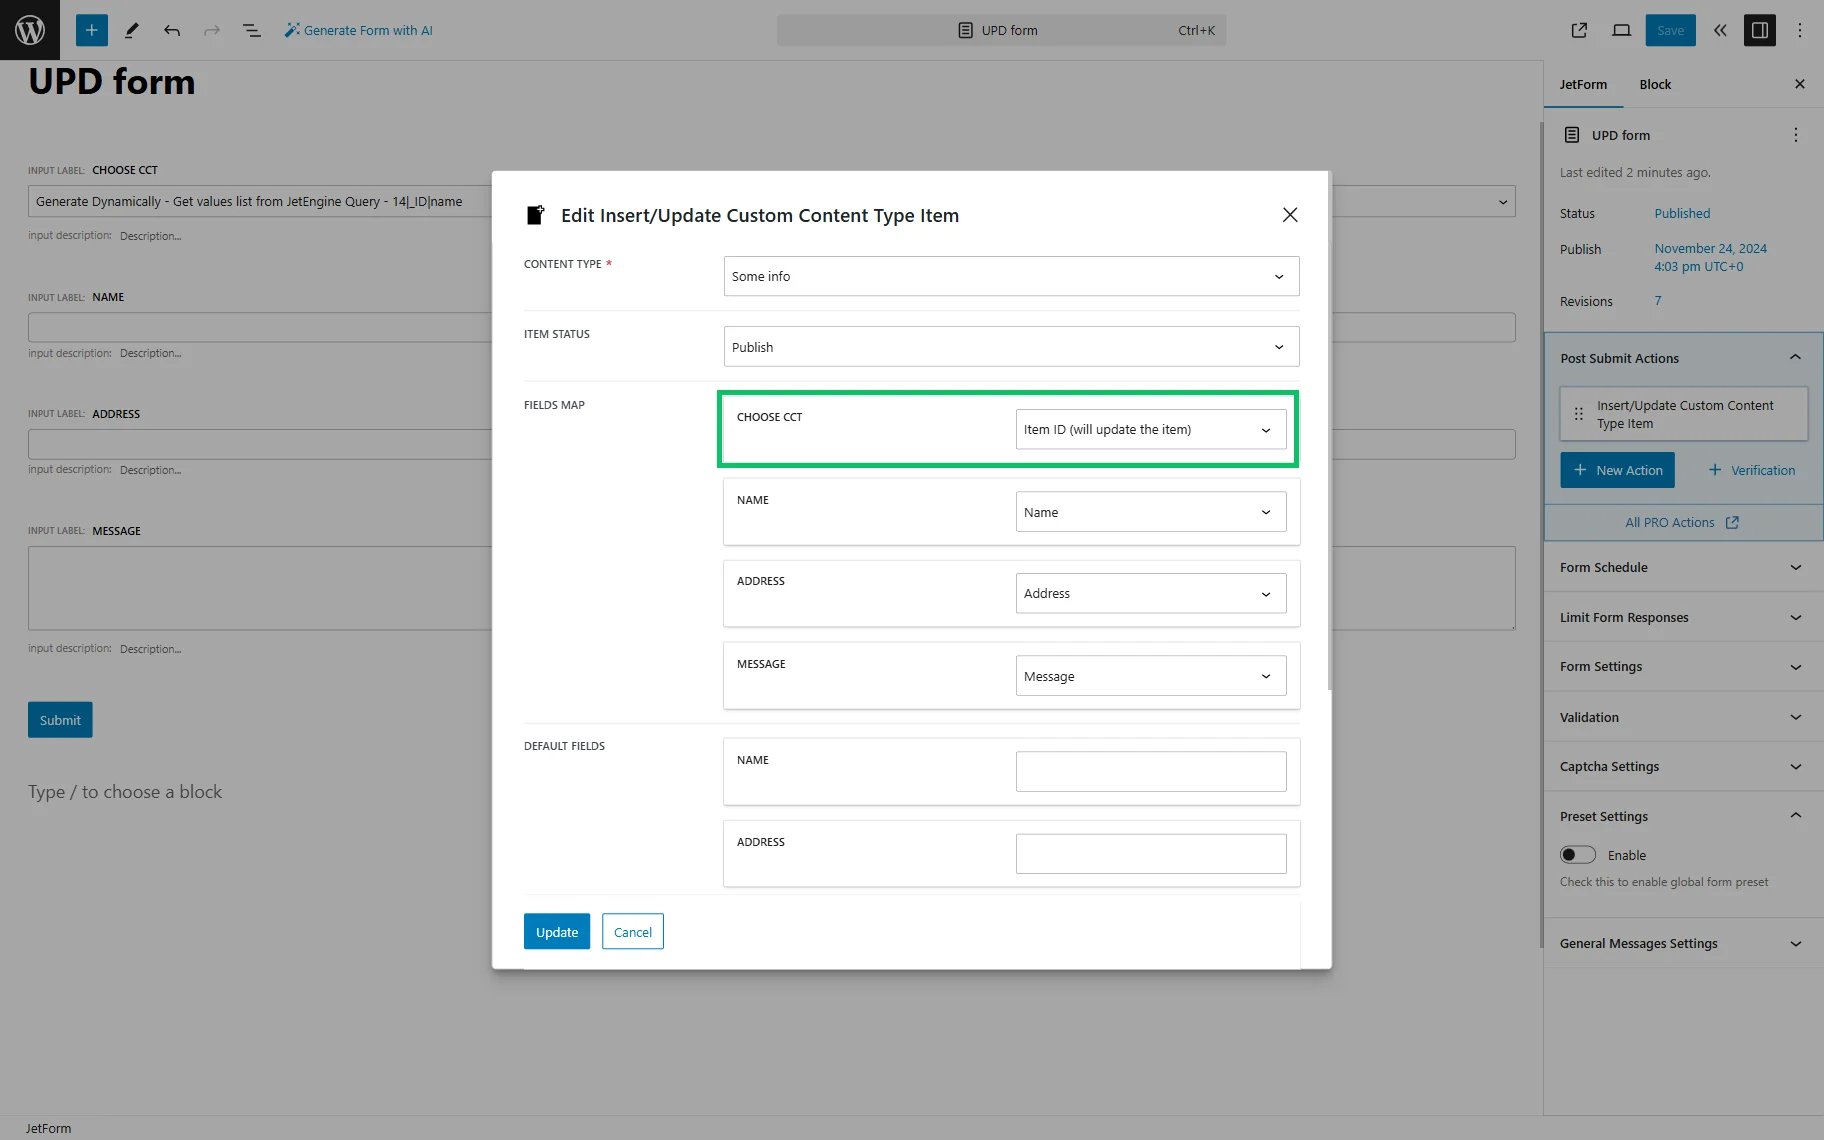
Mapping fields in Insert/Update CCT post-submit action
Go to JetForm > Post-Submit Actions and choose the “Insert/Update Custom Content Type Item” option. Click on the “pencil” icon and map all the fields.
If you have duplicated the form for inserting CCTs, all the fields, except one, will be already mapped correctly.
The goal now is to map the Select Field, which fetches the ID of the CCT to be edited, with the ID of the existing CCT.
Insert the form into the page with the JetForm block/widget/element and use it to update existing CCTs.
That’s it; now you know how to insert and edit JetEngine Custom Content Types items from the WordPress front end.