How to Save and Query Repeater Fields as Separate Fields
From this tutorial, you will learn how to save the repeater fields as separate fields in a database, which is available as part of JetEngine functionality for WordPress.
Before you start, check the tutorial requirements:
- JetEngine plugin installed and activated
With the help of the Save as separate fields feature, you can save every repeater field item as a separate field in the database. Therefore, the data stored in repeater fields can be organized and displayed on your website as needed for you.
Let’s check how this feature helps organize the content for a medical center website.
Let’s imagine that the medical center is holding a symposium of doctors from different hospitals around the world.
Different hospital teams can travel to this event, each consisting of one to fifty members. So, we need to use repeater fields as we don’t know the exact number of participants but require their names, passport numbers, and positions.
With the Save as separate fields feature, the added content can be queried according to the added information, including repeater sub-fields. For example, we want to display the teams that include specialists with the “Surgeon” position.
Let’s check how to adjust such a use case.
Adjust Post Types
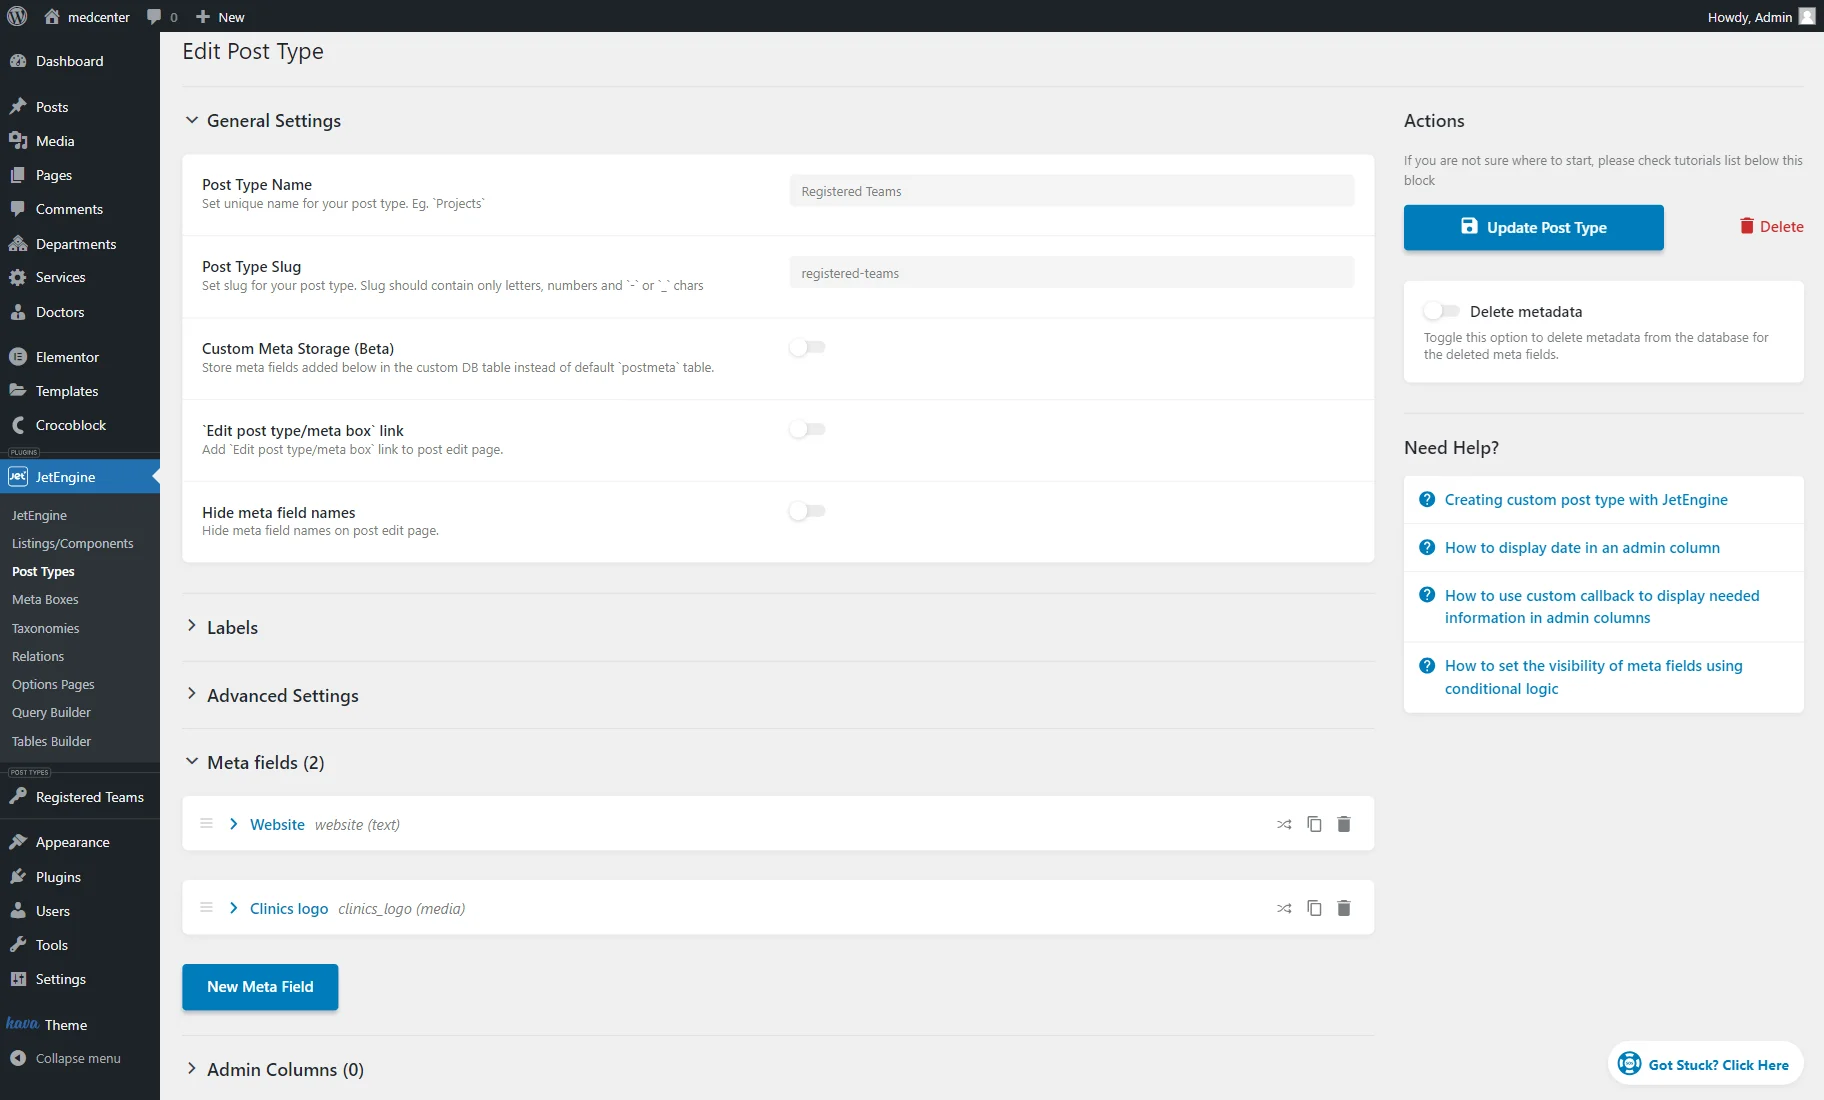
At first, we go to the WordPress Dashboard > JetEngine > Post Types directory to create a Custom Post Type.
We give it a name (“Registered Teams”), adjust its settings, and move the Meta Fields section to add some meta fields.
To add a meta field, press the “New Meta Field” button.
Initially, we add a “Text” field called “Website” and a “Clinics logo” “Media” field.
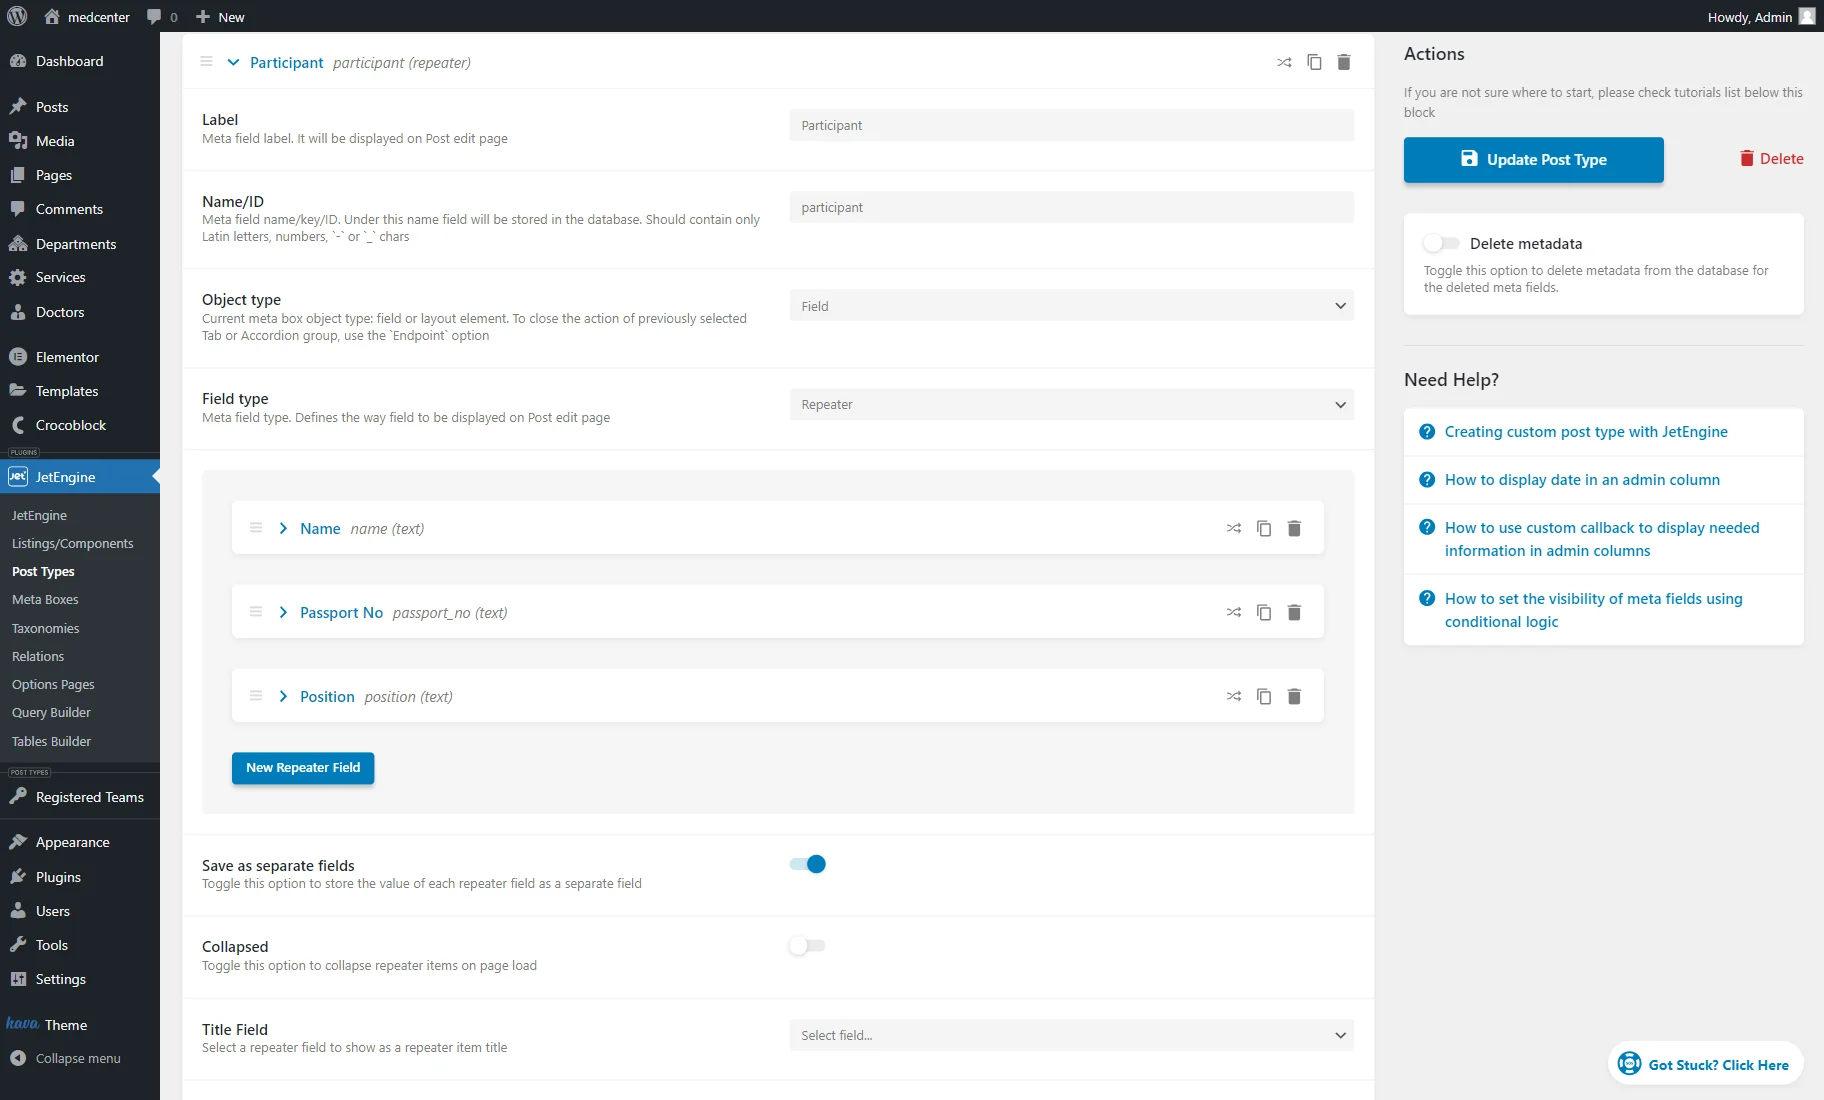
Then, we add a “Repeater” field called “Participant.” Among its sub-fields are three “Text” fields: “Name,” “Passport No,” and “Position.”
Every time you need a new sub-field, press the “New Meta Field” button.
We also activate the Save as separate fields toggle to save all the repeater field items in the separate fields in the database.
Save the post type by pressing the “Add/Update Post Type” button.
Fill in the Posts
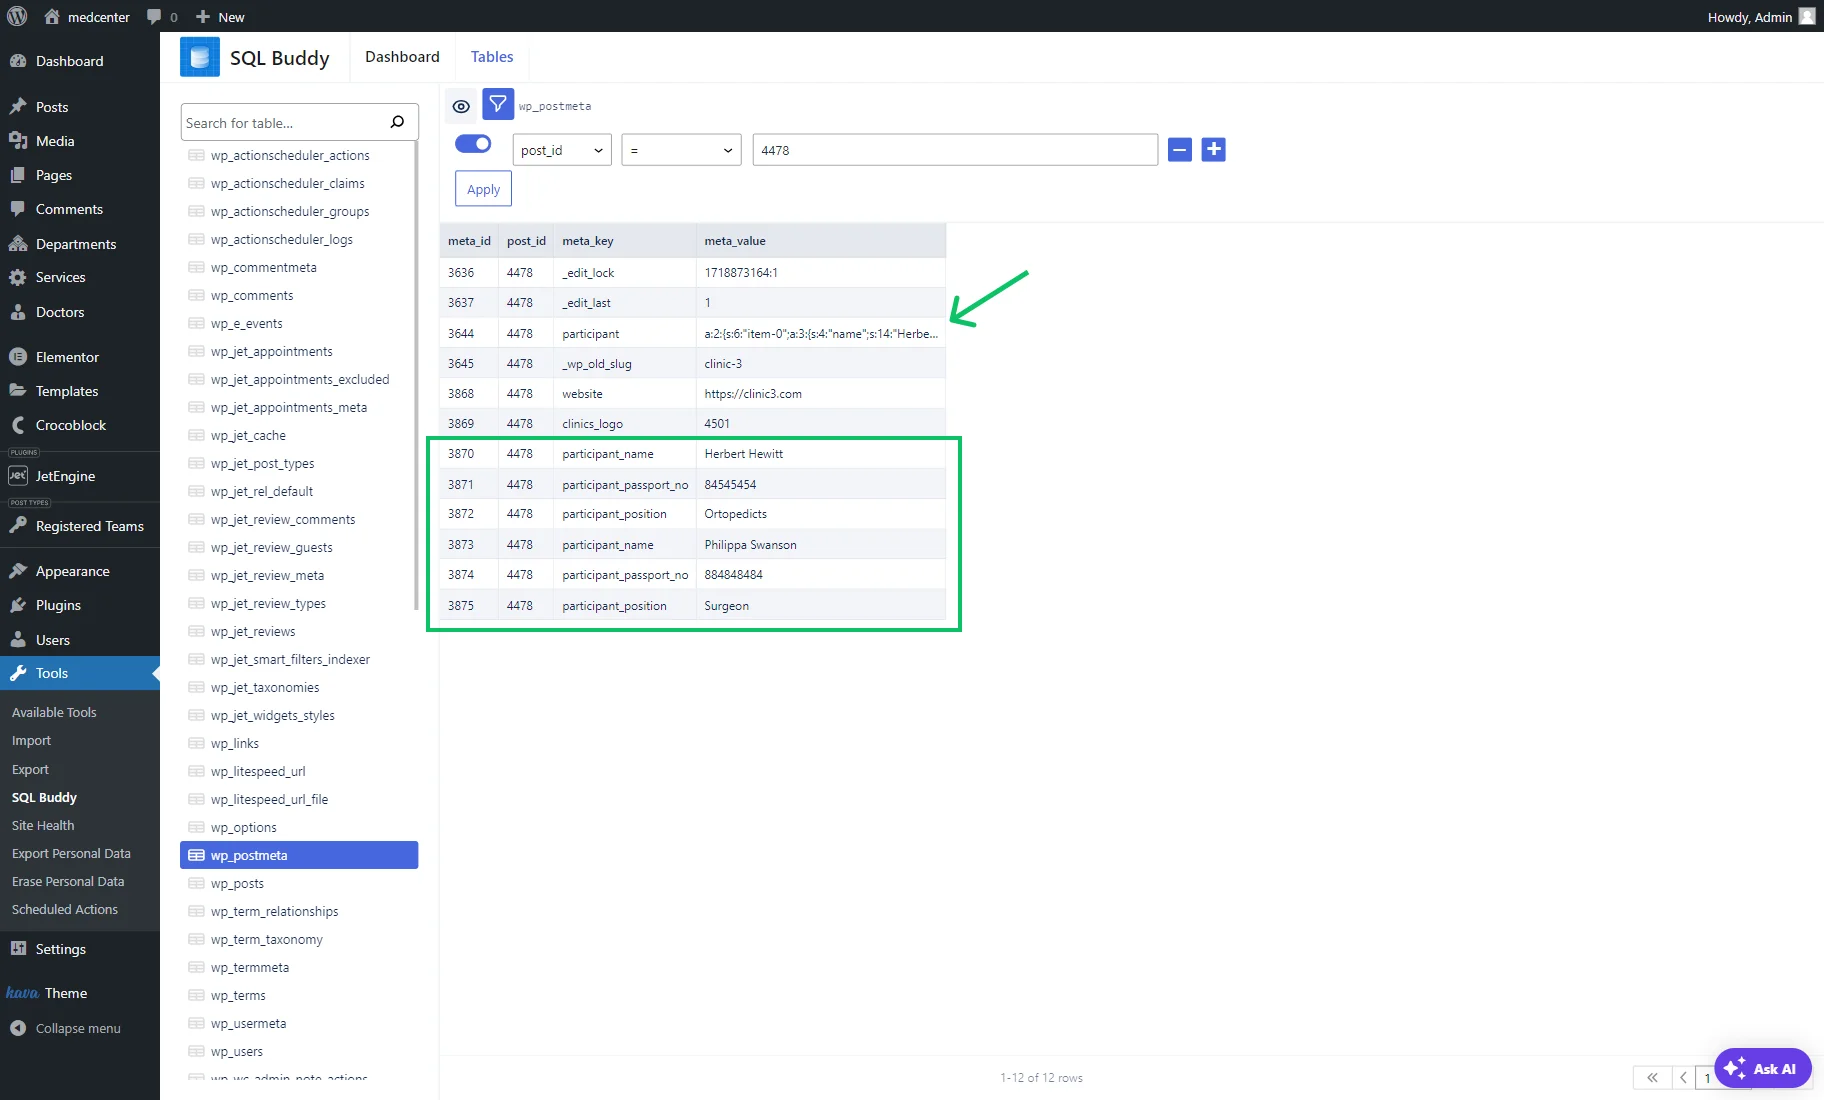
Now, head to the just-built post type and add the needed amount of posts.
For instance, we added three posts for three teams correspondingly.
To edit the post, hover over the item and click the “Edit” button.

During the post editing, we also adjusted the repeater fields. We added participants, their passport numbers and positions.
To save the changes, press the “Update” button.

Build a Query
Head to WordPress Dashboard > JetEngine > Query Builder and press the “Add New” button to build a new query.
This query is needed so we can later display only clinics with surgeons in their team delegation in the listing template.
We set the “Clinics with Surgeons” Name and scroll down to the Posts Query tab.
In the General tab, we select the “Registered Teams” Post Type to fetch the data from there.
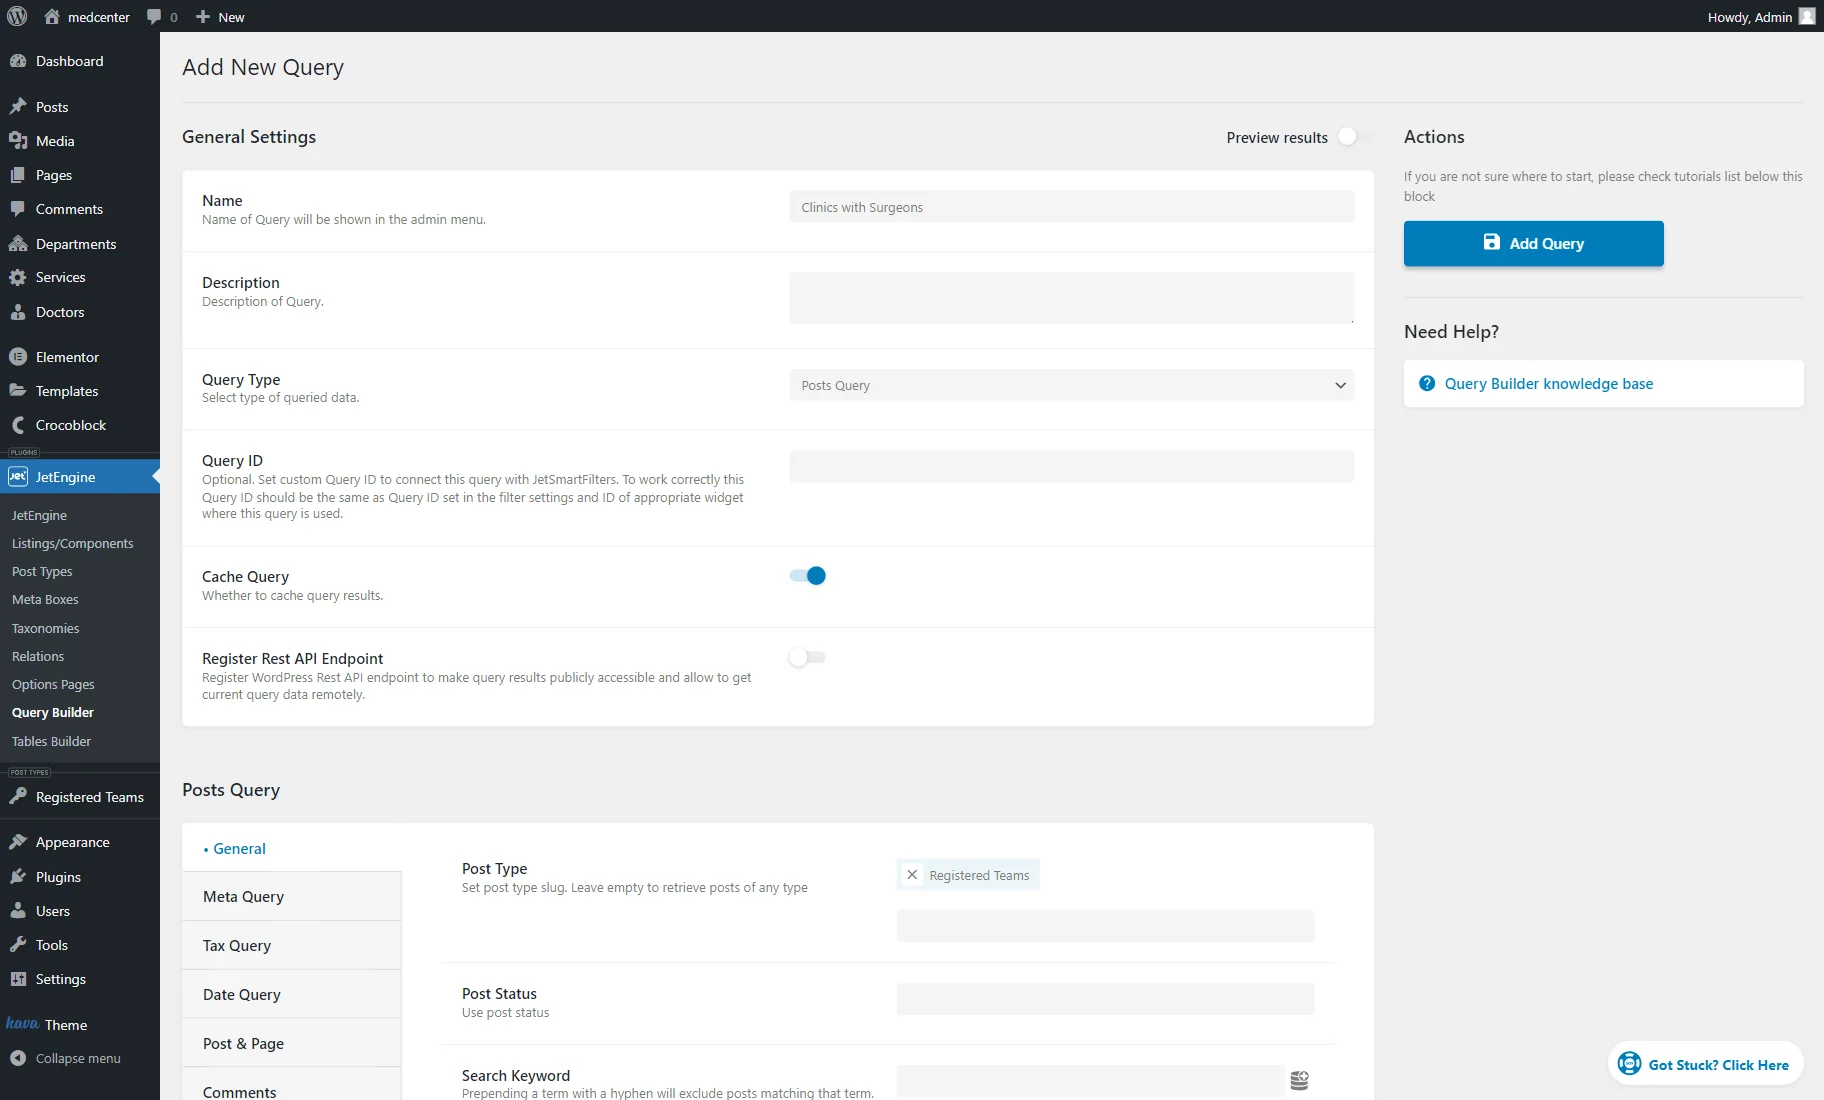
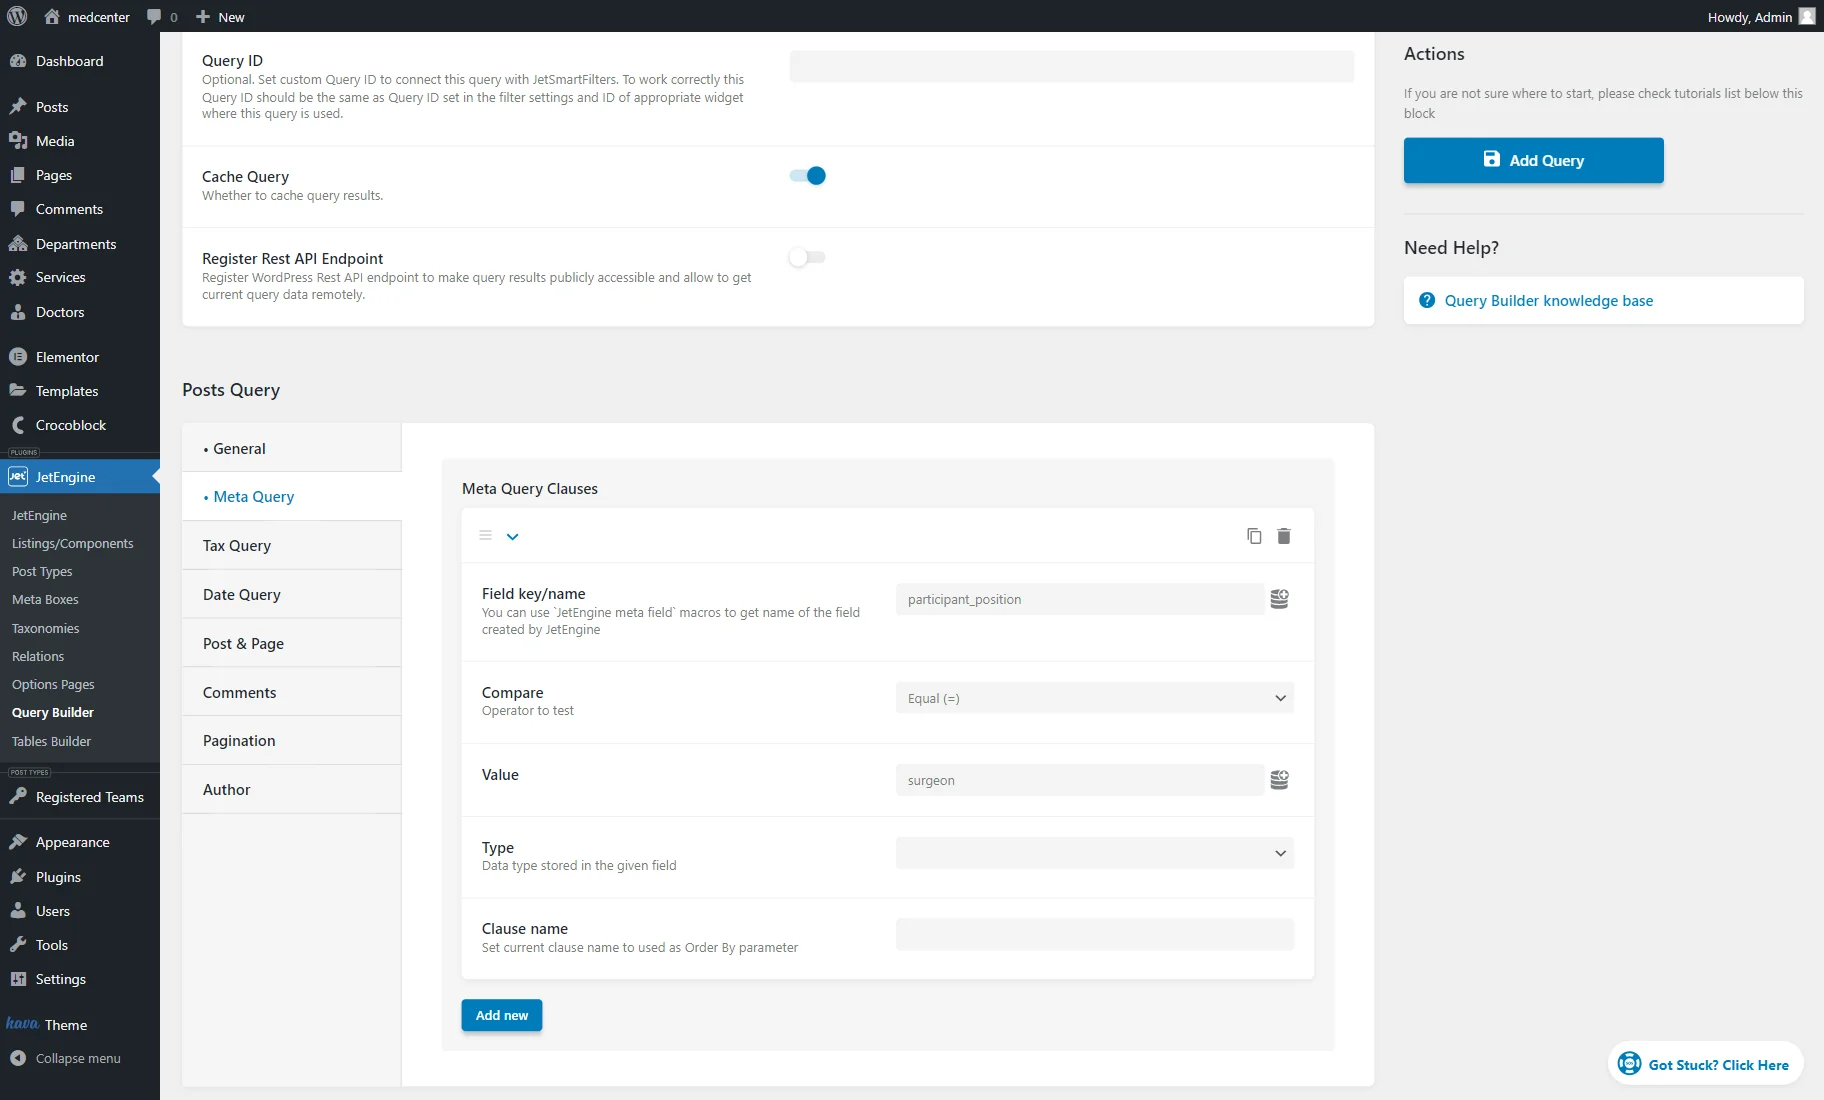
Open the Meta Query tab.
There, press the “Add new” button to adjust a meta query.
Set the Field key/name for the repeater sub-field. In our case, “participant_position.”
Then, we pick the “Equal” Compare operator. You can also use the “Contain” one if the position may consist of a few words.
Next, we set the Value. We want to pull out the teams that include participants with positions set to “surgeon,” so we insert it in the field.
Press the “Add Query” button.
Create a Listing
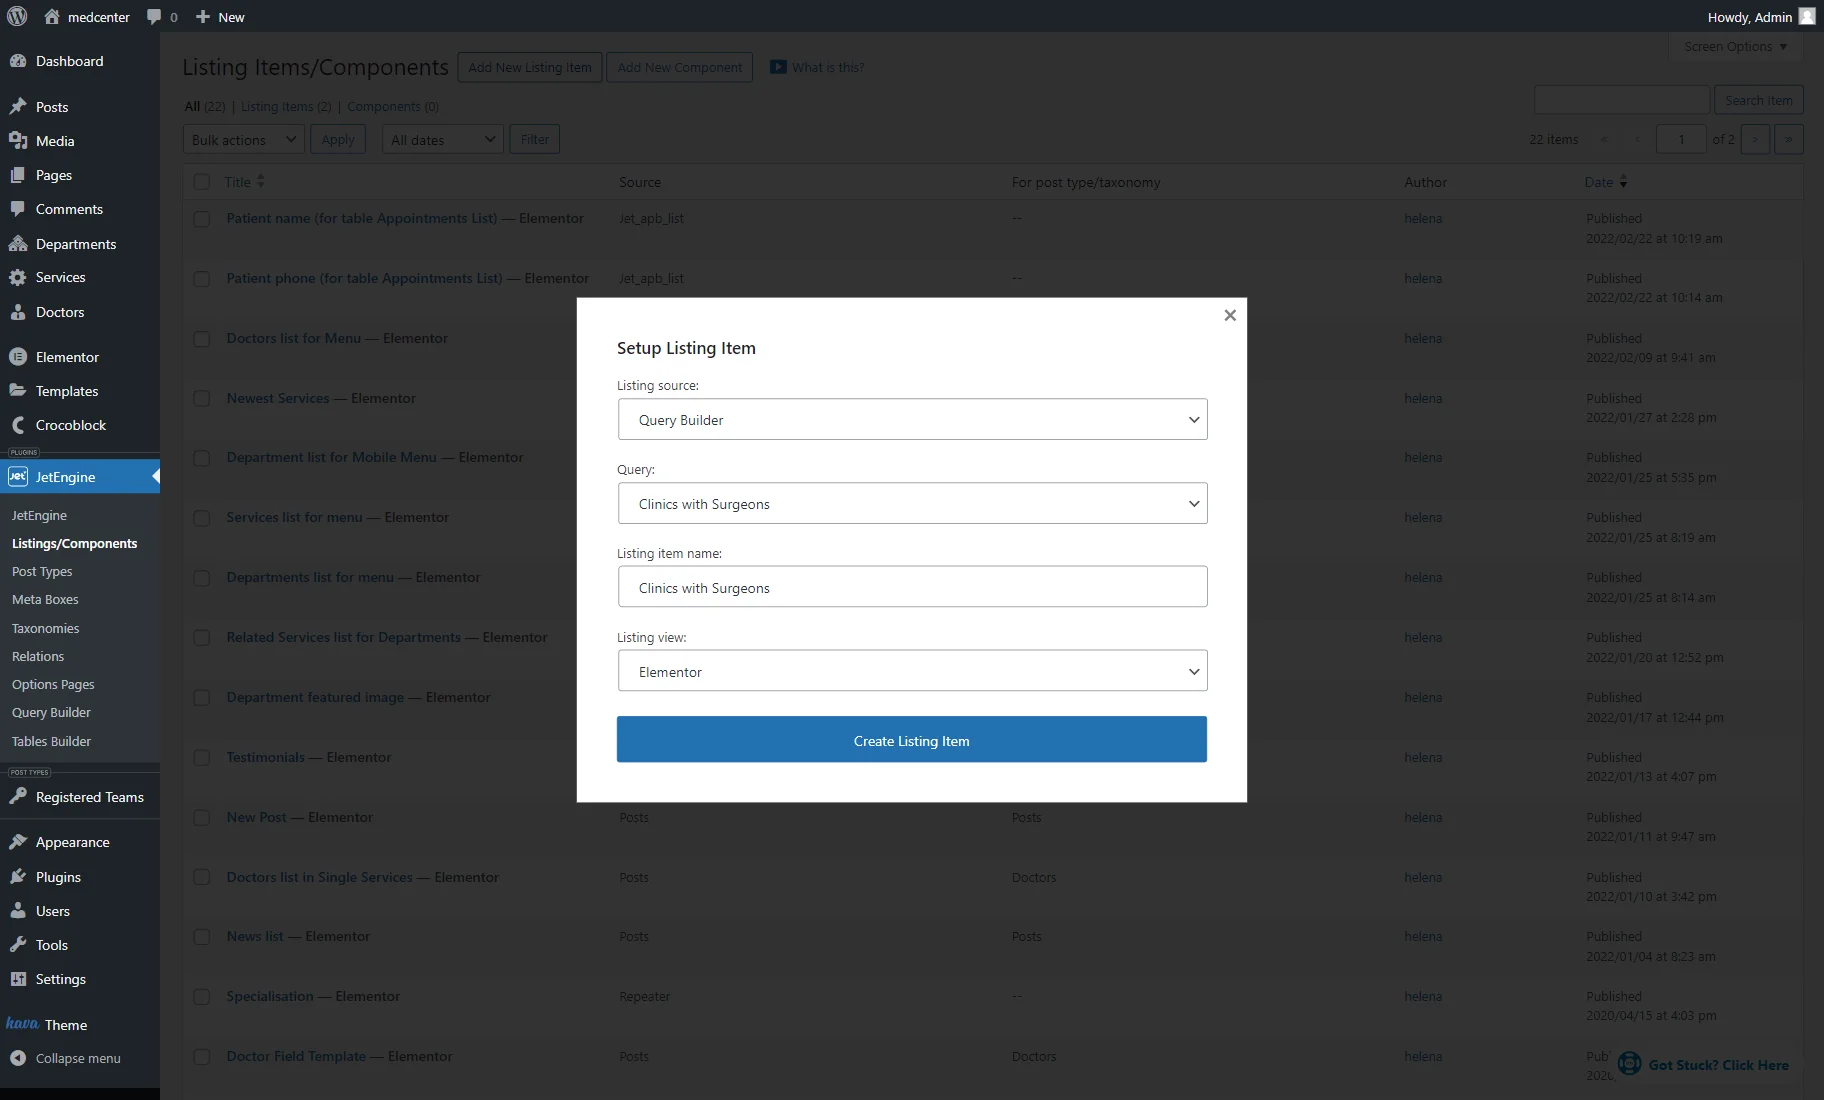
Now, we go to WordPress Dashboard > JetEngine > Listings/Components and press the “Add new listing” button to create a new listing based on the above query.
In the given case, we create a listing template with a “Query Builder” Listing source, specify the built Query (“Clinics with Surgeons” in our case,) complete the Listing item name, and set its Listing view to “Elementor.”
Press the “Create Listing Item” button.
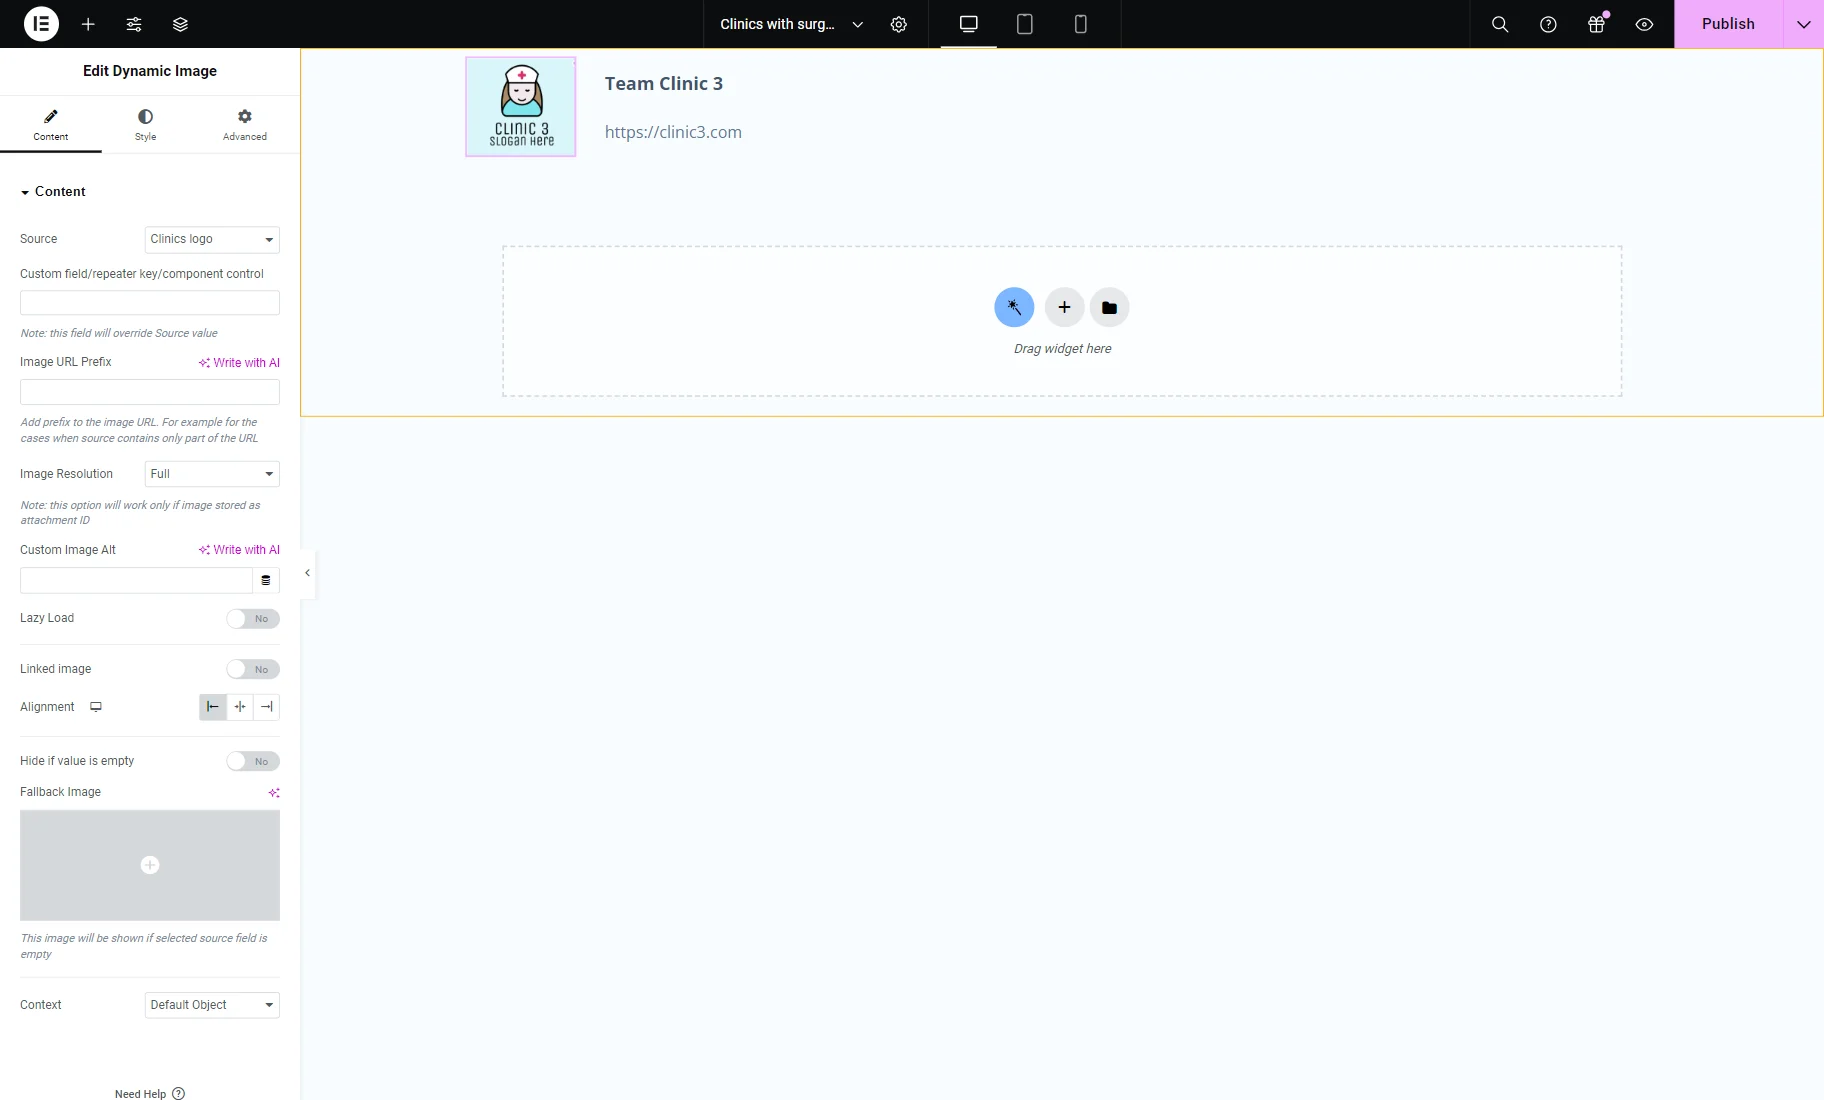
We fill in the template with the needed content. In our case, it is the Dynamic Image widget that displays the clinic logo and two Dynamic Fields with the team name and their website.
All the data in the added widgets is pulled from the meta fields we created earlier.
Once ready, press the “Publish/Update” button to save the listing template.
Place a Listing on the Page
We want to display the listing on the page, so we move to WordPress Dashboard > Pages and press the “Add new” button.
For instance, we will work with the Elementor Page Builder.
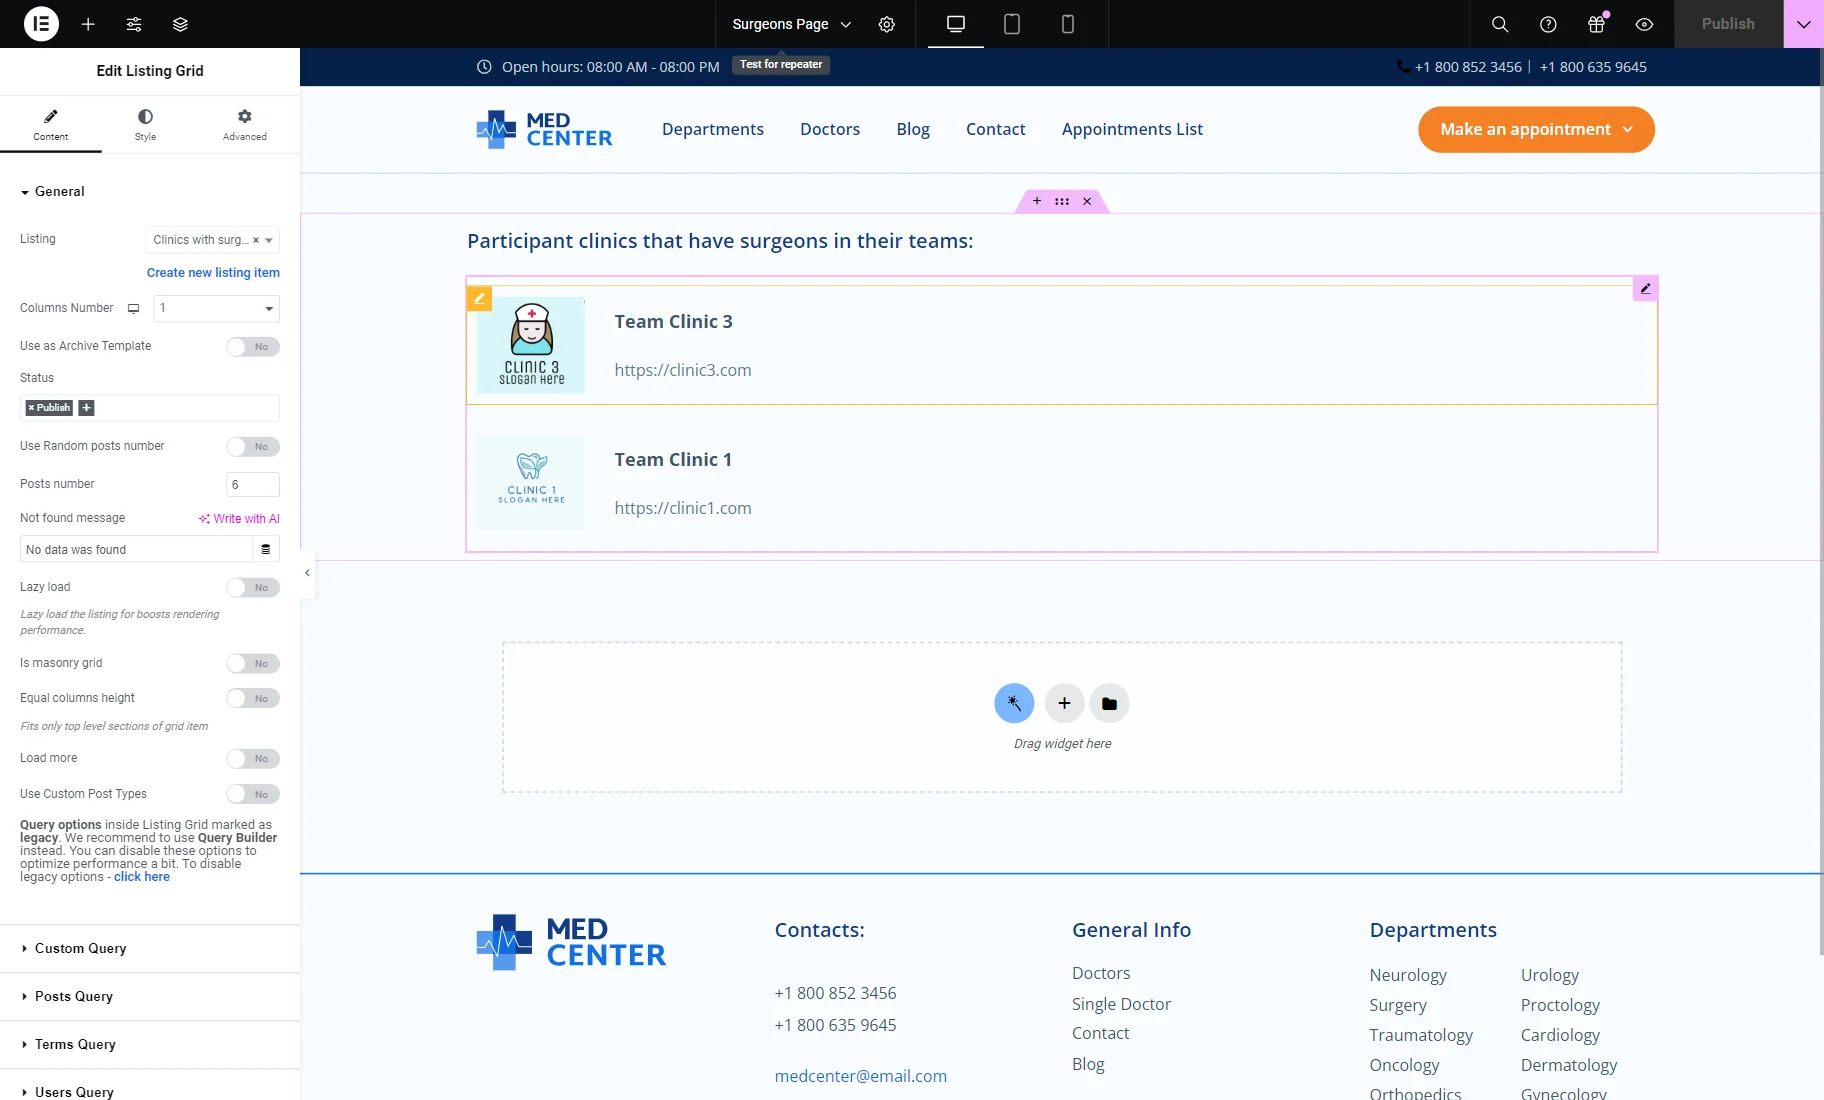
Add a Listing Grid widget to the page. Select the just-built Listing.
Customize the page according to your needs and press the “Publish/Update” button.
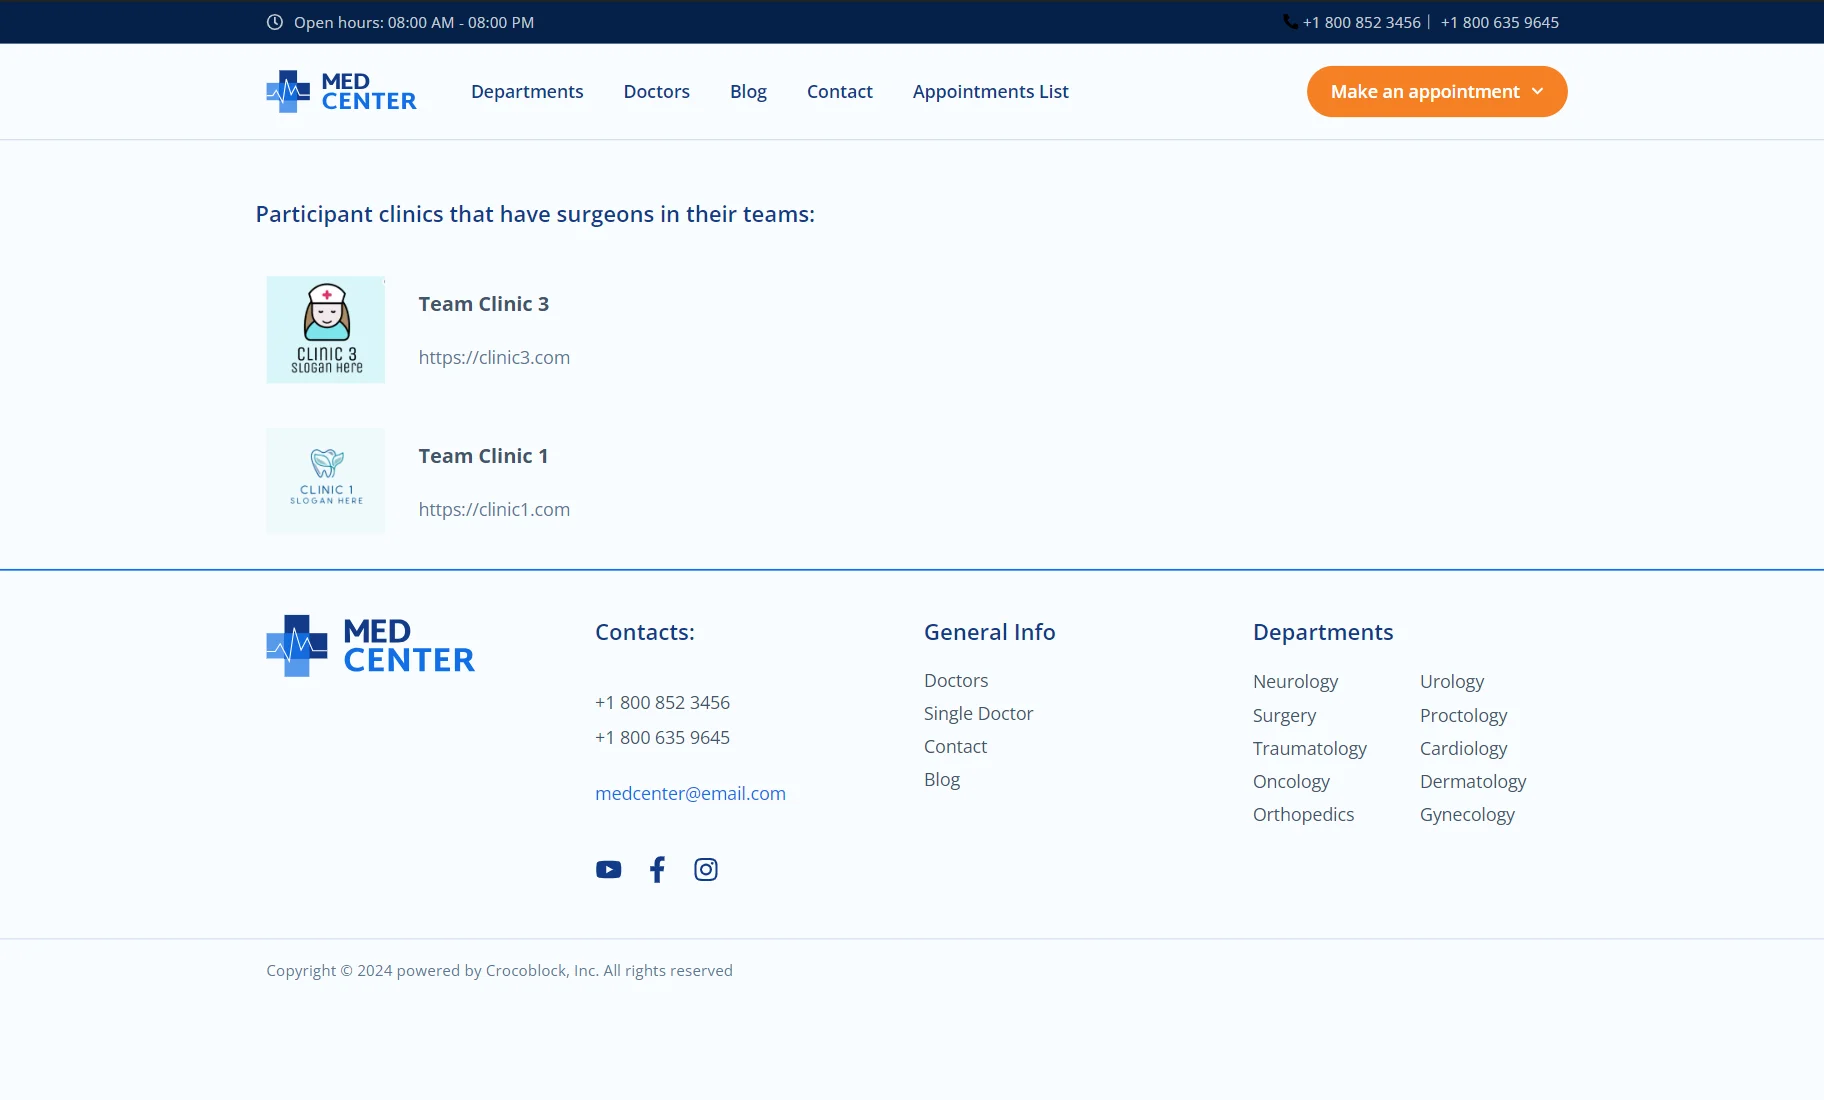
Check the Result
Open the page on the front end. Now, the items in the Listing Grid are queried; only those teams that include participants whose position is set to “surgeon” are displayed.
That’s all about how to save JetEngine’s repeater fields as separate fields in a database and query posts based on these fields on your WordPress website.