How to Show Advanced Date From Custom Field
Learn how to display the state and end dates from the Advanced Date meta field via the Listing Grid widget of the JetEngine plugin for WordPress.
Before you start, check the tutorial requirements:
- Elementor (Free version), Block editor (Gutenberg), and the Bricks theme
- JetEngine plugin installed and activated with with the Calendar Module enabled and a Custom Post Type (CPT) created
Create a Meta Box with the Advanced Date Field and Add it to the CPT
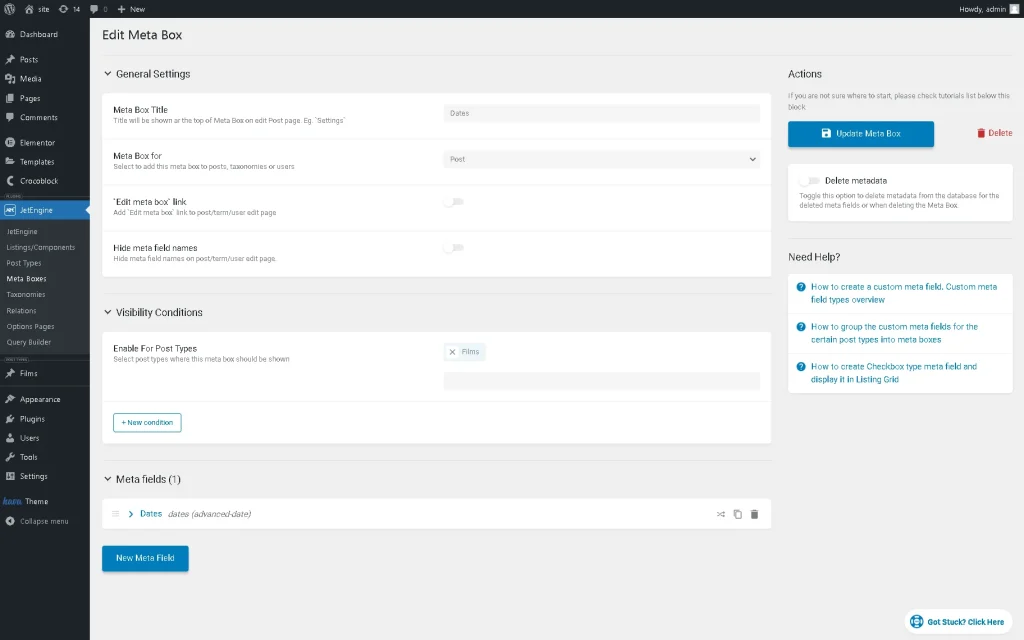
Navigate to the WordPress Dashboard > JetEngine > Meta Boxes tab and create a meta box for the built Custom Post Type (CPT) (here, the “Films” CPT).
Unroll the Visibility Conditions block and select the required CPT from the Enable For Post Types drop-down menu.
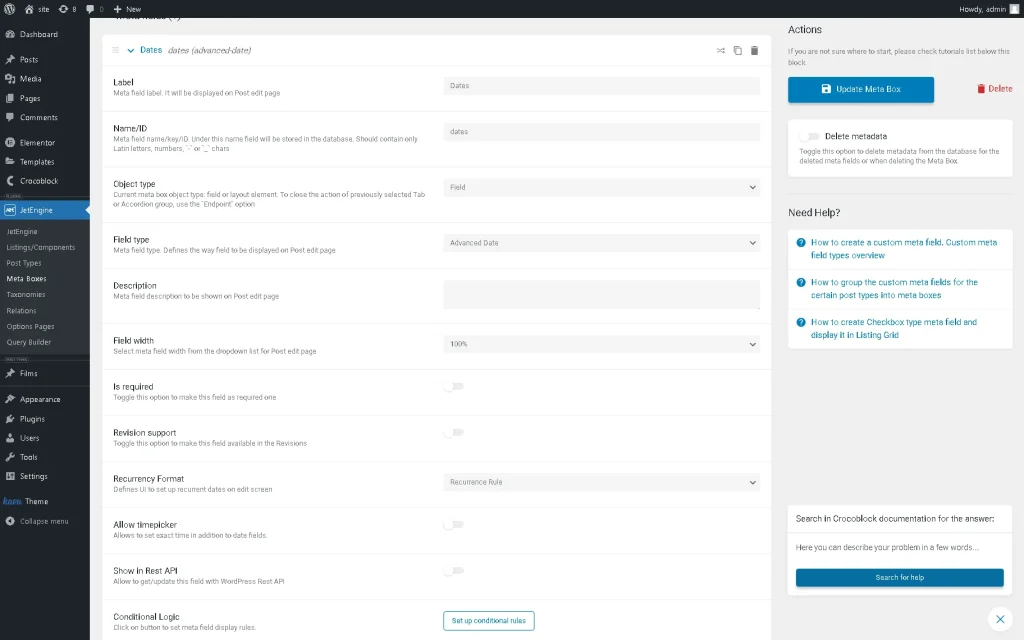
Then, head to the Meta fields block and complete the field’s Label. The Name/ID will be completed automatically. After that, select the “Advanced Date” meta field option in the Field type drop-down menu.
Save the meta box by pressing the “Add Meta Box” or “Update Meta Box” button.
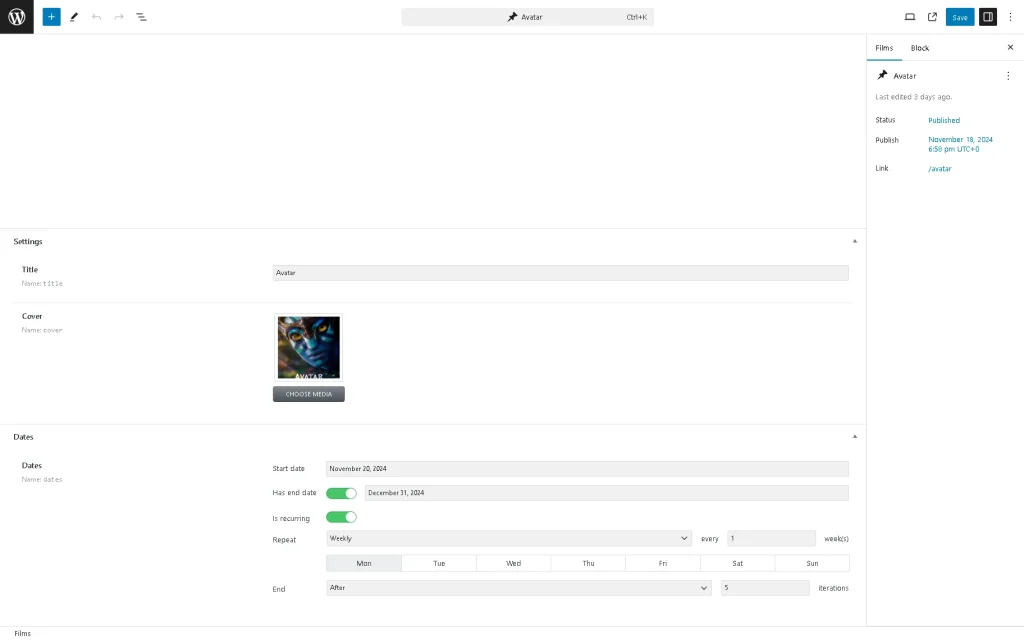
Open the CPT posts, scroll them down, and fill out the Start date and Has end date settings of the “Advanced Date” field of the Meta Box (here, “dates”). In this tutorial, we additionally enabled the Is recurring toggle and selected the “Weekly” Repeat fields options.
Finally, press the “Save” button at the top of the page.
Create a Listing Item
Navigate to the WordPress Dashboard > JetEngine > Listings tab and create a listing item in the preferred editor. In this tutorial, we used Elementor.
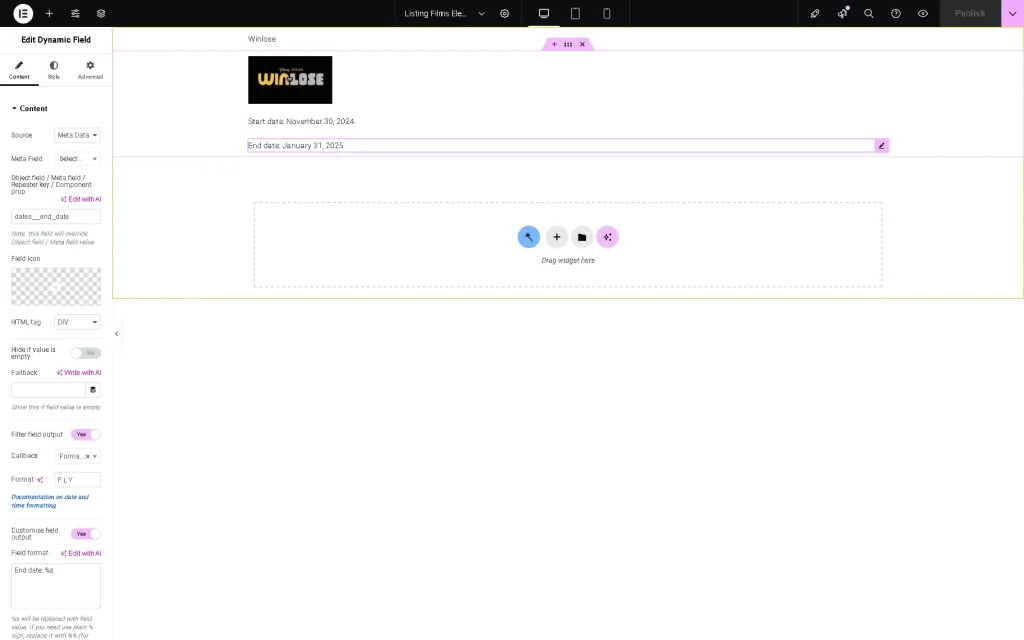
Next, we created the listing item (here, “Listing Films”) for the CPT (here, “Films”) with the necessary dynamic fields to display.
Read the How to Create Listing Template for Post Types in Elementor tutorial to learn how to create a listing item, fill in the listing with content, and place the Listing Grid widget on a page.
After that, add the needed meta fields via the Dynamic Field and Dynamic Image widgets/blocks/elements.
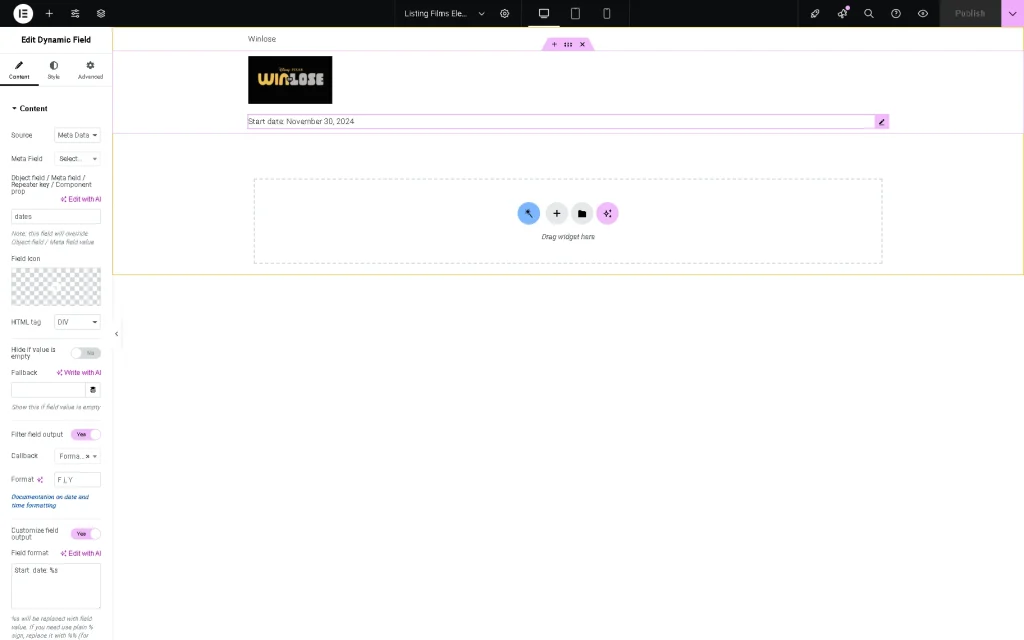
Then, add the Dynamic Field to display the start date. First, select the “Meta Data” option in the Source drop-down list. Second, type the name of the Advanced Date field (the “dates” text in this tutorial) in the Object field / Meta field / Repeater key / Component prop text field.
In the next step, we activated the Filter field output toggle and selected the “Format date” option in the Callback drop-down list. Also, to provide better usability, we typed “Start date:” before the “%s” text in the Field format text field.
In the next stage, insert another Dynamic Field to display the end date. Then, select the “Meta Data” option in the Source drop-down list and type the “dates__end_date” text in the Object field / Meta field / Repeater key / Component prop text field. Here, the “dates__end_date” includes the name of the Advanced Date field (“dates”) and the “end_date” text divided by two underscore signs.
Then, we activated the Filter field output toggle and selected the “Format date” option in the Callback drop-down list. Also, for better usability, we typed “End date:” before the “%s” text in the Field format text field.
Finally, save the Listing Item.
Show the Advanced Dates Fields via the Listing Grid Widget/Block/Element
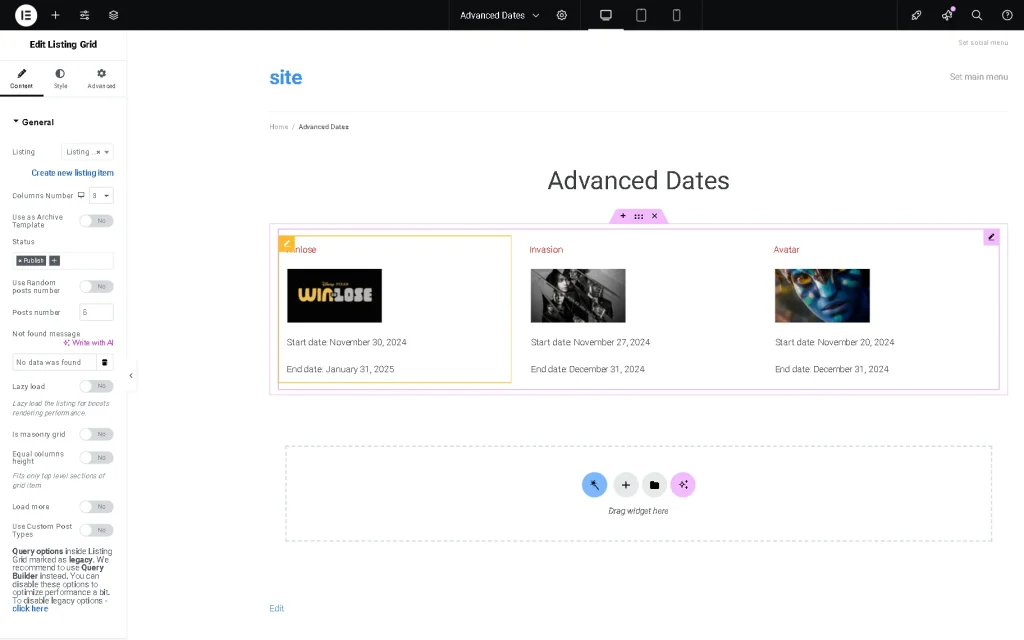
Create a page to display the built listing item with the CPT posts (“Films” in this case). Find the Listing Grid widget/block/element (depending on the editor you use) and drag-n-drop it to the page.
After that, select the built Listing.
Source: Disney+ Press Kits
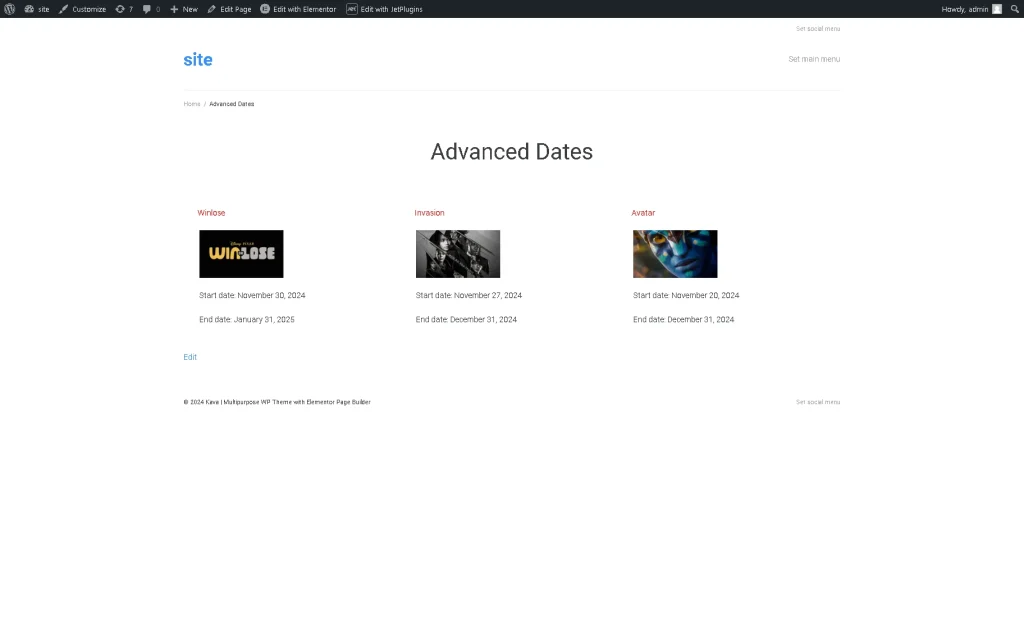
Finally, publish the page and navigate to the front end to observe if the dates from the meta box are shown correctly.
Source: Disney+ Press Kits
Also, you can return the Advanced Date data via the Dynamic Calendar widget. Read the How to Display Repeating Events in a Dynamic Calendar tutorial for more details.
That is all about displaying the start and end dates from the “Advanced Date” meta field via the Listing Grid widget of the JetEngine plugin for WordPress.
