Date Period Filter Overview
Learn how to create the Date Period filter with the help of the JetSmartFilters WordPress plugin to filter publications or products.
The Date Period filter of the JetSmartFilters plugin enables filtering posts by the date of their creation or modification or value set in the meta fields by a specific period and allows setting or selecting a queried field key from the current meta fields. The filter is available for the Date, Datetime, and Advanced Date meta fields of the JetEngine plugin.
It can be used on any Block Editor/Elementor/Bricks edited pages.
Creating the Date Period Filter
A new filter can be created in the WordPress Dashboard > Smart Filters > Add New tab. Here, the creation should be started with the Filter Name typed in.
In the Filter Settings section, “Date Range” should be chosen as the Filter Type.
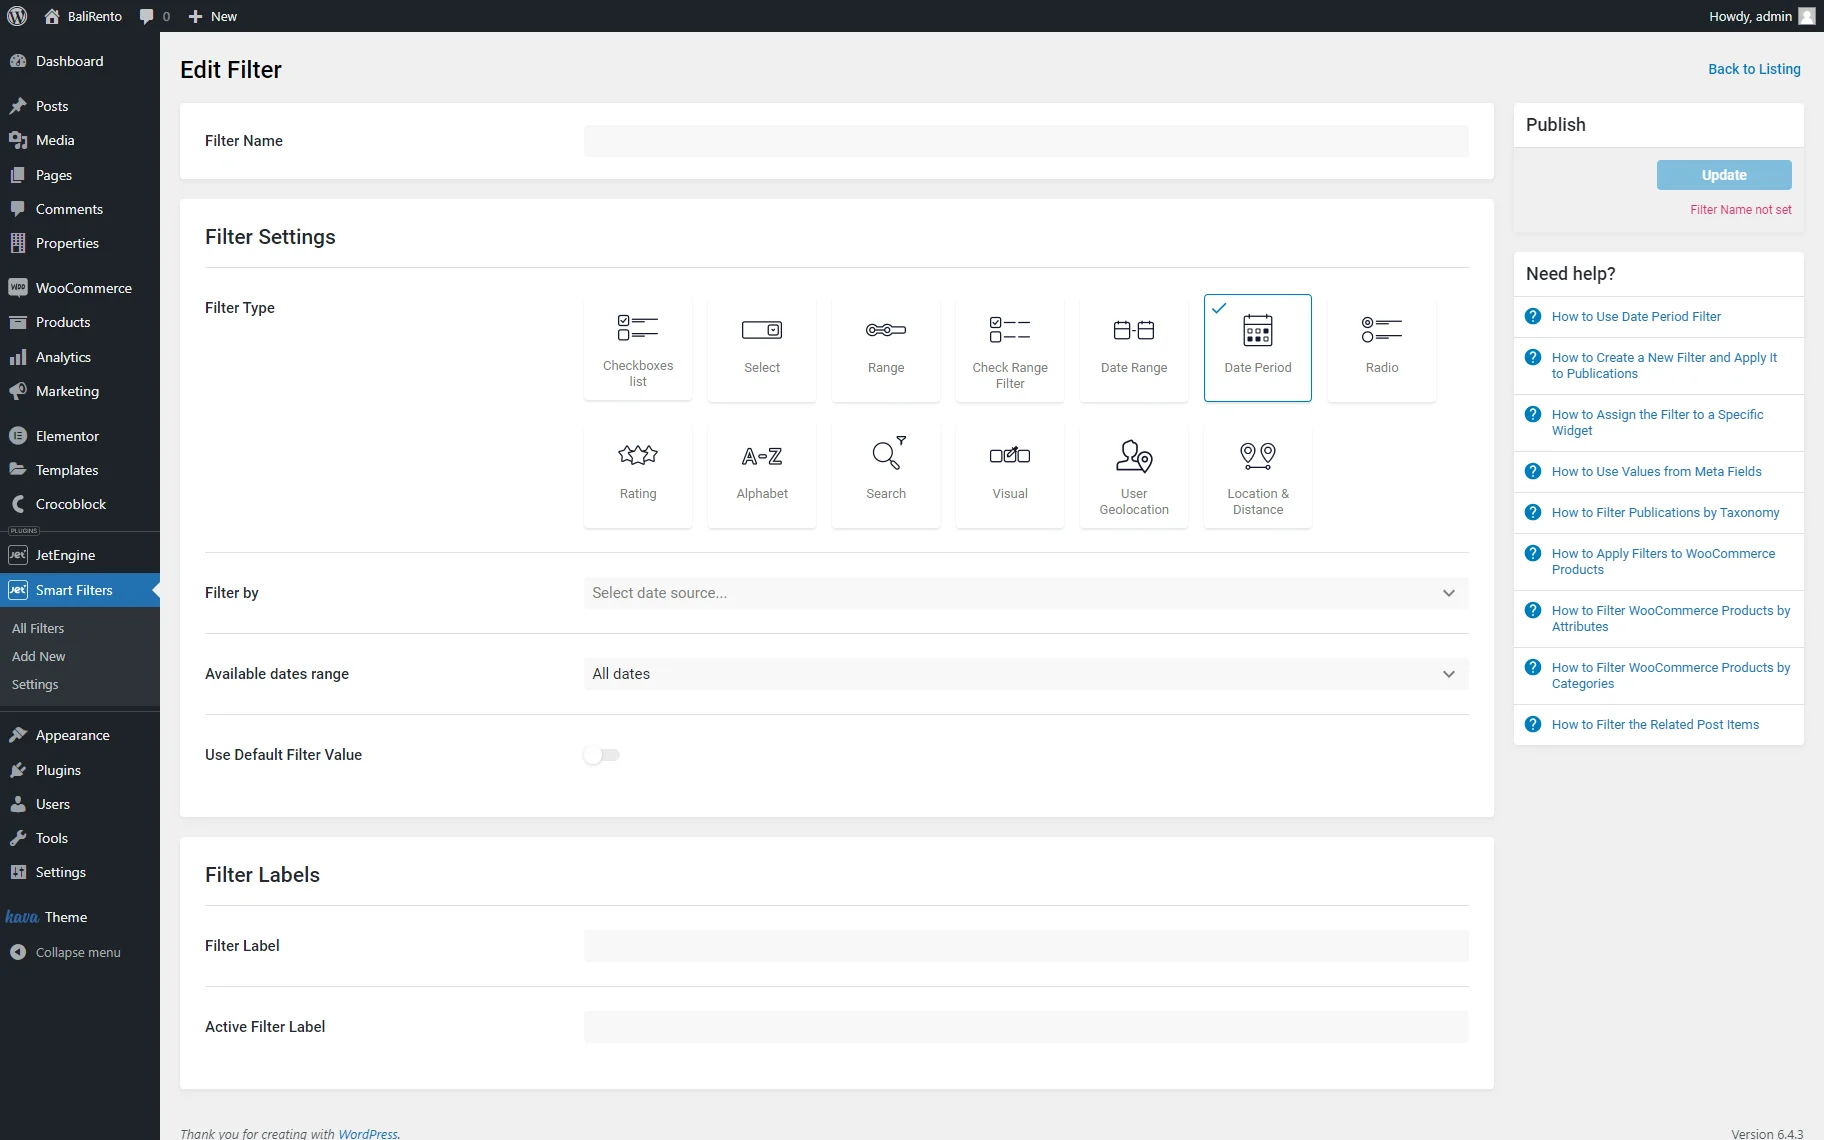
Filter Settings
The settings window has the following fields: Filter by drop-down menu, Period Type drop-down menu, Available dates range drop-down list, and the Use Default Filter Value toggle.
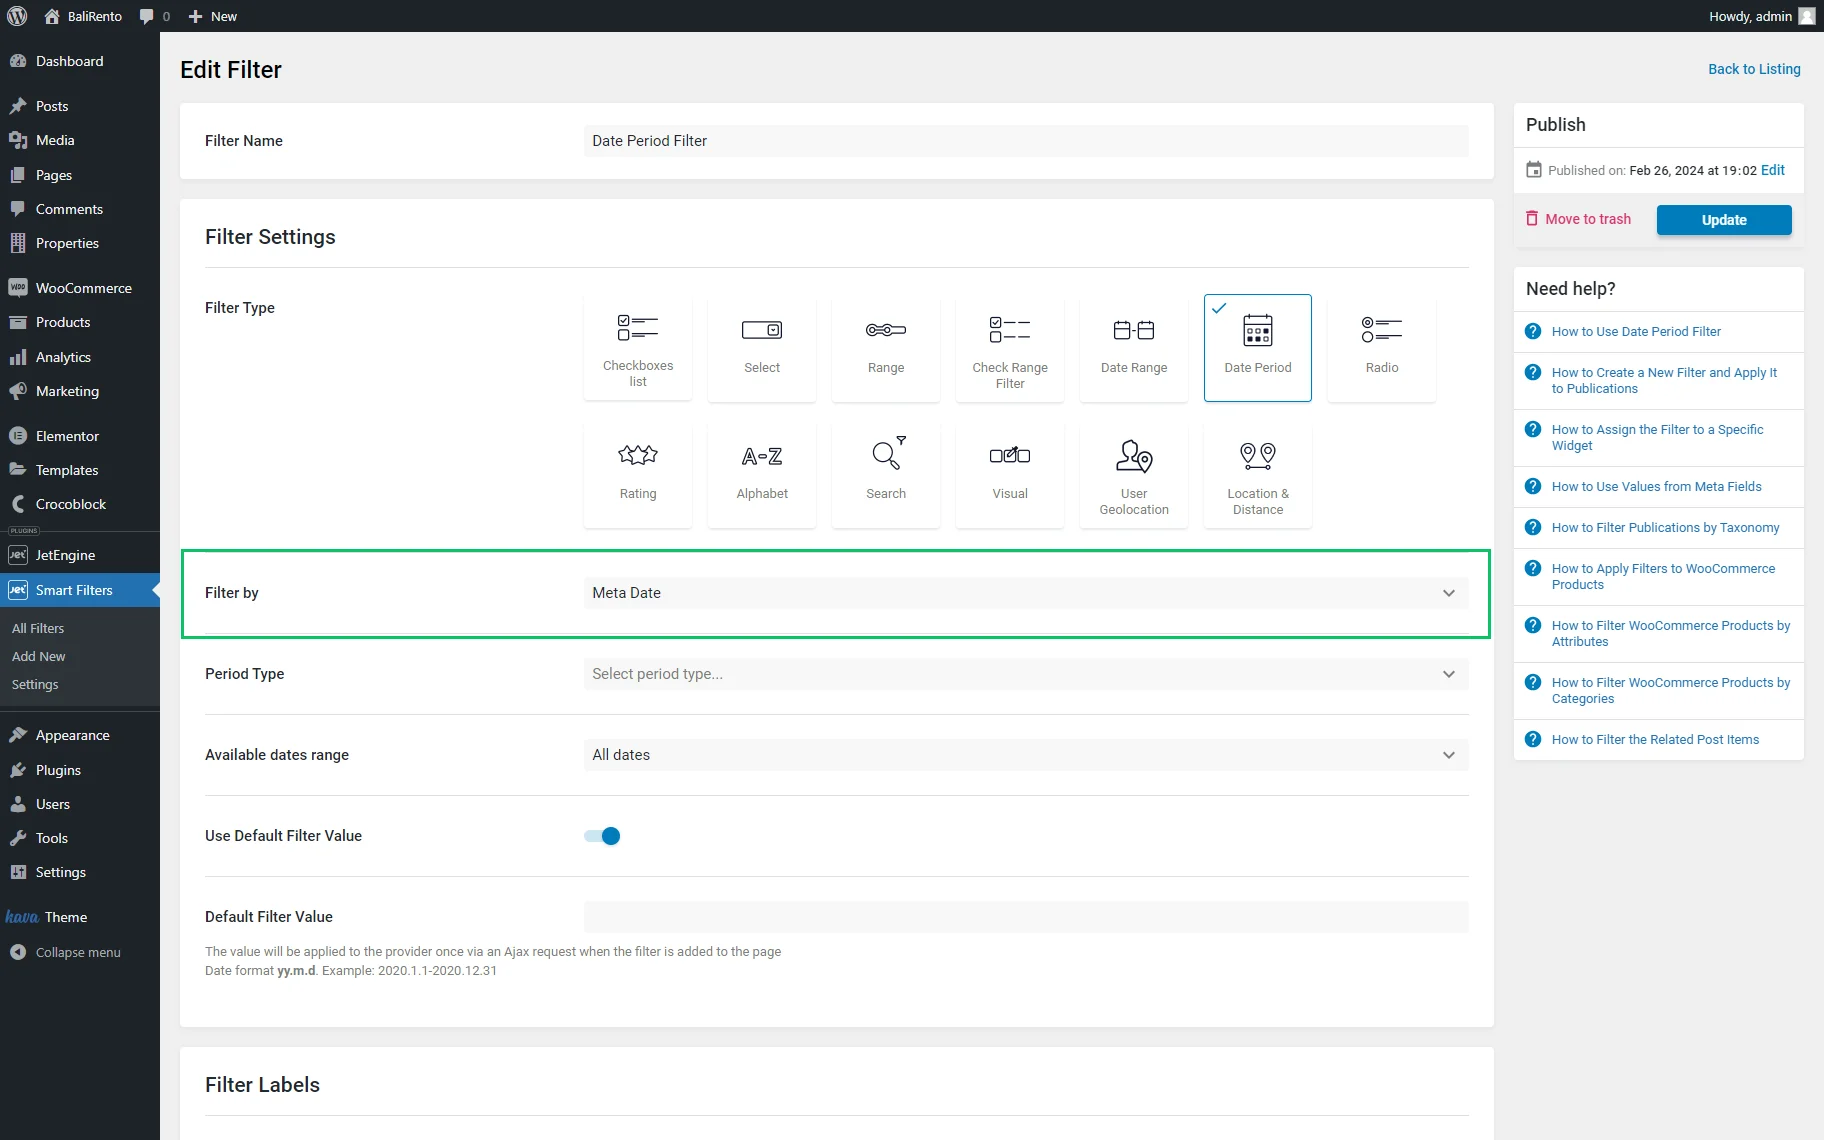
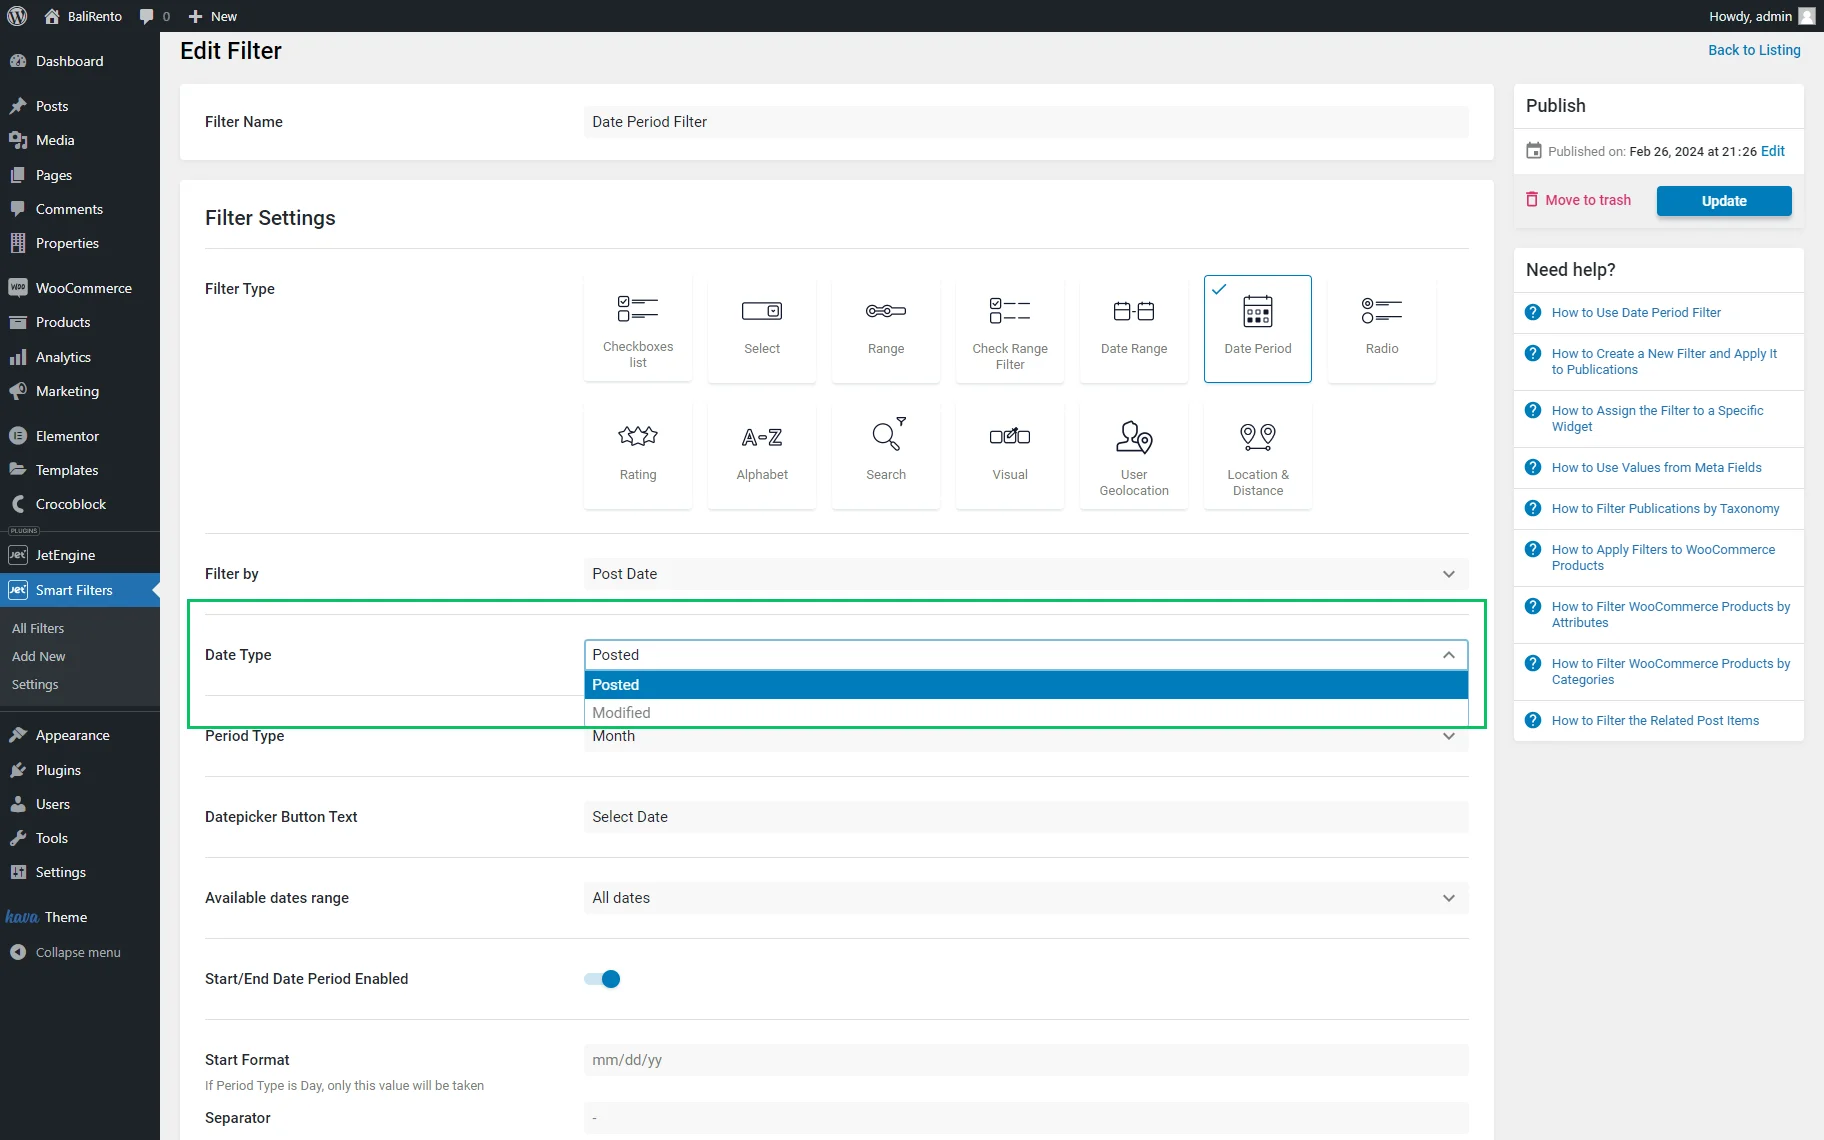
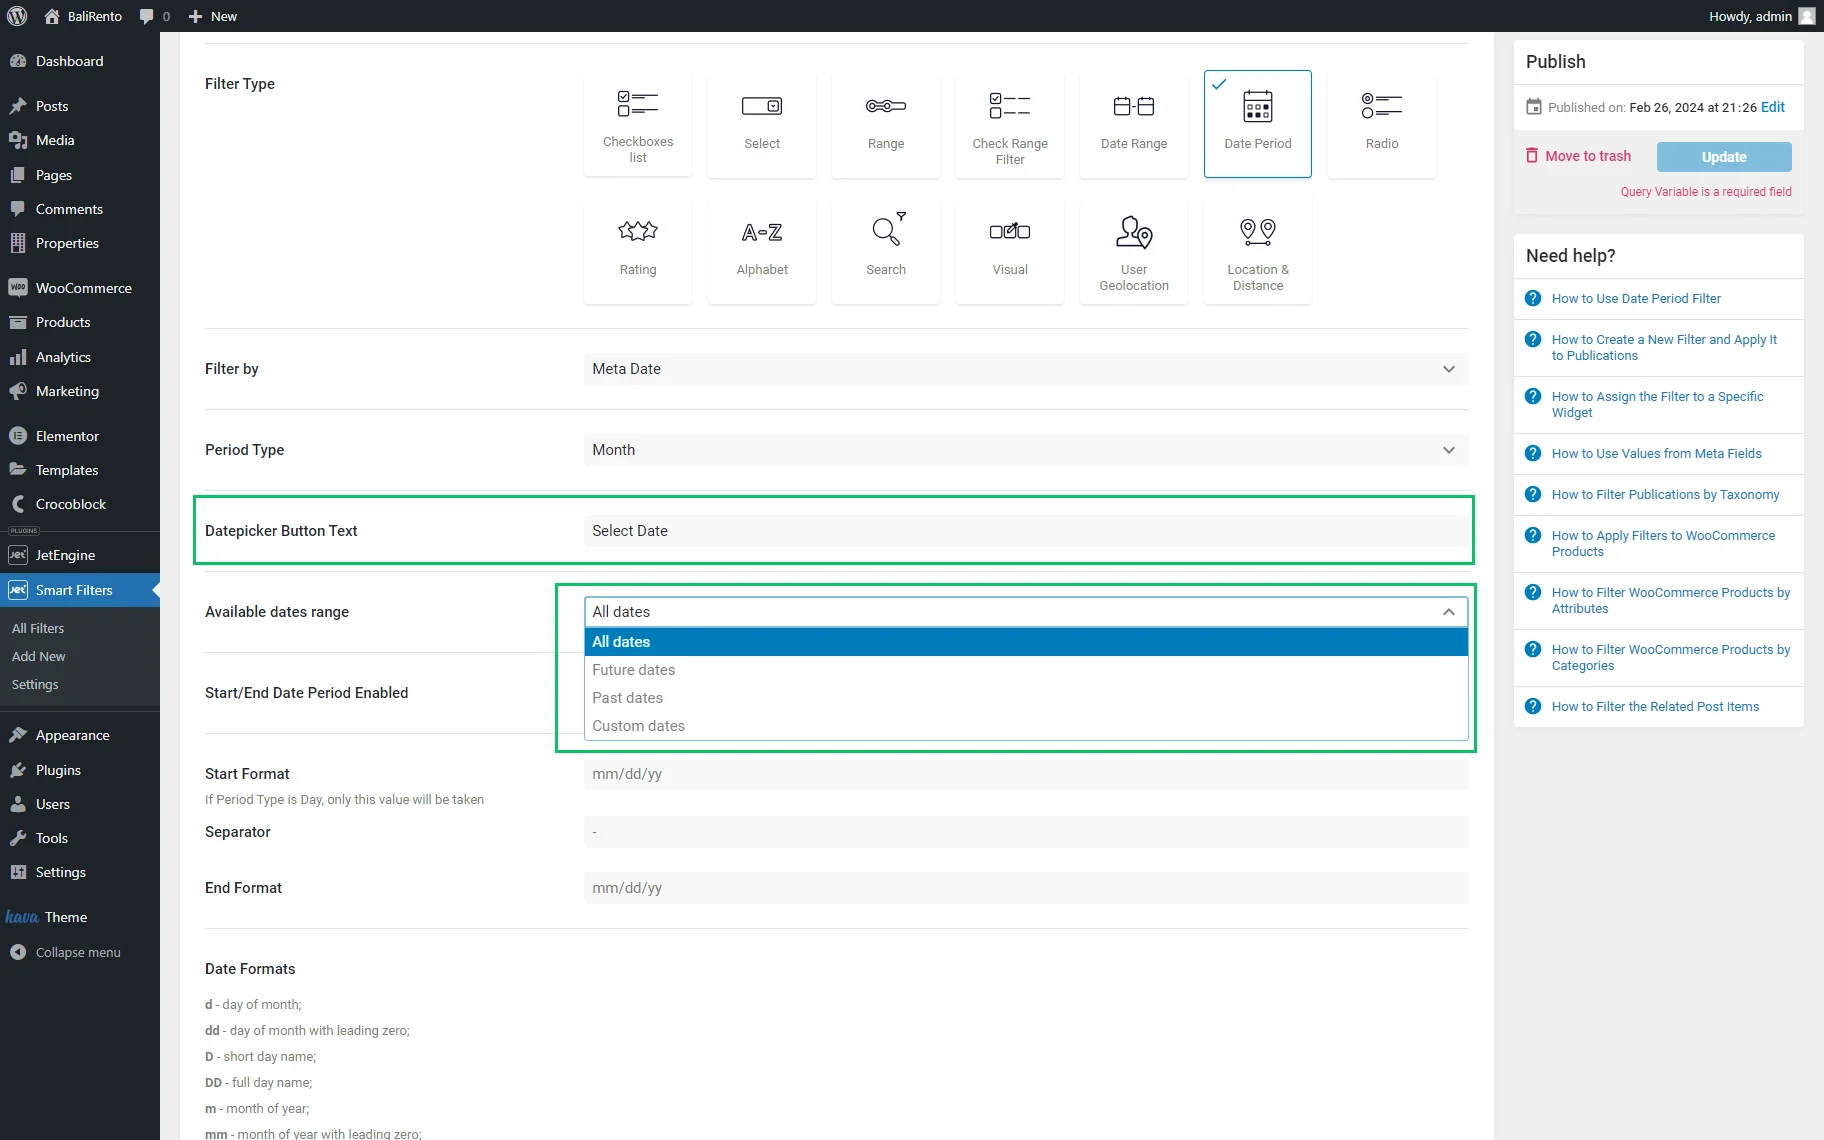
Filter by drop-down menu
This drop-down menu has two options:
- Meta Date — allows filtering products and posts by data set in the meta fields, i.e., it can be a date period of a tour or event;
- Post Date — allows filtering posts by the date of creation or modification. If selected, this option turns on the Date Type drop-down menu with two options: “Posted” and “Modified,” referring to the date of creation or the date of modification, respectively.
Period Type drop-down menu
It becomes available after picking an option from the Filter by menu. The Period Type drop-down menu limits the filtering period according to the selected settings. The menu has the following options:
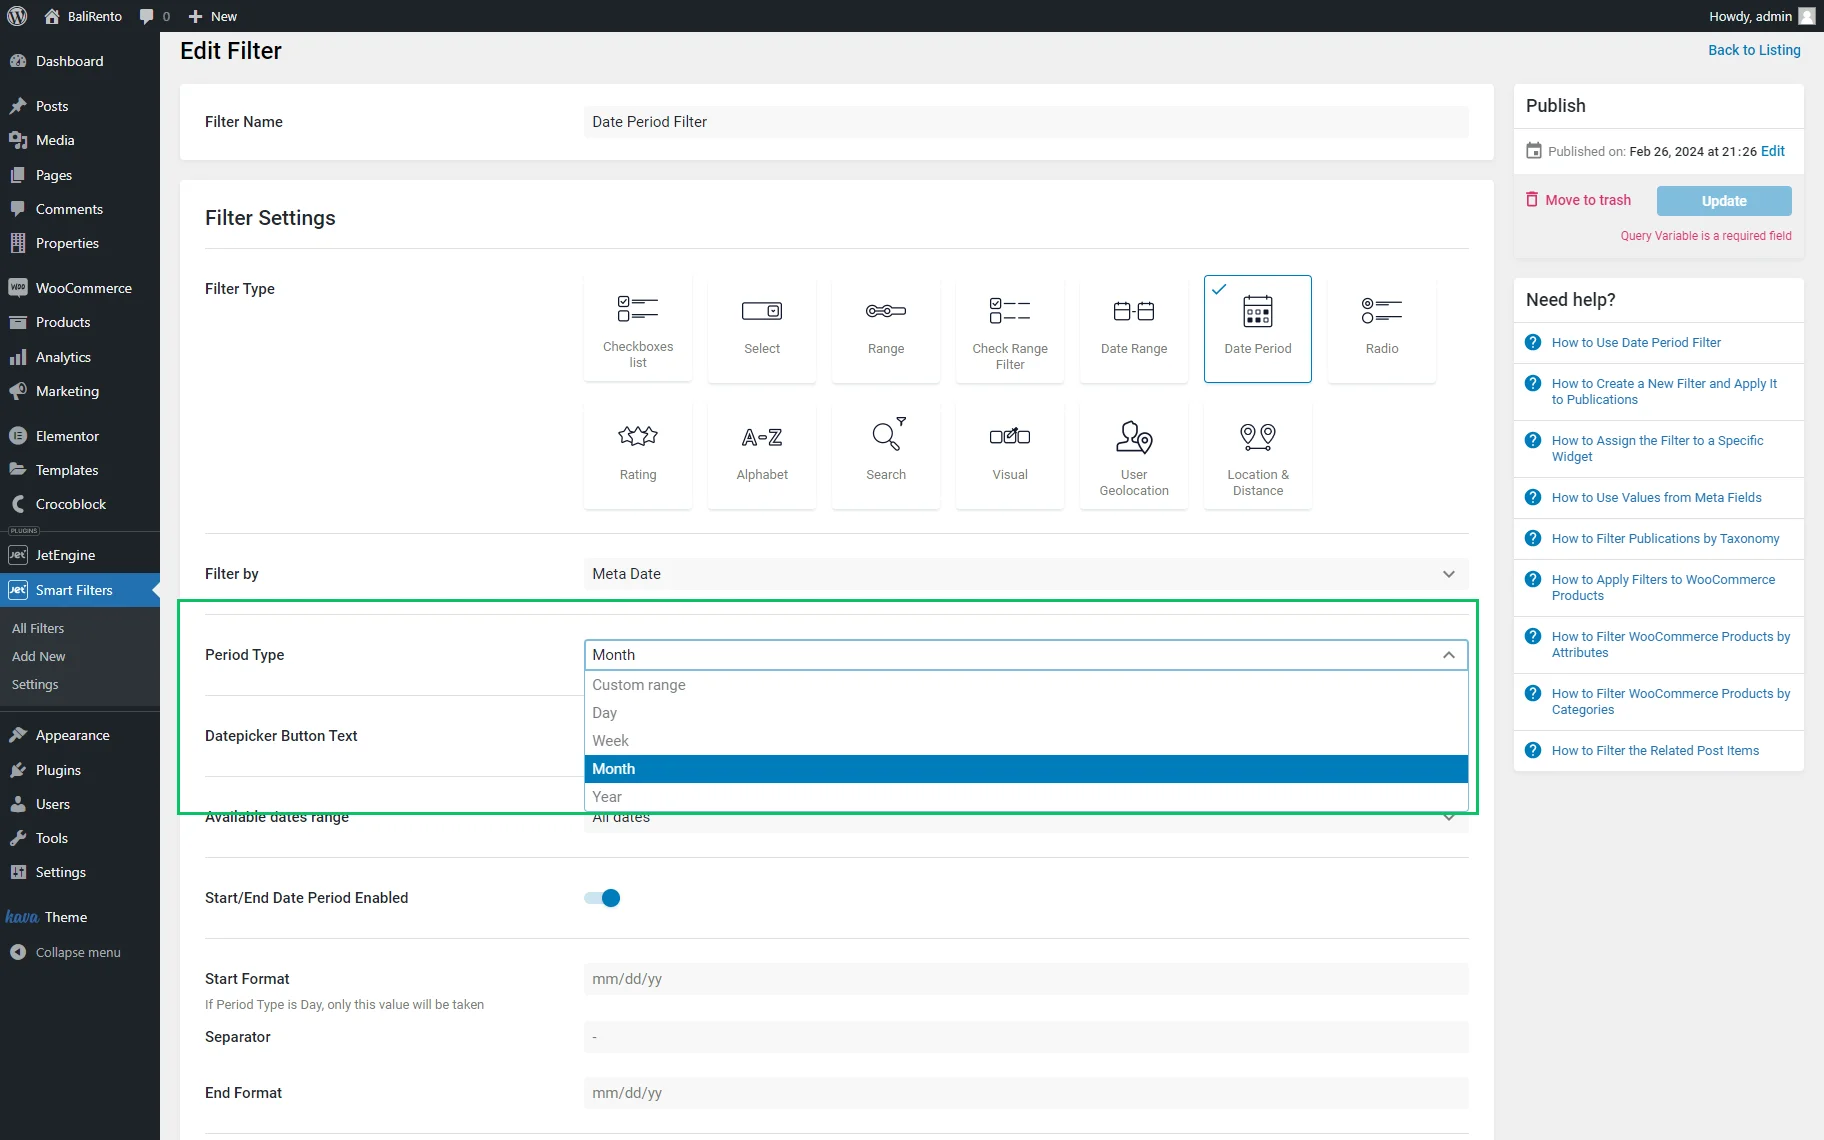
- Custom range — allows users to define a specific date period in the filter according to their preferences. For example, users can filter only posts from June 15th to June 17th;
- Day, Week, Month, and Year — allow filtering by days, weeks, months, or years, respectively.
Date settings
This group of settings is available if an option is selected in the Period Type drop-down menu:
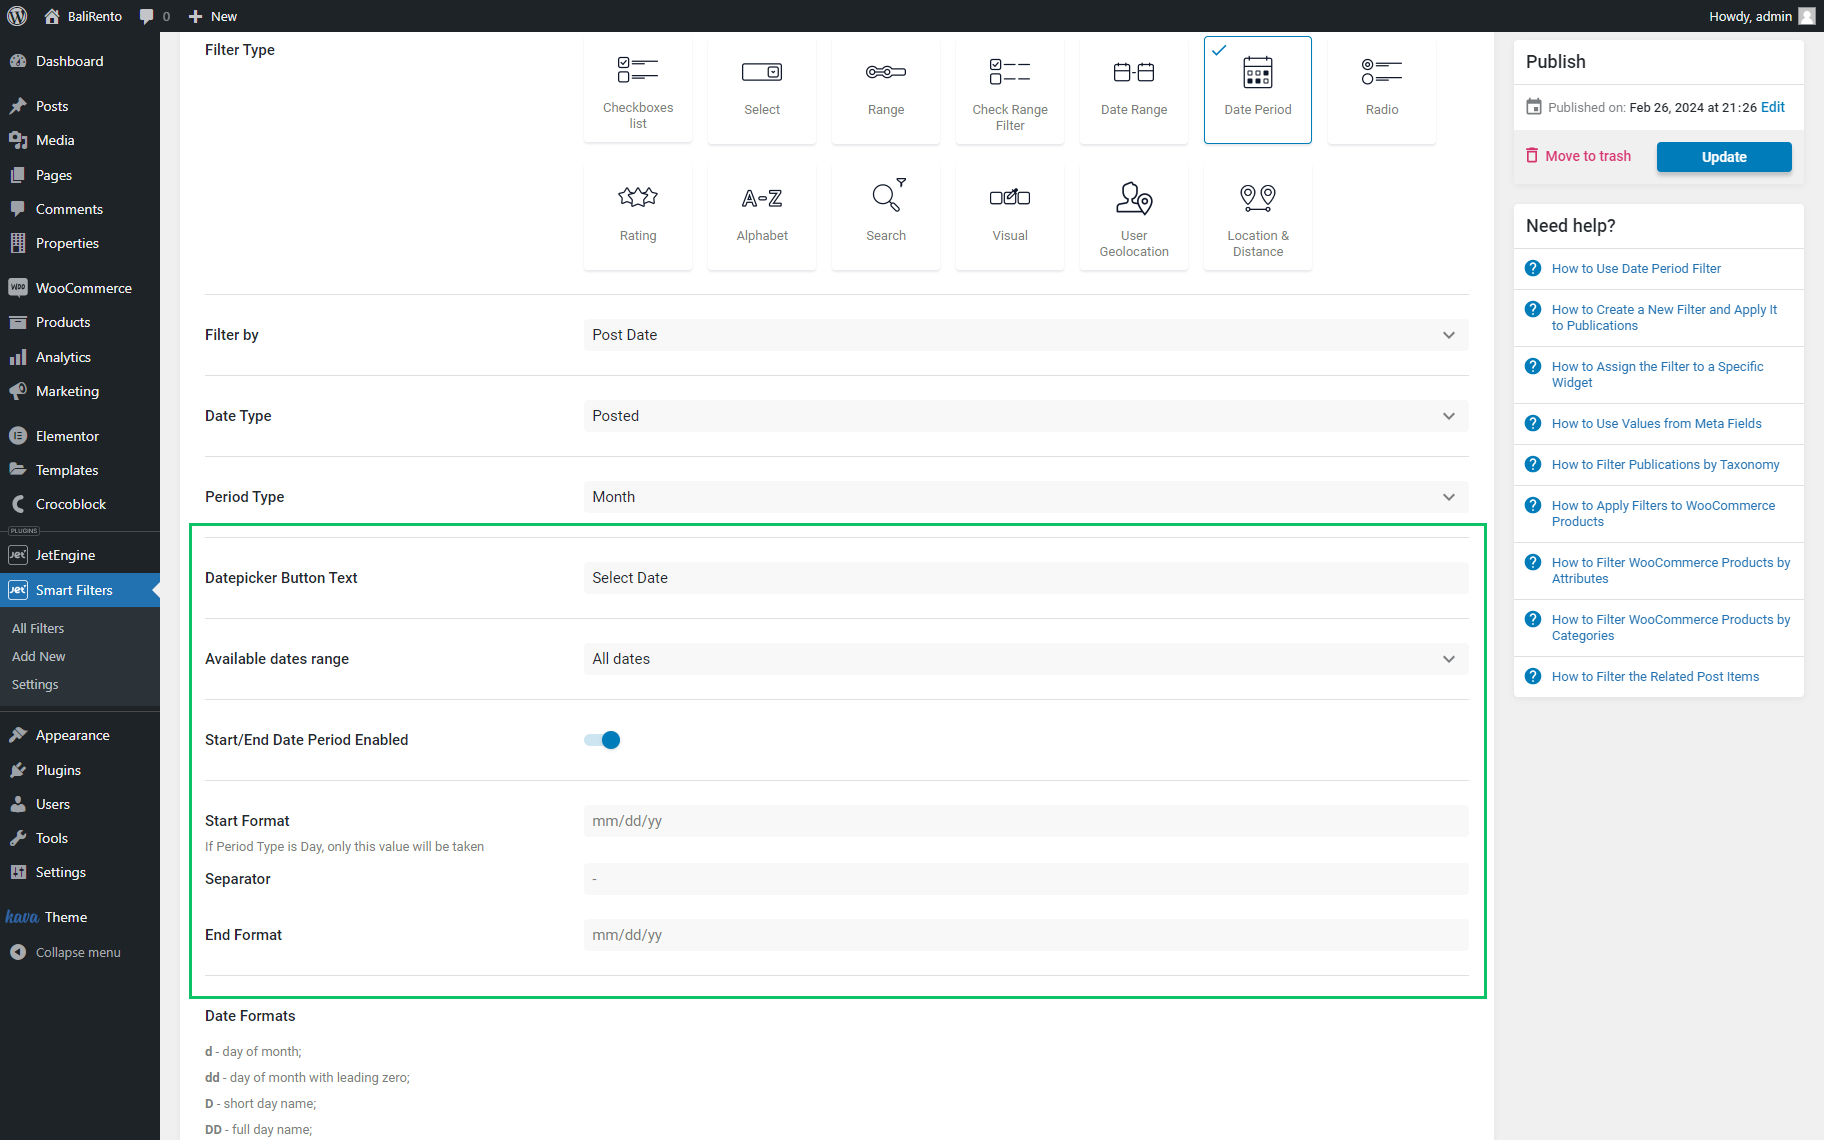
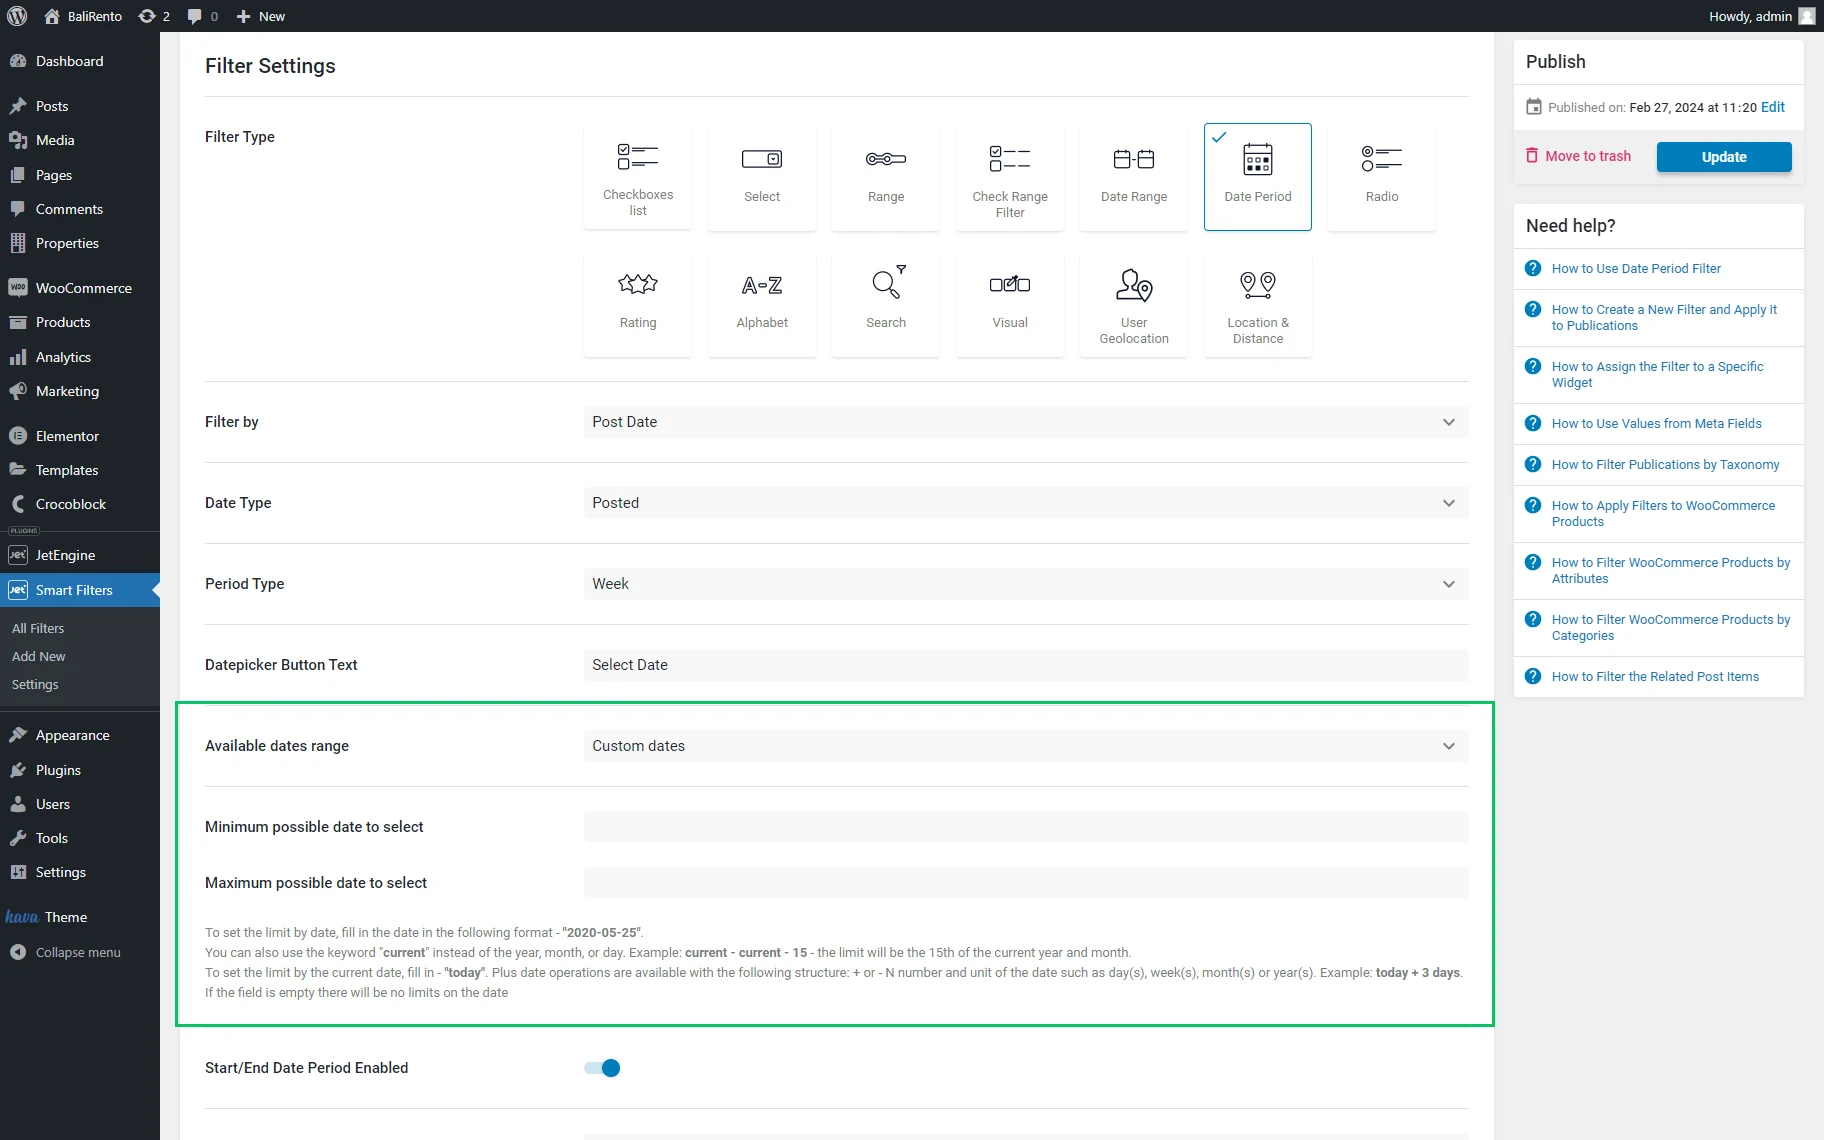
The Datepicker Button Text field is a field for typing the text on the “Datepicker” button.The Available dates range is a drop-down menu for selecting the “All dates,” “Future dates,” “Past dates,” and “Custom dates” options.
If you select the “Custom Dates” option in the Available dates range drop-down menu, the Minimum possible date to select and Maximum possible date to select fields are activated. This field allows typing the dates in the “yy-mm-dd” format, which limits the date range. The date range can also be set by typing the word “current” instead of the day, month, or year, i.e., “current – current – 15” means the 15th day of the current month and year. To set the limit by the current date, fill in 一 “today.” Additionally, date operations are available with the following structure: + or – N number and unit of the date, such as day(s), week(s), month(s), or year(s). Example: today + 3 days. If the field is empty, there will be no limits on the date.
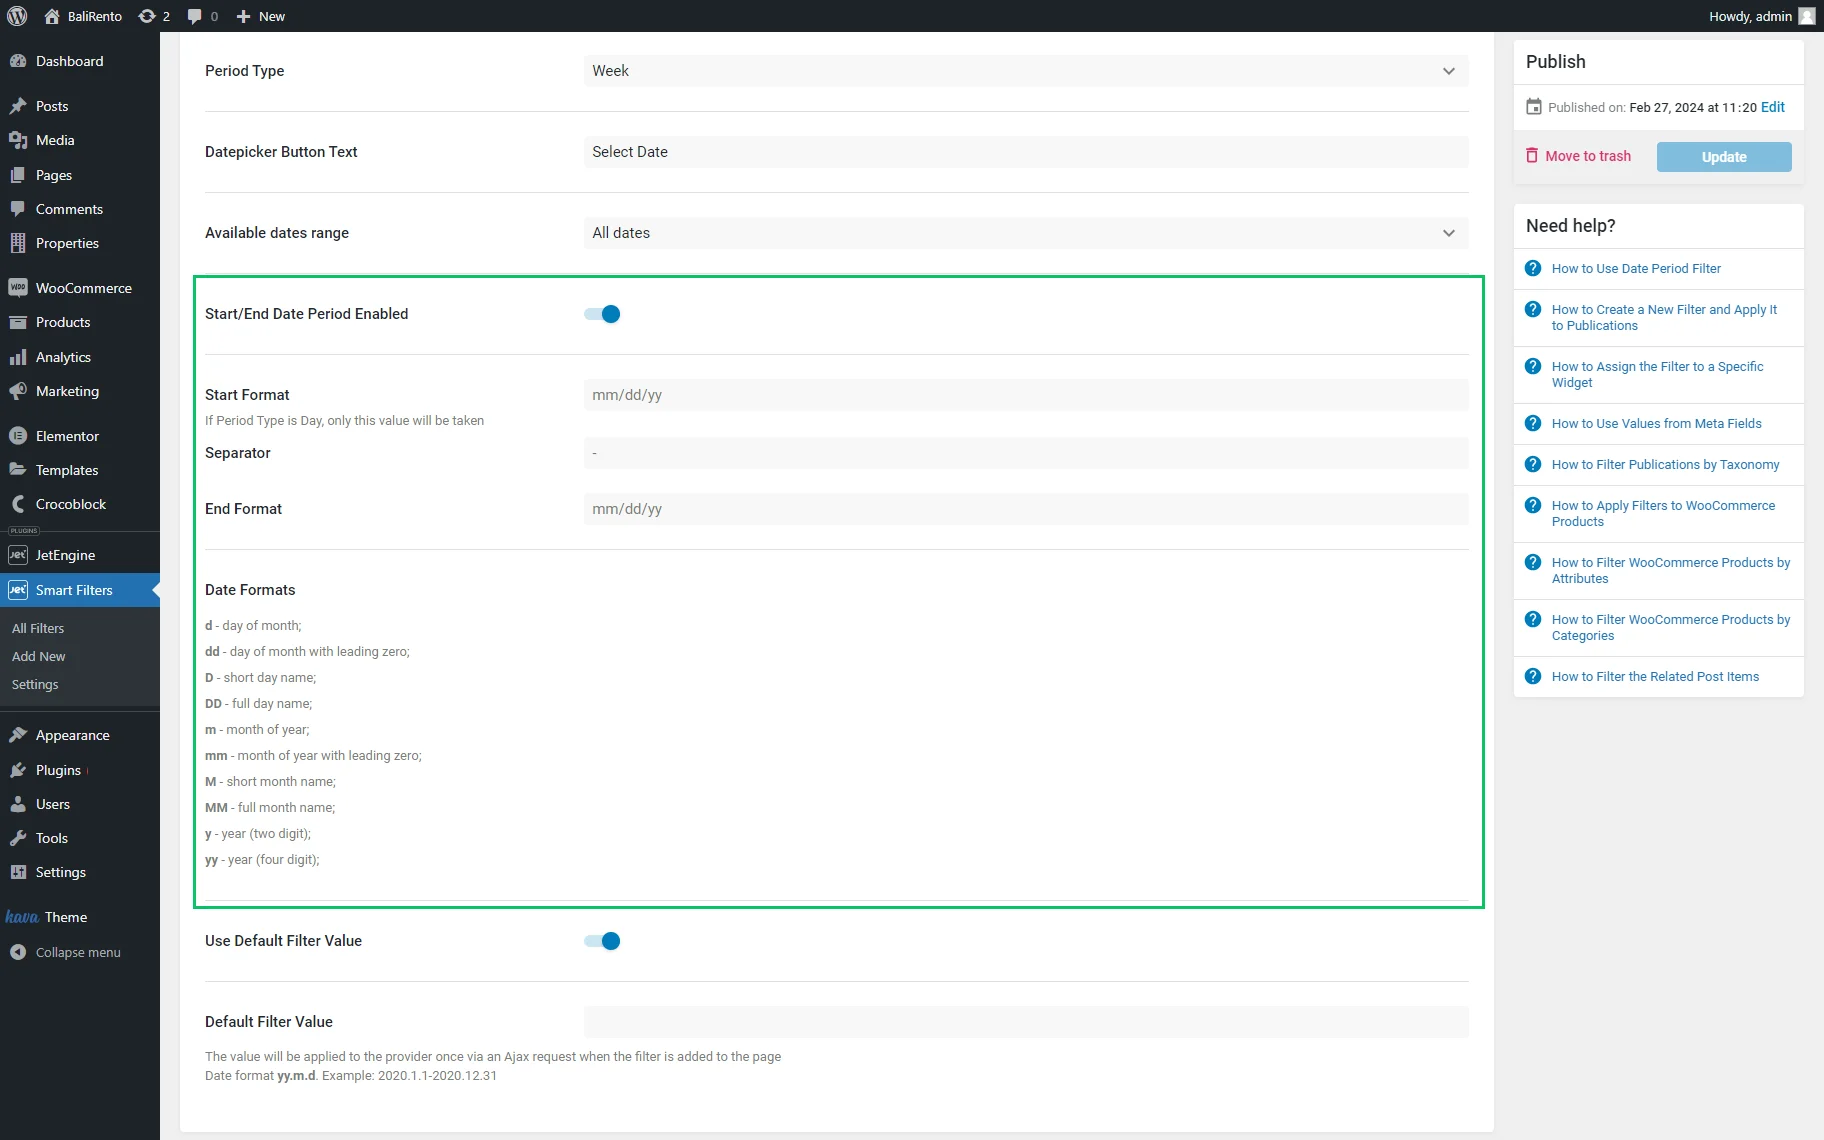
The Start/End Date Period Enabled toggle, if enabled, divides the Date Period Format on the Start Date, Separator, and End Format fields.
The Date Period Format, or Start Format, Separator, and End Format are fields for typing the way the date is displayed. If the Period Type is “Day,” only the Start Format value will be taken.
With the JetSmartFilters plugin, you can not only choose needed posts and products but also filter them by a certain date period. Date Period Filter allows filtering by a specific period. For example, to find posts that were created only on June 15th, or find tours that are available from June 15th to June 20th.
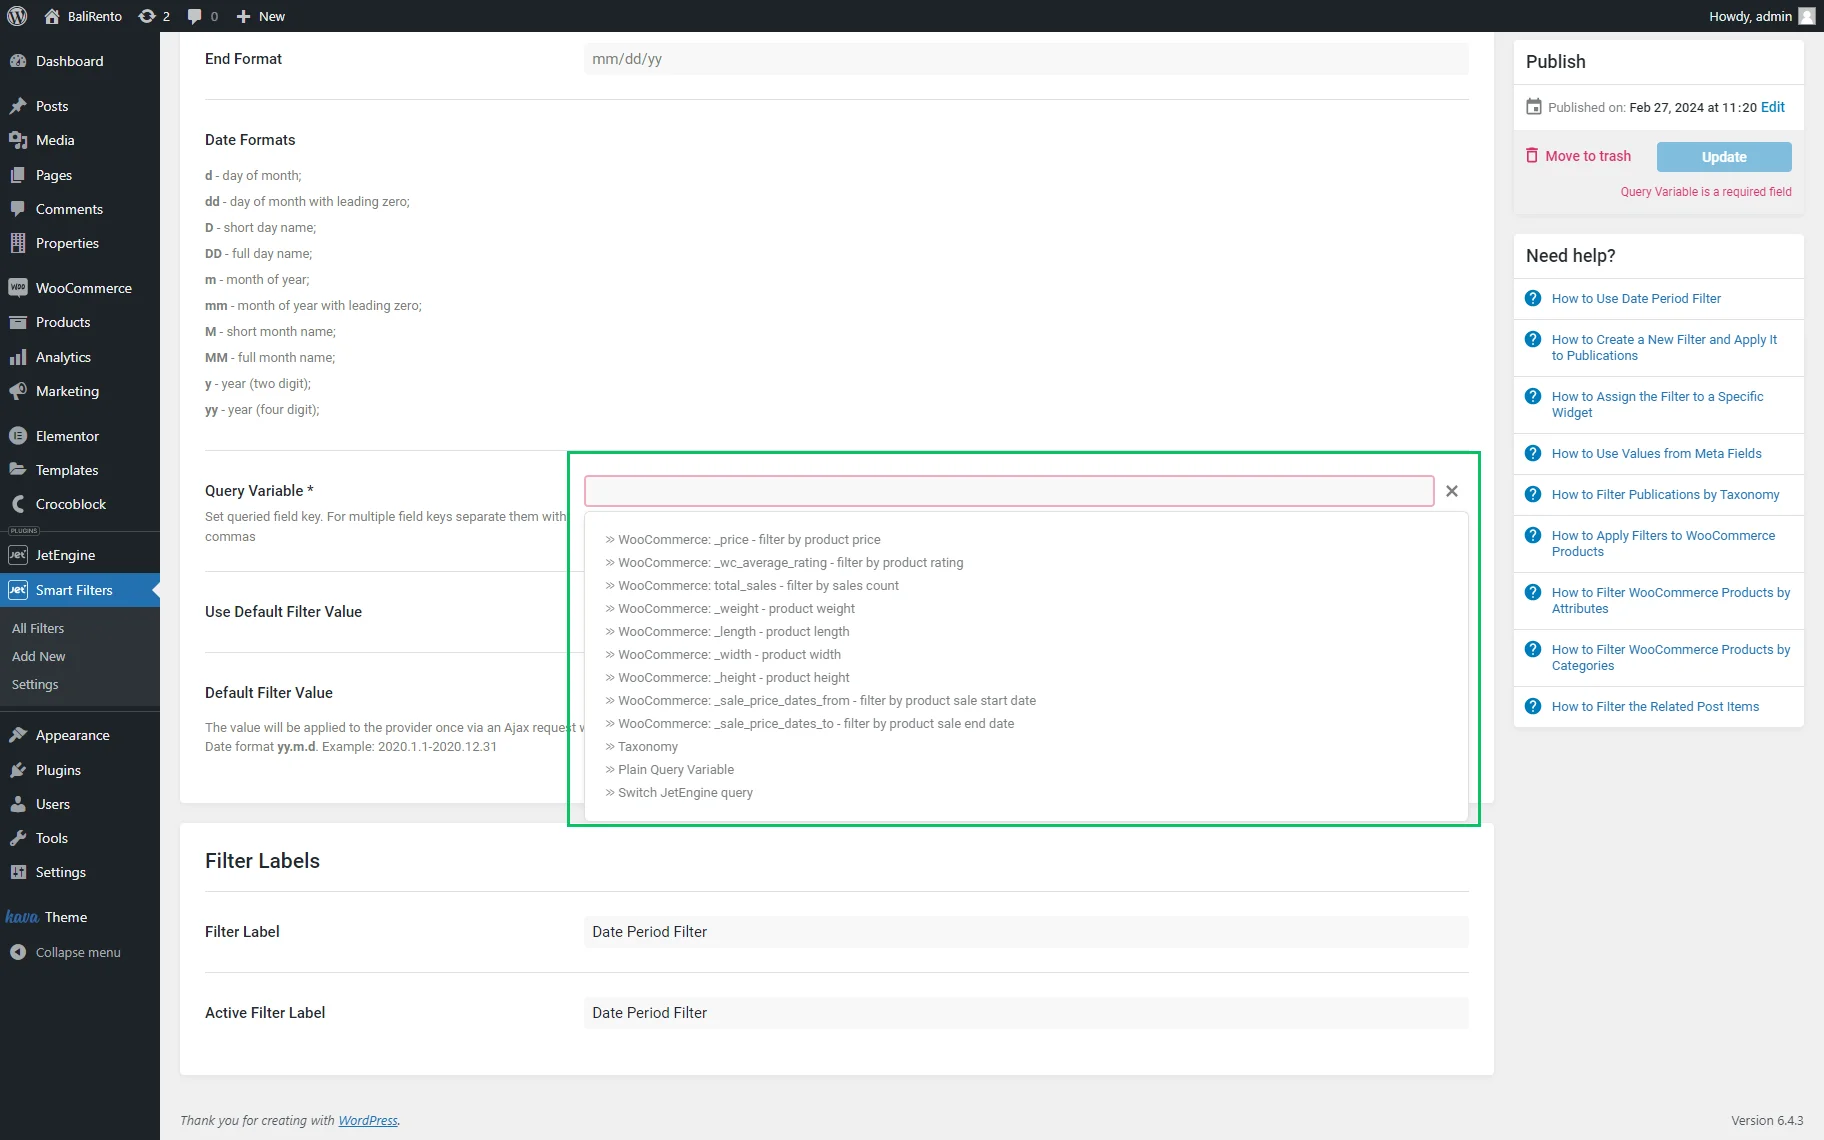
Query Variable
If the “Meta Date” option from the Filter by drop-down menu is selected, it turns on the Query Variable field. This field is a required field, and one has to type a queried field key or set using a dynamic tag by pressing the “coin stack” icon.
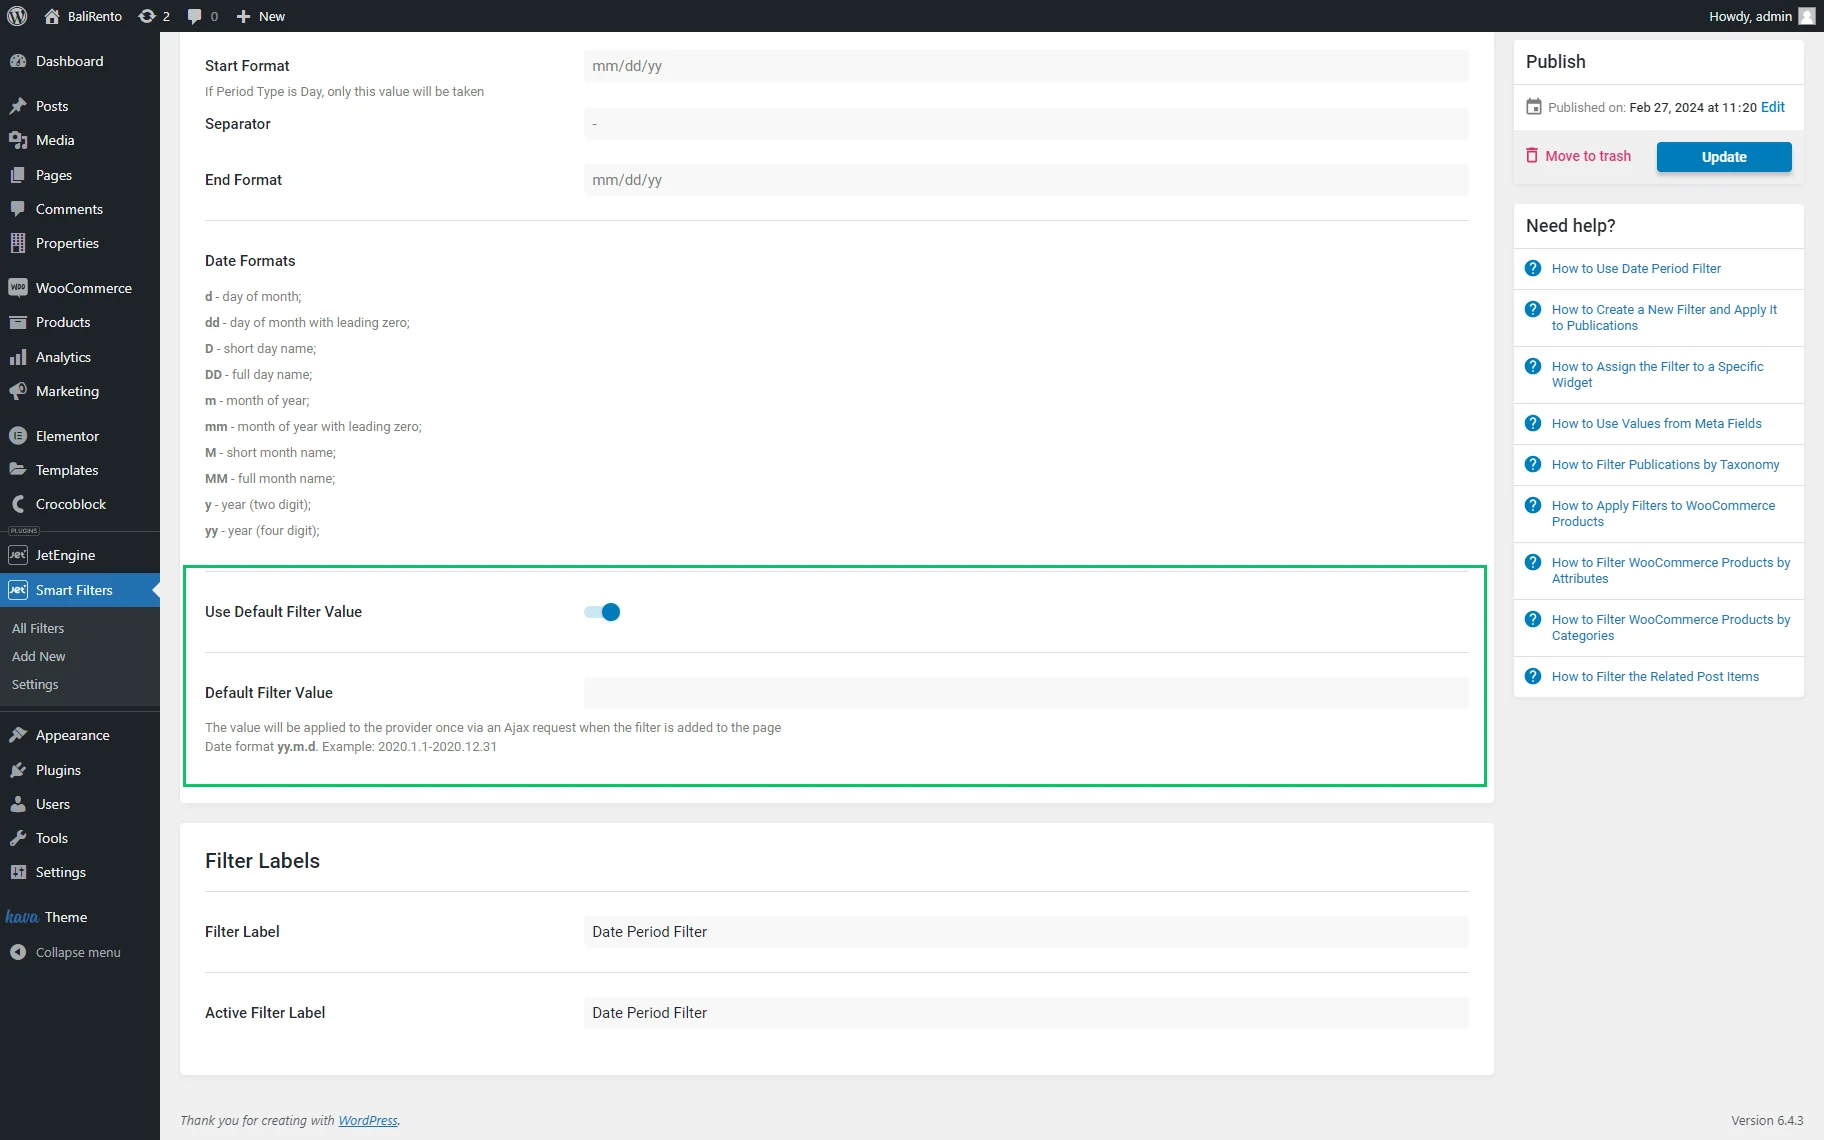
Use Default Filter Value toggle
The Use Default Filter Value toggle, if enabled, turns on the Default Filter Value field to type the value that will be applied to the provider once via an Ajax request when the filter is added to the page. This toggle and the field, respectively, are available both for posts and meta data filterings.
Filter Labels block
The Filter Labels block is intended for typing the Filter Label and the Active Filter Label in the appropriate fields (optionally).
The “Update” button should be pressed to save the filter settings.
Date Period Filter in Elementor
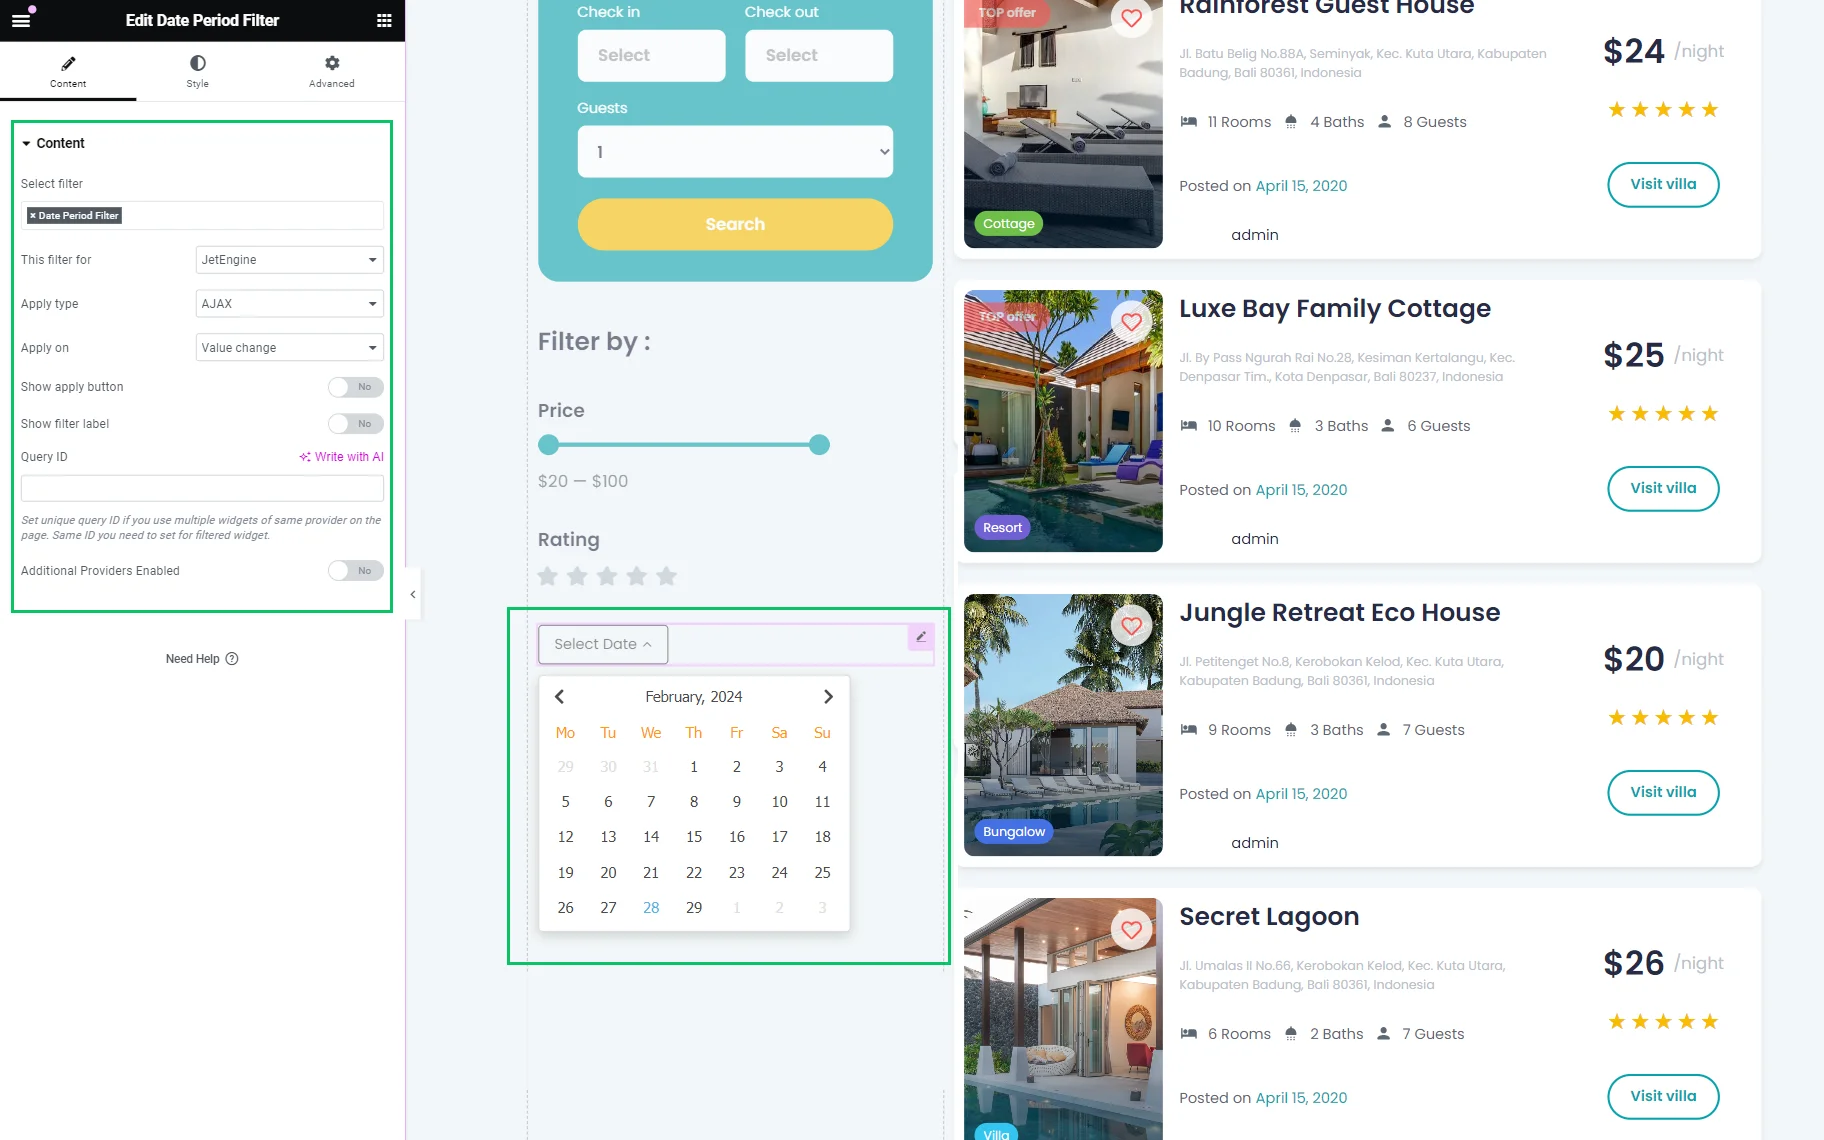
Content
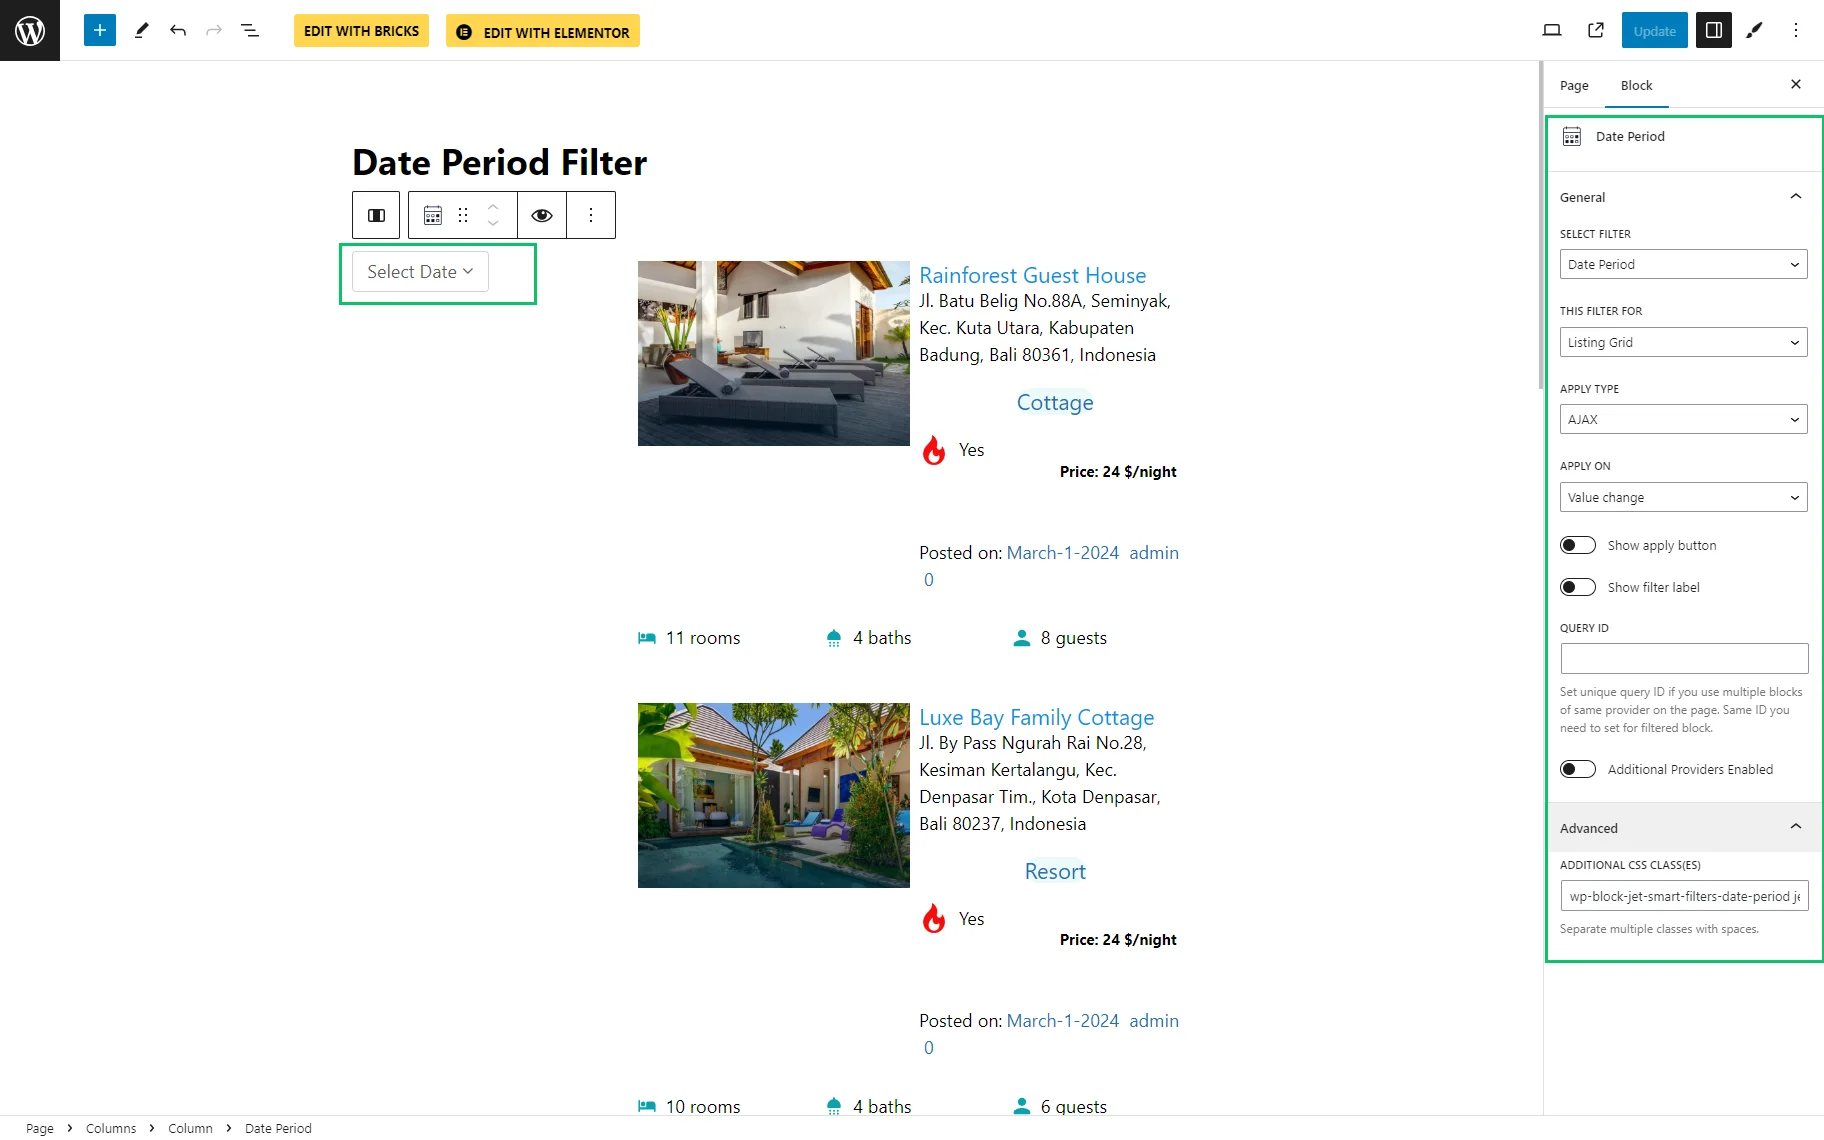
The Data Period Filter widget has the following settings:
- Select Filter — a drop-down menu to select the needed filter;
- This filter for — a provider drop-down list to pick the widget to which the filter will be attached: “JetEngine,“ “JetEngine Calendar,“ and “JetEngine Map“ options;
- Apply type — a drop-down list to choose a way the filter will work. The list includes the options: “AJAX,” “Page Reload,” and “Mixed;”
- Apply on — a field to specify tow to display the filtered results: by the value changes or by clicking the “Apply” button;
- Show apply button toggle is activated if the “Click on apply button” option is selected in the previous Apply on drop-down menu;
- Show filter label toggle, if enabled, shows a filter label above the filter;
- Query ID — a field that can be used if there are several widgets of the same type on the same page, and one is supposed to be used as a provider. For instance, if there are two Listing Grids on the page and only one should be filtered, the Listing Grid settings (Advanced tab) should be opened, and its unique name should be set in the CSS ID field and then put here, in the Query ID field of the filter;
- Additional Providers Enabled is a toggle allowing filtering several widgets.
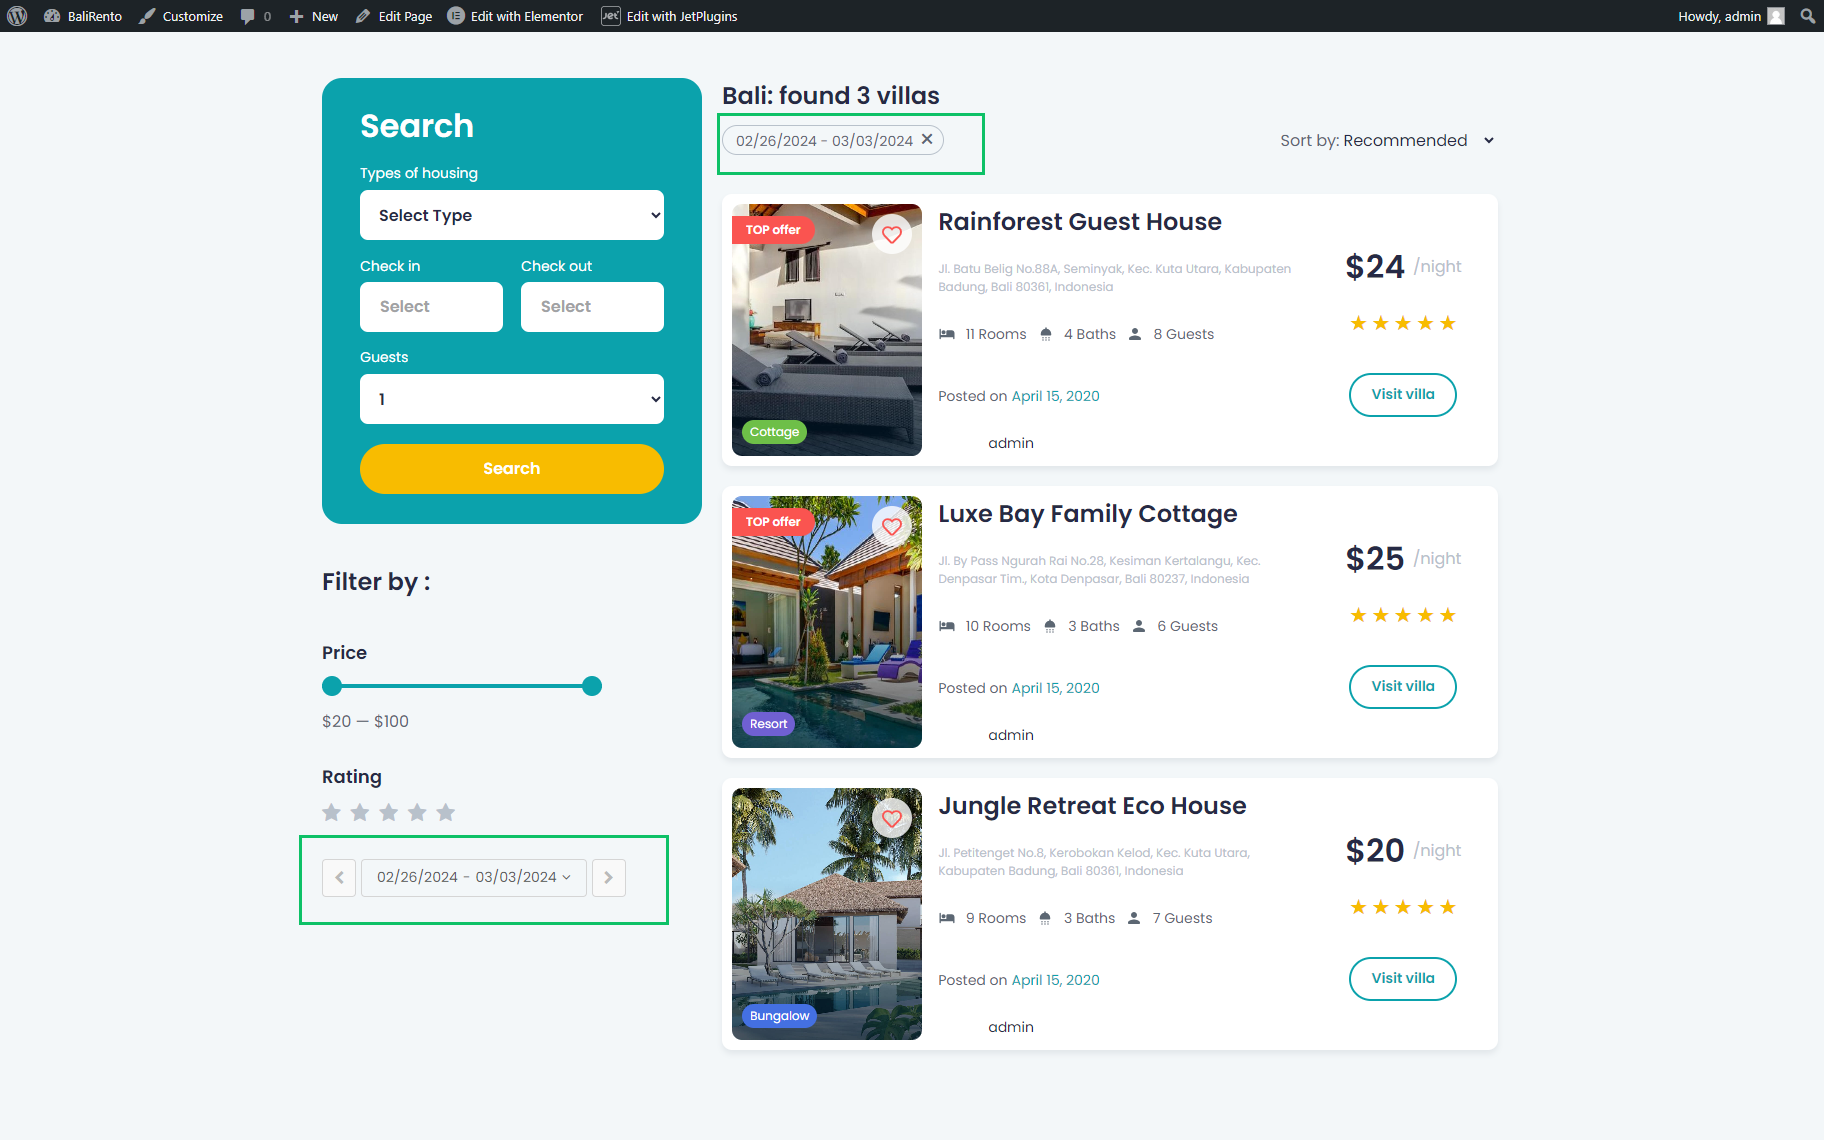
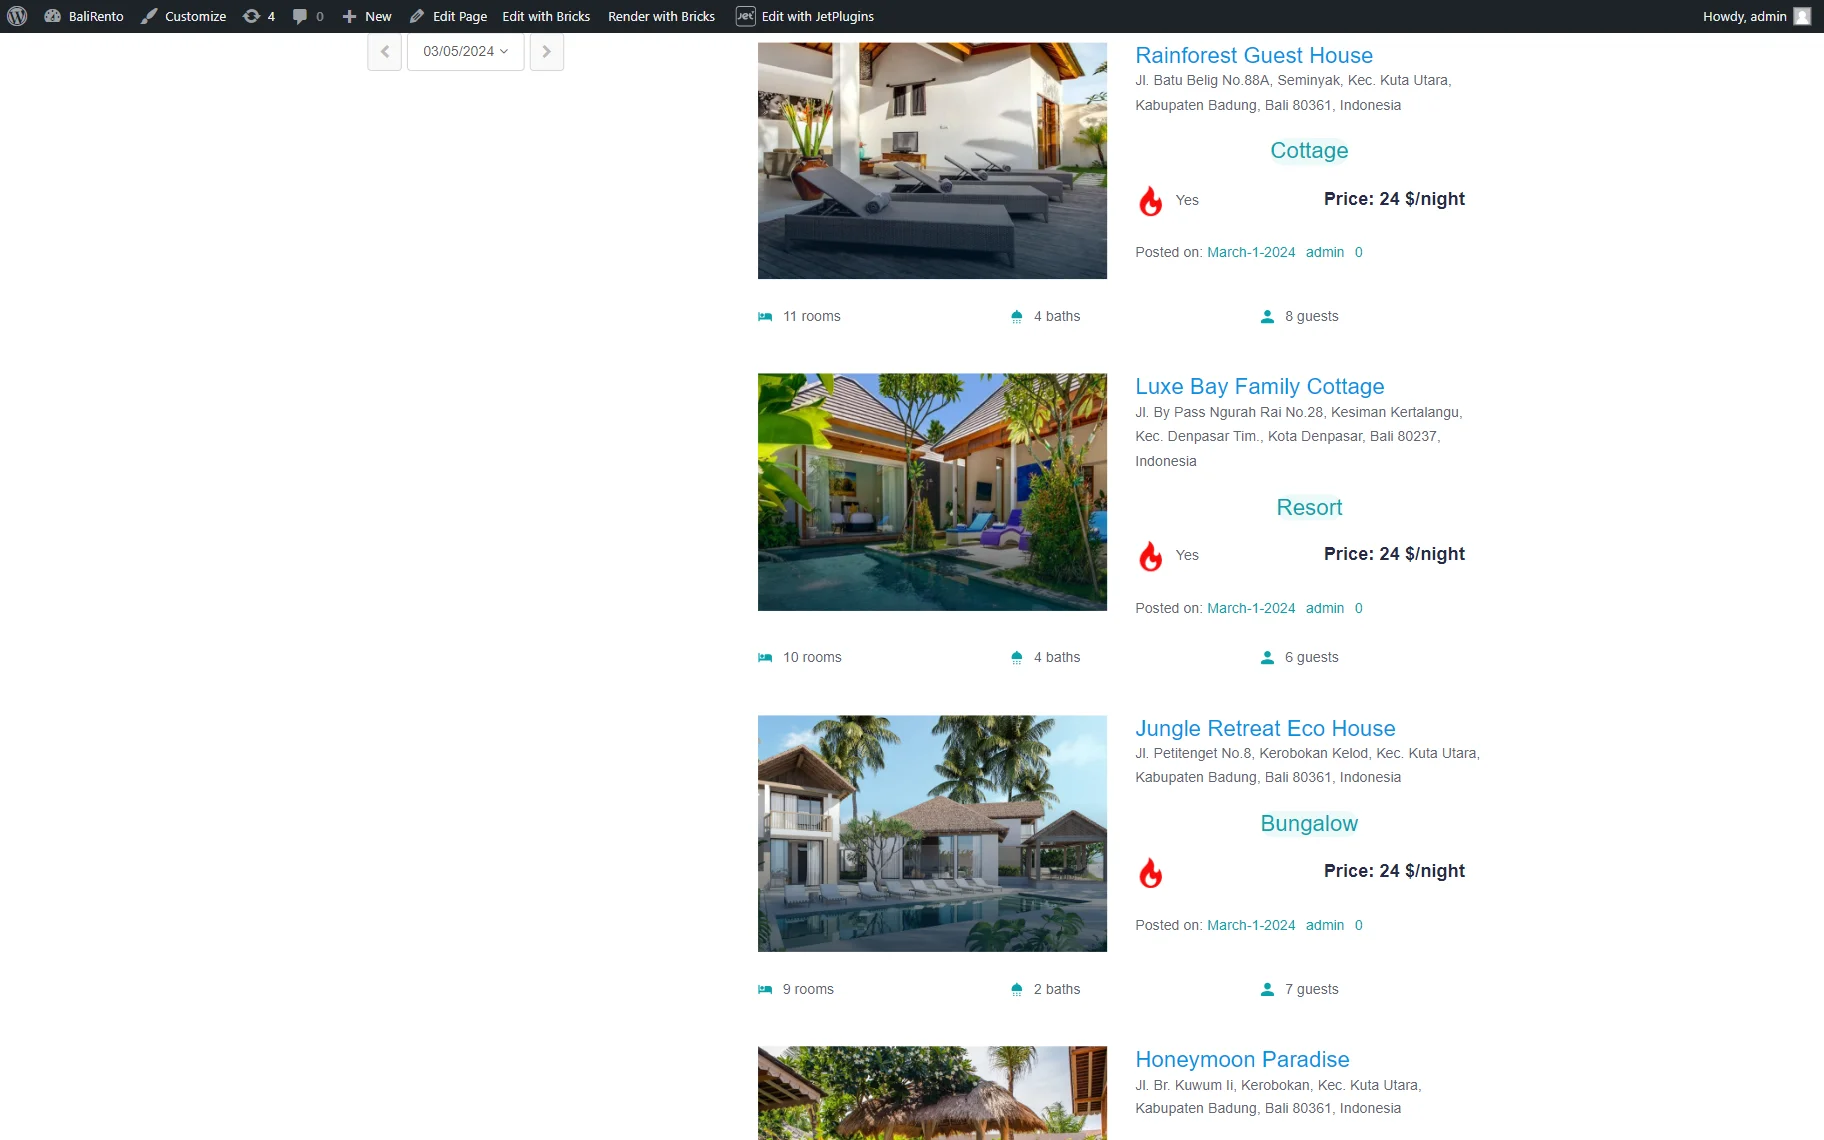
The filter works on the front end as follows.
Style settings
The settings are intended to adjust the widget’s appearance, i.e. the typography, colors, background, borders, padding, alignment and more options of the Datepicker Button, Prev/Next Buttons, Calendar, Calendar Header, Calendar Cell, Calendar Week Days, and Label Button.
Advanced settings
The Advanced settings customize the Layout settings (i.e., Margins, Padding, Width, and more), Dynamic Visibility, Motion Effects, Transformation, and more.
Date Period Filter Block in Gutenberg
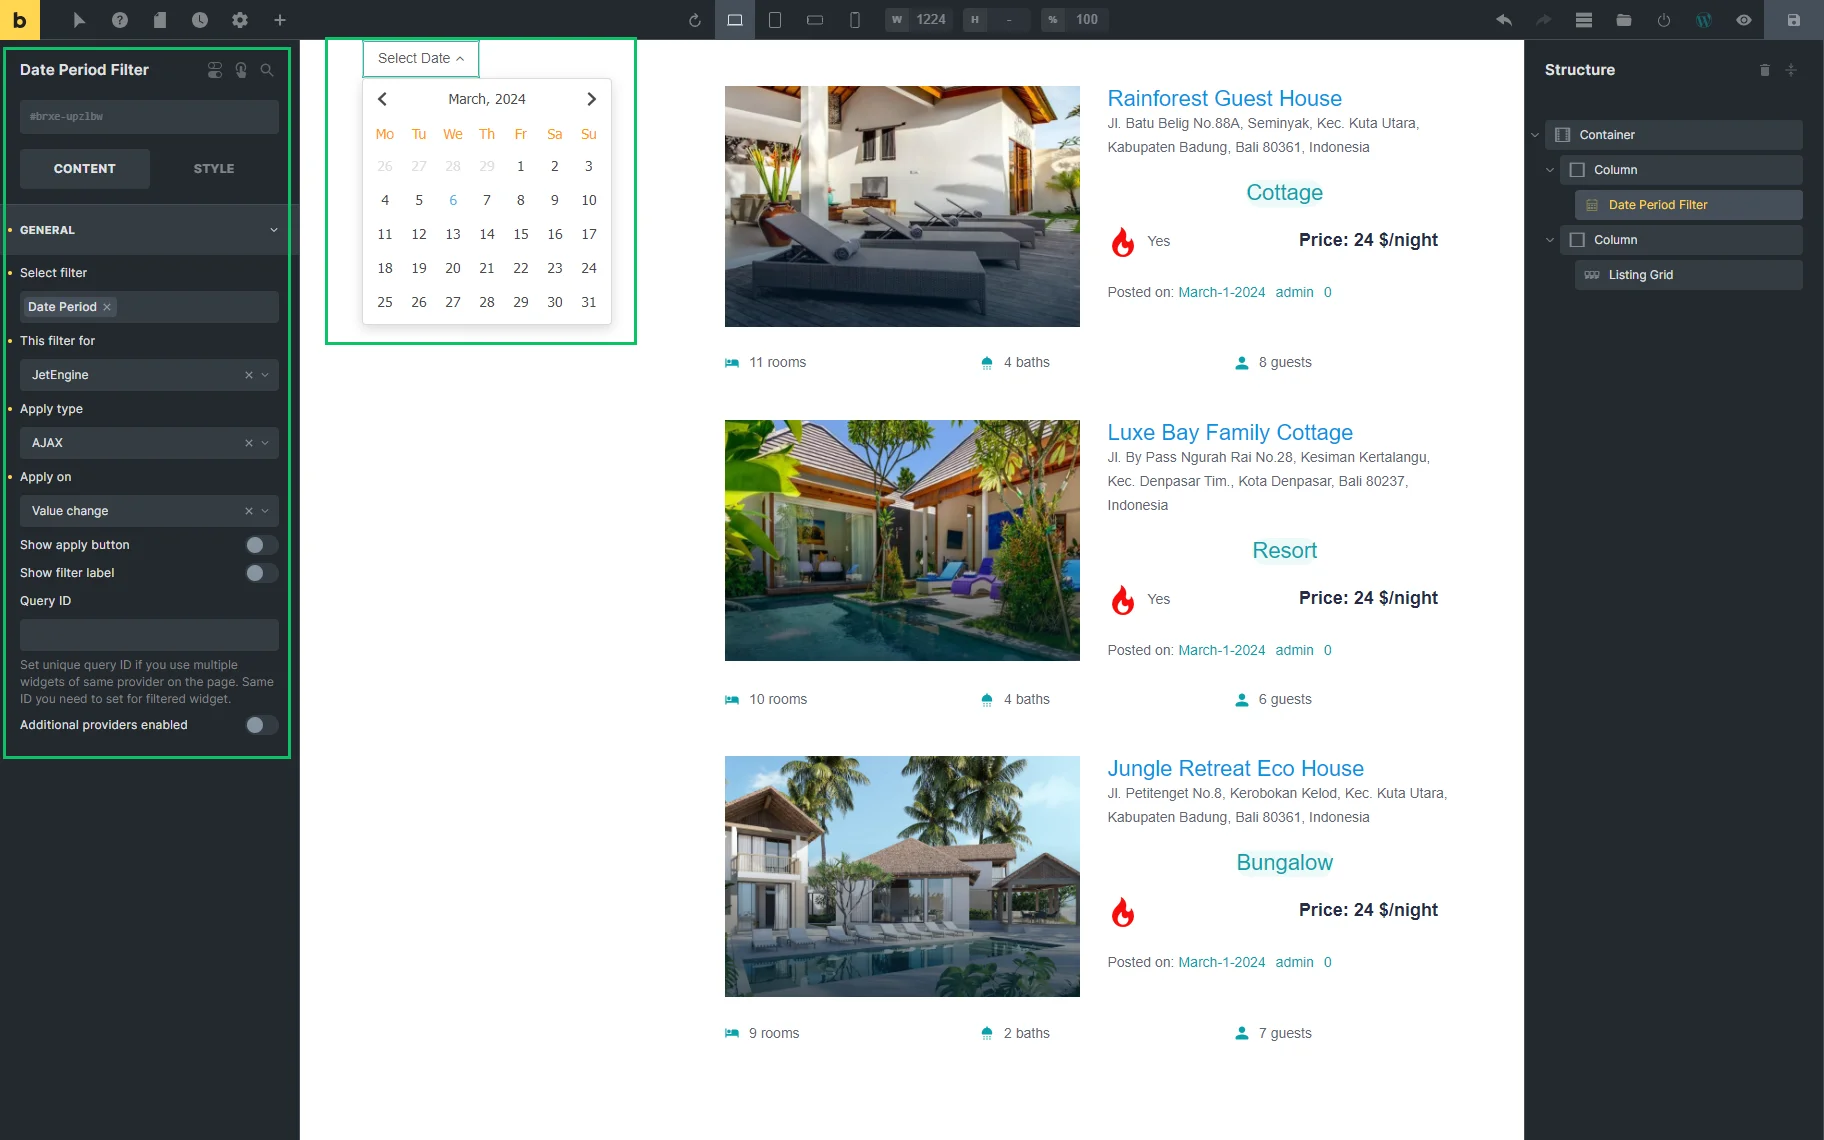
In the Block Editor, the same settings as in Elementor are availiable.
The unique Advanced tab includes ths ADDITIONAL CSS CLASS(ES) field to add an additional css class.
The filter works on the front end as follows.
Date Period Filter Element in Bricks
The Date Period Filter element is available in Bricks also repeats the settings used in Elementor. There is a CONTENT tab the same main settings.
The STYLE tab includes setting for customisation of the layout, typography, background, border and box shadow, gradient and overlay, transformation, CSS, attributes, and buttons.
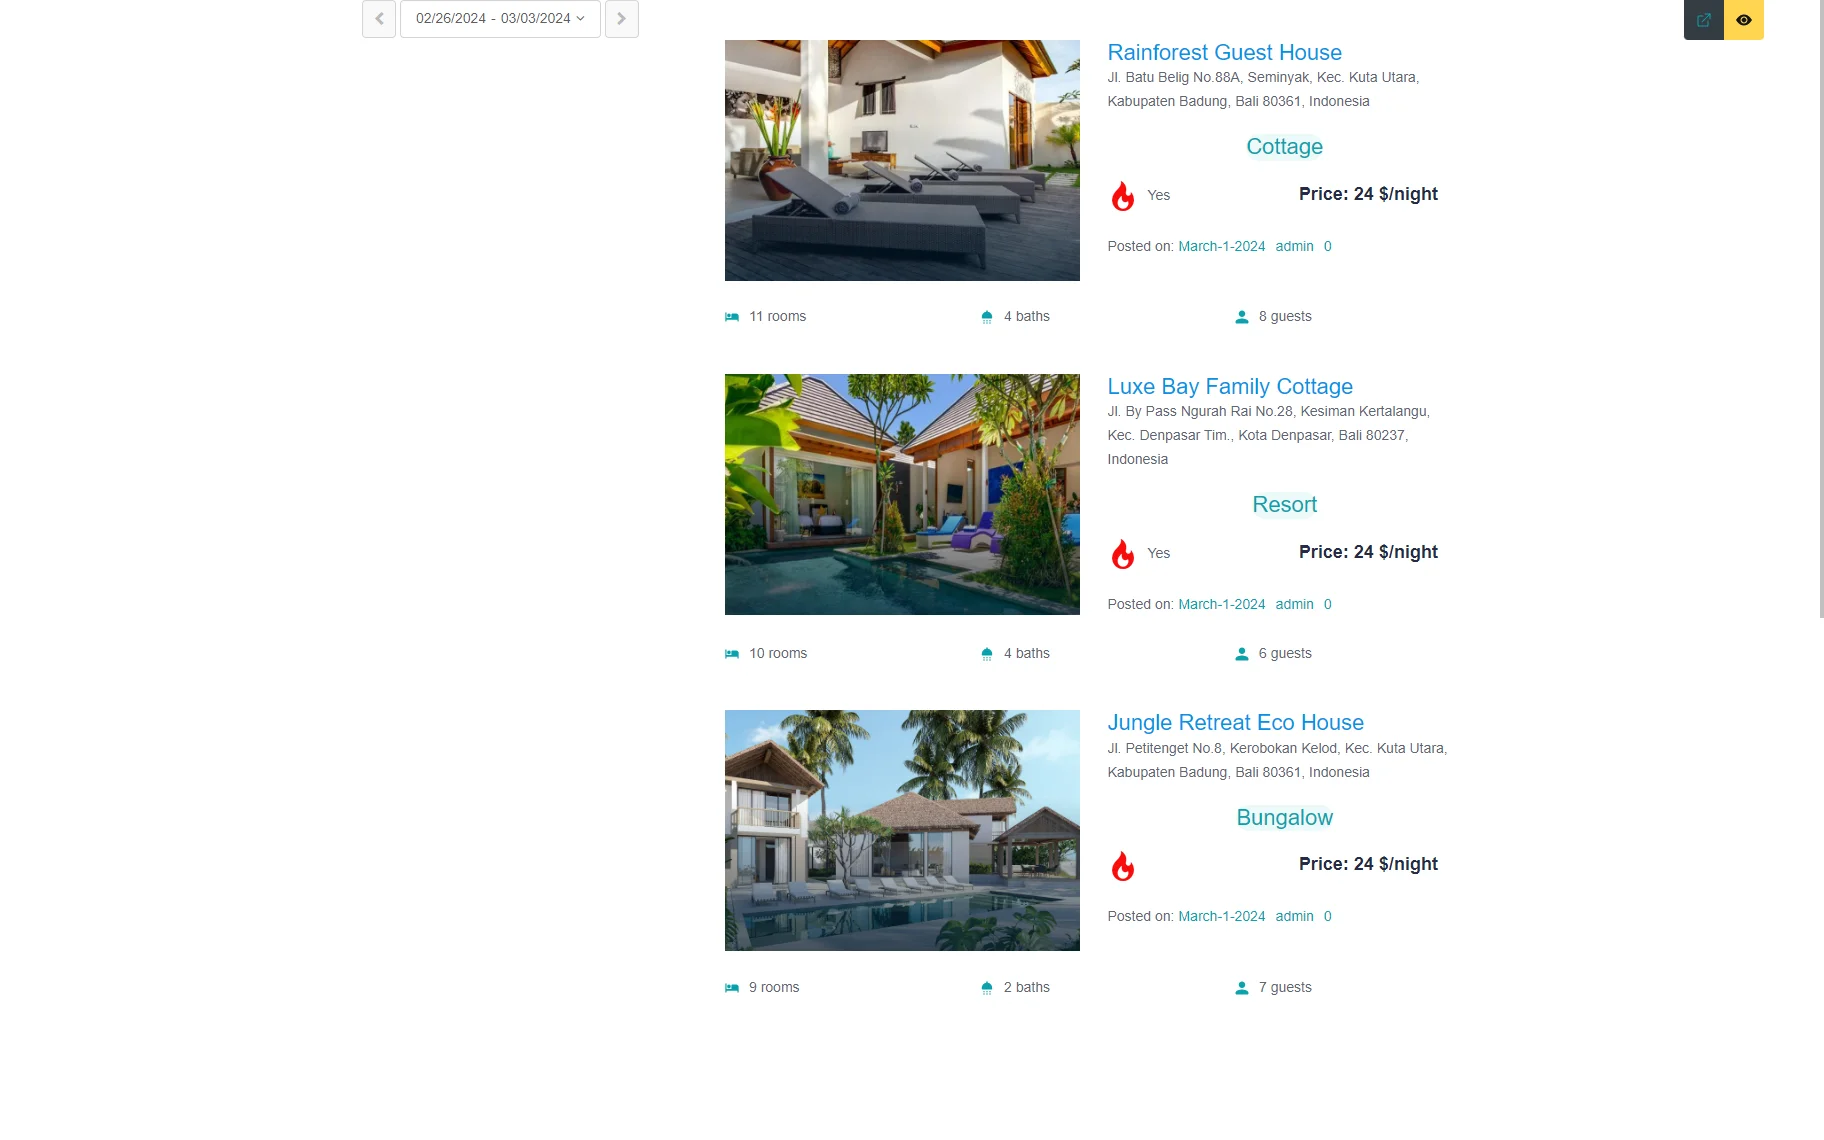
The filter works on the front end as follows.
Now you know how to use the Date Period Filter from the JetSmartFilters plugin.