How to Unlock Content Based on Progress
This tutorial describes how to set the JetEngine Dynamic Visibility Module in the Elementor editor so that users can unlock the content based on progress, answering questions in the JetEngine or JetFormBuilder form.
Unlocking Content Based on Progress in Elementor
With the JetEngine plugin, you’re able to create a WordPress membership site. From this tutorial, you will know how to unlock the posts with the lessons to the users according to their progress. You will learn how to attach Dynamic Visibility to the form so that users can open the next lesson according to the answers in the JetEngine or JetFormBuilder form.
For example, we’ve created a Page that shows all lessons on our site. To each image with the closed lock, we’ve attached a pop-up with a form and dynamic visibility connected to the options in the form.
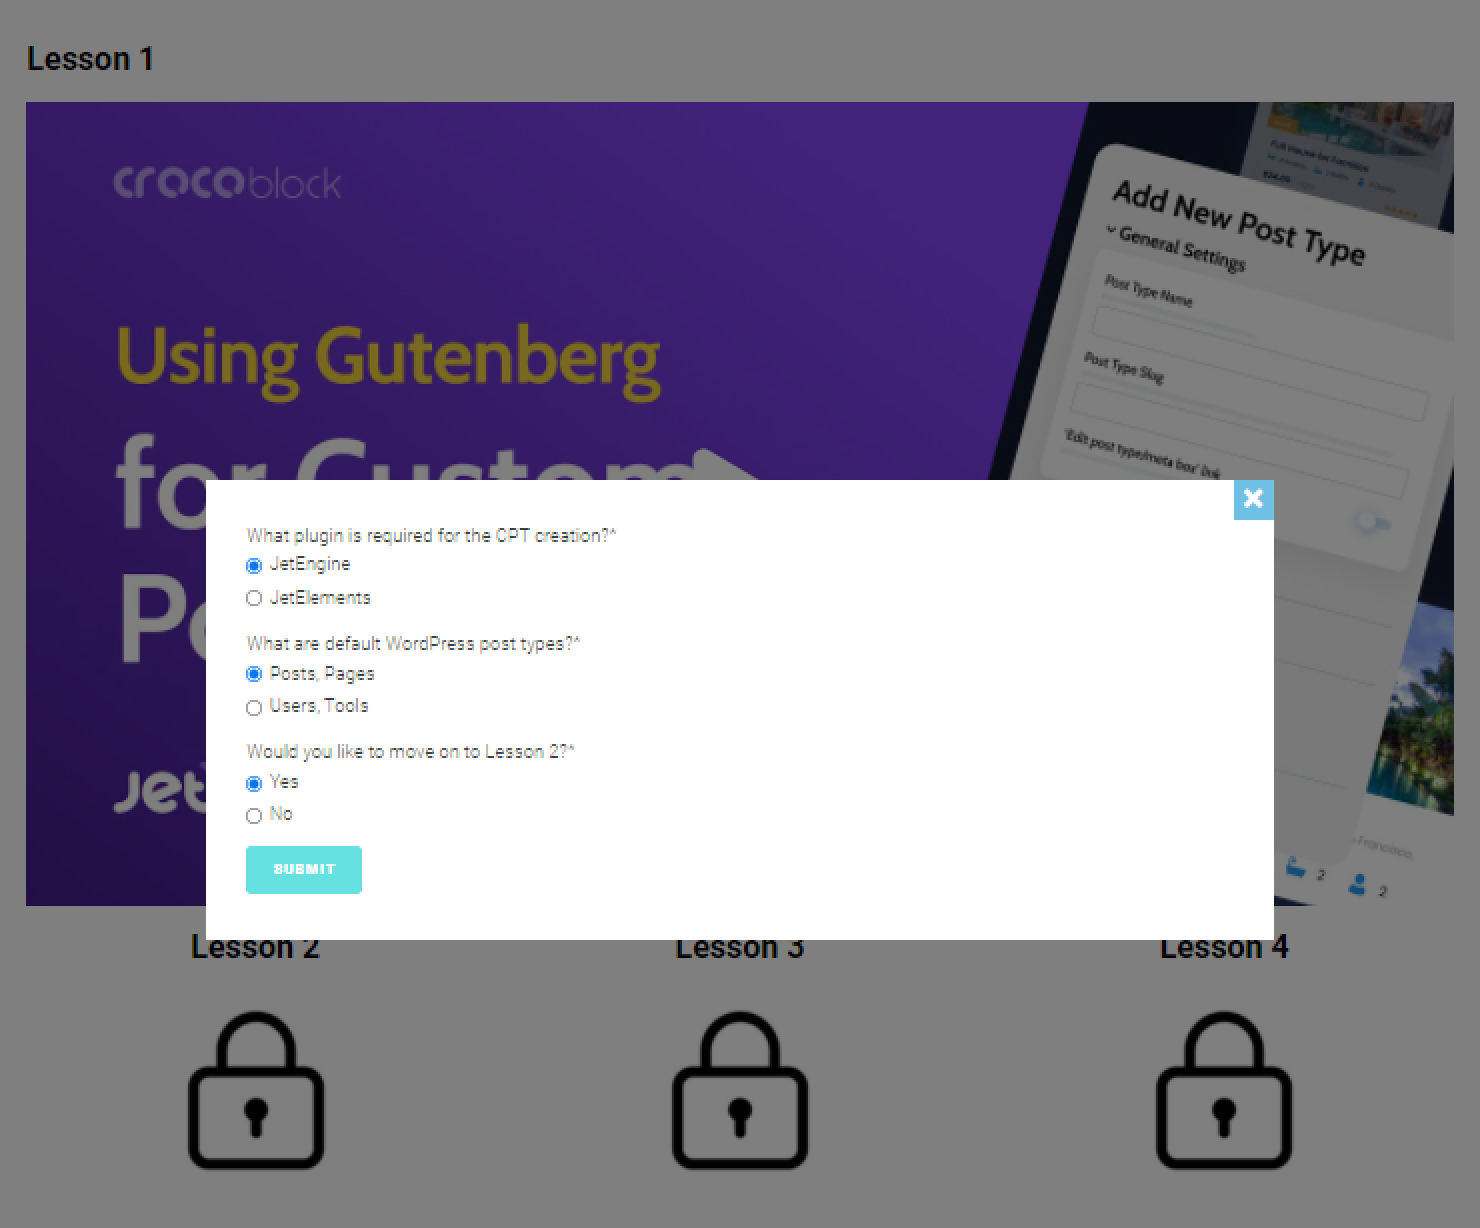
When users select the “Yes” option in the form, they unlock the next lesson. With the Conditional Visibility for the form field, users cannot see the following question unless they don’t correctly answer the previous one.
Create posts, or a new CPT and posts
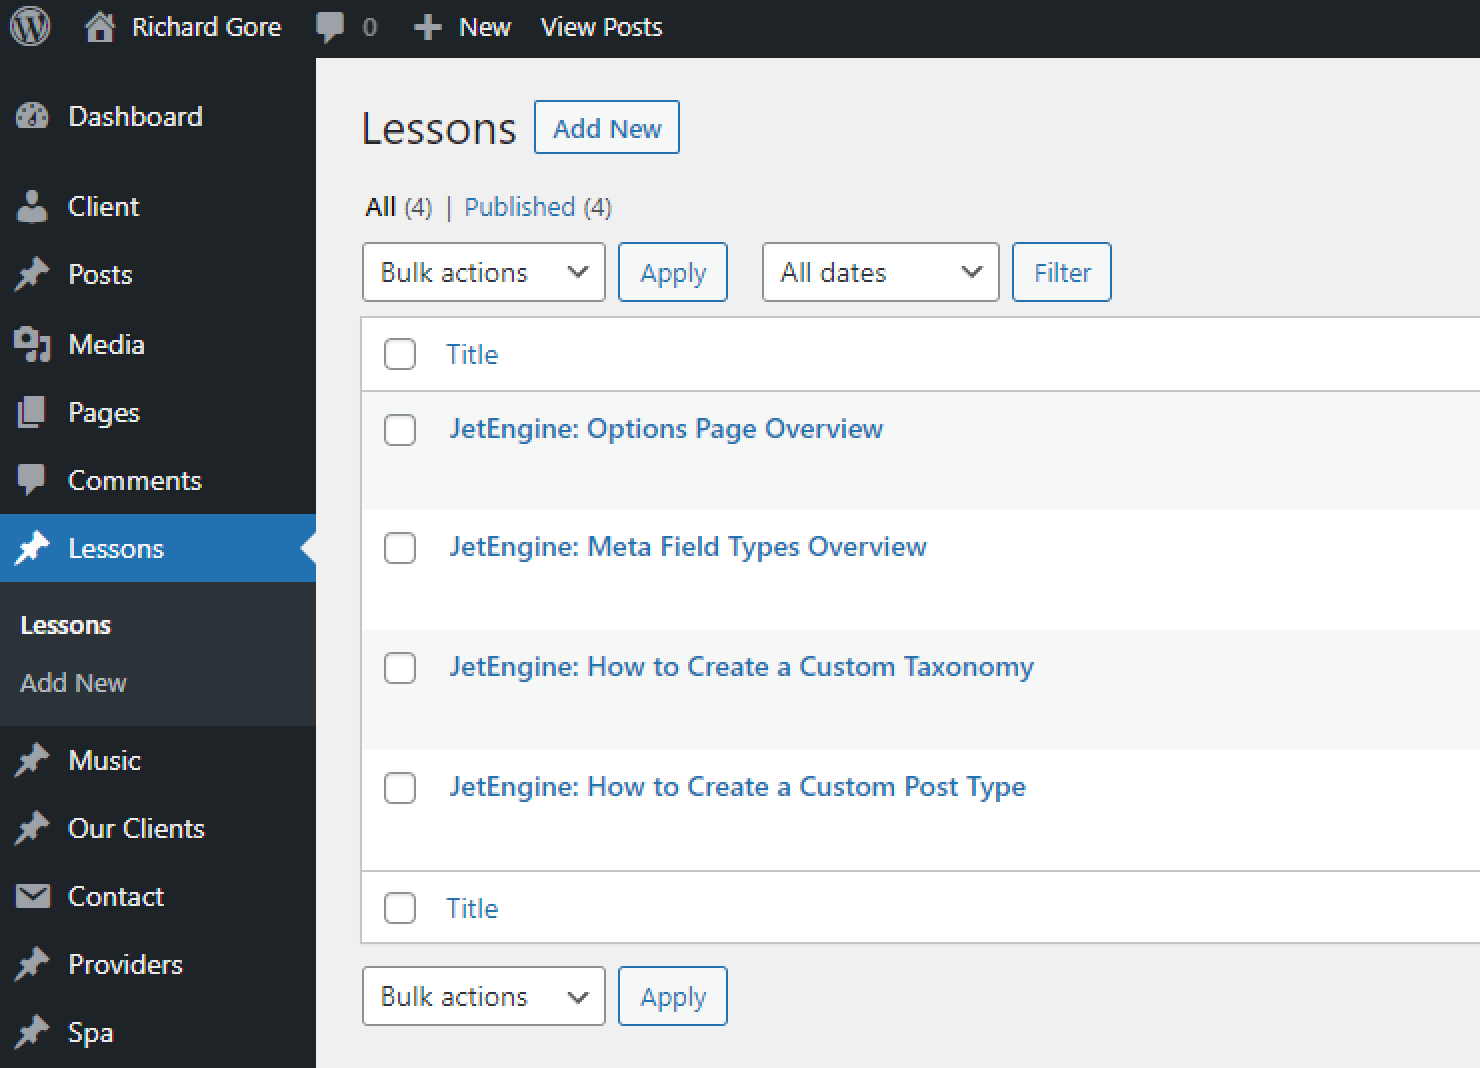
First, you need to create posts with the studying content or the dedicated Custom Post Type (CPT) for the lesson posts.
Create a meta field in the meta box
To make the form and the Dynamic Visibility work jointly, you need to create a meta field.
Since we want to display the form on the page, we are required to create the meta box for the pages.
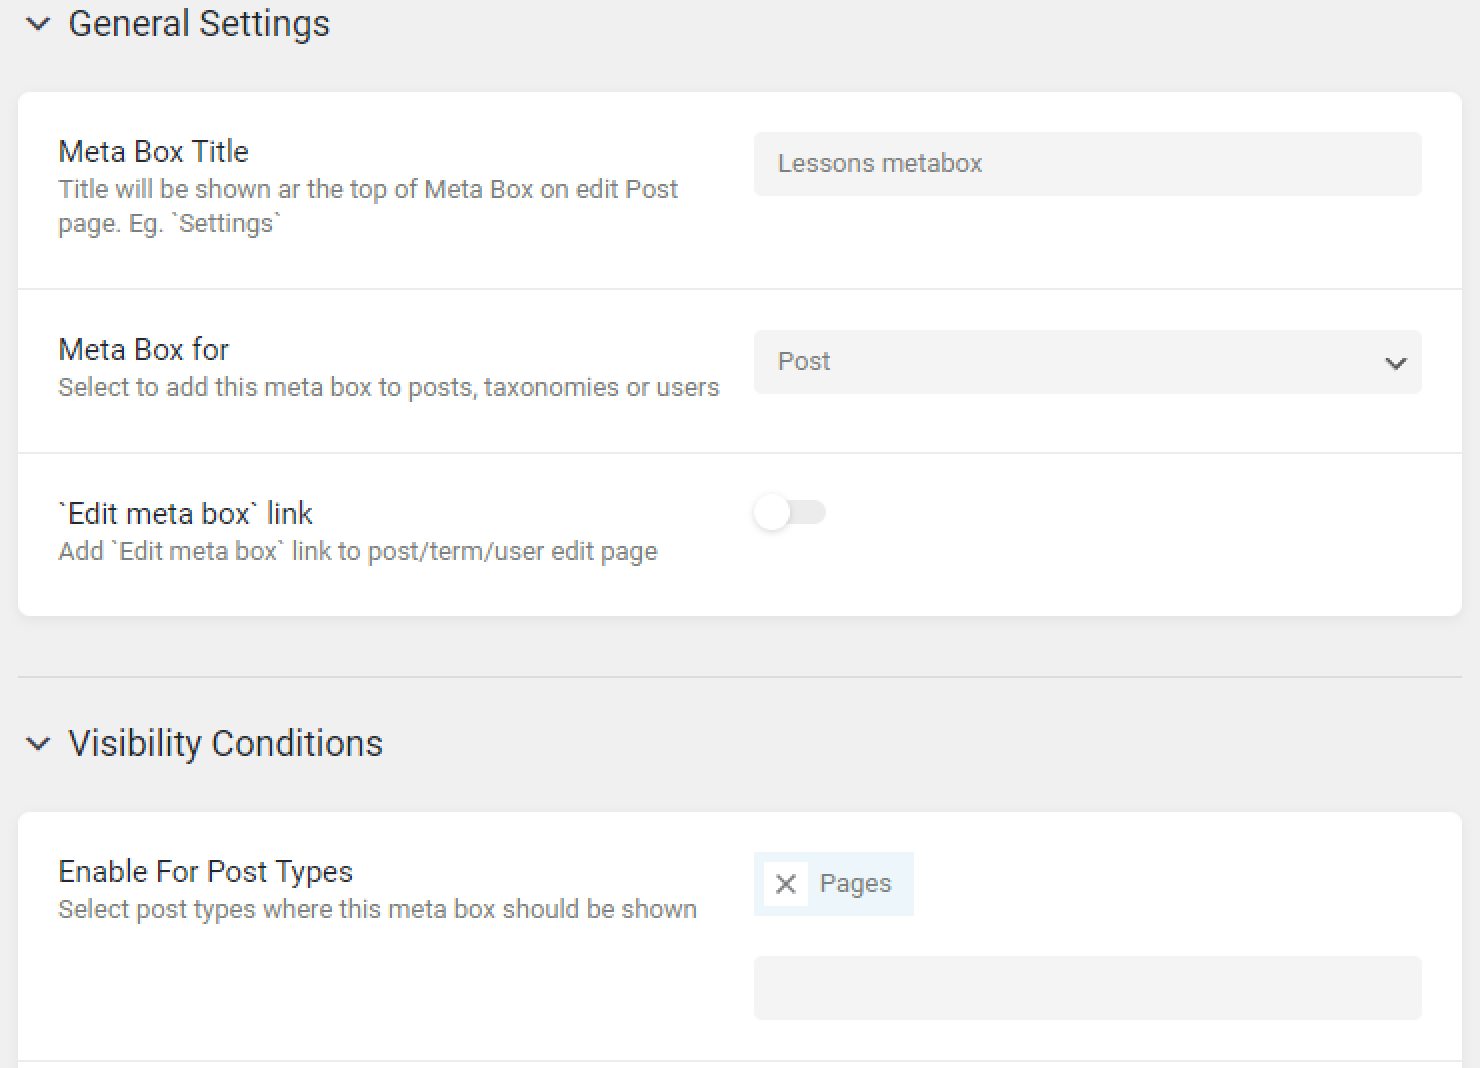
Proceed to JetEngine > Meta Boxes and push the “Add New” button.
Enter the Title and select the “Post” option in the Meta Box for field.
In the Visibility Conditions tab, choose the “Pages” post type in the Enable For Post Types field.
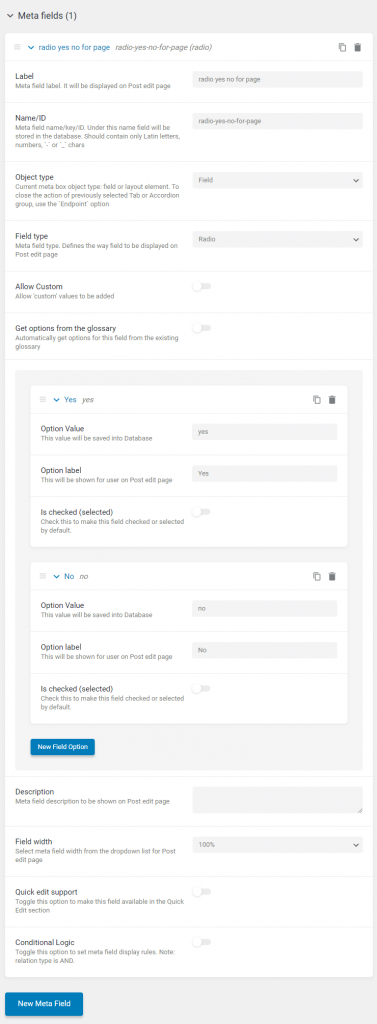
Tick the “New Meta Field” button on the bottom of the page. Since we want to attach the Dynamic Visibility condition to the user’s choice “Yes” or “No” in the form, we will create a Radio meta field with such options. Feel free to create the same field or other ones according to your needs.
You can create the Radio options manually by hitting the “New Field Option” button or fill it with the Glossary feature by enabling the Get options from the glossary toggle.
After finishing, press the “Update Meta Box” button.
How to Create a JetEngine Form
Move to JetEngine > Forms in the WordPress Dashboard and click on the “Add New” button. Give the new form a title.
Leave the Hidden field settings as they are by default, hit the “Add Field” button, and place the new field between the Hidden field and the Submit Button.
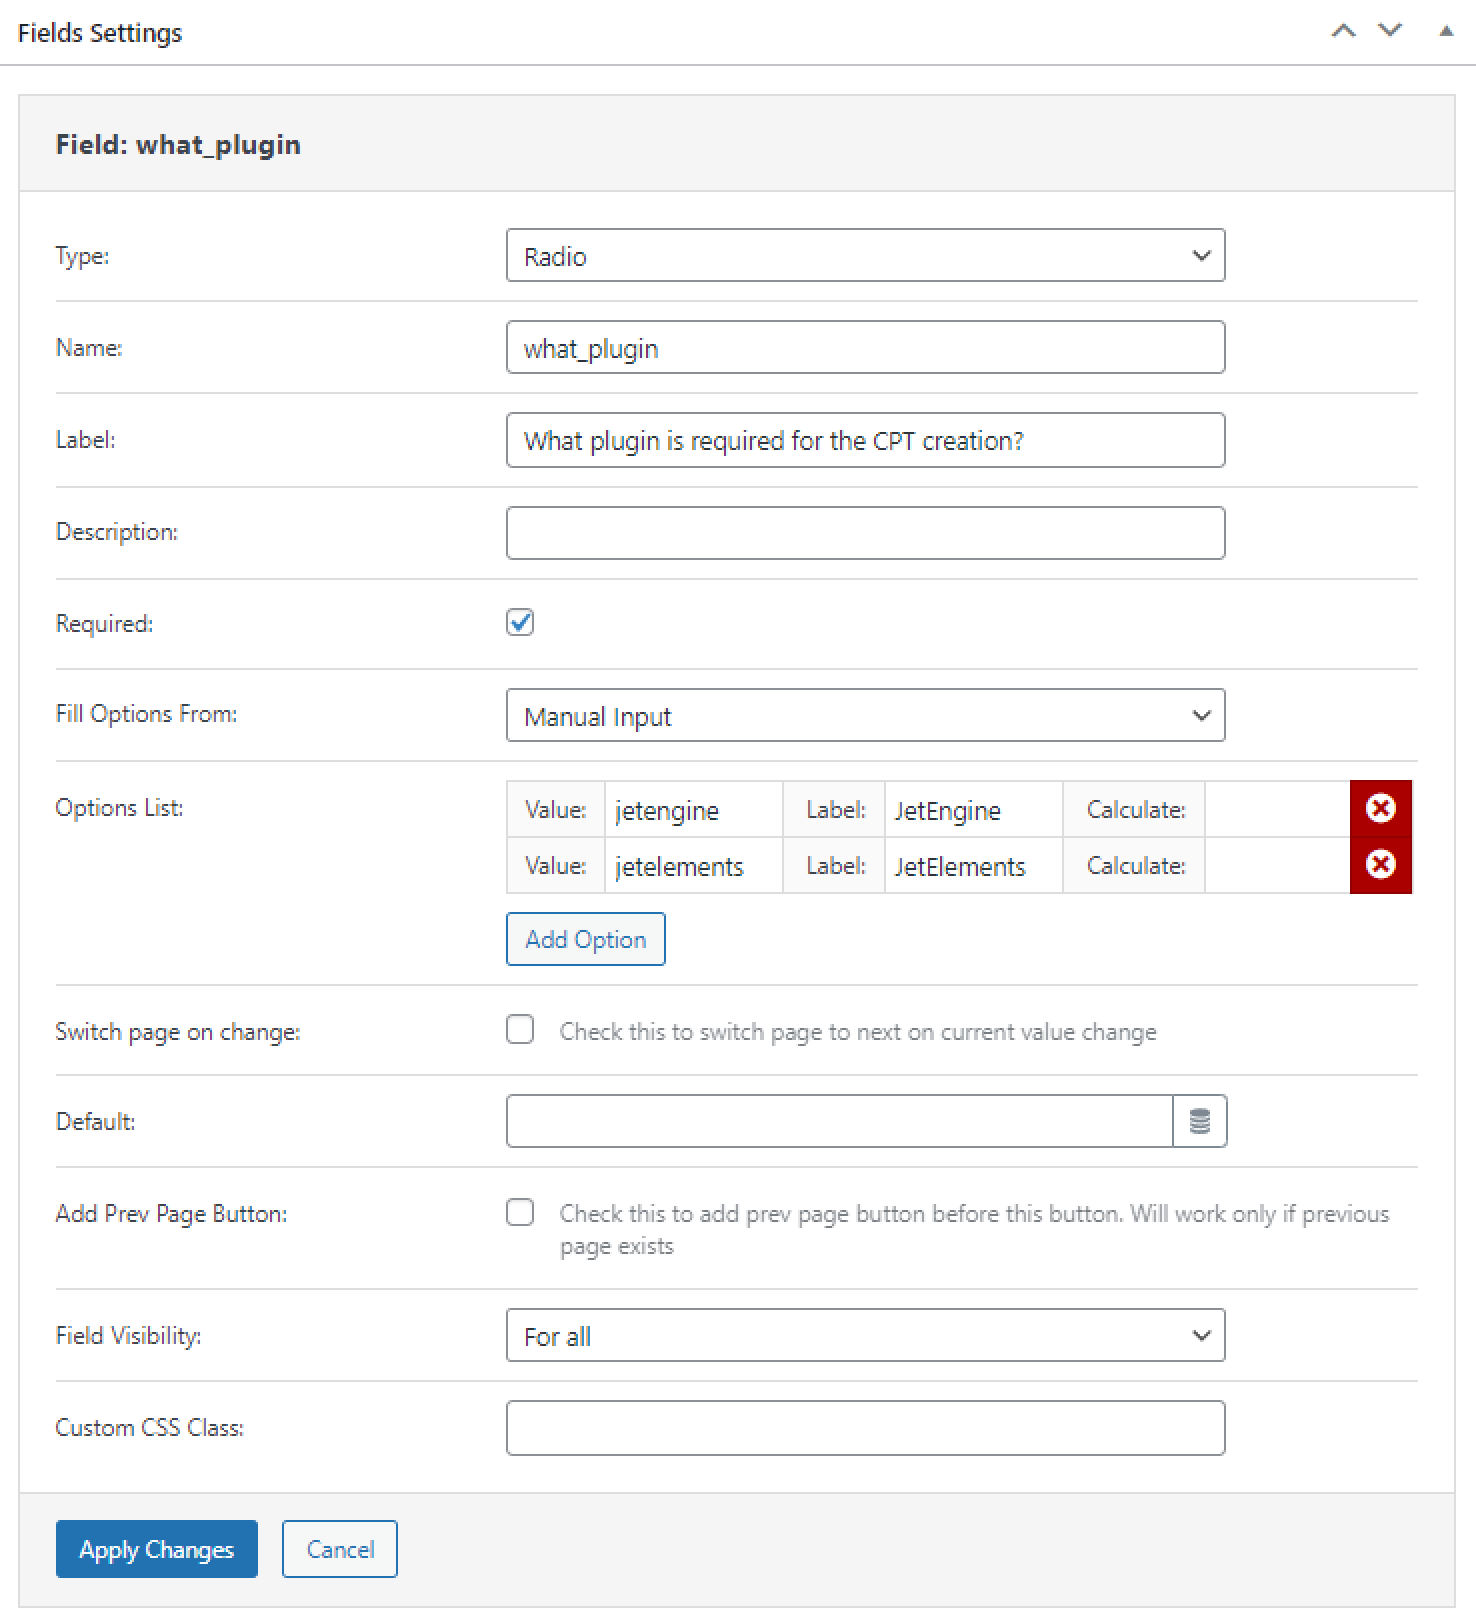
In the new Field Settings window, we’ve selected the same Type as our just created meta field – “Radio,” entered the field’s Name and Label. The Name will be used in the form settings. The Label will be shown to users in the form on the front end so that you can enter the question here.
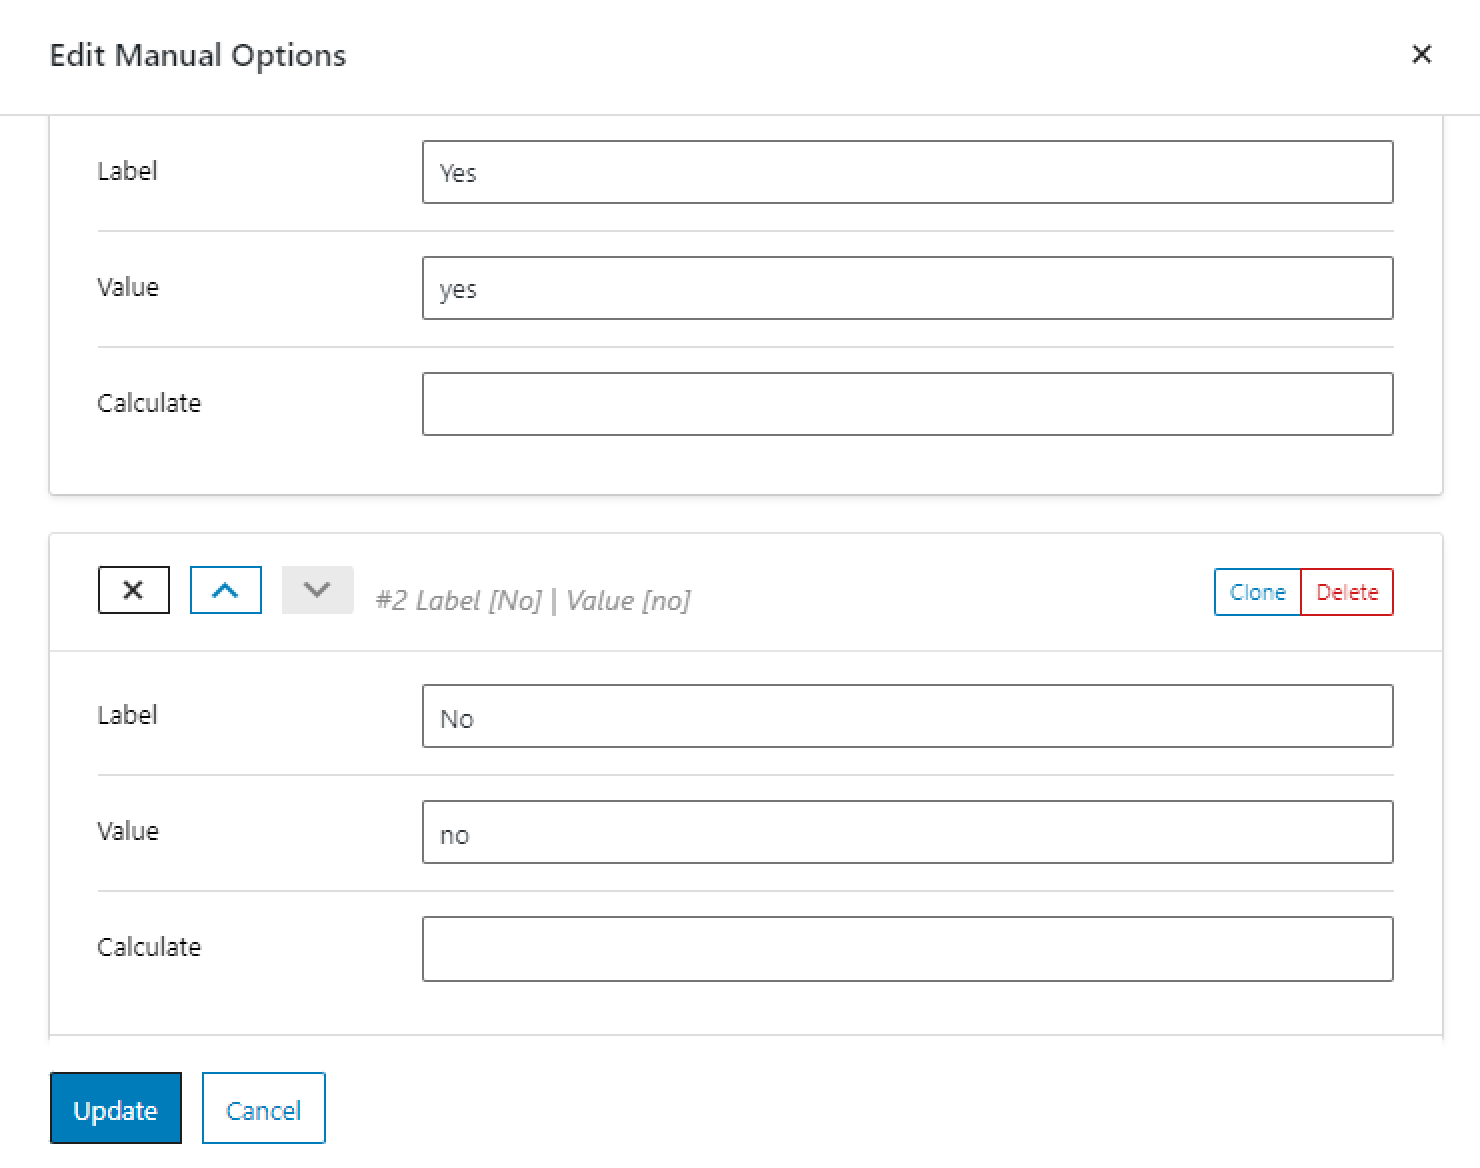
In the Fill Options From field, pick the “Manual Input” option and add the same options as in your meta field (“Yes” and “No” in our case). If you’ve used the Glossary for the meta field, you can use it again here by selecting the “Glossary” option in the Fill Options From field.
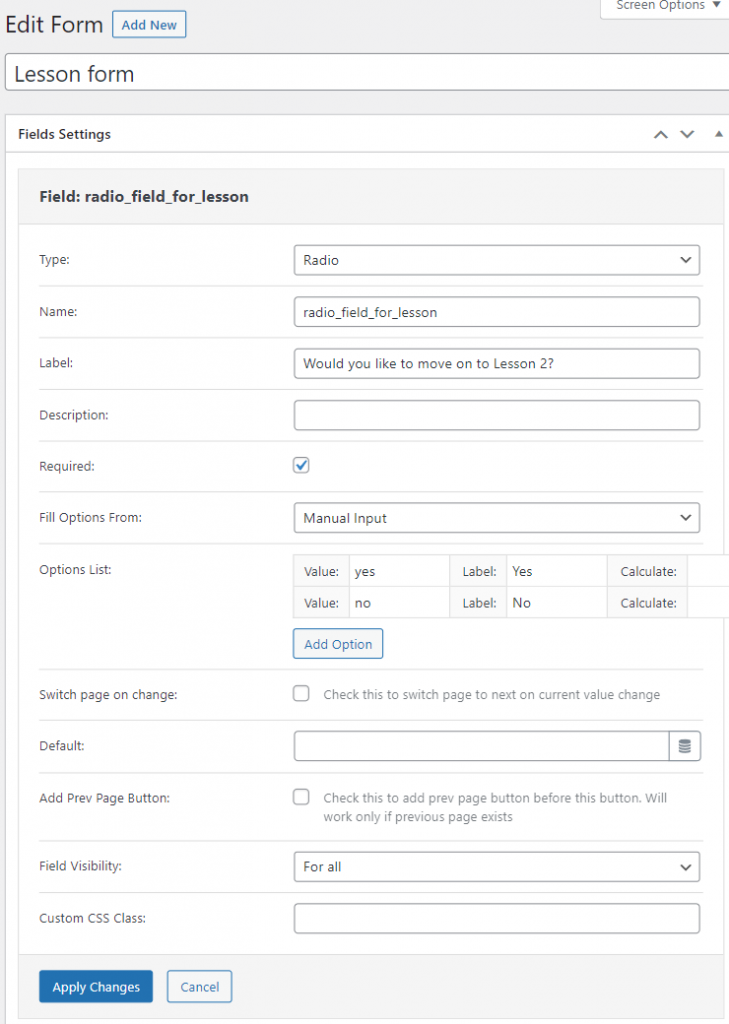
Then, push the “Apply Changes” button.
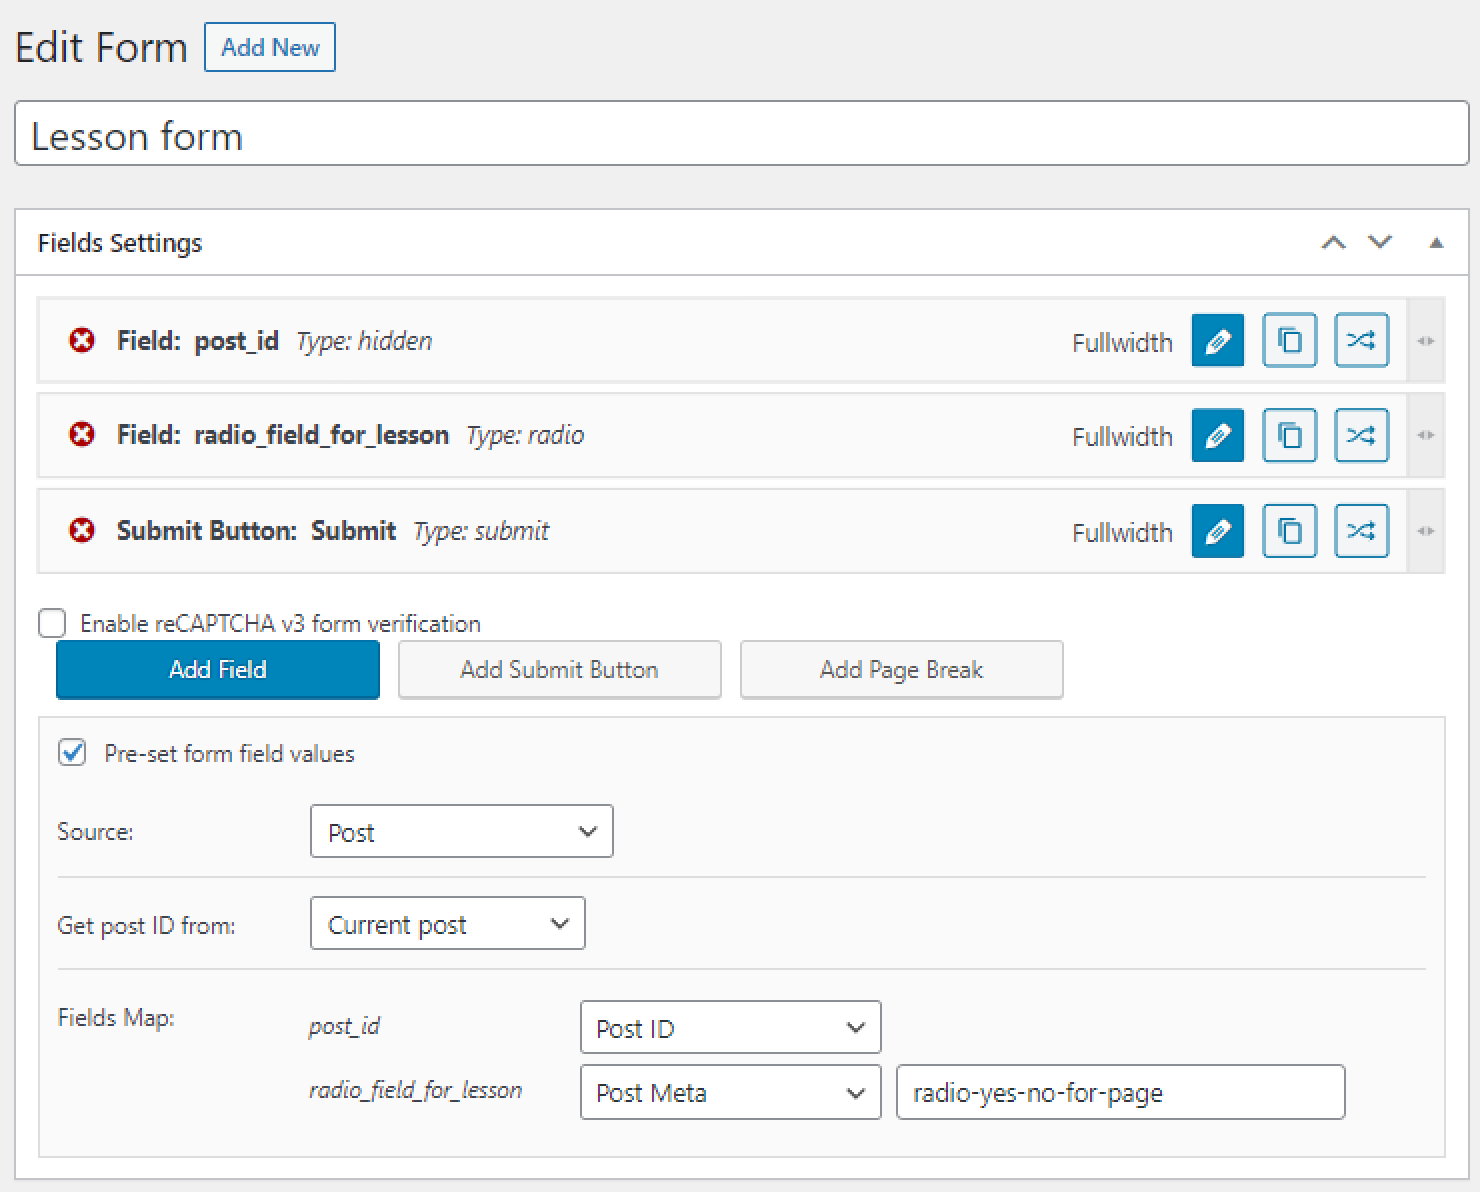
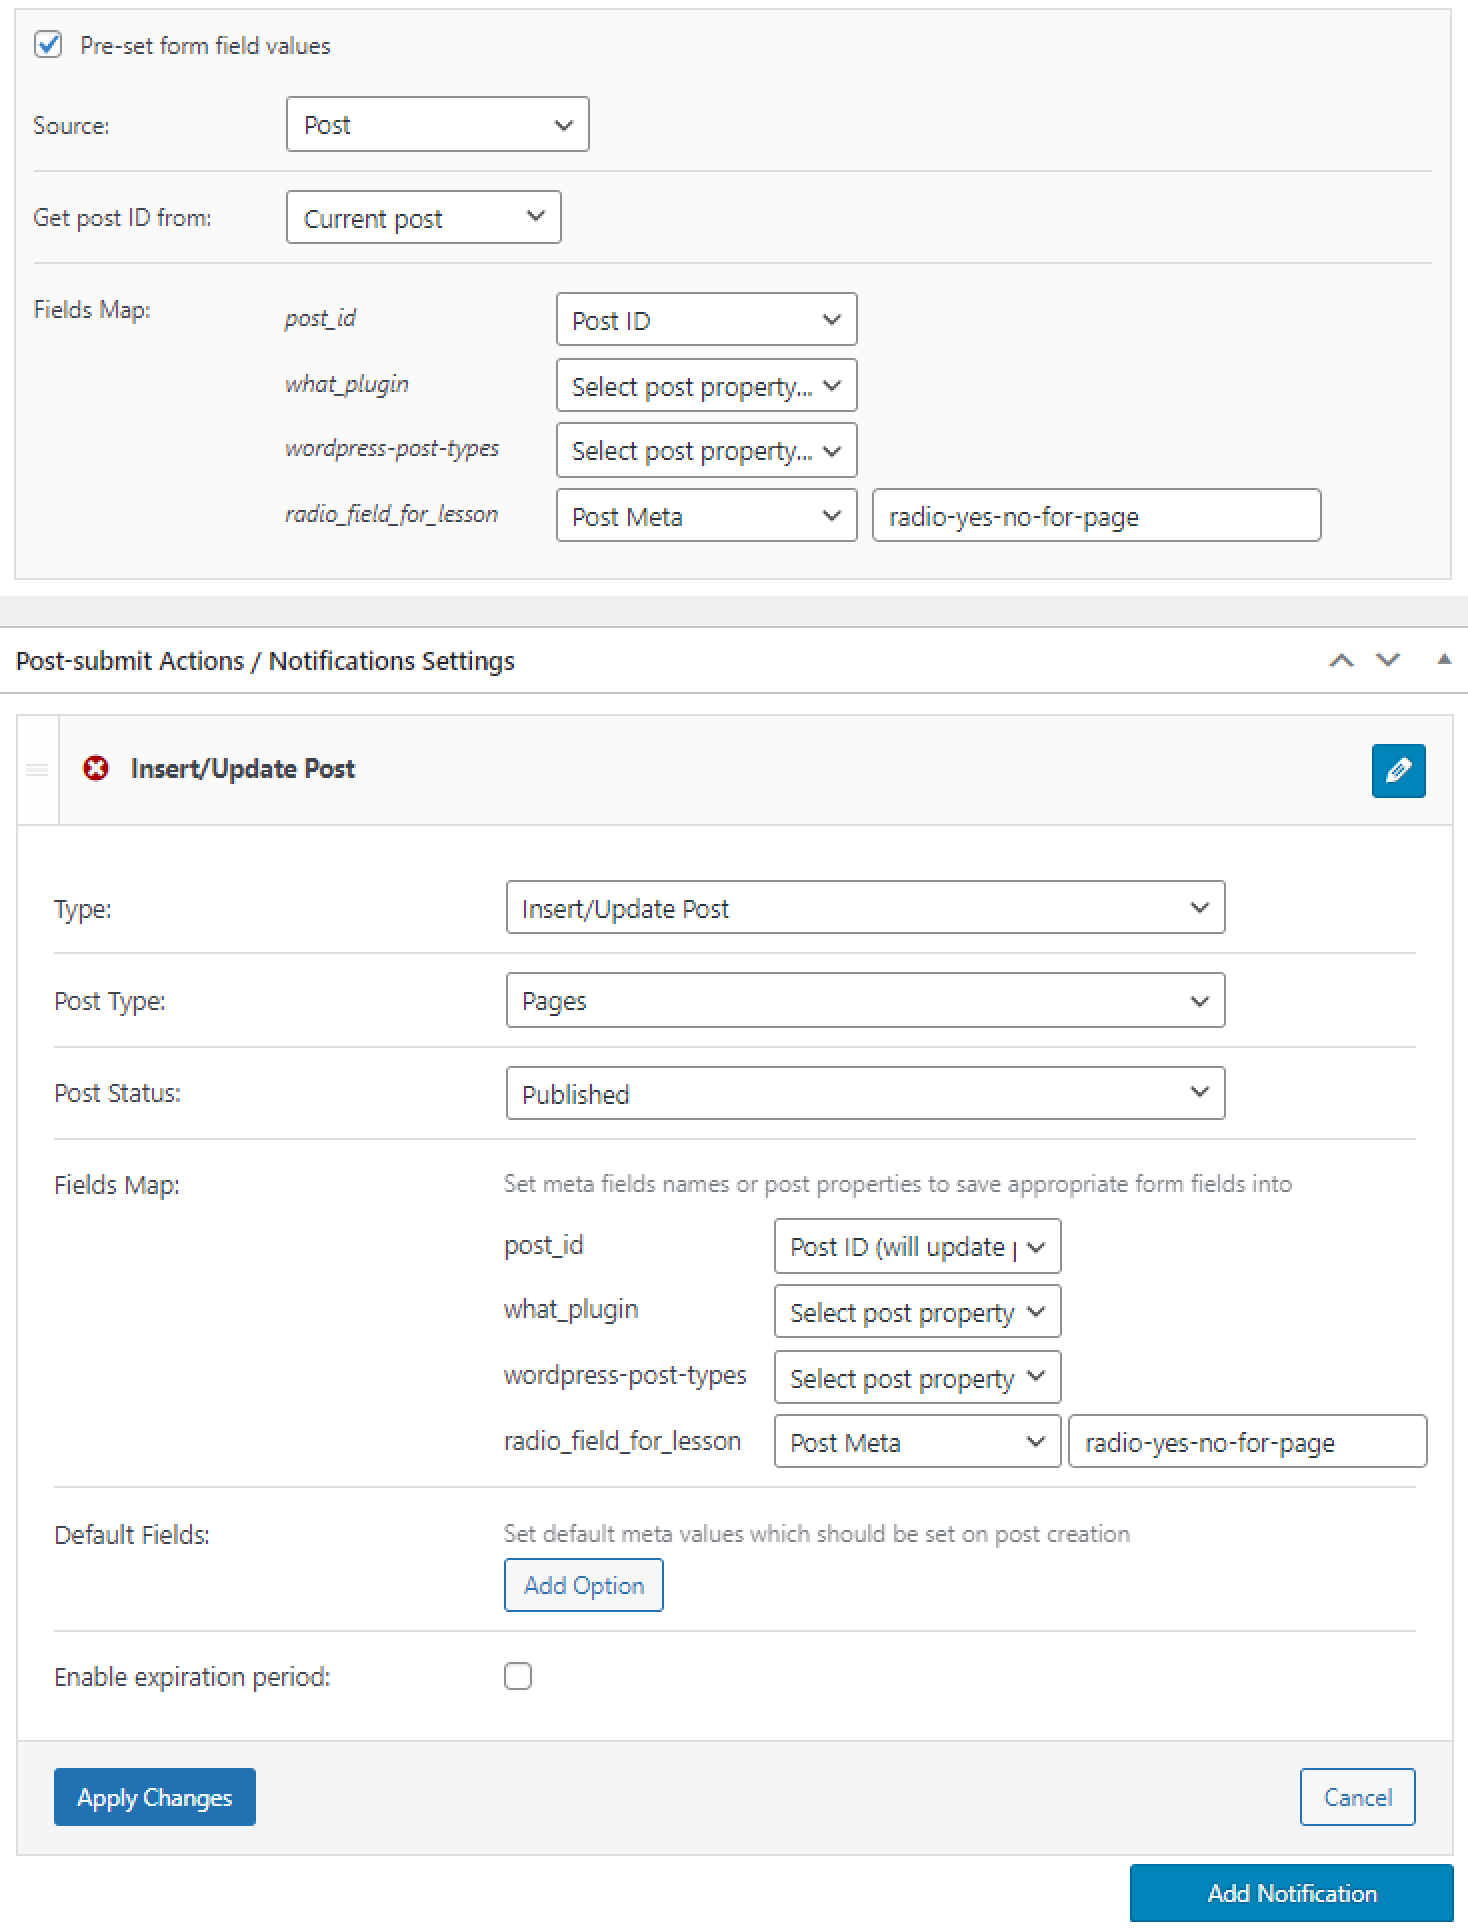
Tick the “Pre-set form field values” checkbox. Choose the “Post” option as a Source and the “Current post” option in the Get post ID from field.
In the Fields Map, select the “Post ID” option near the Hidden field name (post_id in our case). Near the Radio or another field for the Dynamic Visibility, pick the “Post Meta” option, and in the nearby field, enter the name of the recently created meta field.
Go to the Post-submit Actions / Notifications Settings tab and click on the pencil-shaped icon to edit the action.
Pick the “Insert/Update Post” Type, select the needed Post Type (“Pages” in our case), and pick the “Published” Post Status.
In the Fields Map, select the “Post ID (will update post)” option near the Hidden field name (post_id in our case). Near the Radio or another field for Dynamic Visibility, pick the “Post Meta” option again, and in the nearby field, enter the name of the recently created meta field.
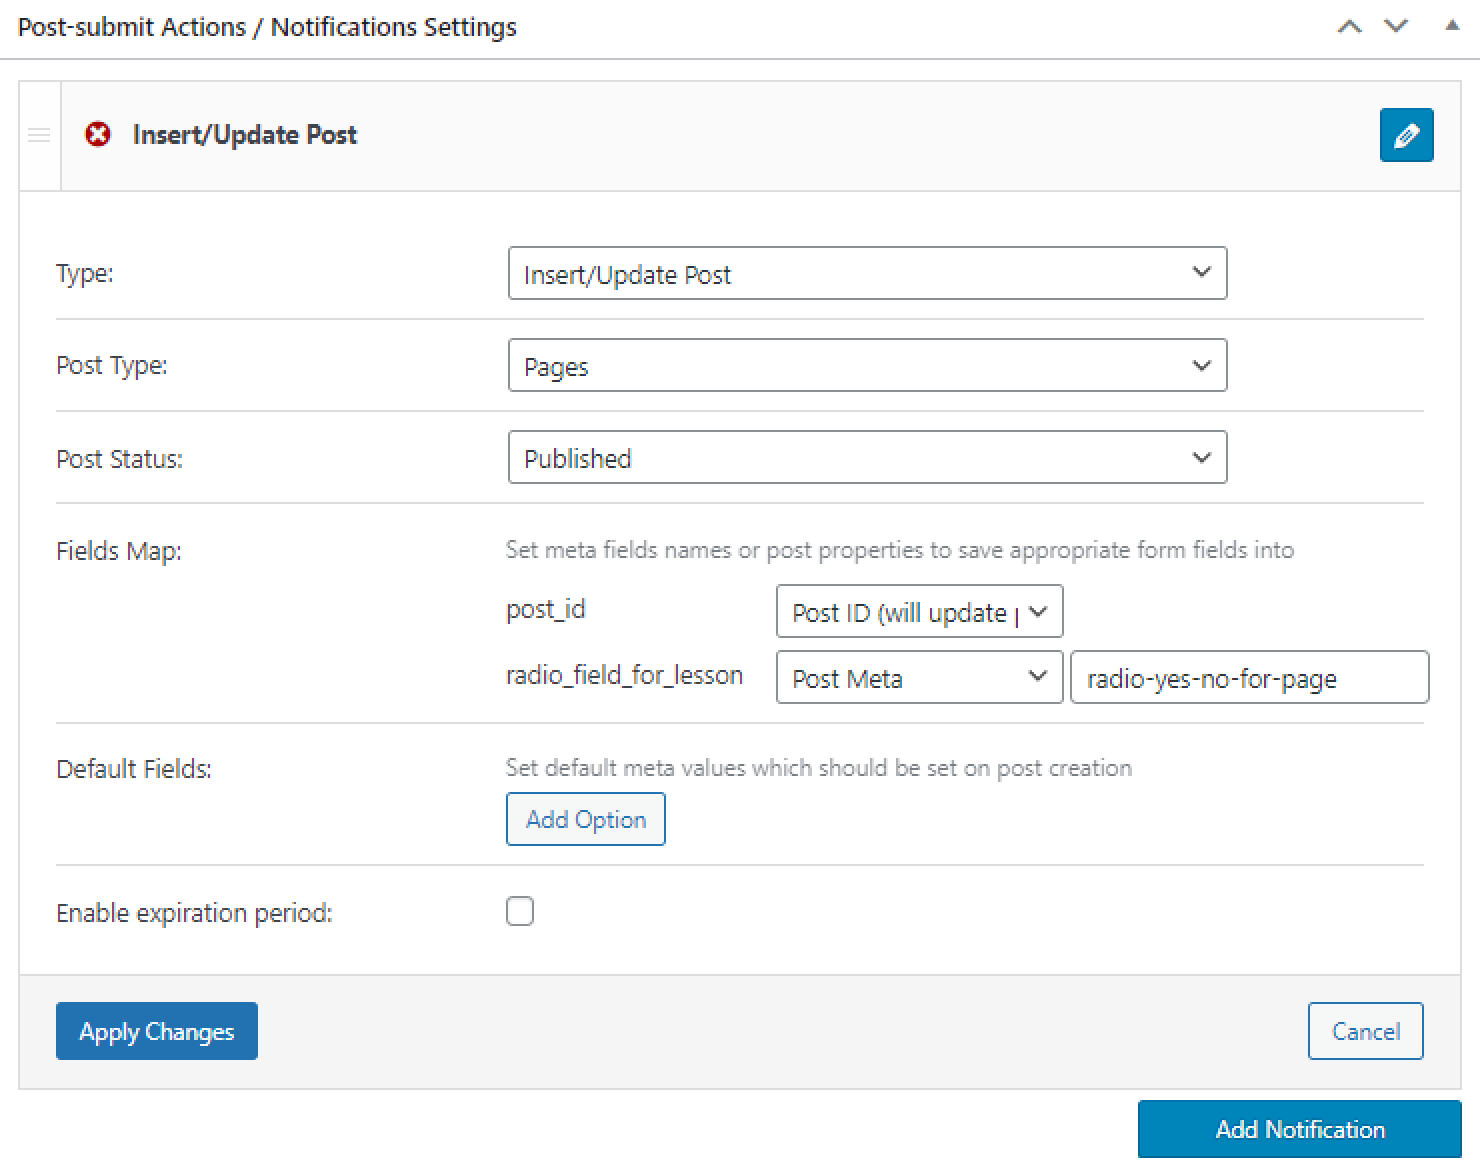
After finishing, push the “Apply Changes” button.
You can also add several fields with the questions into the form to check your learners’ knowledge and apply Conditional Rules to them.
We’ve created three question Radio fields for the form (including the field with the “Yes” and “No” options) and applied the Conditional Rules to the last two of them.
Click on the “Set up conditional rules” button and then press the “+ New Rule” button.

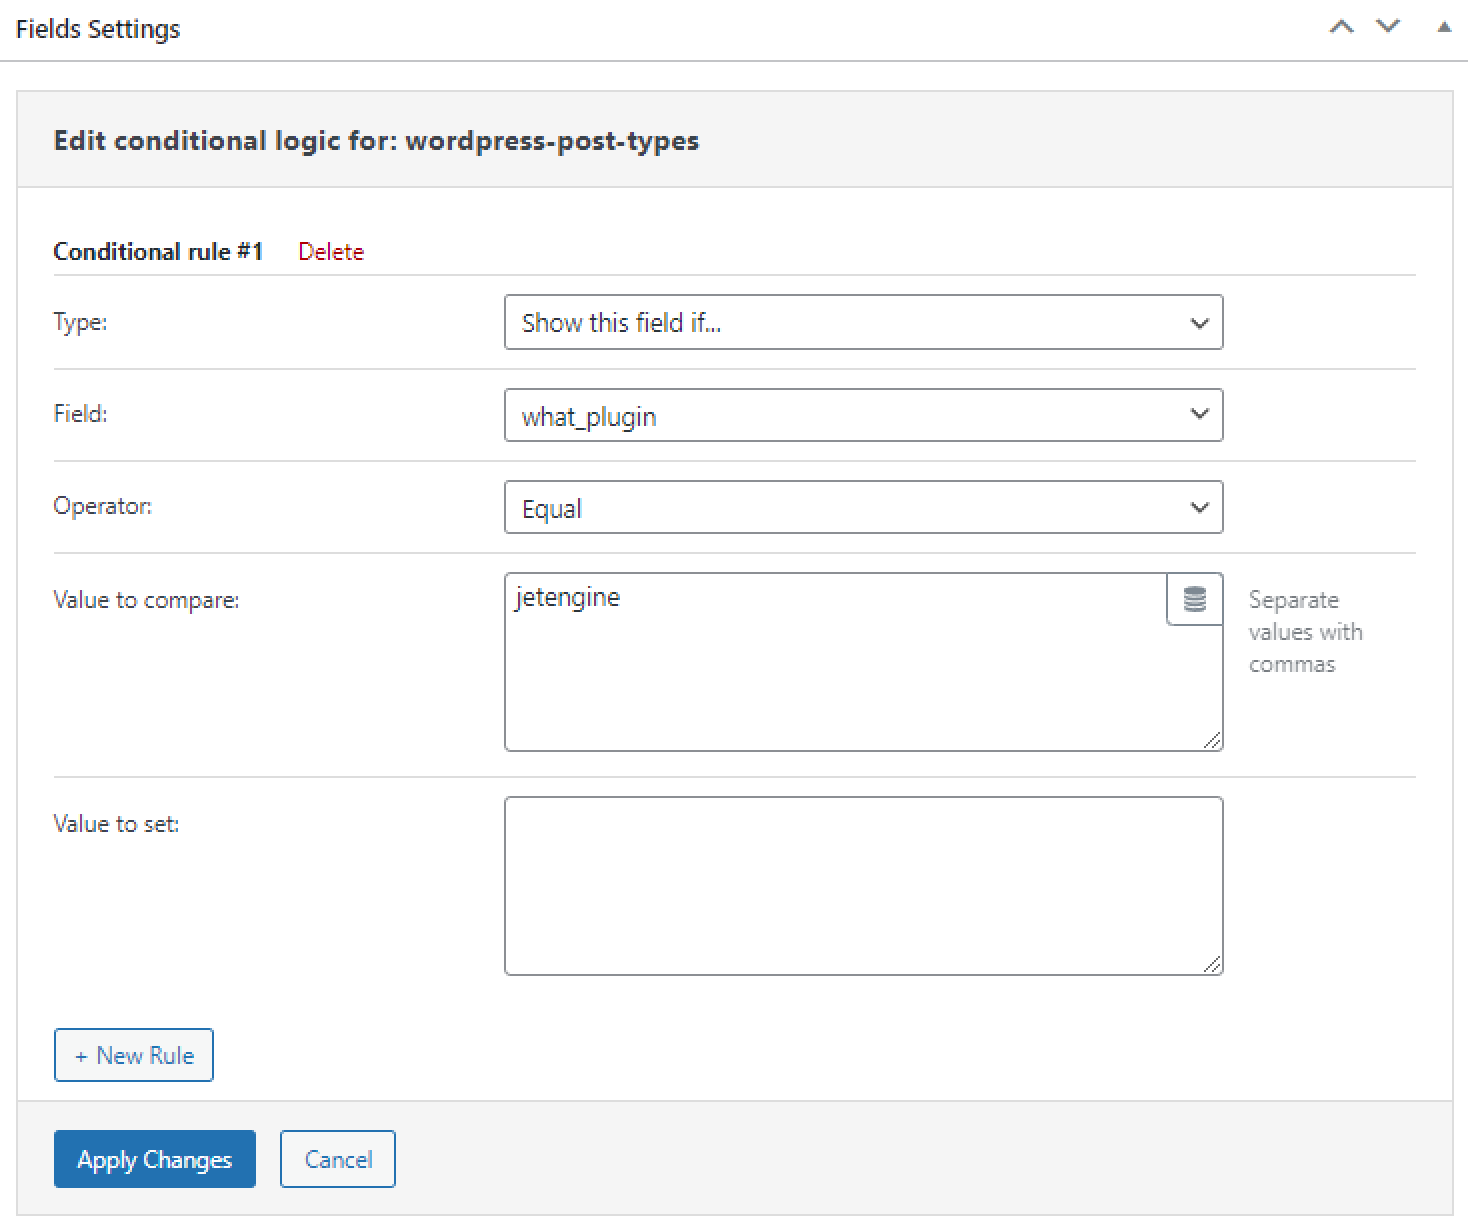
In the Edit conditional logic for window, select the “Show this field if…” Type, choose the name of the previous Field with the question, pick the “Equal” Operator, and enter the Value of the right option in the Value to compare field.
For instance, our previous field contains the Label with the question “What plugin is required for the CPT creation?” and has two Options entered manually with the “jetengine” and “jetelements” Values. The correct answer is “JetEngine,” so we’ve entered the “jetengine” in the Value to compare field. Thus, the user will only see the next question if they pick the correct answer.
Press the “Apply Changes” button and set the Conditional Logic to other fields if you need it.
We don’t want to save the answers results of the newly created Radio field, so we’ve left the Fields Map options in the Pre-set and Post-submit Action unchanged.
When you are done working with the form, hit the “Publish” or “Update” button.
How to Create a JetFormBuilder Form
If you prefer to create the form with the JetFormBuilder plugin, that’s how to do this.
Navigate to JetFormBuilder > Add New in the WordPress Dashboard. Give the new form a title.
Leave the Hidden Field settings as they are by default and delete the Text Field if you don’t need it.
Click on the Toggle block inserter button and place the Radio Field between the Hidden Field and the Action Button.
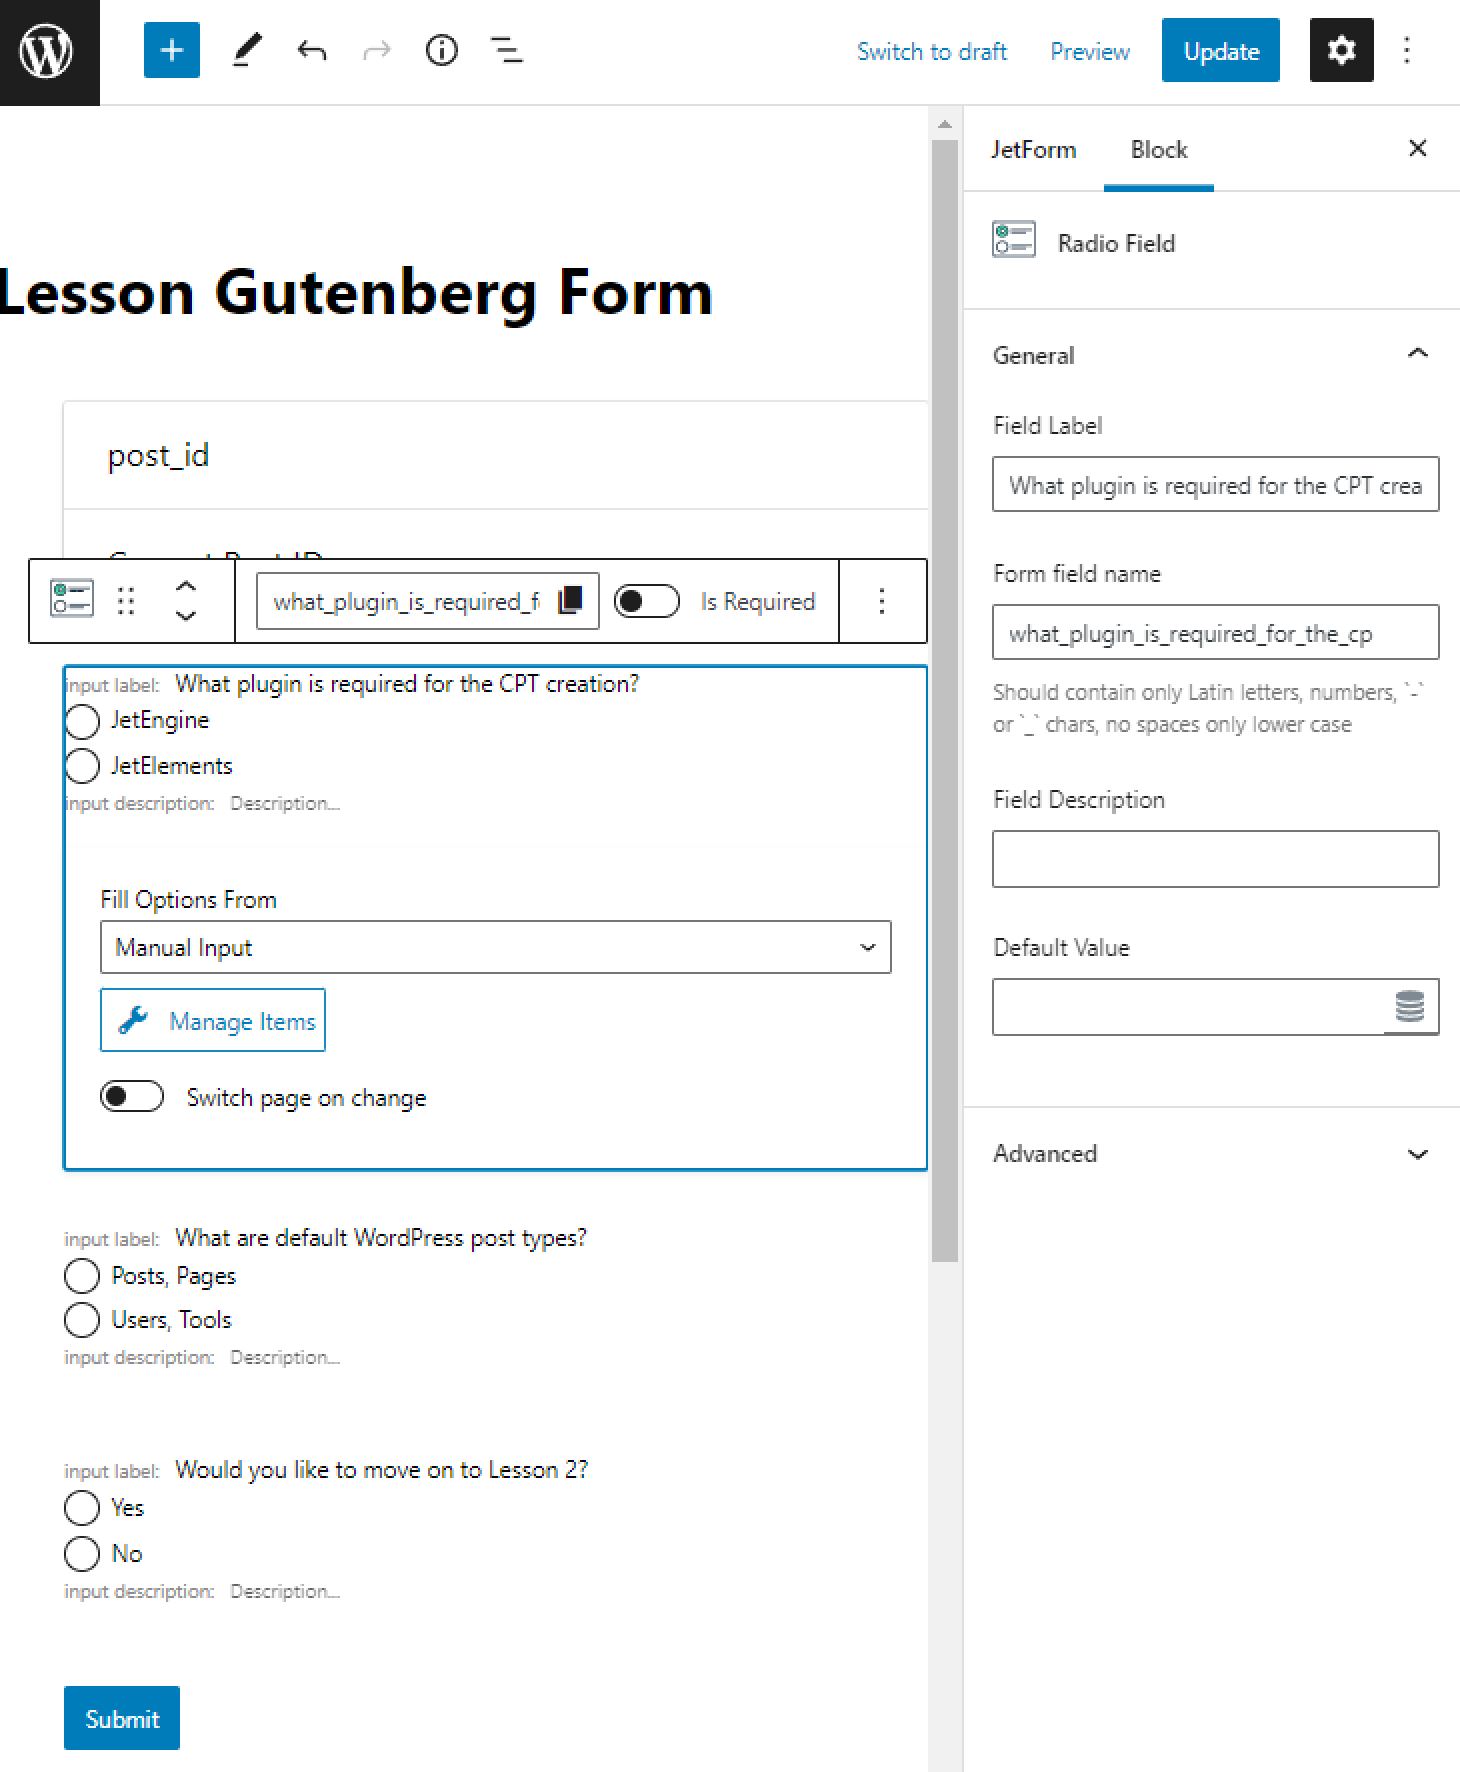
In the Block General settings tab of the Radio Field, enter the Field Label and the Form field name. The Field Label will be shown to users in the form on the front end so that you can enter the question here, and the Form field name will be used in the form settings.
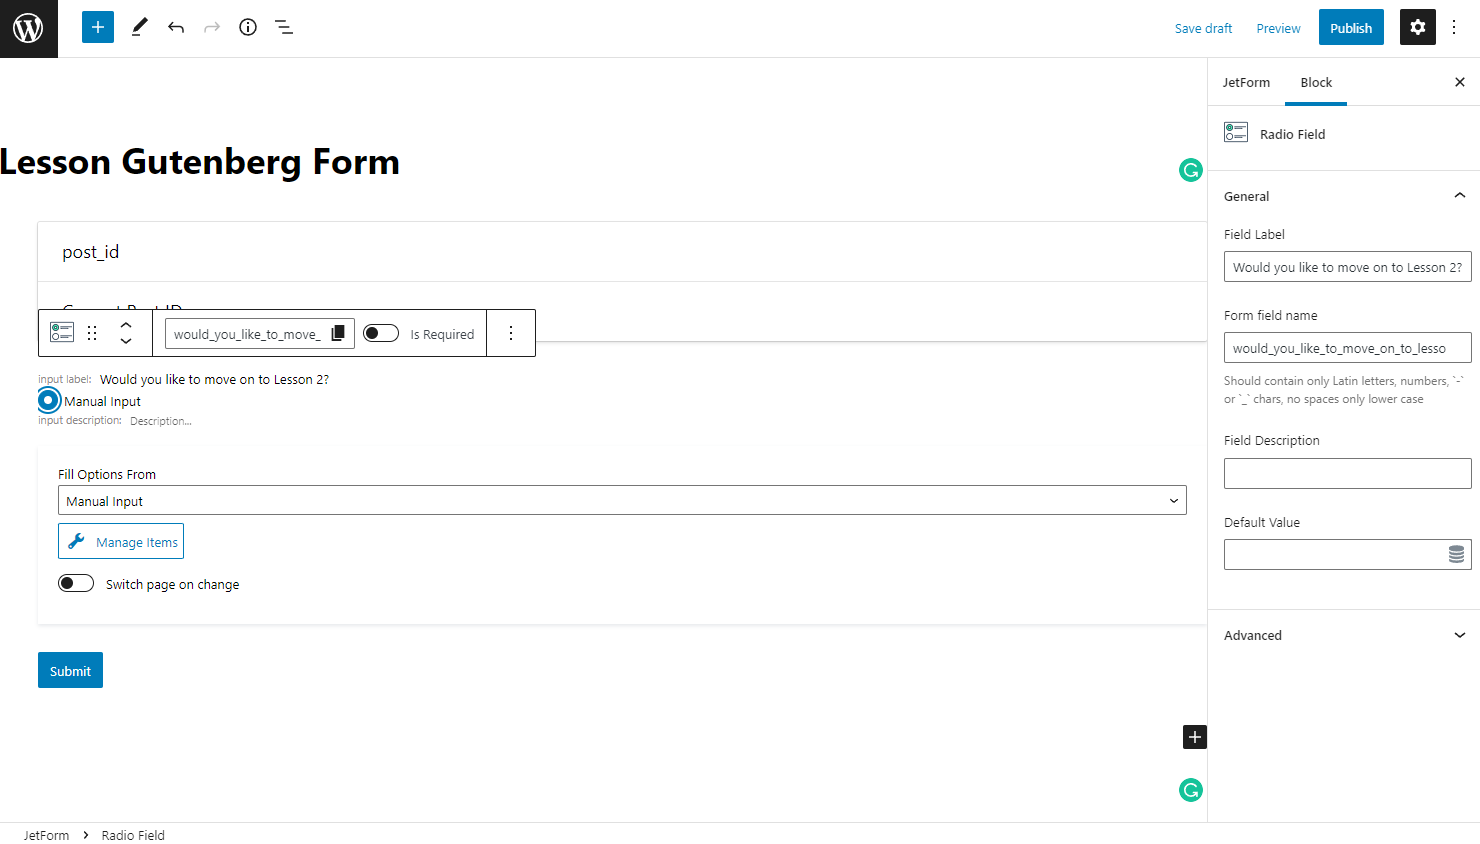
Pick the “Manual Input” option in the Fill Options From field and then hit the “Manage Items” button.
In the new appeared window, add the same options as in your meta field (“Yes” and “No” in our case). If you’ve used the Glossary for the meta field, you can use it again here by selecting the “Glossary” option in the Fill Options From field.
Then, push the “Update” button.
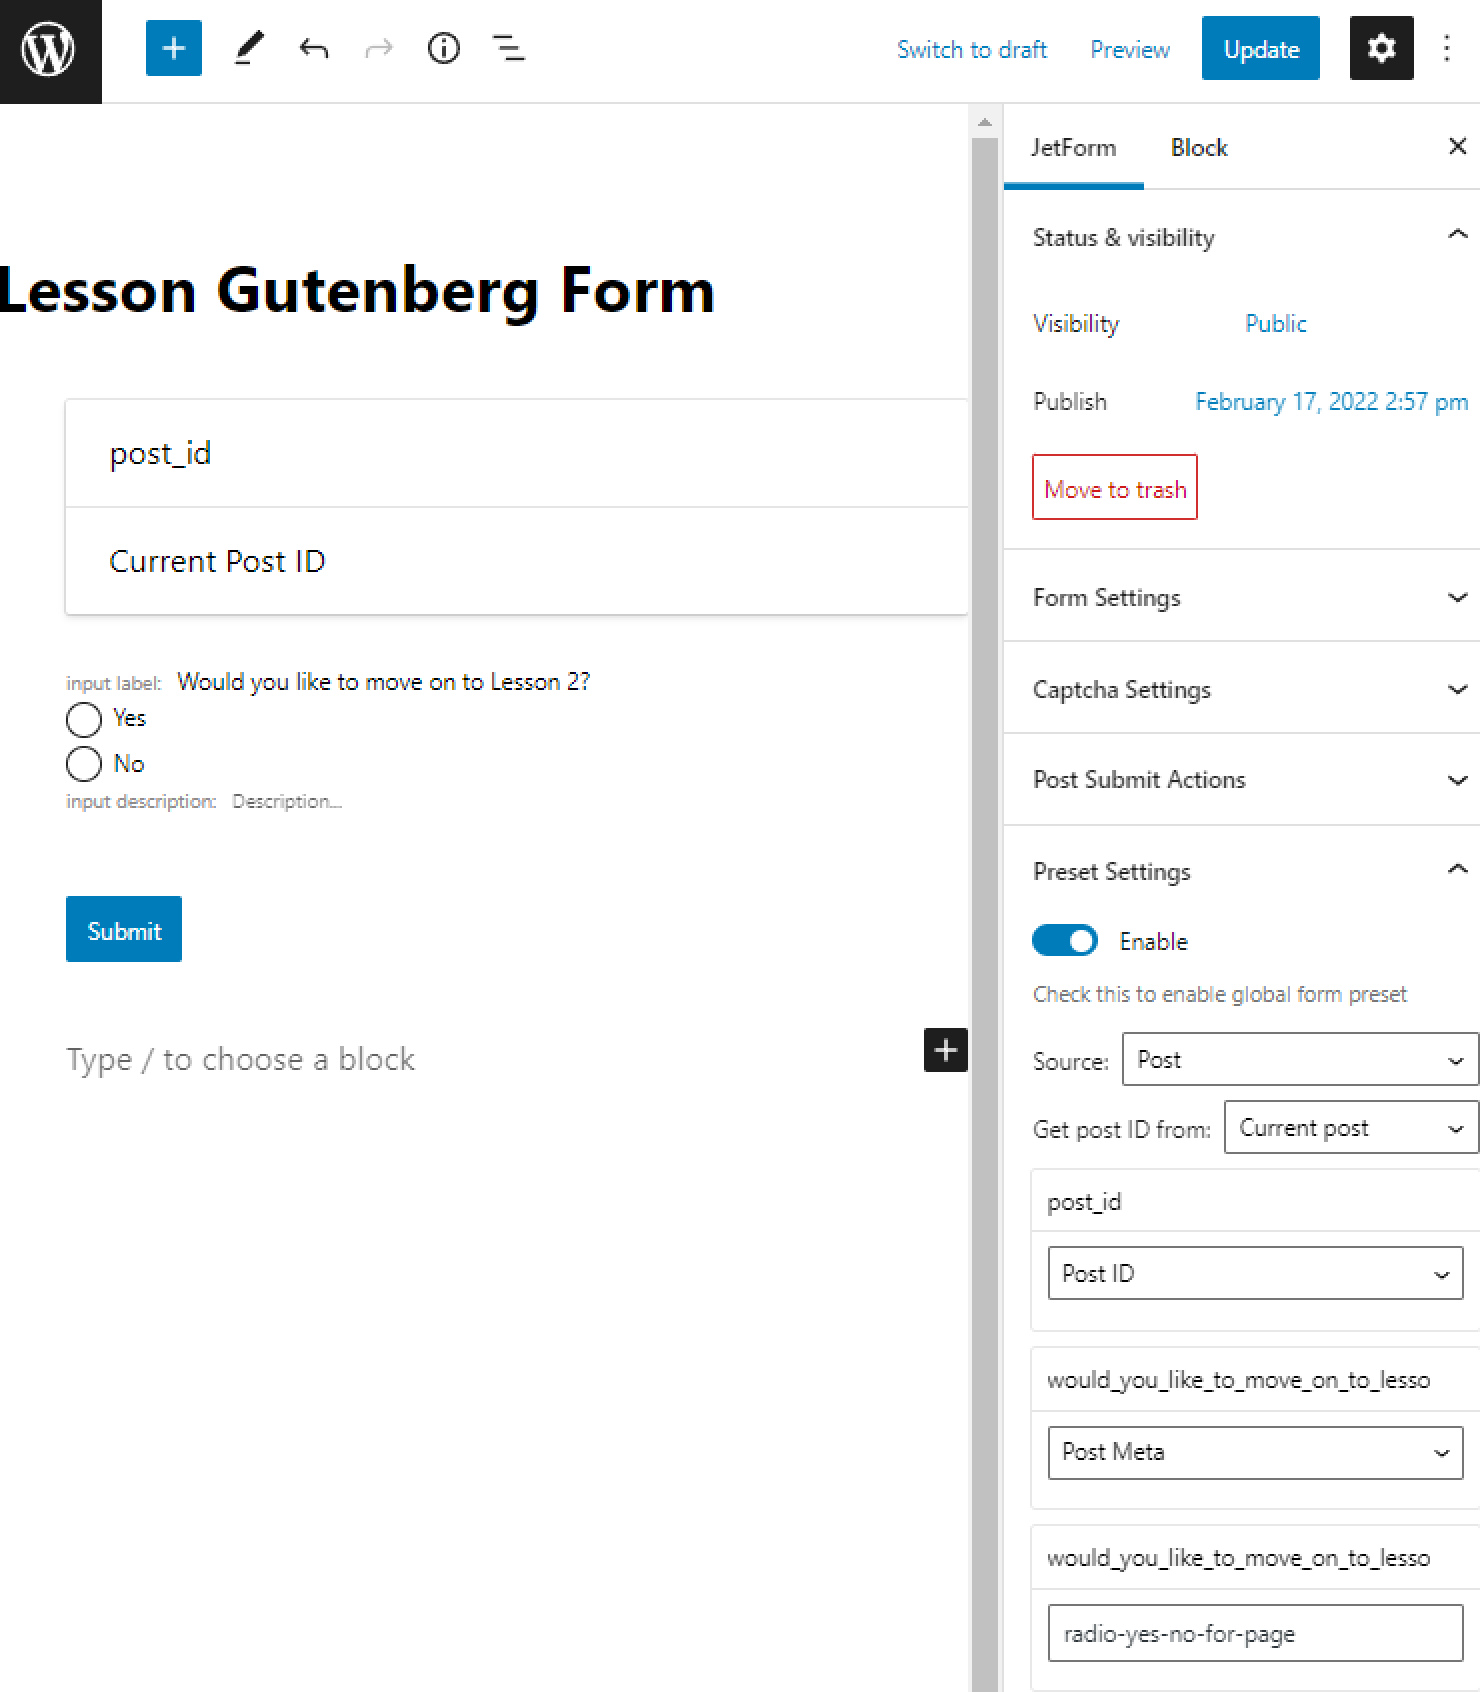
Proceed to the JetForm settings tab and go to the Preset Settings section. Enable the toggle, select the “Post” as a Source, and pick the “Current post” option in the Get post ID from field.
Choose the “Post ID” option near the Hidden field name (post_id in our case). Near the Radio or another field for Dynamic Visibility, pick the “Post Meta” option, and in the nearby field, enter the name of the recently created meta field.
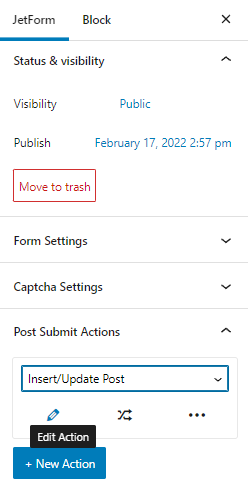
Move to the Post Submit Actions tab, select the “Insert/Update Post” type, and click on the pencil-shaped icon to edit the action.
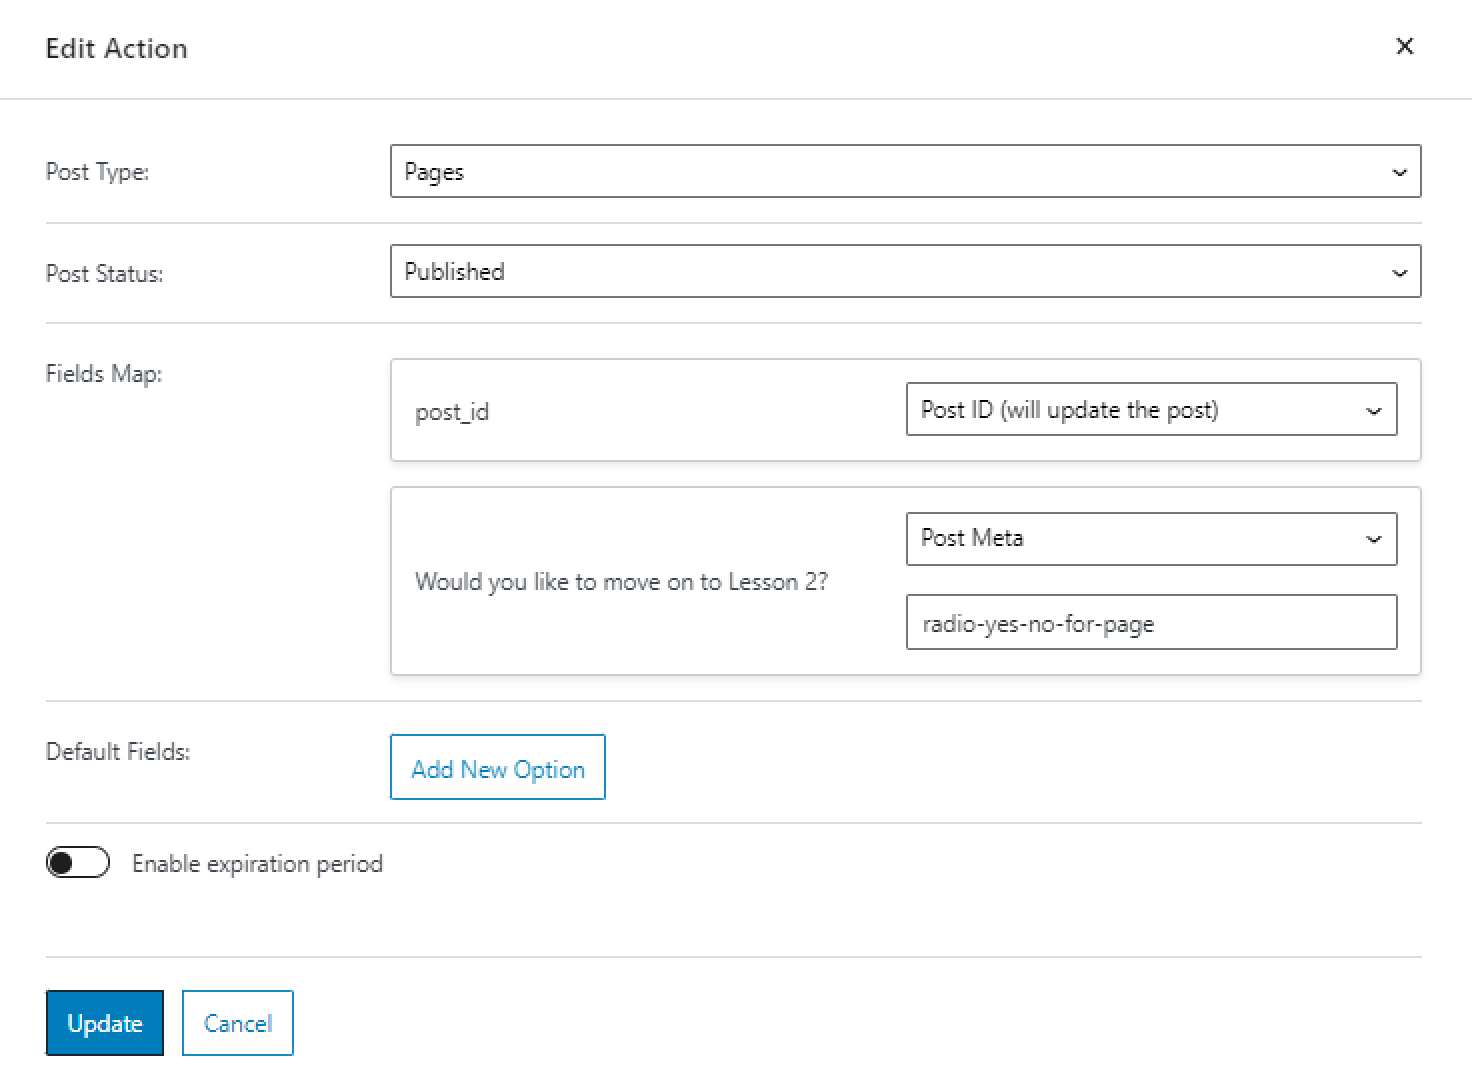
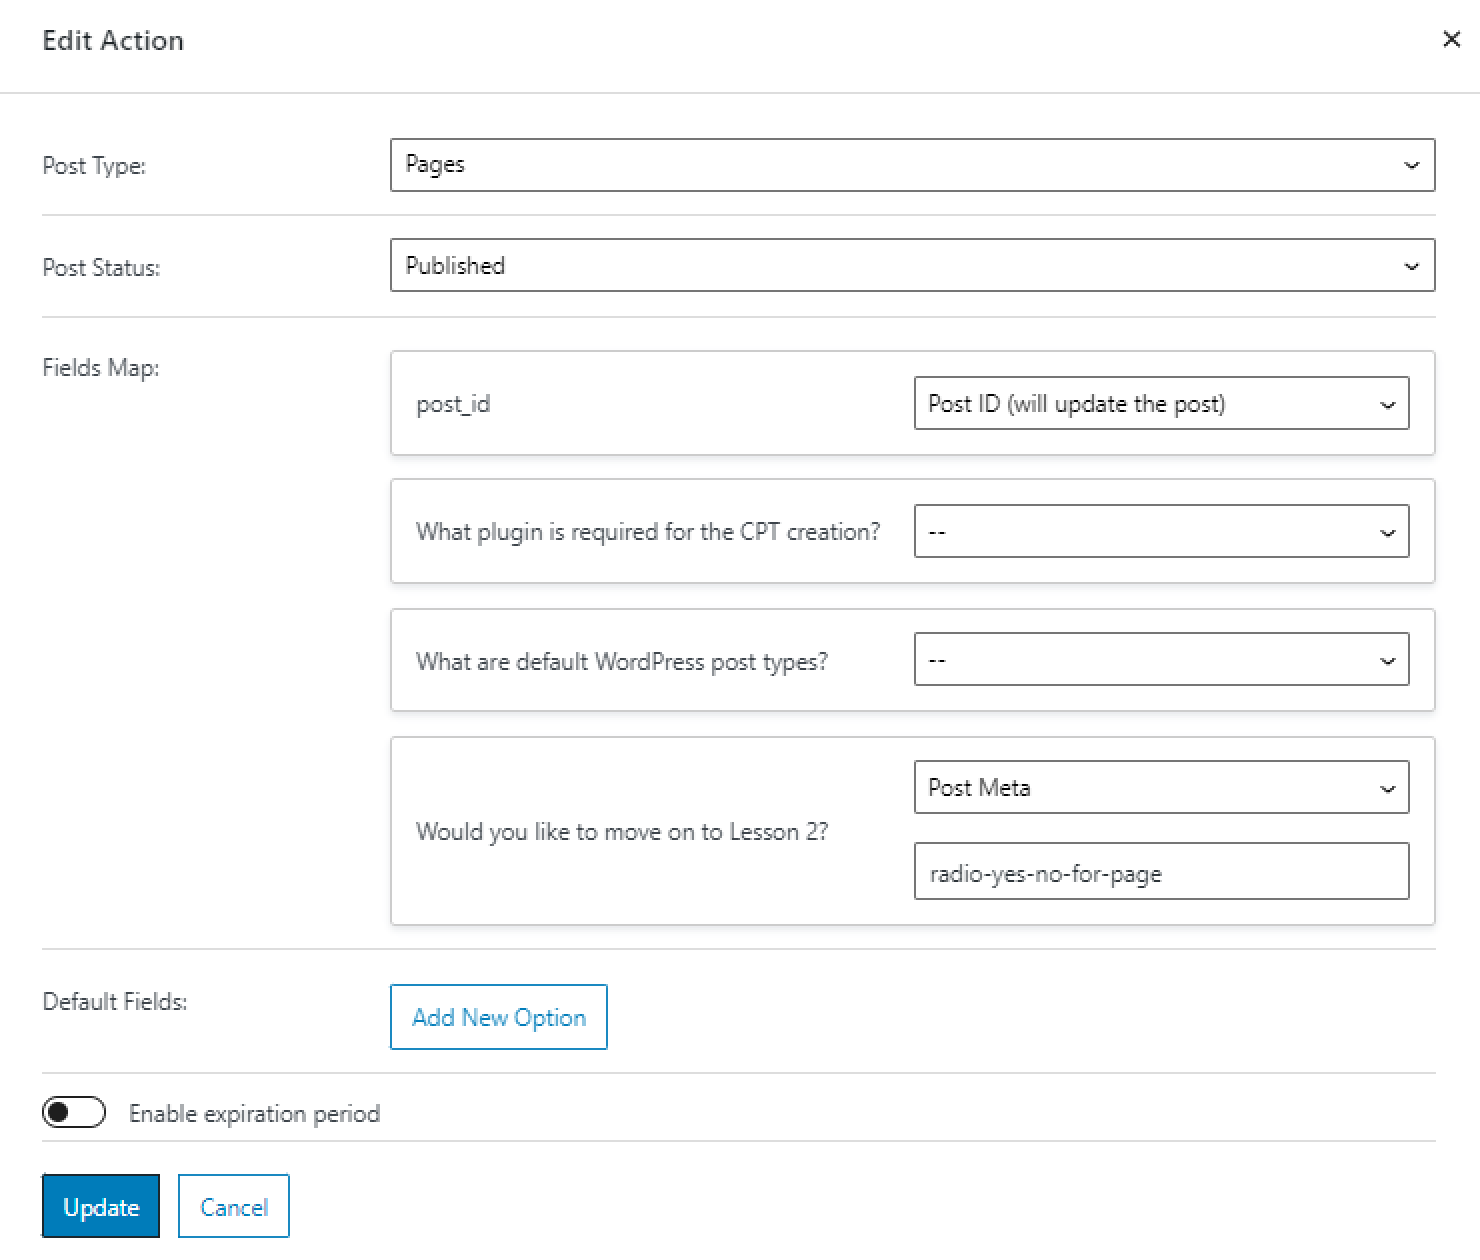
In the appeared window, select the needed Post Type (“Pages” in our case), and pick the “Published” Post Status.
In the Fields Map, select the “Post ID (will update post)” option near the Hidden field name (post_id in our case). Near the Radio or another field for Dynamic Visibility, pick the “Post Meta” option again, and enter the name of the recently created meta field in the field below.
After finishing, push the “Update” button.
You can also add several fields with questions into the form to check your learners’ knowledge and apply Conditional Rules to them.
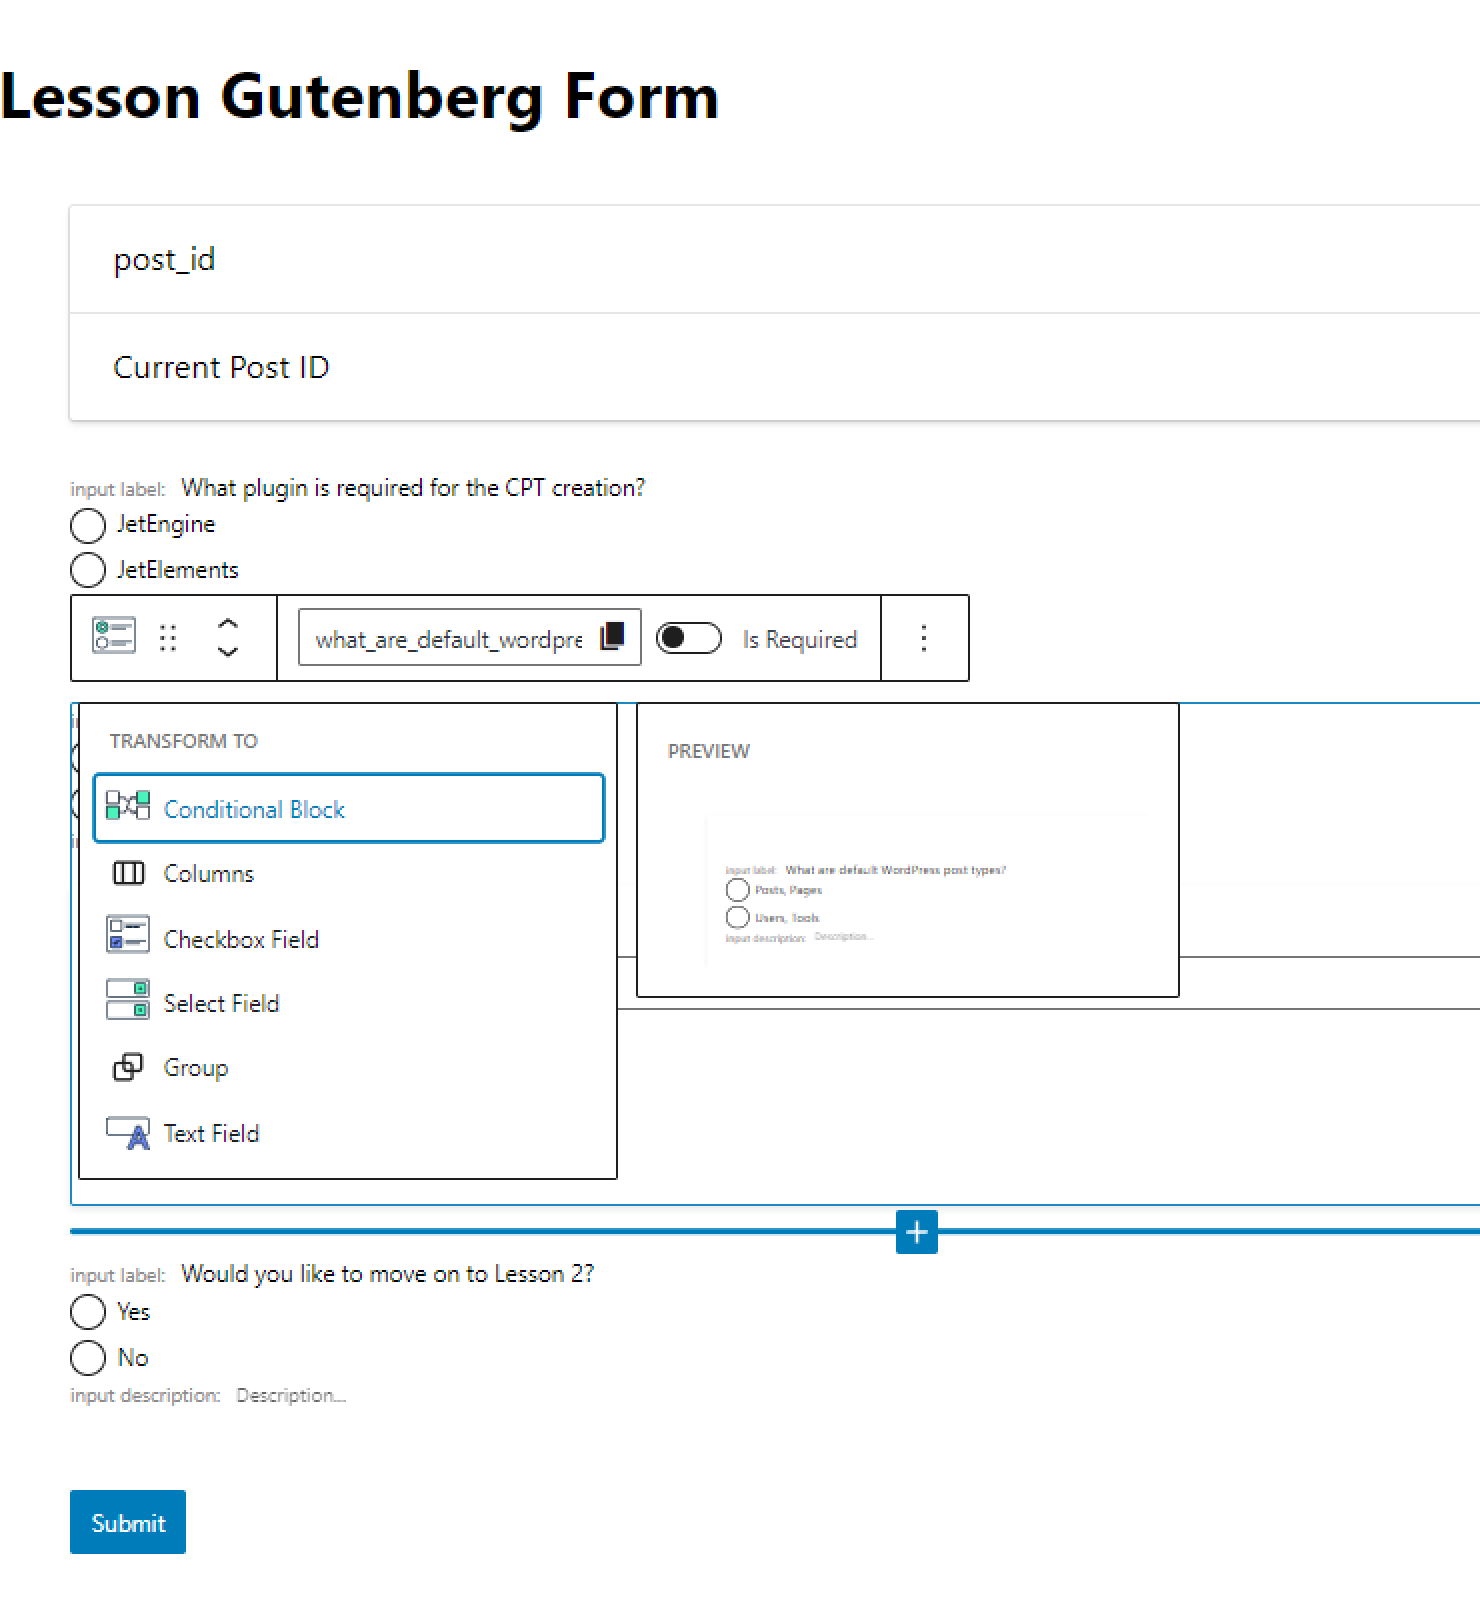
We’ve created three question Radio fields for the form (including the field with the “Yes” and “No” options) and transformed the last two fields into the Conditional Blocks.
Click on the field block and its icon on the appeared panel. Select the Conditional Block from the transformation list.
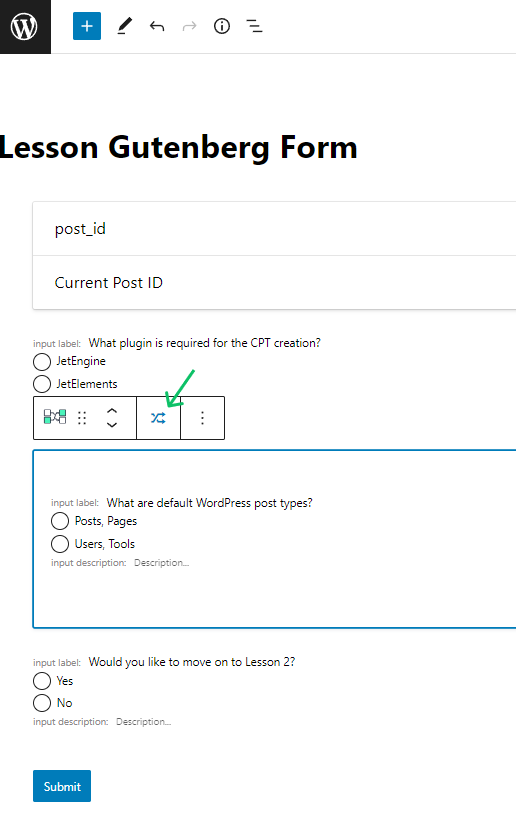
To open the Conditional Block settings window, press the button with the crossed arrows icon placed on the top tool panel to the left of the “Options” button.
In the Conditional Logic window, select the “Show this field if…” Type, choose the name of the previous Field with the question, pick the “Equal” Operator, and in the Value to compare field enter the Value of the correct option.
For instance, our previous field contains the Label with the question “What plugin is required for the CPT creation?” and has two Options entered manually with the “jetengine” and “jetelements” Values. The correct answer is “JetEngine,” so we’ve entered “jetengine” in the Value to compare field. Thus, the user will only see the next question if they pick the correct answer.

Press the “Update” button in the window and set the Conditional Logic to other fields if you need it.
We don’t want to save the answers results of the newly created Radio field, so we’ve left the settings in the Pre-set and Post-submit Action unchanged.
When you are done working with the form, hit the “Publish” or “Update” button.
Create a pop-up
To create a pop-up, you need the installed JetPopup plugin. If you don’t want to set the pop-up, you can also place the form on the page instead of putting it in the pop-up, so simply skip this step.
Navigate to JetPopup > Create New Popup in the WordPress Dashboard. You can also proceed to the JetPopup Presets Library and install any pop-up template from there and redesign it, but we will create a pop-up from scratch.
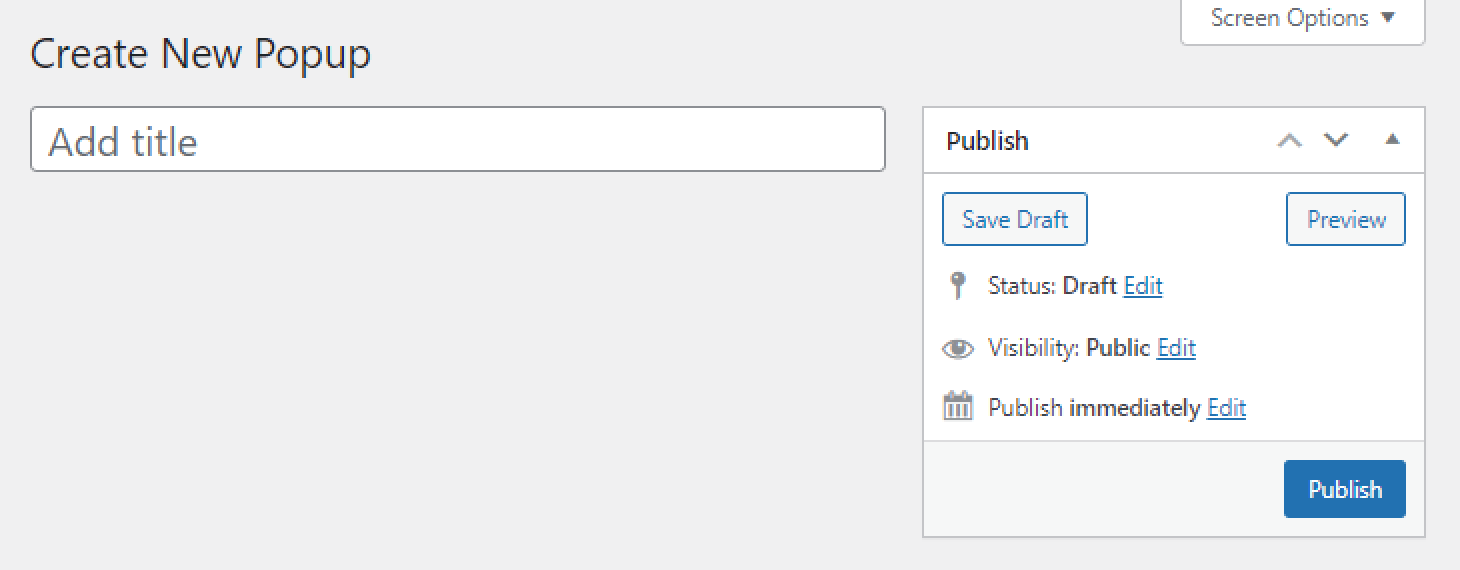
Give the pop-up a title and hit the “Publish” and then “Edit with Elementor” buttons.
Drag-n-drop the Form widget (for JetEngine and JetFormBuilder forms) or the JetForm widget (for the JetFormBuilder forms) into the pop-up.
In the Form widget’s Content settings, choose the Provider plugin which you used to create a form and Select the form’s name.
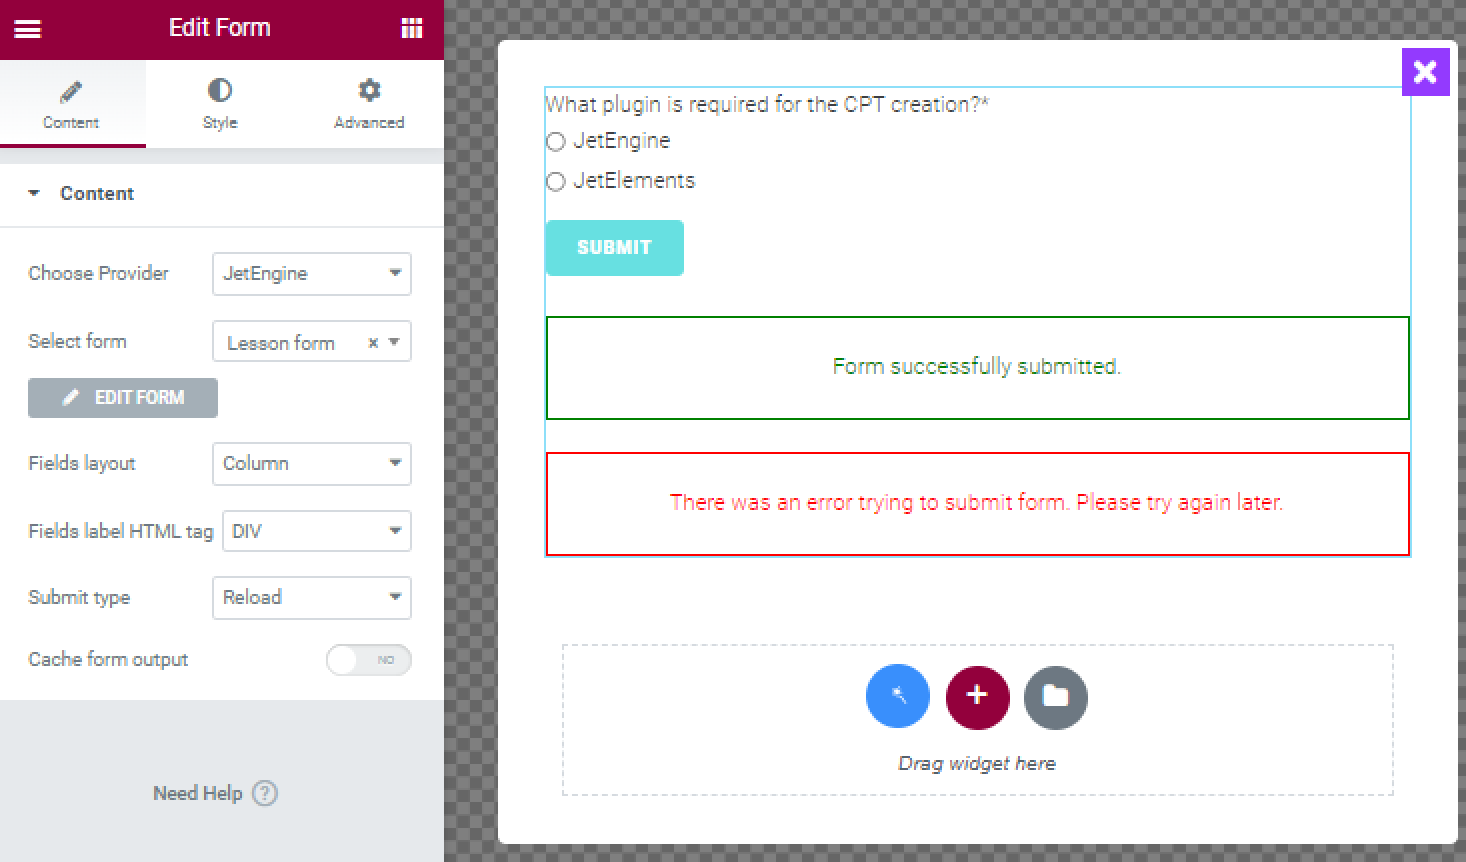
After finishing, click on the “Update” button.
Create a page with content
Move to Pages > Add New in the WordPress Dashboard. Give the page a title and press the “Edit with Elementor” button.
Since there need to be different forms and visibility conditions applied to each post, it’s not possible to use the Listing Grid on the page.
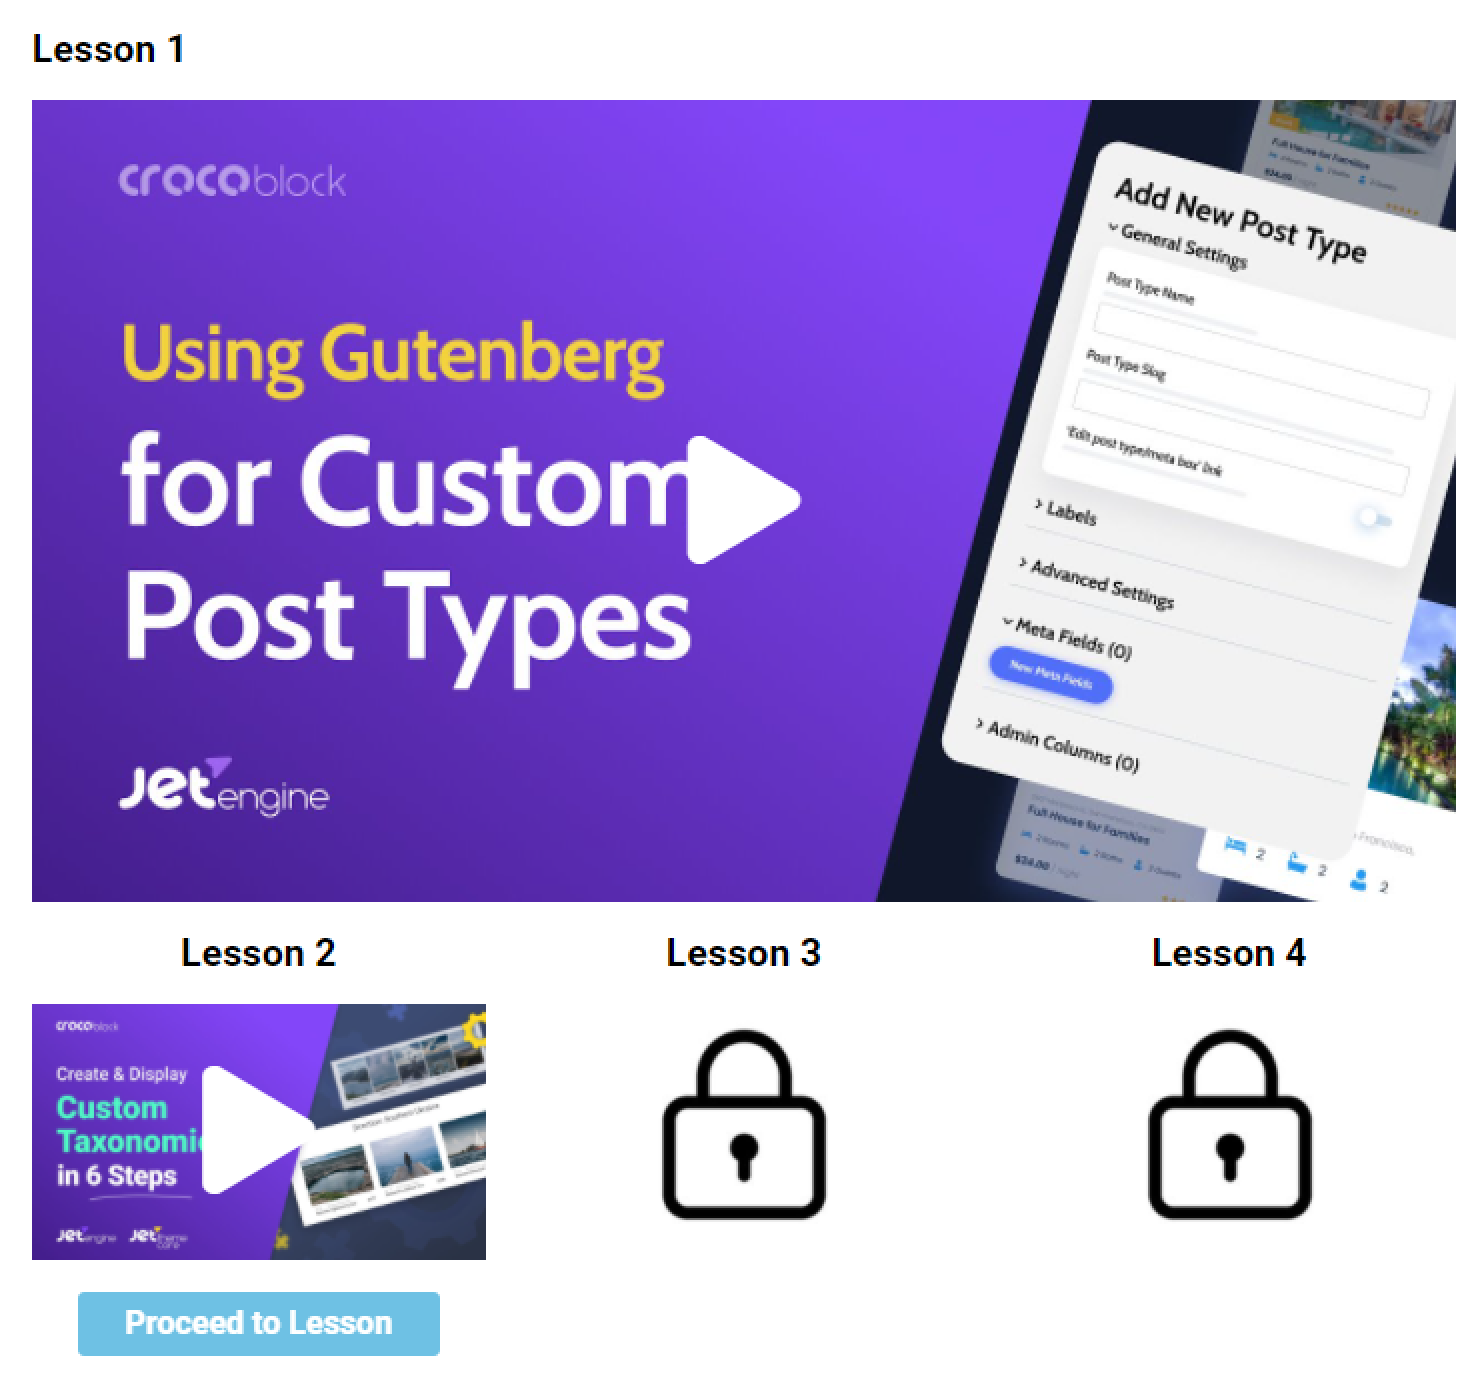
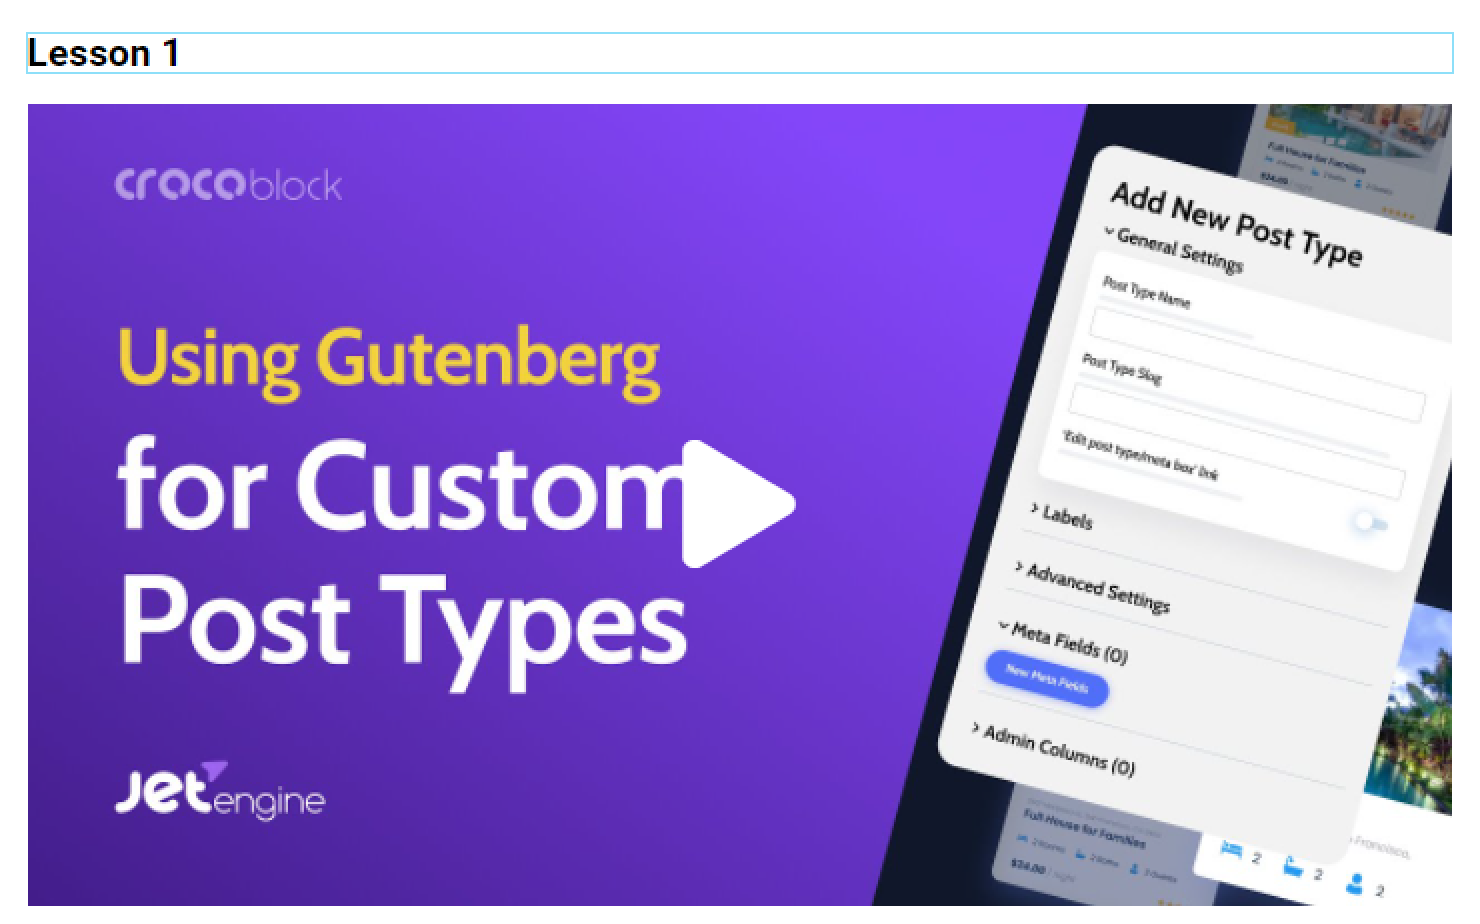
At first, we placed the Title and Video widgets manually on the page without applying dynamic visibility to them to provide the first lesson materials to any learners.
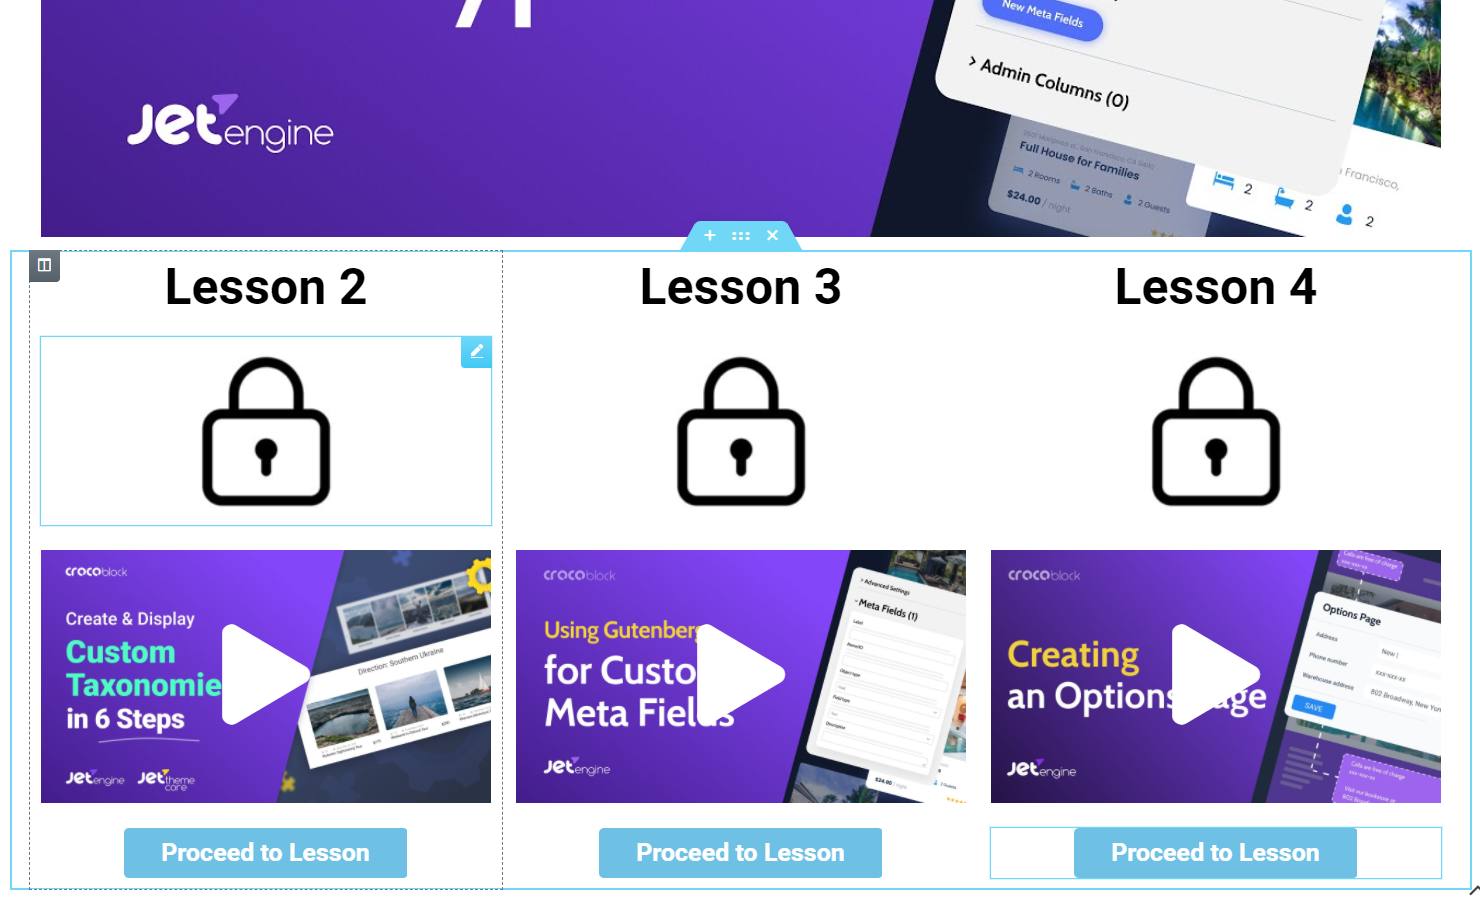
For every next lesson, we’ve added the Title, the Image with the closed lock, the Video, and the Button widgets.
Click to edit the Image widget with the closed lock and proceed to the Advanced section.
Open the JetPopup tab, select the needed pop-up in the Attached Popup field, and leave the “Click on Widget” Trigger Type.
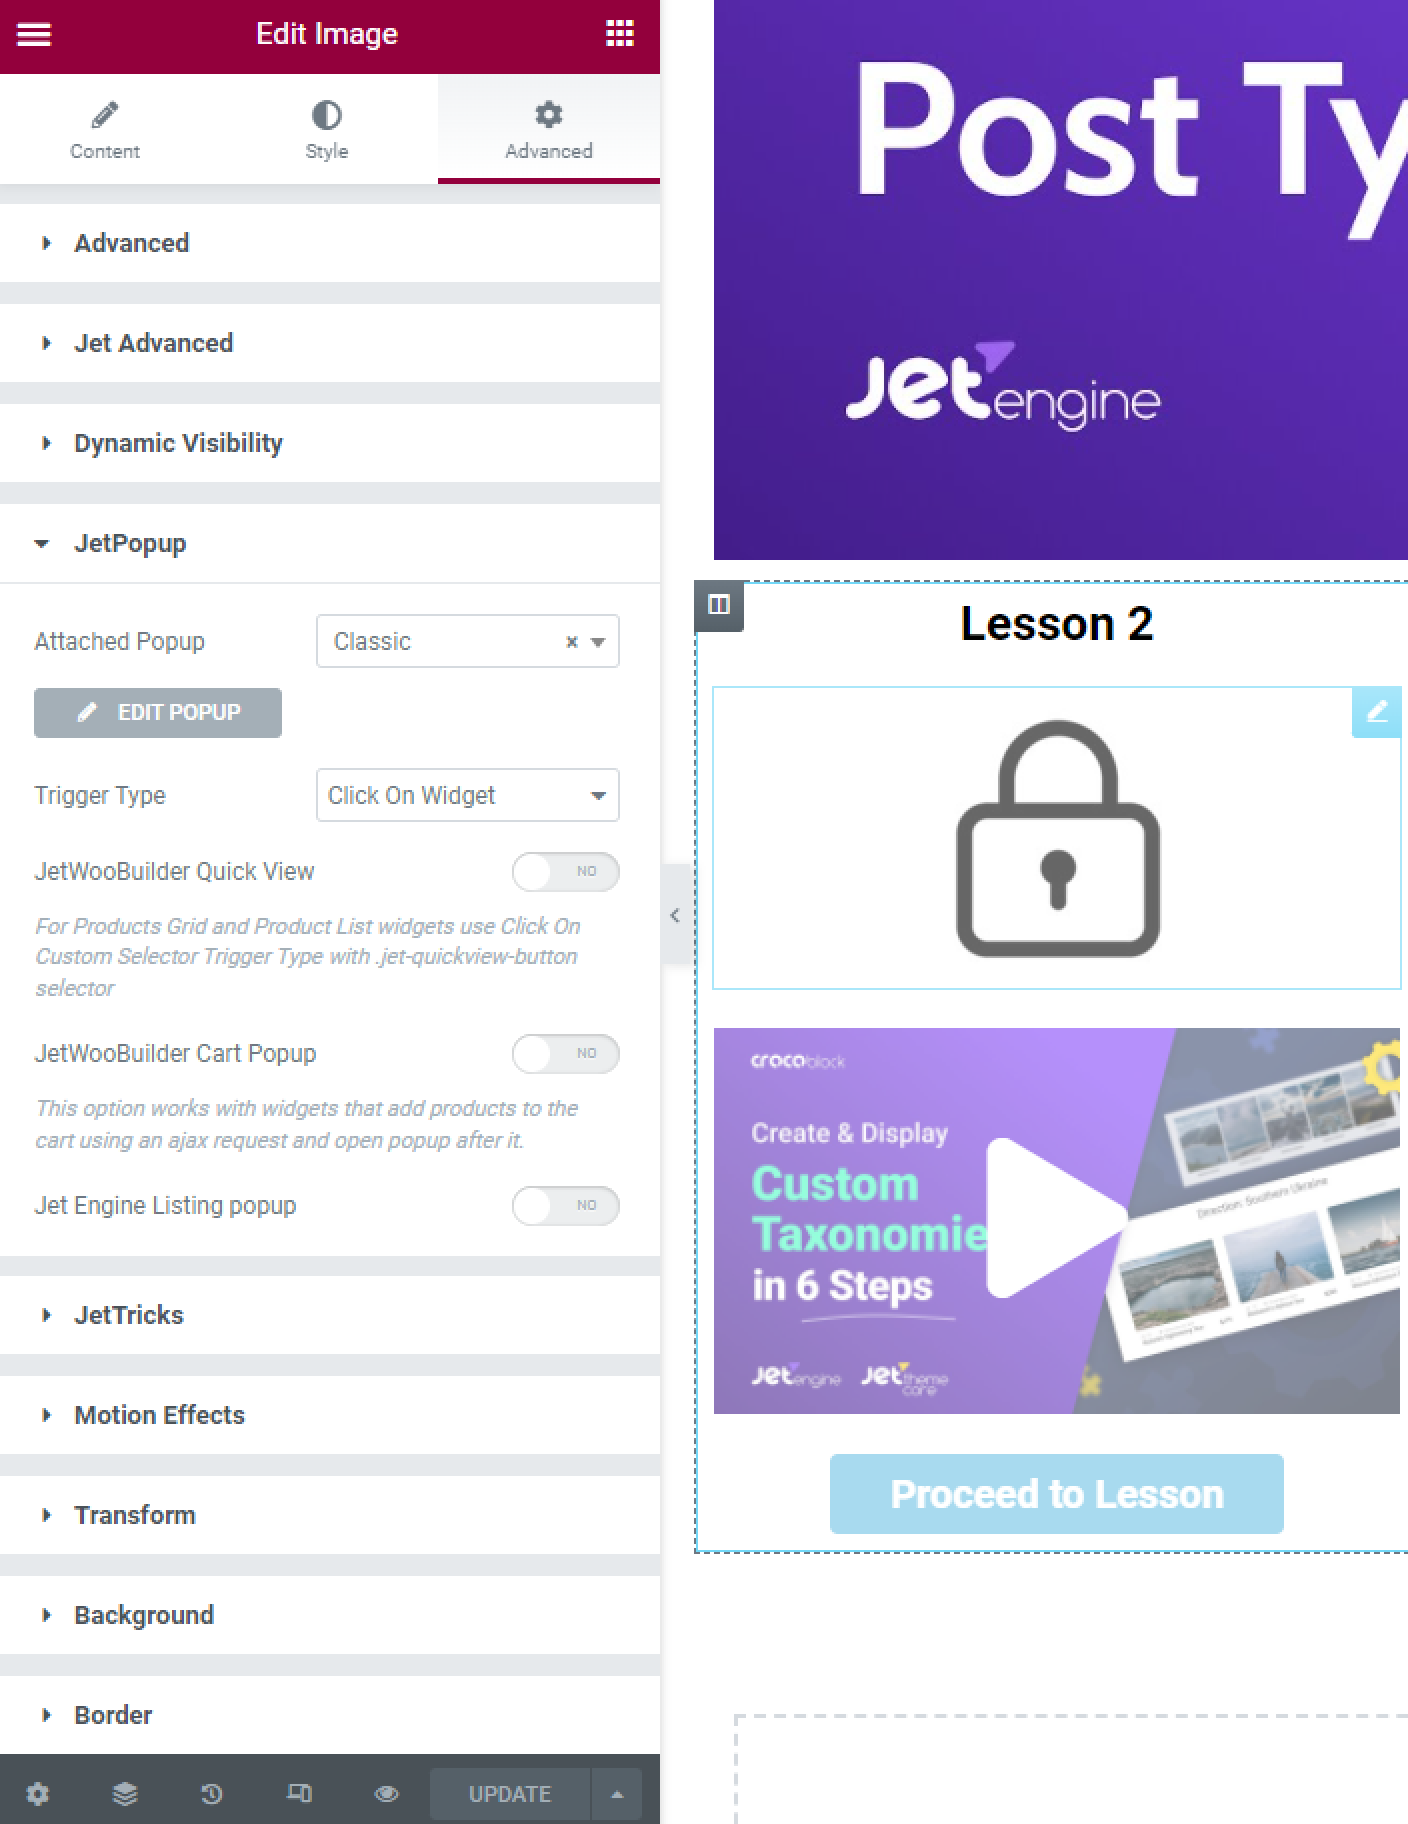
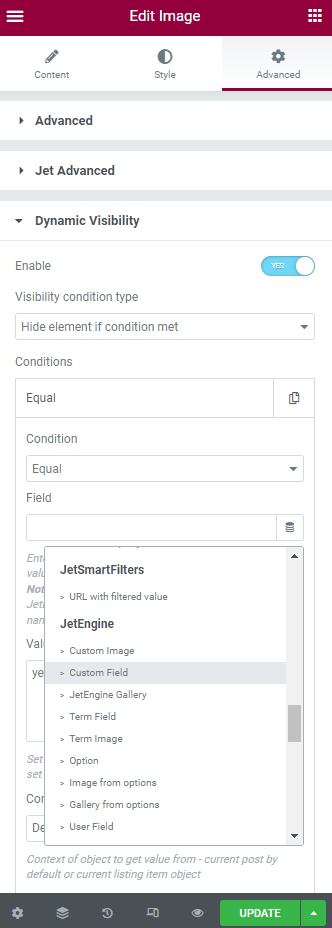
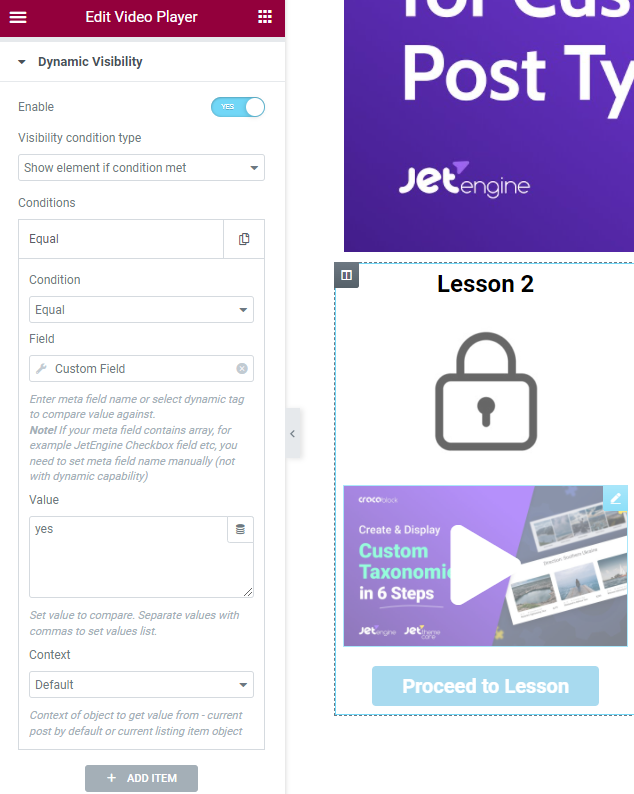
Open the Dynamic Visibility tab and Enable the toggle.
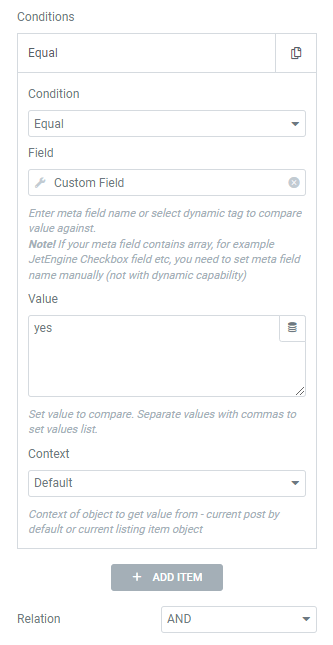
The lock must disappear when the user selects the “Yes” answer to the question “Would you like to move on to Lesson 2?” in the form. So choose the “Hide element if condition met” Visibility condition type and the “Equal” Condition.
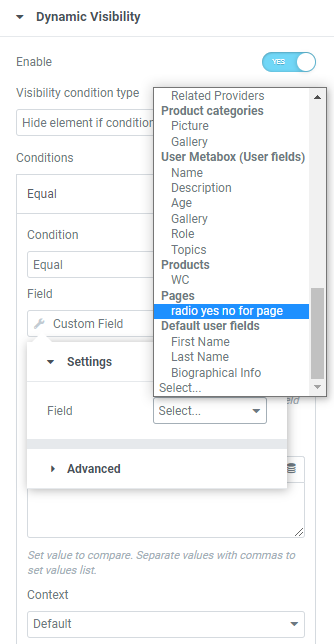
Hit the “Dynamic Tag” button near the Field and select the “Custom Field” option from the list.
In the dynamic tag Settings, Pick the Field you’ve created in the Meta Box for the Pages.
In the Value field, enter the value “yes” of the Radio meta field’s “Yes” option.
Click to edit the widget that will appear when the user chooses the “Yes” option in the form. It could be the featured image of the post, an open lock image, or a video (as in our case).
The settings are similar, but you need to select the “Show element if condition met” Visibility condition type.
You can also attach the same popup to this widget, so users can change their answers and unlock the lesson by selecting the “No” option in the form, but that’s optional.
Set redirection on the post
If you need users to switch to the post with the lesson after they open the video or image, you can set it in the following ways.
- Use the Button widget.
You can drag-n-drop the JetElements Button widget to the page.
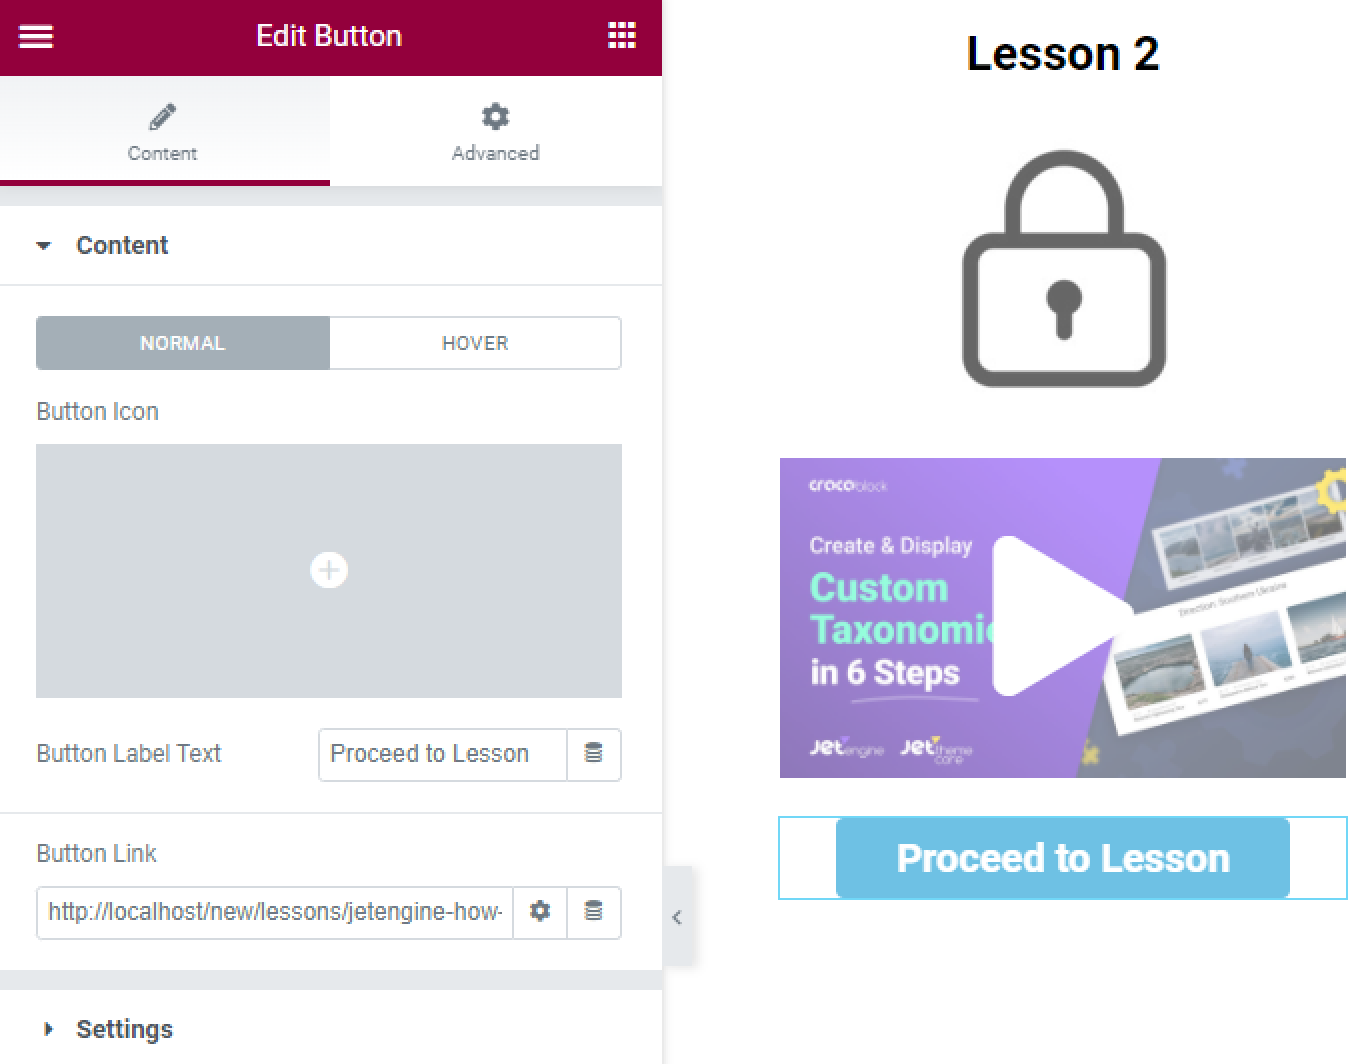
If you don’t have JetElements, the default WordPress Button widget will do.
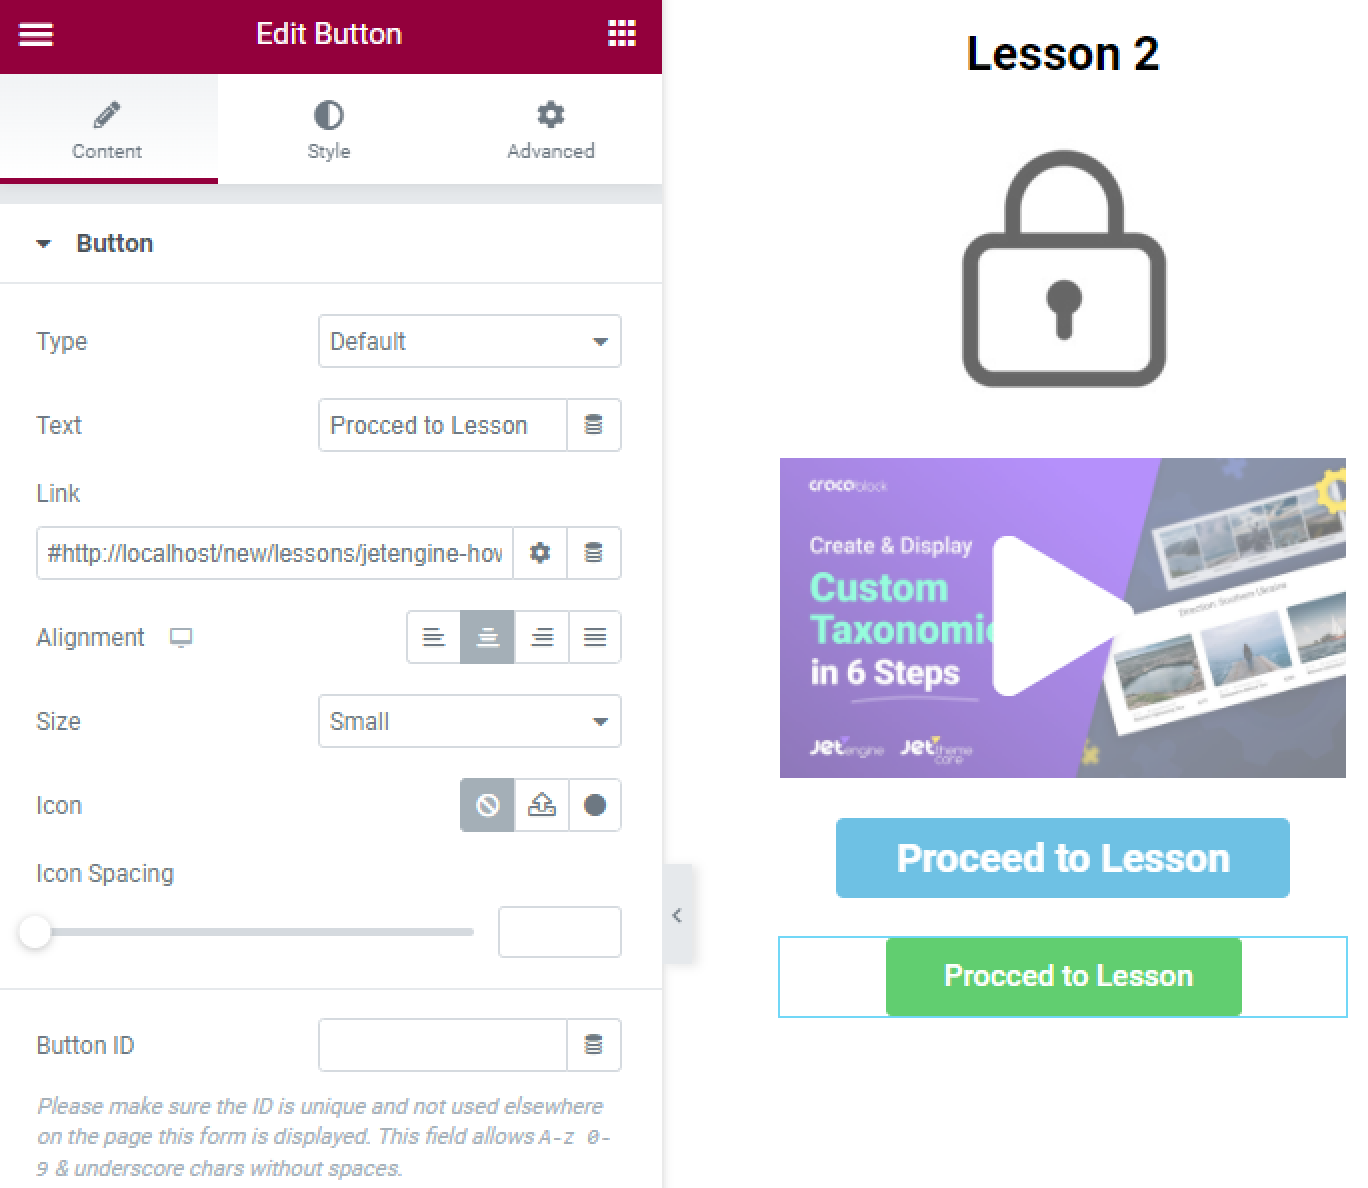
In the Button Link or Link field, enter the link of the lesson post so that users can click on the button and proceed to the lesson.
- Use the Redirect to Page post-submit action in the form.
If you want users to go to the post with the lesson immediately after submitting the form, you can add the dedicated action.
Proceed to the last created form for the dynamic visibility, click to edit it, and hit the “Add Notification” button in the Post-submit Actions / Notification Settings block.
Select the “Redirect to Page” Type, “Custom URL” in the Redirect to field, and enter the link in the Redirect URL field.
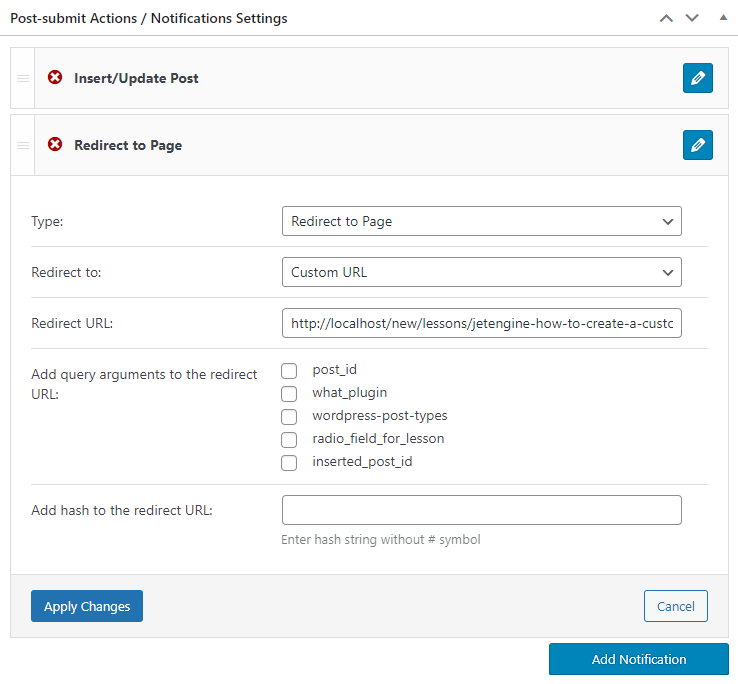
After finishing, press the “Apply Changes” and “Update” buttons.
If you create the JetFormBuilder form, click on the “+ New Action” button, select the “Redirect to Page” type, and click on the pencil-shaped icon to edit the action.
Select the “Custom URL” in the Redirect to field, and enter the link in the Redirect URL field.
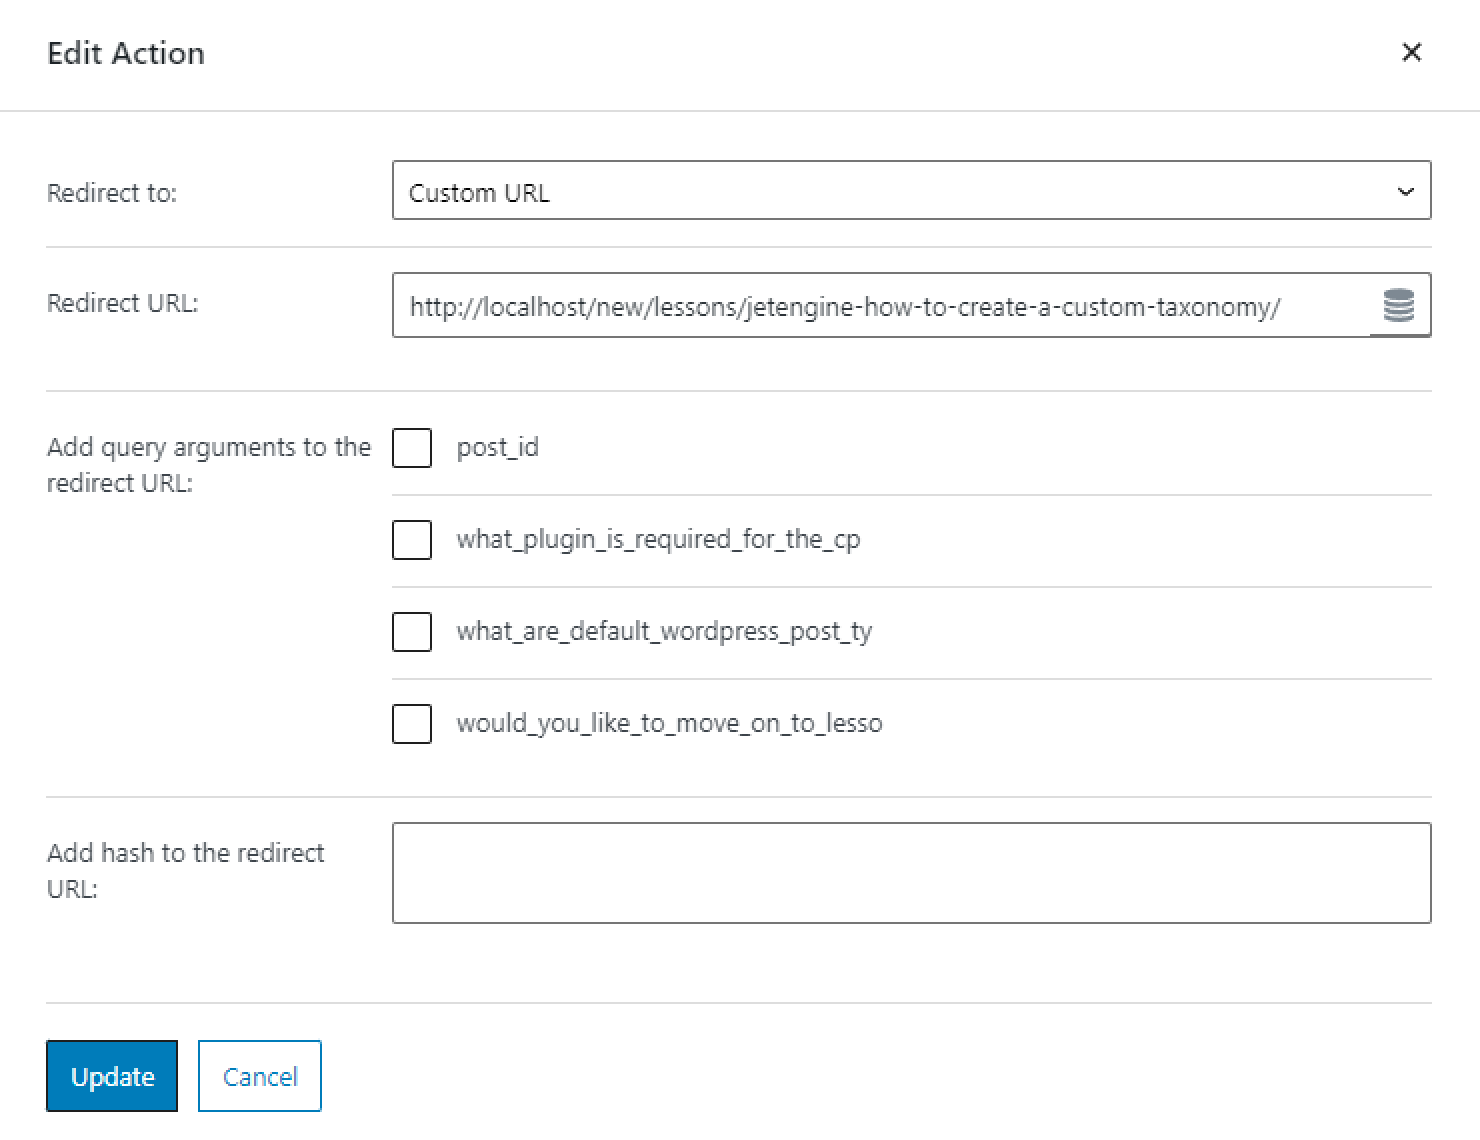
When you’re done, press “Update” to refresh the post-submit action and update the form.
Unlocking Content Based on Progress in Gutenberg
JetEngine plugin got updated, and now it allows applying Dynamic Visibility to the blocks of the WordPress default editor.
Before setting the Dynamic Visibility conditions in Gutenberg, make sure you followed the first steps on creating a CPT, posts, and meta field in the meta box from this tutorial.
Proceed to the page built in the WordPress default editor.
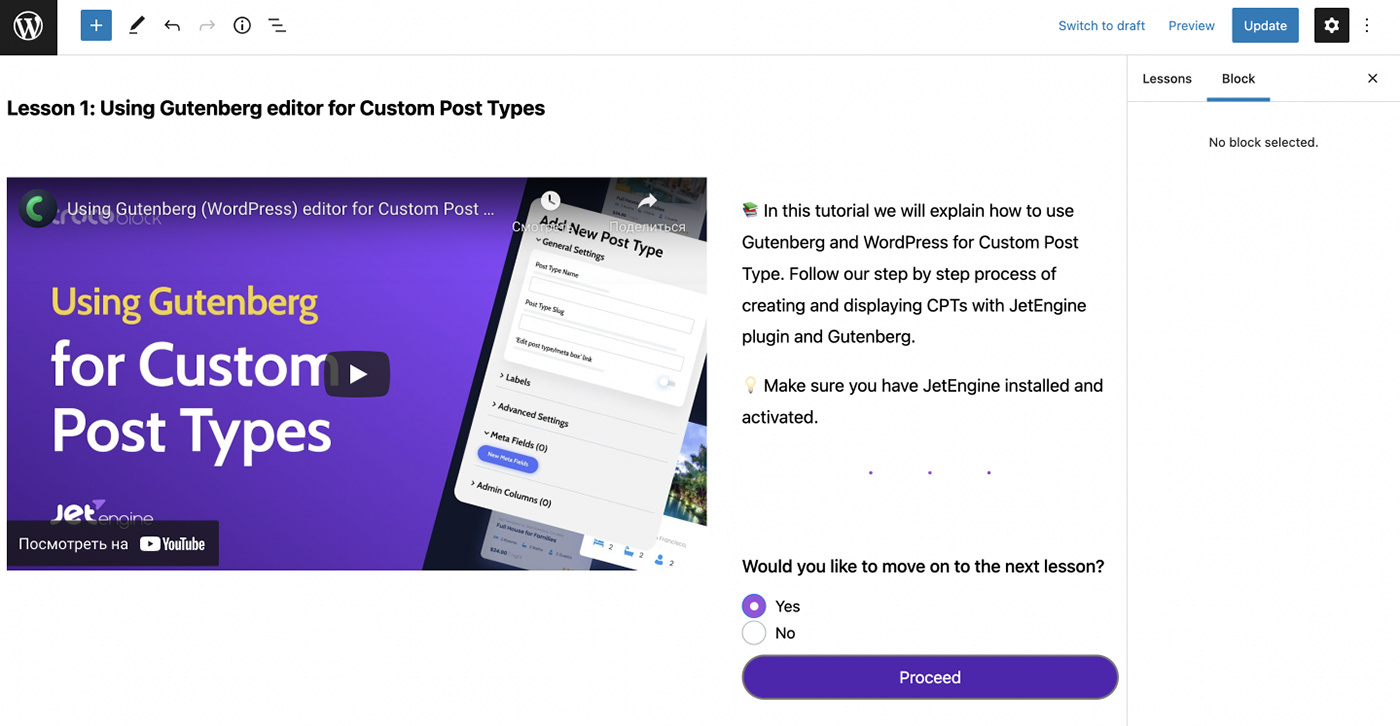
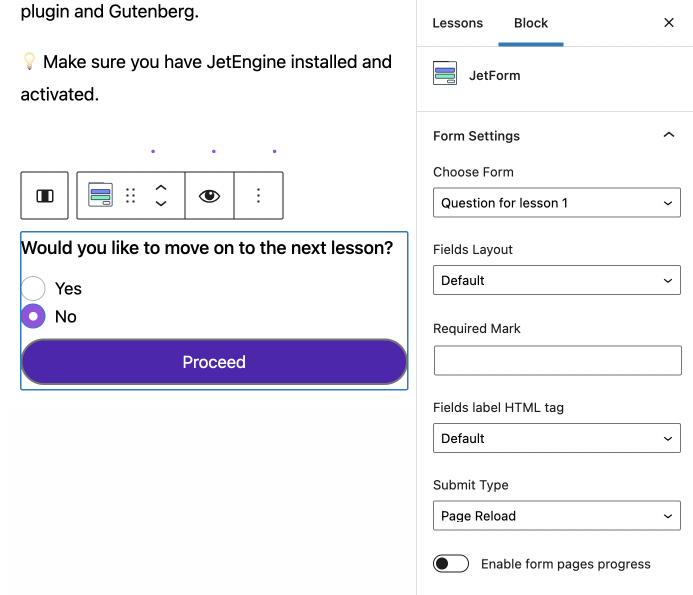
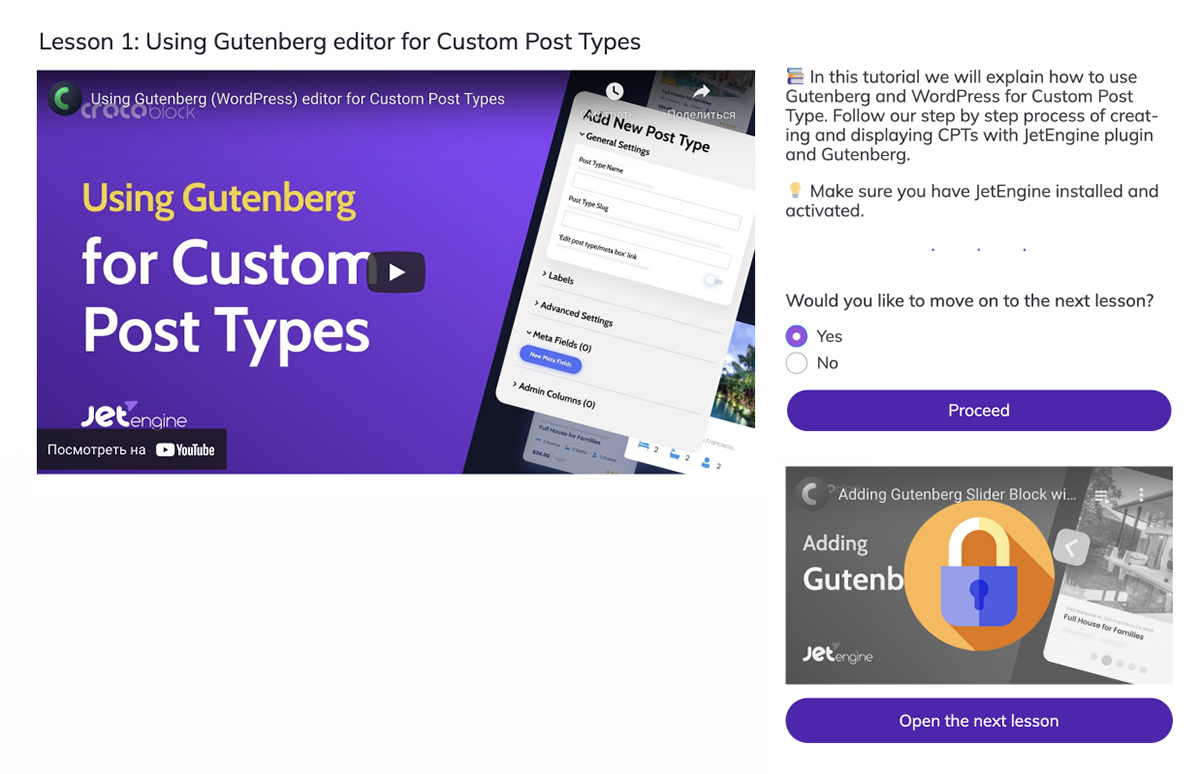
There will be a short form next to the video built with the JetFormBuilder plugin, as described previously in step 3. The needed content will be unlocked after hitting the “Proceed” button.
Decide what kind of content will be unlocked and add the necessary block. It can be a text, a video, or a whole section.
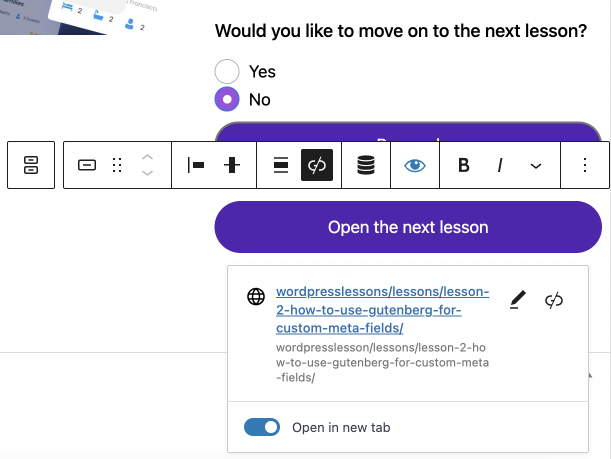
In this case, it will be a button with the link to the next video tutorial. Select the block and click on the eye-shaped icon on the toolbar on top of the block.
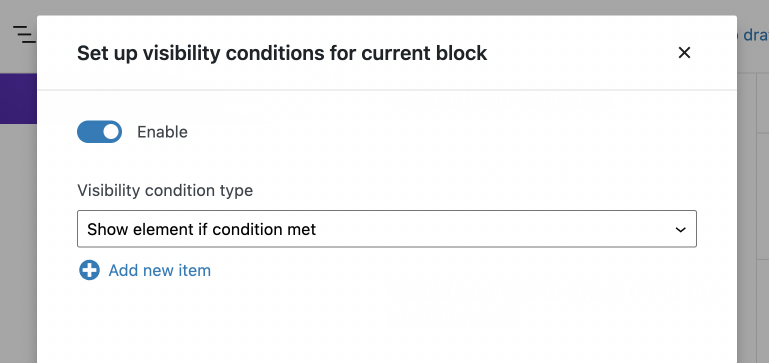
Once you click on it, you will see a pop-up window with the Enable toggle.
Turn it on, but first, make sure that the Visibility condition type is set to “Show element if condition met.”
Then hit the “Add new item” button and choose “Equal” in the Condition drop-down list.
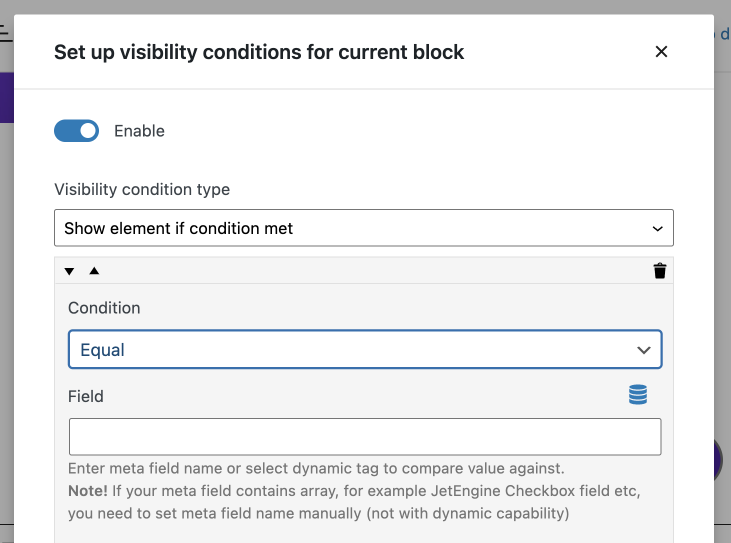
Proceed to the Field and hit the Dynamic Tags button. Choose “Custom data” as a Source.
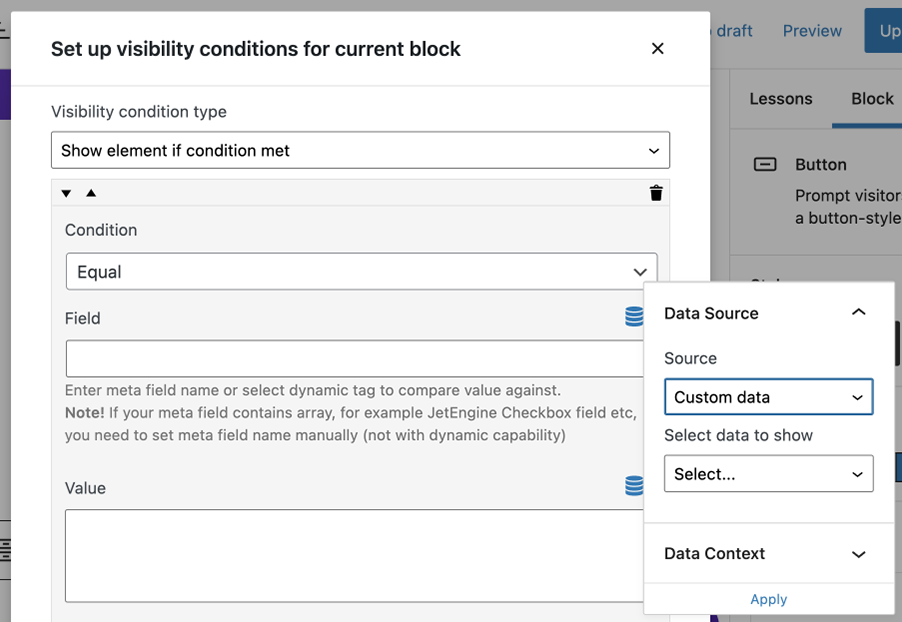
In the Select data to show dropdown, choose the “JetEngine meta field” option, and below in the Field, select the meta field of the meta box you created before.
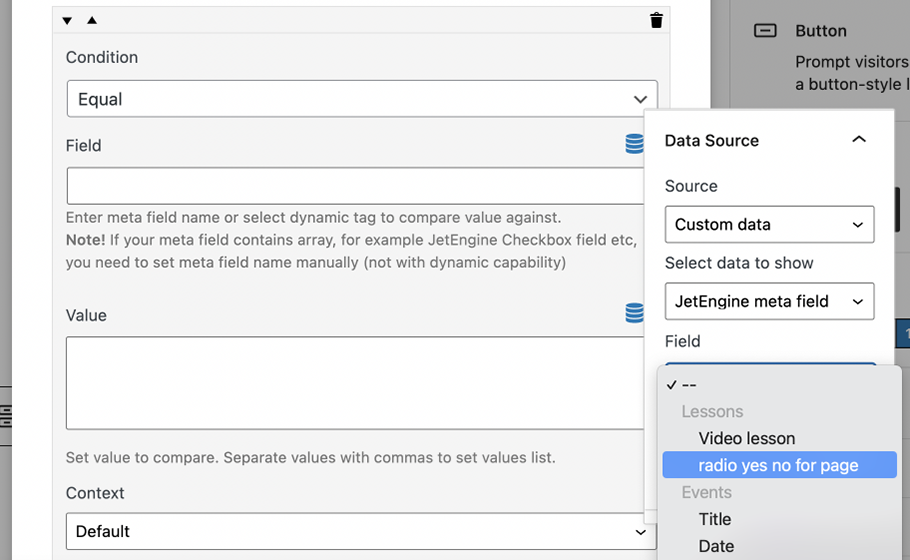
Make sure you set the “Field value” option under the Return. Don’t forget to apply the settings.
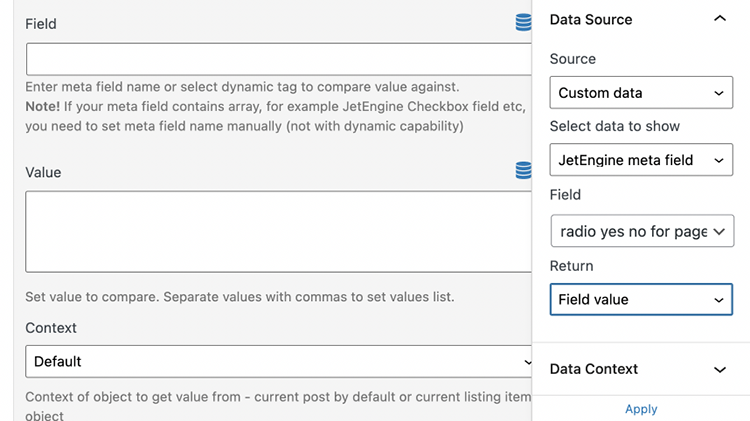
Proceed to the Value field and enter “yes.”

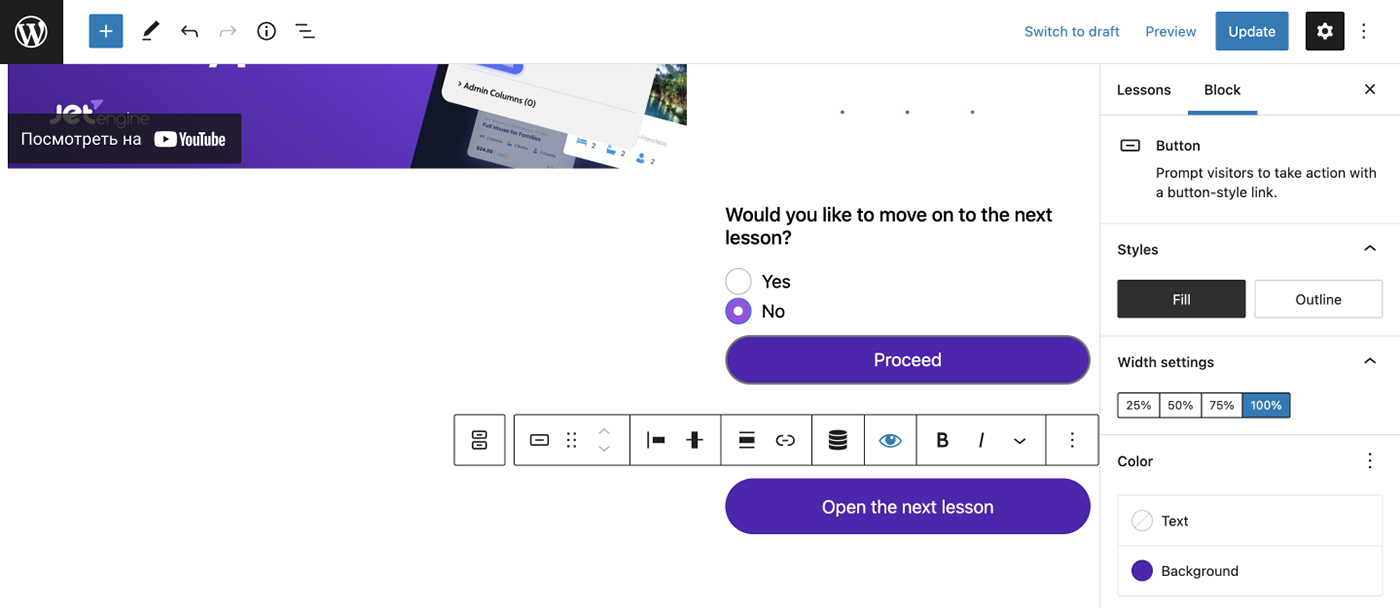
In the Button block, enter the link of the lesson post so that users can click on the button and proceed to the lesson.
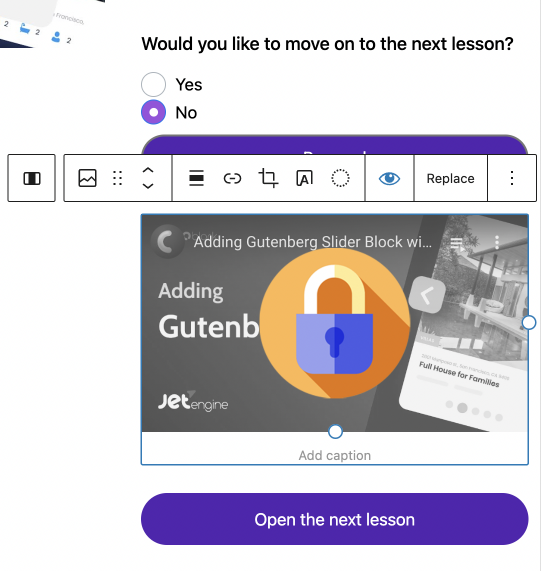
Moreover, you can add more elements, apply the same dynamic conditions, or set different ones depending on your needs.
In our case, we also added an image with the thumbnail of the next lesson with a lock on it. It will also show up along with the button.
When you’re done, update the page and proceed to the front end. The image and the second button are hidden.
Once a user selects the “Yes” option and hits the “Proceed” button, the hidden elements will become visible.
These are steps for the access settings to the second lesson. To access the following lessons, you need to repeat the steps for each of them. For example, to set the availability to the third lesson, you need to create a new meta field in the meta box for pages, form with further questions, pop-up, and attach dynamic visibility to the next image or video and the form options on the page.
According to these steps, you can secure dynamic visibility to each lesson on the page.