How to Translate JetEngine Relations Using WPML
In this guide, you will find out how to translate the JetEngine relations on your WordPress website using the WPML plugin.
Before you start, check the tutorial requirements:
- WPML plugin installed and activated
- JetEngine plugin installed and activated
Before starting, check our How to Make a JetEngine-Built Website Multilingual guide to make a JetEngine-built site fully translatable.
To translate JetEngine relation connections with WPML, you should recreate the following steps.
Initially, you should translate the items that will be set as child and parent items.
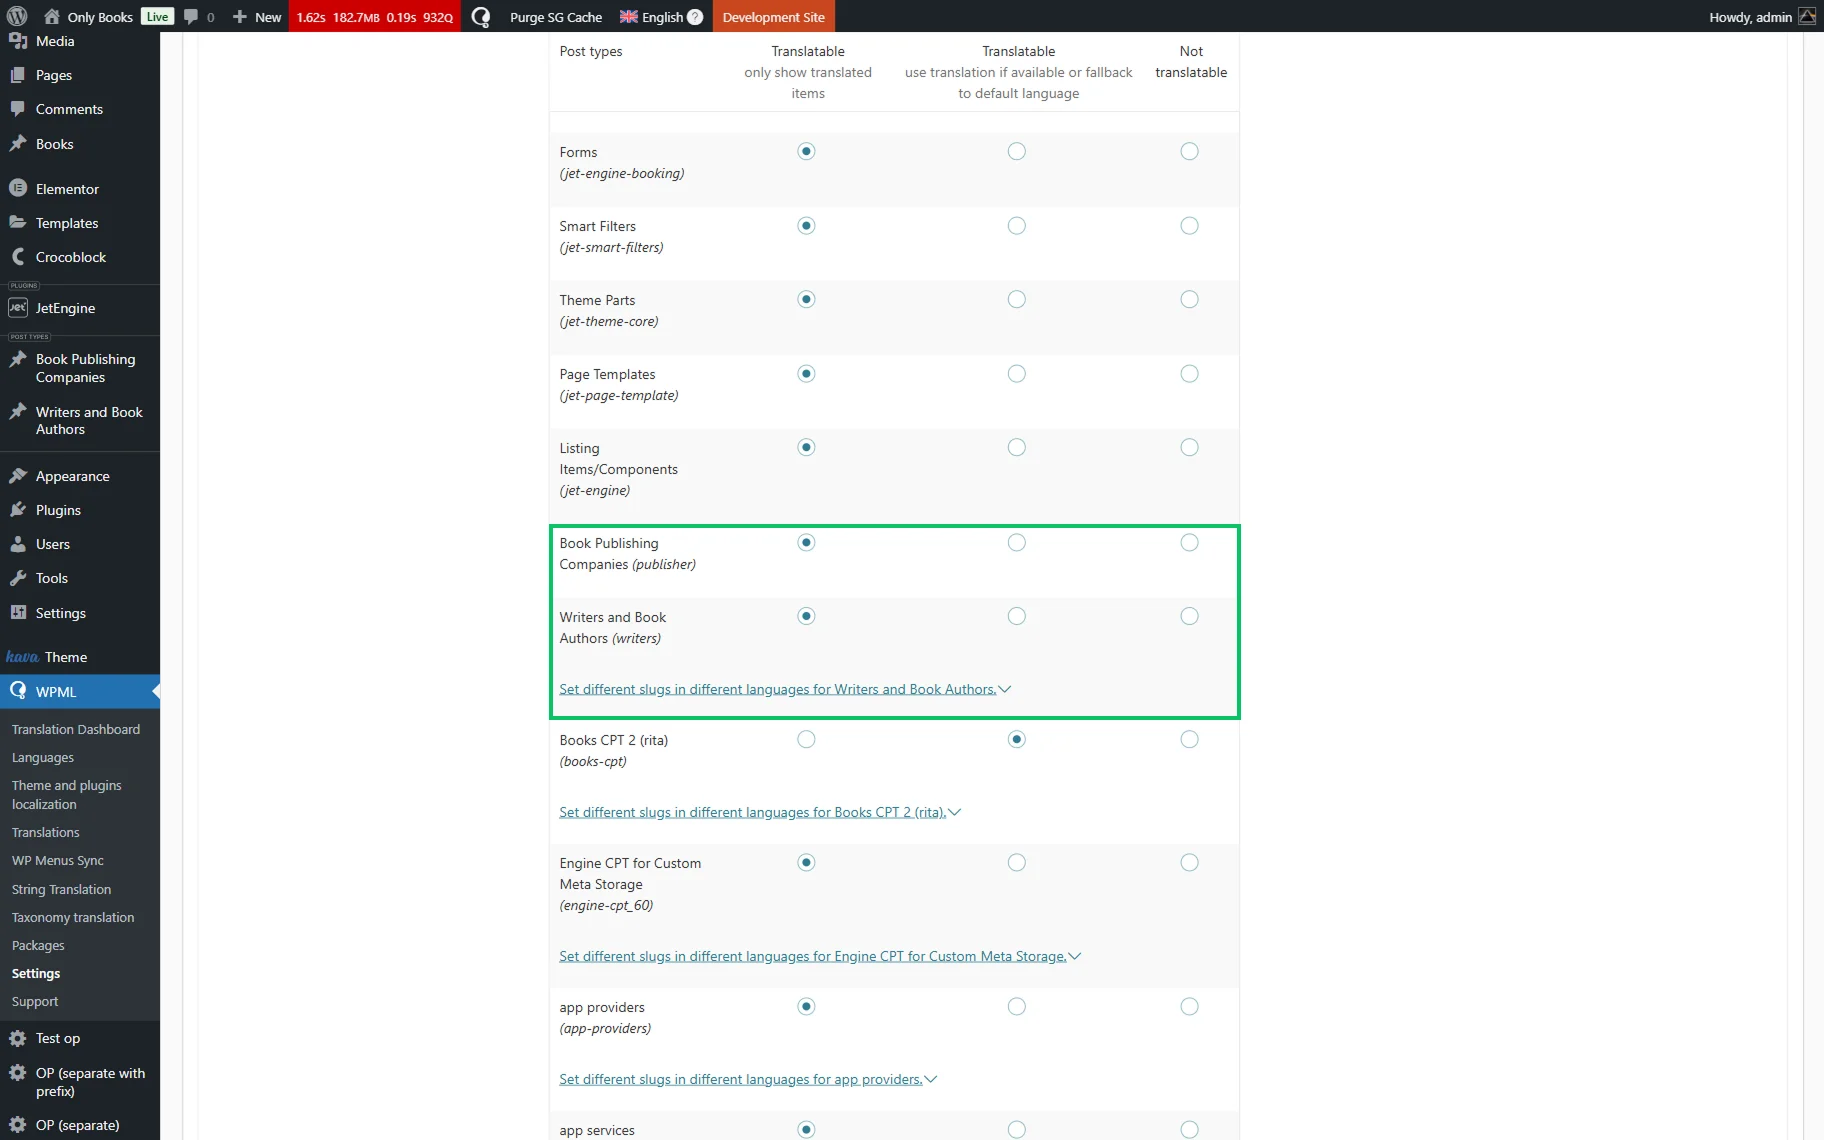
Go to WordPress Dashboard > WPML > Settings and set two needed elements to “Translatable.”
For instance, it can be two Post Types, like in the described case. So, we scroll down to the Post Types Translation section and set two Post Types to “Translatable.”
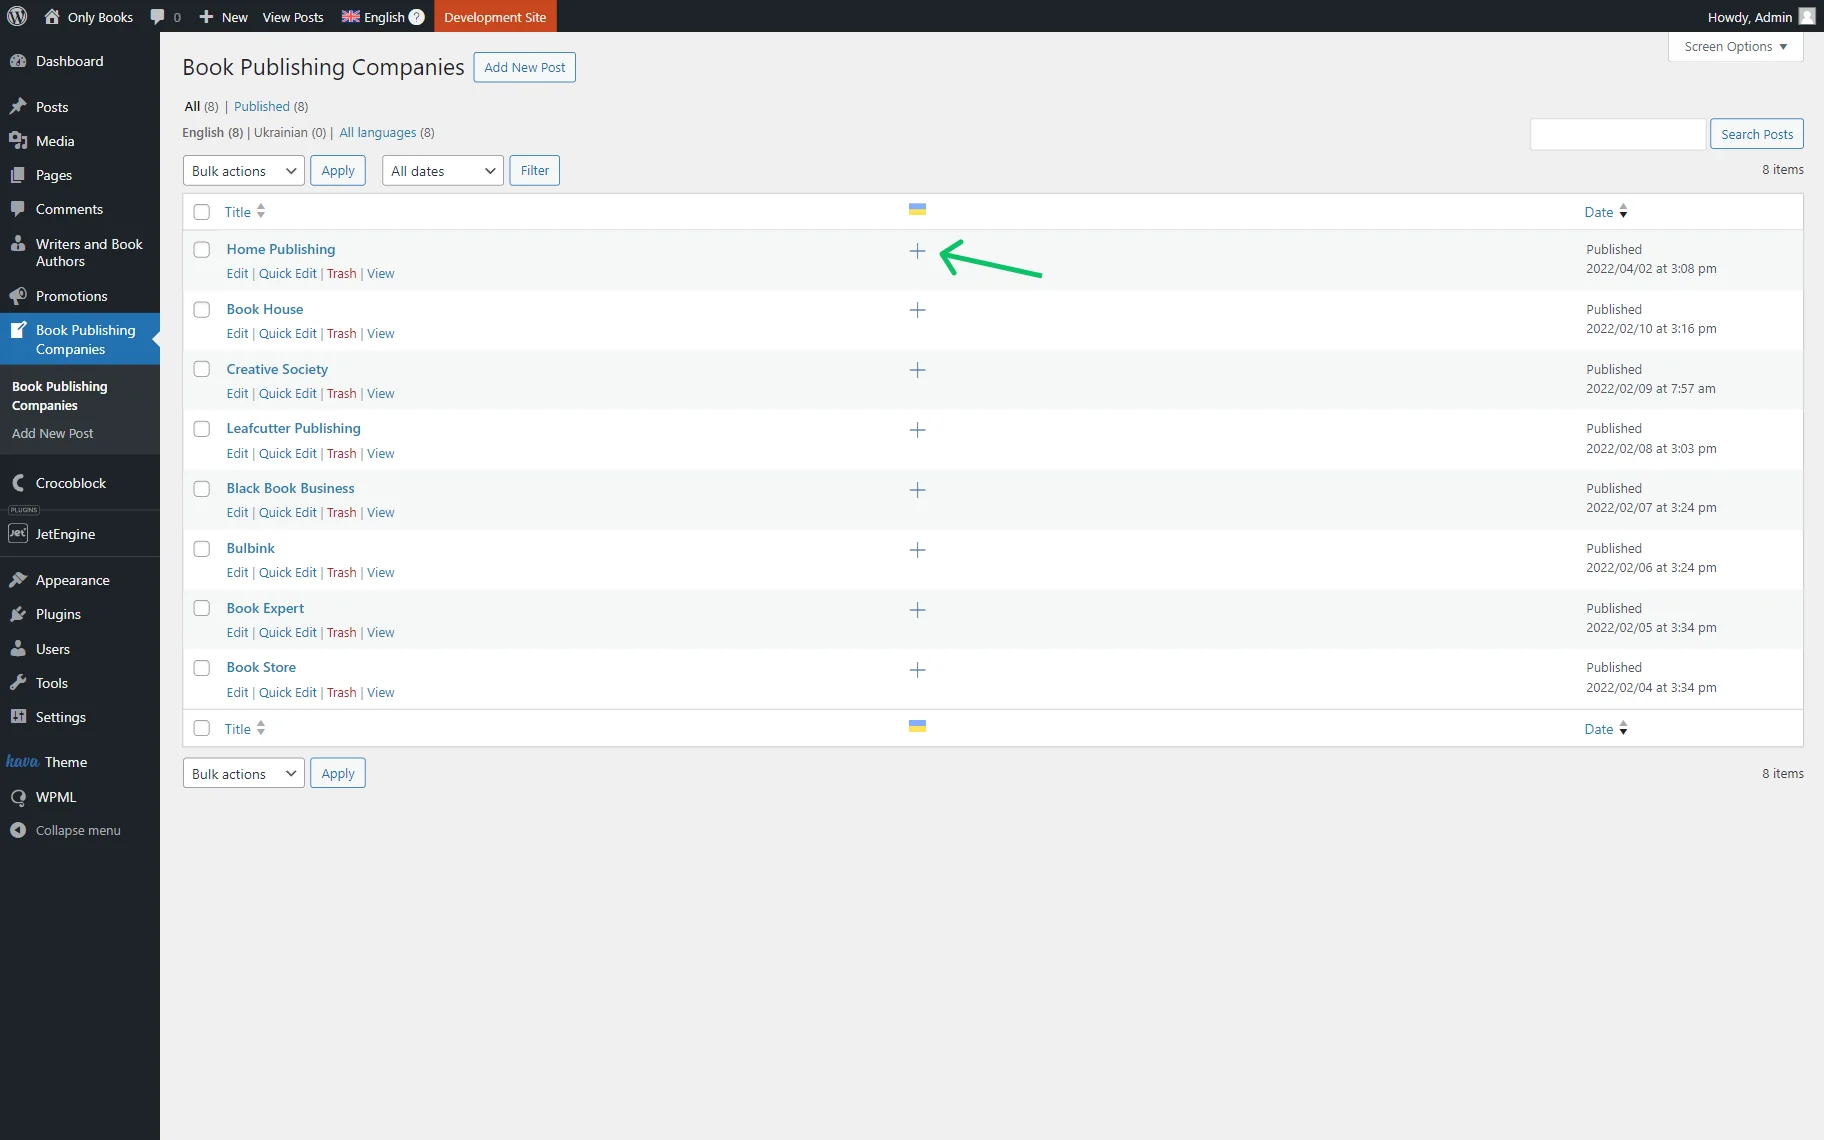
Then we navigate to one of the Post Types and translate all its items by clicking the “+” button next to each item.
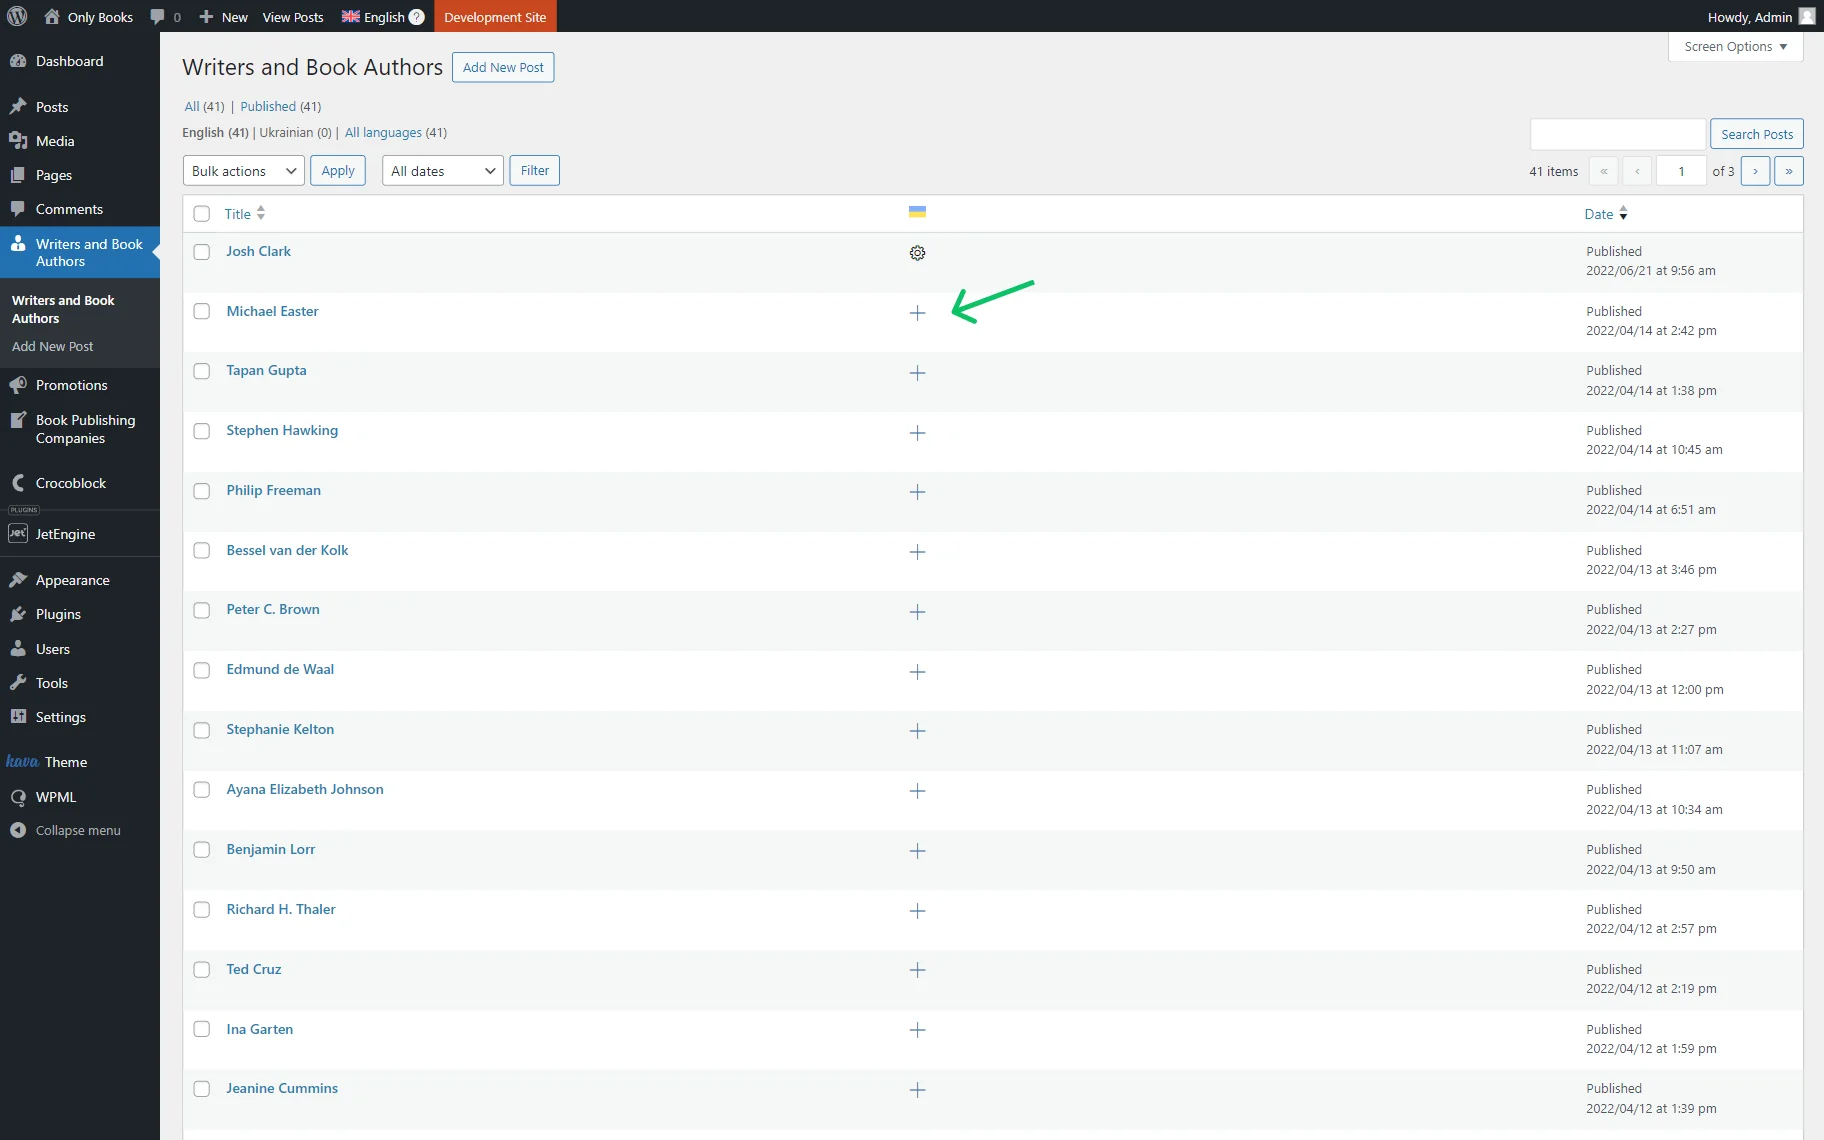
We repeat the same step for the second post type: translate its items.
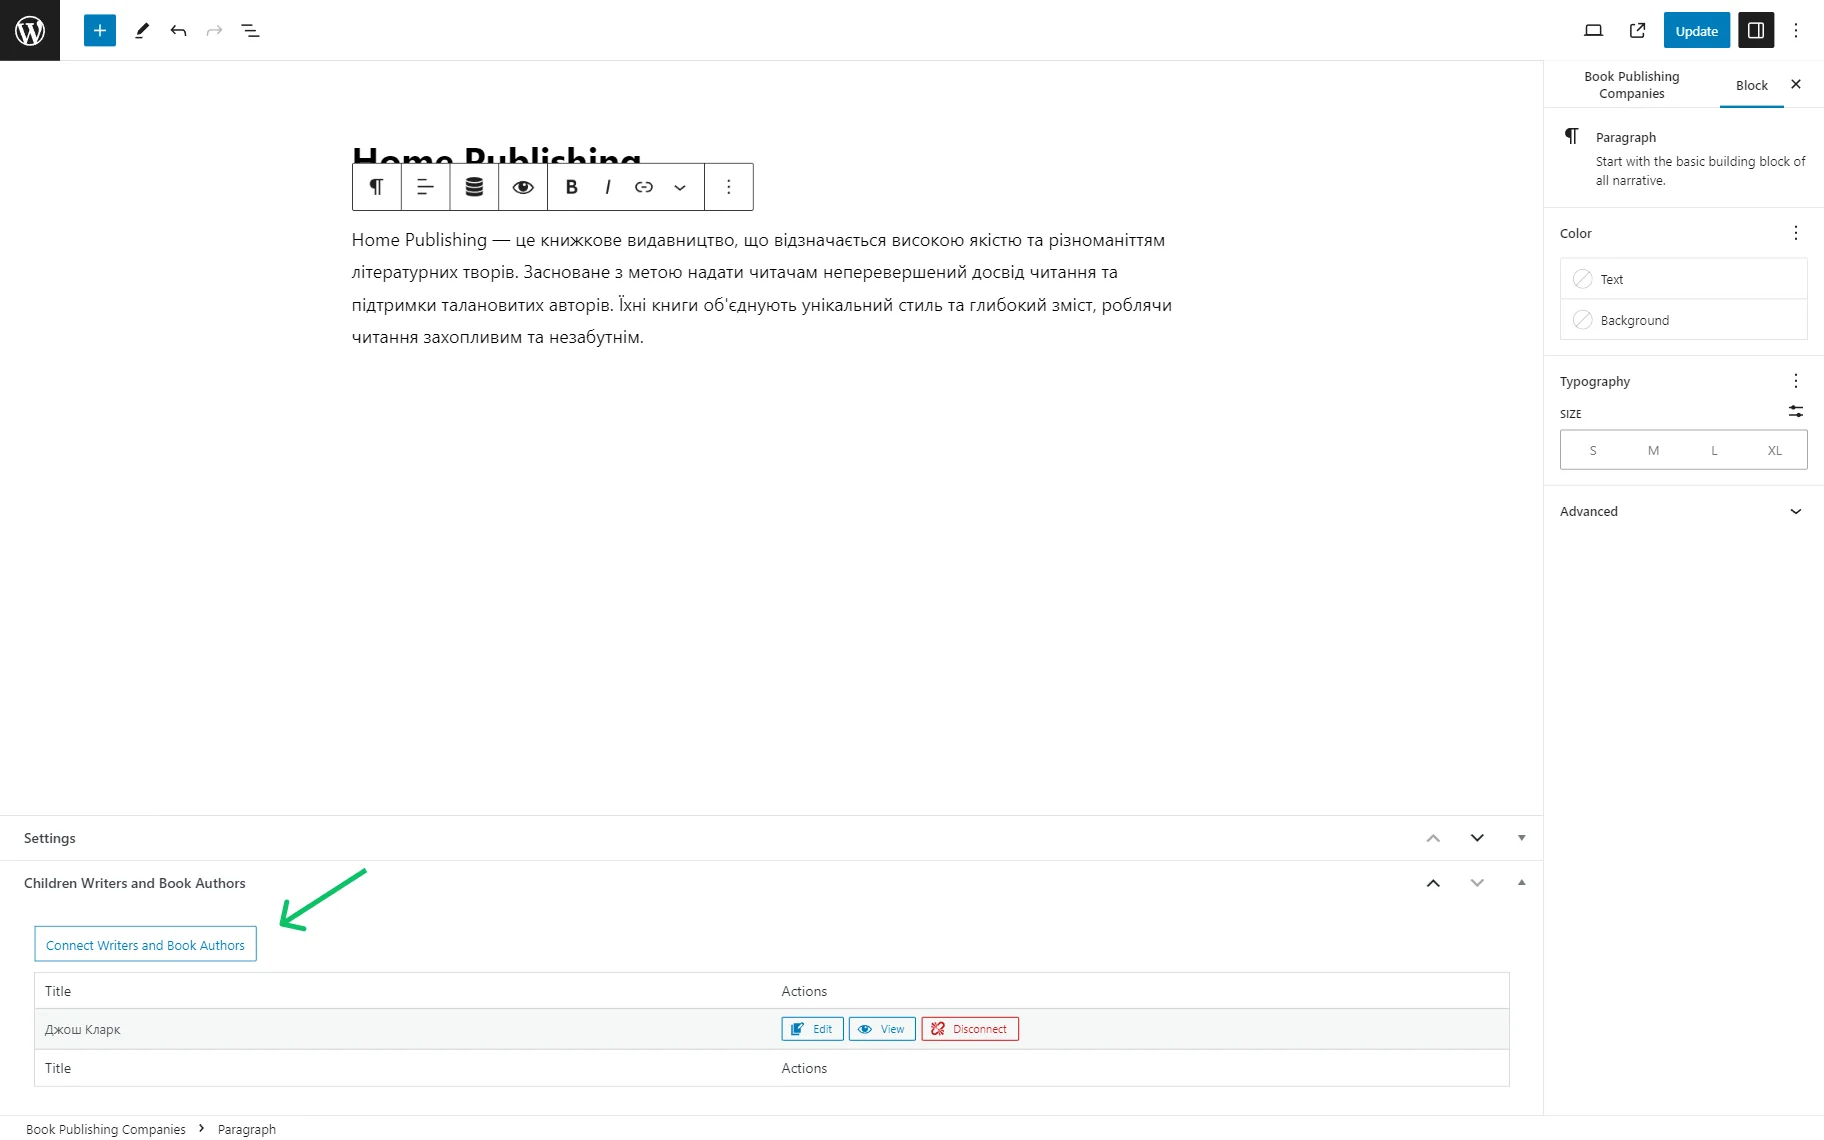
Now, we can create a relation.
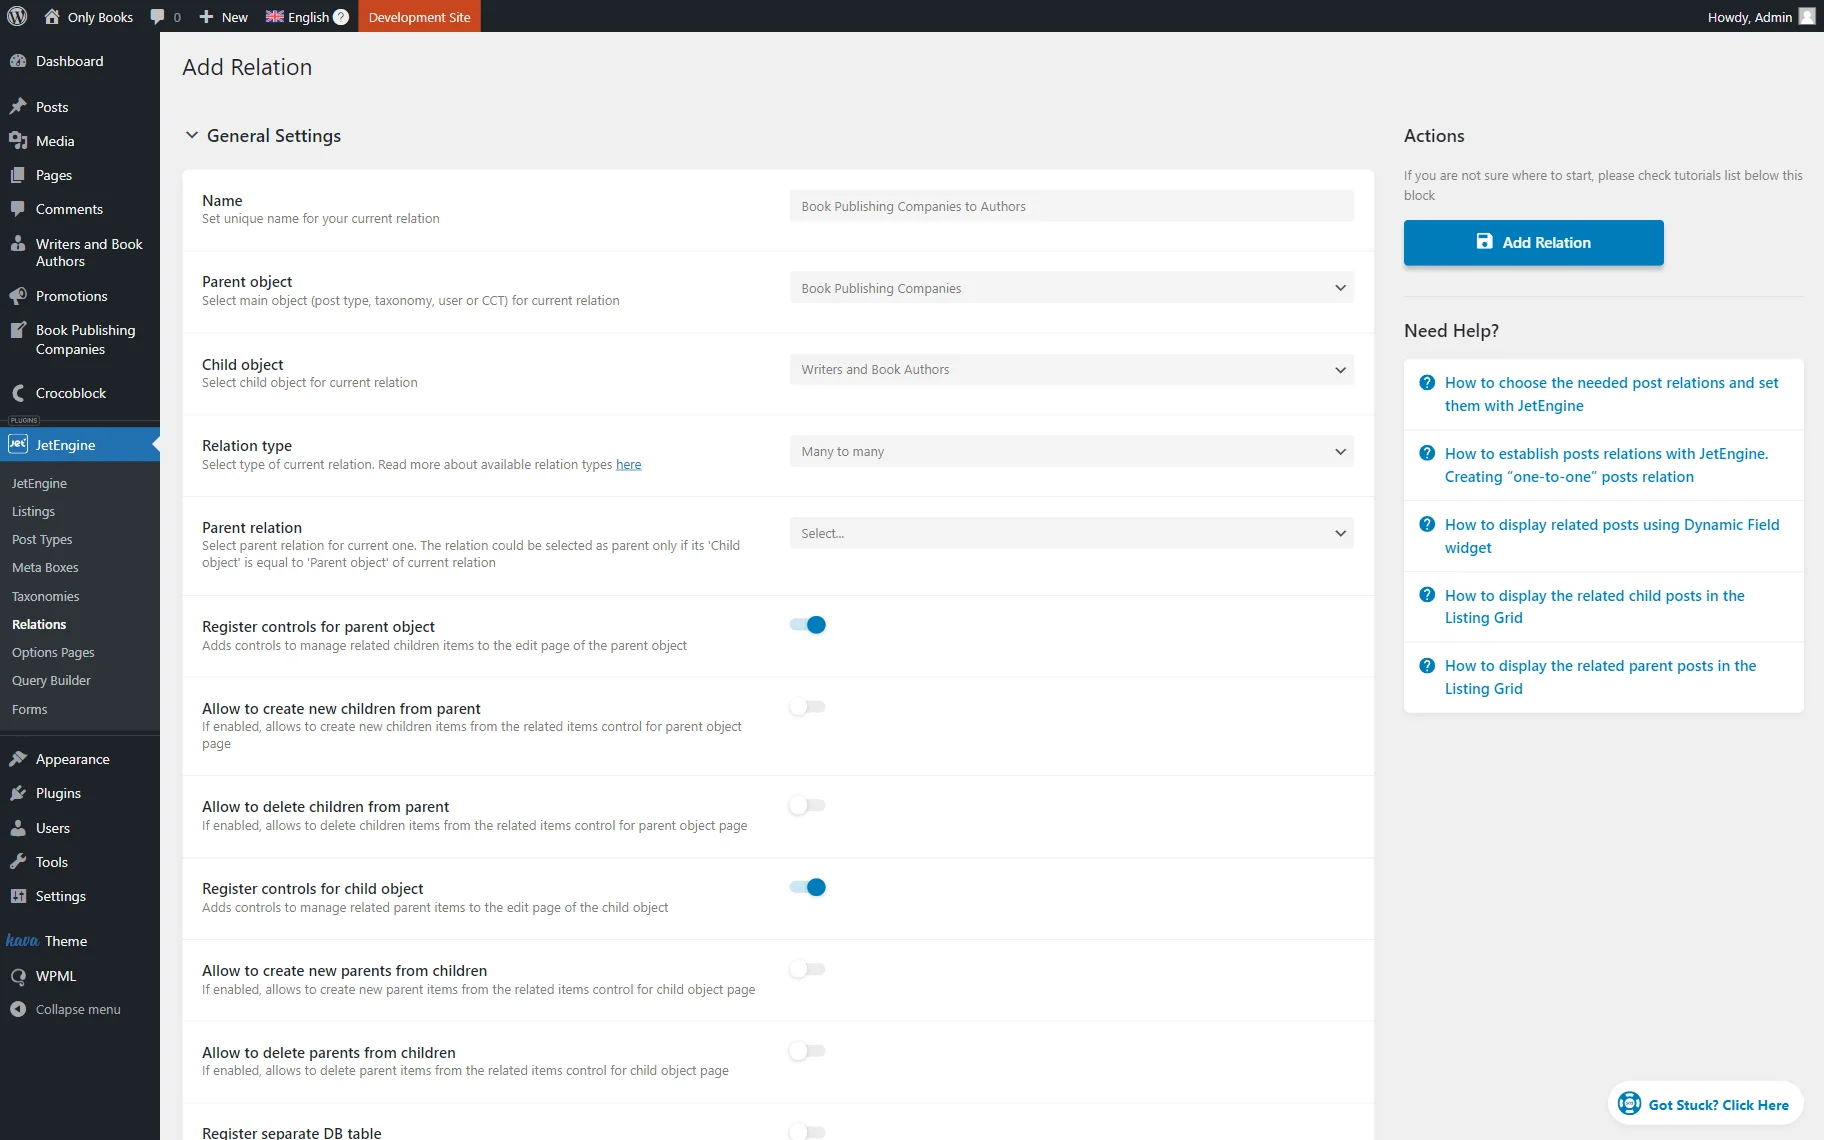
Once the relation is built, the items can be connected.
You can also translate the relations labels in the WordPress Dashboard > WPML > String Translation.
Locate the required label and click the “+” button to add a translation.
Then click anywhere on the screen to save the translation.
That’s all about translating the JetEngine relations using WPML on your WordPress website.