How to Assign a Filter Widget to a Specific Listing Grid
Find out how to assign filters to specific Listing Grids with the help of the JetSmartFilters plugin.
Before you start, check the tutorial requirements:
- JetSmartFilters plugin installed and activated
- JetEngine plugin installed and activated
From this tutorial, you will learn how to specify the Listing Grid for which to apply the filter’s widget. So, let’s check how to achieve it step by step.
Create Filters
Firstly, if you haven’t built filters beforehand, navigate to WordPress Dashboard > Smart Filters > Add New. Here, you should create two different filters, the ones that you need for your website.
Check our Filter Creation Settings Overview to find out more about the settings available in this directory.
In our case, we will build two Search Filters, but you are free to build any Filter Types you need for your case.
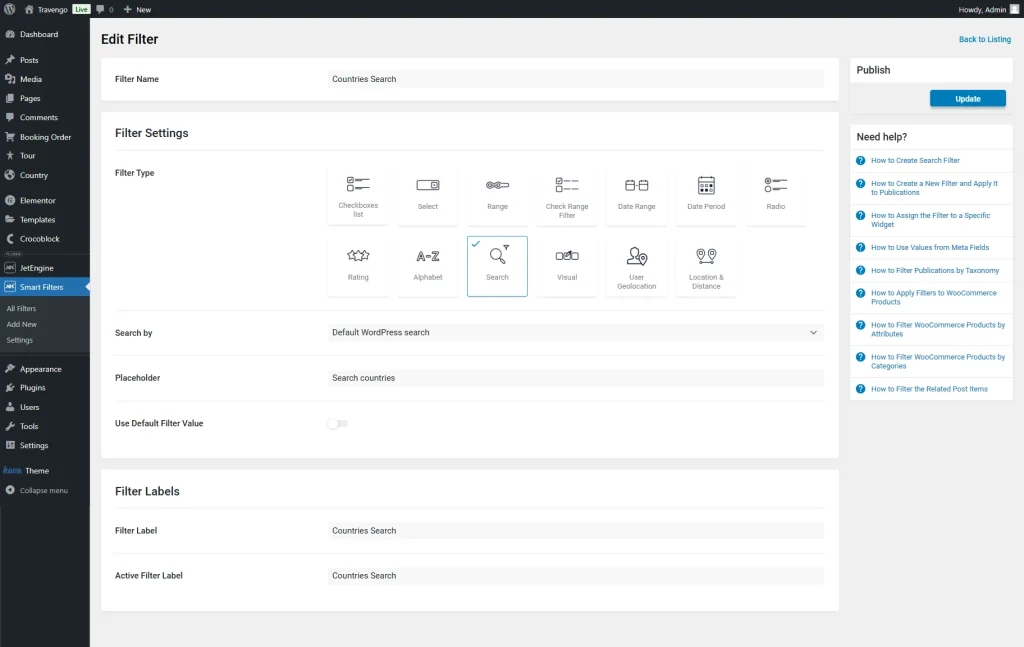
The first filter has the “Сountries Search” Filter Name, and its Filter Type is set to “Search” correspondingly.
Next, we select the “Default WordPress search” option in the Search by field and change the Placeholder to “Search countries”.
In the Filter Labels section, we complete the Filter Label and Active Filter Label with the “Countries Search” value.
When the filter is ready, press the “Update” button.
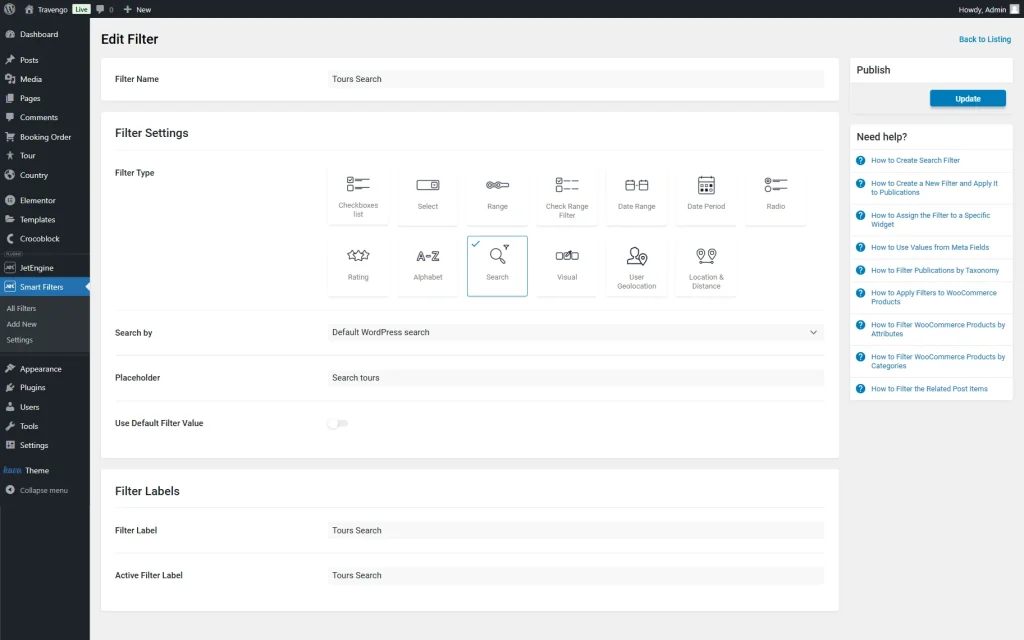
The second filter we create has the “Tours Search” Filter Name and is also of a “Search” Filter Type.
Again, we set the Search by value to “Default WordPress Search”.
Next, we change the Placeholder to “Search tours”.
In the Filter Labels section, we change the Filter Label and Active Filter Label values to “Tours Search” and press the “Update” button to save the filter.
Build Listings
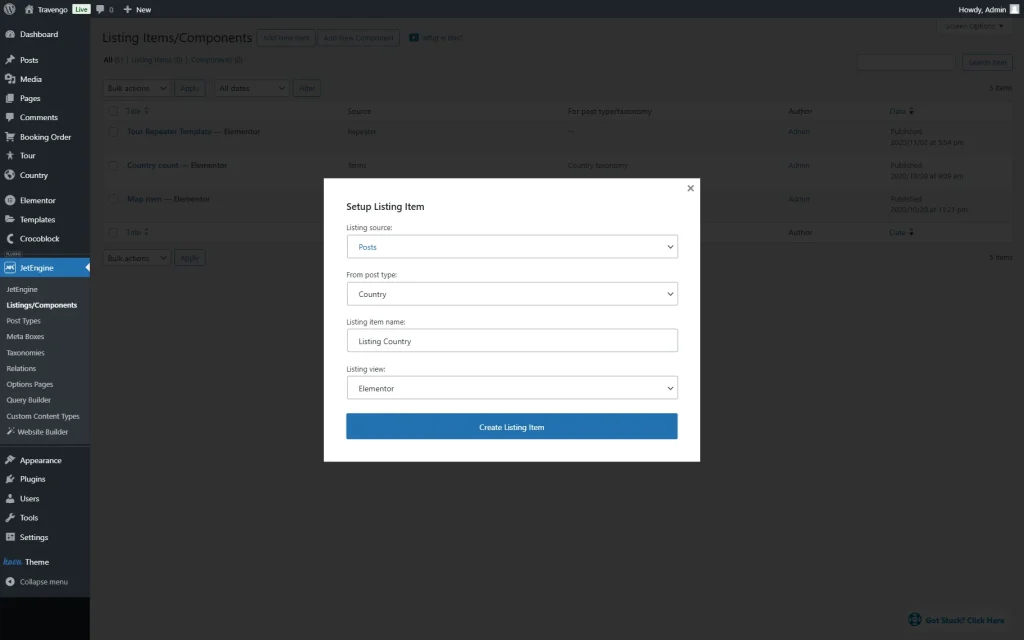
If you haven’t built Listing(s) beforehand, head to WordPress Dashboard > JetEngine > Listings/Components and press the “Add New Item” button.
Also, check out our tutorial to learn how to build a Listing template in more detail.
First, we want to build a Listing for the “Country” Custom Post Type (CPT). So, in the pop-up that appeared after we clicked the button, we keep the default Listing source (“Posts”), select the “Country” option in the From post type dropdown list, set the Listing item name to “Listing Country” and pick the Listing view — in this case, “Elementor” but feel free to select other options (“Blocks (Gutenberg)” or “Bricks”) if preferred.
Press the “Create Listing Item” button to proceed to the selected editor.
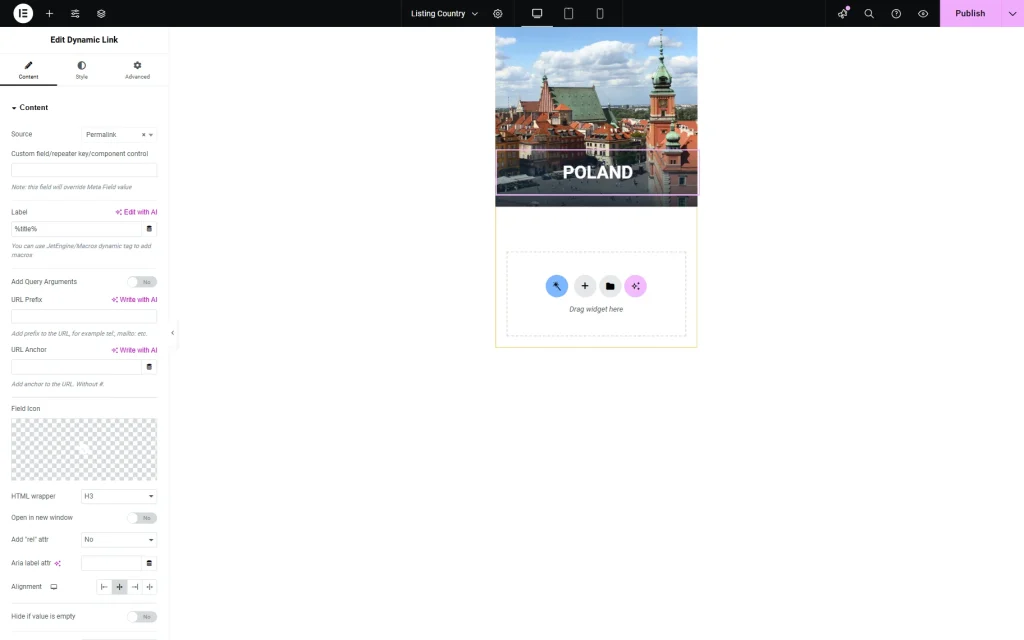
When the editor is opened, add the dynamic widgets of your choice. For example, we add a Dynamic Image widget with the “Post thumbnail” Source and a Dynamic Link widget with the “Permalink” Source and the “%title%” Label.
When the Listing item is ready, save the result.
Now, it’s time to build a second Listing item.
So, return to the WordPress Dashboard > JetEngine > Listings/Components and press the “Add New Item” button once again.
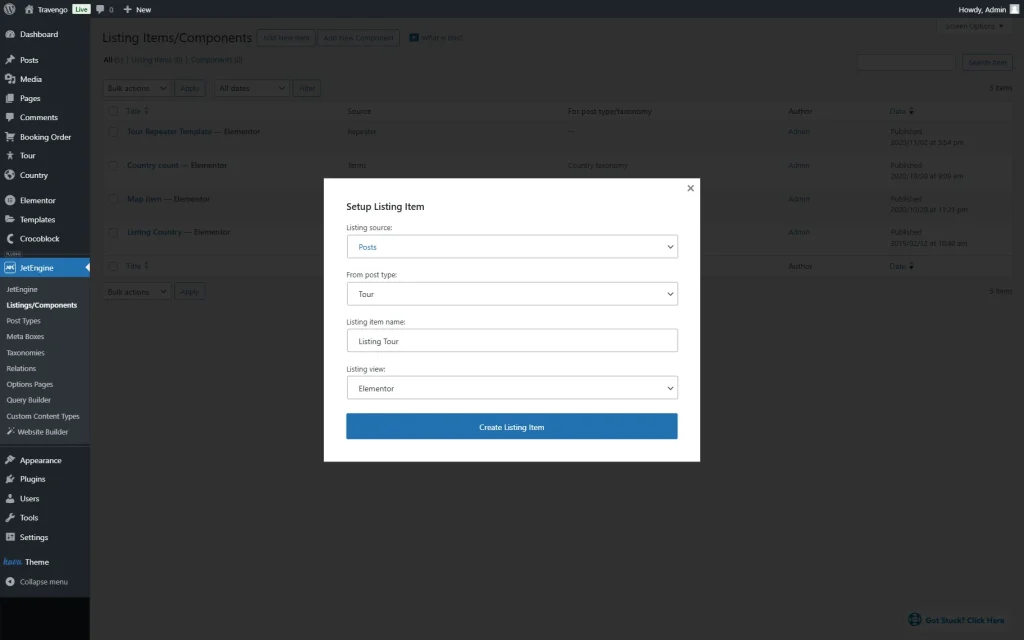
This time, we want to build a Listing for “Tour” CPT so we leave the default “Posts” Listing source and select the “Tour” option in the From post type field. Next, we set the Listing item name to “Listing Tour” and keep the default “Elementor” Listing view.
Finally, click the “Create Listing Item” button to head to the editor.
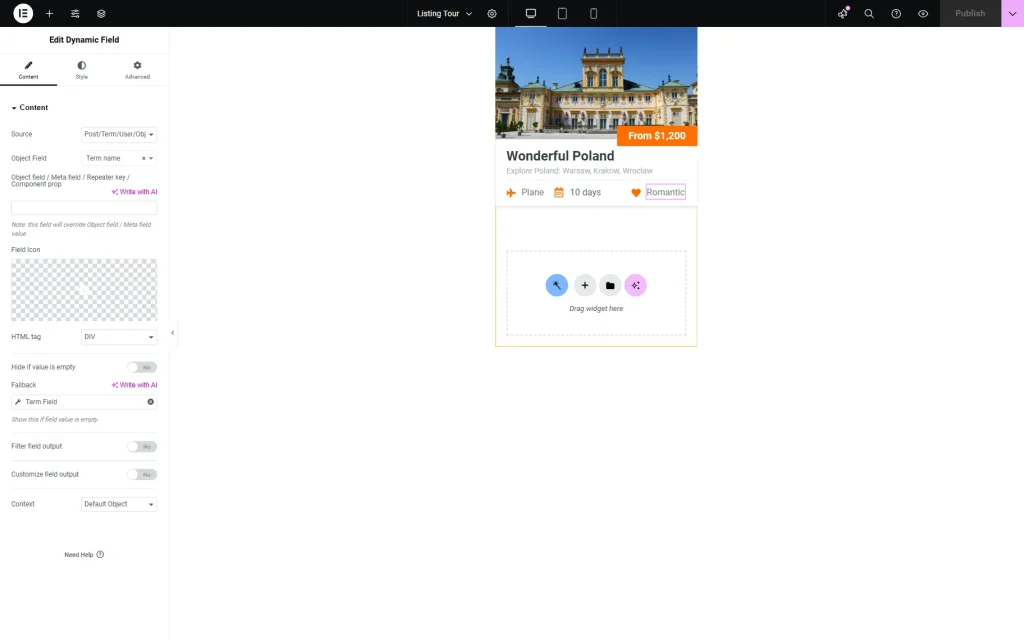
Add the needed dynamic widgets to the page. In our case, it is a Dynamic Image widget with the “Post thumbnail” Source, a Dynamic Field widget with the “Pricing” meta field as a source, a Dynamic Link widget with the “Permalink” Source and the “%title%” Label, a Dynamic Field widget with the “Excerpt” meta field, and Dynamic Images with the corresponding Dynamic Fields that include icons and meta fields containing additional information about tour features.
Whenever the Listing item is ready, save the changes by hitting the corresponding button.
Place Filters and Providers to Page
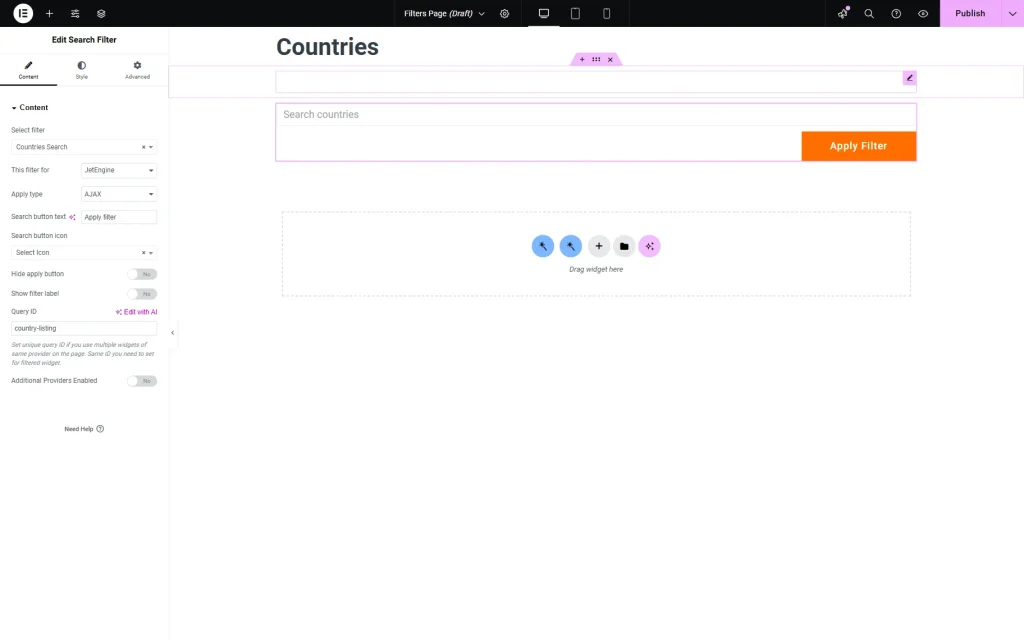
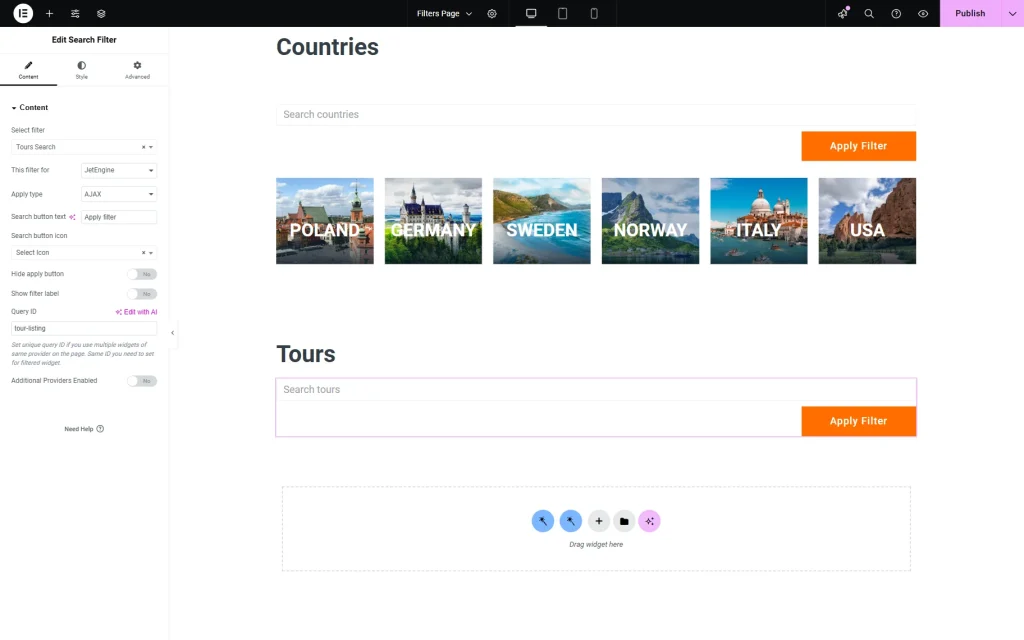
Open the needed page/template in the Elementor and place a filter widget on the page. In this case, we add a Search Filter widget.
Pick the first filter in the Select filter field. In this case, the “Countries Search” option.
Select the “JetEngine” option in the This filter for field.
Then, complete the Query ID field with the value that will be later attached to the Listing Grid.
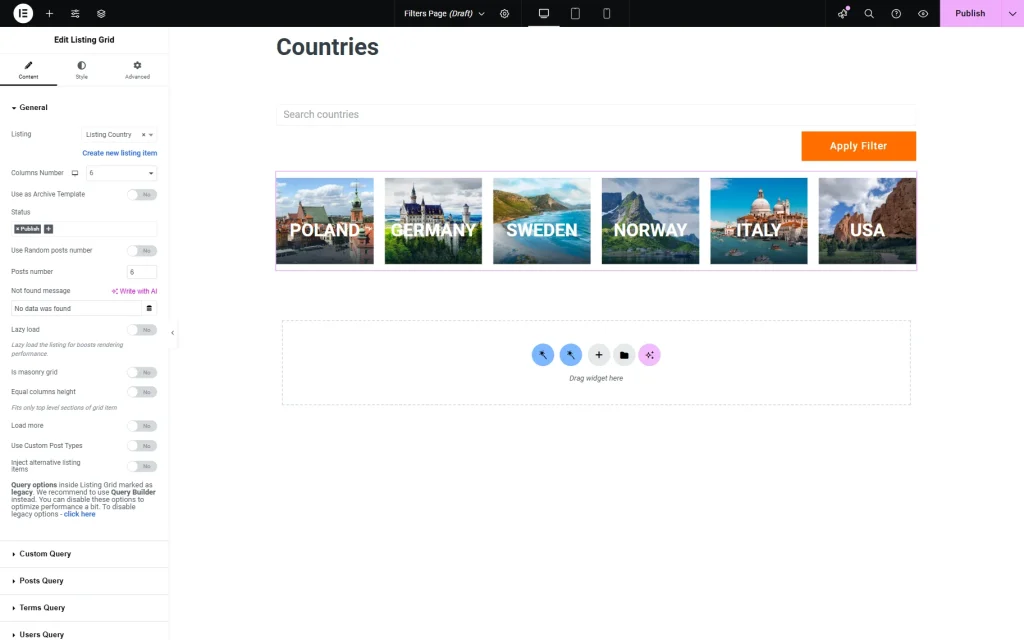
Next, add the Listing Grid widget to the page.
In the Content settings, pick the Listing you previously created for the first filter. In our case, it’s the “Listing Country.”
If necessary, work on other settings in the Content tab. For instance, we changed the Columns Number to “6” and the Posts Number to “6.”
Then, proceed to the Advanced tab of the Listing Grid settings.
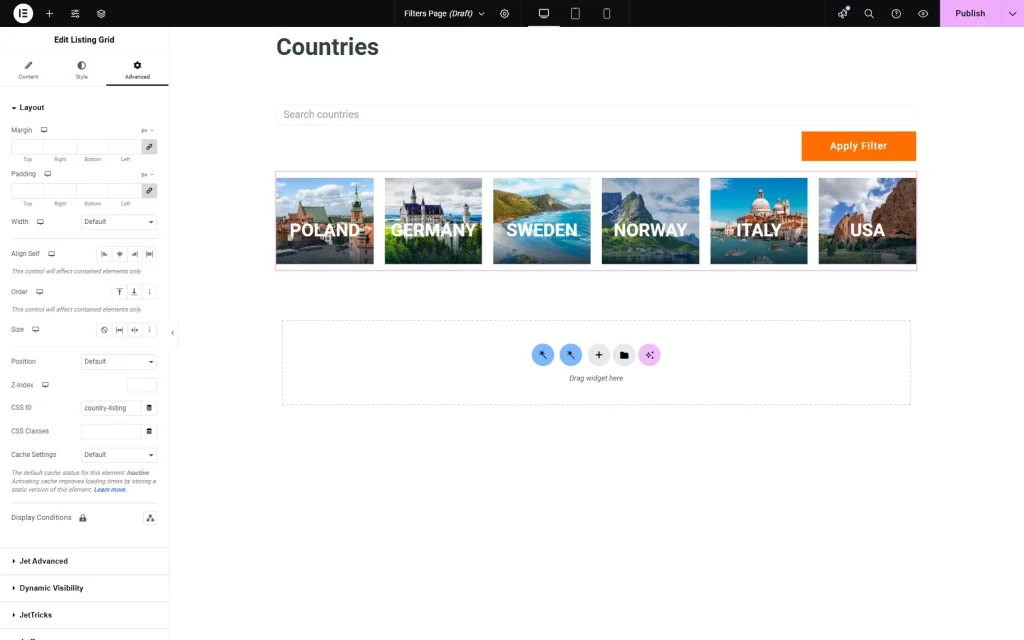
Find the CSS ID field in the Layout tab and complete it with the value you previously put in the Query ID field of the filter widget. In this case, it’s “country-listing”.
Then, add one more filter widget on the page. We add one more Search Filter widget.
Pick the second filter in the Select filter field and set “JetEngine” as the provider in the This filter for field.
Ultimately, set the Query ID value for this filter, which will be later connected to the second Listing Grid. For example, we put the “tour-listing” value here.
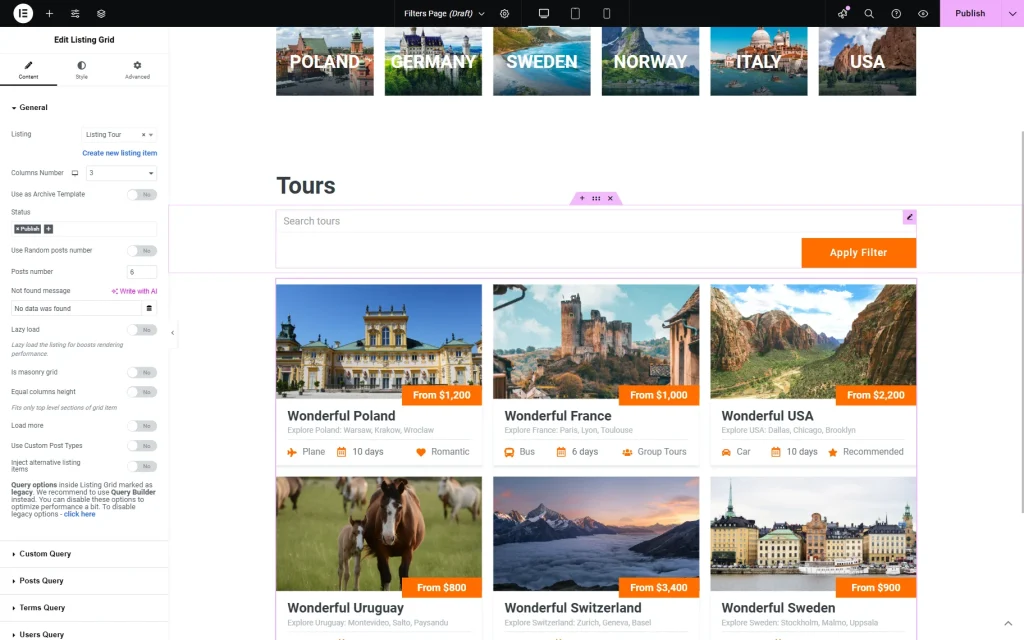
Next, add another Listing Grid to the page and pick the Listing you want to filter with the second filter.
Change the other Content settings if needed.
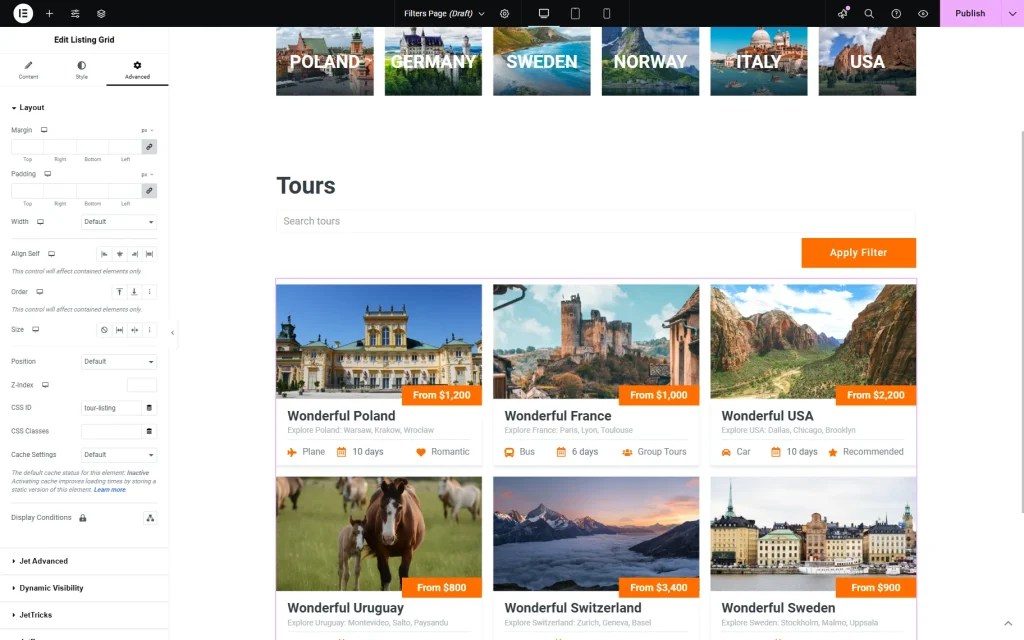
Proceed to the Advanced settings of the Listing Grid and find the CSS ID field. Paste there the value you put in the Query ID field of the filter widget. Here, “tour-listing” value.
Now, press the “Publish” button to save the page.
Check the Result
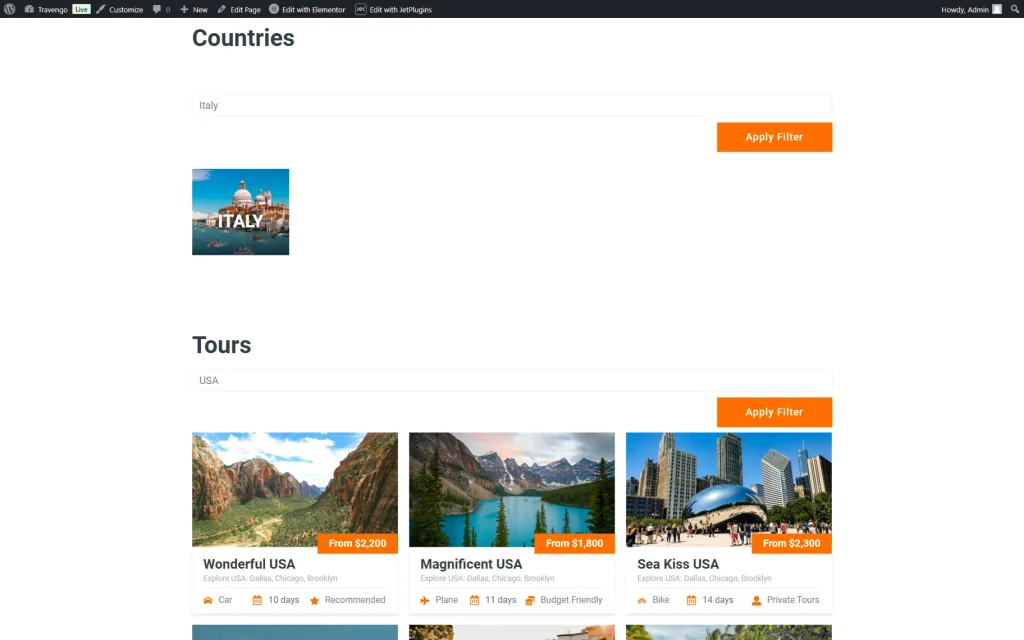
Open the just-edited page on the front end. Check if the two filters work correctly.
If you have added two Search Filters like in this guide, type the search request and press the “Search” button in the two filters.
For example, we put the “Italy” value in the first Search Filter to search for Italy and the “USA” value in the second Search Filter to search for USA tours.
That’s all; now you know how to assign a JetSmartFilters filter to a specific Listing Grid by JetEngine for WordPress websites.
