How to Use Pagination Widget for Product Archives
Learn how to apply the JetWooBuilder Products Pagination widget on the archive pages to add WooCommerce products per page selector and manage the widget settings.
Before you start, check the tutorial requirements:
- Elementor (Free version)
- WooCommerce plugin (Free version) installed and activated with Products created.
If you have not done it yet, please read the tutorial.
- JetWooBuilder plugin installed and activated Archive Page for Products created.
If you have not done it yet, please read the tutorial.
The Products Pagination widget separates posts on WooCommerce archive pages. It adds pagination to the WooCommerce products displayed via the Products Grid, Products List, or Products Loop widgets, as well as allows for the customization of labels, icons, and more.
The widget is part of the JetWooBuilder plugin that covers 60+ widgets for different types of WooCommerce pages.
Activate the JetWooBuilder Settings
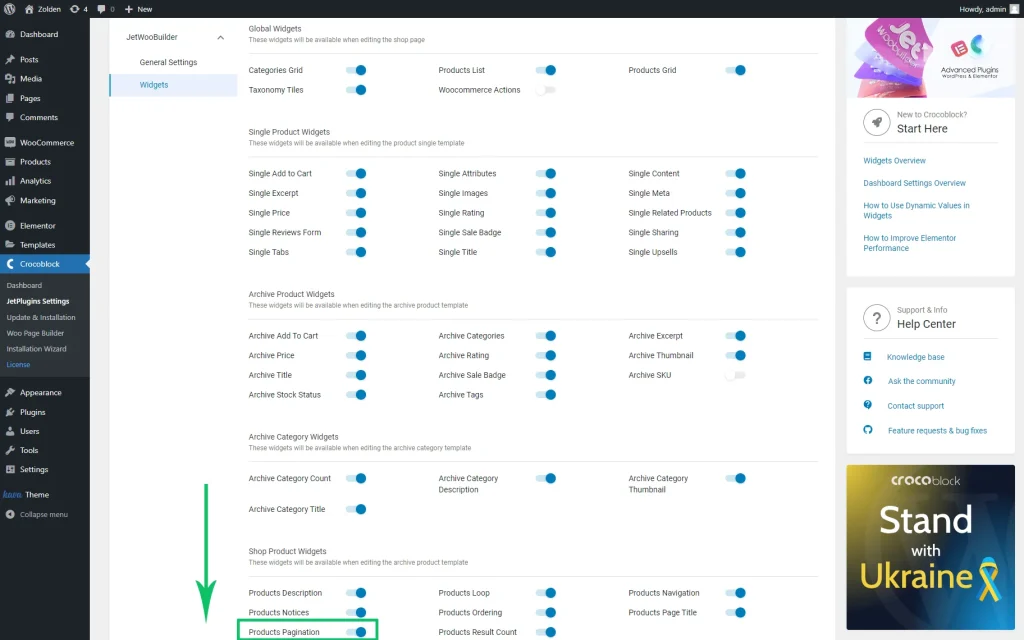
Navigate to the WordPress Dashboard > Crocoblock > JetPlugins Settings > JetWooBuilder > Widgets tab.
Move to the Shop Product Widgets section and enable the Products Pagination toggle.
Create a Shop Page Template
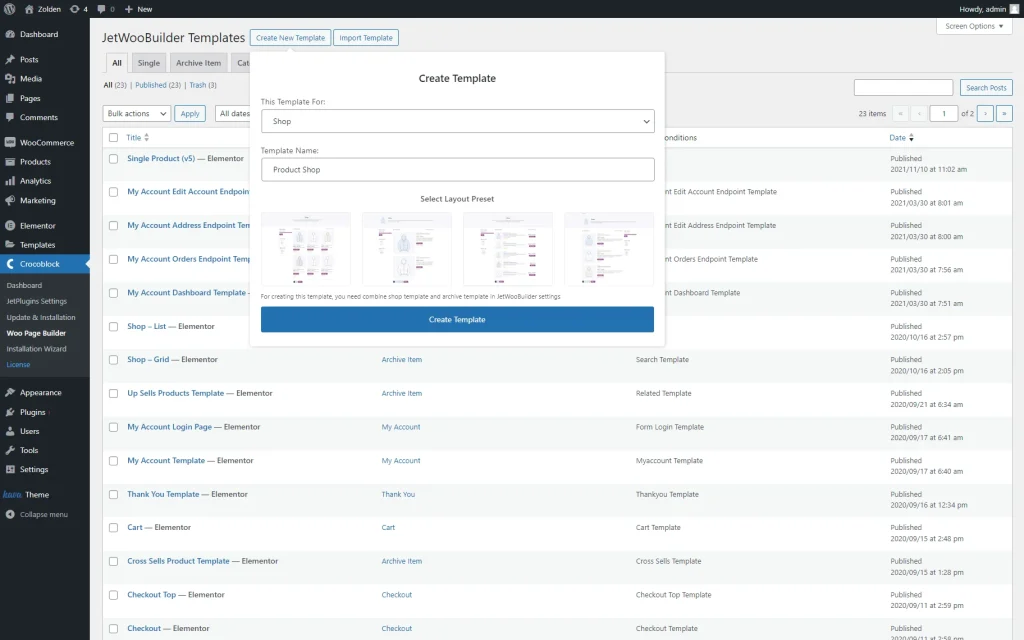
Move to WordPress Dashboard > Crocoblock > Woo Page Builder and press the “Create New Template” button.
In the Create Template pop-up, select the “Shop” option in the This Template For selector and complete the Template Name. Finally, press the “Create Template” button.
Read the tutorial How to Create a Shop Page Template to learn about the main features of the JetWooBuider template creation.
Add the Products Grid Widget
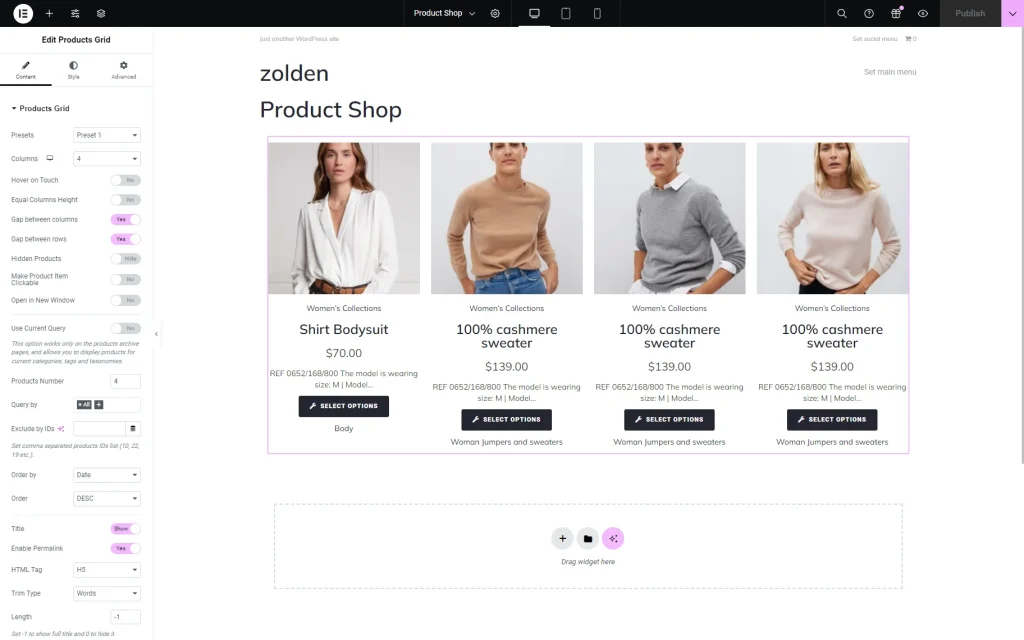
The new template will be opened in Elementor.
Find the Products Grid widget in the search bar and drag-n-drop it to the page. Add the specific preset and set other options.
To learn how to manage the widget’s settings, read the Products Grid Widget Overview.
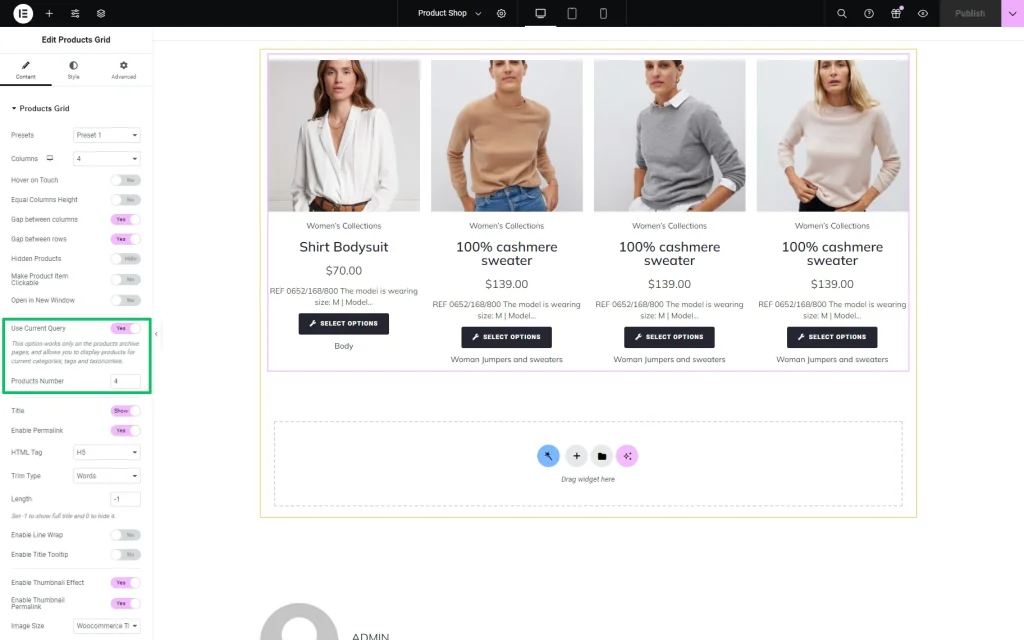
To display the products for current categories, tags, and taxonomies on the archive pages, enable the Use Current Query toggle.
Next, we specified the Products Number that would be displayed on the page. In this case, we set four products per page.
Add the Products Pagination Widget
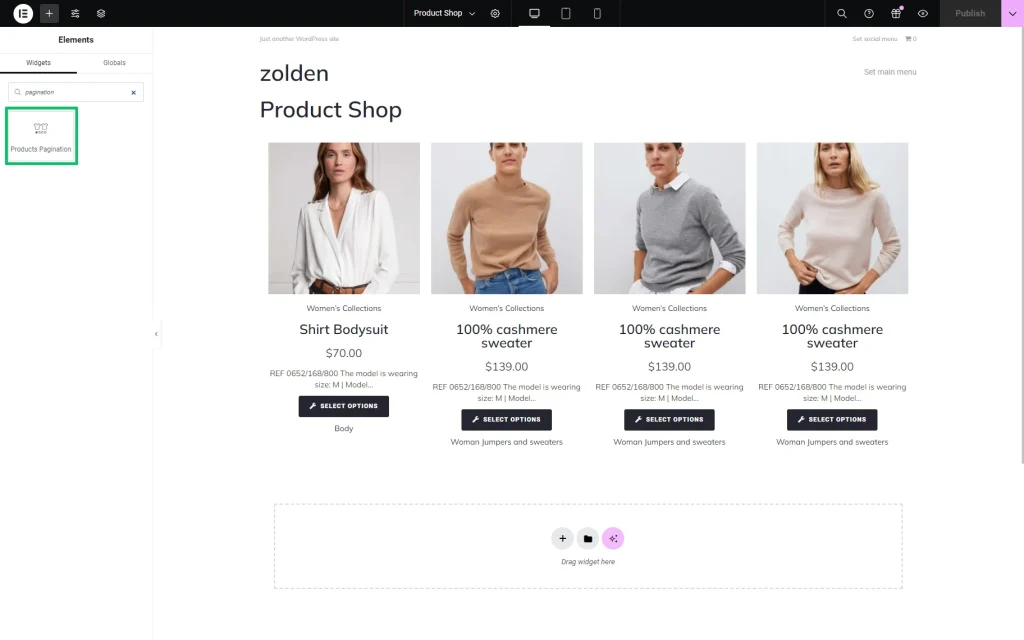
Find the Products Pagination widget and drag-n-drop it to the page.
Adjust the Settings
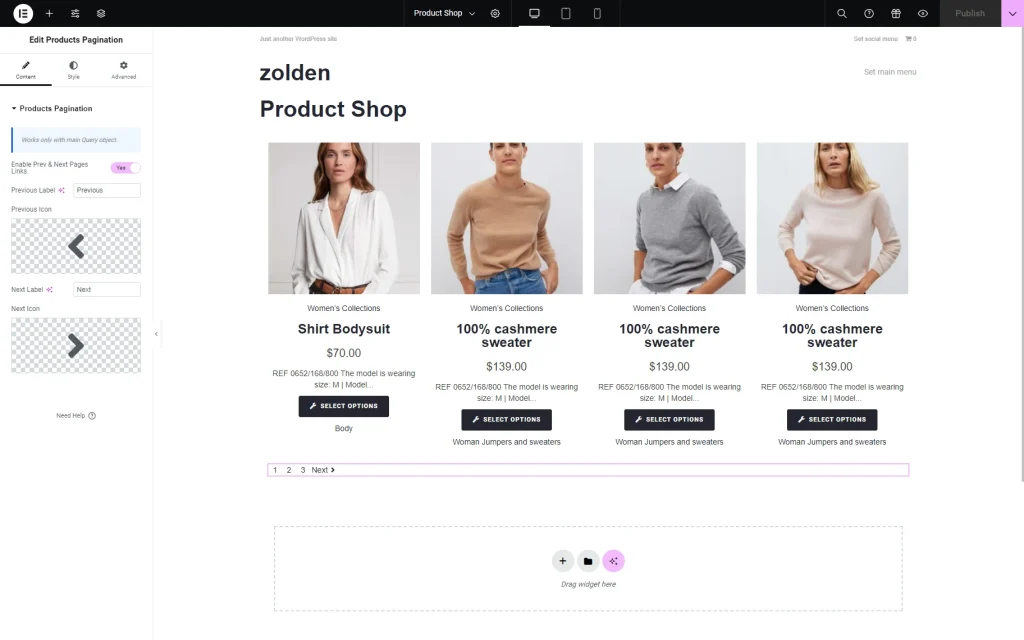
Since the Enable Prev & Next Pages Links toggle is activated by default, the settings for icons and labels are available. In particular, you can change the labels for the “Previous” or “Next” buttons and select their icons.
Then, unroll the Style tab and customize the typography, colors, backgrounds, paddings, borders, alignment, and more for the product pagination, navigation, and navigation icons.
alt text: style settings of the jetwoobuilder products pagination widget
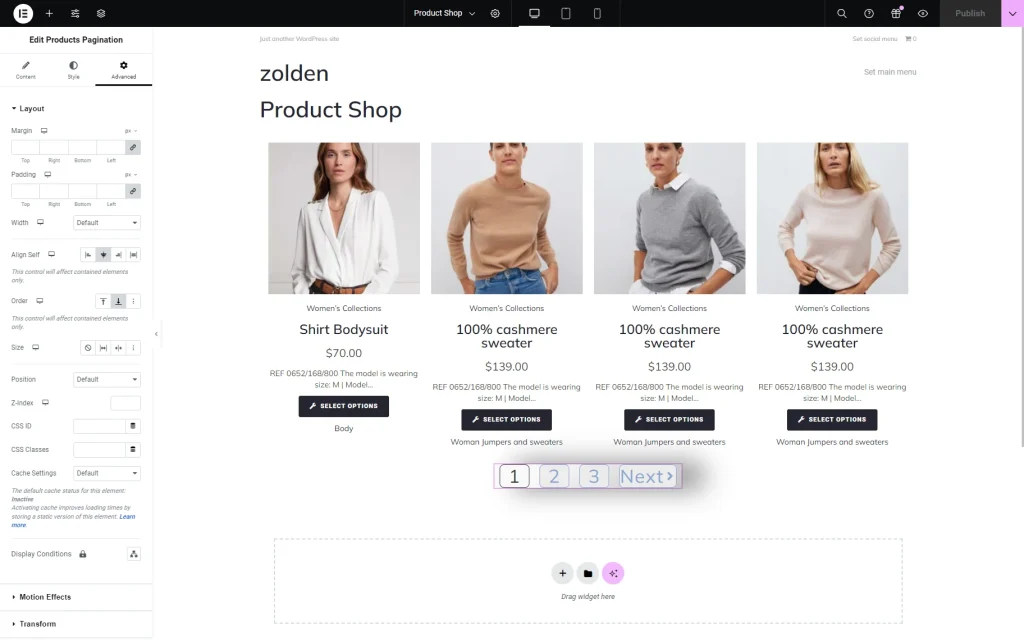
Additionally, we customized the Layout options within the Advanced settings tab.
Check the Result
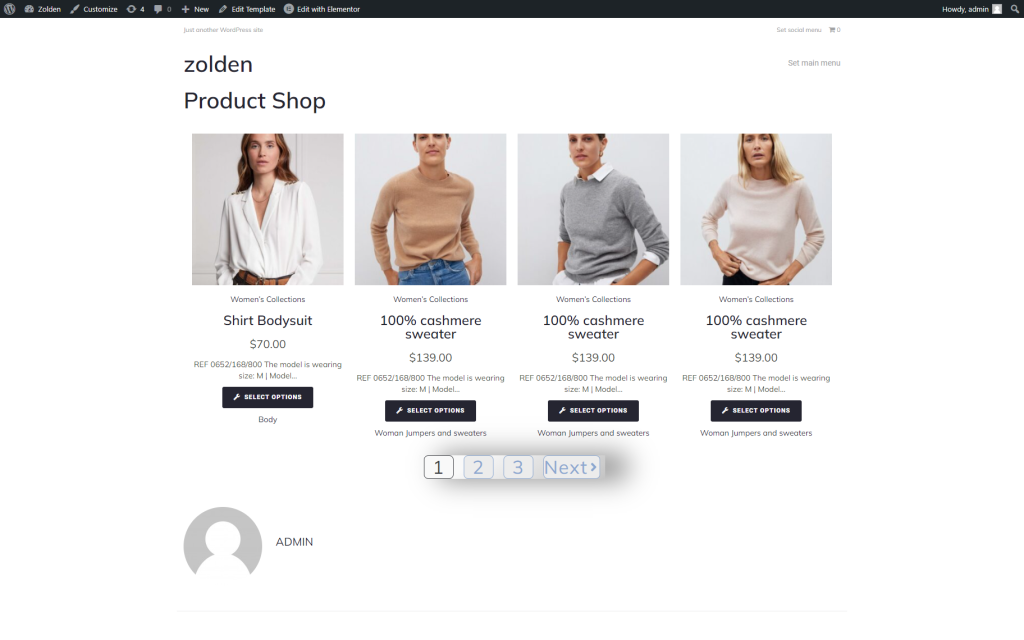
Navigate to the front end and observe how the widget works.
That’s all about adding the Products Pagination widget, displaying the products via the Products Grid widget, and managing the pagination settings with the JetWooBuilder plugin for WordPress.
