JetEngine Profile Builder: 3 Things to Check with Account Page Issue
When I edit a post via the form on the Account Page, the post is not updated. Instead of it, a new one is created, and the Account Page is deleted. How to fix it?
When you have some issues with the User Profile Builder, there are three things that you can check in the JetEngine or JetFormBuilder plugin settings.
Check the Profile Builder Settings
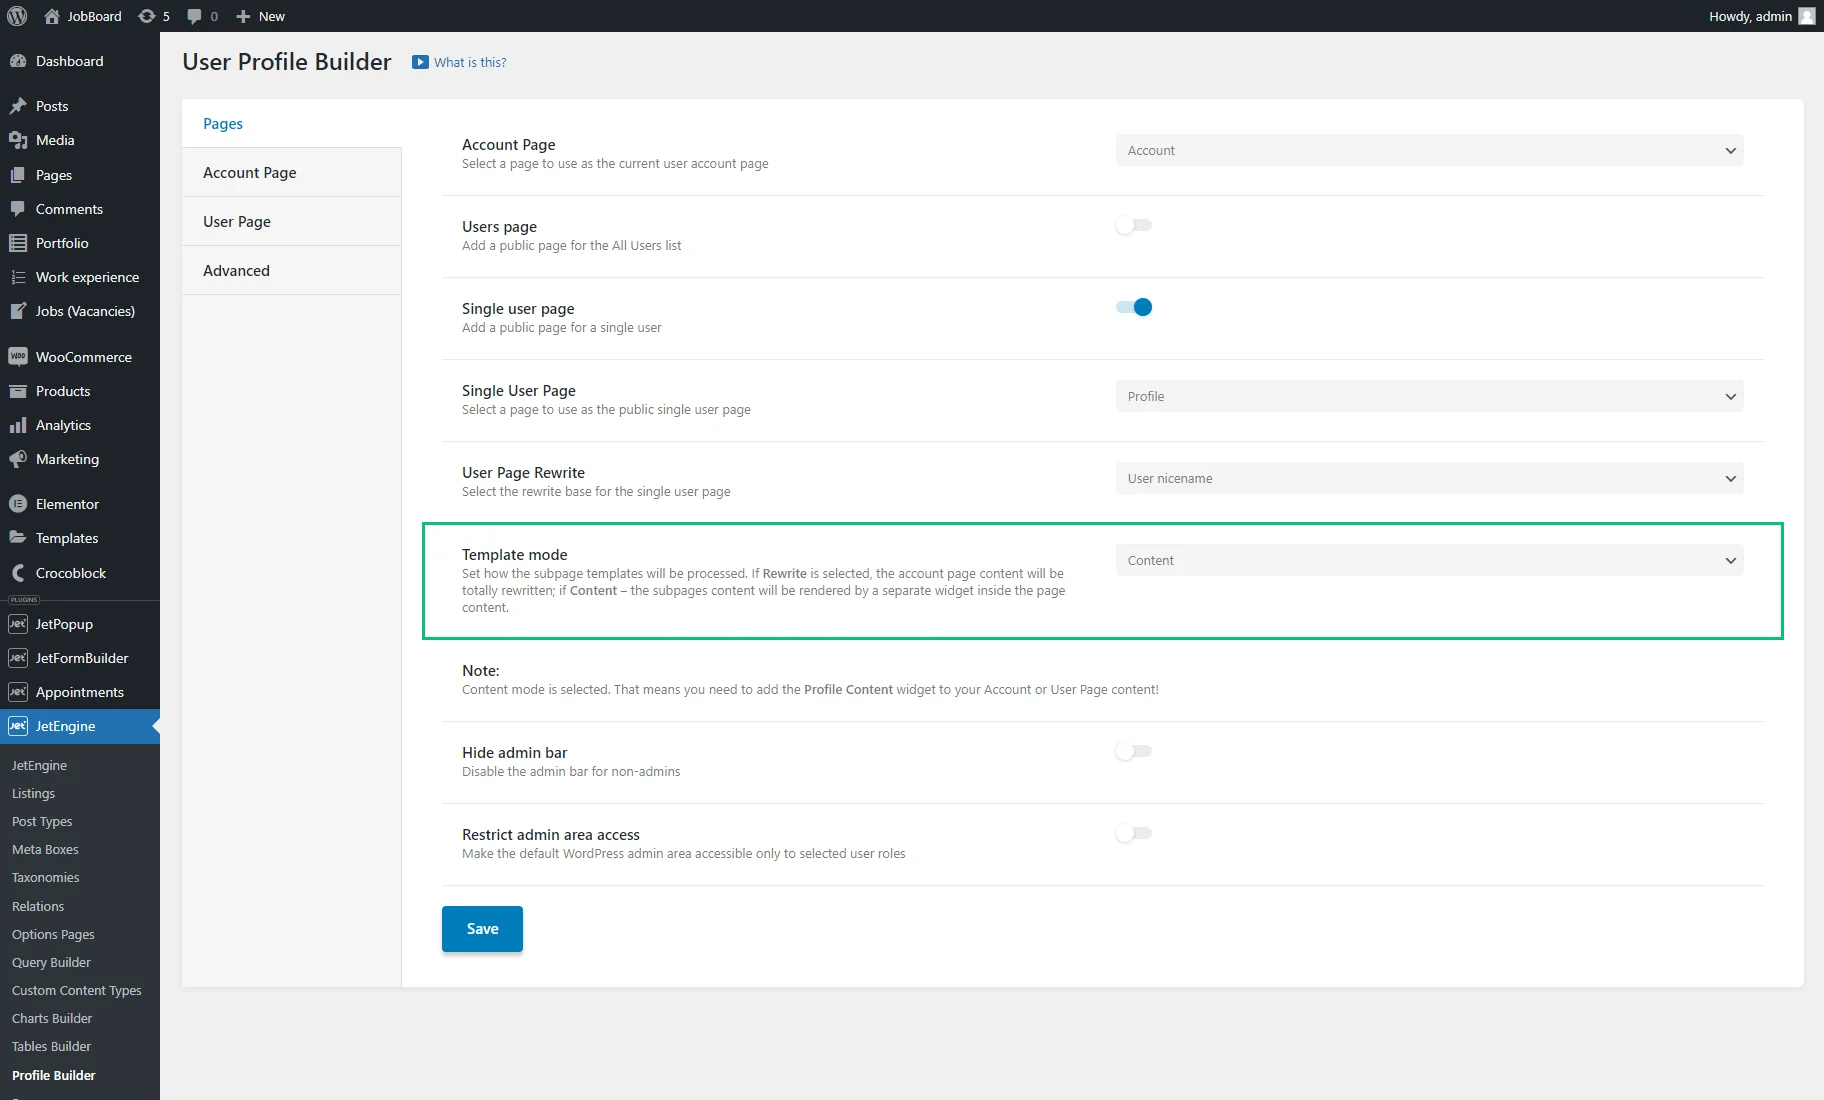
Proceed to the WordPress Dashboard > JetEngine > Profile Builder > Pages tab and check if you selected the “Content” Template mode.
With the active “Rewrite” option, the content is displayed automatically, and you cannot edit it. If you try, you can get the error message: “Content is not found.”
The “Content” option means you’ll need to use the Profile Content widget on your Account or User page to display the content from the needed templates. Then, you can customize the page.
Learn more about the difference between the modes in the Creating User Account Page With Different Dashboard Structures tutorial.
Check the Form for Adding New Posts/Users
JetFormBuilder
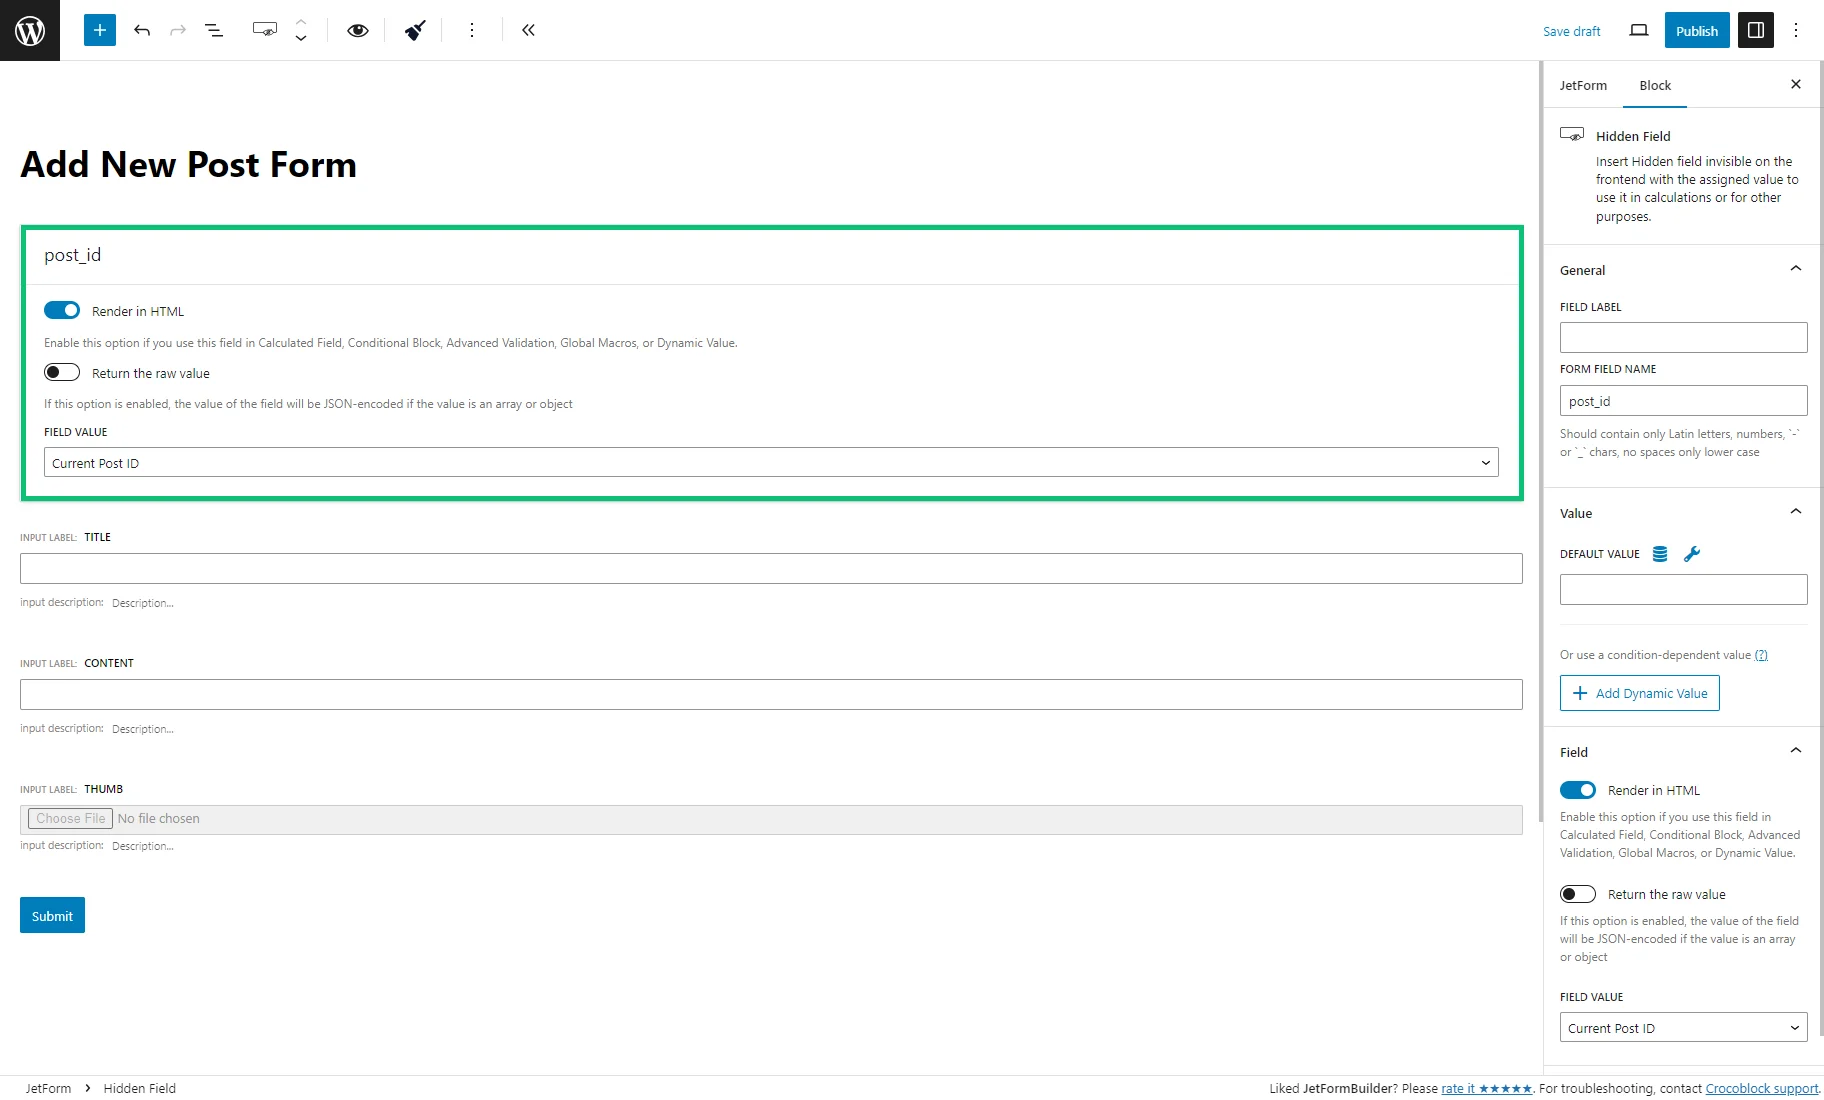
If you create the new post addition form with the JetFormBuilder plugin, find it in the WordPress Dashboard > JetFormBuilder > Forms tab and click to edit.
The “Add new post” form doesn’t need the “post_id” Hidden Field block so that you can delete it.
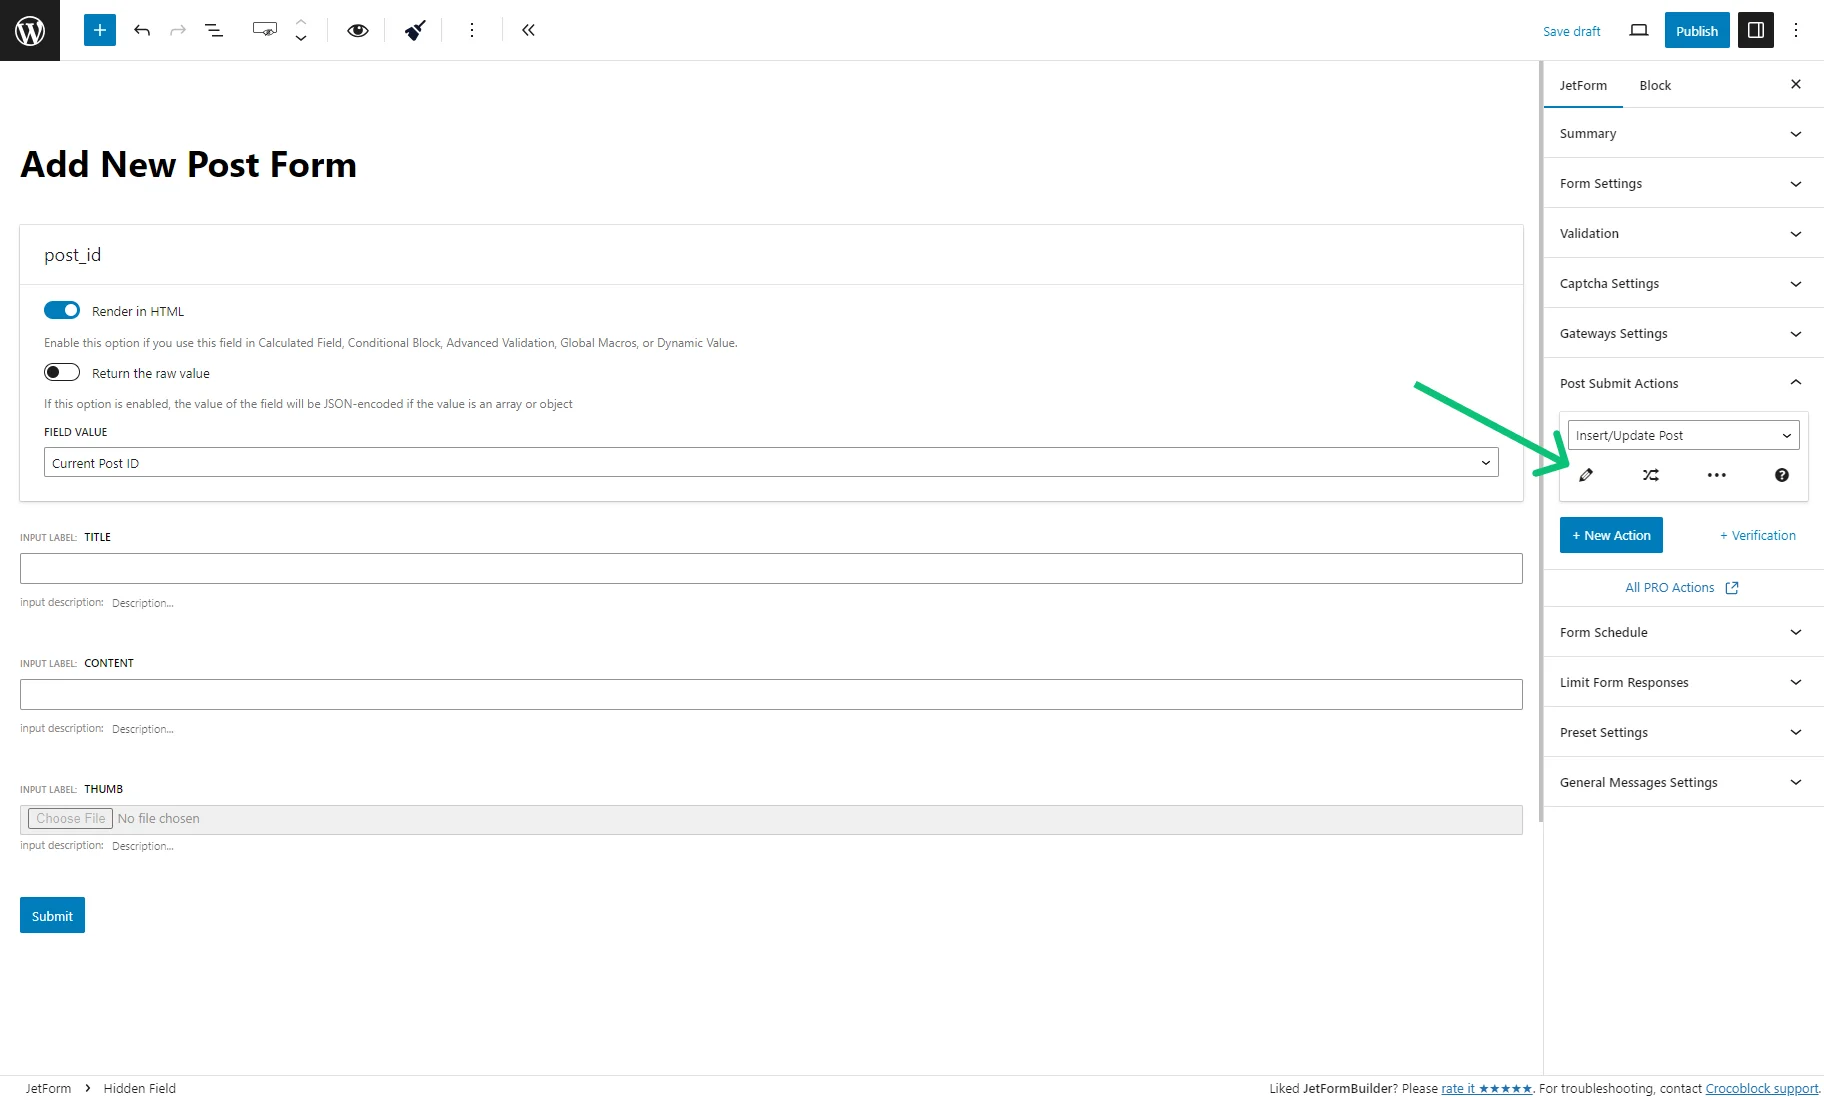
If you decide to keep this block, move to the JetForm section and unfold the Post Submit Actions tab. Click the “pencil” icon under the “Insert/Update Post” action.
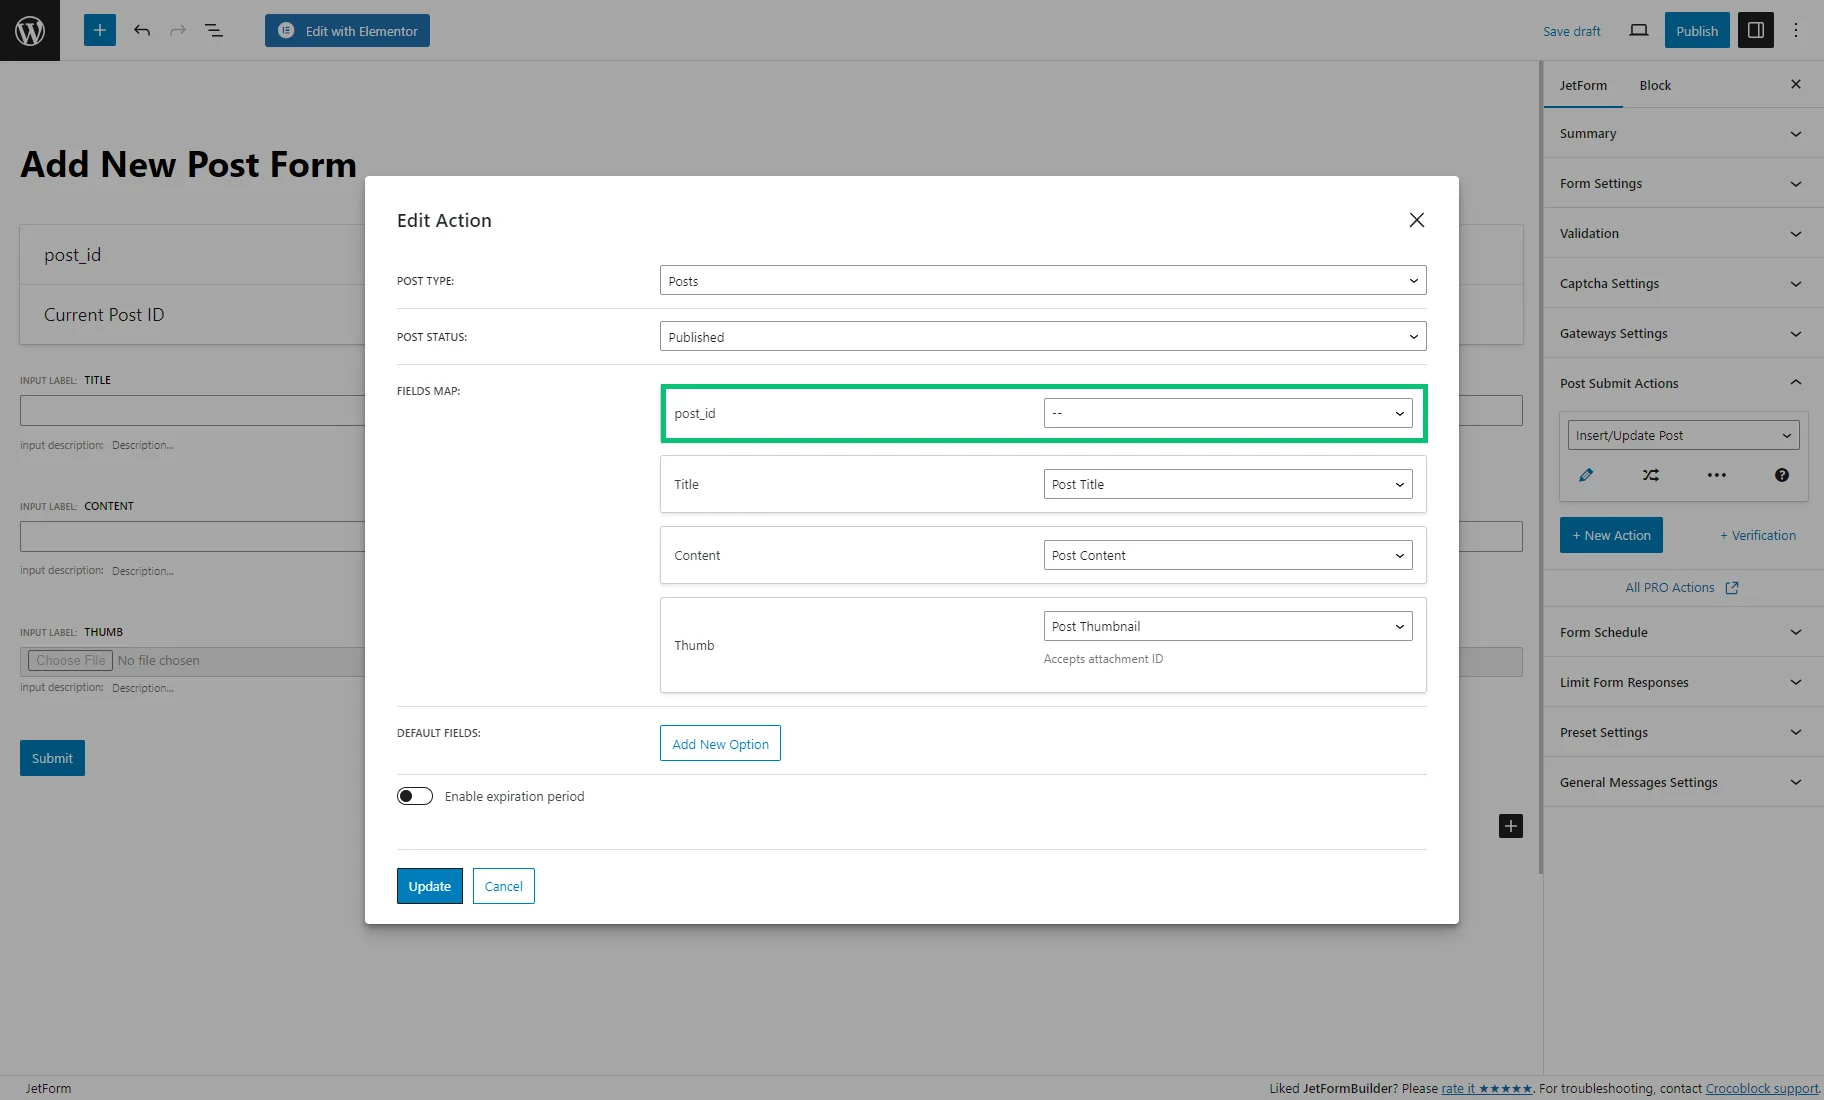
Ensure the FIELD MAP section has no selected options in the post_id drop-down menu.
After the settings change, hit the “Update” button and save the form.
JetEngine
If you create the new post addition form with the JetEngine plugin, find it in the WordPress Dashboard > JetEngine > Forms tab and click to edit.
The “Add new post” form doesn’t need the “post_id” field with the “Hidden” Type so that you can delete it.
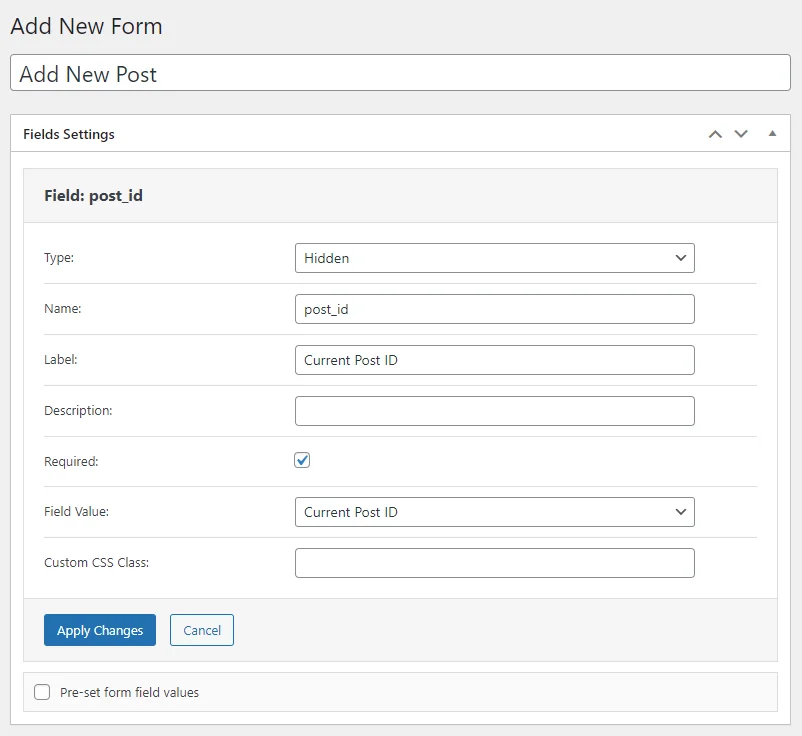
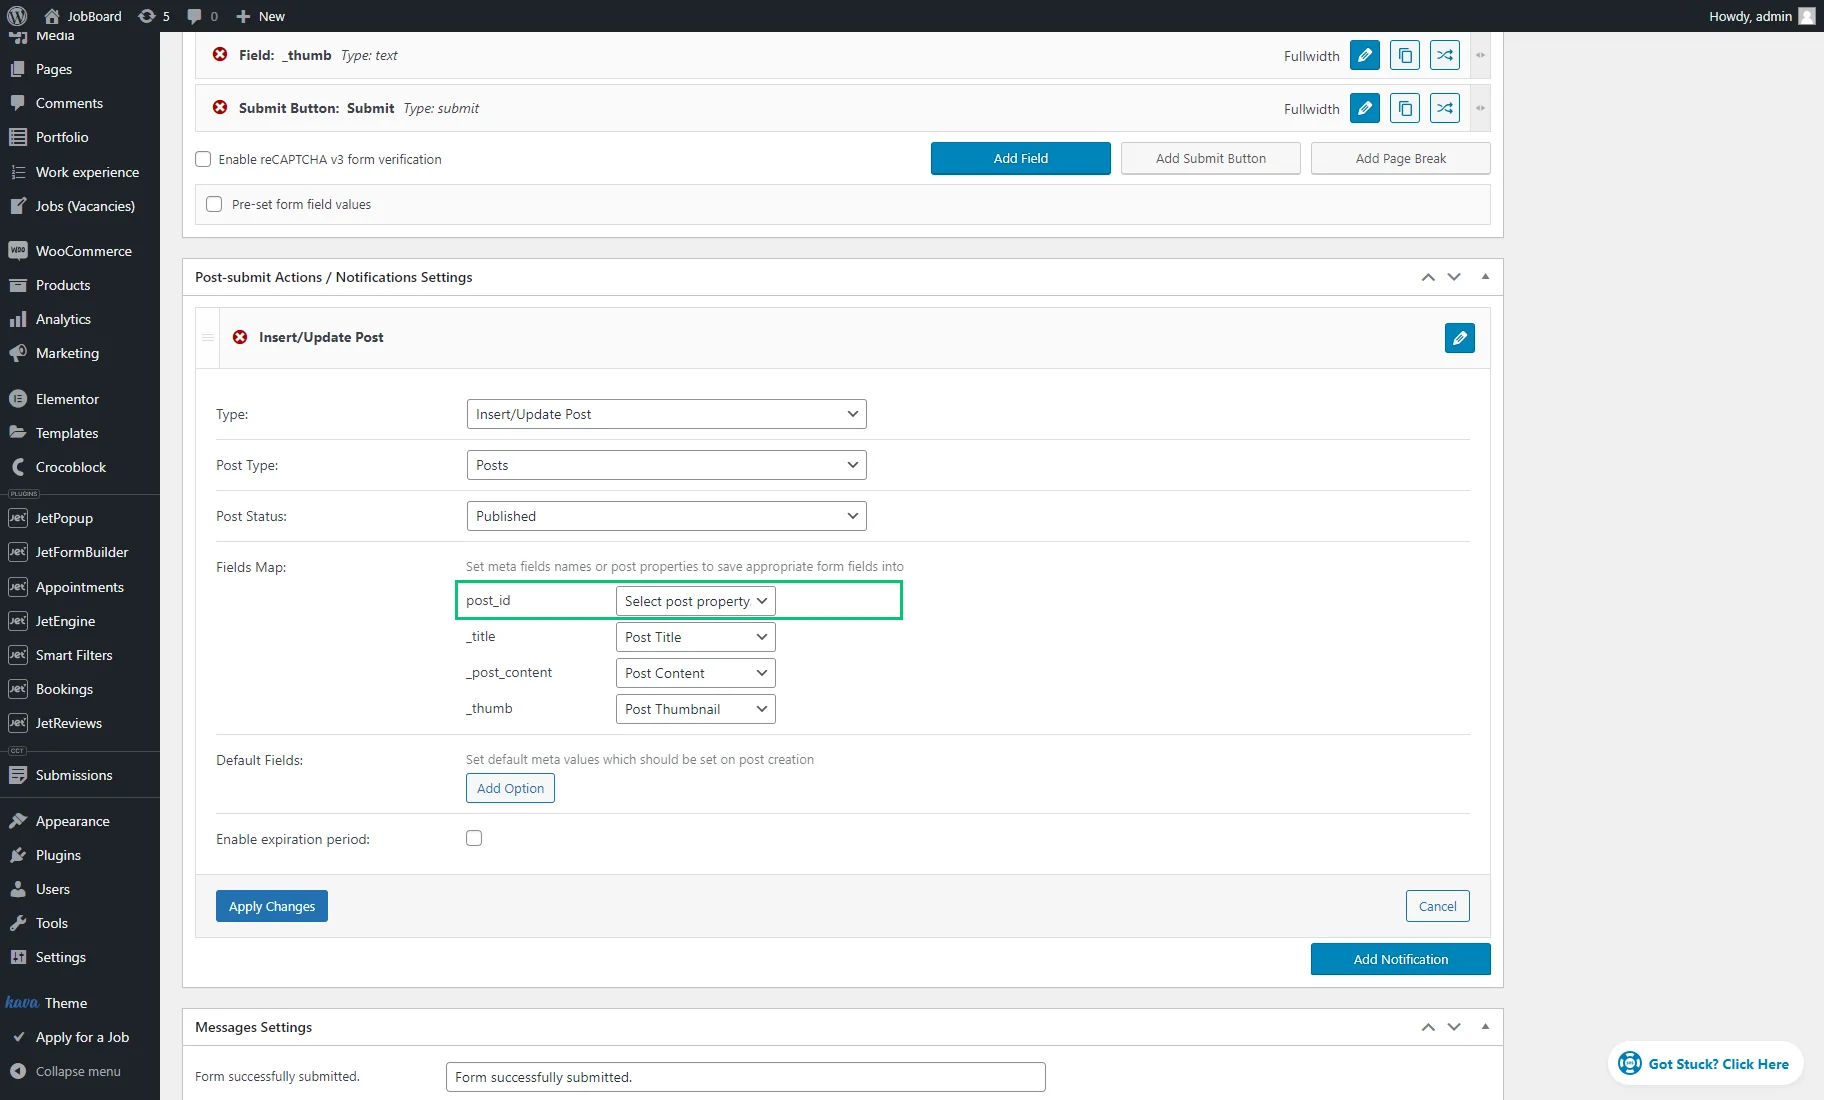
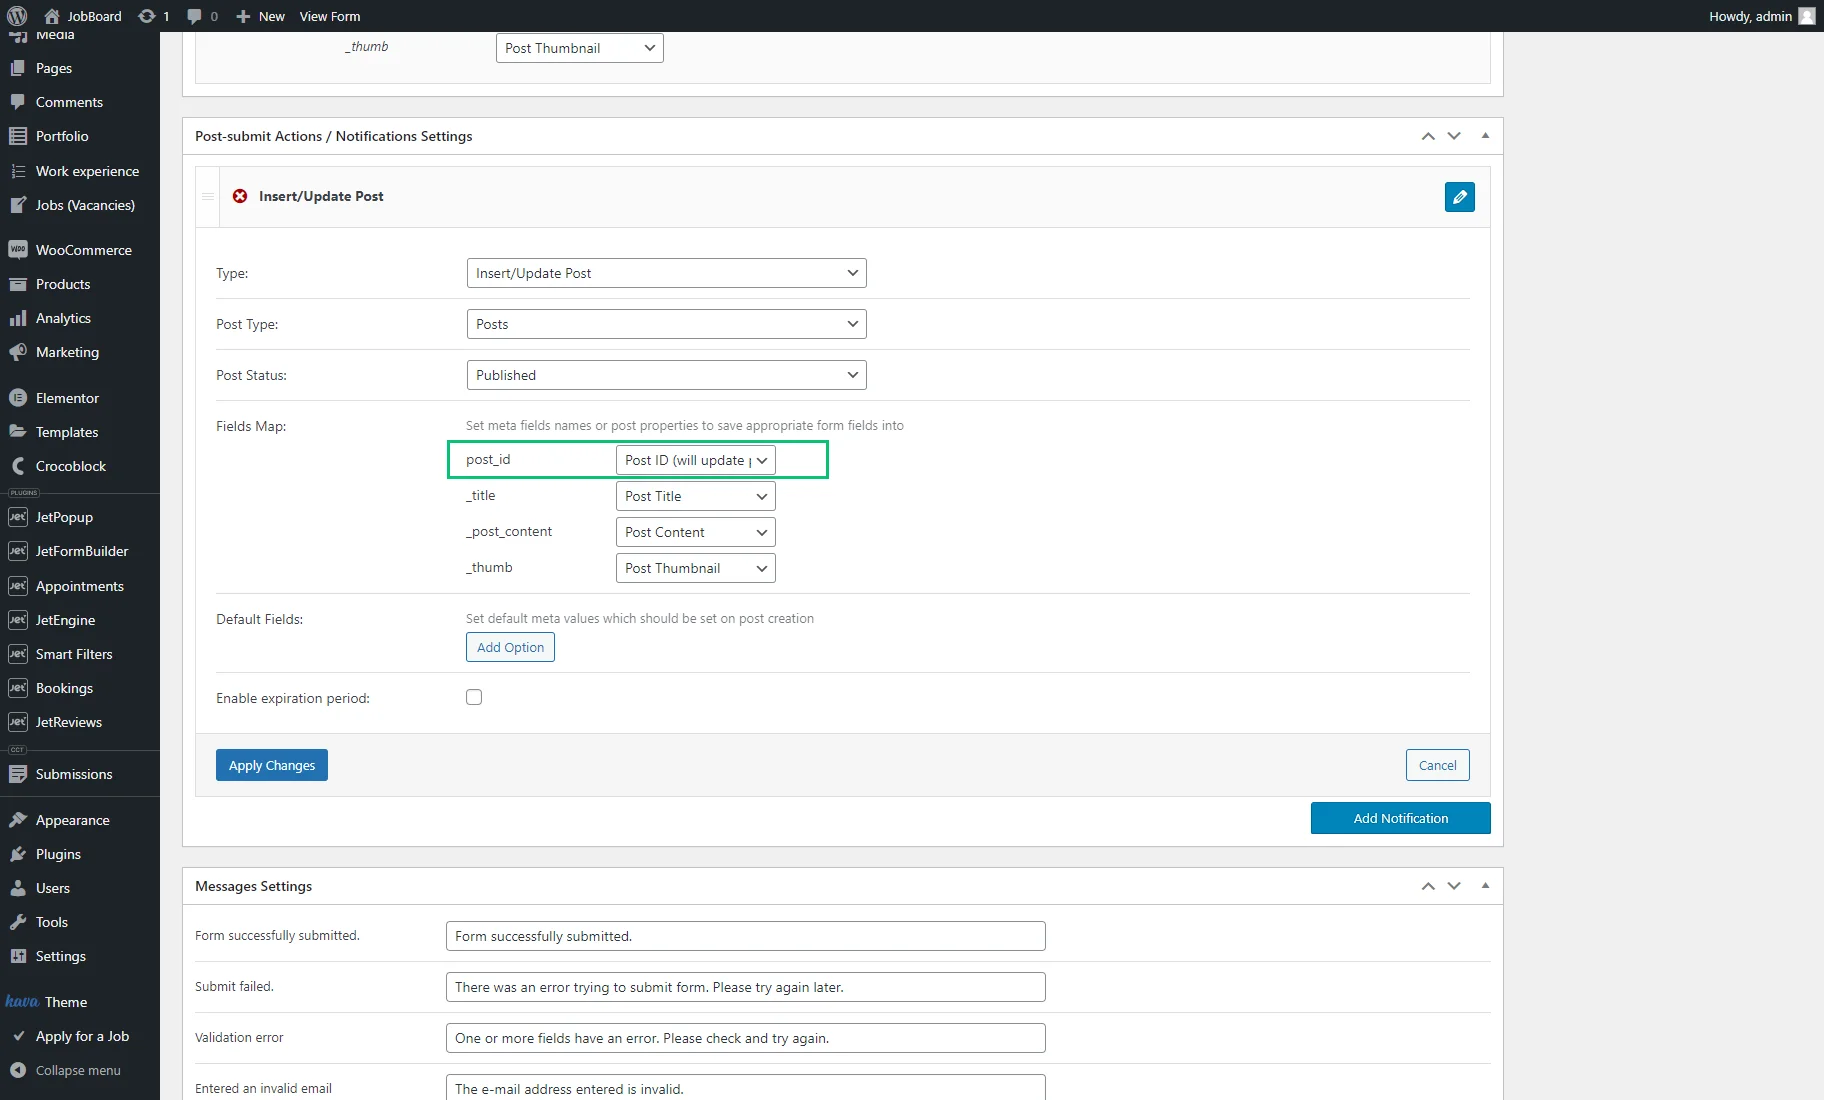
If you decide to keep it, move to the Post-submit Actions / Notifications Settings block and click the “pencil” icon near the “Insert/Update Post” action.
Ensure the Field Map section has no selected options in the post_id drop-down menu.
Finally, hit the “Apply Changes” and then the “Update” button to save the action and form settings.
Check the Form for Editing Posts/Users
JetFormBuilder form
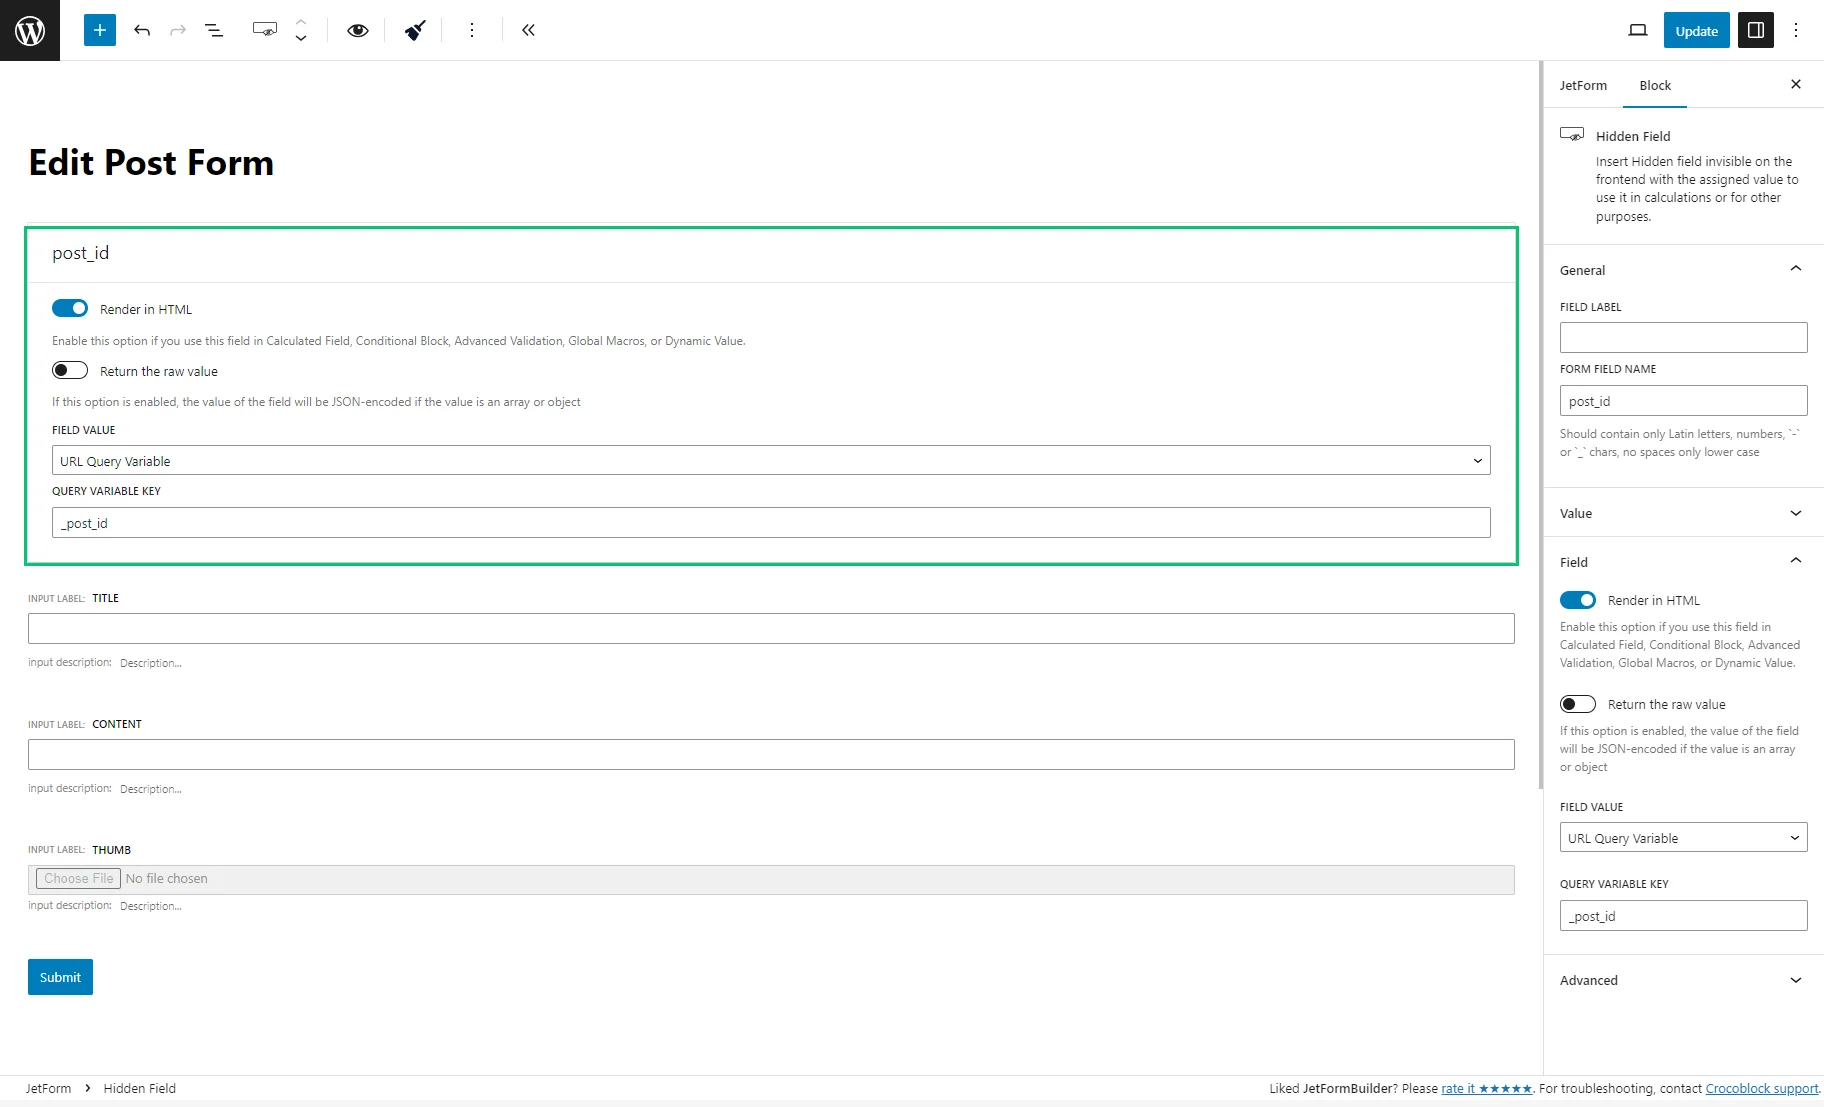
The “post_id” Hidden Field is required for the editing form. Select the “URL Query Variable” FIELD VALUE option and enter “_post_id” as the QUERY VARIABLE KEY (the macro is “_post_id=%current_id%”).
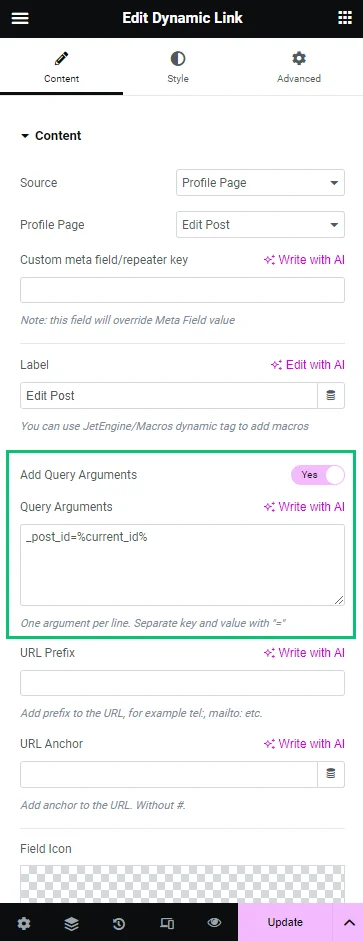
Check the settings of the Dynamic Link widget or block that redirects to the edit post form as well. The Add Query Arguments toggle should be enabled, and the “_post_id=%current_id%” macro should be added to the Query Arguments textarea.
More details are described in the Add the listing template chapter of the How to Update Posts via Front End Form tutorial.
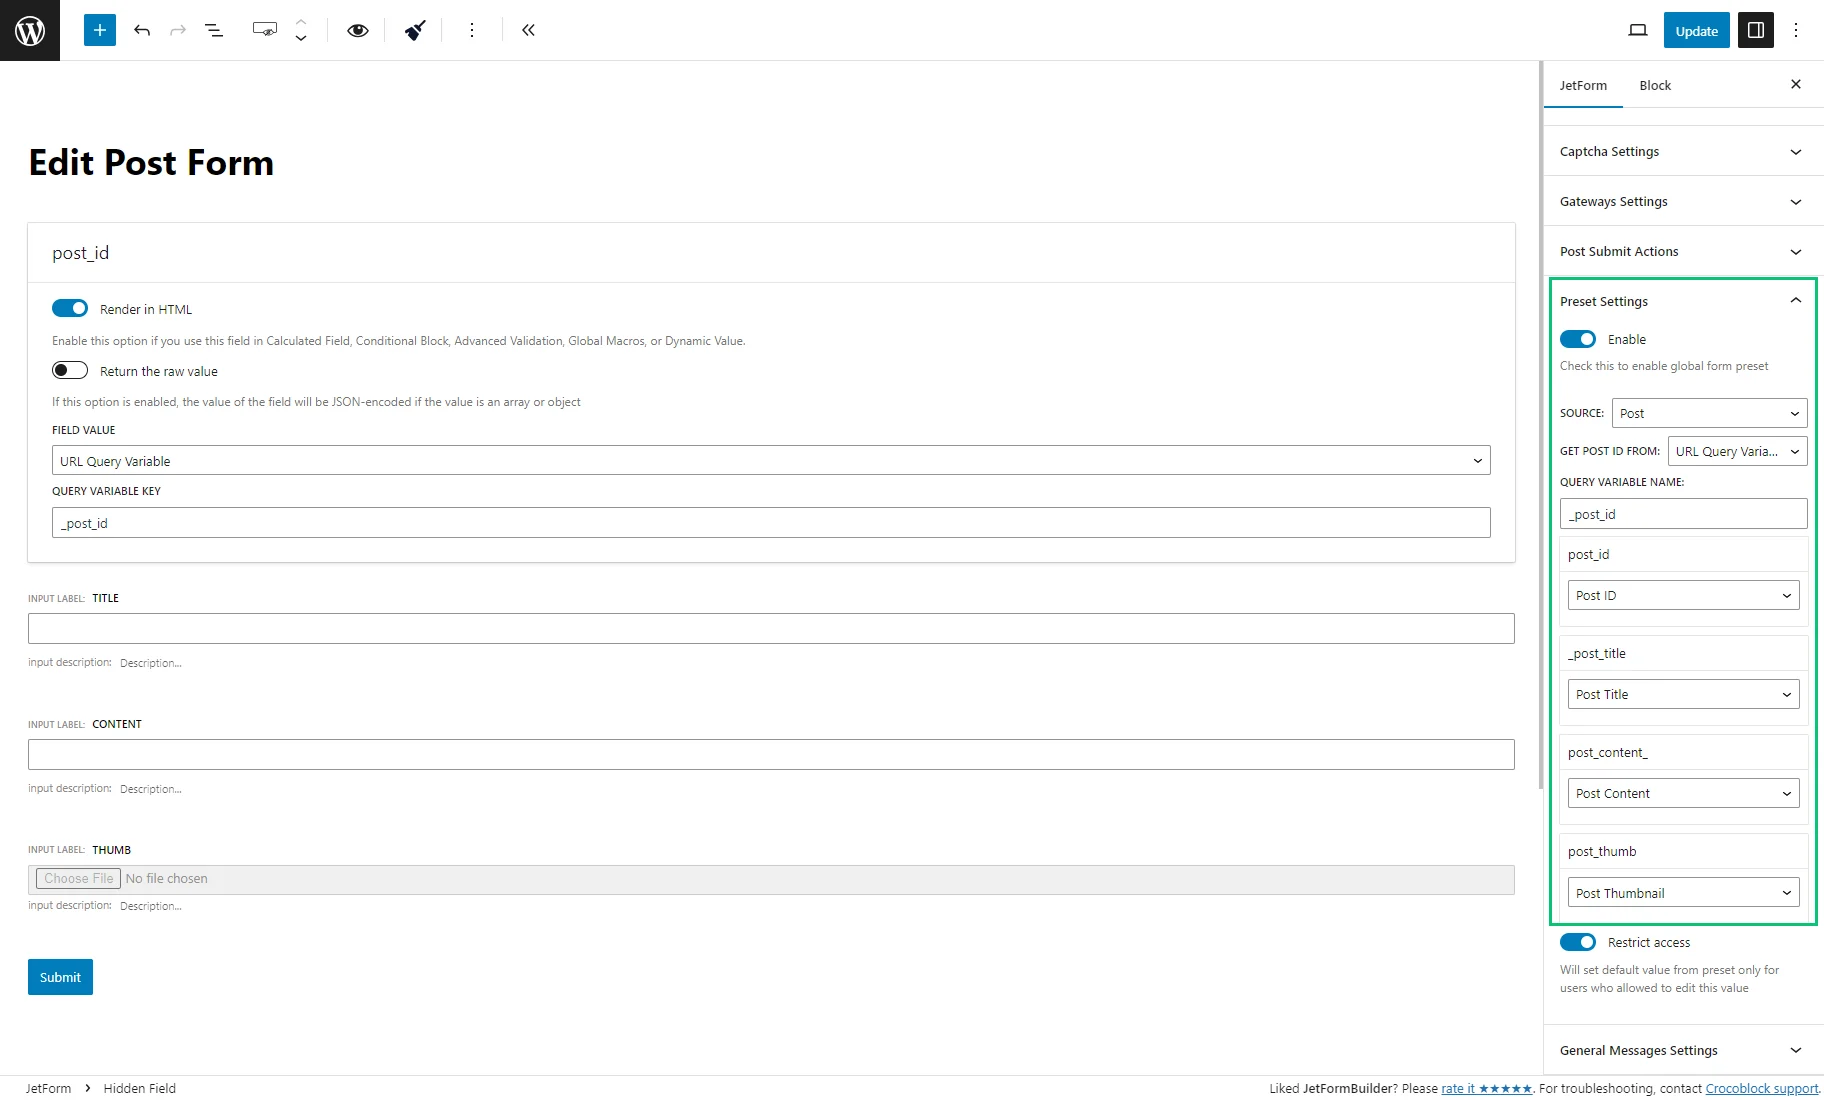
If you want the data to be pre-filled, go to the WordPress Dashboard > JetForm > Preset Settings tab and activate the Enable toggle.
Select the “Post” SOURCE, choose “URL Query Variable” as the GET POST ID FROM option, and enter “_post_id” as the QUERY VARIABLE NAME. Pick “Post ID” in the post_id field and set the remaining fields in the Fields Map tab.
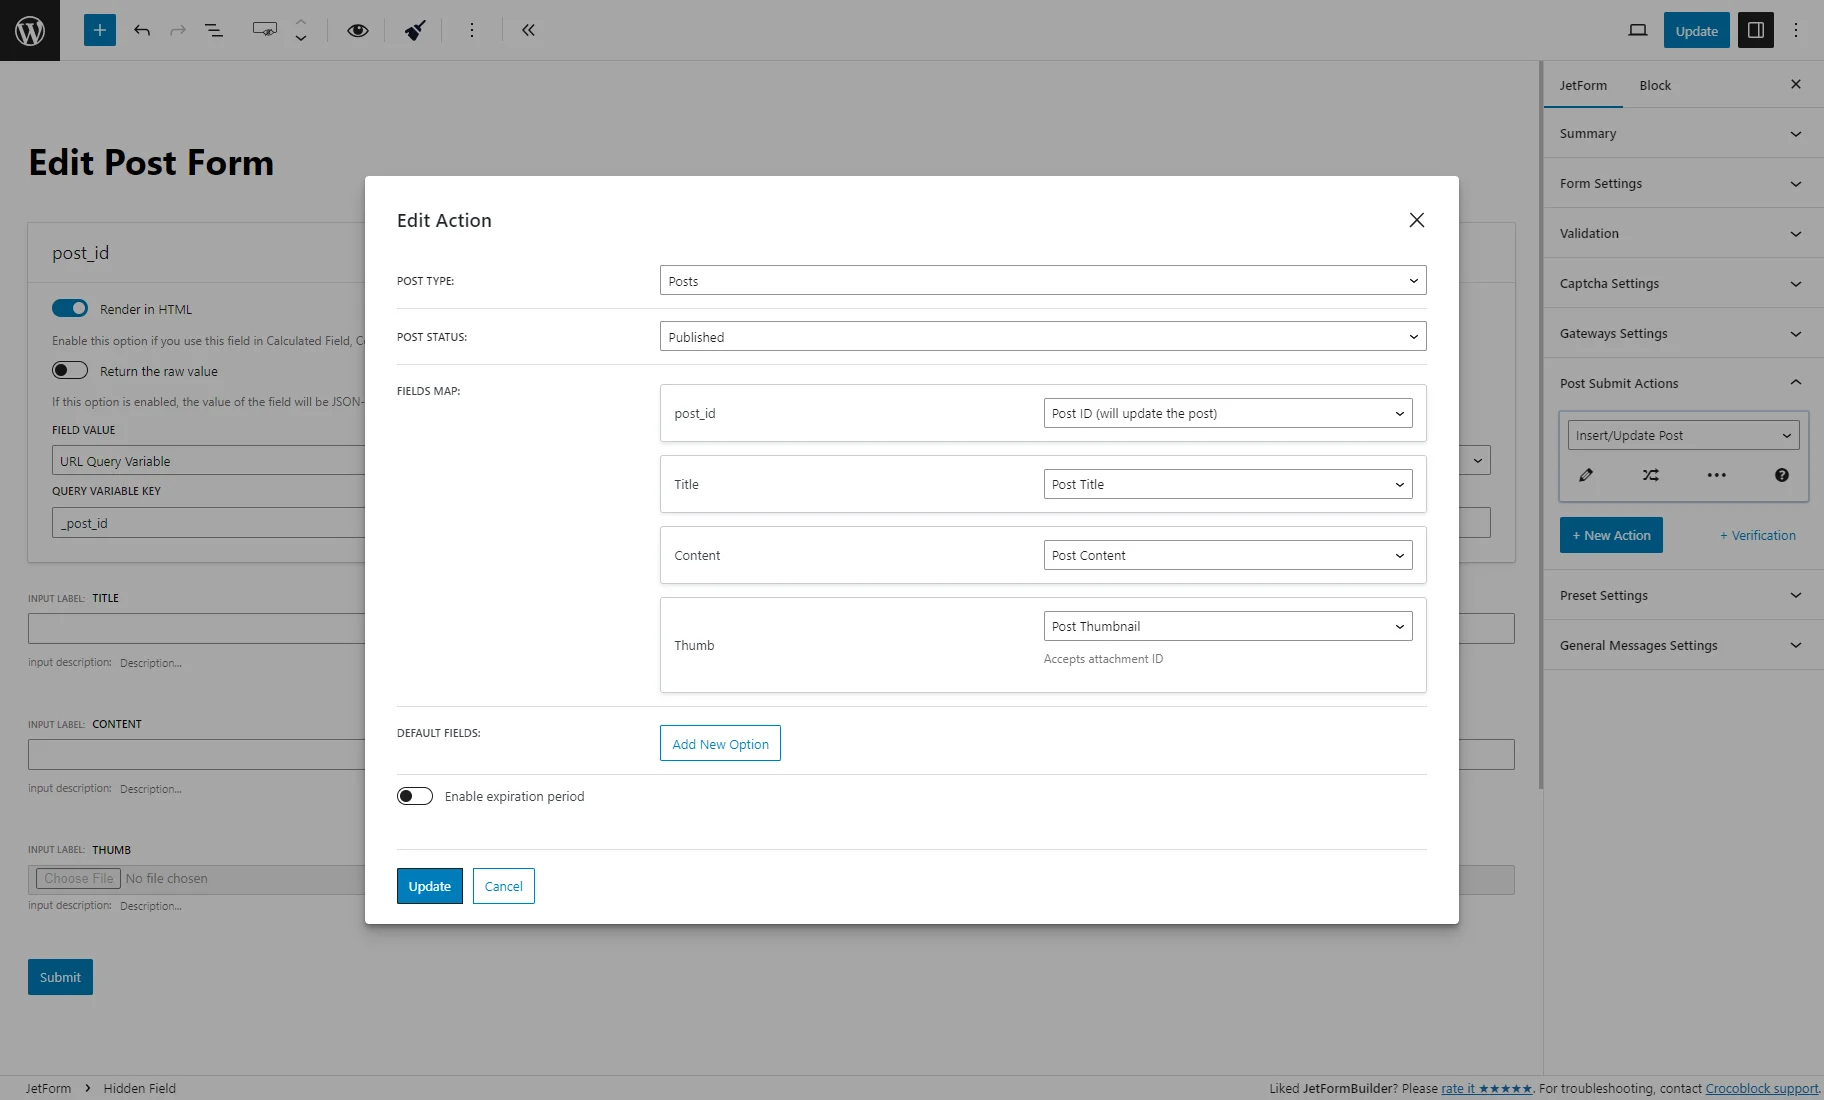
Finally, open the Post Submit Actions tab and hit the “pencil” icon under the “Insert/Update Post” action. In the Edit Action pop-up, the “Post ID (will update post)” value should be chosen as the post_id field in the FIELDS MAP section.
After the settings change, hit the “Update” button and save the form.
JetEngine form
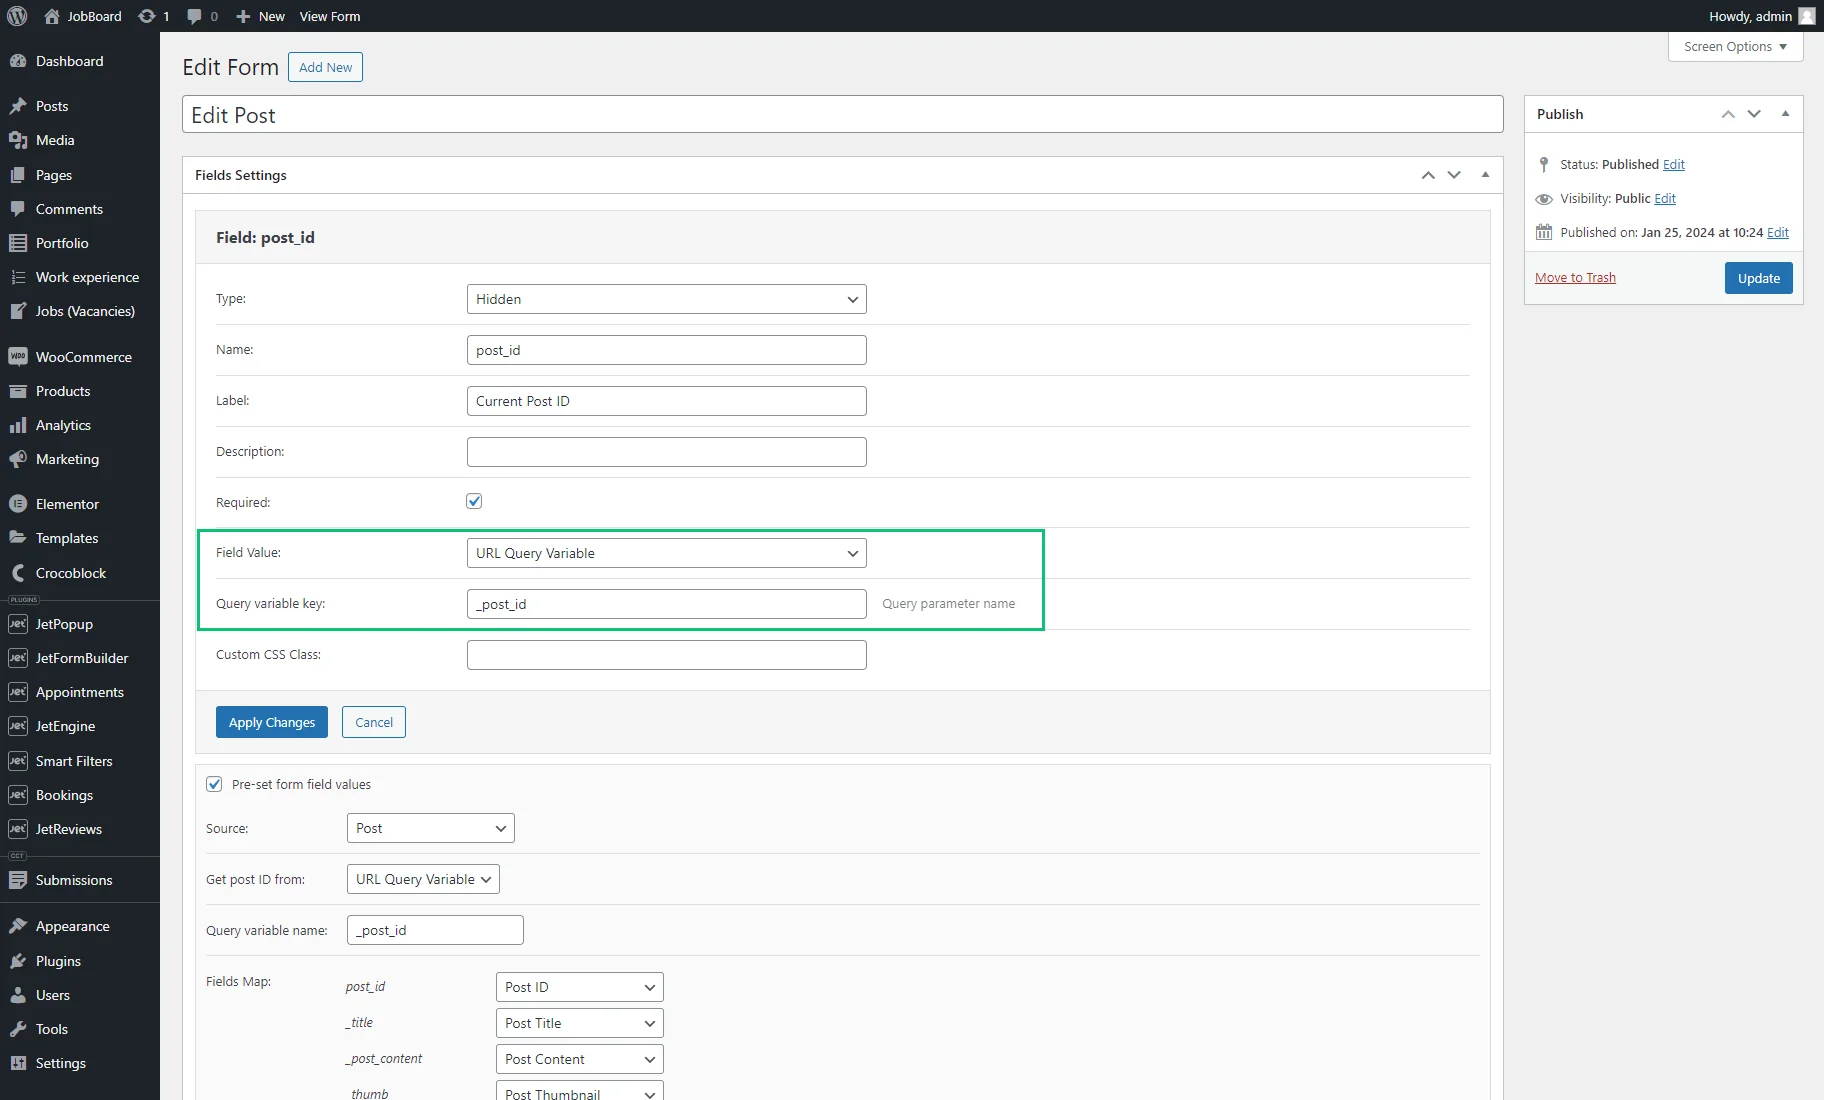
The “Hidden” post_id field is required for the editing form. Select the “URL Query Variable” Field Value option, enter “_post_id” as the Query variable key (the macro is “_post_id=%current_id%”), and hit the “Apply Changes” button.
Check the settings of the Dynamic Link widget or block that redirects to the edit post form as well. The Add Query Arguments toggle should be enabled, and the “_post_id=%current_id%” macro should be added to the Query Arguments textarea.
More details are described in the Add the listing template chapter of the How to Update Posts via Front End Form tutorial.
If you want the data to be pre-filled, the Pre-set form field values checkbox needs to be ticked.
Set the Source, choose “URL Query Variable” as the Get post ID from option, and enter “_post_id” as the Query variable name. Pick “Post ID” in the post_id drop-down list and set the remaining fields in the Fields Map section.
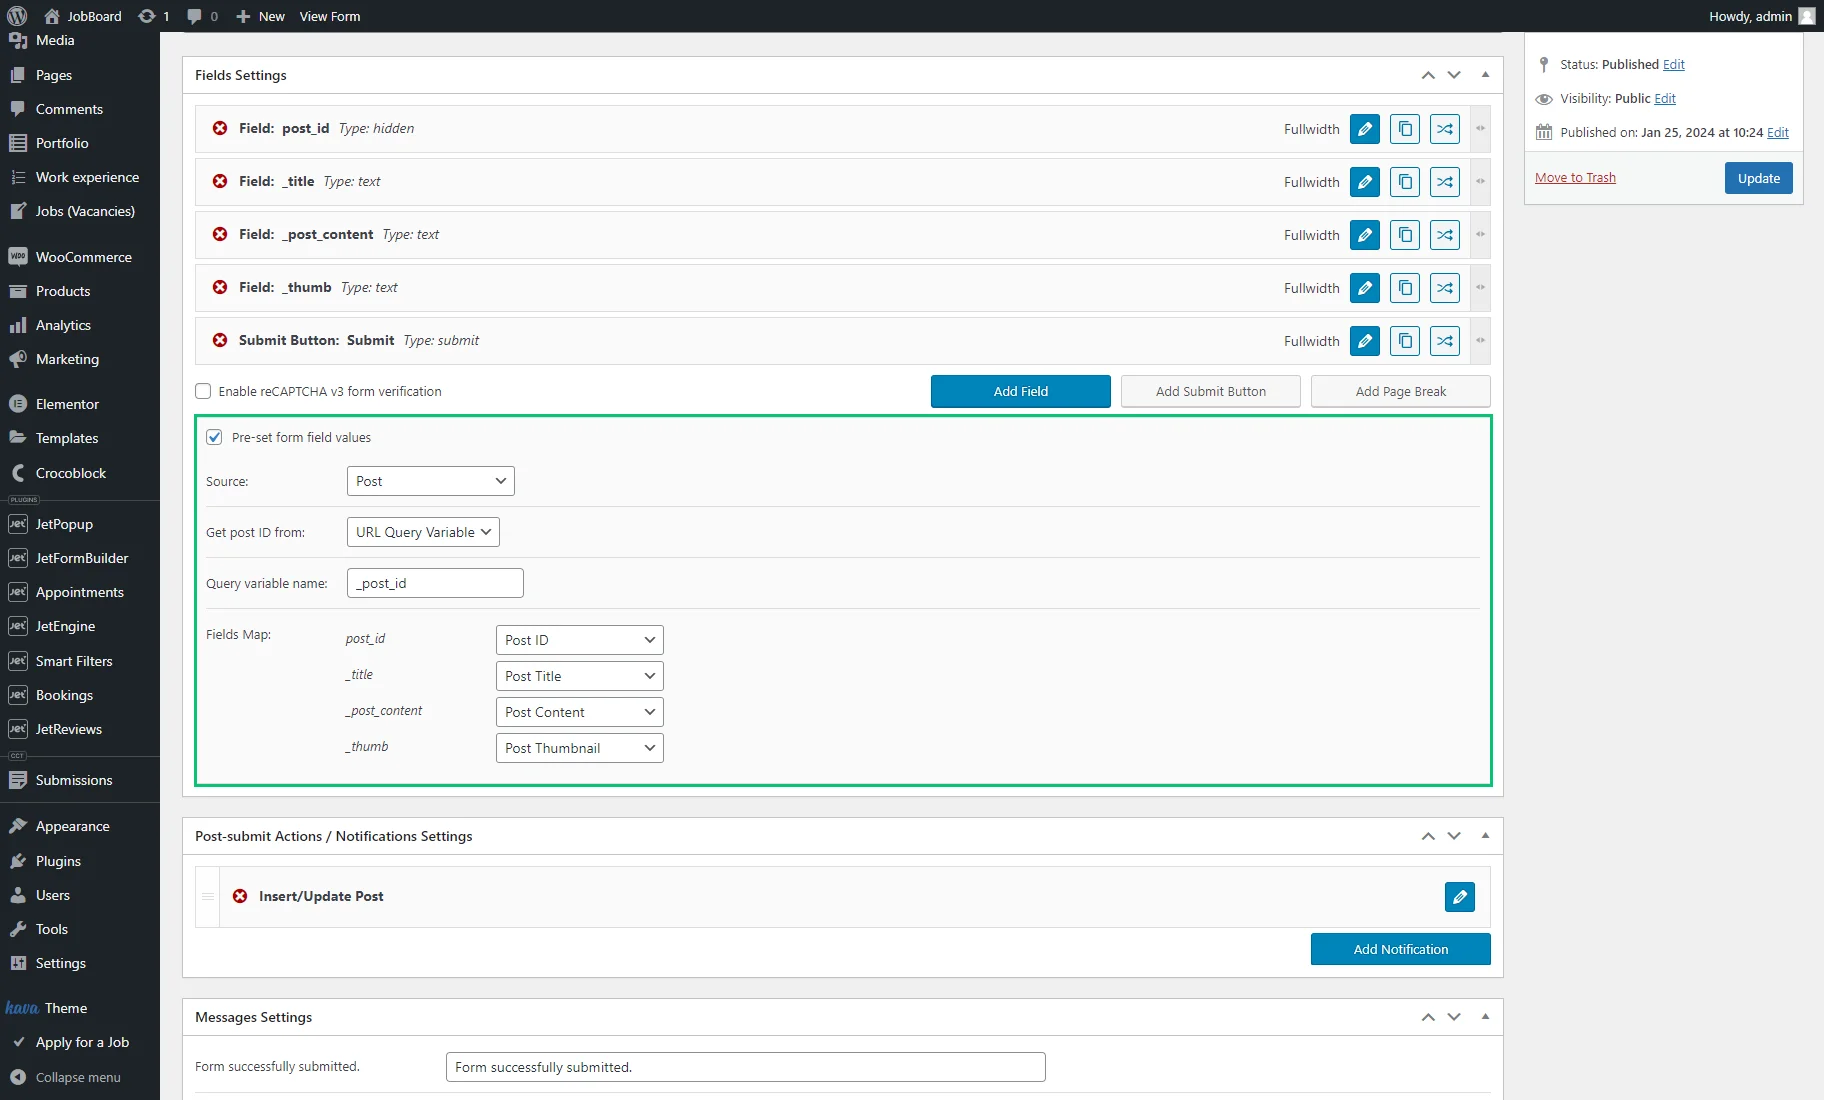
Finally, check the Insert/Update Post post-submit action by clicking the “pencil” icon. Here, the “Post ID (will update post)” value should be chosen as the post_id field.
After the settings change, hit the “Update” button.
That’s all. Now you know what to pay attention to in the settings of the Account Page or the JetEngine or JetFormBuilder forms so they will work correctly on your WordPress website.