How to Update Posts via Front End Form
Follow this step-by-step guide to learn how to update information inside Posts right from the front end.
Before you start, check the tutorial requirements:
- JetFormBuilder plugin or JetEngine plugin installed and activated
with the Forms (Legacy) module enabled and the Profile Builder module configured
When it comes to updating the information in the posts, the JetFormBuilder front-end submission functionality could be a perfect match to implement it. It works both with the default WordPress posts and the Custom Post Types.
JetFormBuilder is a plugin that allows creating forms in Block Editor (Gutenberg) and displaying them in any page builder, including Elementor. JetFormBuilder is a better alternative to the Forms module of JetEngine, which is legacy now.
We will describe the process of creating a form for post editing in both tools step by step.
Create the Sub-page in Profile Builder
We will create a form for editing a post from the “Events ” post type. The form will be placed on an Account sub-page of the Profile Builder. It is not obligatory to place the form on the Account page; it can be placed on any static page.
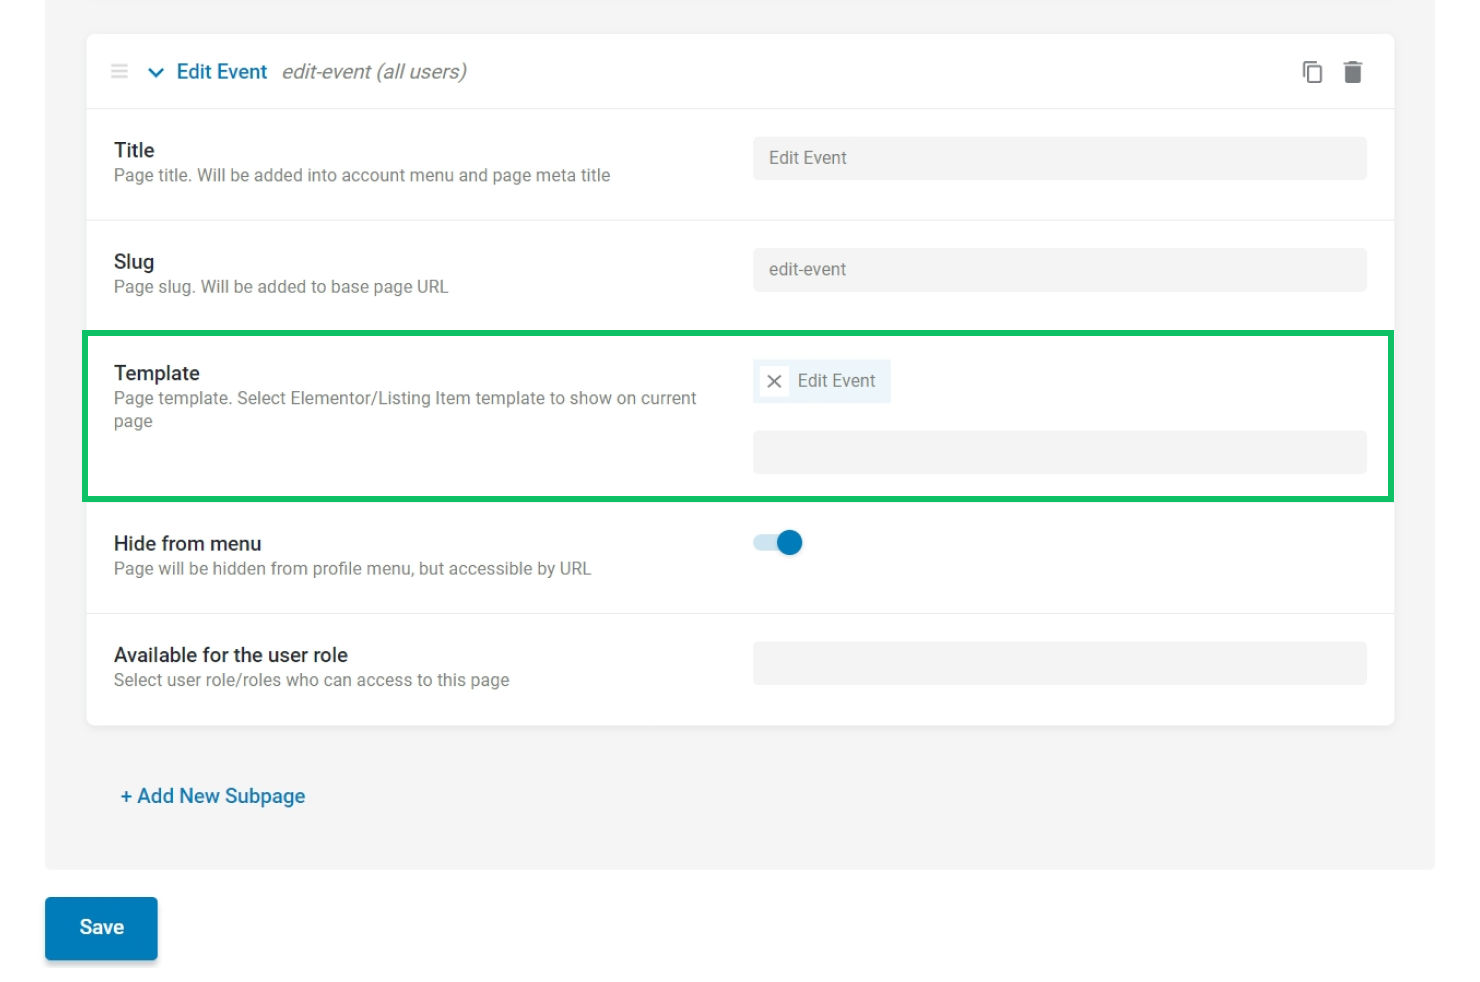
Firstly, navigate to WordPress Dashboard > JetEngine > Profile Builder > Account Page and create a new Subpage. The Subpage will contain the form for posts editing.
Give a Title and a Slug to the Subpage. Enable the Hide from menu switcher to hide the page from the Profile Menu. The page will still be accessible by the URL.
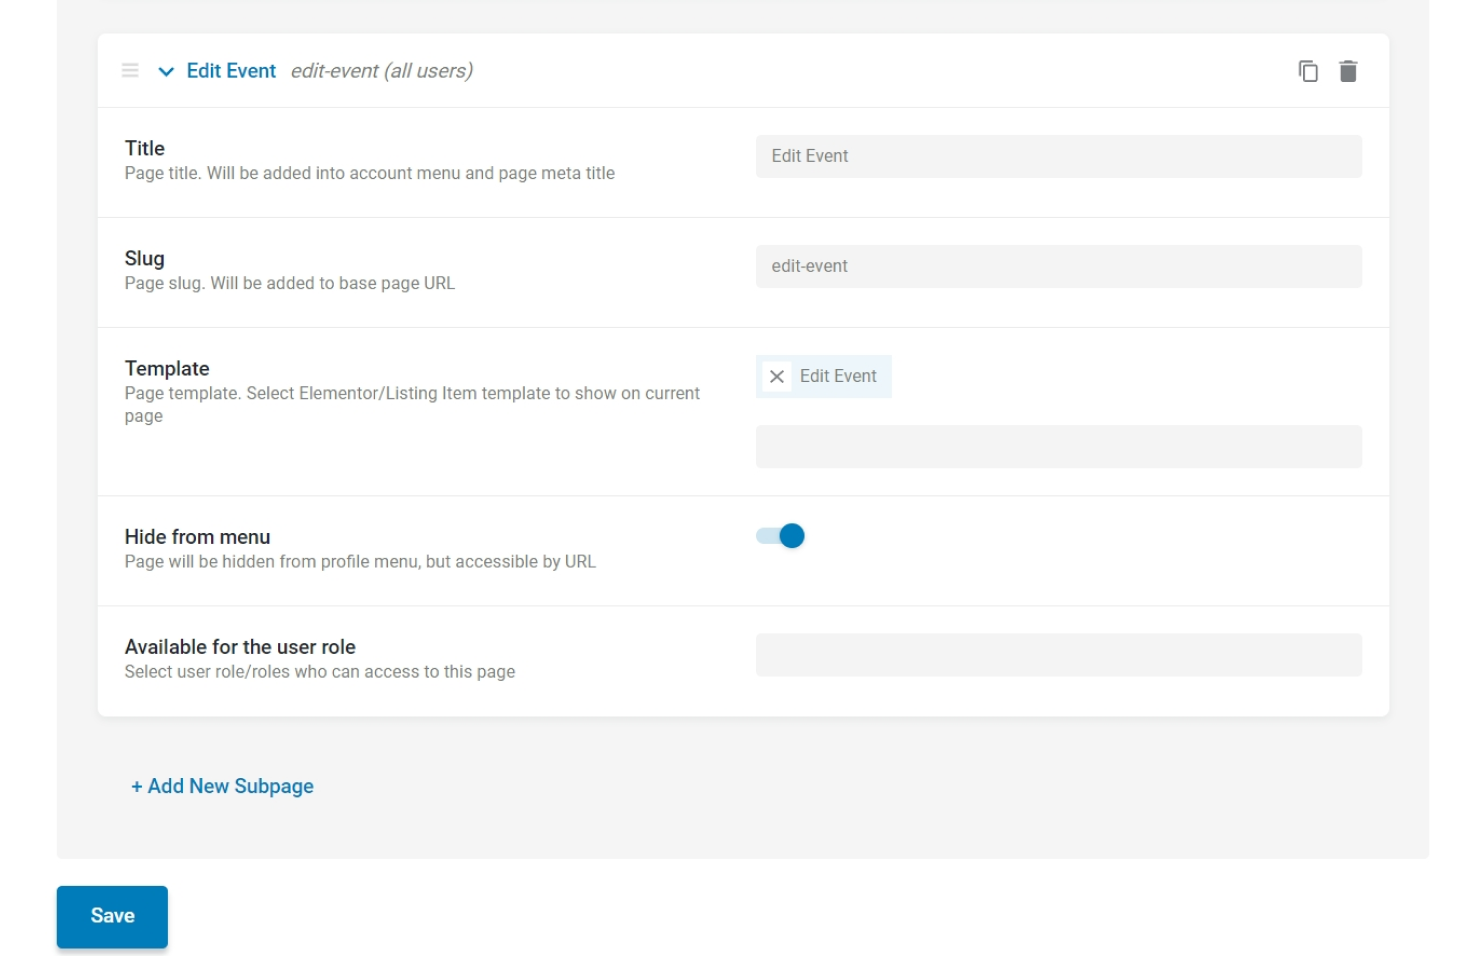
We will place the form on the page later.
Build the Listing
Add the listing template
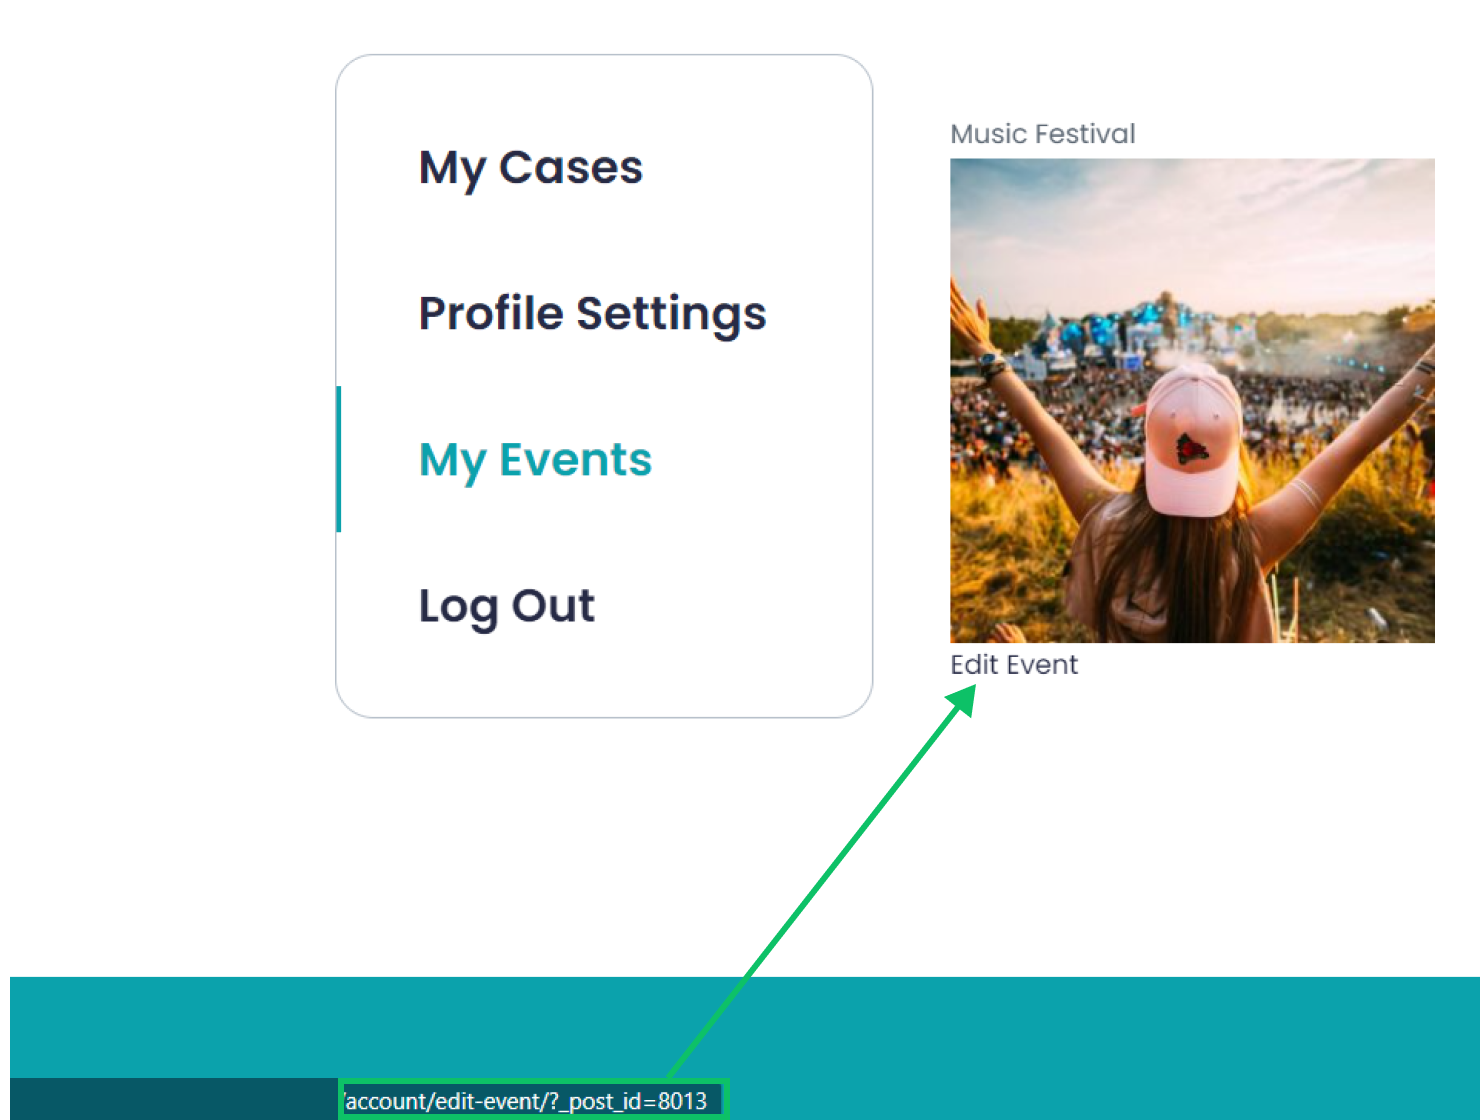
To access the form, the user will need to click the “Edit Post” button in the listing of posts. Then, the user will be redirected to the Subpage of Profile Builder that we created in the previous step. On that page, the user will fill out the form to edit the post.
If you have not done it previously, create a Listing Template for the custom post type, the posts of which will be edited.
Inside the Listing Template, add the Dynamic Link widget. To pass the URL parameters dynamically, we use the Dynamic Link widget.
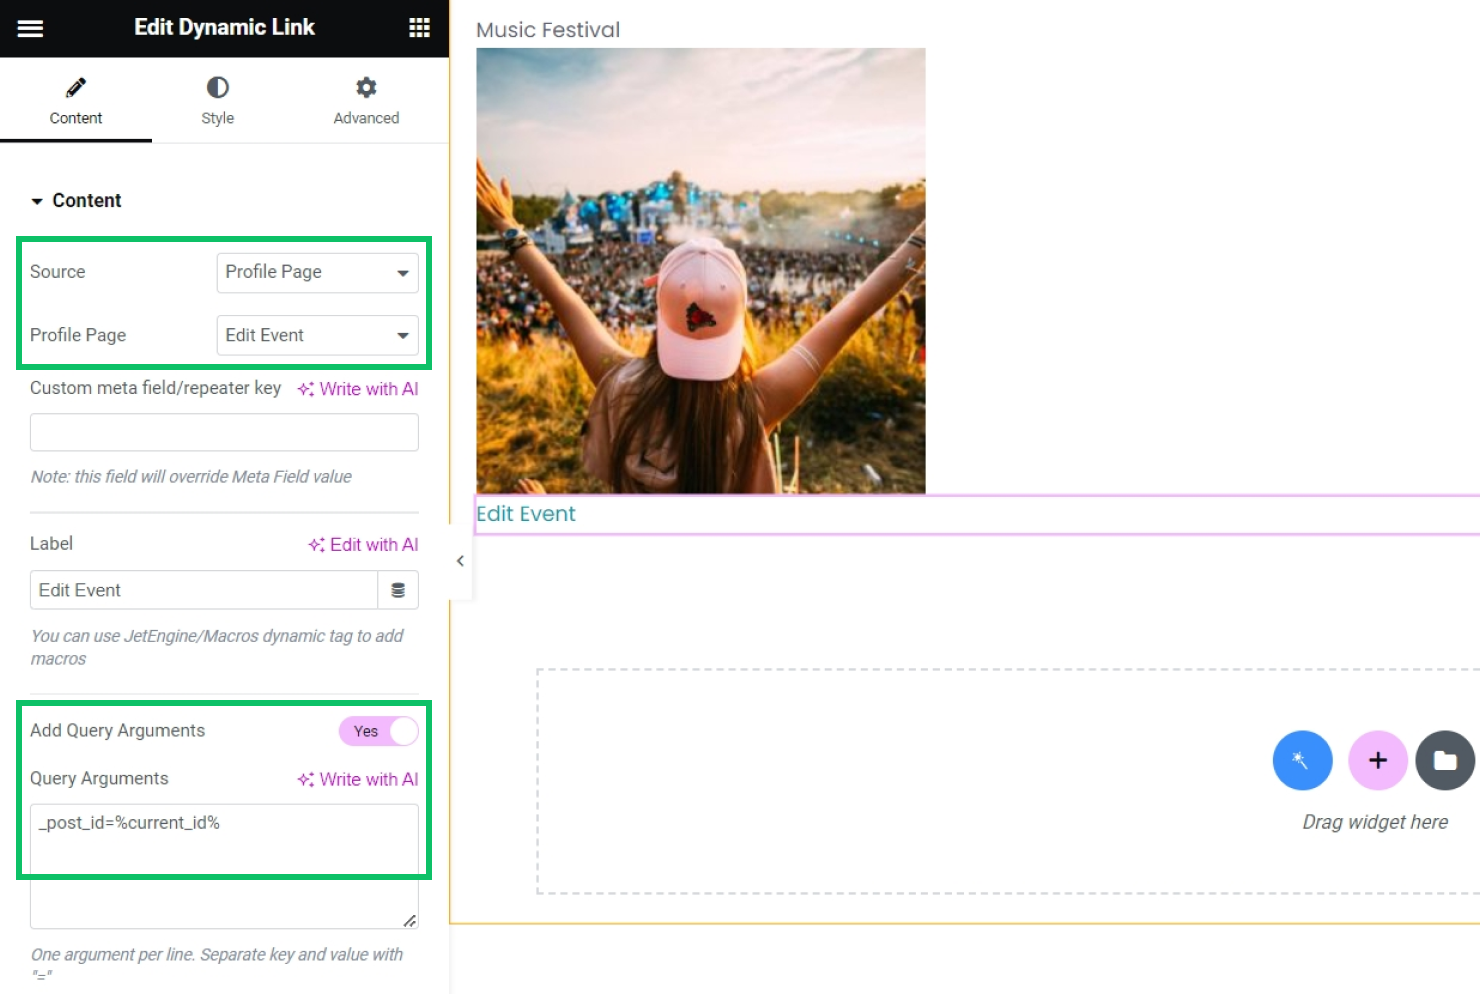
As the Source of the link, select the “Profile Page” option and specify the Subpage; pick the one created earlier. By clicking on this widget, the user will be redirected to the subpage of your choice. On that page, the form will be located.
Next, name the link by providing a Label. We will name the link “Edit Event.”
Enable the Add Query Arguments toggle and place this string in the Query Arguments field:
_post_id=%current_id%Here, “_post_id” if the name of the URL parameter, and %current_id% macro is the value of the URL parameter; it fetches the ID of the current post dynamically.
In the result, when the user clicks the link, it will look this way:
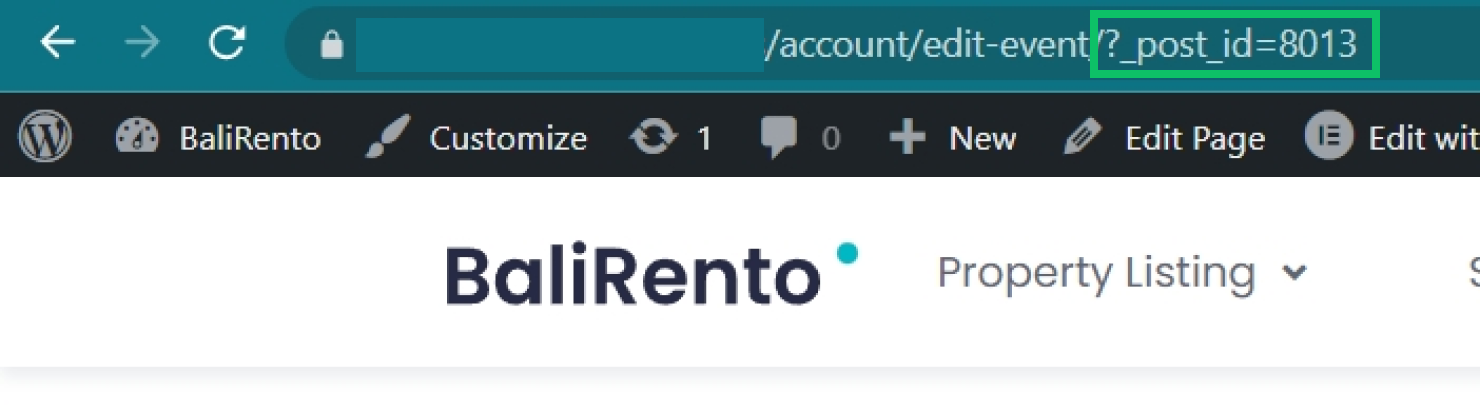
The form will be able to fetch the ID of the edited post from the URL parameter value.
Once you finish editing, save the changes.
Place the listing on the page
The listing of posts can be placed on any page of your choice. We will put it on a subpage of the Profile Builder.
We have a subpage called “My Events” that will display the list of events published by the current user.
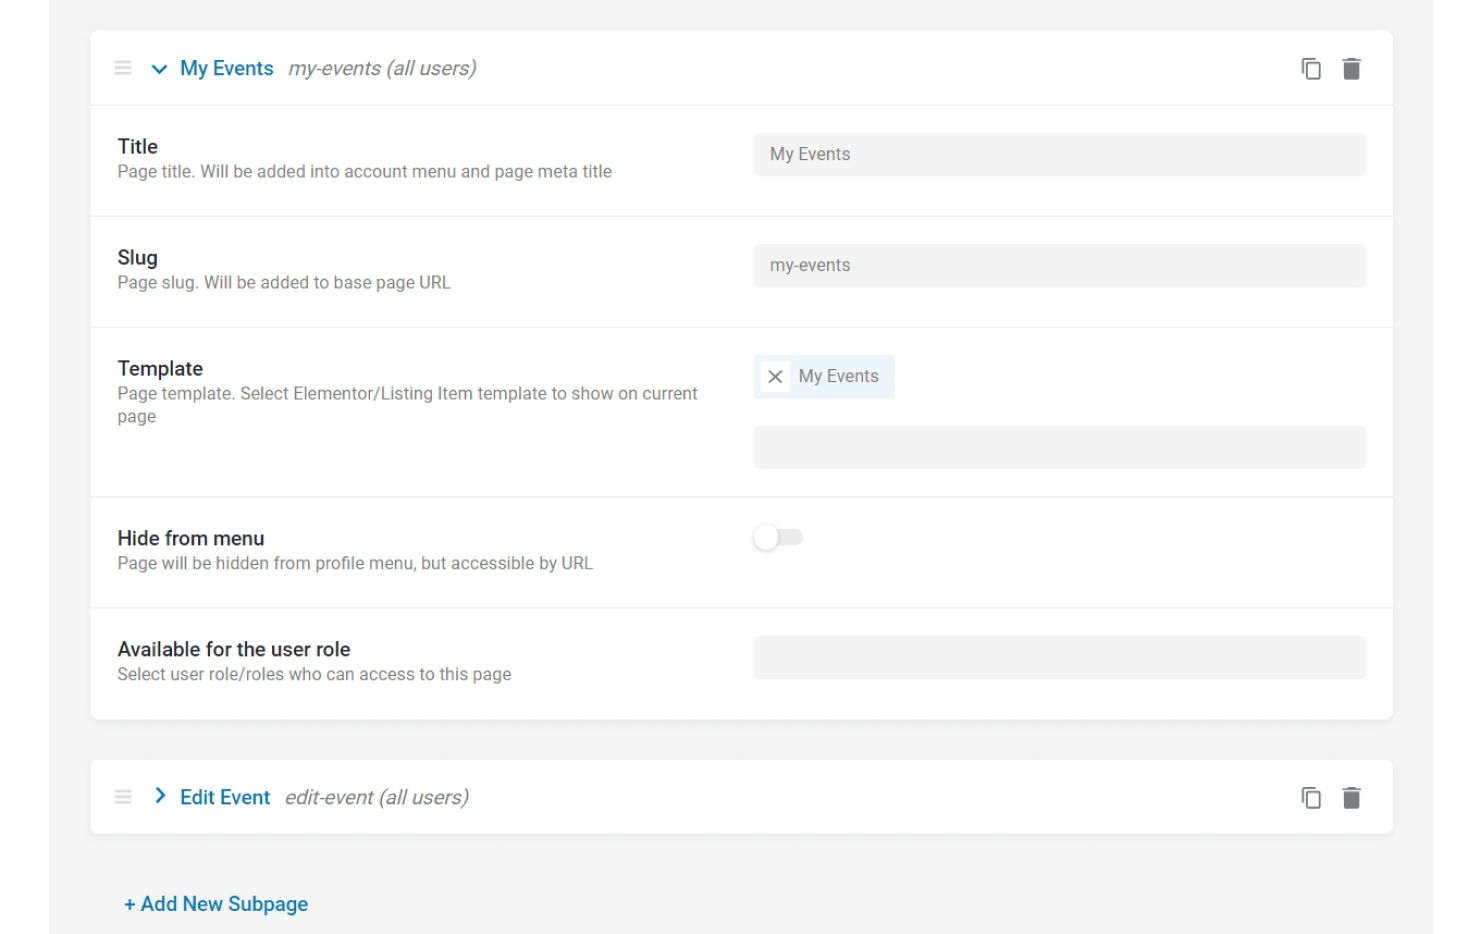
For this subpage, we created a “My Events” Page template in WordPress Dashboard > Elementor > Saved Templates.
Inside the template, we place the Listing Grid widget and select the Listing Template created previously. To display posts authored by current user, use the Query Builder tool.
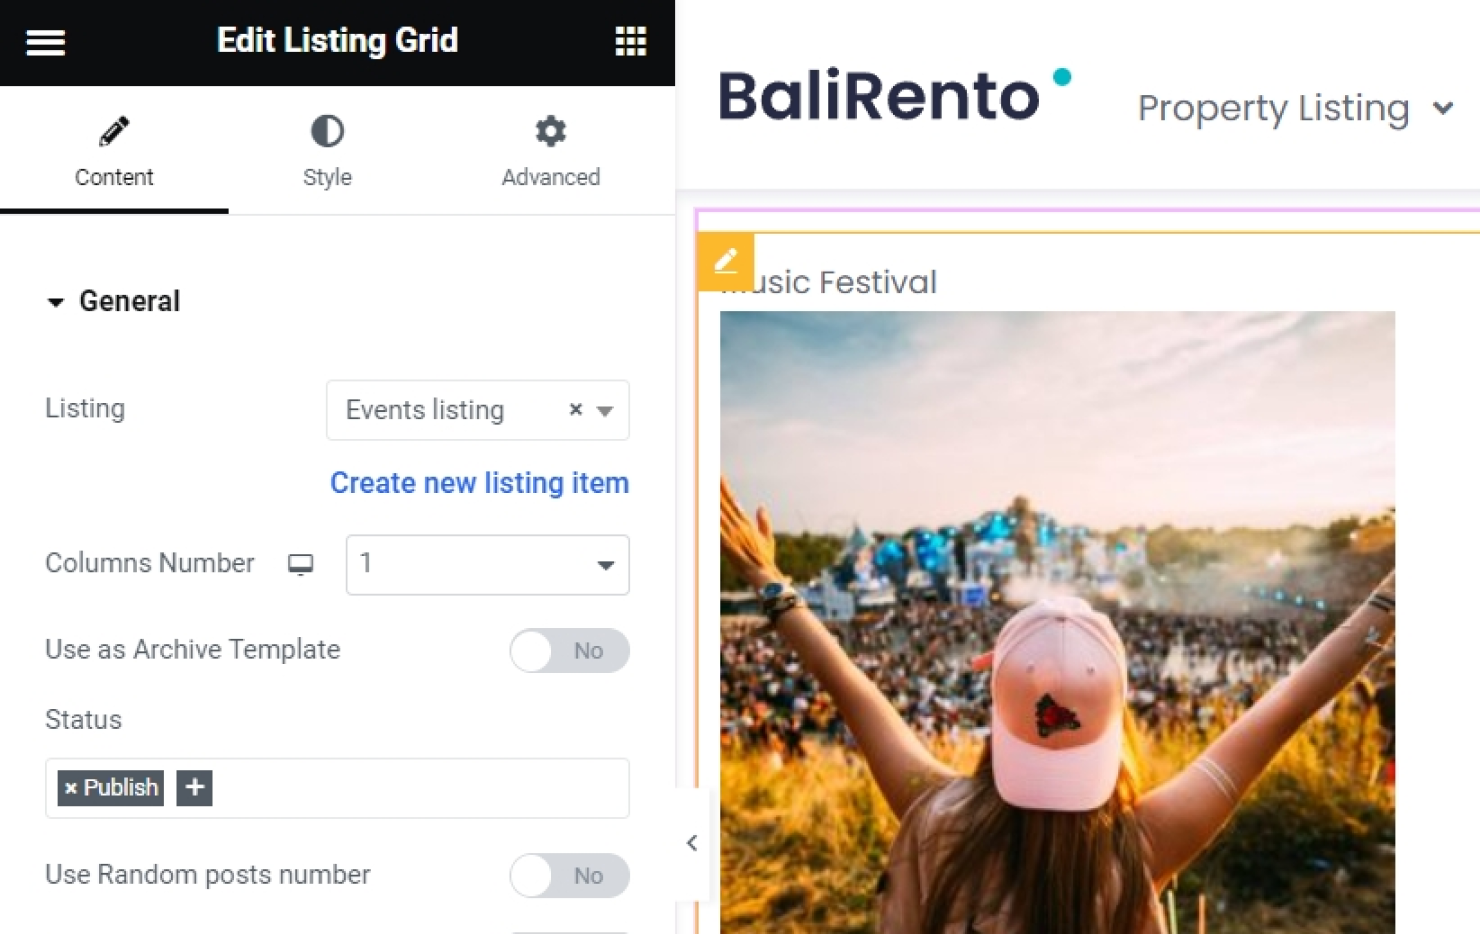
As a result, after clicking the “Edit Event” button in the listing on the “My Events” page of Profile Builder, the user will land on the “Edit Event” subpage to edit the chosen event.
Now, it is time to configure the form itself.
Create the Form in JetFormBuilder
After installing JetFormBuilder, proceed to WordPress Dashboard > JetFormBuilder > Forms > Add New to enter the form editor.
Form Fields Setup
Hidden field
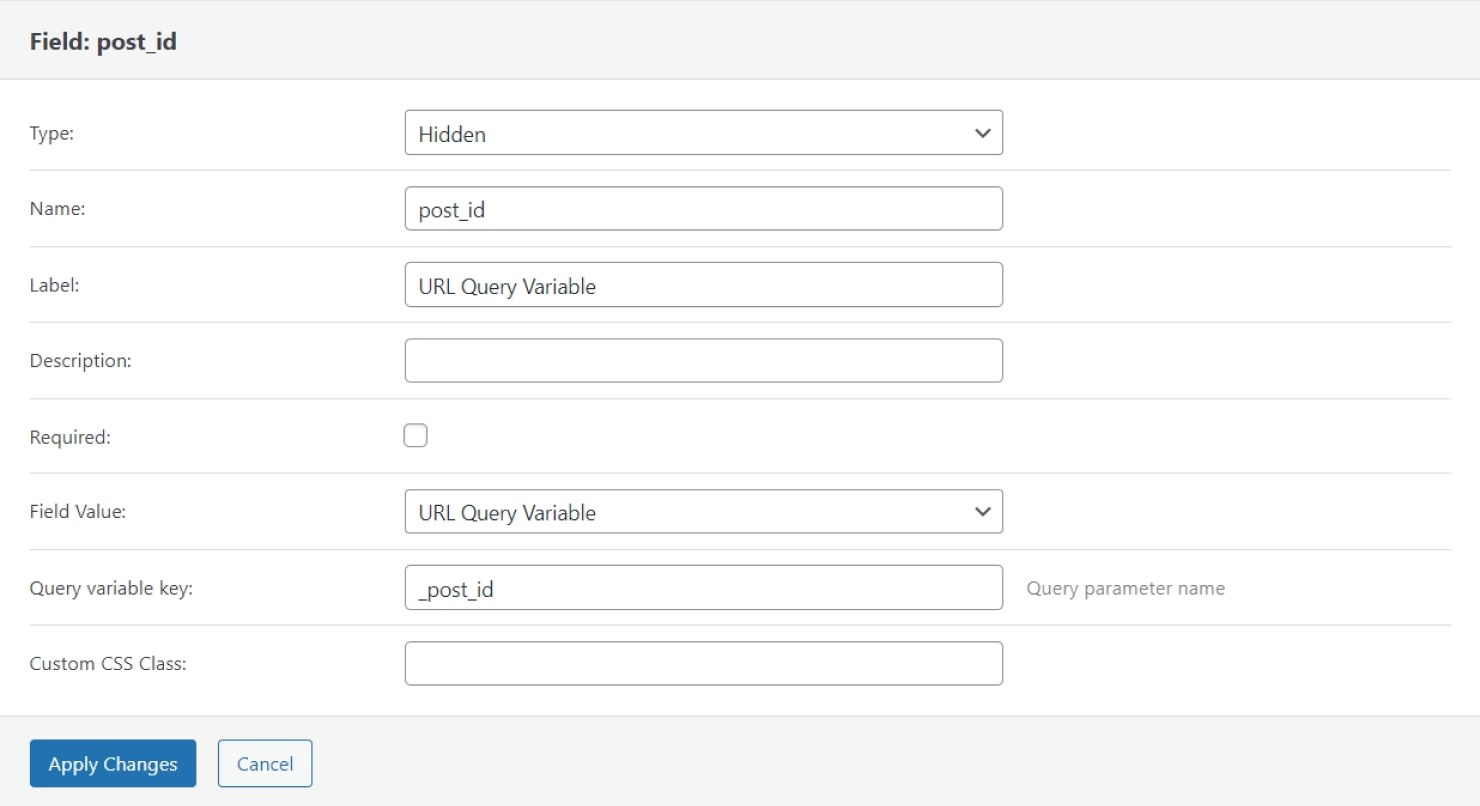
Primarily, add a Hidden Field block to the editing area. As the Field Value, select “URL Query Variable.” In the Query Variable Key field, enter “_post_id.”
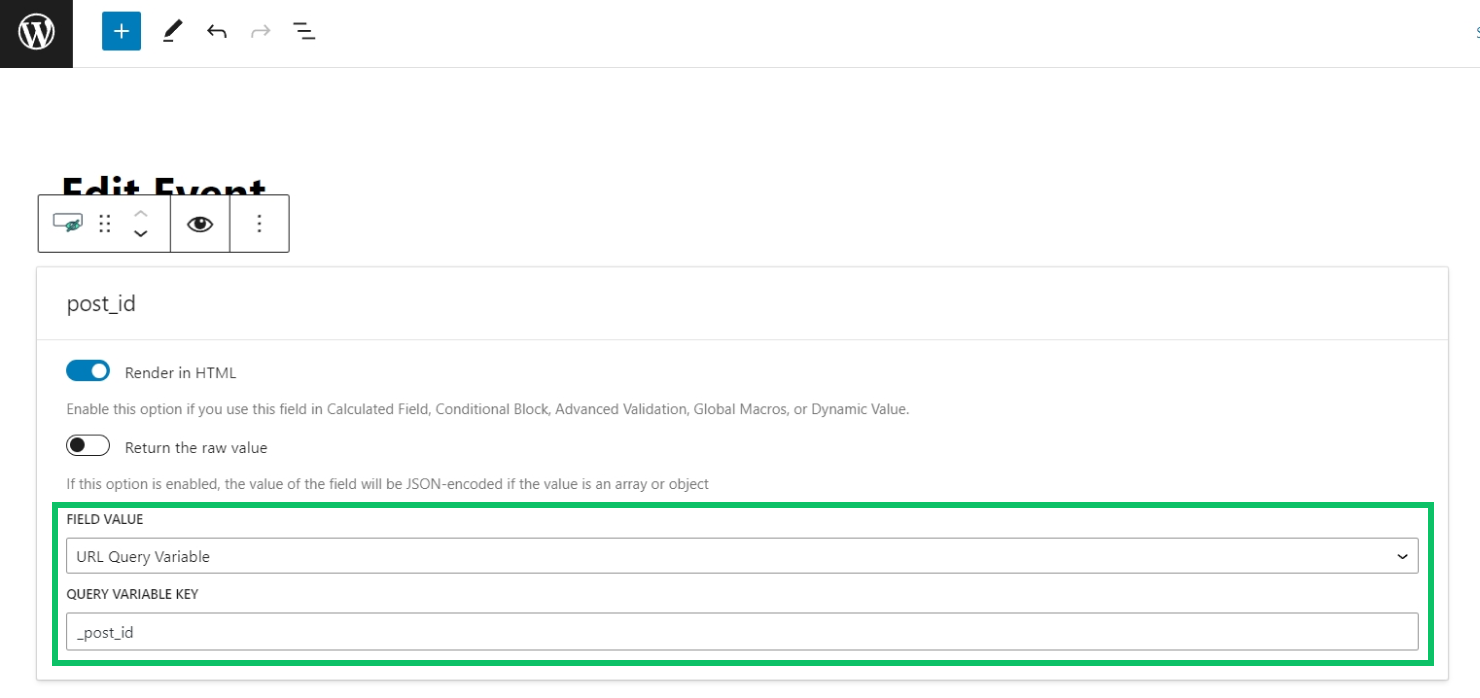
The Hidden Field will retrieve the ID of the edited post from the URL parameters.
In our case, “_post_id” is the name of the parameter, and “8013” is the parameter’s value. “8013” is the ID of the needed post. The Hidden Field will retrieve “8013” and use it as the ID of the post that should be edited.
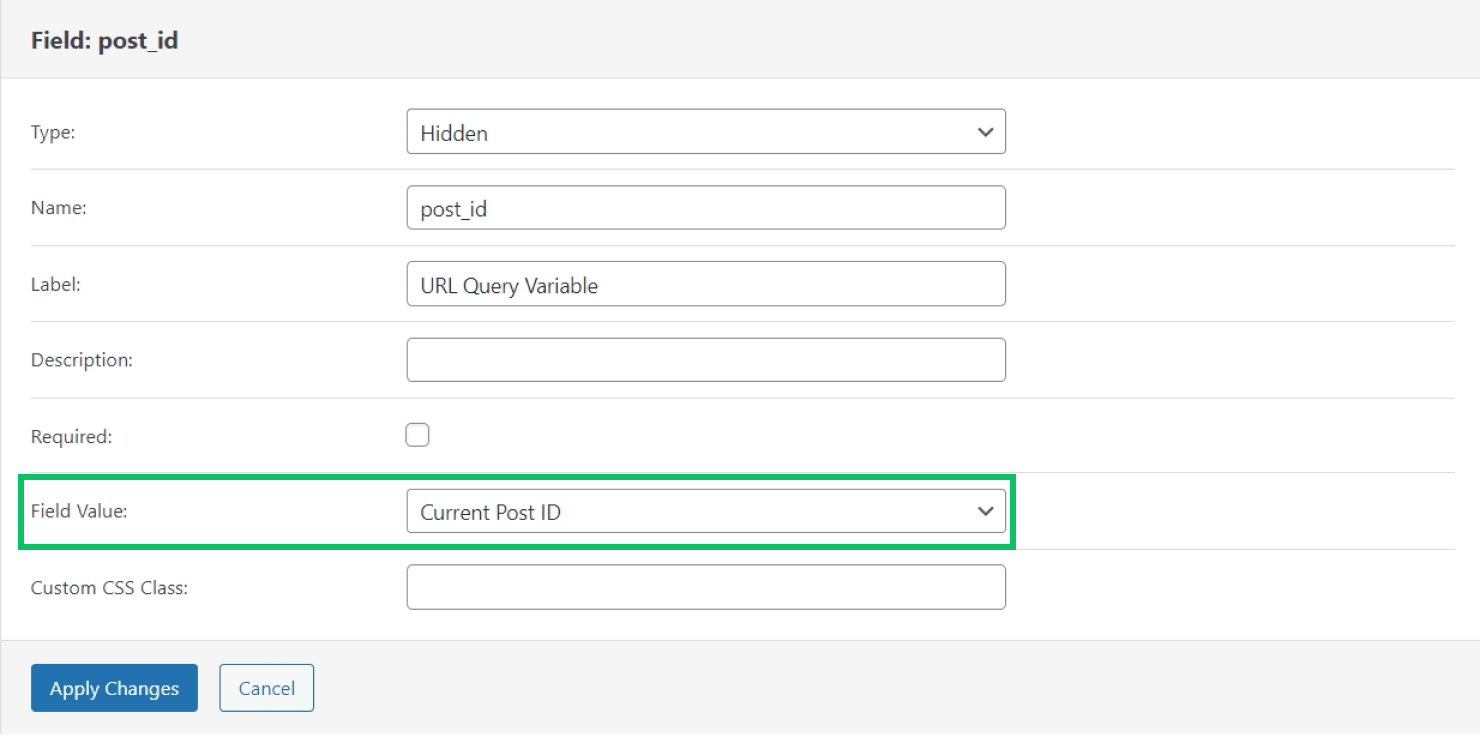
If you plan to place the form on the Single Post page, replace the “URL Query Variable” Field Value with the “Current Post ID” option.
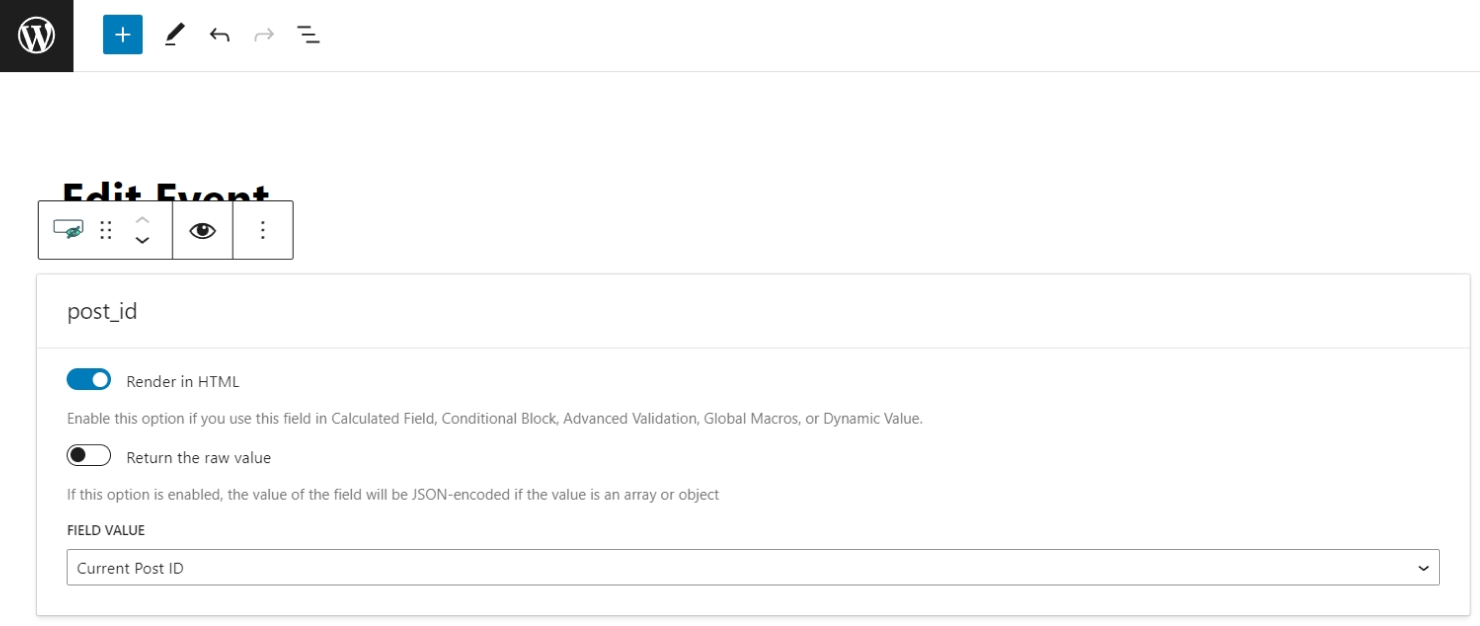
In this case, the Hidden Field will retrieve the ID of the post dynamically from the current page.
Text, WYSIWYG, and Textarea fields
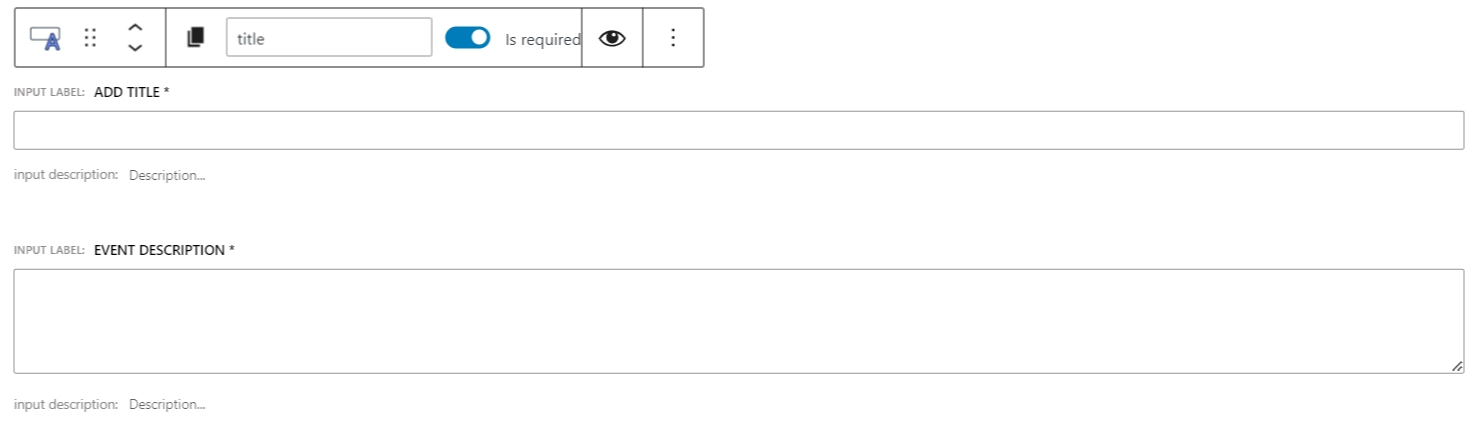
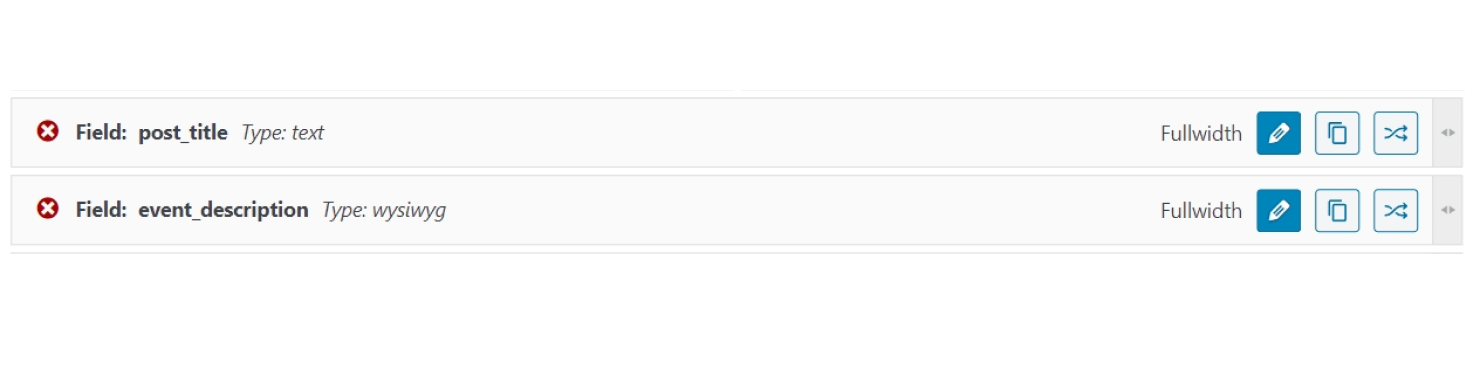
To edit the Text, Textarea, and WYSIWYG meta fields, use the same field types in JetFormBuilder.
We will use the Text field to edit the title of the post and the WYSIWYG field to edit the event description, which is stored in a meta field of type WYSIWYG.
Complete the Field Label and Form Field Name. Other field settings are optional.
Checkbox, Radio, and Select fields
To edit multi-optional meta fields like Checkbox, Radio, and Select, use the corresponding field types in JetFormBuilder forms.
For example, our “Events” post type has a “Checkbox” Meta Field named “activities”.
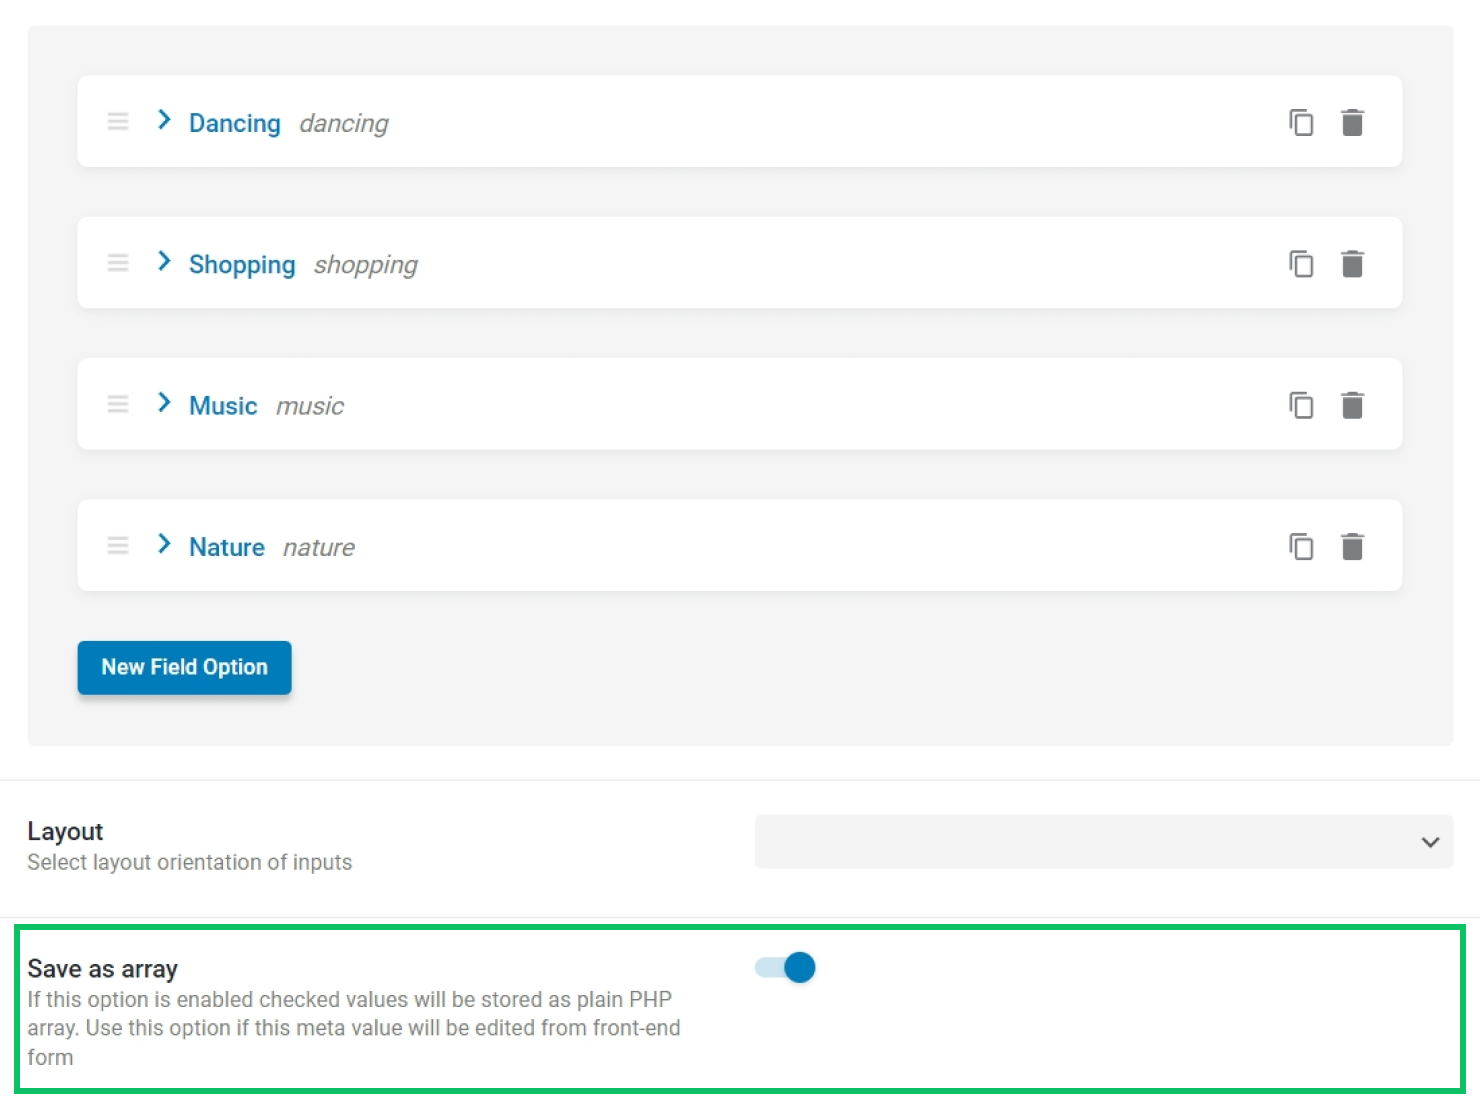
To update this meta field, we select the Checkbox Field block in the settings of the form and configure it in this way.
The Fill Options From is set to “Generate Dynamically,” the Generator Function is “Get values list from JetEngine field options,” and in the Field Name, we insert the name/ID of the “Checkbox” Meta Field. This way, the Checkbox Field will generate options from the “Checkbox” Meta Field options.
Give a name to the field and a label. The rest of the settings are optional.

Next, we add the Select Field block that will list categories of the related taxonomy.
To make the Select Field list taxonomy terms, choose “Terms” in the Fill Options From drop-down and select the needed taxonomy below.
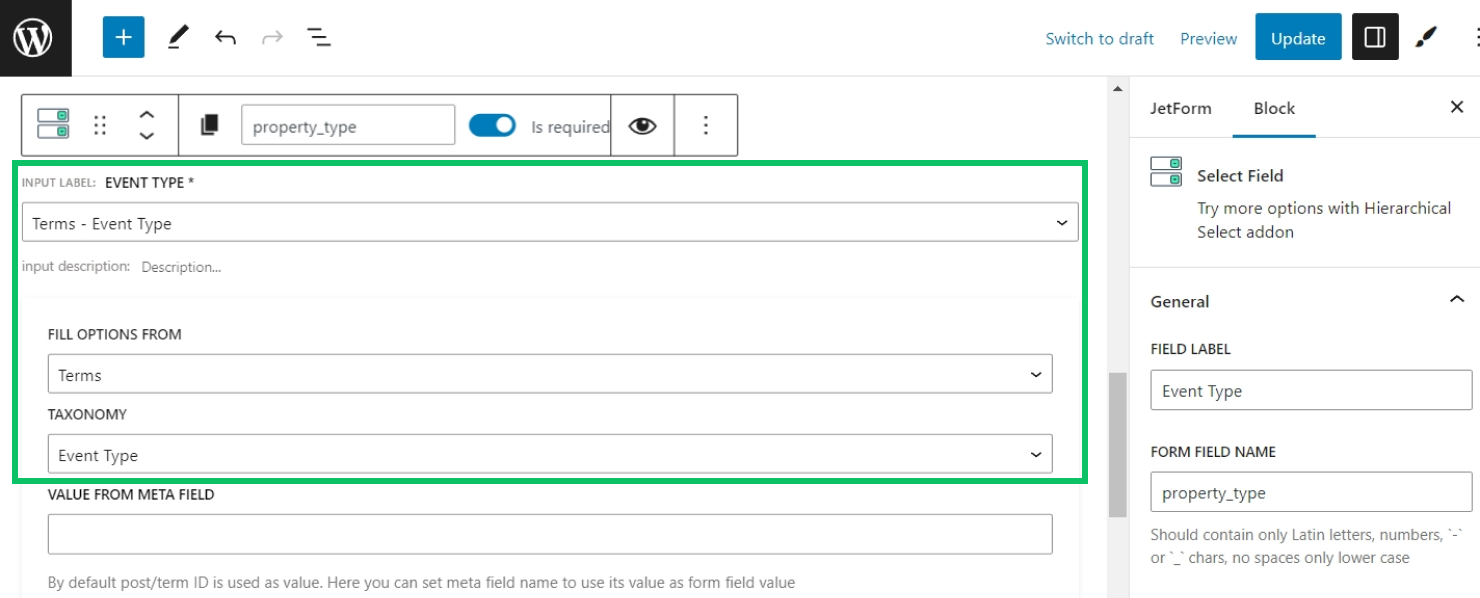
It is possible to use Radio, Checkbox, or Select Fields to update the taxonomy.
Date, Time, and Datetime fields
To update the “Date,” “Time,” and “Datetime” Meta Fields, use the Date, Time, and Datetime Fields in JetFormBuilder accordingly.
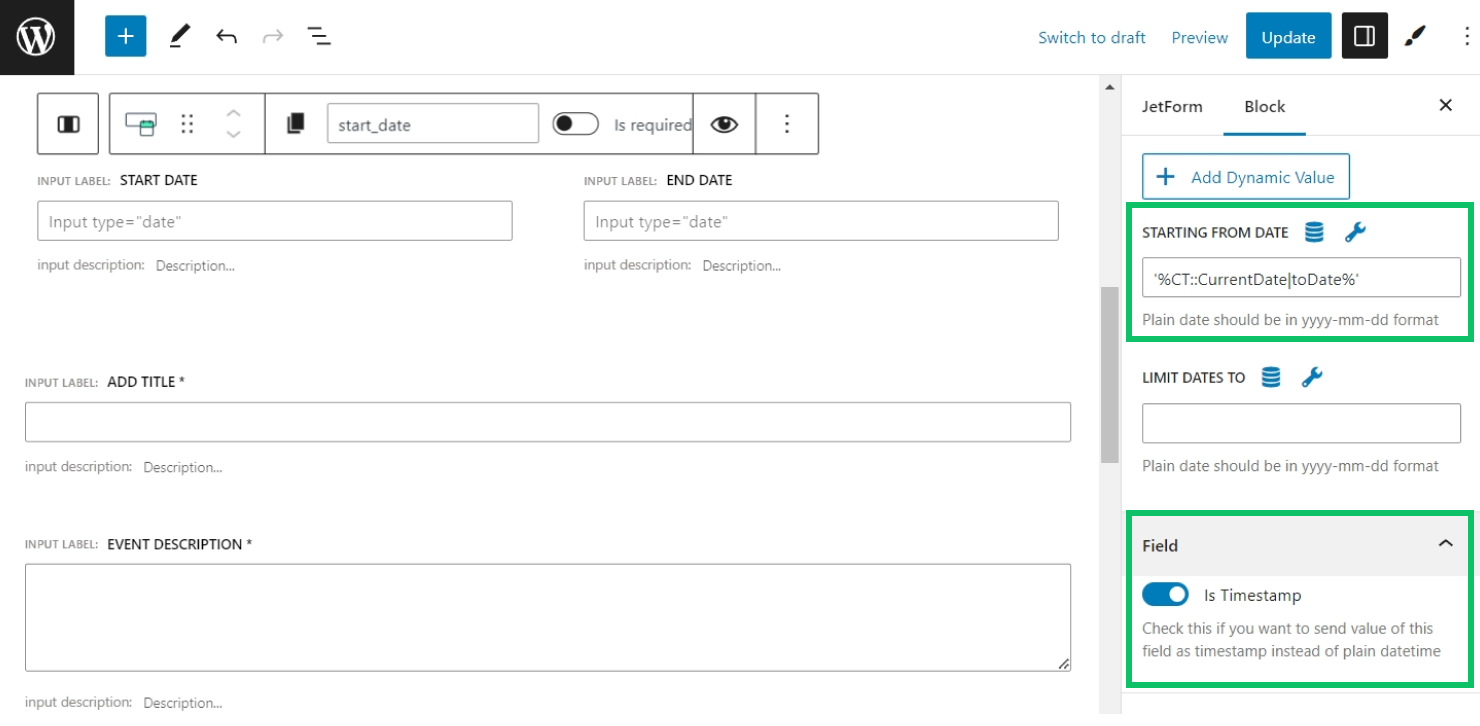
In our “Events” post type, we have two “Date” Meta Fields for the start date of the event and the end date of the event.
Therefore, we add two Date Fields in the settings of the form.
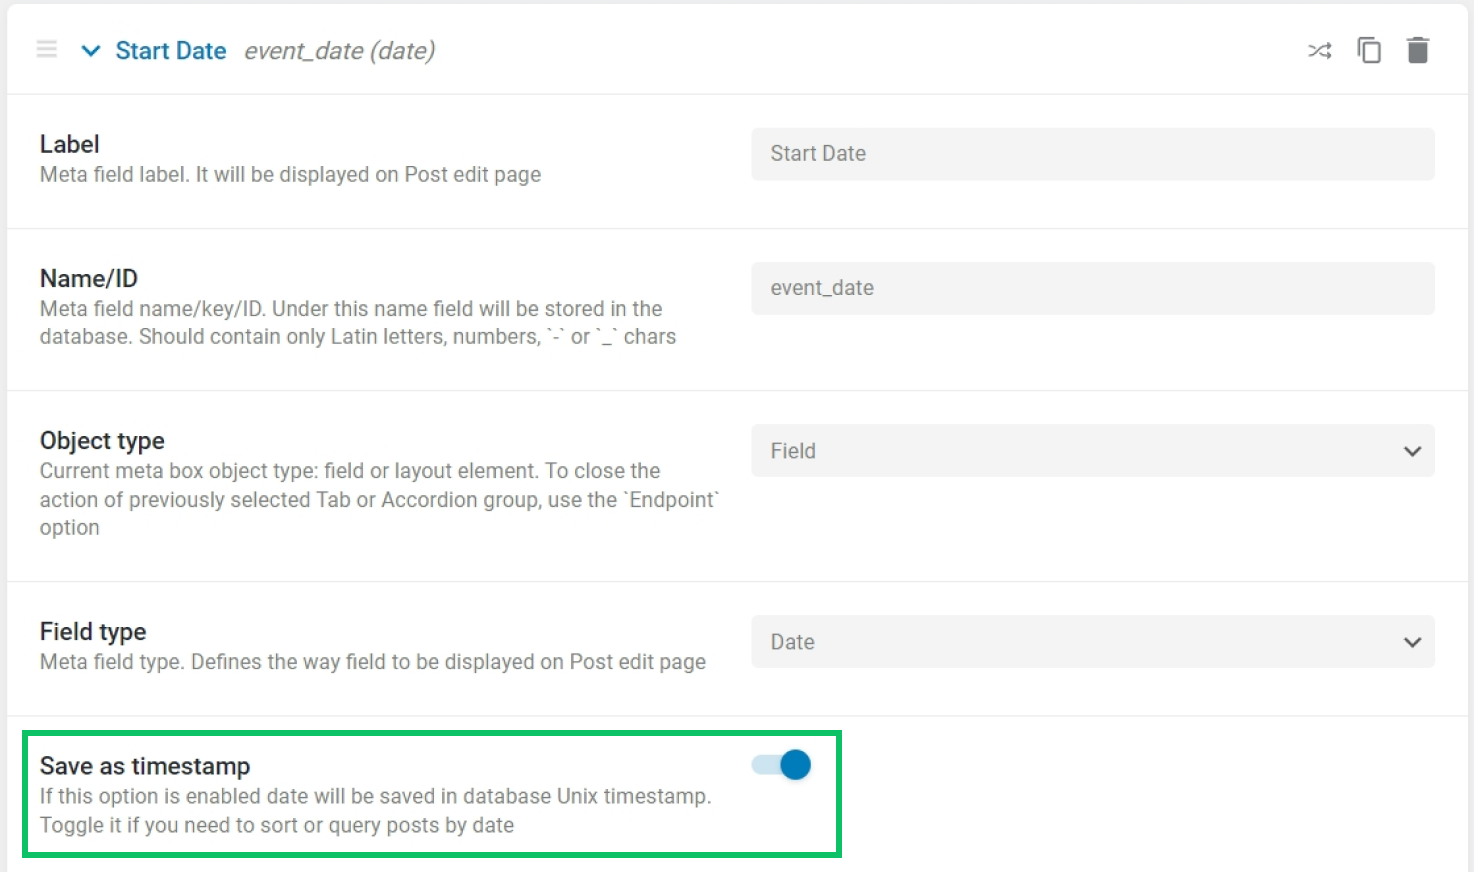
The most important step is to enable the Is Timestamp toggle in the settings of the Date Field.
Also, the “Date” Meta Field should be saved as a timestamp (enable the Save as timestamp toggle in the meta field settings).
Mind that if you work with the Datetime Field, the Is Timestamp toggle should also be enabled. In the Time Field, there is no such setting.
It is also possible to make the available dates in the Date Field start from a certain date, although this setting is optional. To make the available dates in the Date Field start from the current date dynamically, add this string to the Starting from Date field:
'%CT::CurrentDate|toDate%'To make the Time Field start from the current time, use this macro:
'%CT::CurrentDate|toTime%'To make the Datetime Field start from the current date and time, use this macro:
'%CT::CurrentDate|toDateTime%'Media field
To update the post thumbnail, we will use the Media Field.
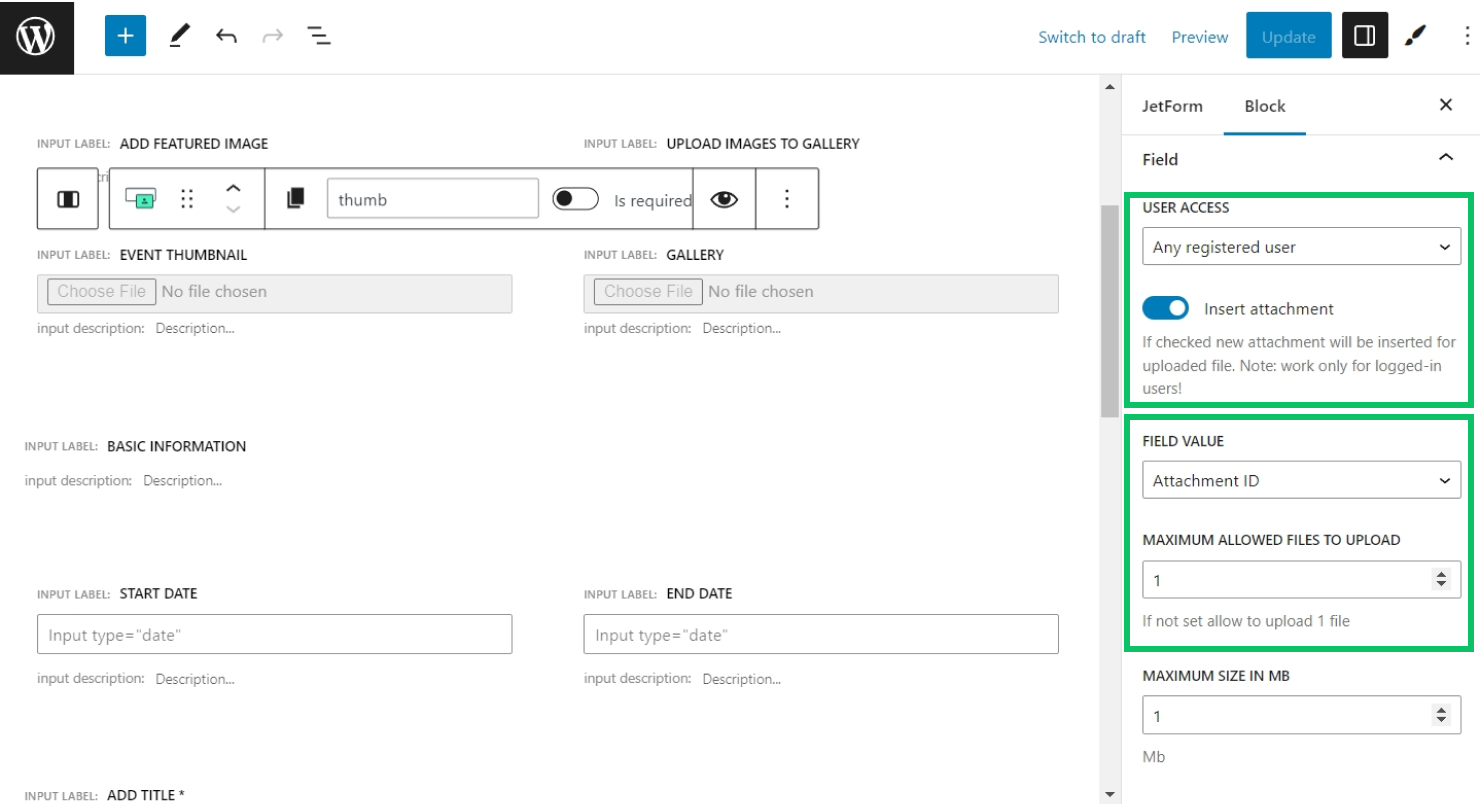
In the settings of the Media Field, select the needed User Access. Pick any option except the “Any user (incl. Guest)” because guests cannot edit posts or upload files to Media Library.
Then, enable the Insert attachment toggle. When this option is enabled, the uploaded media file will also be saved to the Media Library. Note that this option works only for logged-in users.
Next, select the Field Value. Since post thumbnails are stored in the format of ID, we choose the “Attachment ID” value. To update a “Media” Meta Field, make sure the Value format of the “Media” Meta Field matches the selected Field Value in the Media Field in the form.
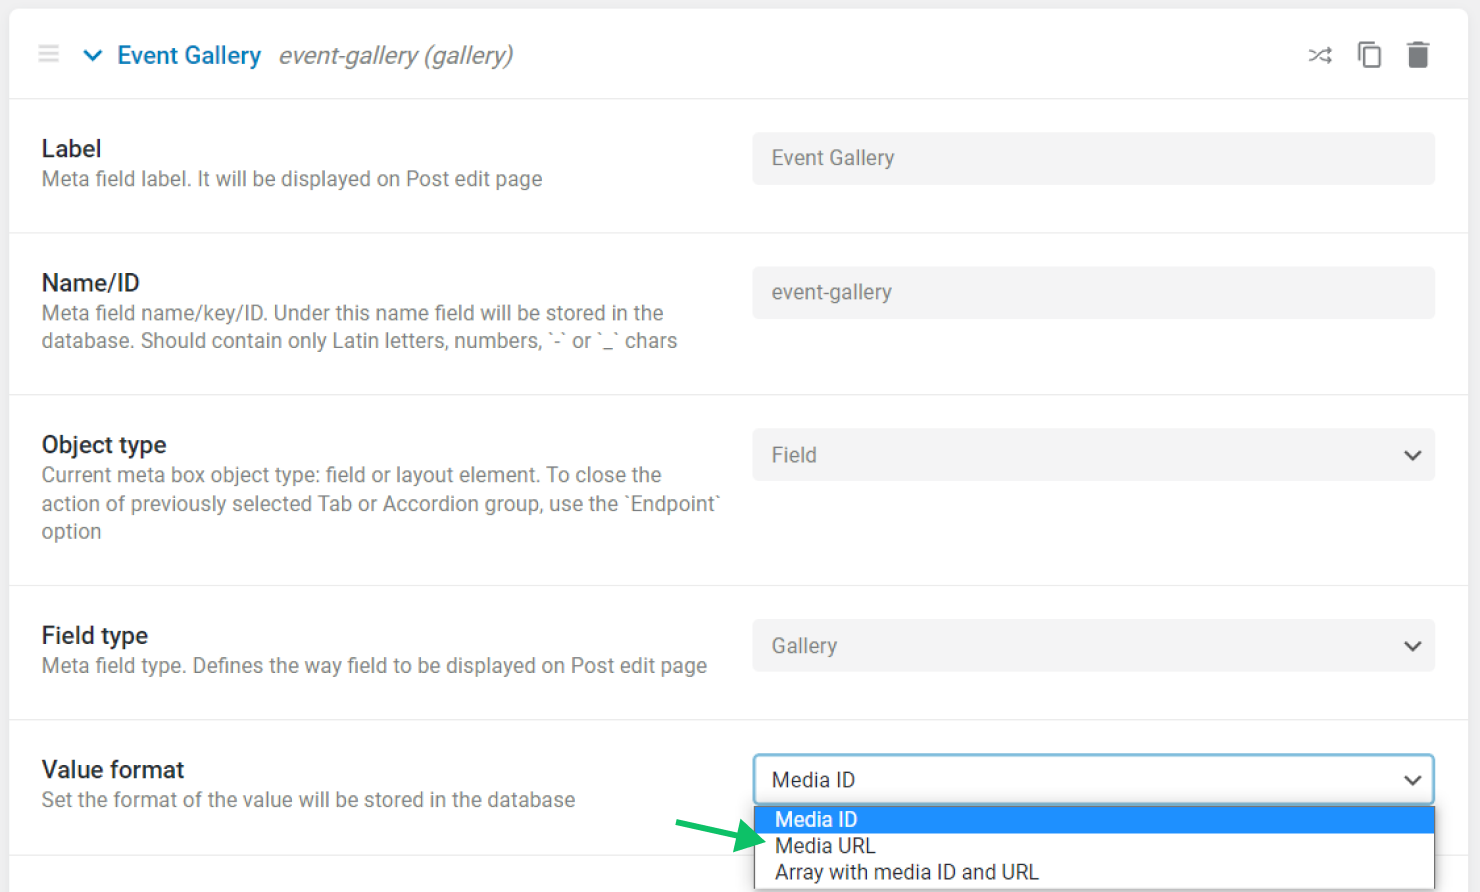
For example, to update a “Gallery” Meta Field where the Value format is set to “Media URL,” we would select the “Attachment URL” option in the settings of the Media Field in the form.
Next, select the Maximum Allowed Files to Upload. To let users update the “Gallery” Meta Field, set the number of allowed files to more than one.
Then, set the Maximum Size in MB, defining the maximum size of each single file uploaded to the current Media Field.
Finally, select the Allowed MIME Types to let users upload files of only certain formats.
Repeater field
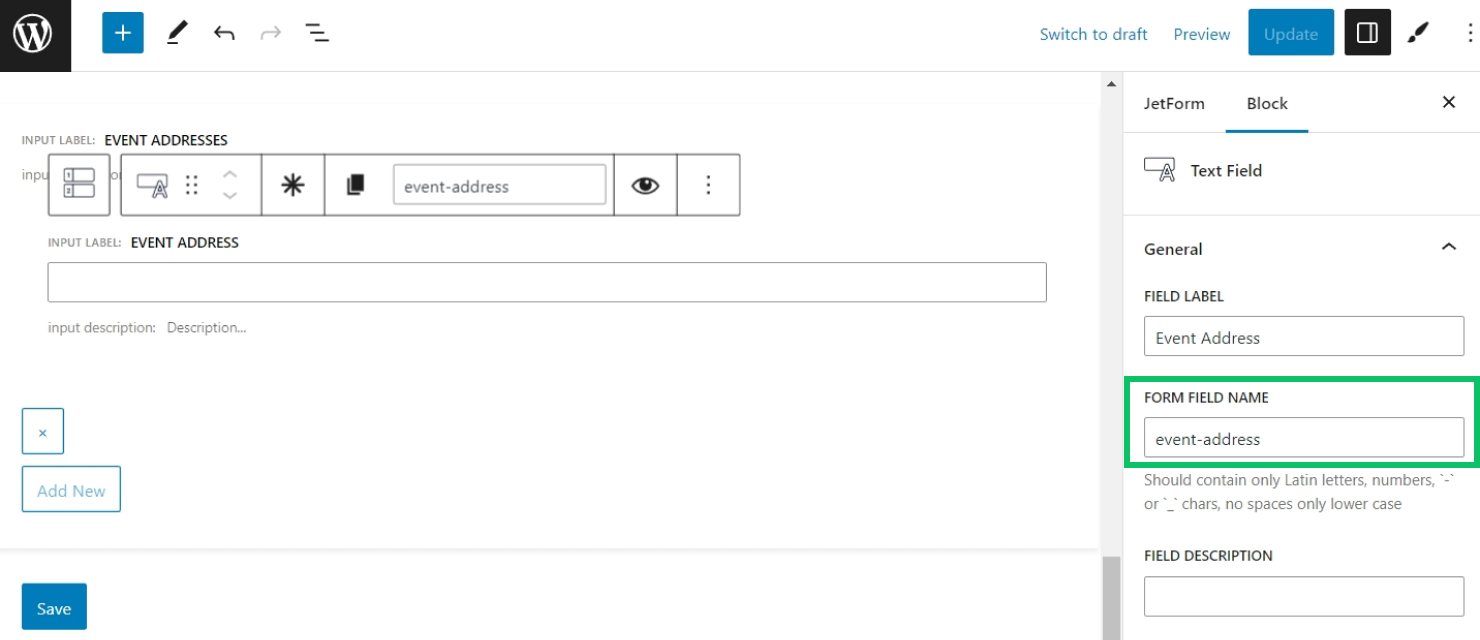
To update the “Repeater” Meta Field, we will use the Repeater Field block. Inside the Repeater Field, we will place the same field types as the fields inside the “Repeater” Meta Field.
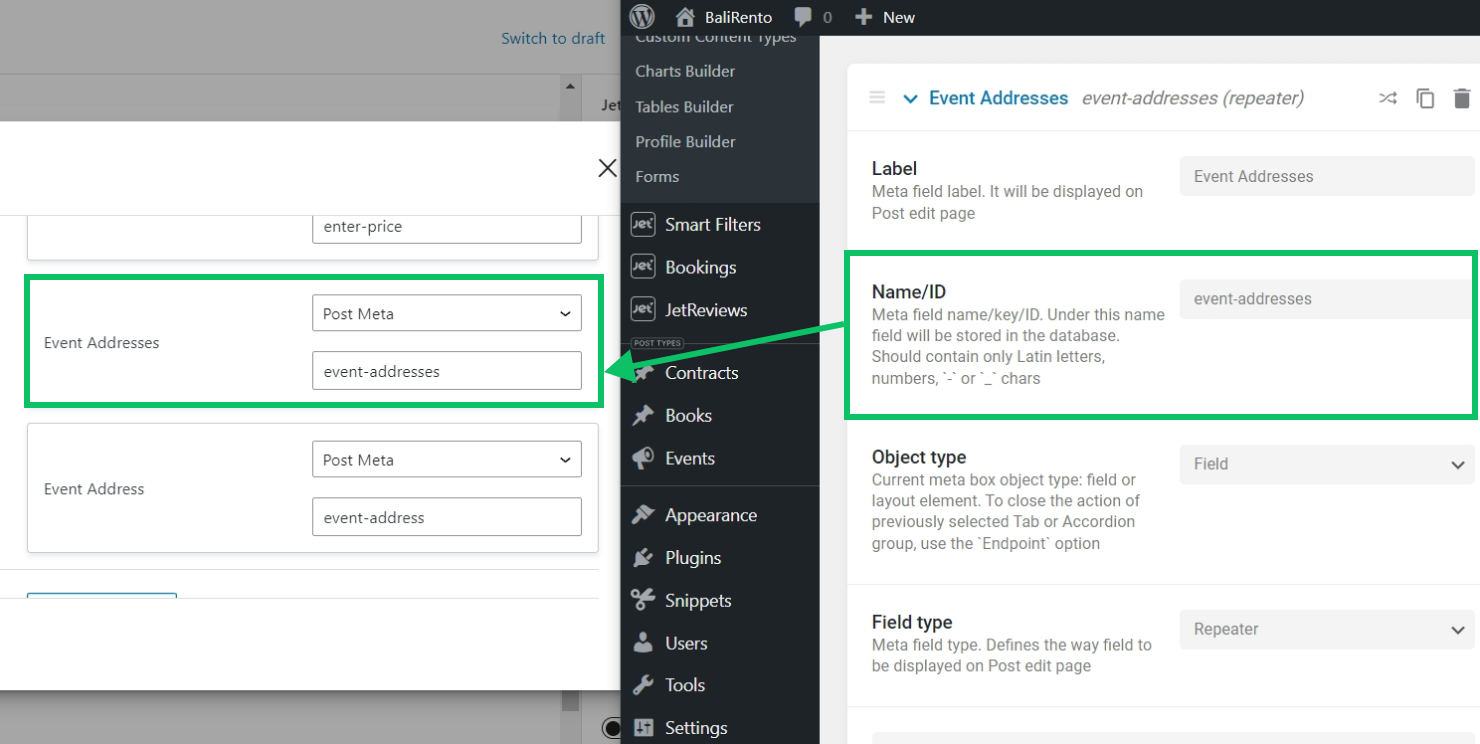
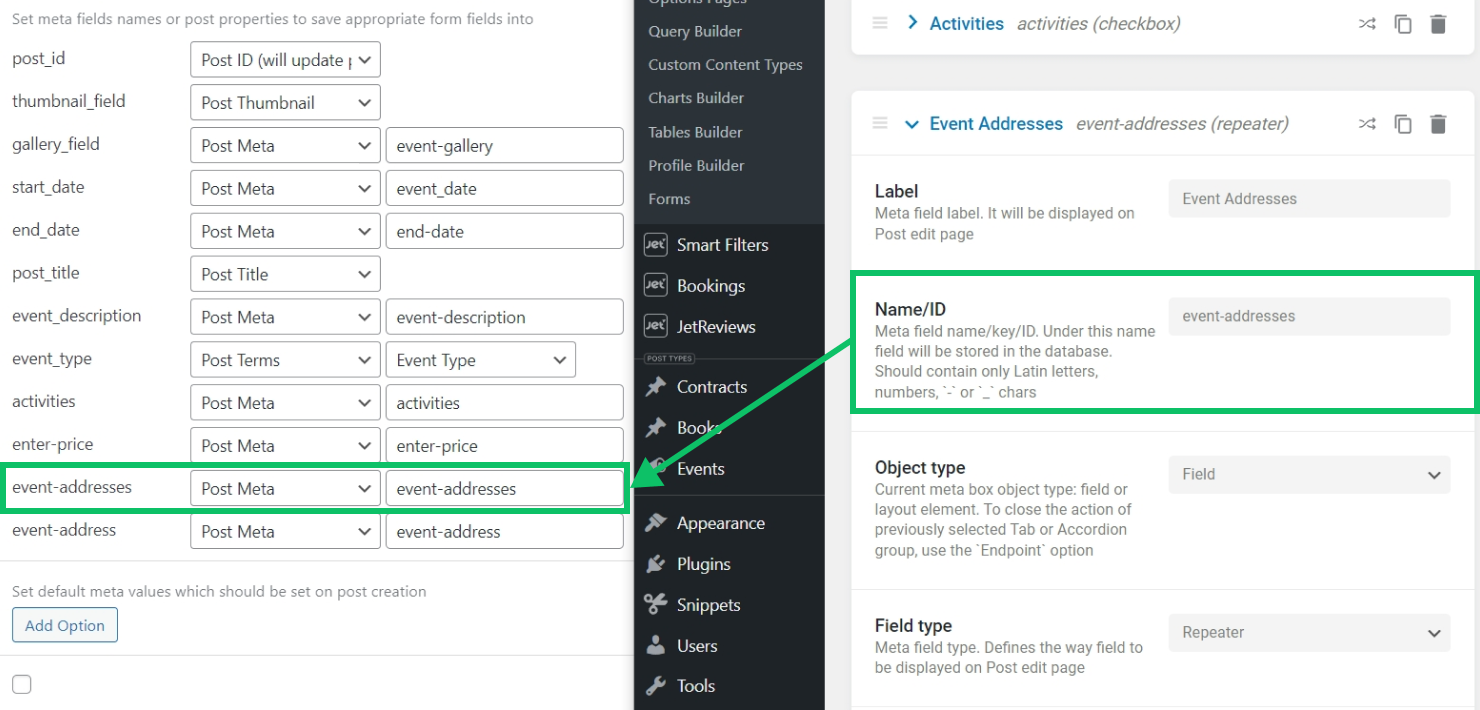
For example, our “Repeater” Meta Field named “event-addresses” has only one field — the “Text” field named “event-address.”
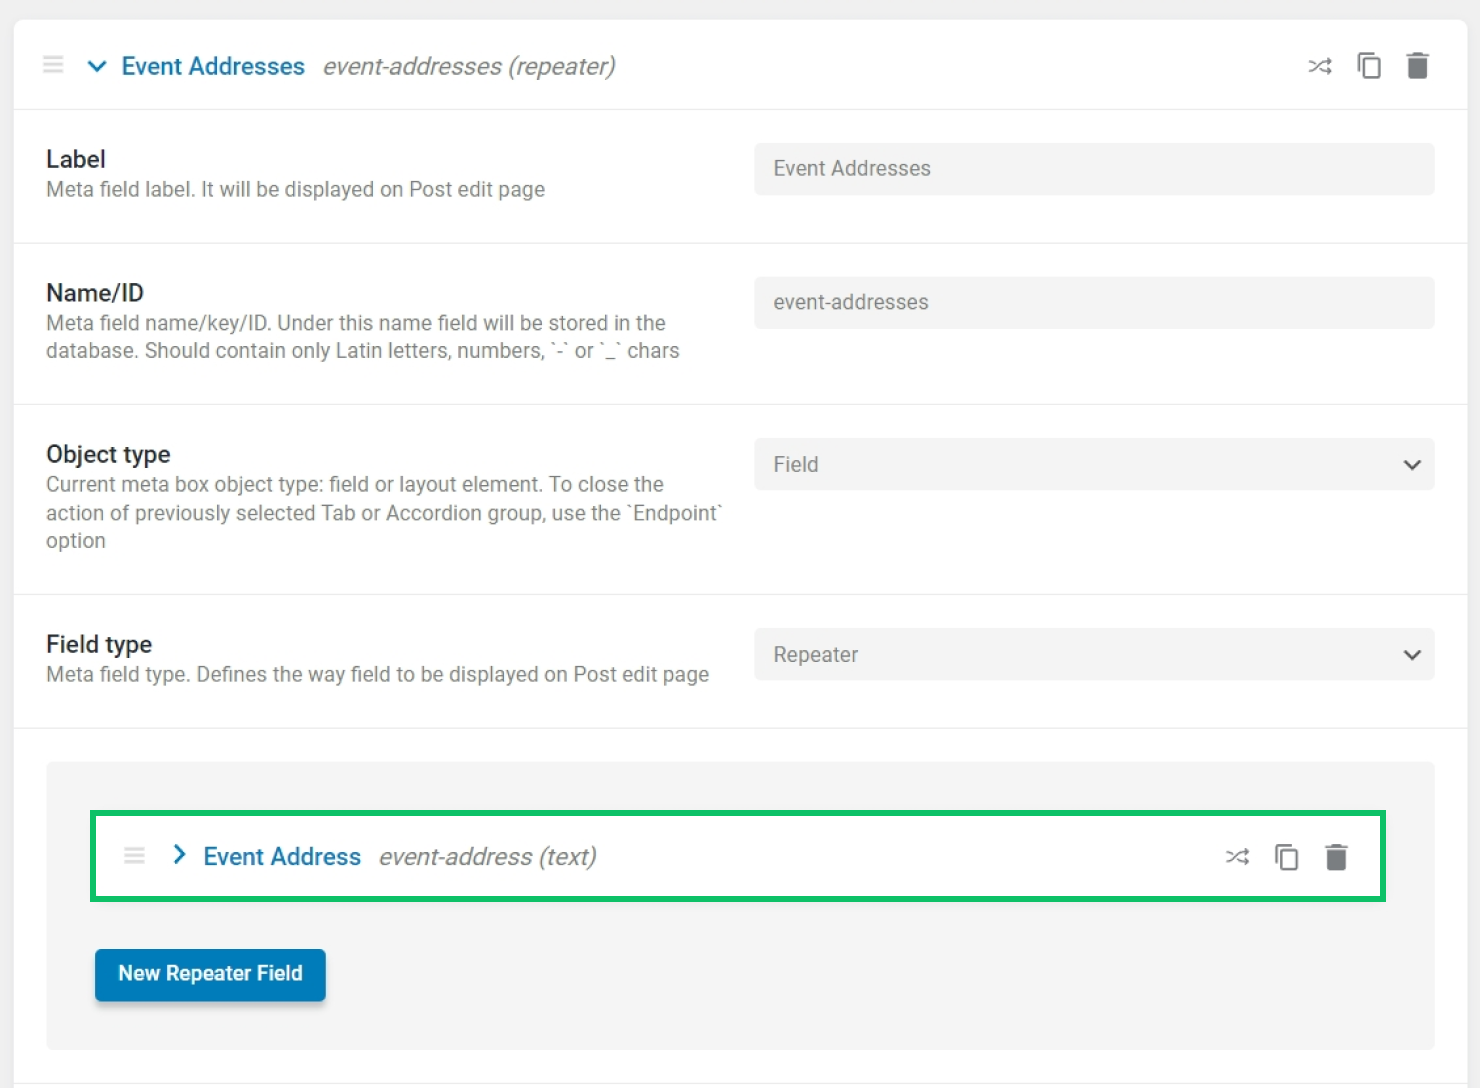
Therefore, we place a Text Field block inside the Repeater Field block in the form.
Then, we copy the name of the “Repeater” Meta Field (“event-addresses”) and paste it as the Form Field Name of the Repeater Field block; also, we copy the name of the “Text” field of the “Repeater” Meta Field (“event-address”) and give the same name to the Text Field block in the form.
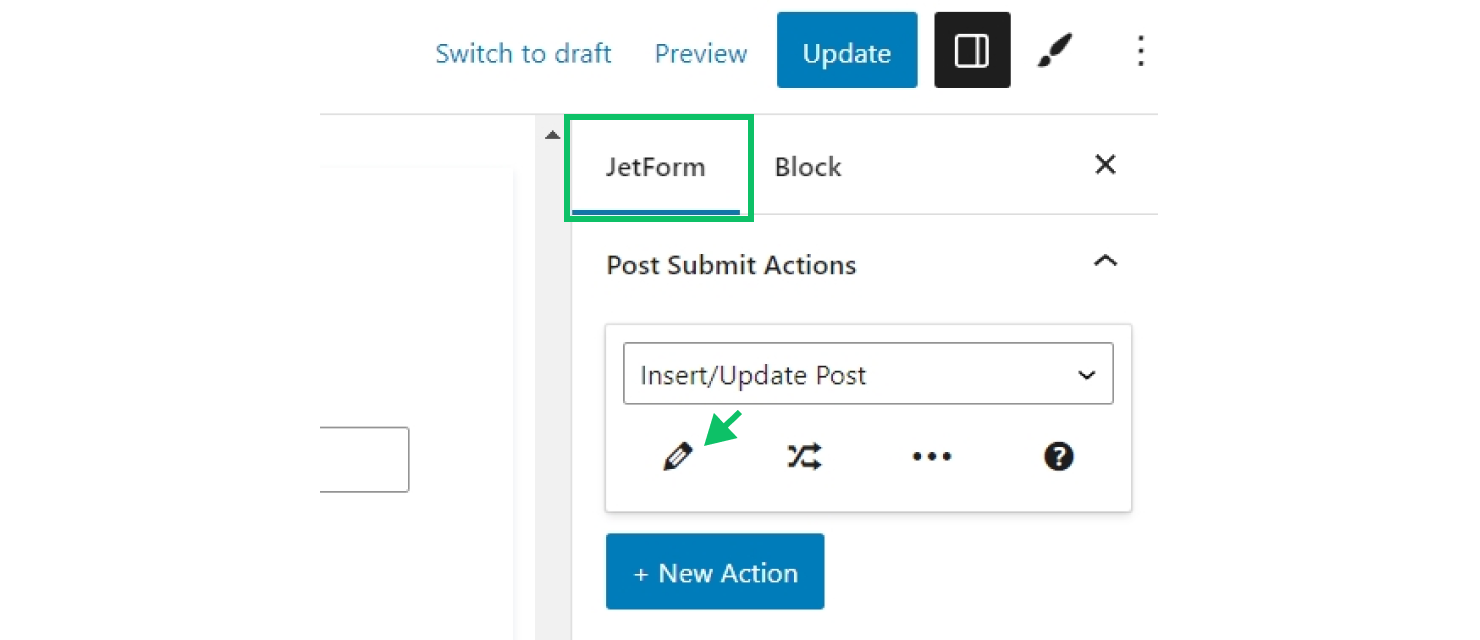
Insert/Update post action
After adjusting the form fields, navigate to the JetForm tab on the right menu and scroll down to the Post Submit Actions section. Unfold the section and press the “New Action” button to add a new action. Select the “Insert/Update Post” action from the list. After that, click the pencil-shaped button to edit it.
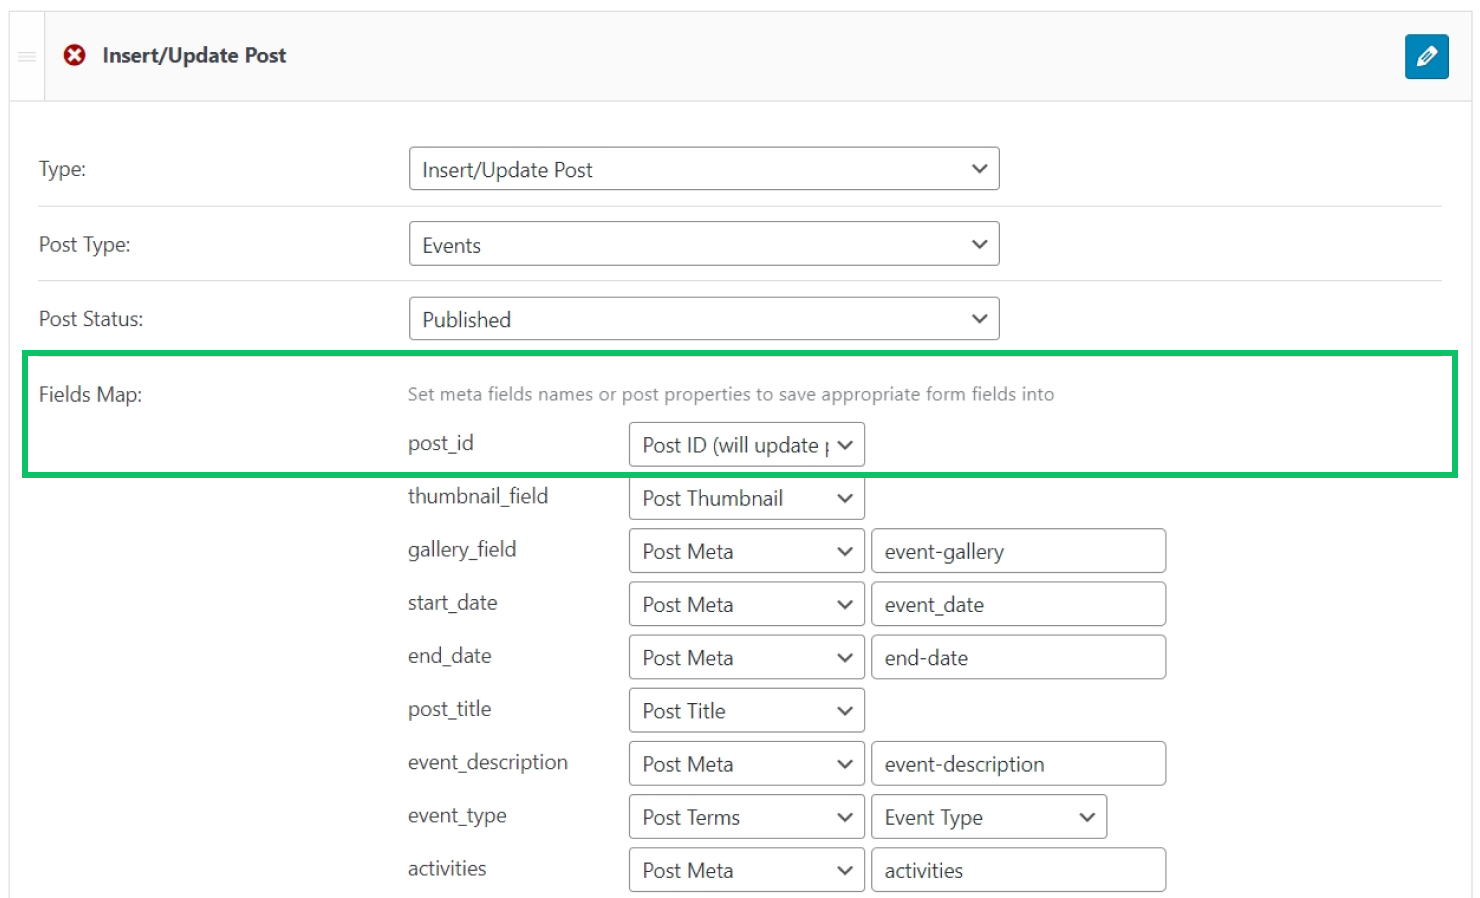
In the Edit Action popup, start by selecting the Post Type, “Events” in our case. Then, select the needed status of the created posts.
After that, move to the Fields Map section and map the form fields on the left with the needed post properties on the right side. Start by mapping the post_id field with the “Post ID (will update the post)” property.
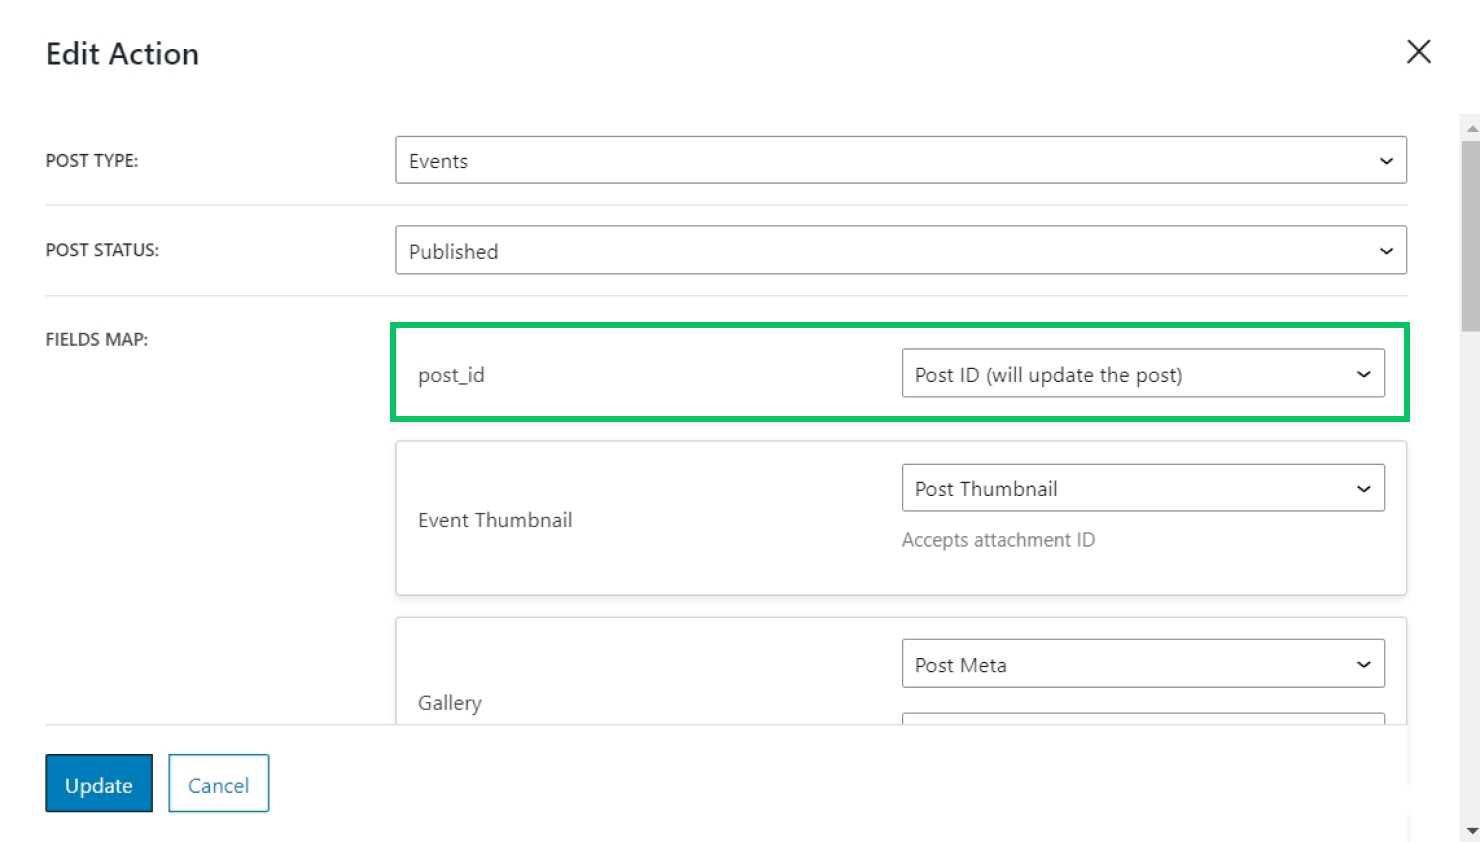
Then, map the rest of the form fields with the post properties that should be populated. If you map the field with a “Post Meta” property, insert the Name/ID of the meta field into the input field under the “Post Meta” property.
Don’t forget to click the “Update” button to save the changes once ready.
Preset settings
In the same JetForm tab, scroll down to Preset Settings and enable them.
Preset Settings let the fields in the form pre-populate with the existing values in the post. Assuming the post already has all the needed information — post title, thumbnail, meta fields, etc.
When Preset Settings are configured, form fields are completed with the data from the post so that the user doesn’t have to fill in all the post fields from scratch but can edit only the necessary information.
Select “Post” as the Source and “URL Query Variable” in the Get Post ID From drop-down. Specify the Query Variable Name: “_post_id”.
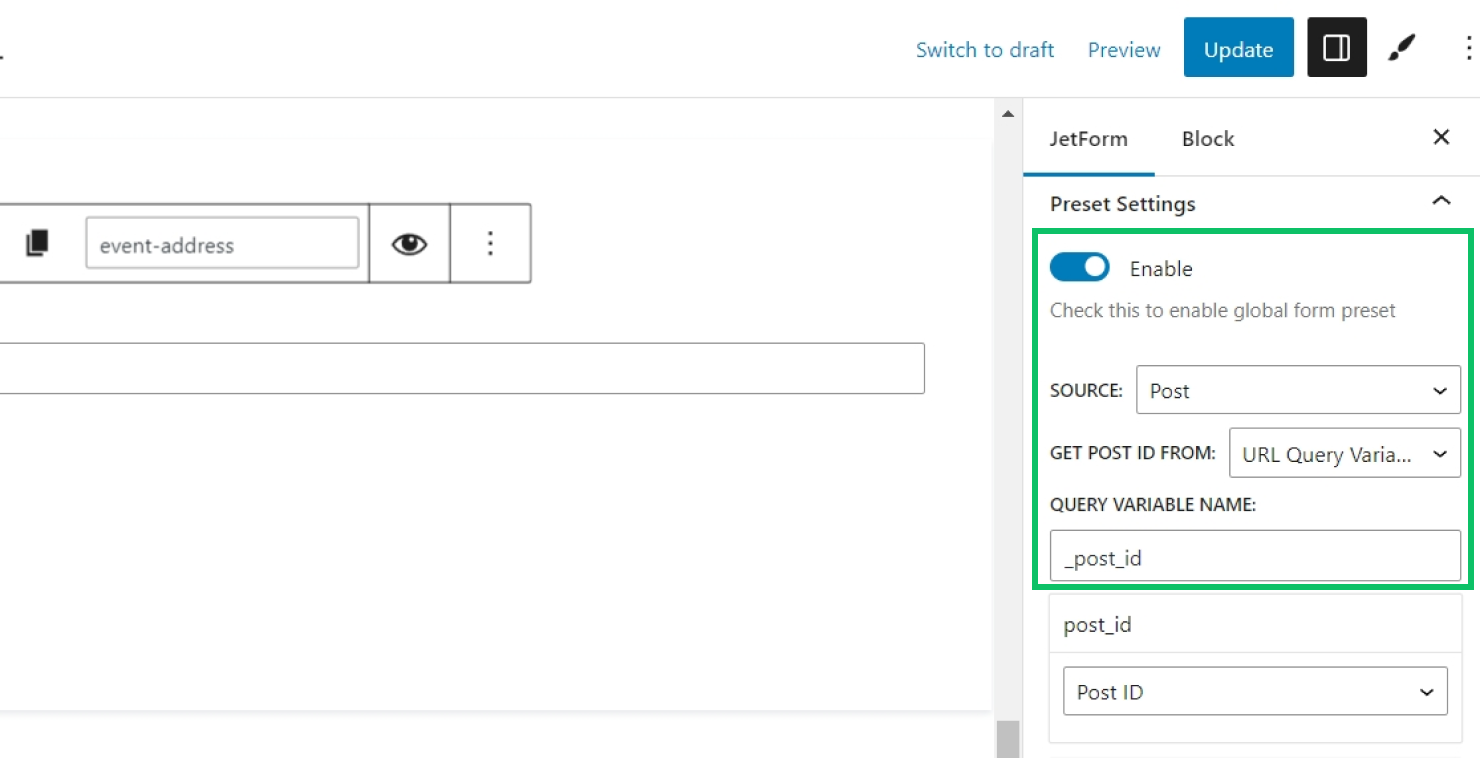
Remember that the ID of the post will be located in the URL parameters, which is why we populate it from the URL Query Variable.
Next, map all the form fields in the same way as when you previously configured the “Insert/Update Post” action.
General messages settings
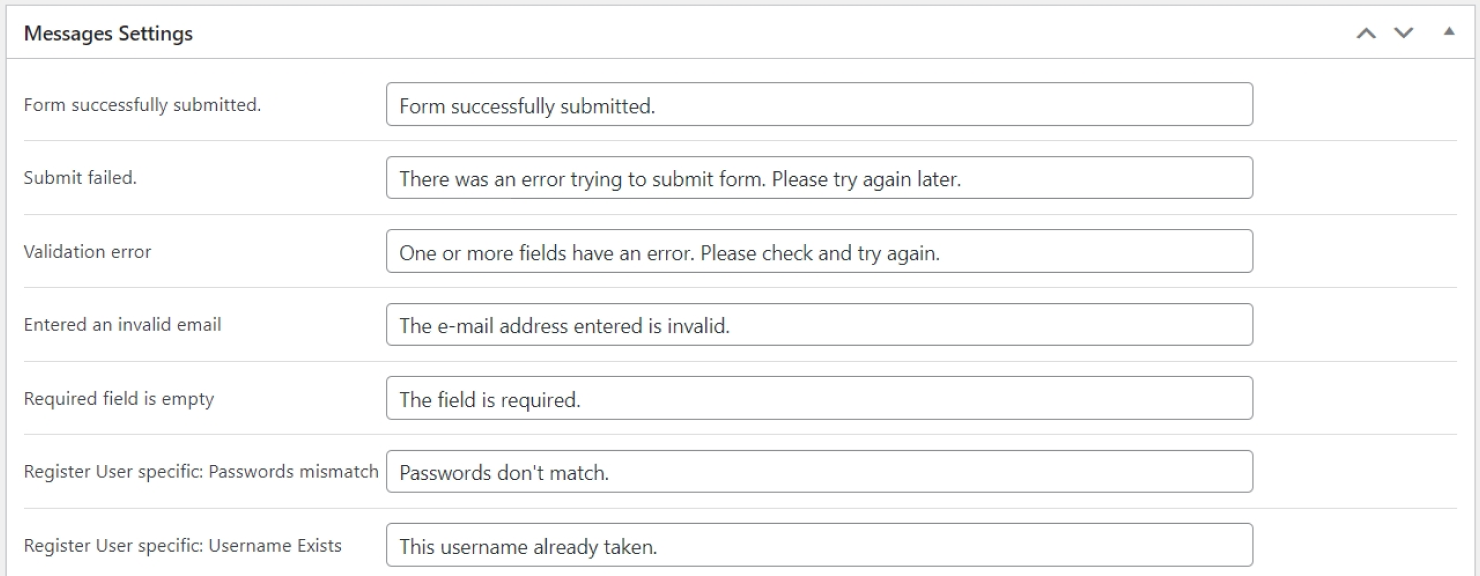
Now, move to the General Messages Settings section and edit the messages appearing once the form is submitted.
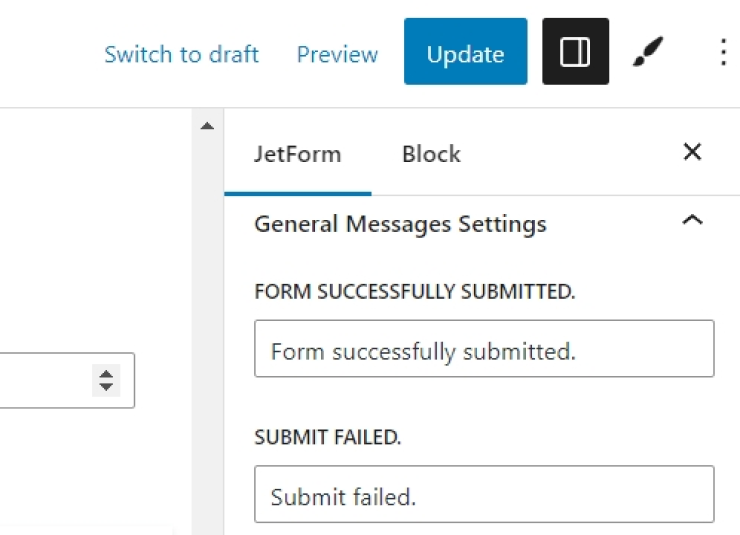
Once you are done, publish the form.
Form adjustment in Elementor
Navigate to the WordPress Dashboard and proceed to Elementor > Templates > Saved Templates.
Create a new template. We will later assign it to the “Edit Event” Subpage in Profile Builder.
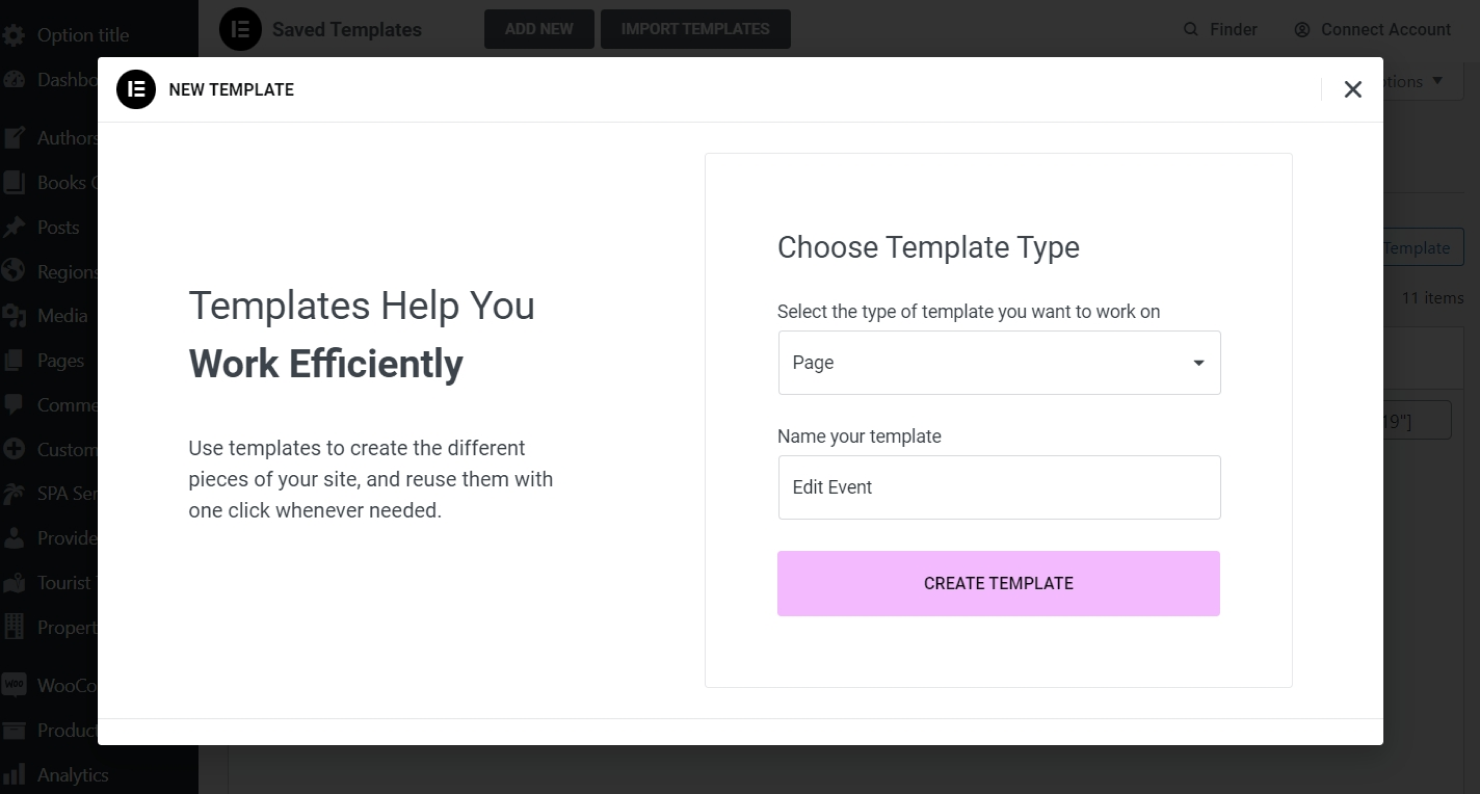
Place the JetForm widget inside. This widget will display the form.
Choose the created form and proceed to edit the rest of the settings. To modify the fields’ appearance, navigate to the Style tab and adjust the appearance of form fields.
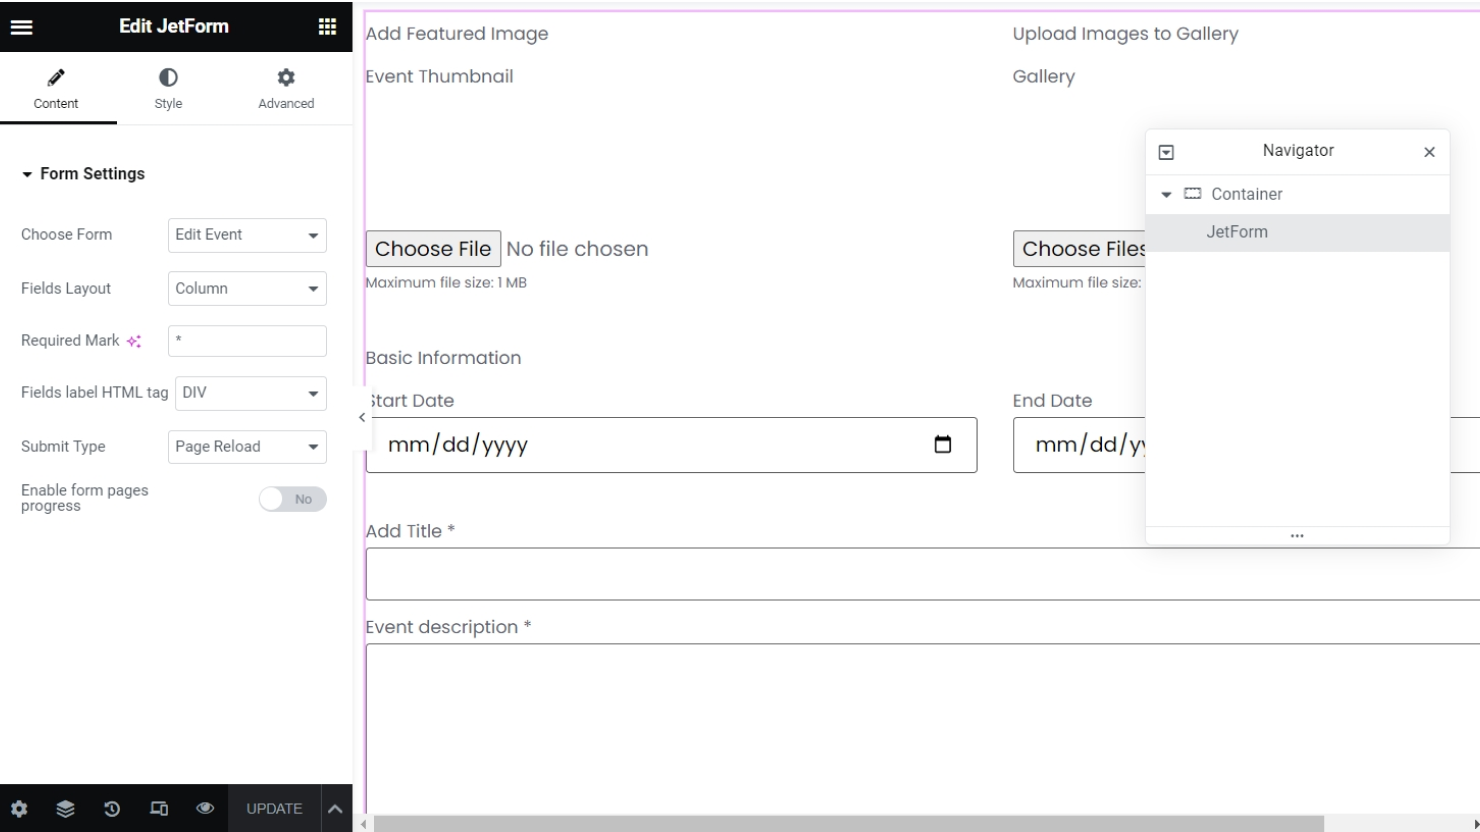
Look through our related video tutorial for additional guidance.
Once done, save the changes, navigate to WordPress Dashboard > JetEngine > Profile Builder > Account Page, and assign the created template to the subpage.
Create the Form in JetEngine Forms (Legacy)
Enable Forms (Legacy) module
Proceed to WordPress Dashboard > JetEngine > Forms to create a new form.
JetEngine form fields setup
Hidden
Initially, add a Hidden field. Select “URL Query Variable” as the Field Value. In the Query variable key field, enter “_post_id”.
The Hidden field will retrieve the ID of the edited post from the URL parameters.
In our case, “_post_id” is the name of the parameter, and “8013” is the parameter’s value. “8013” is the ID of the needed post. The Hidden field will retrieve “8013” and use it as the ID of the post that should be edited.
If you plan to place the form on the Single Post page, replace the “URL Query Variable” Field Value with the “Current Post ID” option.
In this case, the Hidden field will retrieve the ID of the post dynamically from the current page.
Text, WYSIWYG, and Textarea
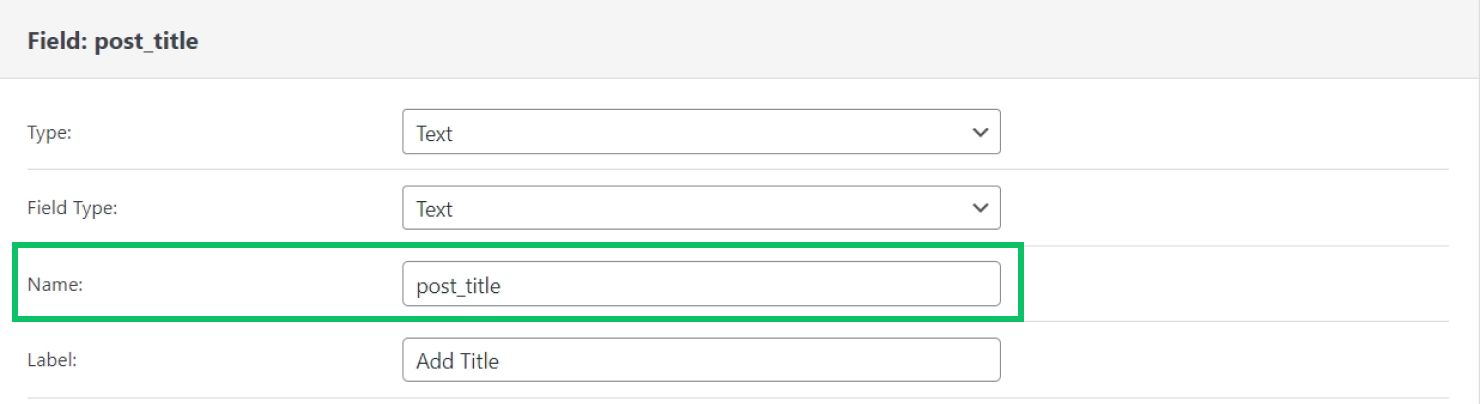
To edit the “Text,” “Textarea,” and “WYSIWYG” Meta Fields, use the same field types in the JetEngine form.
We will use the “Text” field to edit the title of the post and the “WYSIWYG” field to edit the event description, which is stored in a meta field of “WYSIWYG” type.
Give a name and a label to the fields. Other field settings are optional.
Checkbox, Radio, and Select
To edit multi-optional meta fields like “Checkbox,” “Radio,” and “Select,” use the corresponding field types in JetEngine forms.
For example, our “Events” post type has a “Checkbox” Meta Field named “activities”.
To update this meta field, we select to add a “Checkboxes” field.
The Fill Options From is set to “Generate Dynamically,” the Generator Function is “Get values list from JetEngine field options,” and in the Field Name, we insert the name/ID of the “Checkbox” Meta Field. This way, the field will generate options from the “Checkbox” Meta Field options.
Give a name to the field and a label. The rest of the settings are optional.

Next, we add a Select field that will list categories of the related taxonomy.
To make the Select field list taxonomy terms, choose “Terms” in the Fill Options From drop-down and select the needed Taxonomy below.

It is possible to use Radio, Checkbox, or Select fields to update the taxonomy.
Date, Time, and Datetime
To update the “Date,” “Time,” and “Datetime” Meta Fields, use the Date, Time, and Datetime fields in JetEngine forms accordingly.
In our “Events” post type, we have two “Date” Meta Fields for the start date of the event and the end date of the event.
Therefore, we add two Date fields in the settings of the form.
The most important step is to enable the Is Timestamp toggle in the settings of the Date field.
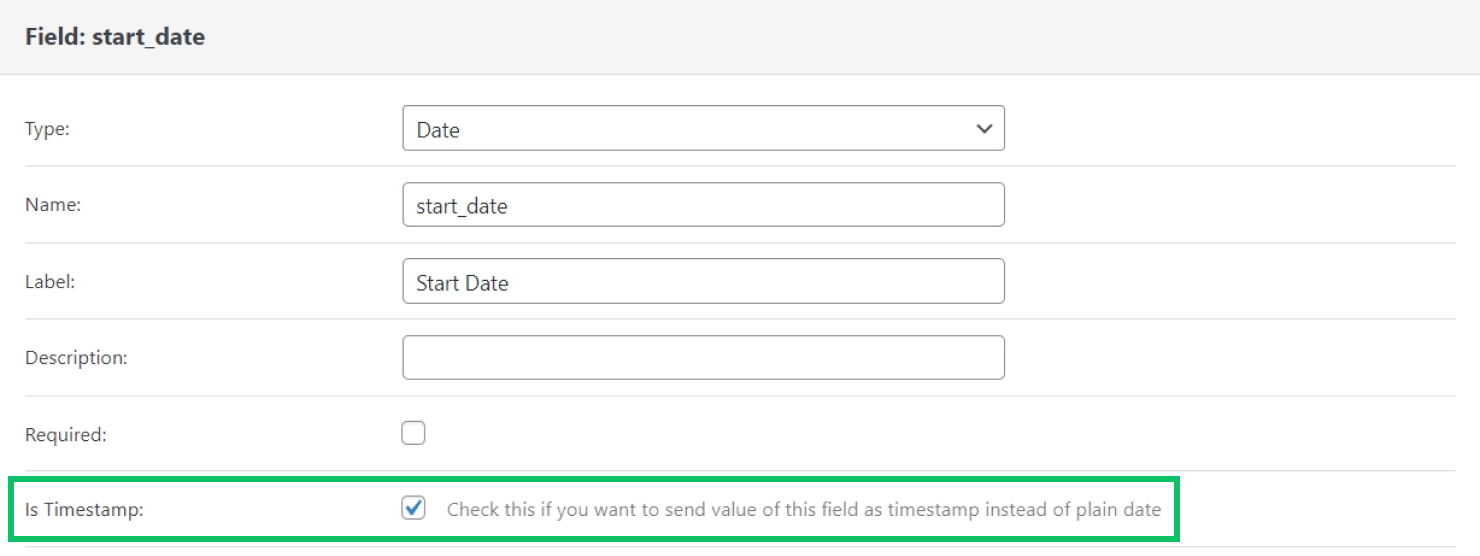
Also, the “Date” Meta Field should be saved as a timestamp.
Mind that if you work with the Datetime field, the Is Timestamp toggle should also be enabled. In the Time field, there is no such setting.
Media
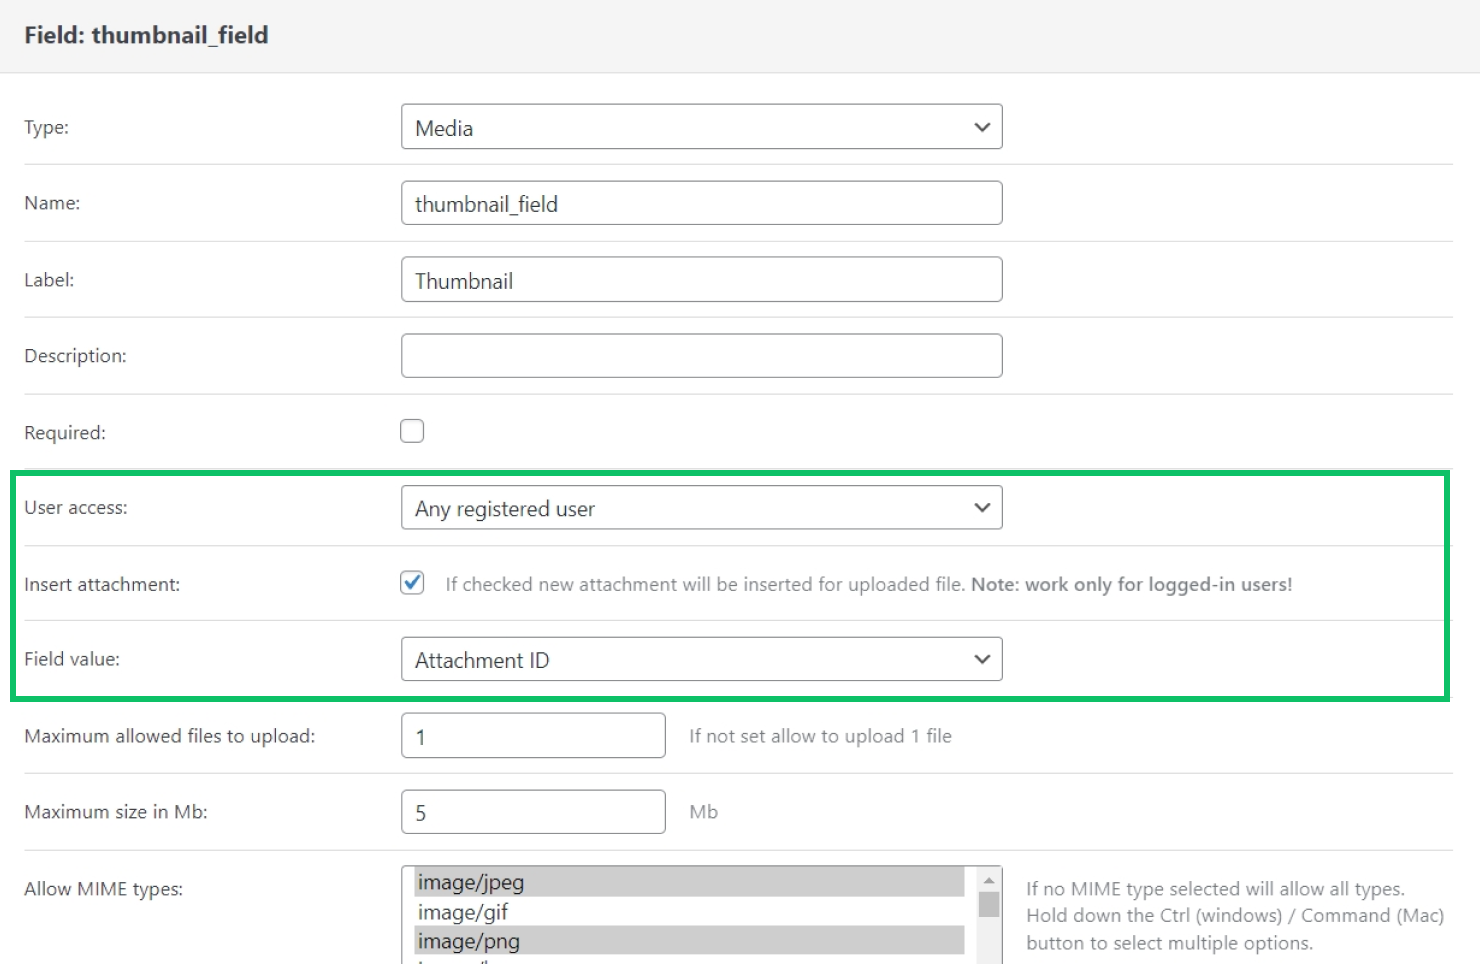
To update the post thumbnail, we will use the Media field.
In the settings of the Media field, select the needed User access. Select any option except the “Any user (incl. Guest)” because guests cannot edit posts or upload files to the Media Library.
Then, enable the Insert attachment toggle. When this option is enabled, the uploaded media file will also be saved to the Media Library. Note that this option works only for logged-in users.
Next, select the Field value. Since post thumbnails are stored in the ID format, we choose the “Attachment ID” value.
To update a “Media” Meta Field, make sure the Value format of the “Media” Meta Field matches the selected Field Value in the Media field in the form.
For example, to update a “Gallery” Meta Field where the Value format is set to “Media URL,” we would select the “Attachment URL” option in the settings of the Media field in the form.
Next, select the Maximum Allowed Files to Upload. To allow users to update the “Gallery” Meta Field, set the number of allowed files to more than one.
Then, set the Maximum Size in MB, defining the maximum size of each single file uploaded to the current Media field.
Finally, select the Allowed MIME Types to let users upload files of only certain formats.
Repeater
To update the “Repeater” Meta Field, we will use the Repeatable Fields Group Start and Repeatable Fields Group End fields. Between them, we will place the same field types as the fields inside the “Repeater” Meta Field.
For example, our “Repeater” Meta Field named “event-addresses” has only one field — the Text field named “event-address.”
Therefore, we place a Text field between the Repeatable Fields Group Start and Repeatable Fields Group End fields in the form.
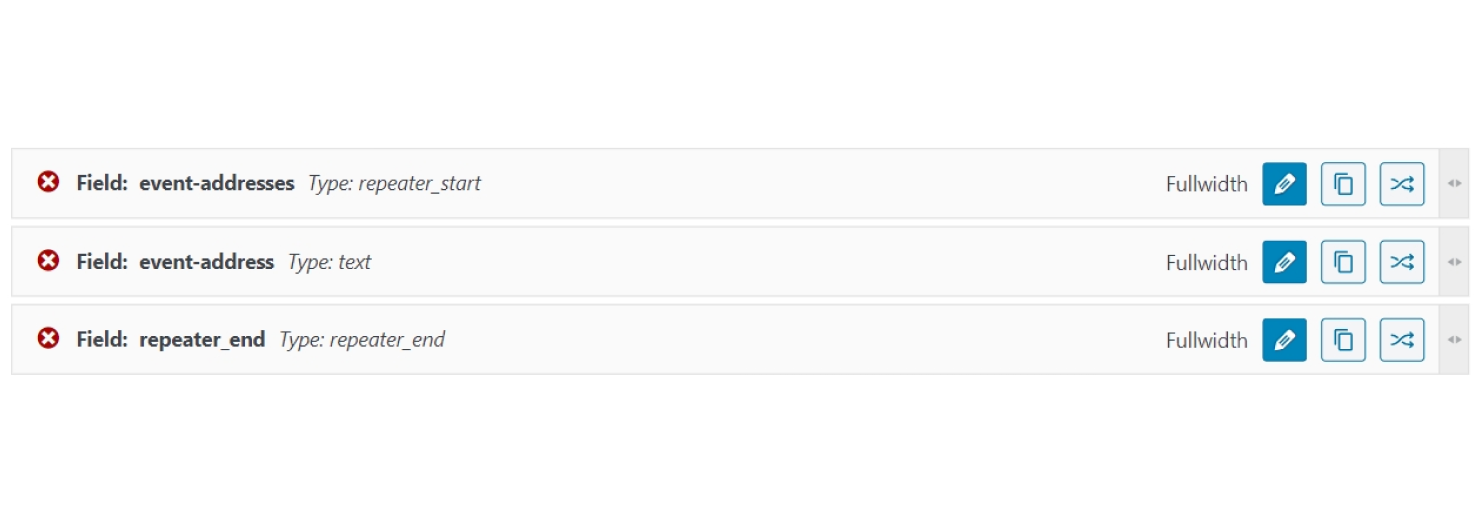
Then, we copy the name of the “Repeater” Meta Field (“event-addresses”) and paste it as the Repeatable Fields Group Start name; also, we copy the name of the Text field of the Repeater meta field (“event-address”) and give the same name to the Text field in the form.
Insert/Update post-submit action
After you finish the form fields setup, scroll down to the Post-submit Actions / Notifications Settings section. Click “Add Notification” to add new post-submit action. Select the “Insert/Update Post” action type.
Start by selecting the Post Type; we have picked “Events.” Then, select the needed status of the created posts.
After that, move to the Fields Map section and map the form fields on the left with the needed post properties on the right side. Start by mapping the post_id field with the “Post ID (will update the post)” property.
Then, map the rest of the form fields with the post properties that should be populated. If you map the field with a “Post Meta” property, insert the Name/ID of the meta field into the input field under the “Post Meta” property.
Don’t forget to click the “Apply Changes” button to save the changes once you are done.
Notifications settings
Now, move to the Messages Settings section and edit the messages appearing once the form is submitted.
Pre-set form settings
Scroll up to the Pre-set form field values checkbox and enable it. Preset settings let the fields in the form pre-populate with the existing values in the post. Assuming the post already has all the needed information — post title, thumbnail, meta fields, etc.
When Preset settings are configured, form fields are populated with the data from the post so that the user doesn’t have to fill in all the post fields from scratch but can edit only the necessary information.
Select “Post” as the Source and “URL Query Variable” in the Get post ID from drop-down.
Specify the Query variable name: “_post_id.” Remember the post ID will be located in the URL parameters, which is why we populate it from the URL Query Variable.
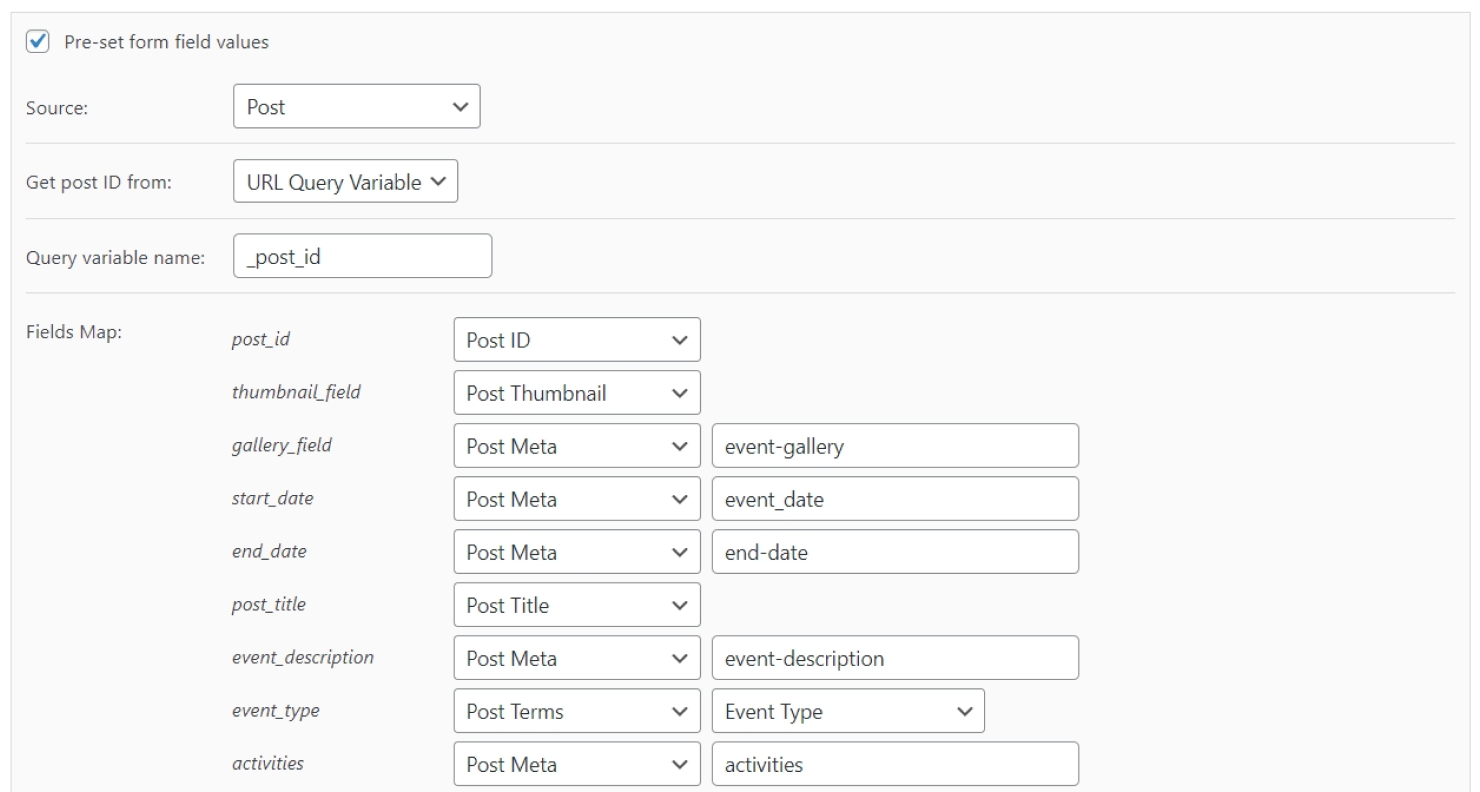
Next, map all the form fields in the same way as when you previously configured the “Insert/Update Post” action.
Form adjustment
Navigate to the WordPress Dashboard and proceed to Elementor > Templates > Saved Templates.
Create a new template. We will later assign it to the “Edit Event” Subpage in Profile Builder.
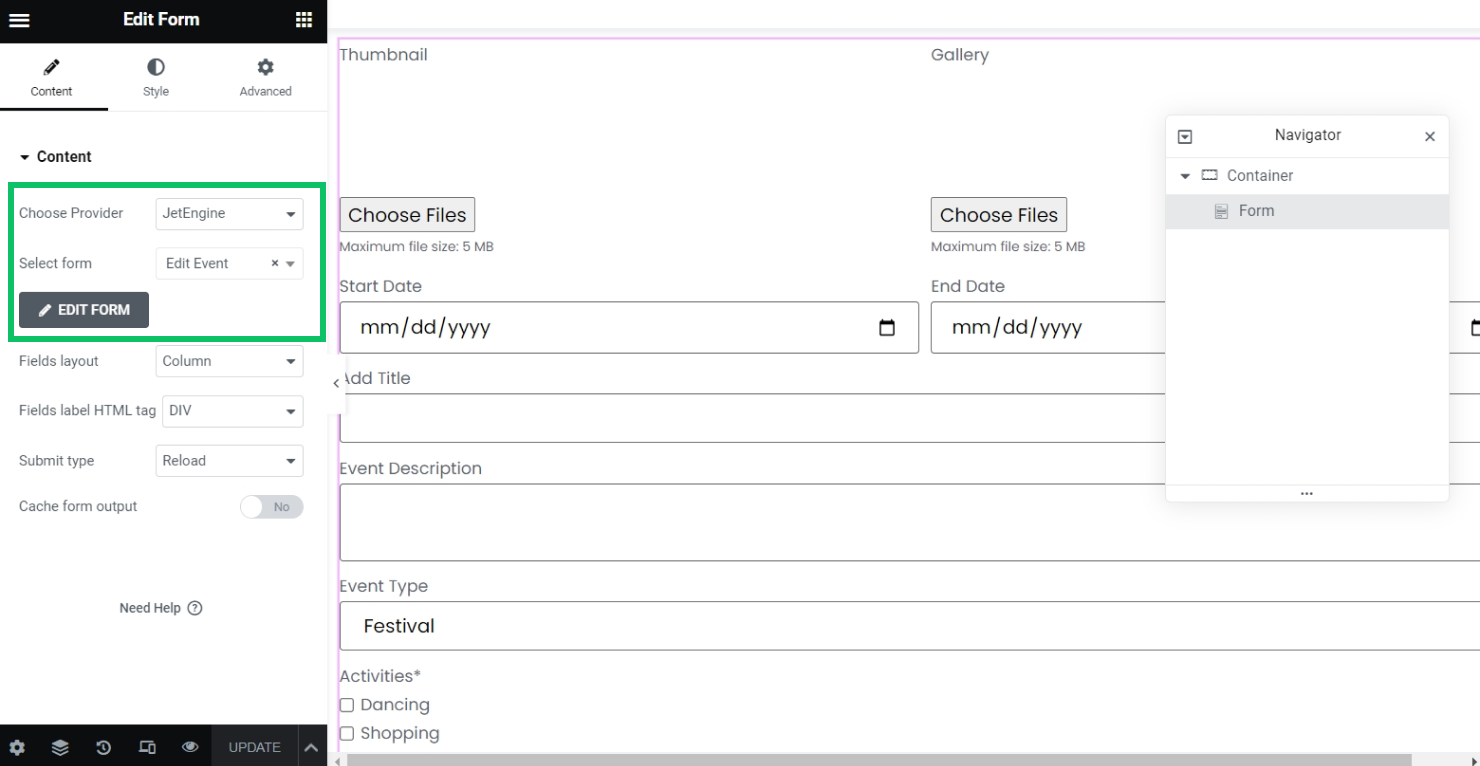
Place the Form widget inside. This widget will display the form.
Choose the created form and proceed to edit the rest of the settings. To modify the fields’ appearance, navigate to the Style tab and adjust the appearance of form fields.
Once done, save the changes, navigate to WordPress Dashboard > JetEngine > Profile Builder > Account Page, and assign the created template to the subpage.
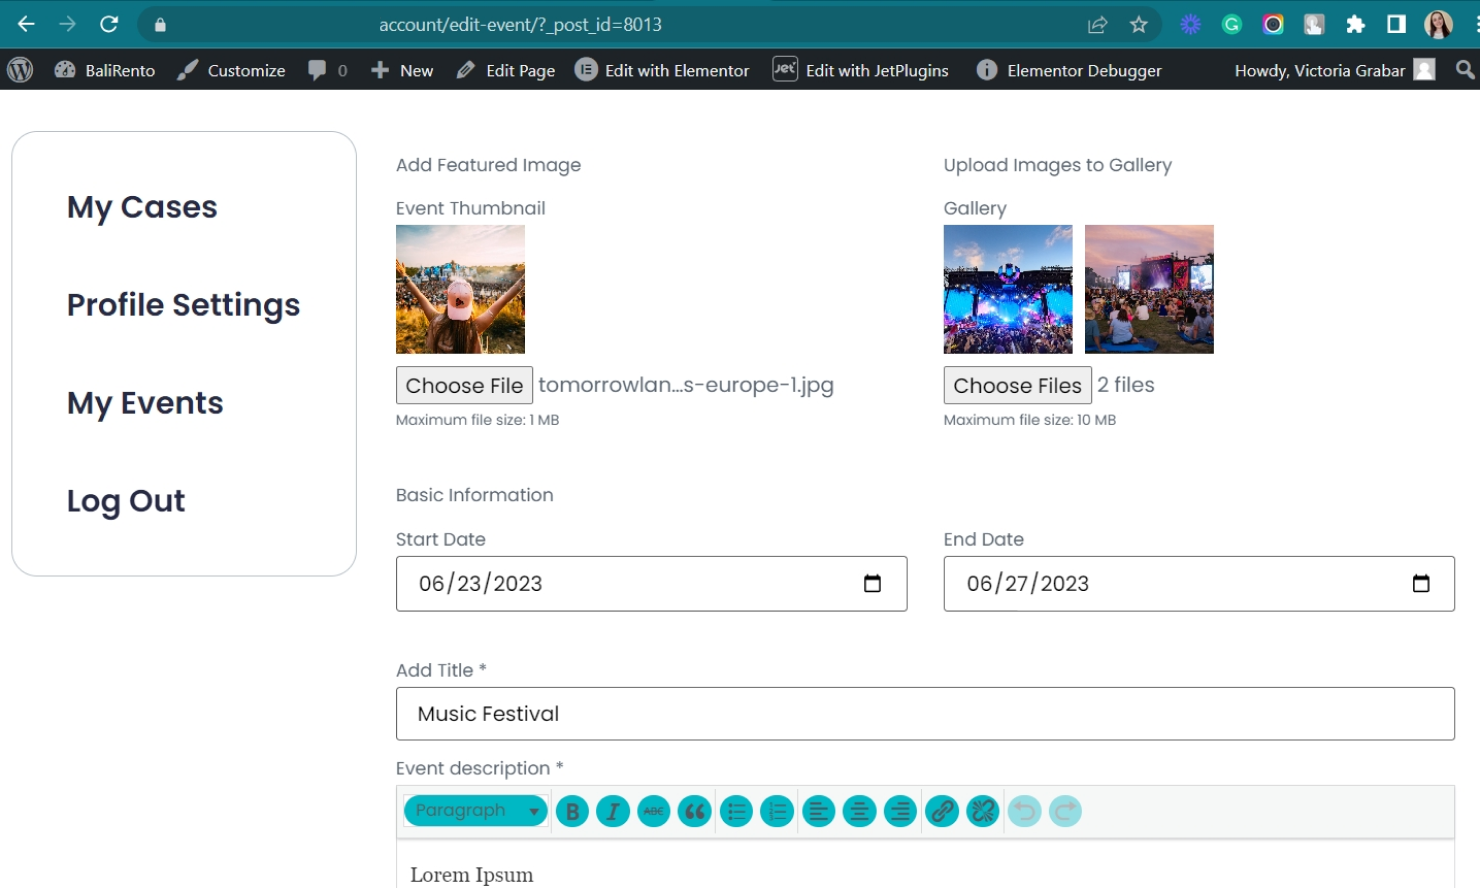
Check in Action
It is time to check the form in action. Find the page where the Listing Grid displaying the posts is placed and click the “Edit Post” button to edit one of the posts.
Thanks to the Preset Settings, the form fields are now populated with the data saved inside the post. Adjust the fields and submit the form to check it in action.
That’s it; now you know how to update posts via front-end form in Elementor with the help of the JetFormBuilder and JetEngine plugins for your WordPress website.