How to Update Users’ Accounts via Front End Form
Follow this step-by-step guide to learn how to update personal user information from the front end via the form using the JetEngine and JetFormBuilder WordPress plugins.
Before you start, check the tutorial requirements:
- Elementor (Free version) or WordPress Block editor (Gutenberg)
- Several users added to the WordPress website
- JetEngine plugin installed and activated with the User Account Page created
Before we overview this option, it should be noted that it was developed for use in combination with User Profile Builder. To learn more about how the Profile Builder works, check this tutorial.
Create an Additional Meta Box
With the Meta Box feature, you can add extra meta fields to the user profile.
You can skip this step if you have already created a user meta box with the needed meta fields.
Navigate to the WordPress Dashboard > JetEngine > Meta Boxes tab and hit the “Add New” button. Enter the Meta Box Title and select the “User” option from the Meta Box for drop-down menu.
In the Visibility Conditions setting tab, select the needed option from the Visible at drop-down list:
- Edit User. It adds meta fields to the Edit User page. Since only administrators can edit users, such fields became visible only to people with such a role;
- Edit User & Profile. This option adds meta fields to the Profile Page and Edit User page, which users can edit.
You can also hit the “+ New Condition” button and include or exclude user roles for whom meta fields will be visible on the user Profile page.
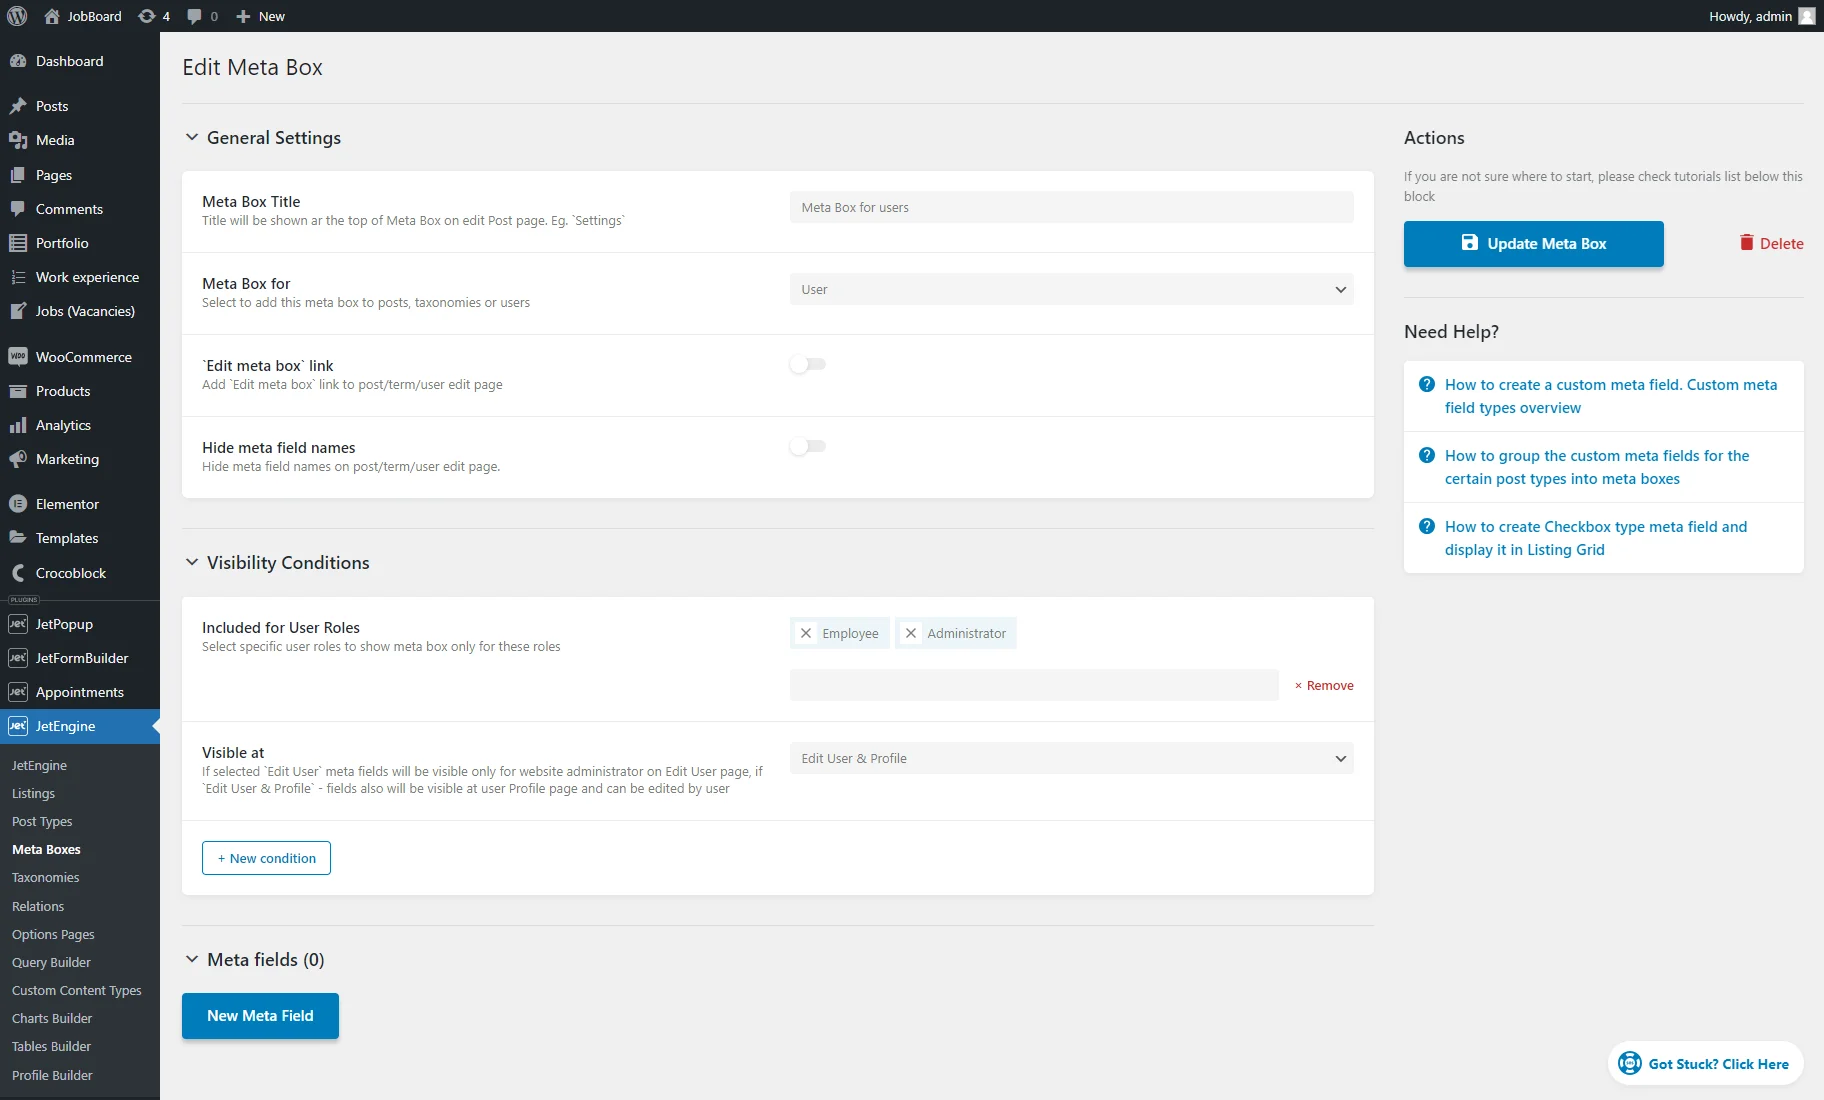
Click the “New Meta Field” button to add a new meta field.
We added the following meta fields to users who want to find a new job: Text (e.g., user nickname, first and last name, email, etc.), Media (user avatar), Date (birthday), WYSIWYG (description), Repeater (skills and education), Number (desired salary), and Checkbox (languages) fields.
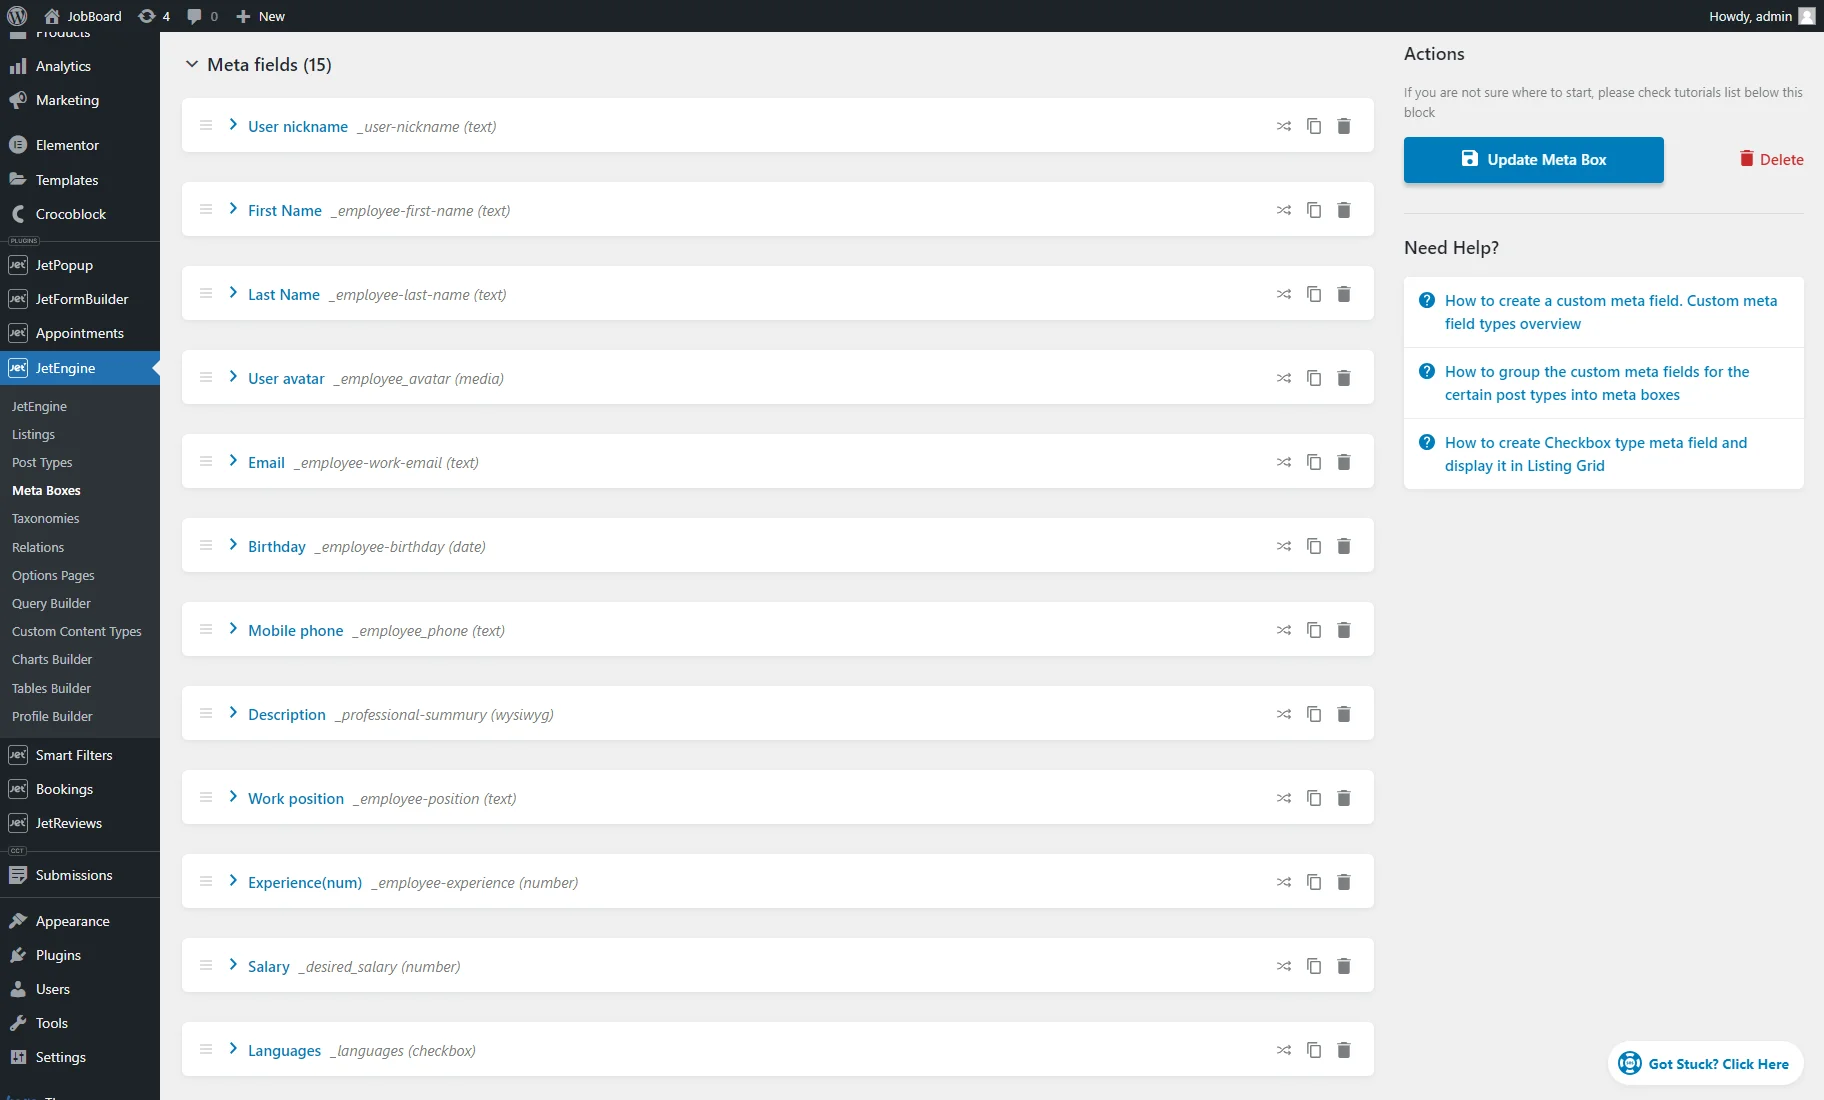
When you are done crafting the meta box, push the “Add/Update Meta Box” button.
Move to the Users > All Users tab, click to edit any user whose role suits the meta box conditions if you set such, and scroll down. Here, you’ll see the created meta box with the meta fields that can be filled in.

Create a Form
JetFormBuilder form
First, ensure to install and activate the JetFormBuilder plugin.
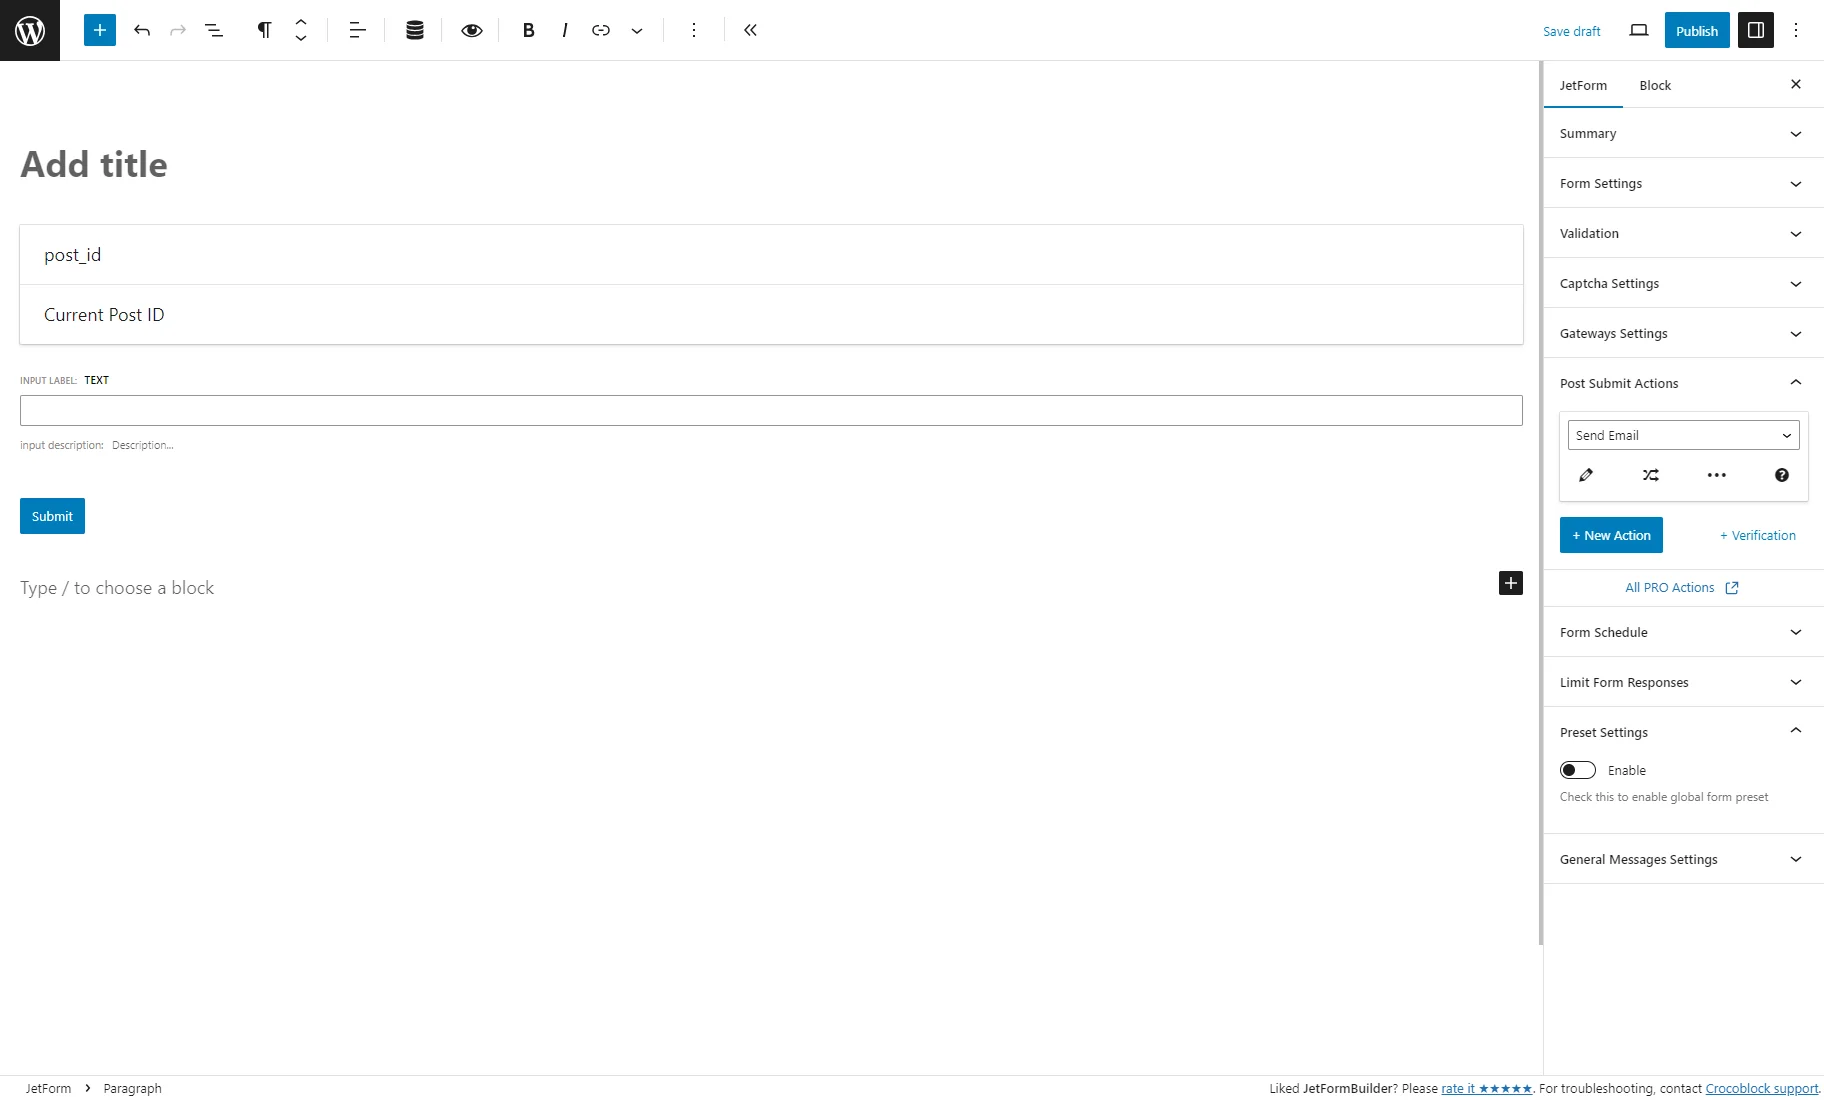
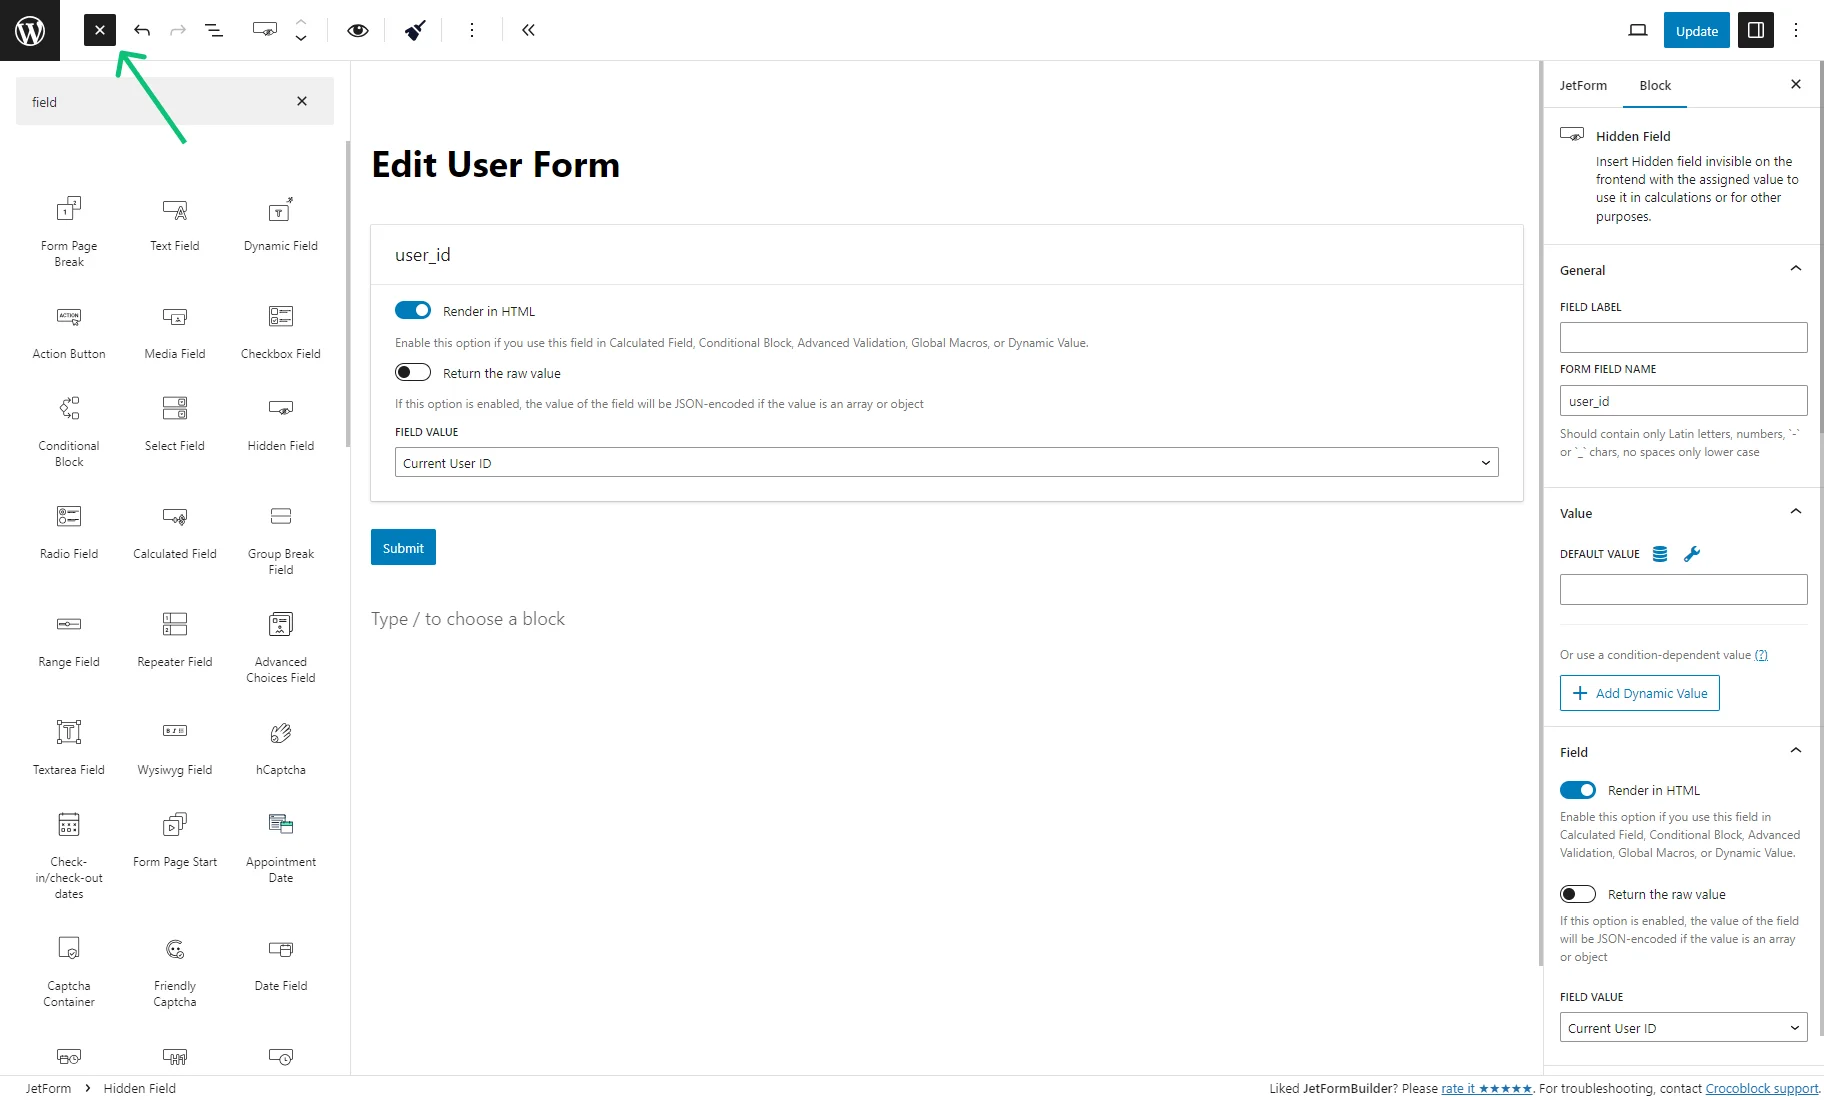
Then, follow the JetFormBuilder > Add New pathway to get to the form-creation page with three blocks: the Hidden Field, Text Field, and Action Button.
Adding the form fields
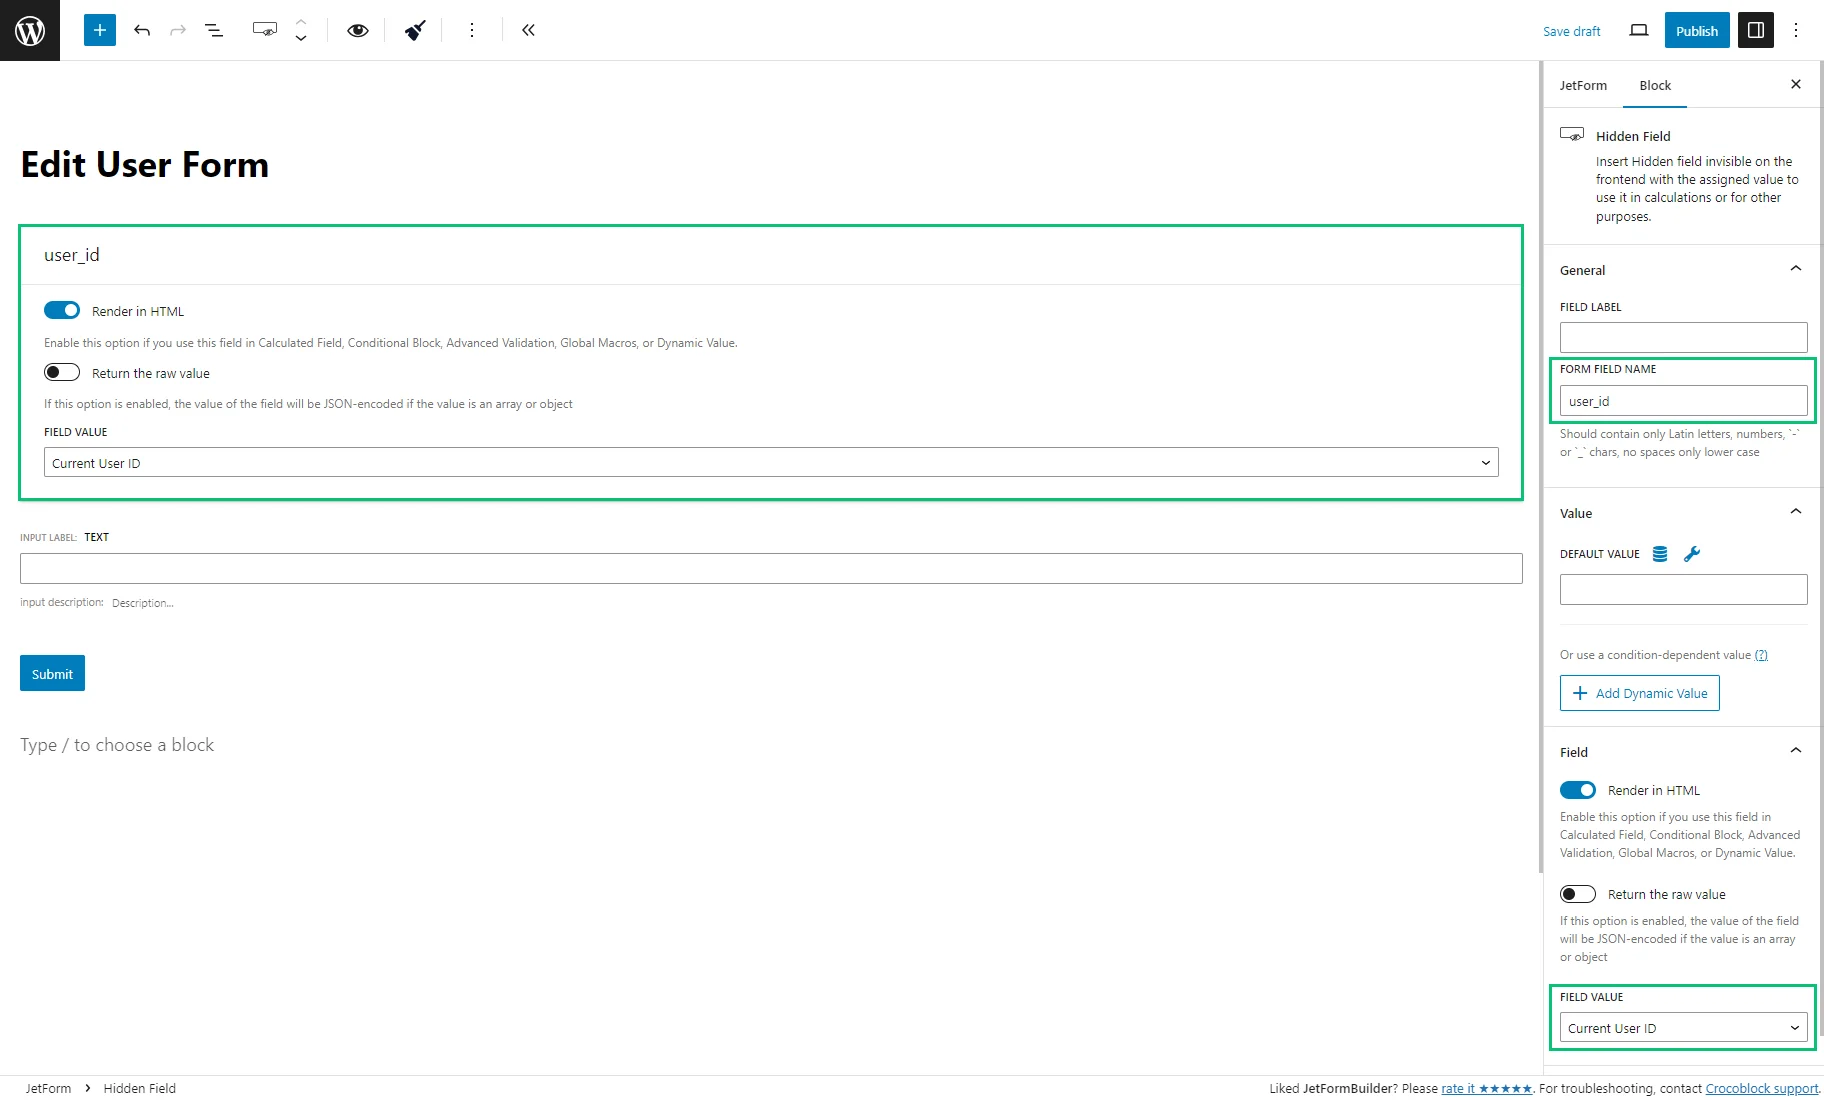
Enter the form title and click the Hidden Field block. Set the “Current User ID” FIELD VALUE option and change the FORM FIELD NAME value (e.g., “user_id”) in the Block settings.
The Text Field block can be deleted or changed. The Action Button can also be edited according to your preferences, but we kept it as it is.
Now, you can add as many form field blocks as you need by clicking the “+” icon.
For this tutorial, we’ve set a few essential fields to show the mechanism of the front-end submission.
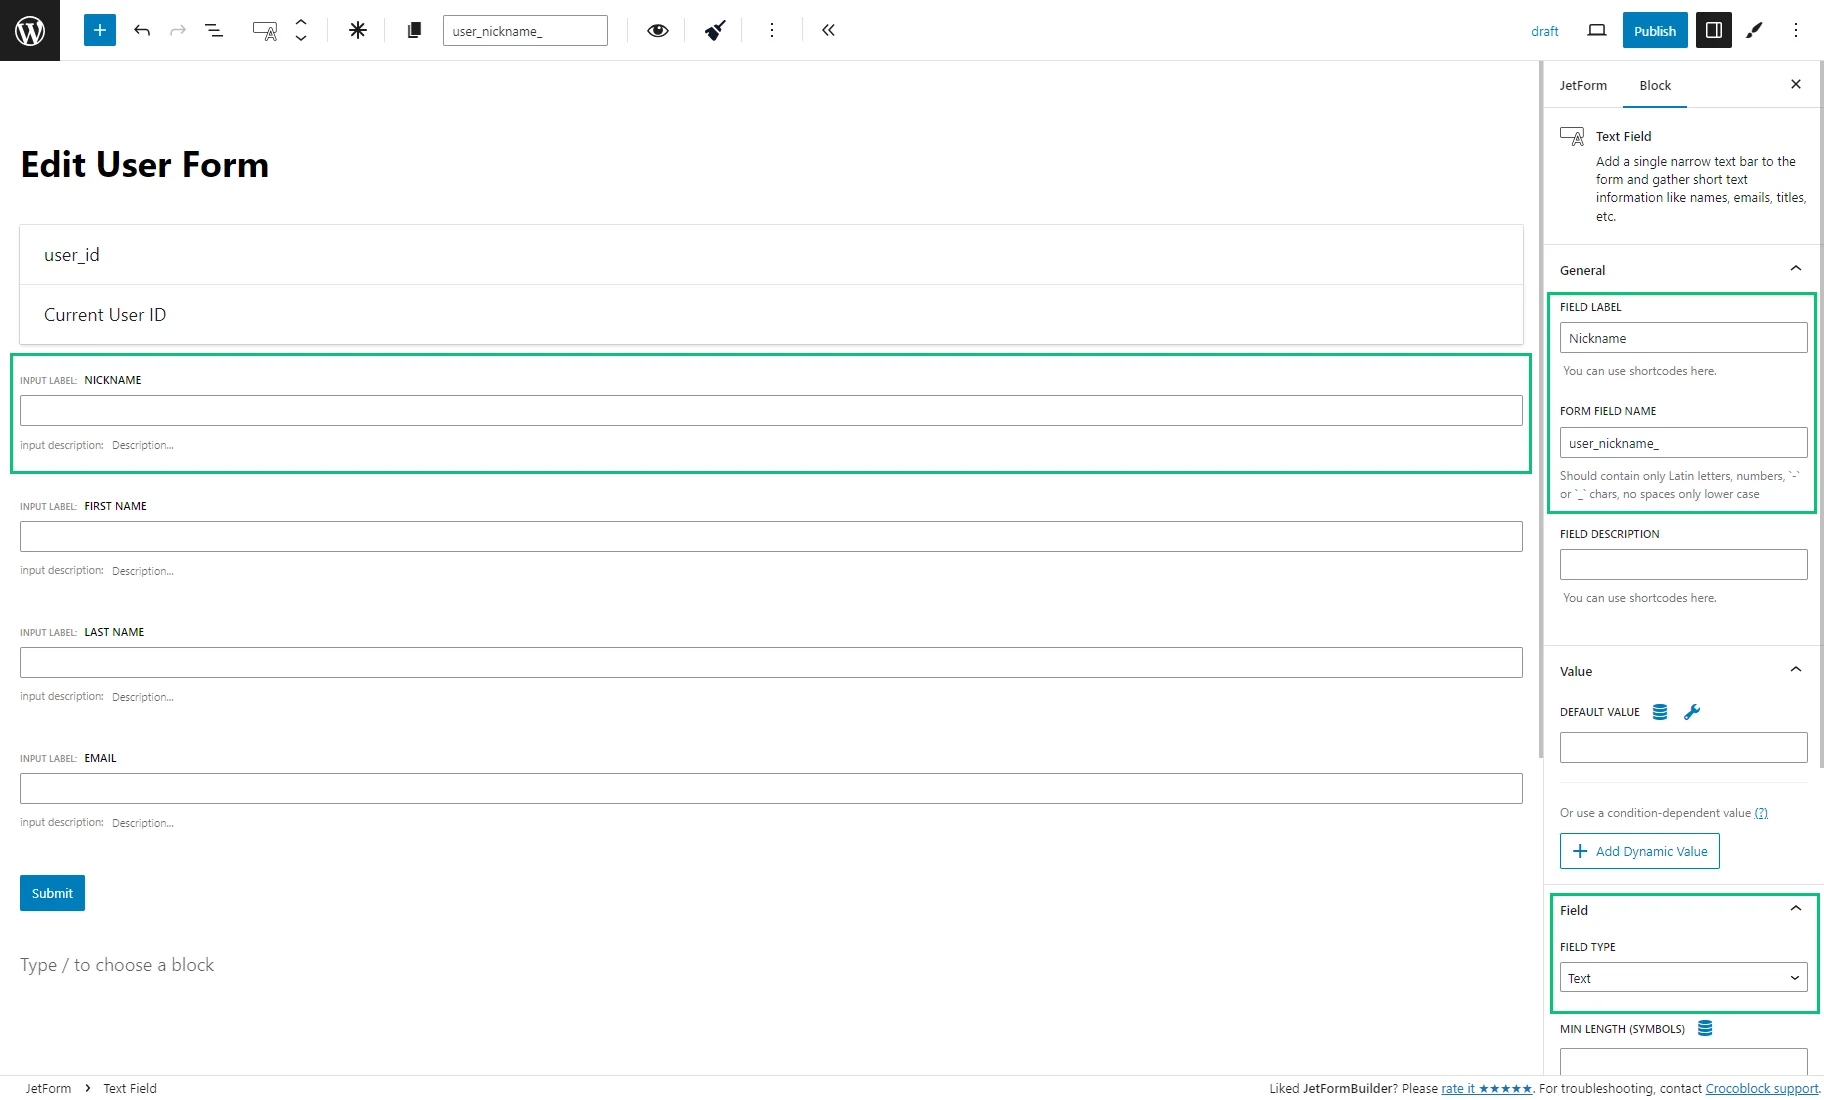
Firstly, we added several Text Field blocks for the user’s nickname, first and last name.
We set the FIELD LABEL and FORM FIELD NAME values and picked the “Text” FIELD TYPE option for these blocks.
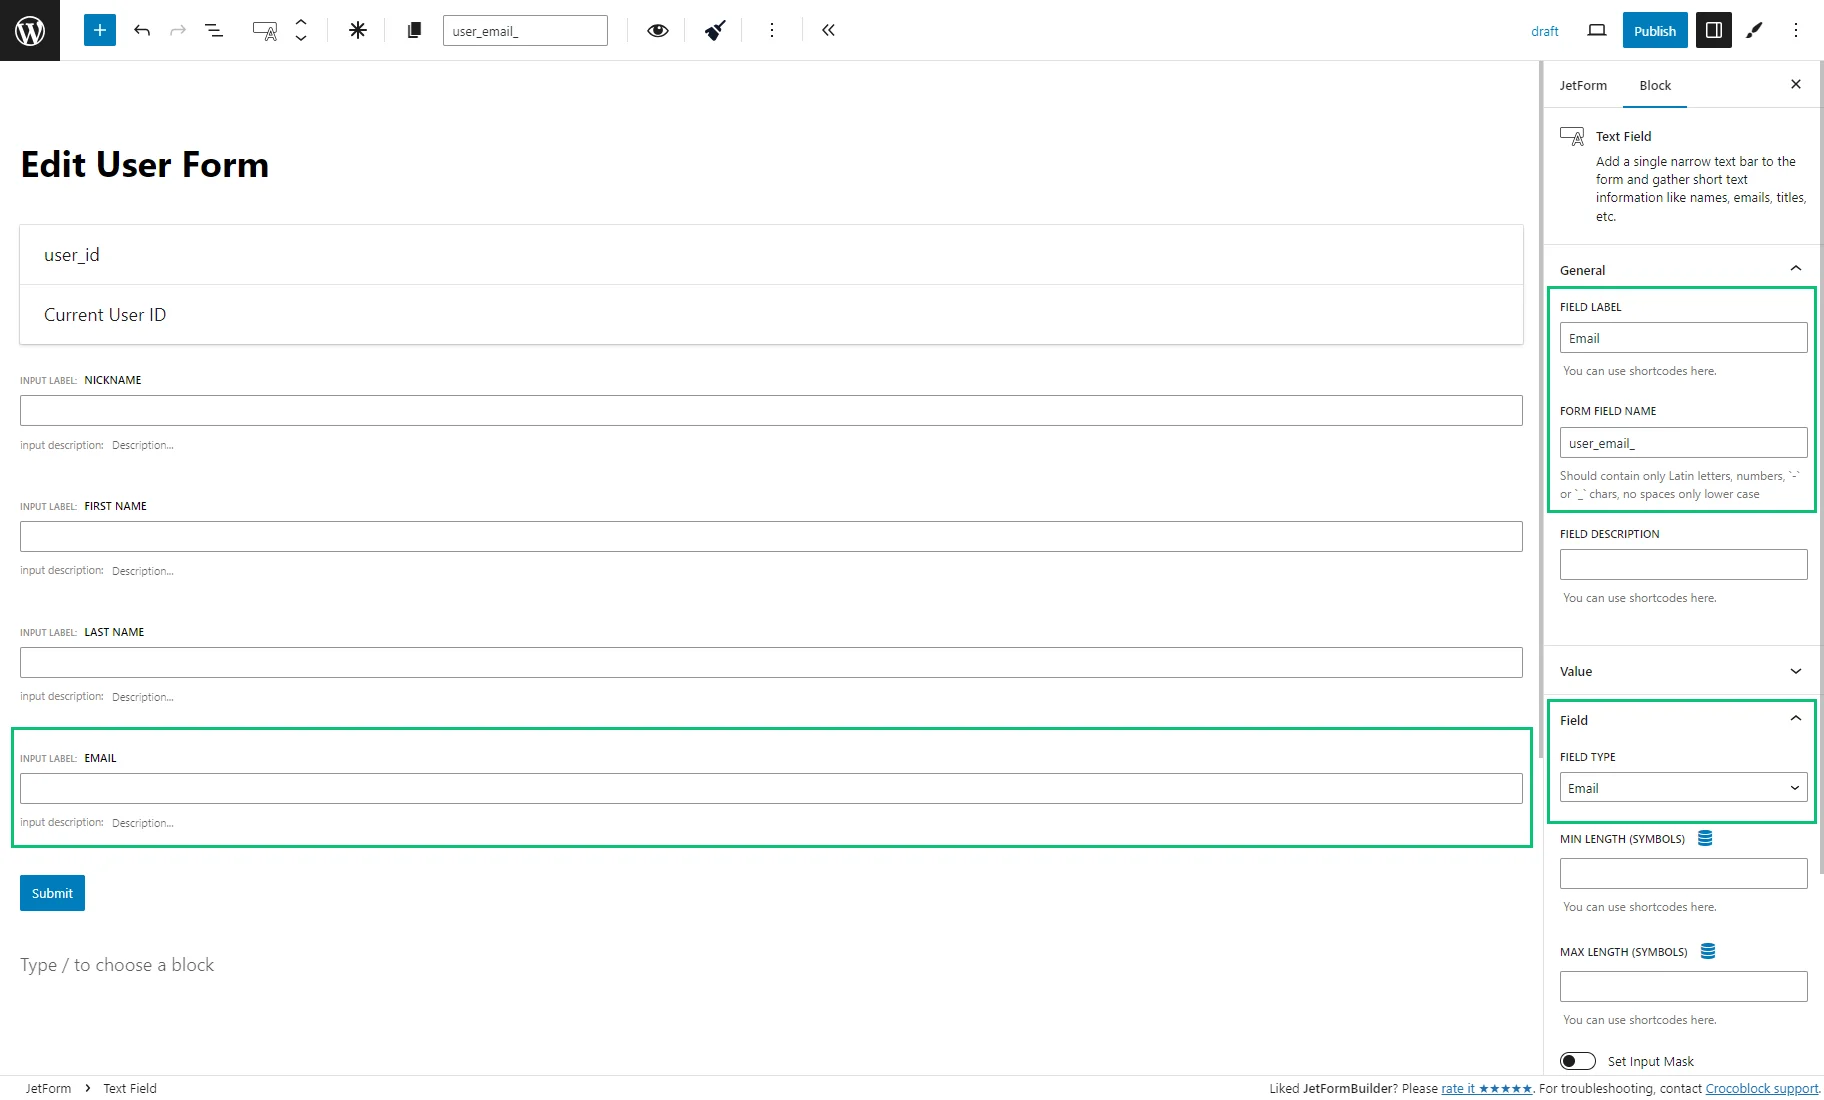
The settings are identical for the “Email” Text Field block, but the FIELD TYPE should be set to “Email.” If you create a field for the user’s phone number, this option should be “Tel.”
For the user avatar, we placed the Media Field block. In its settings, we set the FIELD LABEL and FORM FIELD NAME fields.
Also, we enabled the Insert attachment toggle and set the FIELD VALUE according to the Media meta field settings in the Meta Box. For example, we selected the “Media ID” Value format option for the meta field, so we set the “Attachment ID” FIELD VALUE for the Media Field block. Without these settings, users cannot add files via the form.
When you finish setting the form field blocks, ensure that the Action Button is the last one.
Preset Settings
Head to the JetForm setting tab and unfold the Preset Settings tab. Enable the toggle, pick the “User” SOURCE, and choose the “Current User” option from the GET USER ID FROM drop-down menu.
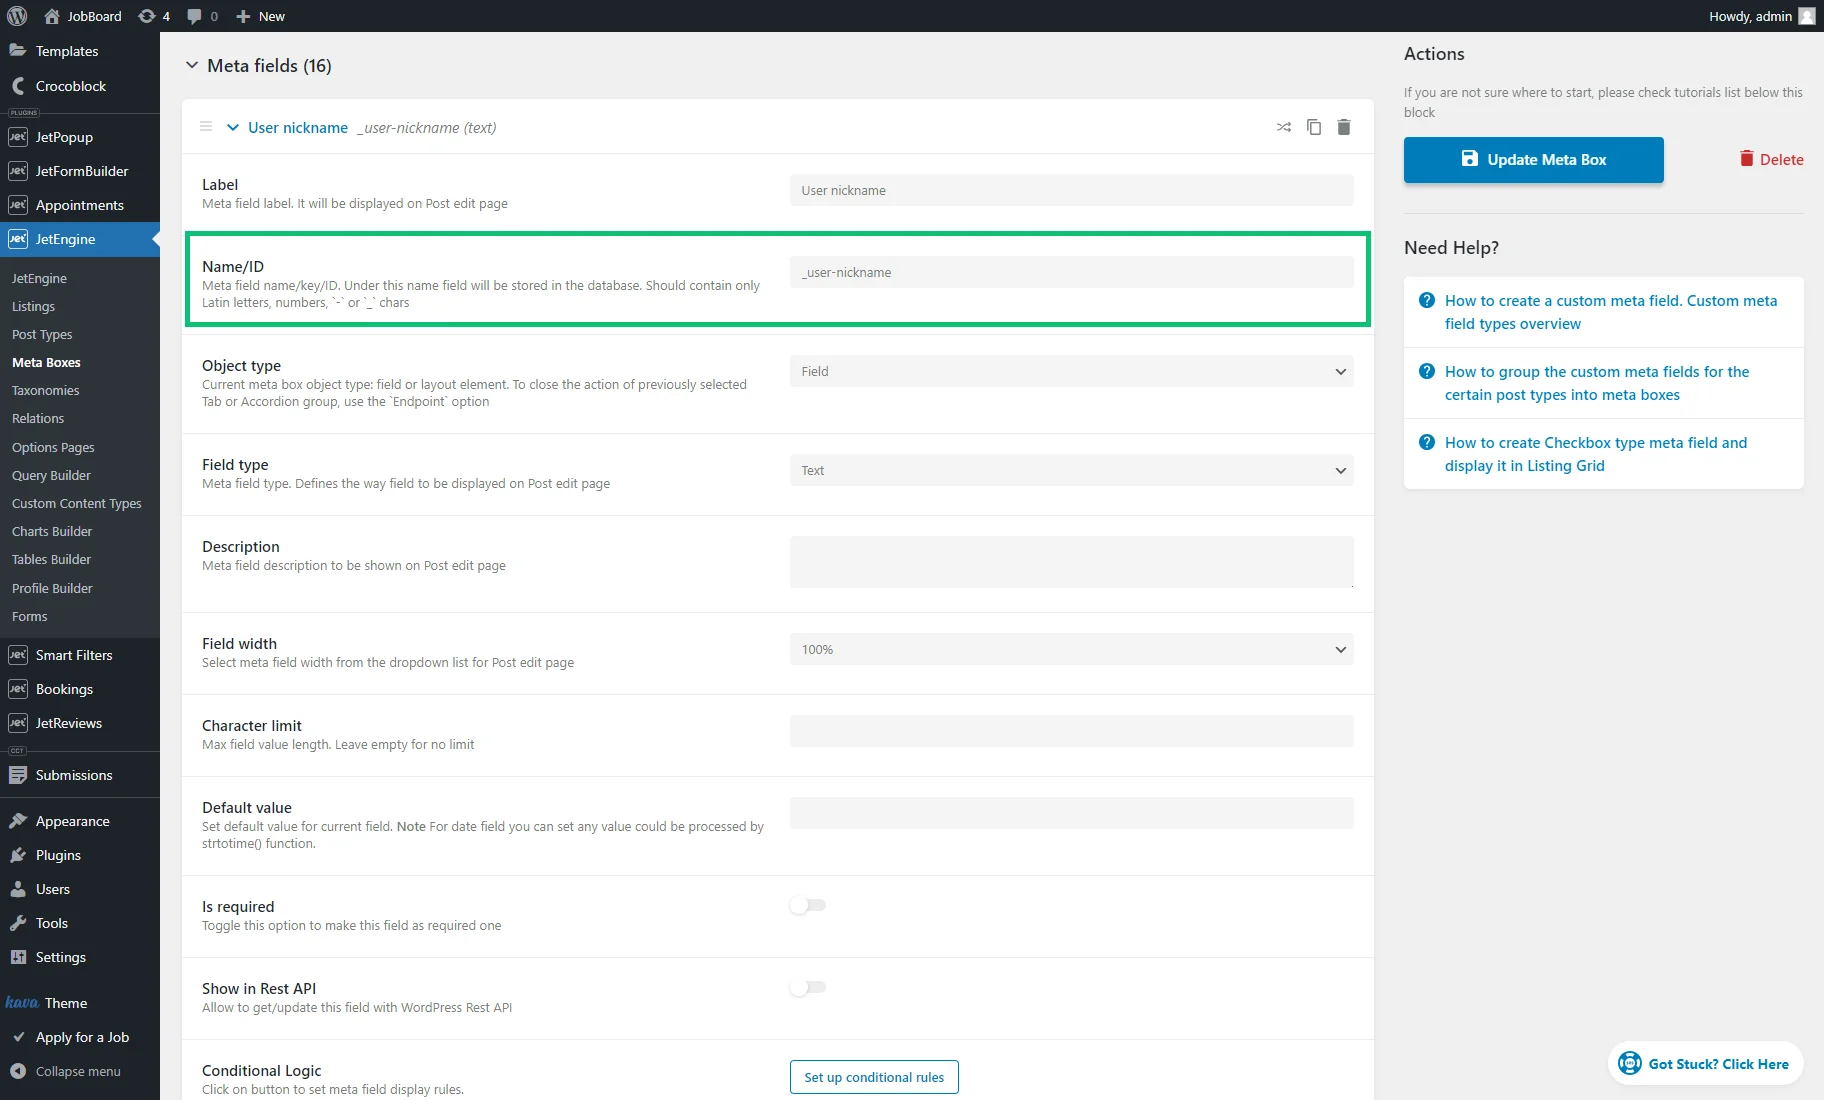
Select the “User ID” option for the Hidden Field with the “Current User ID” option. For other fields, select the “User Meta” option responsible for pulling the data from the custom meta field.
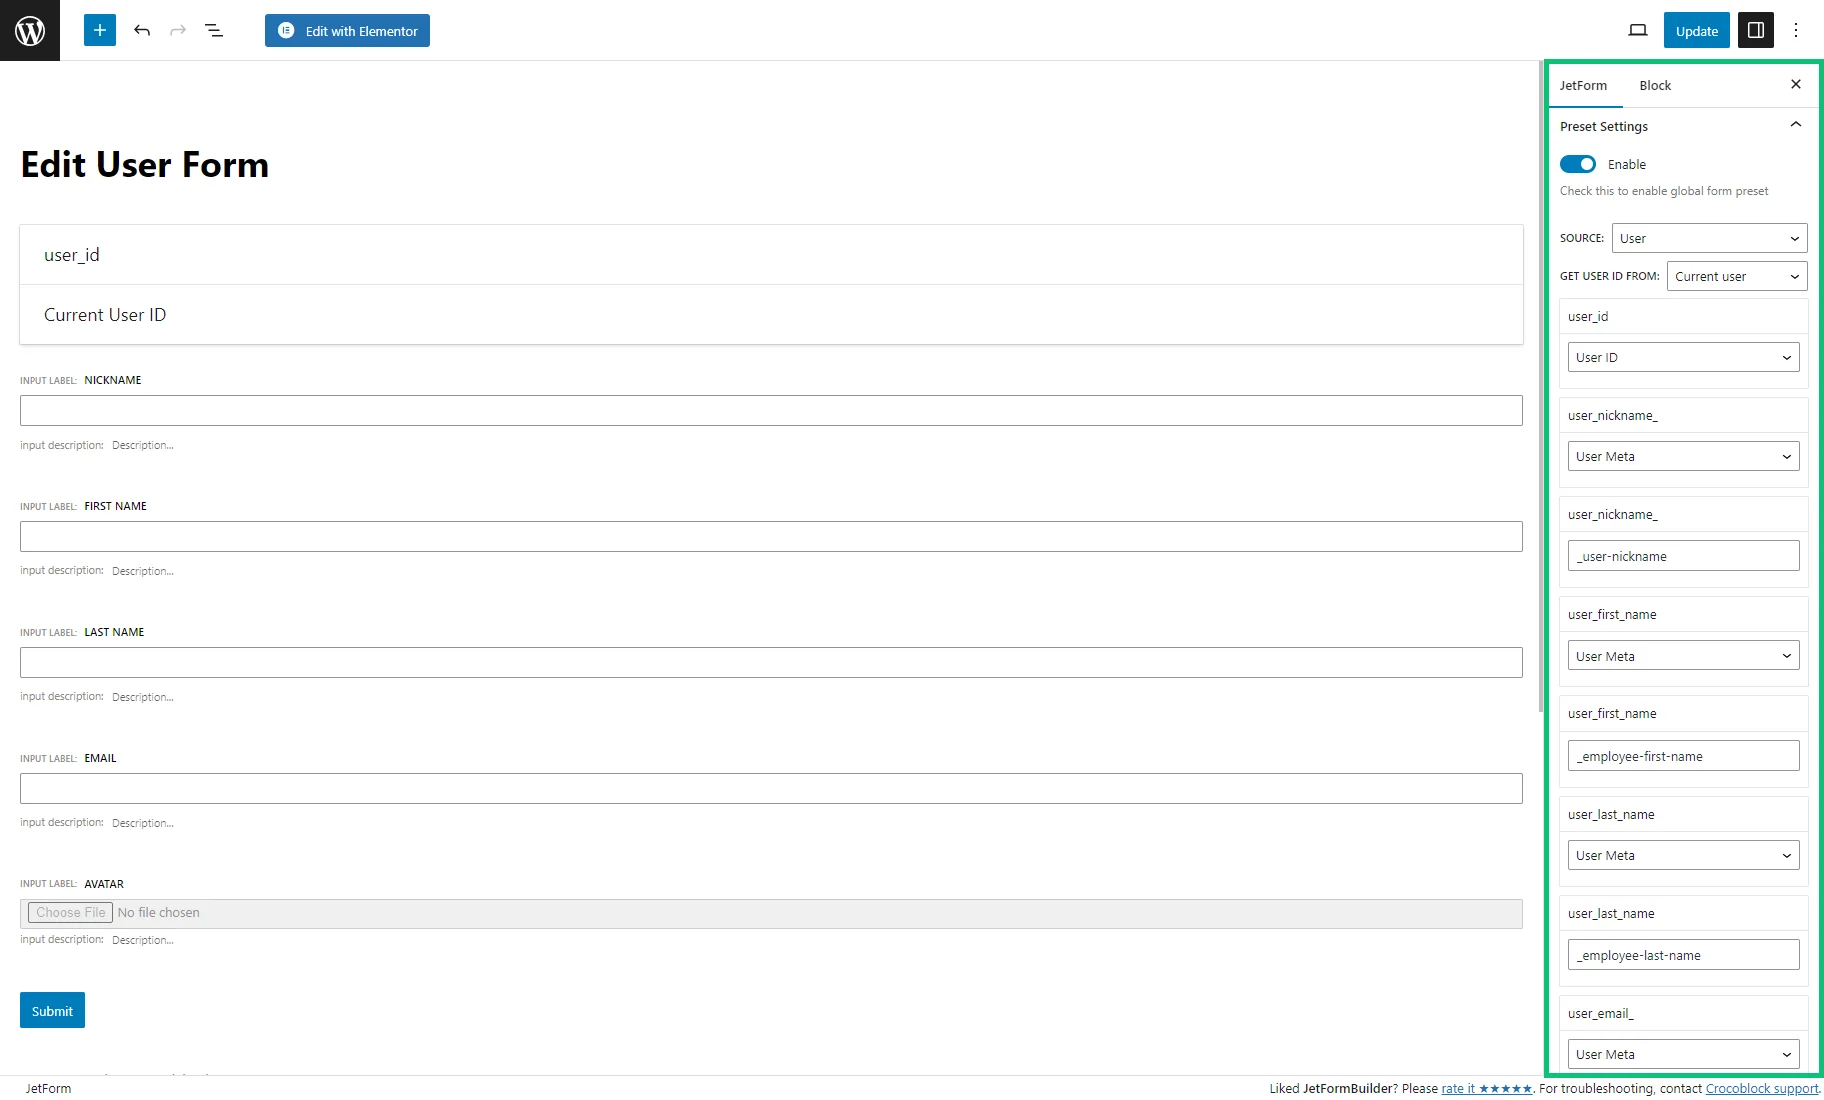
In the appeared fields, enter the Names/IDs of the meta fields from the Meta Box that correspond to the form fields.
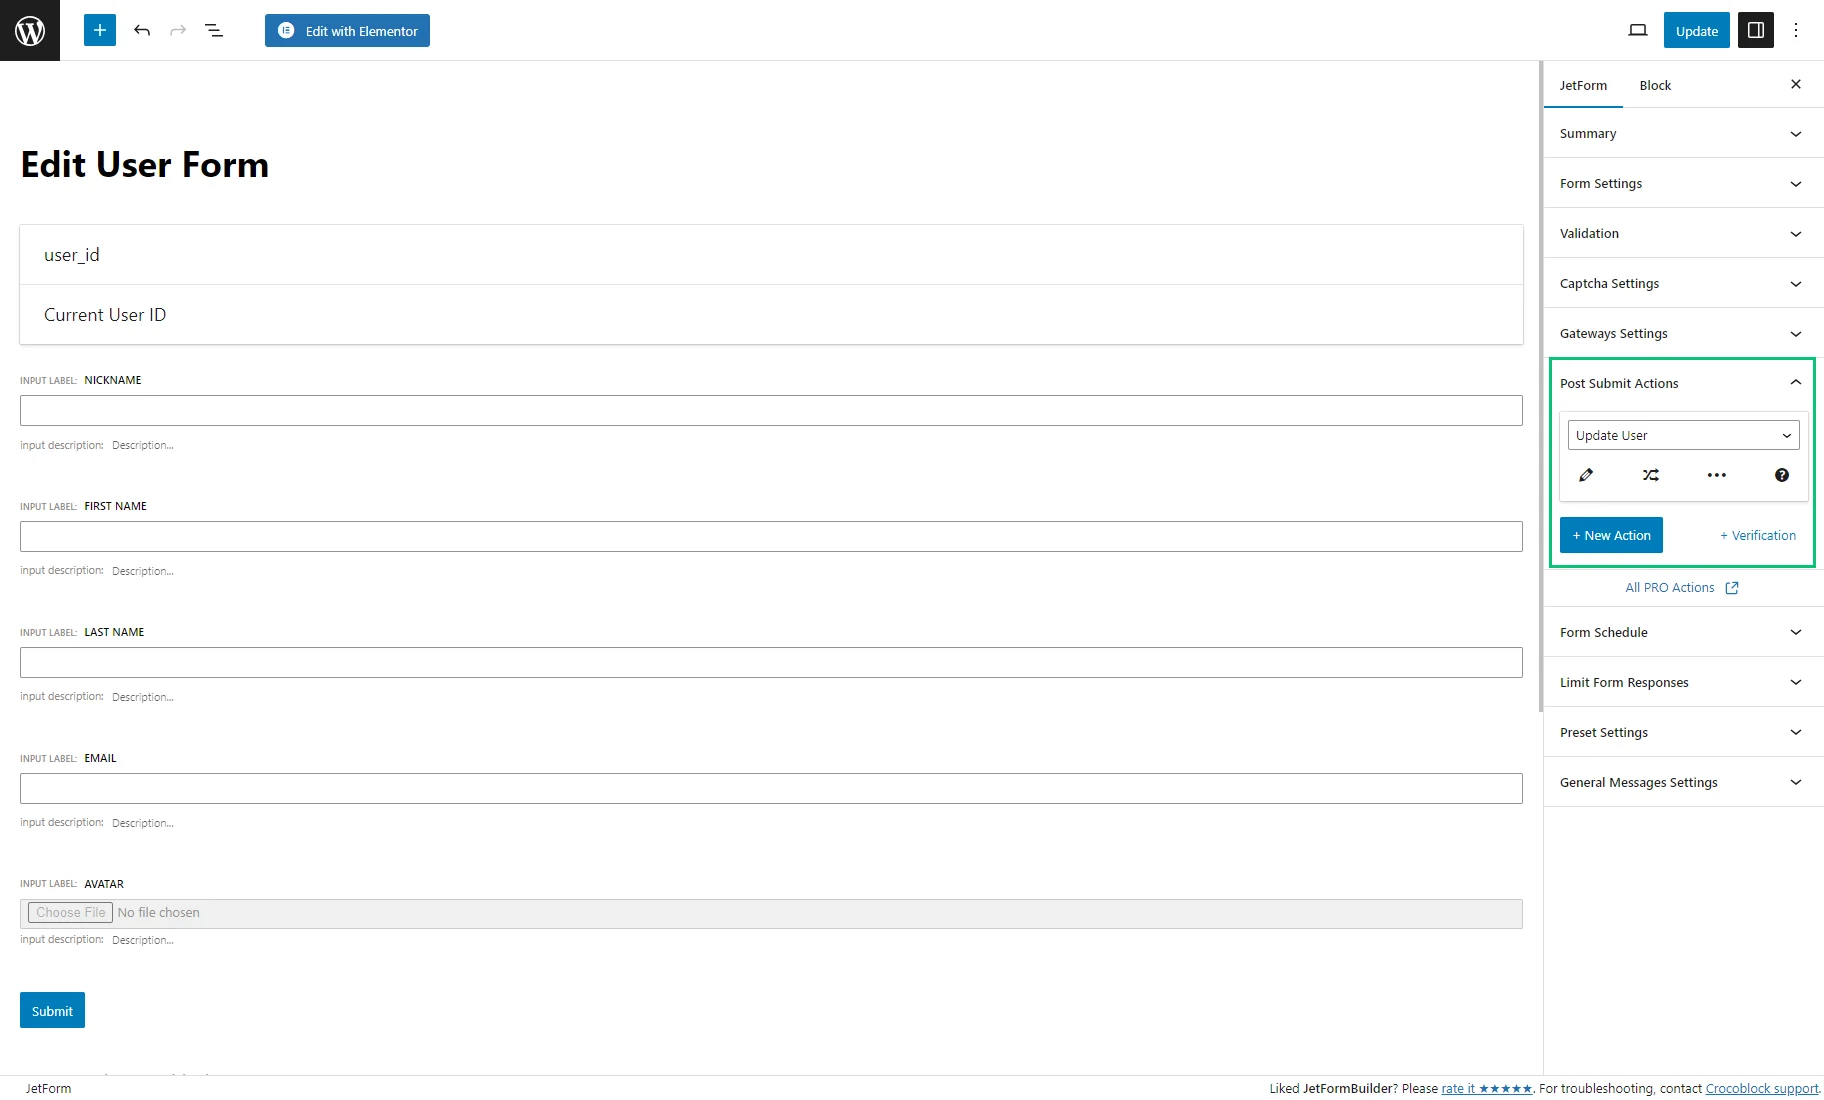
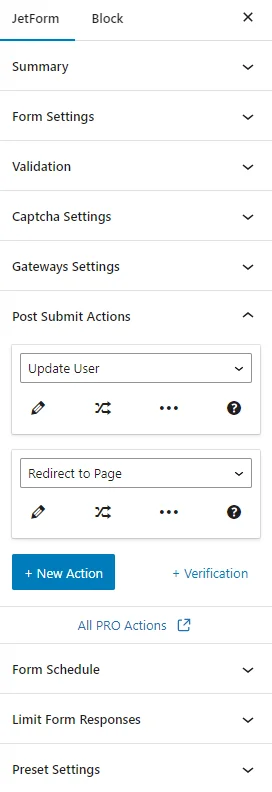
Post Submit Actions settings
Unfold the Post Submit Actions section in the JetForm setting tab, select the “Update User” option, and hit the “pencil” icon to edit the action.
In the FIELDS MAP, choose the “User ID (will update this user)” option for the Hidden Field. For other fields, select the “User Meta” option. In the appeared fields, enter the Names/IDs of the meta fields from the Meta Box that correspond to the form fields.
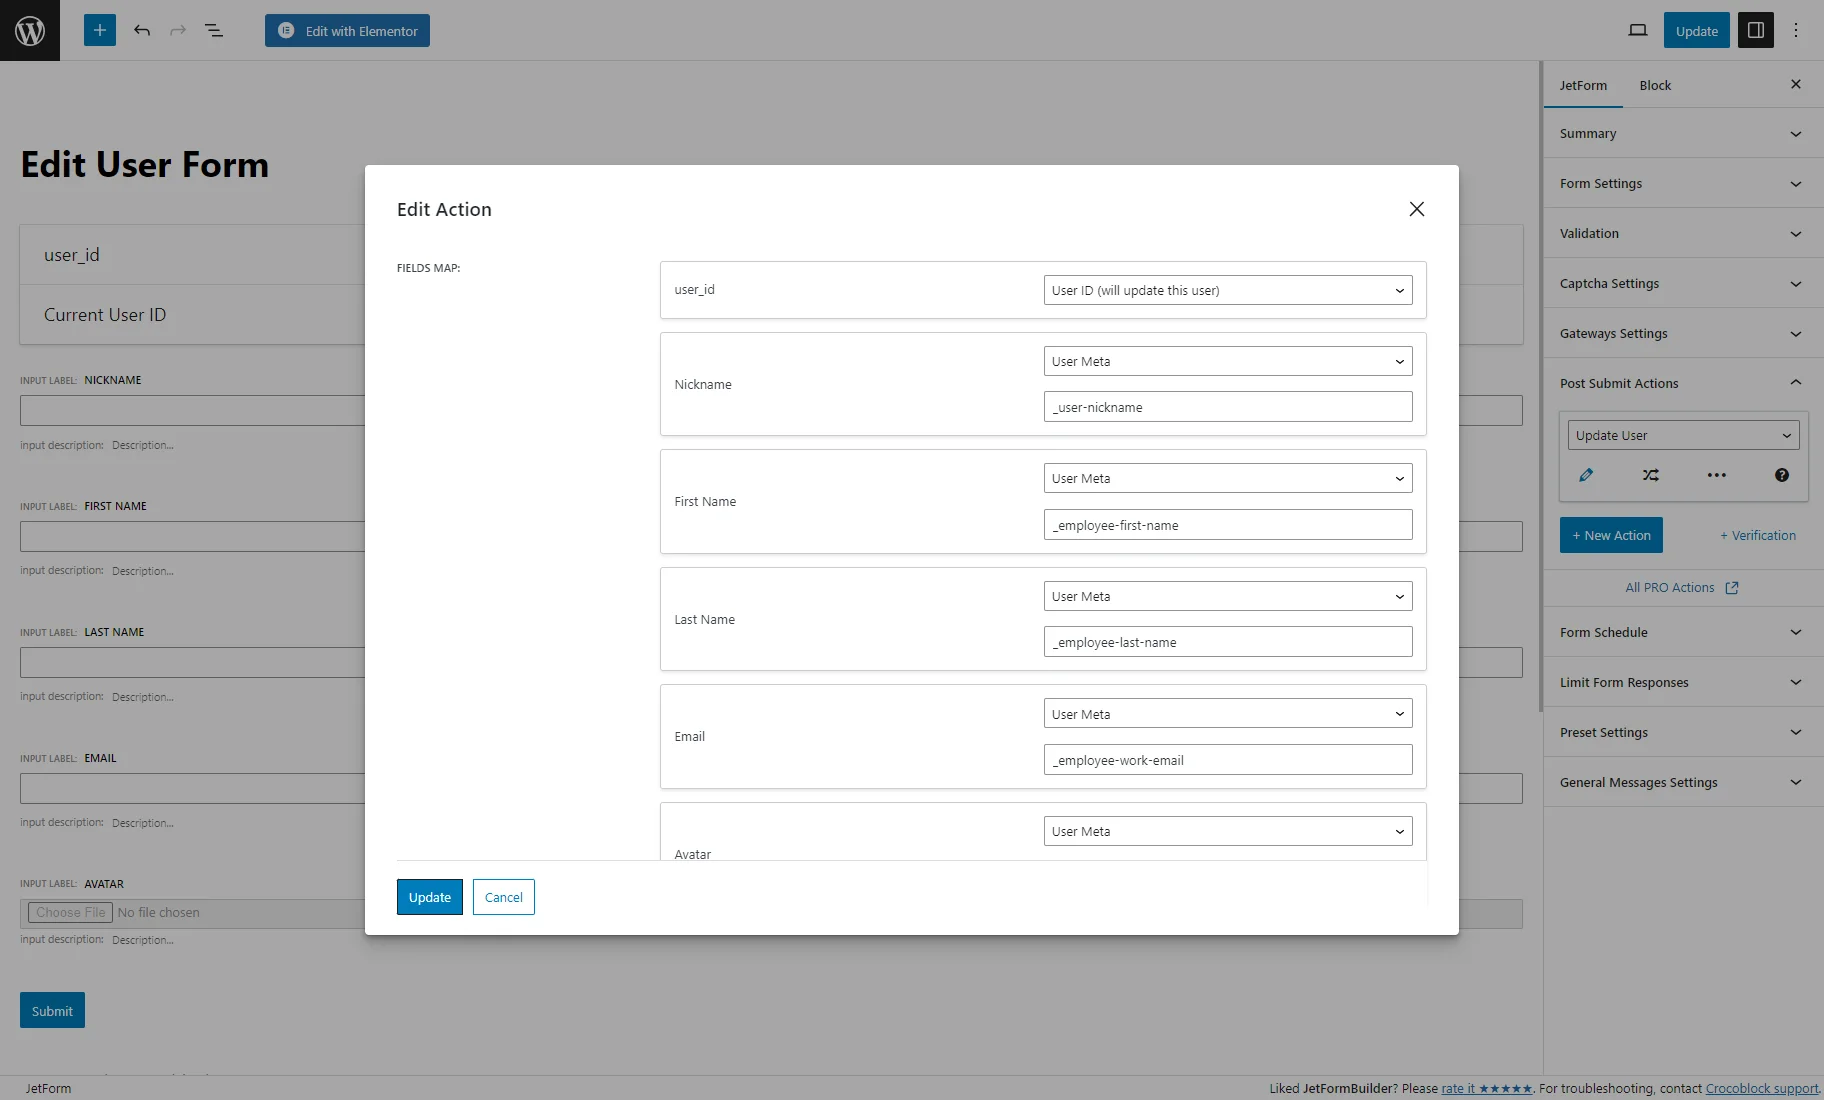
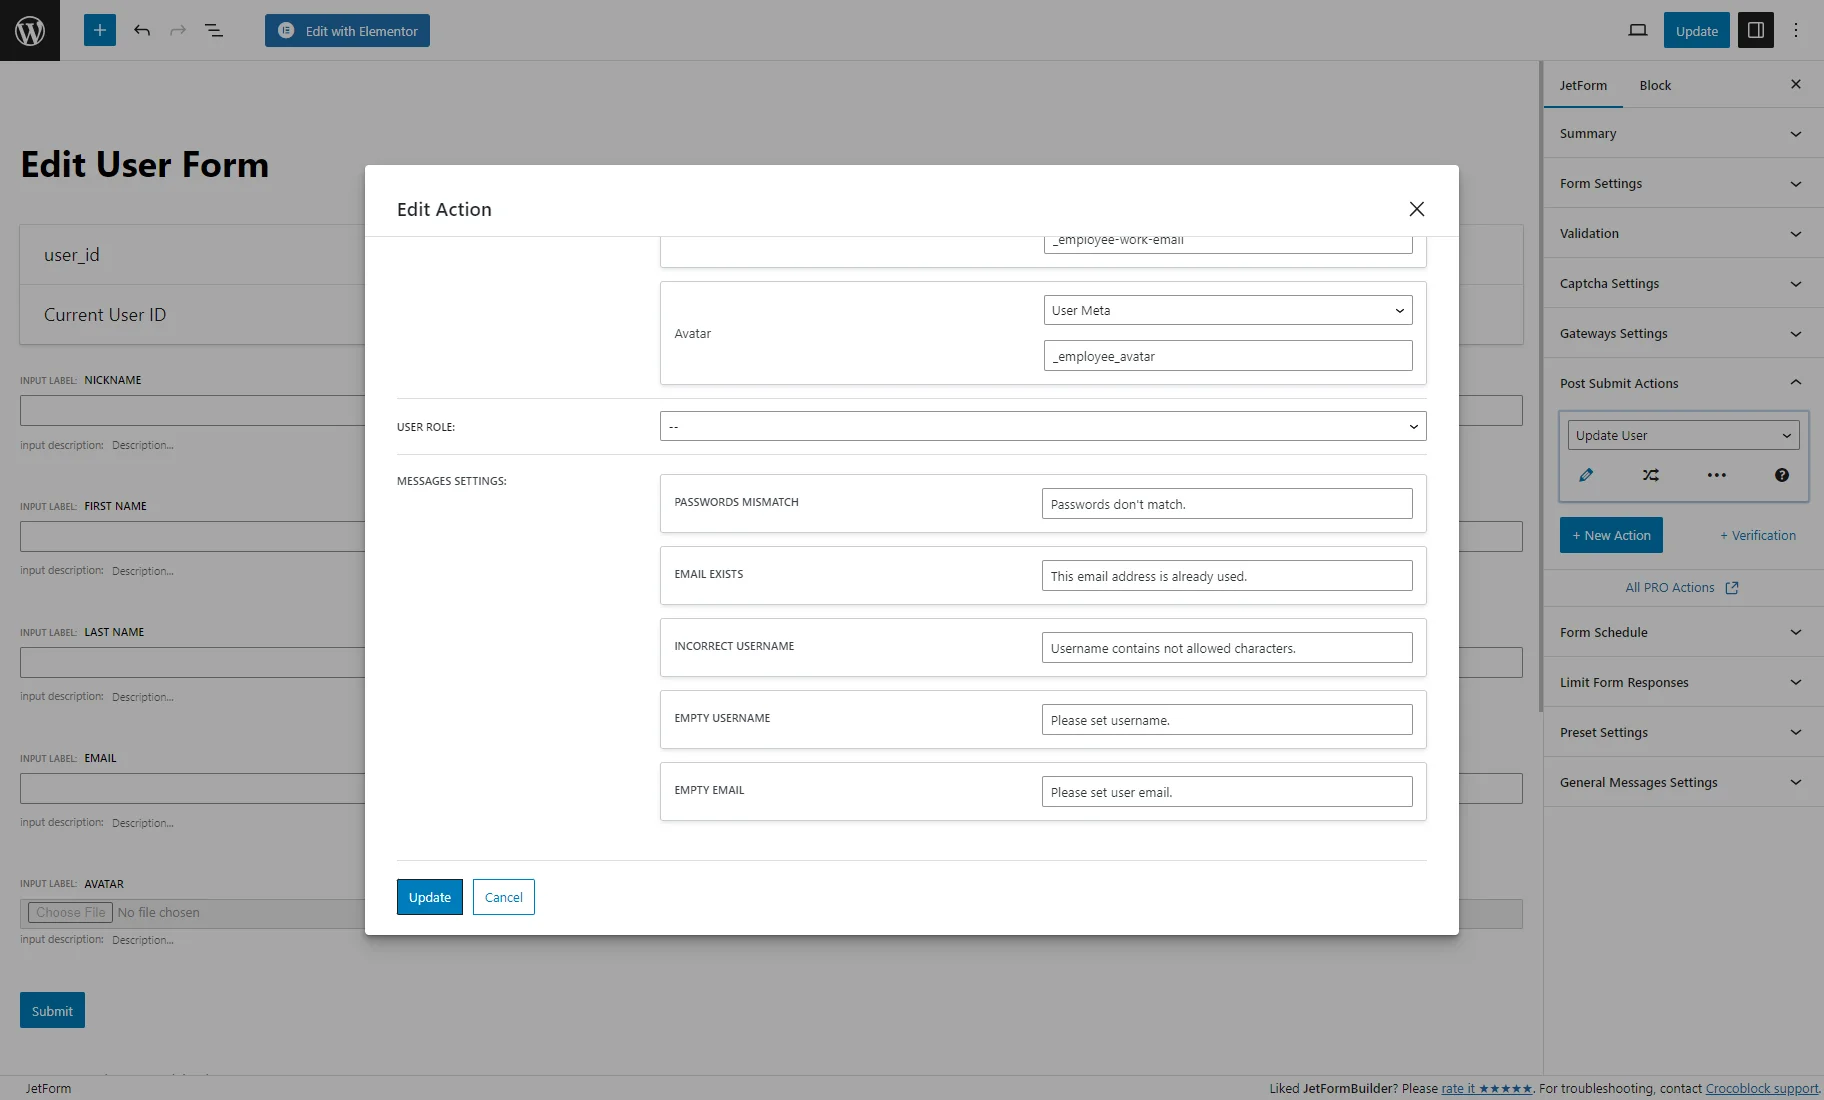
The USER ROLE field should be kept without the selected option; otherwise, user roles will change to the chosen one after submitting the form.
Also, you can set the custom messages in the MESSAGES SETTINGS if you fancy.
After configuring the action settings, hit the “Update” button.
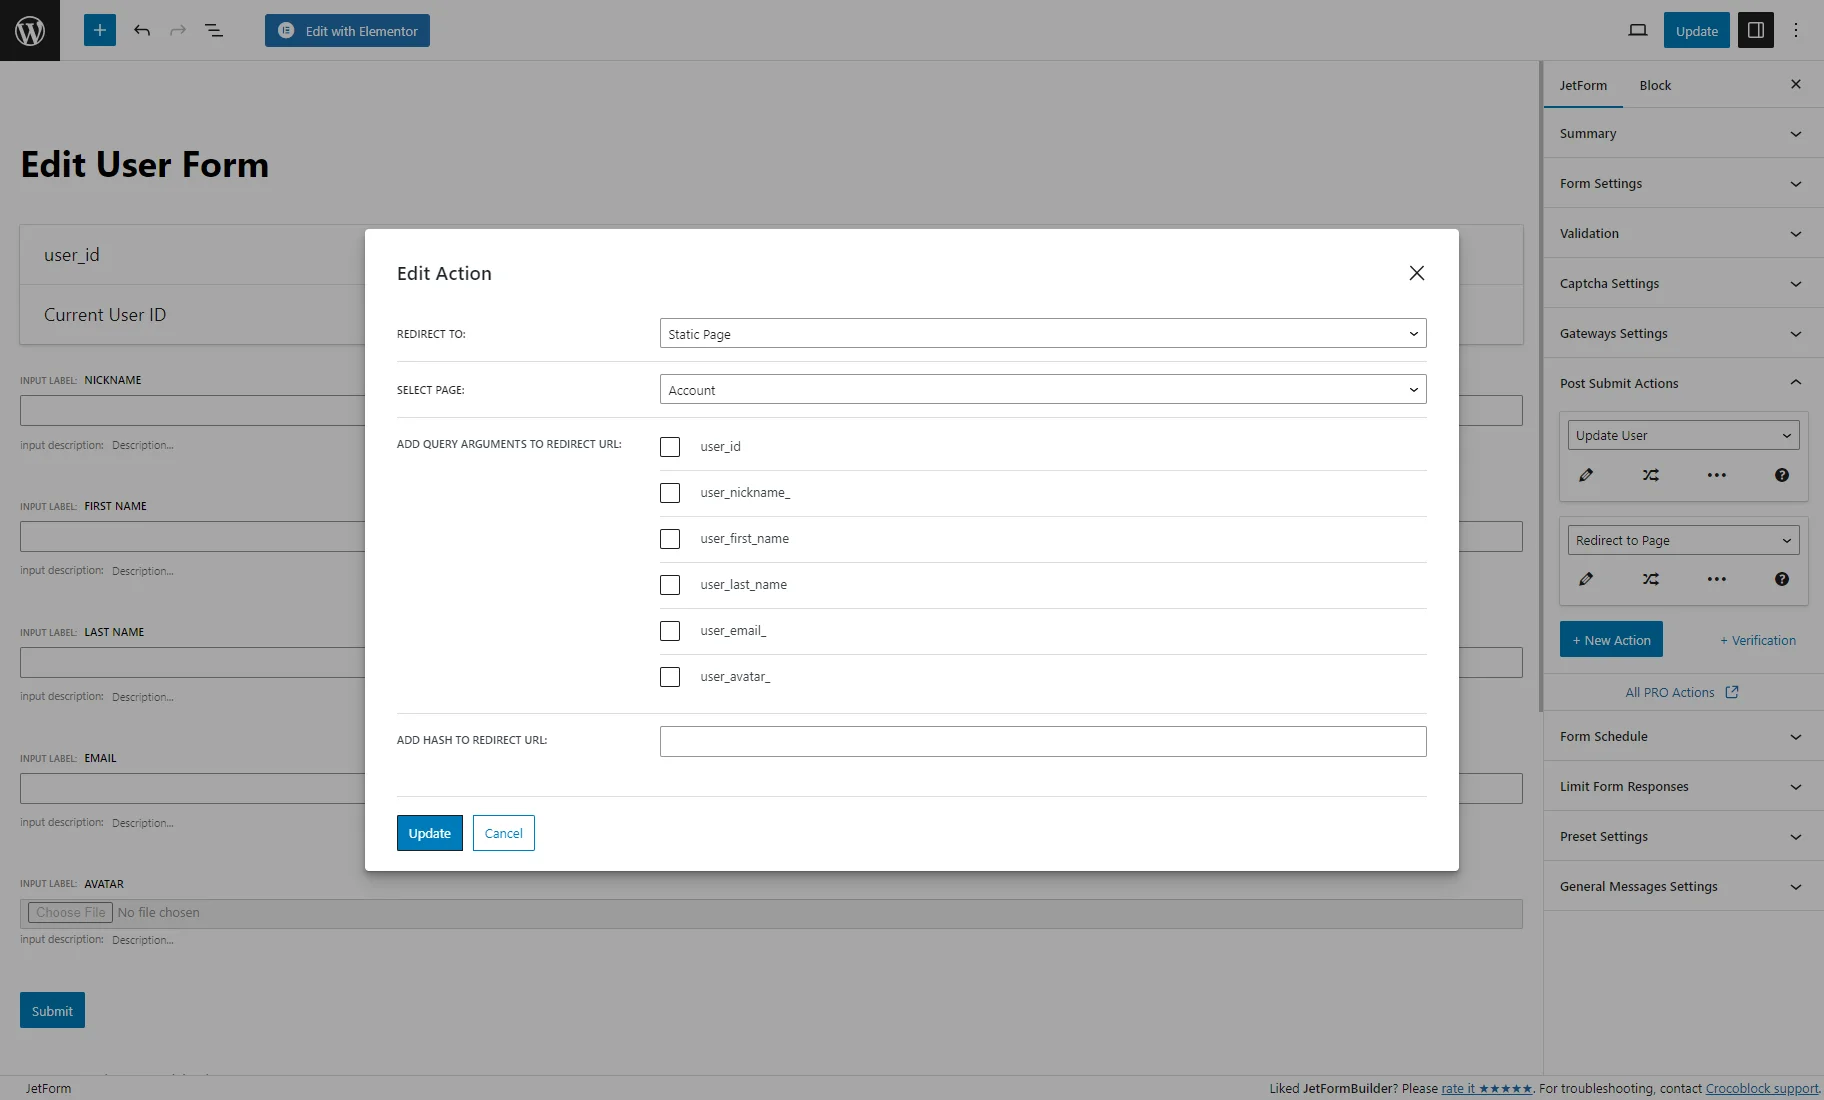
Then, press the “+ New Action” button, select the “Redirect to Page” option, and tap the “pencil” icon.
Elect the “Static Page” REDIRECT TO and “Account” SELECT PAGE options. Set other action settings if required and hit the “Update” button.
After finishing, hit the “Publish/Update” button to save the form.
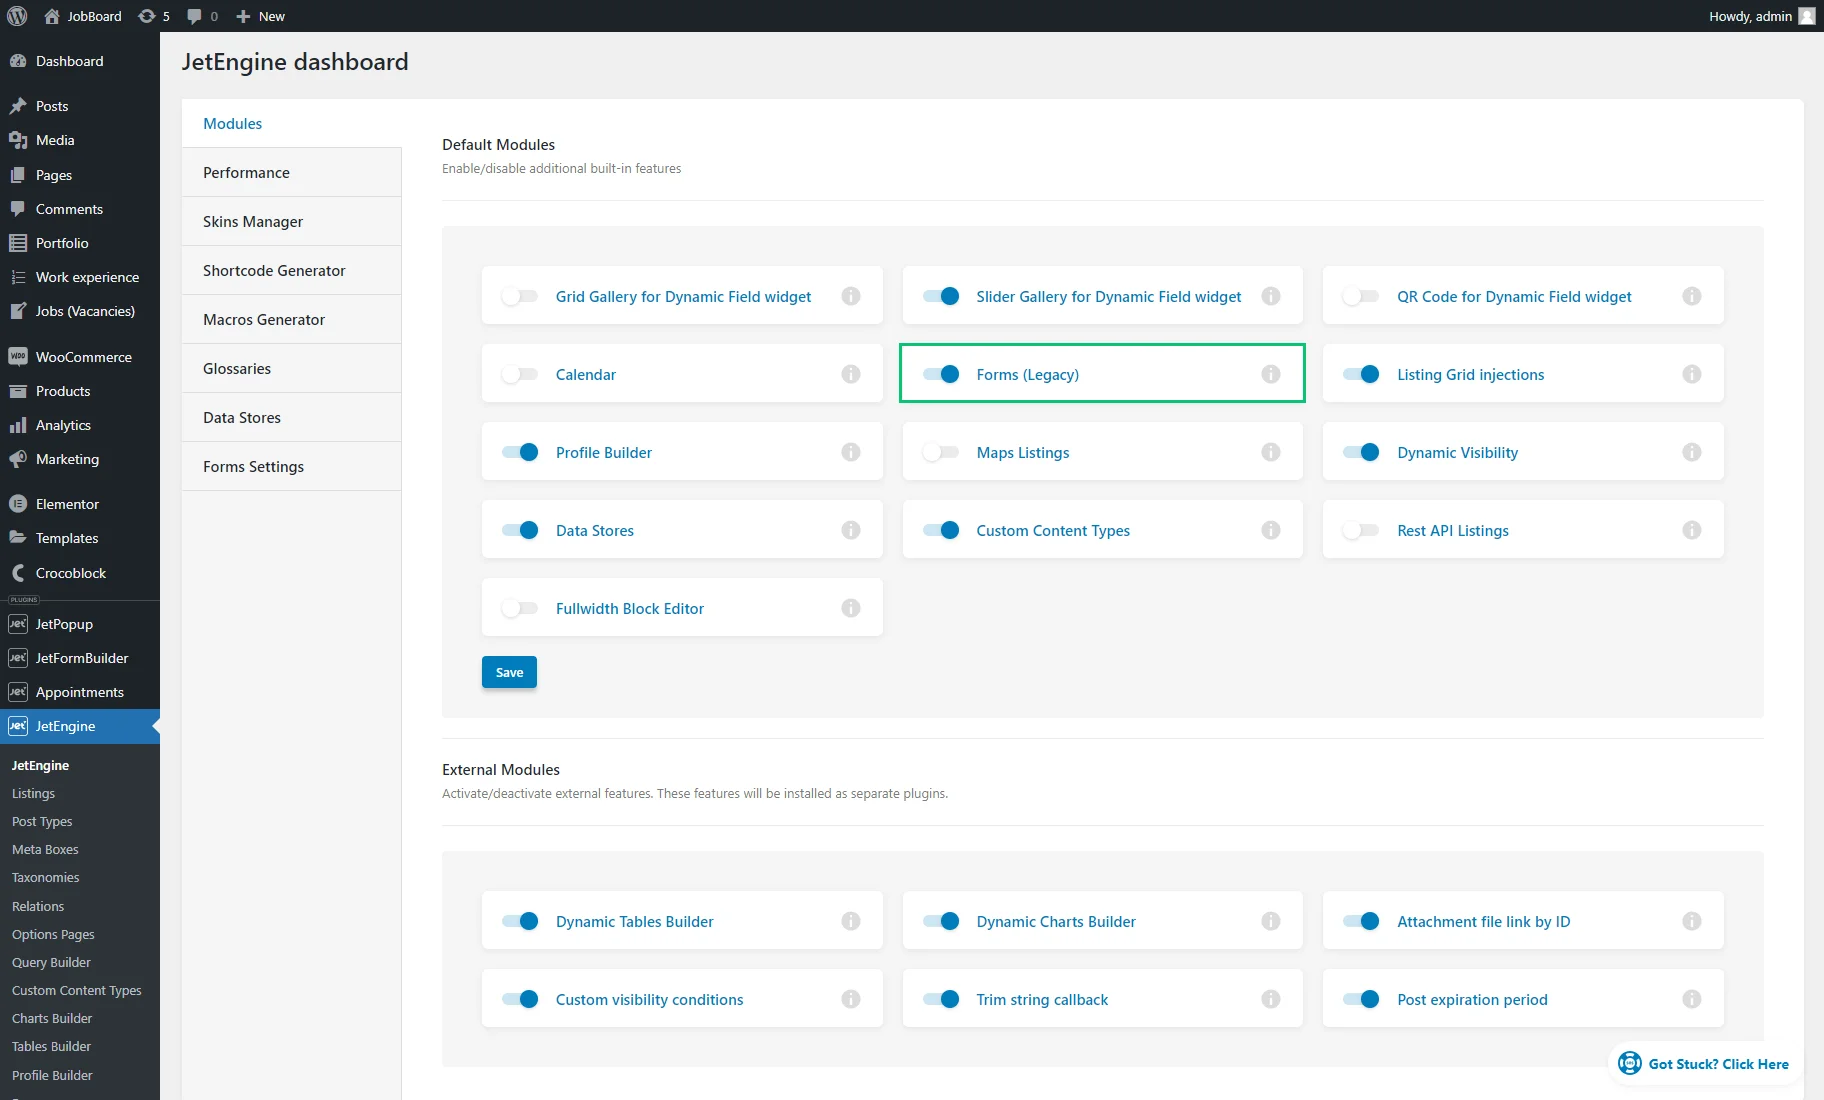
JetEngine form
Before you start, be sure to enable the Forms (legacy) tab and hit the “Save” button in the JetEngine > JetEngine > Default Modules window.
Afterward, you need to proceed to the form creation. Go to the JetEngine > Forms tab and click the “Add new” button.
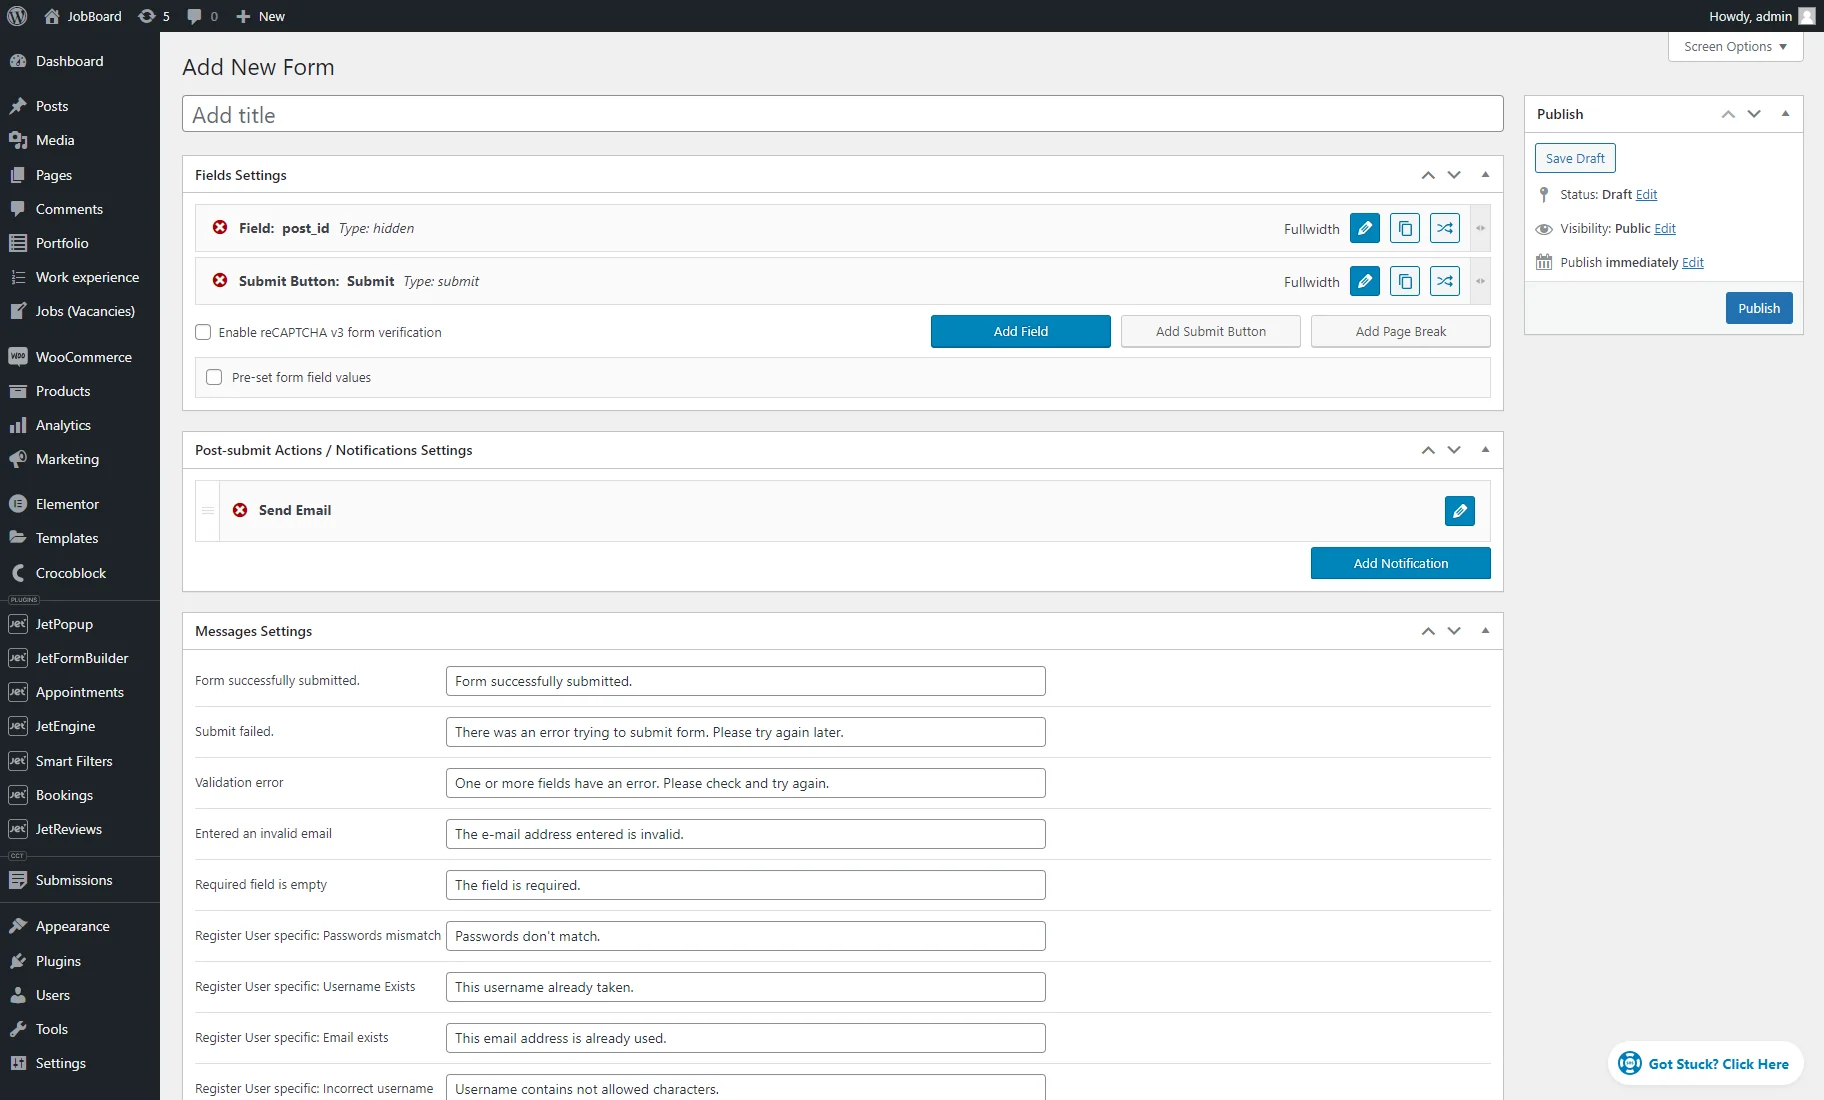
Form fields
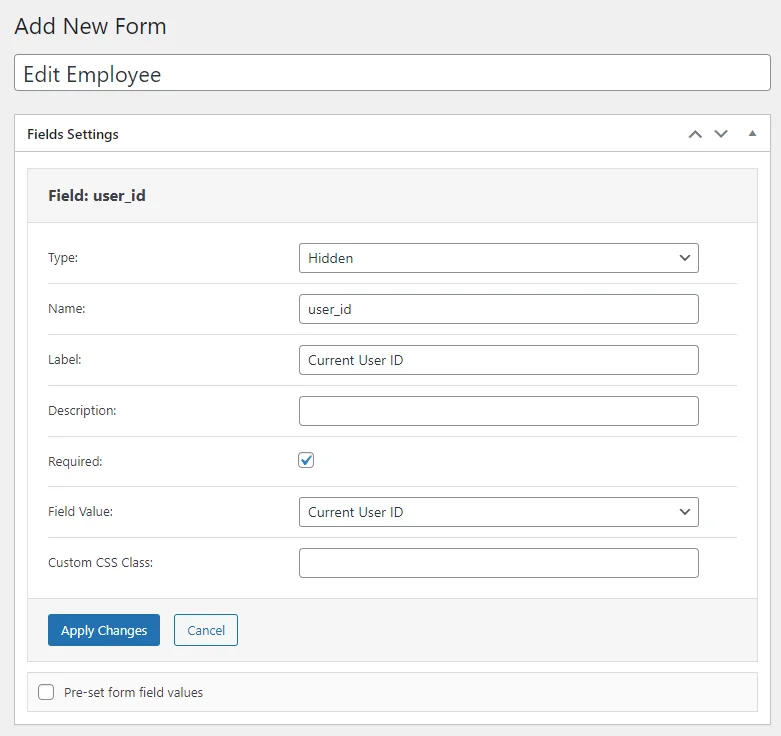
Enter the form title, and hit the “pencil” icon next to the first form field to edit it. Pick the “Current User ID” Field Value option and change the Name and Label if you fancy. Mind that this field will be invisible on the front end. Then, hit the “Apply Changes” button.
Now, you can create as many fields as you need by pushing the “Add Field” button. For this tutorial, we’ve got a few essential fields to show the mechanism of the front-end submission.
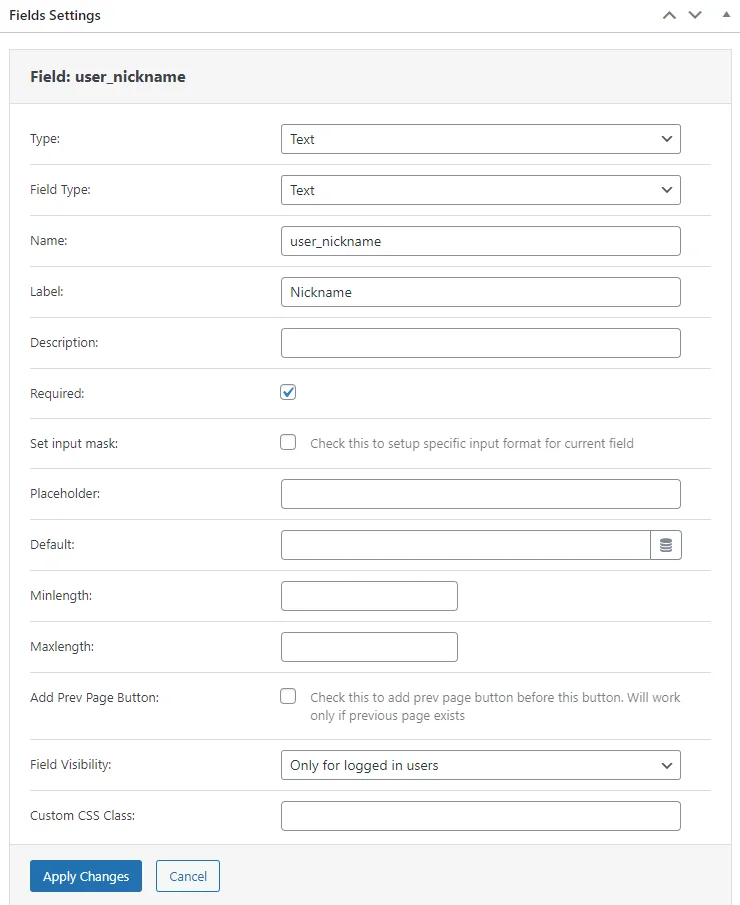
Firstly, we added several fields with the “Text” type for the user’s nickname, first and last name, and email.
We set the “Text” Type and “Text” Field Type fields and entered the suitable Name and Label. Also, we set the “Only for logged in users” Field Visibility and pushed the “Apply Changes” button.
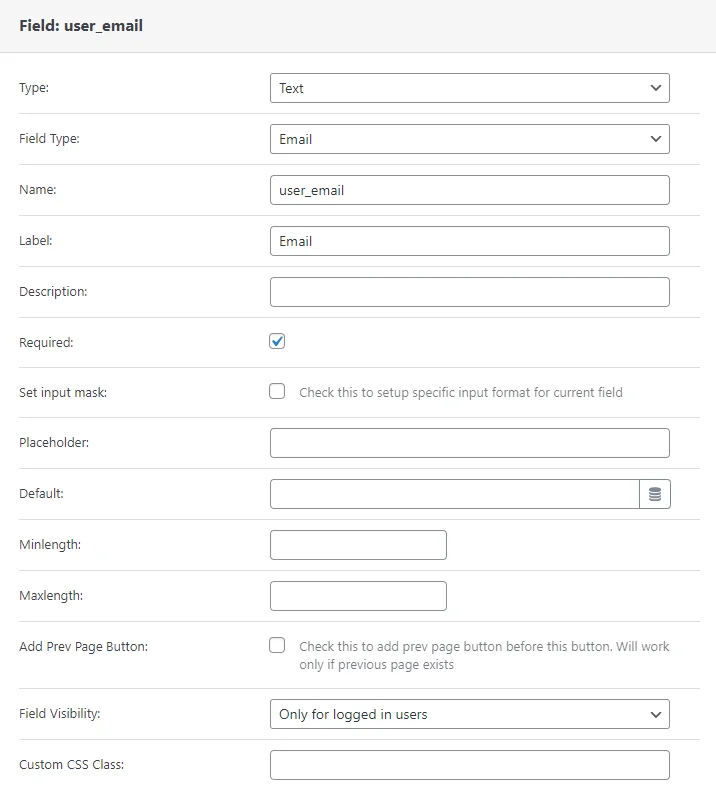
The settings are identical for the “Email” text field, but the Field Type should be “Email.” If you create a field for the user’s phone number, this option should be “Tel.”
For the user avatar, we picked the “Media” Type and set the Name, Label, and User access.
We ticked the Insert attachment checkbox and set the Field value according to the Media meta field settings in the Meta Box. For example, we selected the “Media ID” Value format for the meta field, so we set the “Attachment ID” Field value for the form field. Without these settings, users cannot add files via the form.
Then, we set the Field Visibility and hit the “Apply Changes” button.
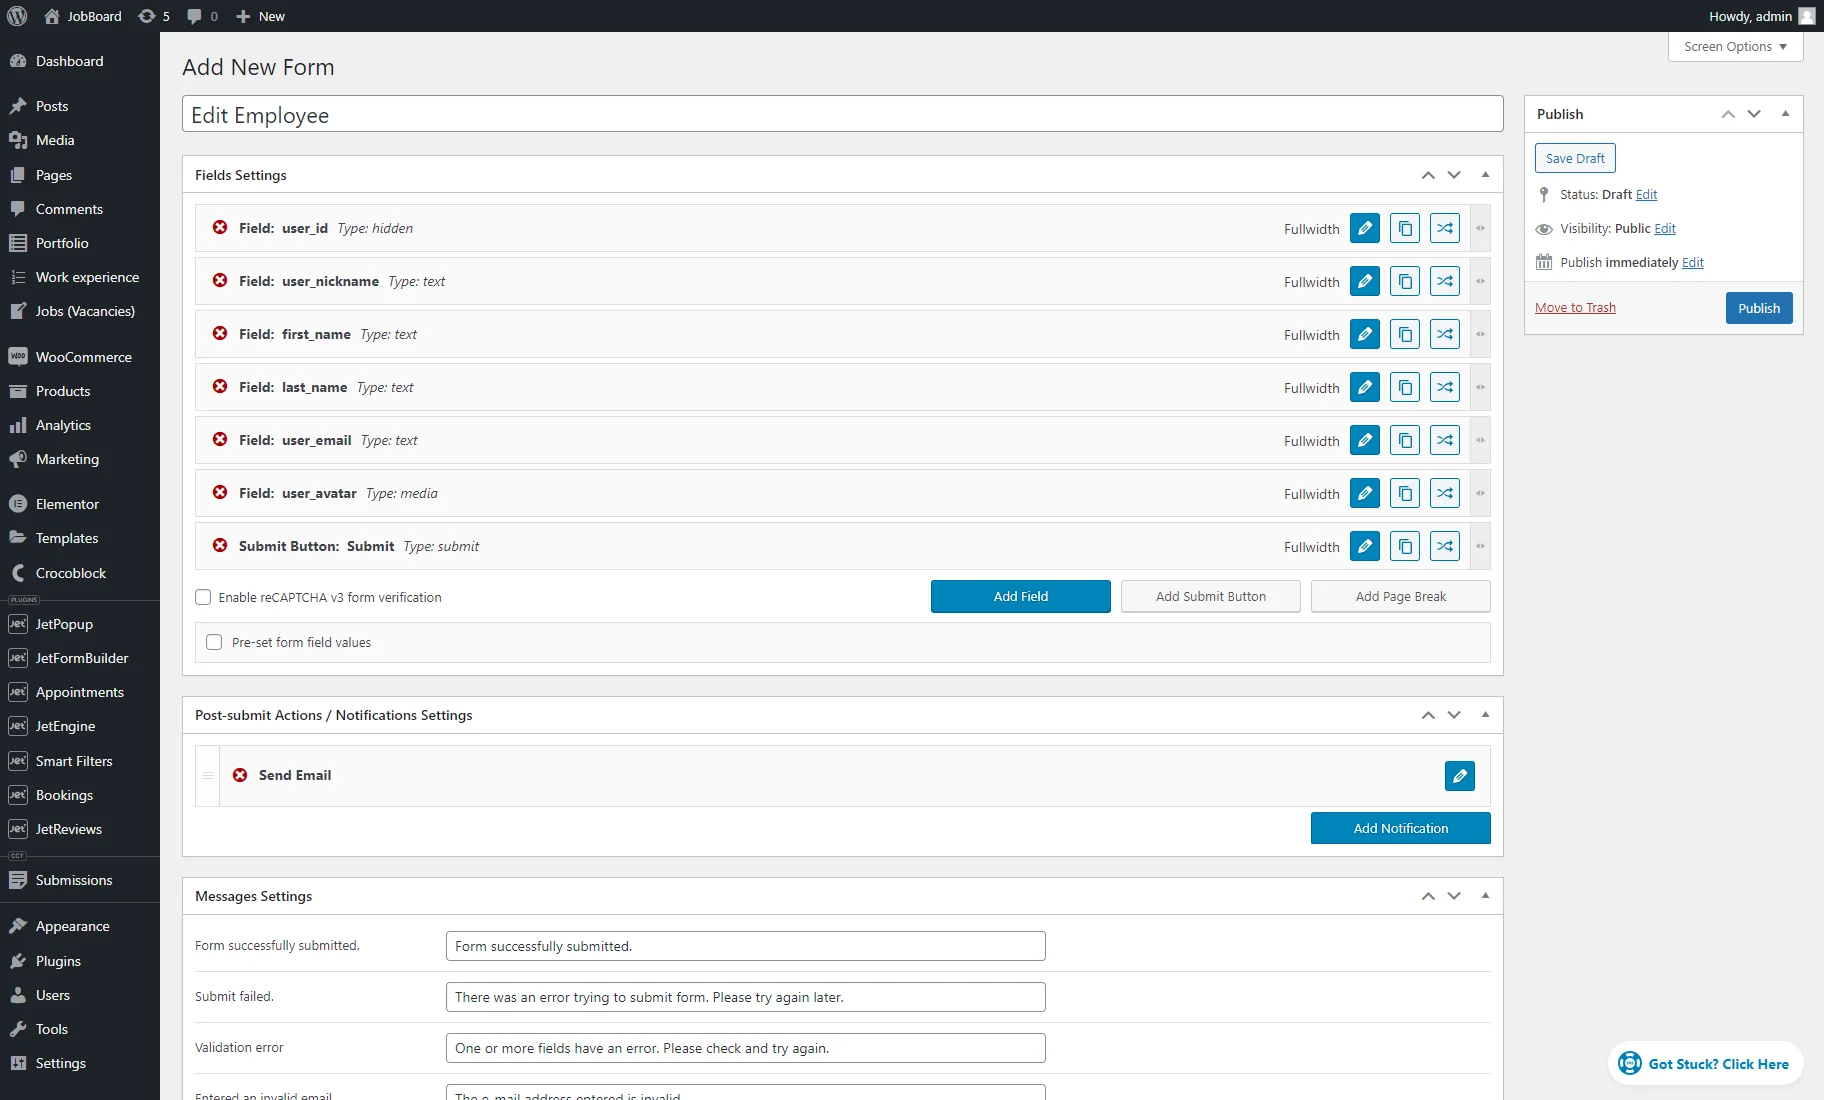
When you finish creating the form fields, you can arrange their order by dragging them. Ensure that the “Submit Button” is the last one.
Pre-set form field values
Under the form fields, tick the Pre-set form field values checkbox to unfold a new block under the form fields.
Set the “User” option for the Source field and choose the “Current user” option from the Get user ID from drop-down list.
In the Fields Map section, pick the “User ID” option for the “Hidden” field. For other fields, select the “User Meta” option responsible for pulling the data from the custom meta field.
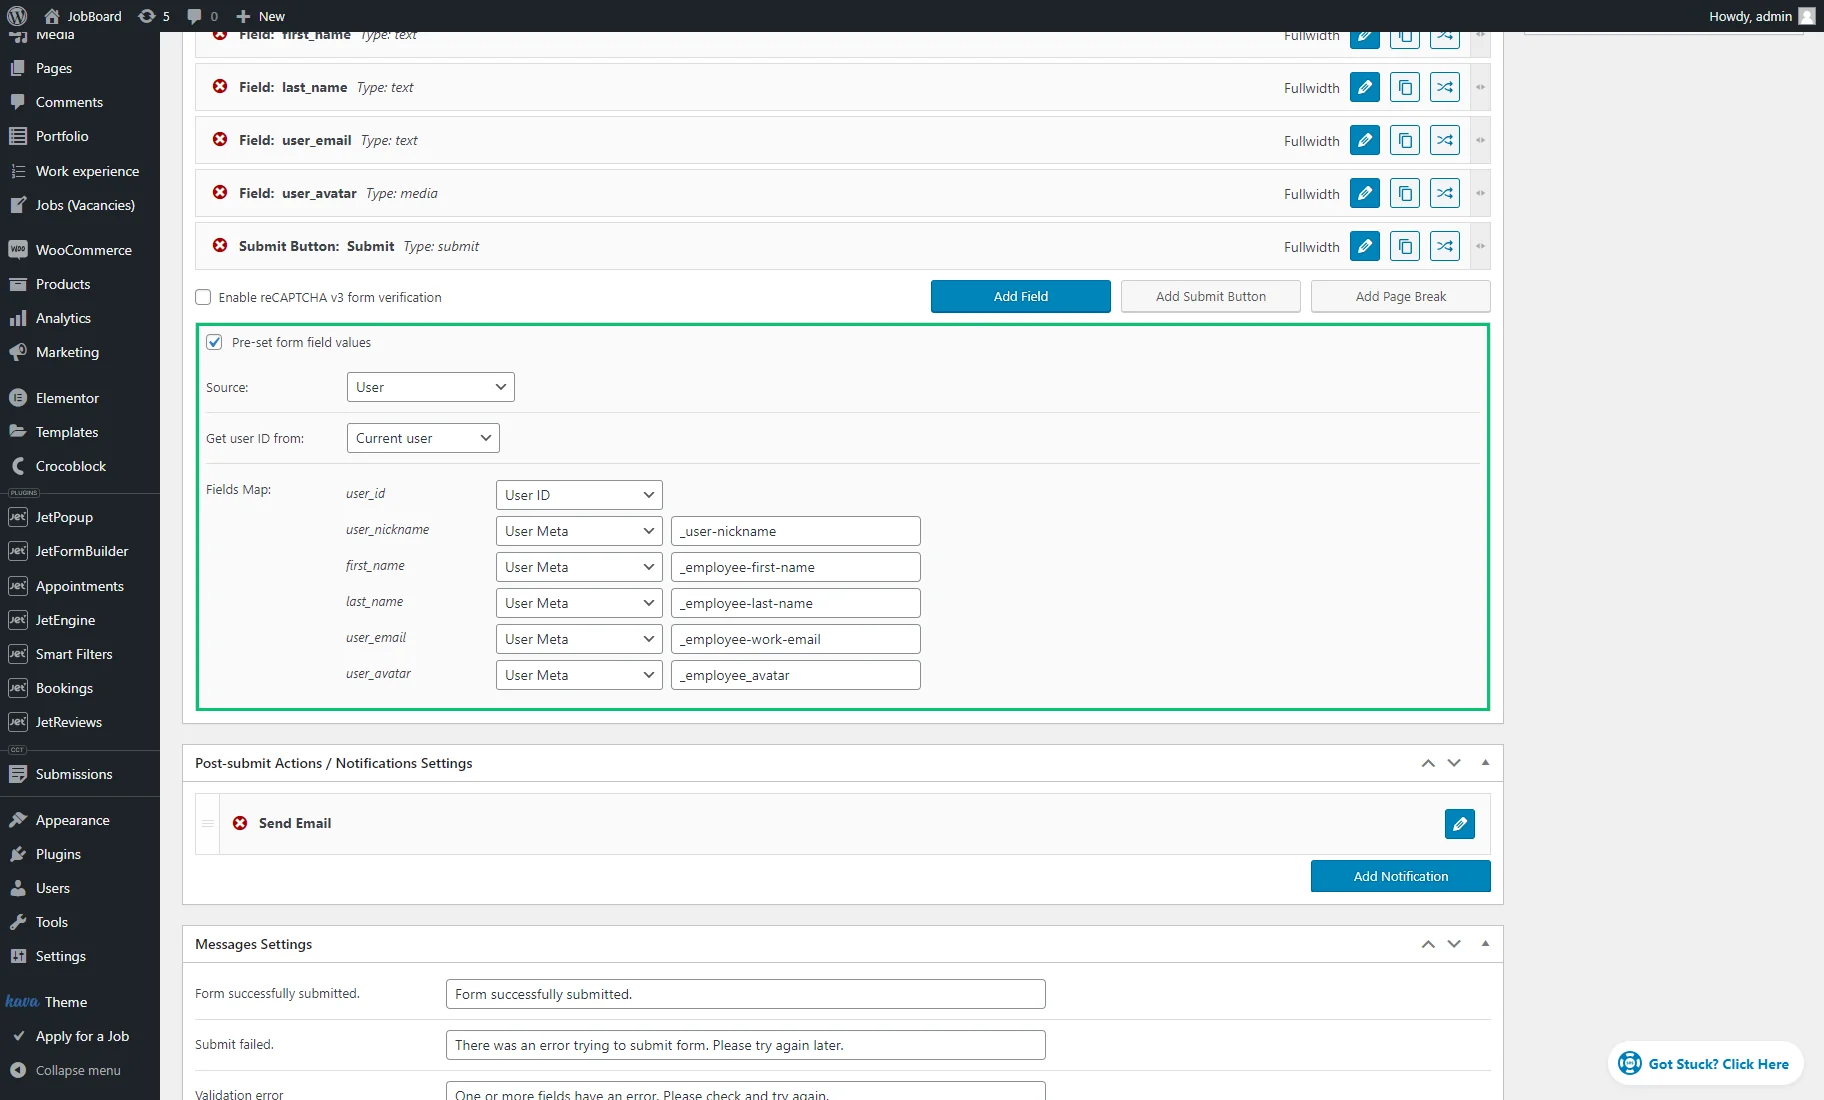
In the appeared fields, enter the Names/IDs of the meta fields from the Meta Box that correspond to the form fields.
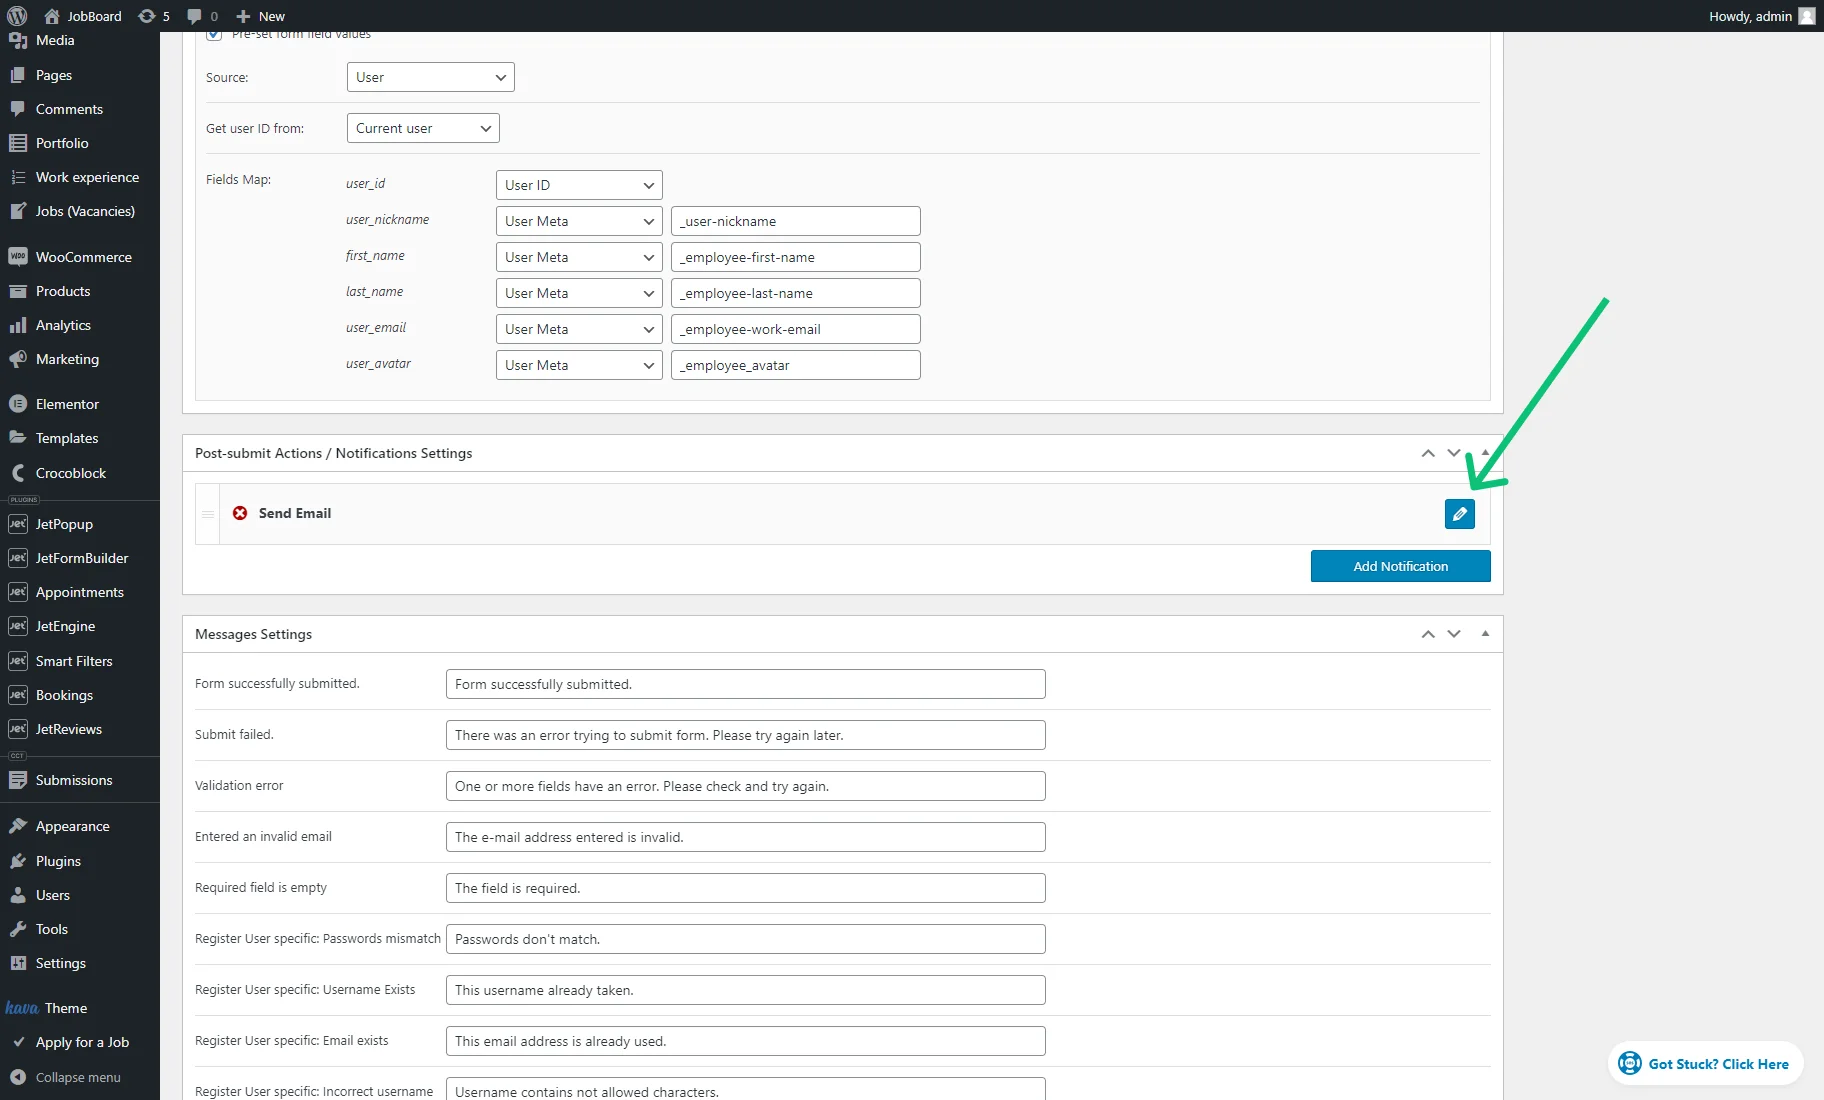
Post-submit Actions
Scroll down to the Post-submit Actions / Notifications Settings block. Here, you’ll see the “Send Email” action. Hit the “pencil” icon to edit it.
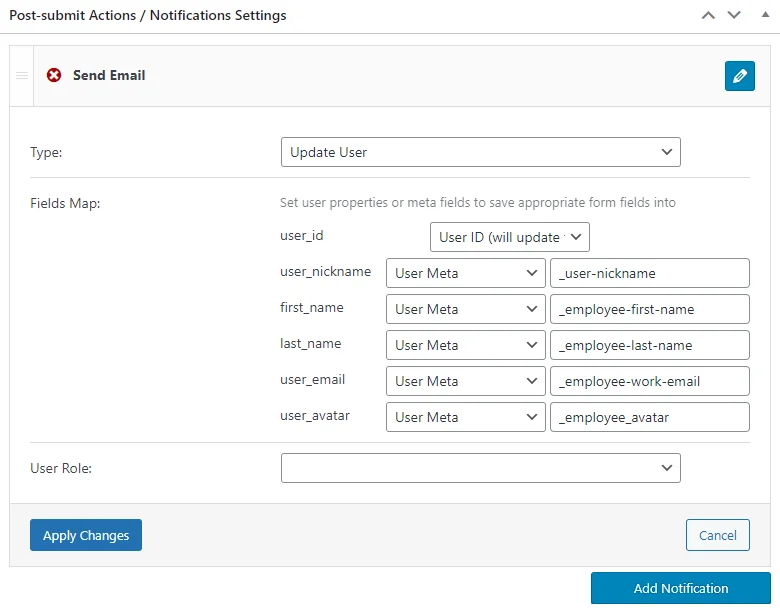
In the unfolded block, pick the “Update User” Type.
In the Fields Map section, choose the “User ID (will update this user)” option for the “Hidden” field. For other fields, select the “User Meta” option. In the appeared fields, enter the Names/IDs of the meta fields from the Meta Box that correspond to the form fields.
The User Role field should be kept without the selected option; otherwise, user roles will change to the chosen one after submitting the form.
After configuring the action settings, hit the “Apply Changes” button.
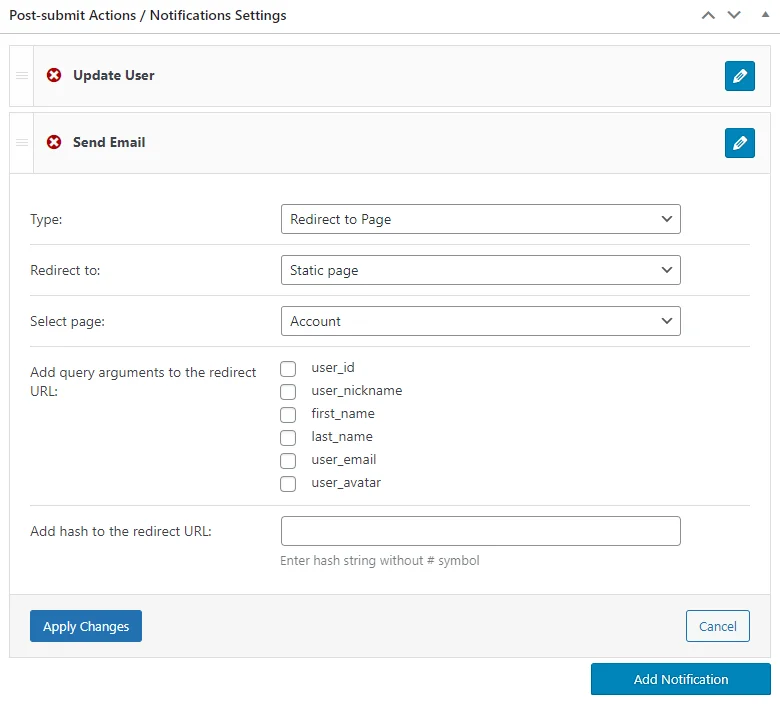
Then, hit the “Add Notification” button and click the “pencil” icon to edit a new action.
Choose the “Redirect to Page” Type, the “Static Page Redirect to, and “Account” Select page options. Set other action settings if you fancy and hit the “Apply Changes” button.
After finishing, hit the “Publish/Update” button to save the form.
Place the Form on the Account Subpage Template
You can create a subpage template with the Elementor theme builder or the JetEngine plugin. The JetEngine allows you to create a template in Elementor or WordPress block editor.
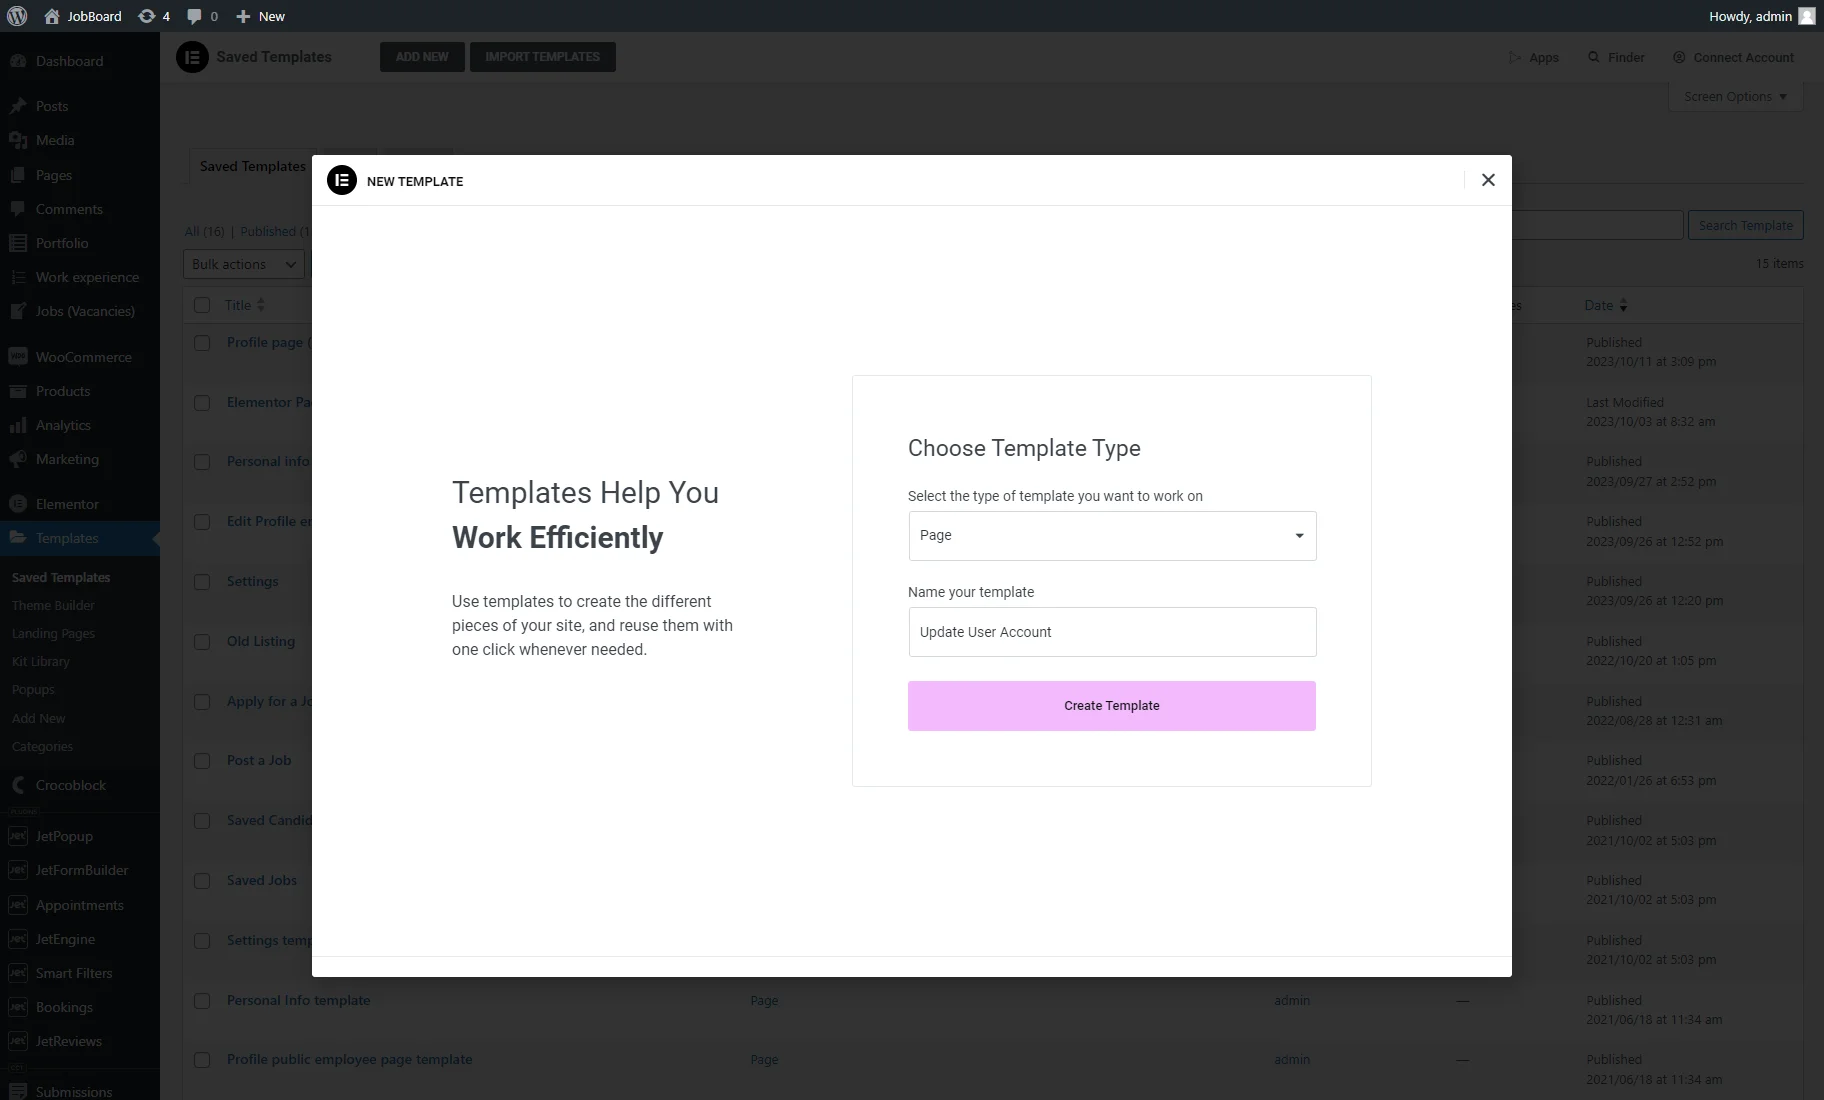
To create a template with the Elementor theme builder, move to the WordPress Dashboard > Templates > Saved Templates tab under the Elementor tab and hit the “Add New” button.
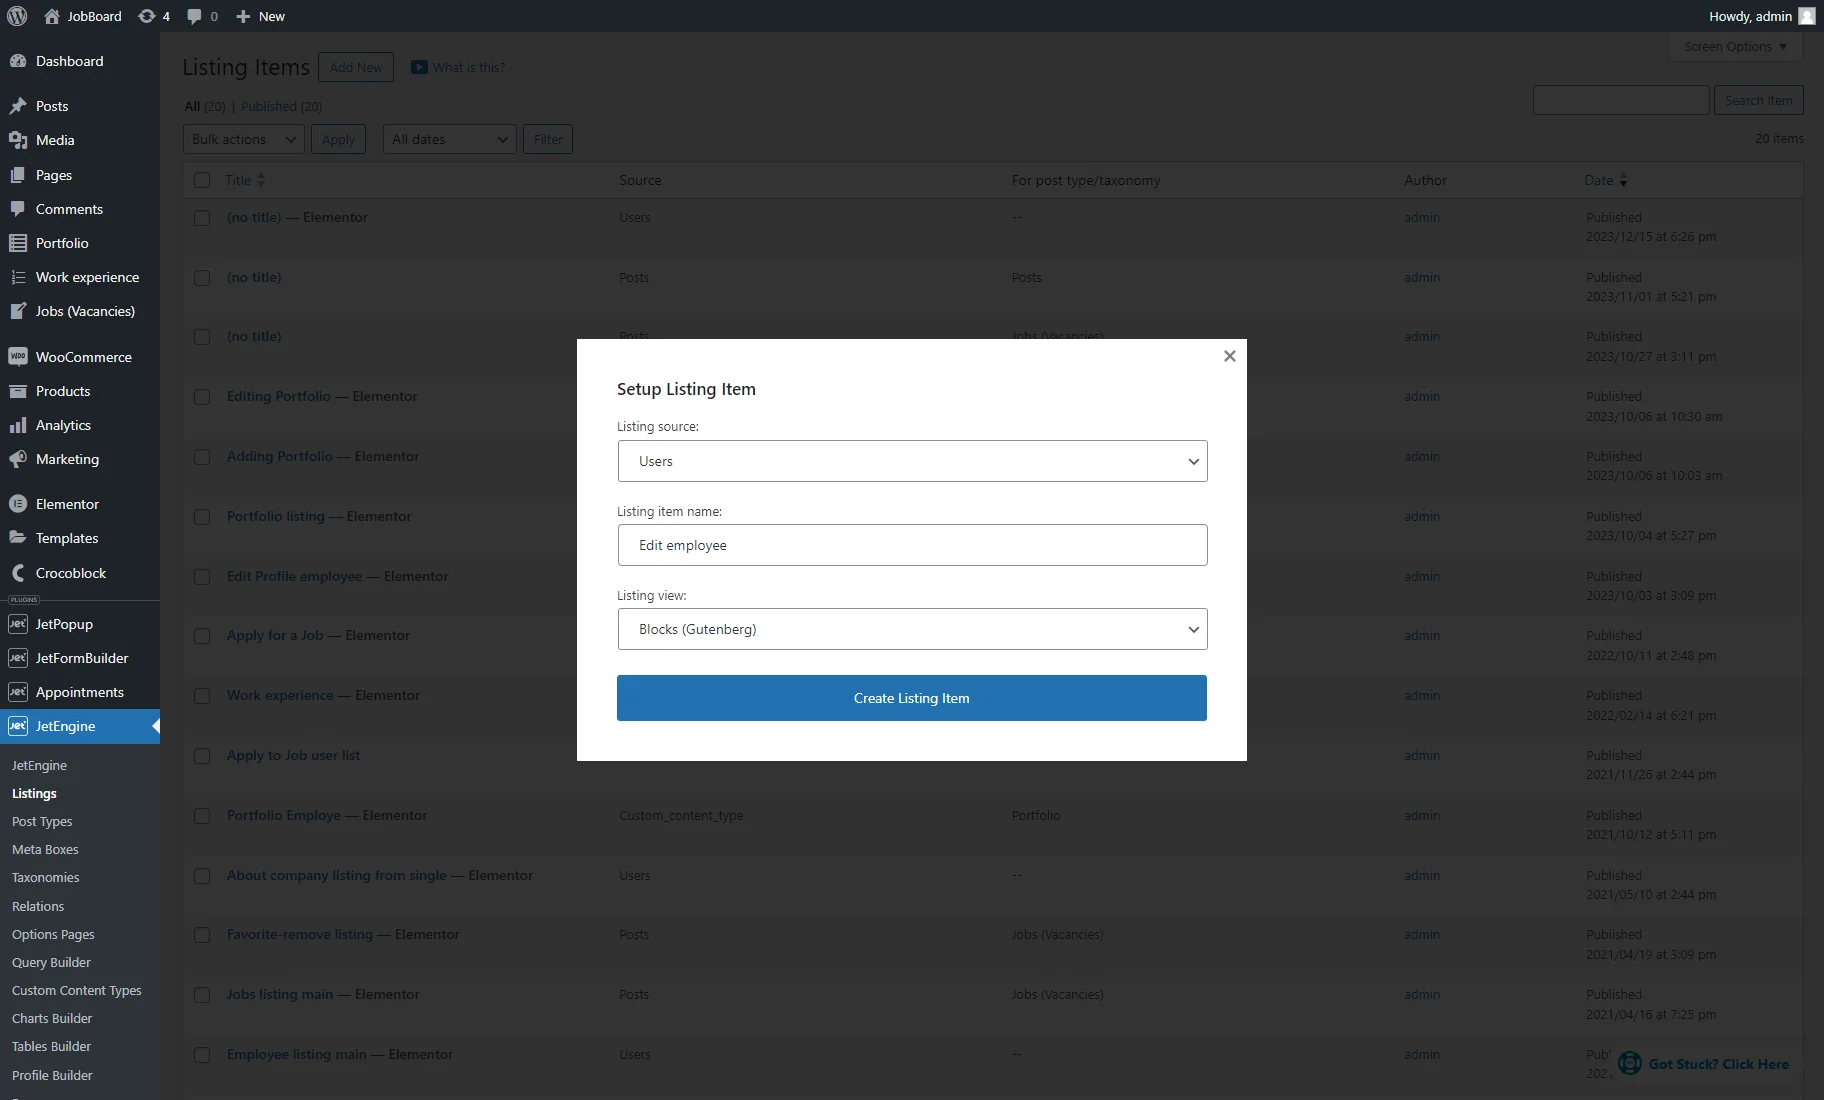
To create a template with the JetEngine plugin, head to the WordPress Dashboard > JetEngine > Listings tab and click the “Add New” button.
In the Setup Listing Item pop-up, pick the “Users” Listing source, enter the Listing item name, and select the “Elementor” or “Blocks (Gutenberg)” Listing view.
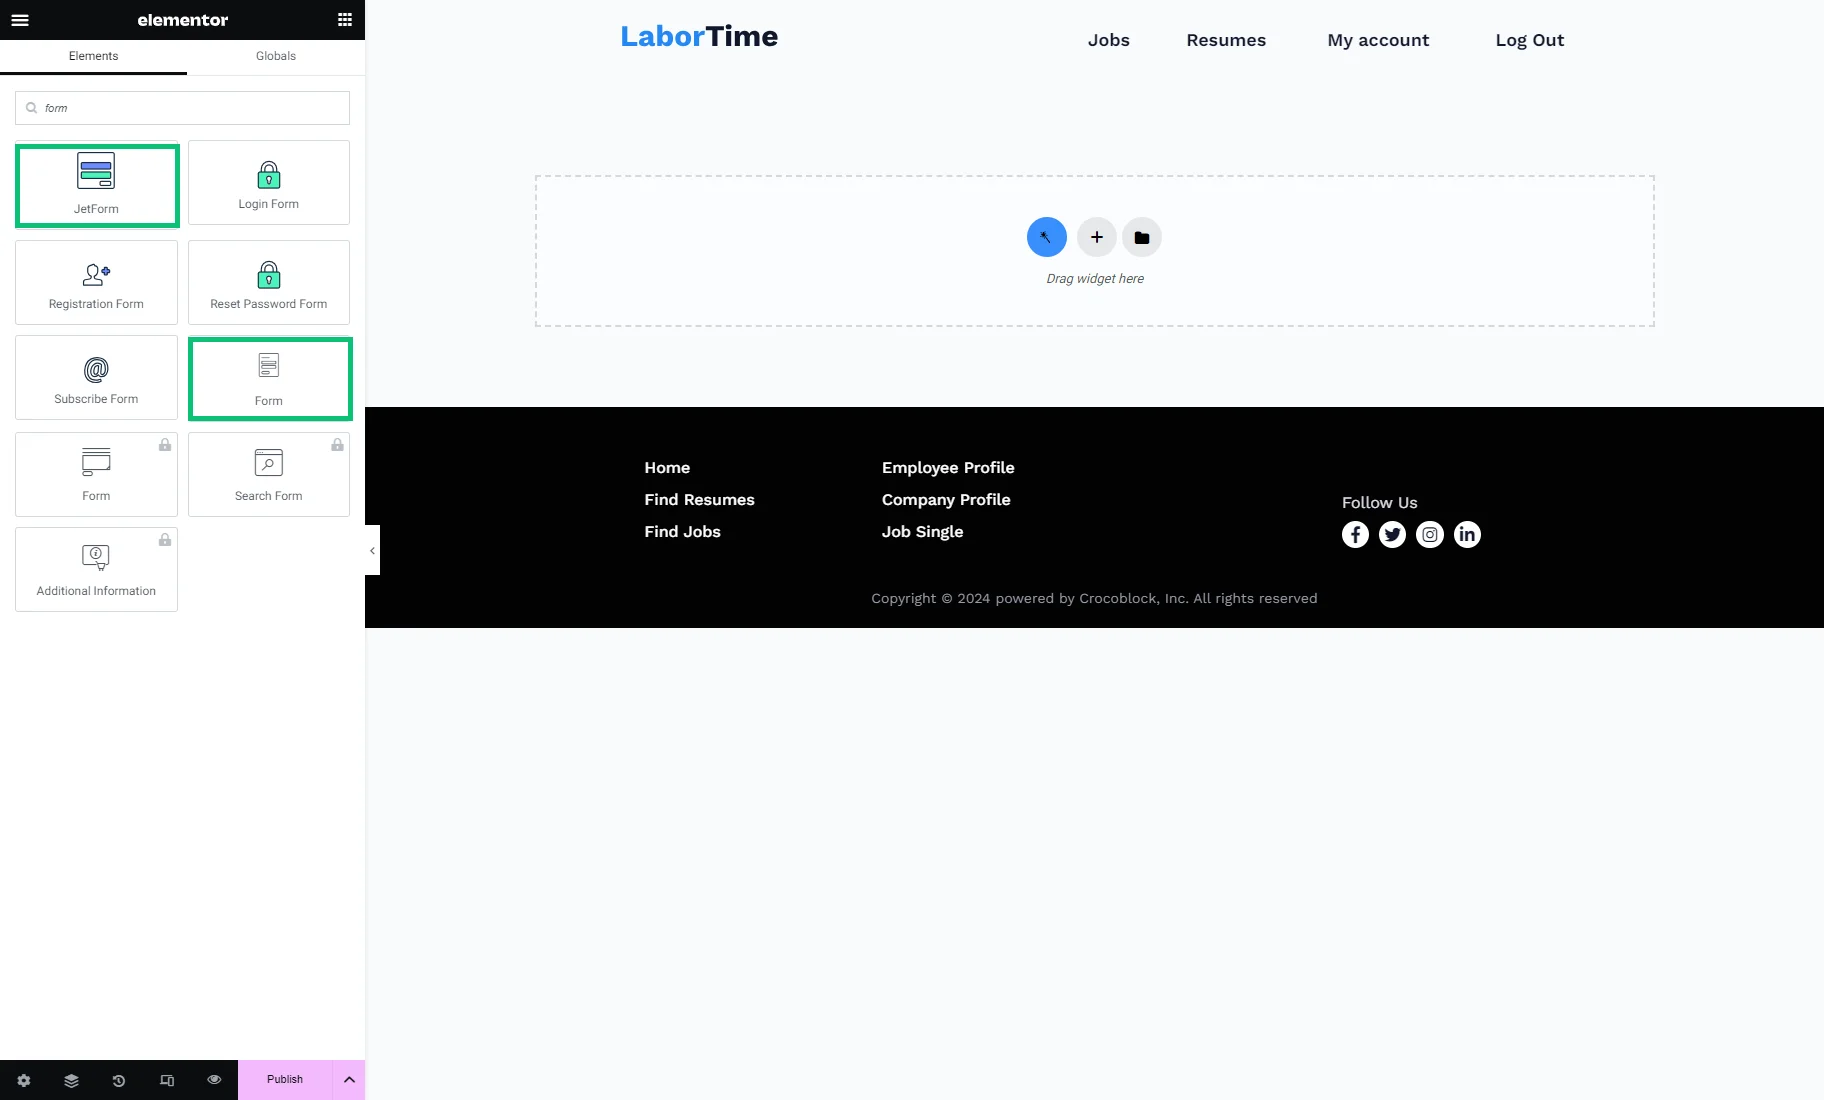
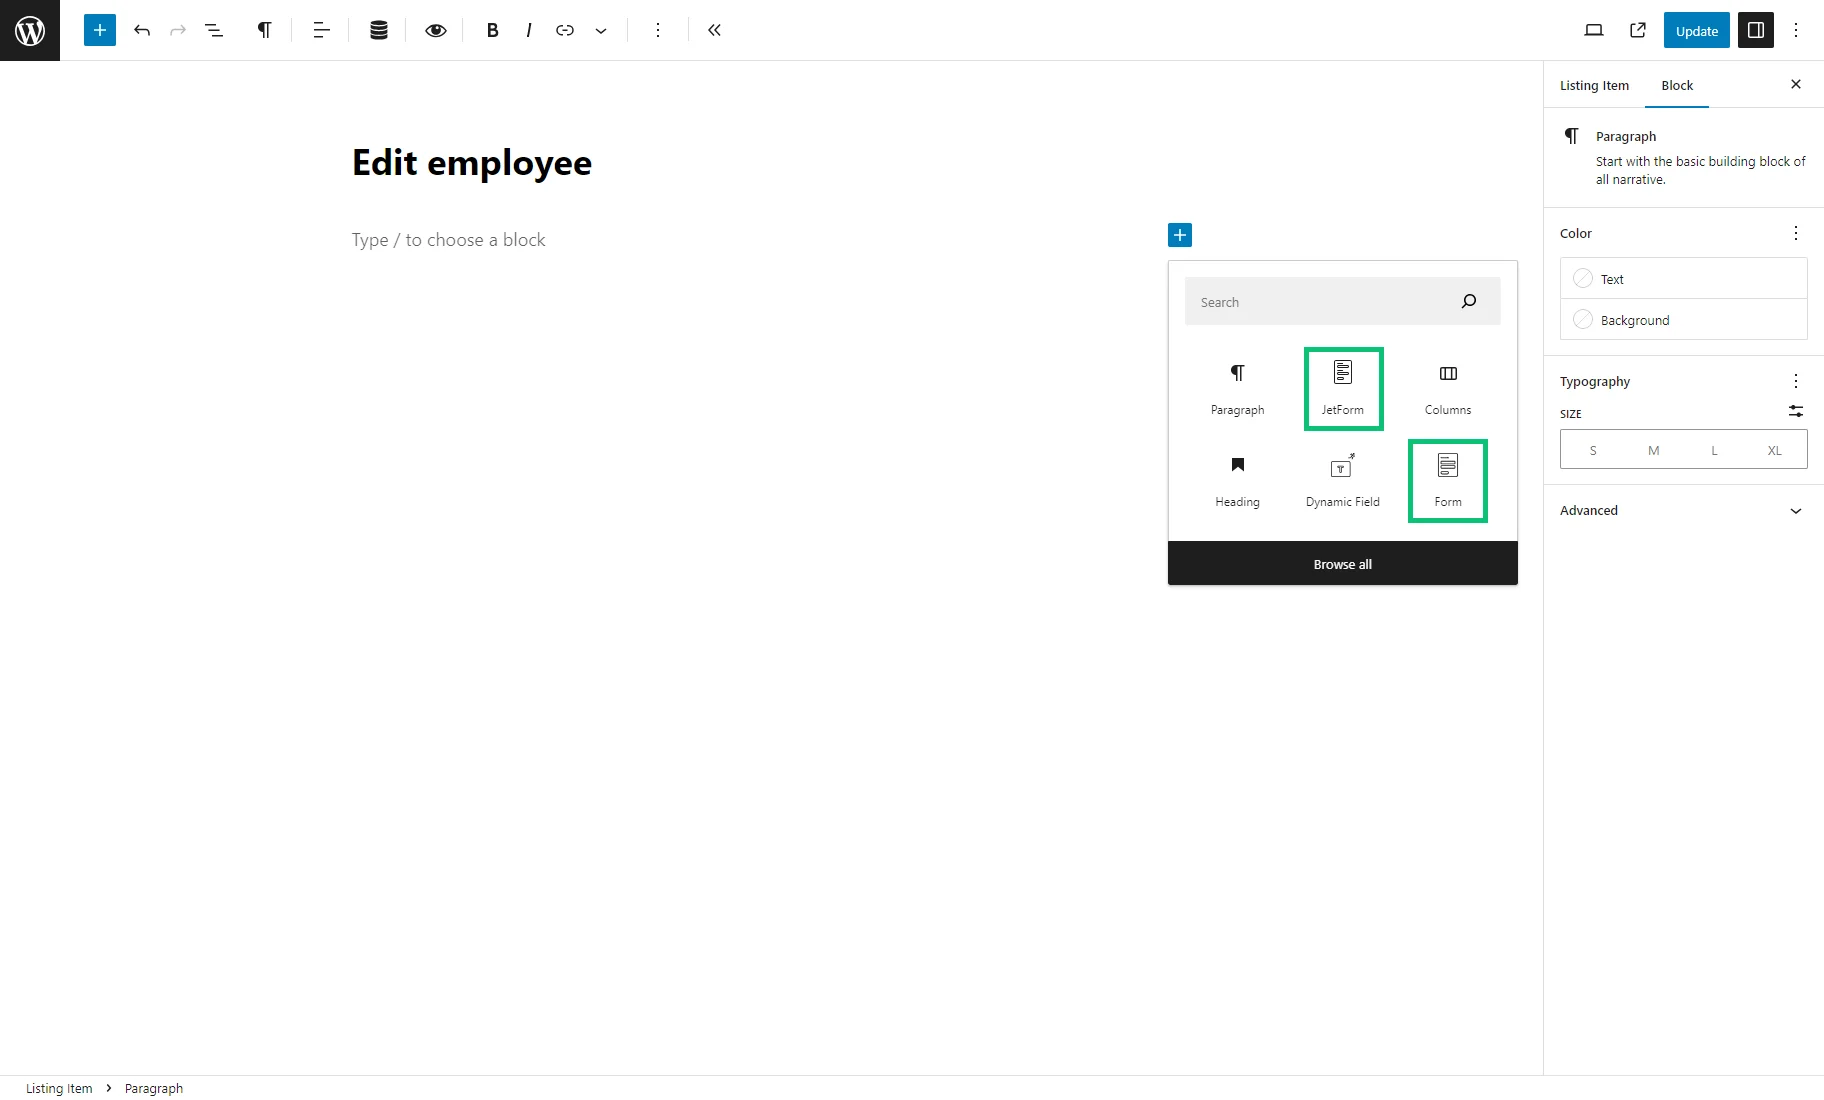
If you craft the subpage in the Elementor, you can drag-n-drop the Form or JetForm widget to the editing page.
Mind that with the Form widget, you can display forms created with JetEngine and JetFormBuilder. With the JetForm widget, you can display only the JetFormBuilder forms. Also, these two widgets have slightly different Content and Style settings.
If you place the Form widget, choose the “JetEngine” or “JetFormBuilder” Provider and set the recently created form.
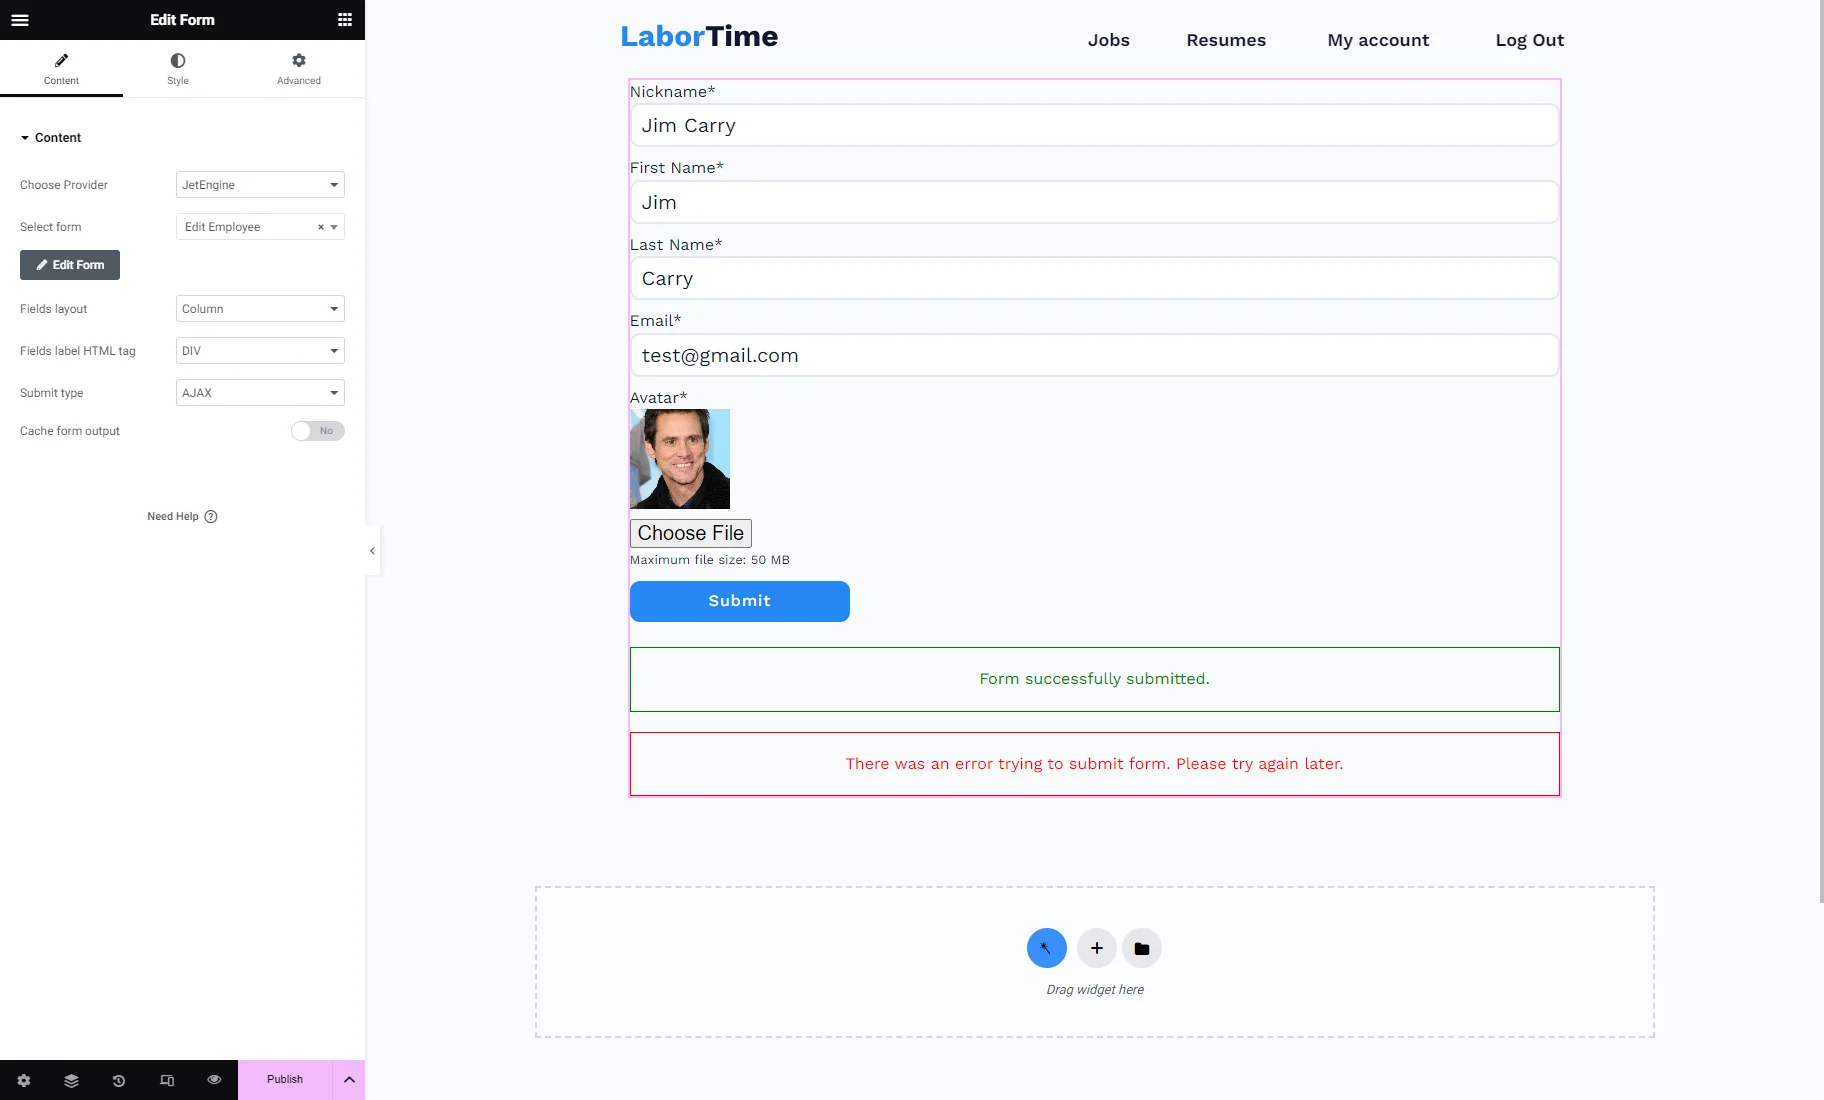
If you place the JetForm widget, just set the recently created form.
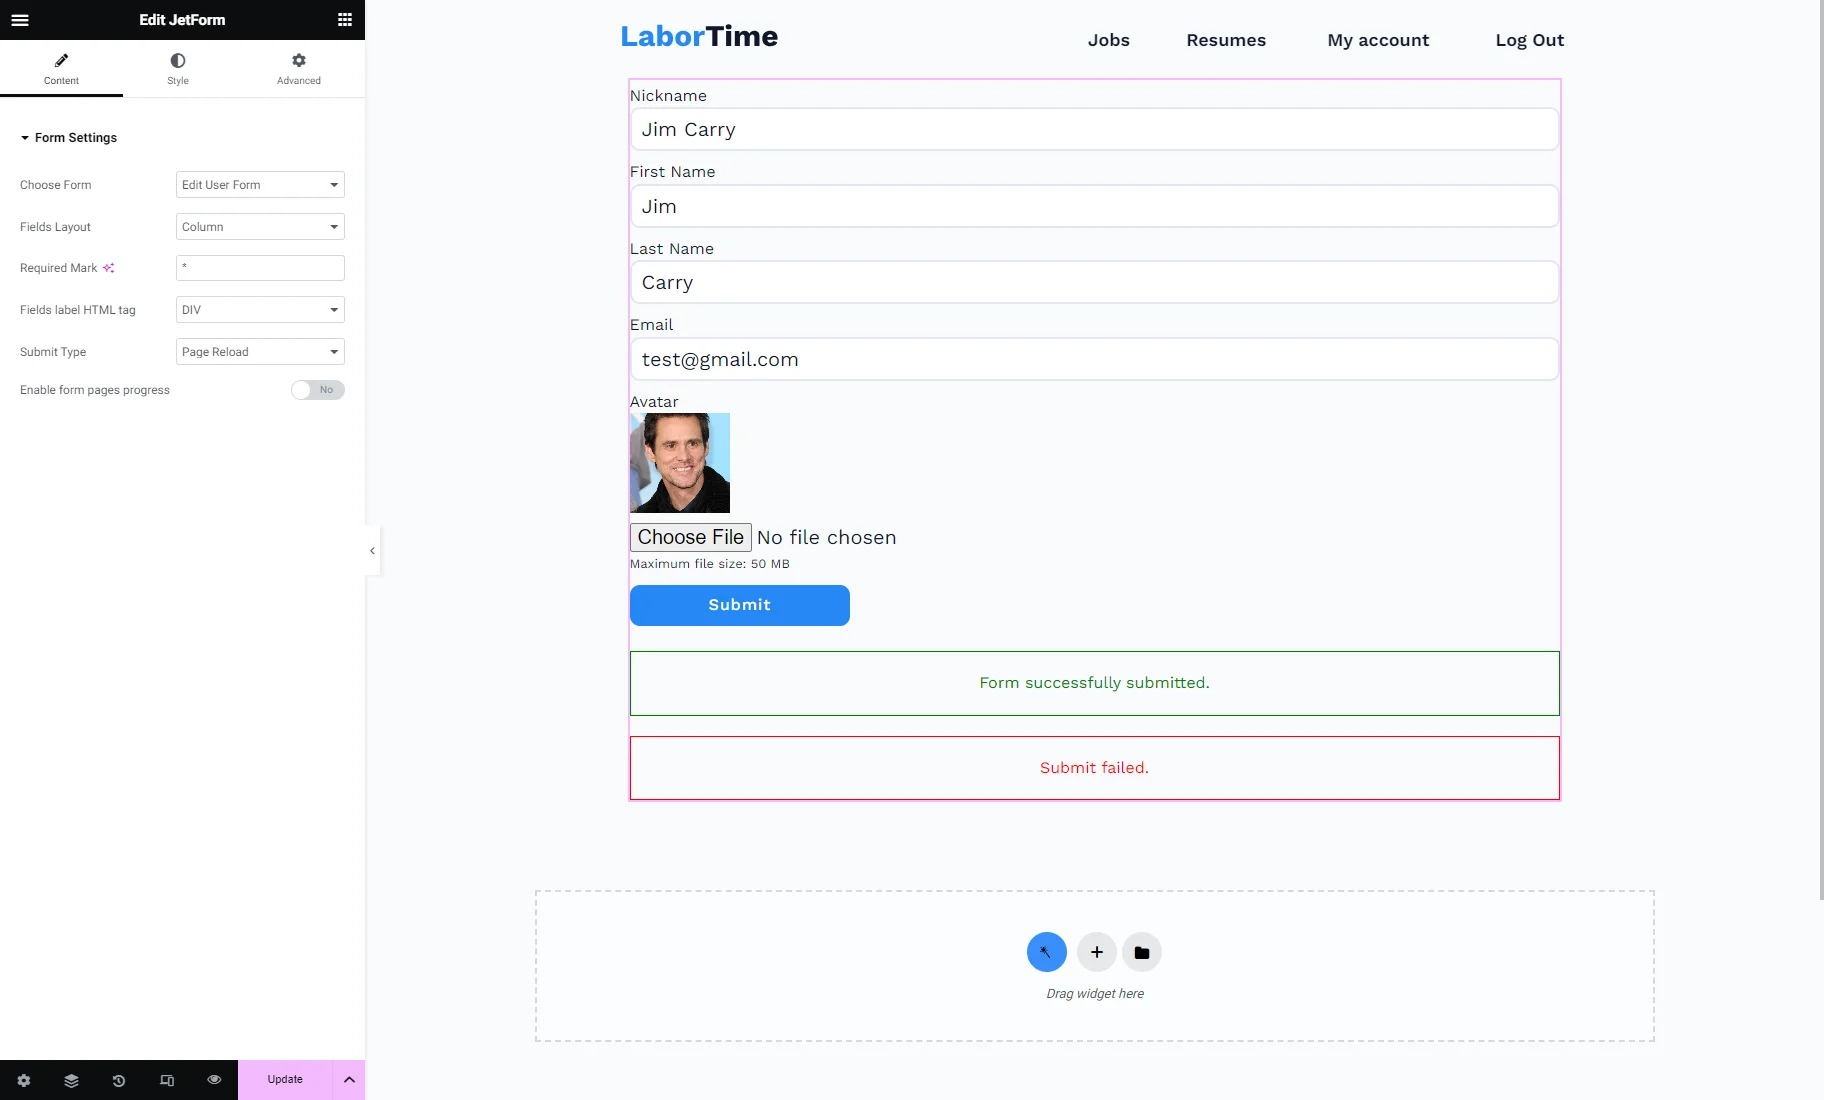
Now, you are free to customize other Content and Style settings according to your needs.
If you set the Account page with the “Rewrite” Template Mode, you can add the Profile Menu widget to the page.
If you set it with the “Content” Template Mode, you don’t need it since the Profile Menu widget should be already set on the Account page.
Hit the “Publish/Update” button.
In the WordPress Block editor, the settings are the same. Place the Form or JetForm block and adjust the settings.
For the style settings, you can use the free JetStyleManager plugin.
Assign the Subpage to the Account Page with Profile Builder
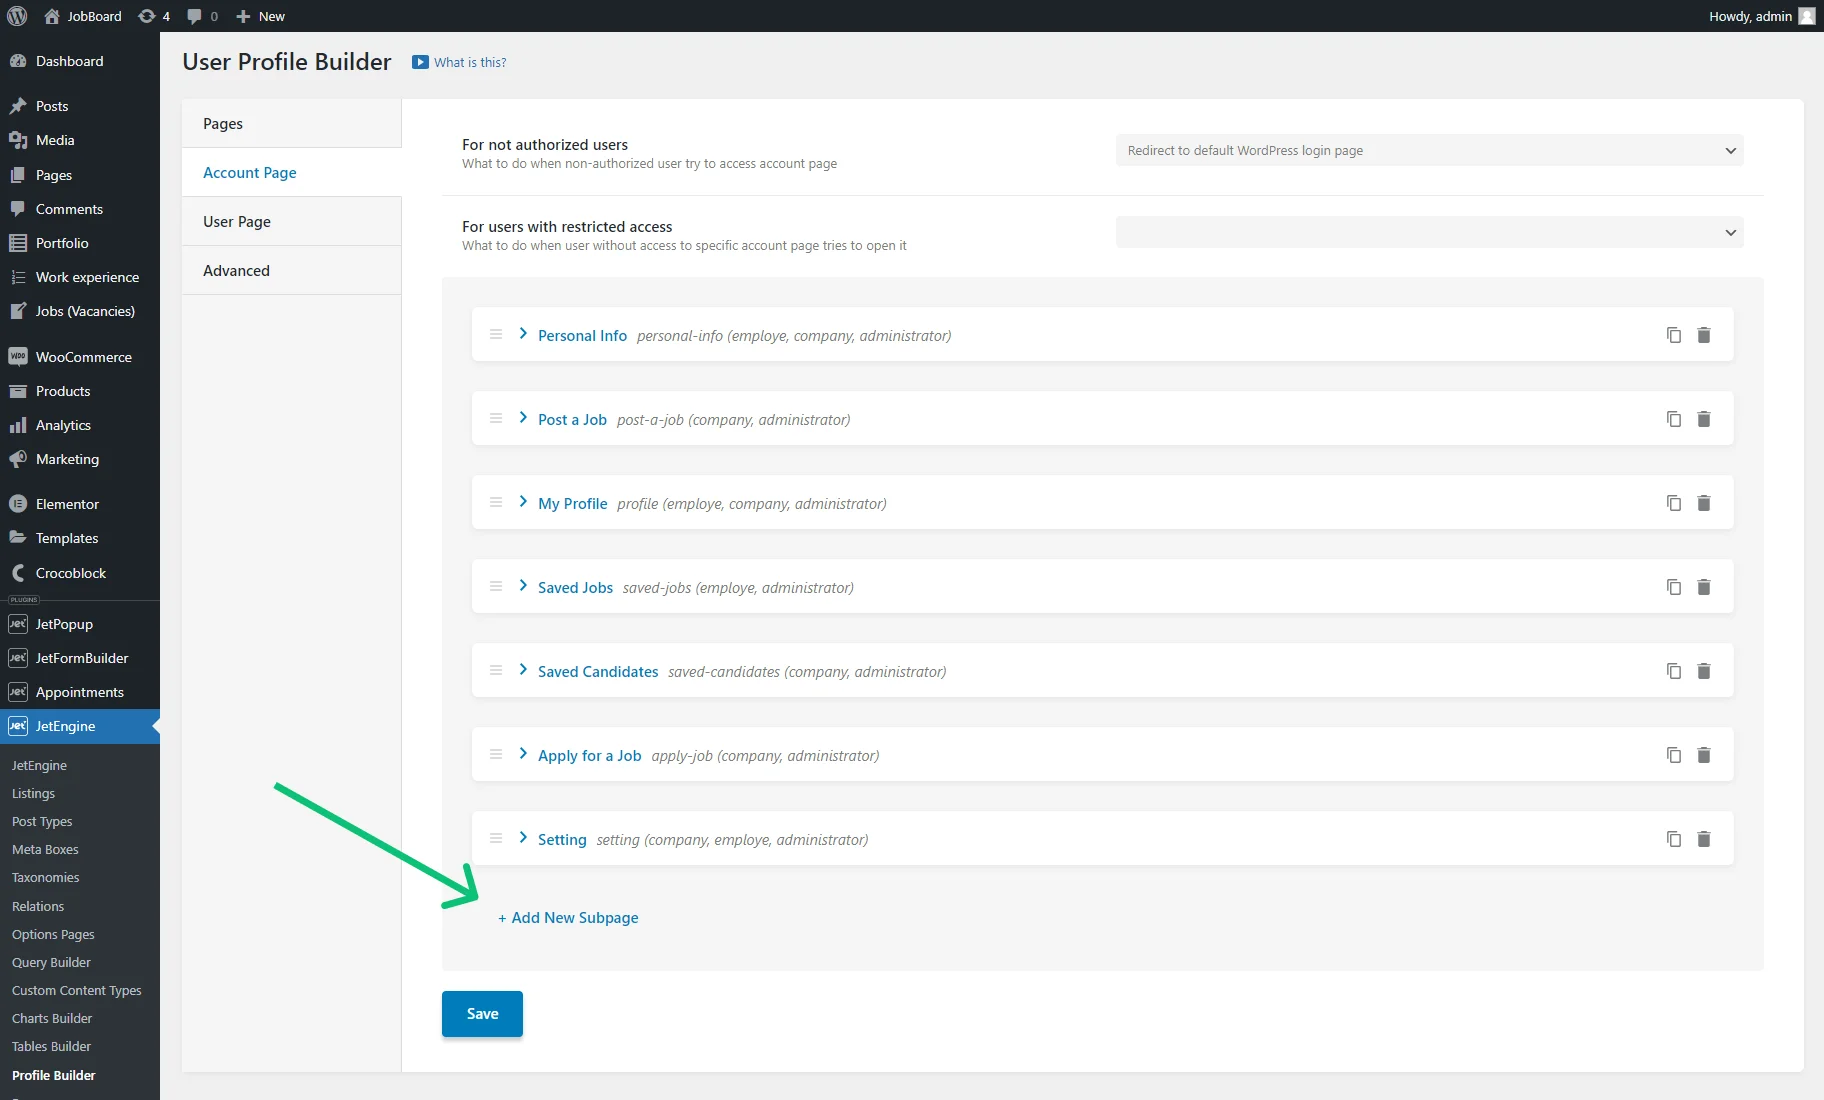
Go to the WordPress Dashboard > JetEngine > Profile Builder > Account Page tab and hit the “+ Add New Subpage” button.
Enter the Title for the account subpage. Set the slug by clicking the Slug field. It will be generated automatically, but you can change it. While editing, don’t forget that the slug must contain only Latin letters in lowercase, numbers, and `-` or `_` chars instead of spaces.
Set the Template you created in the Elementor builder. Also, you can select user roles who can access this page from the Available for the user role drop-down menu.
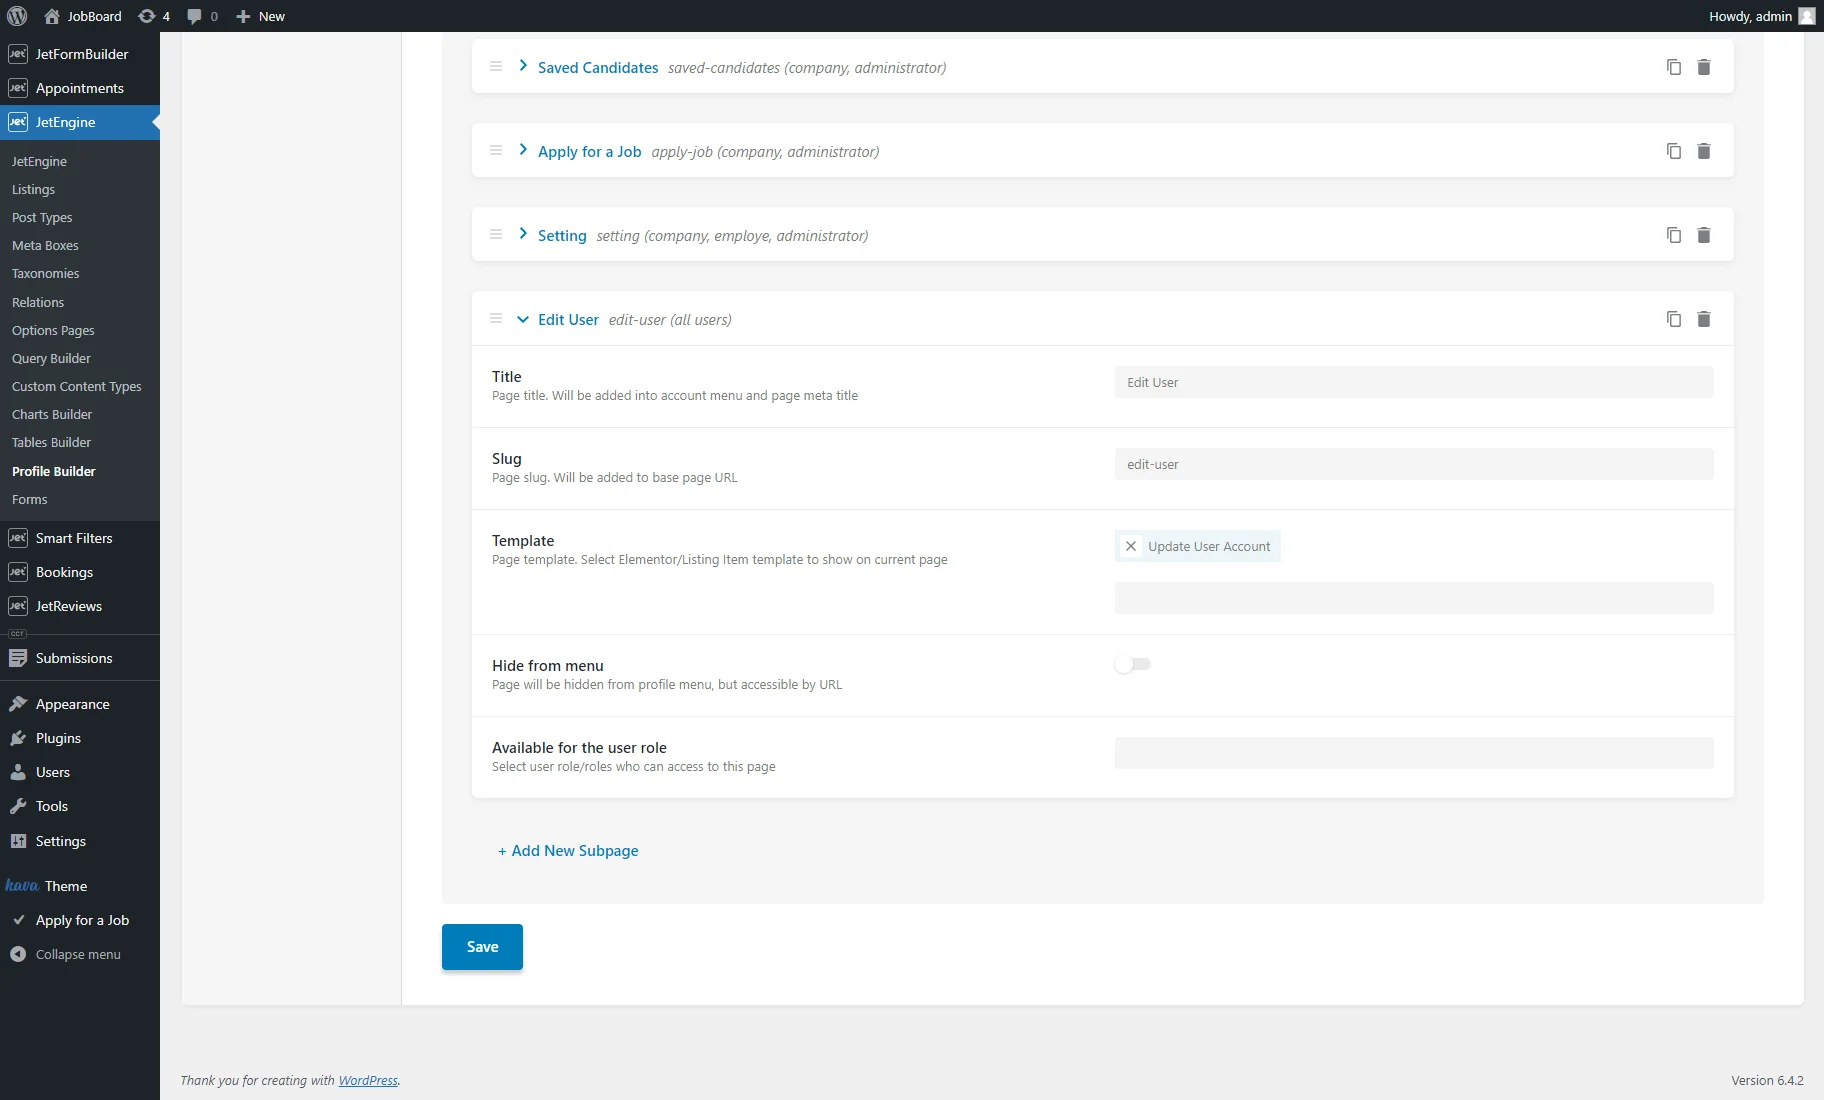
When you finish customizing, click the “Save” button at the bottom of the page.
Front-end User Account Checking
Log in as one of the users to check how the form works.
Open the Account page on the front end and click the profile menu item to open the subpage with the form.
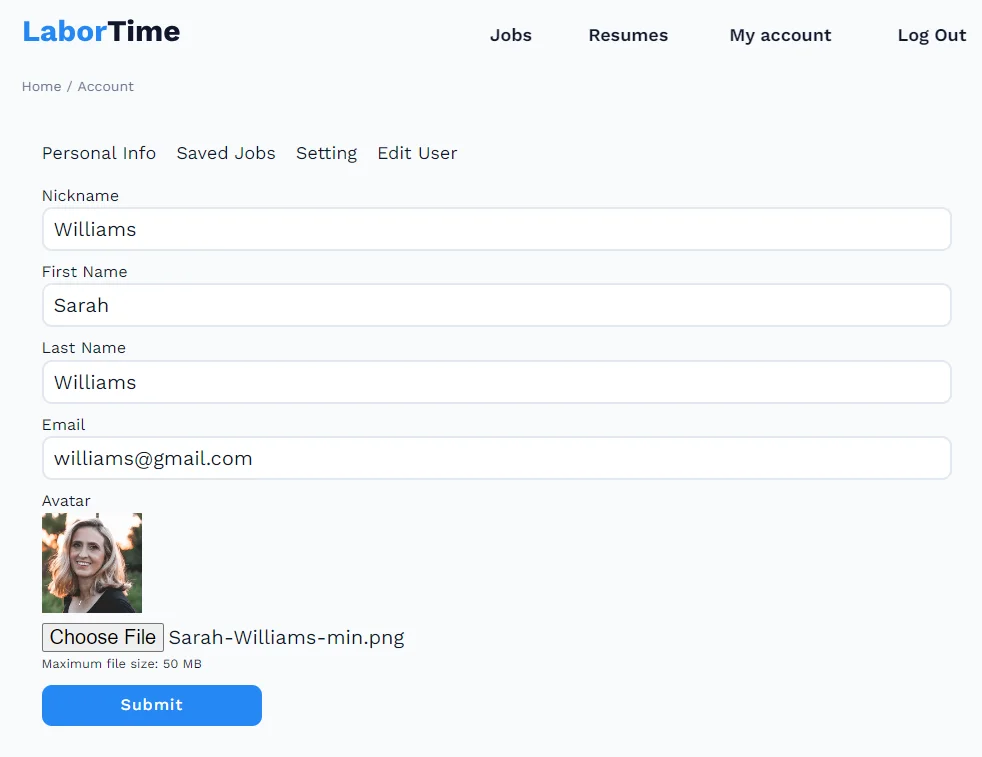
Make changes and hit the “Submit” button to test the form. For example, we modified the user’s avatar.
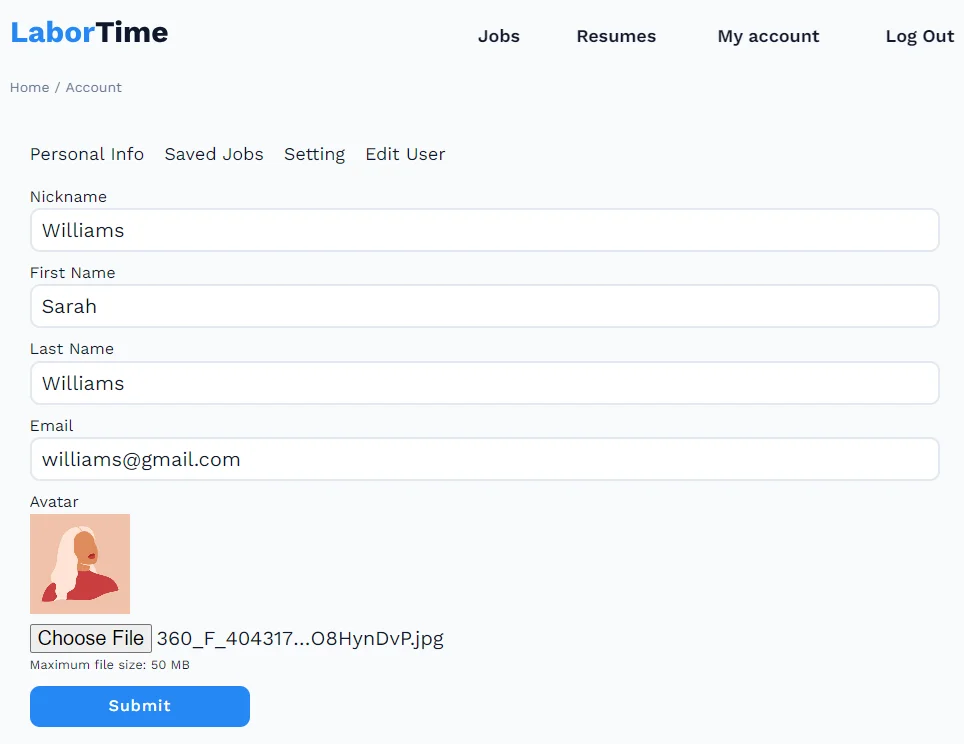
After submitting the form, we were redirected to the Account page, specifically the first Account subpage with the user’s info. The avatar was successfully changed.

Check the Result in the WordPress Dashboard
Let’s check how the information was transferred to the backend.
Log in to the WordPress dashboard as an Administrator, proceed to the Users tab, and click to edit the updated user.
The user’s avatar was changed in the respective meta field.

That’s all. The Profile Builder and JetEngine or JetFormBuilder form functionalities allow users to change their account information from the front end. Set up various fields and custom meta boxes to create a unique user account layout and collect any data you need.