JetSmartFilters Not Working in Bricks: Setting Up the Custom ID
Why is my JetSmartFilters not working in Bricks?
When using JetSmartFilters with Bricks Builder, connecting a filter to a provider may require setting up a Query ID. But the settings may vary for different providers you select in the filter settings. The issue typically appears when users mix up the JetEngine Listing Grid’s CSS ID field with the Bricks Query Loop’s Custom Query ID, and appear to be unsure which ID should go where, resulting in a filter that is connected but does not update the listing on the frontend. This issue affects WordPress sites built with Bricks Builder using JetSmartFilters together with JetEngine’s Query Builder.
It is important to emphasize that both Listing Grid and Query Loop can work with the filters with no Query ID applied when there is just one provider and one query on the page. However, when you have several grids or loops with different queries applied, it is recommended to set the Query ID between the filters and the needed providers. In this tutorial, we focus on setting the Query ID for the JetEngine’s Listing Grid and Query Loop elements in the Bricks Builder.
Additionally, in this troubleshooting, we assume you know how to create a filter and how to set the Listing Grid or Query Loop. So here, we are focusing on connecting the filters to the providers with the Query IDs on the editing page in Bricks.
Setting Up the Custom ID for the Listing Grid
Add the Listing Grid element to the page and the needed filter — in this case, we use a Select Filter.
In the Select filter dropdown, choose the needed filter. In the This filter for field, choose the “JetEngine” option.
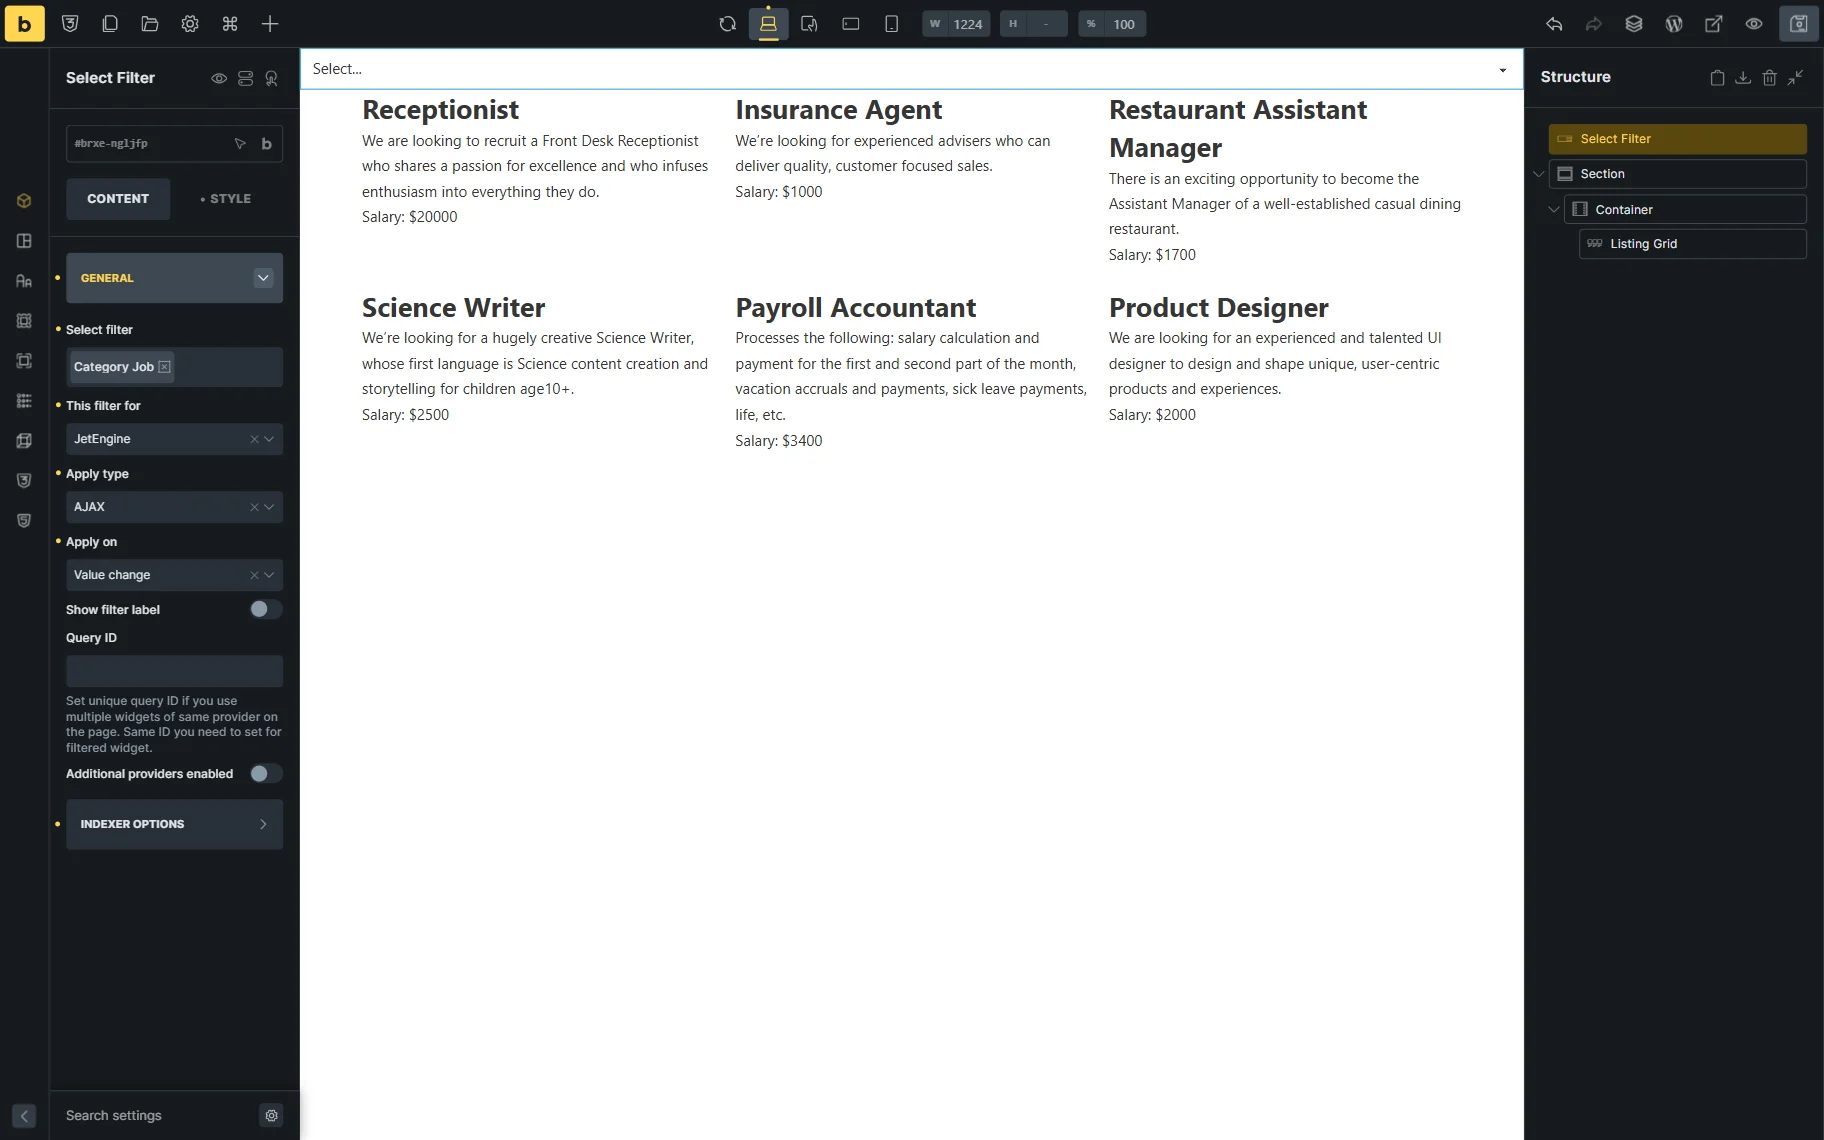
As it was already mentioned, if this is the only provider on the page, the filter will work with the current setup correctly. If you need to attach the filter to a specific provider, add the unique Query ID to the Query ID field in the filter’s settings.

Then, proceed to the Style tab of the Listing Grid settings and open the CSS section. In the CSS ID field, enter the same Query ID you used for the filter.
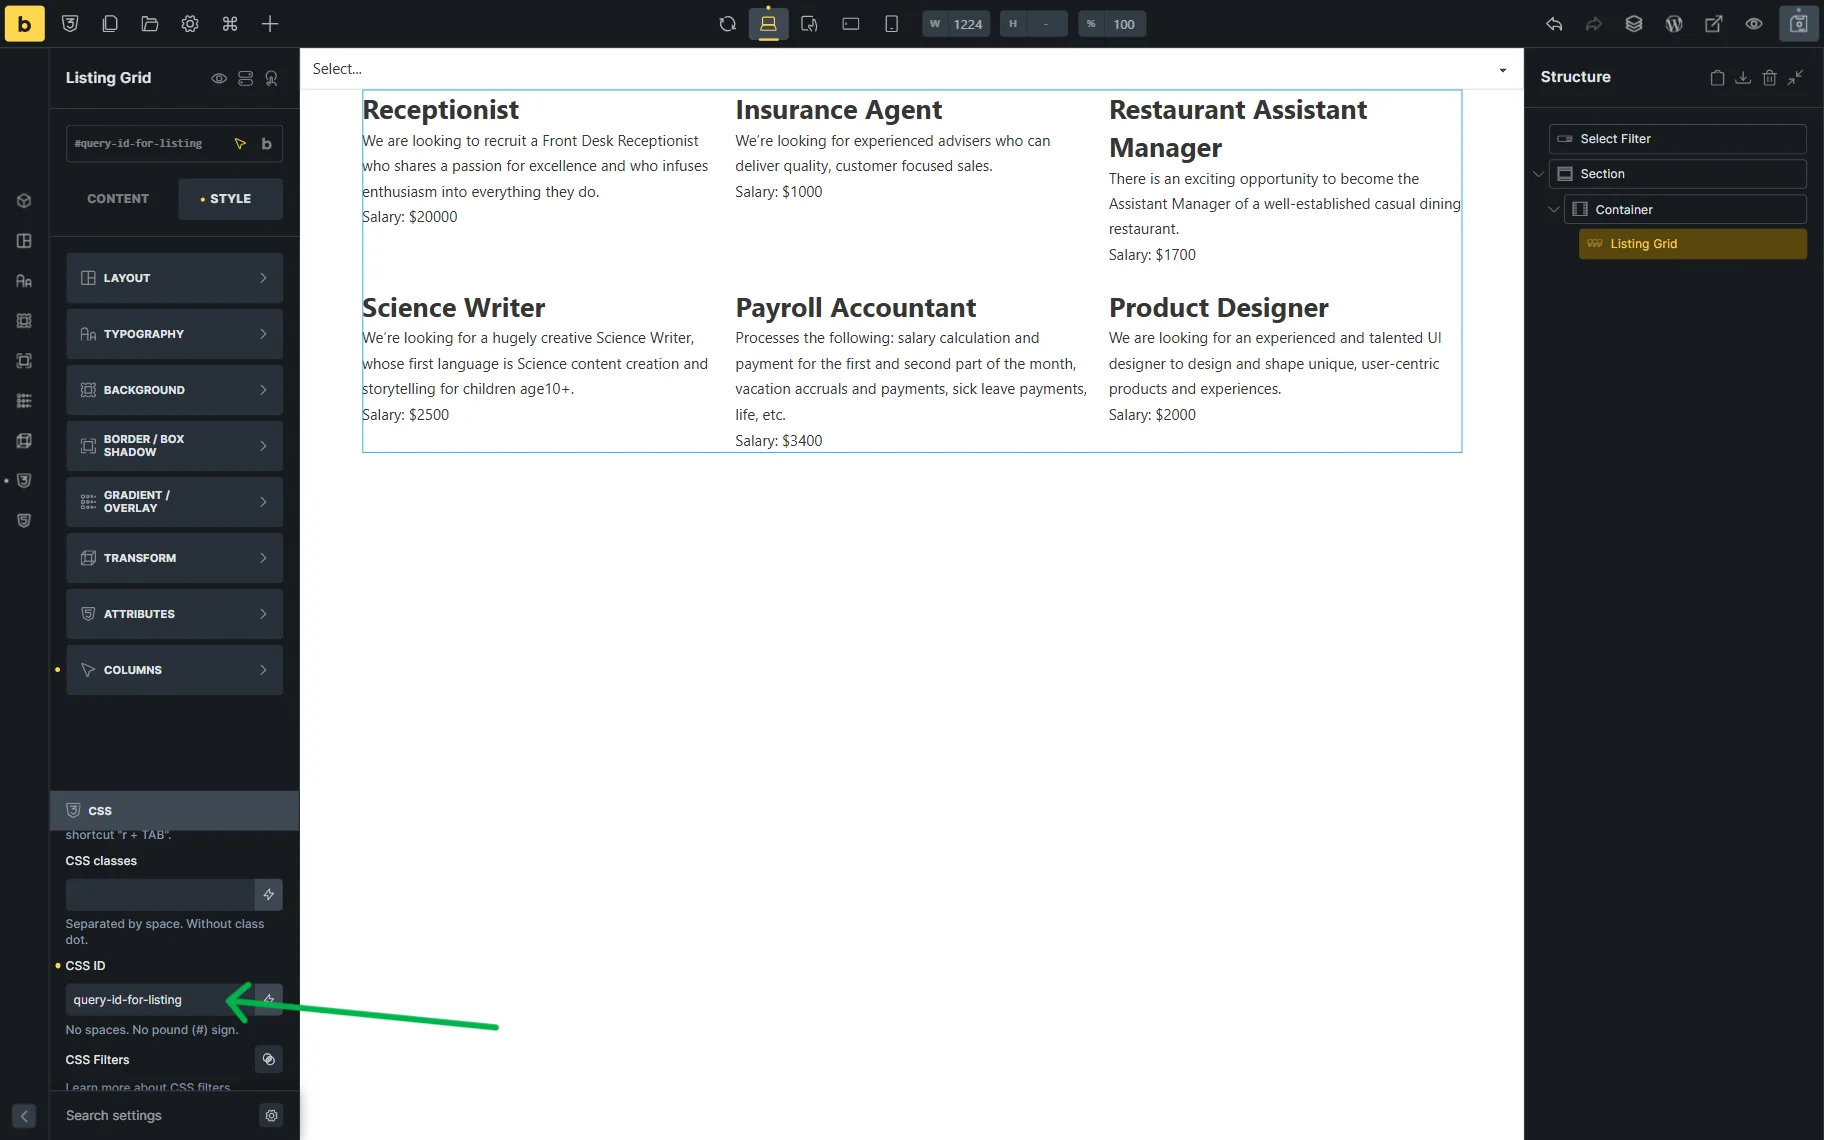
Click the “Save” icon once you are ready.
In case you also have a custom query attached to the Listing Grid, the Query ID should be applied to it as well. For that, proceed to the custom query settings and enter the same Query ID in the dedicated field.
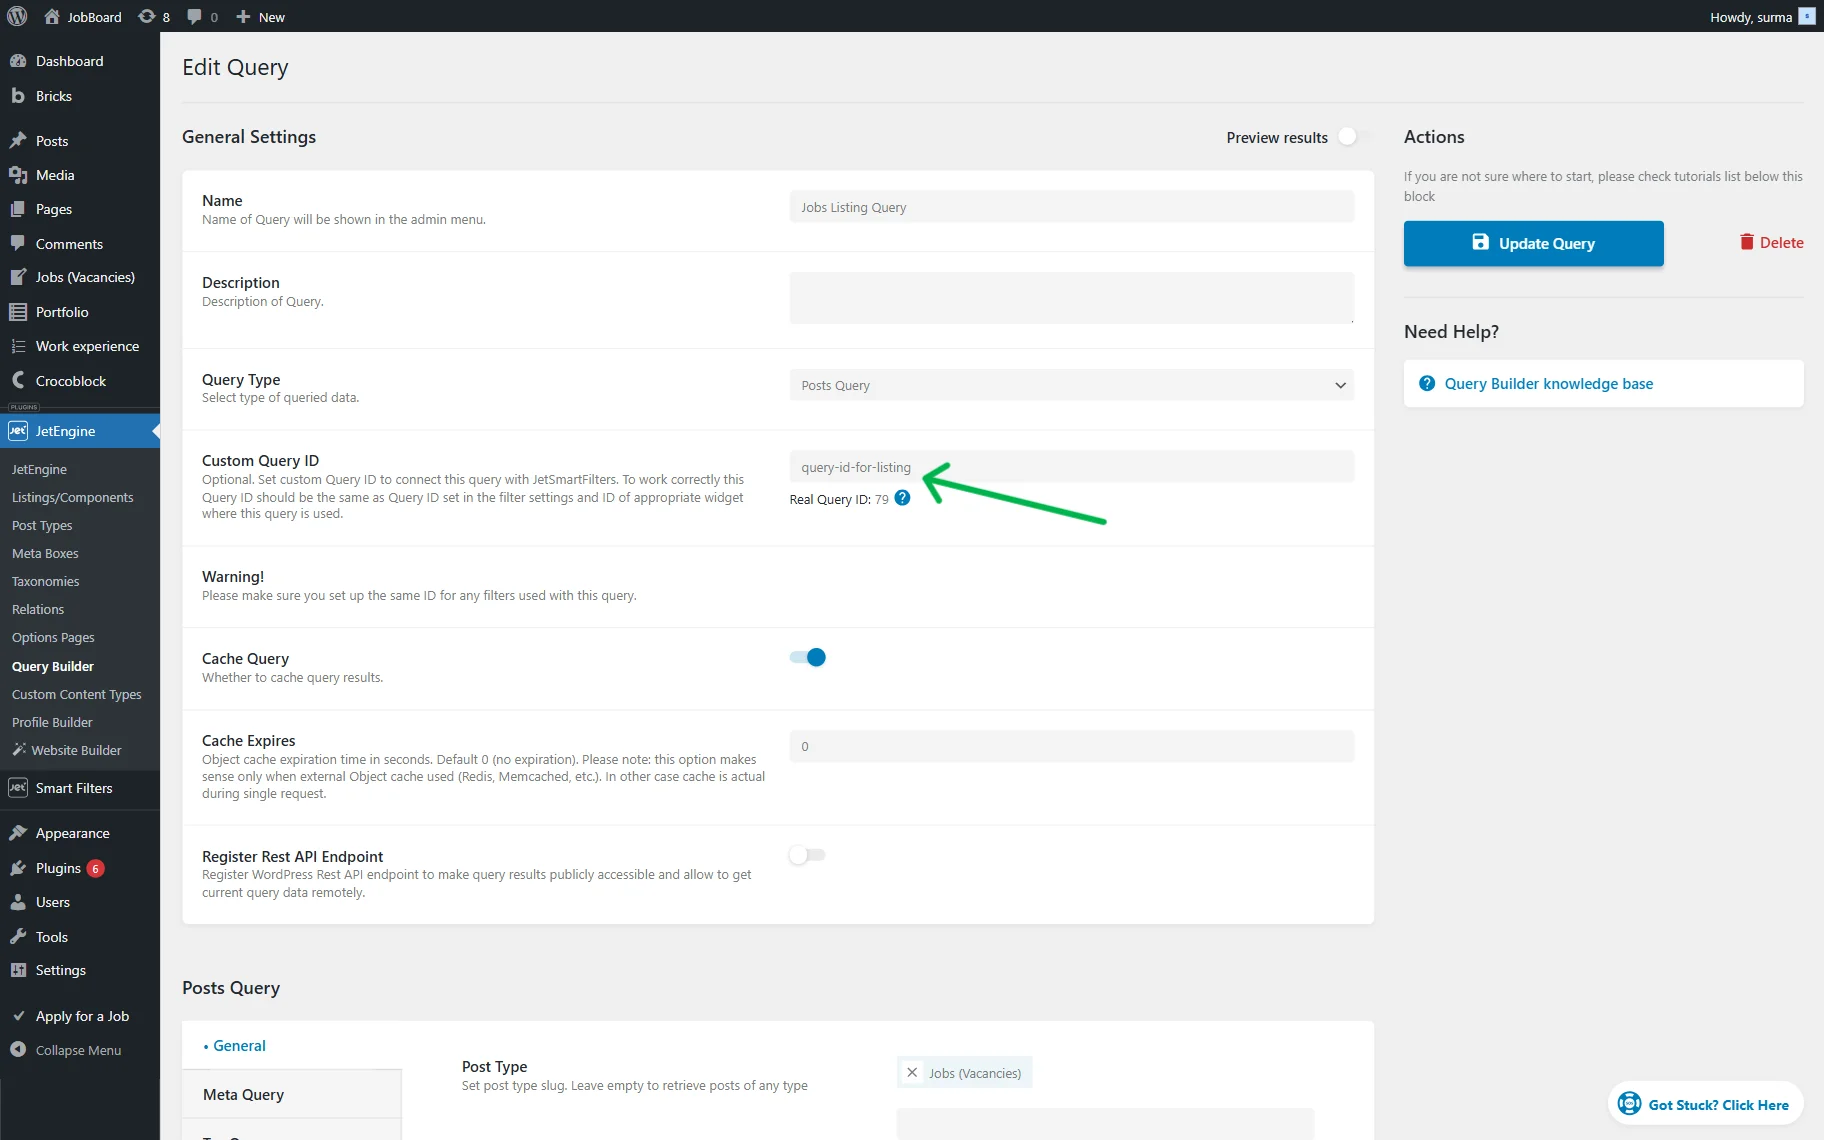
Click the “Update Query” button.
Setting Up the Custom ID for the Query Loop
When you use the Bricks’ Query Loop as a provider for the filters, the Query ID is not required by default. So, add the Container and set the Query Loop in it.
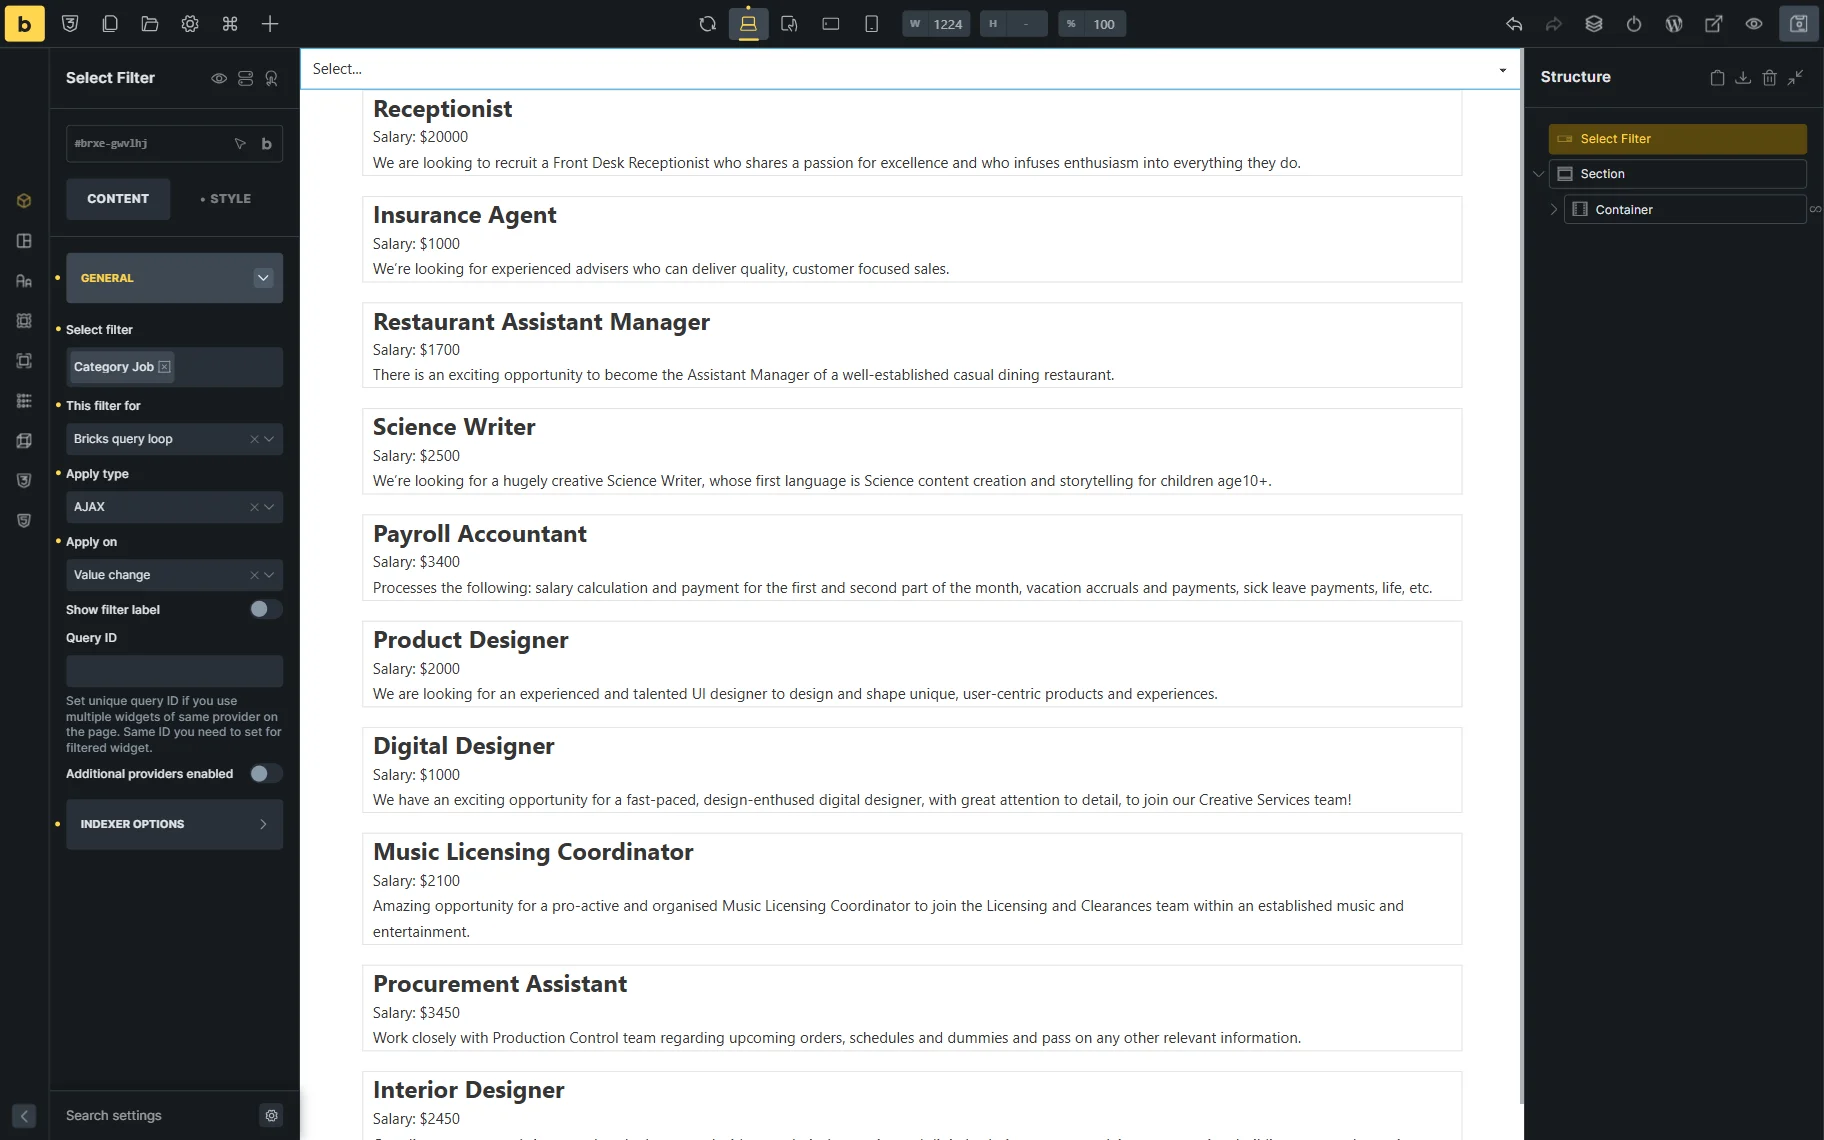
Add the required filter, in this case, we use the Select Filter. Select the needed filter and choose the “Bricks query loop” option in the This filter for dropdown.
In the Query Loop settings, enable the Is filtrable toggle.
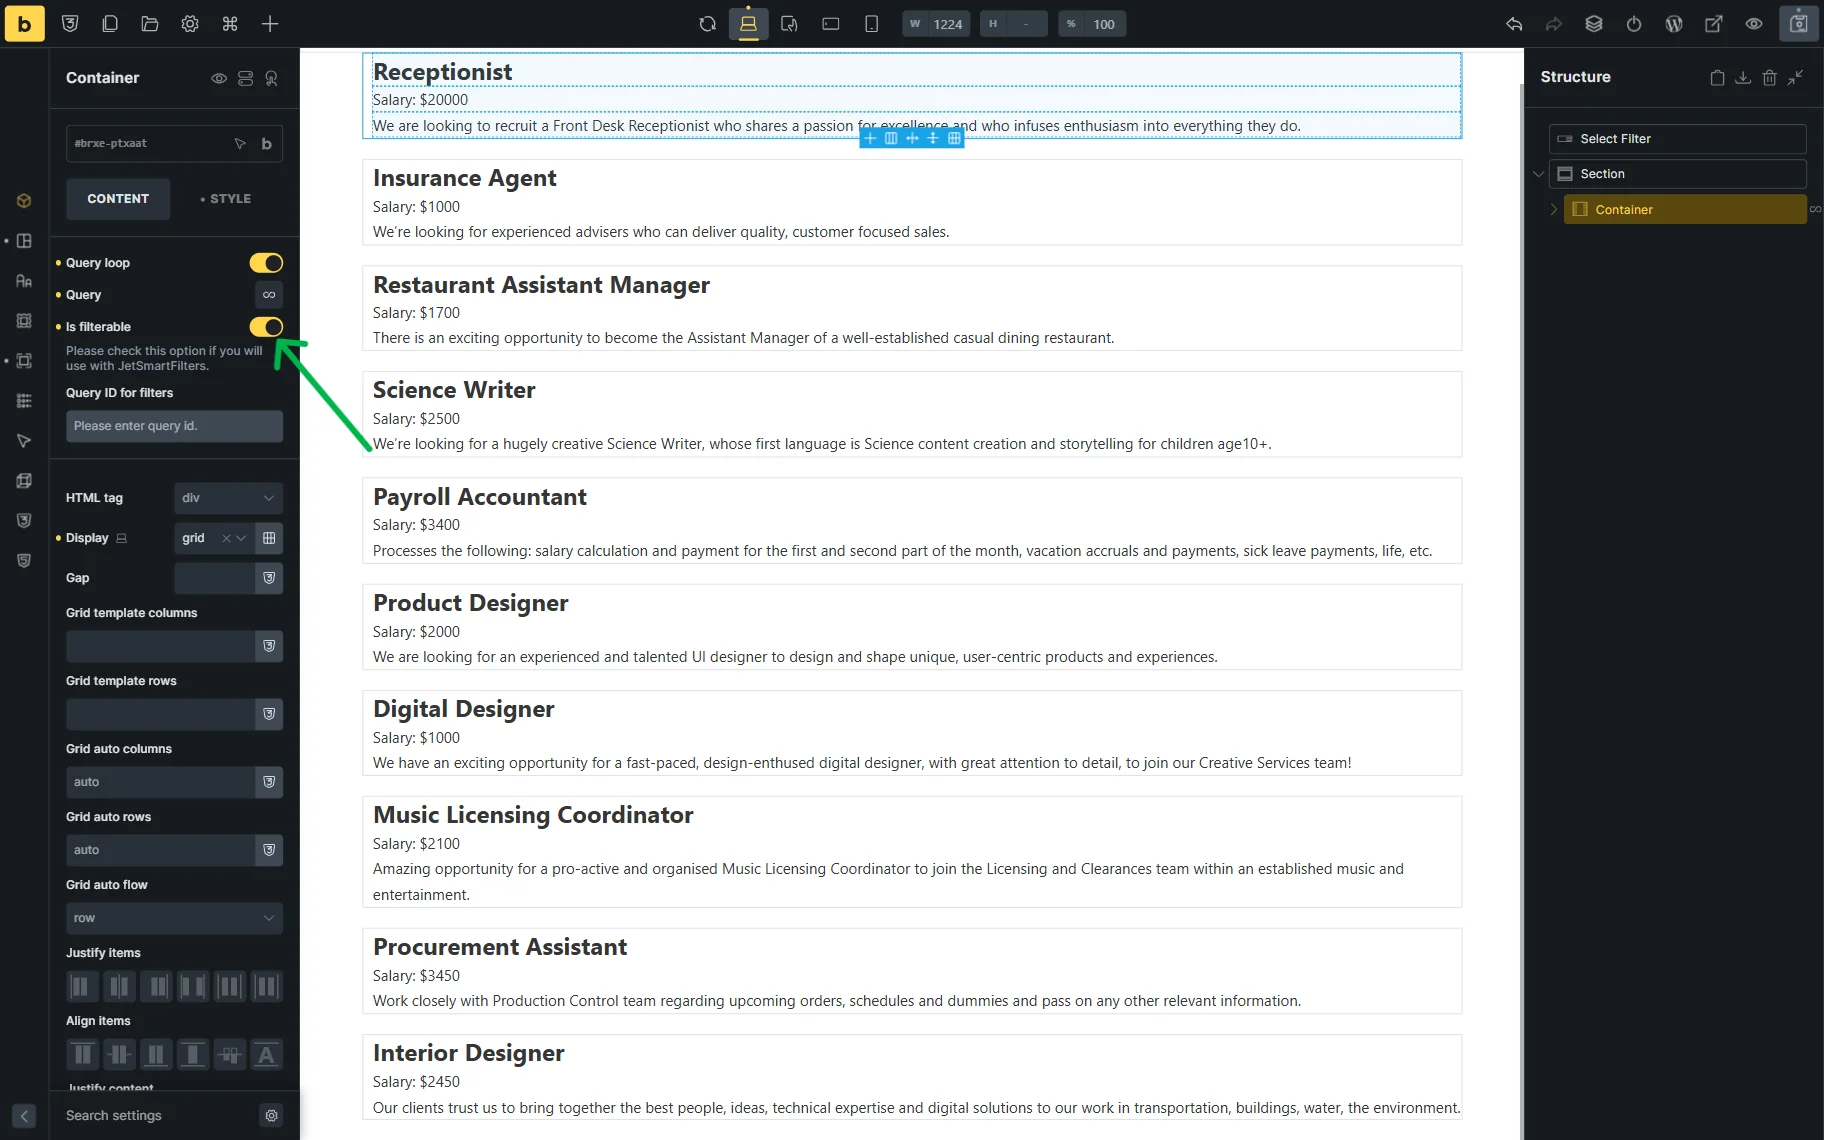
These settings are enough for the correct basic Query Loop filtration. In case you need the Query ID to be applied, enter the unique one in the Query ID field in the filter’s settings.
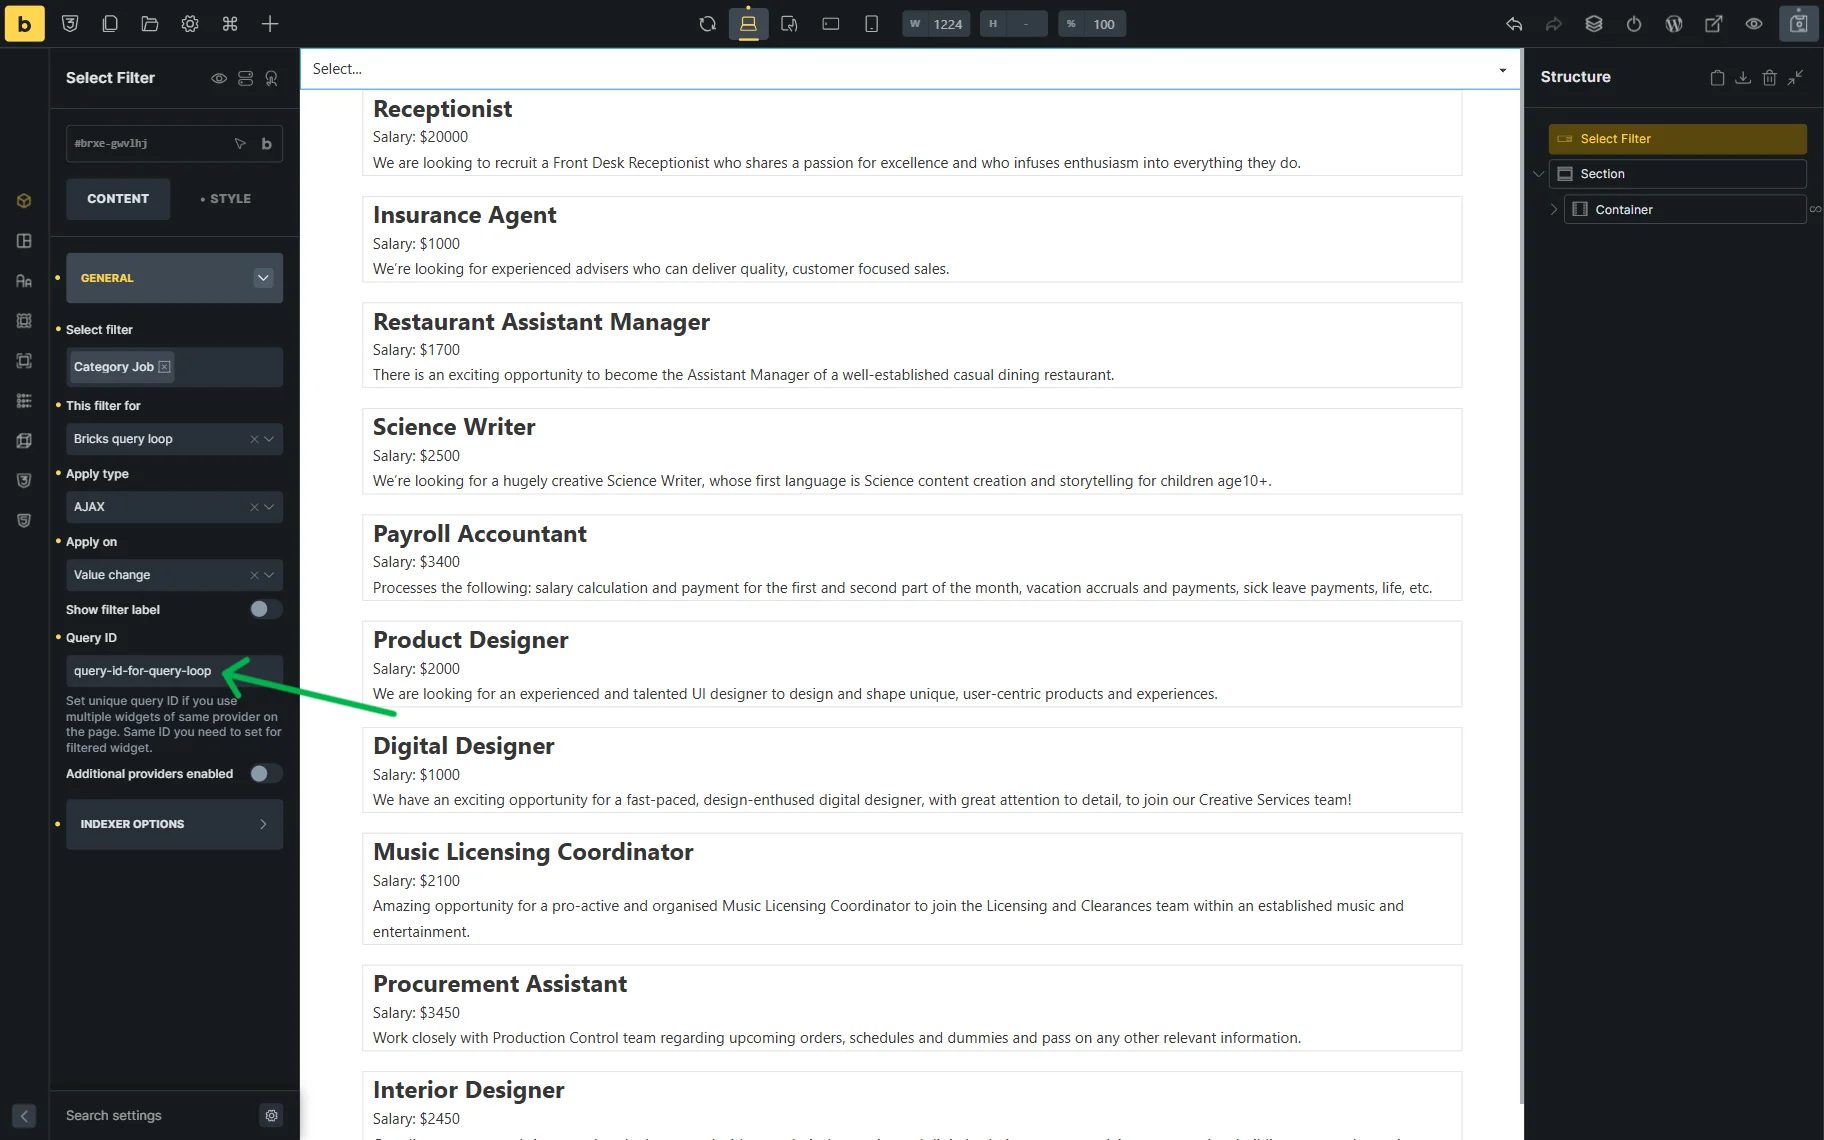
Return to the Query Loop’s settings, and in the Query ID for filters, enter the same Query ID.

Click the “Save” icon once you are ready.
That’s it. Now you know how to set the Query IDs for the JetSmartFilters and JetEngine Listing Grid and Bricks Query Loop providers on your WordPress site.