How can we improve the work with the WordPress website if it has a lot of materials, products, or information?
Add filters and sorting capabilities. These features help you get the desired results in seconds, making filters look intuitive to the user and easy to do.
In this article, you will find six use cases you might want to replicate, so enjoy.
Table of Contents
- What Is the Difference Between Filtering and Sorting?
- What Can Be Done with JetSmartFilters?
- How to Use JetSmartFilter Sorting Filter
- Other JetSmartFilters Use Cases and Examples
- FAQ
- Last Words
What Is the Difference Between Filtering and Sorting?
Even though sorting and filtering tasks are similar, these two functions have different principles when working with data.
So, filtering allows you to exclude certain products, data, or information that do not fit the specified parameters. For example, a person wants to find a red jacket on the site. If they can filter, the results will show only red jackets of different models.
Sorting allows you to organize the data by some criterion. For example, a person looking for the same red jacket can sort by price or size, thus choosing the right thing faster.
What Can Be Done with JetSmartFilters?
Let’s start by looking at the JetSmartFilters plugin’s general functionality.
JetSmartFilters is a plugin that helps you add dynamic filters to pages and sites made with Bricks, Gutenberg, and Elementor. With 13 types of filters available to users, you can create any custom filtering structure to fit your project.
The plugin allows you to customize the output of the results, set the string of permanent links, and customize the filtering logic.
The plugin contains six types of filters and 15 widgets to customize on-page filtering.
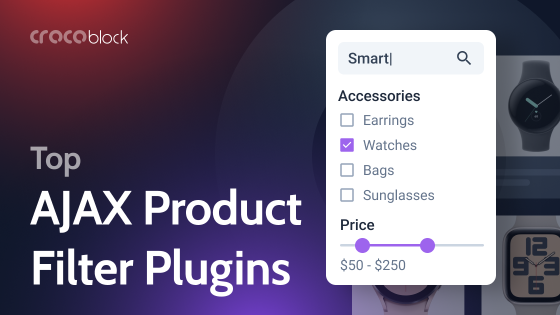
You can choose filters such as search, select, rating, radio, visual, date period, date ranges, or checkboxes list. The results will be displayed without reloading the page using AJAX technology.
You can customize the design in all filters to fit your pages best.
Creating a filter is very easy.
To do this, you need to install and activate the JetSmartFilters plugin. After that, click on “Add New.”
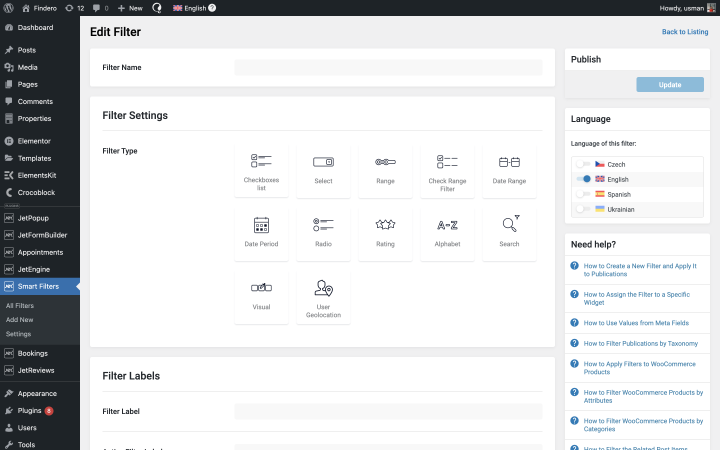
After that, you need to provide a name for the filter, choose the type, and specify where to get the data.
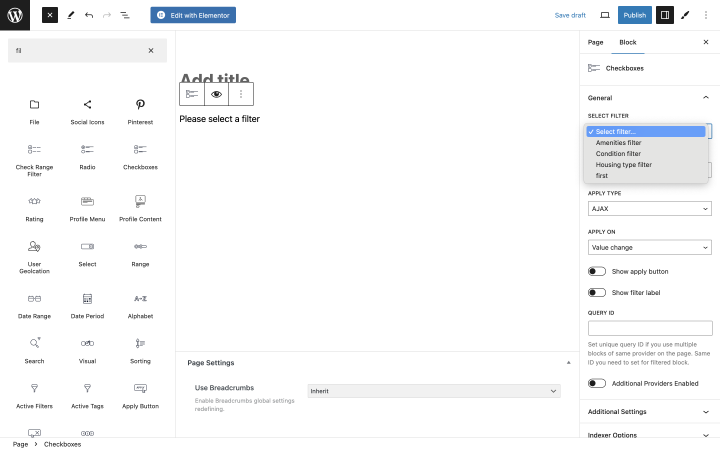
Afterward, you can place the filter in the desired location on the site or page. When you add the filter to the desired location, WordPress will ask you to choose a filter and find the option you created in the dropdown list.
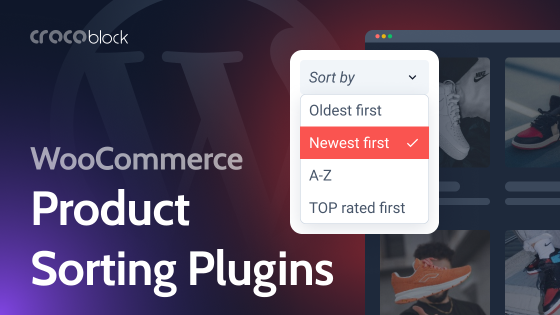
How to Use JetSmartFilter Sorting Filter
The sorting filter on your website may look like this:
Here, you can filter books for popularity, price, and novelty. But in your filter, you can choose any criteria. And here is how you can do it.
In order to add a sorting filter, you need to install and activate JetSmartFilters. Find a sorting filter among the widgets and place it in the right place on the site. First, you need to choose what to filter from, as well as how to display the results – using AJAX or with a page reload.
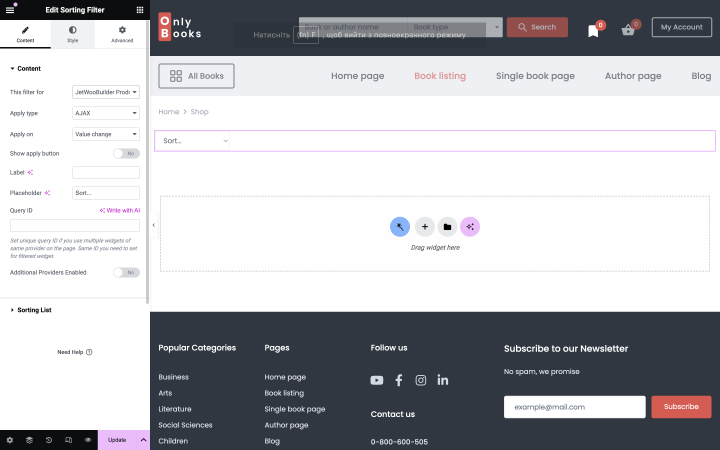
Below, in the Sorting List, you can specify which parameter to filter products by and how they will be seen by the user.
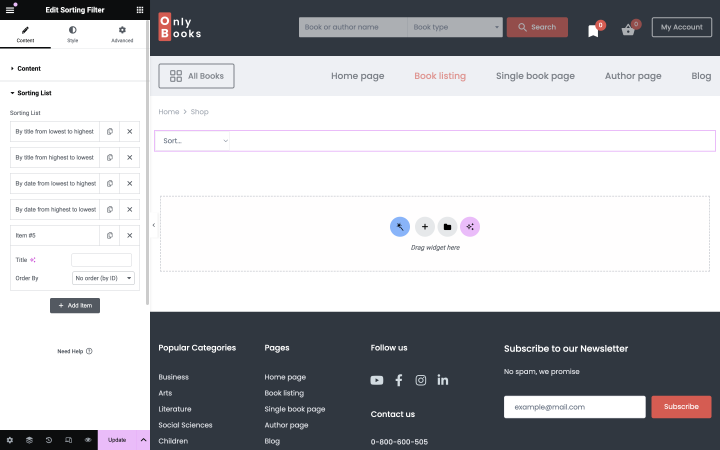
Depending on the plugins installed on the site, The filter for and Order By lists may vary. In our case, shown in the screenshots above, JetEngine, JetWooBuilder, and WooCommerce plugins were used.
Once you’ve specified everything, check to see if your filter is working correctly.
Other JetSmartFilters Use Cases and Examples
Now, let’s look at some practical examples.
Case 1: Set the range of values based on the numeric meta field
Creating such a filter for numeric data is simple. To do this:
- Create a new filter and select the Check Range filter type.
- Next, specify the maximum and minimum values.
- In the Query Variable field, specify the name of the meta field whose values will be filtered.
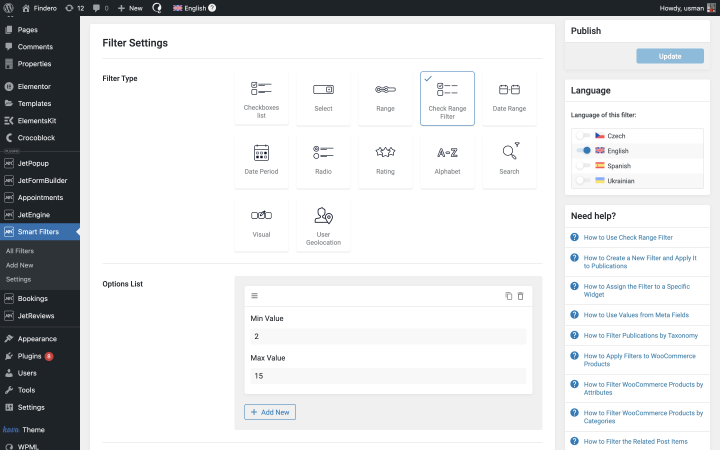
You can set as many ranges as you need.
You can then place a filter on the desired location on the page and filter, for example, tours by the number of days or job candidates by the number of experience.
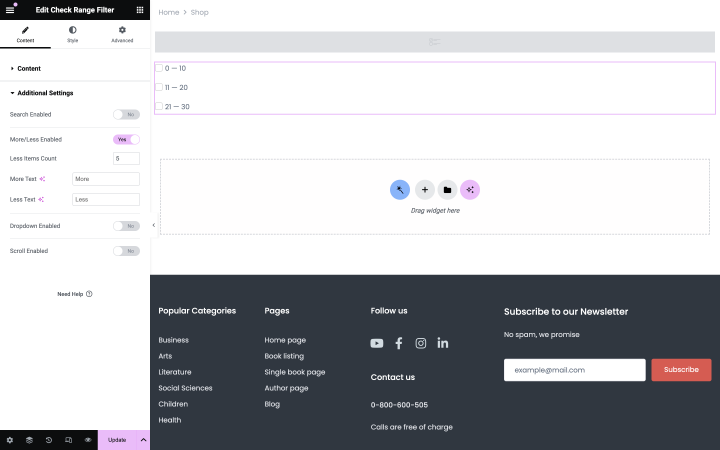
Case 2: Elementor product sorting with range slider
Sometimes, you have an extensive range of data, such as the cost of an item, that you need to filter quickly. In such a case, it would be helpful to use a Range filter.
The order of use is similar to the previous case.
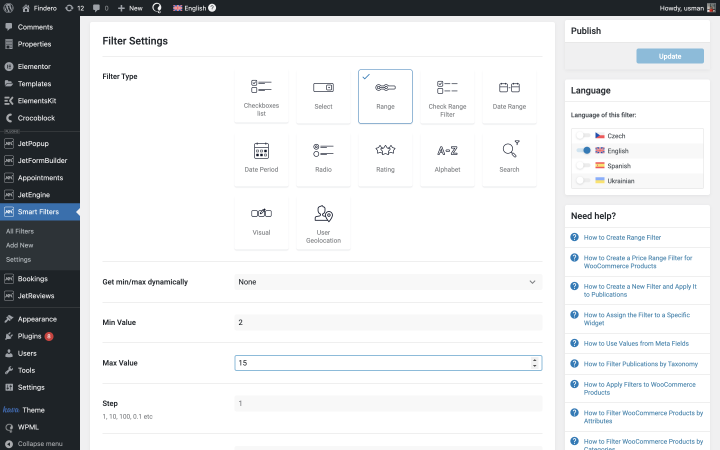
- While creating the filter, you select the Range filter.
- You specify the minimum and maximum values, the step, and the data sources.
- After that, you add the created filter to the page and use This filter feature to select what you want to filter.
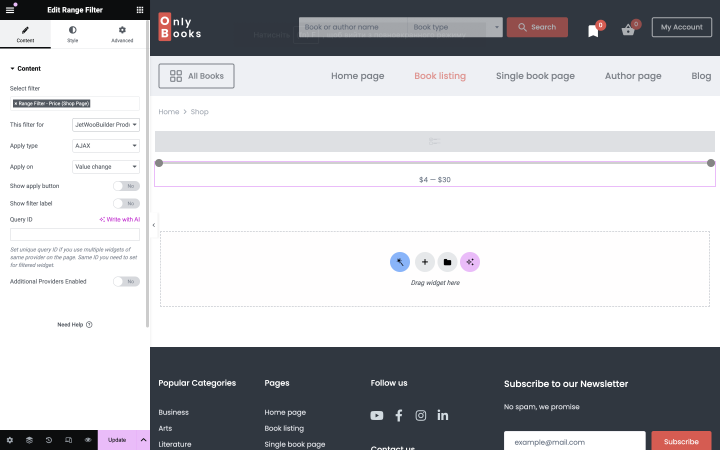
Here is what it may look like on the page:
Case 3: Drop-down lists of items
For many sites, it is imperative to have a drop-down list filter, such as if you need to sort products in WooCommerce.
Let’s imagine the site for selling clothes. The user needs to be able to select only pants or T-shirts. In such a case, a drop-down list filter is the most convenient.
JetSmartFilters can also be used for such a task.
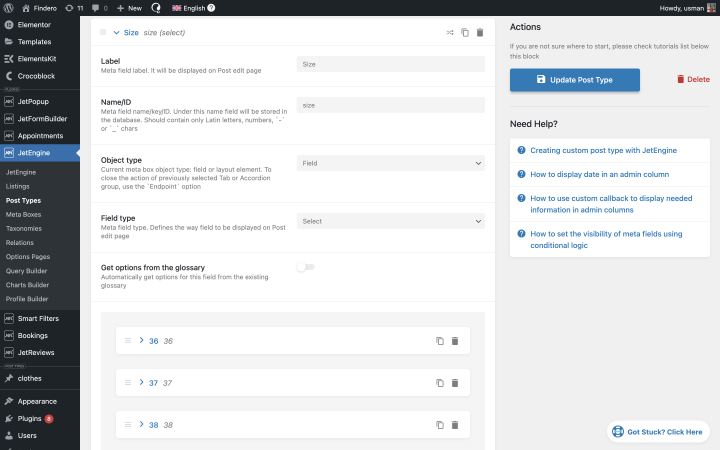
First, you need to create a meta field for the custom post type. For example, in the store, it
can be a clothing size. You can do this with JetEngine. To do this, go to JetEngine > Custom Post Types > Add New.
Next, specify Name/ID, for example, “Size.” This is the meta field that you created previously.
In the Field Type, choose “Select.” Below, you need to specify options by which the user can then filter.
If necessary, you can add the ability to select multiple options.
After that, we proceed to create a filter. Like the previous options, go to JetSmartFilters and create a new one.
Choose “Select” and set Data Source to “Manual Input.”
In the Options Lists section, enter the sizes you specified in Custom Post Types. In the query Variable section, select Size. After saving, you can use the created filter on your page. Manual input of data can be inconvenient because there can be a lot of data. It is better to use custom fields or glossaries instead of manual input.
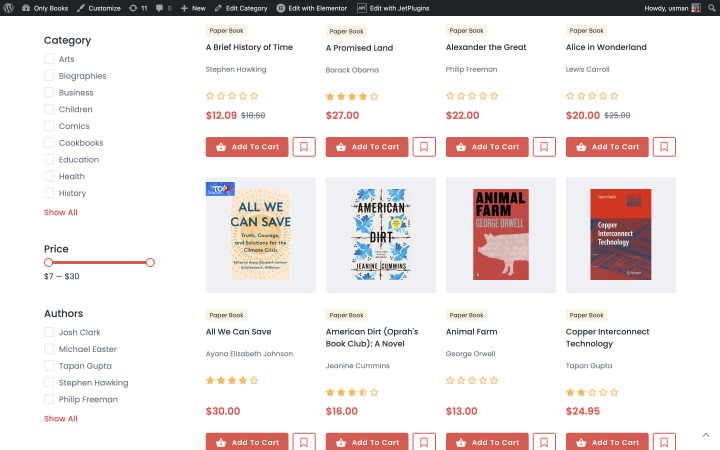
Case 4: Checkboxes
Sometimes, the drop-down list filter is not very convenient, and users need more options when searching for a product.
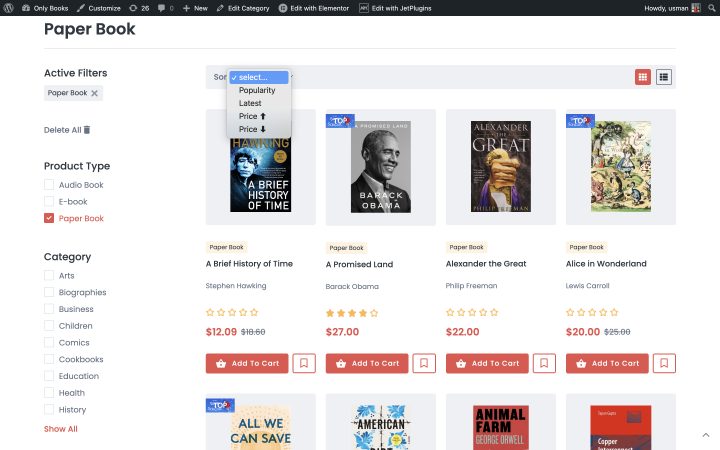
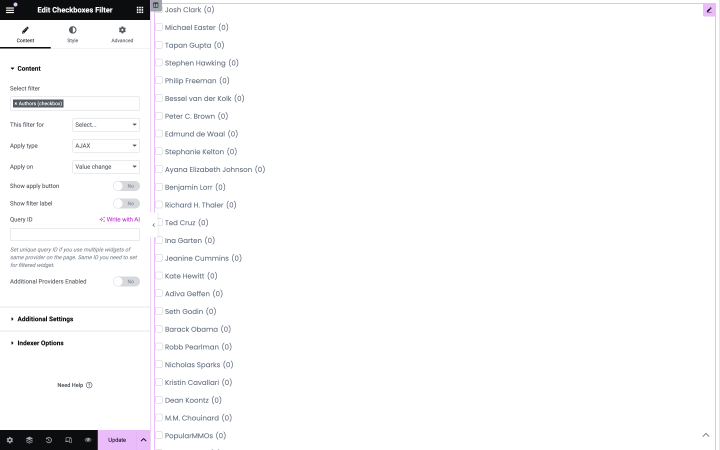
For example, in a clothing store, you need to be able to filter by clothing type, size, and color at once. Here is an example:
In this case, a Checkbox filter with multiple options would be perfect.
To create it, go to JetSmartFilters > Add New.
Before creating the filter, you need to make a meta field in JetEngine, as in the previous case.
Next, select the “Manual Input” option at the Data Source.
Enable the toggle on the Is Checkbox Meta Field (Jet Engine) option. In the next step, you need to specify the possible choices, click “New Option,” and create an Options List. Add the same options as you have created in the meta field.
In the Query Variable field, specify the Name/ID of the meta field from which you have chosen the options.
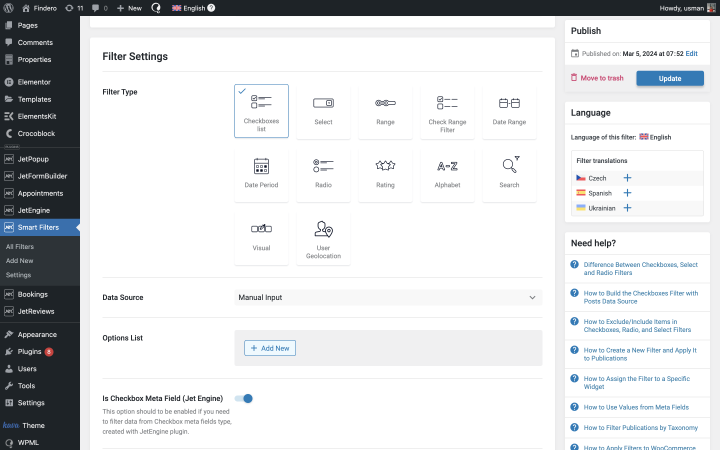
If you need to specify a specific quantity of each product type, add an Indexer to your filter, and items will count automatically.
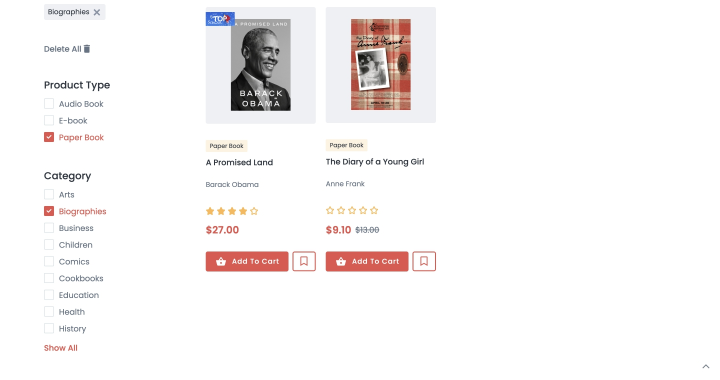
Case 5: Filtering by hierarchy
This case is more complicated but allows you to select more specific options—for example, housing in a particular area of a specific city.
First, we need to create suitable Taxonomies. To do this, go to JetEngine > Taxonomies > Add New.
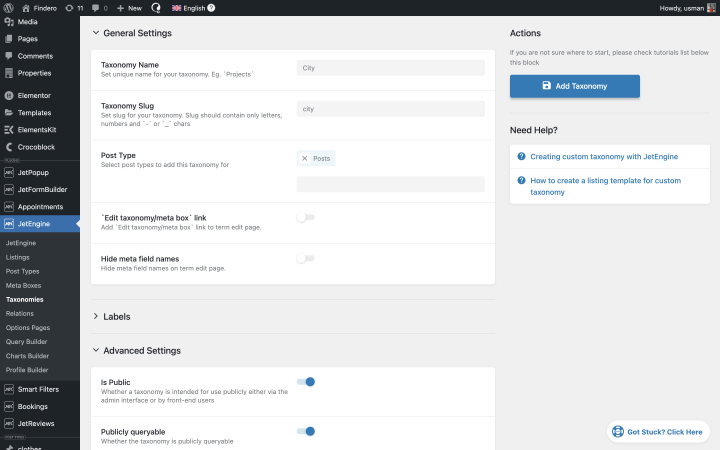
Specify the name and slug of the taxonomy and then select Post Type, specify Hierarchical in the Advanced Settings, and save the created taxonomy.
Create taxonomies for all stages of the list. For example, in the apartment example – country – city – neighborhood, select the identical Post Type for all of them.
After that, open the posts and assign them to the categories you created in the taxonomies. If the taxonomy is “city,” select all cities among the posts. After that, go to publications, and in each, click “Quick Edit” and add the appropriate taxonomy to the posts. This step will give you the possibility to apply a filter later.
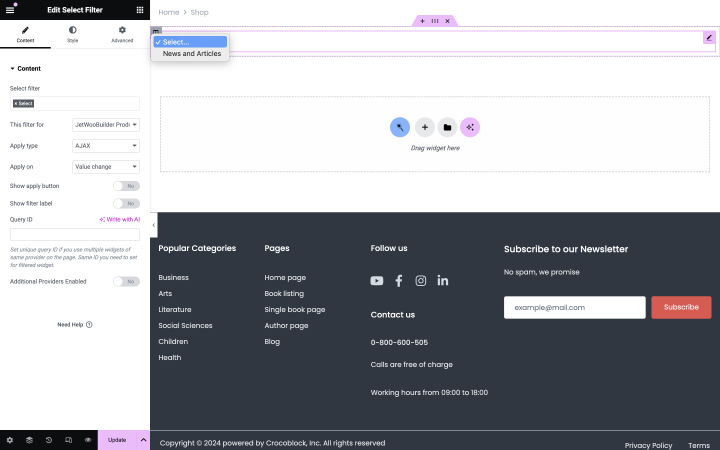
If you have done everything correctly, the last step is easy. You need to go to JetSmartFilters again and click “Add New.” Find the Select filter type in the list and enable the Is hierarchical toggle in the settings. You need to add all the taxonomies you created to the list below.
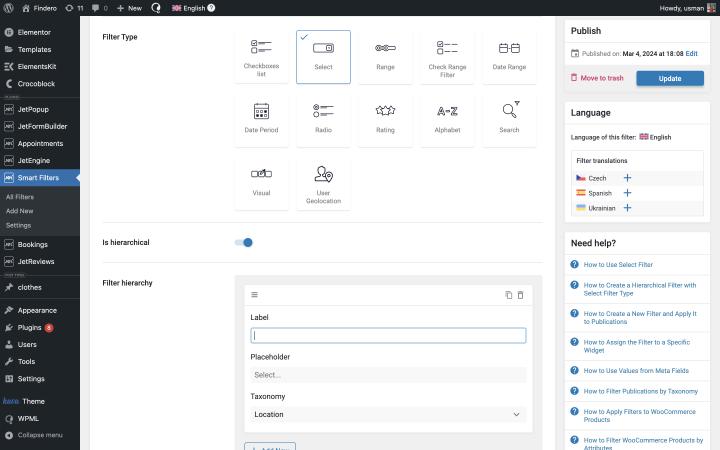
Add the filter label, and after that, click “Update.” Now, the filter works; you can place it on the page’s desired location.
Once you have placed the filter, be sure to specify “JetEngine” in the This filter for field:
FAQ
Using a plugin like JetSmartFilters, you can customize a filter for any complexity in a few clicks. In this article, you even saw how to do it in practice.
You can try some free plugins, but for advanced functionality, a paid plugin like JetSmartFilters is the way to go.
You need to install and activate the plugin on your site. After that, you can use all its functionality.
Yes. But the standard filter isn’t very flexible and doesn’t fit everyone.
Last Words
JetSmartFilters lets you implement the wishes about filtering or sorting on the site.
Its possibilities are remarkable, and you only have to figure out exactly what you want to see. In addition, the plugin allows you to customize the design, which is very convenient for different types of sites.
This article has considered different options and cases of using filters in practice. You learned how to create a system for filtering for various tasks. Use these examples to create filters on your next website, and share your experience in the comments.