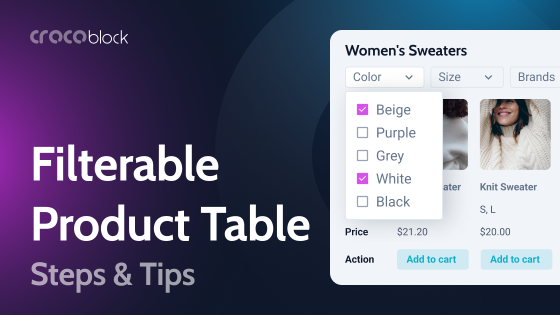
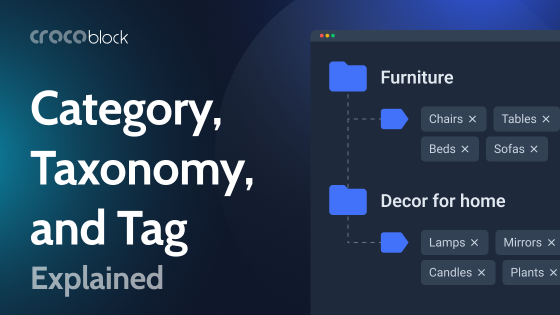
When developing a WooCommerce site, the vital task is to place all the information about goods and products in a convenient way and ensure proper structure and easy navigation.
One of the main helpers in such a task can be WooCommerce attributes. They give the user more information about each of your products, help them quickly find the right option, and even filter the appropriate products behind the attributes. However, their most crucial role is in creating variable products.
Some people confuse tags and attributes in WooCommerce.
This article provides essential information about attributes, why you need them, and how to add them to your WooCommerce website.
Table of Contents
- What Is a Product Attribute?
- Why Add Attributes?
- Types of Attributes
- How to Set Product Attributes
- Use Cases for Product Attributes
- FAQ
- Final Words
What Is a Product Attribute?
In simple words, WooCommerce product attributes are the characteristics of your product. For different products, attributes can include material, size, color, used technological parts (processors, filters, etc.), or model.
For example, if you sell pants, the attributes may include color, size, model, material, country of origin, and condition.
These are essential data about the product, affecting the user’s choice. If you filter by attributes, a person on your site can filter out all your pants, for example, and leave only blue jeans size M.
The attributes will be different for each product. If some characteristic does not apply to your product, you don’t need to add it.
Why Add Attributes?
There are many reasons why you should consider adding attributes to your WooCommerce website. The first and most important is convenience for users. They can get to the site and quickly select what suits them, read more information, and search for similar product options.
But besides this function, attributes help to:
- Make orders. When ordering, a person can select the right attributes and quickly add the best-suited option to the cart.
- Create variable products. Thanks to attributes, you can create variable products, organize them, manage inventories of such products, and so on. Variable products are a much more convenient option than adding separate products for each size, color, etc.
- Enhance SEO. Attributes improve keyword targeting and indexing and play an important role in generating rich snippets.
It’s important to remember that too many or too few attributes can work against you and lead to poorer user experience, sales, and analytics capabilities.
Types of Attributes
There are two types of custom attributes in WooCommerce:
- Global Attributes are best for attributes that will be reused across many products, ensuring uniformity and easier management. You set them once, and then you can select them for different products.
- Specific Attributes are ideal for unique characteristics of individual products that don’t need to be shared across your store.
How to Set Product Attributes
Creating attributes is very easy, but there are a few differences depending on the attributes you need.
Global Attributes
Global attributes are defined at the WooCommerce settings level and can be applied to multiple products. They help maintain consistency across your store.
Go to your WordPress Dashboard and click on Products > Attributes.
In the Add new attribute section, enter the attribute name (e.g., “Color,” “Size”). Optionally, set a slug and enable the attribute to be used for variations. Click “Add attribute.”
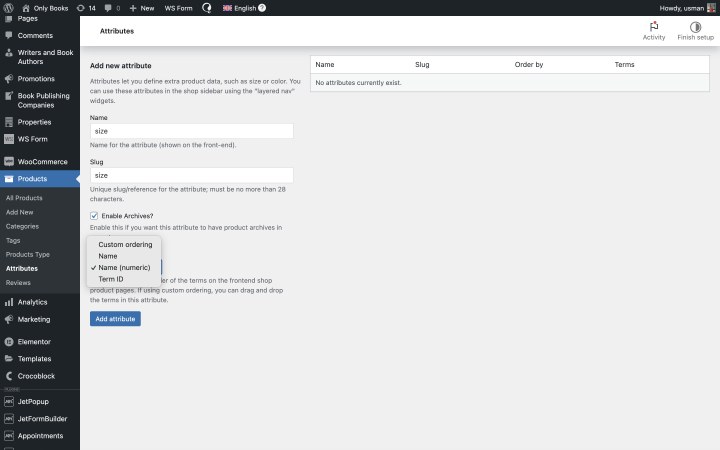
After creating the attribute, you will see it listed on the right side. Click “Configure terms” to add the specific terms (e.g., “Red,” “Blue” for Color).
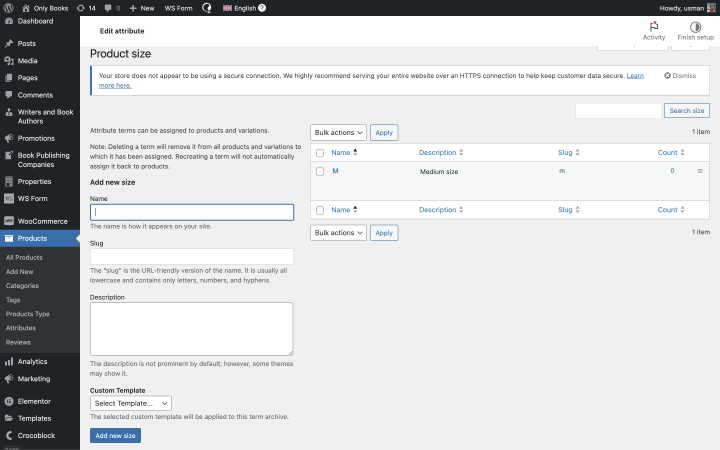
Then, apply attributes to products. Go to Products > All Products. Select the product you want to edit.
After that, scroll down to the Product Data section and click on the Attributes tab.

From the Custom product attribute dropdown, select the global attribute you created and click “Add.”
Configure the terms for this product (e.g., select size “S”, “M,” or “L”) and save the product.
Specific Attributes
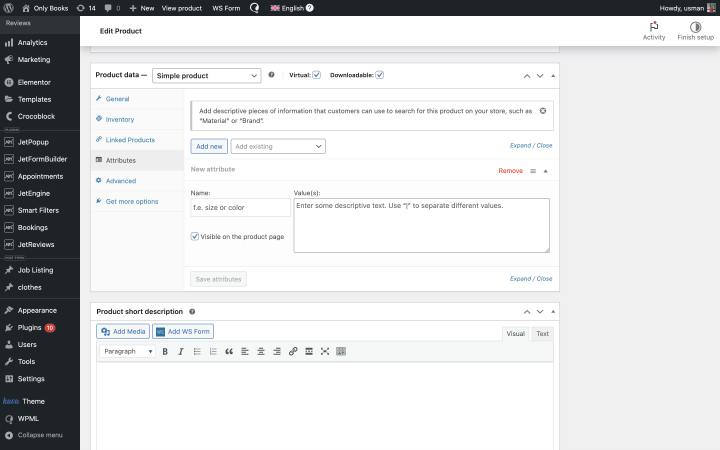
Specific or custom attributes are defined at the individual product level. They are useful if you need to add custom attributes for only a few products.
If you want to set them, go to Products > All Products. Select the product you want to edit.
Scroll down to the Product Data section and click on the Attributes tab.
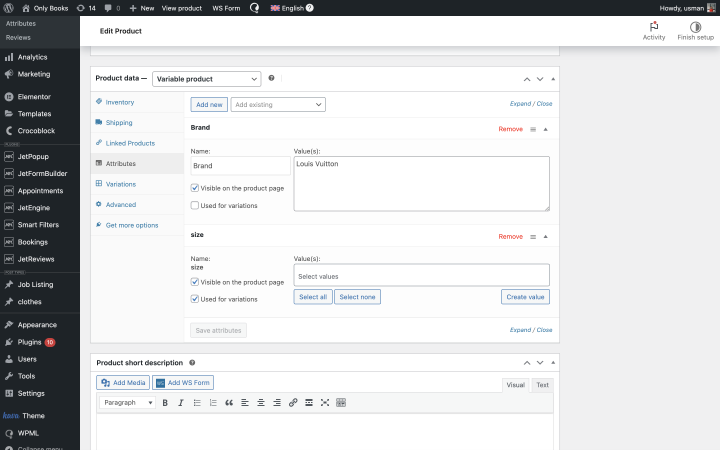
In the Custom product attribute section, click “Add” and enter the attribute name (e.g., “Material,” “Dimensions”).
Enter the terms for this product (e.g., “Cotton,” “100x200cm”). Optionally, check the boxes to make the attribute visible on the product page or to use it for variations. Then, save the product.
Use Cases for Product Attributes
Let’s look at a few examples of using attributes on your WooCommerce site. In addition to the WooCommerce plugin, these user cases also use the JetWooBuilder plugin from Crocoblock. It is a dynamic eCommerce plugin for Elementor. It allows you to build custom page templates like cart, checkout, and account, showcase WooCommerce products using multiple widgets, and query them.
Сreating product variations
A variation is a combination of different attributes. For example, in our pants example, you may have several models of jeans, classic pants, and palazzos in red, blue, and black, in sizes S, M, and L. The red palazzo in size L will be one of your variations.
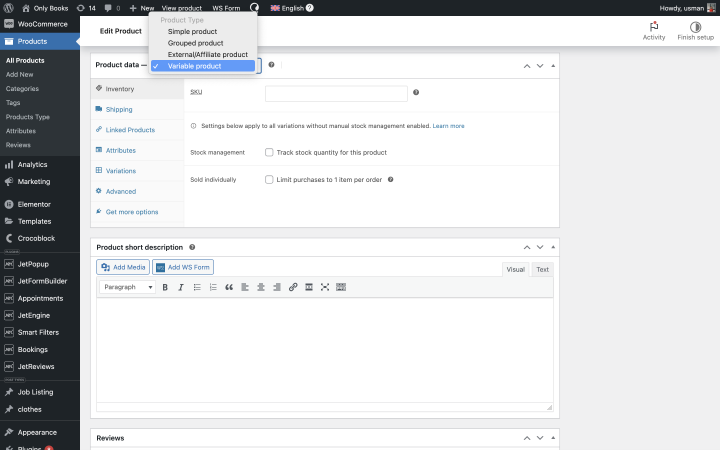
To make product variations, go to the product settings and select Variable Product in the Product Data field.
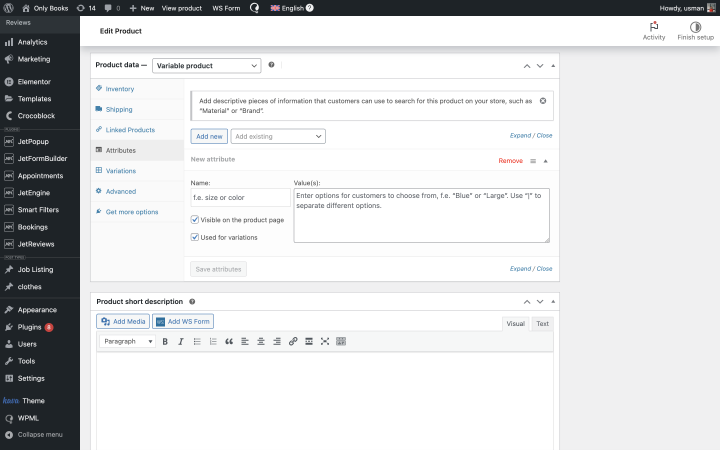
Next, specify the SKU and the relevant attributes for this product.
Afterward, you need to go to the Variations tab and click “Add Variation.” You can also select the “Create variations from all attributes” option and generate variations from all previously added attributes.
How to set filtering by attributes
Now, let’s see how to build a filter with the created attributes so the user can conveniently find the desired option.
For this purpose, you will need the JetSmartFilters plugin. After installation and activation, you will be able to create different types of filters.
If you need a simple filter, you can go to Smart Filters > Add New. Then select the appropriate filter type and choose “Taxonomies” in the Data Source tab. After that, specify the needed taxonomies for the filter from the created attributes – size, color, etc. Here are the detailed instructions.
To create a hierarchical filter, for example, you need to proceed to Smart Filters > Add New in the Dashboard. Then select the Select filter type, enable the Is hierarchical toggle, and add all taxonomies. Here are the detailed instructions for your convenience.
FAQ
Product attributes are additional information about the products on your WooCommerce website. They can be any essential characteristic of what you are selling.
The main function of attributes is to help differentiate products and services. A business can categorize all its products by some characteristics, and customers can quickly find the right fit. Also, they are essential for creating variable products.
They help your customers find the suitable variant of products faster, which means they improve the user experience. In addition, adequately created attributes help products to be found in Google searches, which positively impacts SEO.
Final Words
Product attributes are a simple way to make navigation on a WooCommerce site even more convenient. Having attributes will help systematize everything, especially if you need to put a lot of monotonous products on one site.
In addition, attributes allow you to estimate sales and manage inventory properly, so adding them to your site is a good idea for most WooCommerce businesses.
