Conditional Logic for Custom Fields Overview
Read about the Conditional Logic provided by the JetPlugins for Custom Fields and Meta boxes.
Before you start, check the tutorial requirements:
- Elementor (Free version) or Block editor (Gutenberg)
- JetEngine plugin installed and activated
The Conditional Logic options are available for meta fields and Meta Boxes developed by the JetEngine plugin, as well as for form fields created with the JetFormBuilder plugin. This feature is intended to schedule opening hours and appointments, provide additional product information for some users, and show delivery types for a shop manager to choose from when adding a product, among other purposes.
Conditional Logic for JetPlugins Custom Fields allows:
- showing/hiding, setting value(s) for 18+ JetEngine meta fields if one or some conditions are met;
- applying one or some logic operators simultaneously for one meta field or a set of meta fields;
- applying logic operator(s): “Equal,” “Not Equal,” “In the List,” “Not In the List;”
- comparing custom field values with the pre-set data (Value to Compare bar).
Conditional Logic for JetPlugins meta boxes can be added as Visibility Conditions to the Meta Box as a whole to display or hide specific items, and as Conditional Logic to the Meta Fields that are previously added to the Meta Boxes.
The Visibility Conditions for the Meta Boxes allow:
- showing/hiding visibility of meta boxes for different user roles and taxonomy terms;
- showing/hiding visibility of meta fields added to meta boxes (applies the visibility conditions as “Include Posts,” “Exclude Posts,” “Included for User Roles,” “Excluded for User Roles,” “Post Has Taxonomy Terms,” and “Taxonomy“).
The Conditional Logic options applied to the Meta Fields cover the Conditional Logic for JetPlugins Custom Fields mentioned above. Read the How to Add Custom Meta Fields to WordPress Post via Meta Boxes tutorial for more details.
Conditional Logic for CPT Meta Fields
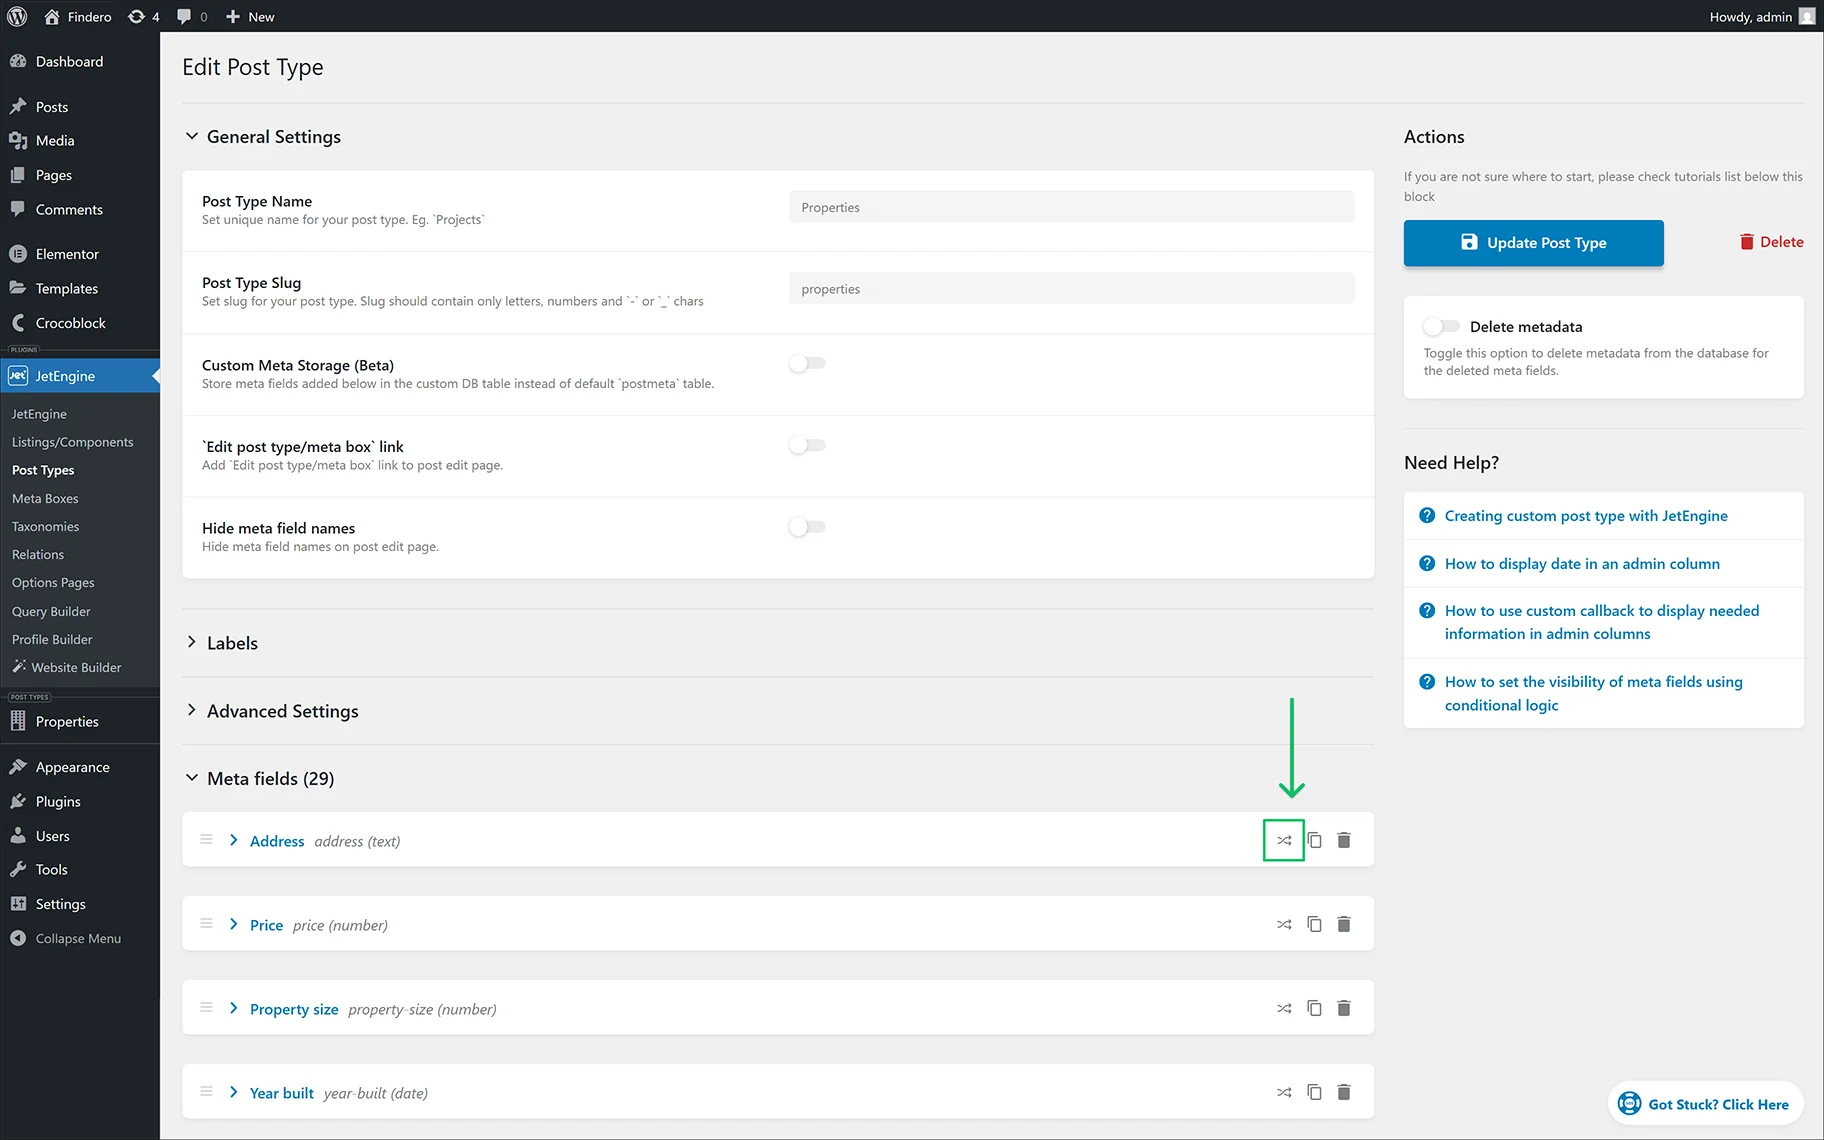
Conditional logic rules for Custom Post Types (CPTs) can be set for CPT meta fields when creating or editing the CPT in the WordPress Dashboard > JetEngine > Post Types tab.
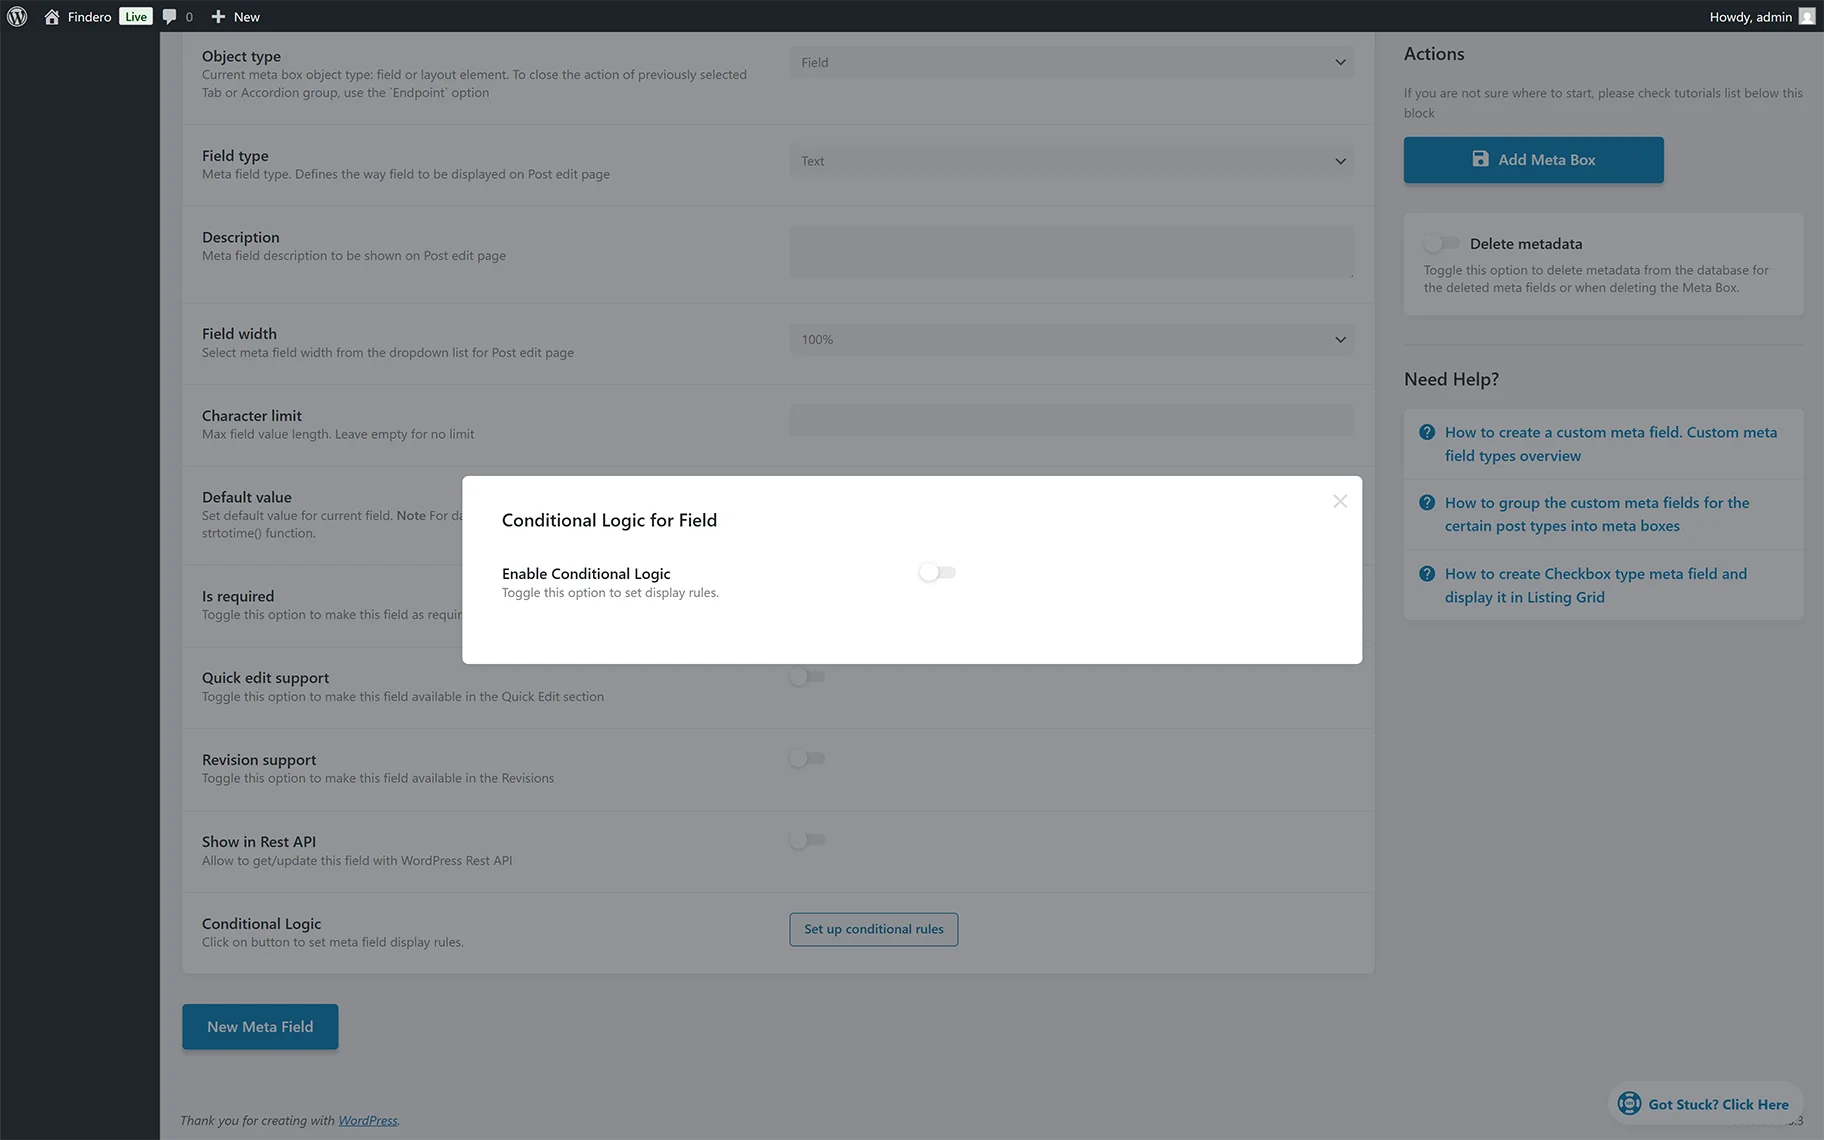
To specify the conditional rule for a particular meta field, the Meta Fields tab should be clicked and expanded, and after that, the “Conditional Logic” button to set meta field display rules should be pressed.
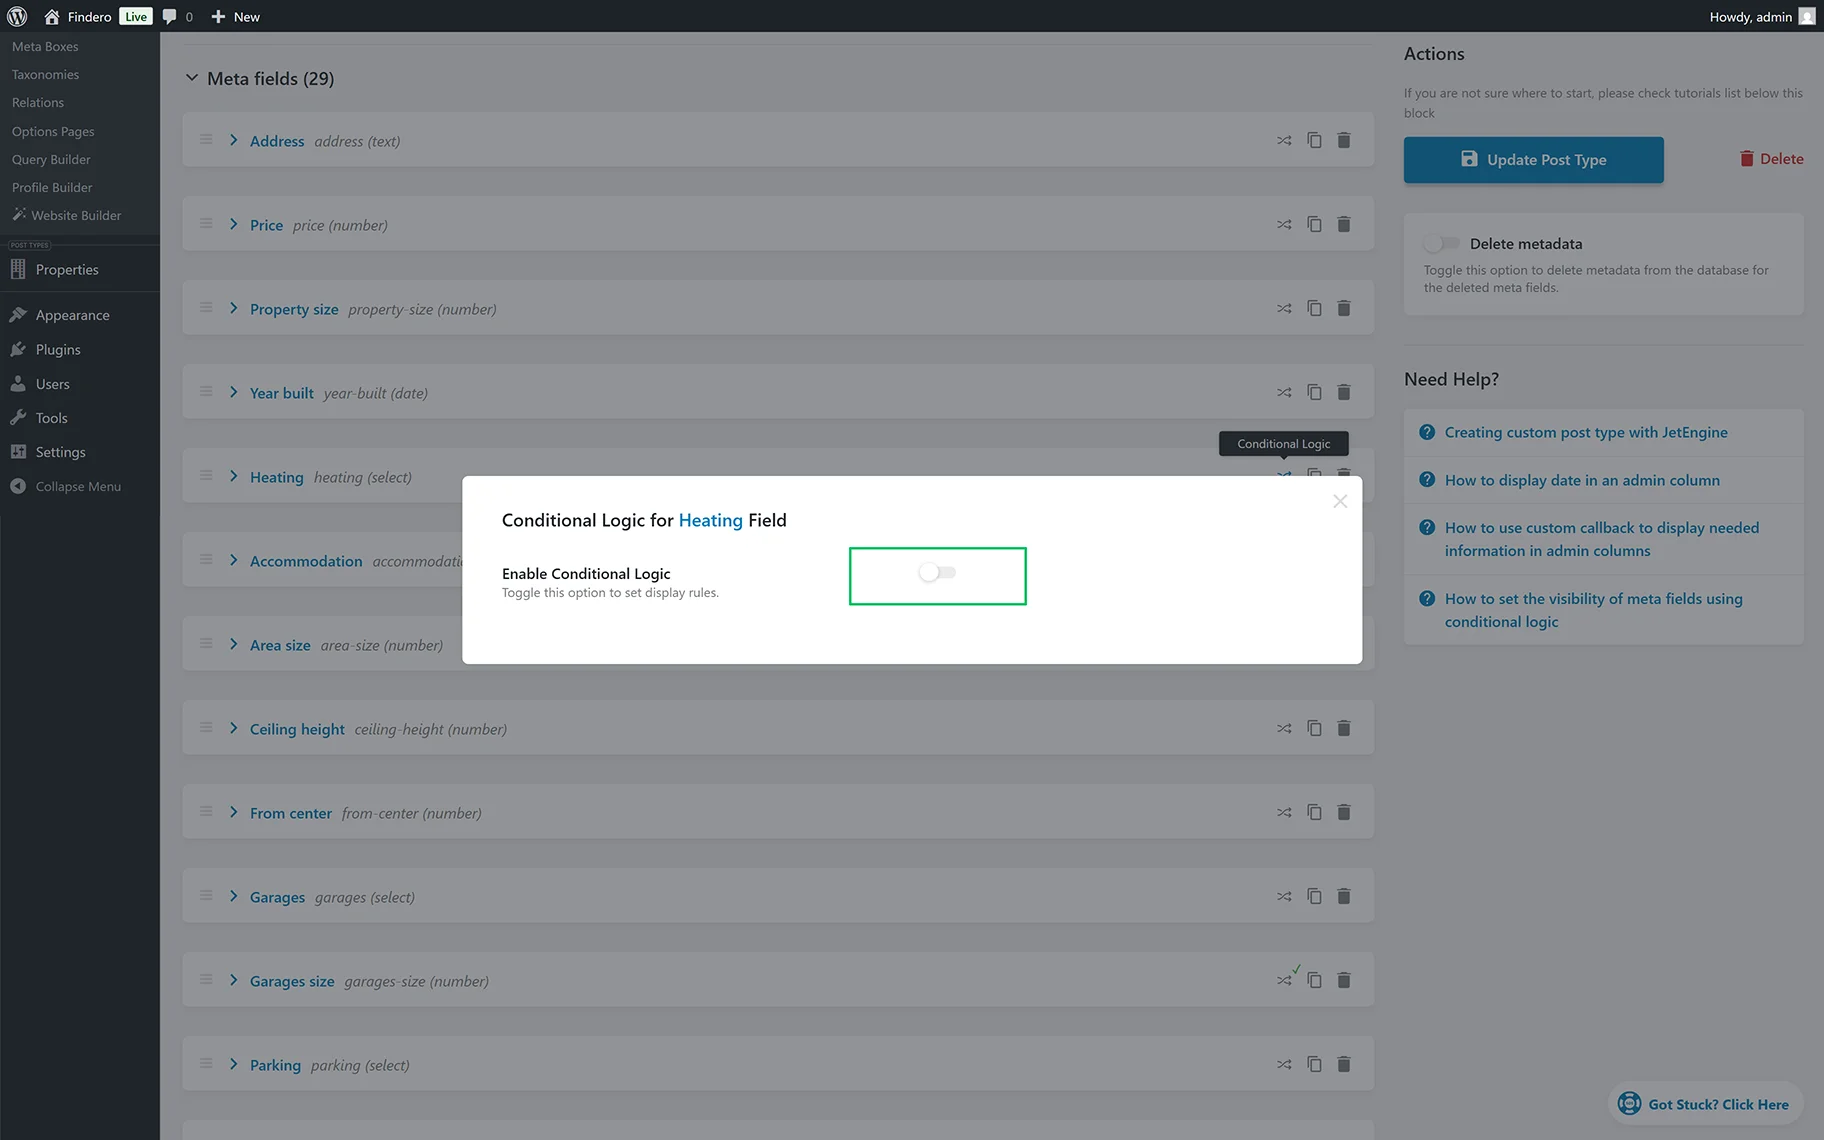
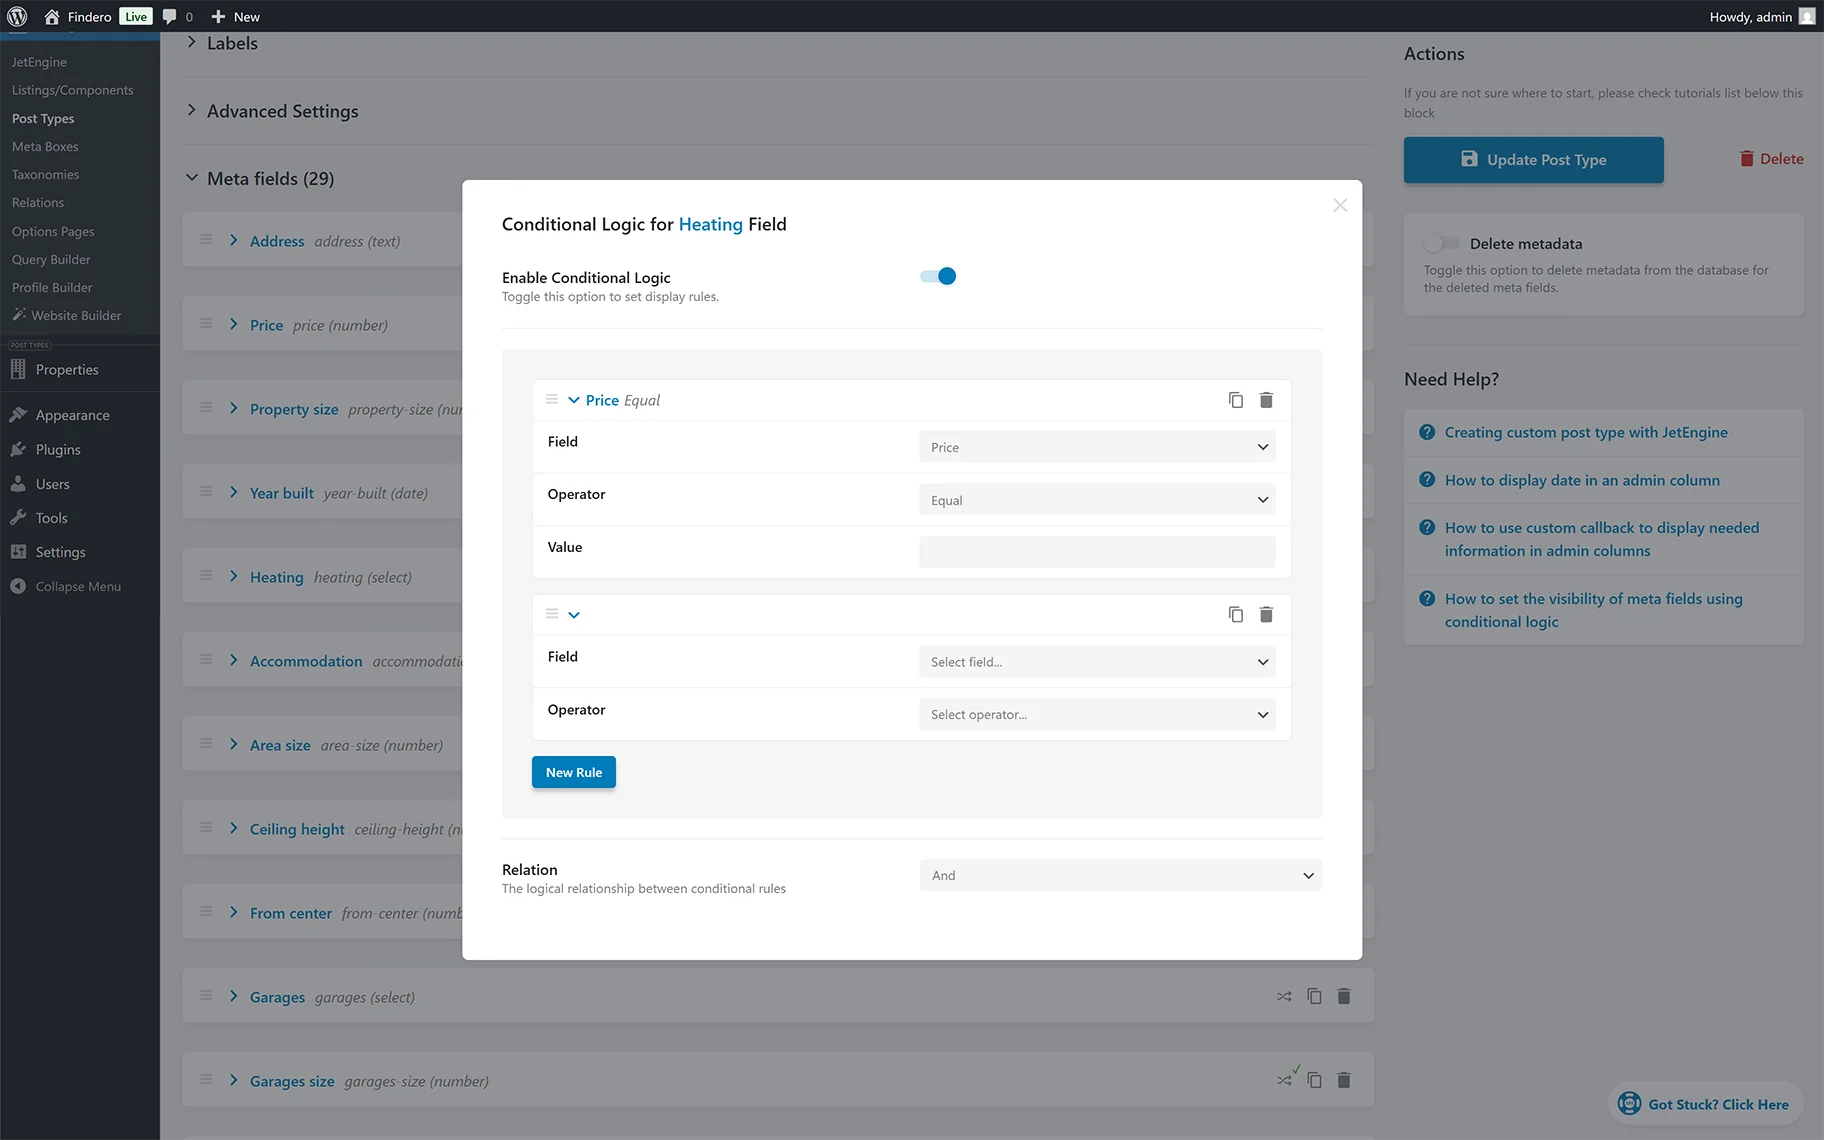
Then the Conditional Logic for (particular) Field pop-up with the disabled Enable Conditional Logic toggle will be displayed.
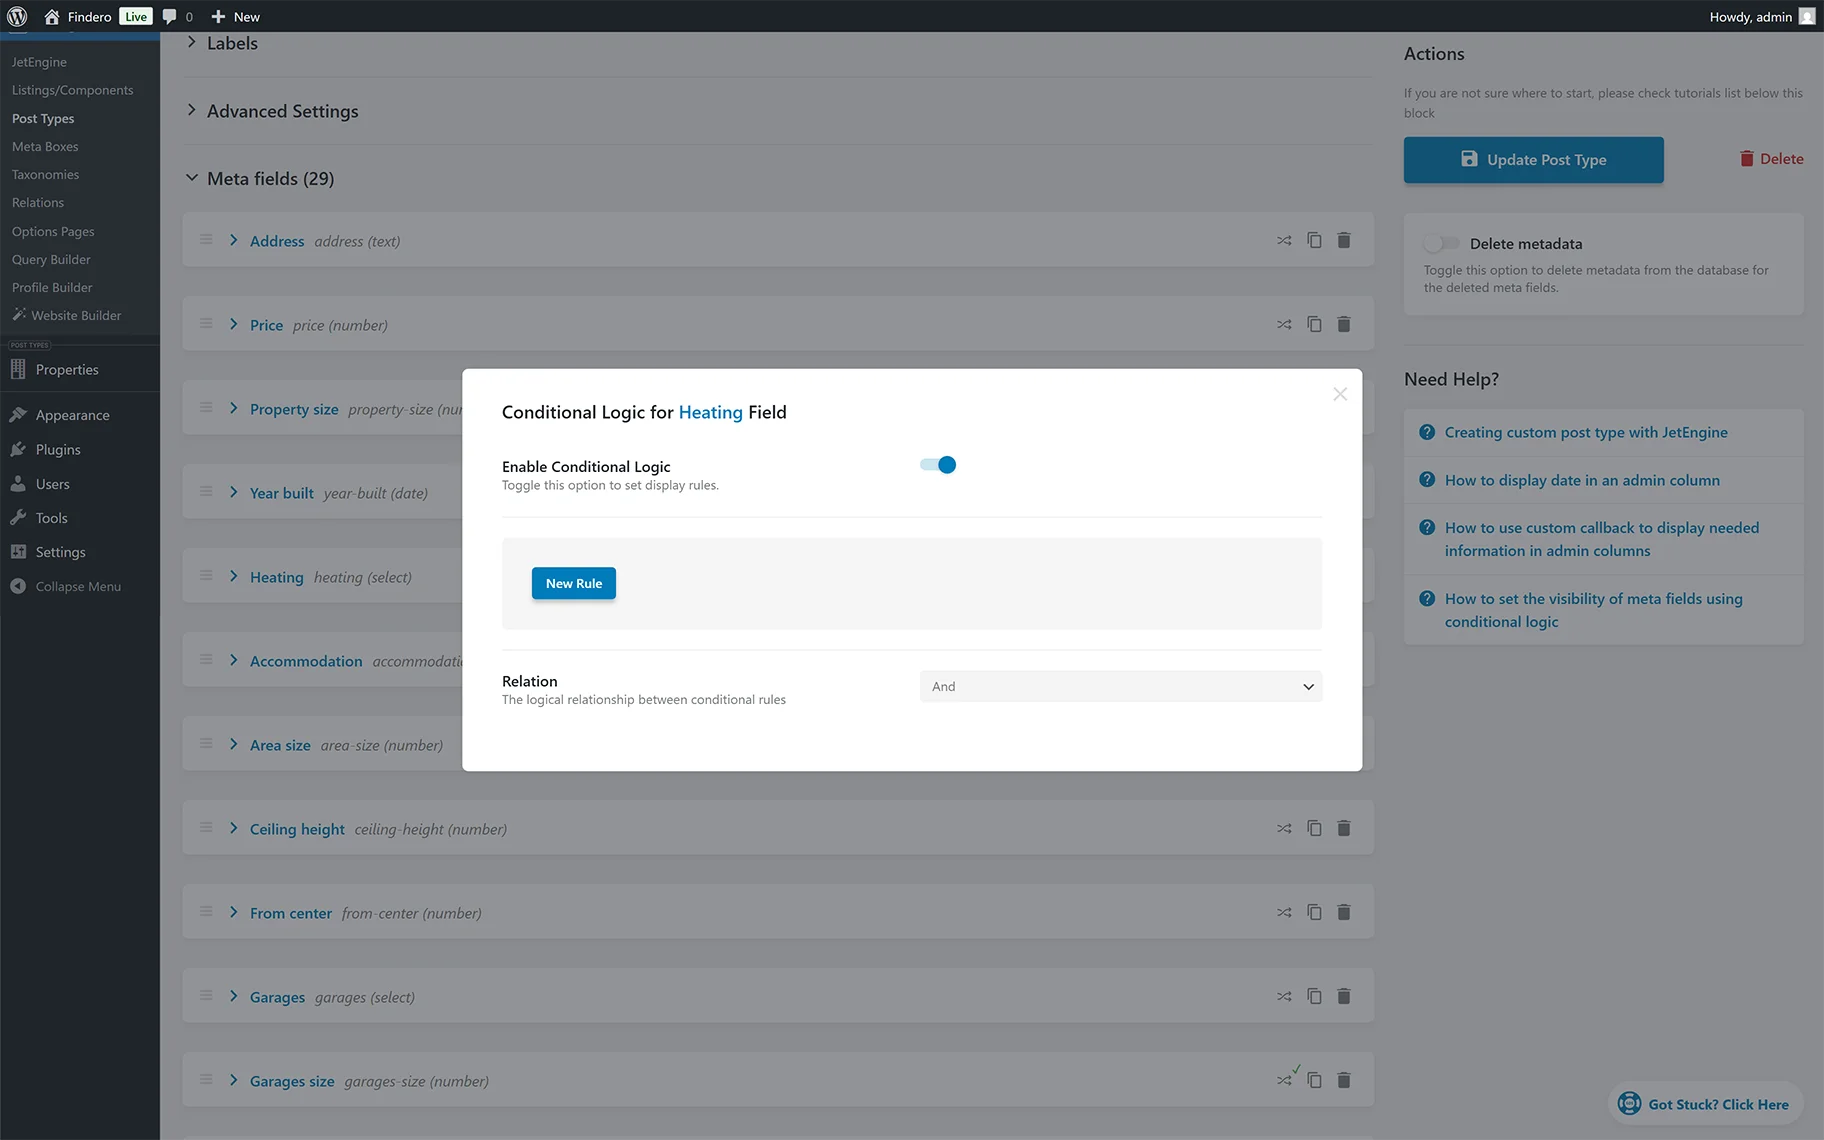
After enabling this toggle, the “New Rule” button and the Relation drop-down will appear.
Pressing this button activates the following fields:
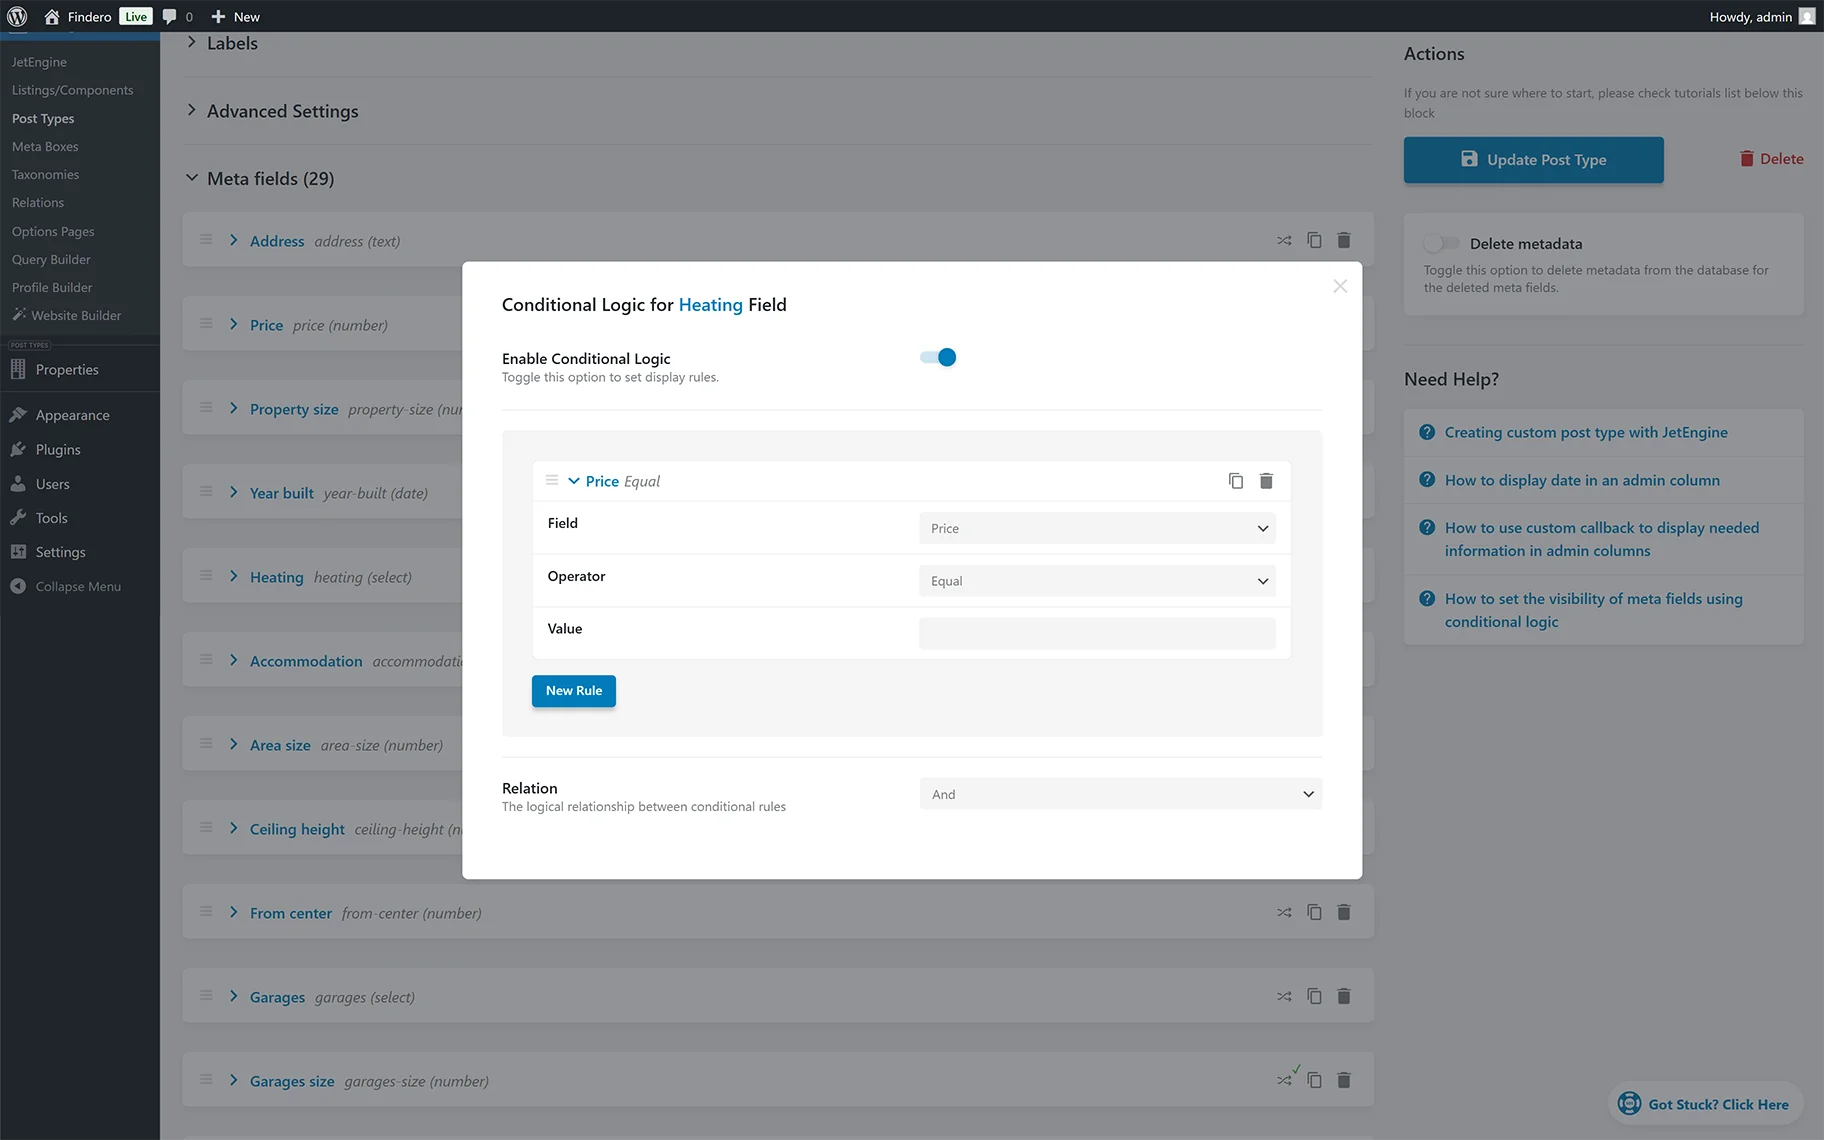
- Field 一 a drop-down menu that allows choosing the CPT meta field;
- Operator 一 a drop-down menu that allows selecting the condition (i.e., “Equal,” “Not Equal,” “In the List,” “Not In the List”). If the Field and Operator drop-downs are set, the Value field will appear to insert the needed value.
The “New Rule” button, displayed below the Field, Operator, and Value fields, allows setting another condition block using the newly appeared set of fields.
After configuring the required settings, the “Add Post Type” or “Update Post Type” button should be pressed.
Also, the newly appeared condition block can be deleted by pressing the “recycle bin” icon or duplicated by pressing the “double sheets” icon at the top of the block.
The Relation drop-down is the last field in the Conditional Logic for (particular) Field pop-up. This drop-down includes the “And” and “Or” options that allow setting the corresponding relations between the conditions.
For more details on configuring relations for various items, refer to the WordPress Relationships Explained article. Additionally, the WordPress Relations Use Cases and Common Mistakes articles present more use cases on relations.
Conditional Logic for Meta Boxes
Conditional logic rules for meta boxes can be set when creating or editing a meta box in the WordPress Dashboard > JetEngine > Meta Boxes tab. For more explanations about creating and configuring the Meta Boxes, read the Custom Meta Box Creation Guide tutorial.
In the Meta Box tab, one should move to the Visibility Conditions section and press the “+New Condition” button to unroll the list of possible Visibility Conditions.
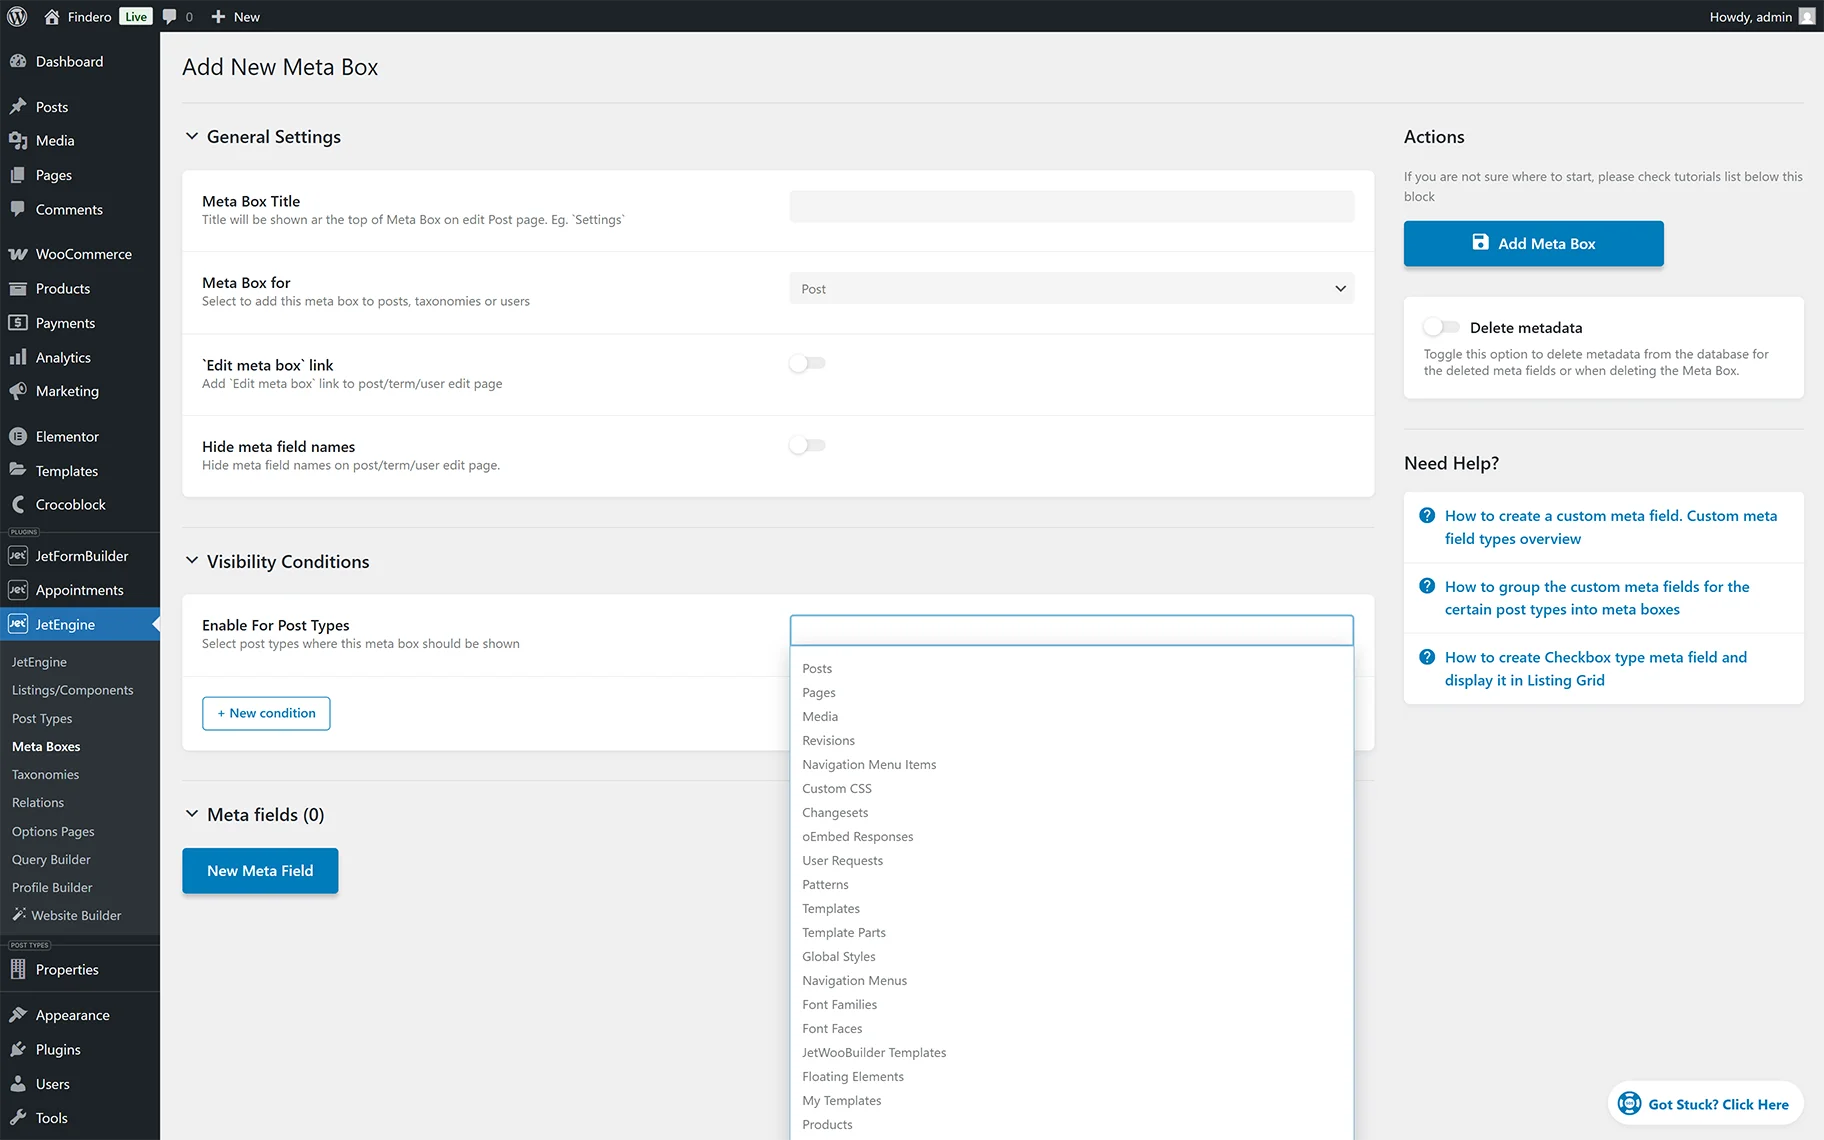
The detailed description of adding and configuring the Visibility Conditions can be found in the Meta Boxes Visibility Conditions Overview.
After specifying the needed options in the unfolded fields, another condition can be set by selecting the required option from the Add new condition drop-down list.

Also, Conditional Logic options can be set to the Meta Fields added to the Meta Boxes.
After configuring the required settings, the “Add Meta Box” or “Update Meta Box” button should be pressed.
That’s all about configuring the Conditional Logic settings for CPT meta fields and Meta Boxes developed by the JetEngine plugin for WordPress.