JetPopup Dashboard Settings Overview
This overview reveals all the features and settings of the JetPopup WordPress Dashboard.
The JetPopup plugin allows one to create and add pop-ups to the pages using the Elementor and Block Editor. To make changes in the stylization of the created pop-ups, one doesn’t need to dig into the code.
After downloading and installing the JetPopup plugin, the additional submenu will appear in the WordPress Dashboard. Let’s examine all its tabs.
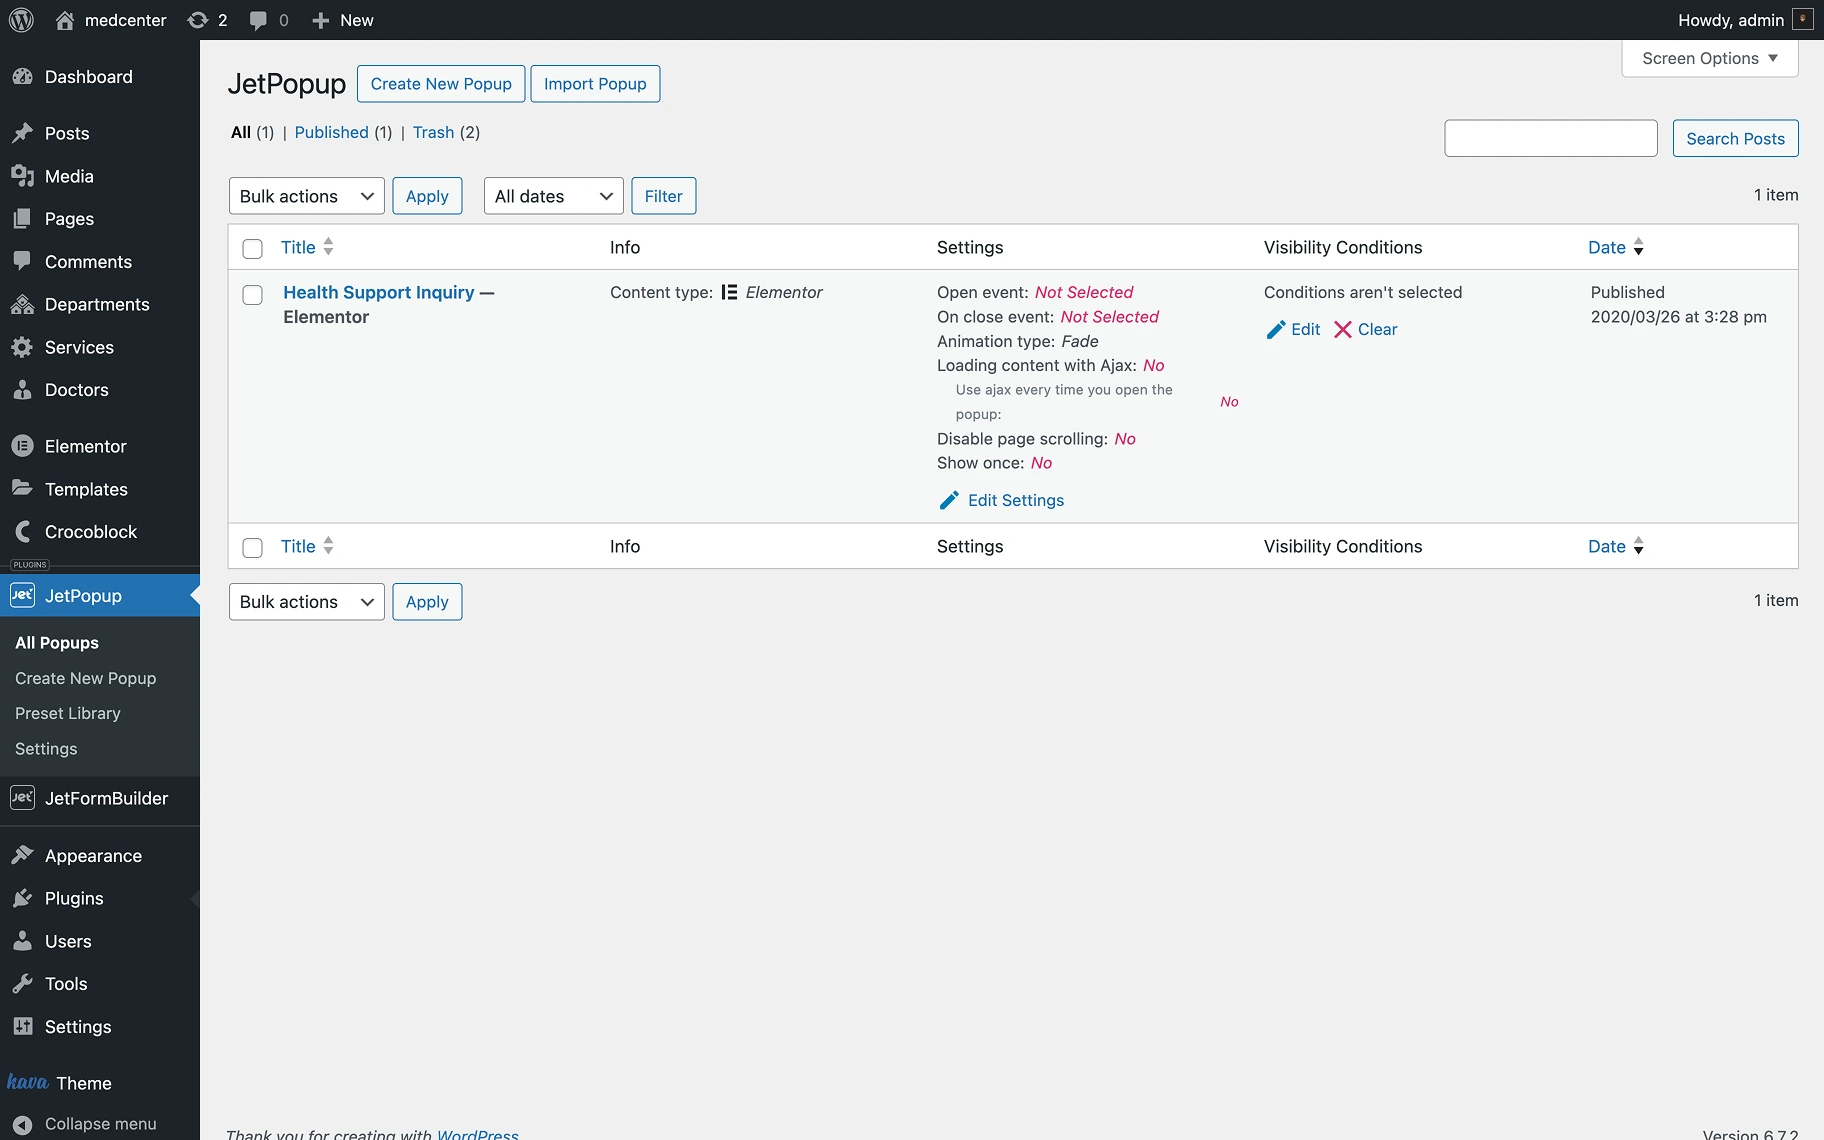
All Popups
All created pop-ups are stored here in a table. On the top of the page, there are two buttons with which one can “Create New Popup” or “Import Popup.”
The first column of the table shows the pop-up Title. When hovering over a title, one sees the actions that can be committed with a pop-up: “Edit,” “Quick Edit,” “Trash,” “View,” and “Export Popup.” When creating a pop-up in the Elementor builder, one sees the “Edit with Elementor” action.
If interested in importing and exporting pop-ups, follow the How to Export and Import Popup Templates in .json Format tutorial.
The Info column shows which builder was used to create the pop-up: Elementor or Gutenberg (Block Editor).
In the Settings column, one can check general pop-up settings. One can change them by hitting the “Edit Settings” button.
One can find the following settings in the pop-up:

- Animation — a feature that allows choosing an animation effect for the pop-up from a set of available options;
- Open Event — a feature that enables selecting the event that triggers the pop-up to open;
- On Close Event — a feature that allows choosing the event triggered when the pop-up closes;
- Prevent Page Scrolling — a switch that blocks page scrolling while the pop-up is open when enabled (disabled by default);
- Show Once — a switch that, if enabled (disabled by default), displays the pop-up only once per user session;
- Loading Content with Ajax — a switch that loads pop-up content using AJAX, improving site loading speed by delaying content loading until the pop-up appears;
- Use Close Button — a switch that enables or disables the close button (enabled by default);
- Use Overlay — a switch that enables or disables the overlay behind the pop-up (enabled by default);
- Close On Overlay Click — a switch that allows users to close the pop-up by clicking on the overlay when enabled (enabled by default).
After finishing, the “Save Settings” button at the bottom of the pop-up should be pushed. Also, one can fully customize the pop-up settings by editing them in the builder.
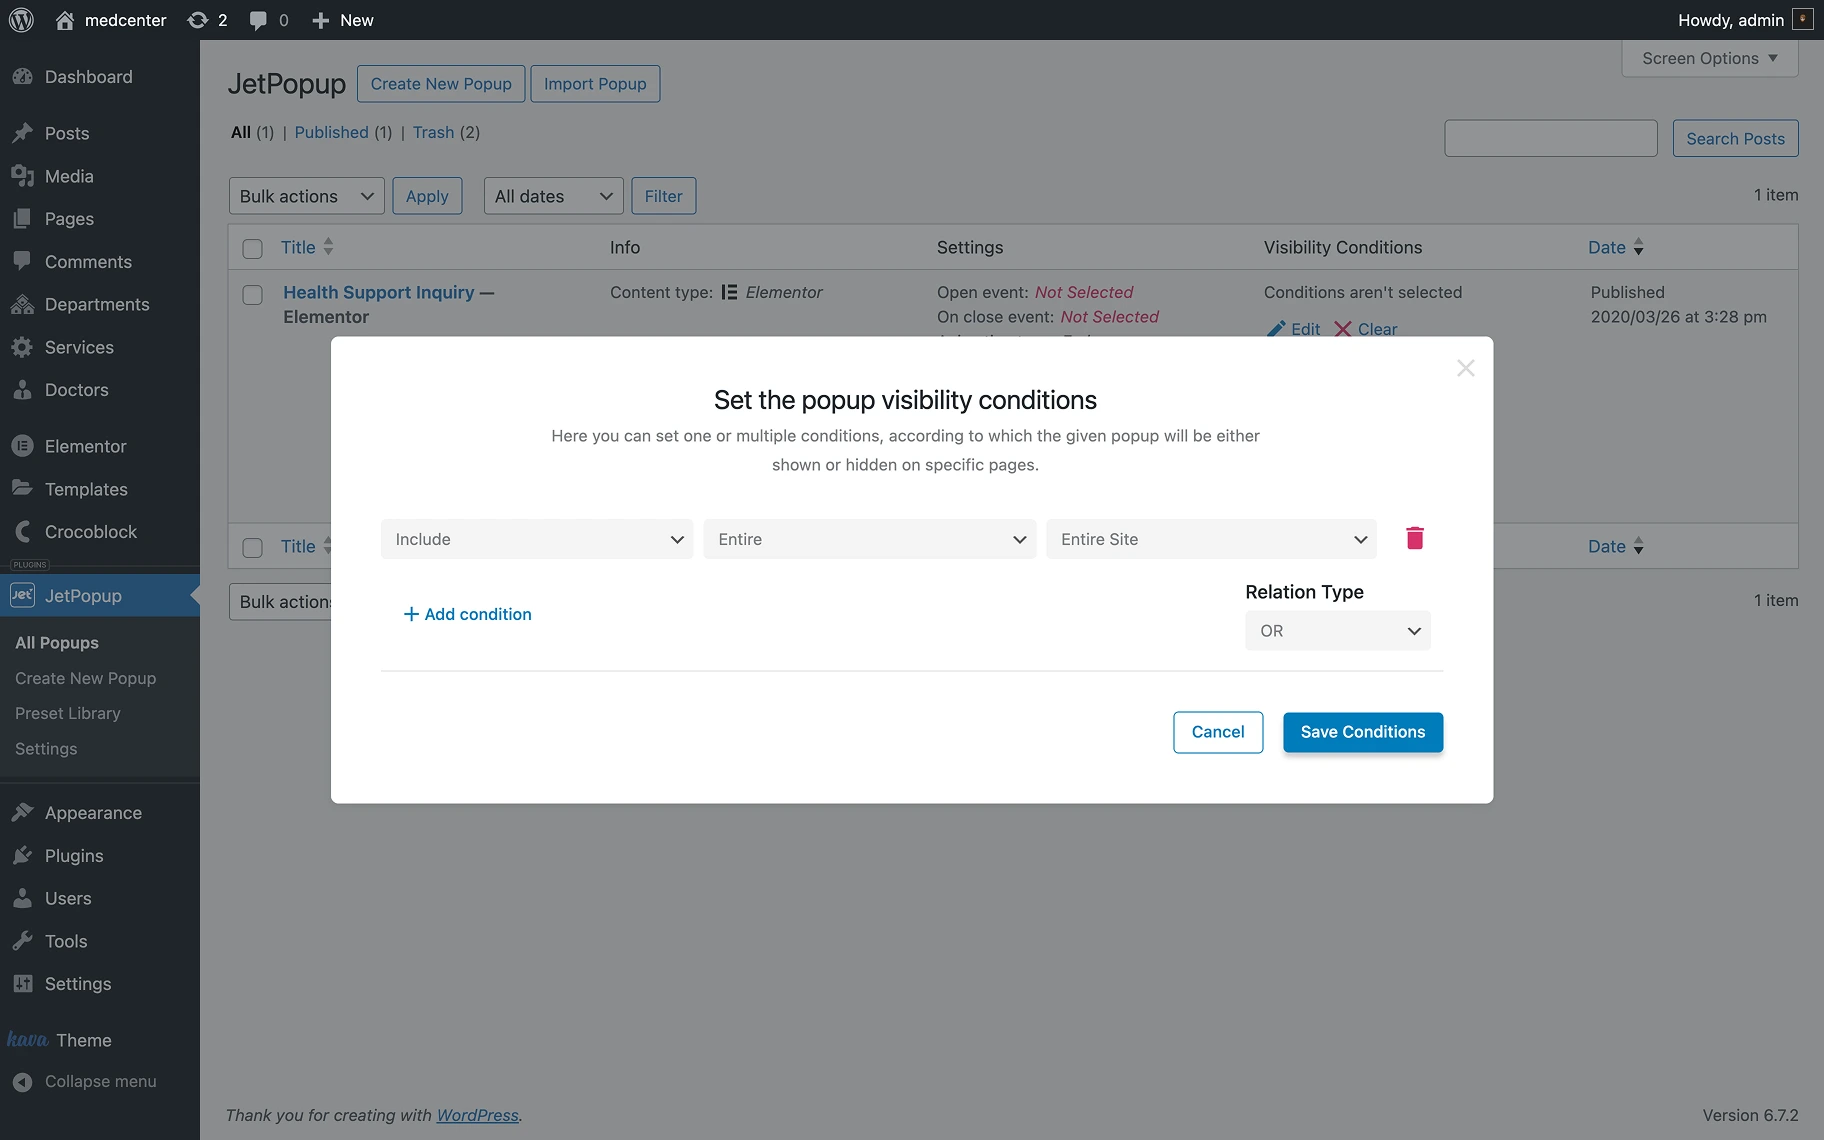
In the Visibility Conditions column, one can see where a pop-up will appear. It can be visible on the entire site, a single page, specific devices (e.g., mobile only), or other locations. One can set the conditions by pressing the “Edit Conditions” button.
Explore more in the Popup Conditions Overview.
The last column shows the Date of the pop-up creation.
Create New Popup
When going to the WordPress Dashboard > JetPopup > Create New Popup tab, one will get to the Gutenberg (Block) builder. To create a pop-up with Elementor, one should hit the “Edit with Elementor” button.
One should check:
- How to Create a New Popup Template in Elementor tutorial to learn how to use JetPopup with Elementor builder;
- How to Create Popup in Gutenberg tutorial to learn how to use JetPopup for WordPress (Block) editor.

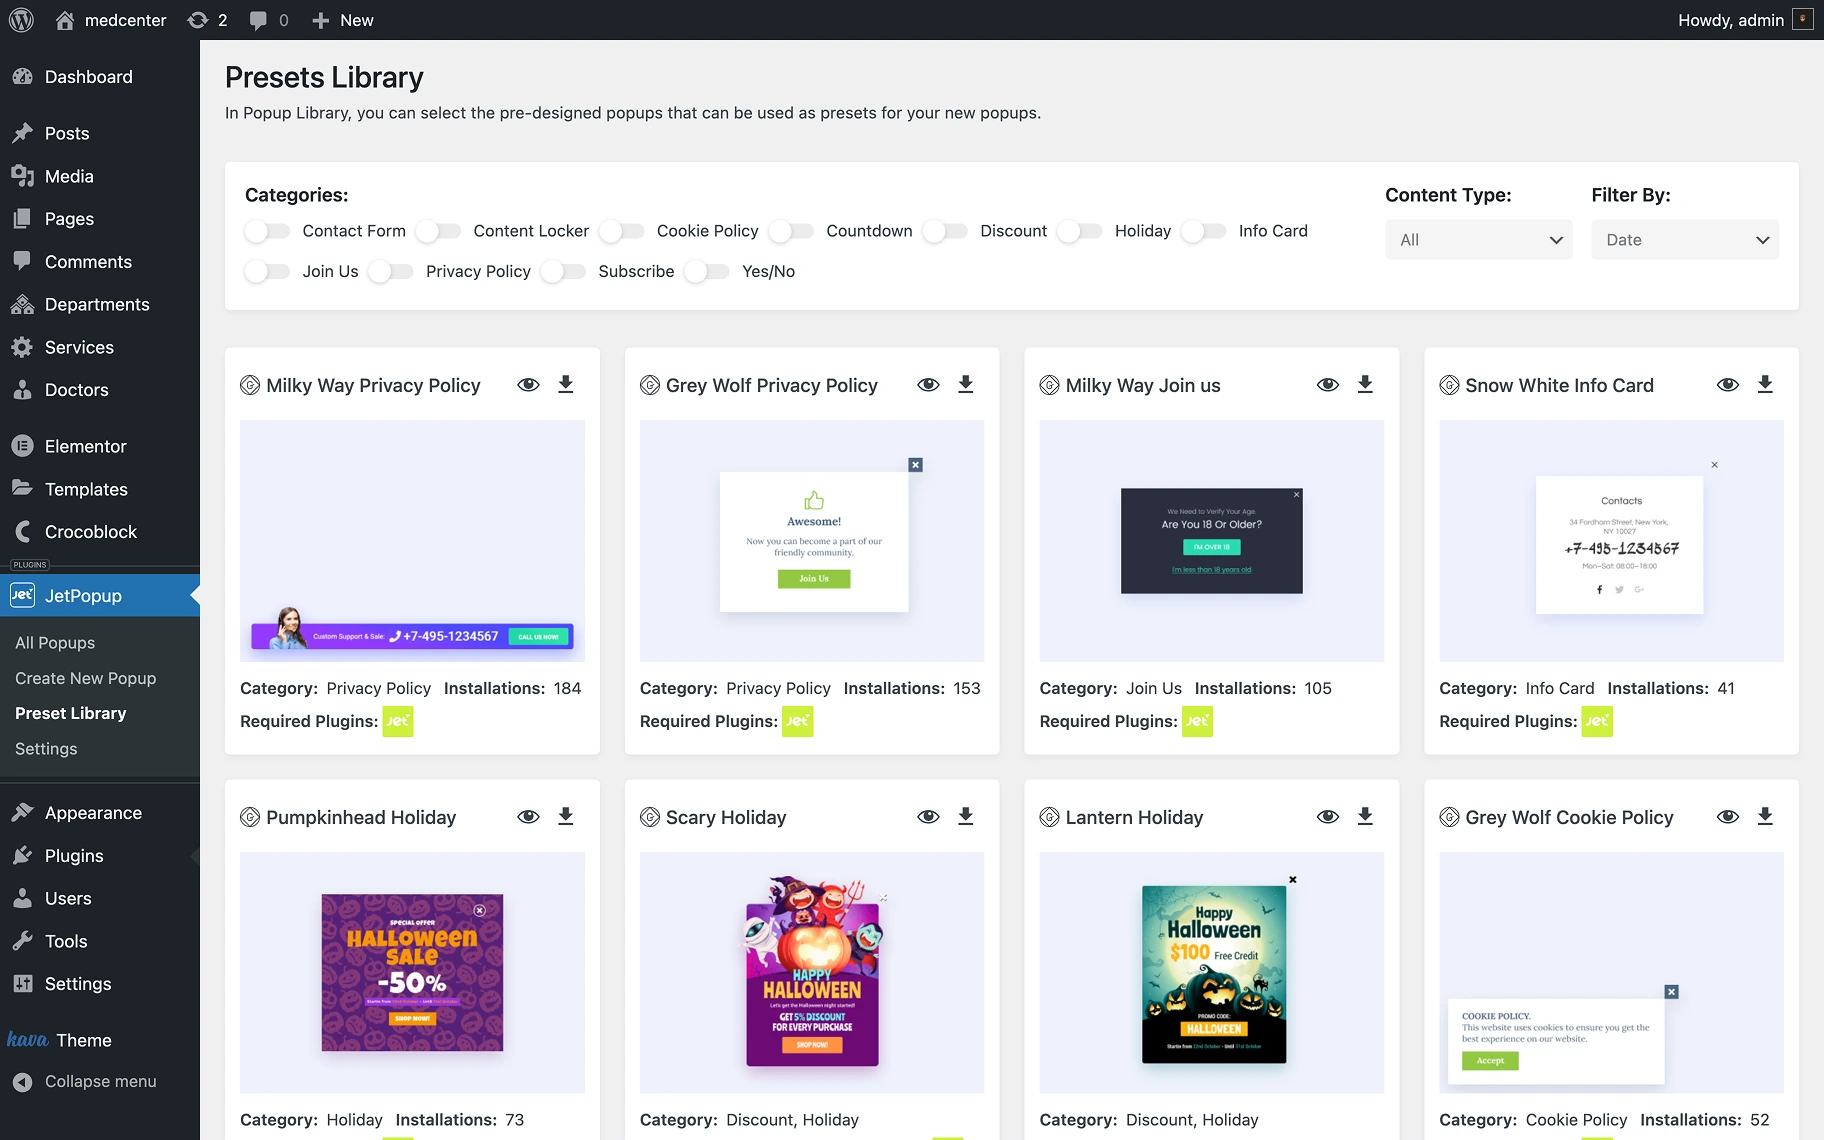
Preset Library
Here, one can install one of the pre-designed pop-ups and customize it in the Elementor or Gutenberg builder.
Check it out in the JetPopup Presets Library. How to Pick Pre-designed Popup and Apply It to Site tutorial.
Settings
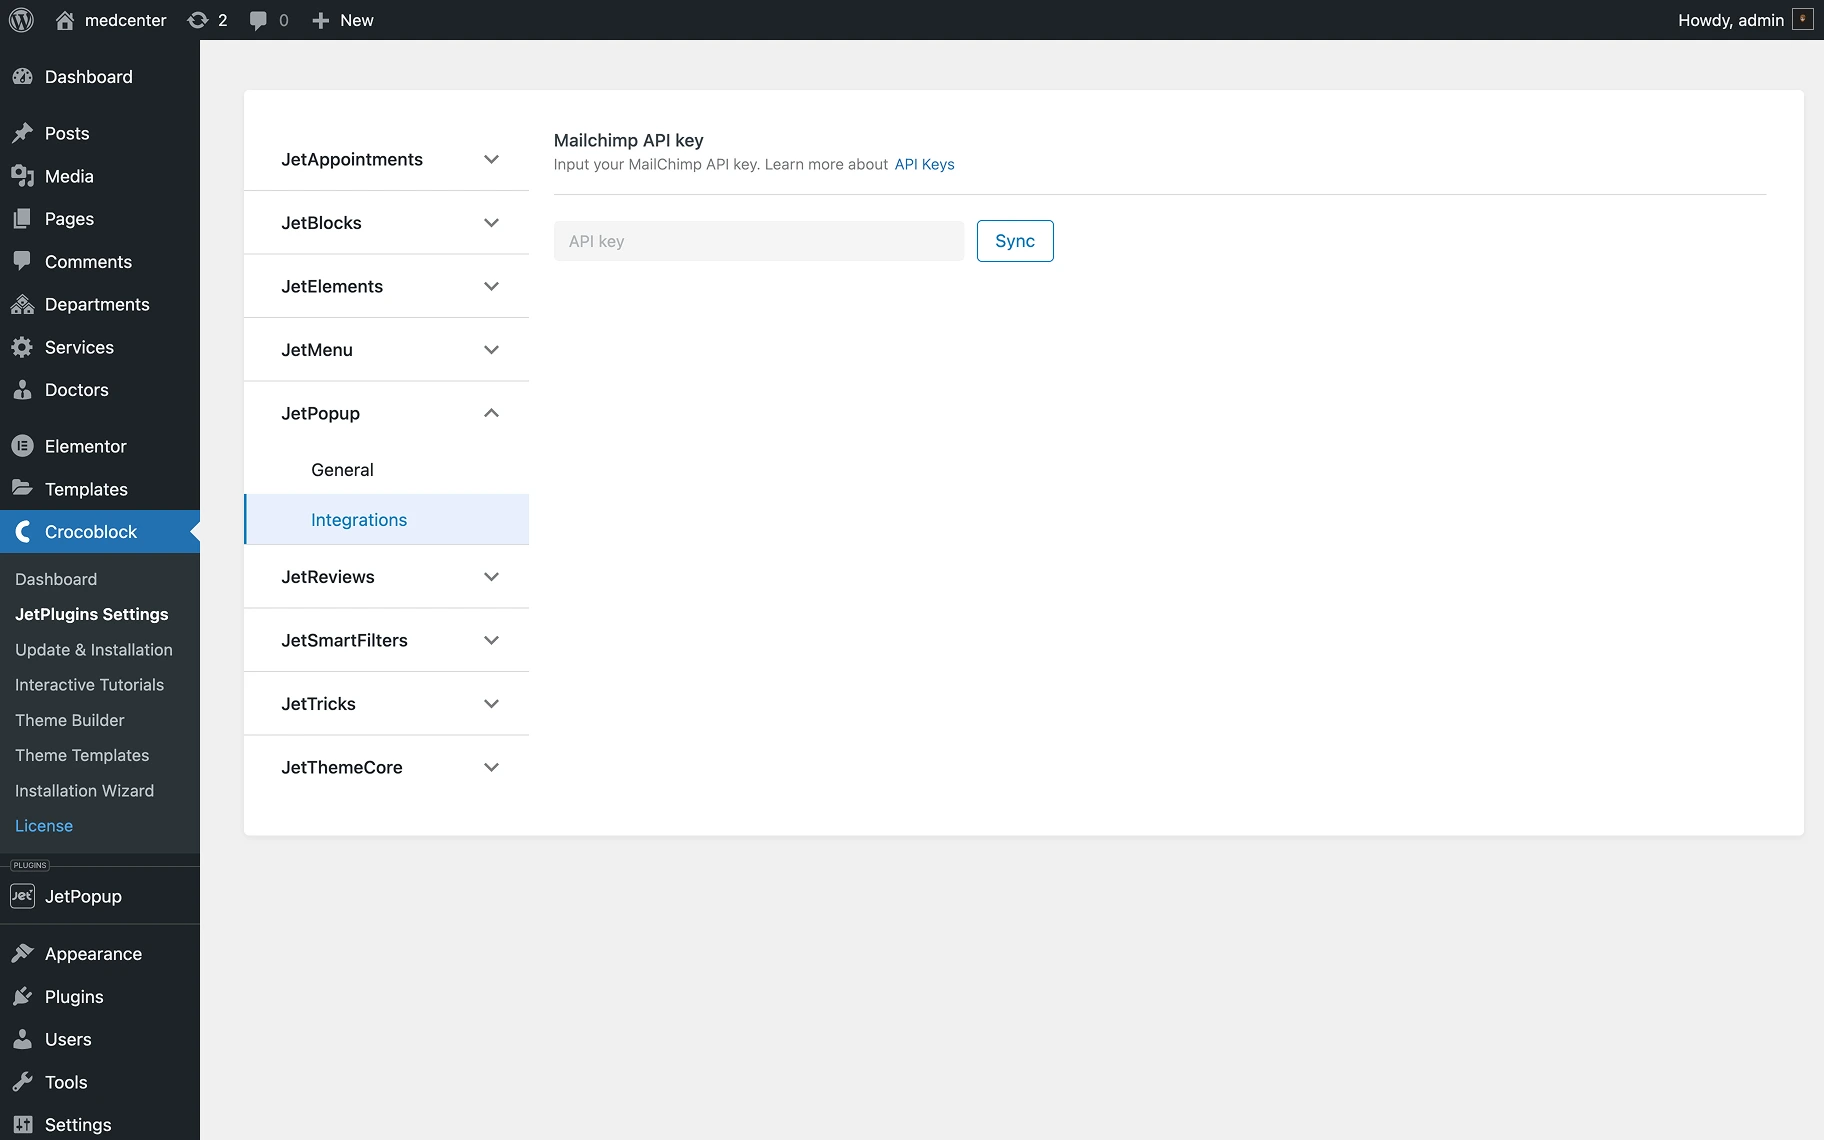
To access the Integrations settings, one should follow the path: WordPress Dashboard > Crocoblock > JetPlugins Settings > JetPopup > Integrations. Here, one can enter the Mailchimp API key and synchronize it for further use.
To learn how the integration works, navigate to the How to Create Multi-field MailChimp Form to Display in Popup tutorial.
That’s all one needs to know about the dashboard settings of the JetPopup WordPress plugin.