How to Allow Users to Add Portfolio With the Front-End Form
This tutorial describes how to allow users to add their portfolio via the JetFormBuilder front-end form on the Account page and display it on the user’s Profile page using the JetEngine WordPress plugin.
Before you start, check the tutorial requirements:
- Elementor (Free version)
- JetFormBuilder plugin installed and activated
If you want to create a job board website to allow users to find suitable vacancies and publish their resumes, you can also allow them to publish their portfolios.
In this tutorial, we will show how to allow users to add, edit, and delete portfolios on the Account page and how to display them on the Profile page.
Create a Portfolio Custom Content Type
For portfolios, we recommend creating a separate Custom Content Type. When you create a new CCT, you also create a new SQL table where the items are stored. It’s useful when you want to allow multiple users to upload their portfolios. If portfolio items are in a separate database table, the website won’t slow down.
Proceed to the JetEngine > JetEngine tab and enable the Custom Content Types toggle in the Default Modules tab.
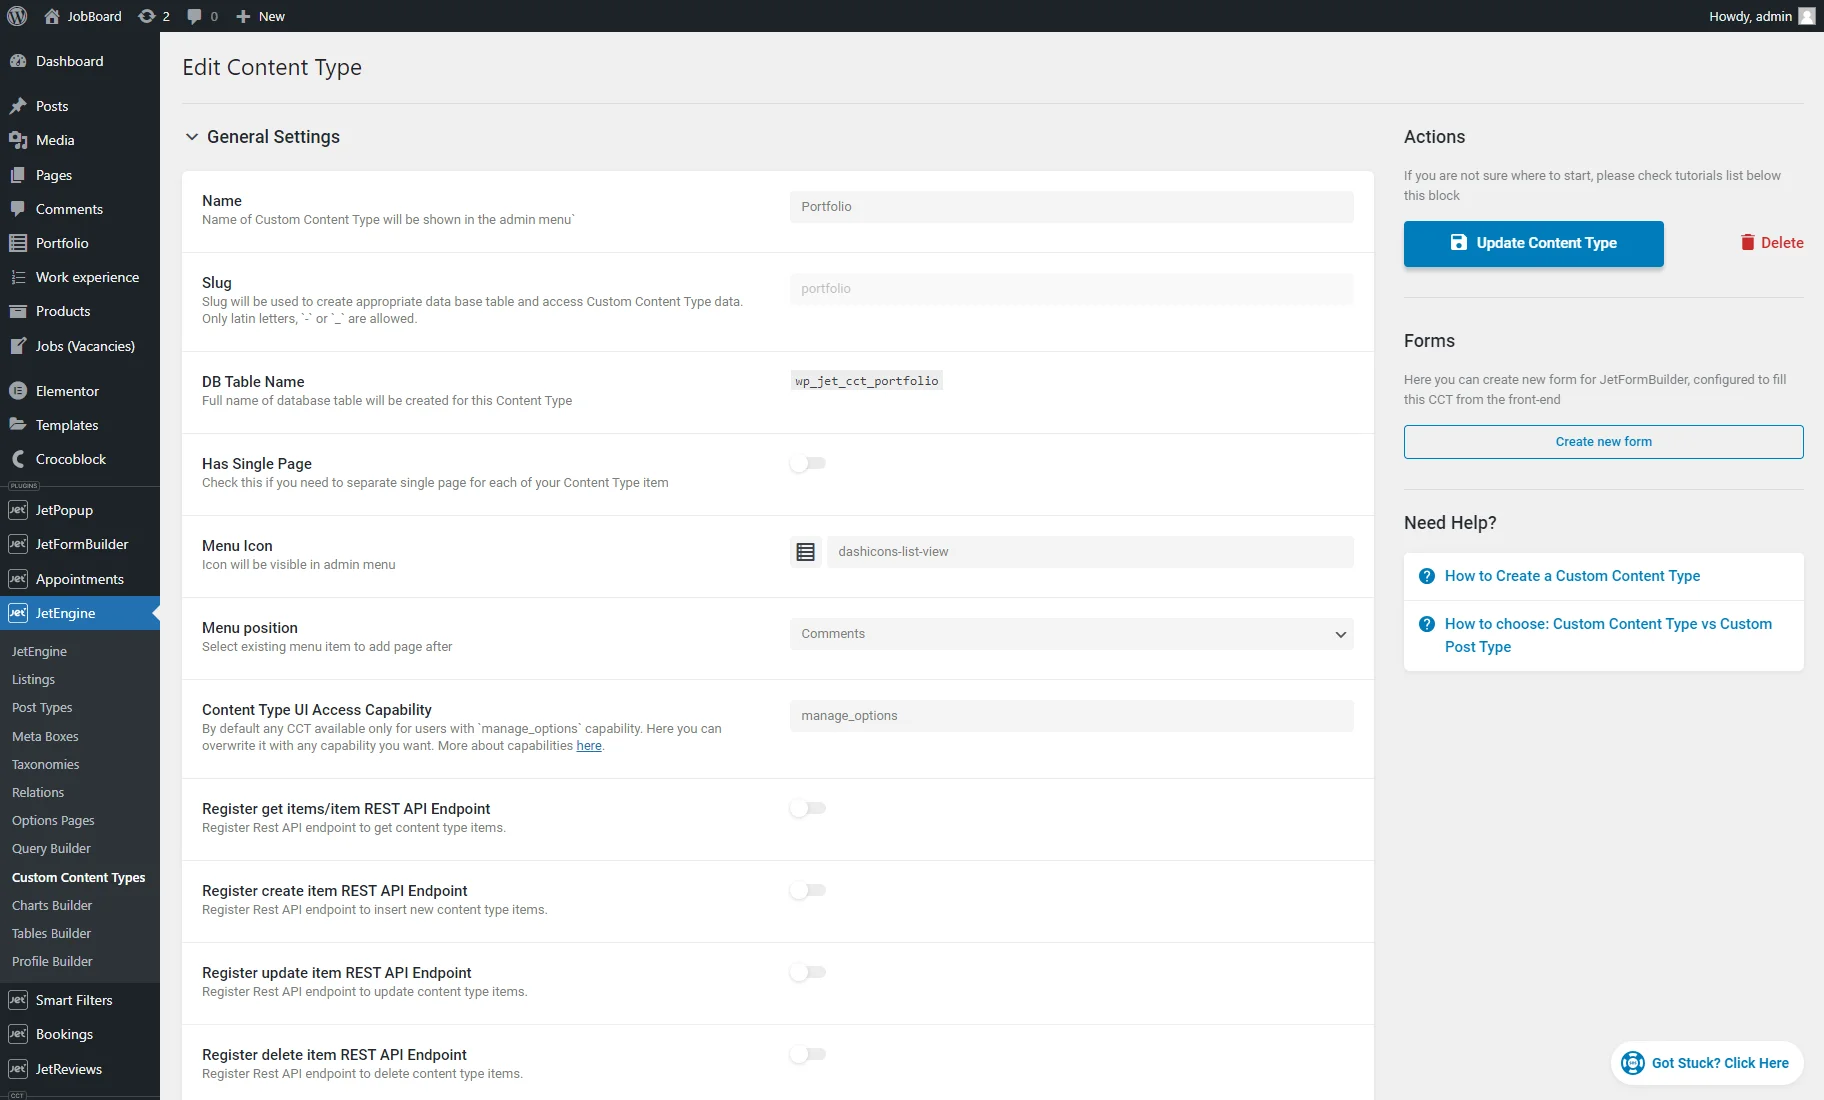
Then, go to the JetEngine > Custom Content Types tab and hit the “Add New” button.
In the General Settings, the Name field must be filled in. After entering the name, the Slug and DB Table Name will be generated automatically.
The other options can be set according to your needs.
You can add custom meta fields to your CCT in the Fields tab.
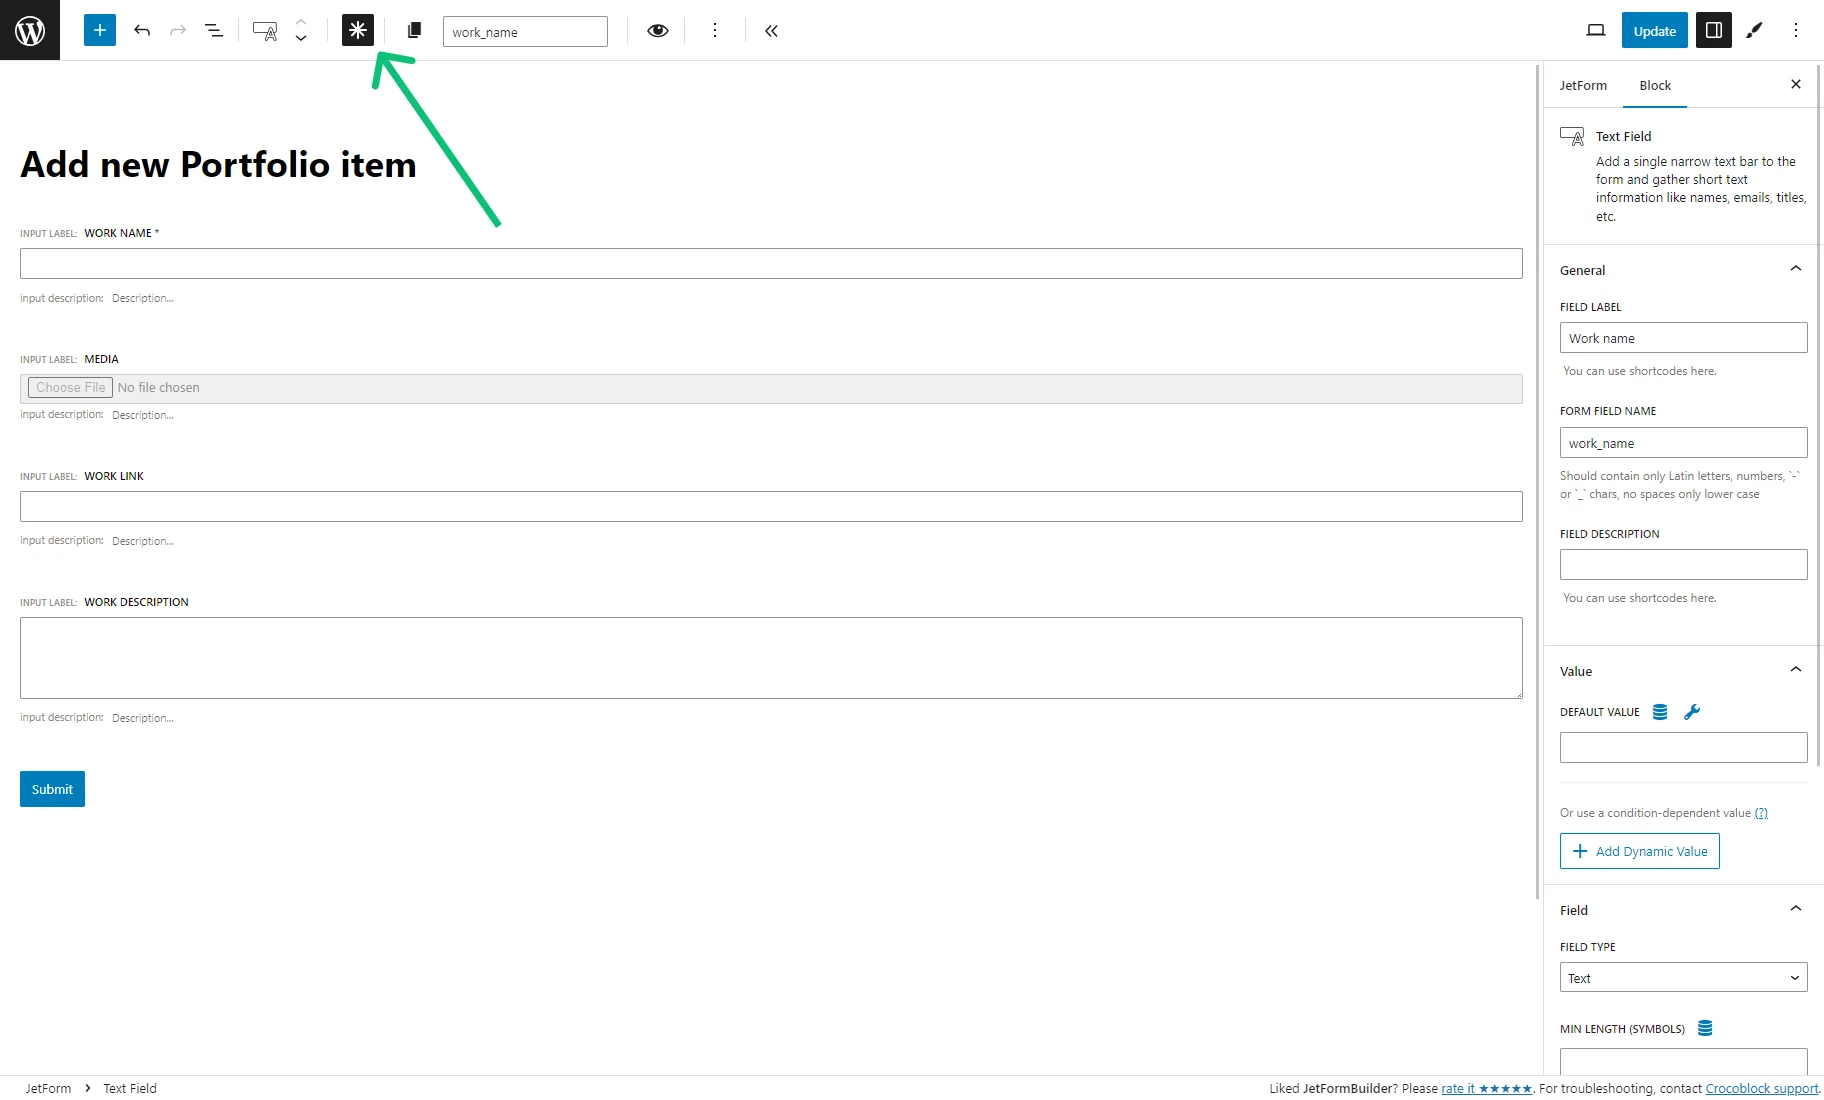
For example, we added four fields: Work name text field, Media media field for a picture, Work link text field, and Work description textarea field.
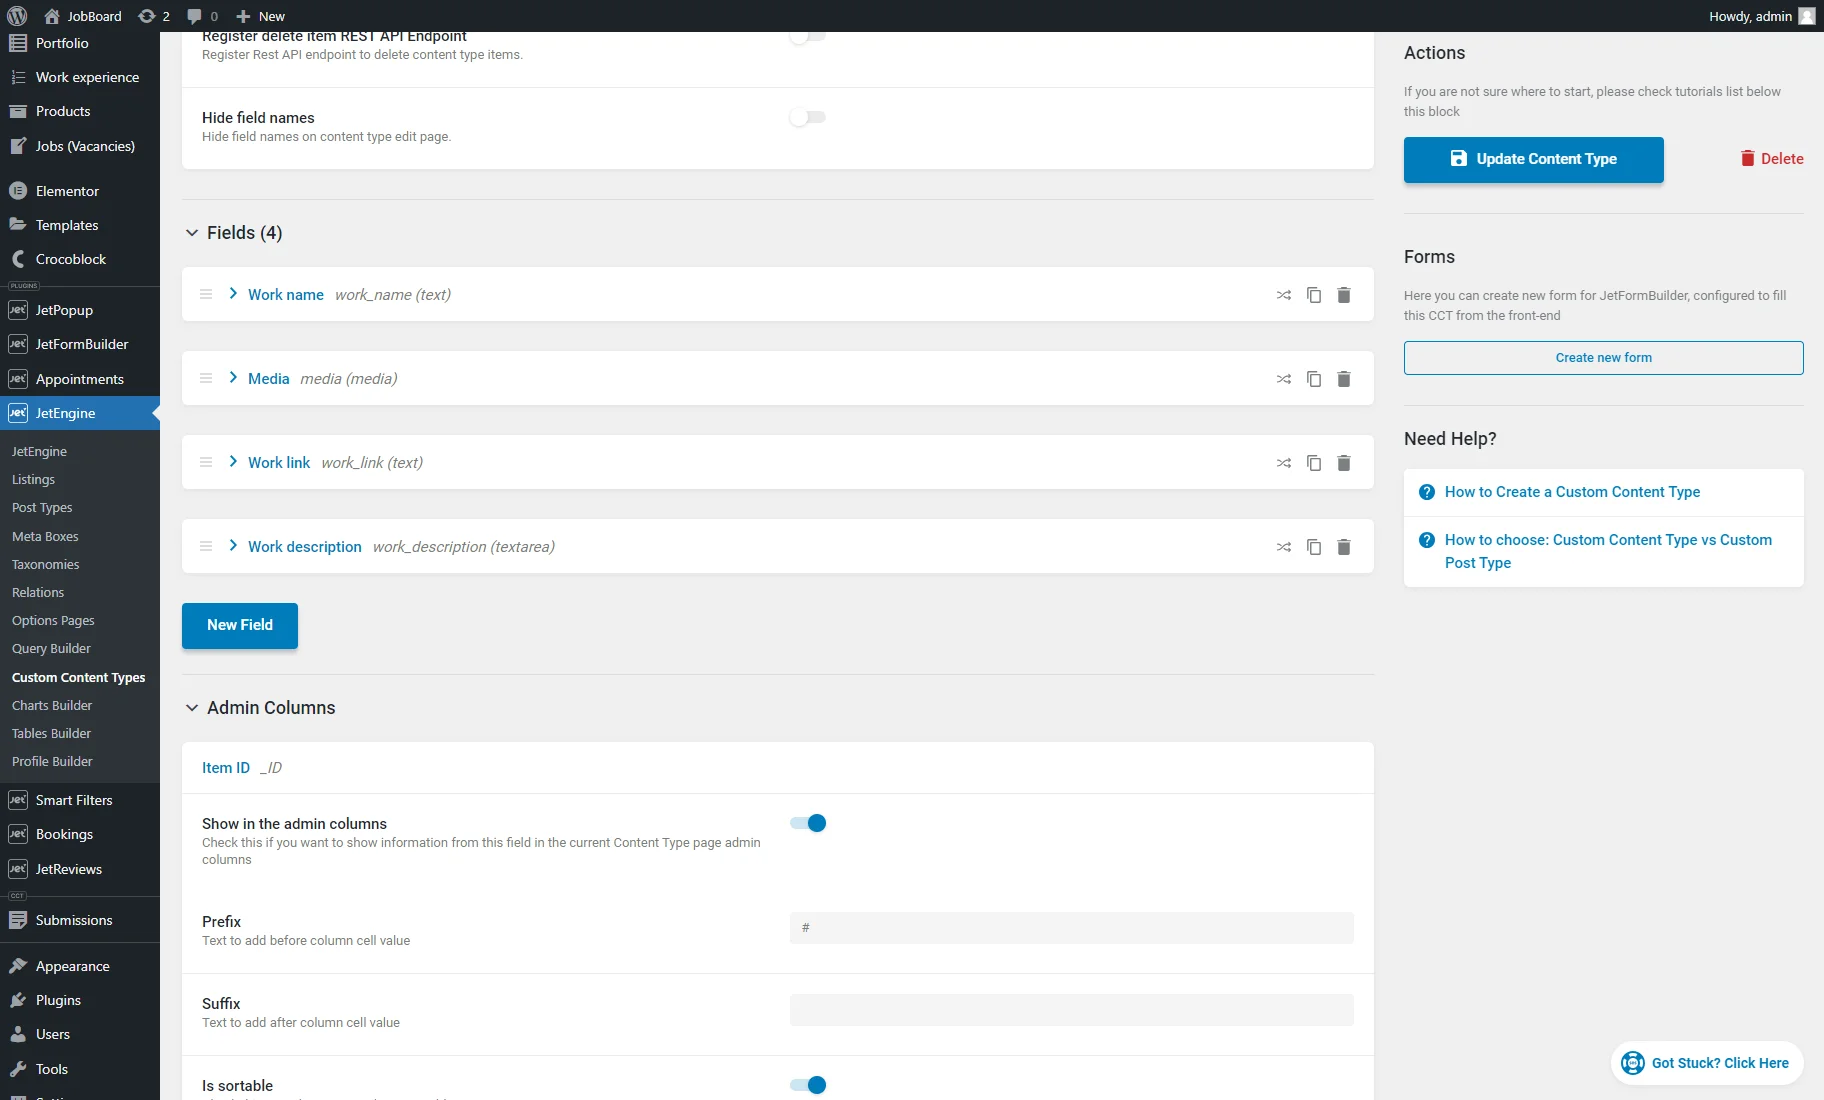
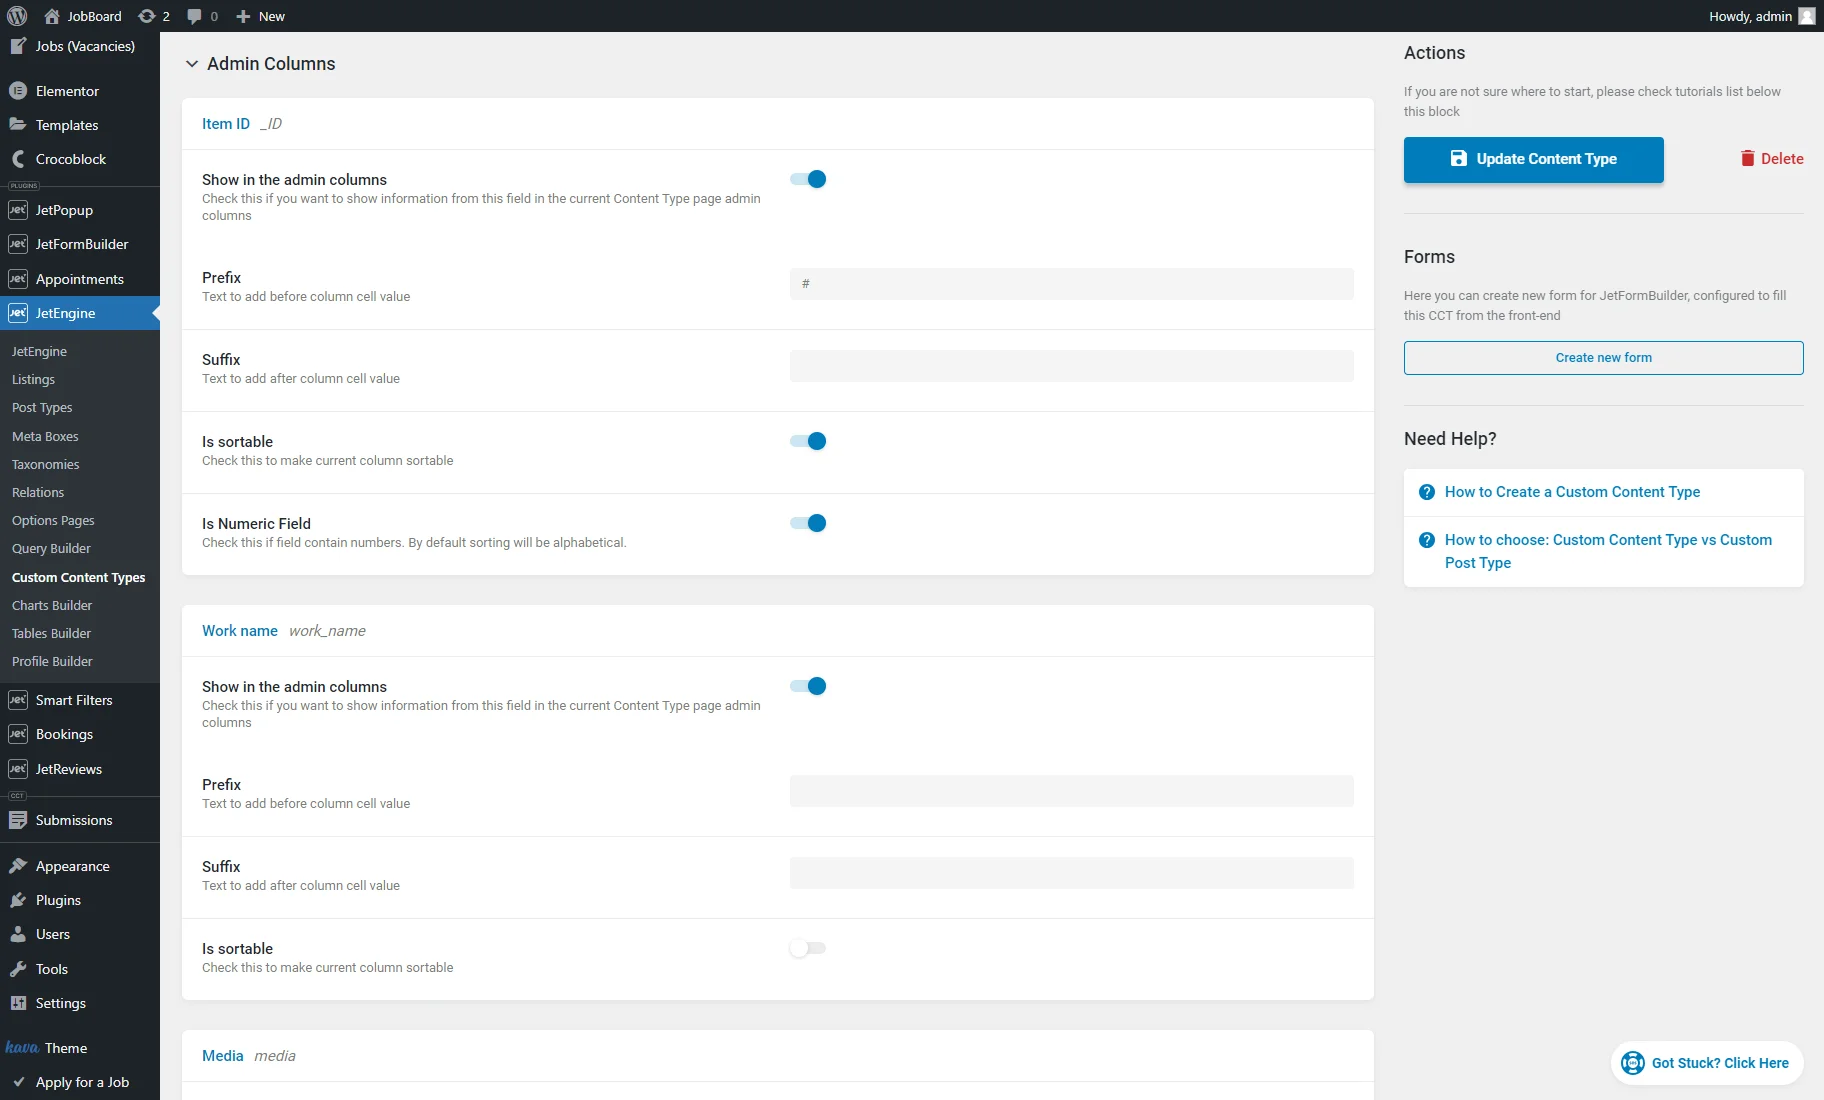
Also, you can decide what values from the CCT fields can be shown in the CCT item list on the backend by enabling the dedicated toggles in the Admin Columns tab.
After customizing the CCT, hit the “Add/Update” button.
Create a Form for Adding CCT Items
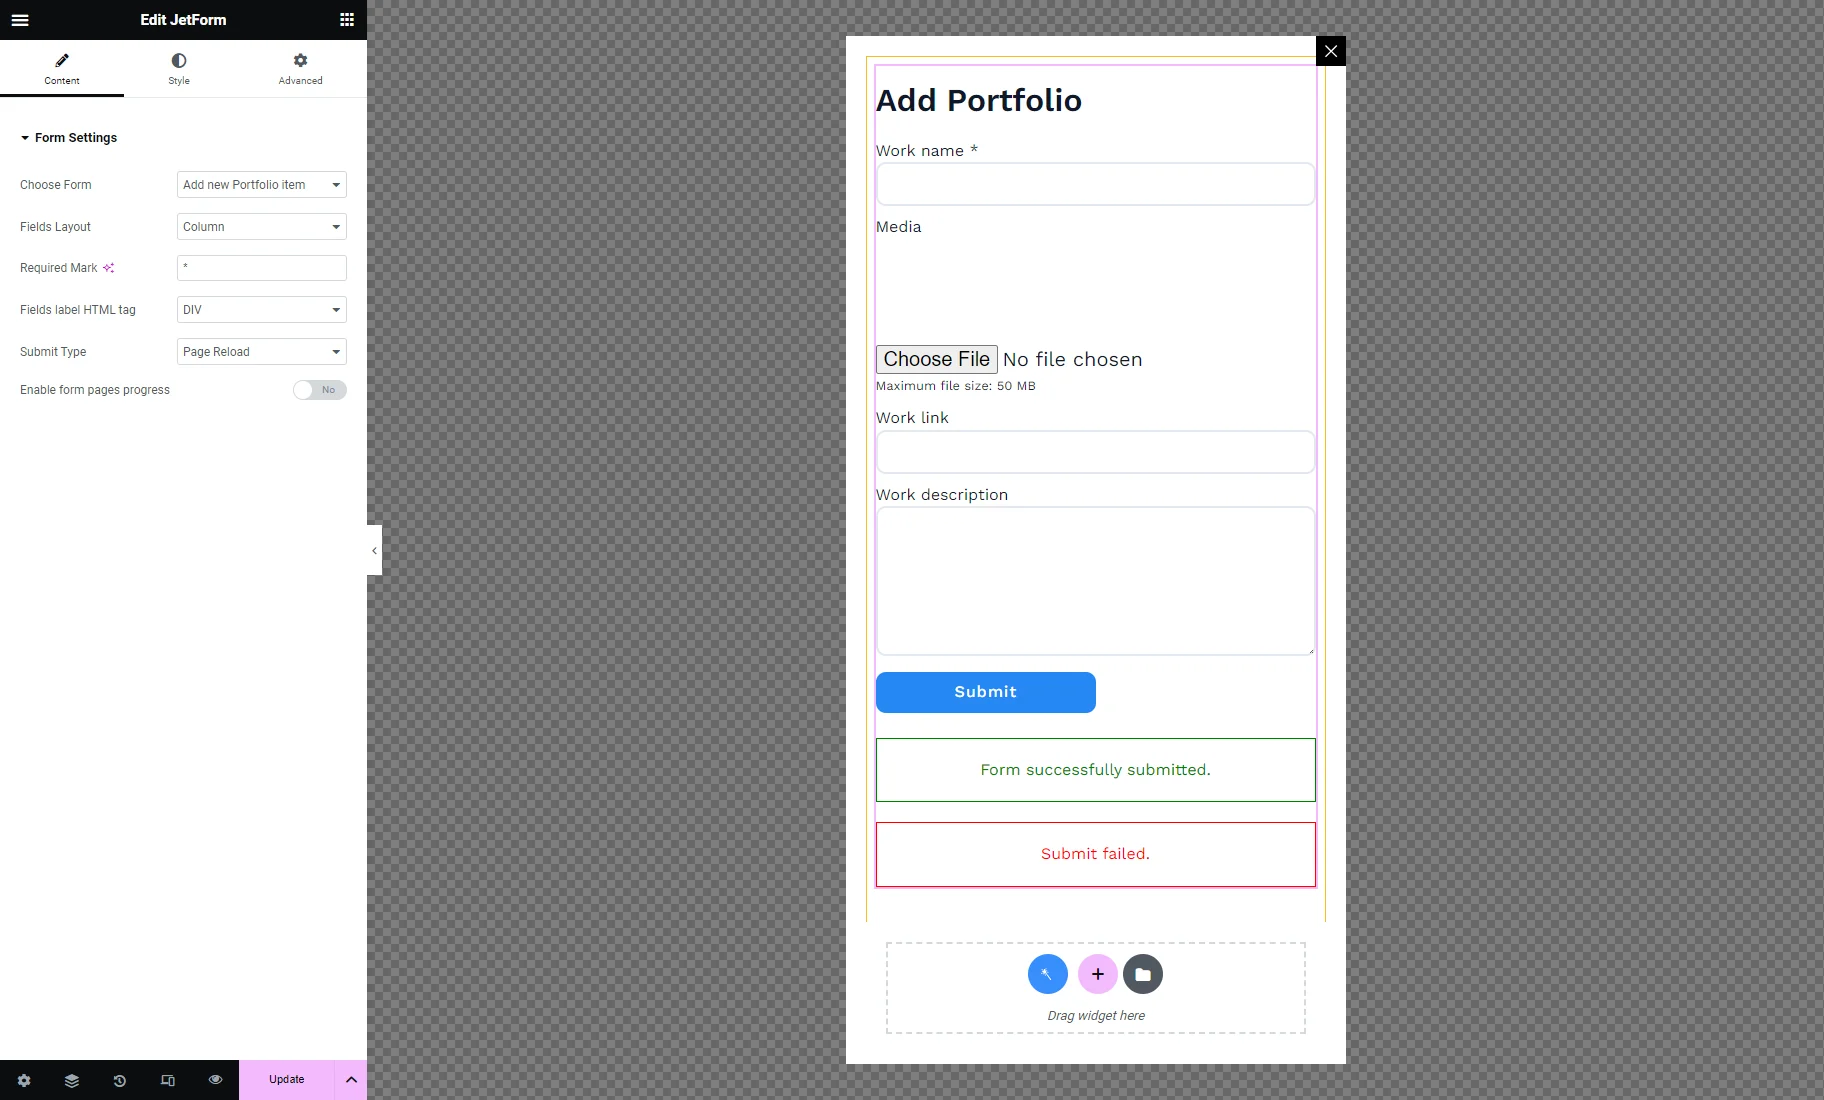
After creating the Custom Content Type, you can click the “Create new form” button. This feature generates a front-end form that allows users to create CCT items.

After clicking the button, you will be redirected to the editing page of the created form.
The form contains fields with the same labels, names, and types as the CCT custom meta fields.
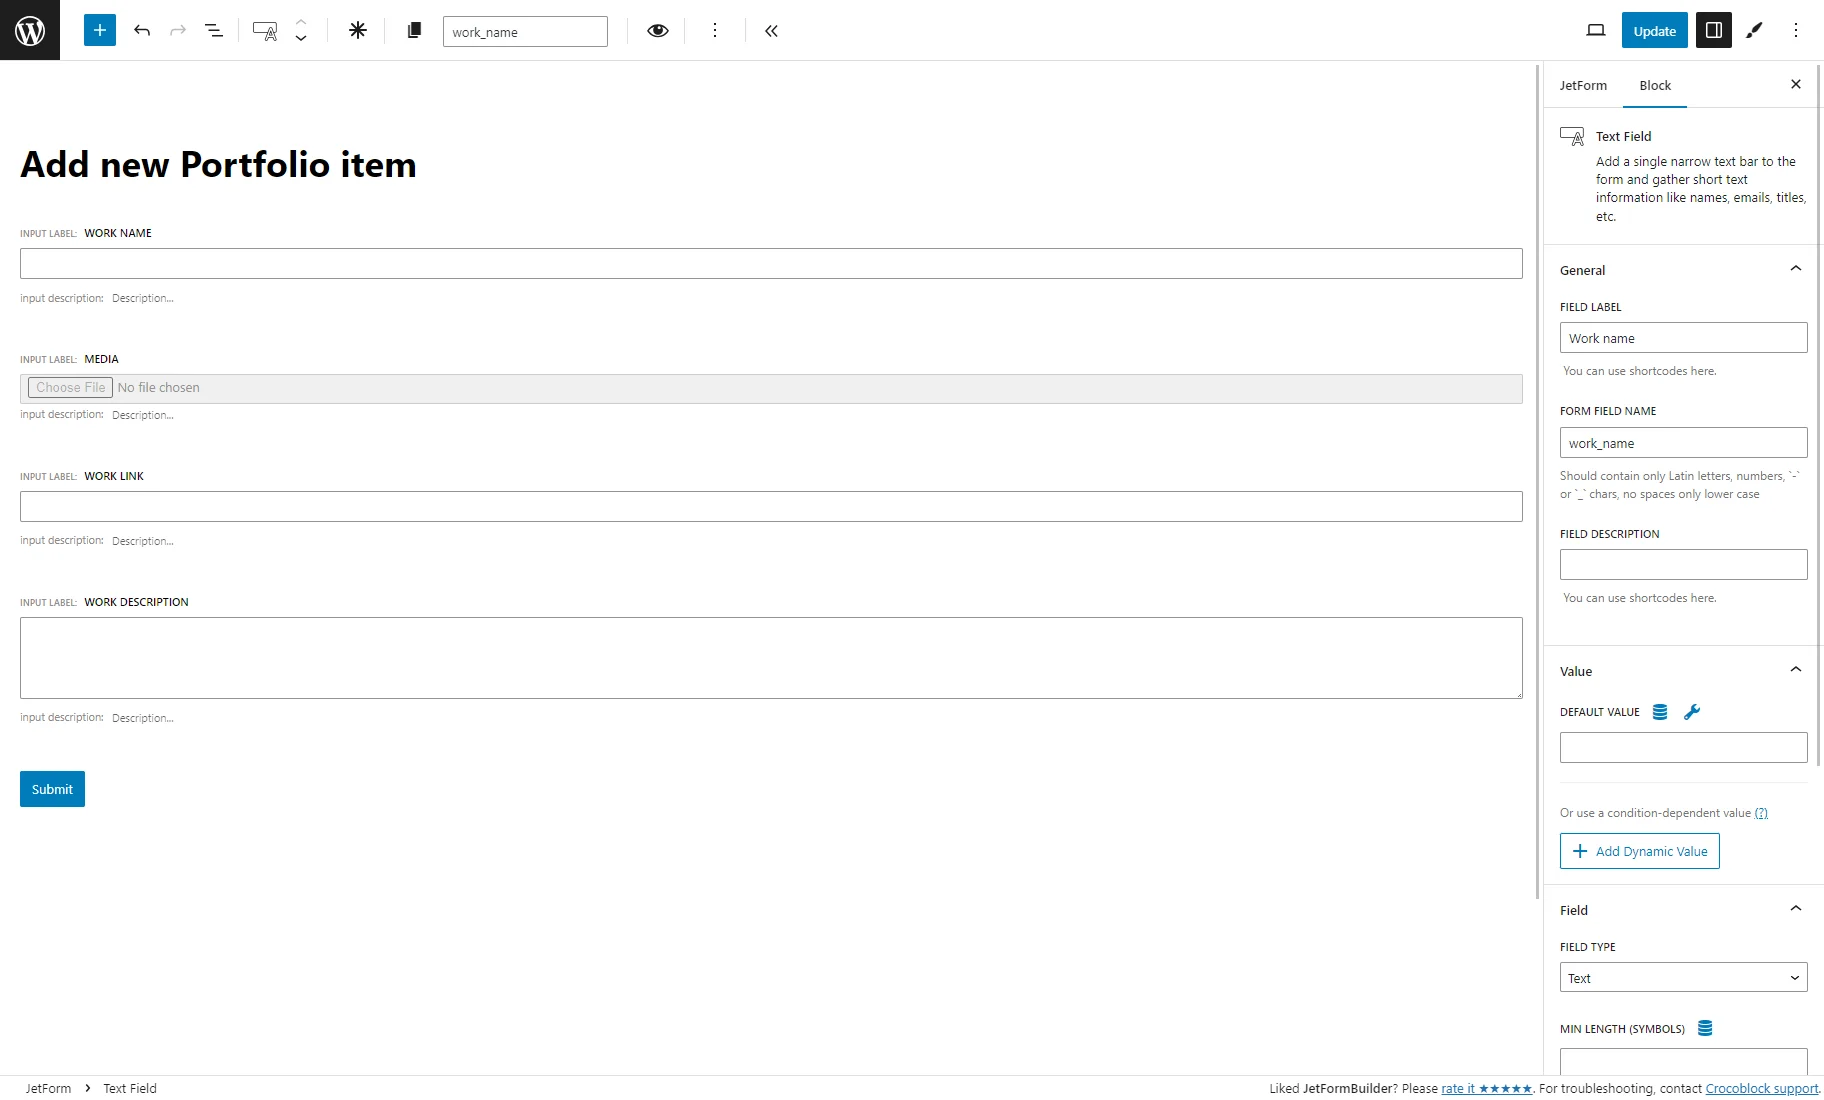
To make a field mandatory, hit the asterisk icon next to it. After that, if a user doesn’t fill in the field, the form cannot be submitted. More about the form settings you can read here.
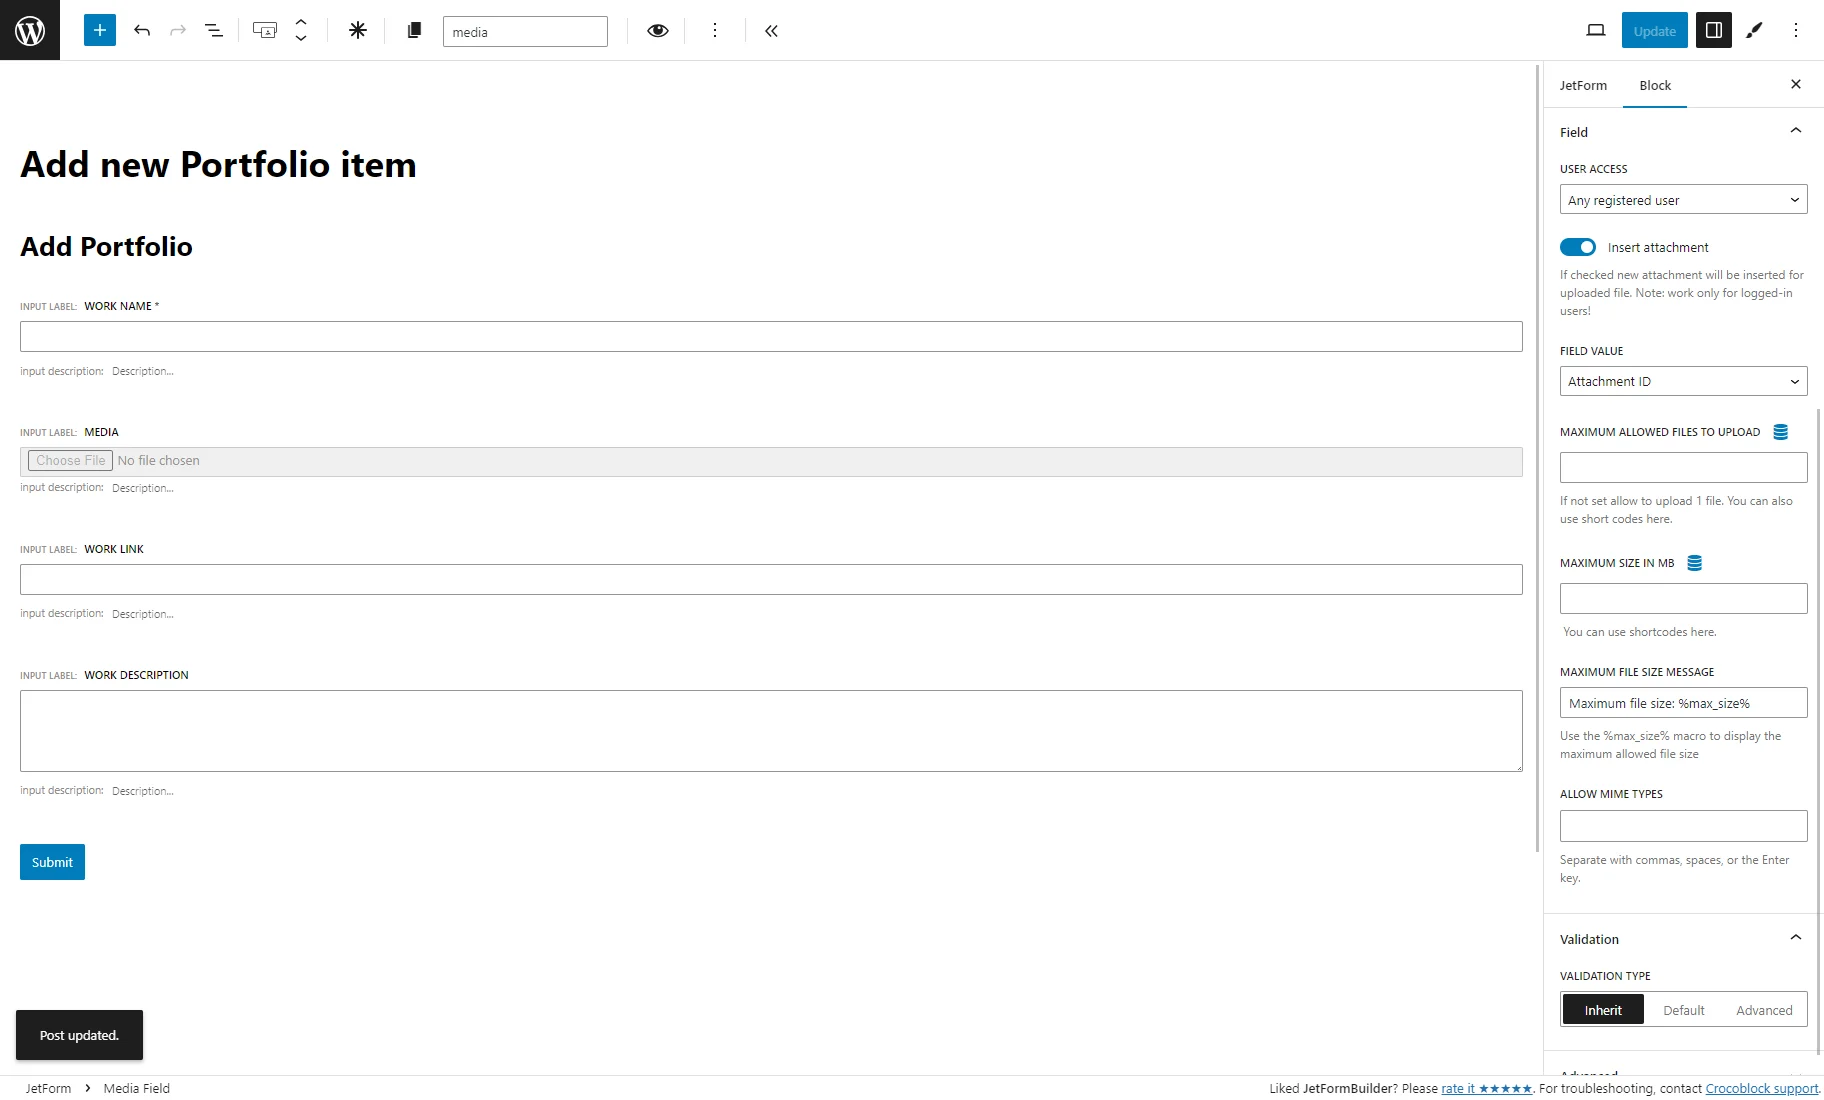
If the form contains the Media Field blocks, proceed to the Block settings tab and open the Field tab. Here, enable the Insert attachment toggle and set the FIELD VALUE according to the Media meta field settings. For example, we selected the “Media ID” Value format for the meta field, so we set the “Attachment ID” FIELD VALUE for the form field. Without these settings, users cannot add files via the form. Also, you can set the User access.
In the JetForm > Post Submit Actions tab, the “Insert/Update Custom Content Type Item” action is set by default.
Click on the pencil icon to open the settings pop-up.
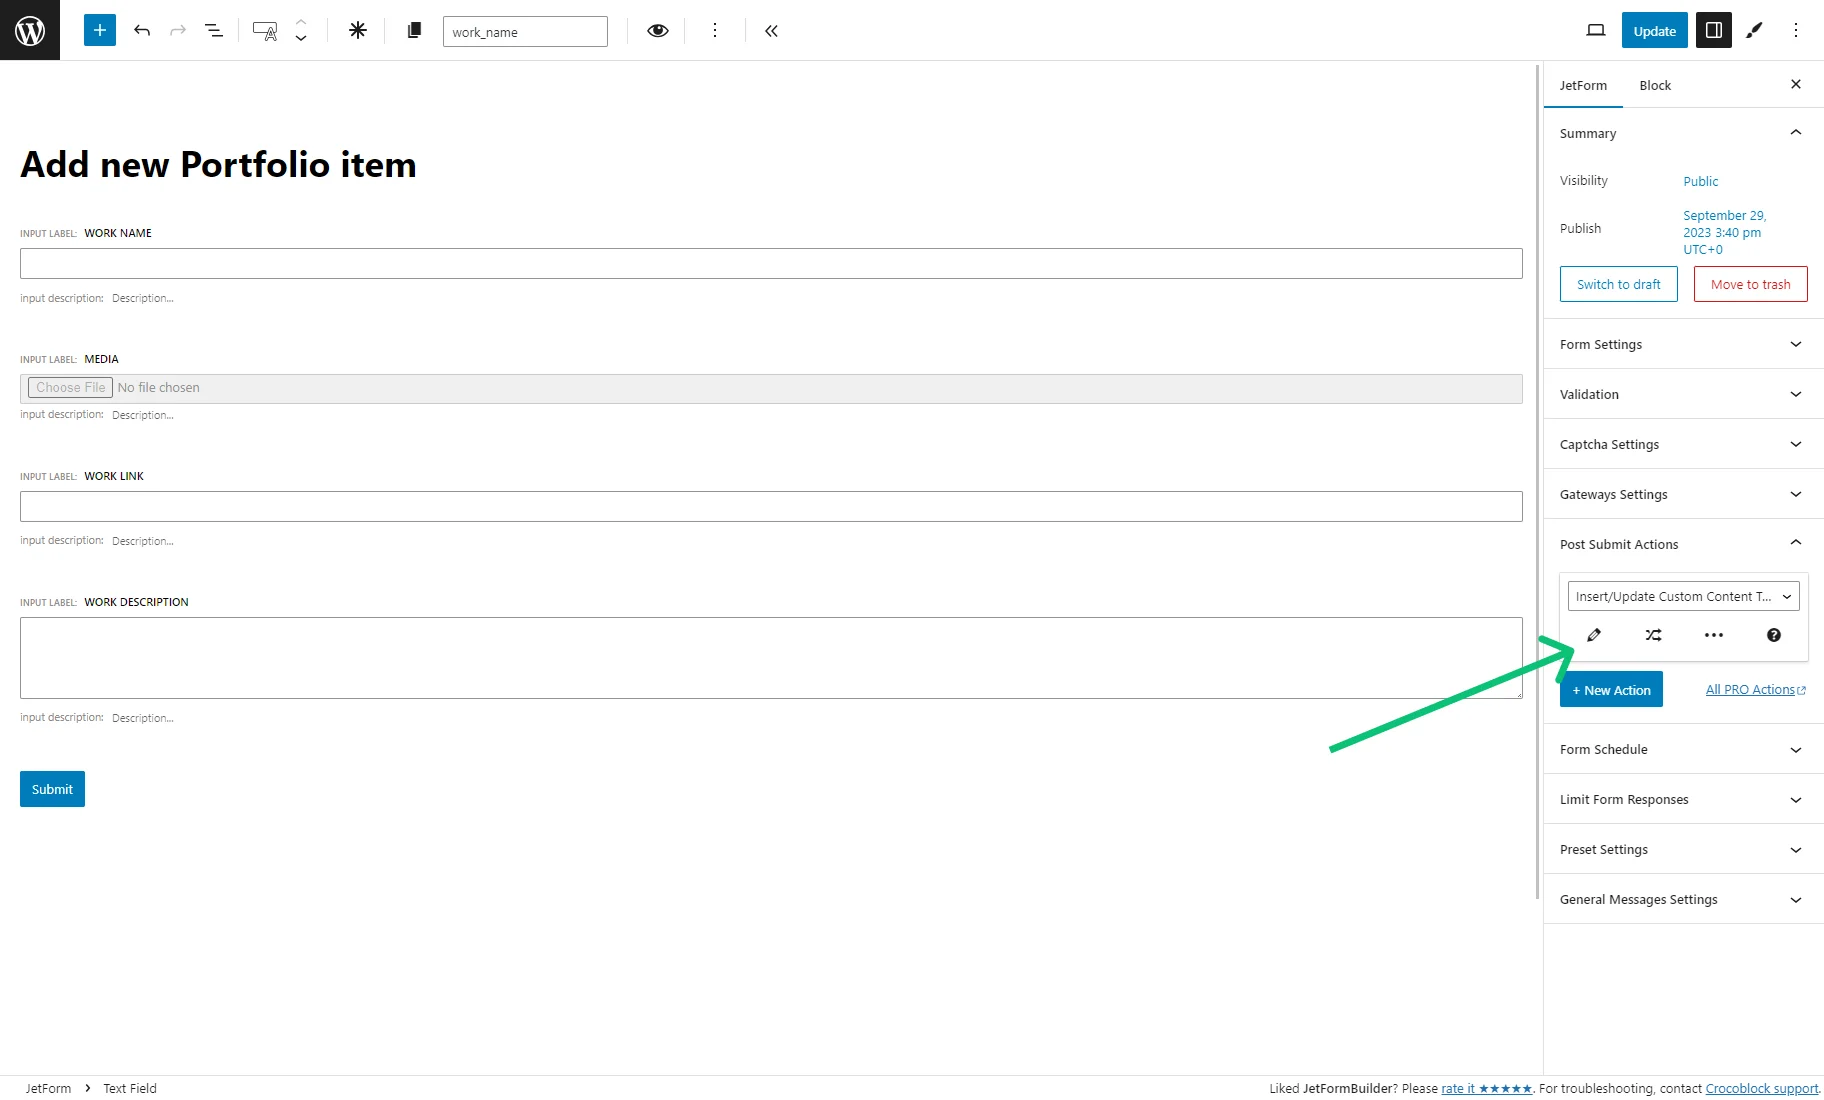
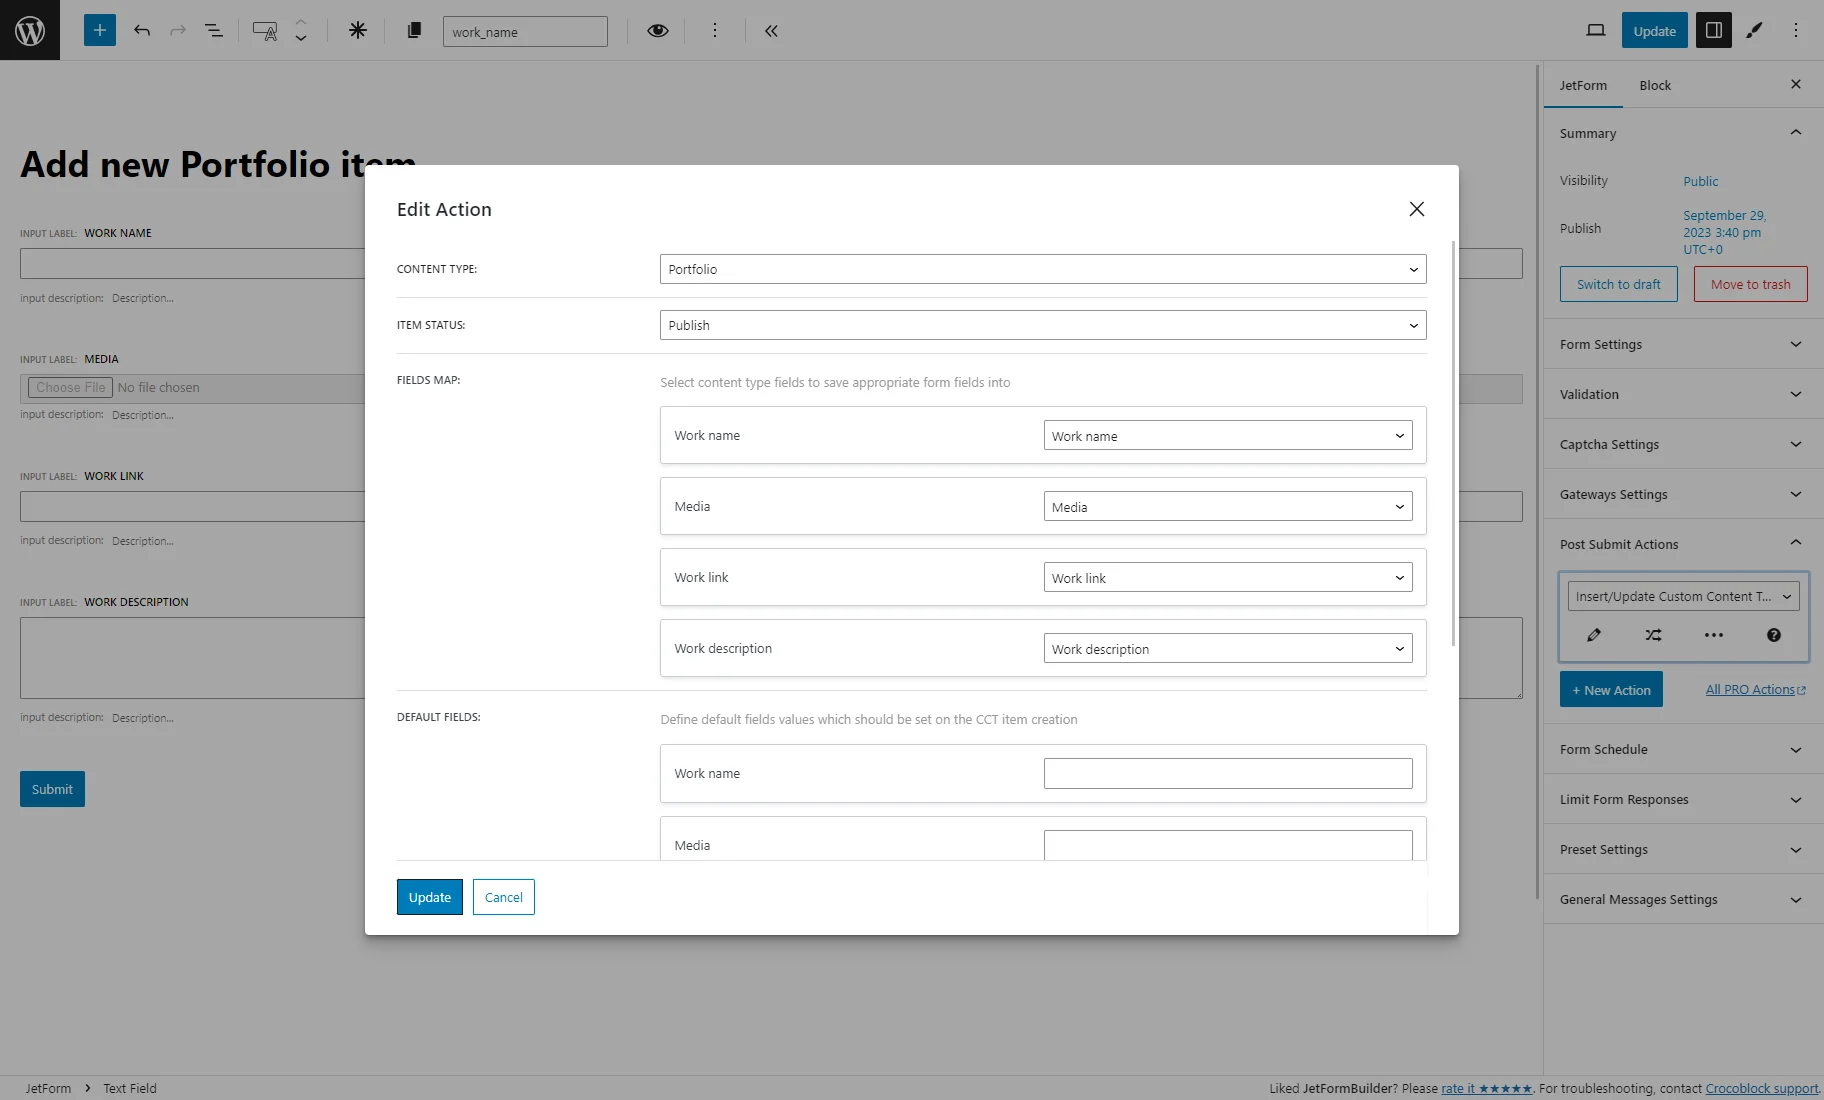
The Edit Action pop-up contains such settings:
- CONTENT TYPE. The recently created “Portfolio” CCT is set here by default;
- ITEM STATUS. Here, you can decide whether an item will obtain “Draft” or “Publish” status after a user submits the form;
- FIELDS MAP. These settings show the connection of the form fields with the CCT meta fields. After a user fills in the form fields and clicks the “Submit” button, the CCT item will be created with the corresponding values in the meta fields;
- DEFAULT SETTINGS. Here, you can define values for the CCT default fields.
If you changed any Post Submit Action settings, hit the “Update” button.
To redirect users to the Account page after submitting the form, click the “+ New Action” button, pick the “Redirect to Page” Post Submit Action, and push the pencil icon.
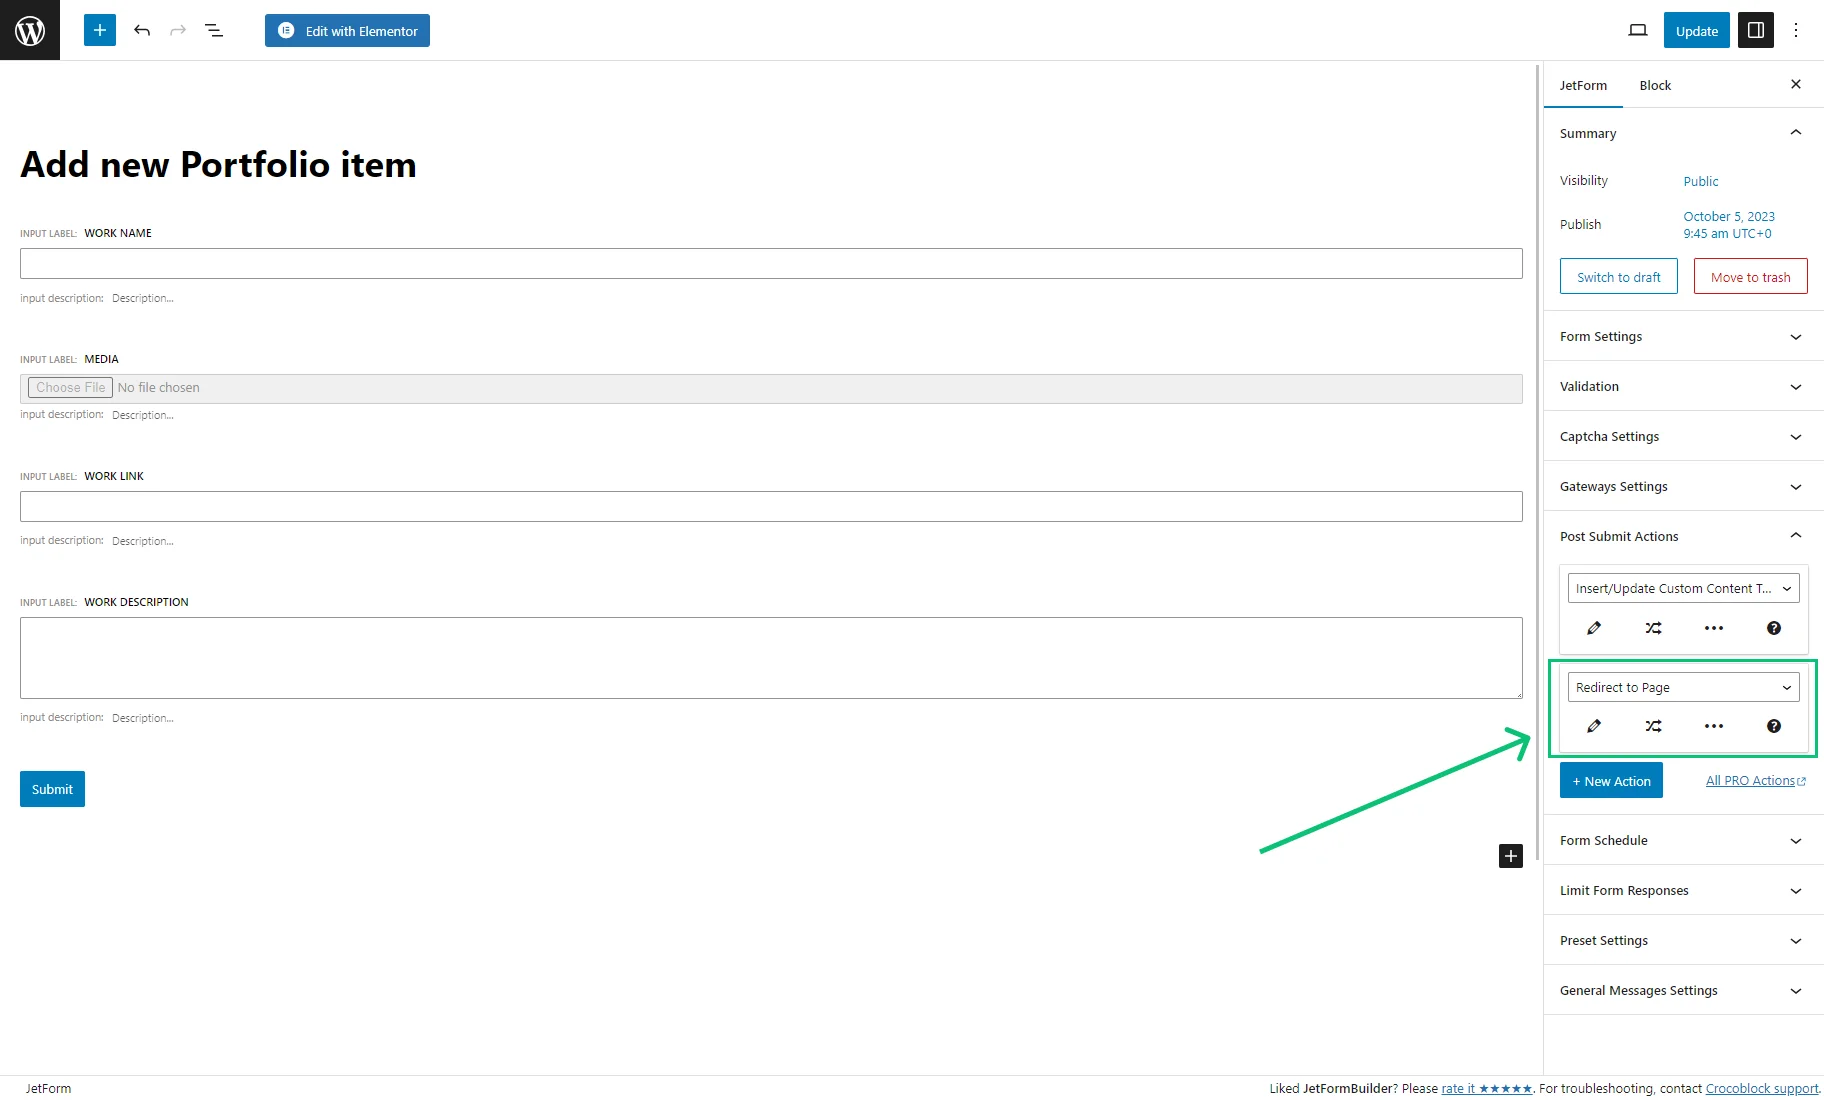
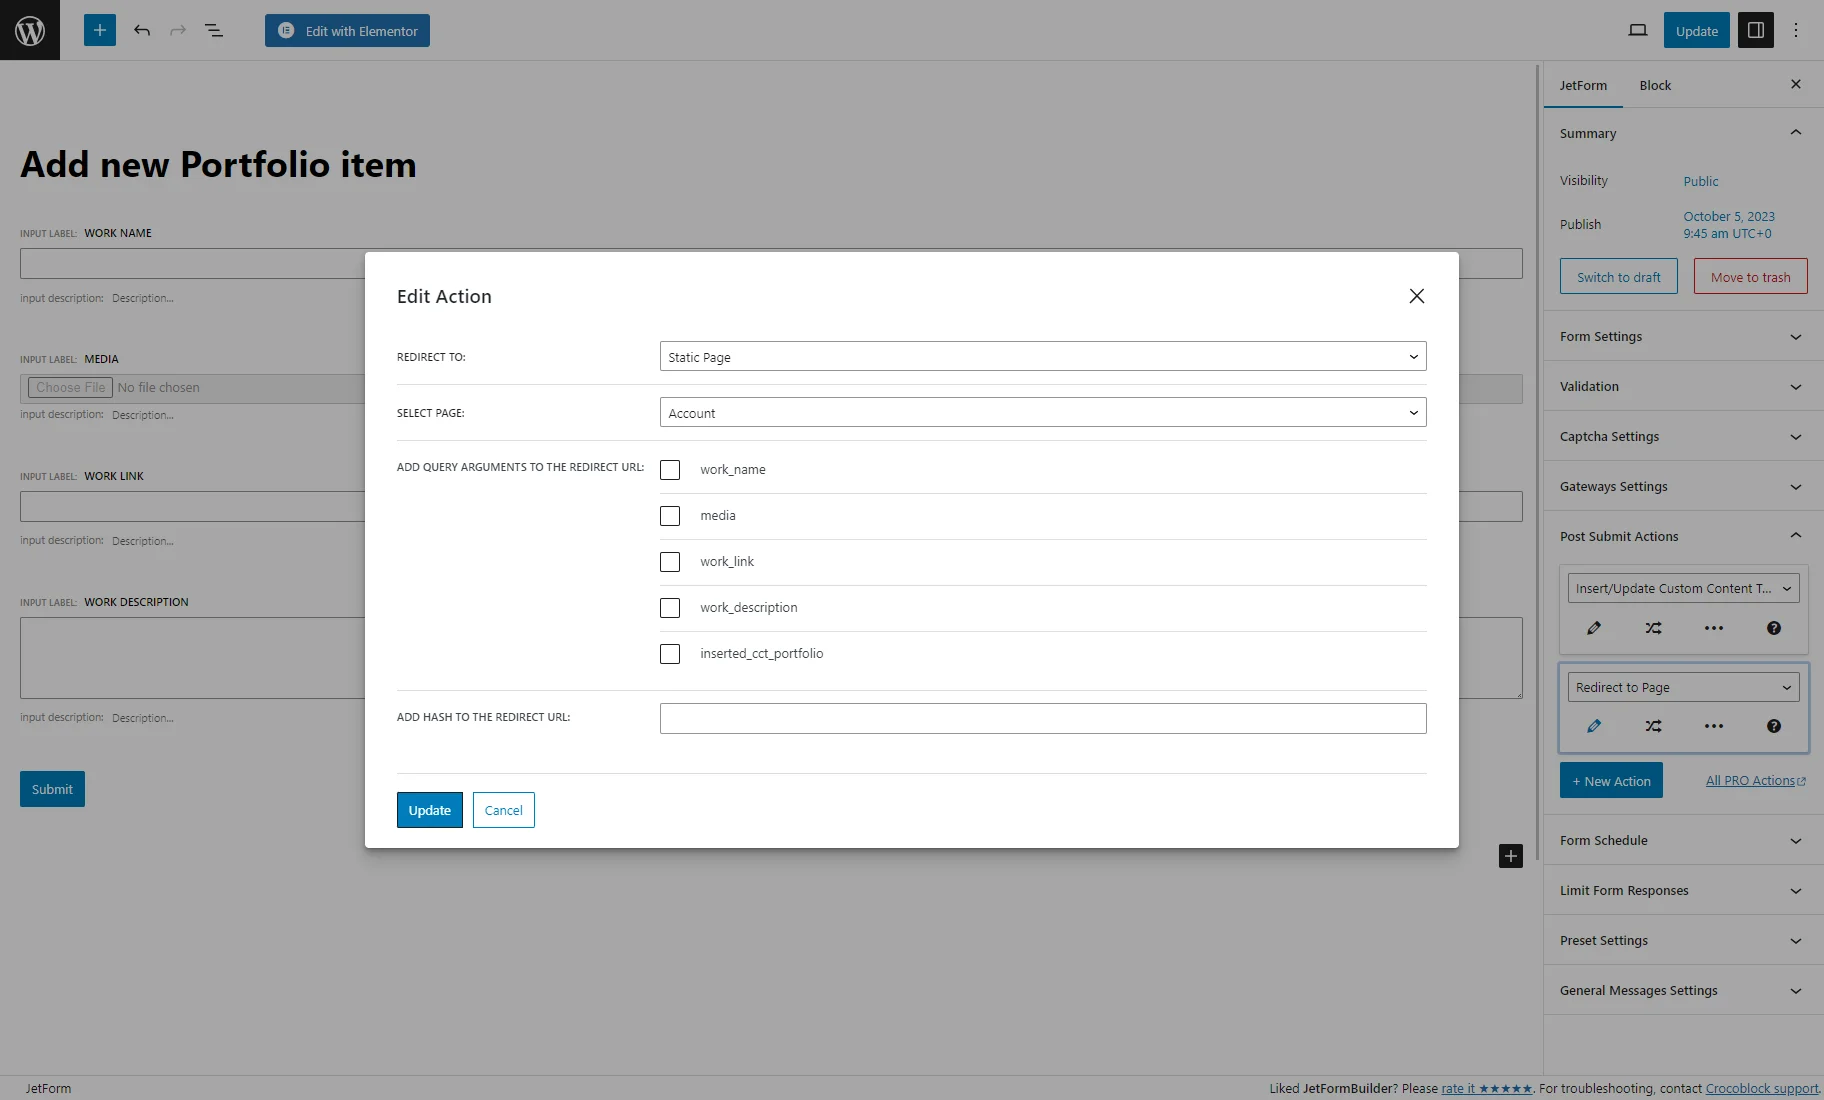
In the Edit Action pop-up, set the “Static Page” option for the Redirect to field, and from the Select page drop-down menu, pick “Account.” Then, hit the “Update” button.
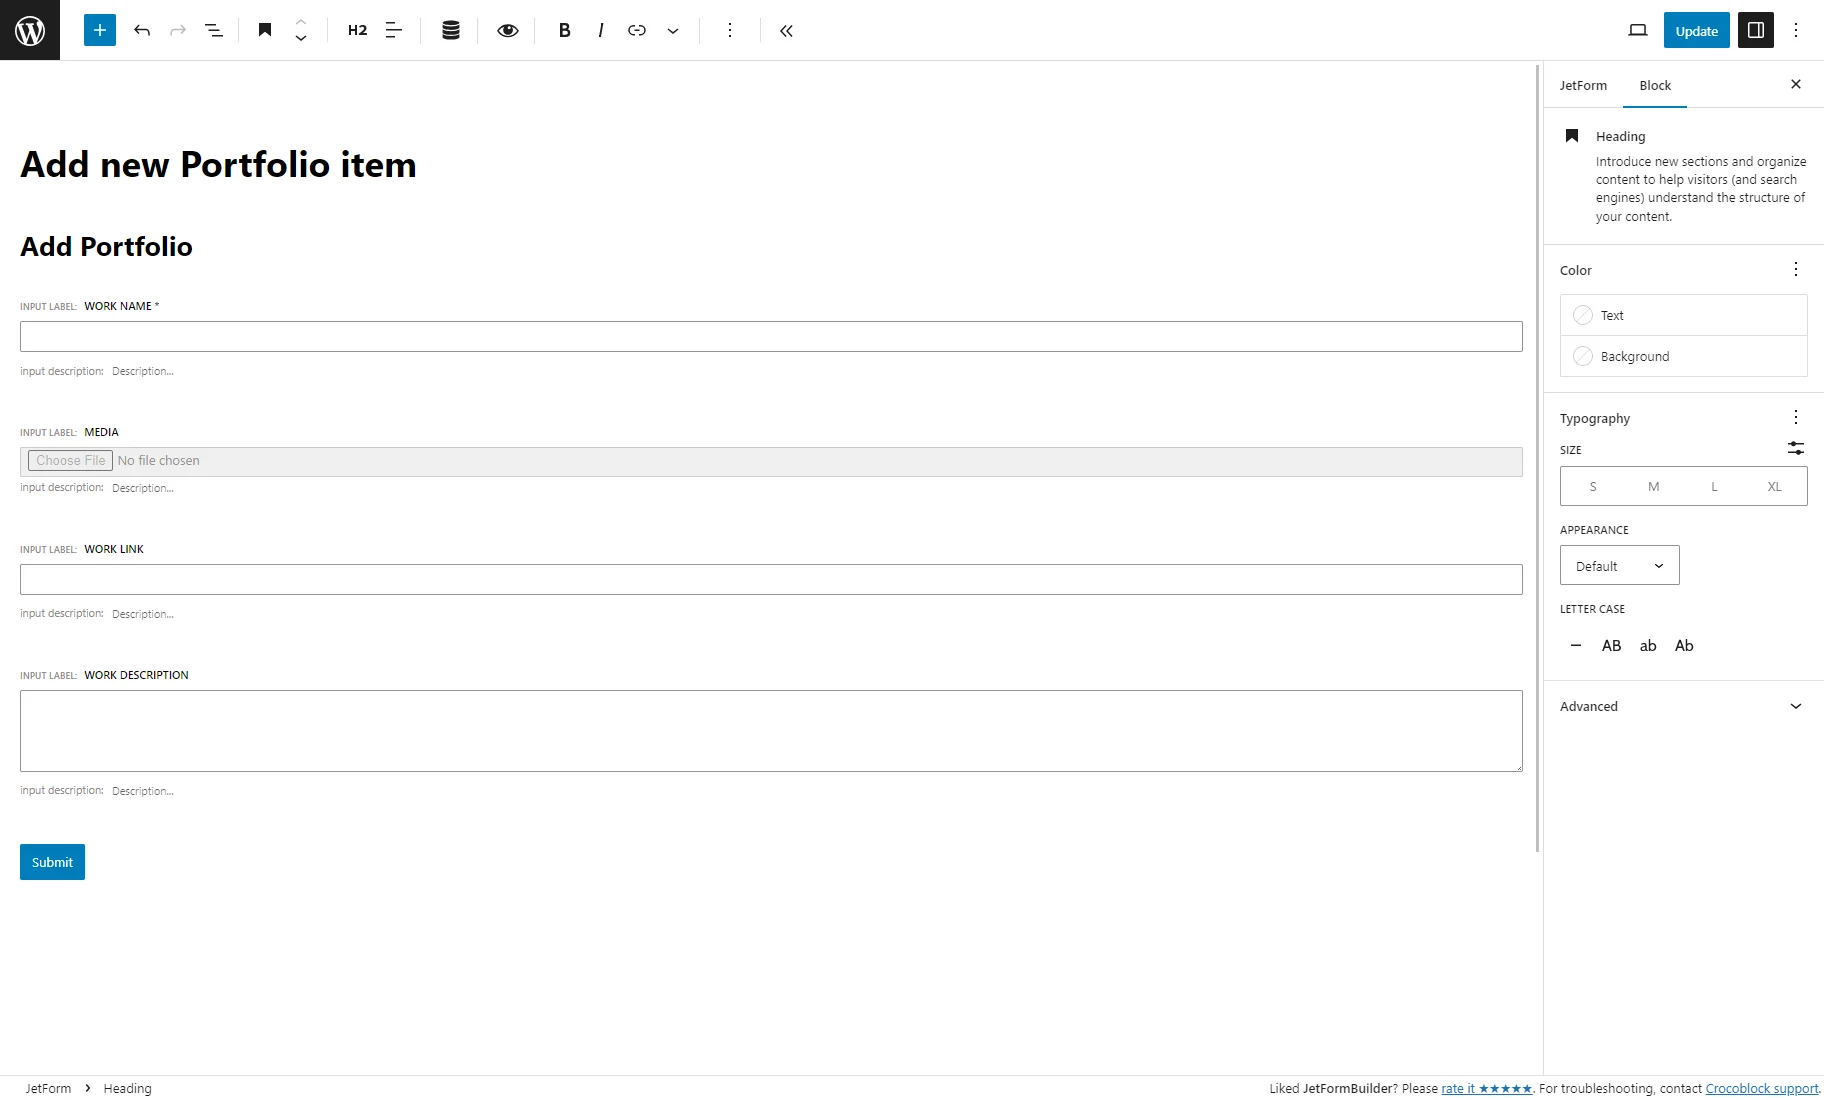
You may edit the form according to your preferences. For example, you can add a custom text with the Heading block. After that, push the “Update” button to save the changes for the form.
Create a Form for Editing CCT Items
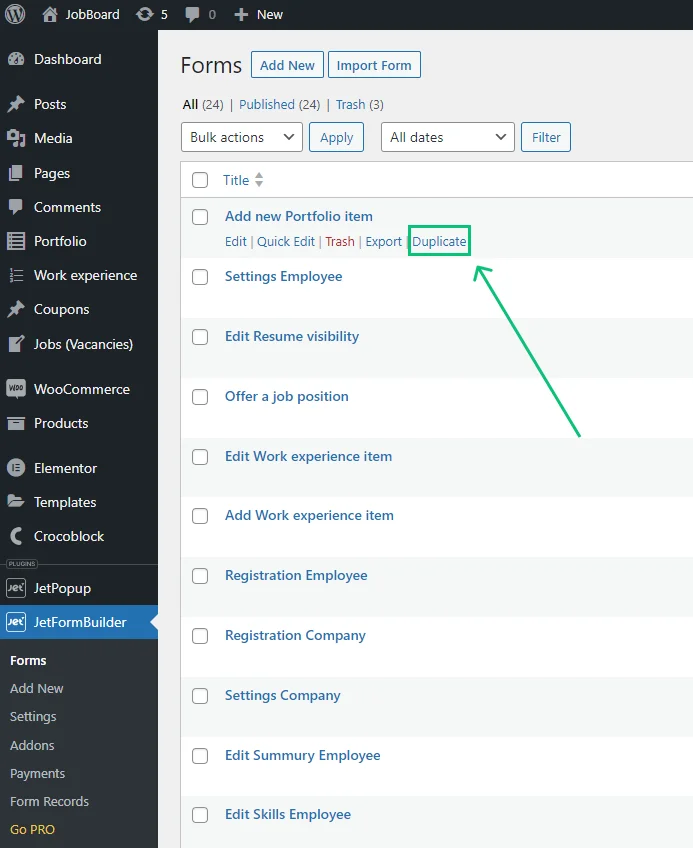
Proceed to the JetFormBuilder > Forms tab and click the form’s “Duplicate” button to add items.
Rename the form and insert the Hidden Field. Change the Form field name and set the “Manual Input” Field Value.

In the Block section, click the coin-stack icon above the DEFAULT VALUE field.
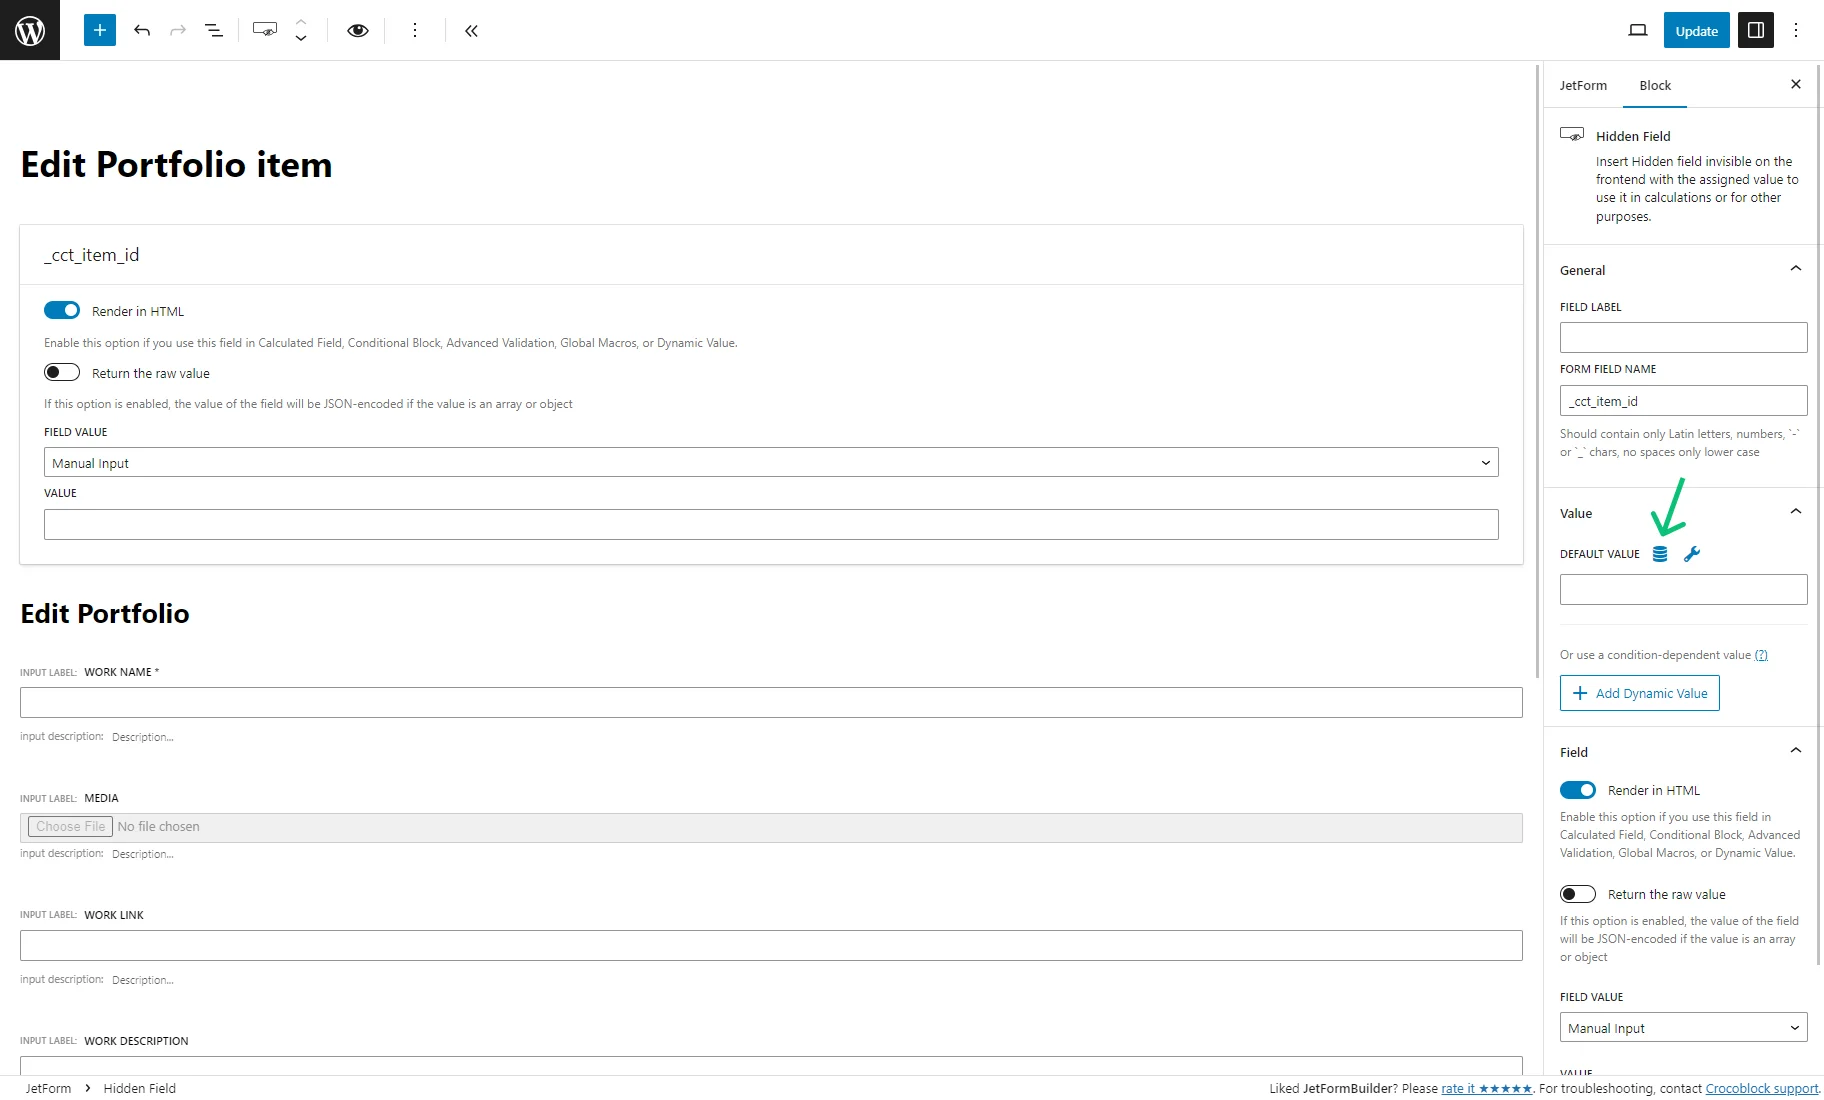
In the Edit Preset pop-up, pick the “Custom Content Type” Source, Get Item ID from “Current post,” and “Item ID” CCT value. Then, press the “Update” button.

Other fields in the form that replicate the CCT meta fields don’t need to be changed.
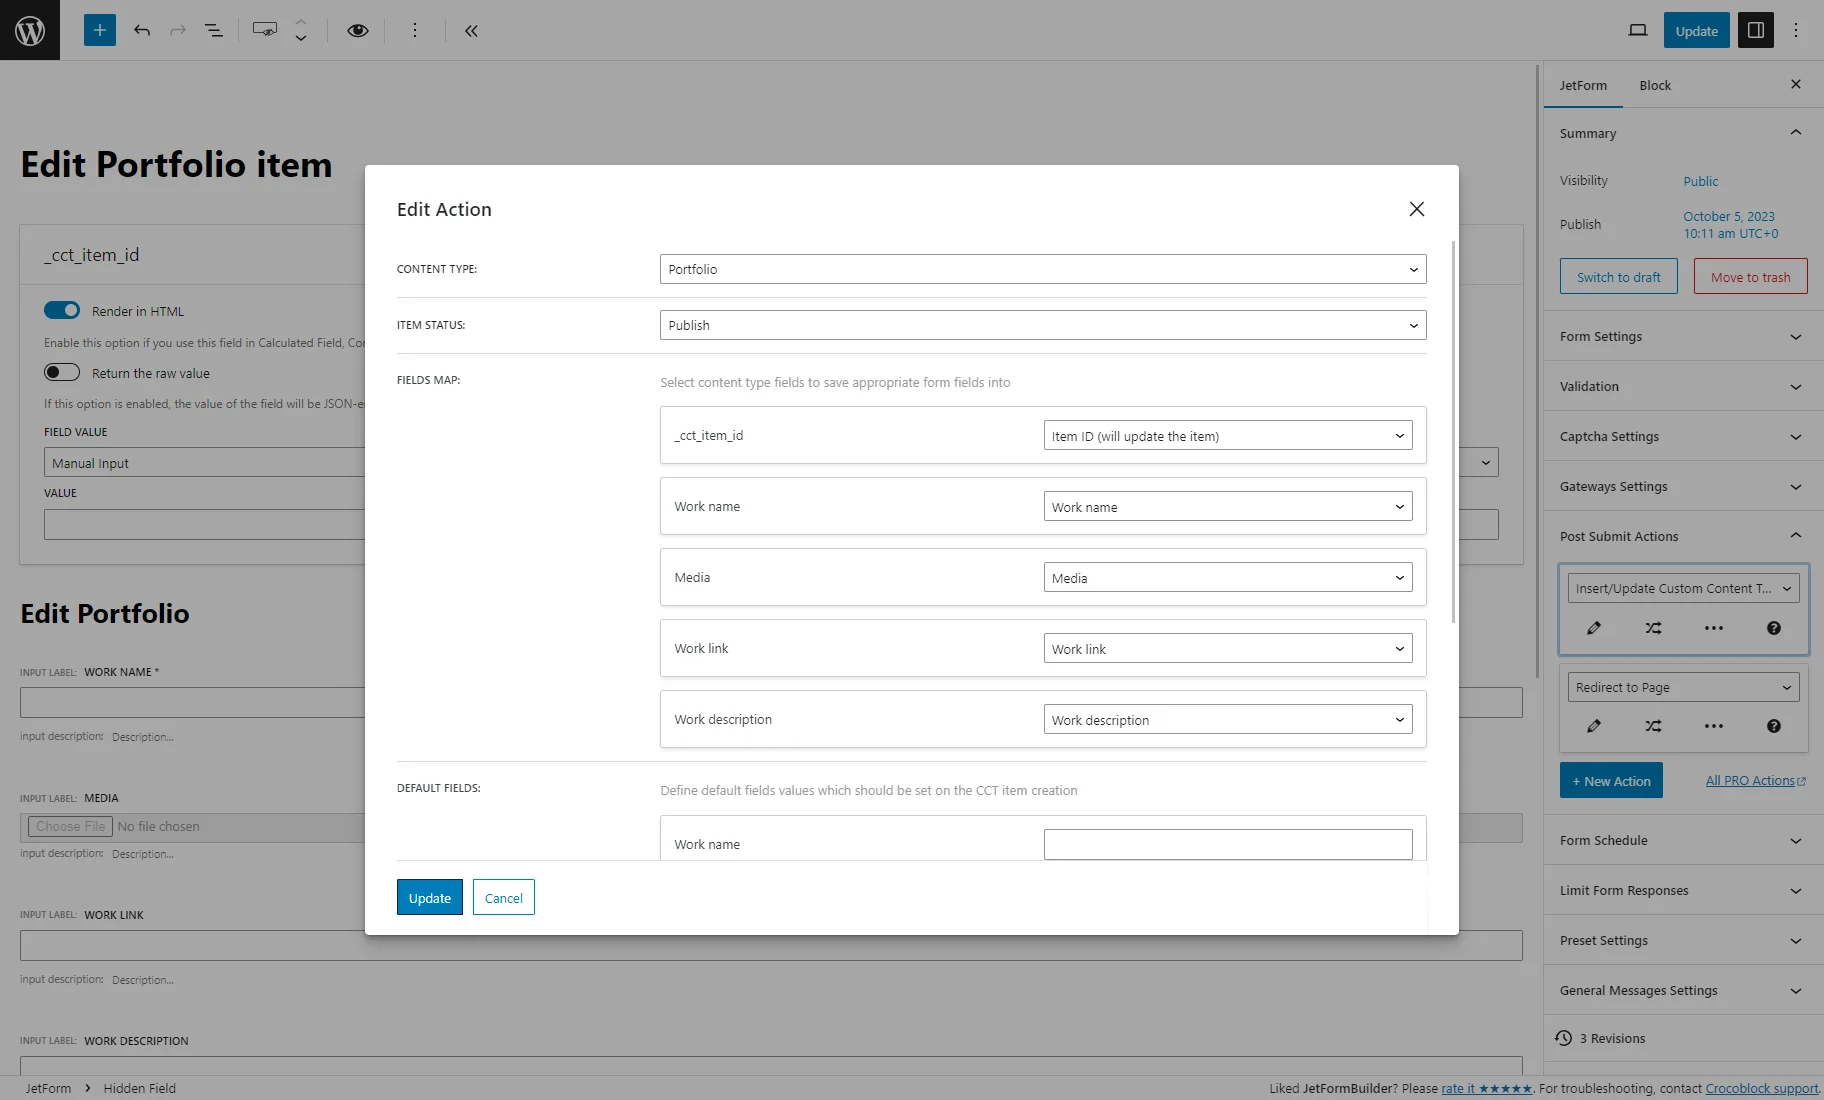
Head to the JetForm > Post Submit Actions tab and click the pencil icon under the “Insert/Update Custom Content Type Item” action.
In the Edit Action tab, set the “Item ID (will update the item)” option for the Hidden Field with the CCT item ID. Then, hit the “Update” button.
Then, unfold the Preset Settings tab and hit the Enable toggle. Select the “Custom Content Type” SOURCE and GET ITEM ID FROM “Current Post.” Under that, you will see the list of the fields that you added to the form. Each has a select field underneath, where you can choose a CCT meta field to connect to a form field. When users edit the item with the form, the preset will put the meta field data from the current CCT item into the form fields, so users won’t need to fill in fields again to change the item content.
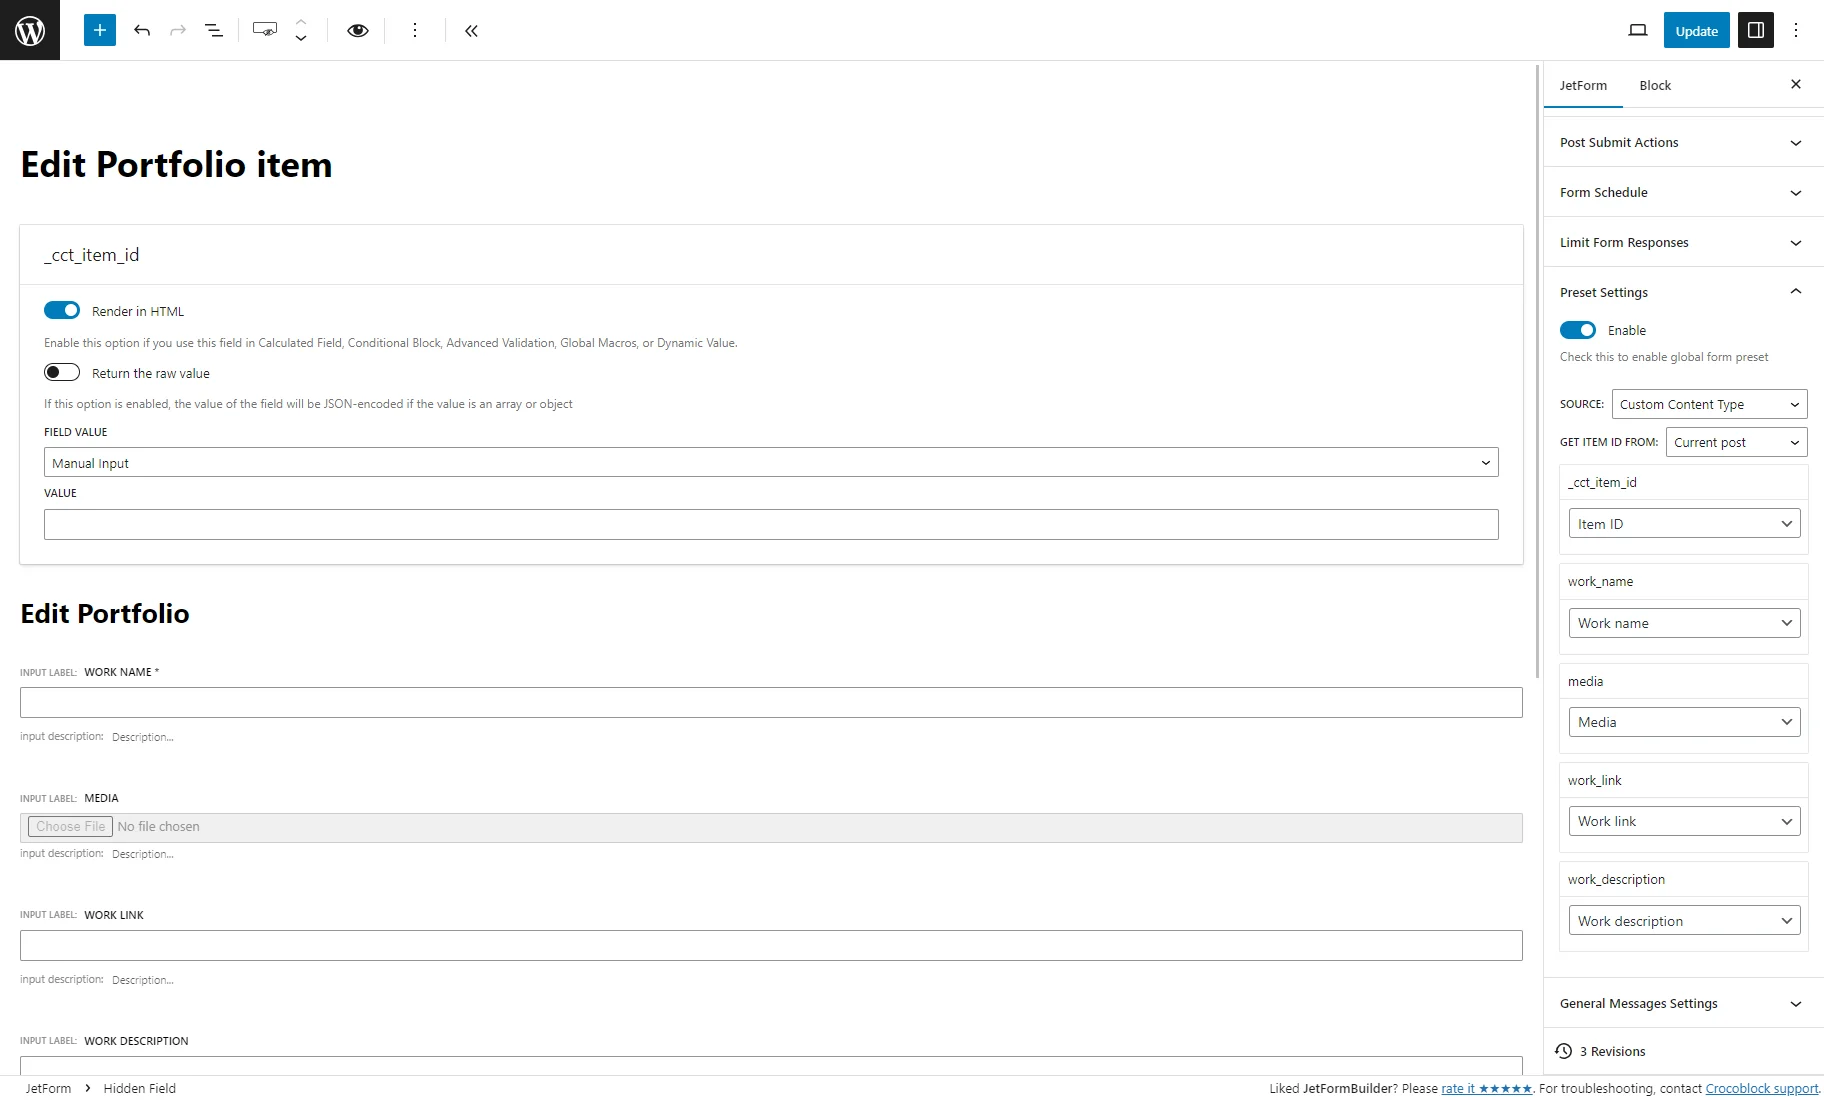
Press the “Update” button to save the form settings.
Place the Forms in Pop-Ups
With the JetPopup plugin, you can create two pop-ups that can be attached to the buttons.
We will create one pop-up for adding and another for editing CCT items.
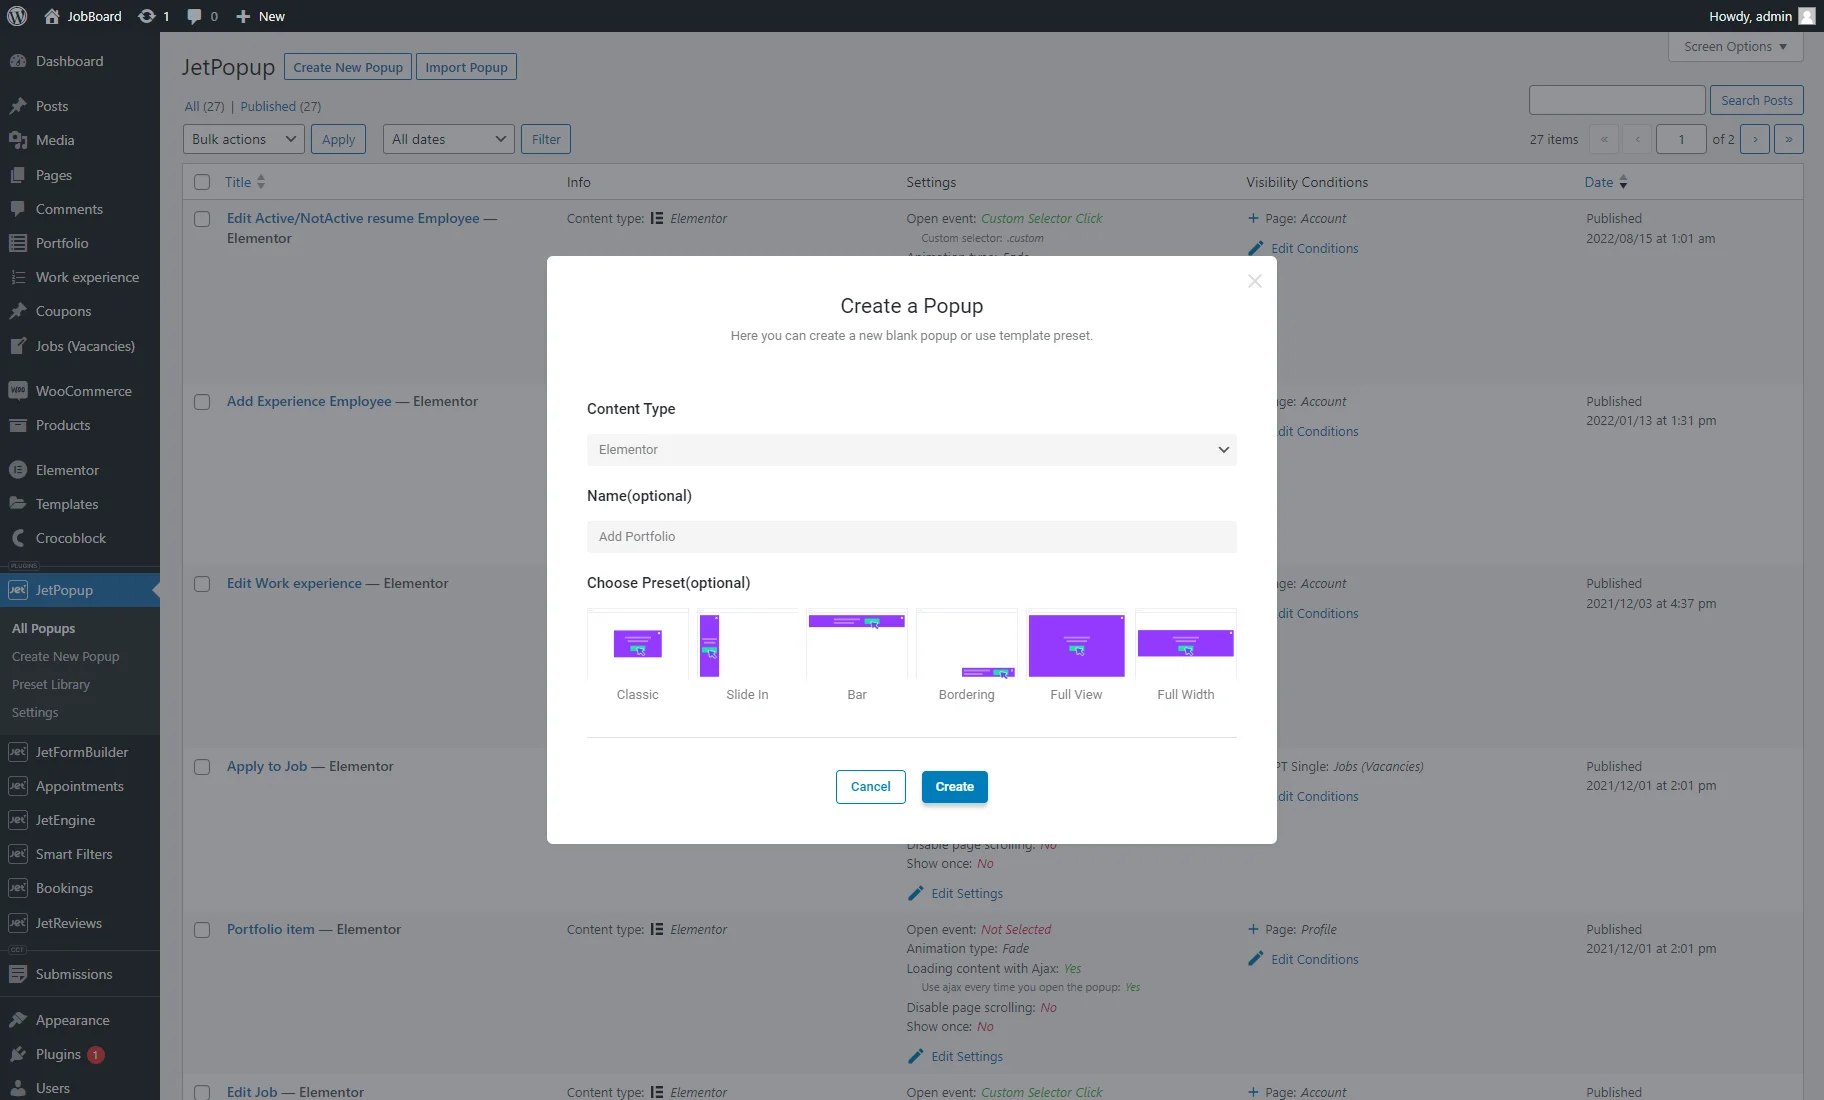
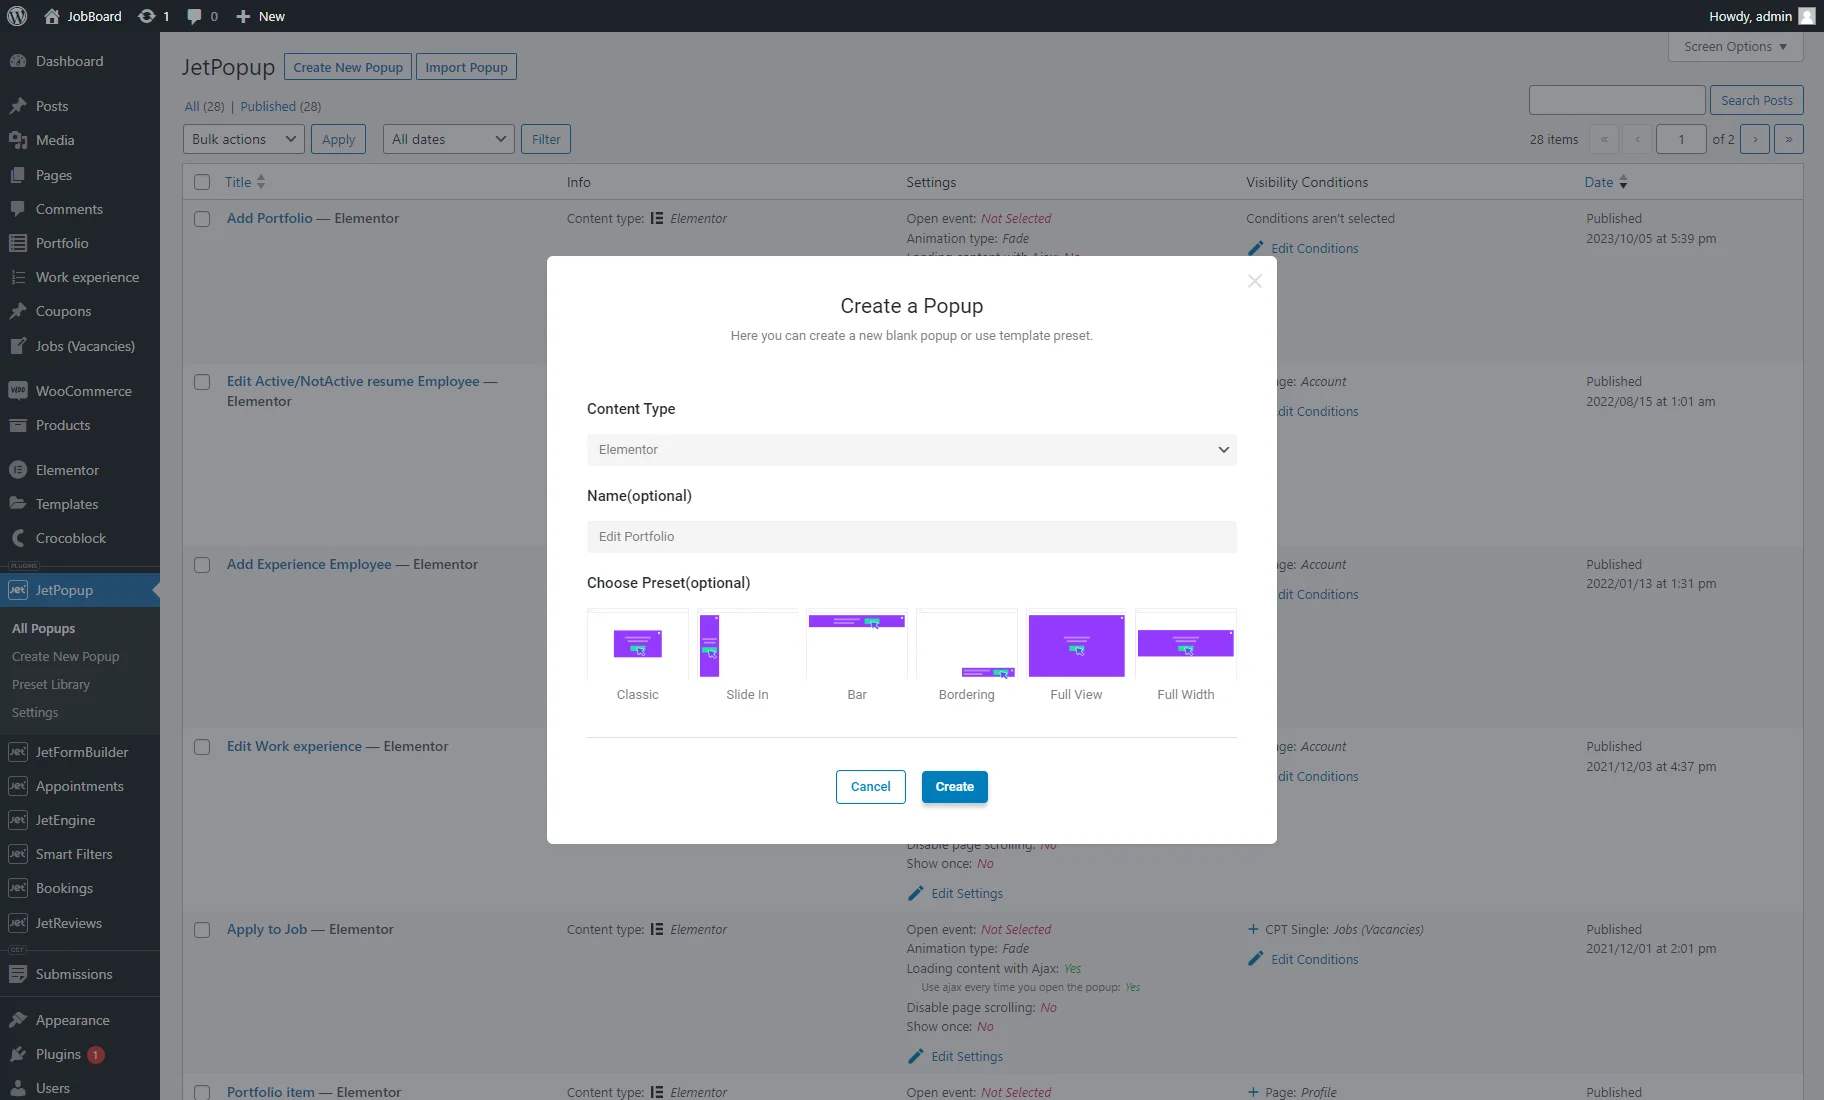
Head to the JetPopup > Create New Popup tab. In the Create a Popup window, select the Content Type (Elementor or Block editor), enter the pop-up Name, and Choose Preset. Then, hit the “Create” button.
Place the JetForm widget or Form block on the editing page. Open the Choose Form drop-down menu and pick a form you created for adding the CCT items (portfolios).
Customize the form and pop-up settings as preferred and hit the “Update” button.
To learn more about pop-up settings, check the How to Create a New Popup Template in Elementor and How to Create Popup in Gutenberg tutorials.
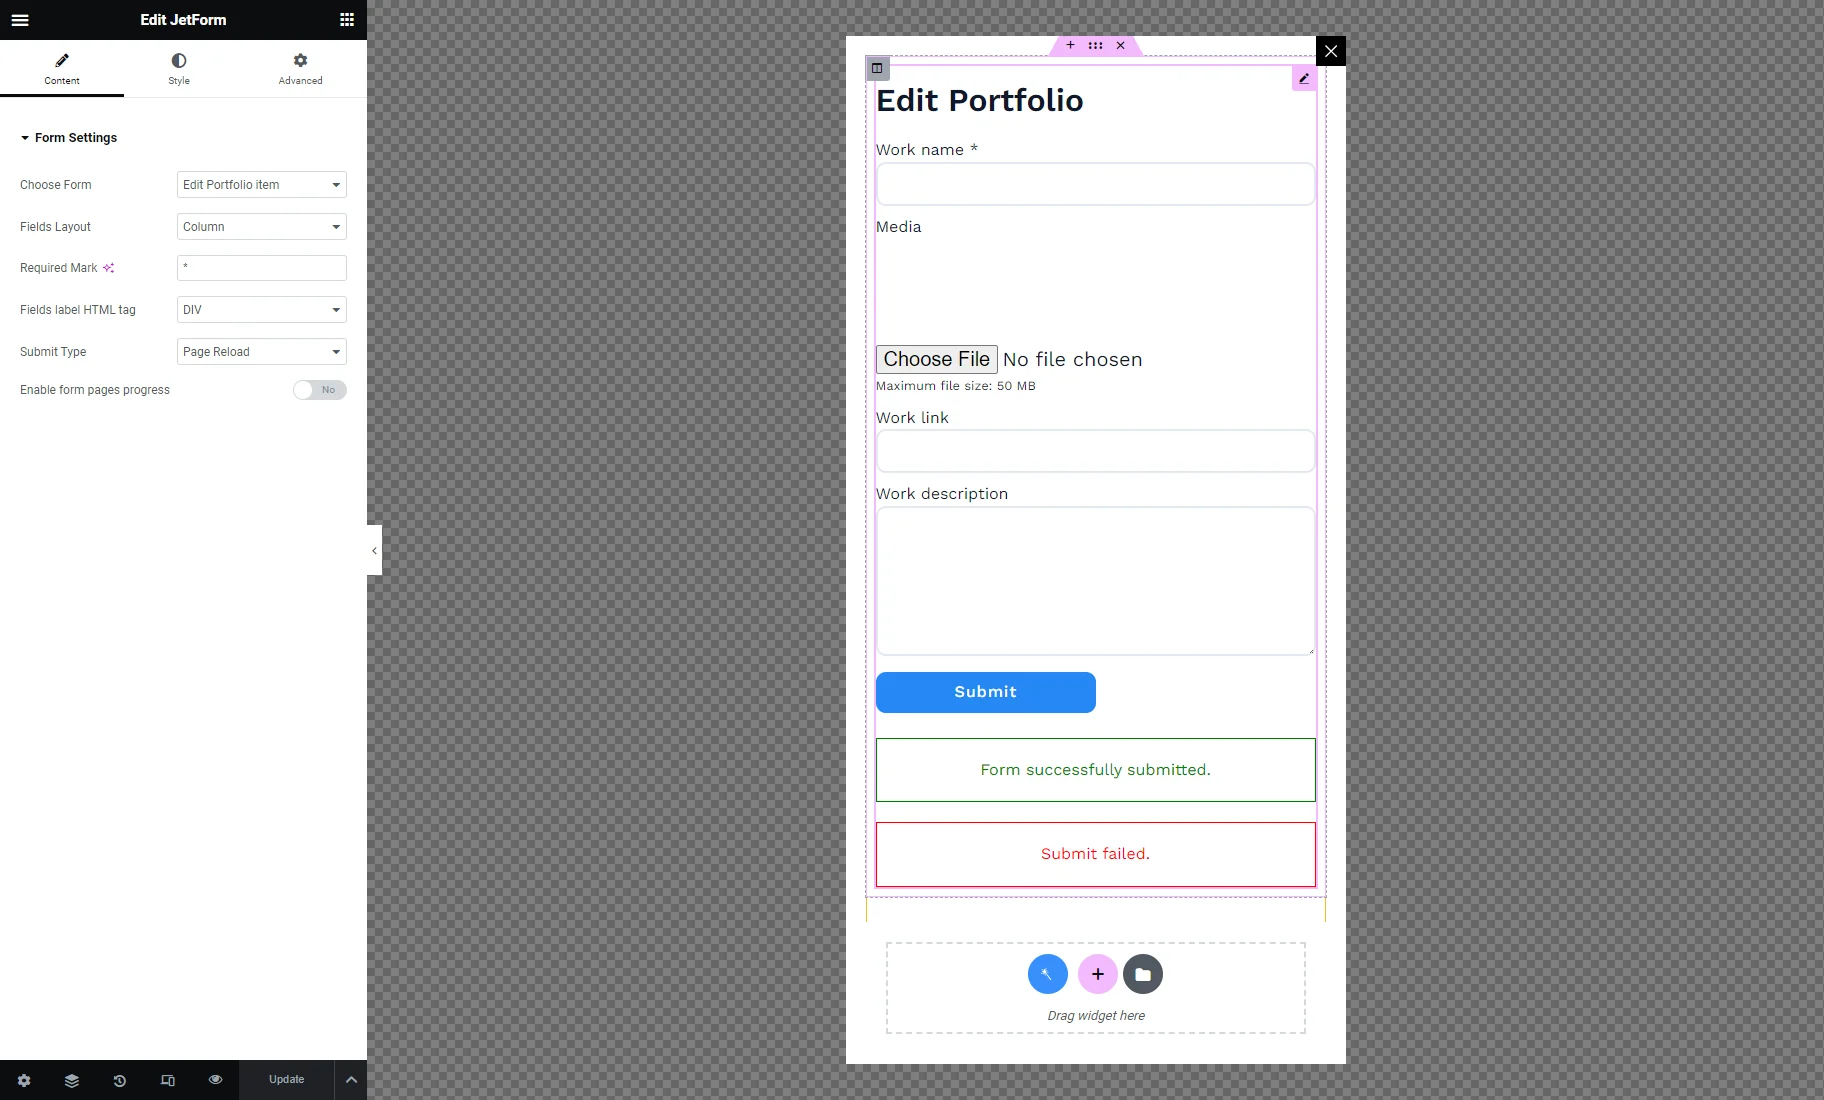
Return to the JetPopup > Create New Popup tab and create another pop-up.
Place the JetForm widget or Form block and set the form for editing CCT items (portfolios).
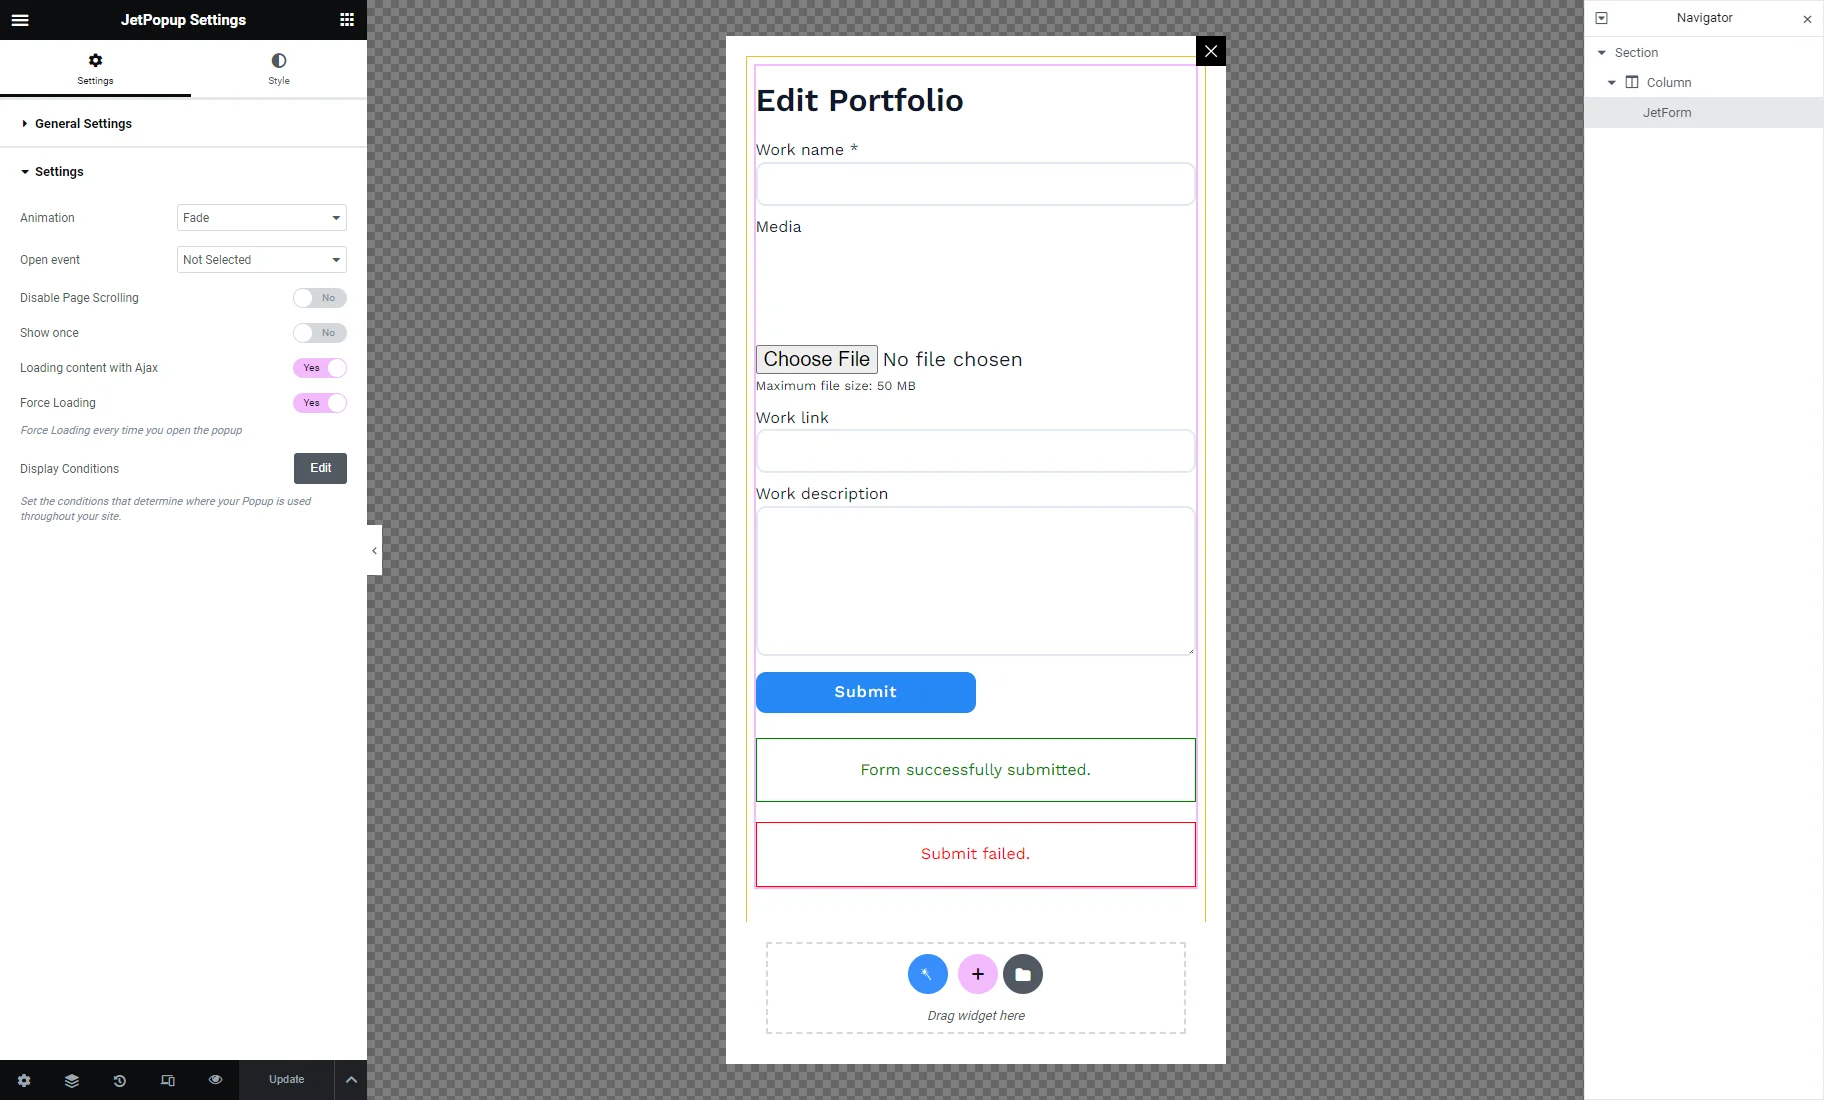
Click the gear icon to open the pop-up settings and enable the Loading content with Ajax and Force Loading toggles. The form preset won’t work in the pop-up without those enabled options.
Customize the pop-up and press the “Update” button.
Create a CCT Query
To display only portfolios of the queried user on the Profile page, we need to create a custom query. Head to the JetEngine > Query Builder tab and push the “Add New” button.
Enter the query Name and select the “Custom Content Type Query” option from the Query Type drop-down menu.
In the Content Types Query settings tab, select the needed CCT from the From Content Type drop-down list (“Portfolio” in our case). You can set the Number of the displayed items in the Listing Grid (we will create a Listing template for it later). Also, you can select the “Publish” Status to show only those items that are published.
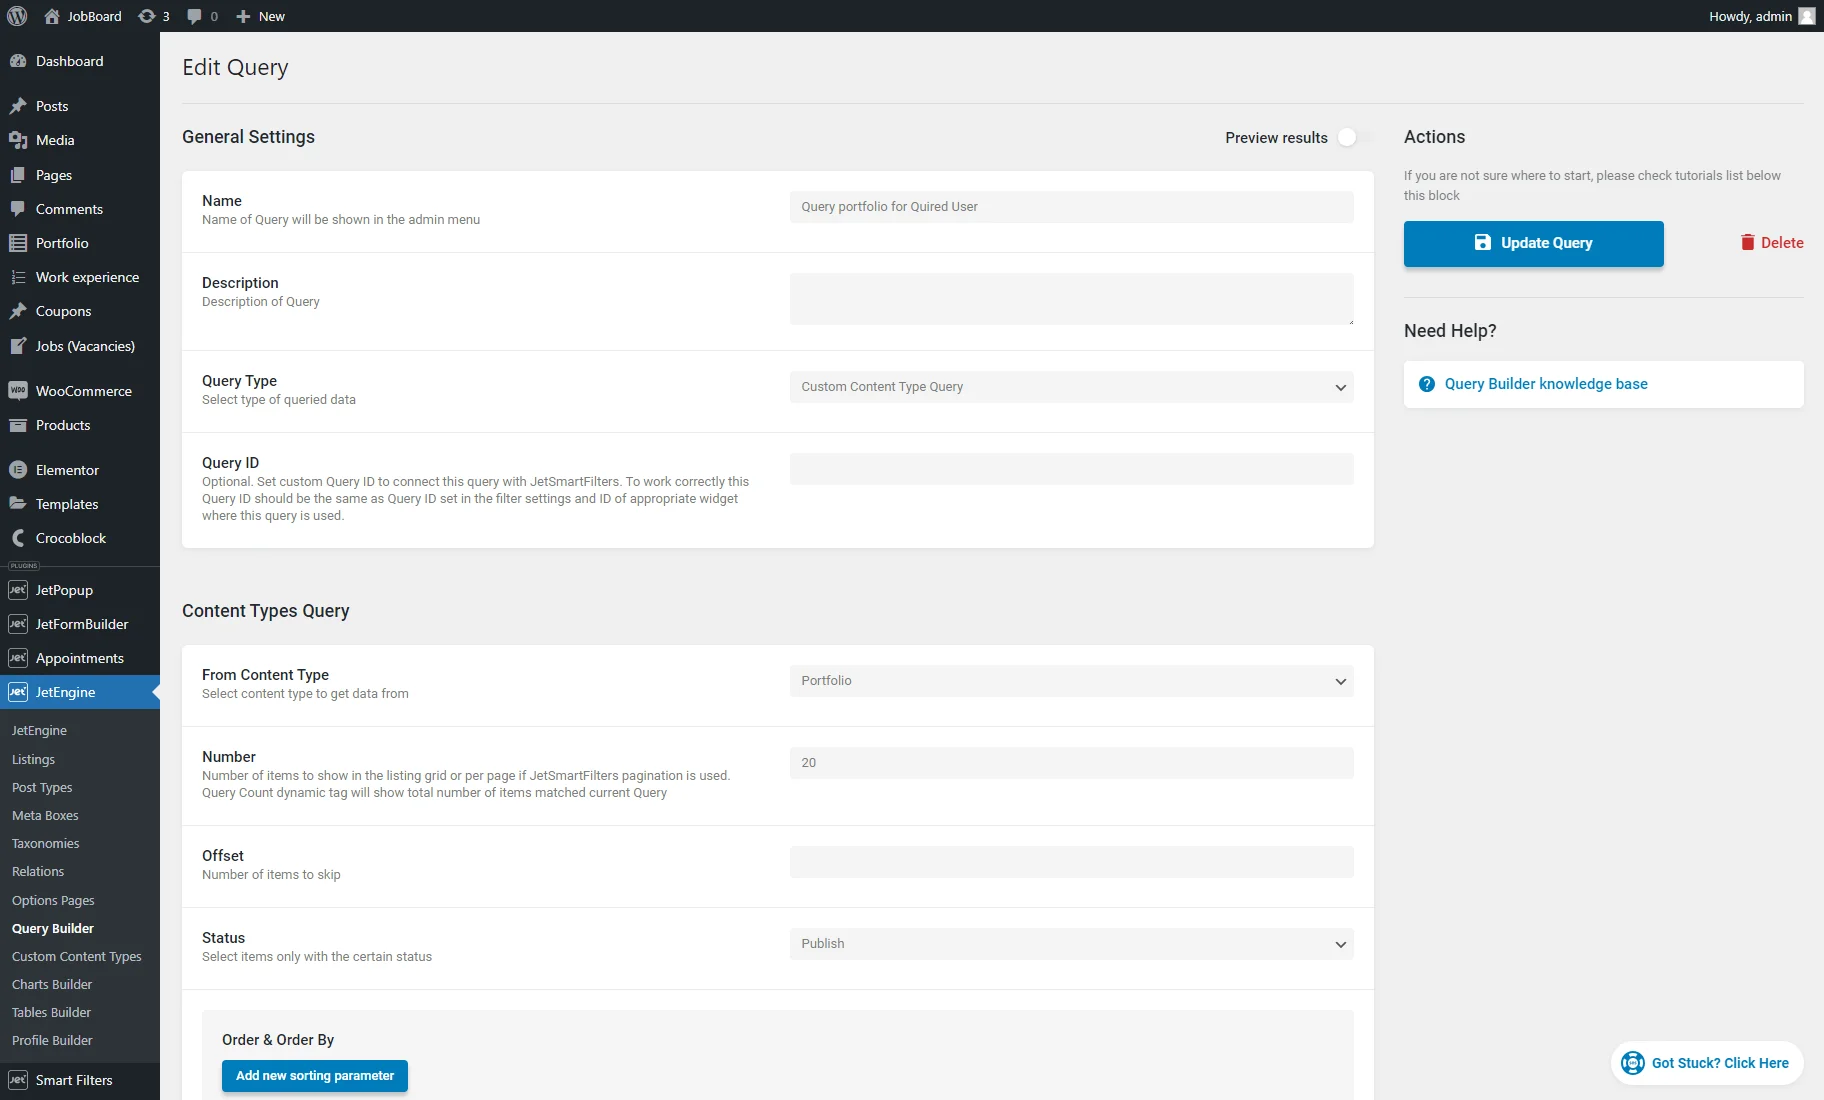
In the Query tab, hit the “Add New”button. Set the “Item Author” Field and “Equal (=)” Compare. Click the coin-stack icon near the Value field and pick the “Queried user ID” from the drop-down menu. Finally, pick the “Numeric” Type.
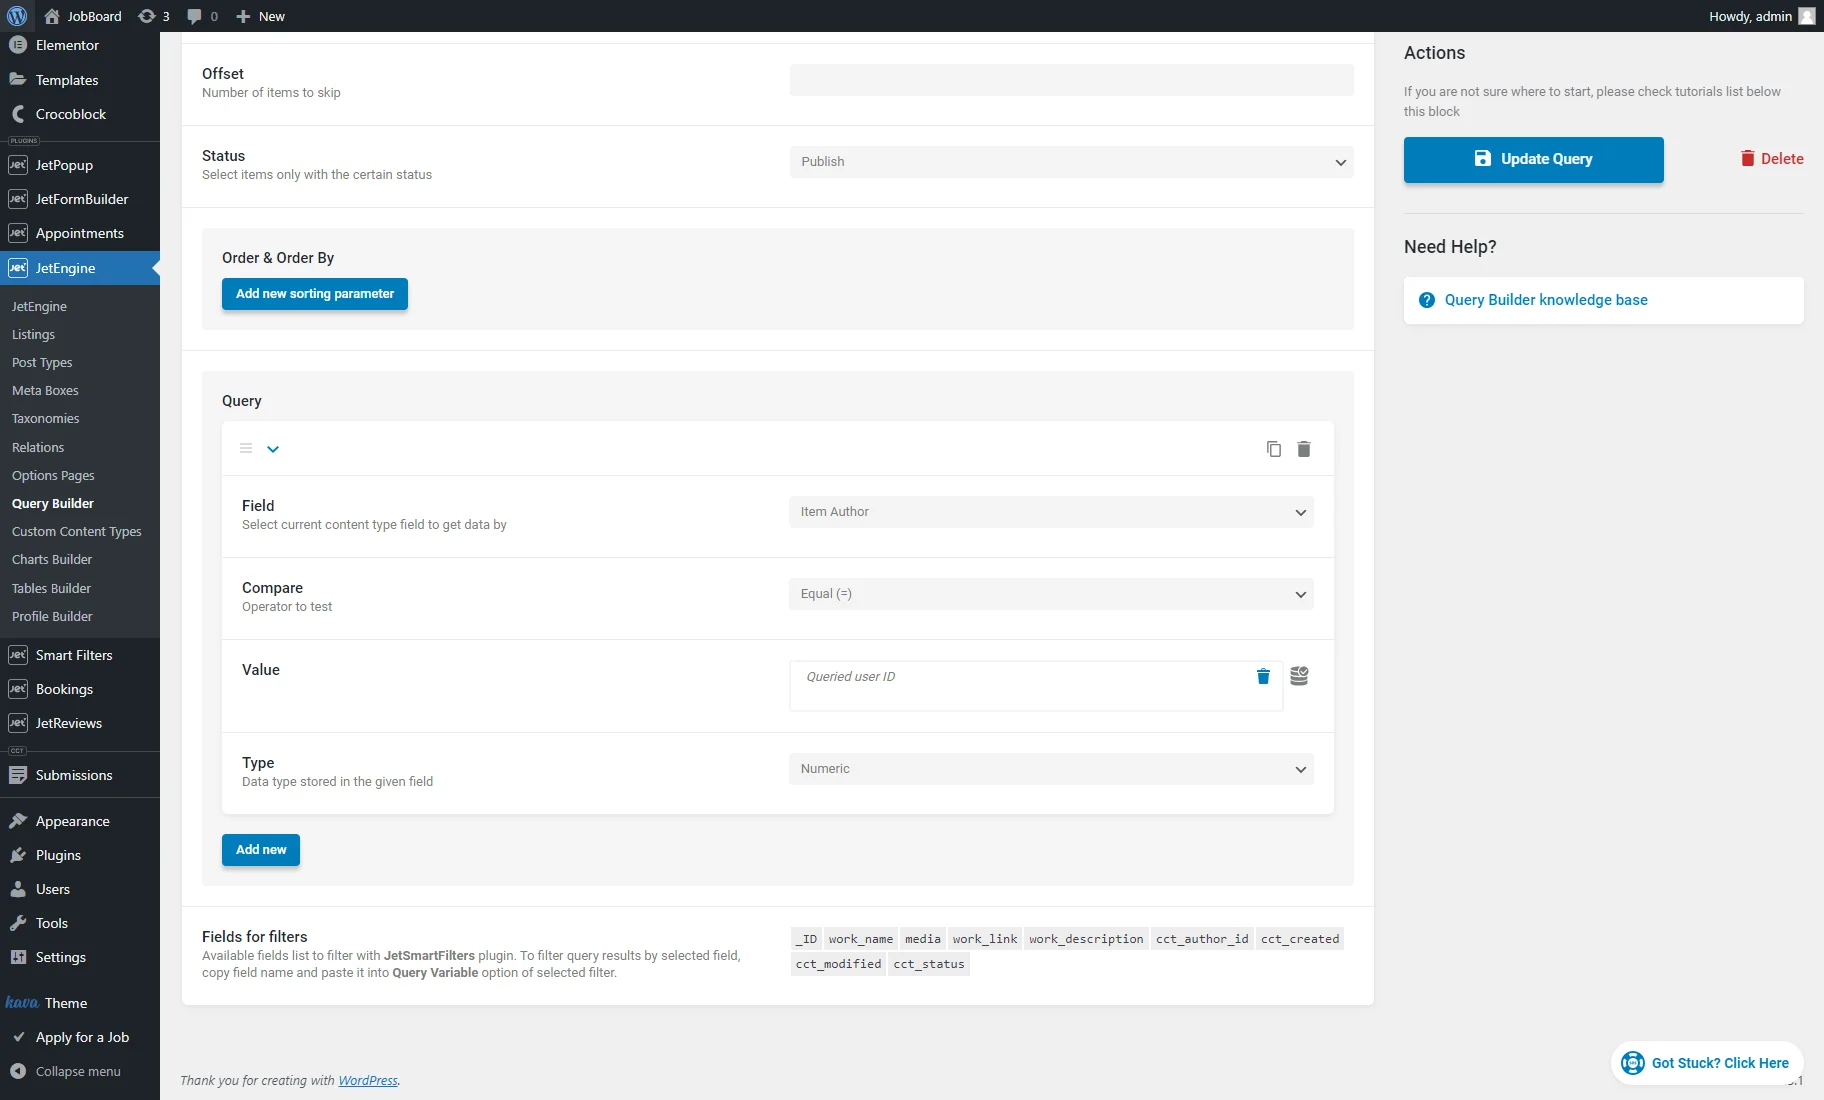
The query is ready, and you can hit the “Add/Update Query”button.
Create a Listing Template
To display portfolios in the listing grid on the user’s Account and Profile pages, it’s necessary to create a listing template.
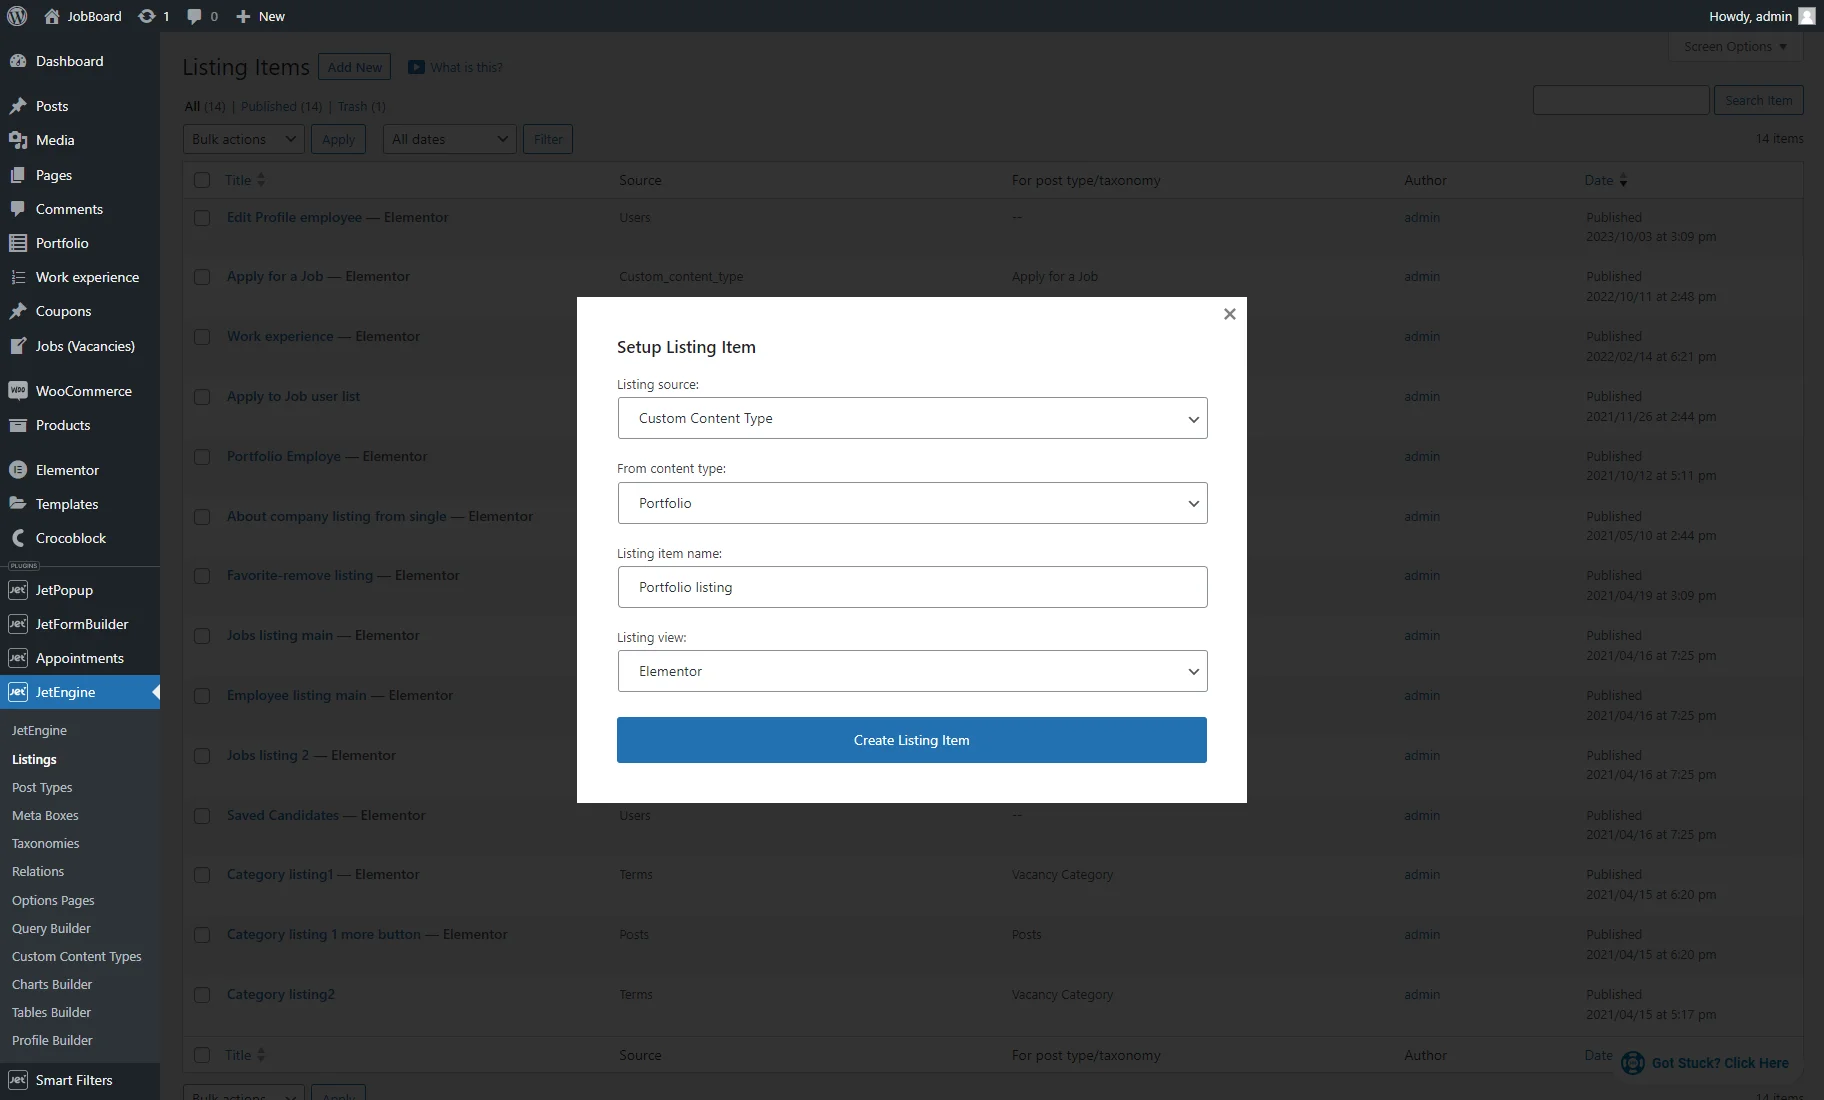
Go to the JetEngine > Listings tab and press the “Add New” button.
In the Setup Listing Item pop-up, select the “Custom Content Type” Listing Source, choose the needed CCT in the From content type field (e.g., “Portfolio”), enter the Listing Item name, pick the “Elementor” Listing view, and click the “Create Listing Item” button.
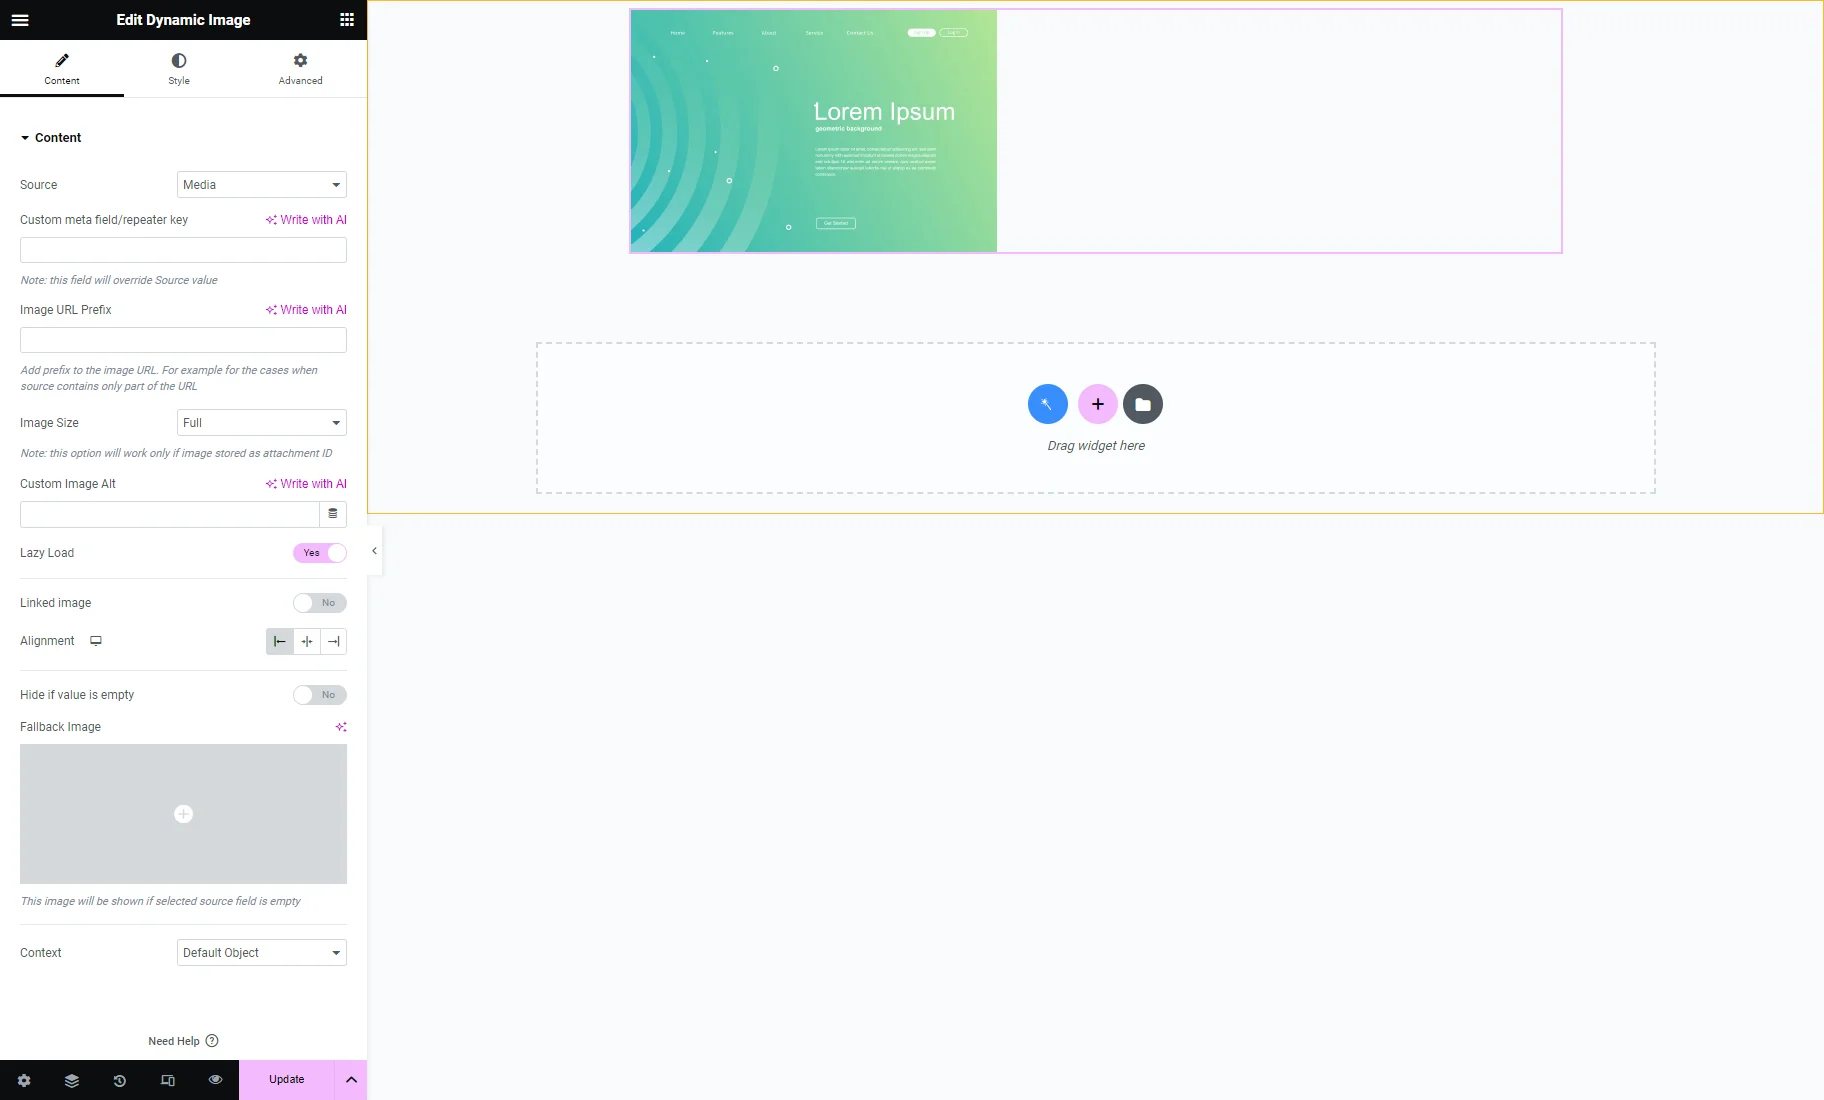
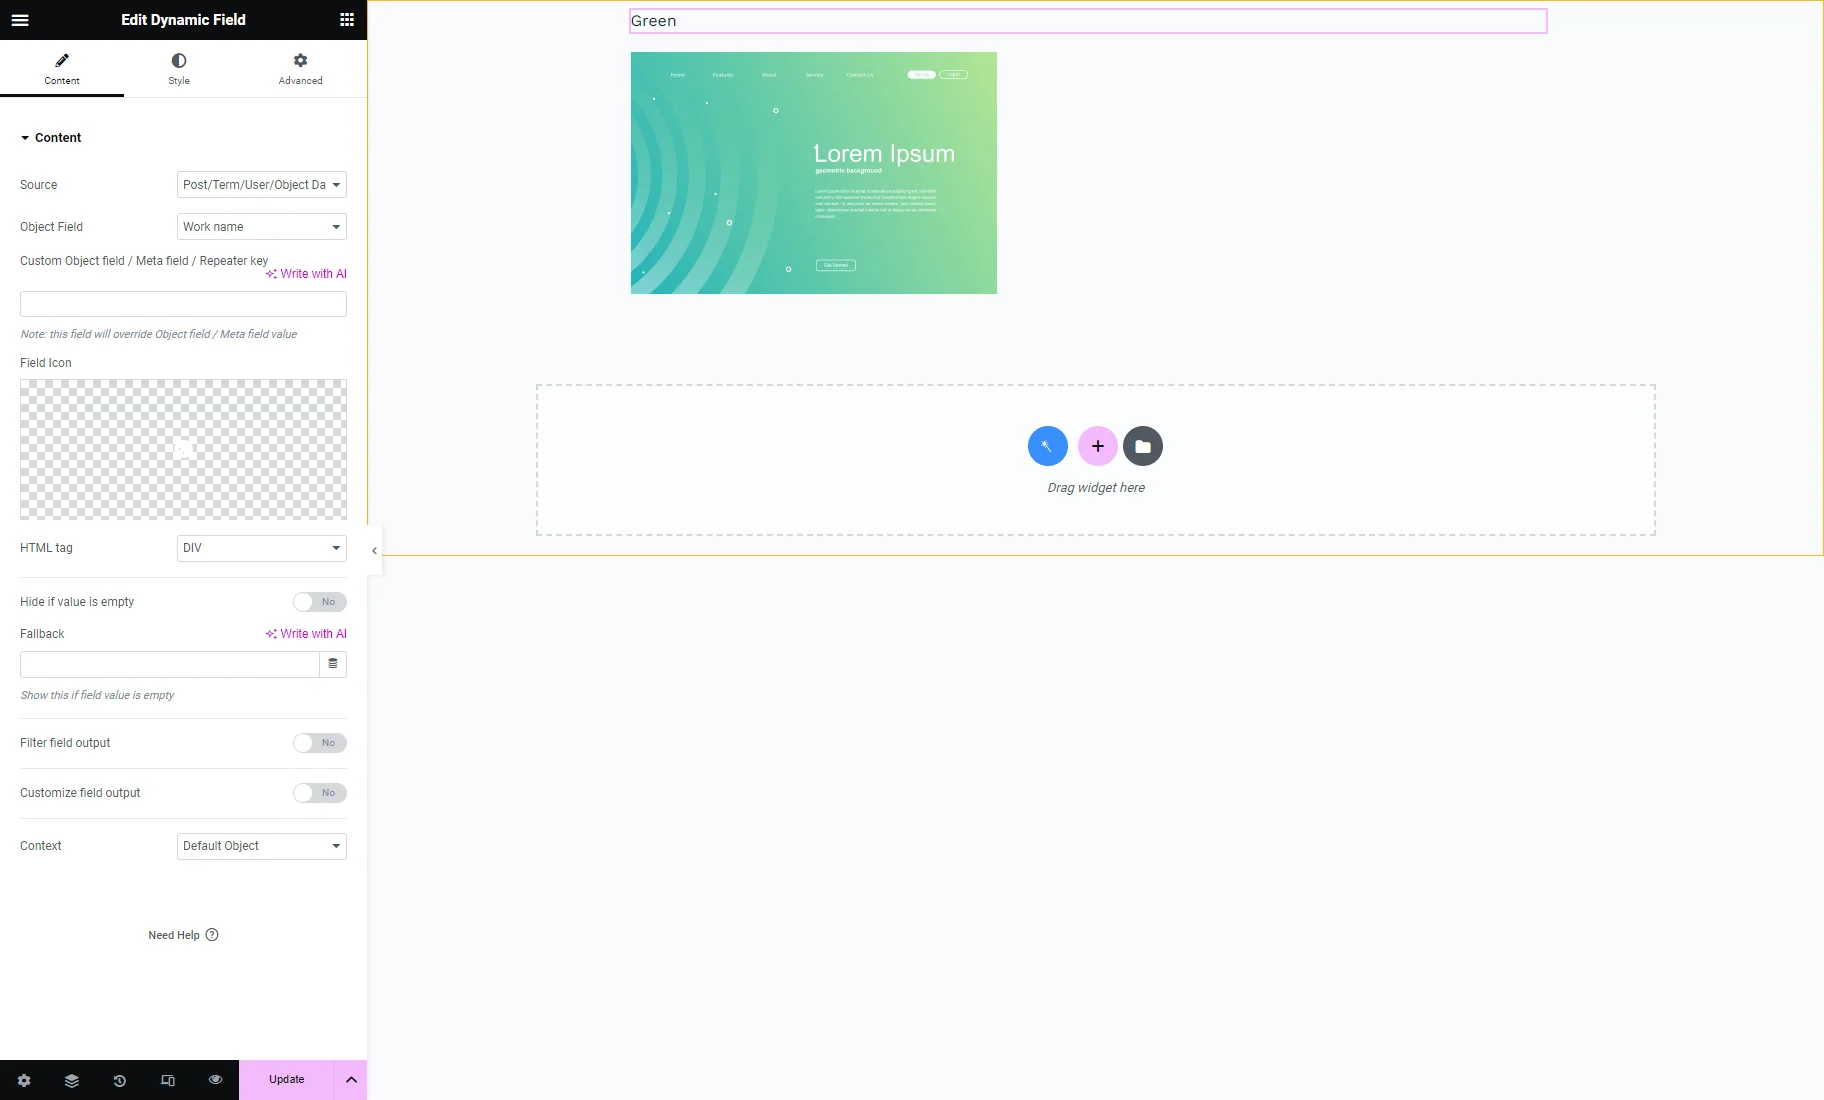
On the Elementor editing page, place the Dynamic Image widget to display the portfolio picture. As the Source, pick the Media meta field from the “Portfolio” CCT.
To display the portfolio name, drag-n-drop the Dynamic Field widget. We chose the “Post/Term/User/Object Data” option as the Source and selected the “Work name” CCT Text meta field.
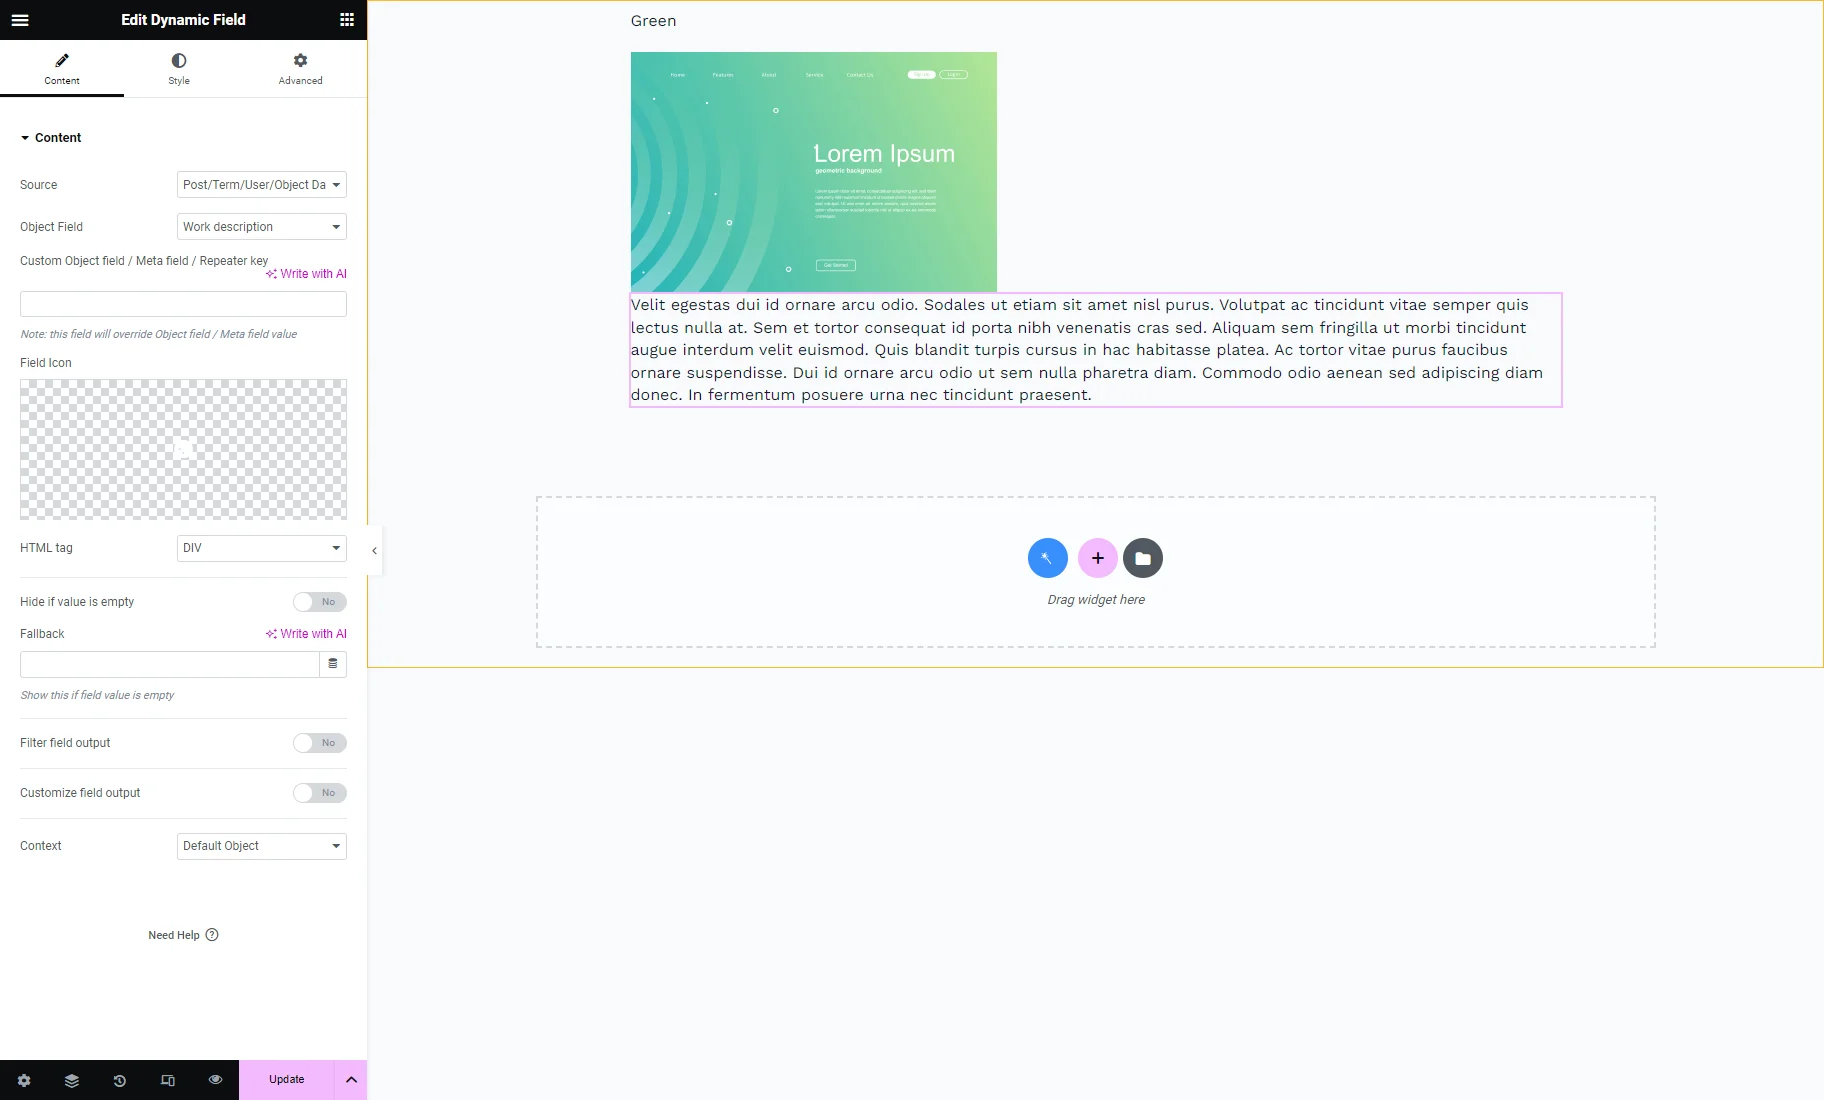
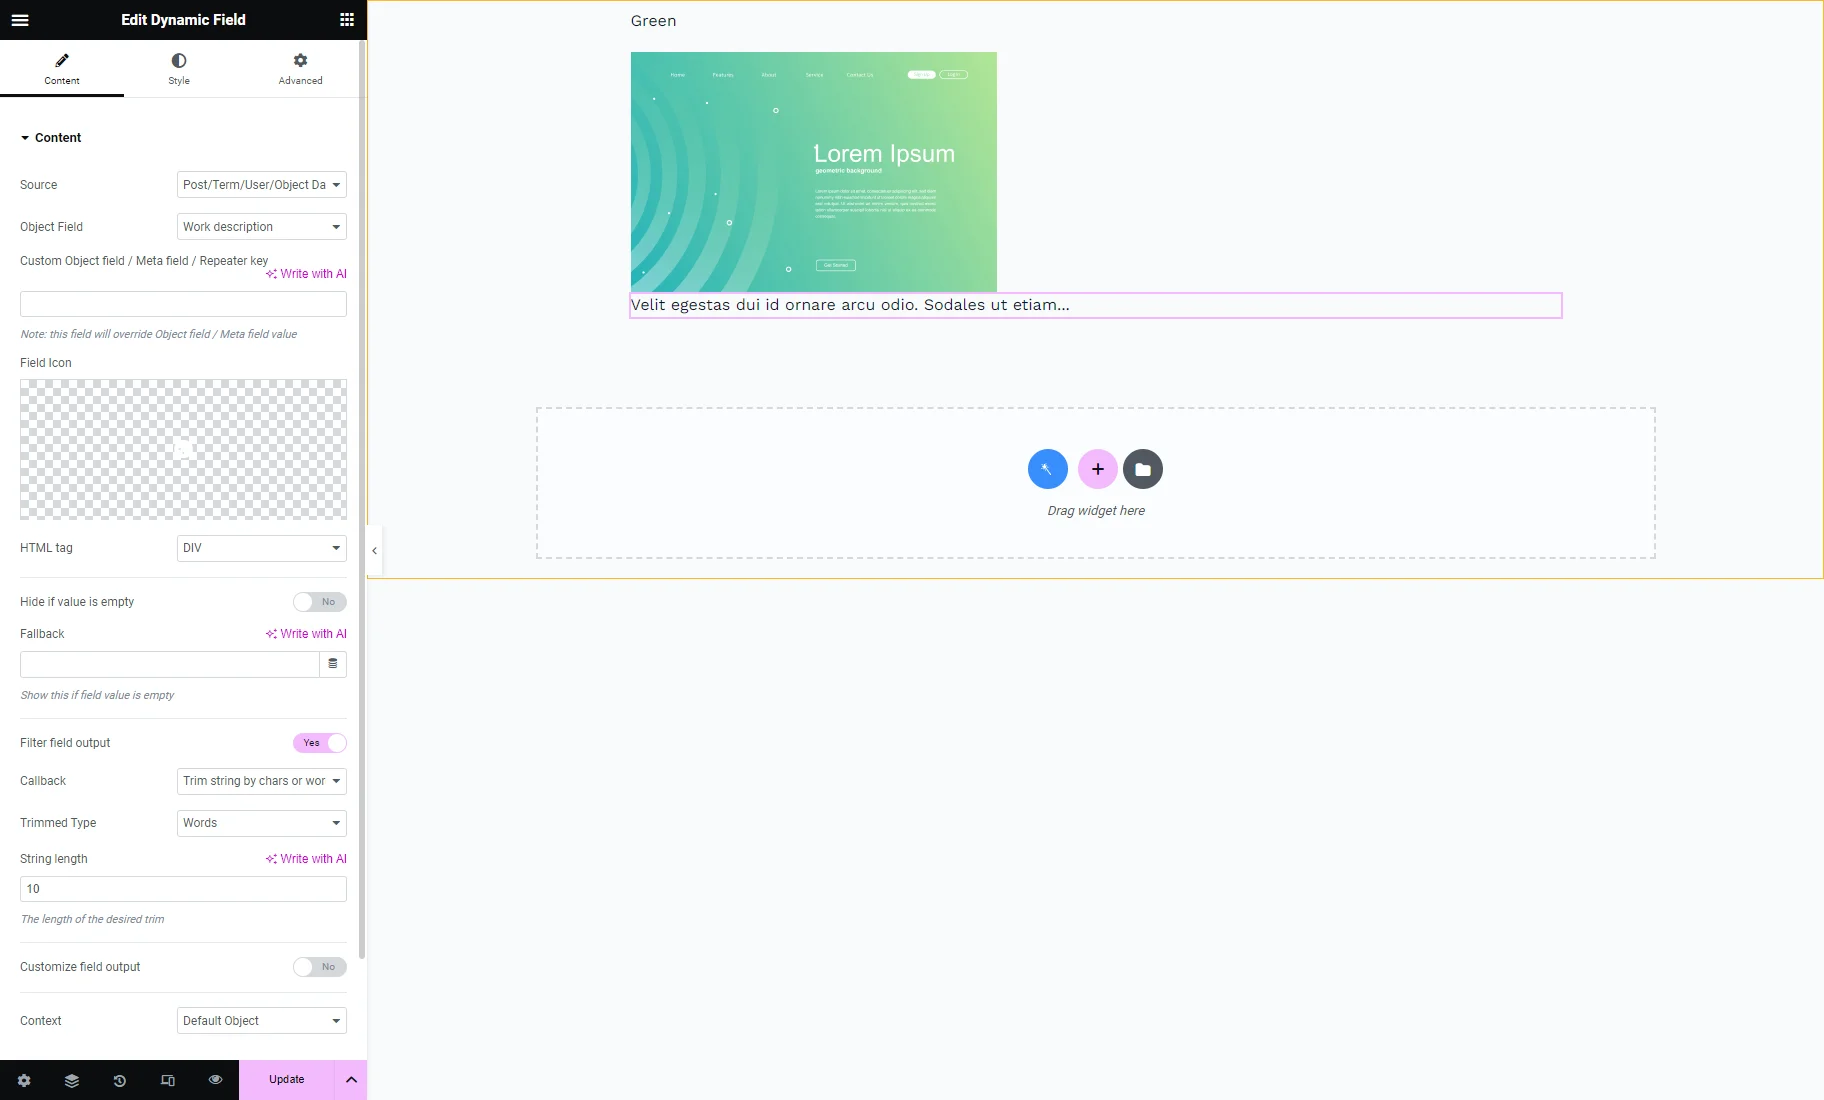
We placed another Dynamic Field widget, chose the “Post/Term/User/Object Data” option as the Source, and selected the “Work description” CCT Text meta field to display portfolio description.
To hide part of the description text, we enabled the Filter field output toggle and selected the “Trim string by charts or words” Callback. Be aware that the callback is available only after you enable the Trim string callback toggle in the JetEngine > JetEngine > Modules > External Modules tab. With this callback, you can set the number of words or charts displayed in the Dynamic Field.
We added the Dynamic Link widget and picked the “Work link” CCT Text meta field to display the link to the portfolio.

We drag-n-dropped another Dynamic Link button by clicking on which user can delete the portfolio. As the Source, we picked the “Delete current post link” option and filled in the Confirm deletion message field.
In the Redirect after delete field, you can enter the Account page URL, so the user will be redirected to the Account page after deleting the portfolio.
You can change the Label text. We wanted to display the icon only, so we deleted it.
Enable the Add Query Arguments toggle and enter the “_cct_id=%current_id%” macro.
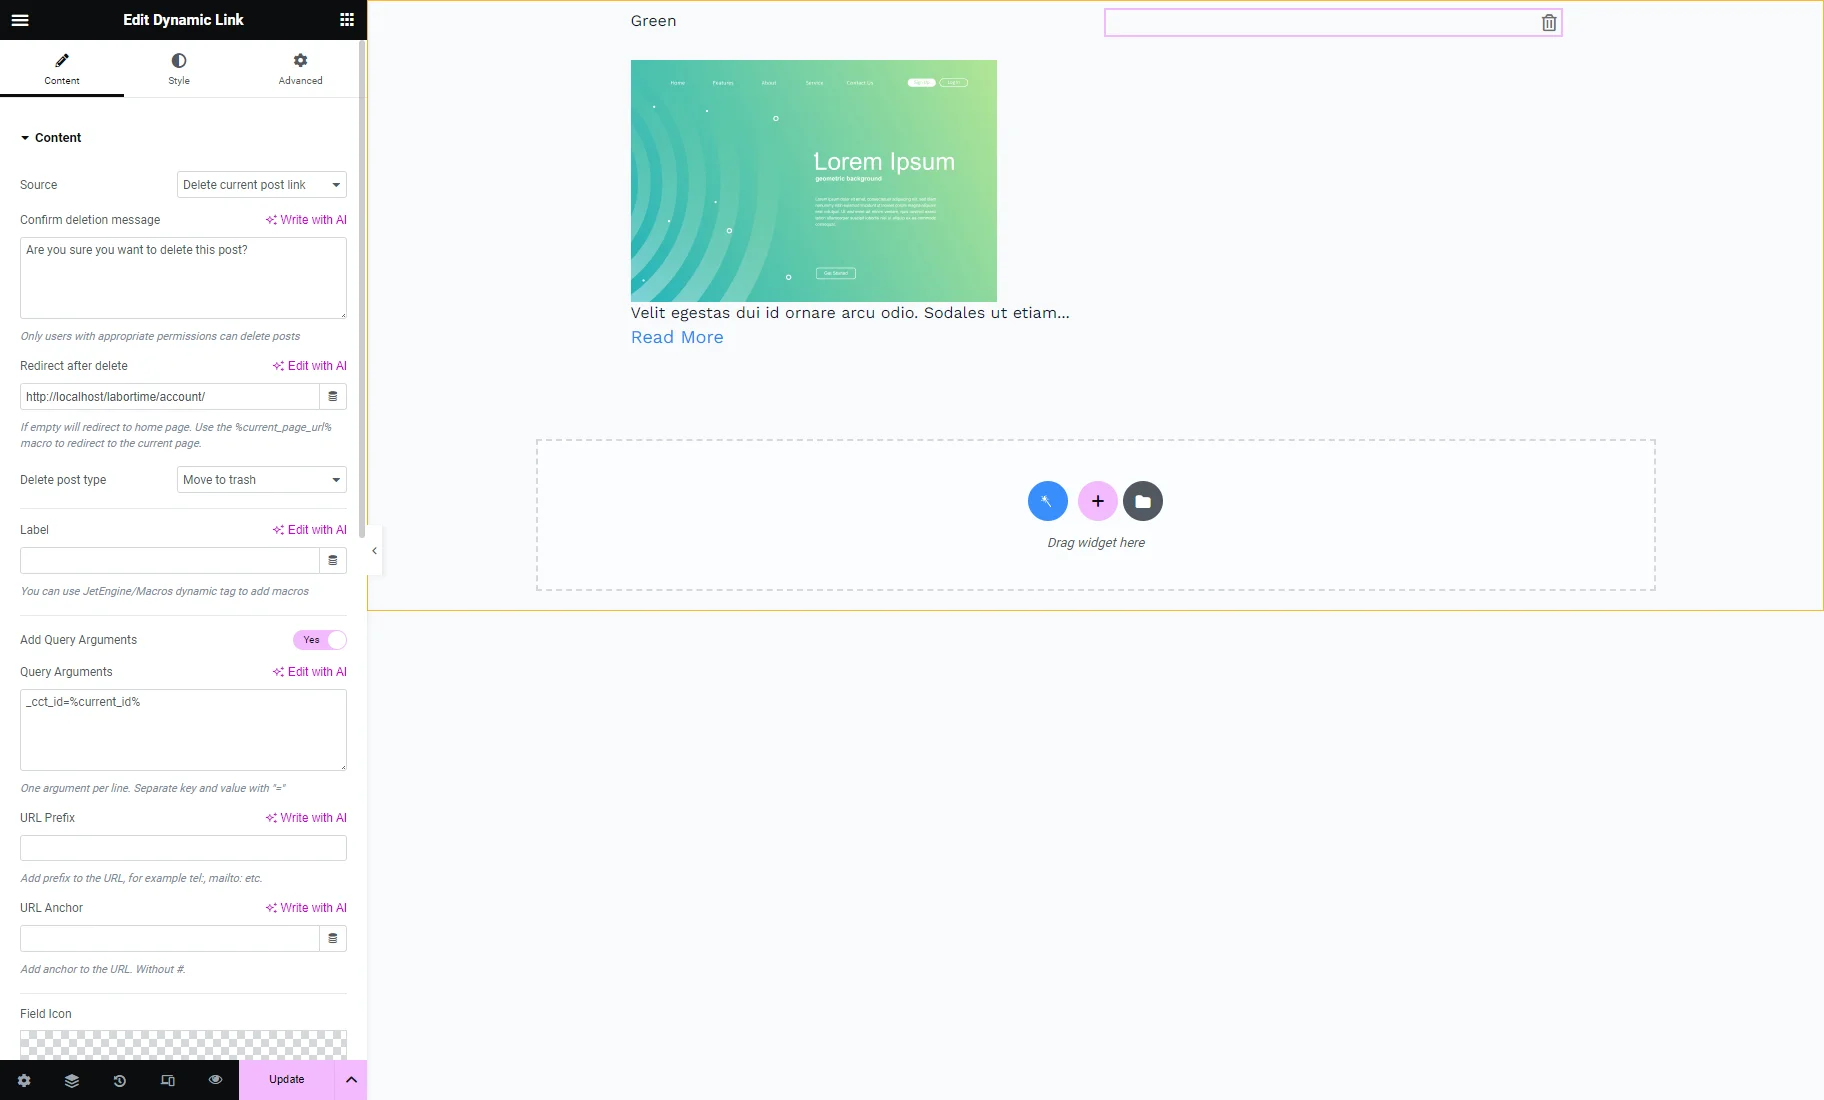
Also, we set the “Trash” Field Icon and “End” Alignment.
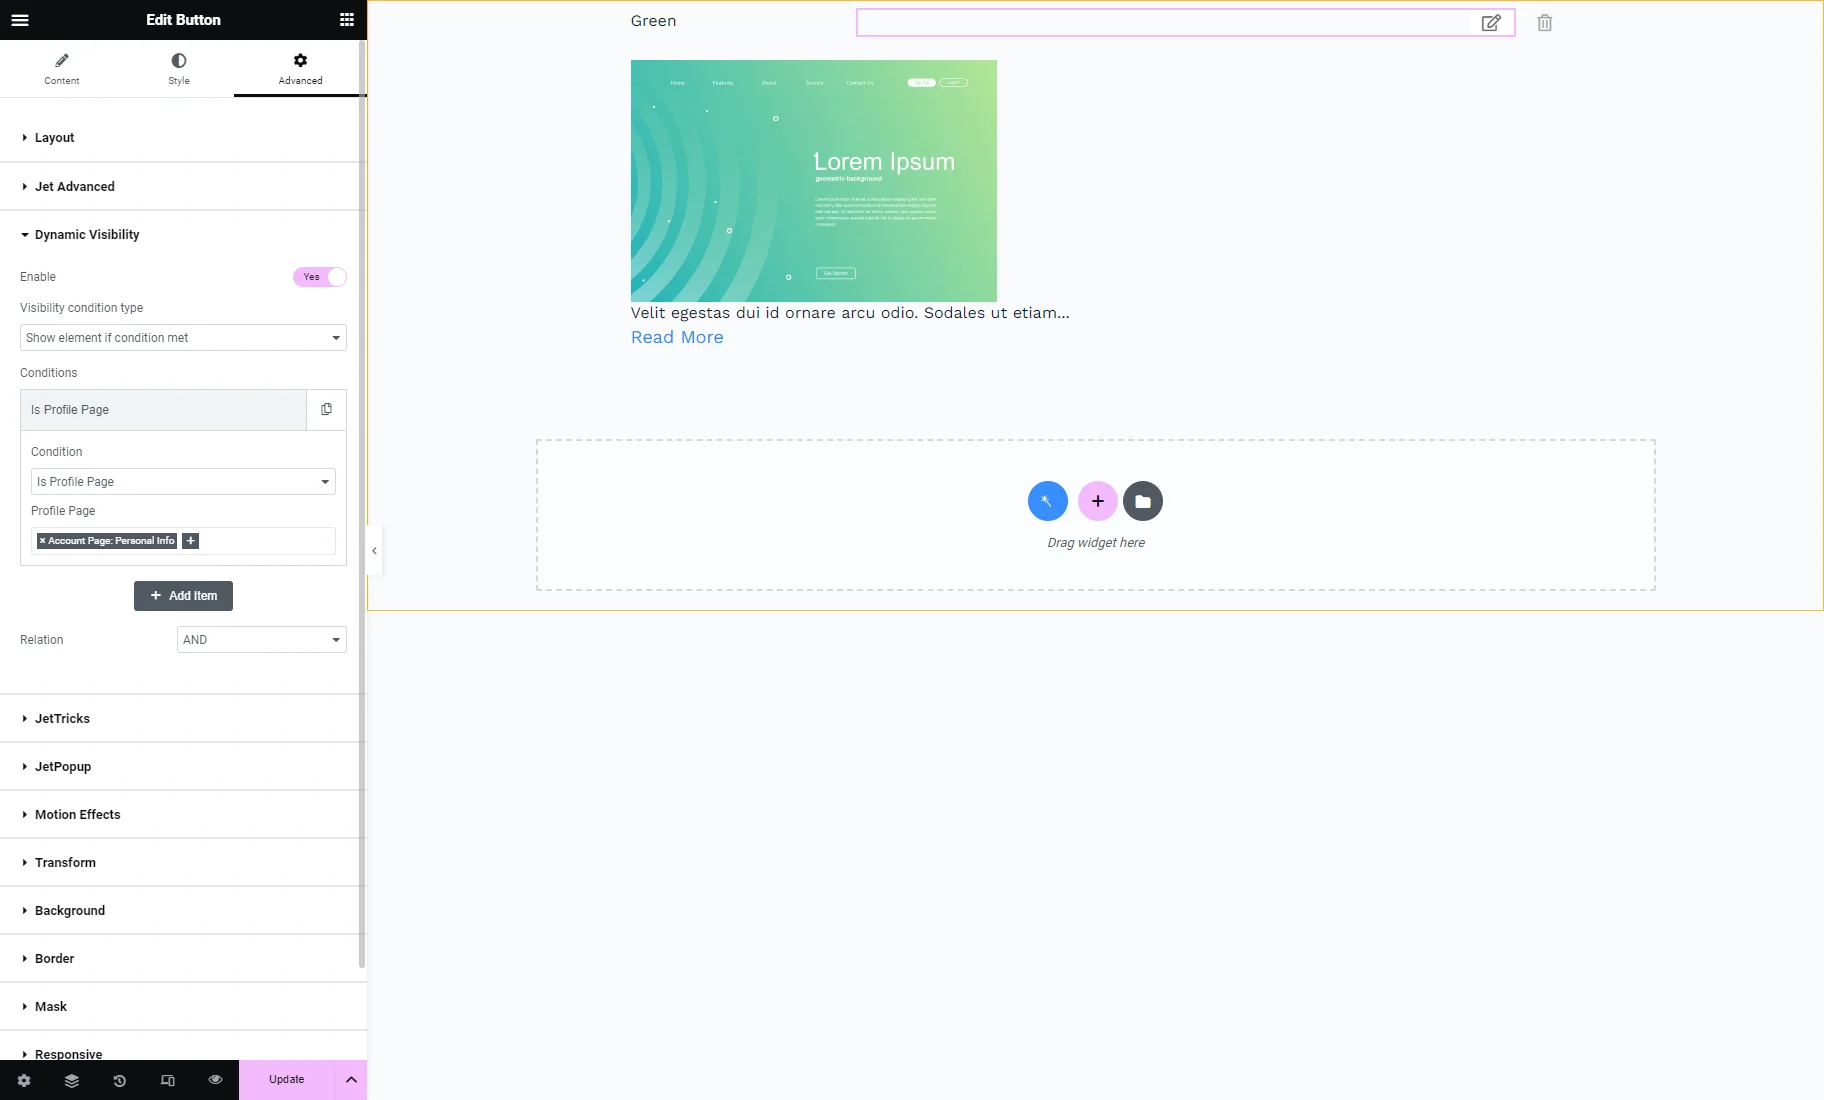
Proceed to the Advanced settings tab of the widget, unfold the Dynamic Visibility tab, and hit the Enable toggle. Set the “Show element if condition met” Visibility condition type and “Is Profile Page” (from the JetEngine specific section) Condition. In the Profile Page field, pick the Account subpage that shows the user’s info and where you will place the listing grid with portfolios.
Such dynamic visibility settings show the Dynamic Link for deleting a portfolio only on the user Account page. On the Profile page, it will be invisible.

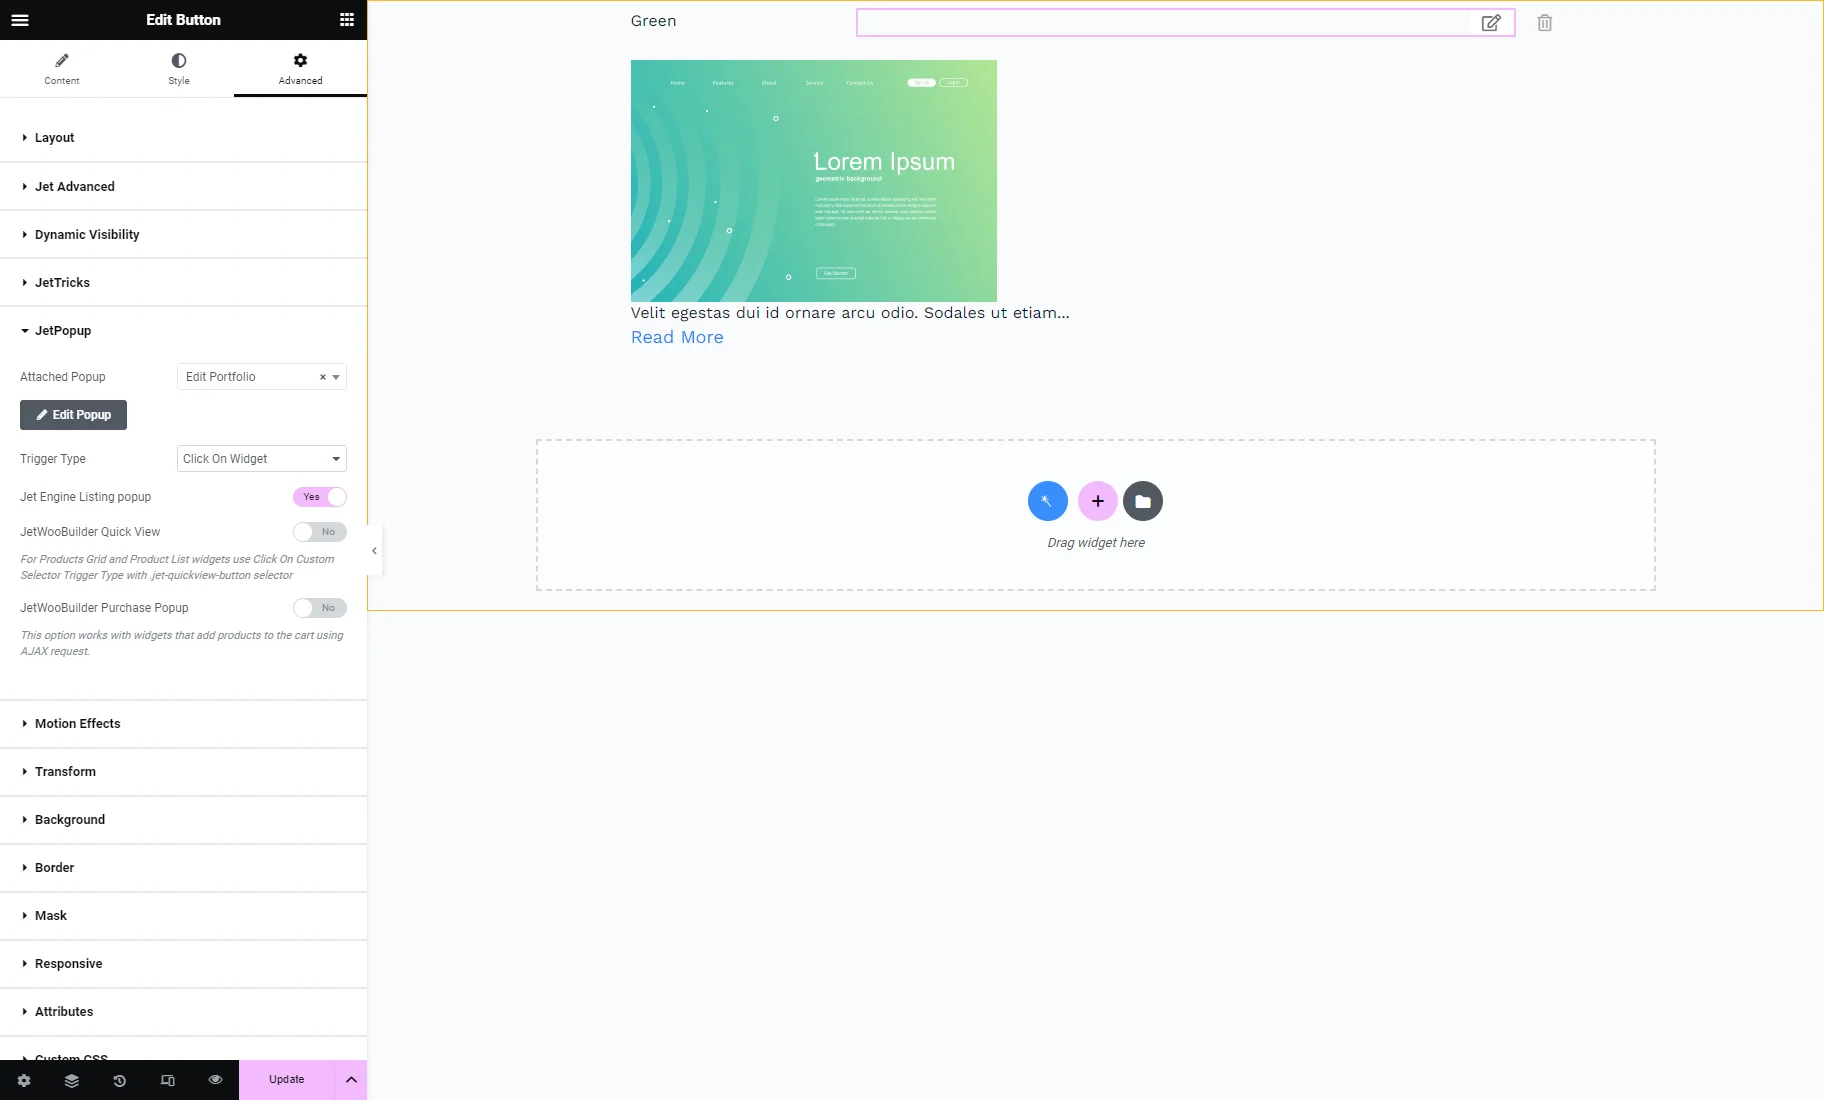
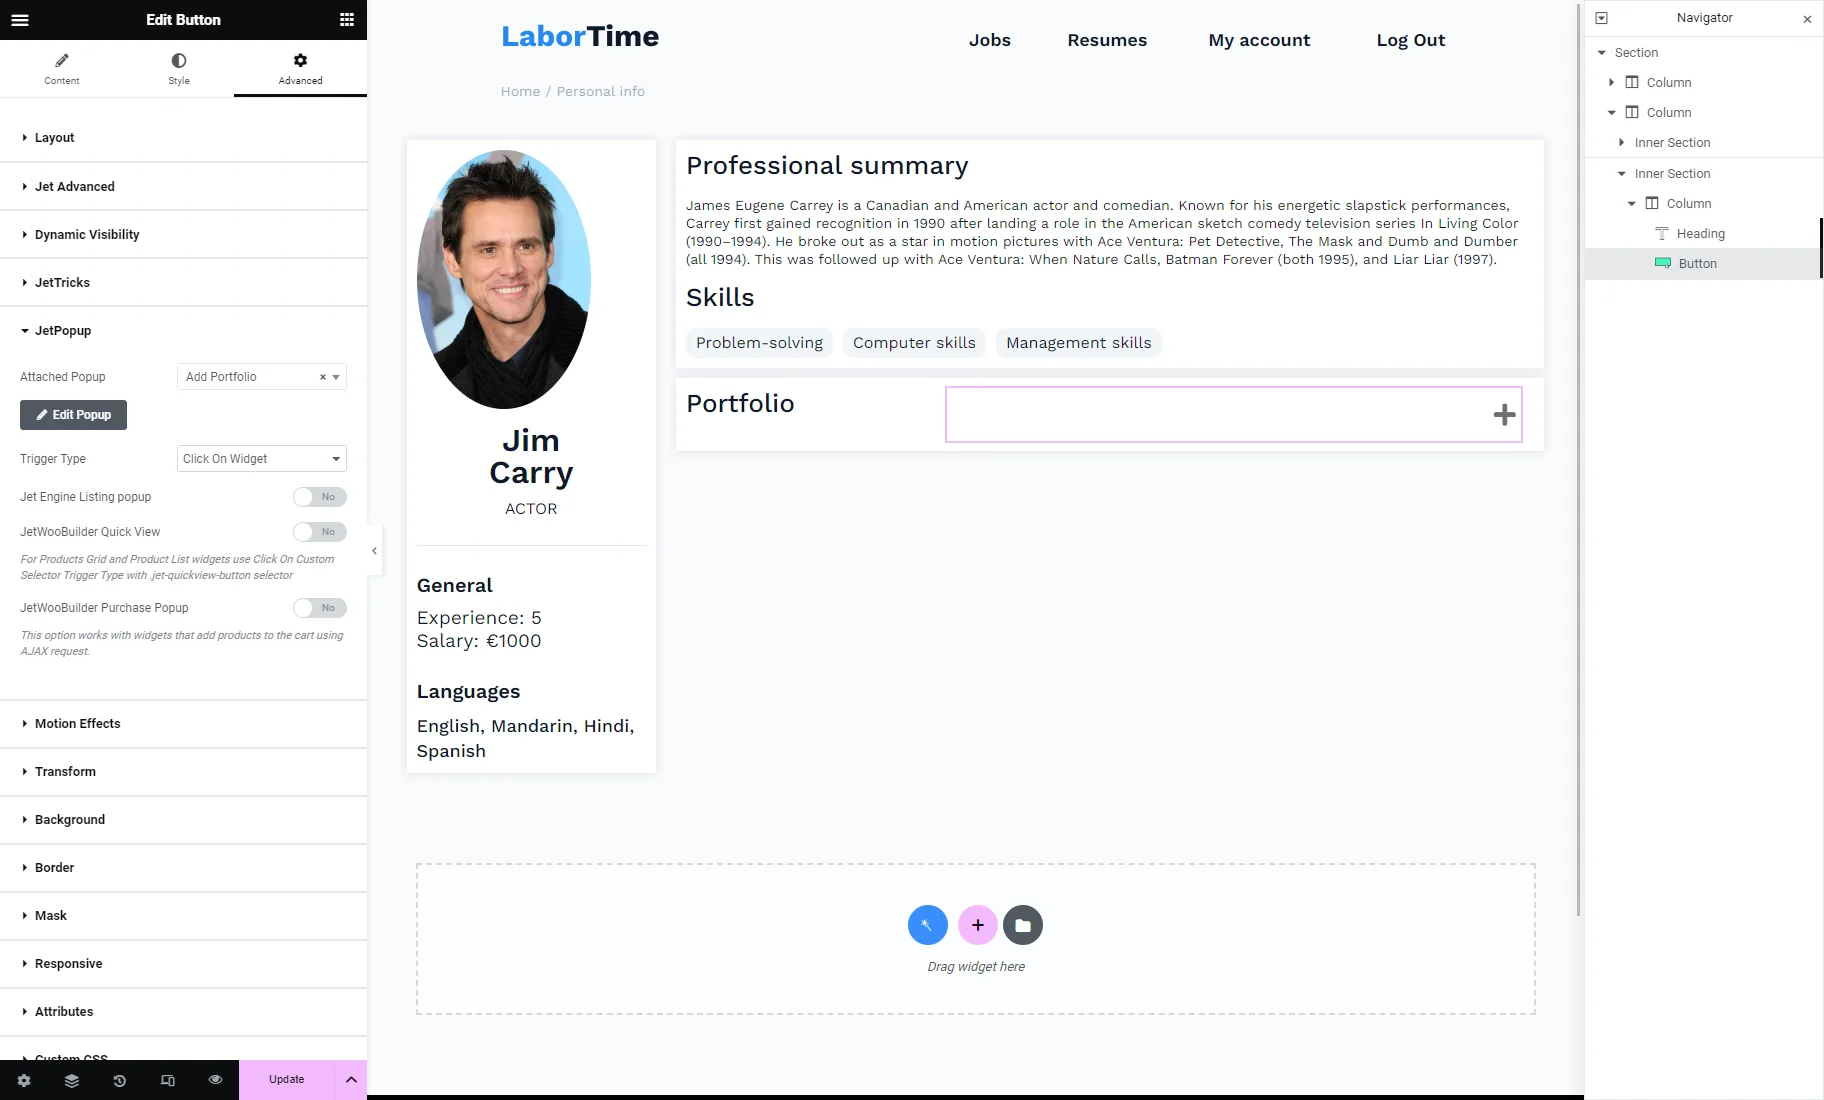
Now, you can add a button for triggering the pop-up with the editing portfolio form.
You can add the Elementor or the JetElements Button widget. To learn more about the latter, you can read the How to Add a Button Widget with Custom Text and Links tutorial.
Add the Button to the editing page and customize its Content and Style settings according to your needs.
Then, go to the Advanced settings tab and open the JetPopup tab. Set the pop-up with the editing portfolio form in the Attached Popup field, pick the “Click On Widget” Trigger Type, and enable the Jet Engine Listing popup toggle.
Unfold the Dynamic Visibility tab and hit the Enable the toggle. Set the “Show element if condition met” Visibility condition type and “Is Profile Page” (from the JetEngine specific section) Condition. In the Profile Page field, pick the Account subpage that shows the user’s info.
Finish customizing the Listing item and hit the “Update”button.
Place the Listing Grid on the Account Page
Click to edit the Account subpage template with the user information.
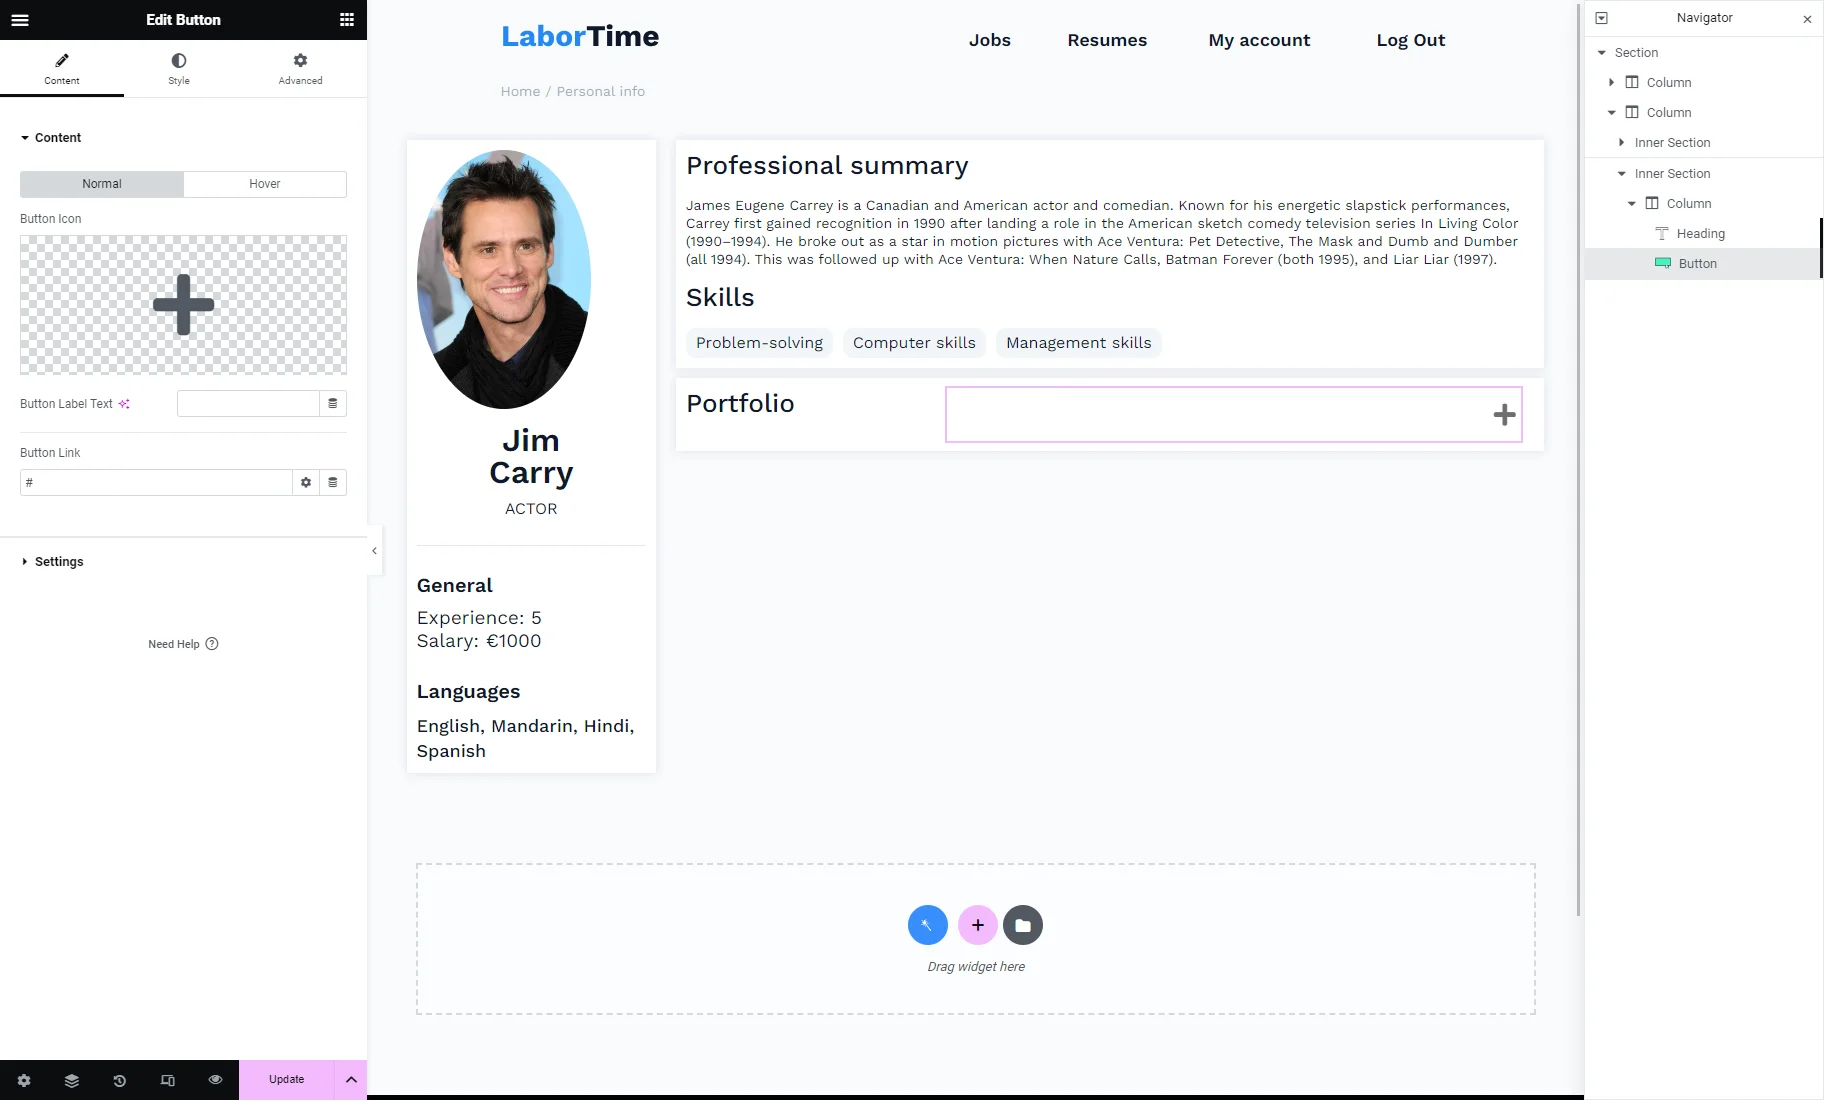
On the editing page, we placed the Heading widget with the “Portfolio” text.
Then, we added a button for triggering the pop-up with the adding portfolio form.
To add the button, drag-n-drop the Elementor Button widget or the JetElements Button widget and customize its Content and Style settings according to your needs.
Then, go to the Advanced settings tab and open the JetPopup tab. Set the pop-up with the adding portfolio form in the Attached Popup field and pick the “Click On Widget” Trigger Type.
Place the Listing Grid widget and select the recently created Listing item. According to the Dynamic Visibility settings, the Listing Grid doesn’t show the “Edit” and “Delete”buttons yet, but they will be visible on the Account page on the front end.
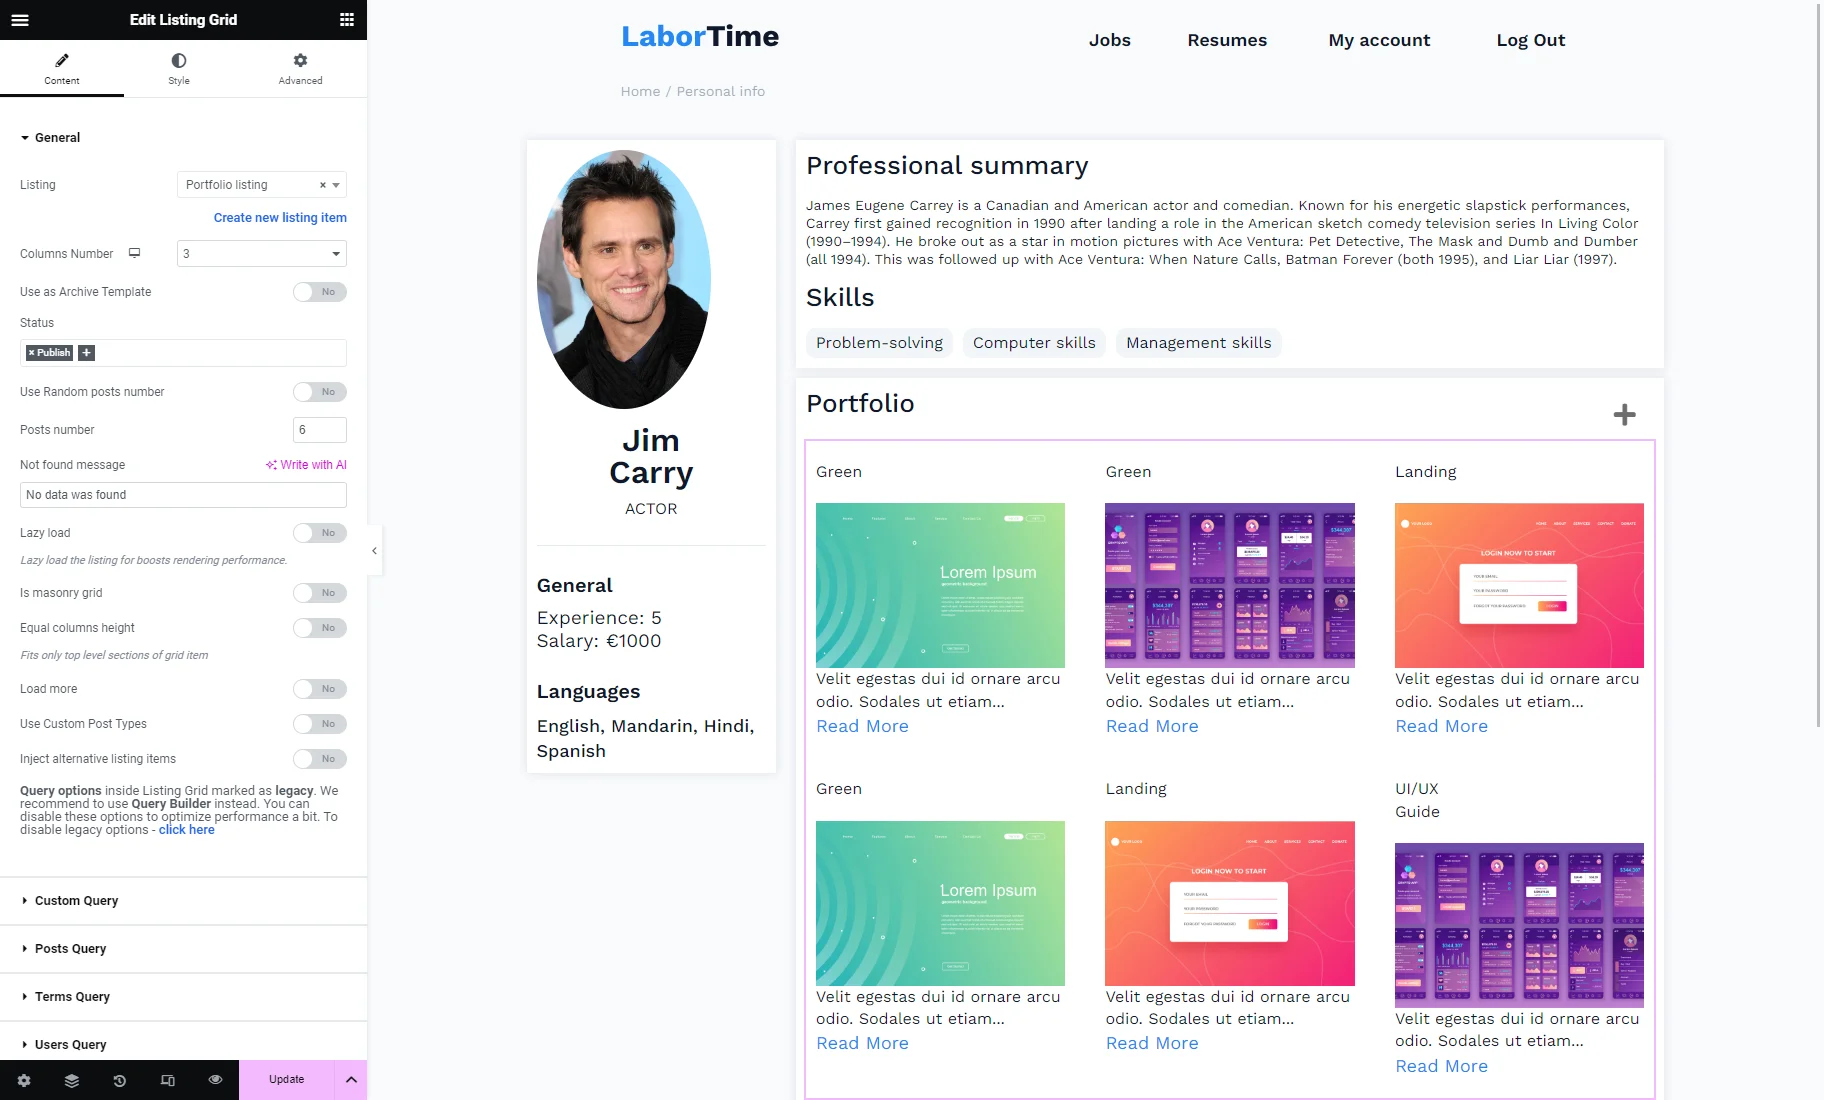
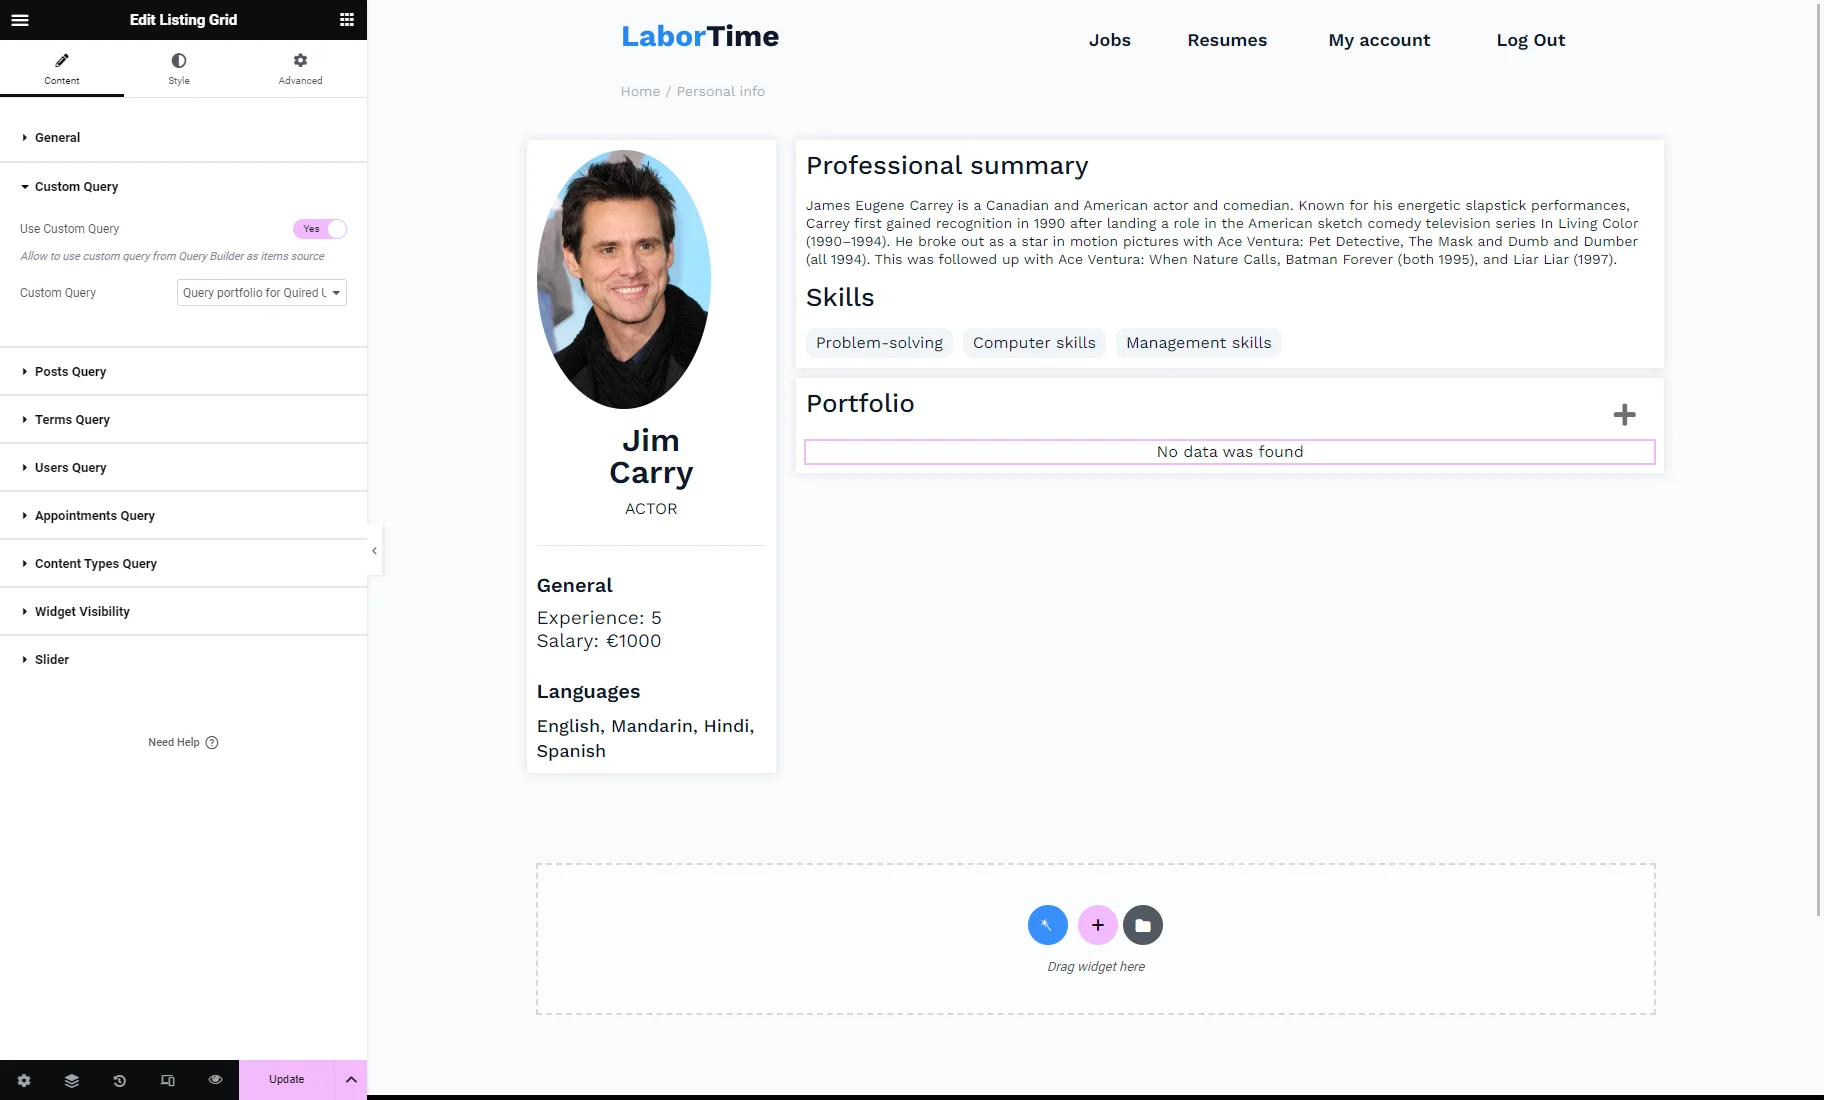
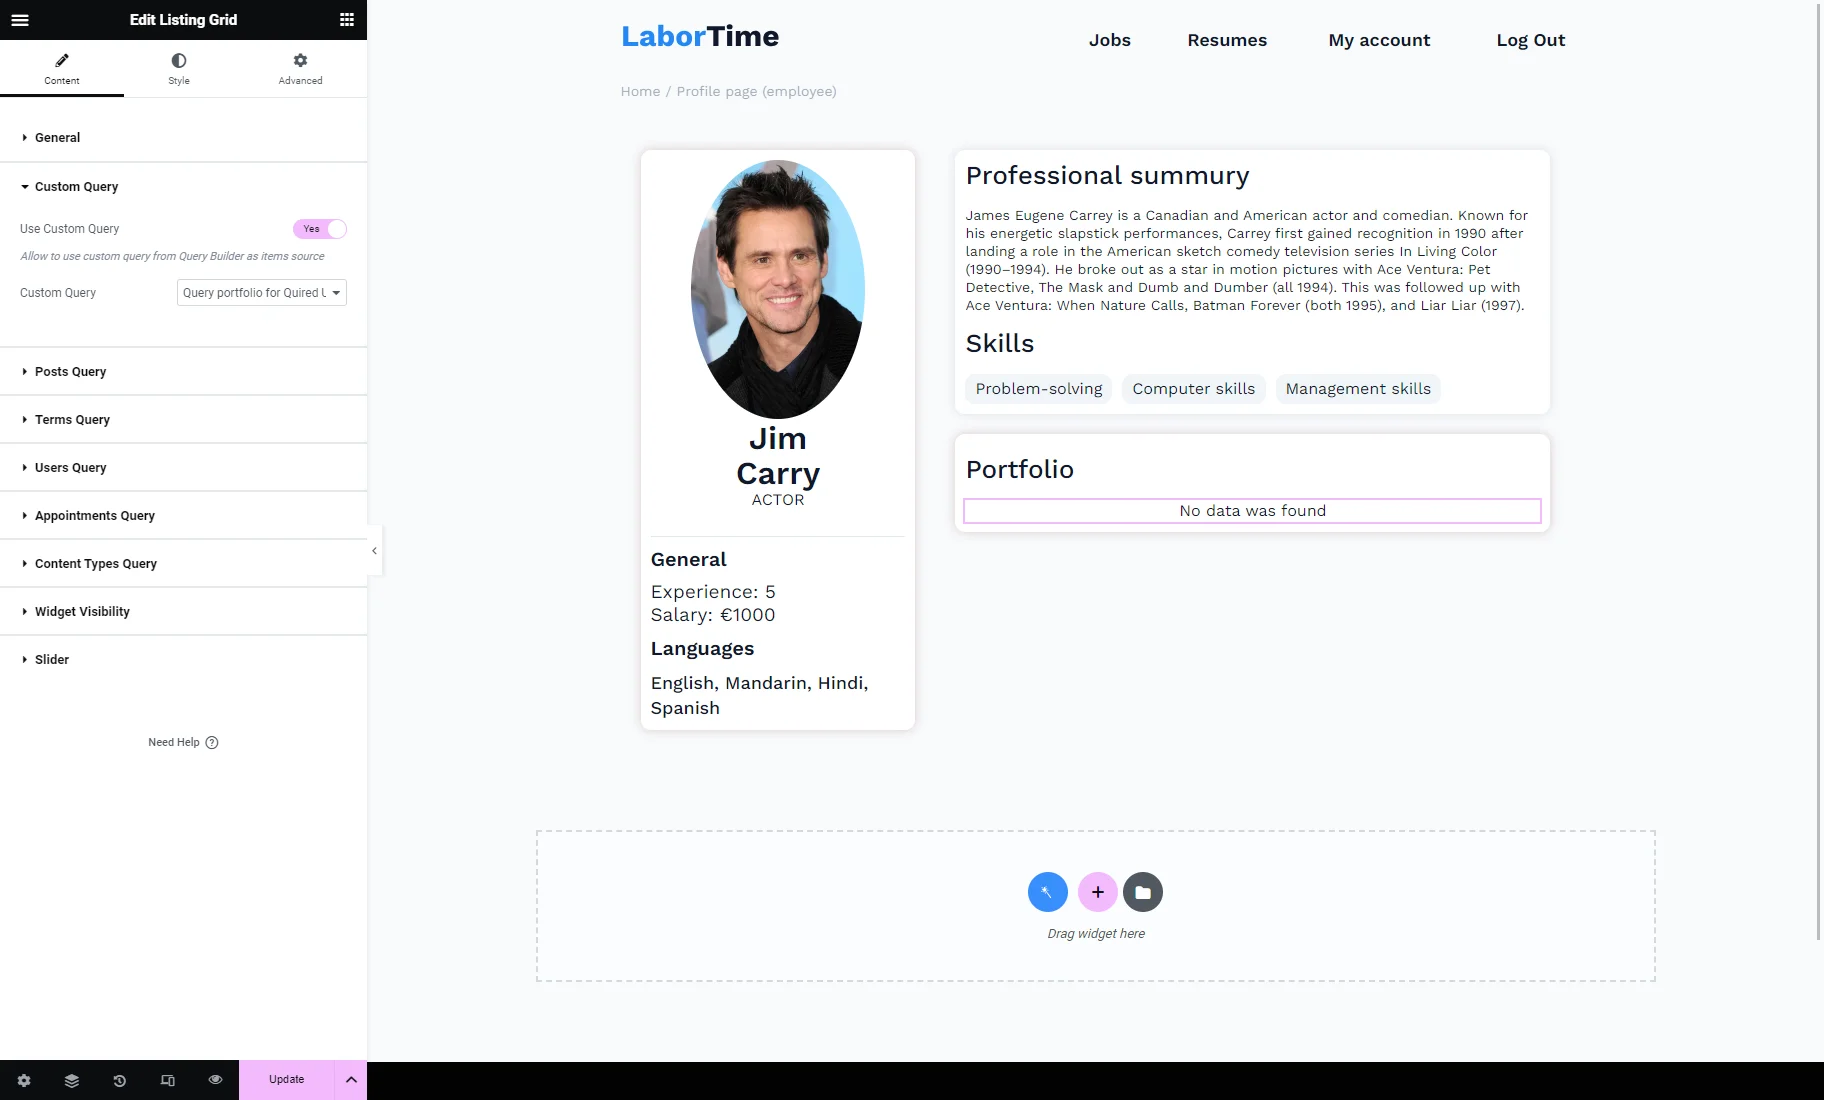
Unfold the Custom Query tab and enable the toggle. From the drop-down menu, select the previously created CCT query. Since we haven’t added portfolios yet, the listing grid is empty.
Finish customizing the template and hit the “Update” button.
Place the Listing Grid on the Single User Profile Page
Click to edit the Single User subpage template with the user information.
On the editing page, we placed the Heading widget into the Column of Inner Section with the “Portfolio” text.
Drag-n-drop the Listing Grid widget and select the recently created Listing item.
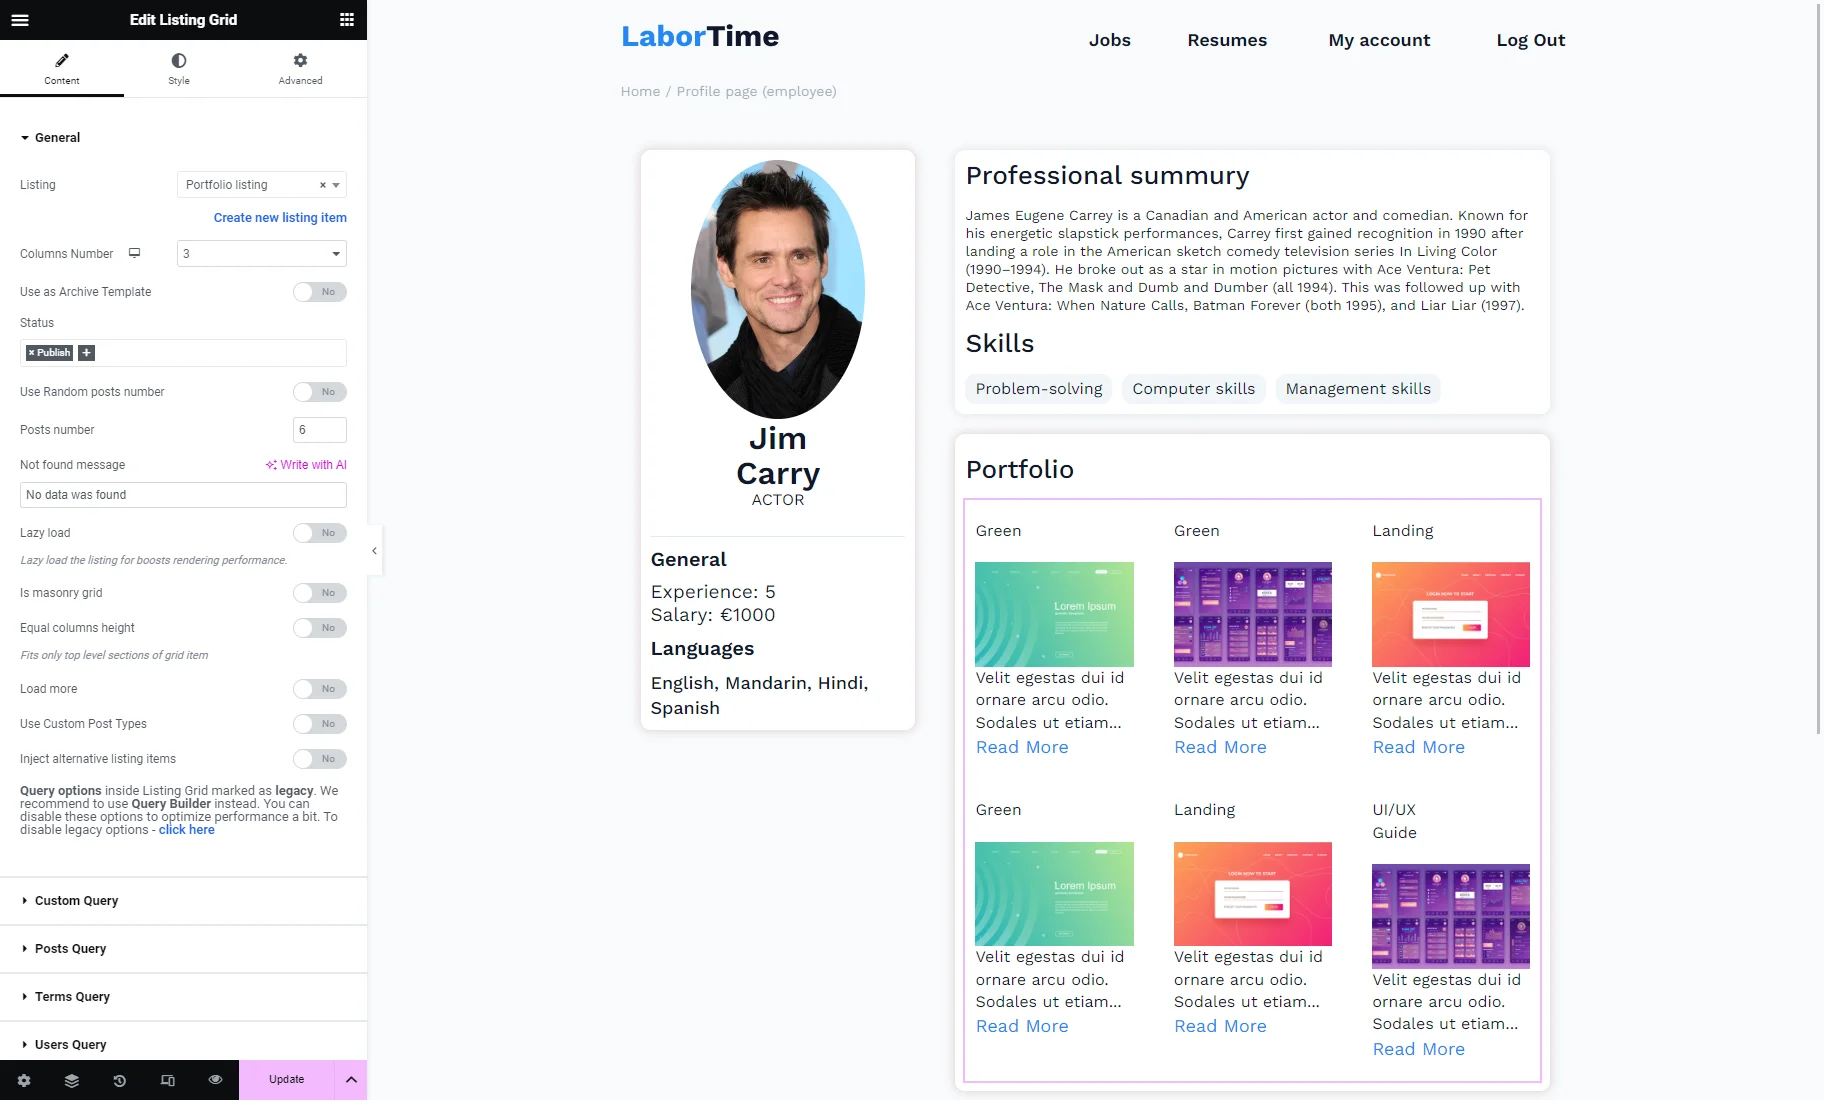
Unfold the Custom Query tab and enable the toggle. From the drop-down menu, select the previously created CCT query.
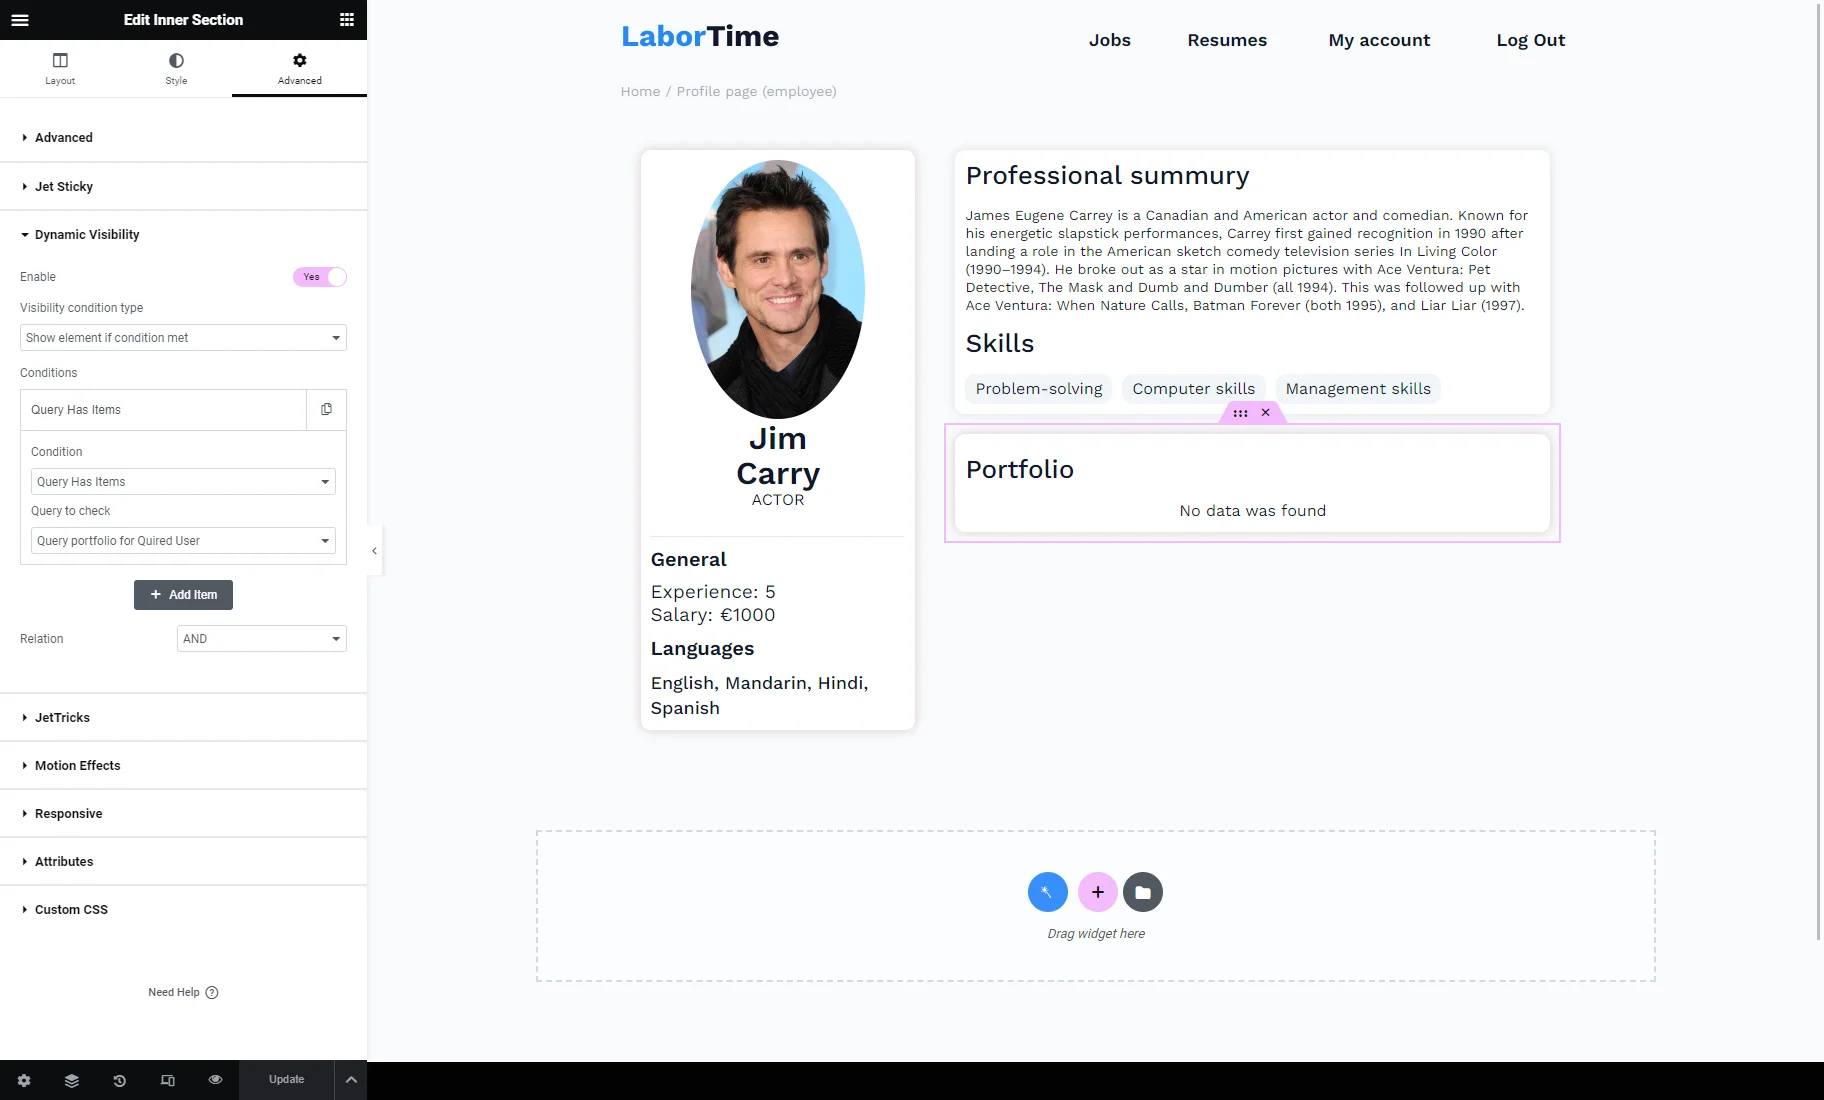
Also, we opened the Advanced settings tab of the Inner Section widget, unfolded the Dynamic Visibility tab, and enabled the toggle. We selected the “Show element if condition met” Visibility condition type, “Query Has Items” Condition, and set the same CCT query in the Query to check field. Such settings enable the section display only if a user adds at least one portfolio.
Finally, hit the “Update” button.
Check the Results
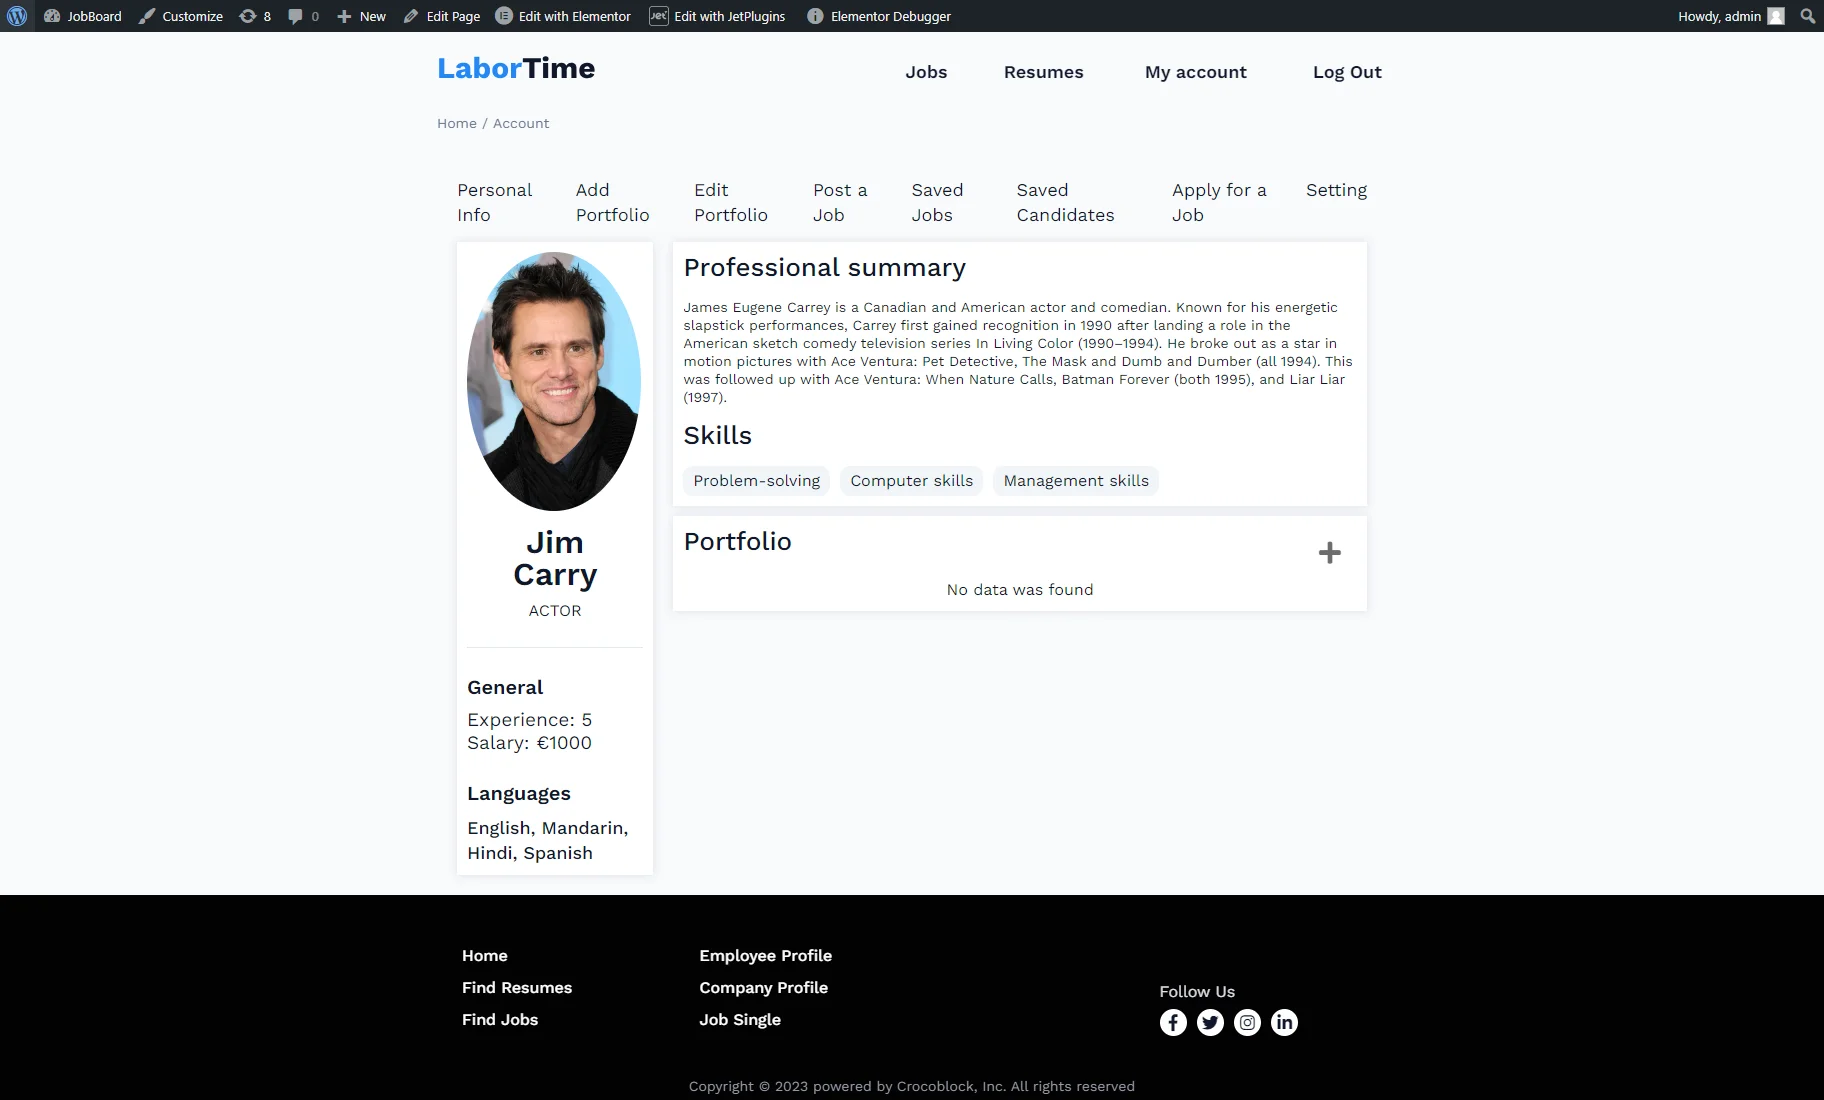
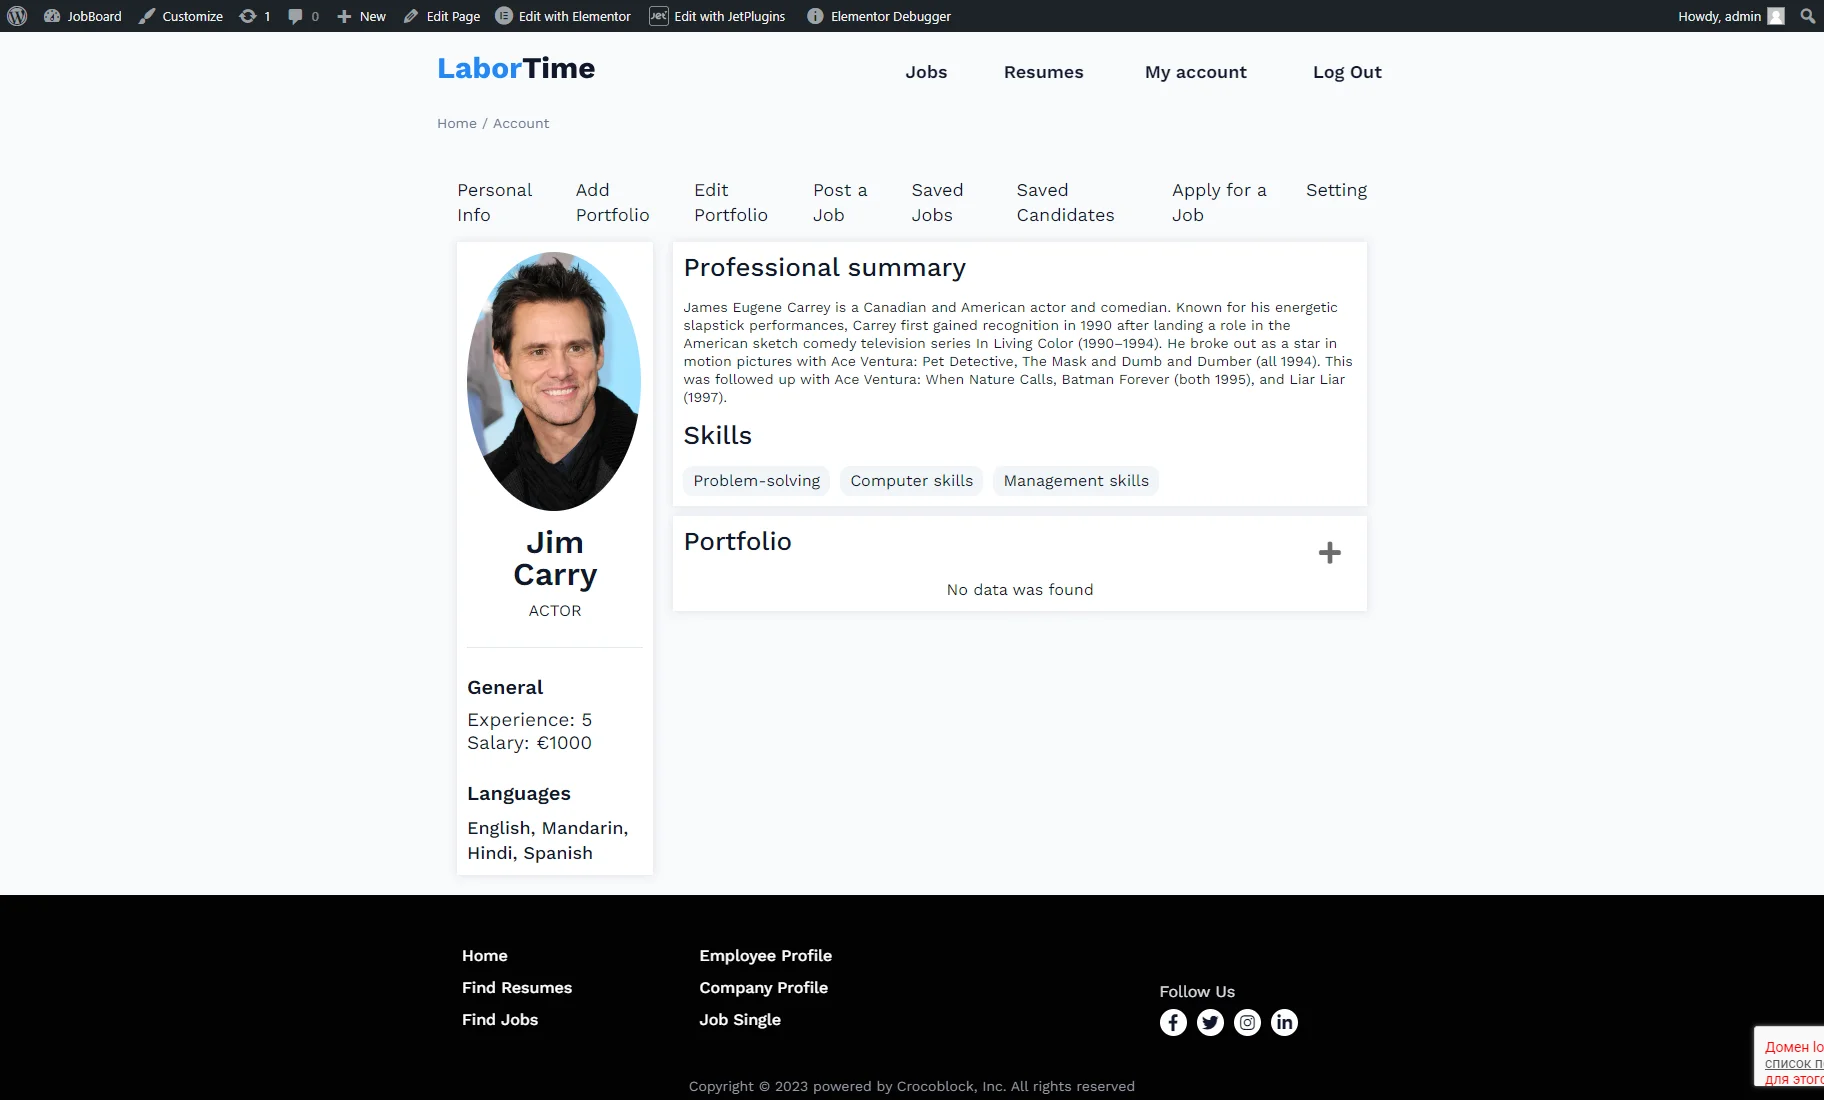
Open the Account page on the front end.
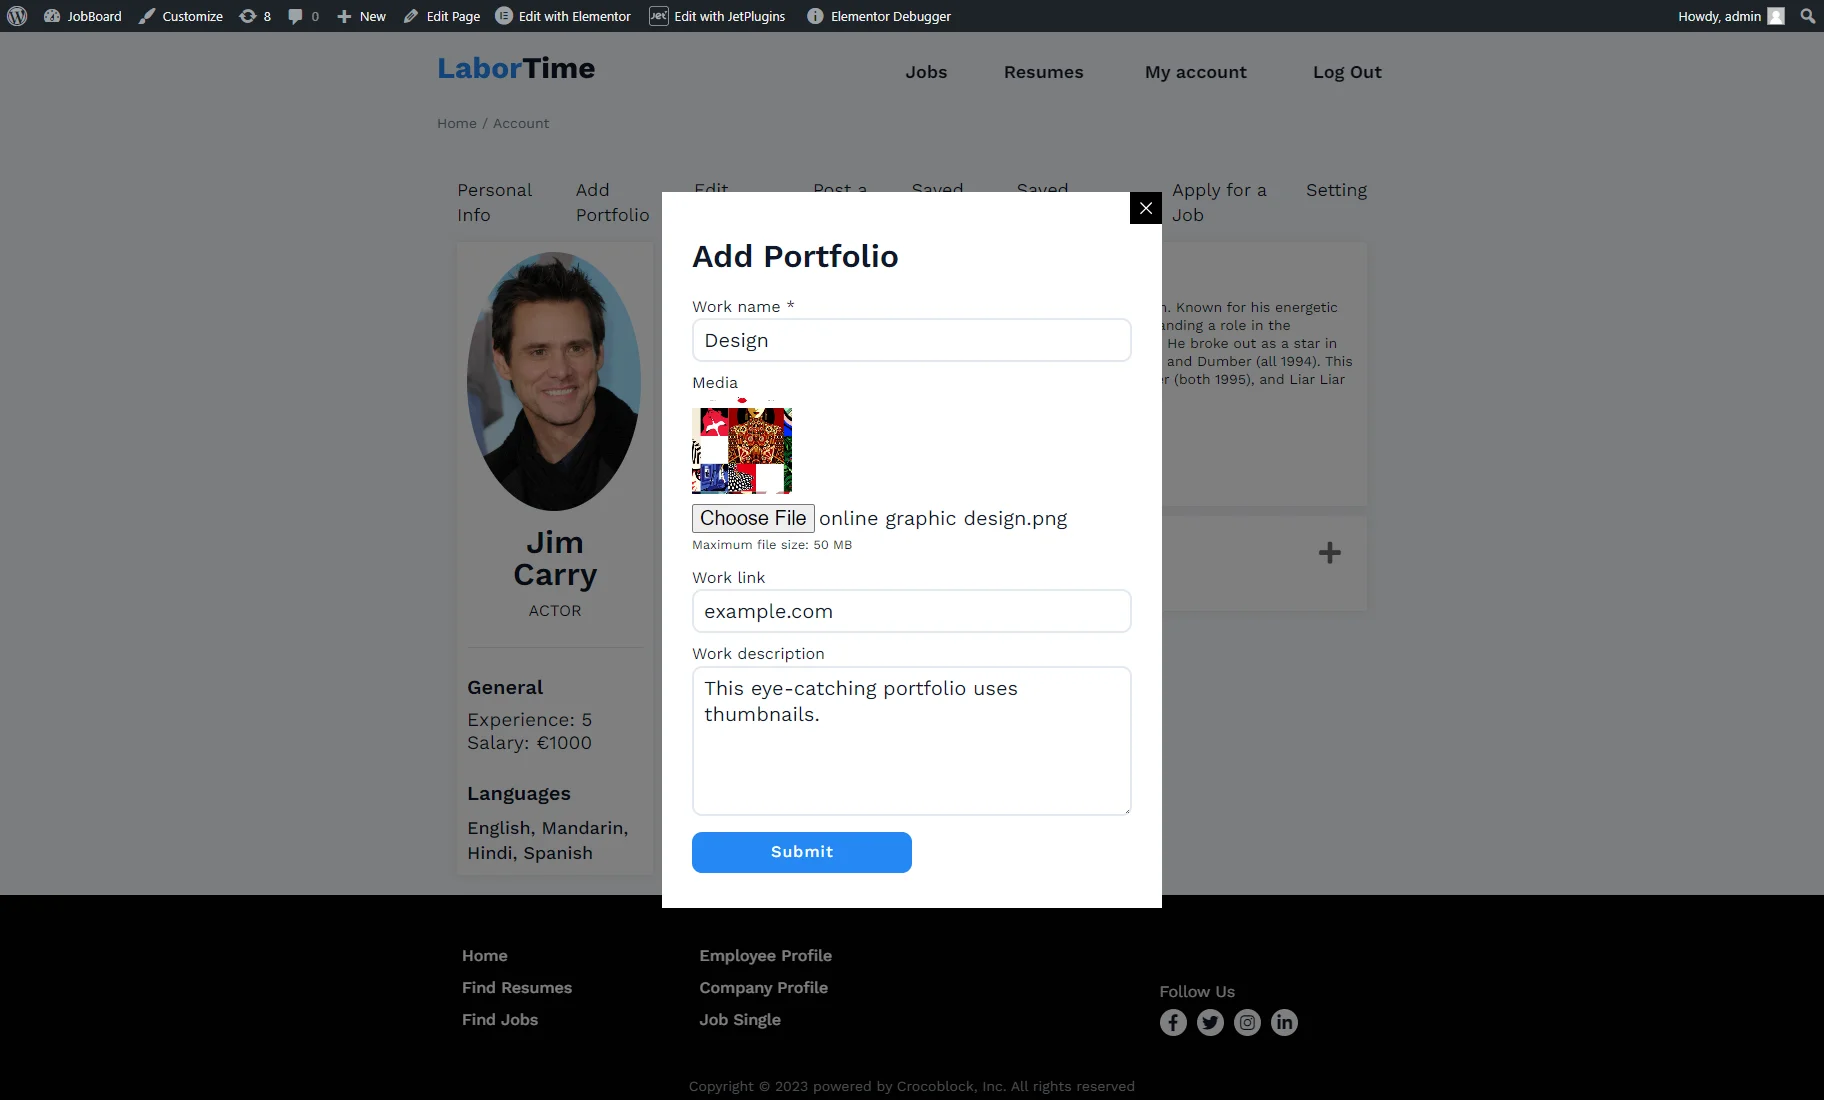
To test a pop-up with the adding portfolio form, we hit the button, and the form appeared.
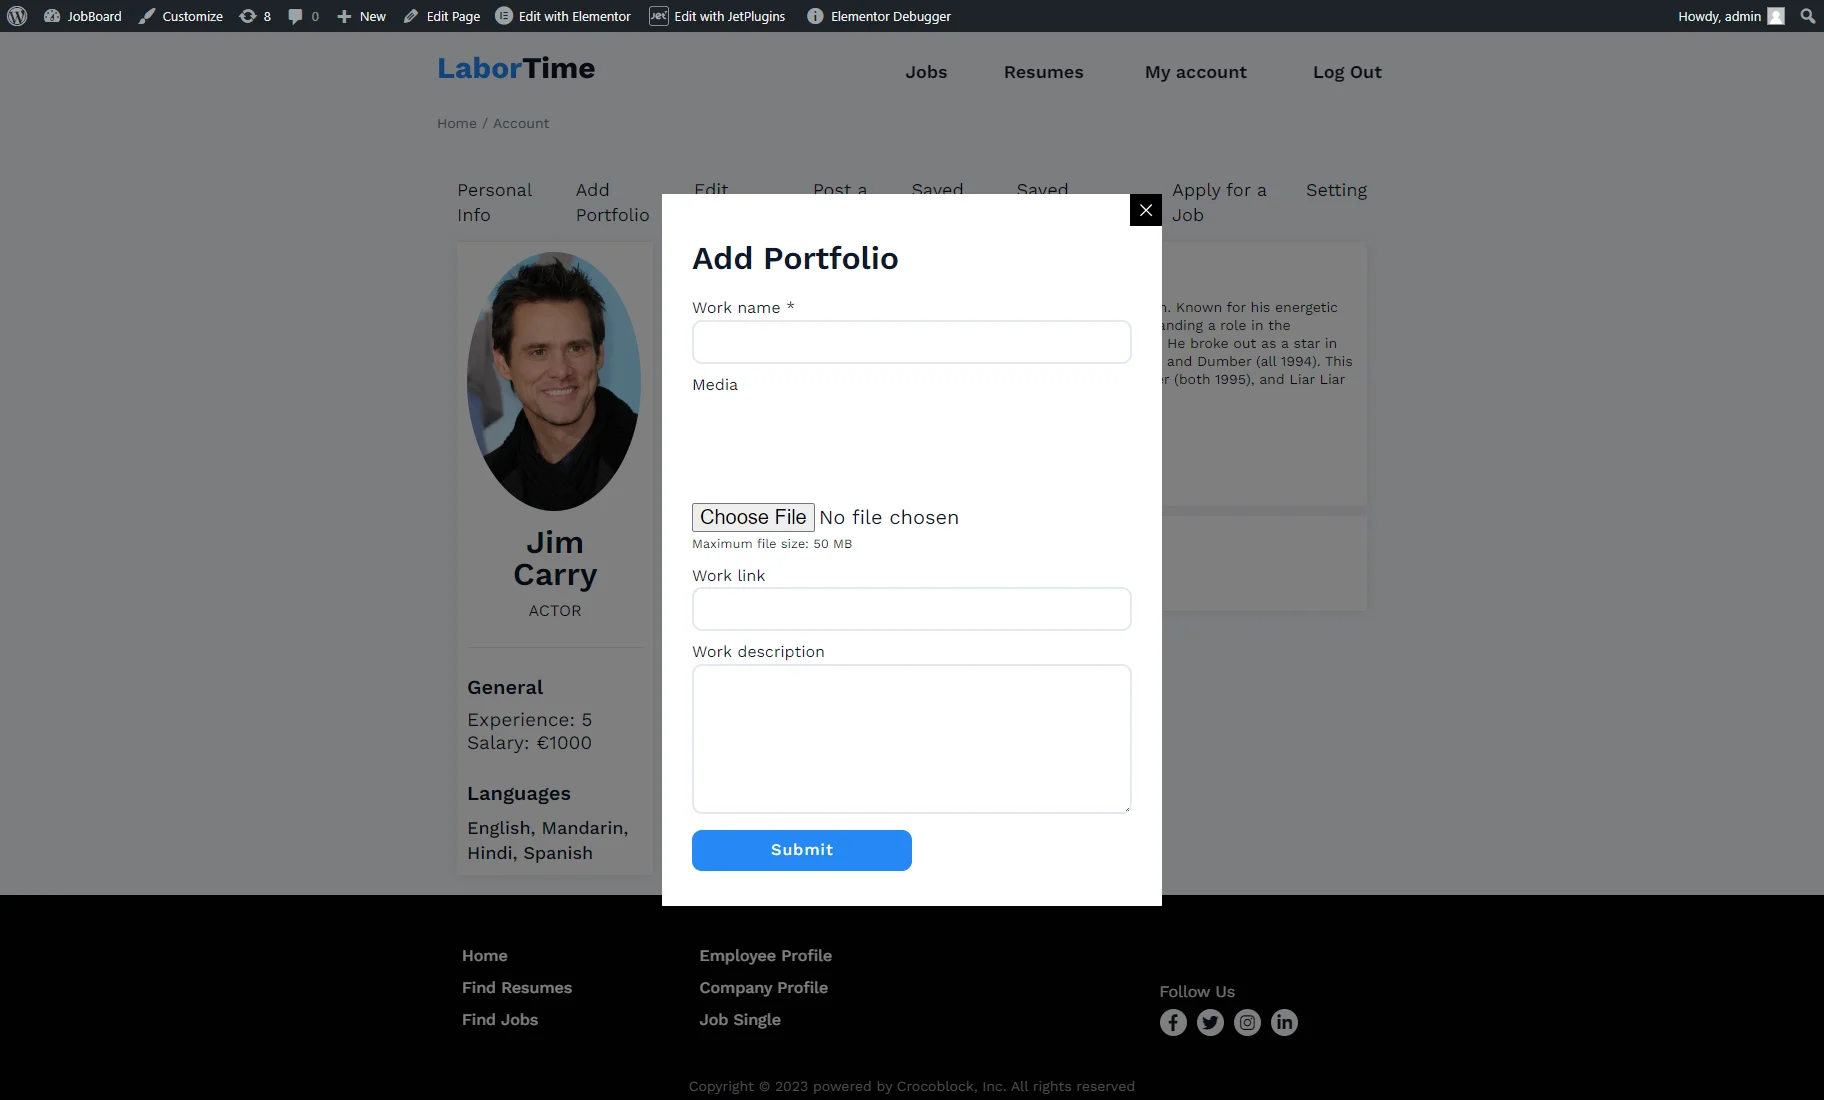
Let’s fill in the fields and click the “Submit” button.
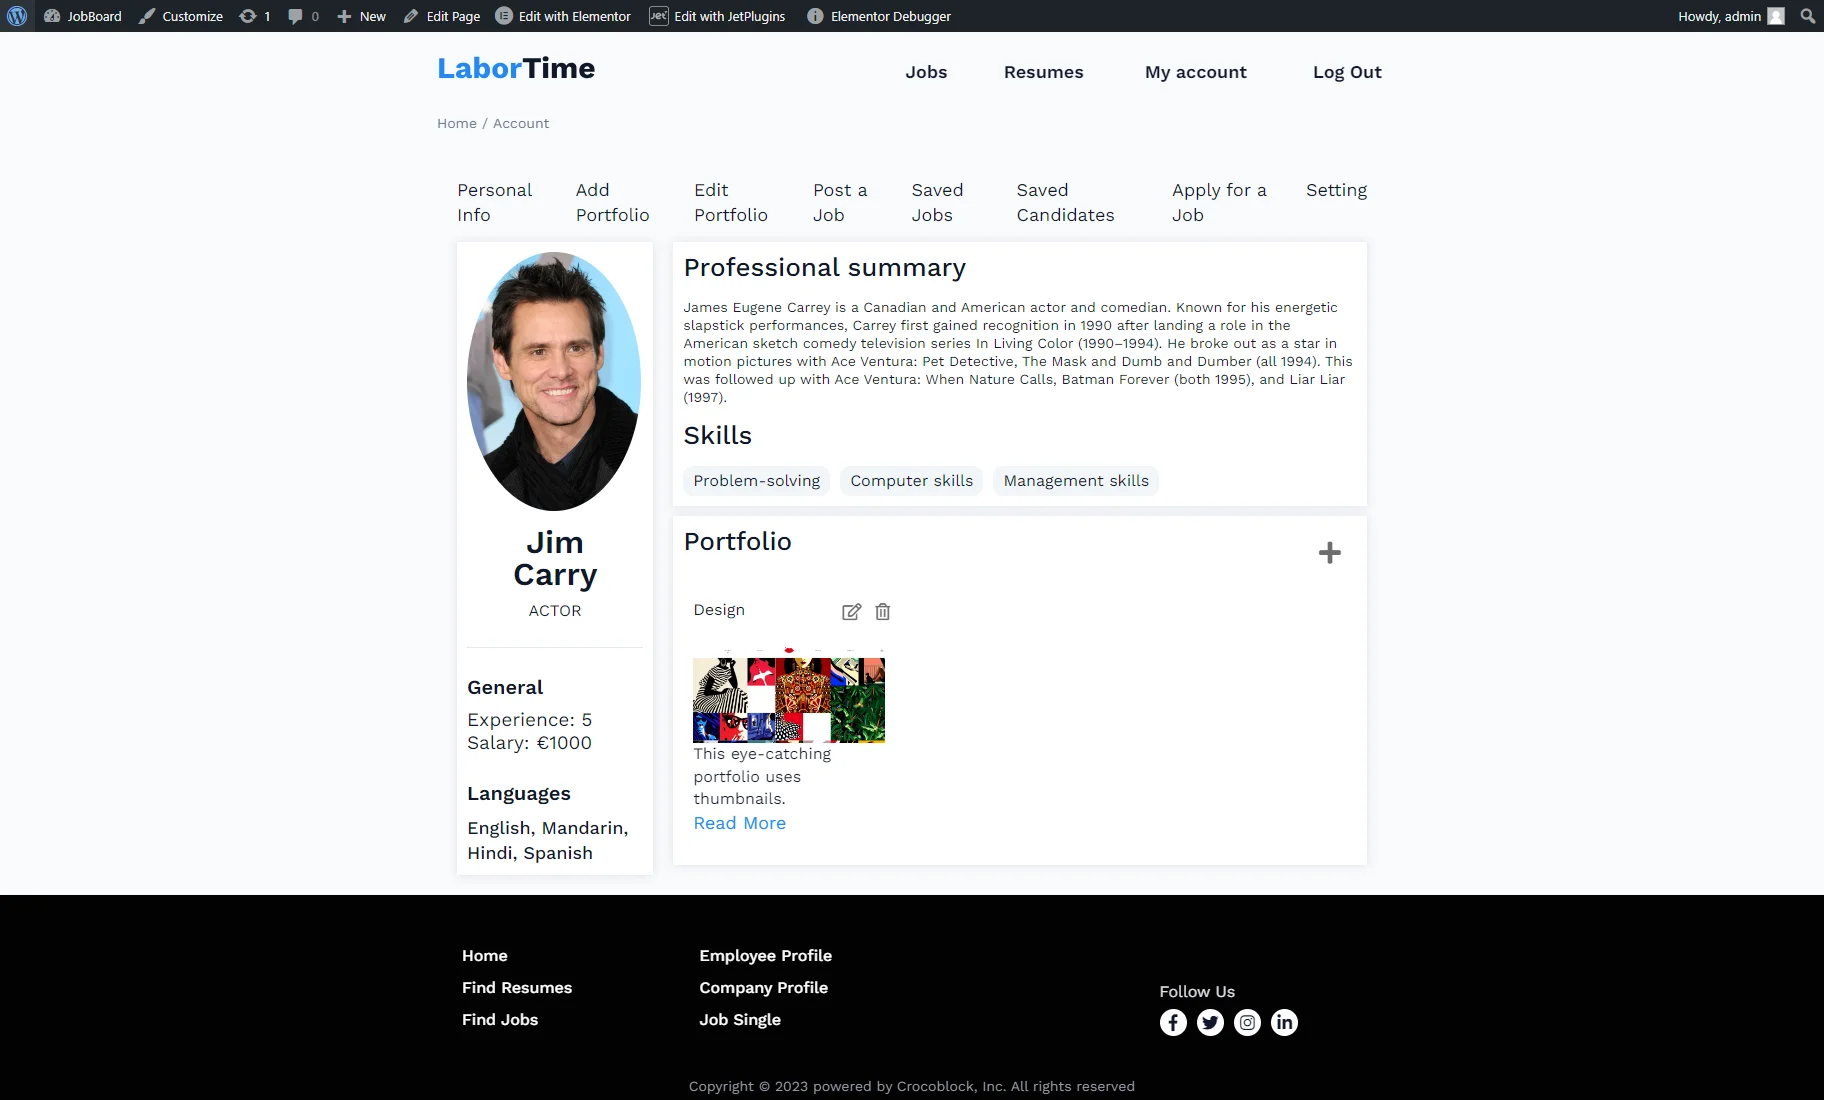
After that, a newly created portfolio item appears in the listing grid.
If we click the “Edit” button in the listing item, the pop-up with the editing portfolio form shows up. Due to the form preset settings, the form fields are auto-filled with the values from the CCT item meta fields.
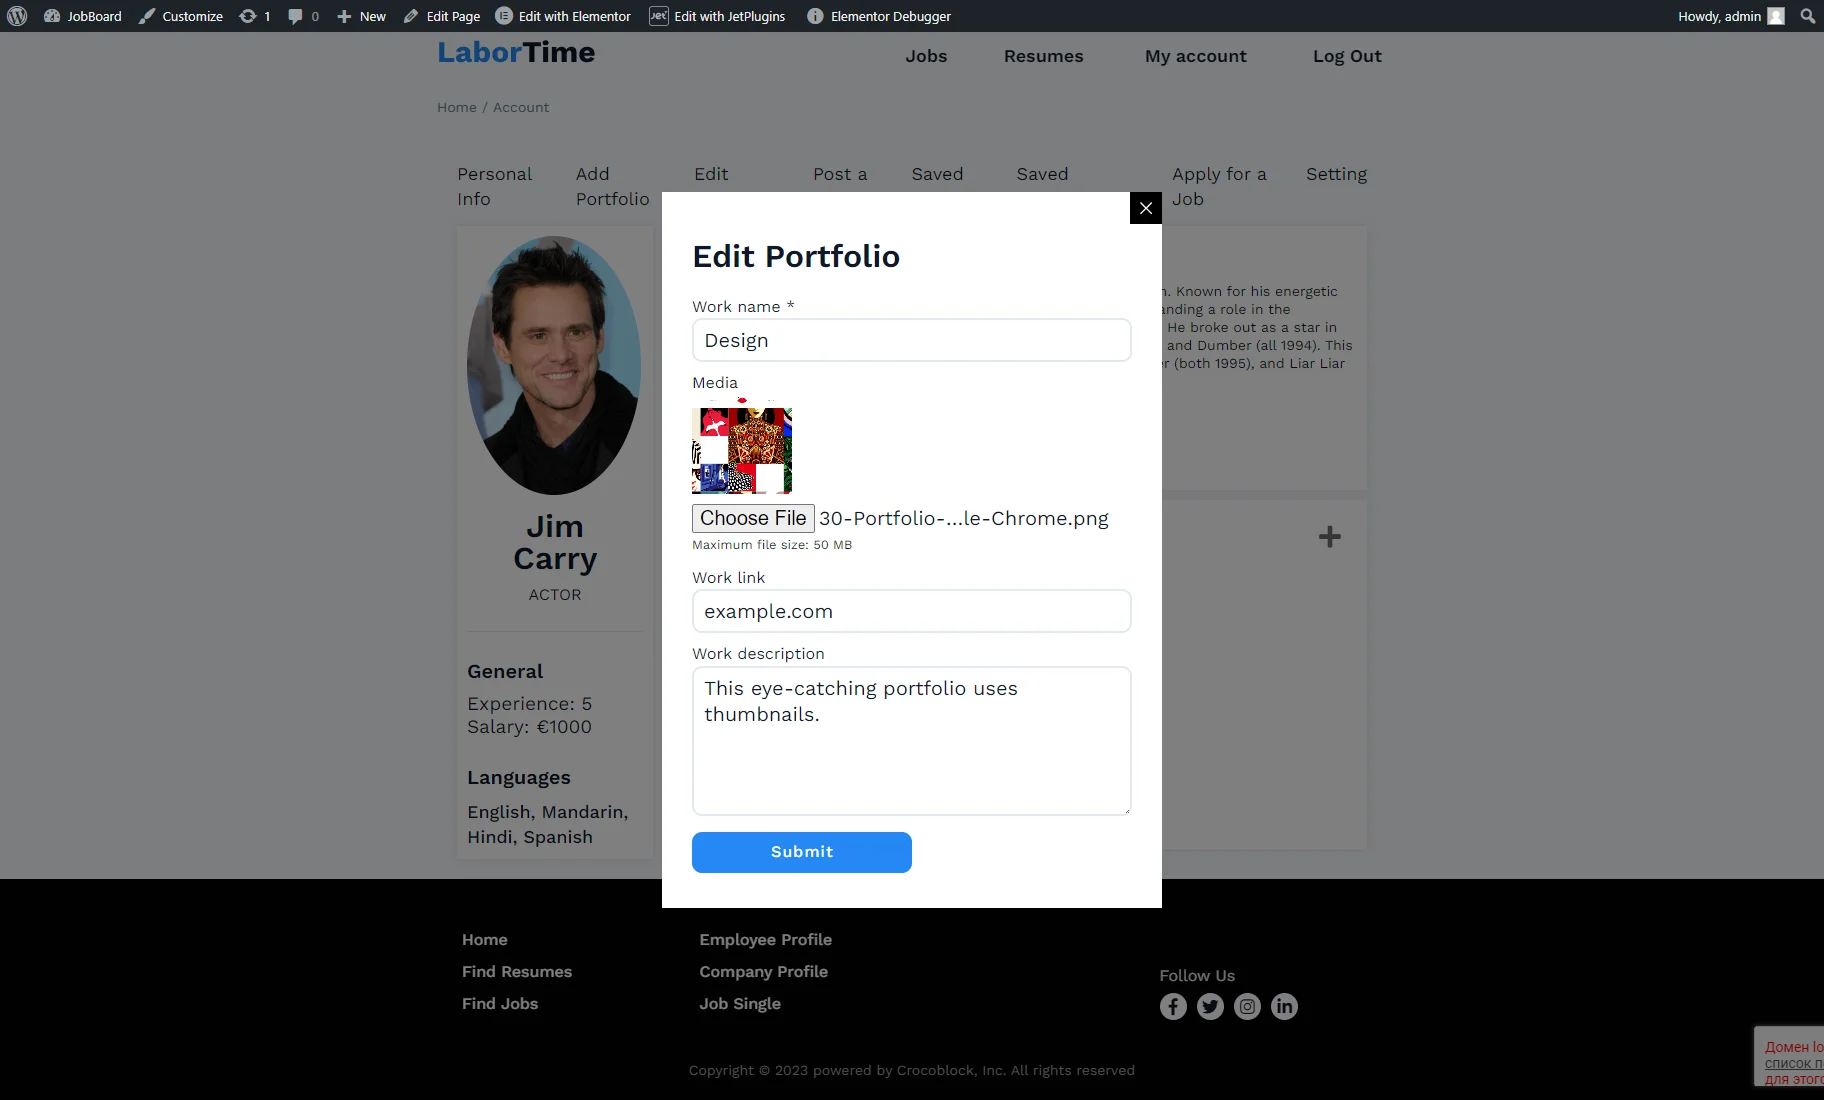
We changed the portfolio name and hit the “Submit” button. The change was saved and displayed in the listing grid.
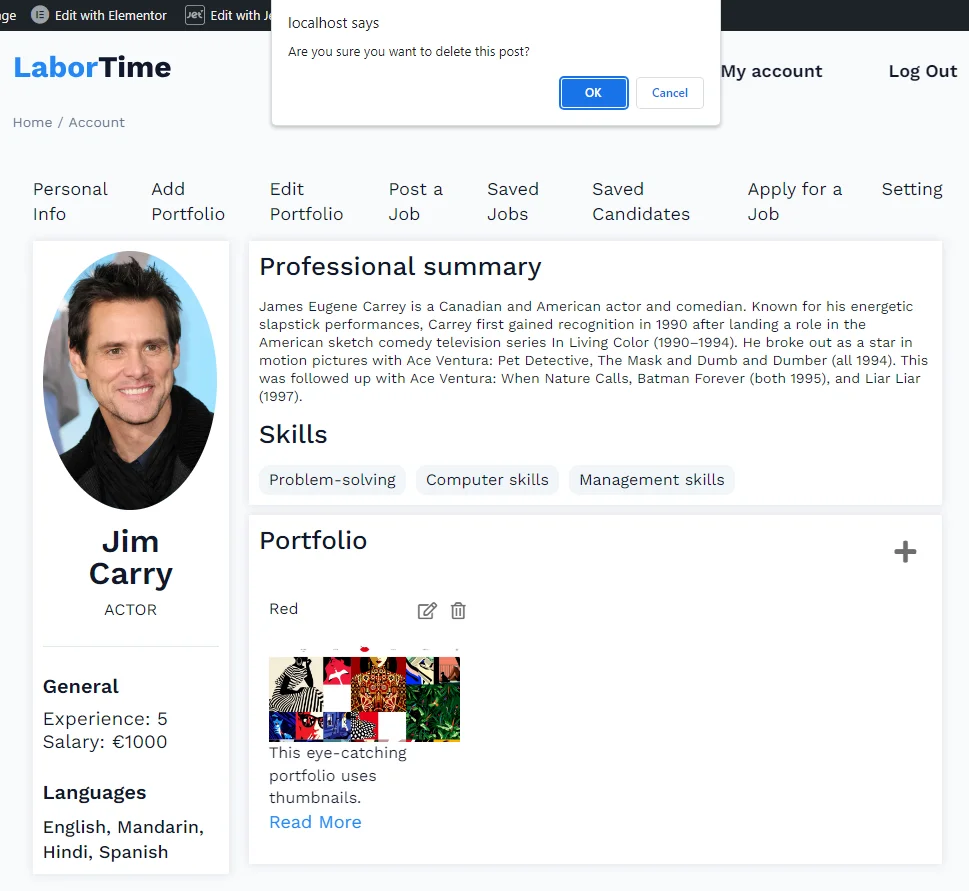
If we hit the “Delete” button, the notification appears with the confirm deletion message. We can click the “Ok” button to delete the item or “Cancel” to save it.
We deleted the portfolio, so the listing grid is empty again.
Now, let’s check the Profile page.
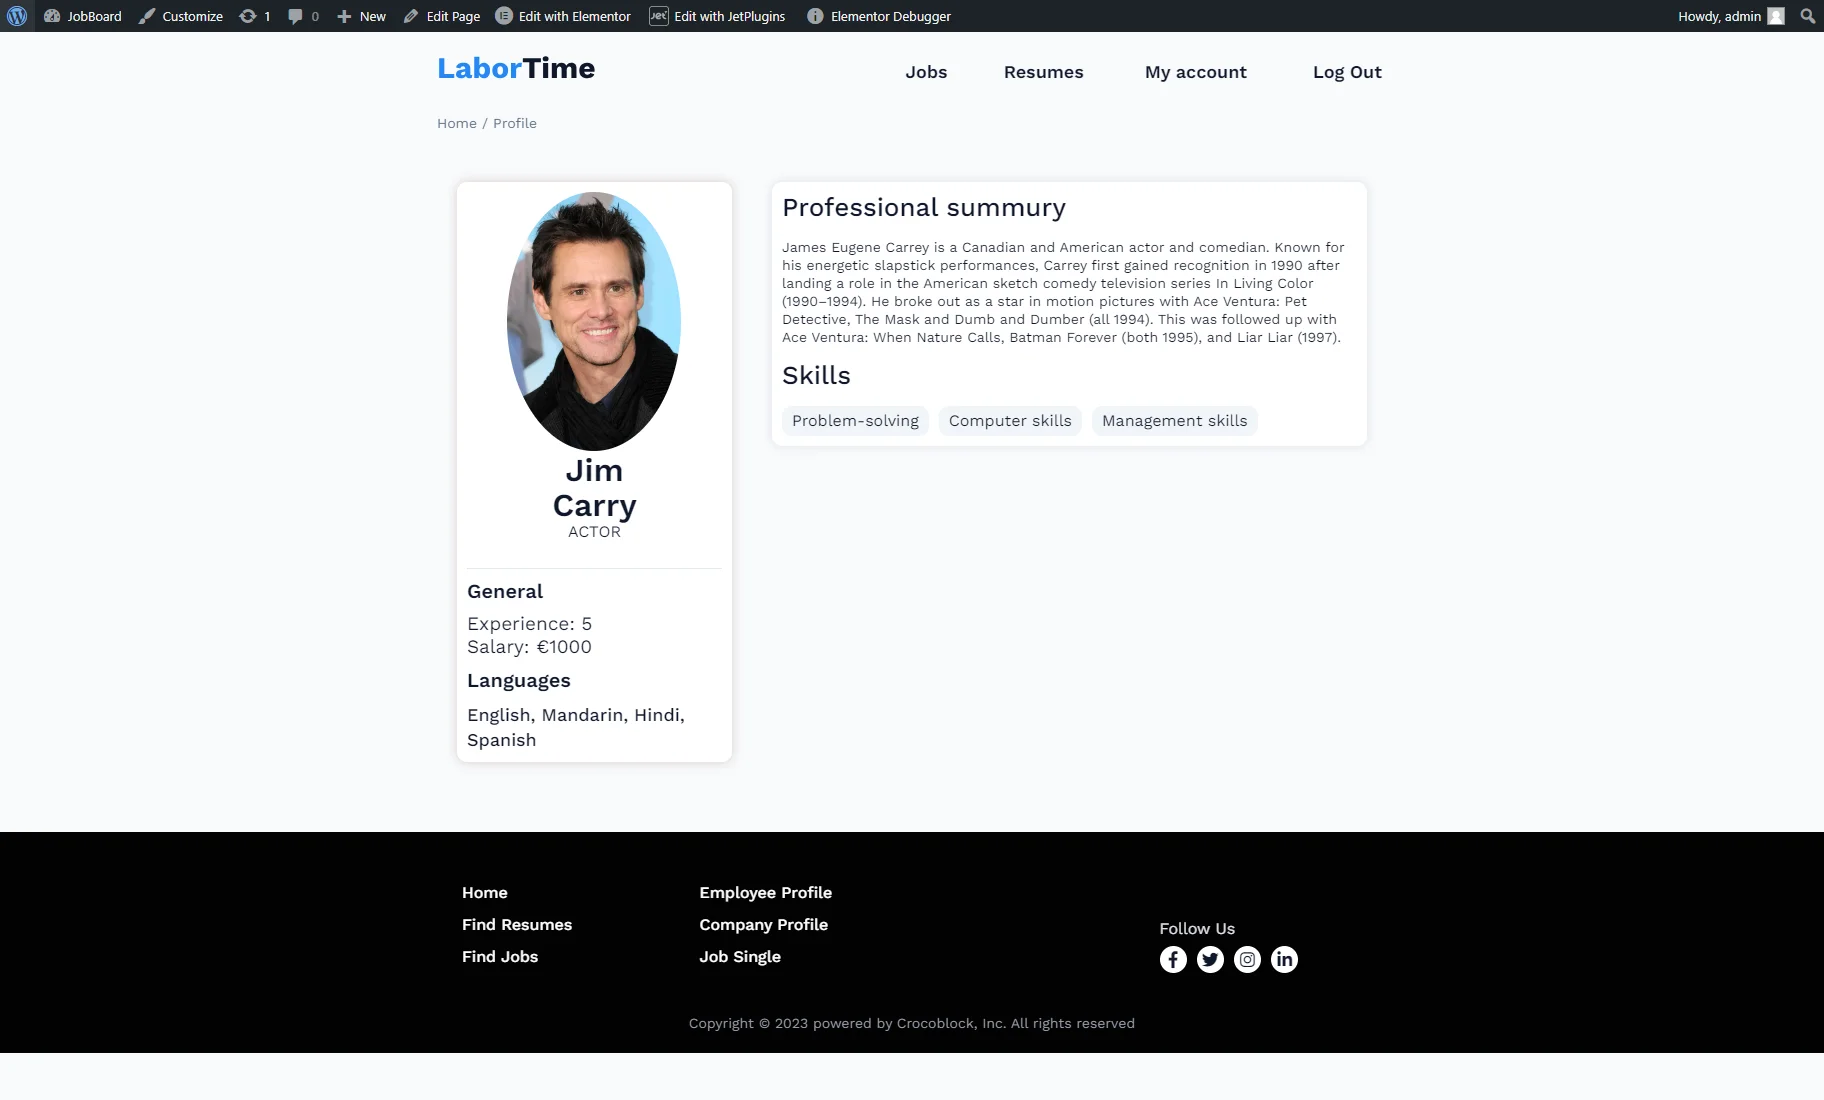
When we added a new item from the Account page, the section with a portfolio appeared on the User Profile page. The page doesn’t show the“Add,” “Edit,” and “Delete”buttons according to the dynamic visibility settings.

That’s all. Now you know how to allow users to add their portfolio via the front-end JetFormBuilder form on the Account page and how to display it on the user’s Profile page using the JetEngine WordPress plugin.