How to Display the Search Results Split by Listings' Categories
This tutorial explains how to showcase the search results page with listings of posts divided by their categories and hide/show categories with no results.
Before you start, check the tutorial requirements:
- Elementor (Free version) or Block editor (Gutenberg)
- JetEngine plugin installed and activated with Custom Post Type and Taxonomy created, and the Listing items for posts and terms built
- JetSmartFilters plugin installed and activated
- JetThemeCore plugin installed and activated with the created Archive template. If you have not done this yet, please follow this tutorial.
Adding a Listing Grid for Posts into a Listing Item for Categories
Open the created listing item for categories. Here should be the following set up. Use the Inner Section widget to divide the page into sections for better search results displaying.
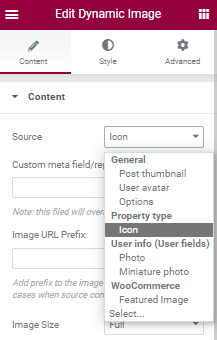
Use the Dynamic Image widget to add the image of the categories to the page (if the CPTs for categories have this field). Specify the Icon option from the appropriate CPTs as a Source for the dynamic image from the drop-down menu.
Use the Dynamic Field widget to place the field with the categories.
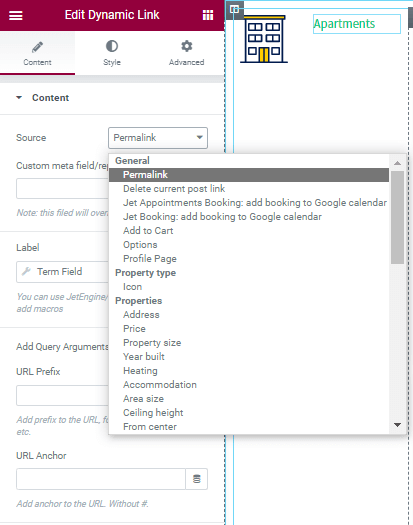
Read the tutorial on How to Work with Dynamic Field Widget to apply the dynamic widgets of the JetEngine plugin.
In another section, add the Listing Grid widget and select the created Listing for the posts that are going to be filtered. Adjust the listing template; for example, specify the number of posts.
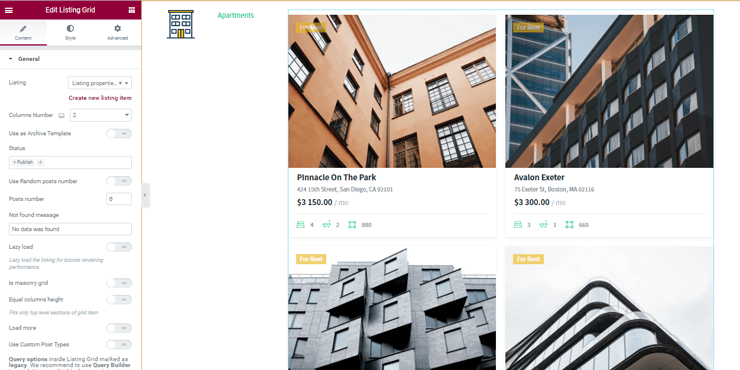
More Listing Grid widget options and settings for the customization are in the following Listing Grid Widget Overview tutorial.
Using the JetSmartFilters Widgets for Displaying the Search Results
Create a Search filter from the JetSmartFilters plugin
Navigate to the SmartFilters > Smart Filters List on the WordPress dashboard and press the “Add new” button. Create a new Search filter.
This tutorial details the JetSmartFilters widgets usage and explains How to Use Search Filter.
Search settings
Open the page to place the Ajax Search Filter widget in the Elementor page builder and add this widget to the page.
Specify the settings of the filter by selecting This filter for JetEngine.
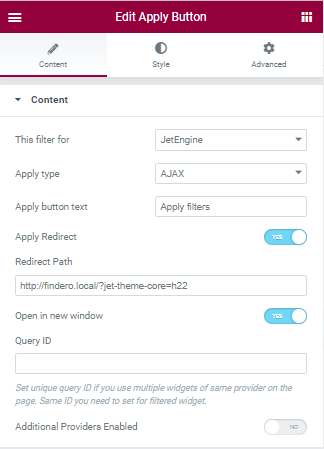
Add the Apply Button widget with the redirection to the archive page:
- navigate to the This filter for drop-down menu and select the JetEngine option;
- unroll the Apply type drop-down menu and select the AJAX option;
- type (or paste) the archive page’s URL into the Redirect Path field.
Below, place the Listing Grid widget for displaying the listing template with the listing of categories.
Open the archive page for search results and add there the Ajax Search widget and listing.
This tutorial explains How to Create Archive Template for Displaying Search Results.
Creating a Custom Query for Displaying the Search Results
Since the Ajax Search Filter widget displays all posts without filtering and splitting for listings’ categories, the Query Builder was used.
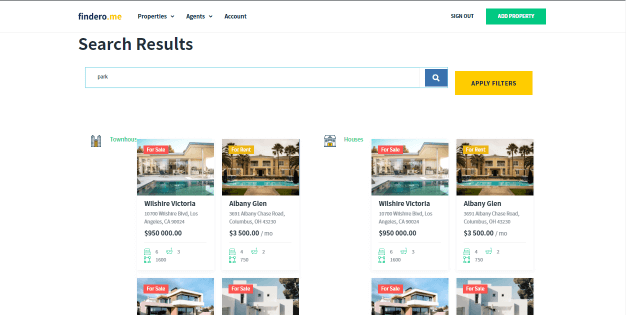
Creating a query to display posts of the category matching the search criteria
Go to the WordPress Dashboard, navigate to the JetEngine > Query Builder and press the “Add new” button to create a query. Specify its Name (here, Display_posts) and choose the Posts Query option from the Query Type drop-down menu.
Navigate to the Posts Query setting tab and specify the Posts Type (here, Properties CPTs) from the drop-down menu and Posts Status (Published).

Using the Query Variable macros
Navigate to the Search Keyword drop-down menu of the General setting tab to set the search keyword.
Press the “Dynamic Tag” icon to use the Query Variable macro.
Type the variable “s” (usually, this variable is used to transfer the keyword entered by a user into the query parameters) in the Variable Name field.
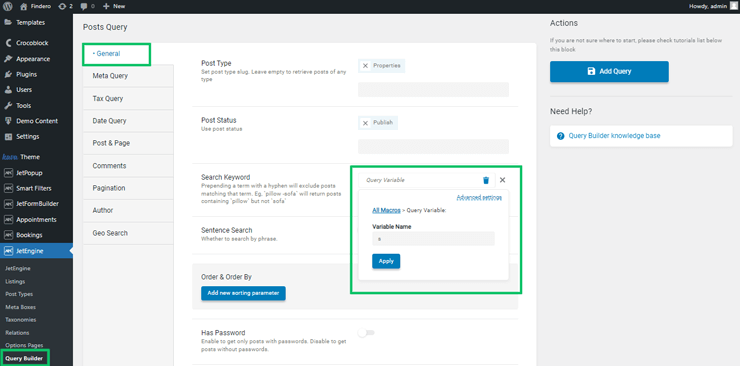
Press the “Apply” button to set the variable.
Customizing the tax query settings
Navigate to the Tax Query setting tab. Unroll the Taxonomy drop-down menu to select the taxonomy per post from the CPTs you need (here, the Property type CPT is set).
Unroll the Field drop-down menu and select the Term ID option as a taxonomy term.
Click the Terms drop-down menu and select the Current ID option as the taxonomy term(s) to get posts.
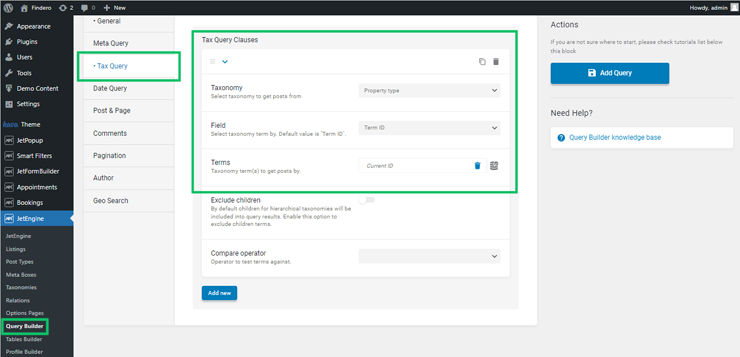
Press the “Add Query” button to save changes.
Applying query to posts listings with categories items inside
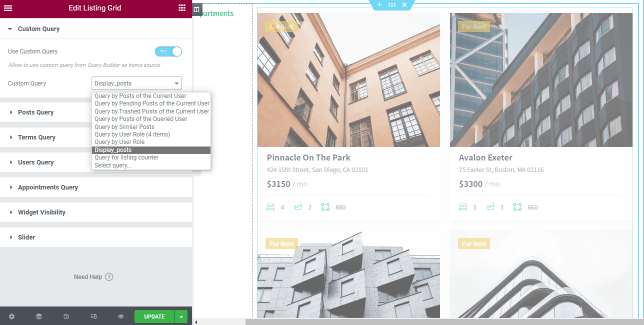
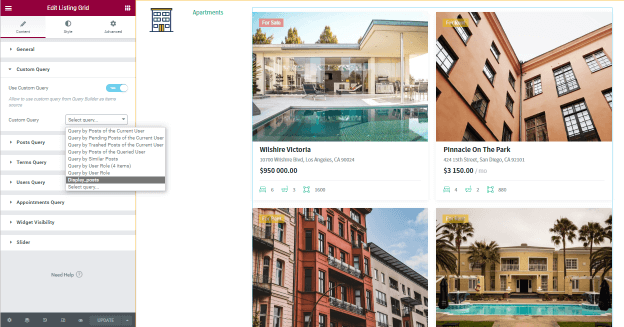
Navigate to the JetEngine > Listings and open the listing with the categories items inside (here, Results_listing_item). Open the Custom Query tab and turn on the Use Custom Query toggle. Unroll the Custom Query drop-down menu and select the newly created custom query (Display_posts).
Updating pages with applied listing
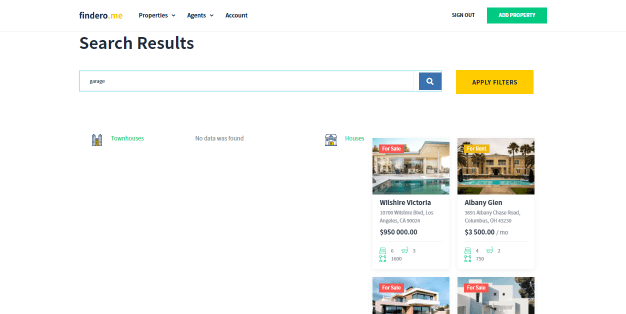
Update the search and results pages with the used listing template. The search will show categories and related posts.
Hiding the Categories with no Results
Hiding categories with no results
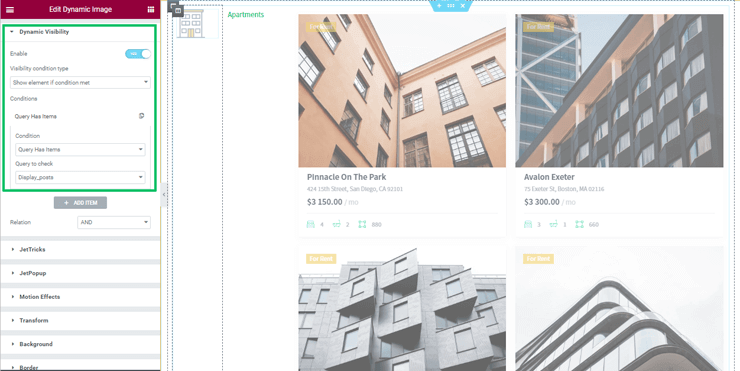
To hide the categories with no results once the search was performed, open the listing with the categories items inside (here, Results_listing_item). Navigate to the Advanced settings tab, unroll the Dynamic Visibility tab and switch the Enable toggle.
If enabled, this toggle turns on the Visibility condition type drop-down menu. Choose the Show element if condition met option. To specify the visibility condition, unroll the Conditions drop-down menu and choose the Query Has Items options.
Choose the create custom query (here, Display_posts) from the Query to check drop-down menu.
Applying same visibility conditions to all sections of listing
Apply the same visibility conditions to all sections of the listing.
Update the listing page and pages linked with this listing.
Refresh the search results.
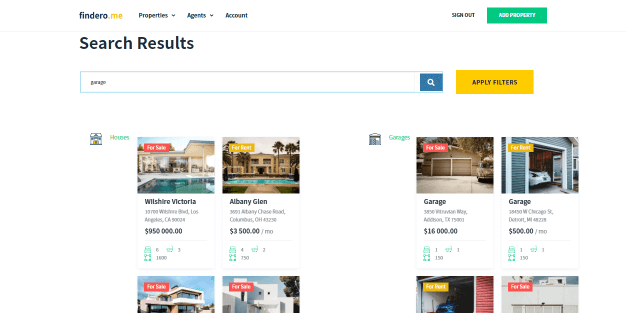
Now you know how to display the search results split by listings’ categories.