How to Show Posts in Listing Grid Based on Location and Distance
In this tutorial, you will find out how to use the Location & Distance filter from JetSmartFilters to filter the posts from JetEngine’s Listing Grid.
Before you start, check the tutorial requirements:
- Elementor (Free version)
- JetEngine plugin installed and activated with post type with posts, meta field storing address, and Listing item created
- JetSmartFilters plugin installed and activated
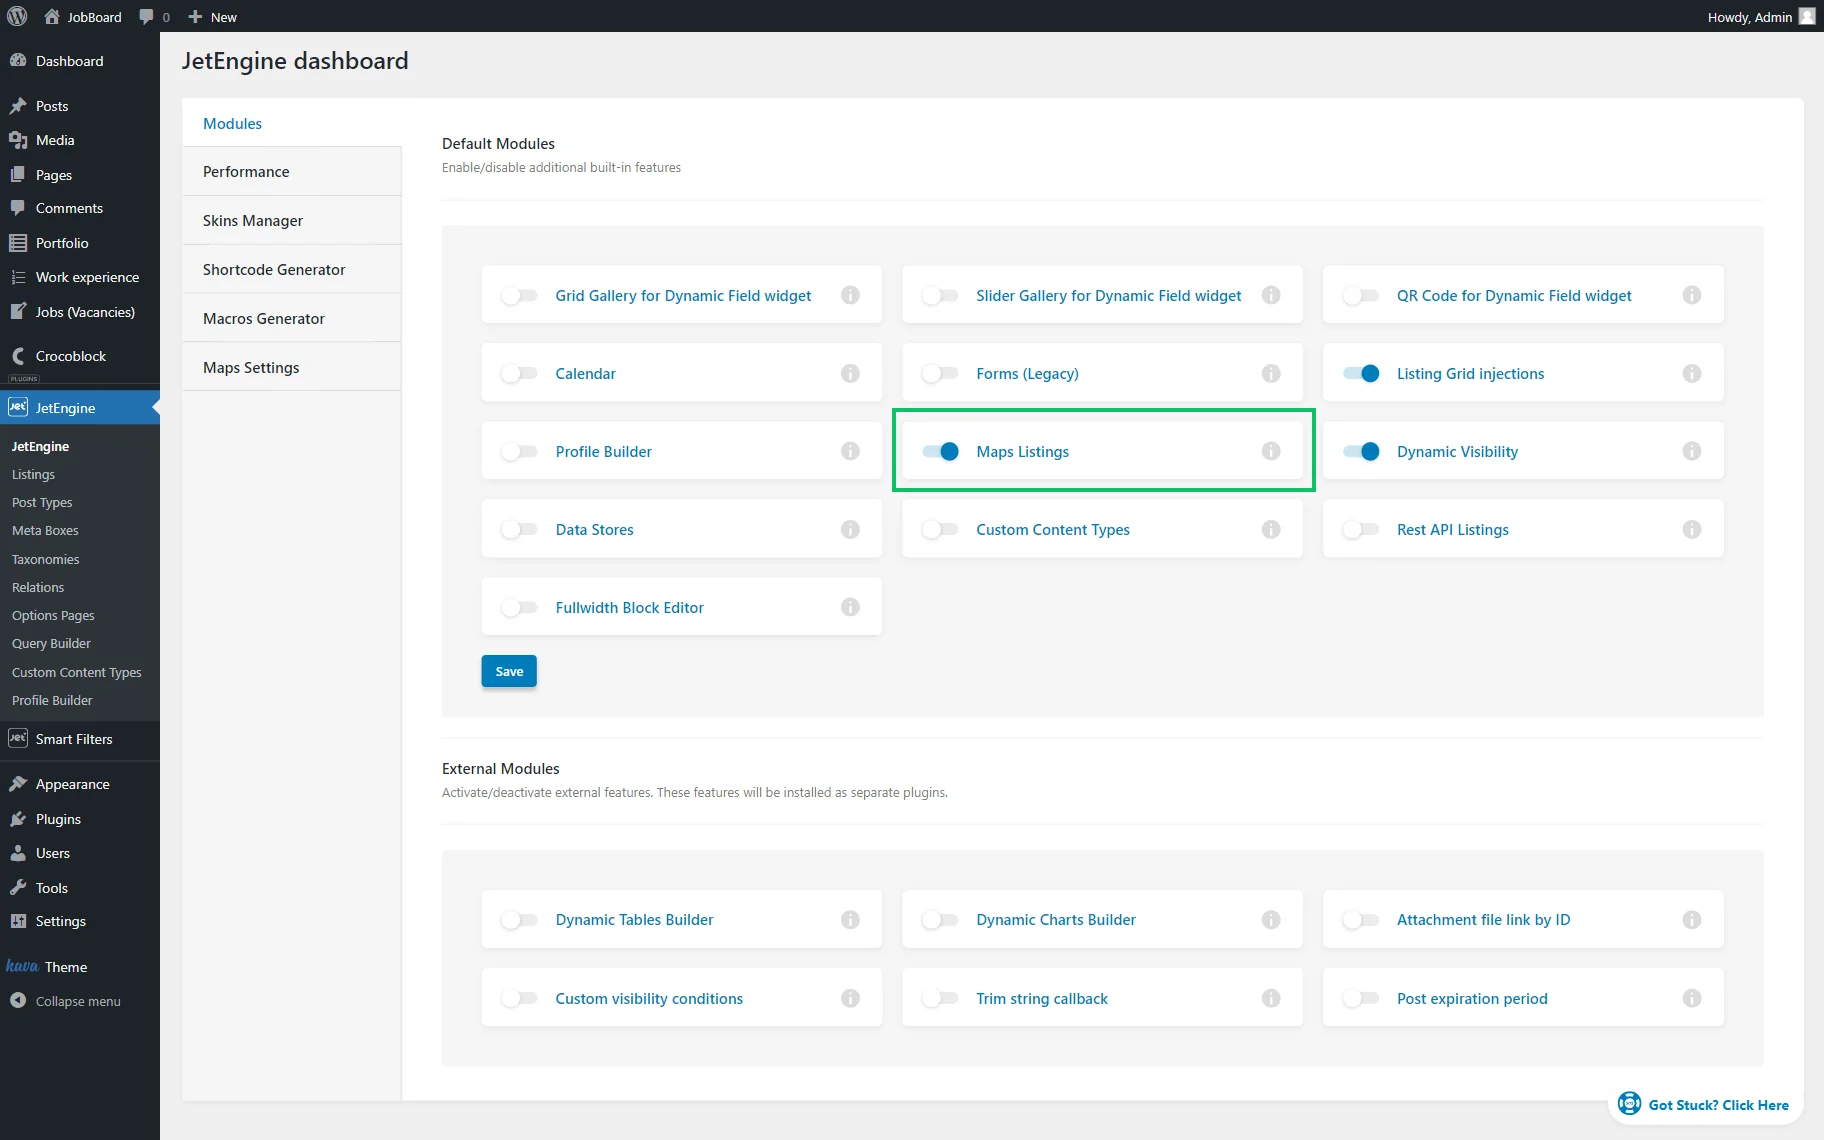
Activate Maps Listings Module
Open the WordPress Dashboard > JetEngine > JetEngine directory and activate the Maps Listings switcher in the Modules tab.
Hit the “Save” button.
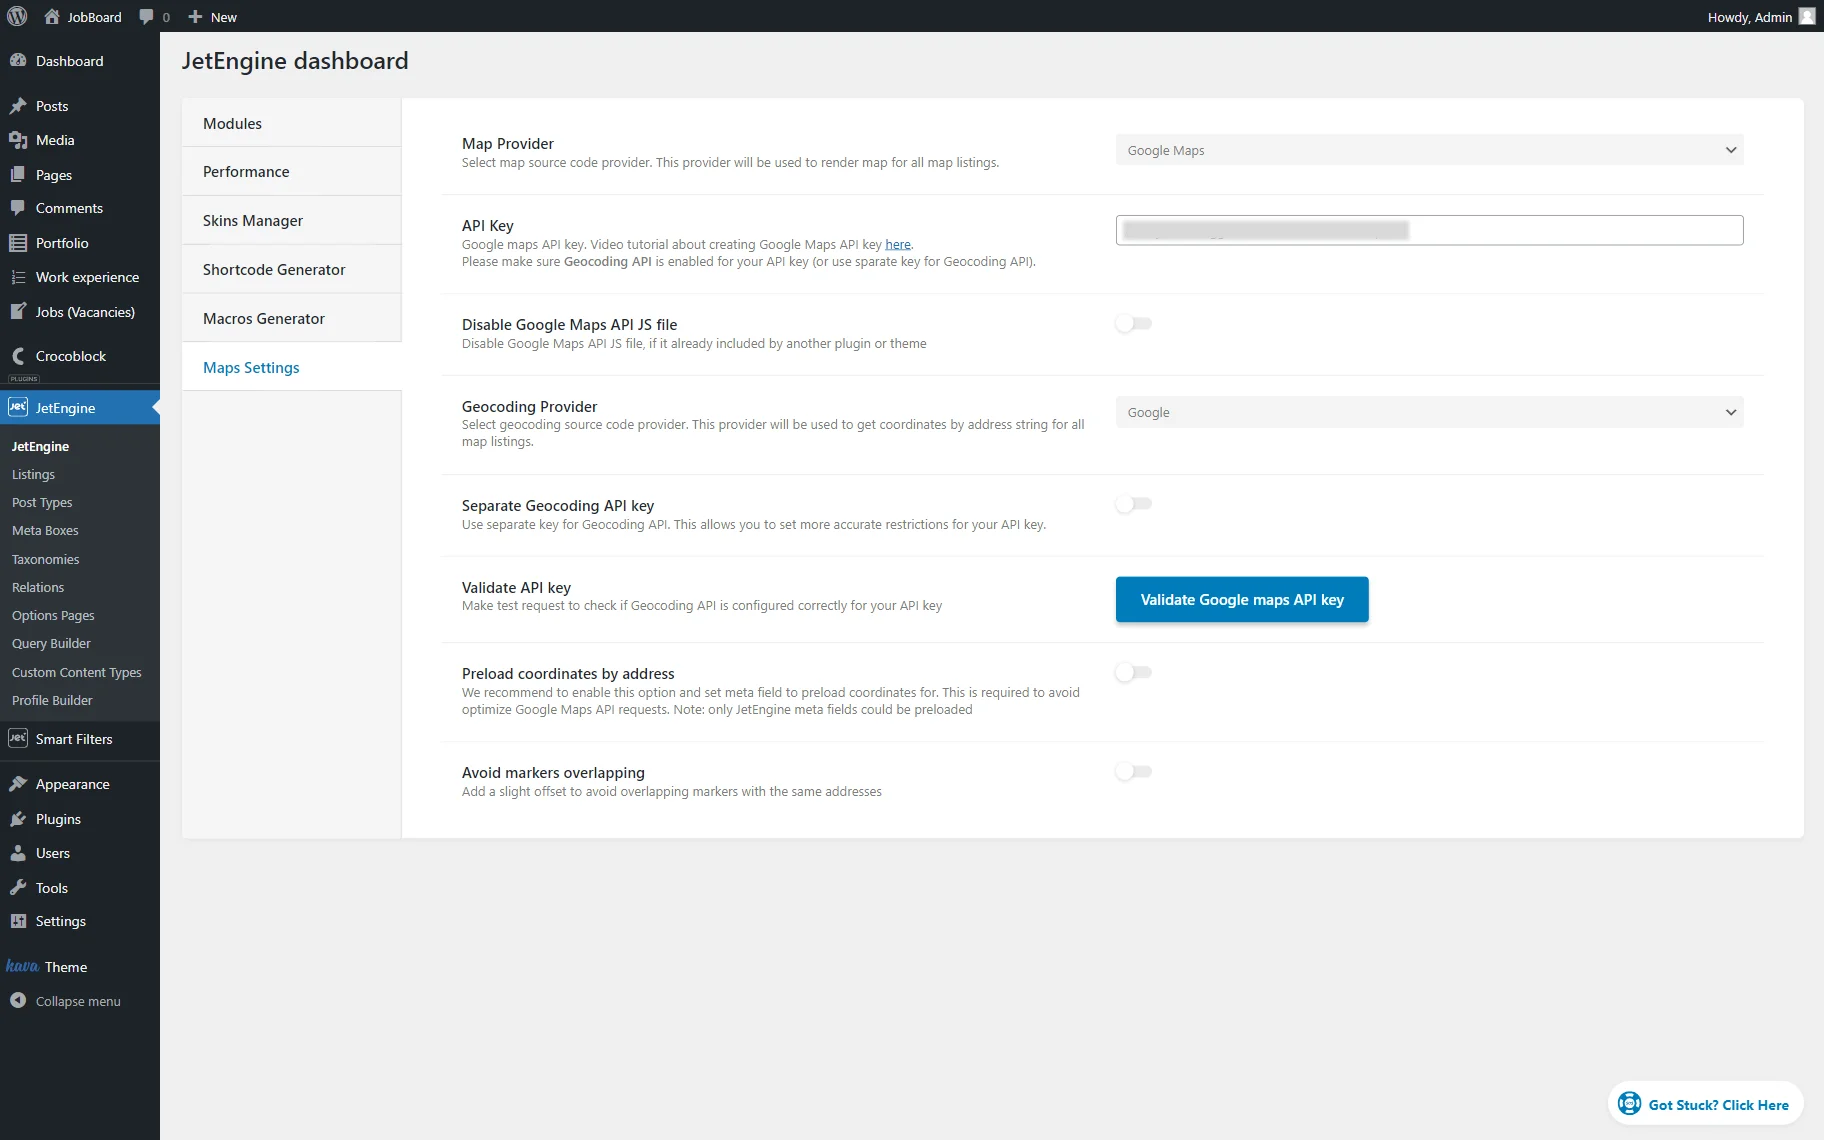
Proceed to the Maps Settings tab and adjust settings according to your wishes.
The settings will be saved automatically.
Build a Filter
Go to WordPress Dashboard > Smart Filters > Add New.
Complete the Filter Name and select the “Location & Distance” Filter Type in the Filter Settings tab.
Also, fill in the Filter Label and Active Filter Label fields. The first label can be used next to the filter on the page, and the second one will be shown if the Active Filters or Active Tags widgets/blocks are used.
Press “Update” to save the filter.

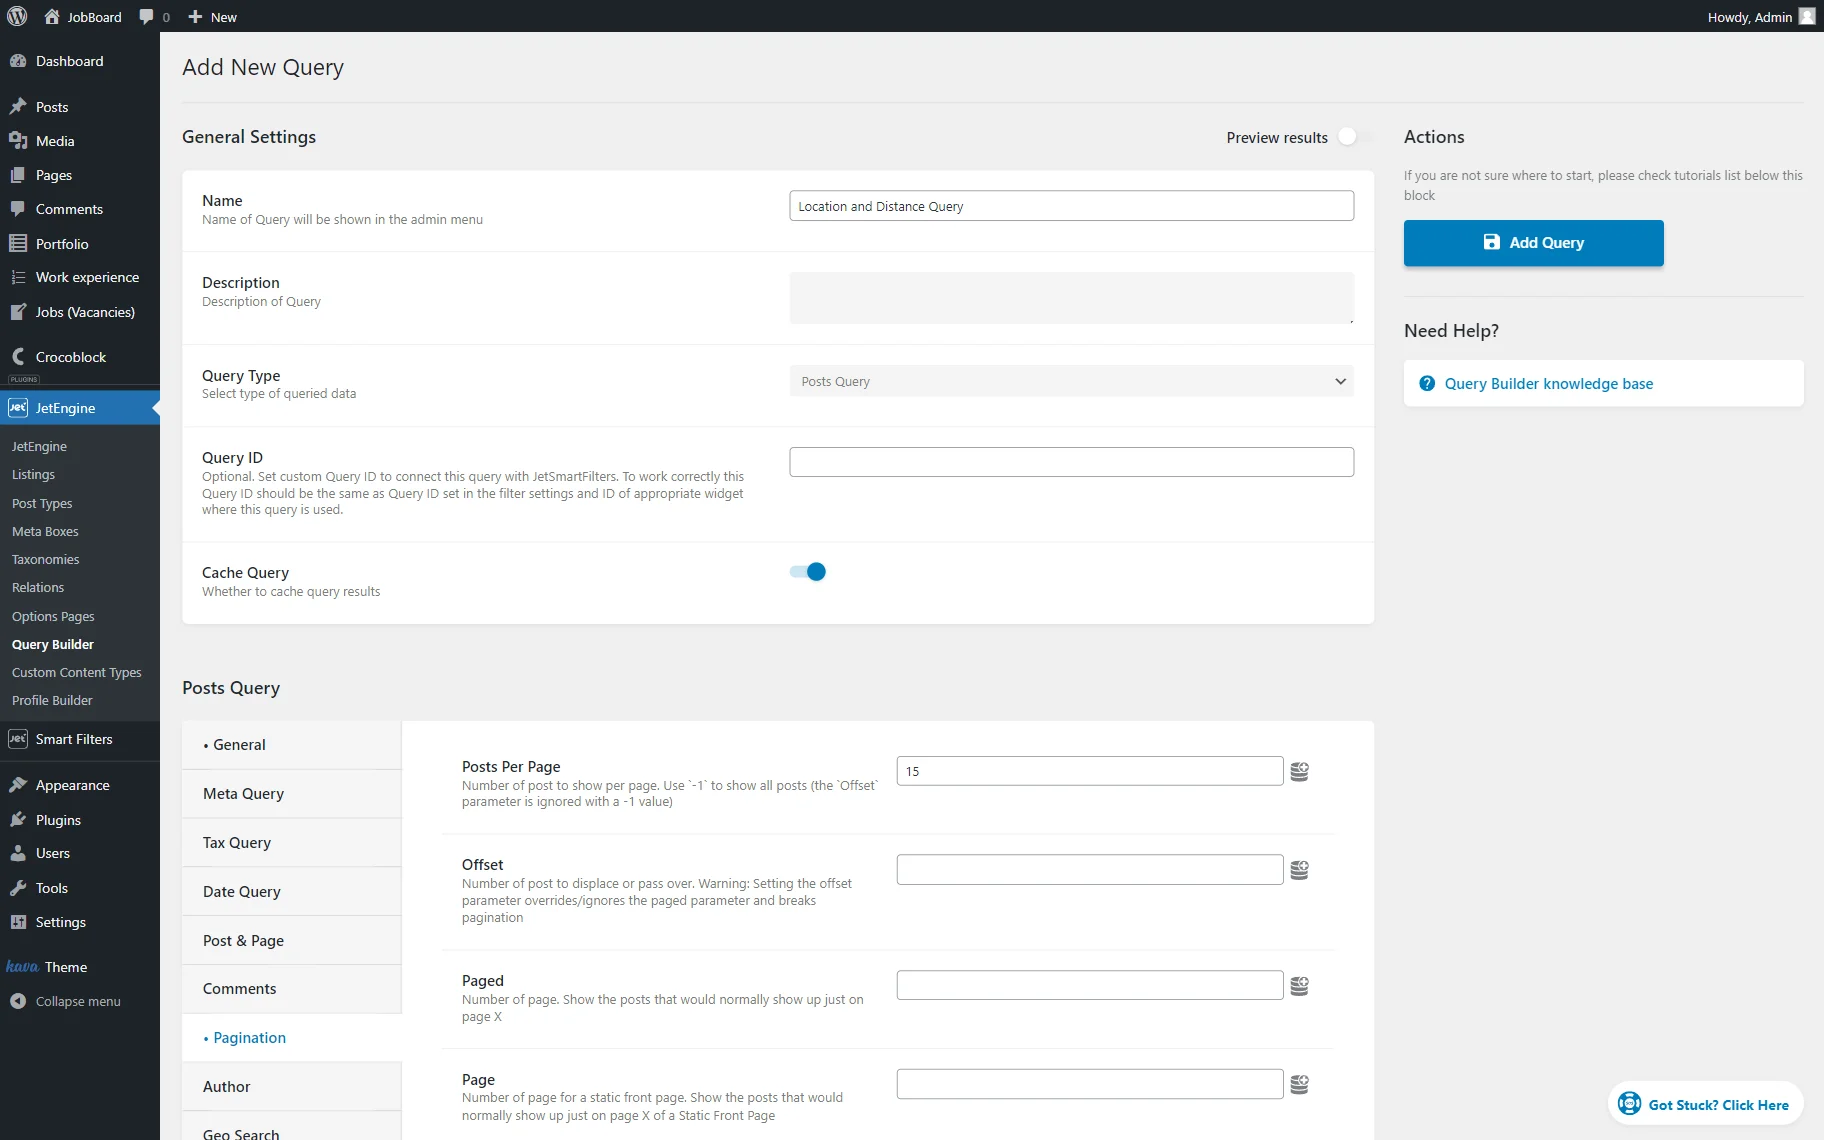
Create a Query
Navigate to WordPress Dashboard > JetEngine > Query Builder to add a new query.
Give a Name to the query and pick one of the Query Type options; it should be one that supports Geo Query. Among the options are: “Posts Query,” “Terms Query,” “Users Query,” and “Custom Content Type Query.”
Now, we will pick the “Posts Query” option as we will work with the JetEngine’s Custom Post Type.
In the Posts Query section, the General tab is opened by default. In the Post Type field, we pick “Jobs (Vacancies)” CPT.
We also set the Post Status as “Publish” in order to show only posts that have this status.
You can also complete the next fields. However, these are not obligatory to make the current case complete.

The following tab to proceed to is Pagination. Here, we set Posts Per Page.
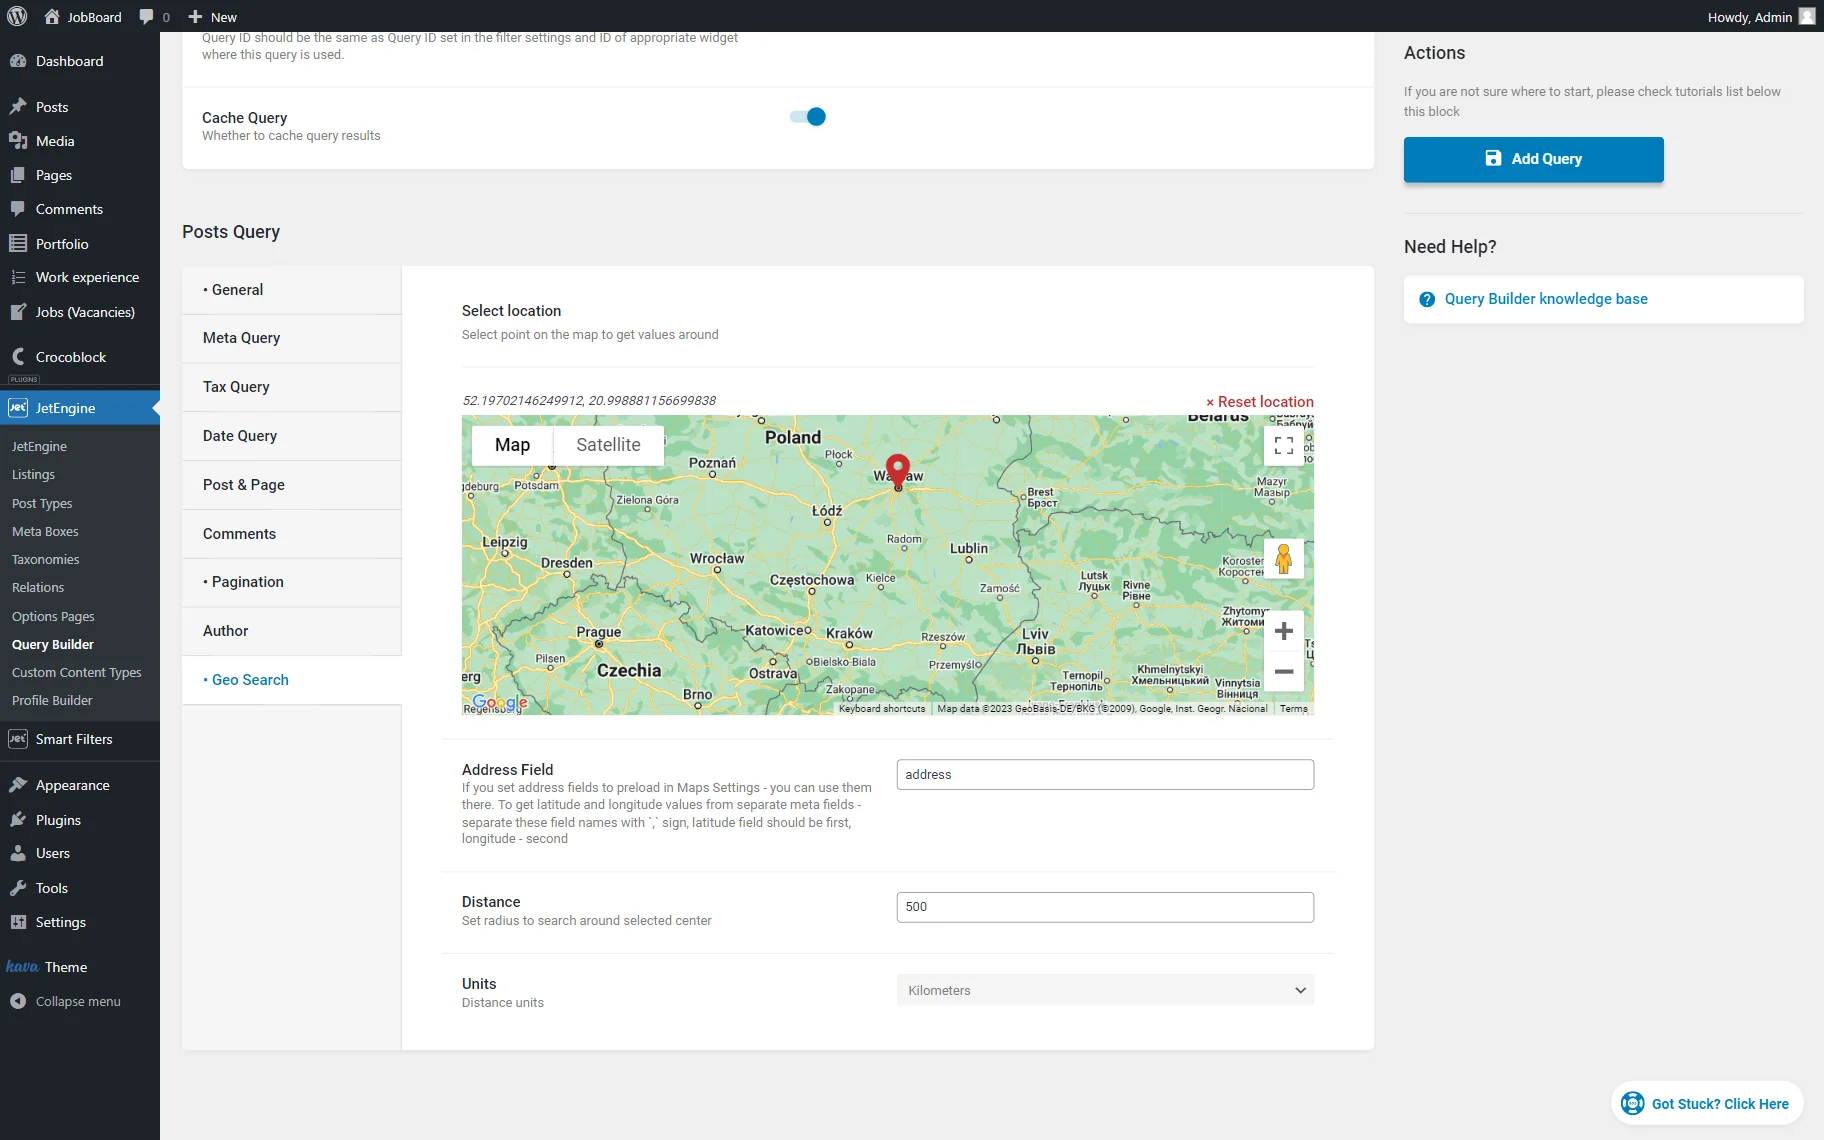
The most important step is adjusting the Geo Search tab.
Pick the needed point on the map as a center for the initial search in the Select location section.
Complete the Address Field bar with the meta field’s key that stores address information about your posts.
Also, set the Distance value, which will serve as the radius around the picked center. Additionally, the Units can be specified: “Kilometers” or “Miles.”
The query is now set; you can click the “Add Query” button.
Add or Update the Page
It is time to put the content on the page. Head to WordPress Dashboard > Pages > Add New or open the editor of the existing page.
You can work with Gutenberg or Elementor.
For now, we will use Elementor.
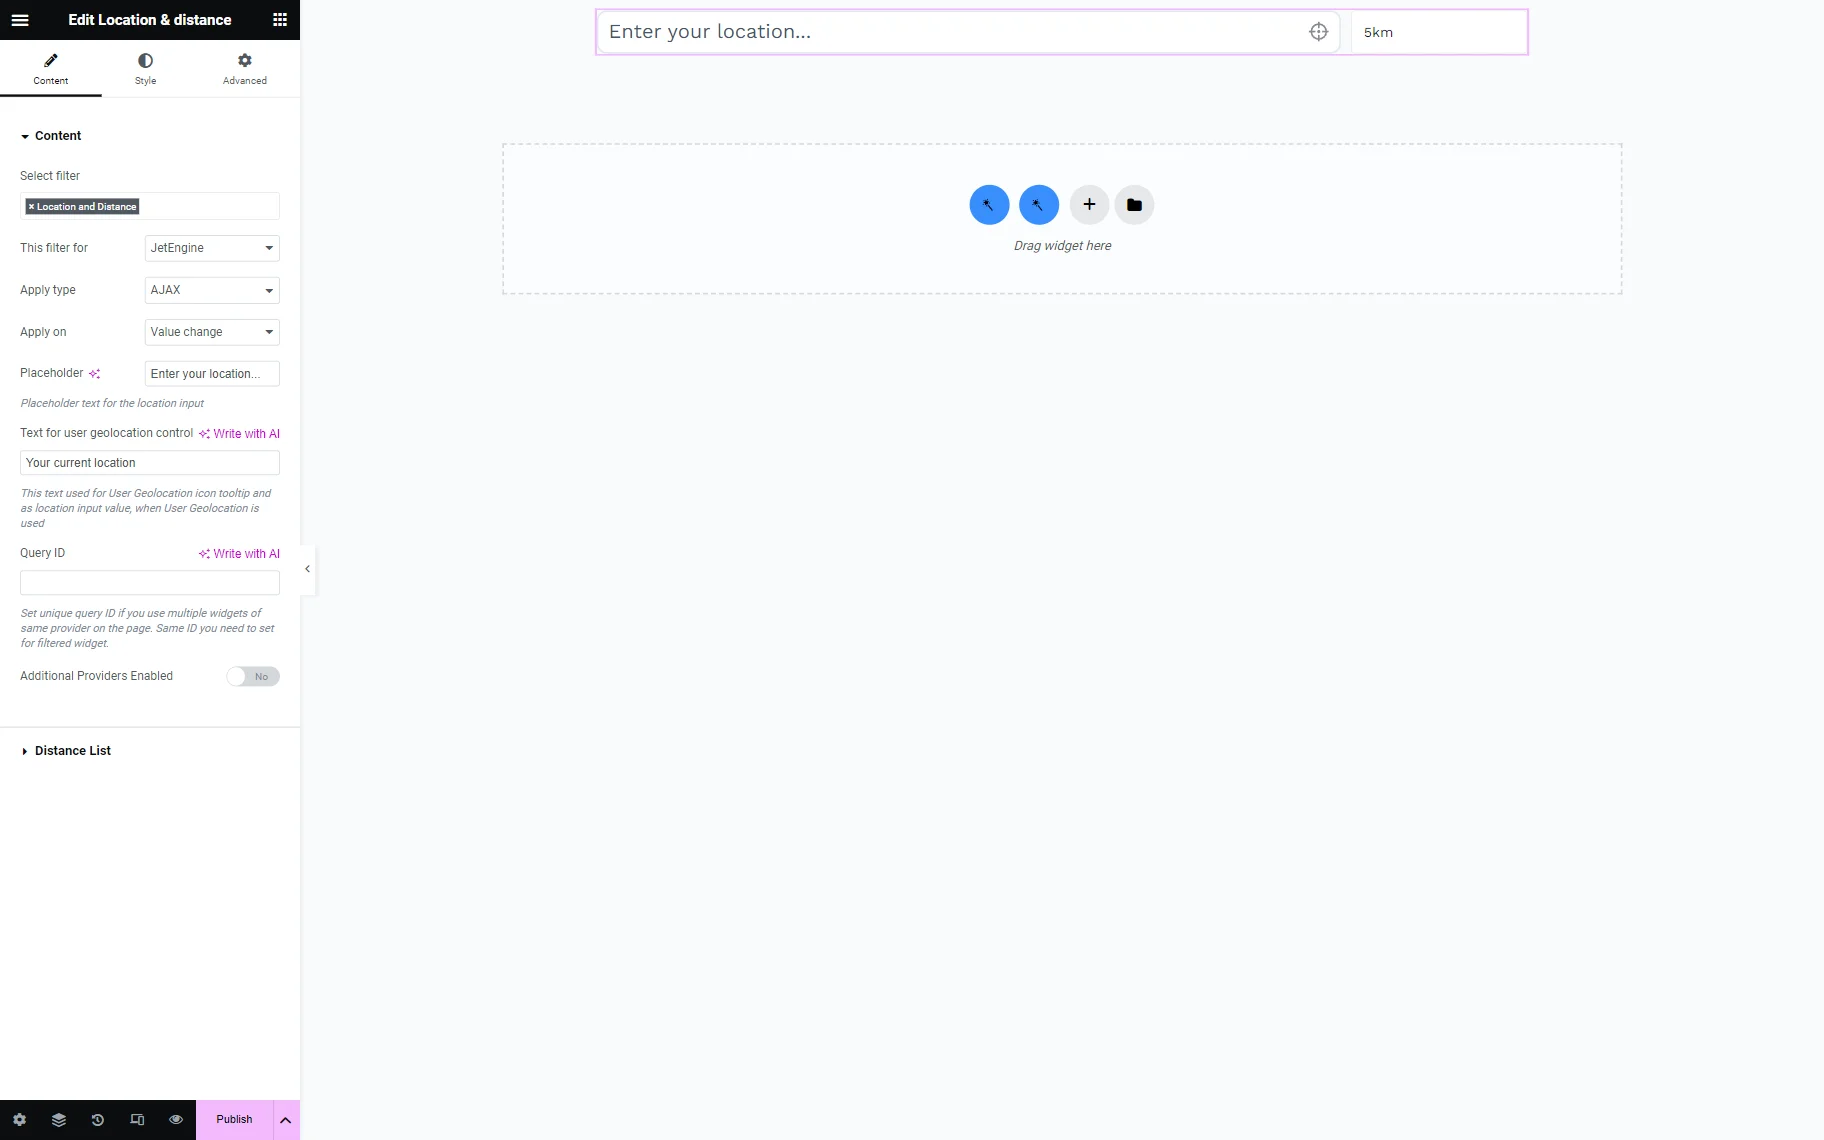
Once the editor is opened, search for the Location and Distance Filter widget and add it to the page.
Adjust its settings. The main steps are selecting the filter (Select filter bar) and setting its provider to “JetEngine.”
If you want, you can alter other customization options. You can find out more about them in the Location & Distance Filter Overview.
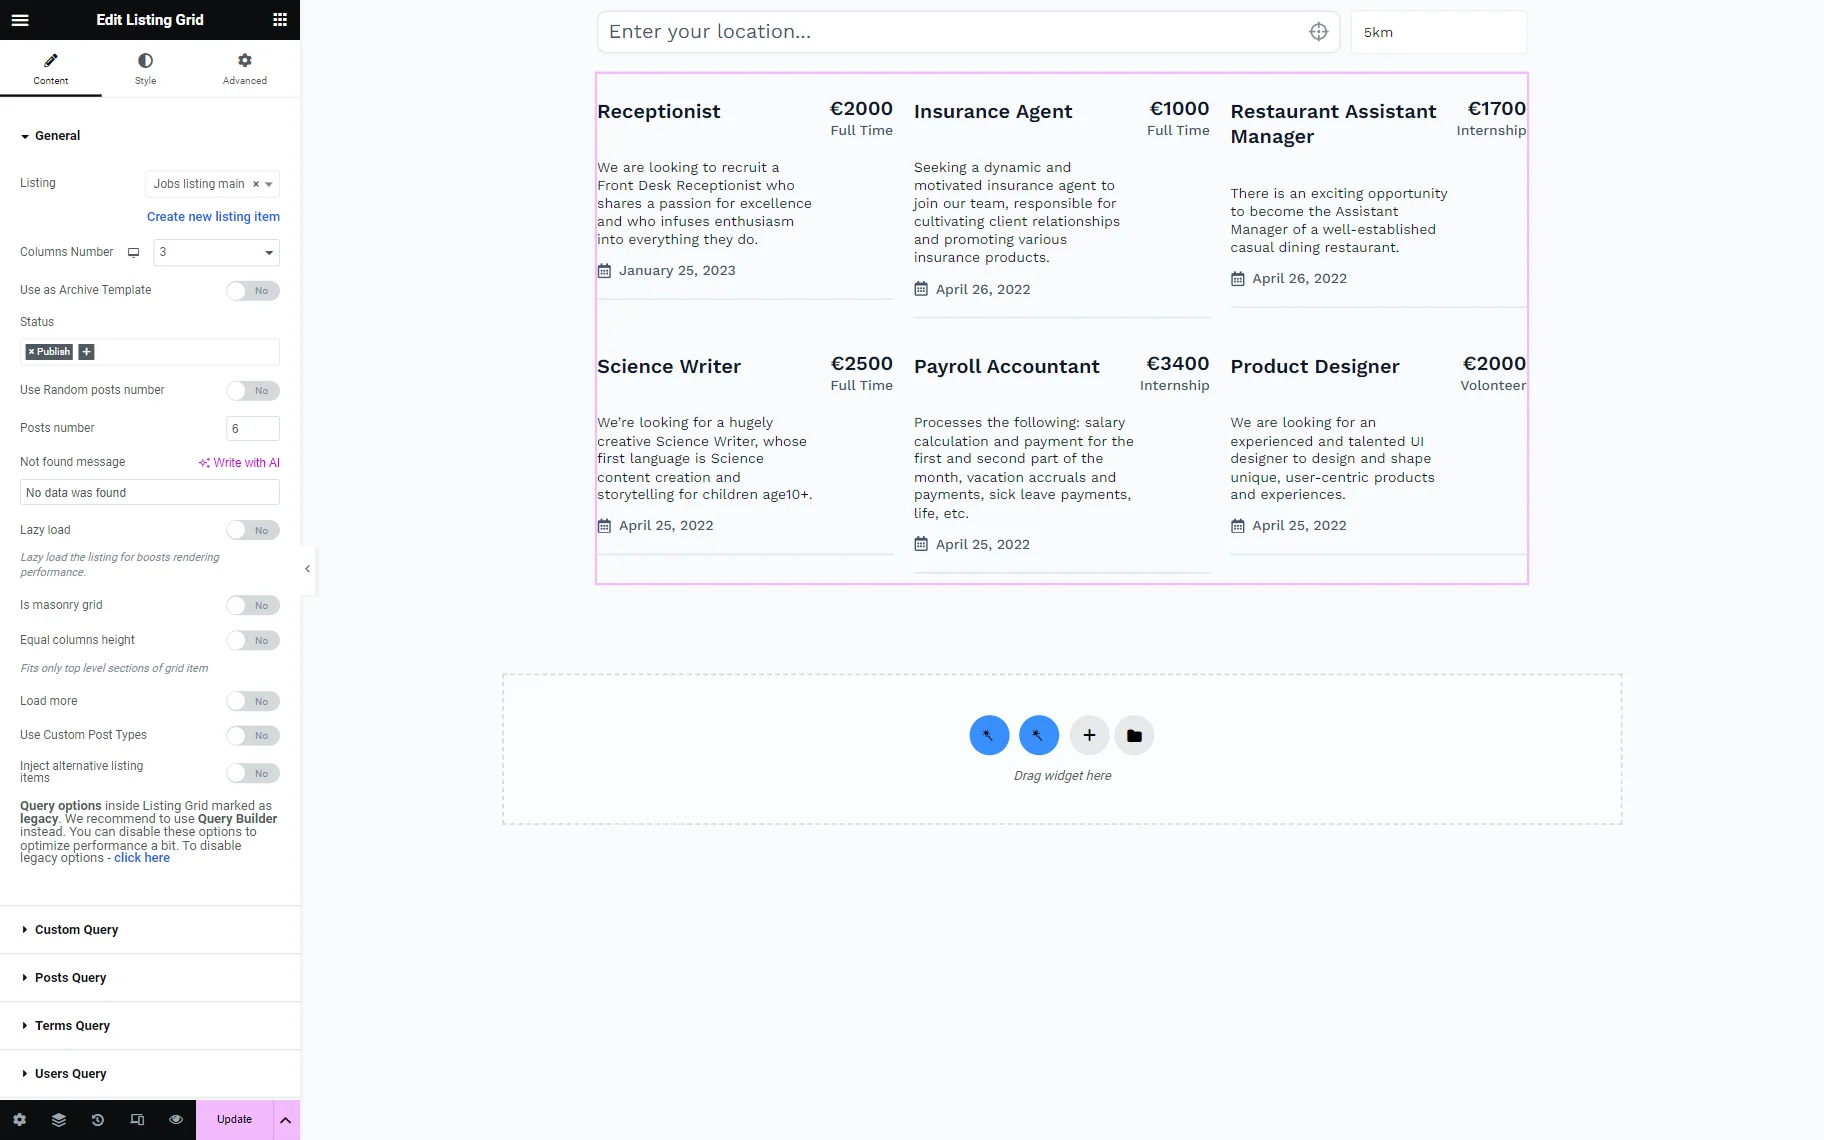
As we want to display posts, we add the Listing Grid widget.
Select the Listing with the needed post type’s posts in the General settings tab.
Go to the Custom Query tab and activate the Use Custom Query toggle. Then, choose the newly built Custom Query.
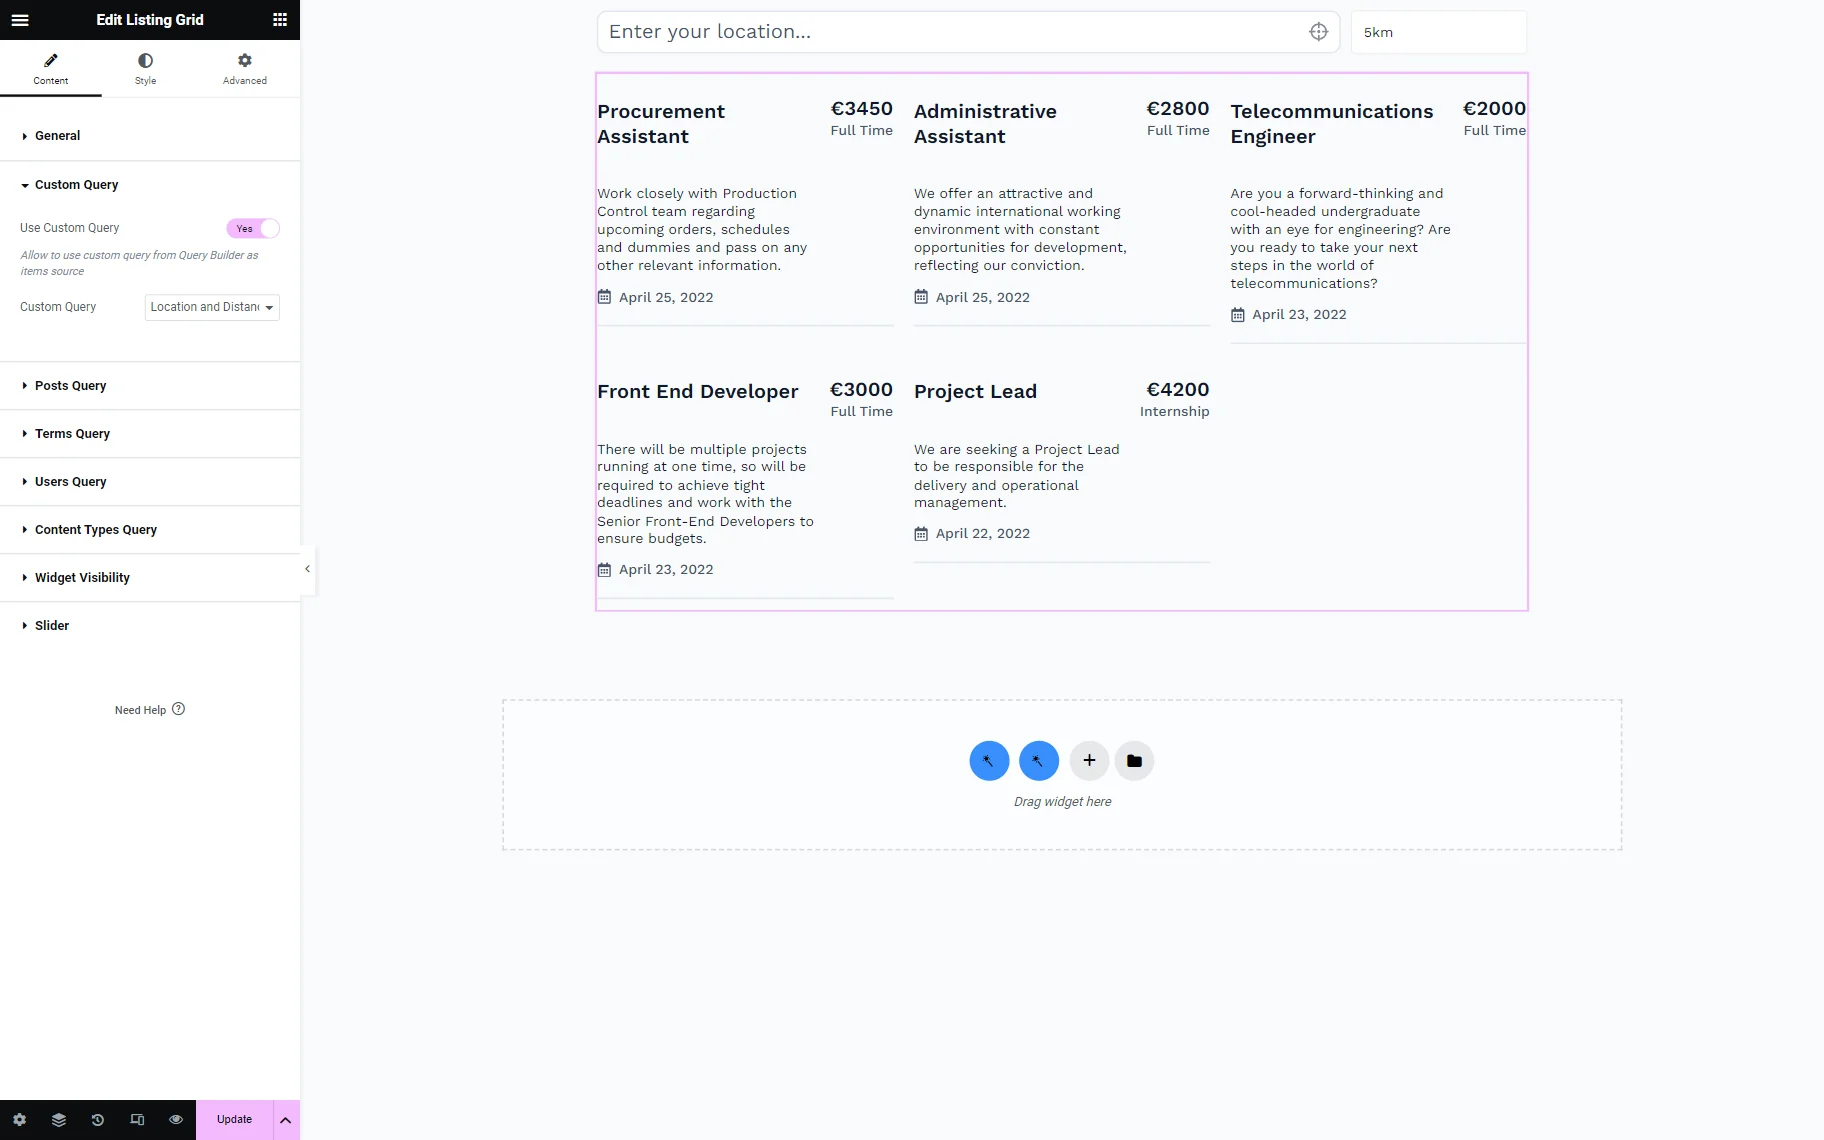
Set up the styling settings and hit the “Publish/Update” button.
Check the Result
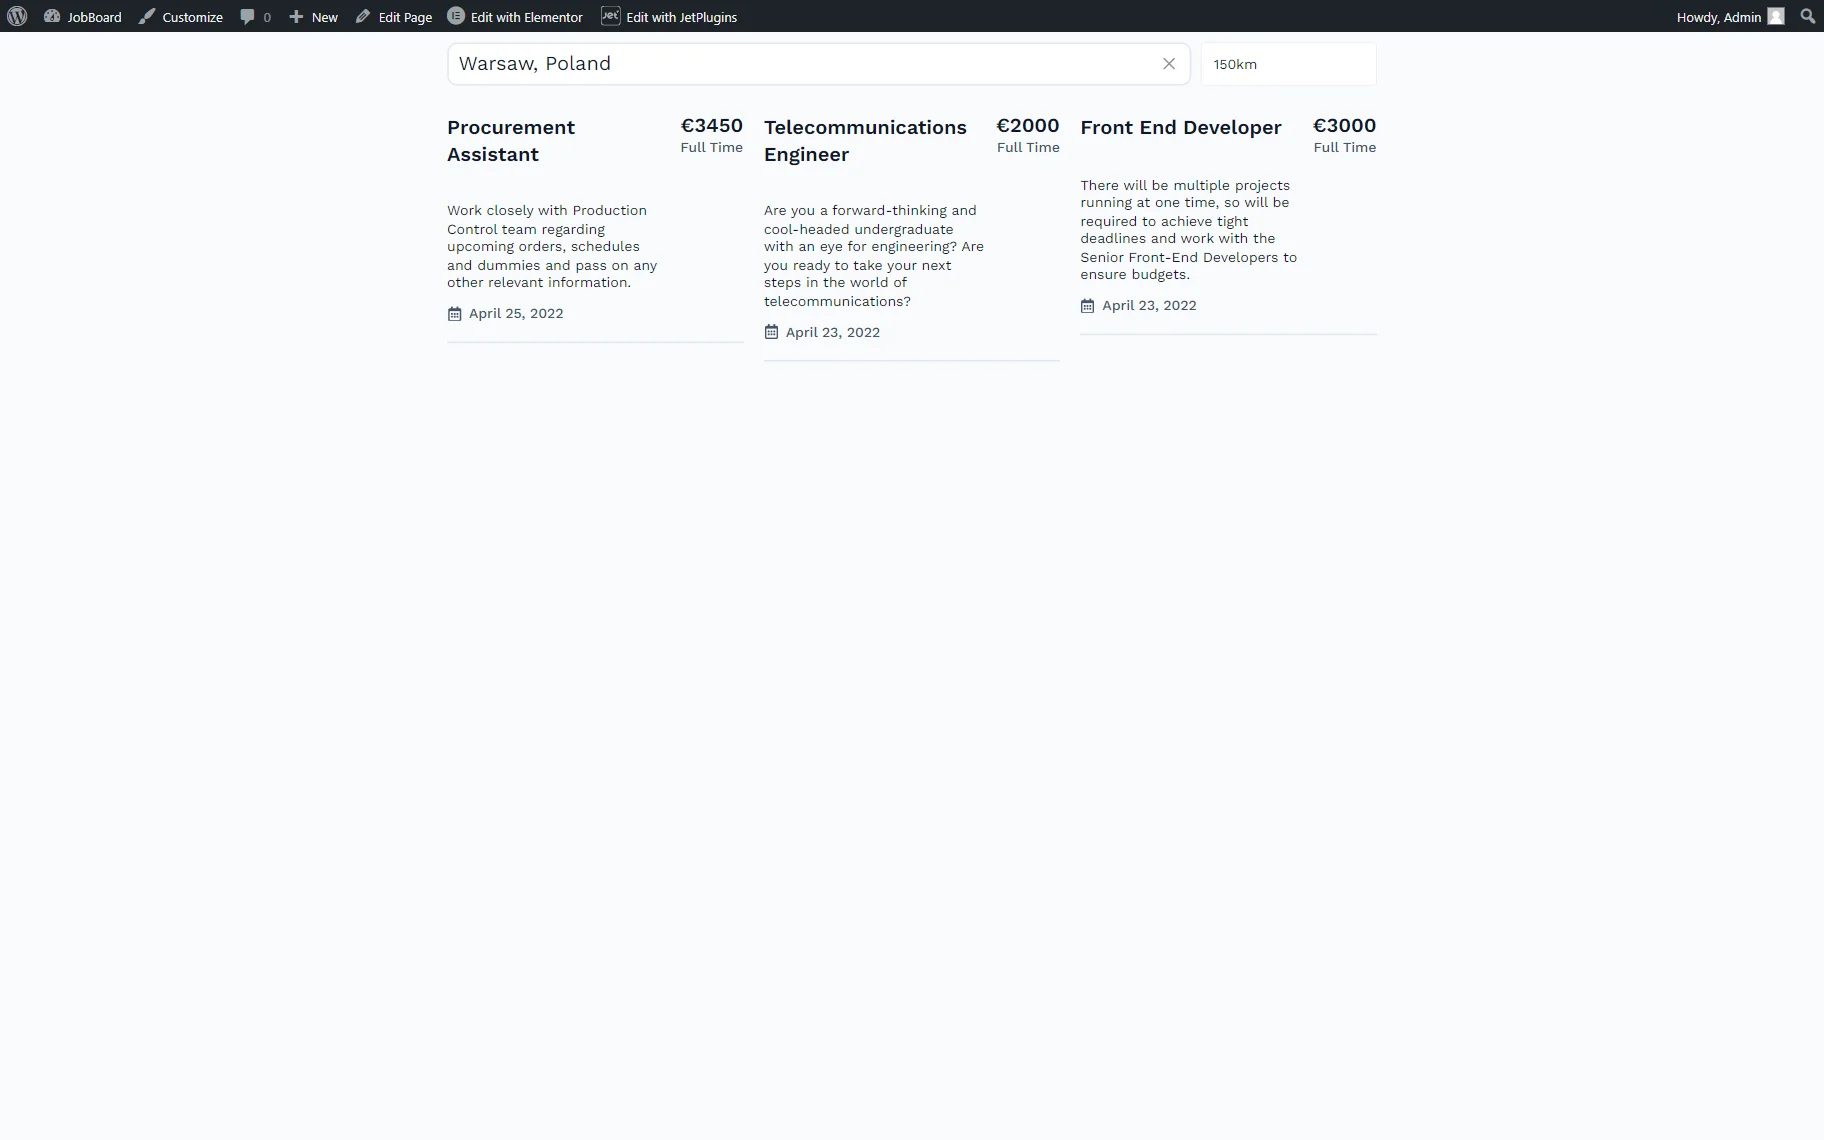
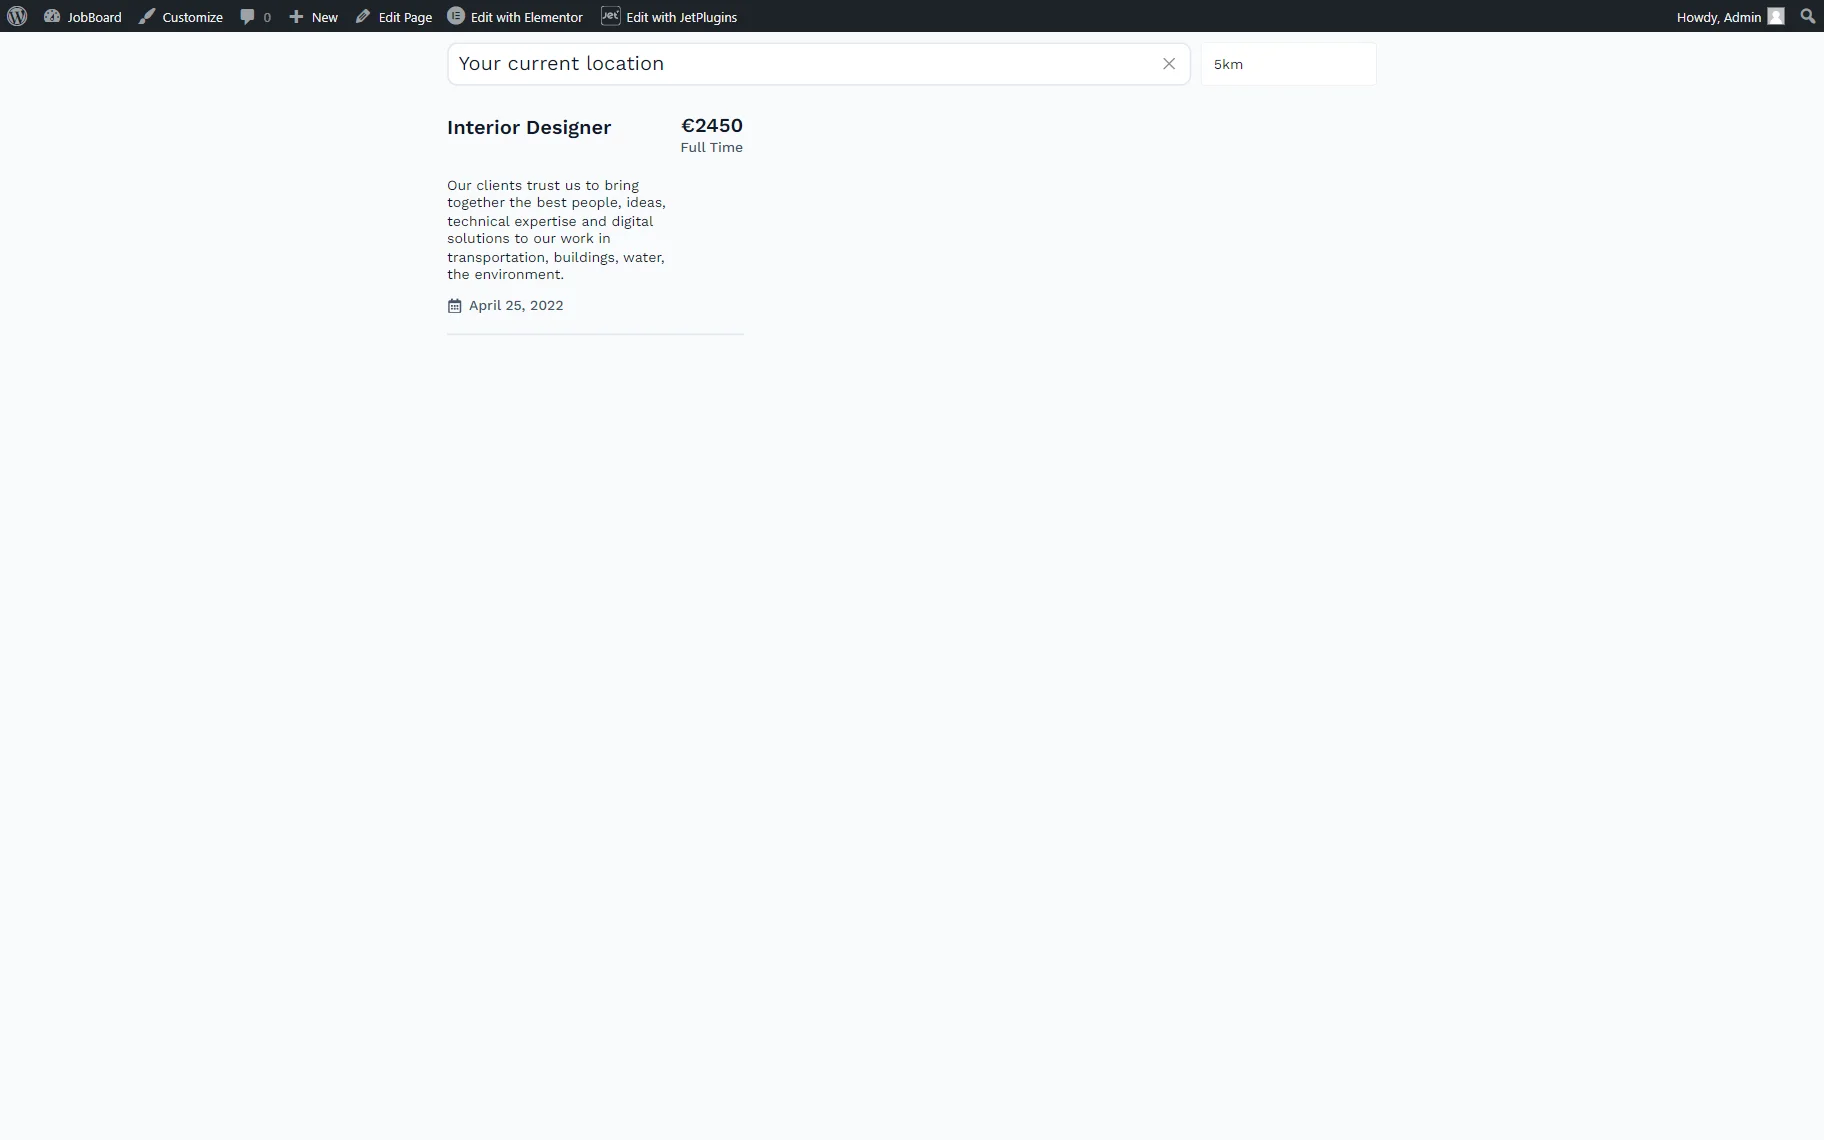
Now, you can check the result by heading to the front end.
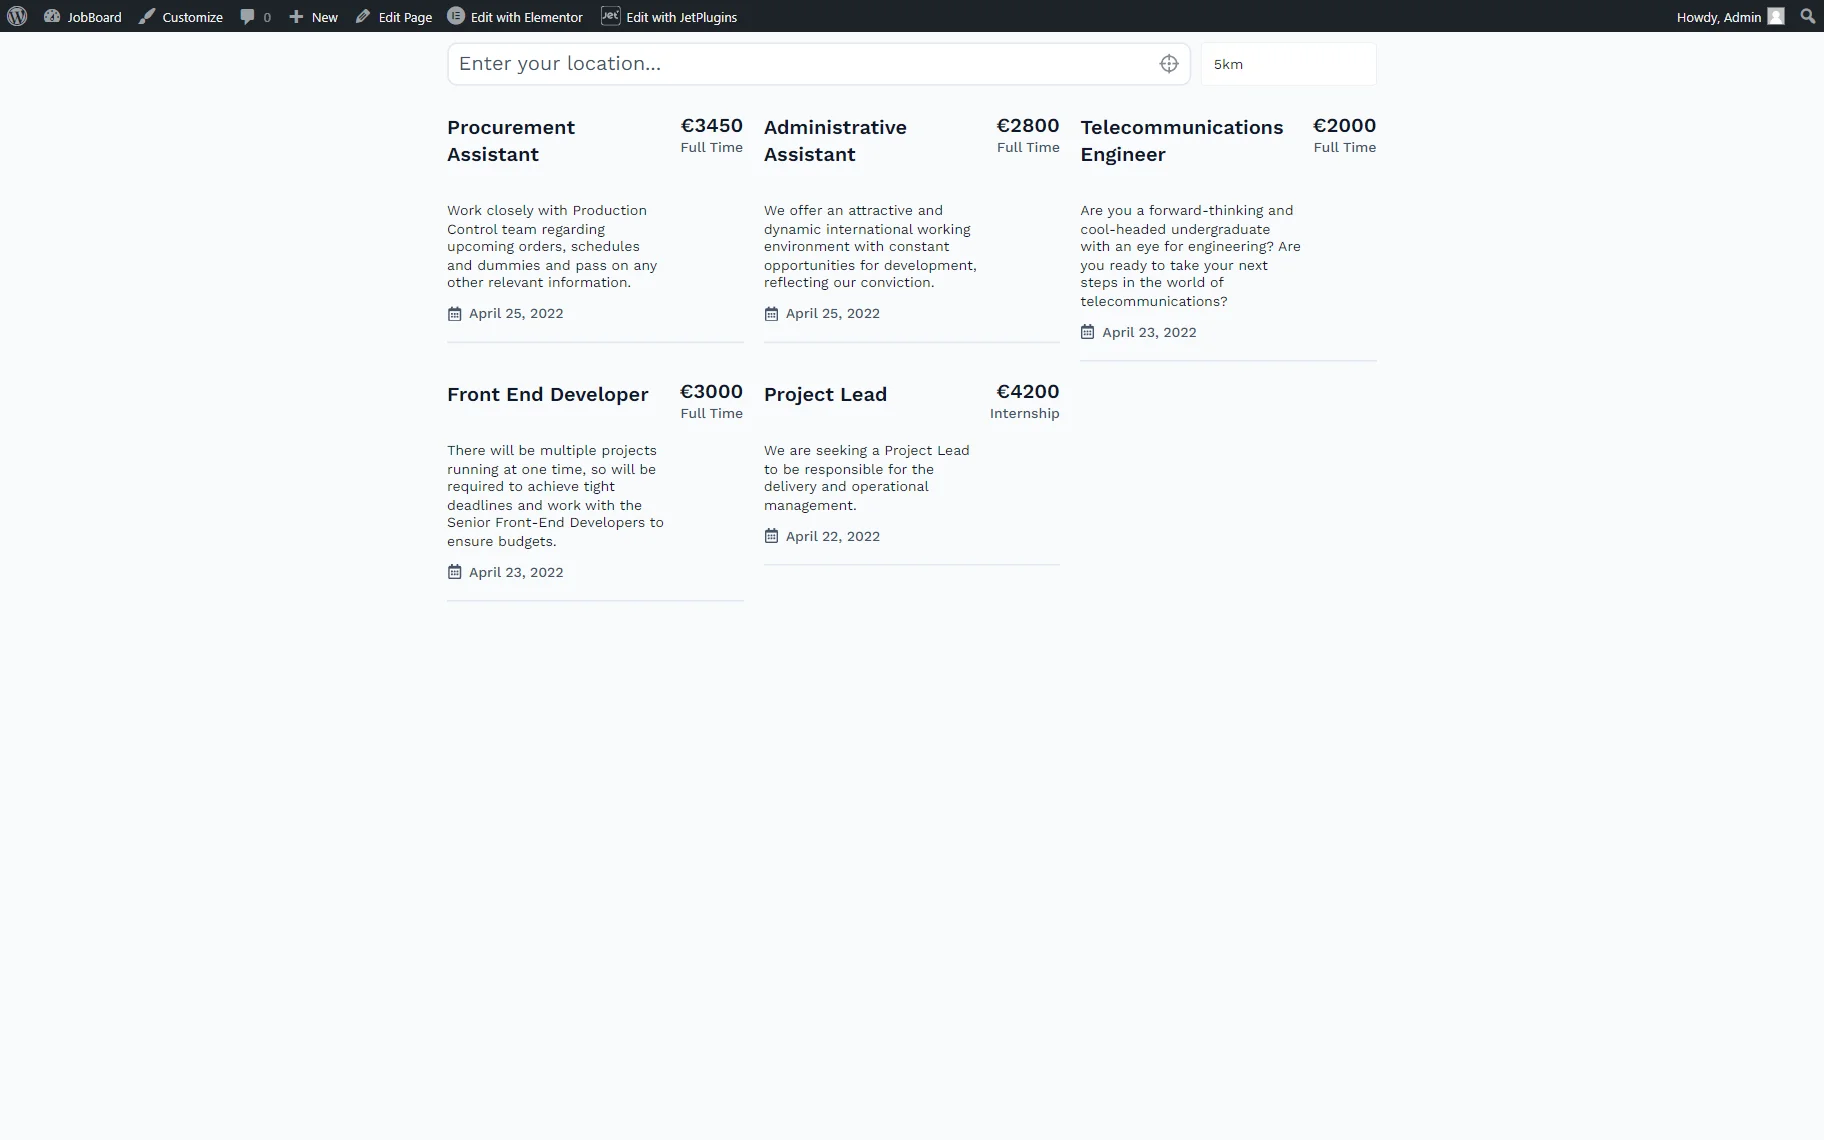
You can type the name of the location in the search bar and select the needed option from the drop-down list.
Then, you can also pick the distance in the bar next to the location.
Clicking the “Your current location” button will initiate a search around your current location.
Now you know how to display posts in JetEngine’s Listing Grid based on the “Location & Distance” filter from JetSmartFilters on your WordPress website.