How to Set a Different Number of Posts in a Listing Grid for Each Breakpoint
Learn how to set a different number of items in a JetEngine Listing Grid for each screen size using the Items Number Switcher filter in Elementor, Gutenberg, or Bricks on your WordPress site.
Before you start, check the tutorial requirements:
- Elementor (Free version), Block editor (Gutenberg), or Bricks
- JetEngine plugin installed and activated
- JetSmartFilters plugin installed and activated
This guide describes how to configure a JetEngine Listing Grid to display a different number of items (posts, terms, users, etc.) per page for specific screen width breakpoints (desktop, tablet, and mobile).
The setup is implemented using the Items Number Switcher filter of JetSmartFilters in combination with a custom query, and can be applied in Elementor, the WordPress block editor (Gutenberg), or Bricks.
Enable the Items Number Filter External Module
Proceed to the WordPress Dashboard > JetEngine > JetEngine > Modules > External Modules tab and activate the Items Number Filter toggle. This module will be installed and activated as a separate plugin.

Create a Query
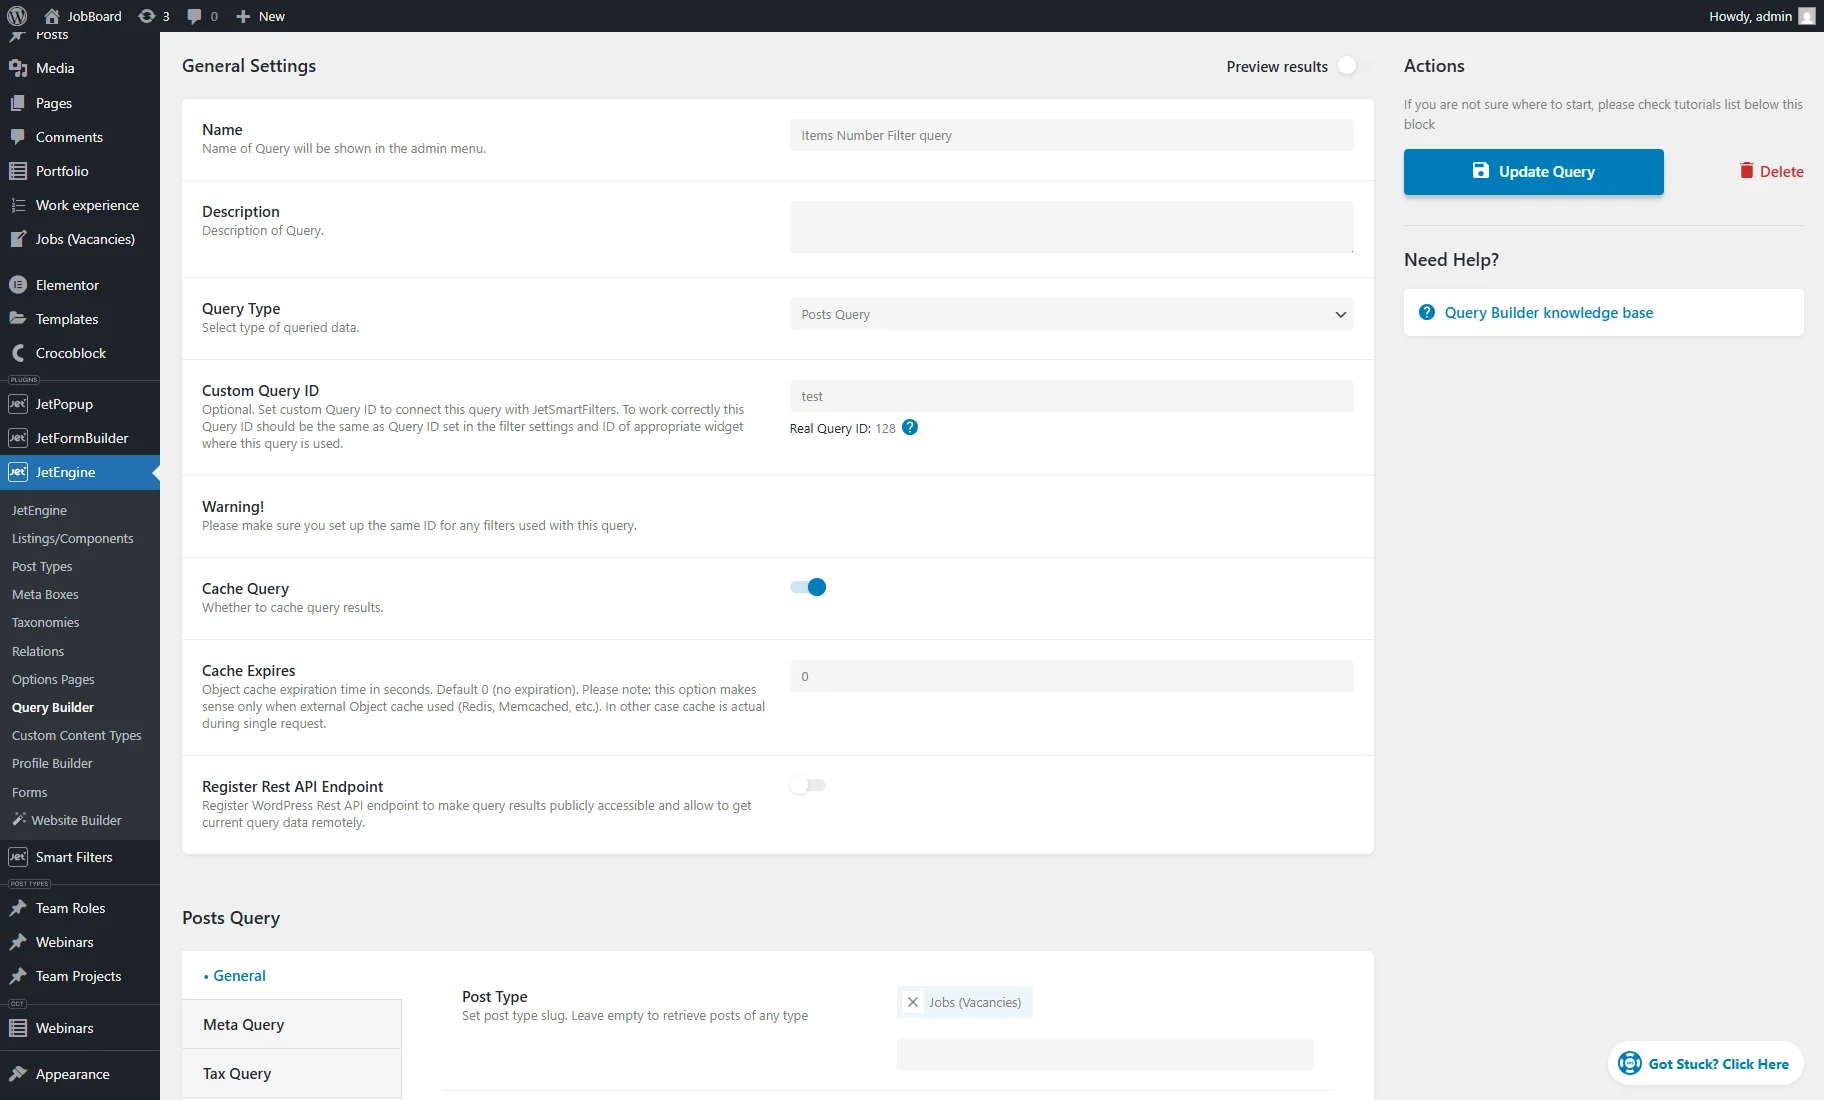
Proceed to WordPress Dashboard > JetEngine > Query Builder and create a custom query by pressing the “Add New” button.
Enter the query’s Name and select the required Query Type. For example, we want to display posts from a Custom Post Type, so we pick the “Posts Query” option.
Then, enter the Custom Query ID that will be used later in the filter and Listing Grid settings. It should be unique and contain lowercase letters only, numbers, hyphens, or underscores.
Finally, adjust other query settings according to your needs. For example, in the General tab of the Posts Query section, we specify “Jobs (Vacancies)” as the Post Type.
Create a Listing Template
Create a Listing template to display it later in a Listing Grid. In our case, we create a listing for posts as described in the How to Create a Listing Template for Post Types tutorial.
Adjust the Items Number Switcher and Listing Grid
Proceed to a page or template created with Elementor, WordPress block, or Bricks editor where you want to display items in a Listing Grid.
Settings in Elementor
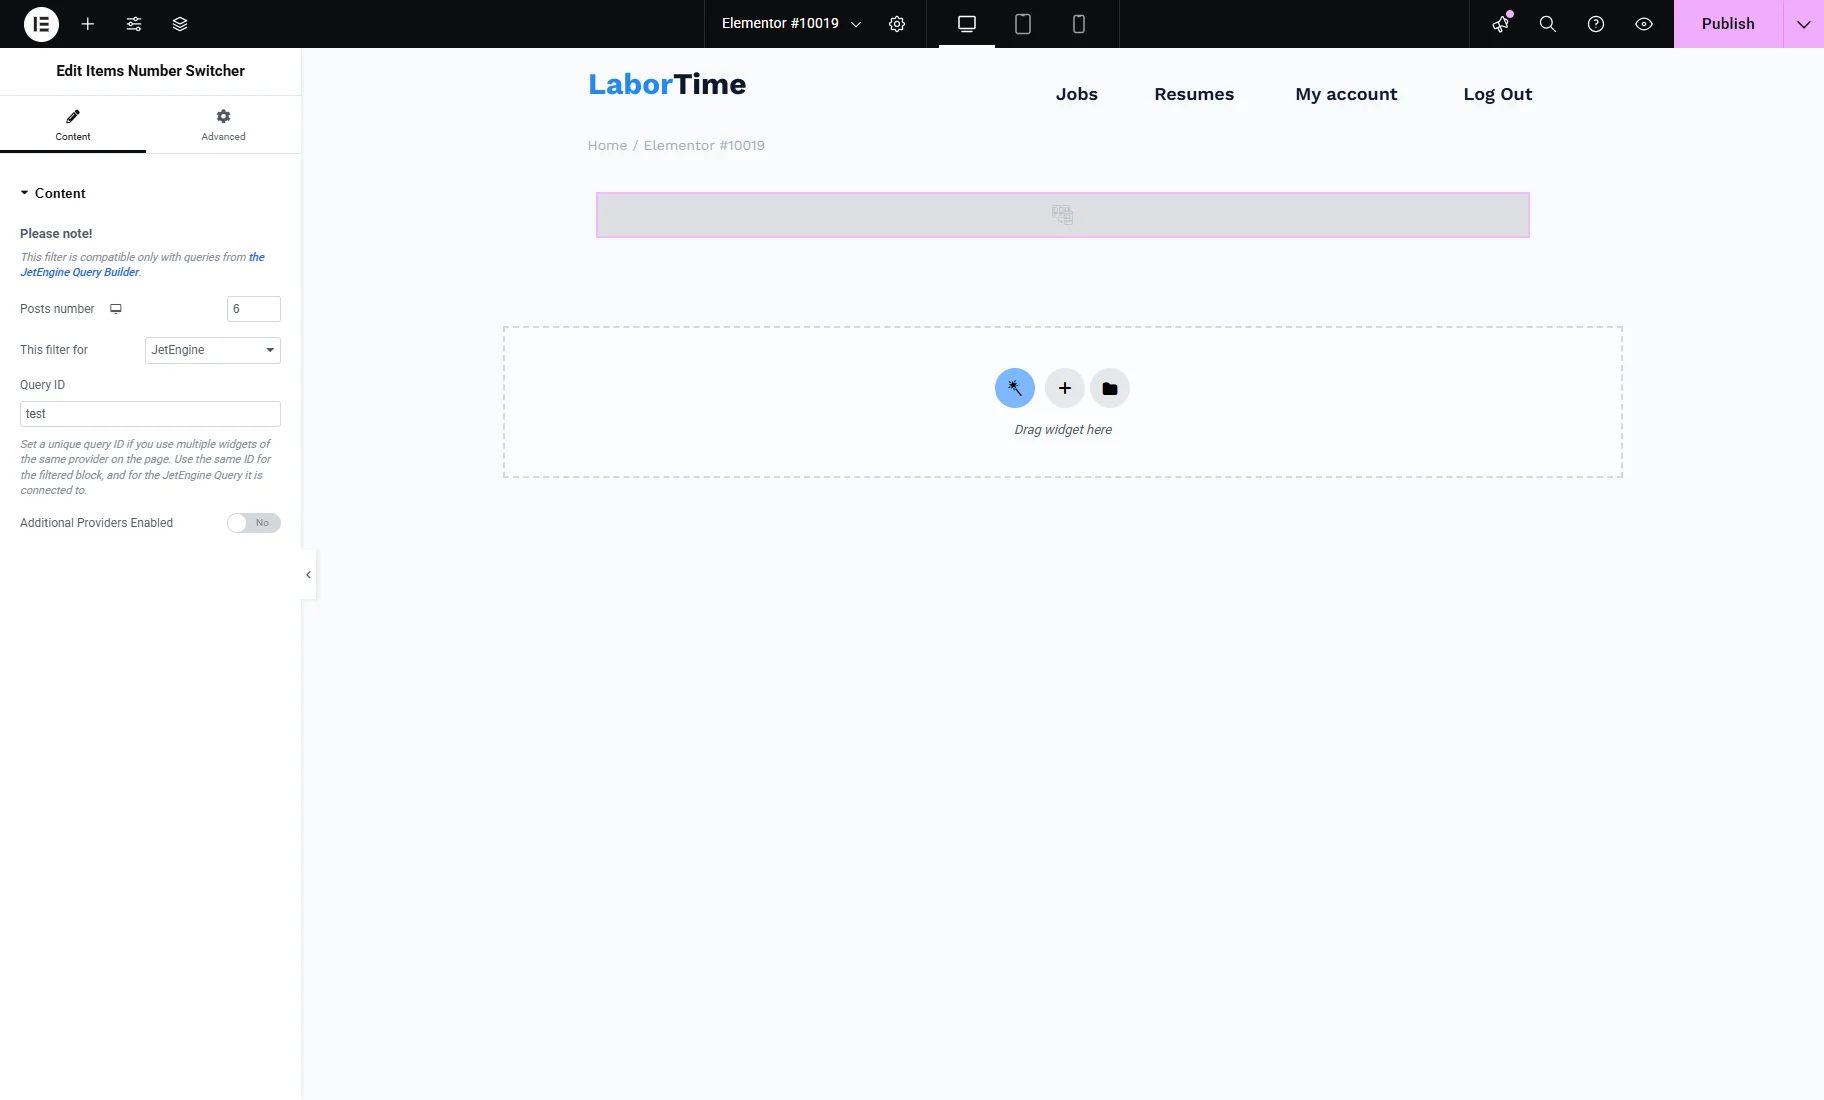
Find and place the Items Number Switcher widget and adjust its settings:
- Posts number — here, you can customize how many posts will be displayed for desktop, tablet, and mobile devices;

Switch between the device icons to set the number of posts for each type. For example, we set “6” for desktop and “2” for mobile devices.
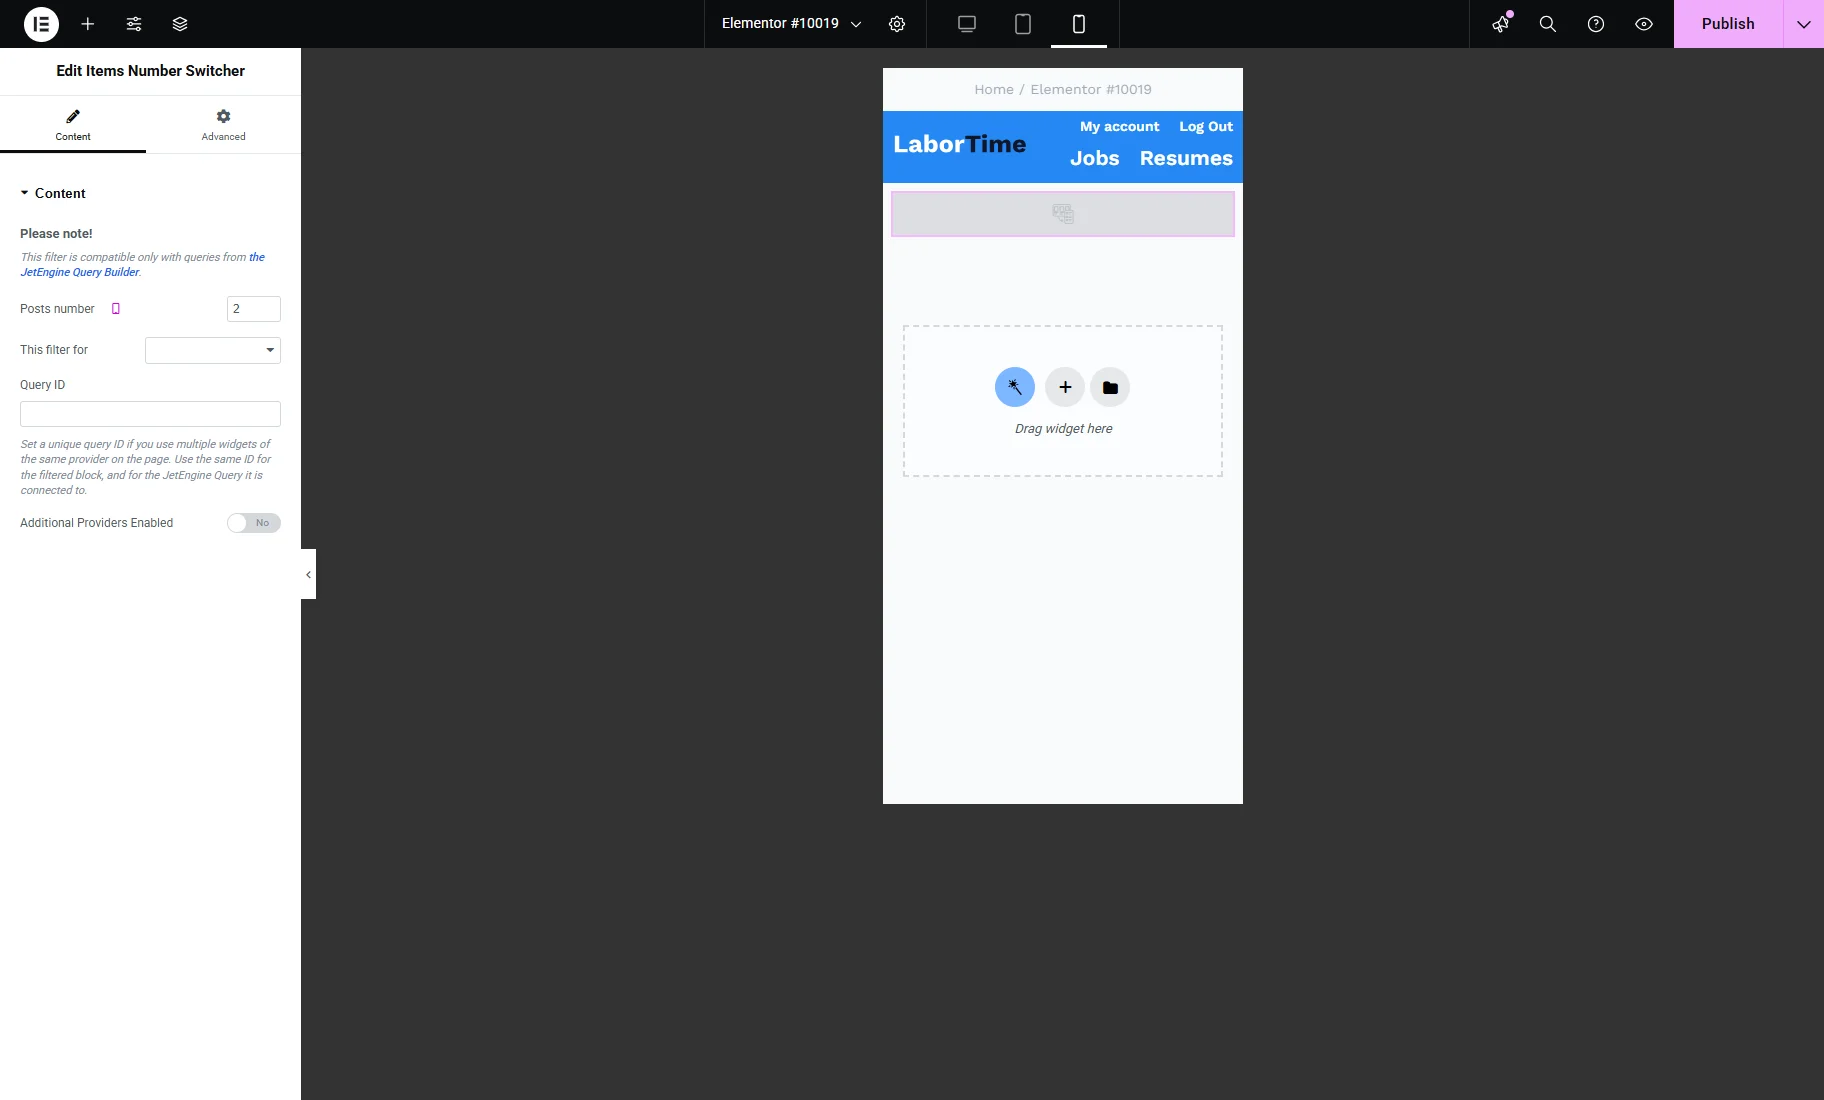
- This filter for — for this case, select the “JetEngine” option;
- Query ID — enter the Custom Query ID set in the query settings;
- Additional Providers Enabled — a toggle to be enabled if several widgets should be filtered. Check the Additional Providers List Option Overview for more information.
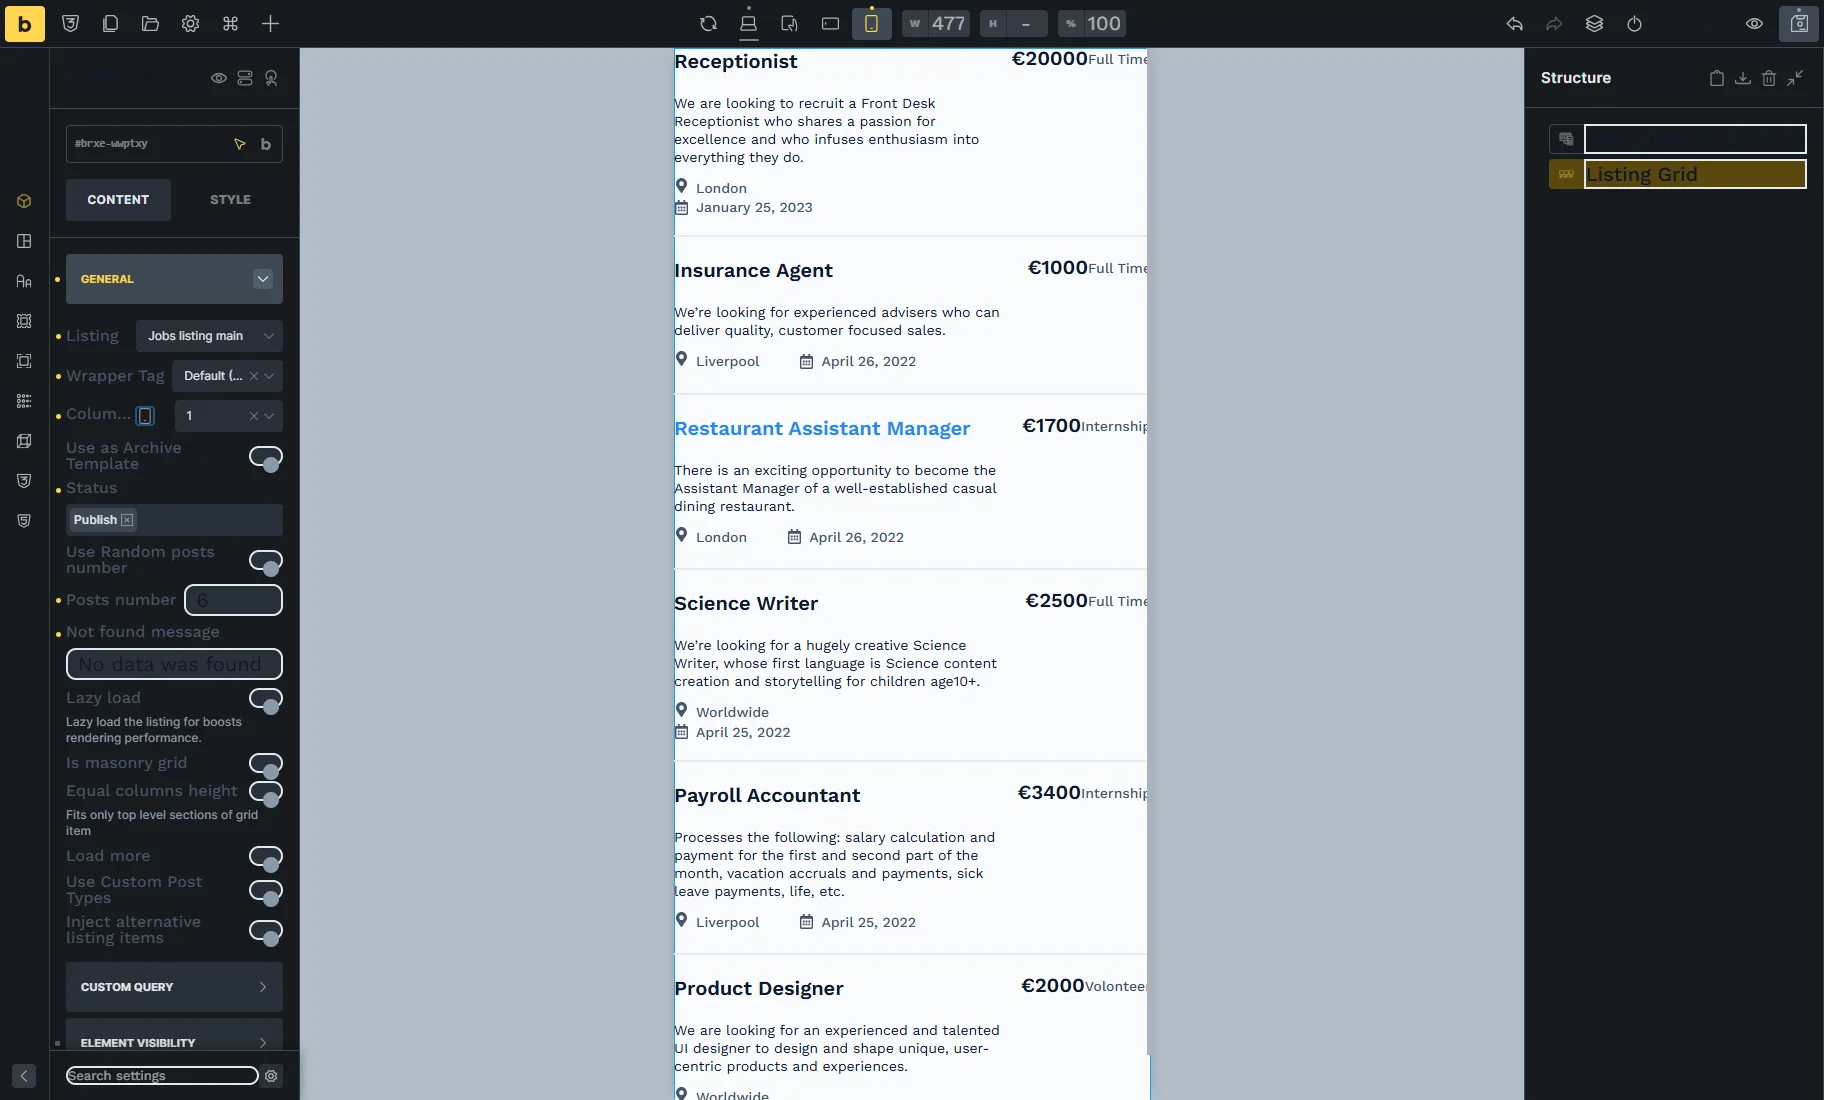
Then, you can place the Listing Grid widget. In its settings, choose the required Listing.

Other settings of the General tab can be altered according to your needs. For example, we change the Columns Number for different devices: “3” for desktop and “1” for mobile.
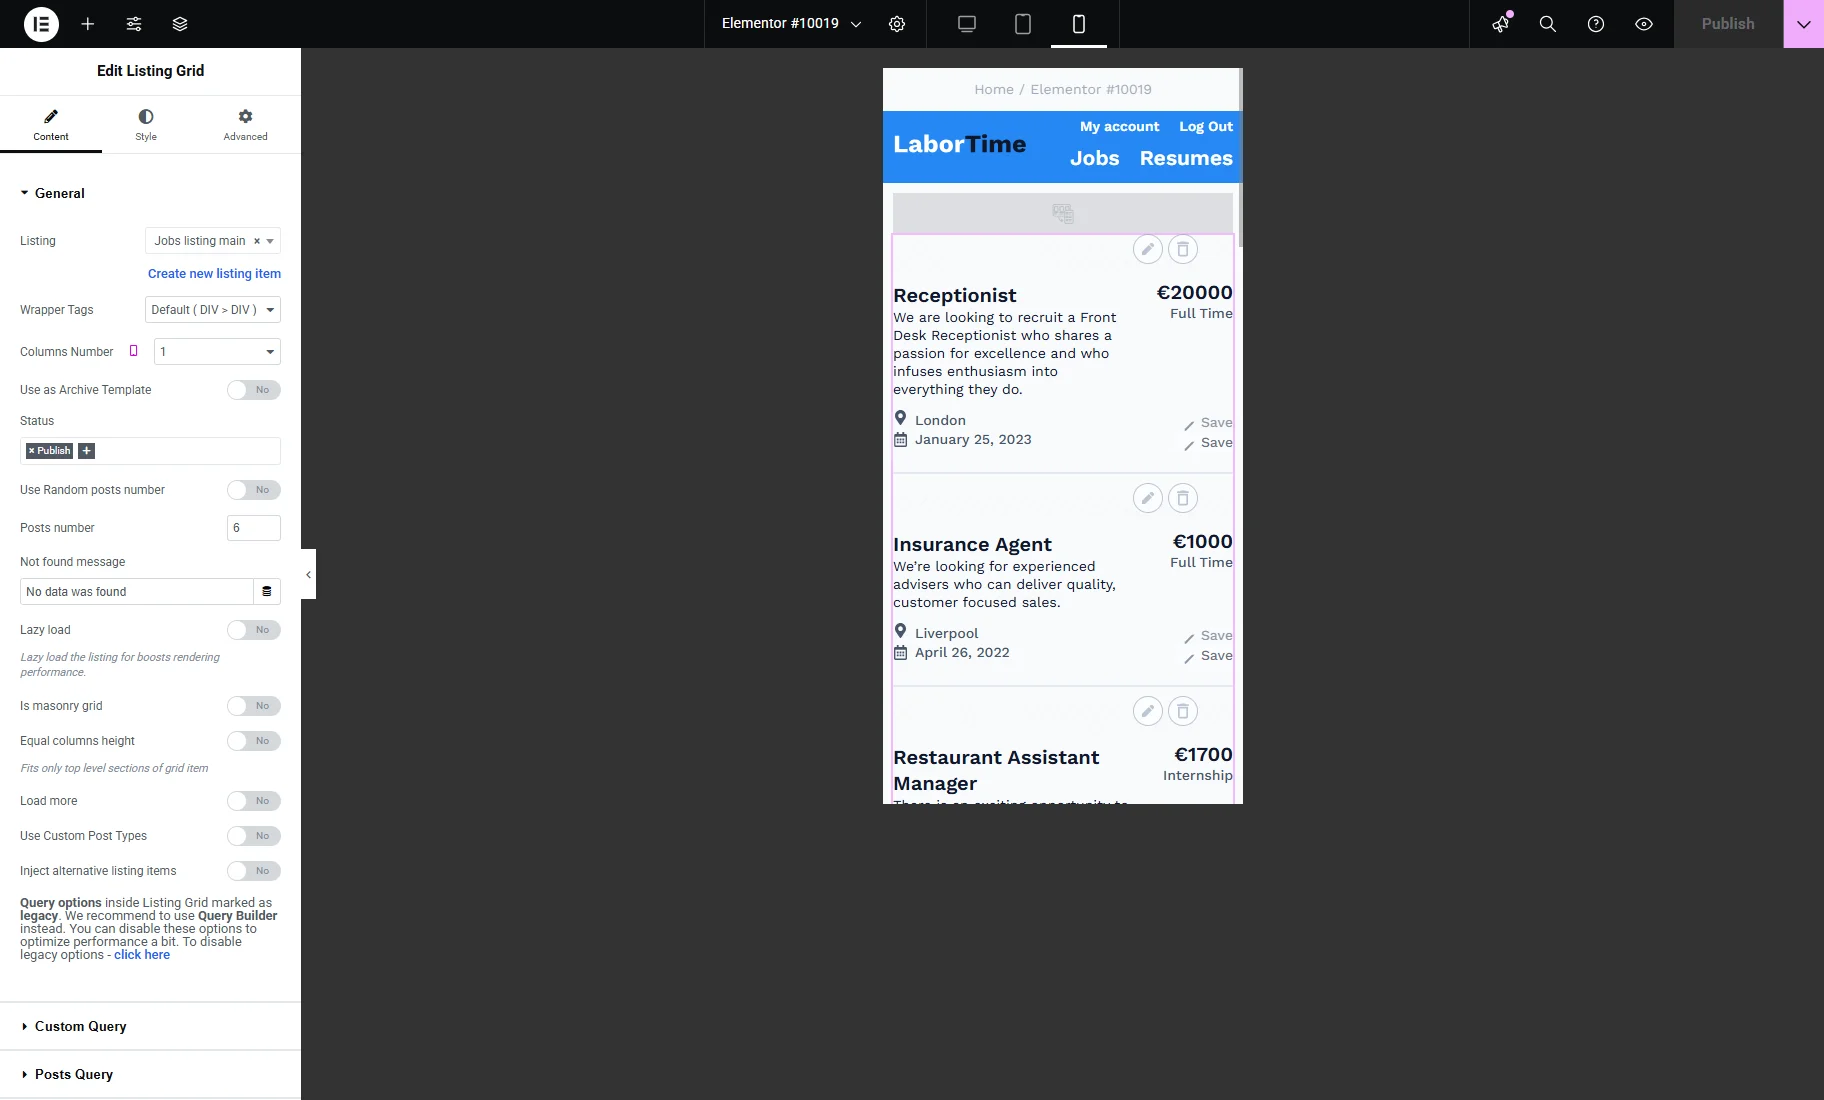
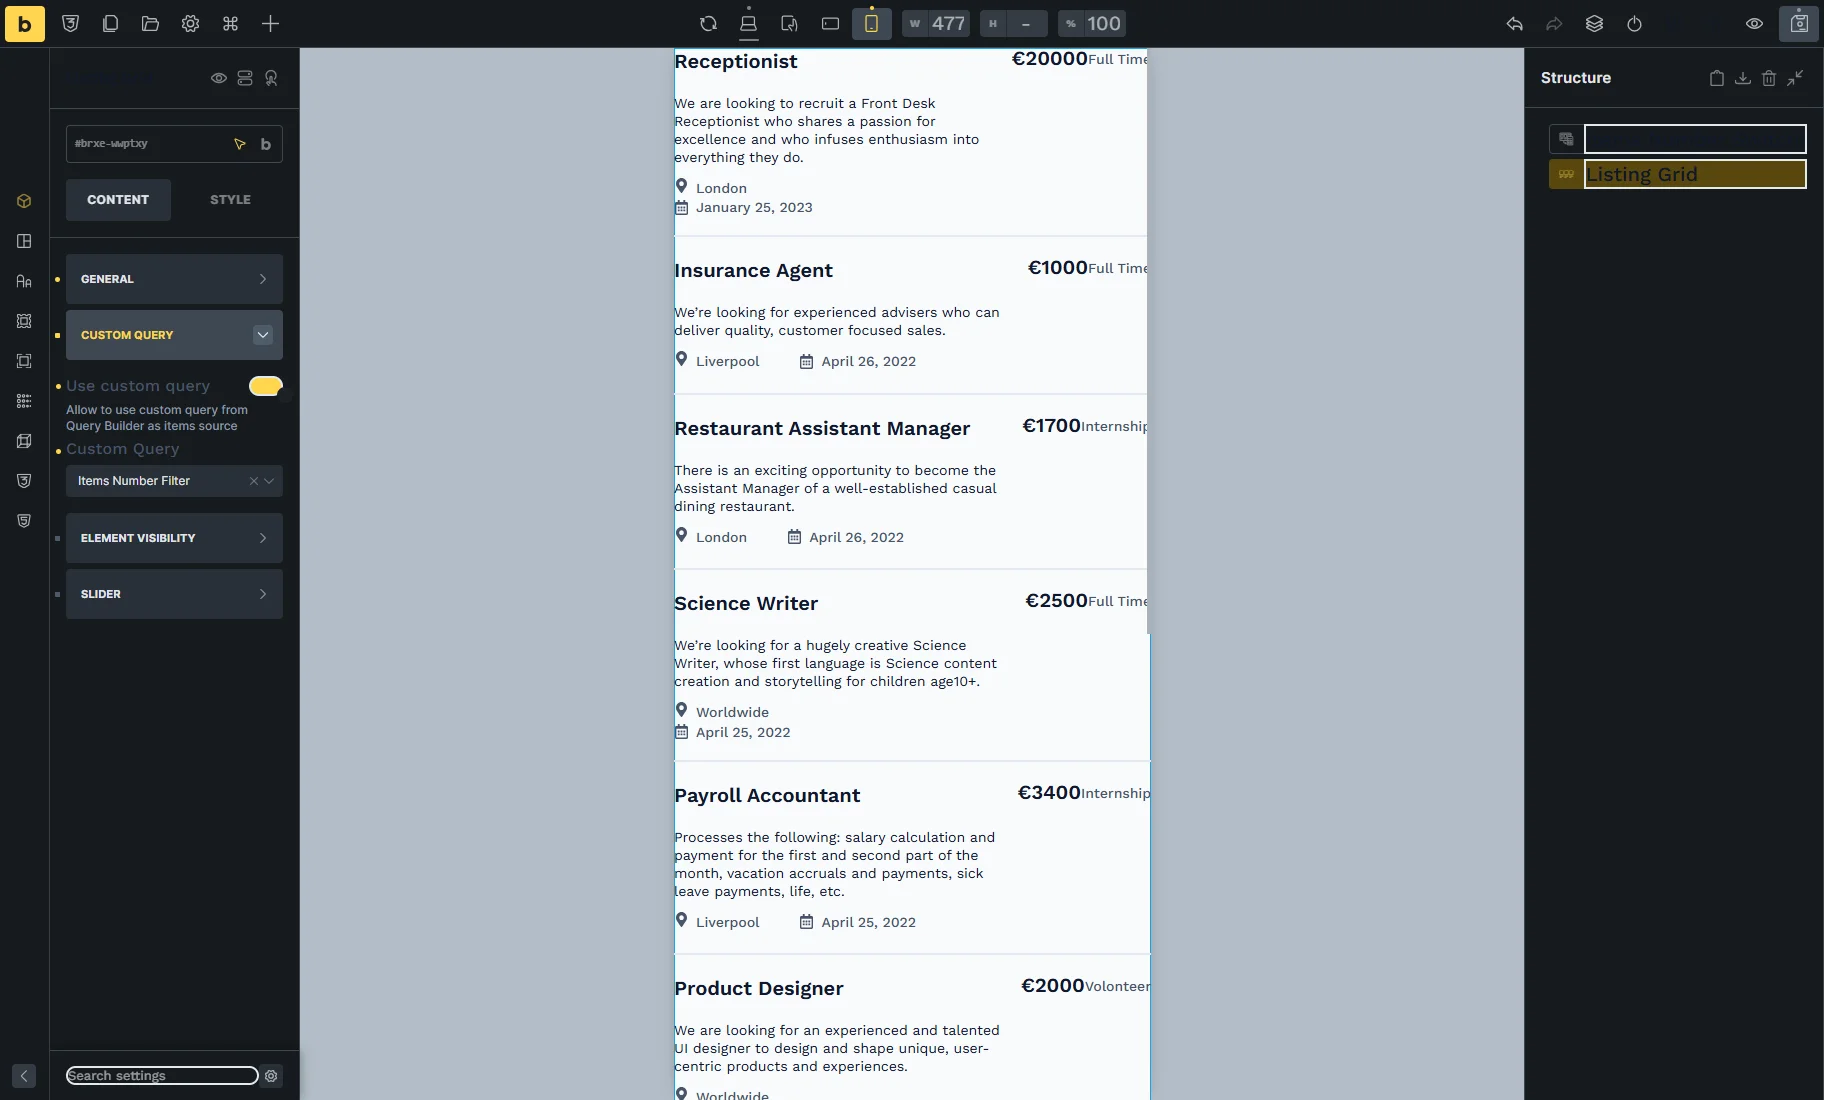
Next, unroll the Custom Query tab, enable the Use Custom Query toggle, and select the previously created Custom Query.

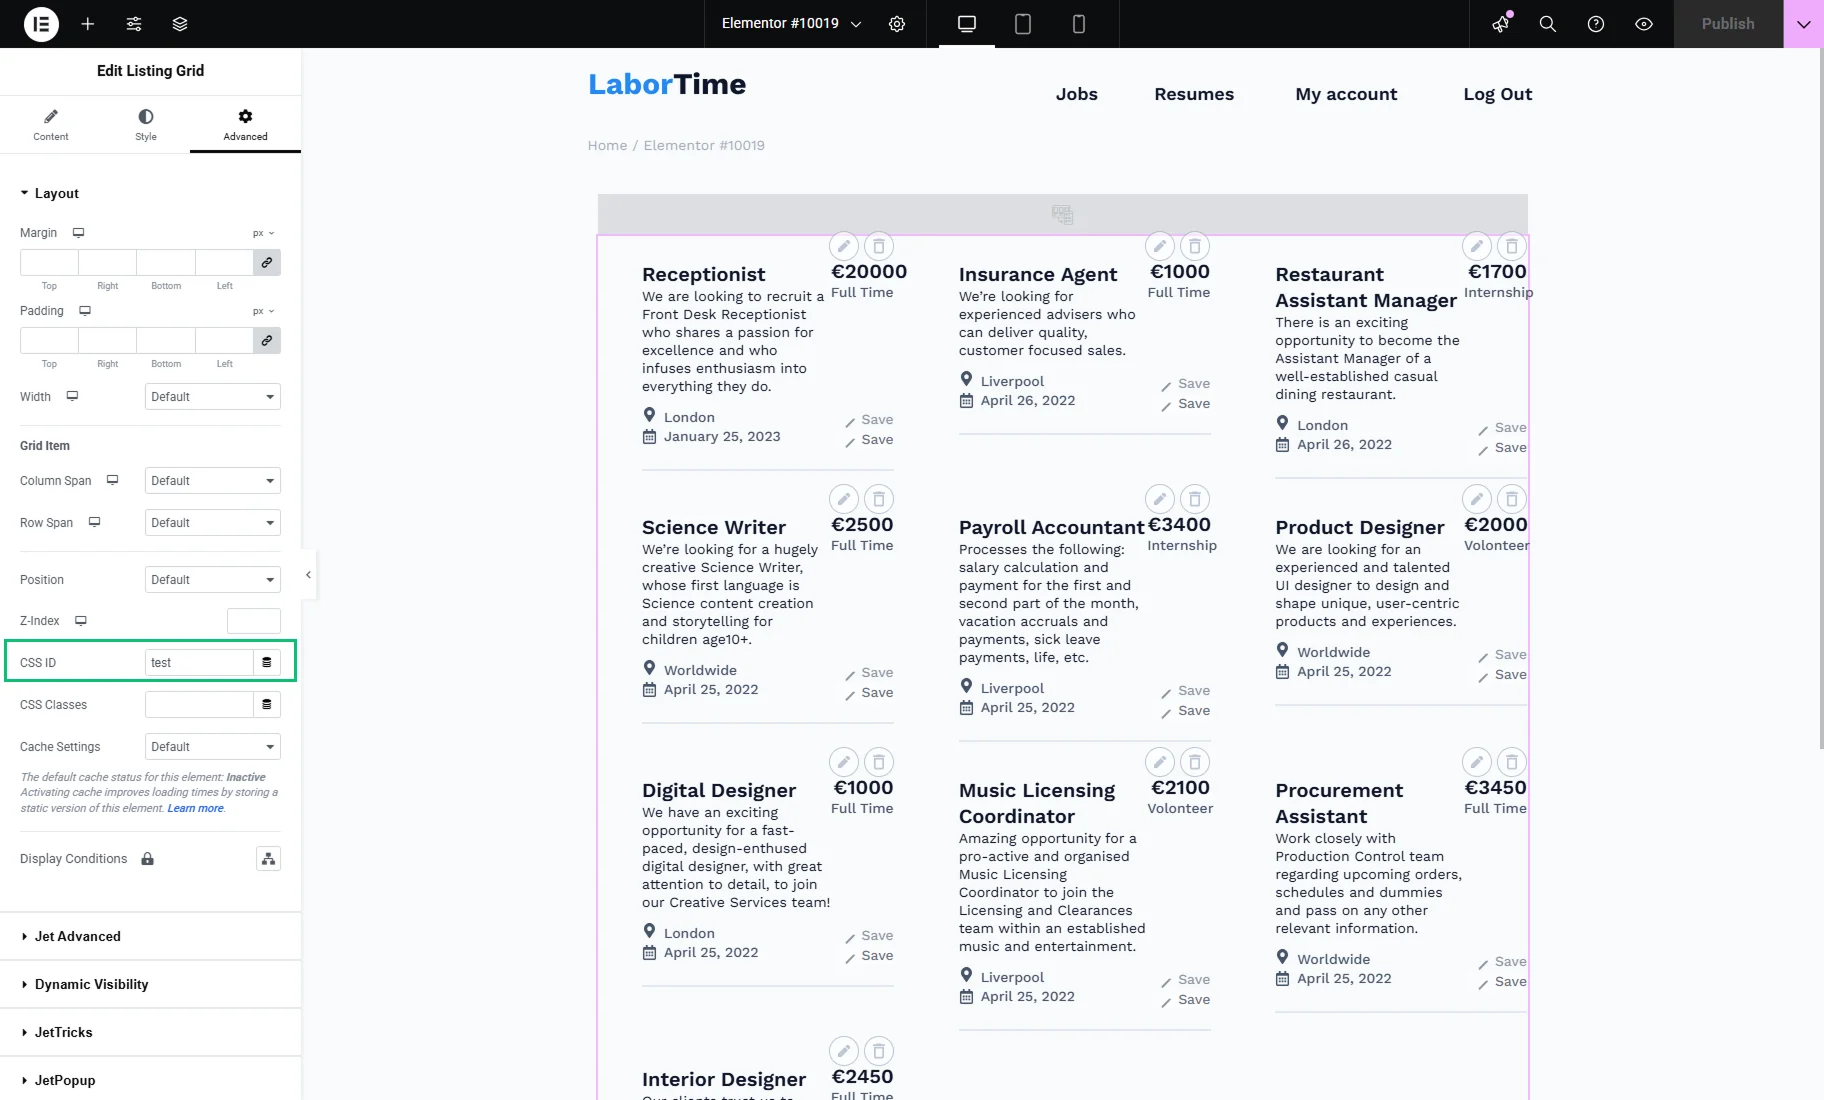
Proceed to the Advanced section and enter the Custom Query ID set in the query settings into the CSS ID field.
Settings in the WordPress block editor
Find and place the Items Number Switcher block and adjust its settings.
The repeater items enable you to control the number of items displayed based on the visitor’s screen width (breakpoint).
For example, we set “2” ITEMS NUMBER for the “767” BREAKPOINT (mobile), “3” for “1024” (tablet), and “6” for “1920” (desktop).
In the THIS FILTER FOR dropdown, select the “Listing Grid” option.
In the QUERY ID field, enter the Custom Query ID set in the query settings.

Next, place the Listing Grid block and select the required LISTING.
If needed, adjust other settings like COLUMNS NUMBER, COLUMNS NUMBER(TABLET), and COLUMNS NUMBER(MOBILE).

Then, unroll the Custom Query tab, enable the Use Custom Query toggle, and select the previously created CUSTOM QUERY.
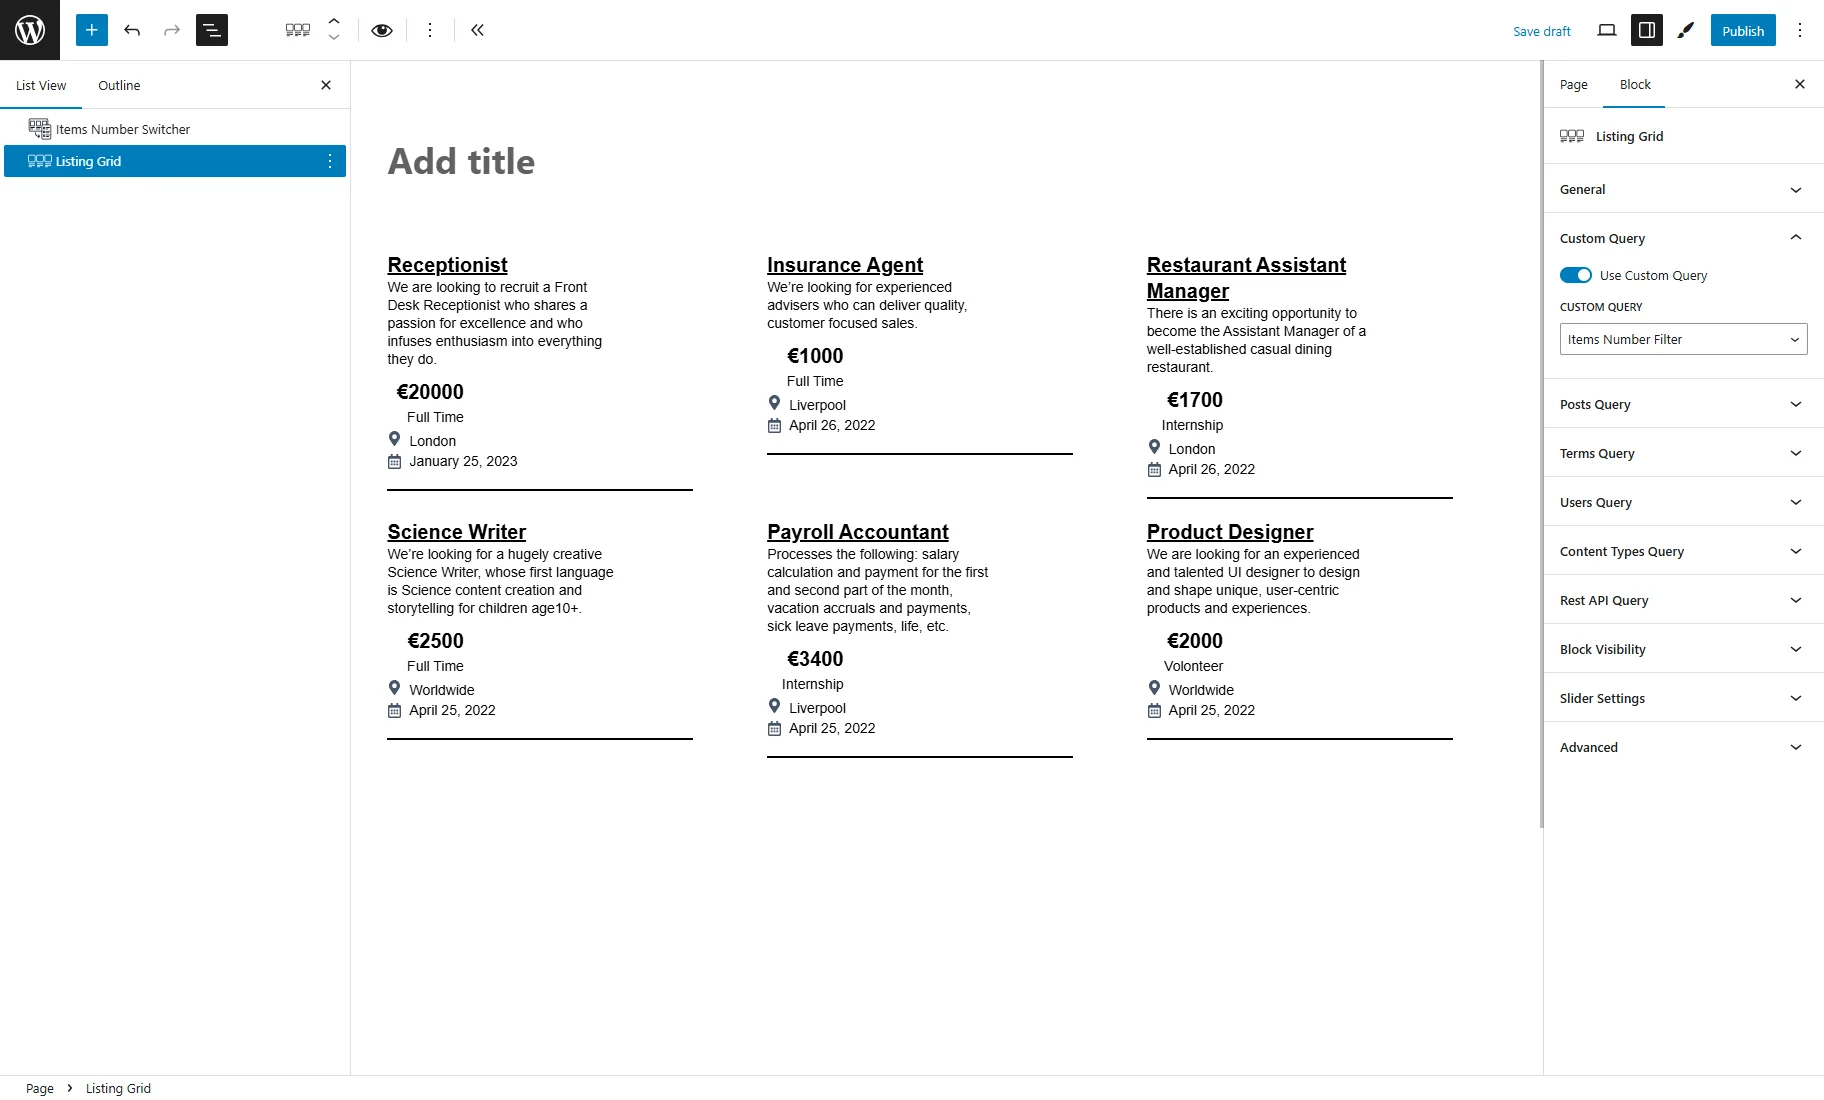
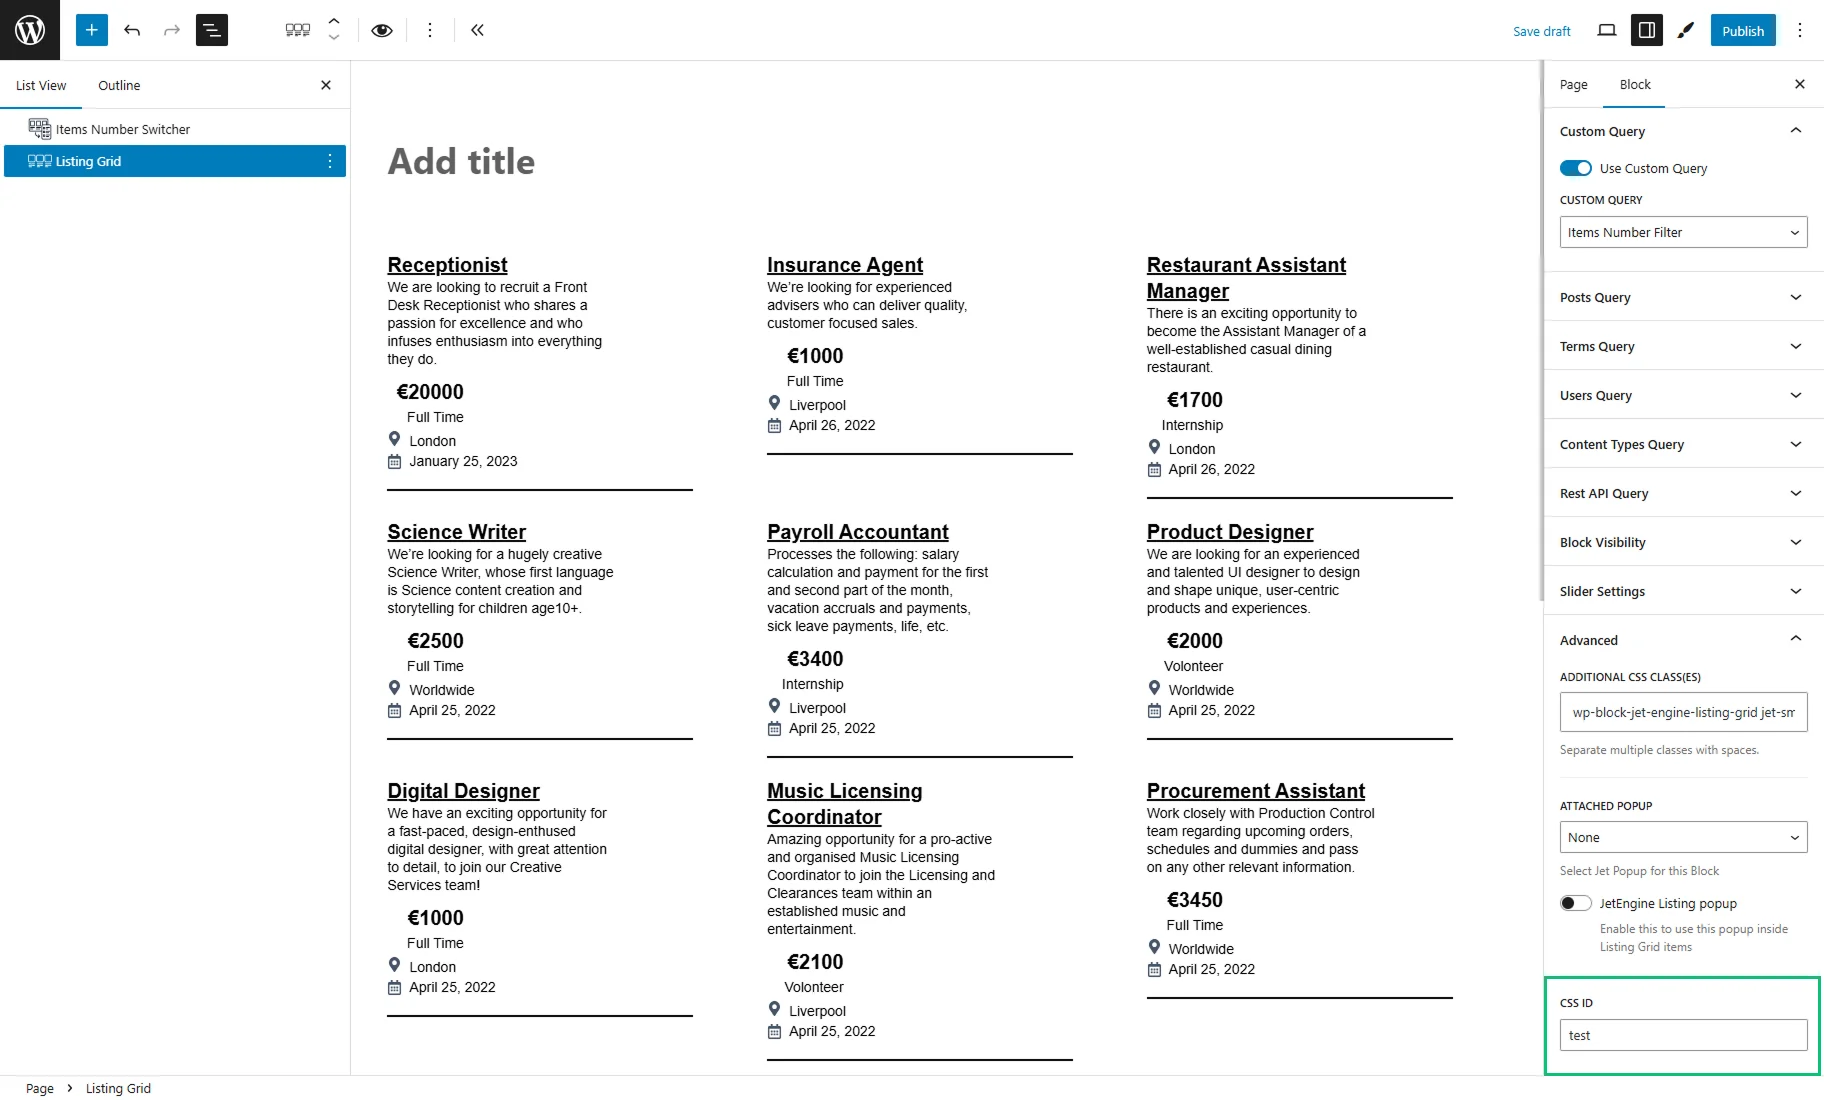
Next, proceed to the Advanced tab and enter the Custom Query ID set in the query settings into the CSS ID field.
Settings in Bricks
Proceed to a page or template where you want to display items in a Listing Grid. Find and place the Items Number Switcher element and adjust its settings:
- Posts number — here, you can customize how many posts will be displayed for desktop, tablet, and mobile devices;

Switch between the device icons to set the number of posts for each type.

- This filter for — for this case, select the “JetEngine” option;
- Query ID — enter the Custom Query ID set in the query settings;
- Additional Providers Enabled — a toggle to be enabled if several elements should be filtered.

Then, you can place the Listing Grid element. In its settings, choose the required Listing.
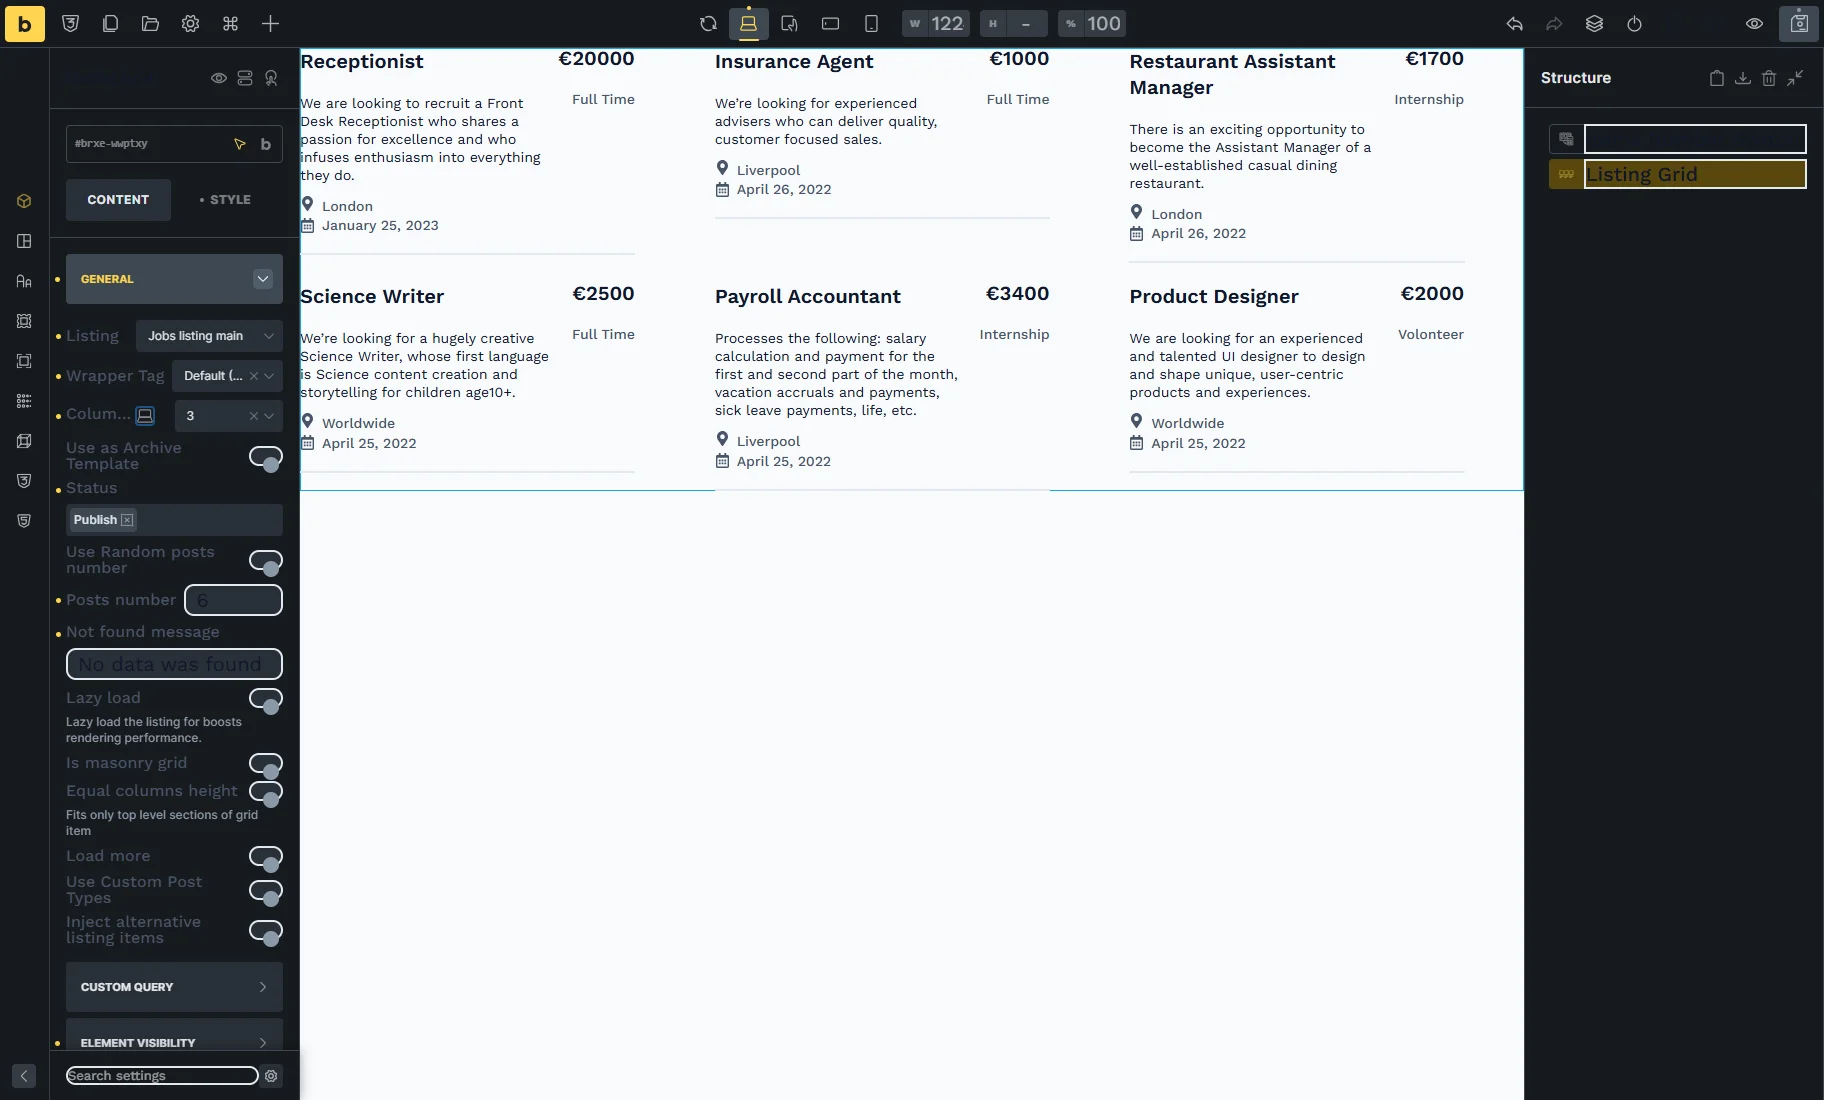
Other settings of the General tab can be altered according to your needs. For example, we change the Columns Number for different devices: “3” for desktop and “1” for mobile.
Next, unroll the CUSTOM QUERY tab, enable the Use Custom Query toggle, and select the previously created Custom Query.
Then, open the STYLE section and unroll the CSS tab. In the CSS ID field, enter the Custom Query ID set in the query settings.

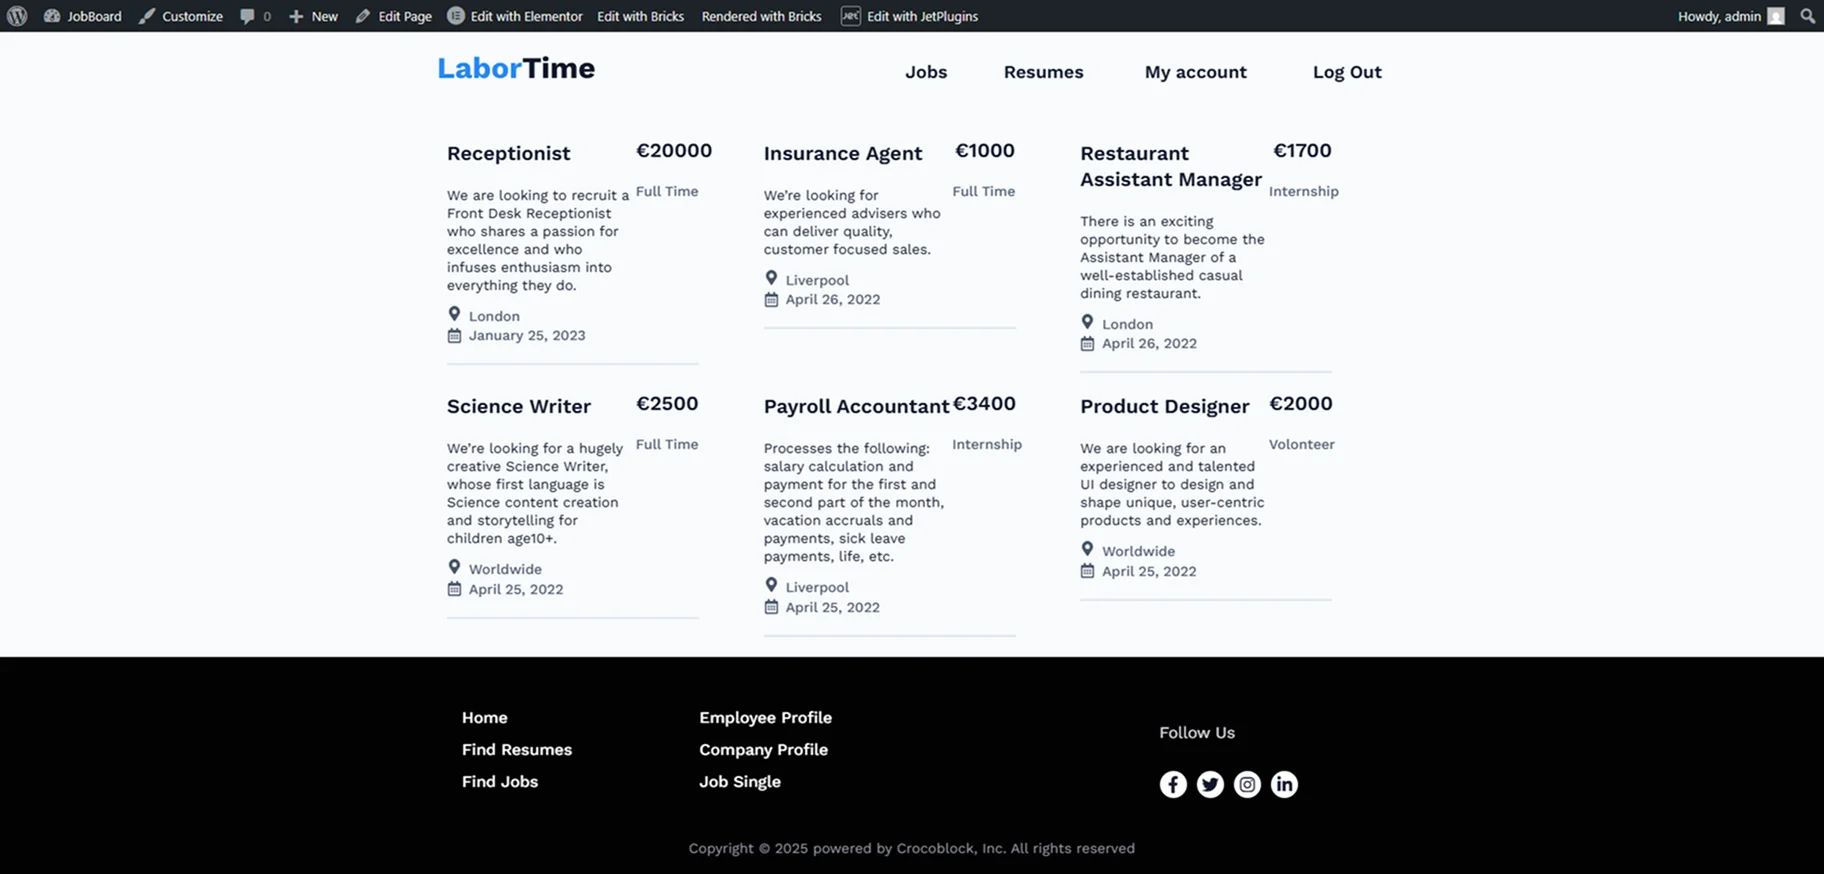
Check the Result
Finally, the results should be checked on the front end. In the desktop view, the Listing Grid displays six posts.
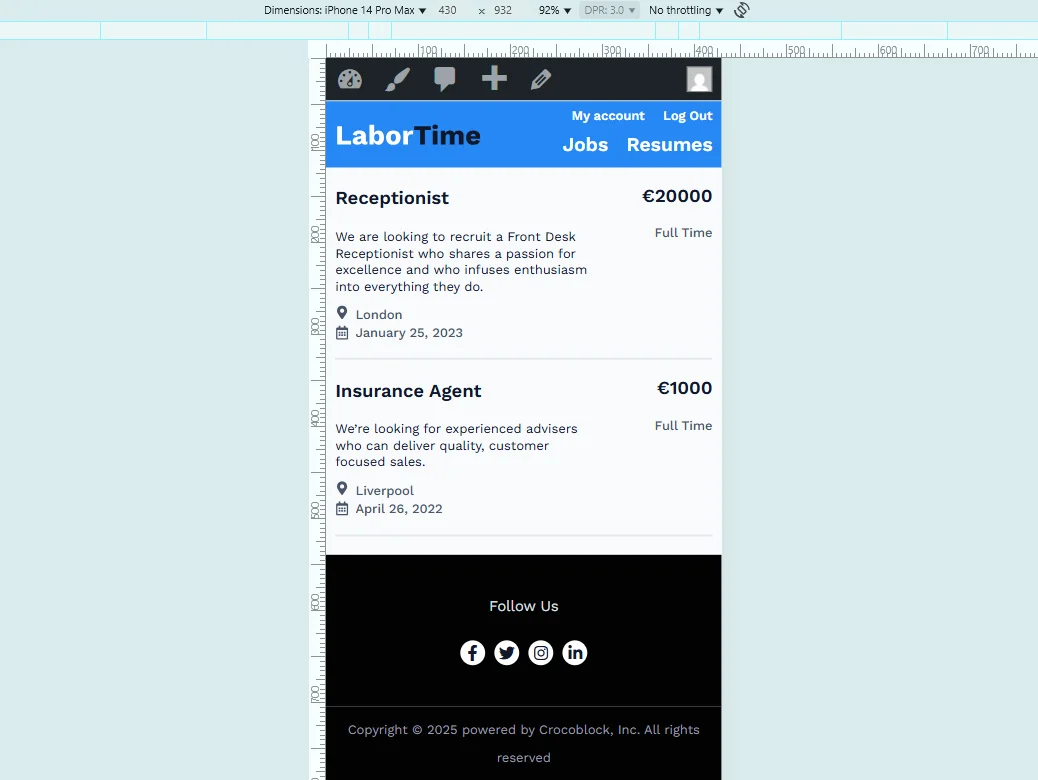
To check the mobile and tablet view, you can open the DevTools page (in Chrome, use the keyboard shortcut “Ctrl+Shift+I” or “Cmd+Opt+I” on Mac). Select the required device from the Dimensions dropdown or adjust the width as needed.
In our example, two posts are shown in the mobile view. Additionally, the number of columns has been changed.
That’s all. Now you know how to set a different number of items in a JetEngine Listing Grid for each screen size using the Items Number Switcher filter in Elementor, Gutenberg, or Bricks on your WordPress site.