How to Apply JetSmartFilters to Your Booking Website
Learn how to apply the filters of the JetSmartFilters plugin to your booking website. Use JetBooking and JetEngine dynamic tags to calculate the price for the booking period.
Before you start, check the tutorial requirements:
- Elementor (Free version), Block editor (Gutenberg), or Bricks
- JetSmartFilters plugin installed and activated
- JetBooking plugin installed and activated
Create filters using the JetSmartFilters plugin to filter the content on your website. It’s a useful feature for your booking website that helps customers choose their preferred room, along with the booking date and the number of people, etc.
For example, we will use the “Date Range” filter, which allows users to select a specific date and displays available apartments in the filter results.
Creating a New Filter
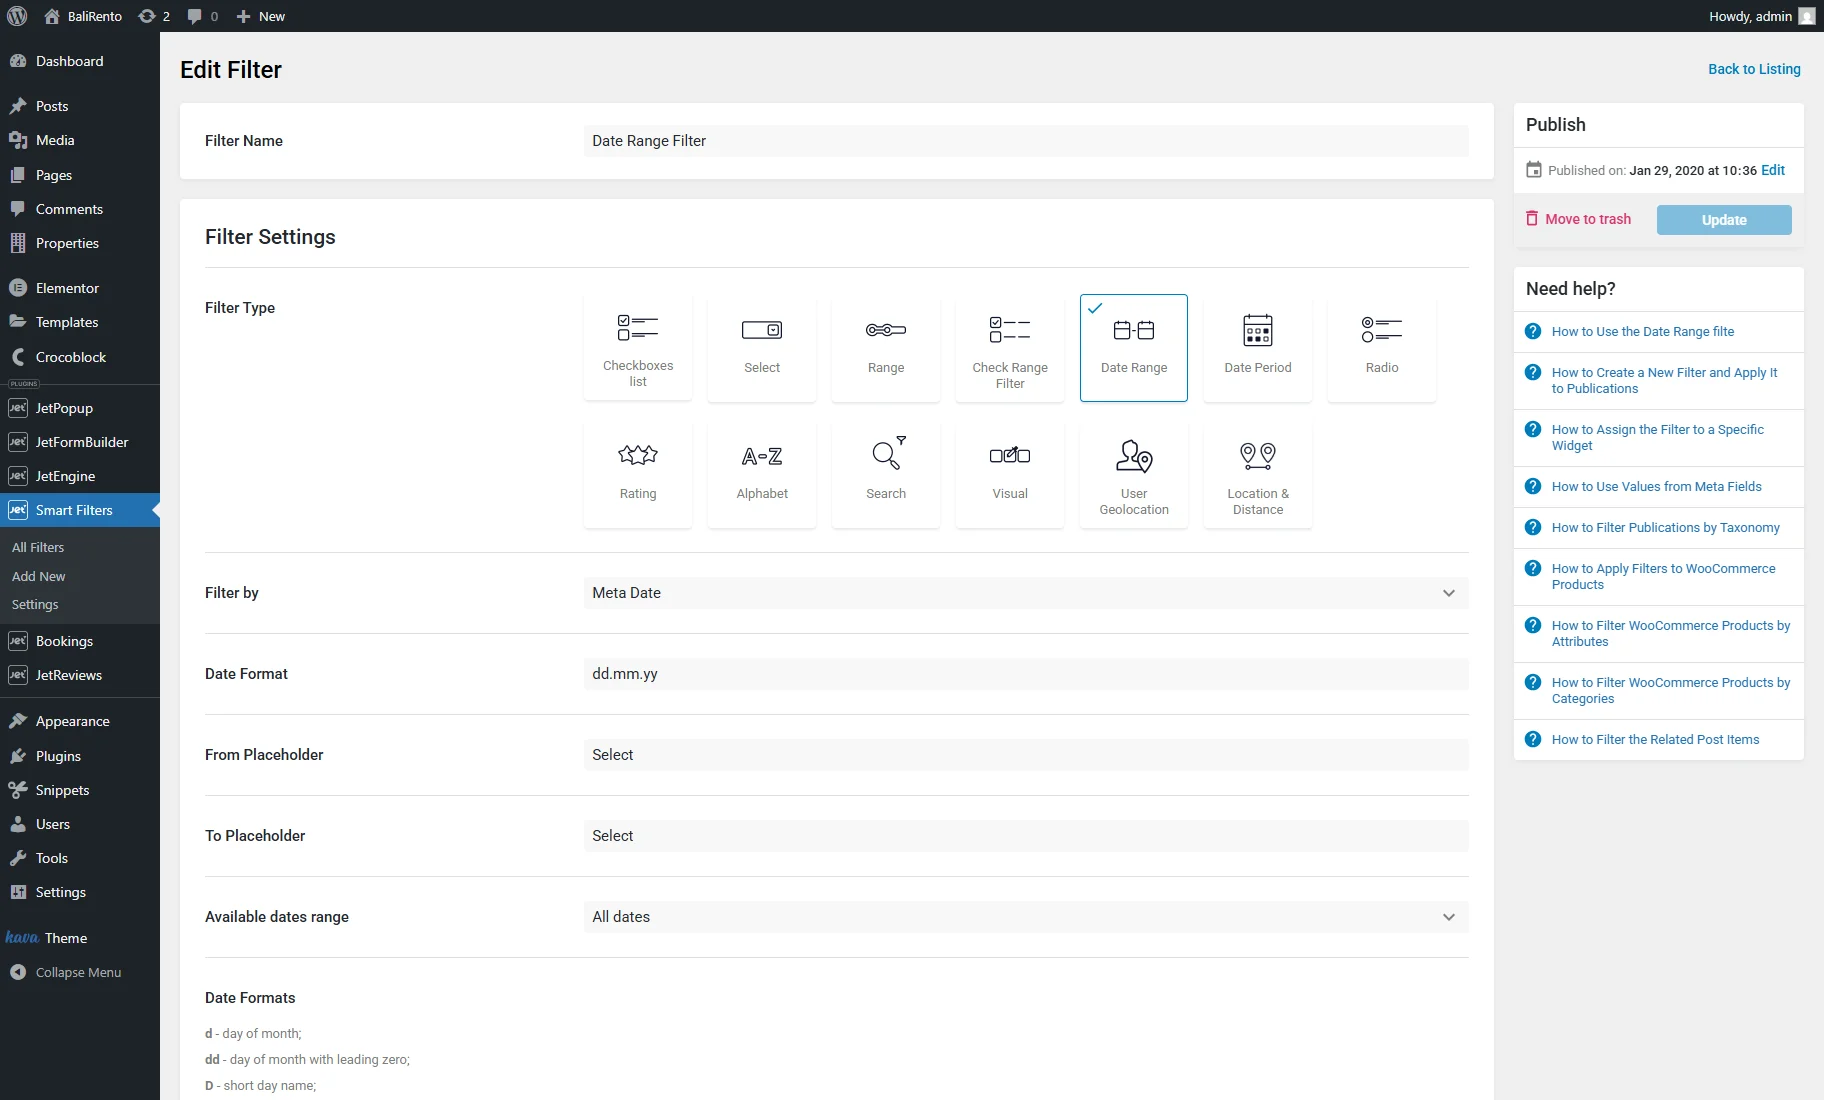
Proceed to the WordPress Dashboard > Smart Filters > Add New tab.
Enter the Filter Name and select the “Date Range” Filter Type.
Then, adjust other settings like that:
- Filter by — from this dropdown, select the “Meta Date” option;
- Date Format — set as preferred or leave empty (e.g., “D, M d”);
- From Placeholder and To Placeholder — set as preferred or leave empty (in our case, the “Select date” text;
- Available dates range — select the needed option here. More details can be found in the How to Filter Posts by Custom Date Range tutorial;
- Query Variable — press the “database” button near this field and select the “JetBooking: checkin_checkout – filter available instances by checkin/checkout dates (allowed only for Date Range filter)” option to input the “checkin_checkout” key.
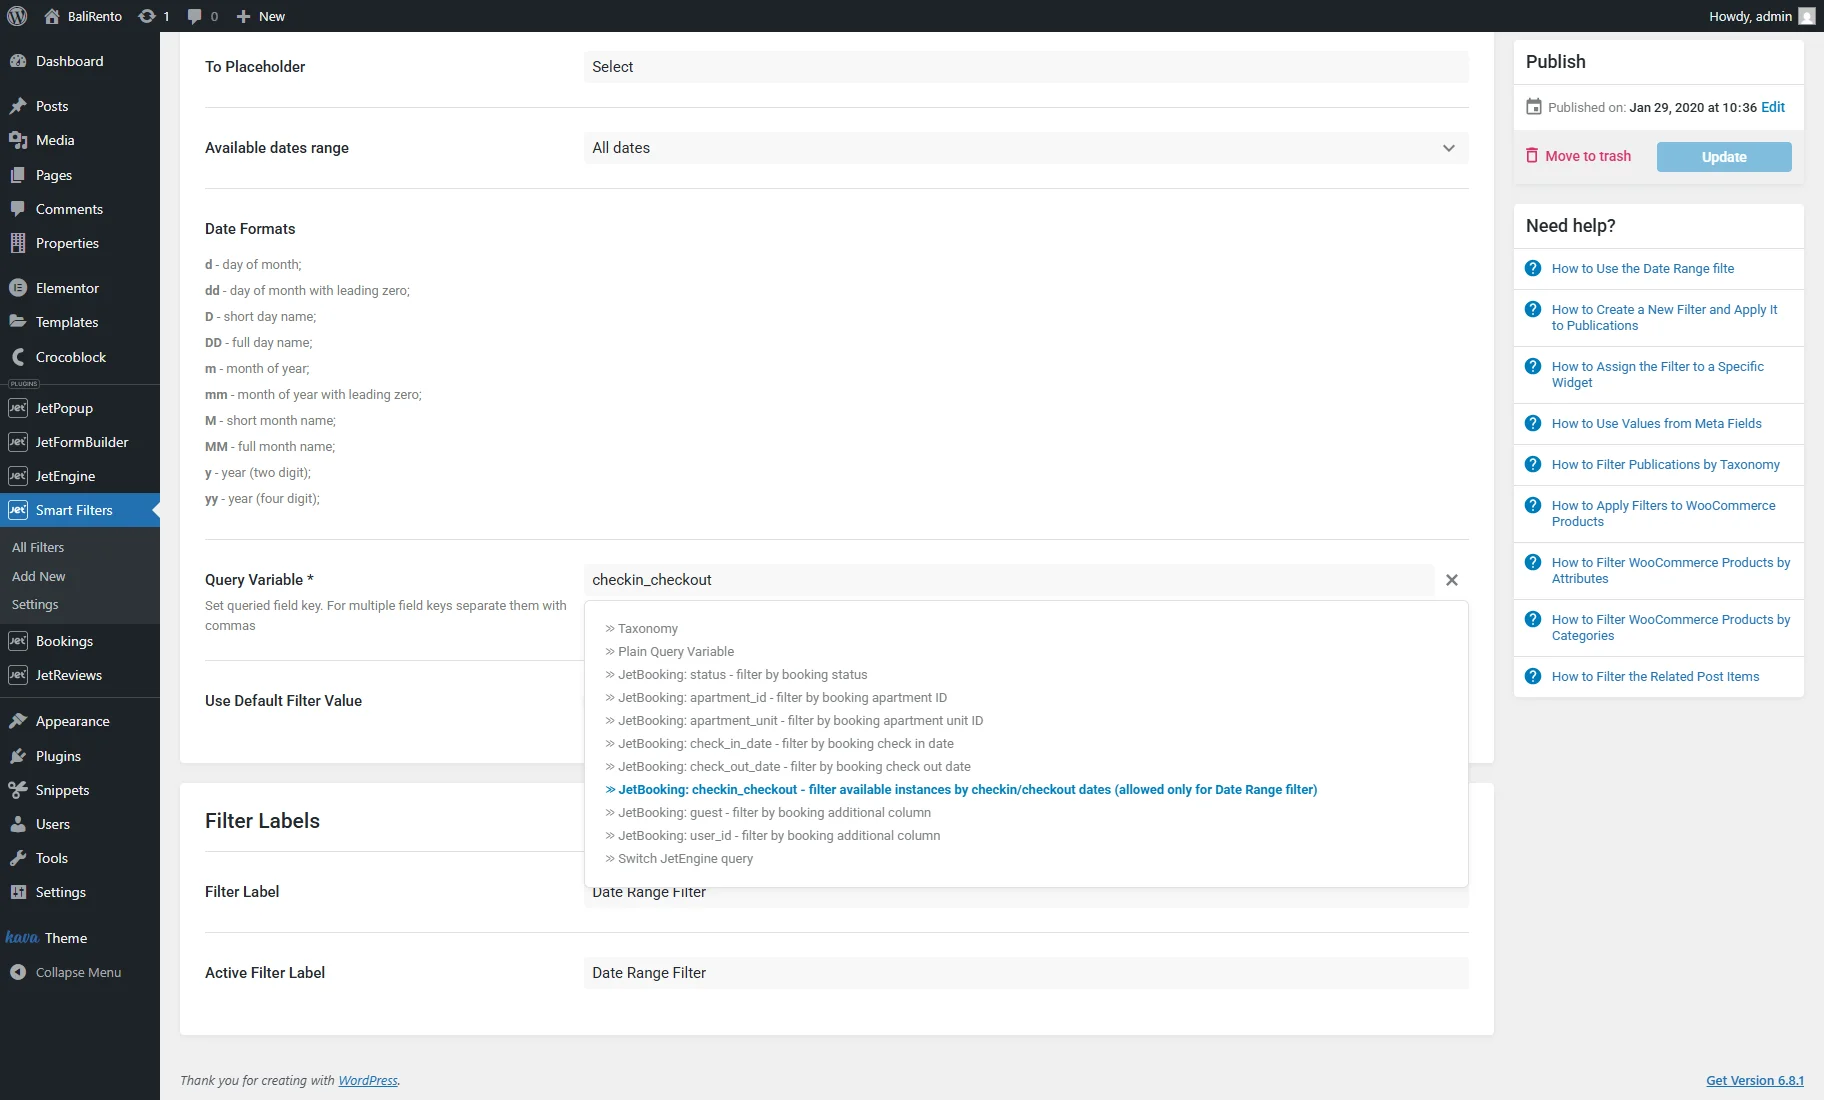
After modifying the settings, press the “Update” button.
Editing the Archive Page
Edit the Archive page, where the list of booking properties is located.
For our case, we will use the page created in Elementor with the JetThemeCore plugin. For more details, see the How to Create an Archive for a Custom Post Type tutorial.
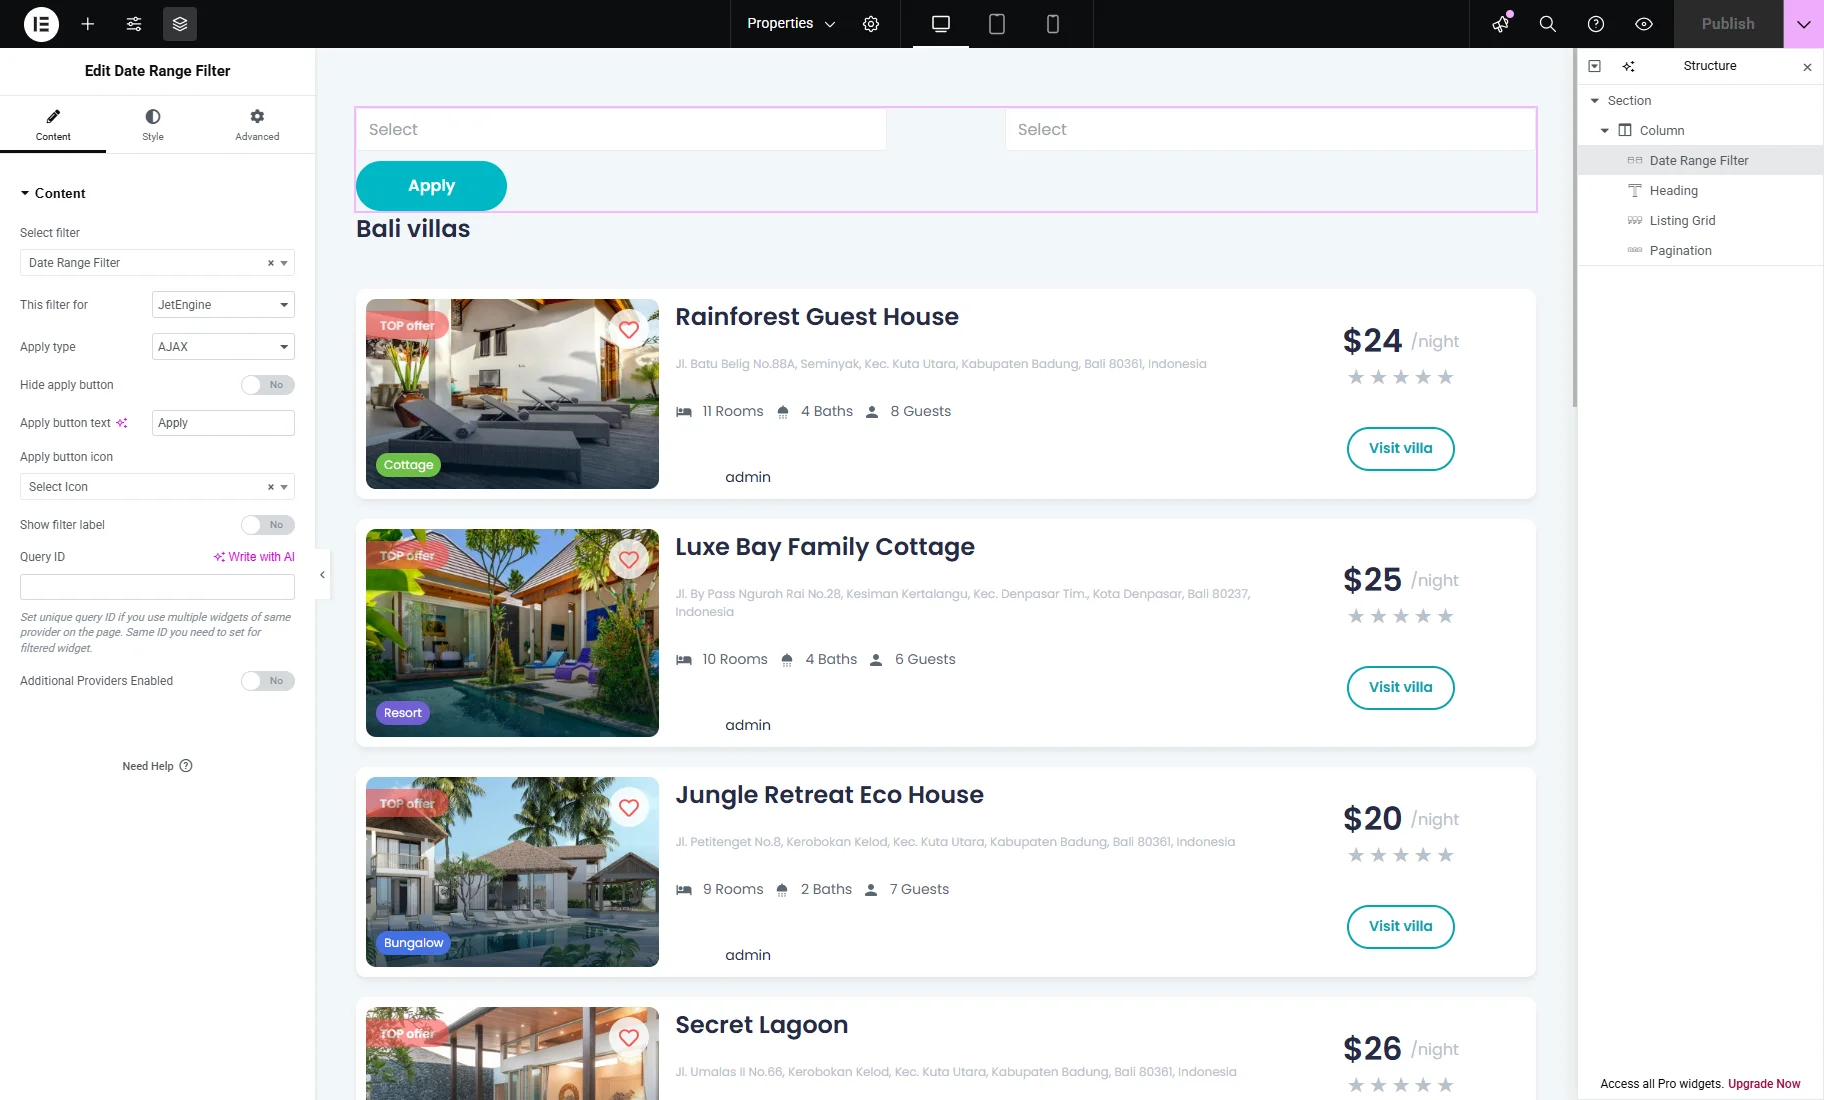
On the Archive page, we displayed a list of properties using the Listing Grid from the JetEngine plugin.
Place the Date Range Filter on the Archive page, select the recently created filter from the Select filter dropdown, and pick the filter provider from the This filter for dropdown (“JetEngine” in our case).
Then, the Archive page settings can be saved.
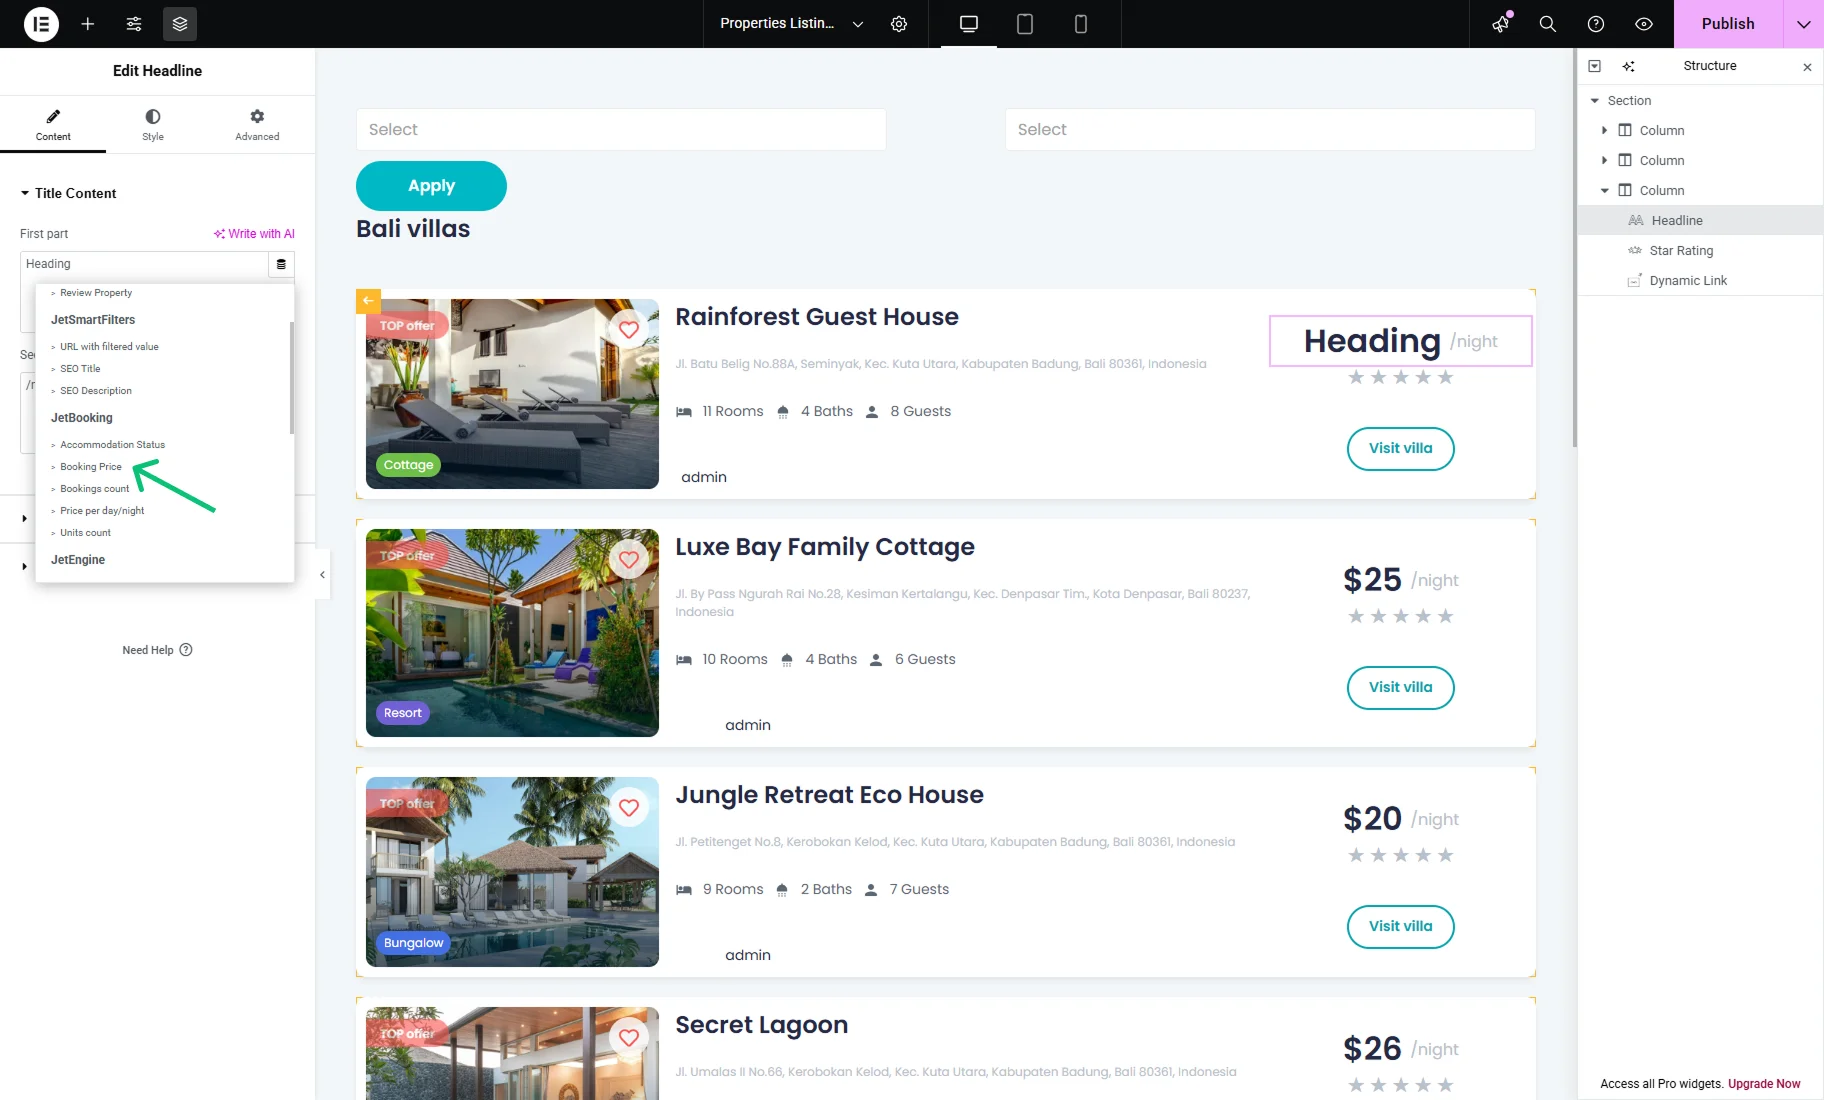
With the Date Range Filter, the “Booking Price” JetBooking Dynamic Tag can be used, which will calculate the apartment price for the date period selected in the filter.
To apply it in the Listing Grid, we hover over the first listing item and press the “pencil” icon.
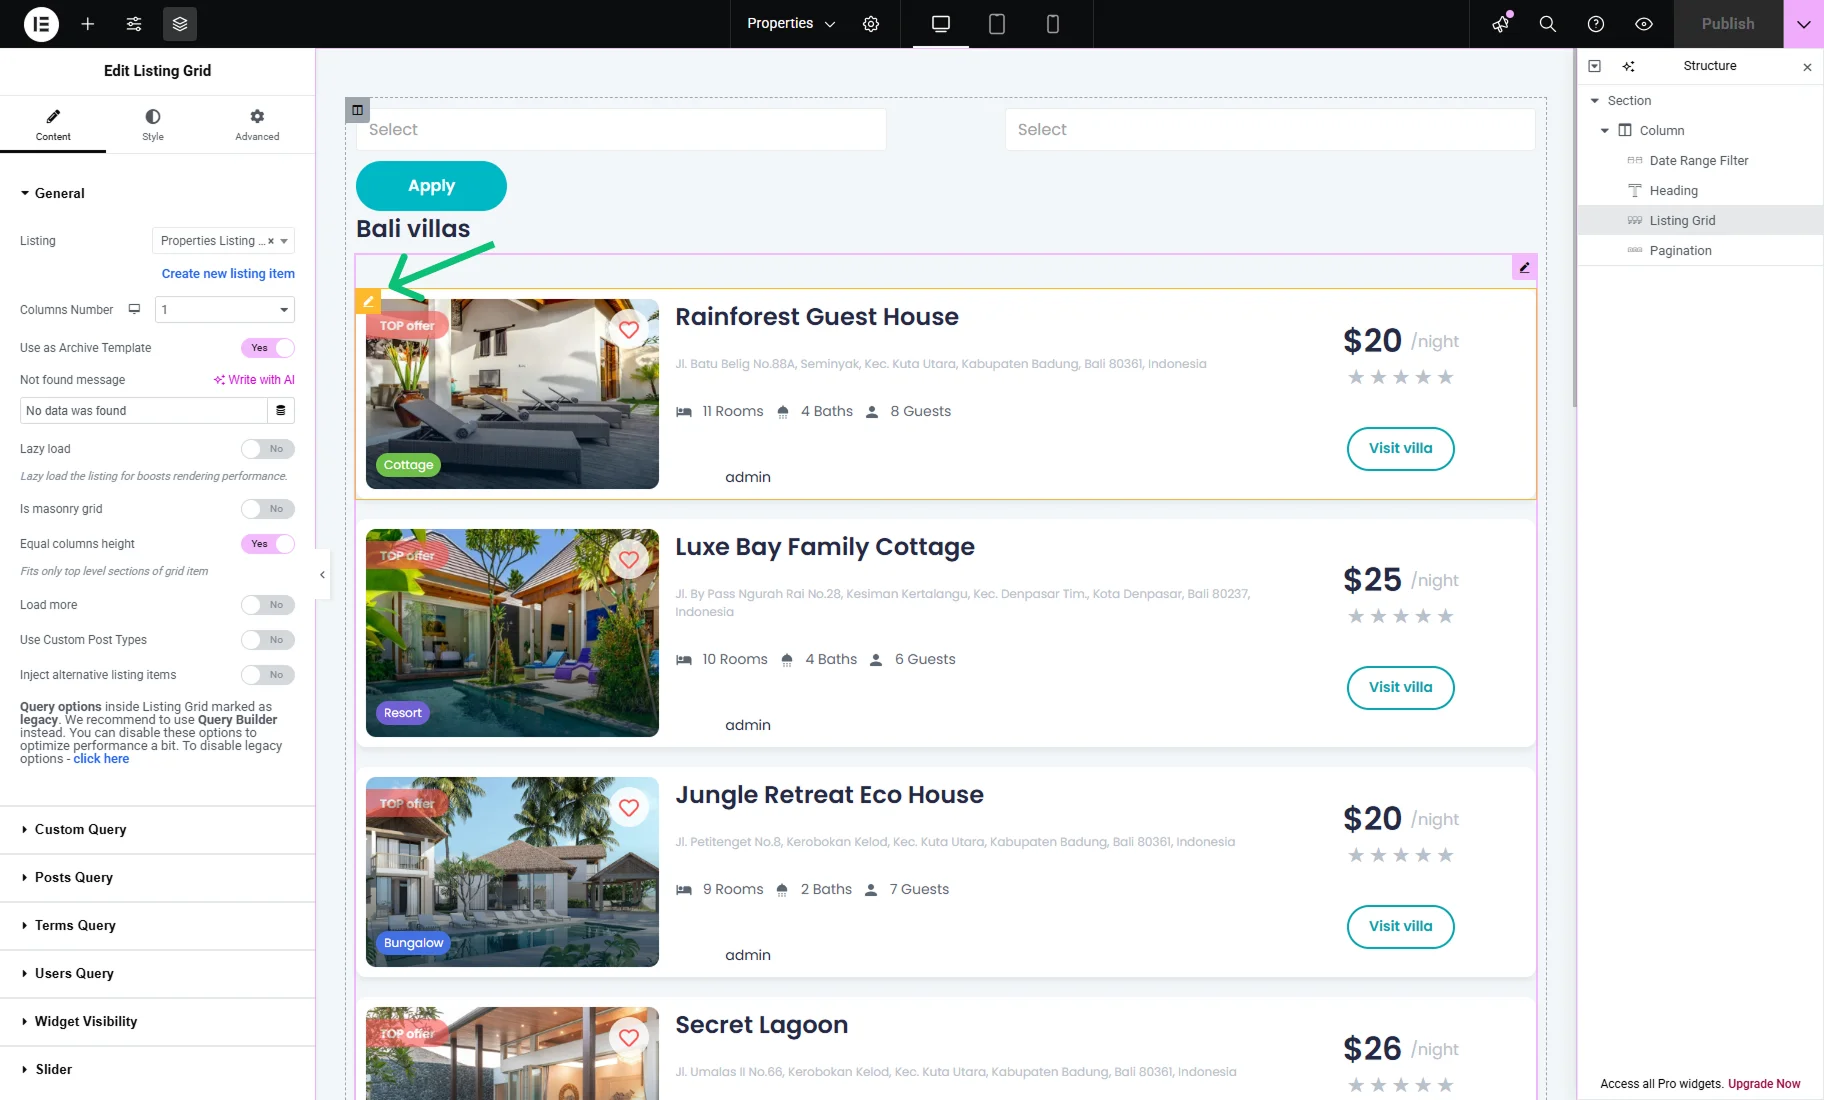
Now, we can edit the Listing Item template. Use a widget or block here that supports dynamic tags (e.g., Headline widget from JetElements or Heading).
Press the “database” icon and select the “Booking Price” option in the JetBooking section from the dropdown menu.
After that, you can modify the settings in the pop-up according to your needs. We retain the default configurations and press the “Publish” button to save the Listing Item adjustments.

Using the Filter on the Frontend
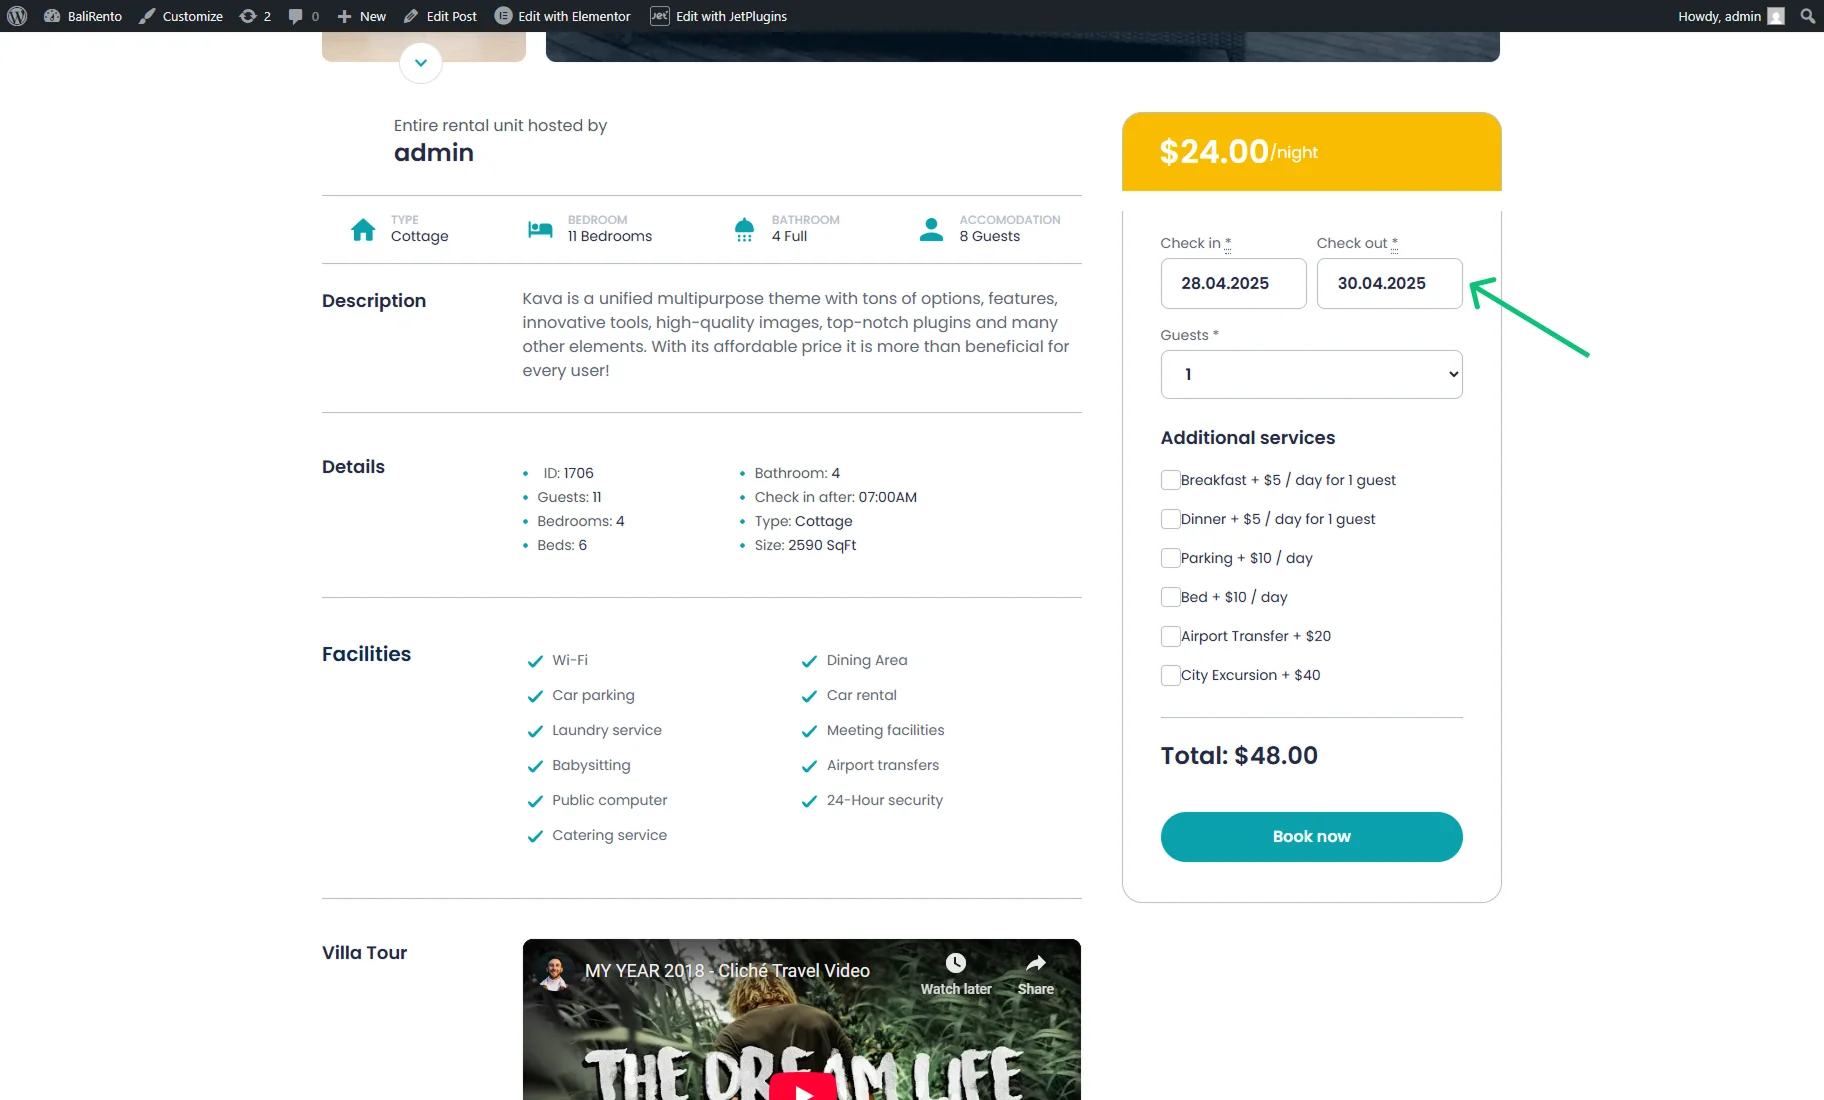
Now let’s check the frontend. At first, book a property for a specific date. It can be accomplished from the property’s Single page via the booking form or from the WordPress Dashboard > Bookings > Bookings tab.
For example, we book the “Rainforest Guest House” for the dates 28-04-2025 to 30-04-2025.
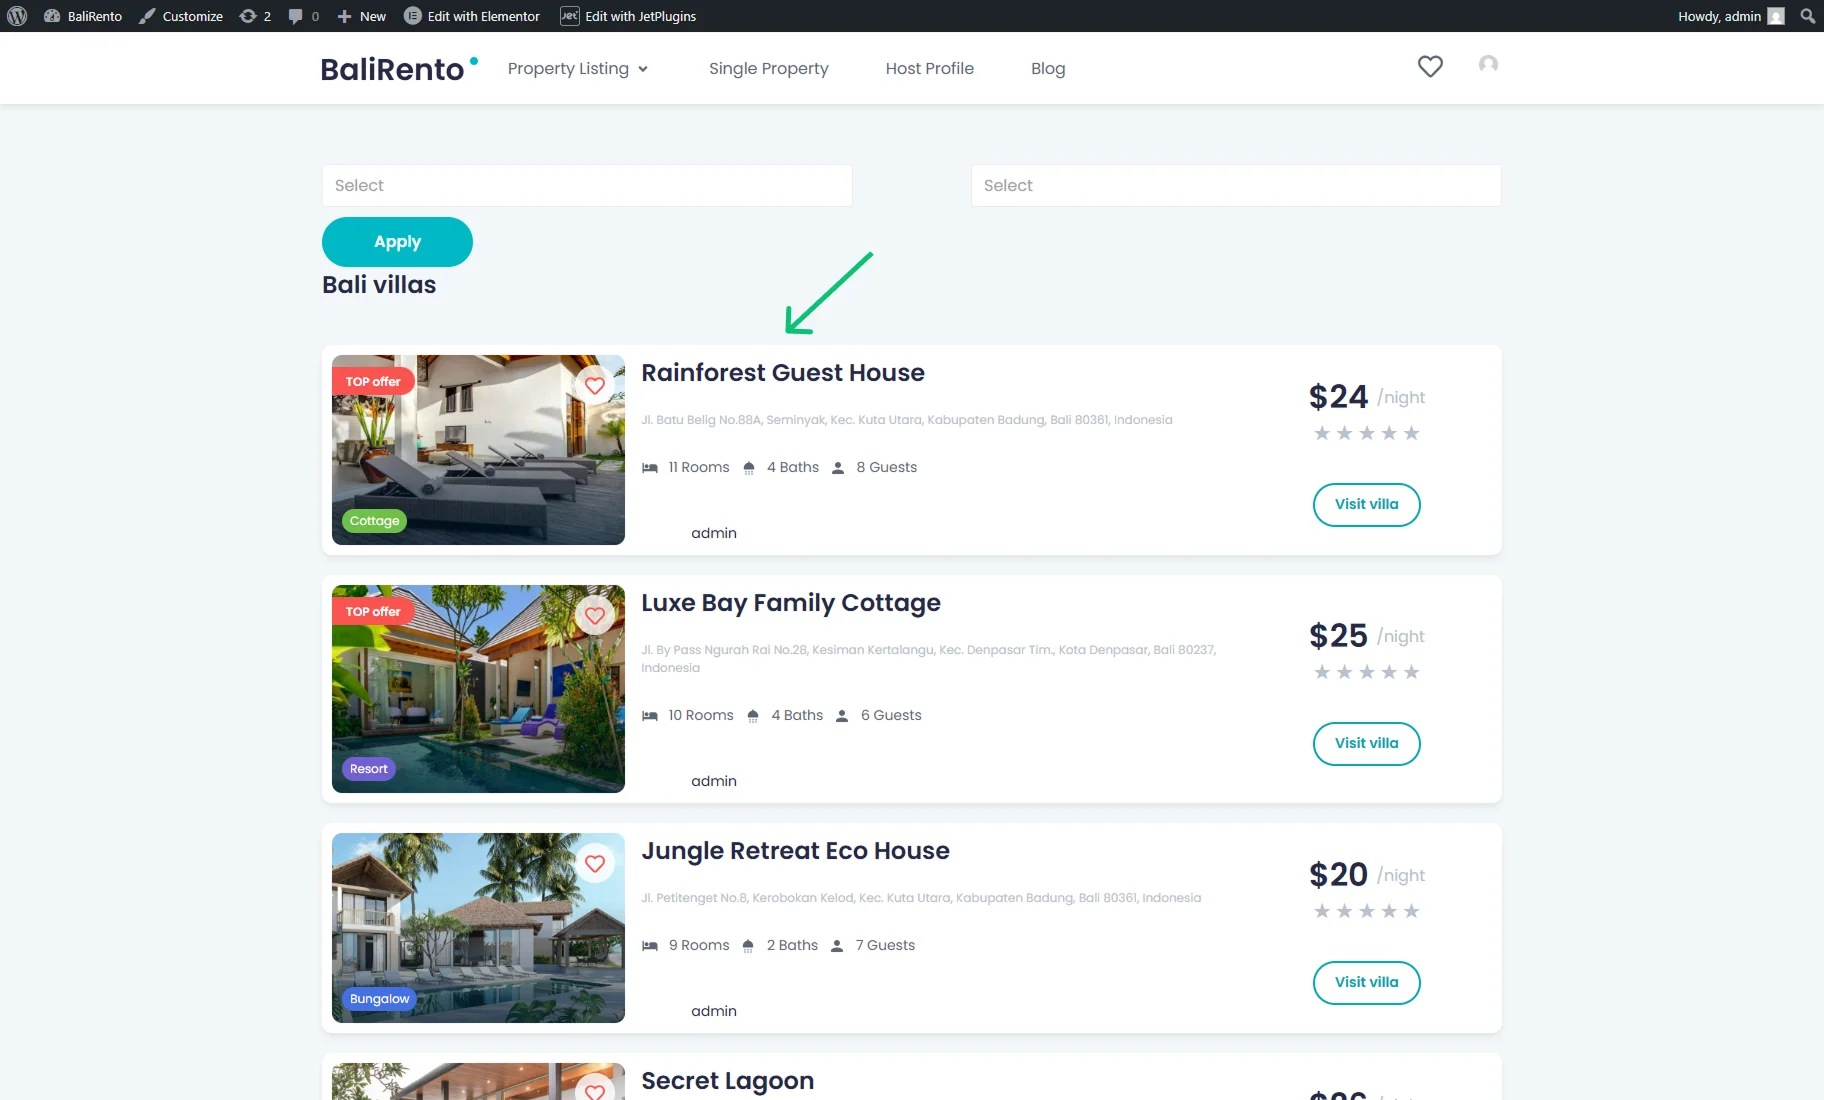
Then, we proceed to the Archive page. For now, the “Rainforest Guest House” is listed.
In the “Date Range” filter, we pick the dates 26-04-2025 to 29-04-2025, and press the “Apply” button. The booked property is not available for this date period, so it is hidden from the list. Also, the booking price of other properties is multiplied by the number of nights we set in the filter.
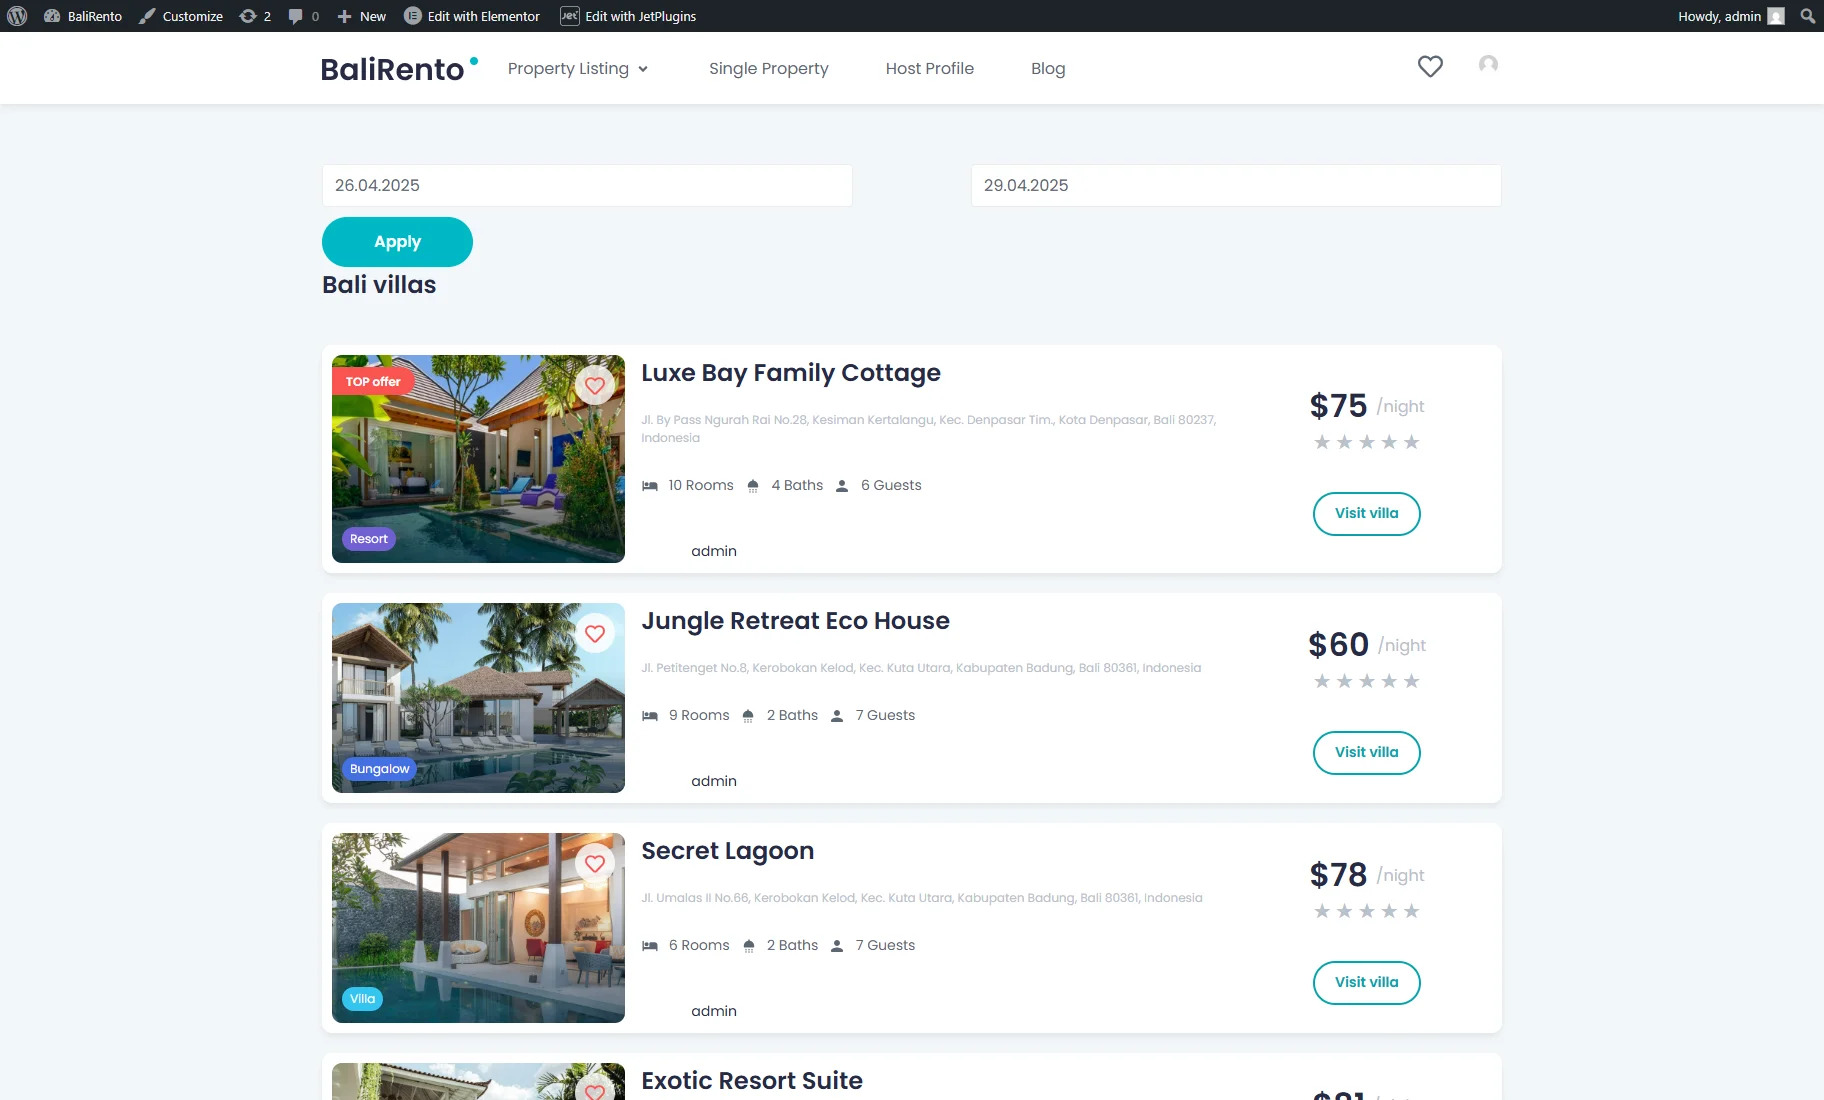
That’s all. Now you know how to apply filters from the JetSmartFilters plugin to your booking website.