How to Filter Posts by the Posted and Last Modified Date
The tutorial explains how to manage the Date Period Filter or Date Range Filter settings of the JetSmartFilter plugin to display posts with the date of publishing or modification within the selected range.
Before you start, check the tutorial requirements:
- Elementor (Free version), Block editor (Gutenberg) or Bricks builder
- JetSmartFilters plugin installed and activated
- JetEngine plugin installed and activated with CPT posts created
The tutorial describes how to adjust the backend settings of the JetSmartFilters plugin’s Date Period Filter and use the Date Period Filter widget for Elementor to filter CPT posts by the posted and modified dates and display these posts on the front end.
The tutorials Date Period Filter Overview and Date Range Filter Overview detail these filters’ settings.
Create a Date Period Filter
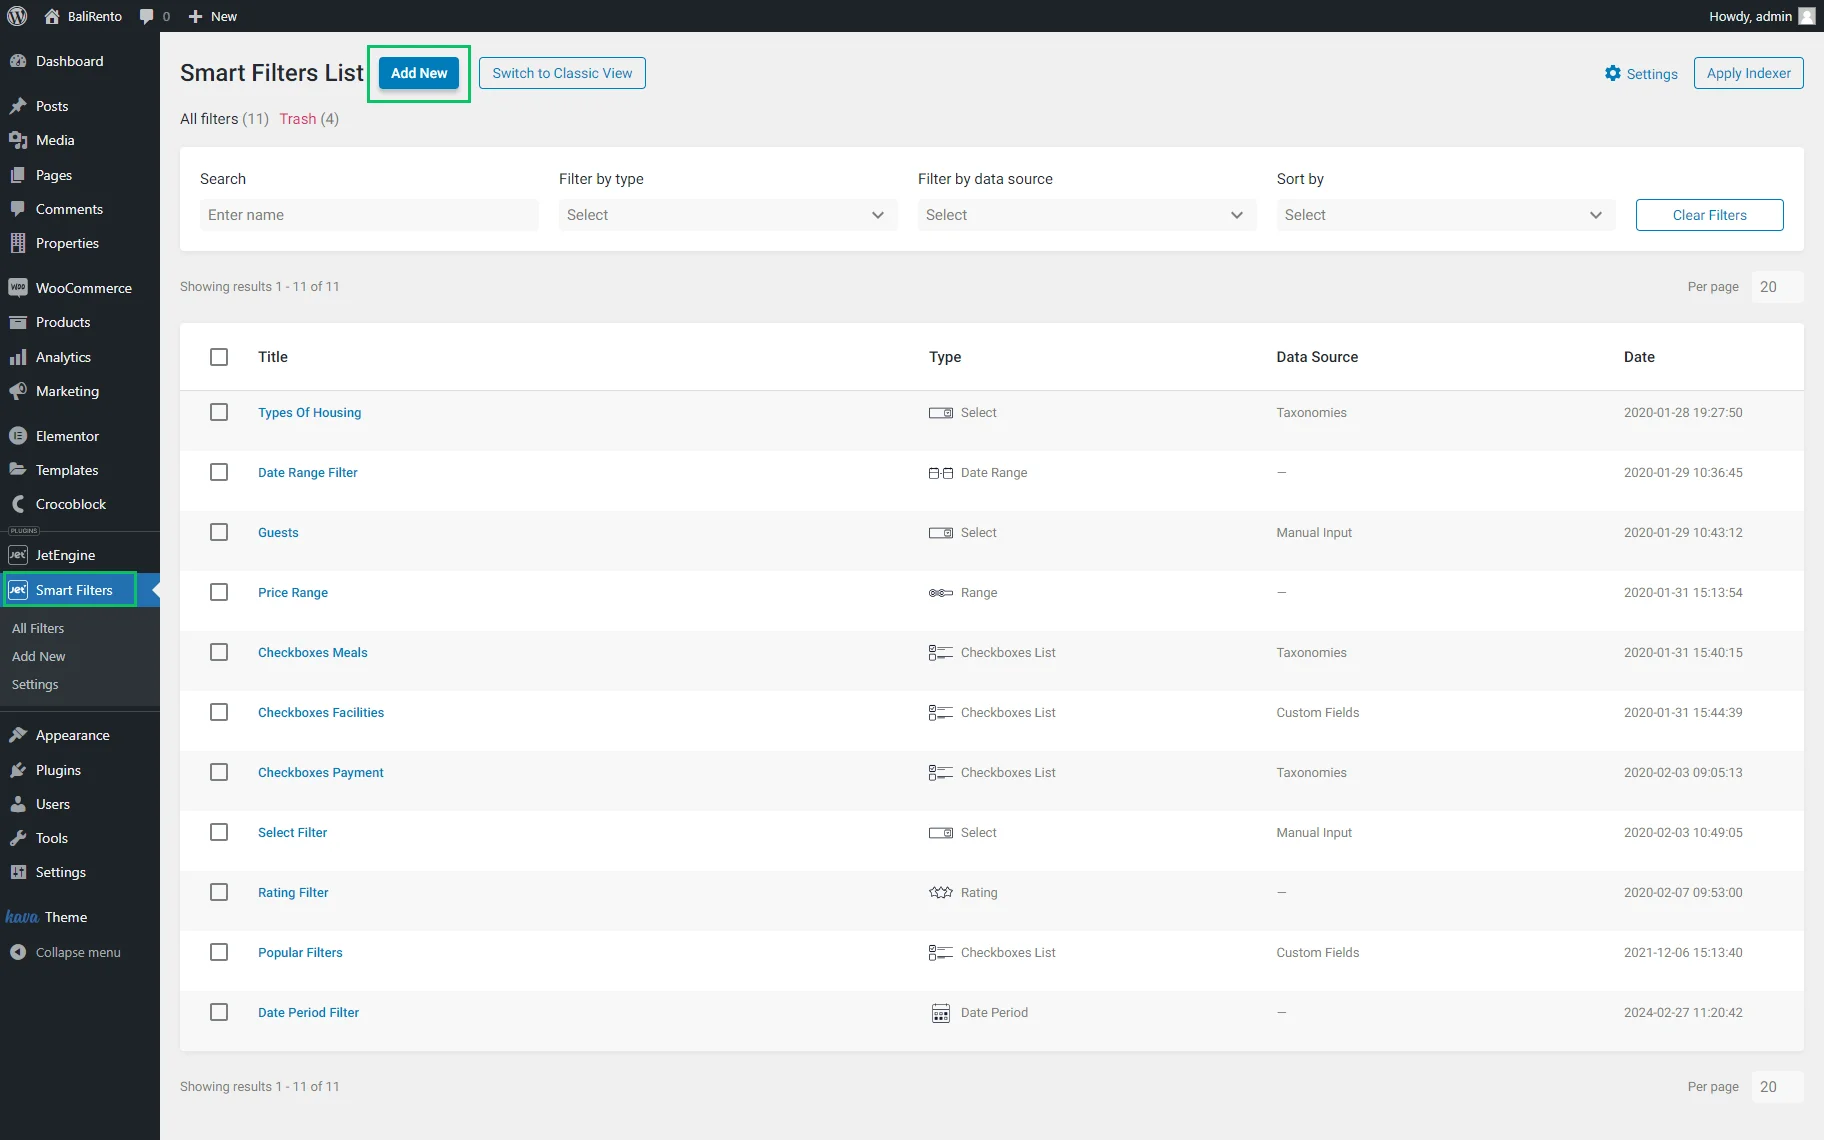
Navigate to the WordPress Dashboard > Smart Filters tab and press the “Add New” button to create a filter.
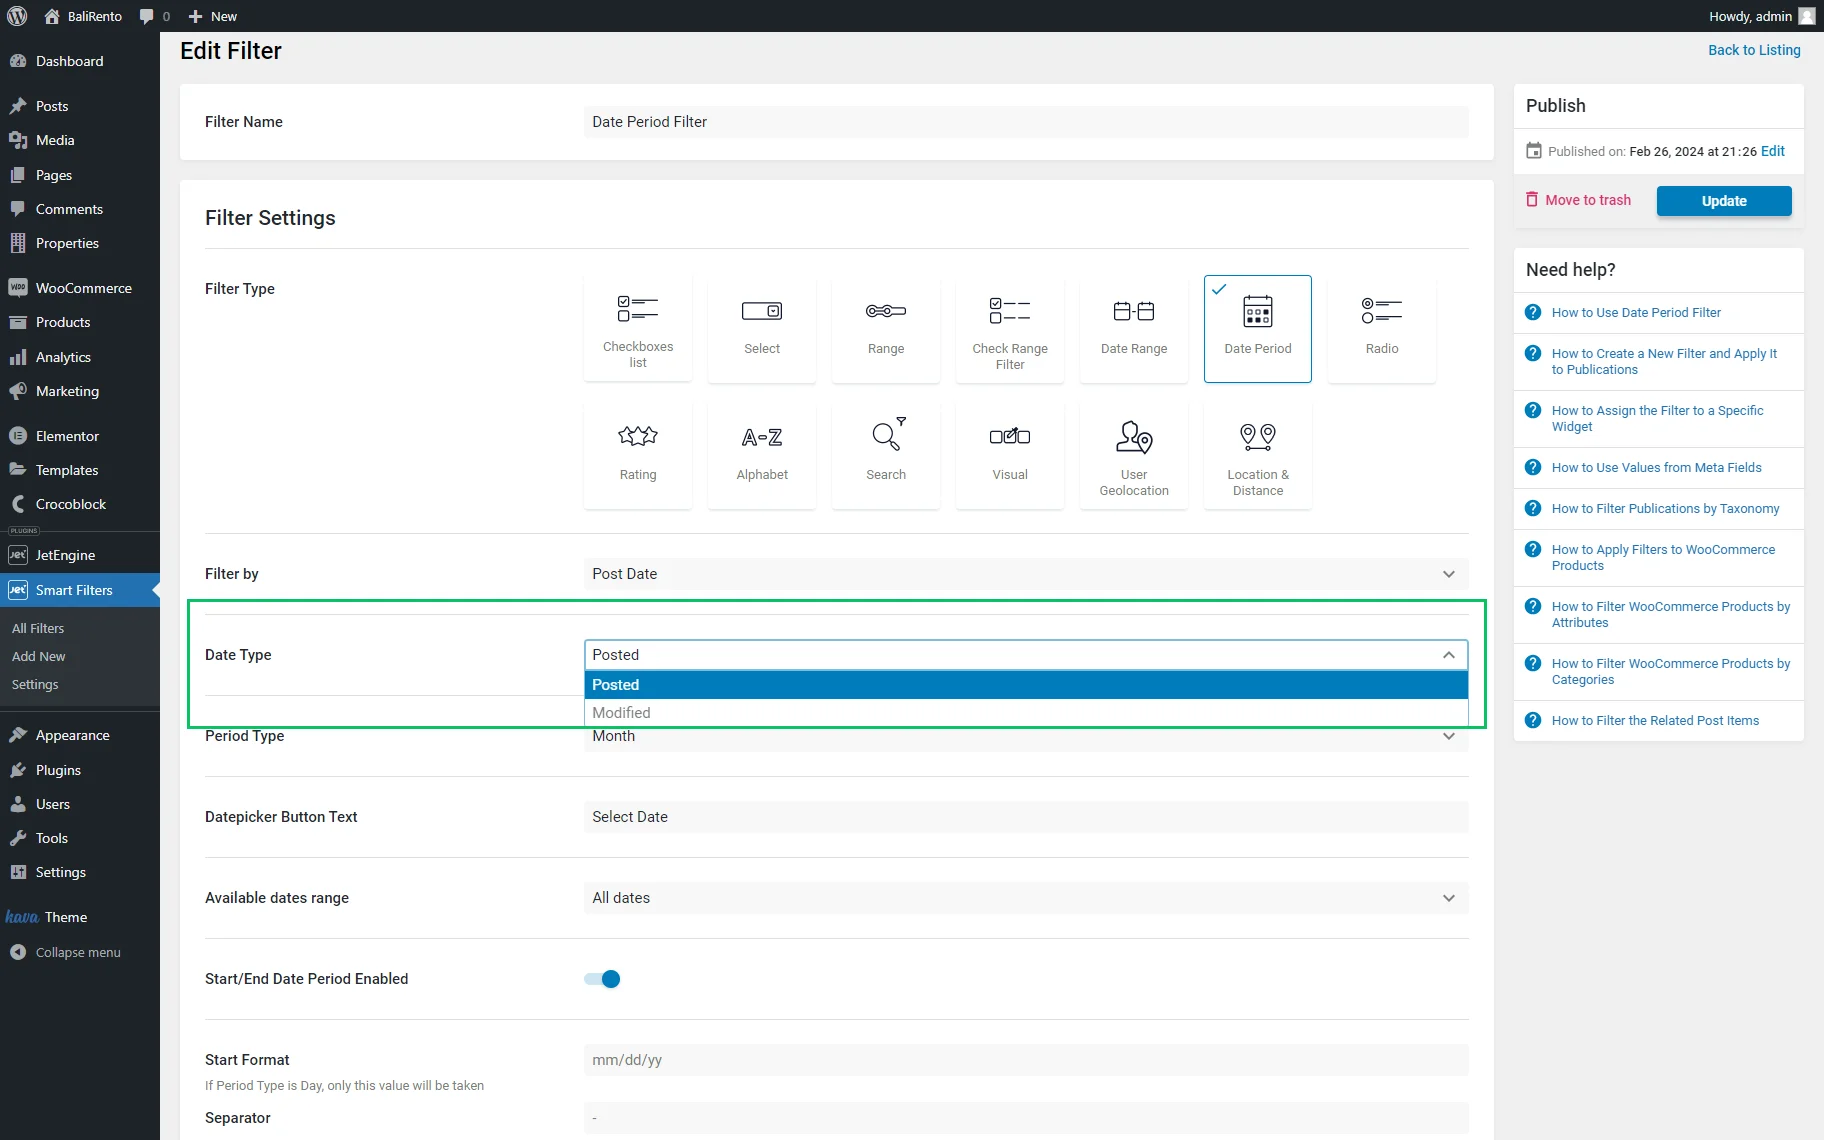
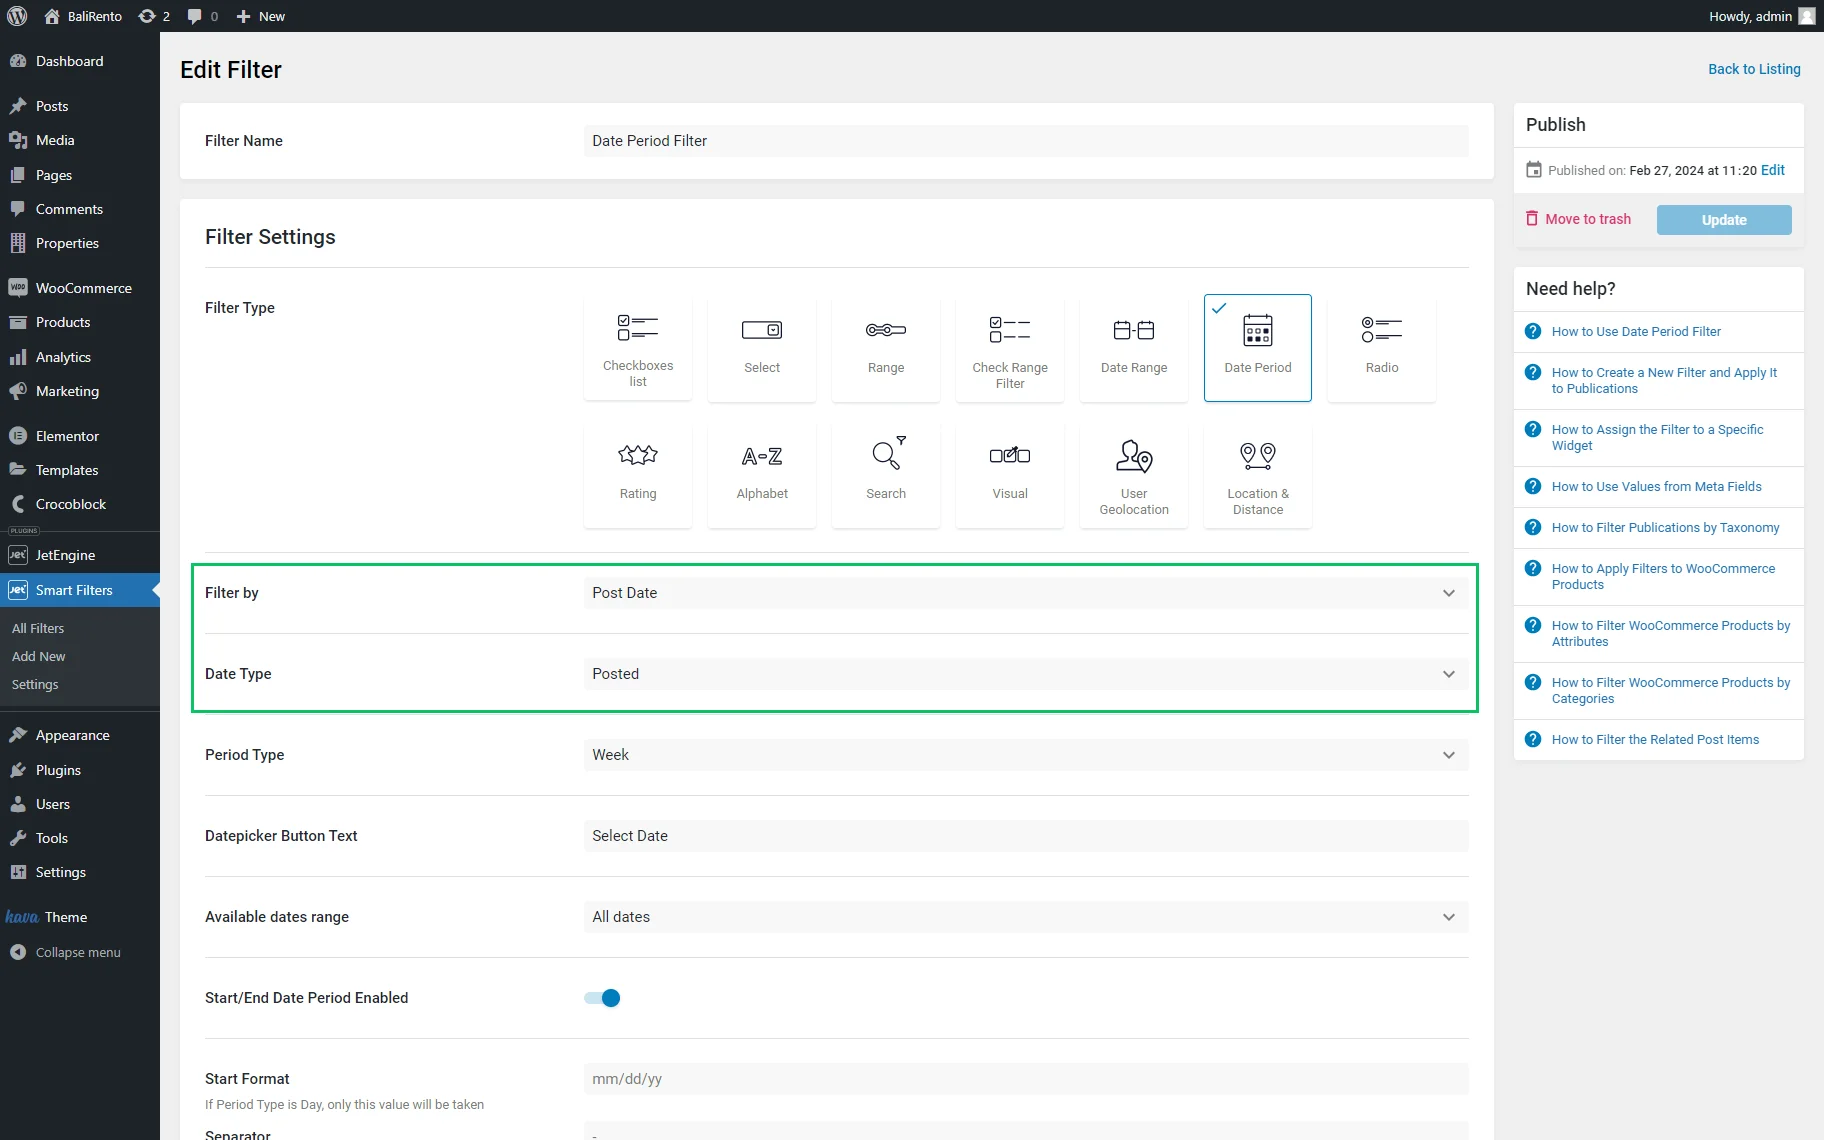
Select the “Date Period” Filter Type. The Date Period Filter Overview describes the filter’s settings.
Type the filter’s name in the Filter Name field.
Navigate to the Filter by drop-down menu and select the “Post Date” option.
This option activates the Date Type selector, where you can choose between the “Posted” and “Modified” variants, which refer to the date of creation or the date of modification.
Select the “Posted” option if you need to filter the CPT posts referring to the date of creation or the “Modified” option if you need to display posts referring to the date of modification from the Date Type drop-down menu.
Filter Settings
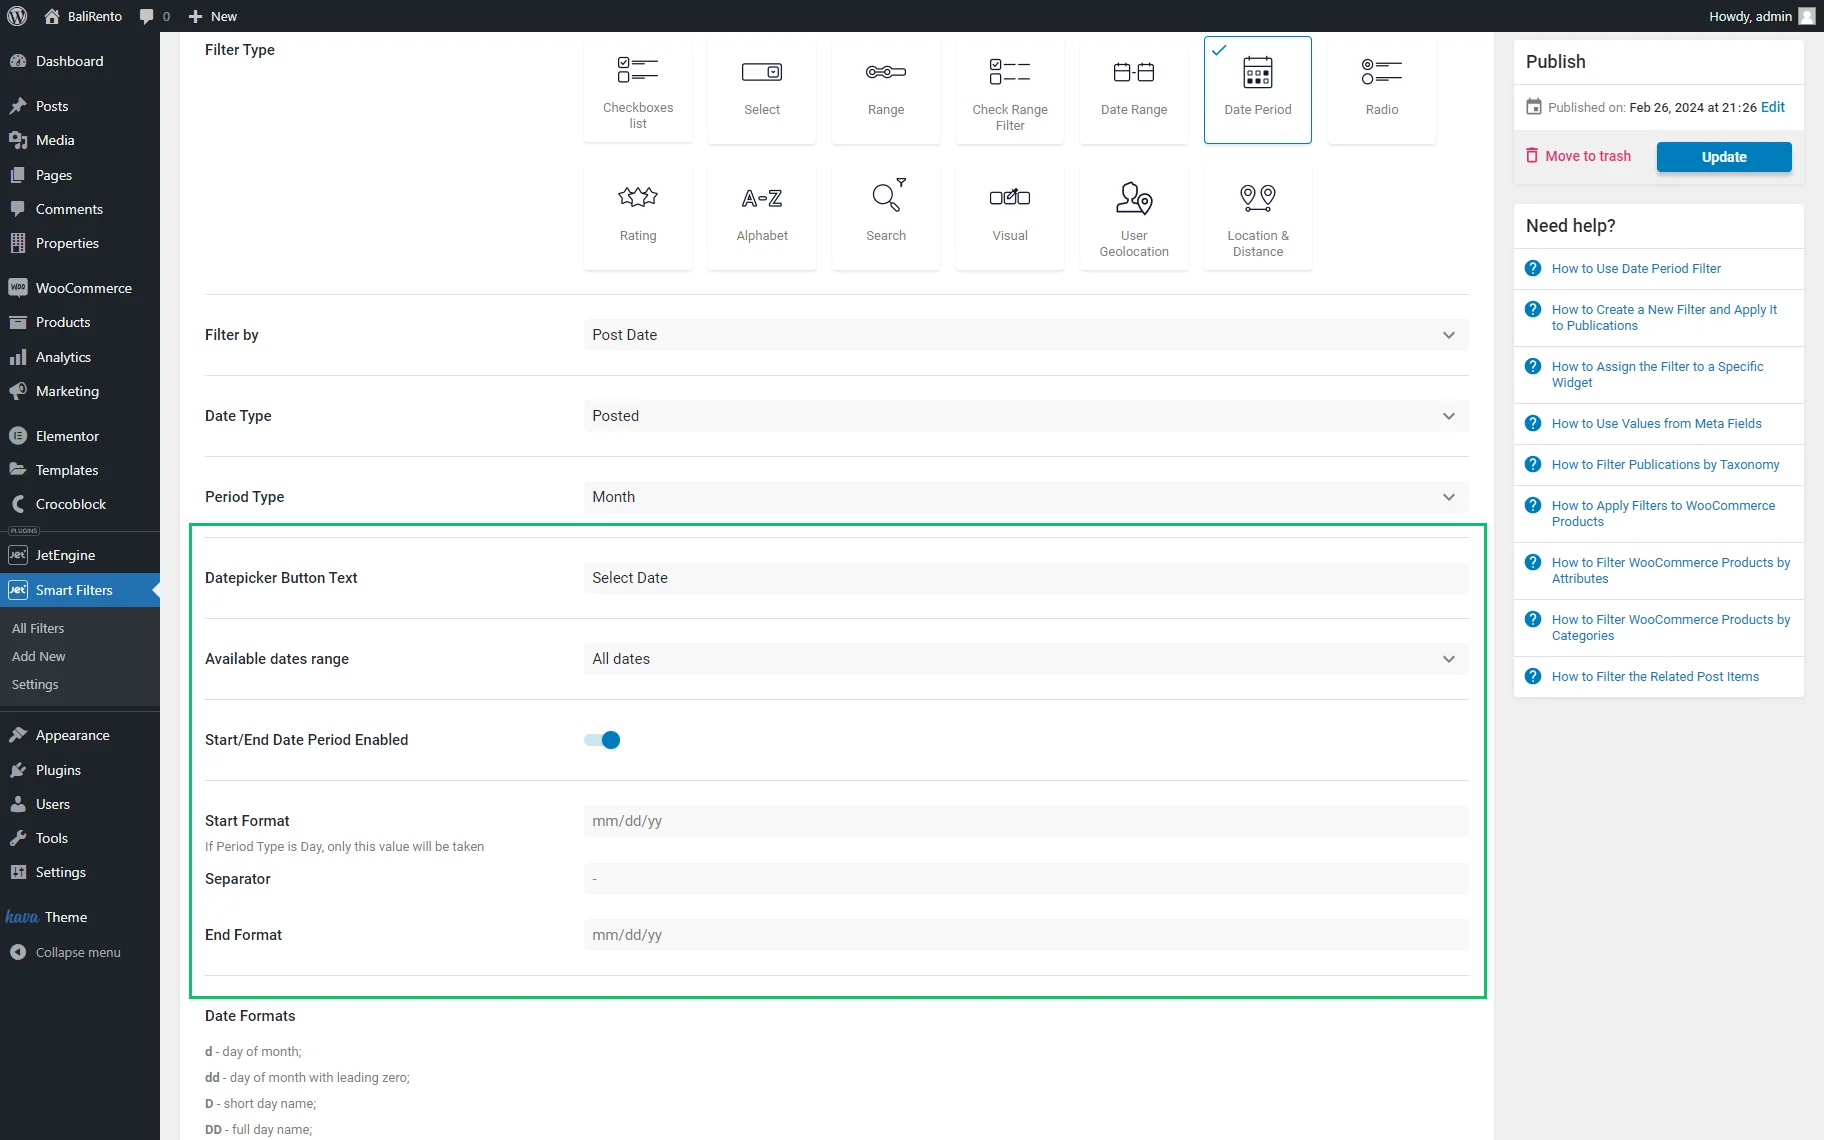
Navigate to the Period Type drop-down menu and select the filtering period you need from the “Custom range,” “Day,” “Week,” “Month,” and “Year” options. In this case, we selected the “Week” option to filter the posts with the post date created within the selected week.
Type the text you need to be displayed on the filter’s button in the Datepicker Button Text field (here, the “Select Date” text is set by default) and specify the Available dates range (here, we selected the “All dates” option, but you can choose the “Future,” “Past,” or “Custom dates” variants).If necessary, enable the Start/End Date Period Enabled toggle to enter the formats in which the selected dates will be displayed in the Start Format, Separator, and End Format fields.
Enable the Use Default Filter Value toggle if you need to set a date period that will be selected in the filter on the front end from the start. If enabled, this toggle activates the Default Filter Value field, where you can specify your desired value.
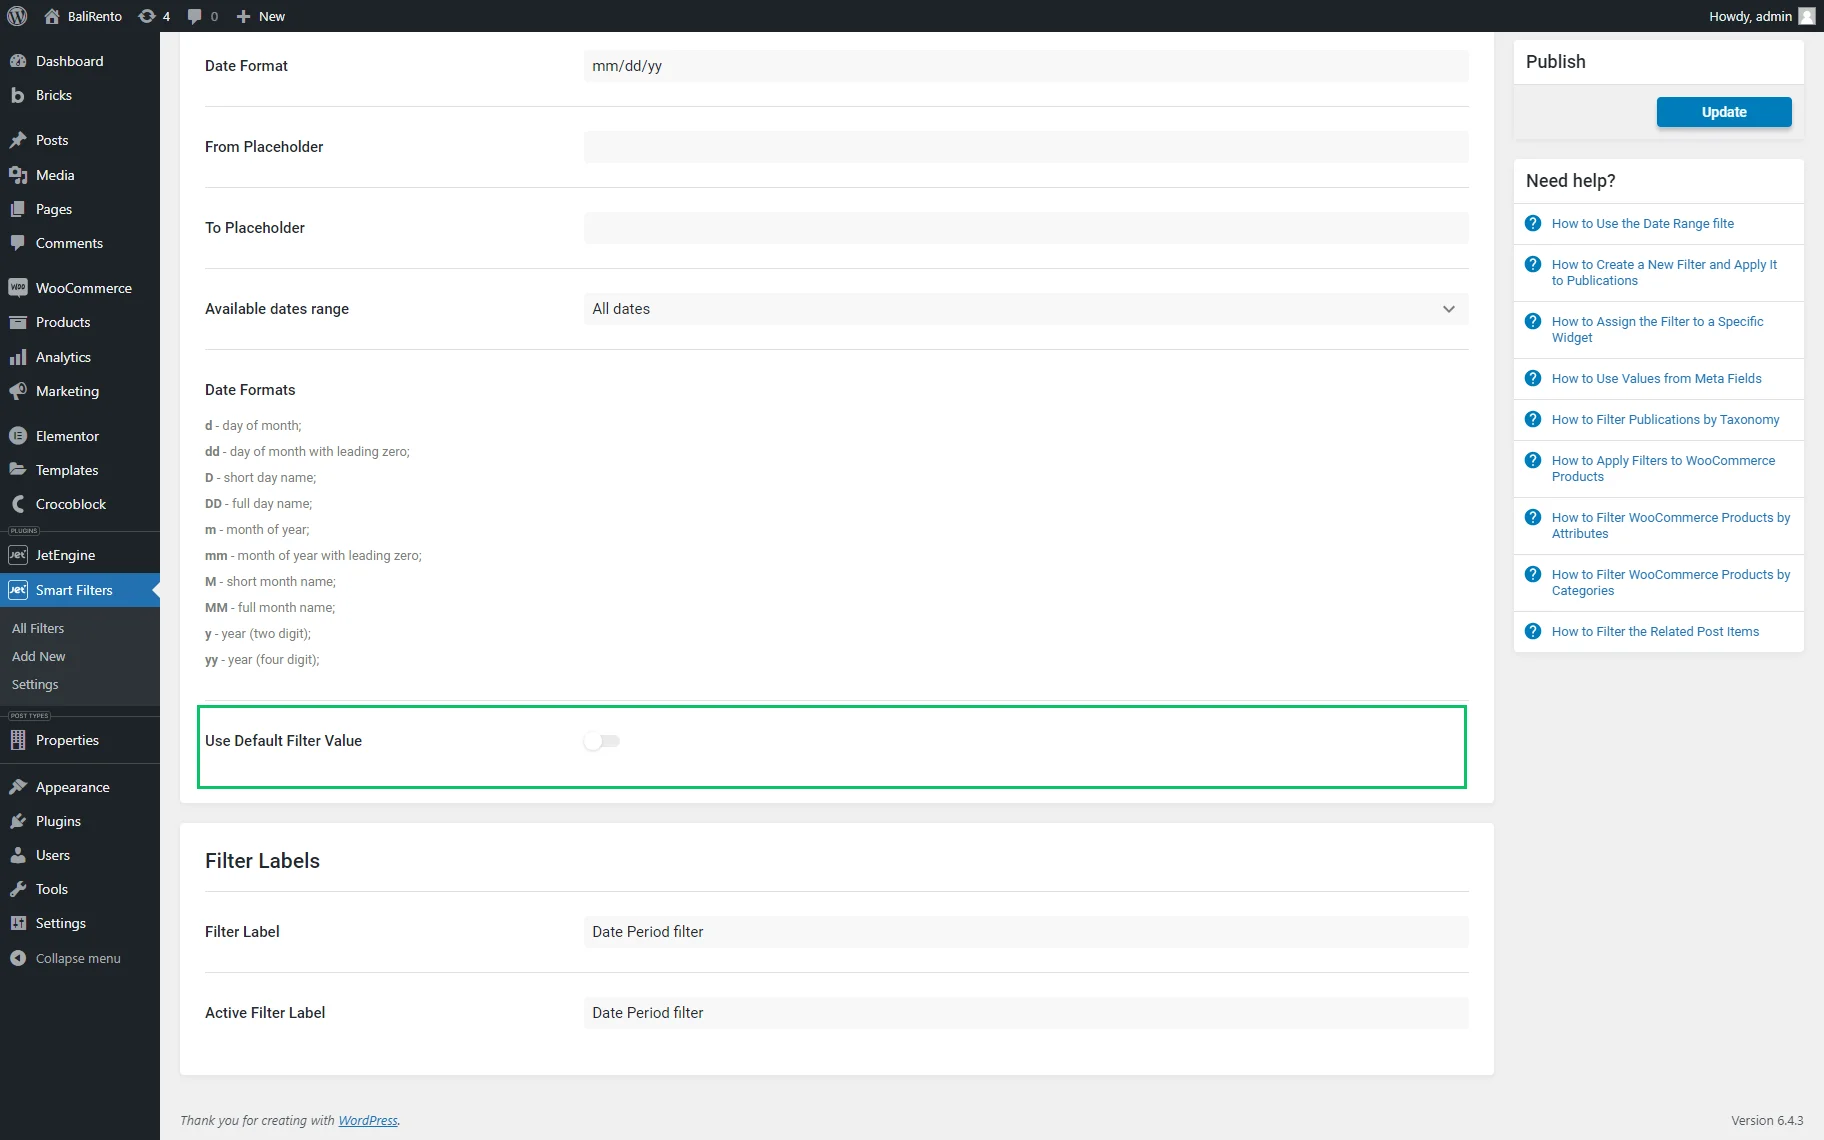
Fill in the Filter Label and Active Filter Label fields.
A detailed description of all settings can be found in the Date Period Filter Overview .
Press the “Update” button to save the filter.
Add the Filter to a Page
Modify the CPTs you need. We created a listing item, added the needed dynamic content, and updated the item.
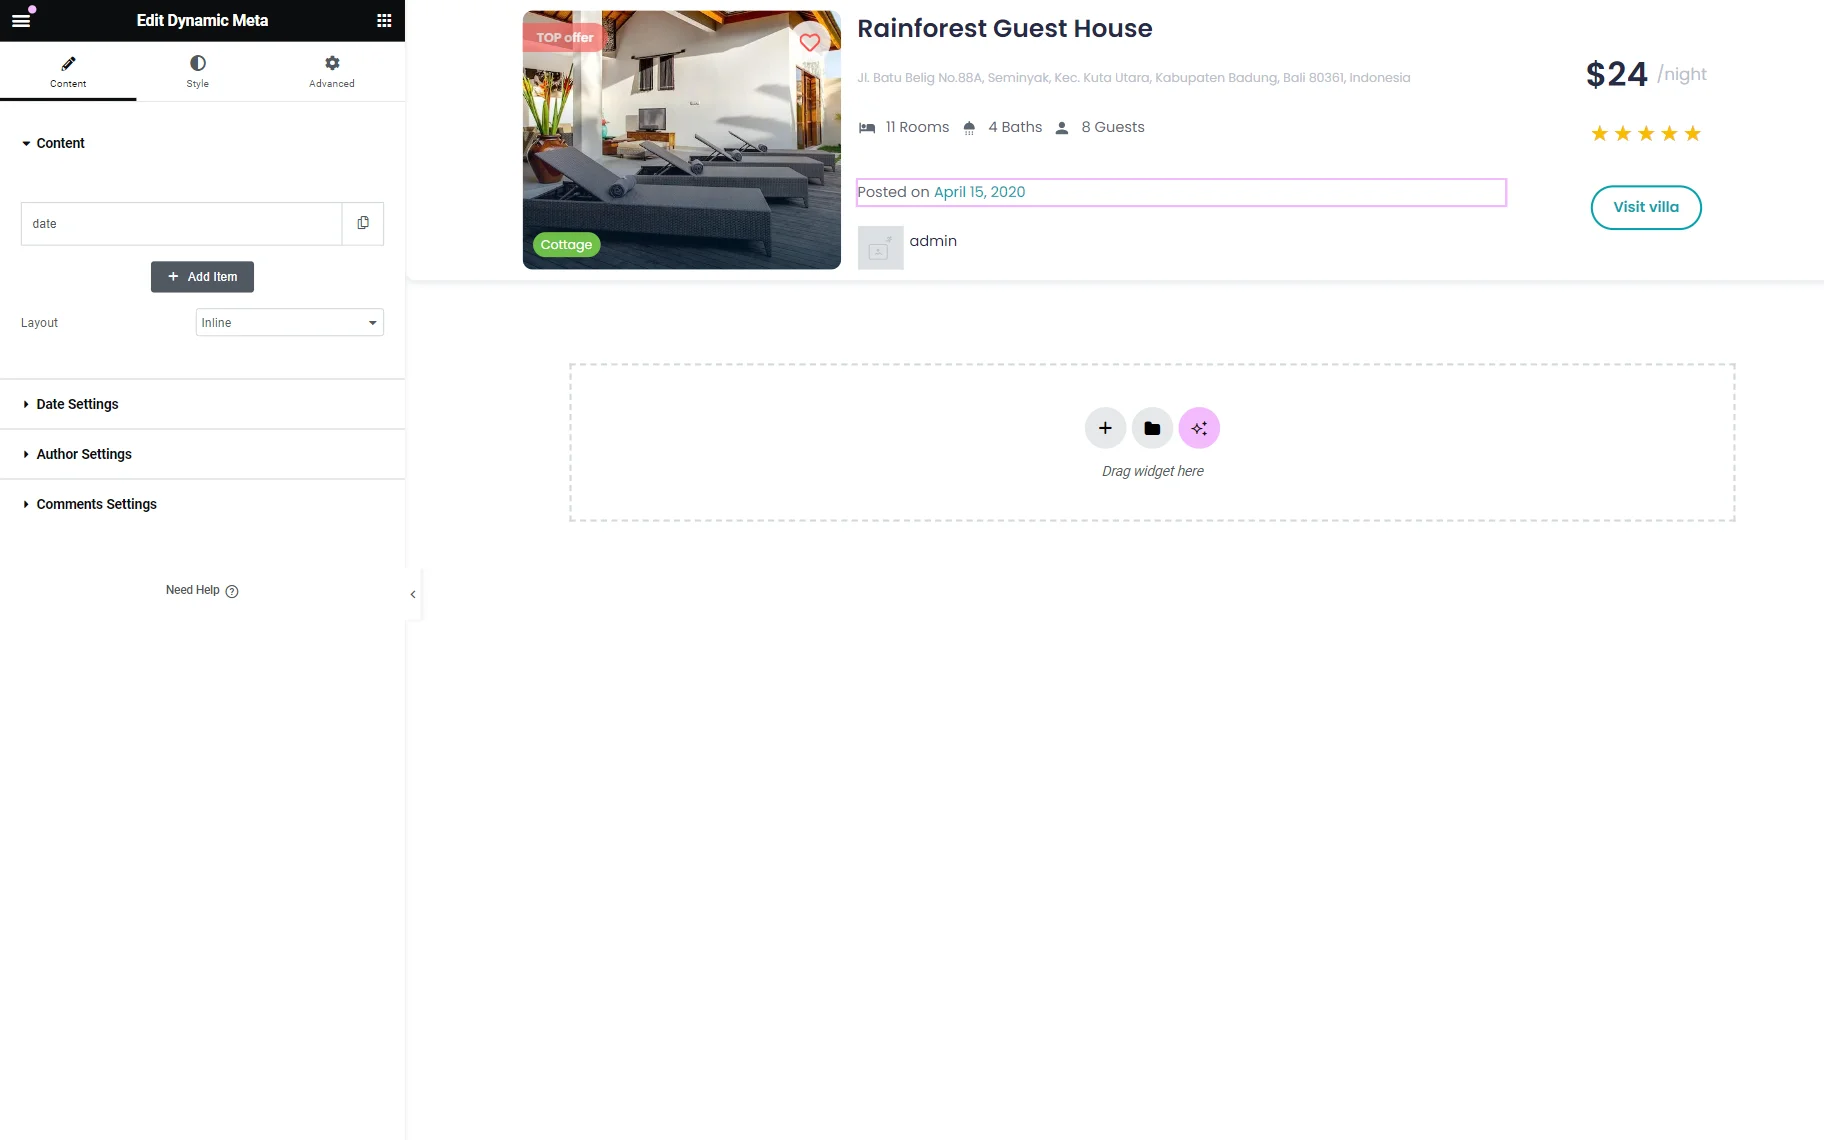
To create a listing item based on the CPT data, follow the How to Create Listing Template for Post Types tutorial.
Create a post/page in Elementor and divide the layout of the post/page into columns.
Find the Listing Grid widget and add it to a column. Select the Listing you need.
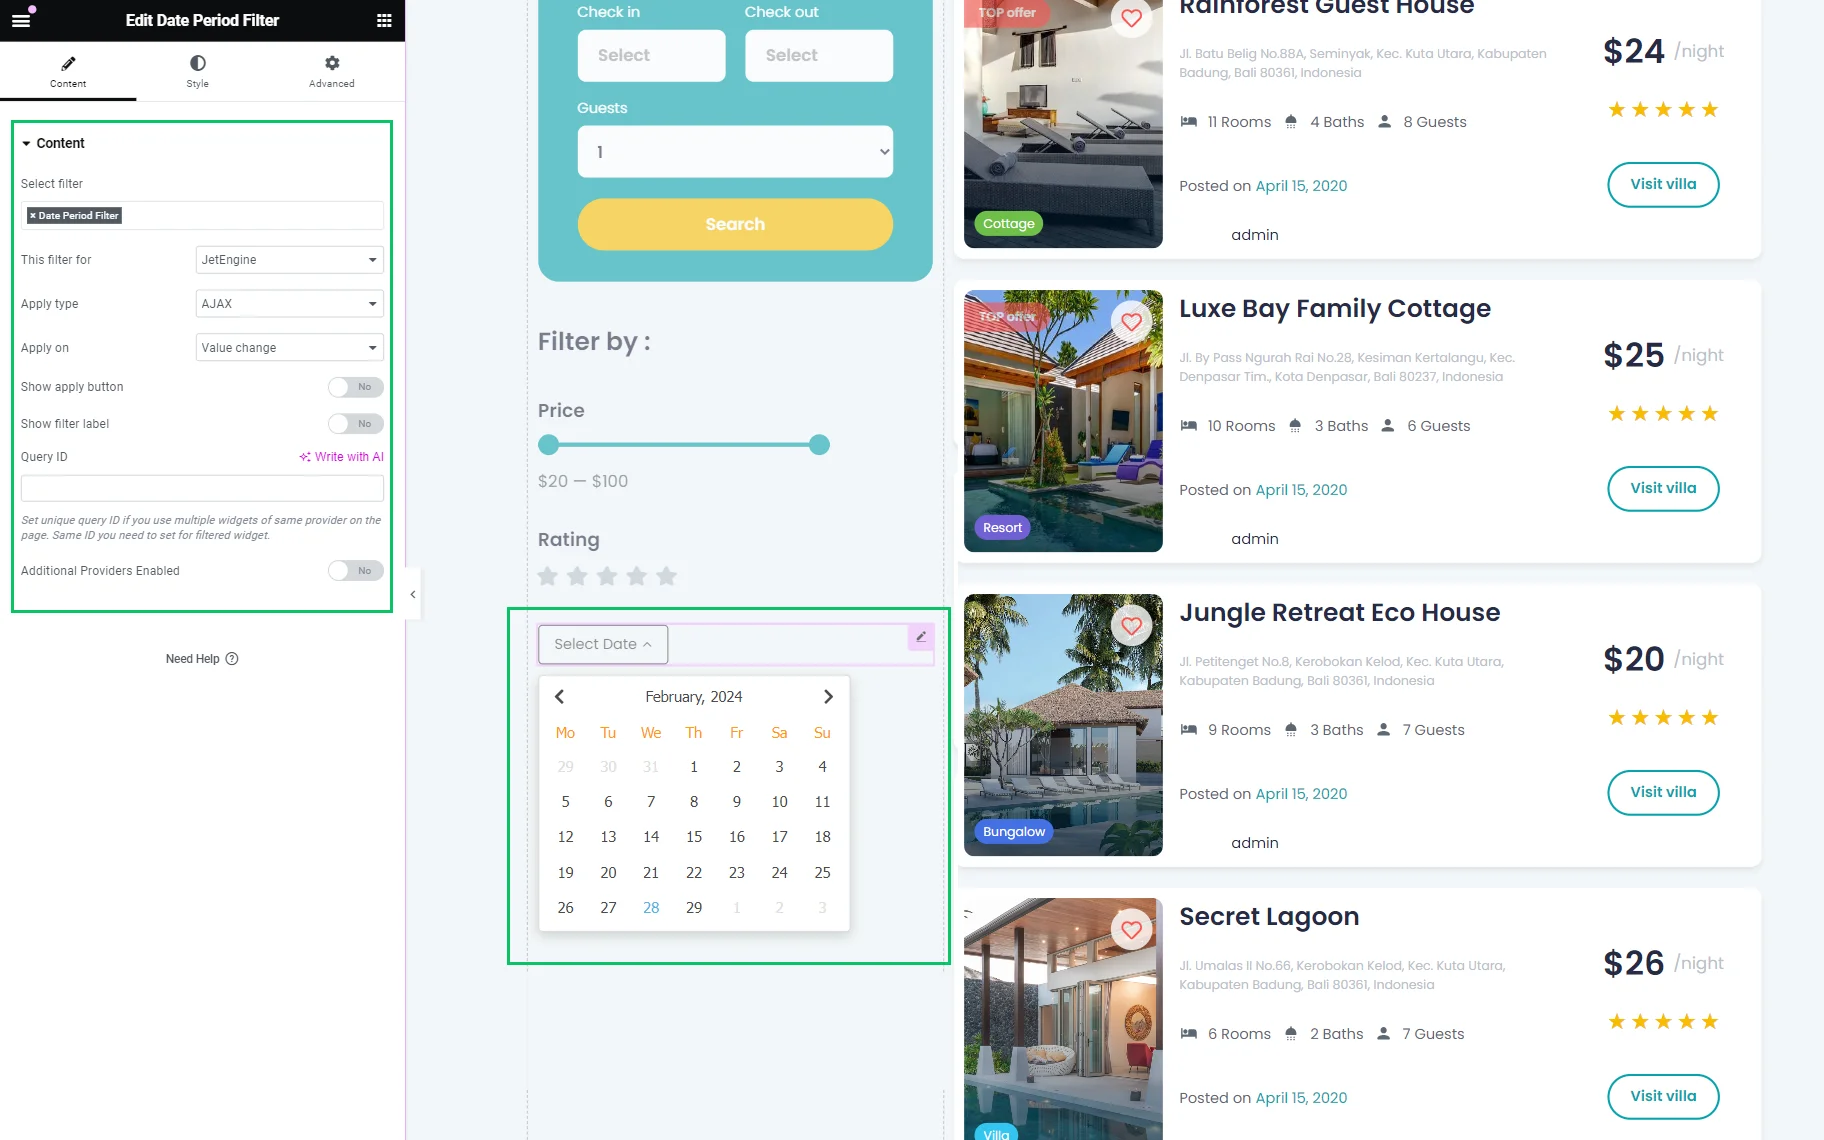
Find the Date Period Filter widget and drag and drop it to another column. Unroll the Content settings and select the built Date Period Filter for the Select Filter field. Pick the “JetEngine” option in the This filter for drop-down menu.
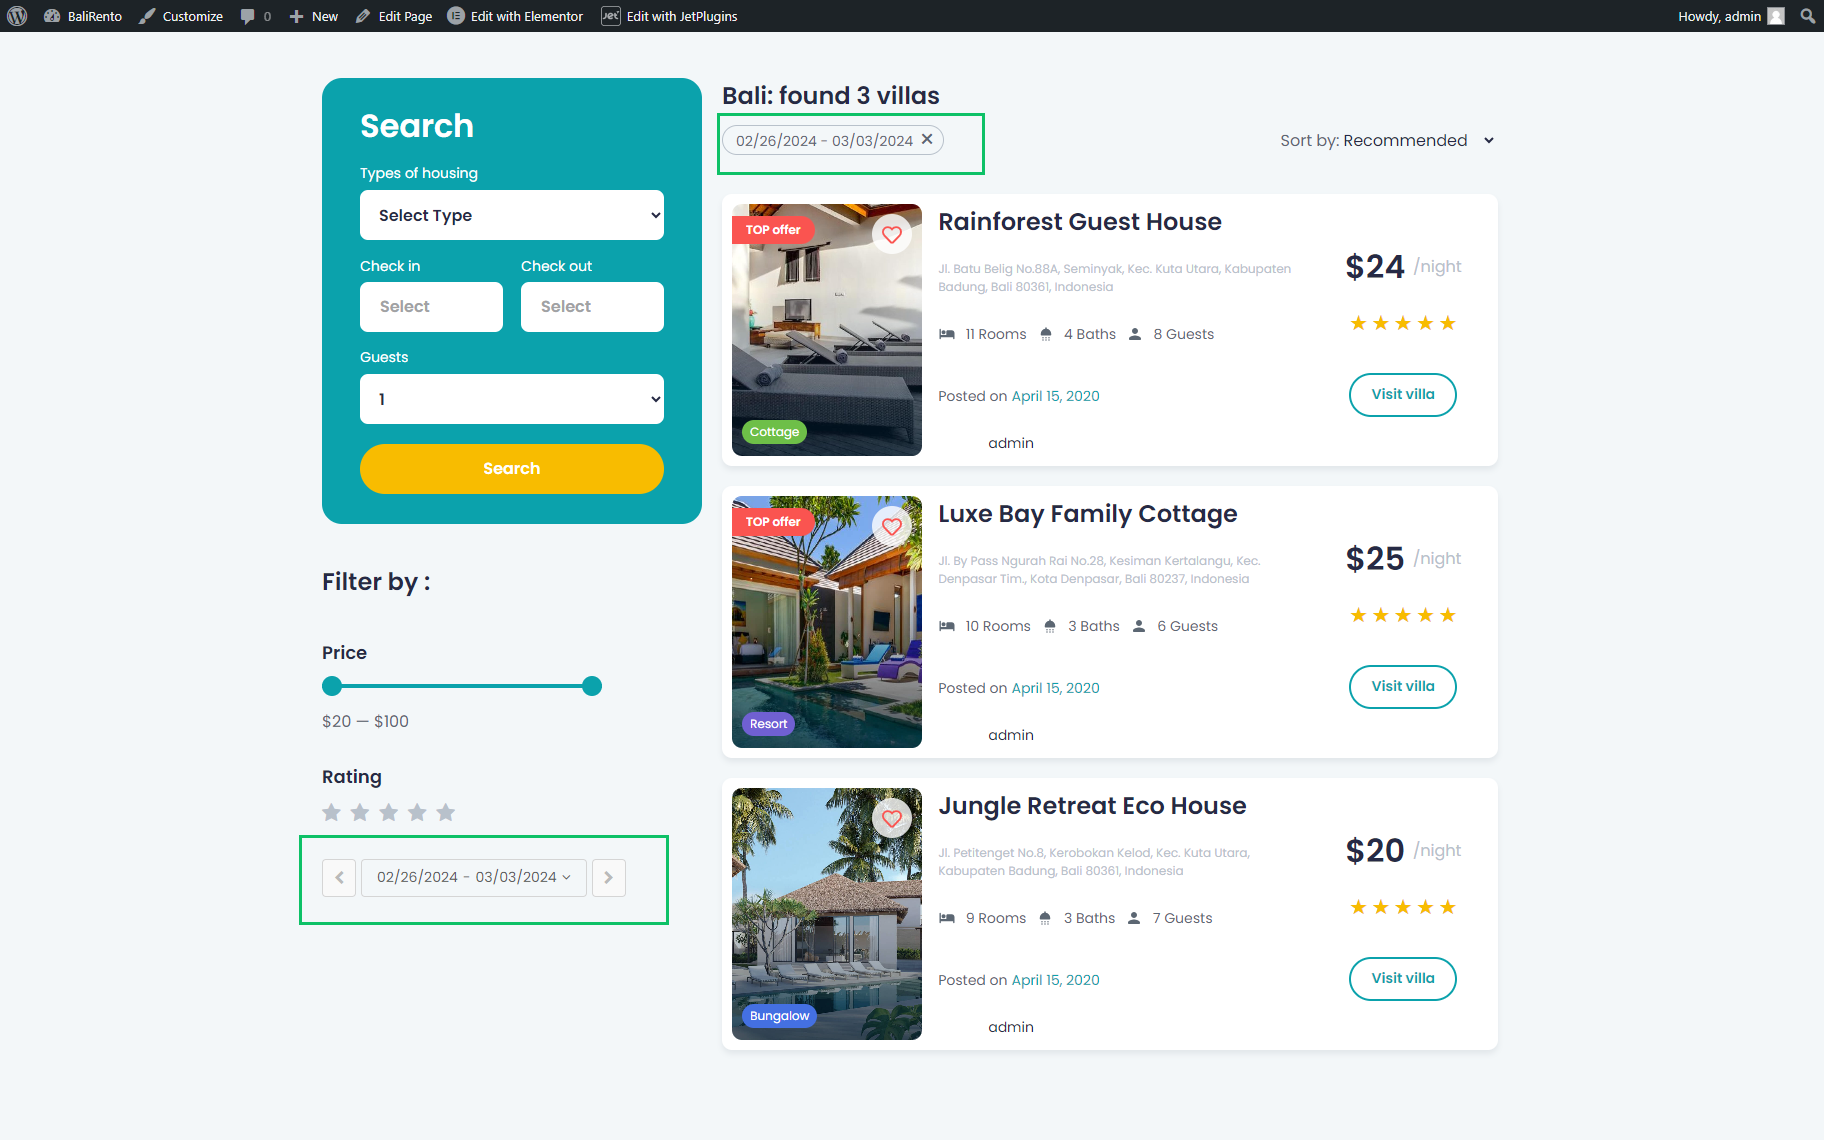
Front End View
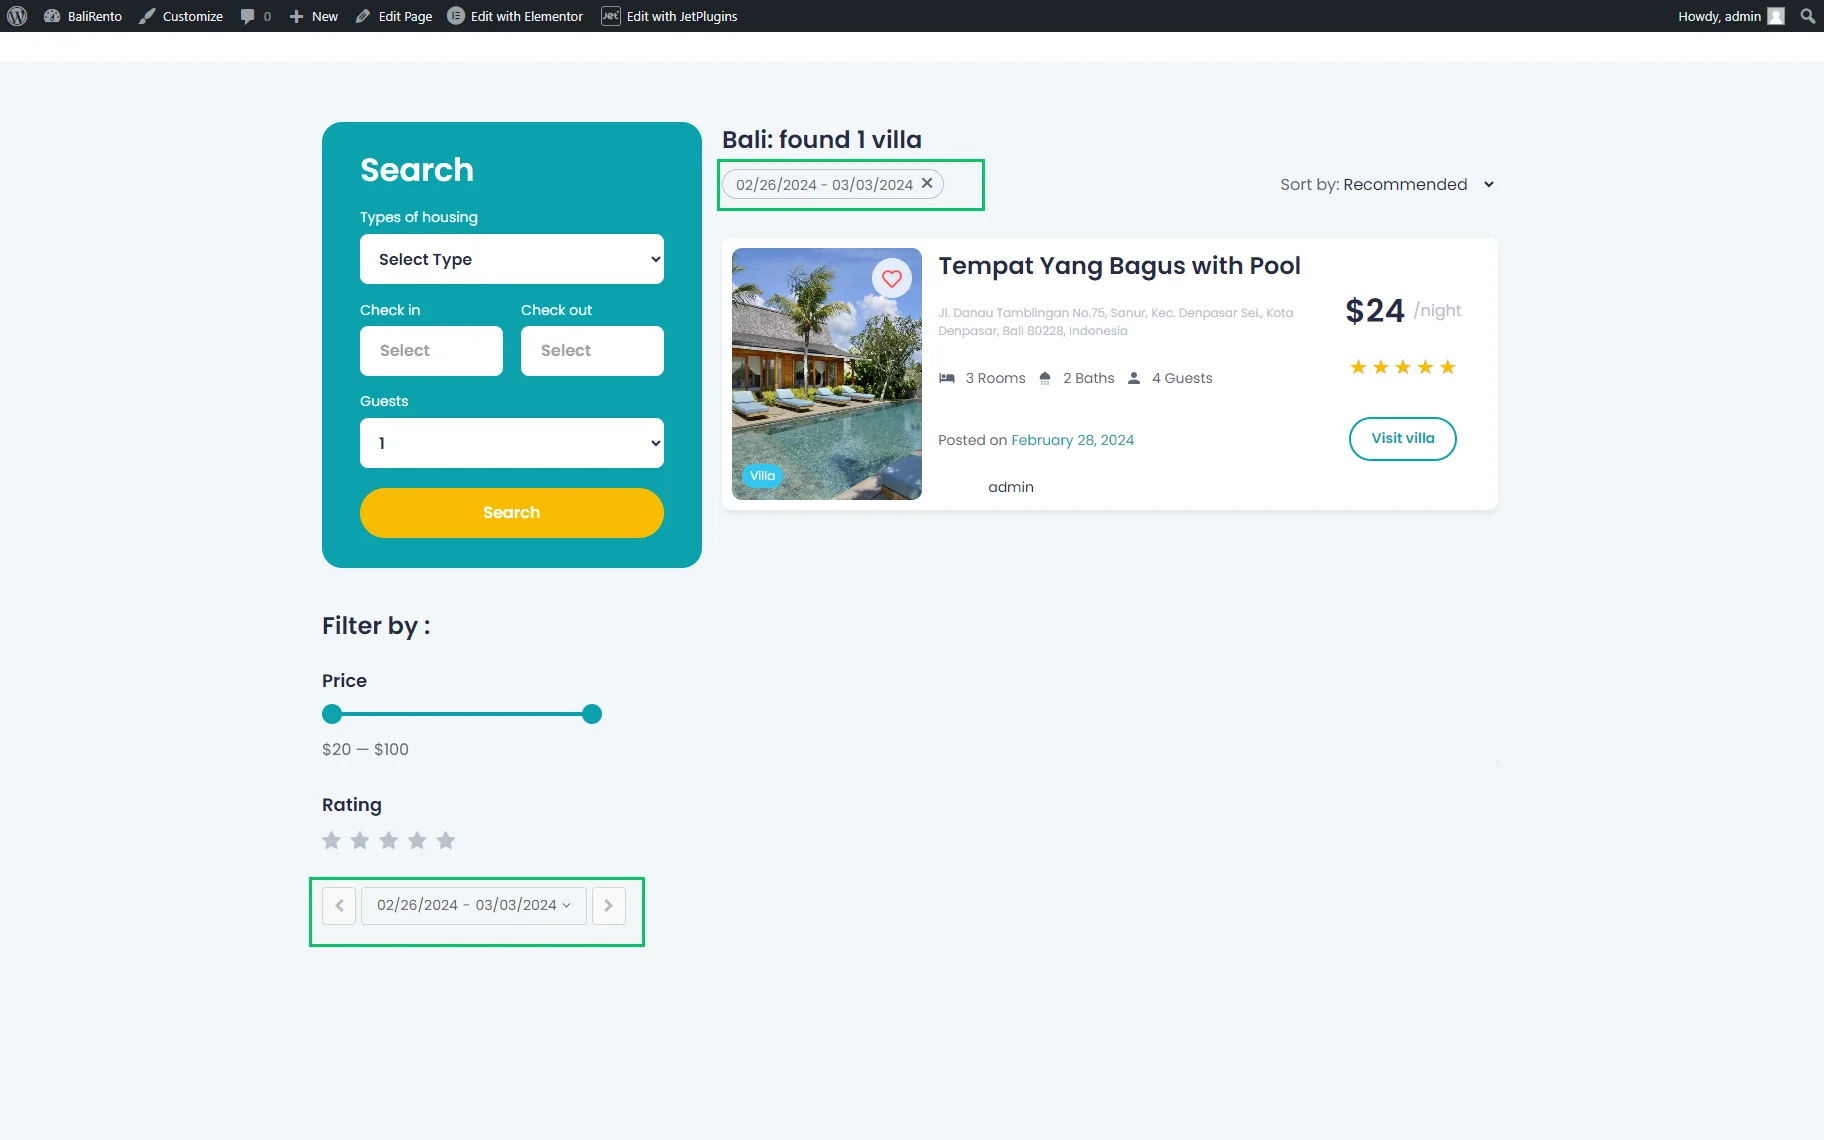
Navigate to the front end and apply the filter. Here, we selected February 28, 2024, and the Listing Grid displays posts modified from February 25, 2024, to March 03, 2024.
Let’s take a look at a bit of a different use case. Return to the WordPress Dashboard > All Filters > Smart Filters List tab. Open the created filter and adjust its settings.
Select the “Posted” option in the Date Type drop-down menu when creating the filter.
That will affect filtering in the following way: the filter will display only one result for the same dates.
That’s all about filtering posts by the posted and last modified date using the JetSmartFilters plugin on the WordPress website.