Displaying Google Reviews on Your WordPress Site Dynamically
Find out how to retrieve reviews from Google to your WordPress website dynamically by using the JetEngine plugin.
Before you start, check the tutorial requirements:
- Elementor (Free version), Block editor (Gutenberg), or Bricks
- JetEngine plugin installed and activated with the Custom Post Type (CPT) built
In this guide, we will explore a real-life use case based on the How to Dynamically Display Google Reviews on Your WordPress Site video walkthrough, created by one of our partners, Tobi Salami.
In the comments under this video, some users have requested a more advanced scenario: how to integrate Google Reviews with the Custom Post Type (CPT) and display a unique set of reviews for each post.
Additionally, Google has recently updated its Places API, which now requires a slightly different connection and authentication approach.
So this guide is based on the video and requests, and fully describes how to set up a fully dynamic review system for JetEngine’s CPTs. It covers the creation of a “Place ID” meta field, endpoint configuration, query and listing building, and is fully compatible with the latest Google API changes.
Also, check our demo page to see the ultimate Reviews Listing result.
Add a Meta Field for Place ID
Initially, let’s add a “Place ID” meta field for the CPT you work with. In this field, the necessary place ID will be stored and then used to establish a connection between the WordPress website and Google.
So, go to WordPress Dashboard > JetEngine > Post Types > Your CPT Name and click the “Edit” button.
Scroll down to the Meta Fields section and click the “New Meta Field” button.
Give a Label to the field (for example, “Google ID”), and the Name/ID will be generated automatically.
You can leave all the other settings as they are, as we need the default “Text” Field type to be set.
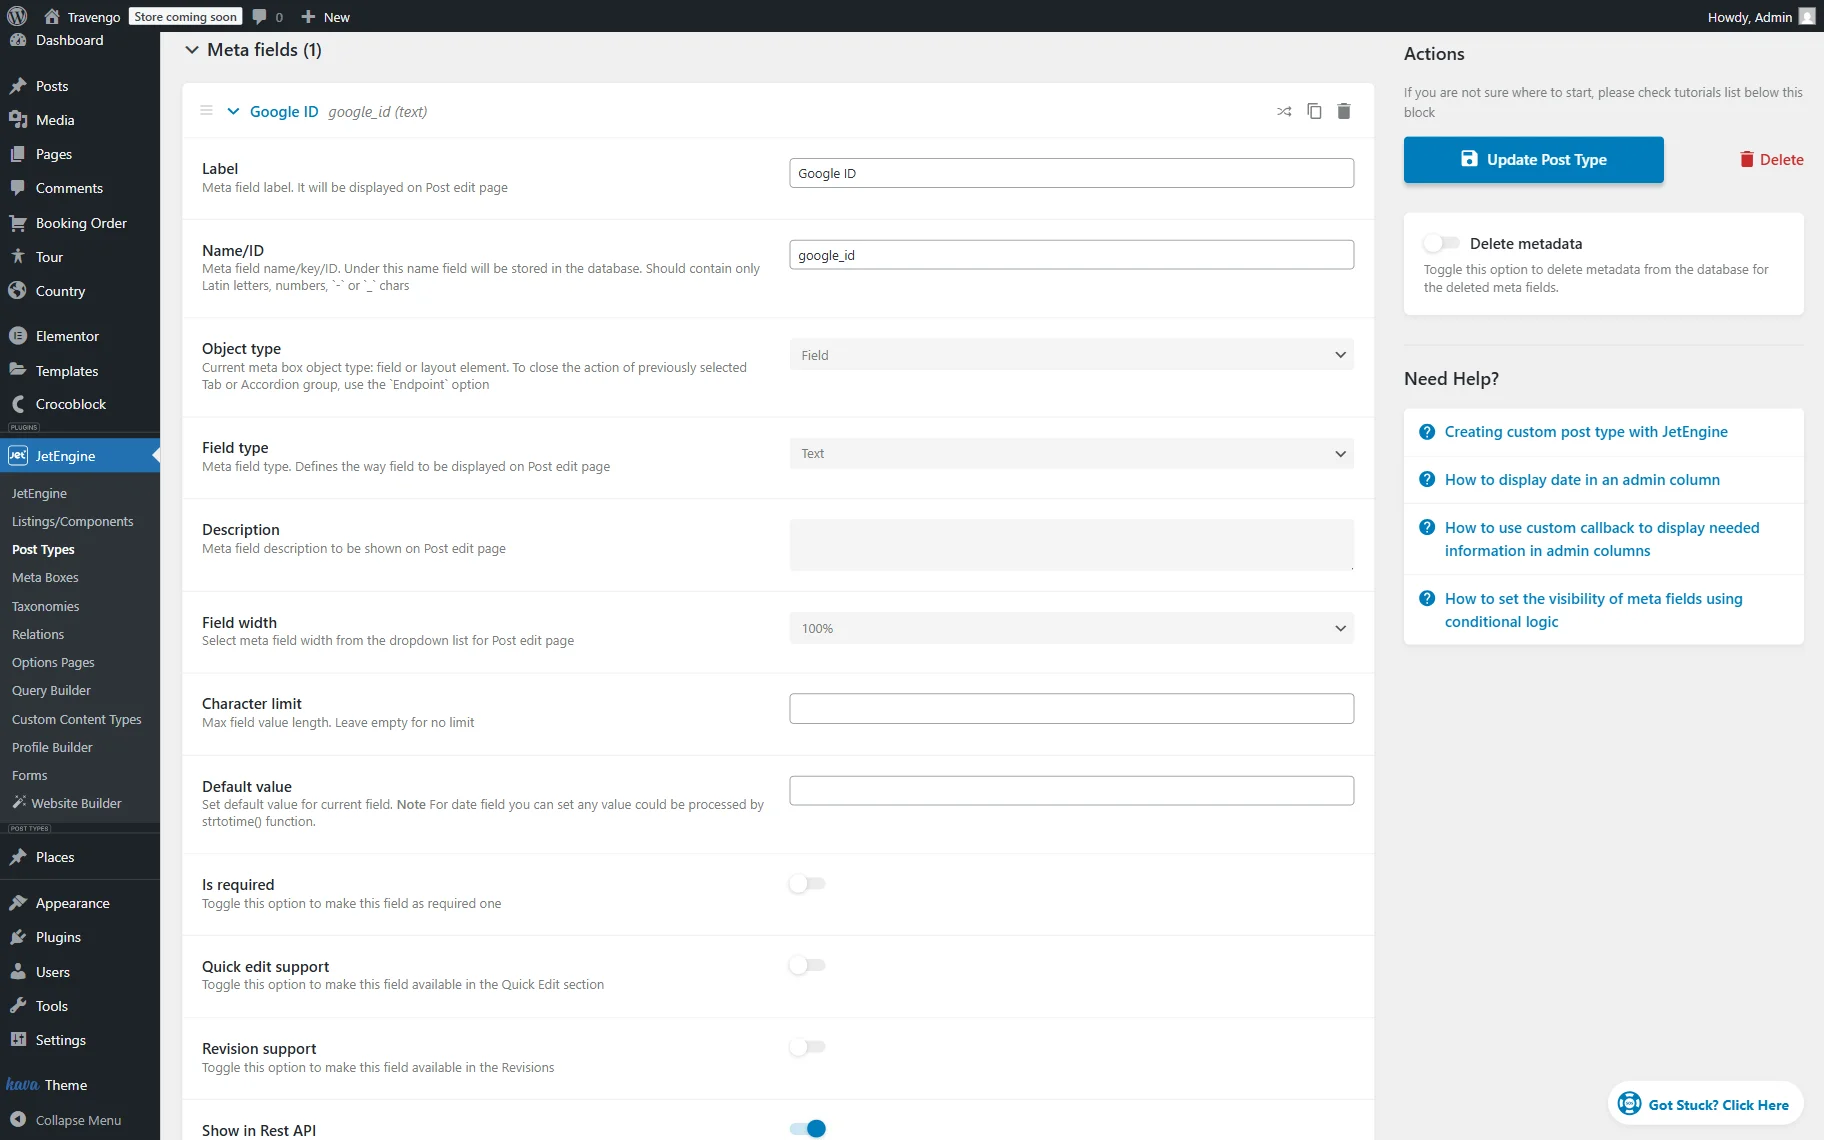
Save the post type settings by hitting the “Update Post Type” button.
Fill in the Place ID Field
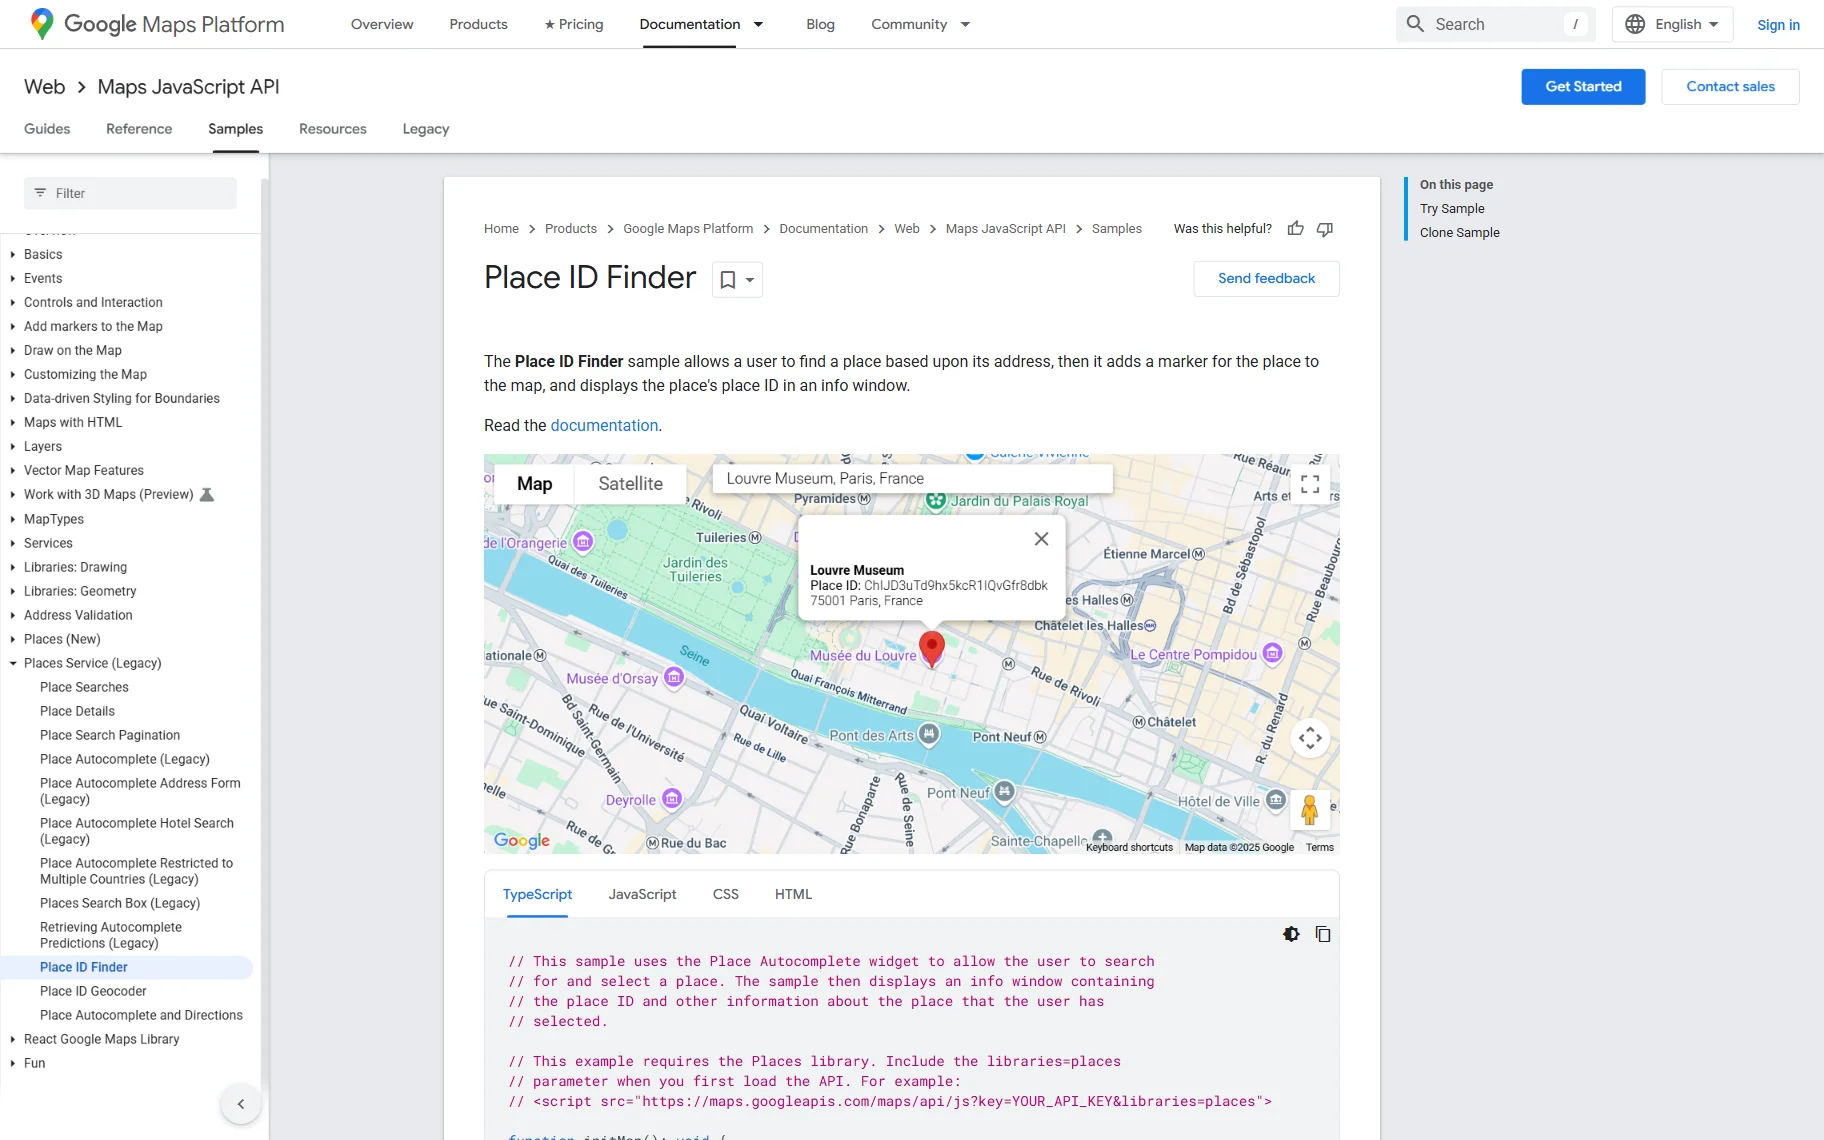
You can not get Google Reviews without Place ID. So, let’s proceed to Google Place ID Finder and search for the place whose place ID you want to add. To find a Google Place ID without address, simply enter the name of the business or location, and select the correct result from the dropdown list.
For instance, we search for the Louvre Museum and then copy its place ID from the window that appears.
Complete Google ID Field
Return to your WordPress website and navigate to the CPT posts list where you want to add the place ID. Click the “Edit” button next to one of the posts to open it.
Complete the “Google ID” meta field with the copied place ID and save the post.

You can repeat the same procedure with other posts. Simply copy the required Place ID from the Google Place ID Finder page and paste it into the corresponding post.
Create a New Endpoint
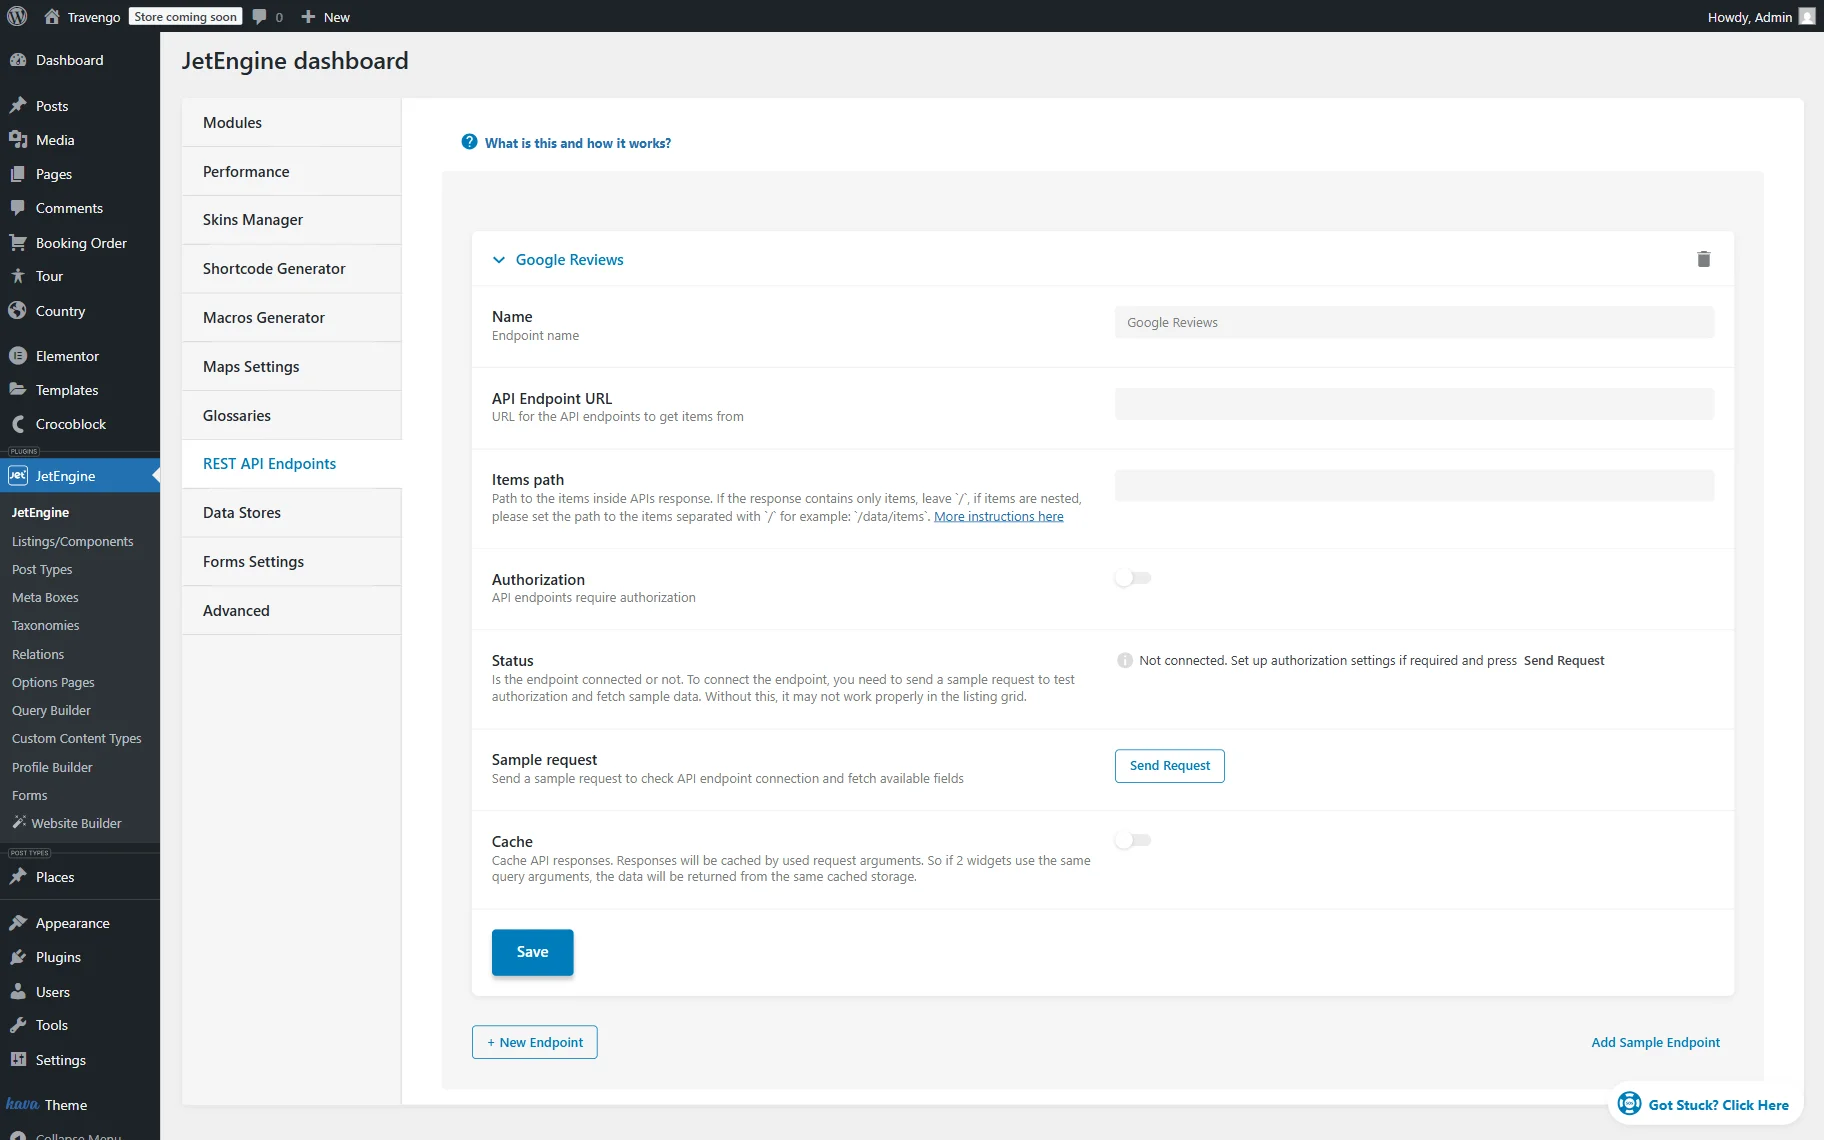
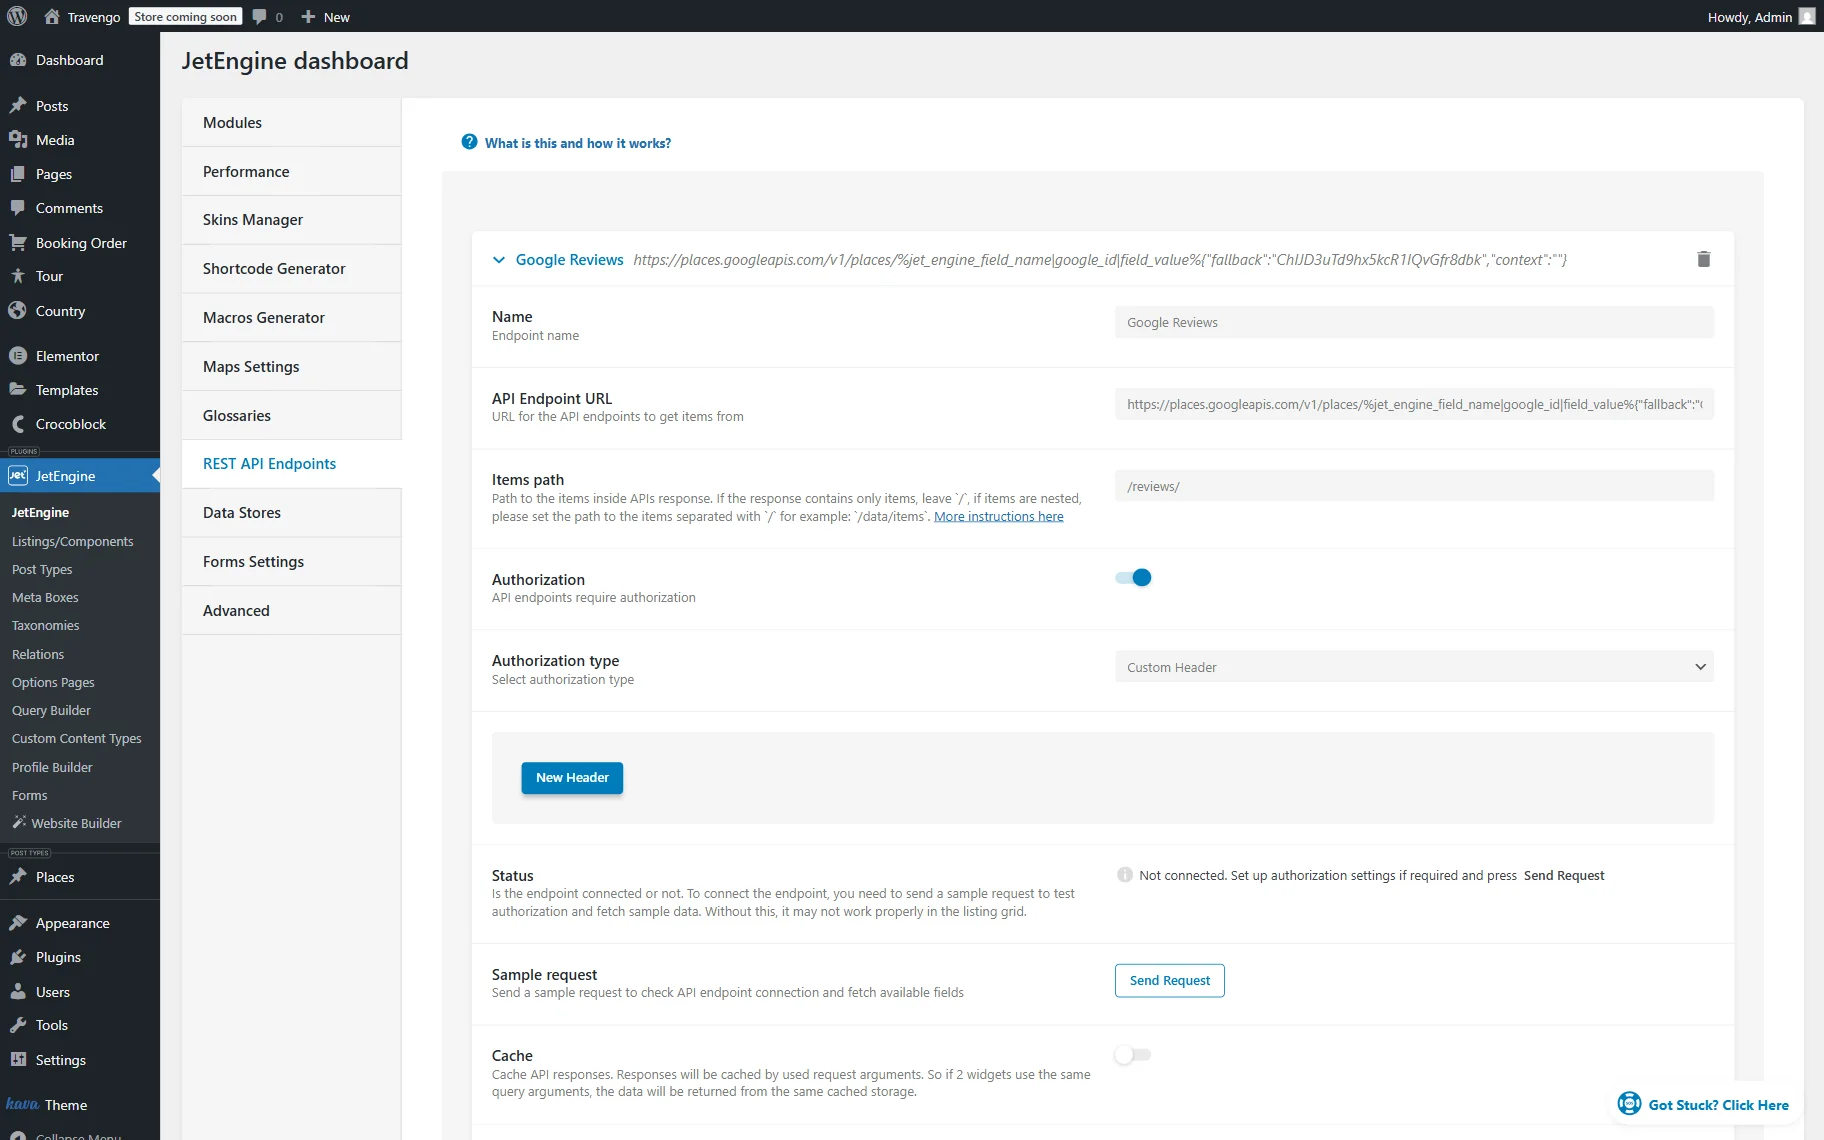
It’s time to adjust a REST API endpoint that will connect Google reviews with our website. To do so, go to WordPress Dashboard > JetEngine > JetEngine > REST API Endpoints tab.
Press the “New Endpoint” button to adjust a new endpoint.
Complete the endpoint’s Name (here, “Google Reviews.”)
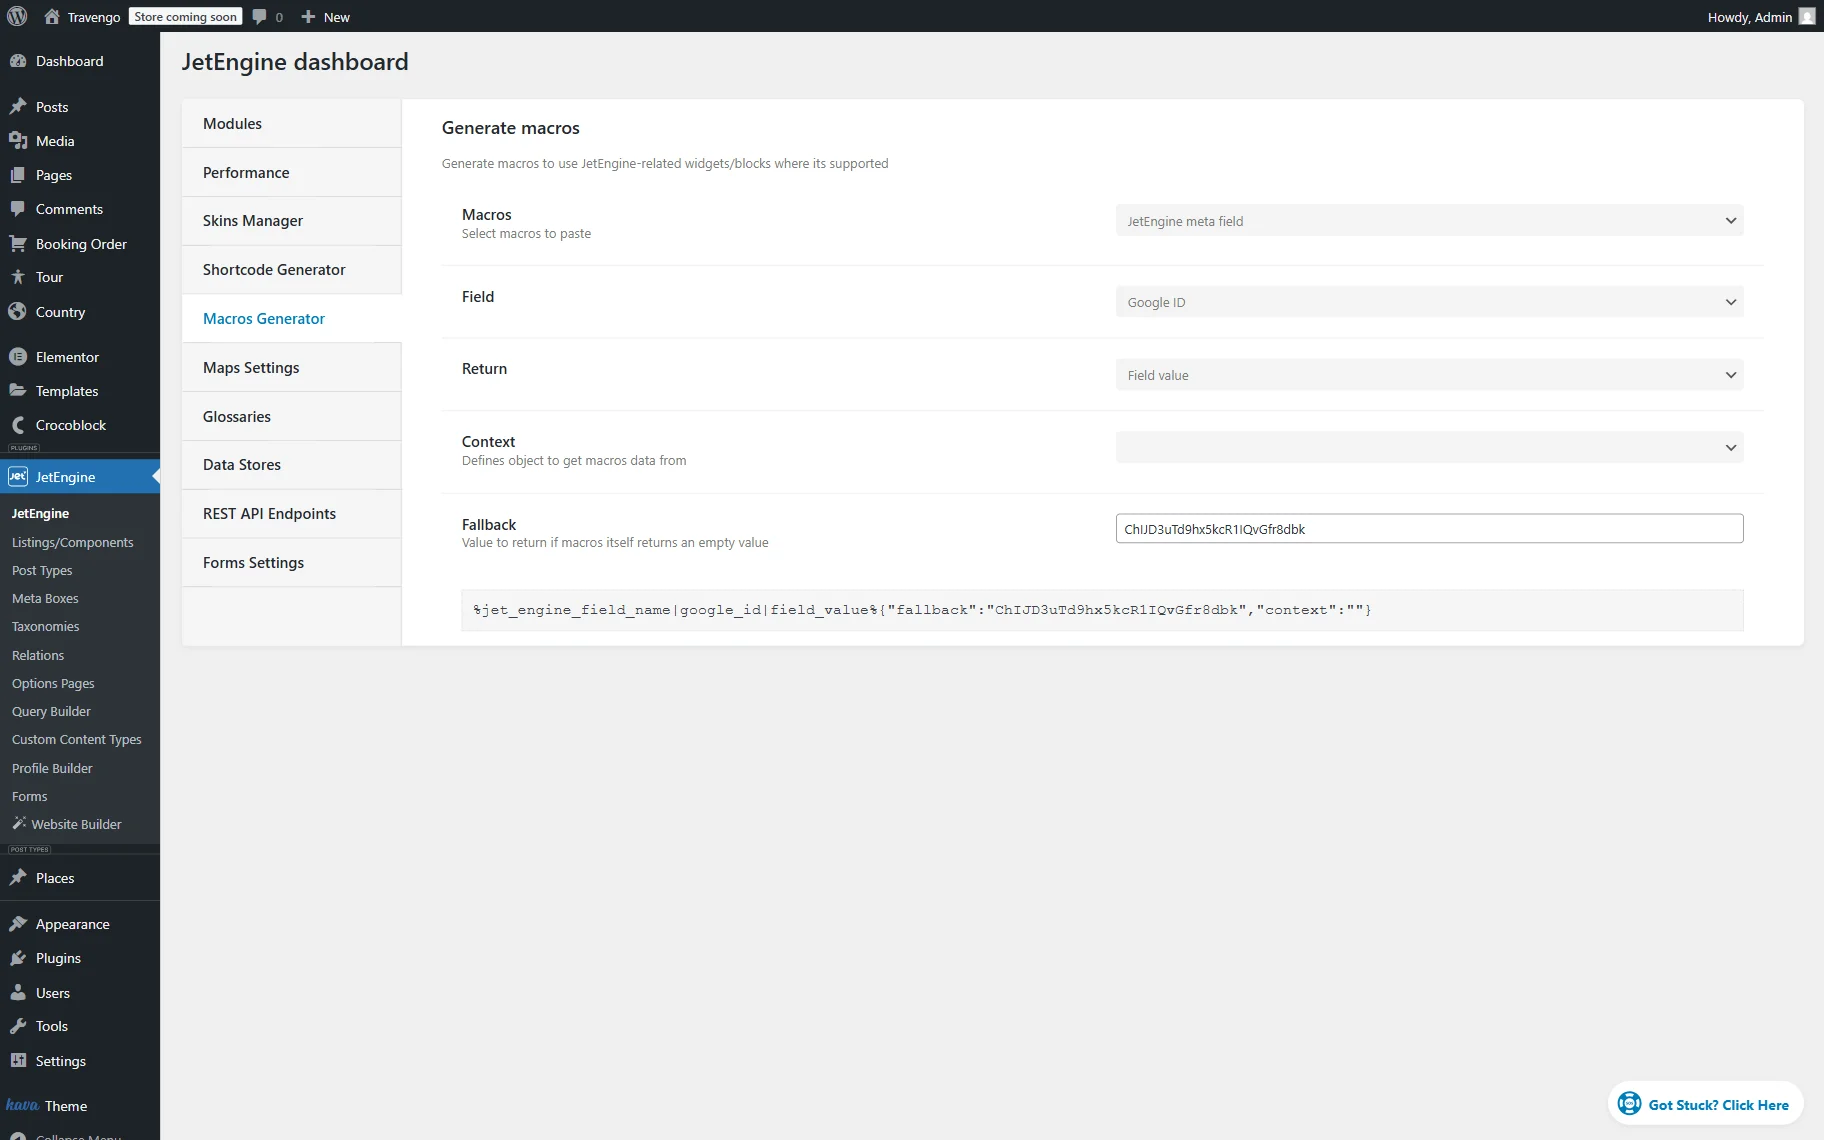
Now, open the Macros Generator tab in a new tab.
There, select the “JetEngine meta field” option in the Macros field, choose the “Google ID” Field, and the “Field value” option in the Return field.
Next, paste the Fallback, the place ID that will be used if no place ID is provided.
Below, you will find the generated shortcode; copy it.
Return to the REST API Endpoint tab, and in the API Endpoint URL field, add the following link:
https://places.googleapis.com/v1/places/%jet_engine_field_name|google_id|field_value%{"fallback":"ChIJD3uTd9hx5kcR1IQvGfr8dbk","context":""} where:
- %jet_engine_field_name|google_id|field_value%{“fallback”:”ChIJD3uTd9hx5kcR1IQvGfr8dbk”,”context”:””} — a macro generated in the Macros Generator. It allows you to get the place ID for each post dynamically;
- ChIJD3uTd9hx5kcR1IQvGfr8dbk — is a real place ID, which serves as a fallback value and ensures that the REST API preview will work correctly.
Next, in the Items path field, paste the following value:
/reviews/which is the path to the reviews list inside the API response.
Additionally, let’s set up authorization to securely connect our WordPress website to the Google Places API. To do so, activate the Authorization toggle.
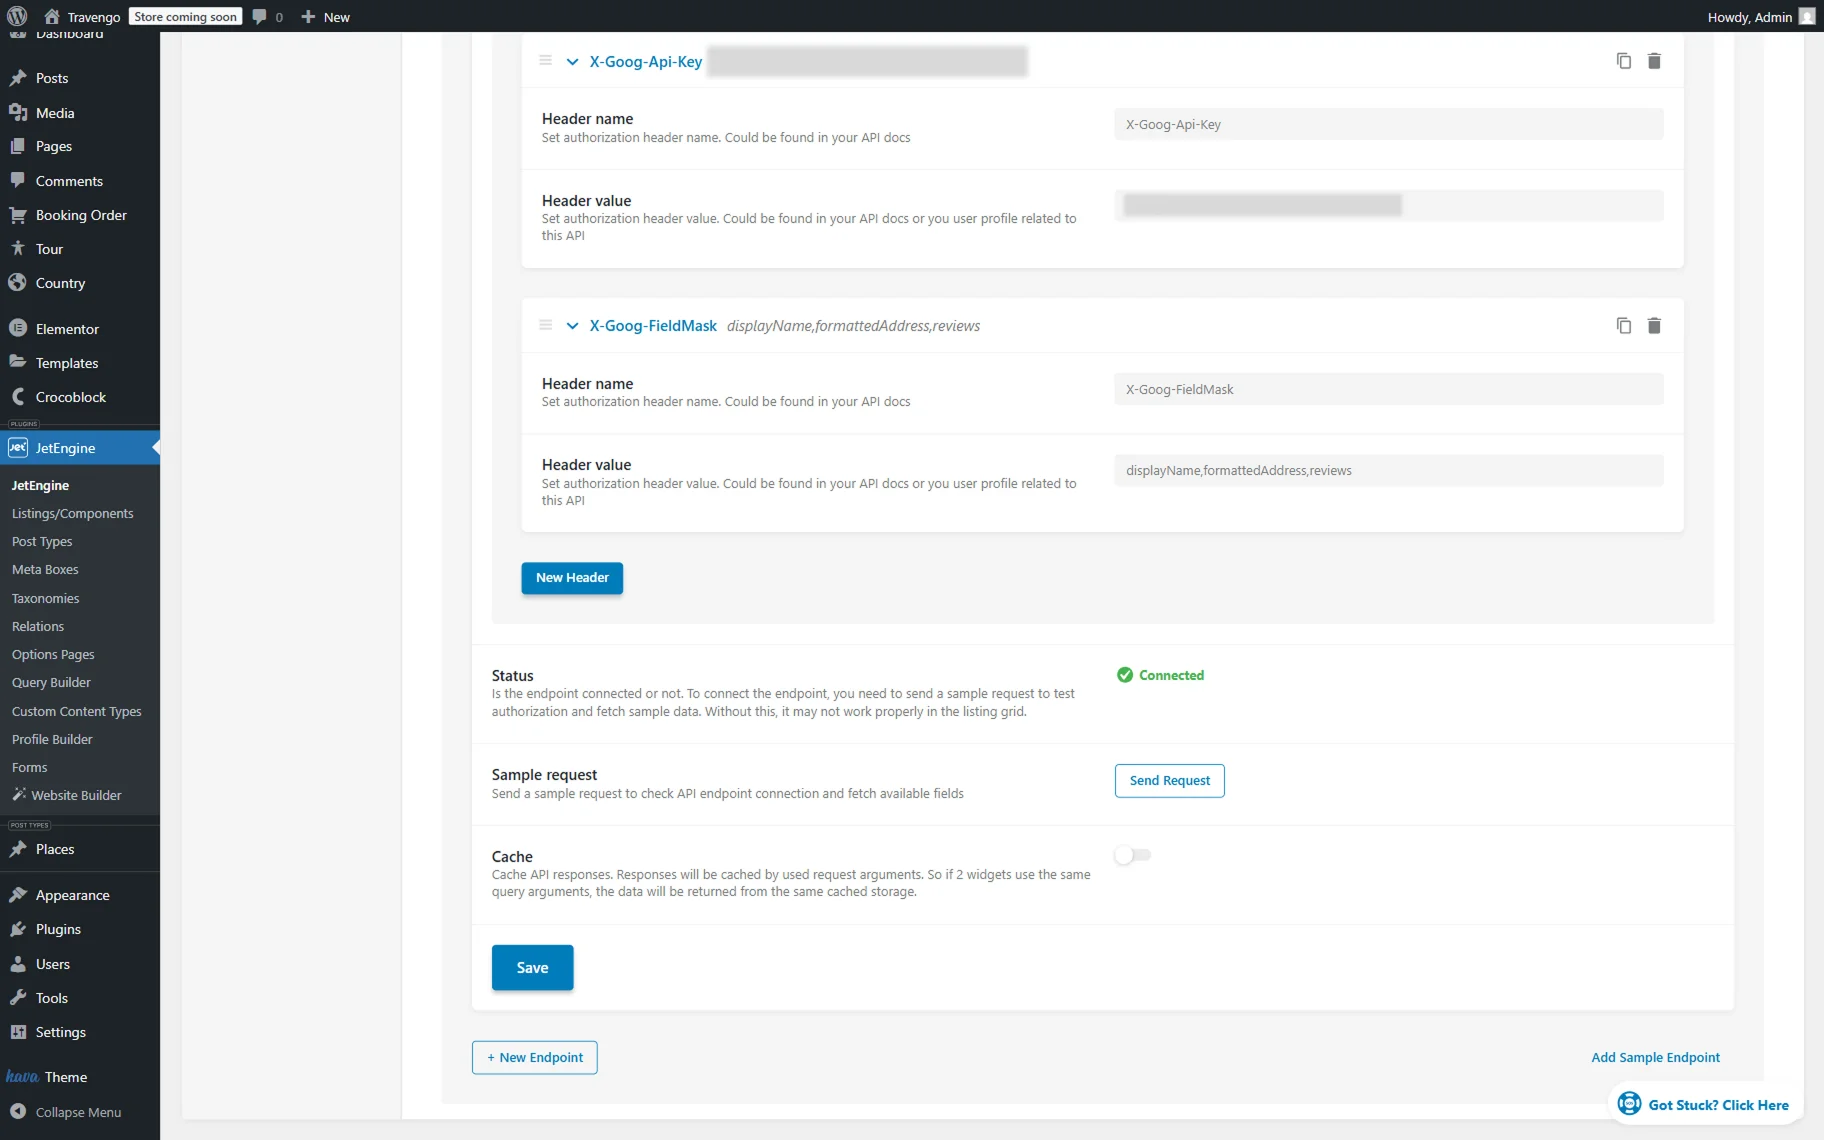
Select the “Custom Header” option as the Authorization type and click the “New Header” button.
Let’s add a Google API key (here, the “X-Goog-Api-Key” Header name).
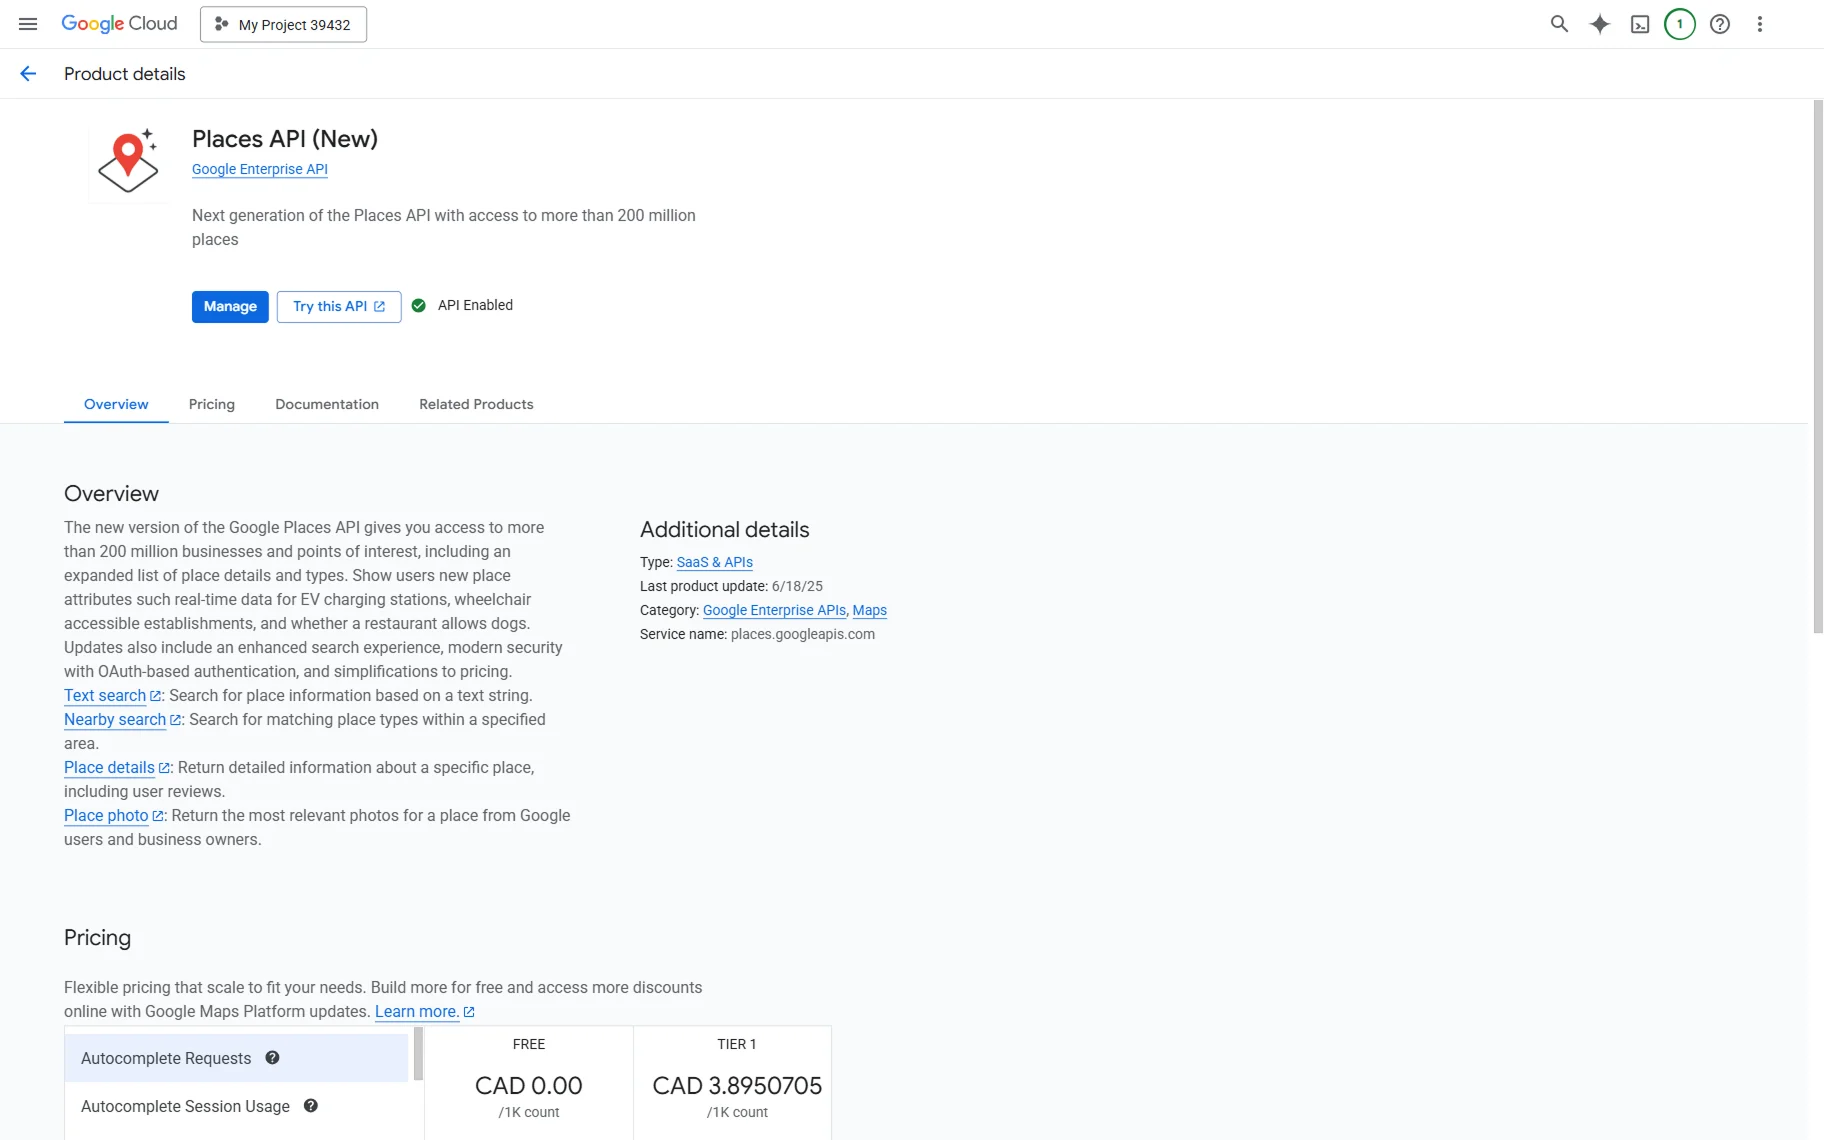
To do so, go to your Google Cloud account. Search for “Places IP (New)” and enable it.
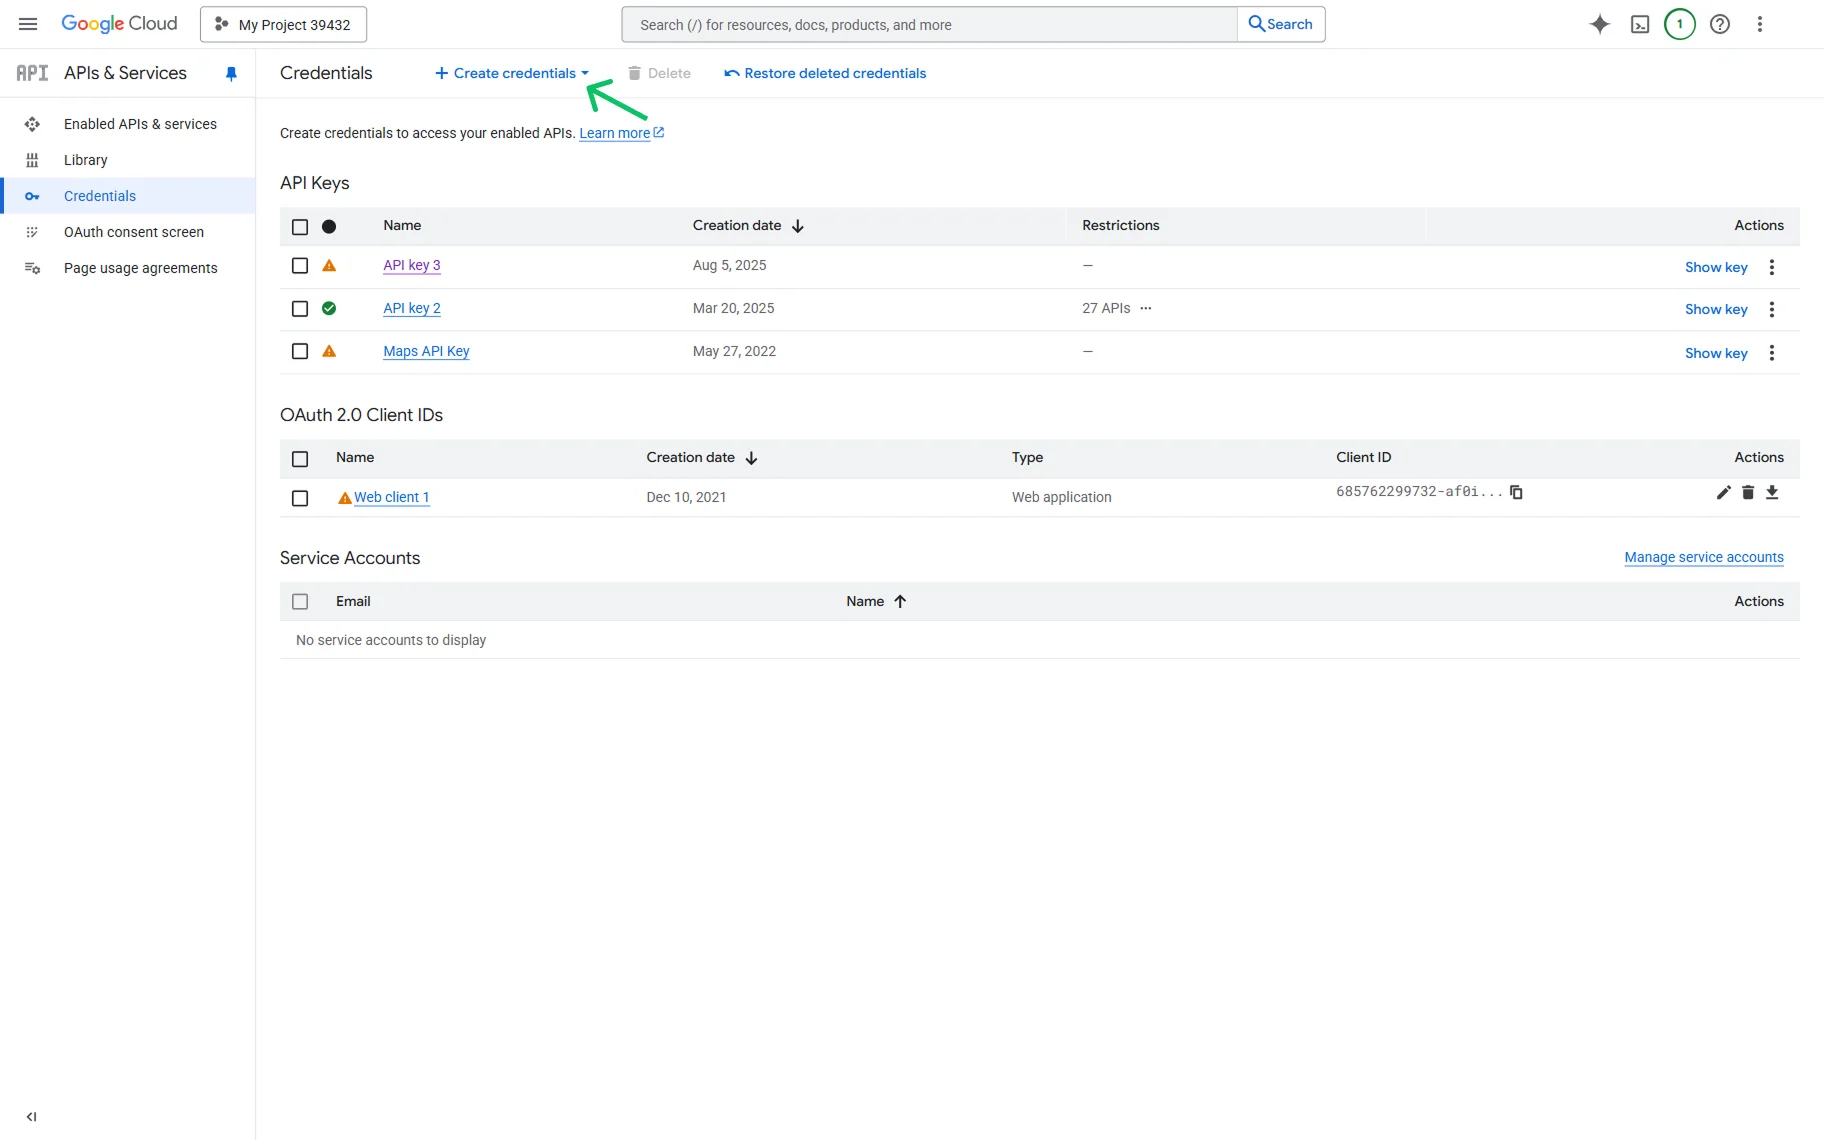
Then, go to the Credentials tab and press the “Create credentials” button.
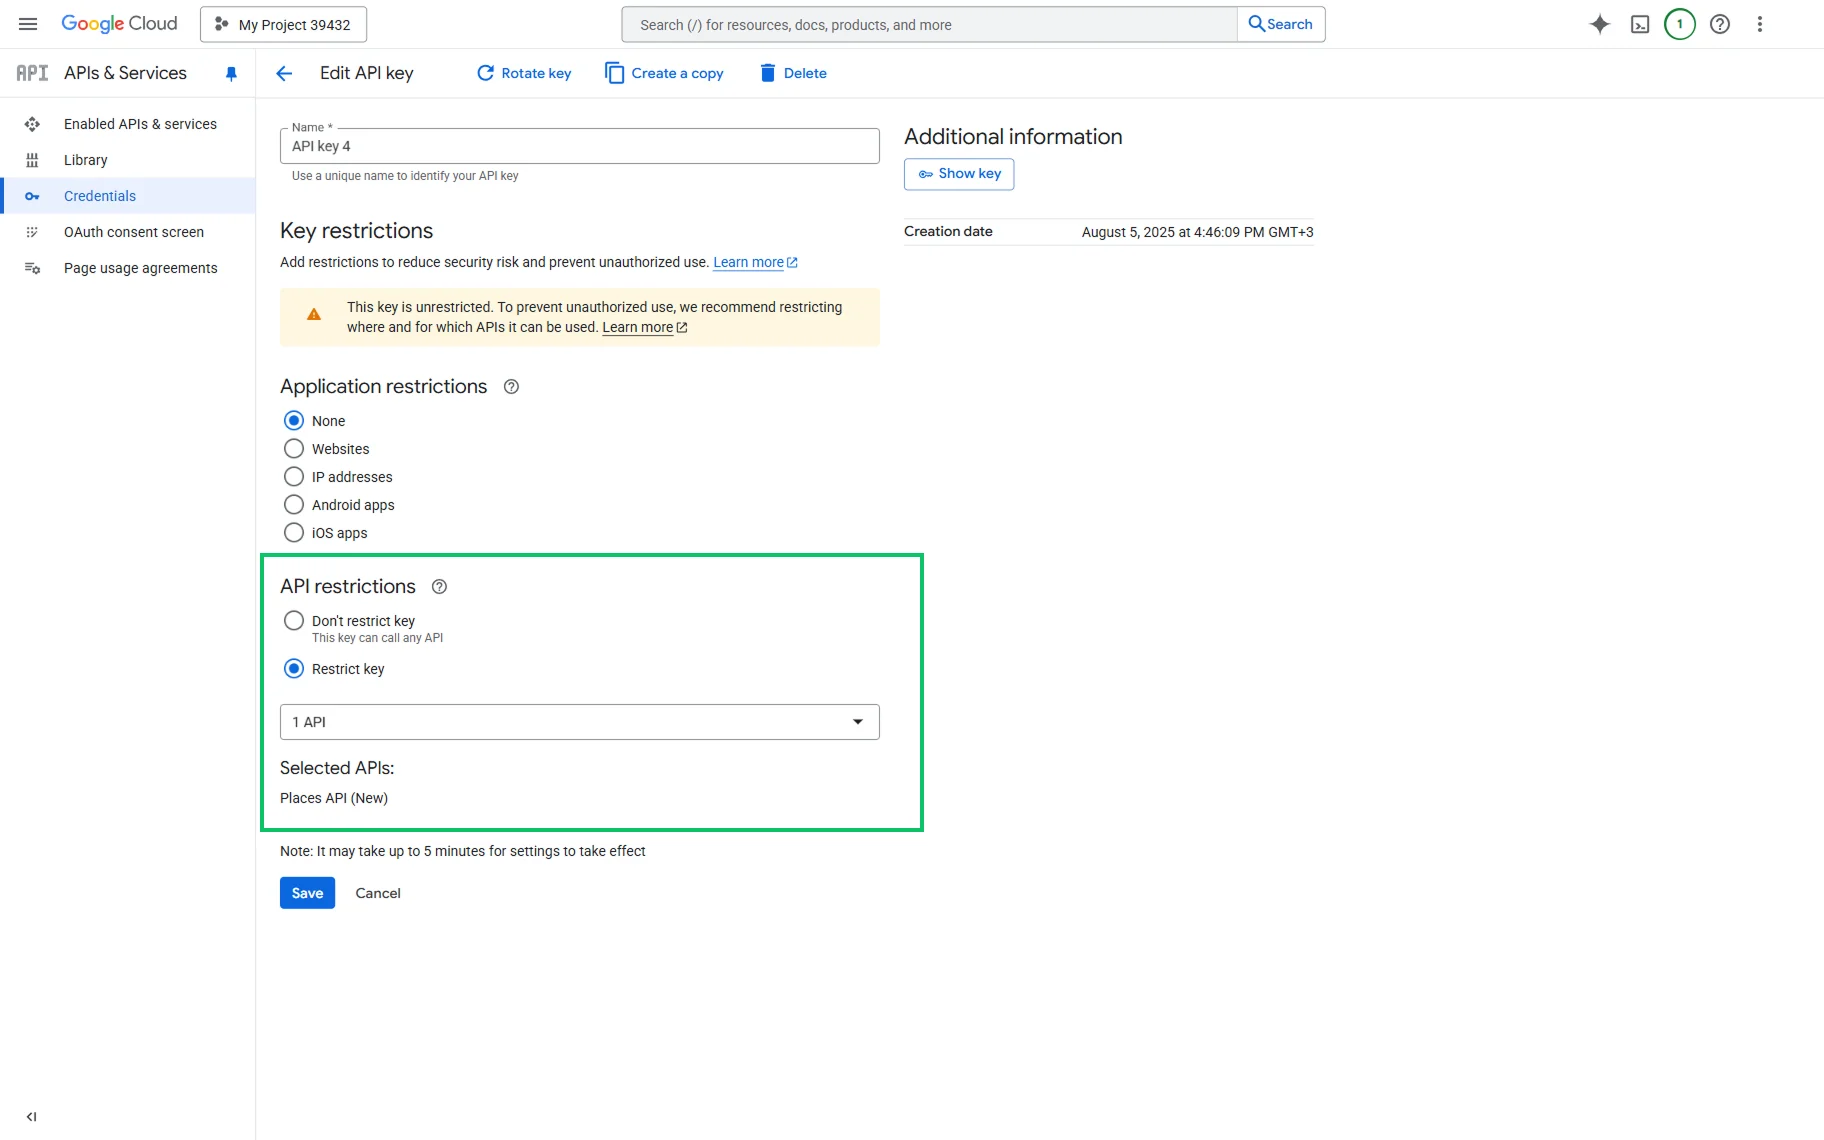
Once created, edit the key. In the section, select “Restrict key” and pick the “Places API (New)” option in the dropdown field.
Then, hit the “Save” button.
Press the “Show key” button and copy the generated API key.
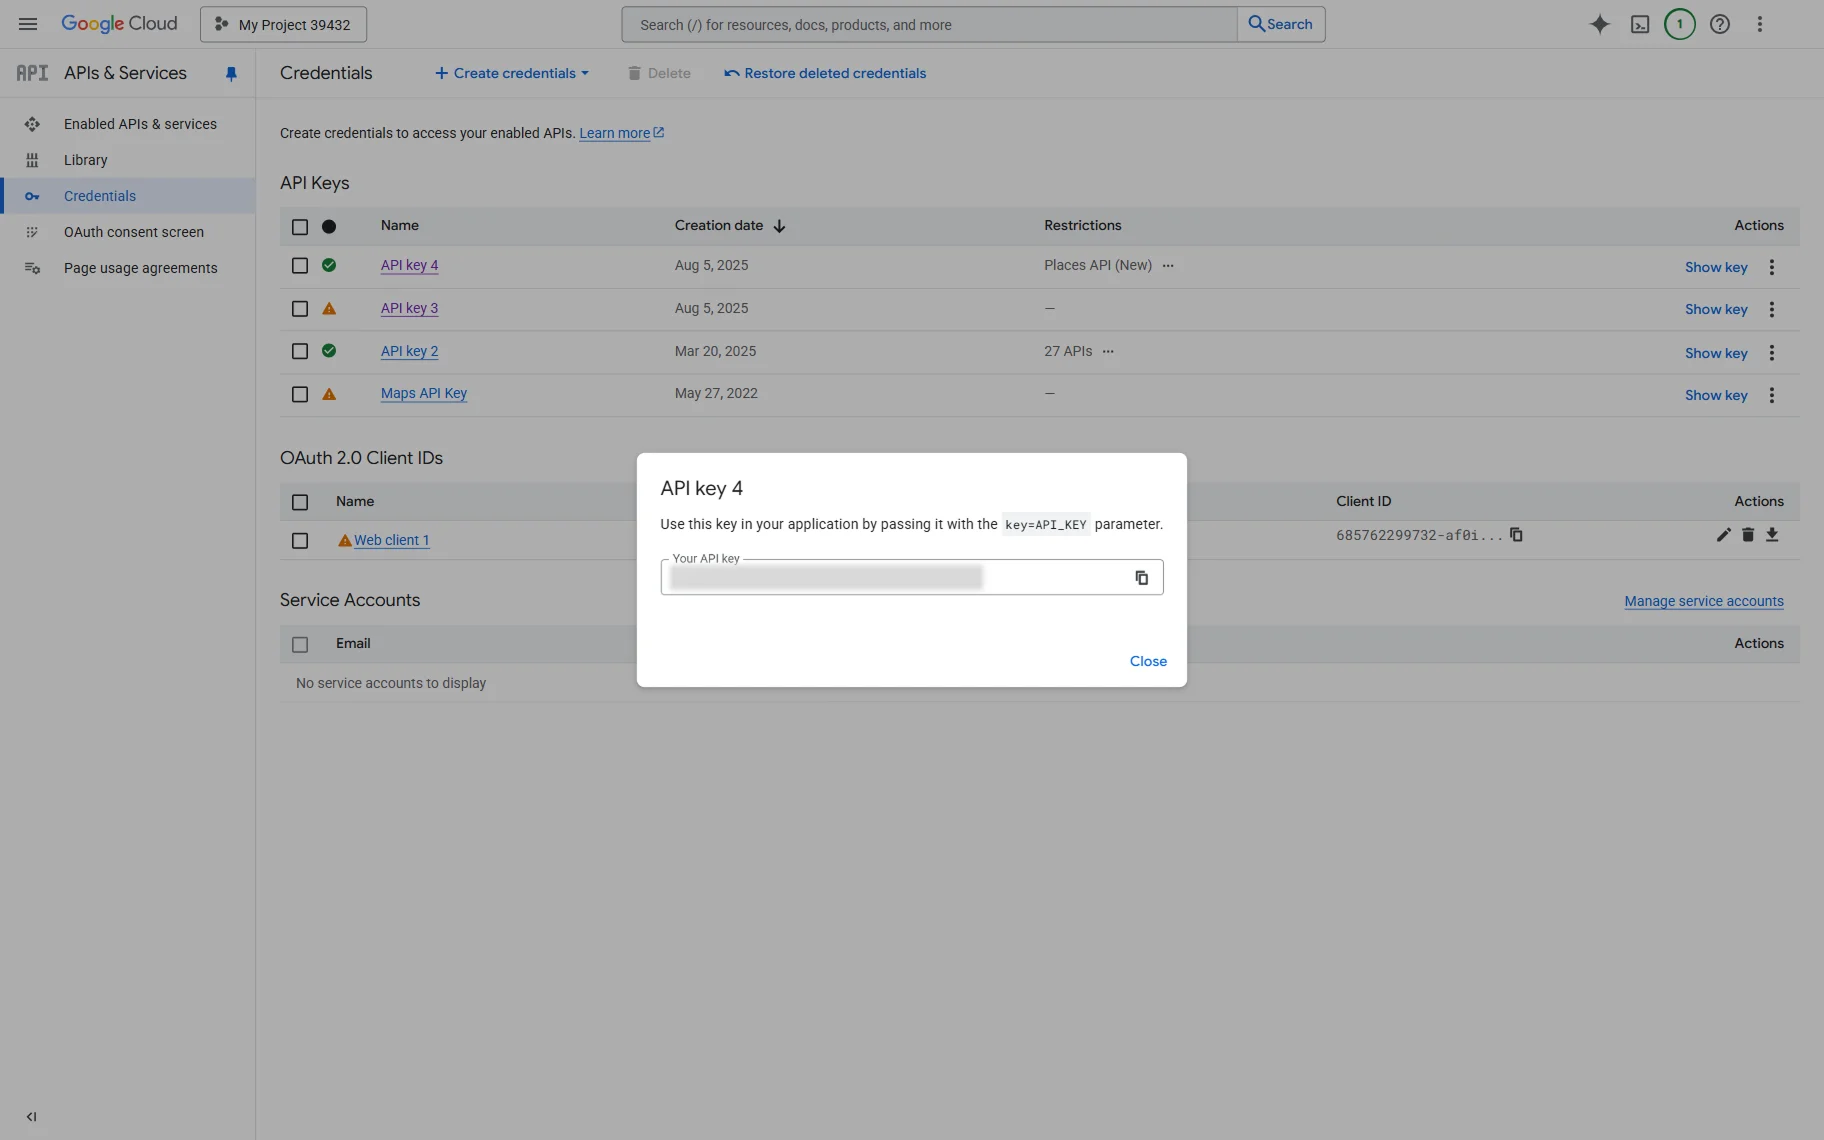
Return to the WordPress Dashboard > JetEngine > JetEngine > REST API Endpoints tab and paste your Google API key in the Header value field.
Then, press the “New Header” button once again. This time, we do this to add field masks (here, “X-Goog-FieldMask” Header name).
Also, paste the needed value in the Header value field. Check more about the available parameters that can be added in the Migrate to Place Details guide.
For example, we add the following parameters:
displayName,formattedAddress,reviewsFinally, press the “Send Request” button in the Sample request section. If everything works correctly, the “Connected” Status will be displayed.
Now, don’t forget to press the “Save” button.
Build a Query
Let’s build a query that will serve as the source for the REST API listing that will be created in the next step.
To build it, head to the WordPress Dashboard > JetEngine > Query Builder editor and press the “Add New” button.
In the General Settings section, complete the Name of the query (here, “REST API Query”) and select the “REST API Query” Query Type.
Adjust other fields in this section and move to the REST API Query section.
In the From Endpoint drop-down, select the name of the endpoint you have just created.
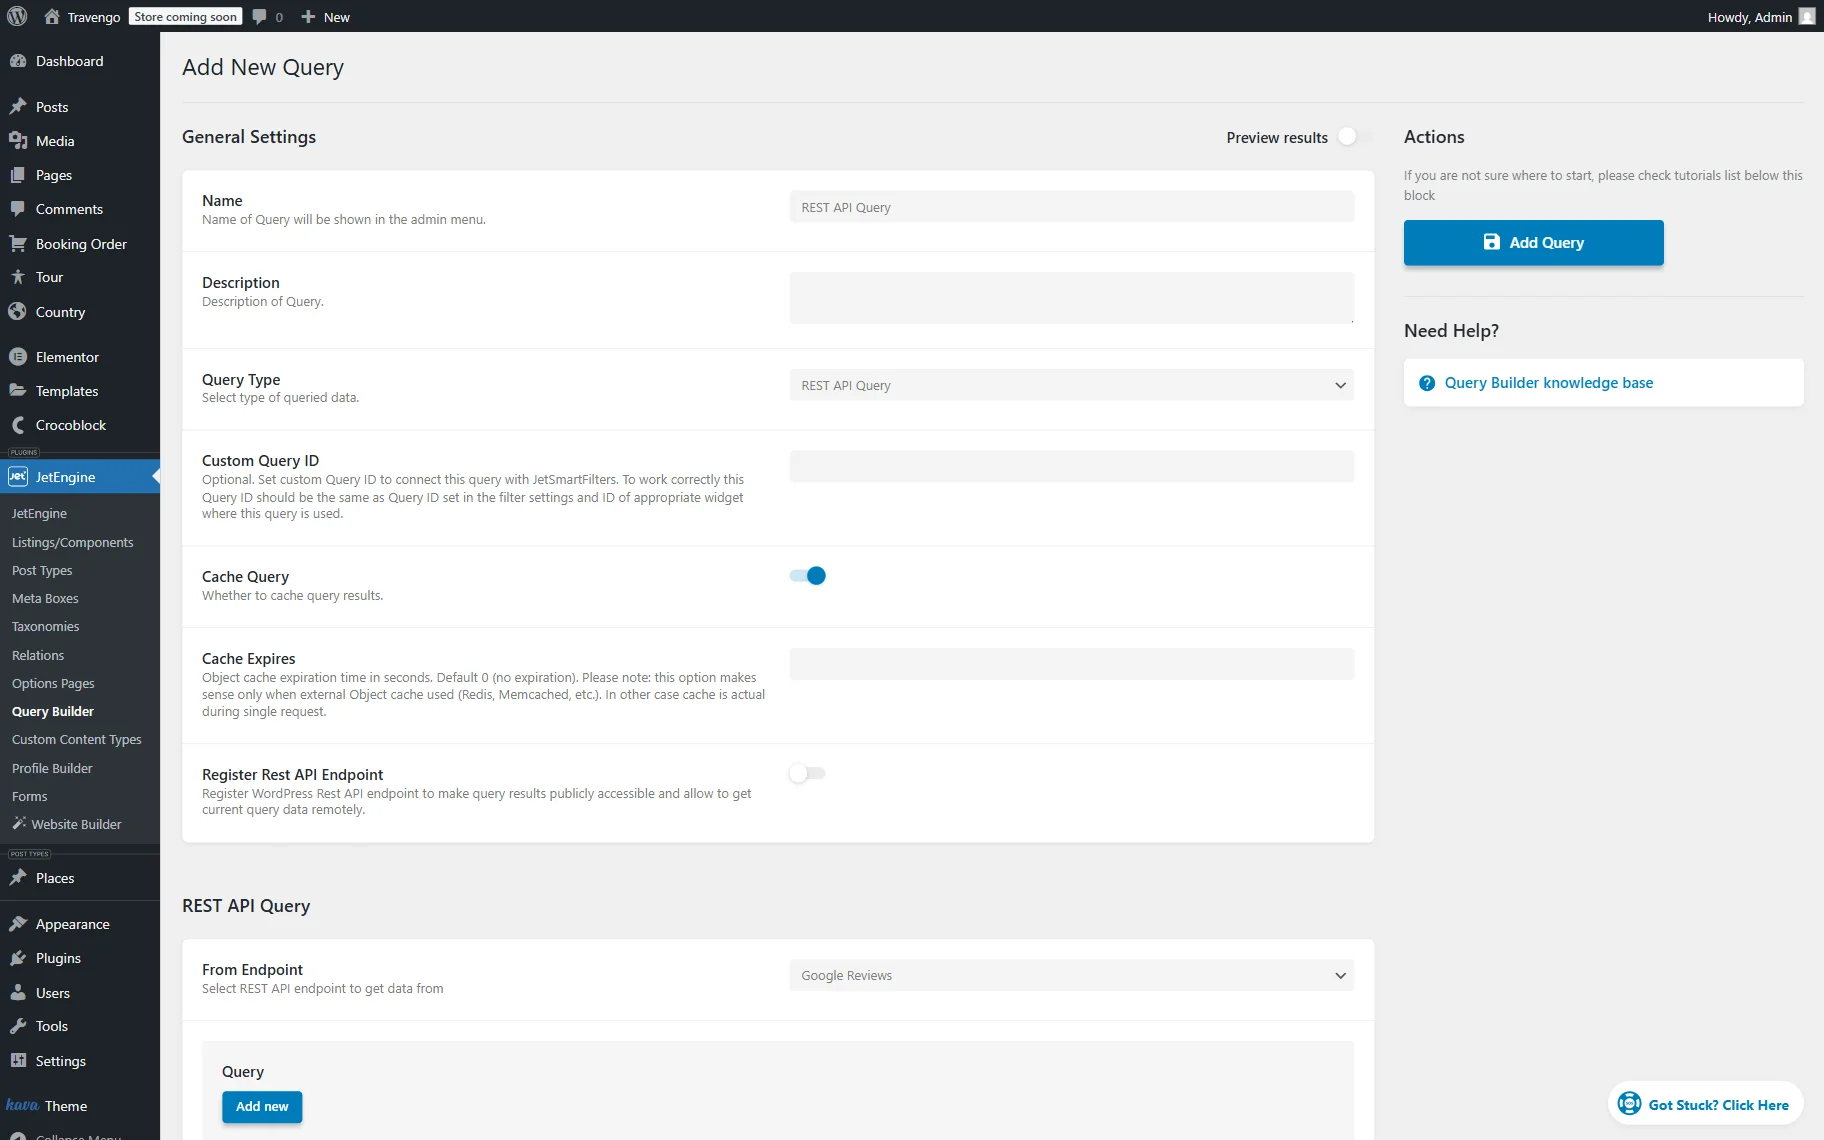
That’s it for the basic settings customization, so press the “Add Query” button whenever ready.
Create a Listing Template
Now, let’s build a Listing template to display reviews.
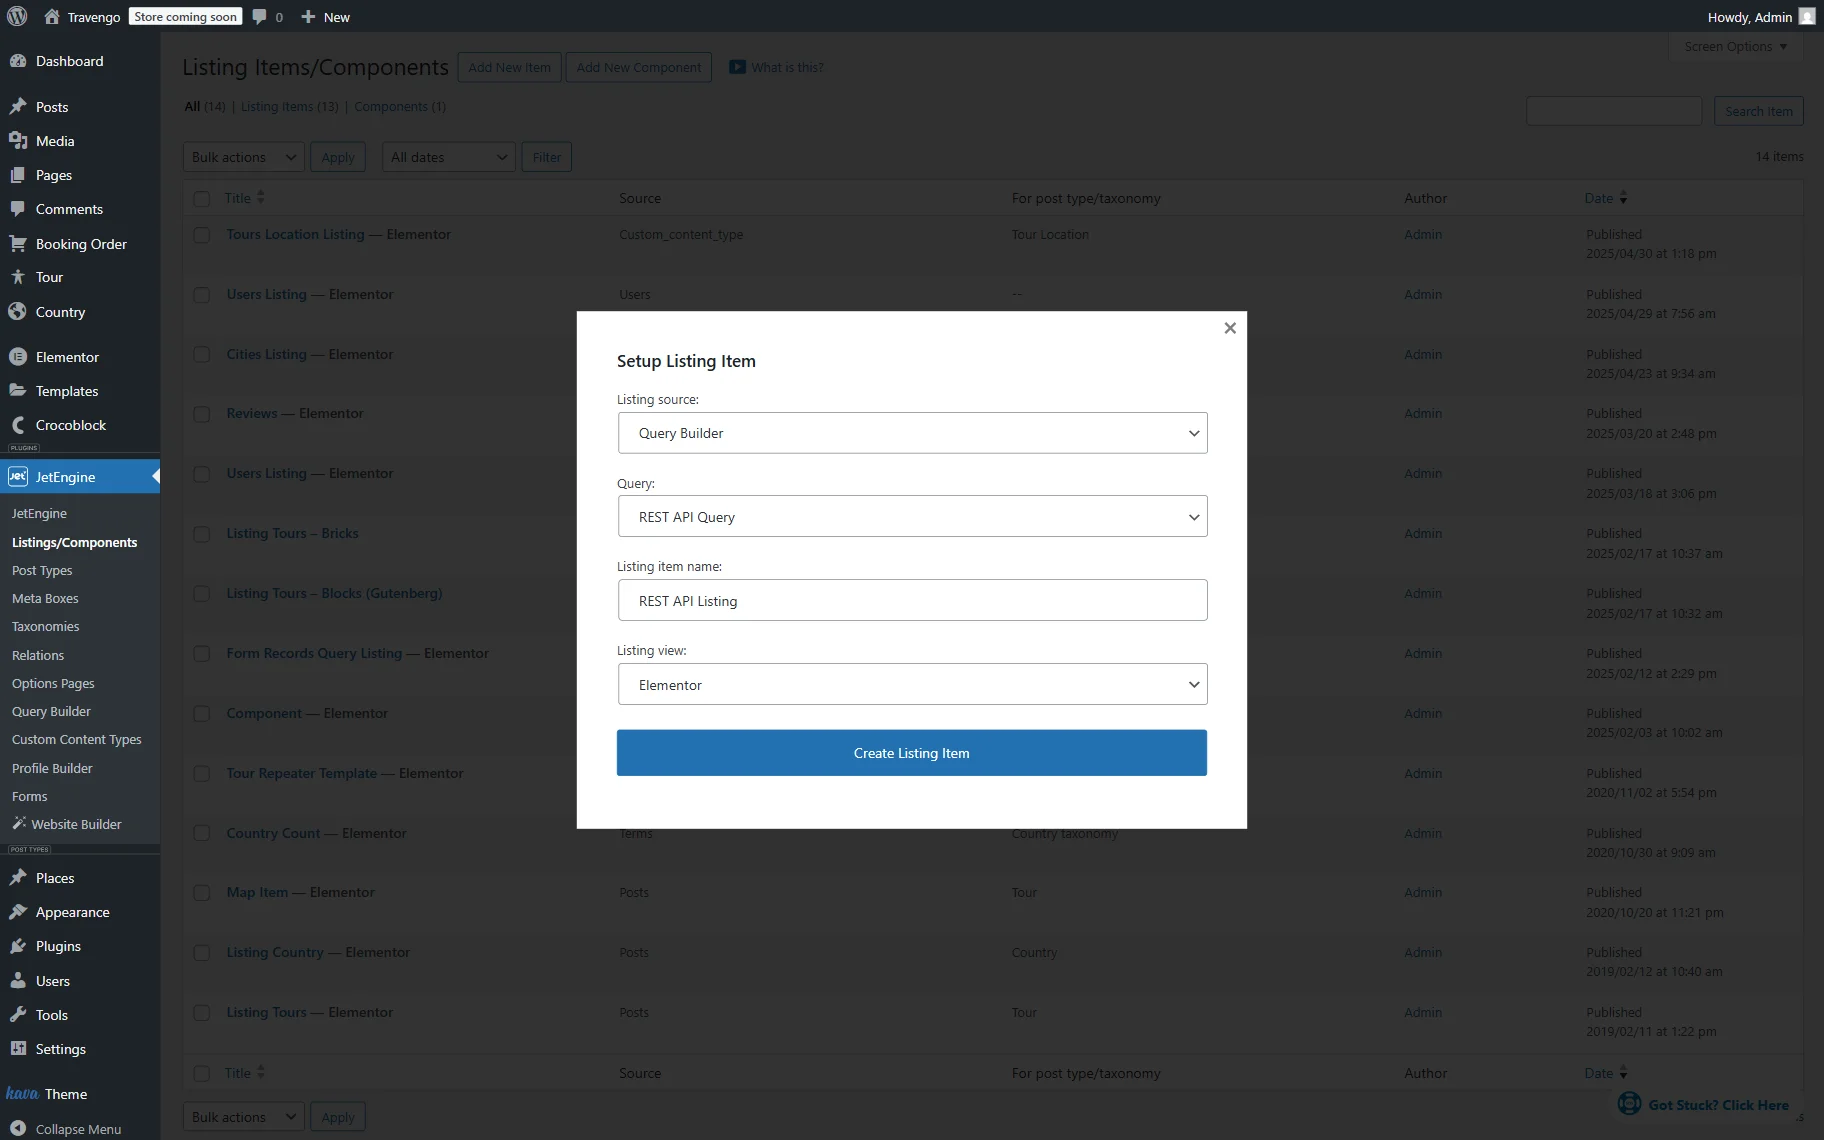
Navigate to the WordPress Dashboard > JetEngine > Listings/Components directory and click the “Add New Item” button.
In the Setup Listing Item pop-up, select the “Query Builder” option as the Listing source and the built query’s name in the Query field.
Next, set the Listing item name (here, “REST API Listing”) and pick the desired Listing view. For instance, we use Elementor.
To open the editor, press the “Create Listing Item” button.
When the editor is opened, you can add a desired set of widgets. We will now review the customization process for displaying the available review data.
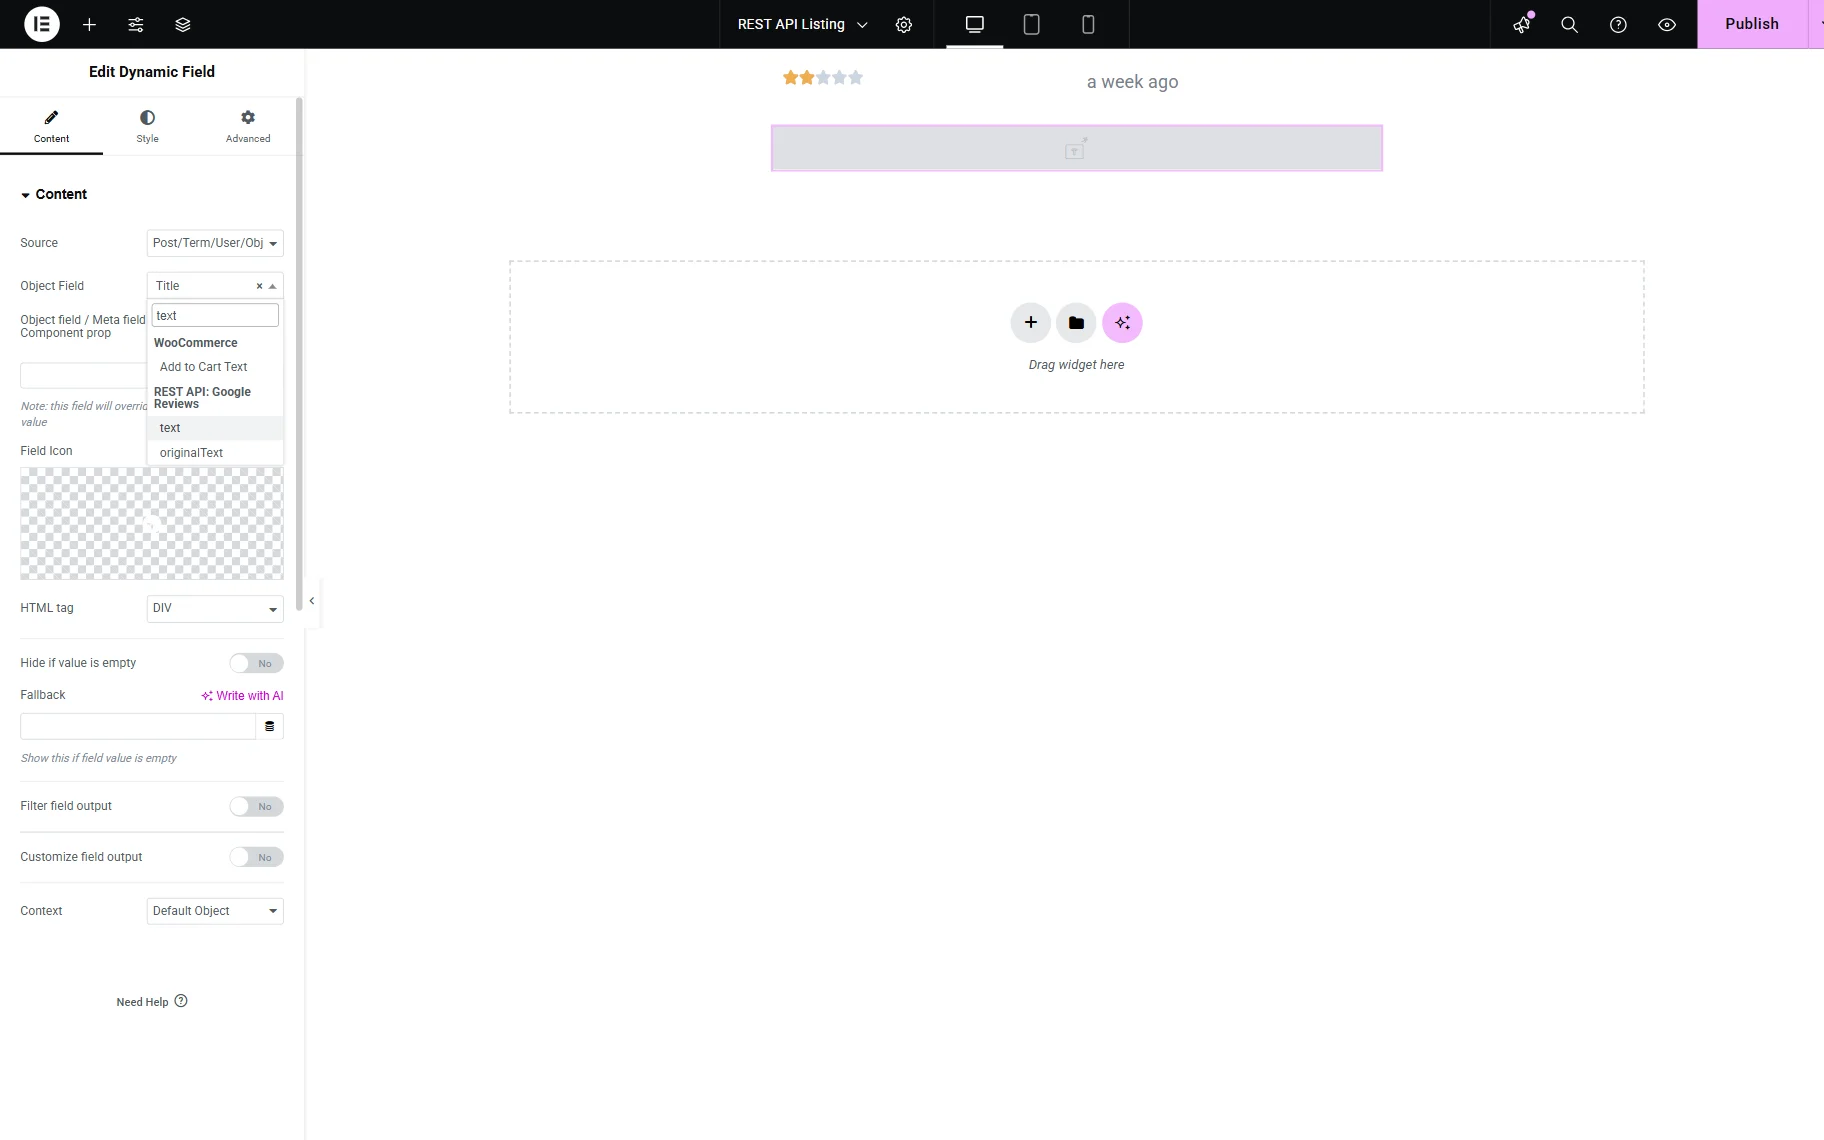
First, we add a two-column layout and place a Rating widget inside the first column. Leave the default Rating Scale and click the “Dynamic Tag” button next to the Rating field.
In the appeared list, find and select the “Current Object Field” option.
In the opened settings, select the “rating” Field in the REST API: (Your endpoint name) section and leave the default “Default Object” Context.

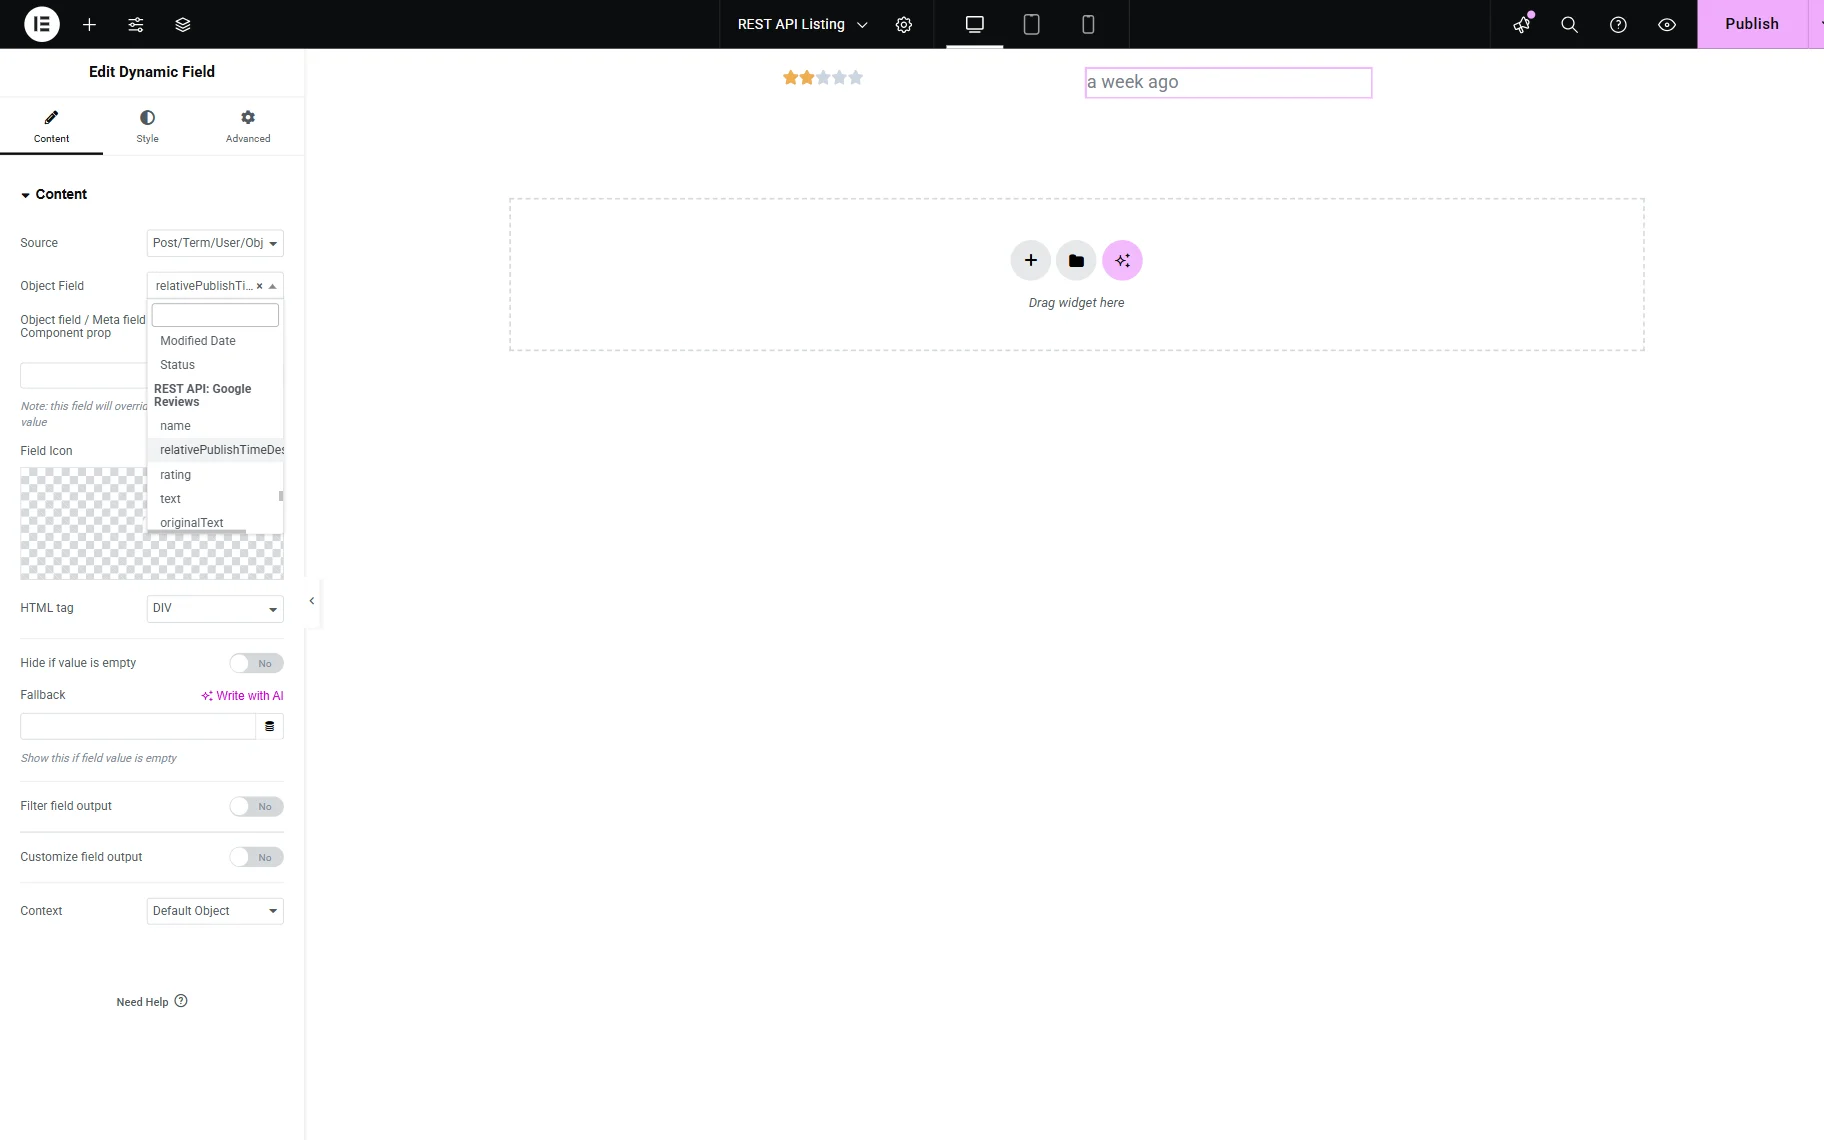
In the second column, we will now add a review publish time. To display such info, add a Dynamic Field widget.
Leave the “Post/Term/User/Object Data” Source and press the “Dynamic Tag” button next to the Object Field.
Find the REST API: (Your endpoint name) section and pick the “relativePublishTimeDescription” option.
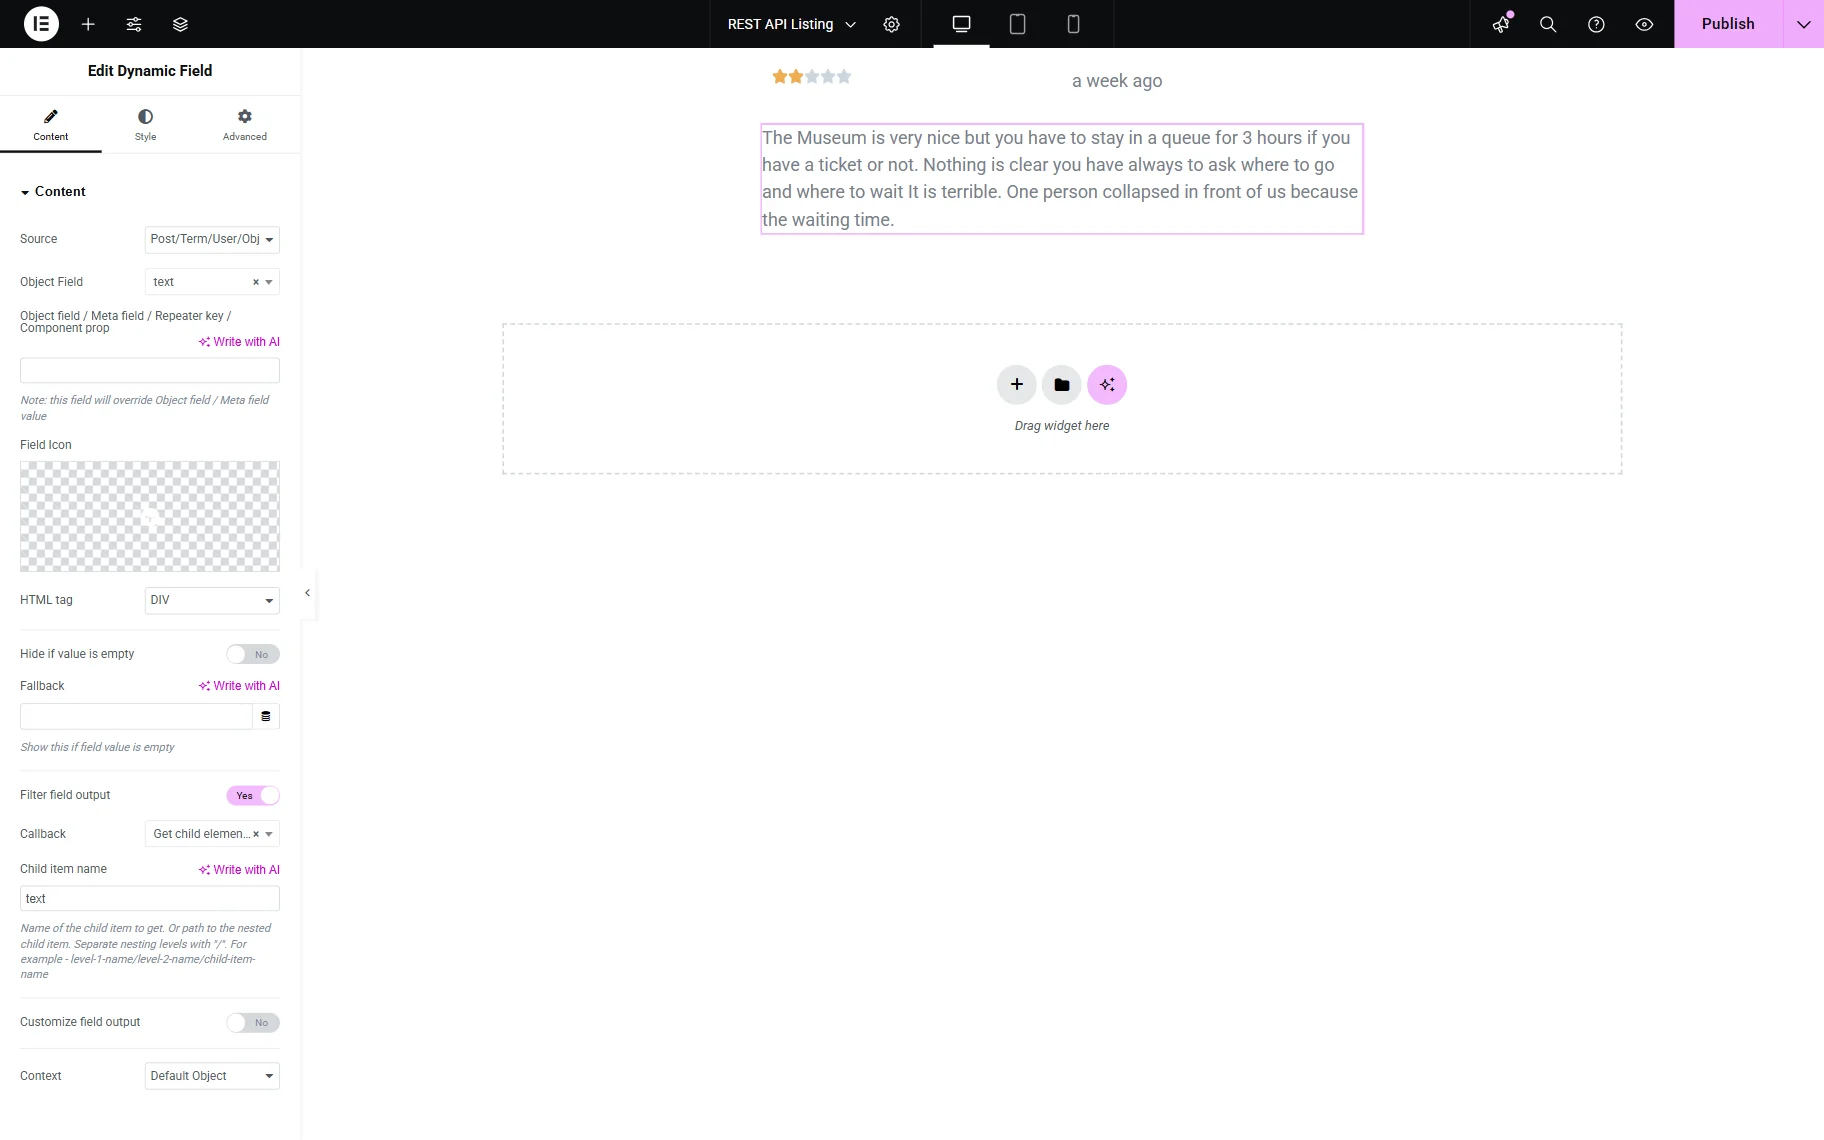
Now, let’s add the review text itself. To do so, add another Dynamic Field to the page.
Leave the default “Post/Term/User/Object Data” Source and press the “Dynamic Tag” button. Find the REST API: (Your endpoint name) section and pick the “text” option.
Let’s adjust the callback by activating the Filter field output toggle. In the Callback field, select the “Get child element from object/array” option and complete the Child item name field with the “text” value.
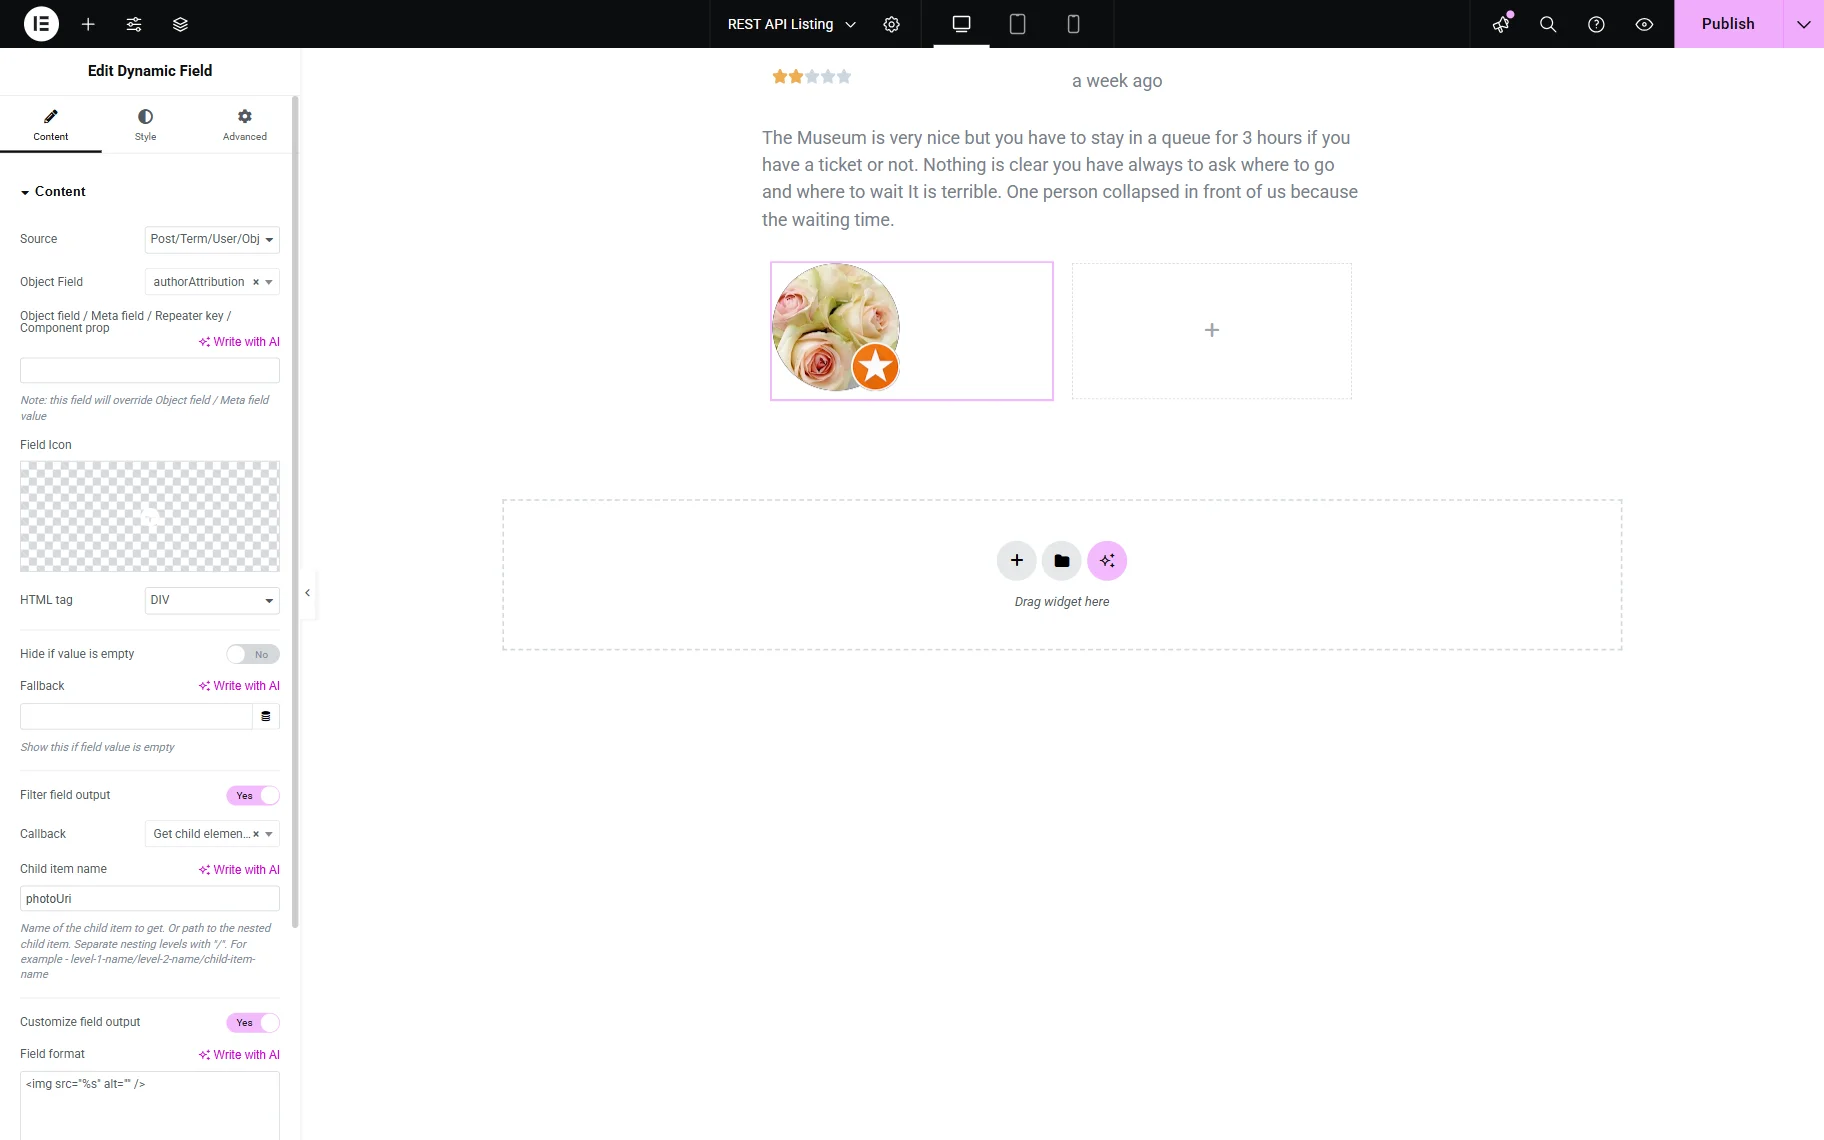
Now, let’s add a Google avatar of the person who wrote the review. So, once again, add another Dynamic Field to the page.
Leave the default “Post/Term/User/Object Data” Source and click the “Dynamic Tag” button next to the Object Field.
In the REST API: (Your endpoint name) section, find and select the “authorAttribution” option.
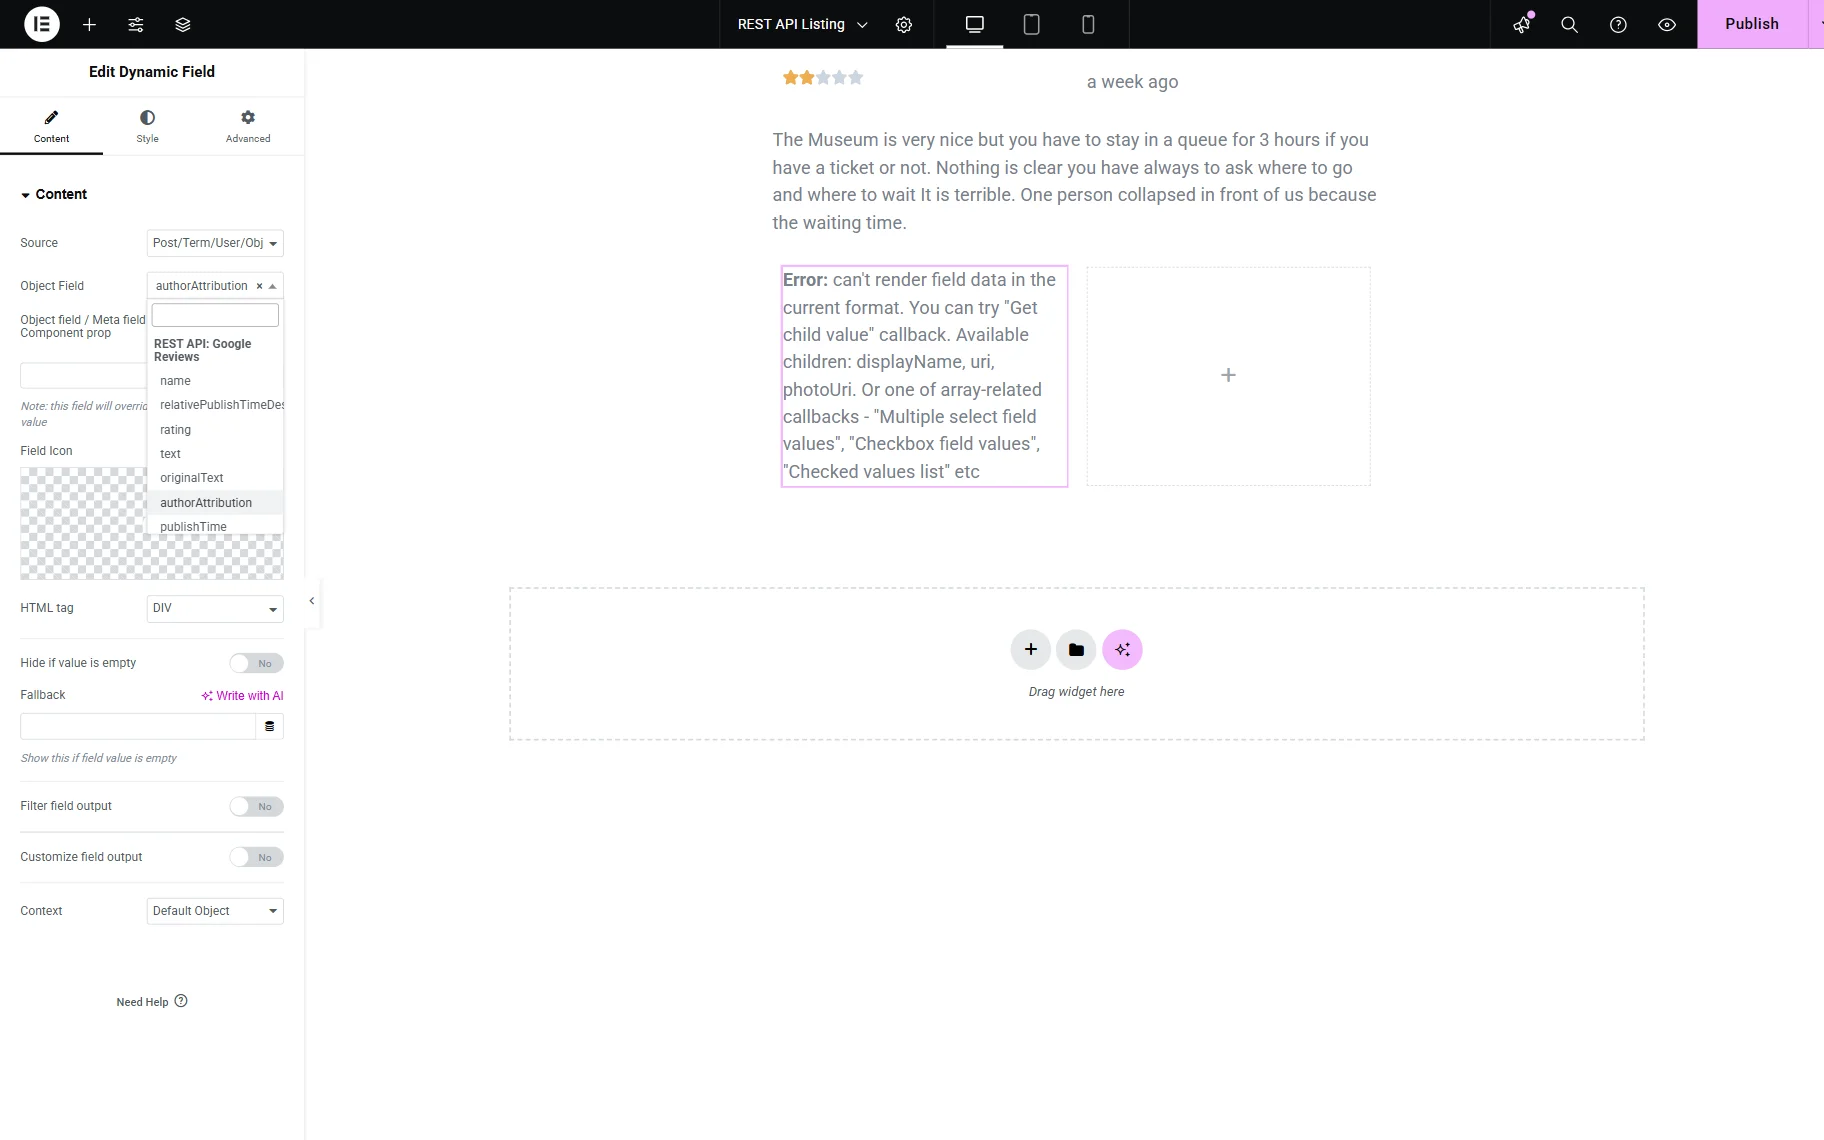
The image is not currently displayed. Let’s continue the widget customization by activating the Filter field output toggle.
Pick the “Get child element from object/array” Callback and set the “photoUri” Child item name.
Also, let’s activate the Customize field output toggle and add the following Field format:
<img src="%s" alt="" />This format displays an actual image instead of just showing the image URL. The “alt” attribute is also included to provide an alternative text of the image.
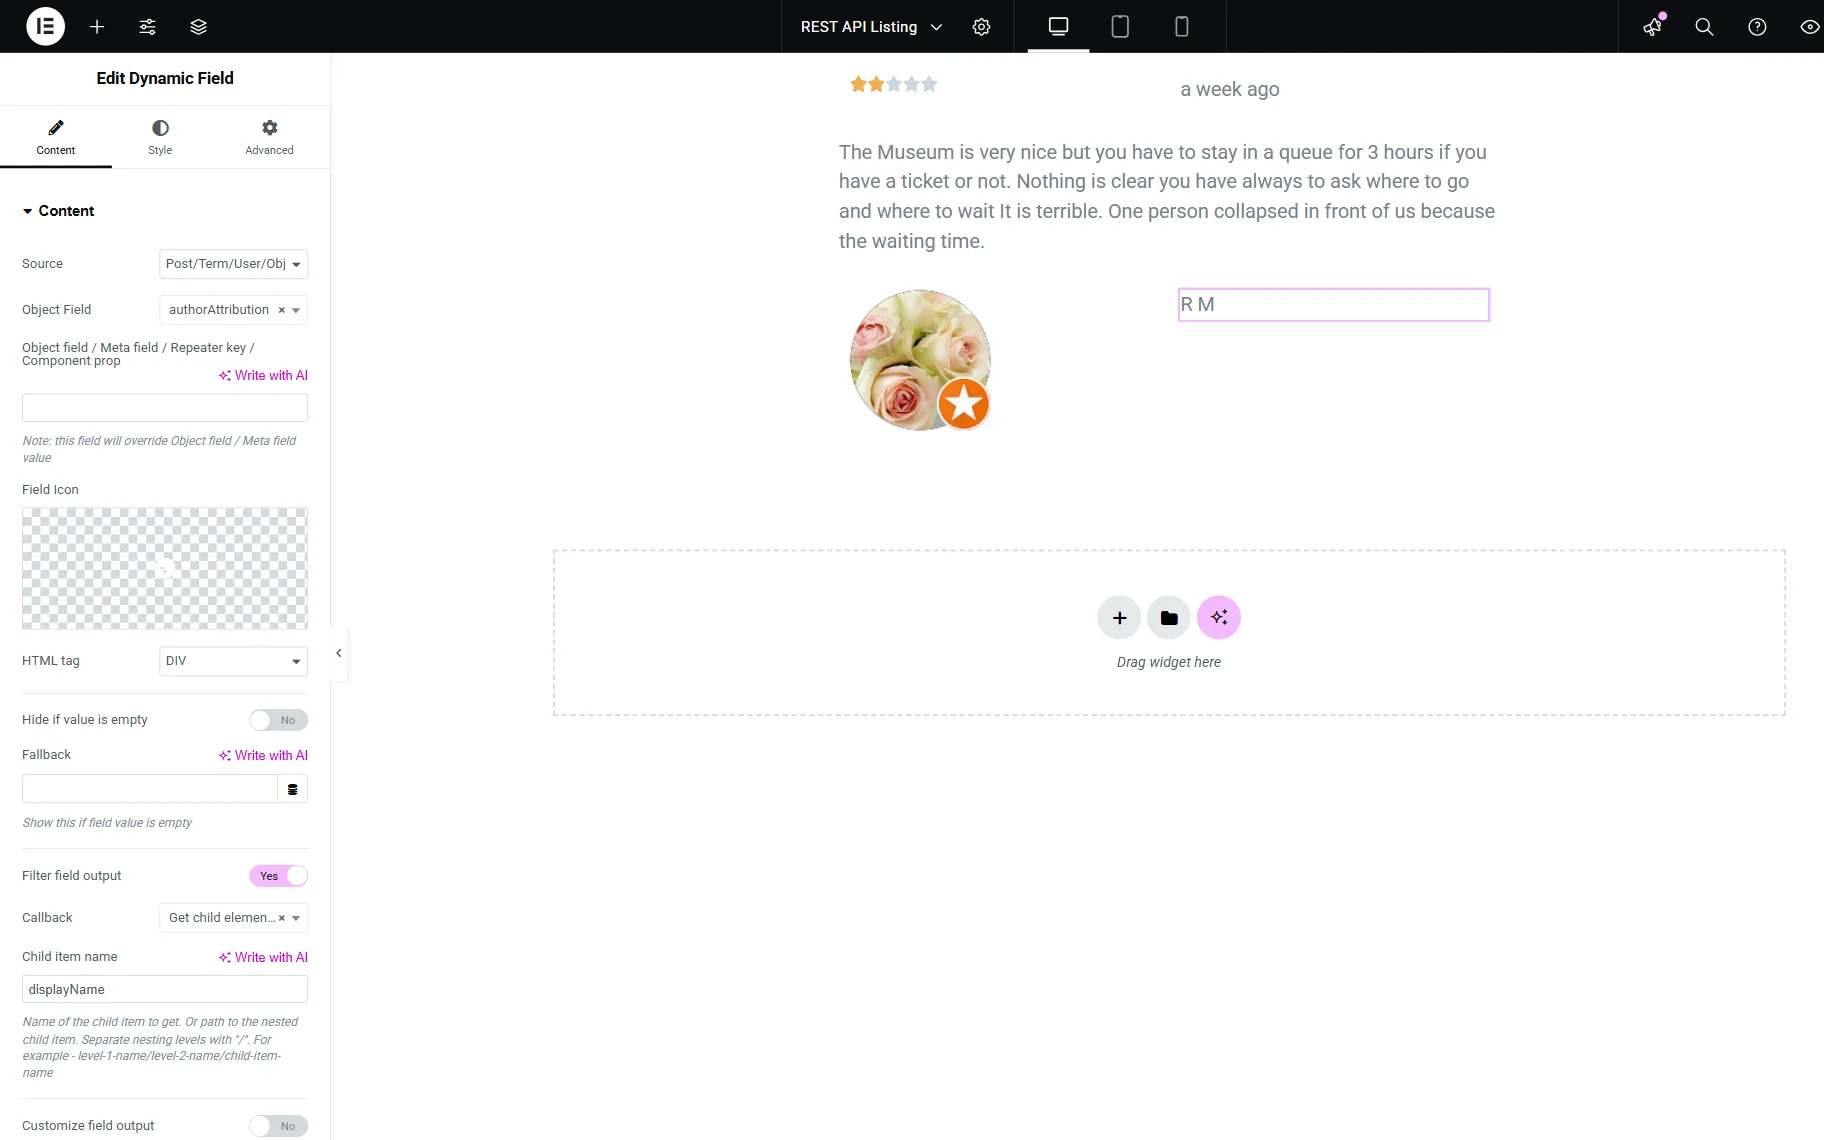
Finally, let’s add a user’s nickname. Add one more Dynamic Field to the page.
Leave the default “Post/Term/User/Object Data” Source and press the “Dynamic Tag” button next to the Object Field button.
Then, in the appeared dropdown, pick the “authorAttribute” option in the REST API: (Your endpoint name) section.
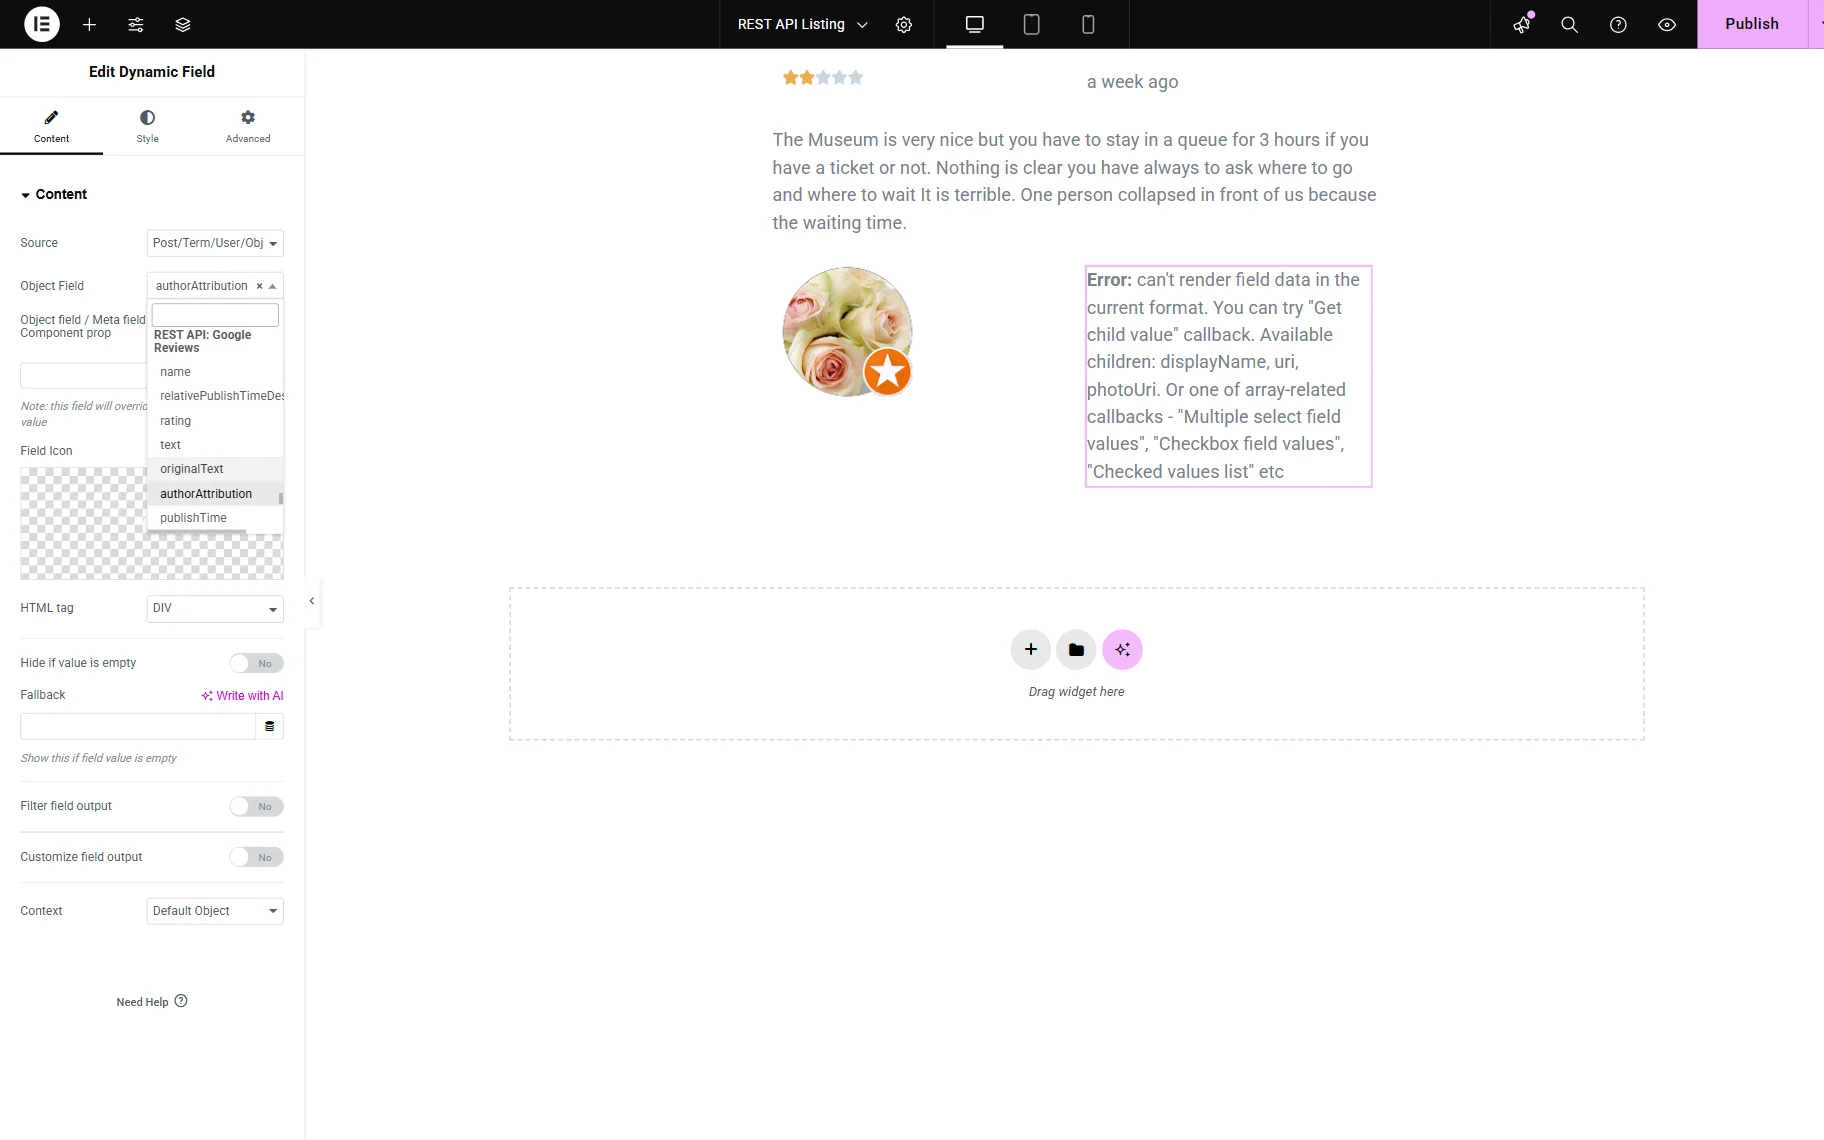
Enable the Filter field output toggle and pick the “Get child element from object/array” Callback.
In the Child item name field, paste the “displayName” value.
That’s all for the listing template customization. You can now style the template, and when ready, press the “Publish” button.
Add Listing to the Page/Template
Now, it’s time to display the listing template on the page or template. We will add it to JetThemeCore’s Single Page, so every “Places” CPT post’s page displays its reviews.
If you also want to add Google reviews to the Single Page template, go to WordPress Dashboard > Crocoblock > Theme Builder and open the needed Single Page template’s body editor, or create a new one.
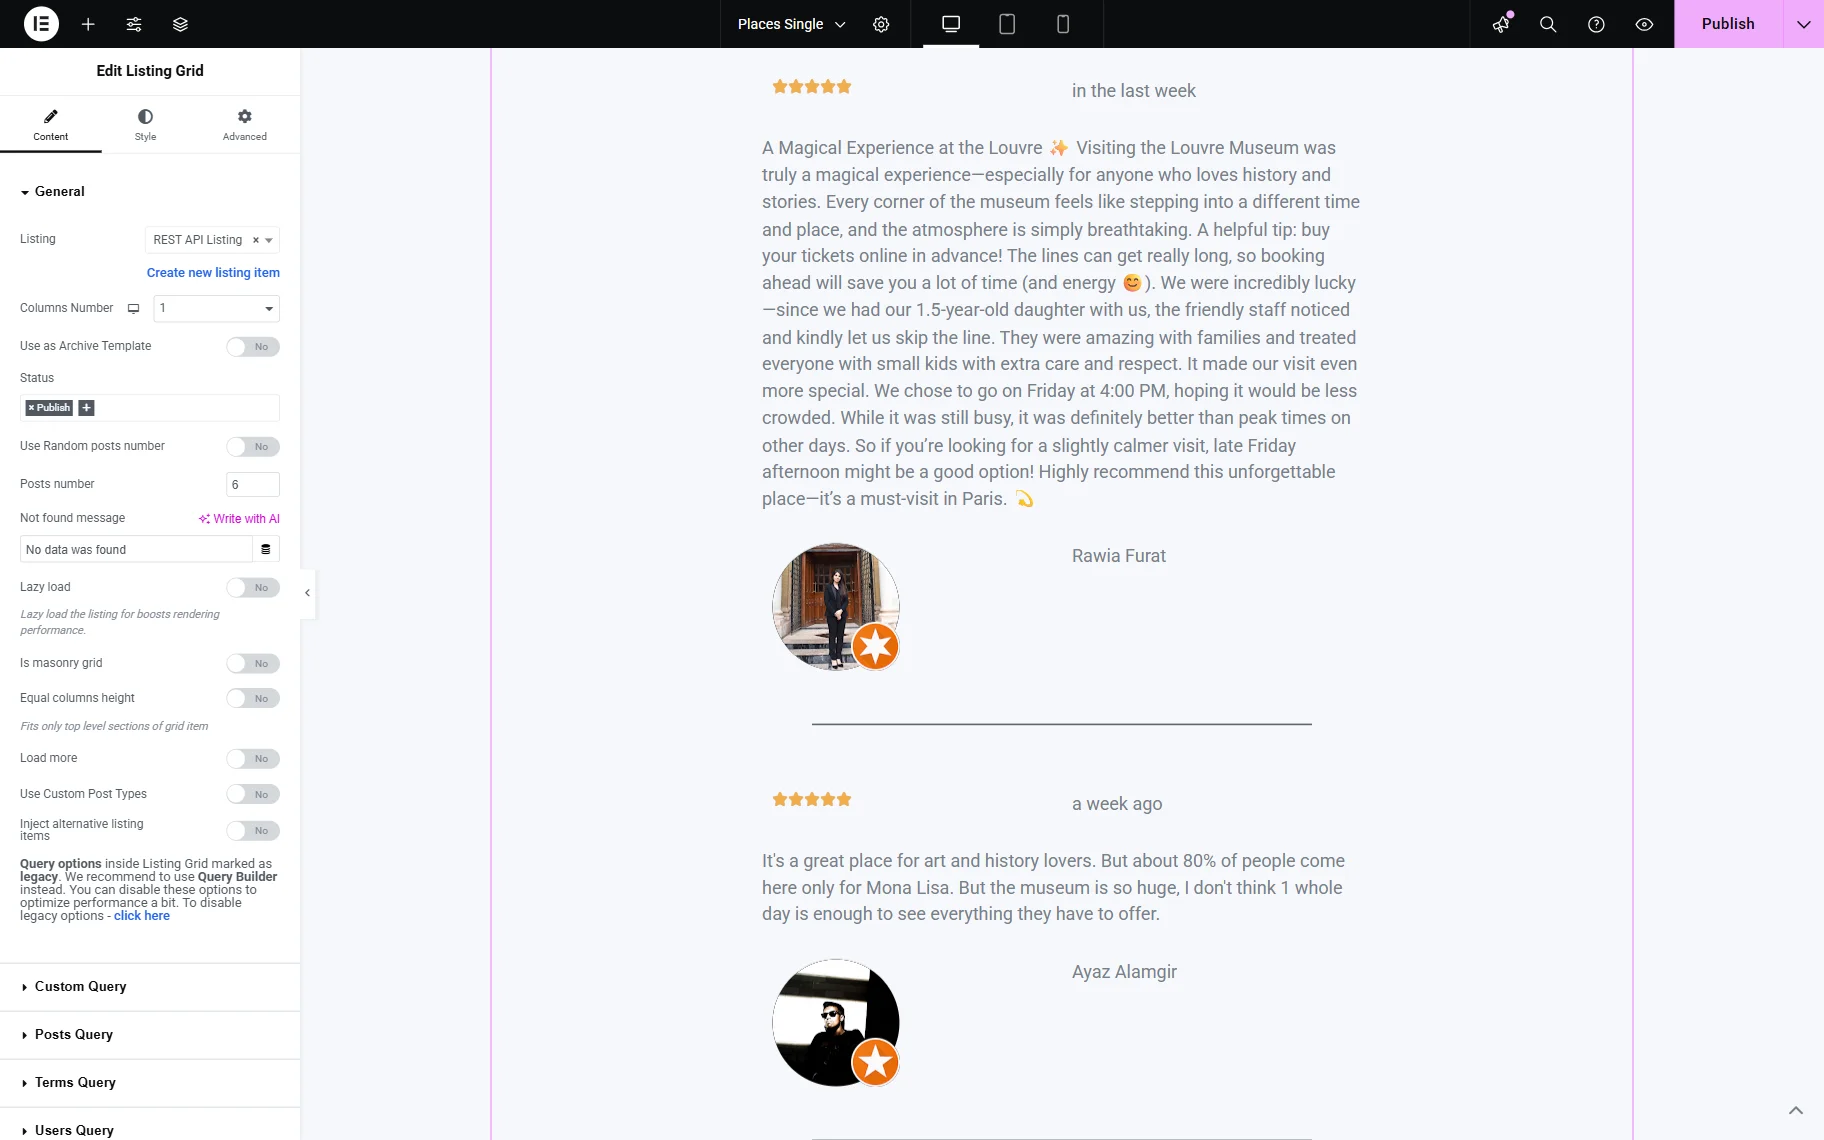
In the editor (Elementor or Blocks Editor), add the Listing Grid widget/block to the page.
Select the Listing you built in the previous step of this guide and customize its settings if needed. For example, we set a Columns Number to “1.”
Once all customizations have been completed, save the template.
Check the Result
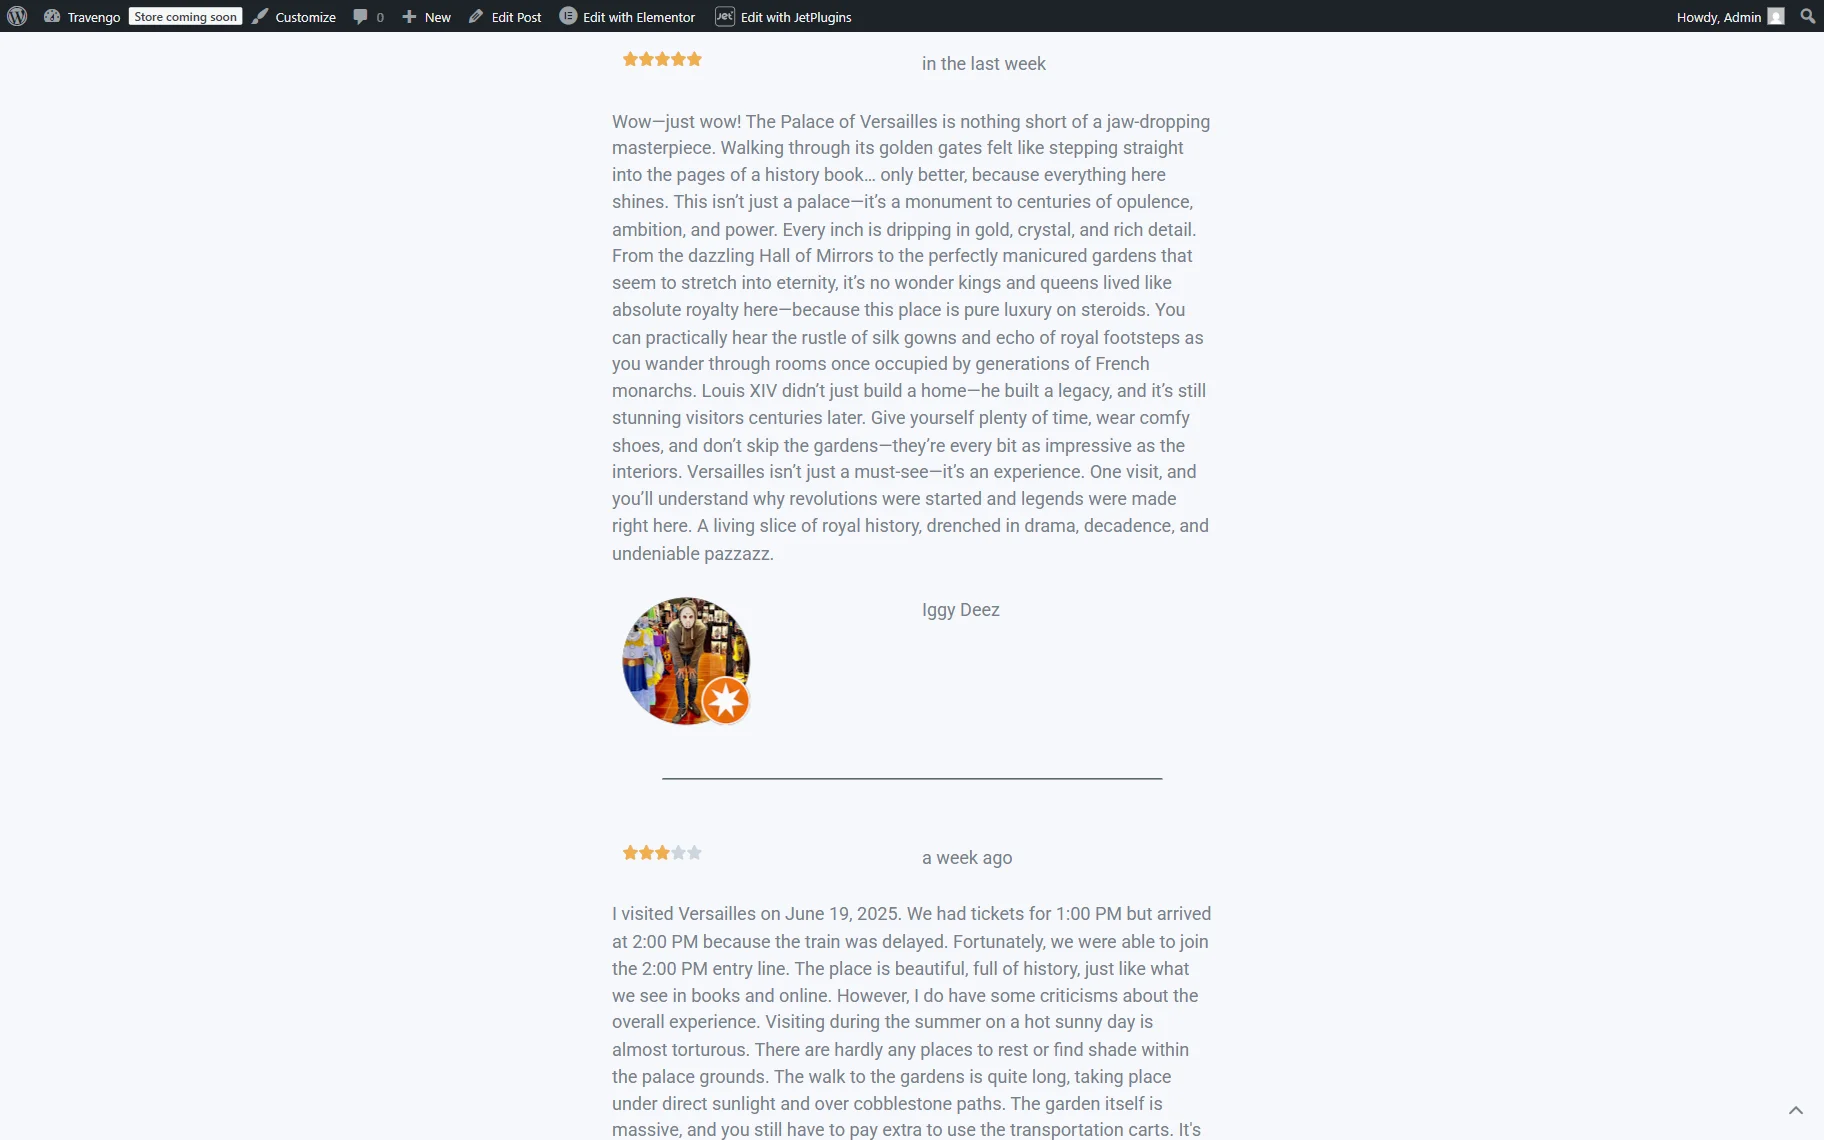
Open one of the CPT’s posts on the frontend. For example, we will open the “Versailles Palace” one to see that the reviews section is displayed not only for the “Louvre Museum” post.
As you can observe, the reviews listing now displays the Versailles Palace’s reviews, taken from Google.
That’s all; now you know how to dynamically display Google Reviews on your WordPress website with the help of the JetEngine plugin.