Updating Checkbox Field via Rest API
Find out how to update the Checkbox field built with the JetEngine plugin via Rest API. Solve the issue using the WordPress form built with JetFormBuilder.
Before you start, check the tutorial requirements:
- Elementor (Free version) or Block editor (Gutenberg)
With the Custom Content Type with the created Checkbox meta field
Let’s say you’ve got a Custom Content Type with a Checkbox meta field. You are transferring data from site A to site B via Rest API. You also have a dedicated Add New CCT item form that lets you quickly submit a new ССT item.
Check the Checkbox Fields
Every Checkbox field should be saved as an array.

Please note that if you already created the CCT items with the checkbox fields checked, you need to check the values and resave the items so that the data would be saved in the database. You can also use the Glossary for the Checkbox field.
Create the Checkboxes field in the New CCT Item Form
On site B go to the JetFormBuilder tab and find your form. Click the “Edit” button and add a new Checkbox Field to it. If there is already a field in the form, you can start editing it.
Option 1:
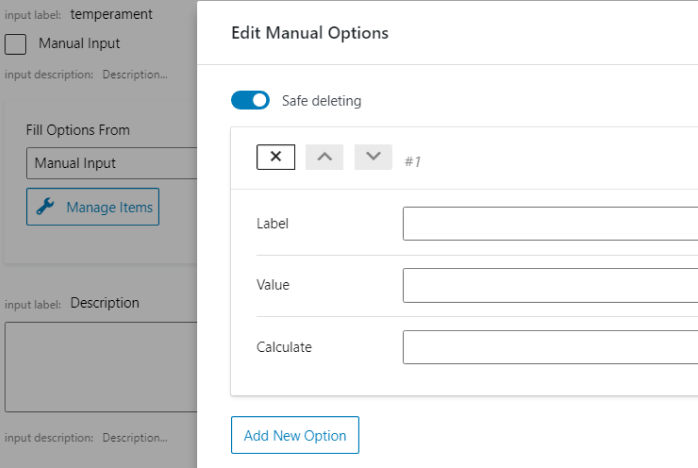
Manual input – This means that you can insert the option values manually. Click the “Manage Items” button and see the Edit Manual Options pop-up window.
You can define the option’s title and value in the Label and Value fields. Use the Calculate field when you want to apply a calculable number to the option’s value. That number can afterward be used in the Calculated Field.
You can add as many options as you need by clicking the “Add New Option” button.
Please note that you need to duplicate the values and labels from site A to site B.
Option 2:
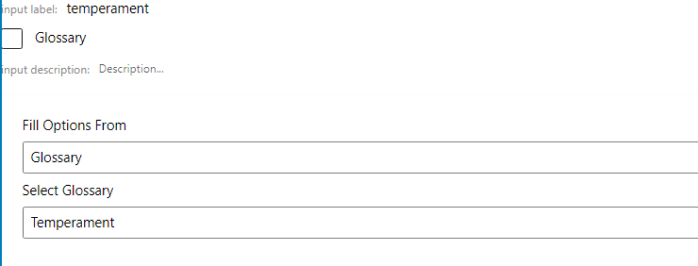
Glossary – Copy the values and labels and create a new Glossary on site B.
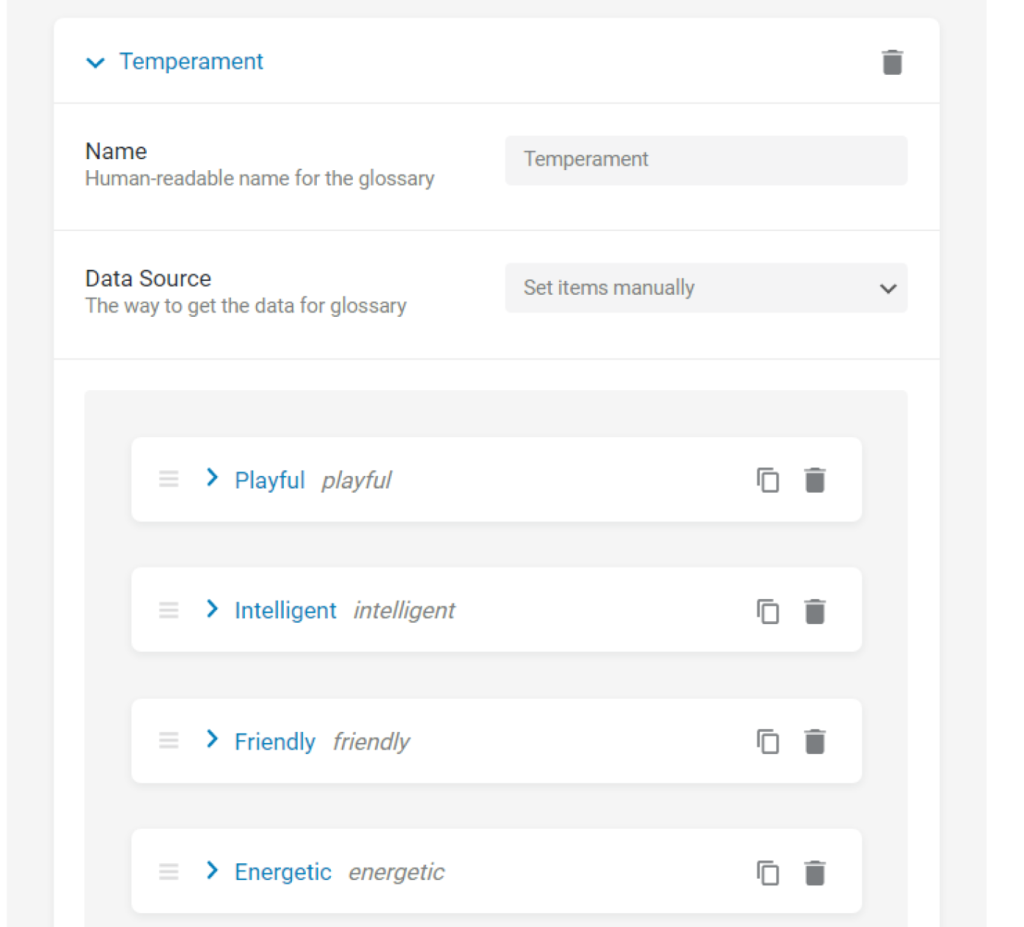
Then you can use this Glossary in the form.
Create a Request
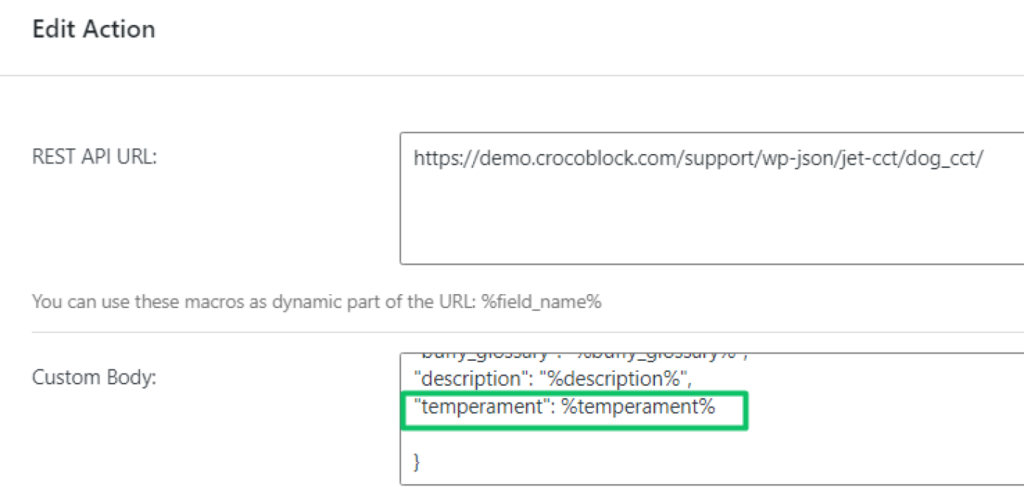
When the form fields are ready, go to the Post-submit Actions/Notification Settings section, press “New Action,” and choose the “REST API Request” option. Then press the pencil-shaped button to edit the action.
Paste the Endpoint URL to the REST API URL field.
The Custom Body text area is for the JSON code of the request. Here you need to define the connections between the form fields and the CCT meta fields.
The result should be the following, where the “temperament”, for example, is the name of the meta field from the website A and the second “%temperament|render_acf_checkbox%” is the macro with the form field name:

There is another option: the second %temperament% is the macro with the form field name; you can write the field without quotes, and it will work.
Don’t forget to click the “Update” and “Publish” buttons when you finish editing.
Place the form on any page, fill in the fields, and hit the “Submit” button. Check if the new item appears on the main website with the saved Checkbox field.