Building a real estate website isn’t just about tossing up a few property listings and calling it a day. Think of it like designing a storefront—you wouldn’t just slap on a sign and hope for the best, right? A well-designed site should do more than look good; it should make finding the right property simple and intuitive while presenting your expertise in the best light. It’s about functionality, clarity, and a user-friendly experience that turns visitors into clients.
But here’s the truth: a real estate website should be your most powerful tool. It should work for you 24/7, showcasing your properties in a way that not only looks professional but also drives real results. From dynamic property pages and intuitive filters to fully customizable Custom Post Types and queries, the possibilities are endless—if you have the right tools.
Today, I’m going to show you step-by-step how to transform your website into the ultimate real estate platform. No fluff, no unnecessary jargon—just practical, actionable steps. By the end of this journey, you’ll have everything you need to create a website that doesn’t just exist but thrives.
Table of Contents
- Step-by-Step Guide to Building a Real Estate Website
- Step 1. Setting up the Findero template – the foundation for your real estate website
- Step 2. Creating and configuring CPTs and meta fields
- Step 3. Adding and configuring meta boxes in Findero
- Step 4. Adding single CPT templates in Findero
- Step 5: Queries – filtering properties and users in Findero
- Step 6: Filters in Dashboard – enhancing user experience
- Step 7: User profiles – front-end access to the user’s website data
- How to Get Started With Findero
- FAQ
- Conclusion
Step-by-Step Guide to Building a Real Estate Website
Your mission is not just to create a website—it’s to build an efficient tool that works for you 24/7, helping you sell real estate and impress clients. The first step on this journey is setting up Findero, the backbone that will lay a strong foundation for your project.
Step 1. Setting up the Findero template – the foundation for your real estate website
Let’s face it: setting up a website can feel overwhelming, especially if you’re not a tech guru. That’s where Findero steps in. This template is designed to do the heavy lifting for you. No confusing manual setups or endless tinkering—it’s a streamlined process that gets you up and running in no time.
Why Findero?
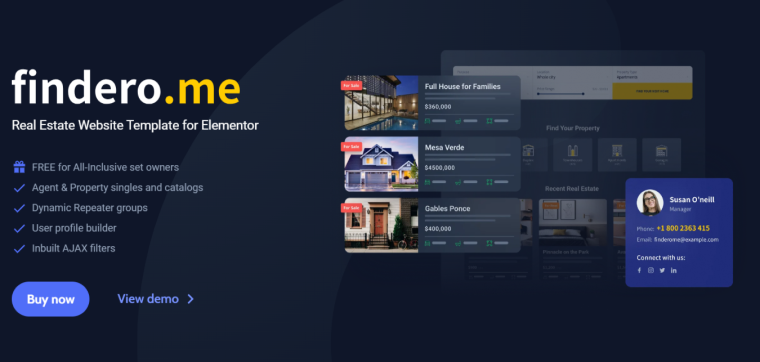
Findero isn’t just a pretty face. It’s a smart, well-thought-out solution tailored specifically for real estate websites with multiple sellers. Think of it as a toolbox where every tool has a purpose: property pages, advanced filters, contact forms—it’s all there, prepped and ready.
What makes Findero special?
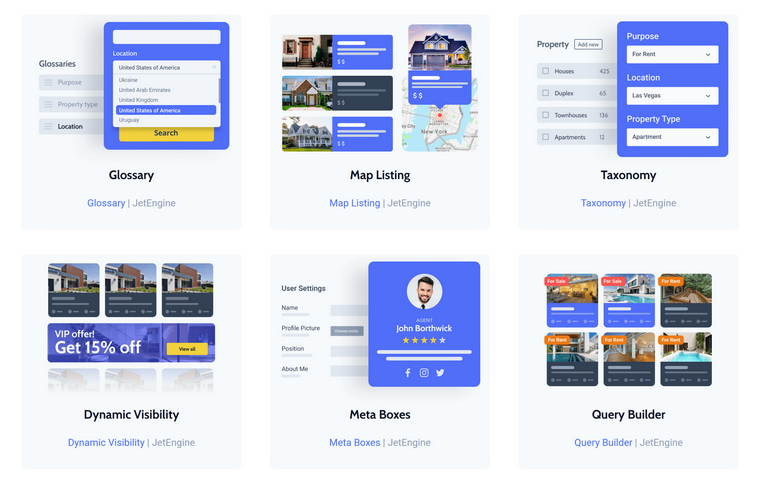
There are all the required elements for the real-estate marketplace provided in this dynamic template:
- the Custom Post Type for Properties with all the required custom meta fields;
- custom taxonomies to organize Properties;
- user profiles for Agents and all the additional user meta fields;
- review functionality by JetReviews;
- design templates for Properties, Agents, taxonomies, and individual listings;
- custom queries to fetch data about properties and agents dynamically and display them inside the templates;
- advanced AJAX filters and search;
- map listings.
How to install Findero
Forget about complicated installation processes. With Crocoblock’s Installation Wizard, getting started is as simple as clicking a few buttons.
- Start the Wizard.
Go to your WordPress dashboard and navigate to Crocoblock > Installation Wizard. Click “Let’s Go” to kick things off. - Choose your template.
Select Findero from the list of available templates. - Install everything you need.
The Wizard will handle the installation and activation of the theme and all required plugins automatically. - Import demo content.
During setup, select the option to import demo content. This step populates your site with pre-built property pages, search tools, and booking forms.
Step 2. Creating and configuring CPTs and meta fields
When working with the Findero template, it’s crucial to understand that CPTs and meta fields are the backbone of your real estate website. They don’t just organize your content—they transform property listings into structured, searchable, and visually engaging assets that users love.
While Custom Post Types (CPTs) let you create specific types of content (like Properties), meta fields define the details for each item within the CPT. Think of them as data containers or fields you fill in for every property—price, location, or number of bedrooms.
For example, when creating a listing, meta fields ensure that each property displays structured information consistently. Without them, you’d have to cram all the details into one text box, making it harder to search, filter, or display information dynamically.
In short:
- CPTs define the “type” (e.g., Properties).
- Meta fields define the “details” (e.g., price, size, amenities).
What custom fields does Property CPT have?
The Findero template simplifies your work by providing a pre-configured Properties CPT, complete with useful meta fields. These meta fields cover all the basics you’ll need for a real estate website:
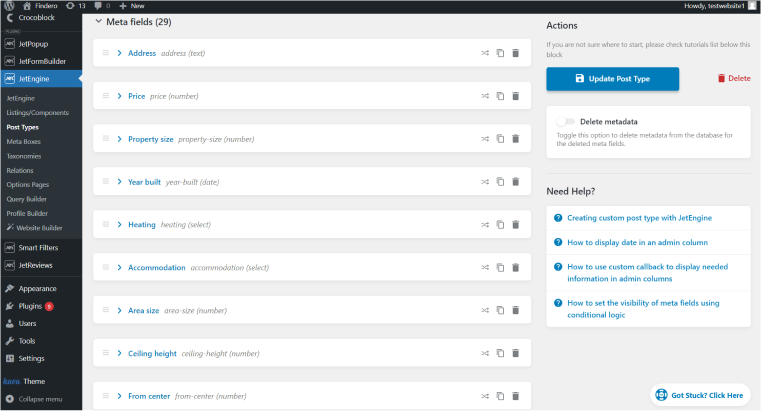
- price: the property’s price;
- gallery: upload multiple property images;
- bedrooms: number of bedrooms;
- bathrooms: number of bathrooms;
- floor plans: add property layouts;
- condition: indicate whether it’s new, renovated, or requires work;
- property size: the total area in square meters or feet;
- year built: the year of construction;
- amenities: features like a pool, parking, or gym;
- housing type: classify the property (apartment, house, etc.).
How to customize and add new meta fields
Feel like the existing meta fields don’t cover everything? Adding your own is easy. Let’s say you want to track energy efficiency ratings or nearby landmarks. Here’s how to do it:
- Navigate to JetEngine > Custom Post Types.
- Select the Properties CPT to edit.
- Add a new meta field:
- Label: Energy Efficiency Rating.
- Field Type: Dropdown or select.
- Options: A+, A, B, C, etc.
- Click “Save changes.”
- Test your new field by creating a sample listing and seeing how it looks.
Why do meta fields matter?
Meta fields bring structure and flexibility to your listings. They ensure:
- consistent layouts for all property pages;
- searchable data to help users find relevant properties faster;
- scalable solutions as your database grows.
Imagine trying to search for all properties with three bedrooms or filtering listings by price. Without meta fields, this wouldn’t be possible.
Step 3. Adding and configuring meta boxes in Findero
Meta boxes are groups of meta fields that can be assigned to a few CPTs and also users, taxonomies, default, custom post types, and WooCommerce Products—unlike the meta fields that are described above that can be connected to one particular post type.
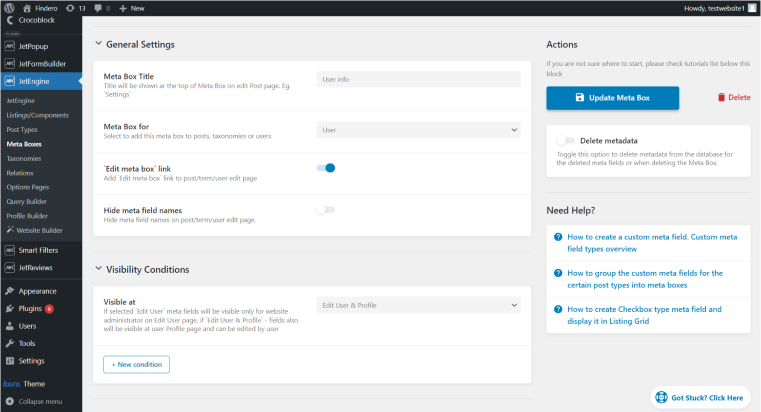
In the case of Findero, a meta box with additional user information is added so the agents can fill in additional information, which will be displayed in their profiles:

- profile photo: upload the agent’s headshot for their profile;
- phone: add the agent’s contact number;
- email: display the agent’s email address;
- about me: include a short bio for the agent;
- social icons: link to the agent’s social media profiles.
This meta box ensures agents’ profiles look professional and include all necessary contact details.
How to customize or add meta boxes
Want to tweak the default settings or add new fields? It’s simple. Here’s a step-by-step guide:
1. Check the existing meta boxes
- Go to JetEngine > Meta Boxes in your WordPress dashboard.
- Review what’s already set up: the meta fields and the entities (user, post, taxonomy, etc.) they are assigned to. If they are assigned to posts, the next input will be used to choose the post type.
2. Add or modify meta fields
- Add new fields: for example, add a field for Experience to show how experienced the agent is.
- Edit existing fields: for example, change the Social icons repeater field to add more social media links.
3. Set visibility conditions
- Define when and where the meta box should appear. For example, make users’ information editable only for website administrators or agents in their user profiles.
Step 4. Adding single CPT templates in Findero
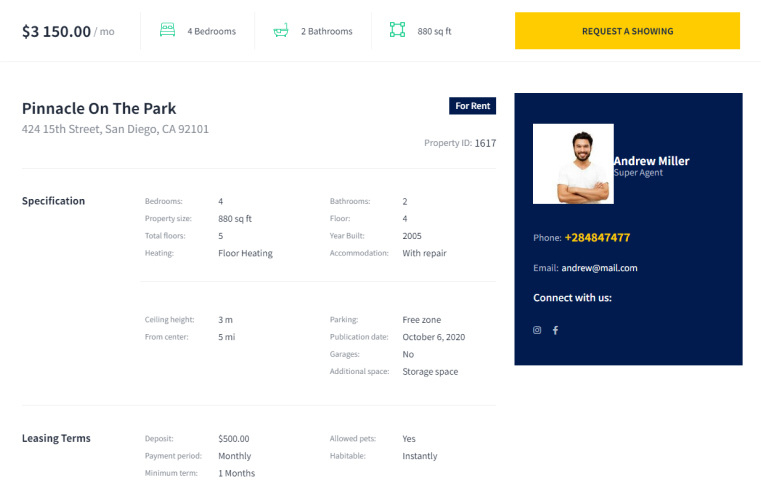
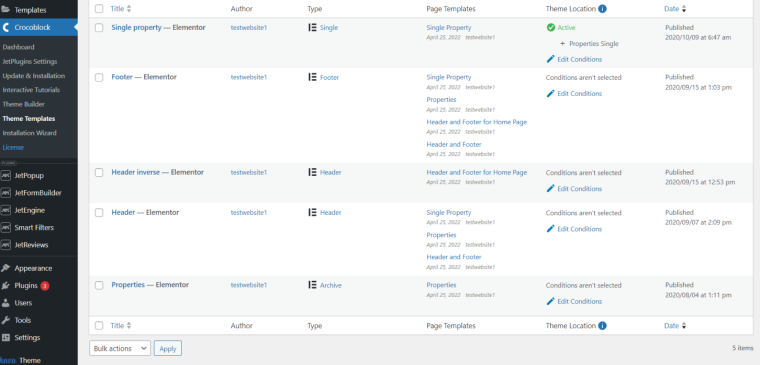
Let’s talk about Single CPT. Essentially, these are pre-designed layouts for displaying custom post types with meta fields on the front end. For this particular real estate website, that means crafting a dedicated design for a single property page and user profiles as well.
What are Single CPT templates?
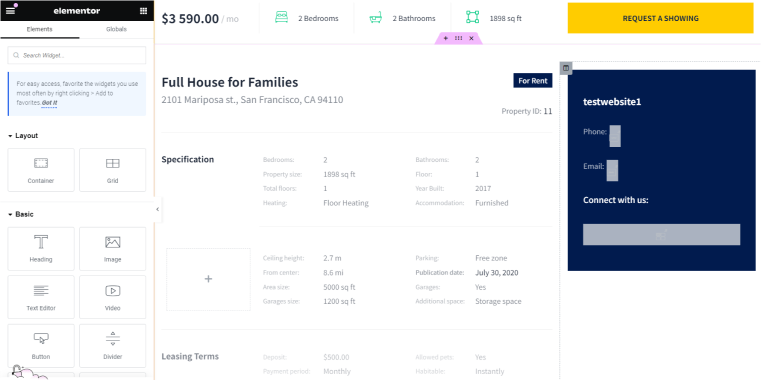
Think of them as a blueprint for how each property listing will look when someone clicks on it. Instead of creating a new design for every single property, you design one template using page builders, Block Editor, or Twig and let it handle all the listings dynamically. This ensures every property page looks consistent and professional without any extra effort.
You can use the same logic for taxonomy or user templates as well.
How it works in Findero
- Dynamic content integration: the template pulls data (such as price, photos, size, etc.) directly from the meta fields of the property CPT you’ve already set up.
- Reusable design: design it once, and every property uses the same layout automatically.
- Customizable widgets: add JetEngine Dynamic Field or Dynamic Image widgets/blocks/elements for Elementor, Bricks, or Block Editor, such as property price, gallery, or floor plan.
Step 5: Queries – filtering properties and users in Findero
Queries are the backbone of dynamic content in the Findero template. They make it possible to pull very specific information with particular settings from your database and present it dynamically on your site. Think of queries as instructions that tell your website, “Show me all properties under $500,000” or “List all real estate agents.”
What are Queries?
In simple terms, queries are database requests. They fetch information that meets certain criteria and display it on your website.
For example, custom queries can show property listings of the current Agent on their profile page. You can set up any filters and order to display particular categories, update dates, or filter them by meta fields.
In Findero, the JetEngine Query Builder makes it easy to create and manage queries without coding. Then, you just display them in a listing template based on the query.
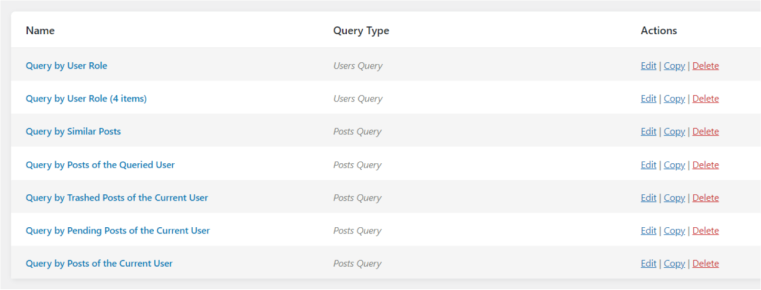
Pre-configured queries in Findero:
Step 6: Filters in Dashboard – enhancing user experience
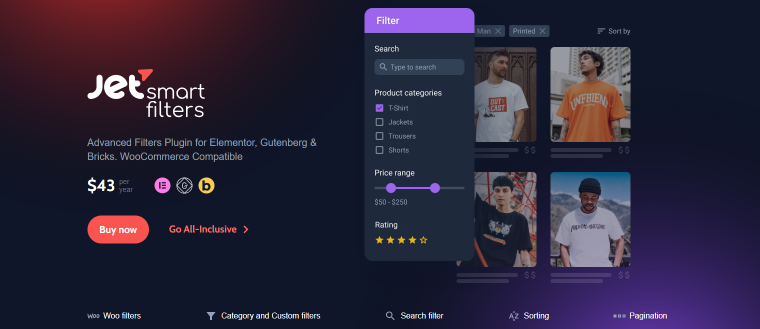
Filters in Findero make it easier for users and admins to find what they’re looking for. Whether it’s refining property listings or managing user profiles, these tools bring simplicity and efficiency to your dashboard. Let’s explore how filters are used and what makes them essential for your real estate marketplace.
What are filters?
Filters are dynamic tools that allow users to narrow down results by applying specific criteria. Without filters, it would be very hard to find anything on the website, so they’re essential. Also, JetSmartFilters can work with users’ locations.
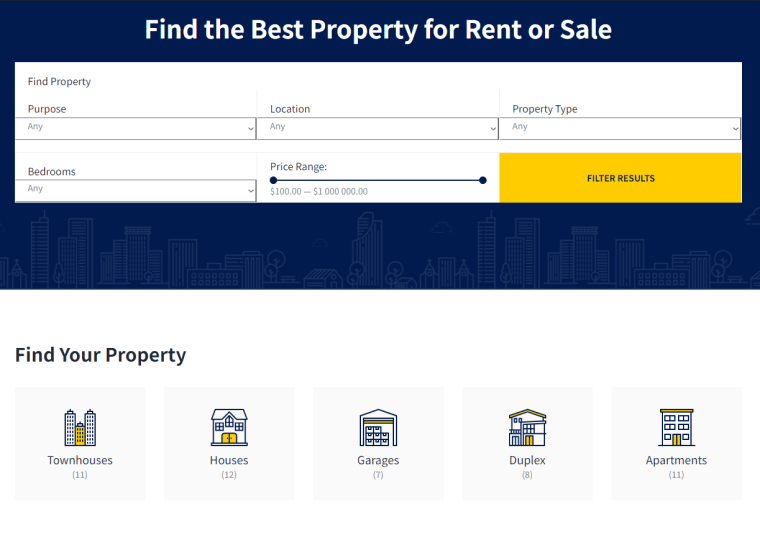
Pre-configured filters in Findero
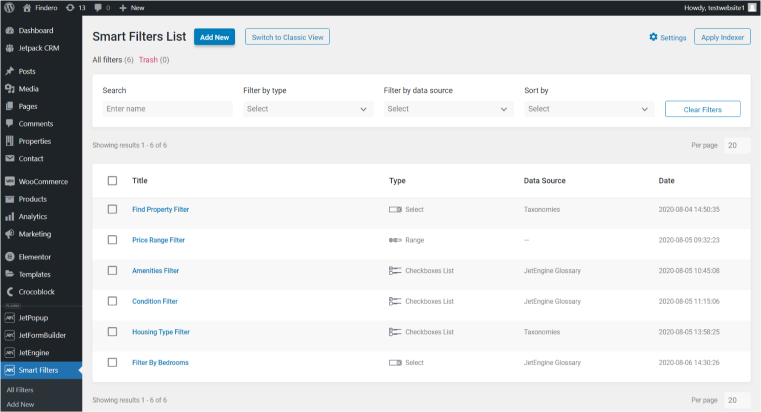
Findero comes with several default filters designed for real estate:
- Find Property Filter
- Type: Select;
- Purpose: filters properties by taxonomy terms.
- Price Range Filter
- Type: Range;
- Purpose: helps users set a minimum and maximum price range for properties.
- Amenities Filter
- Type: Checkboxes List;
- Purpose: allows filtering properties by features like parking, pet-friendly, or utilities.
- Filter by Bedrooms
- Type: Select;
- Purpose: shows properties based on the number of bedrooms.
- Conditional Filter
- Type: Checkboxes List;
- Purpose: shows properties based on the number of bedrooms.
- Housing Type Filter
- Type: Checkboxes List;
- Purpose: filters properties by taxonomy terms.
Pre-configured filters in Findero:
Step 7: User profiles – front-end access to the user’s website data
Technically, the native WordPress user dashboard can be used by external users (like Agents) to manage their data on the website. However, if they are not familiar with the WordPress interface, they might be confused. Also, the way the data is displayed there is not that visually appealing; plus, you will have to control user role permissions very carefully for the sake of website security.
JetEngine’s Profile Builder offers all the tools for creating visually appealing user dashboards that can be controlled from the front end without requiring you to use the WordPress dashboard.
Read more about how to set up the User Profile Builder here.
How to Get Started With Findero
There are two straightforward paths to access the Findero template and unlock its potential for building an exceptional real estate website:
For existing Crocoblock users
If you’re already a Crocoblock subscriber, upgrading to the All-Inclusive plan is your best bet.
- Simply log in to your Crocoblock account and navigate to the Subscription section.
- Upgrade to the All-Inclusive package (Yearly or Lifetime, valid for one site or unlimited sites) by paying the difference between your current plan and the upgraded one.
As an All-Inclusive member, you’ll not only gain access to Findero but also to all other dynamic templates and Crocoblock tools to maximize your website-building capabilities.
For new Crocoblock users
If you’re new to Crocoblock, here’s how to get started:
- Visit the Pricing Page on the Crocoblock website.
- Purchase the All-Inclusive Yearly or Lifetime Plan based on your project needs.
- Once subscribed, you’ll gain immediate access to the Findero template along with Crocoblock’s entire suite of plugins, design templates, and interactive features.
FAQ
By leveraging Crocoblock’s tools like JetEngine and JetSmartFilters, you can enhance functionality with features such as advanced filtering, dynamic property listings, and seamless booking systems.
Absolutely. The Findero template is highly customizable. You can add or modify meta fields, create custom post types, and configure filters to align with your specific requirements, whether you’re focused on residential properties, commercial listings, or vacation rentals.
No coding knowledge is required. The Findero template, paired with Crocoblock’s user-friendly tools and Elementor’s drag-and-drop interface, makes it simple to build a professional real estate website. Clear documentation and responsive support further streamline the process.
Conclusion
That’s it—our journey through the Findero template has come to an end. Now, you’re equipped with everything you need to create a real estate website that doesn’t just exist but truly works for your business. From setting up dynamic property listings to crafting intuitive booking experiences, we’ve pulled back the curtain on every tool and plugin to make your project a success.
If any steps seem unclear or if you want to explore more possibilities, don’t hesitate to contact us. Our support team is here to guide you every step of the way.
