
Very rarely, WooCommerce pages don’t need any customization, as shop pages should match the whole website’s design and requirements for usability. The default structure of WooCommerce product pages and other elements can look bulky and overloaded for many projects. So, let’s talk about ways to customize such pages.
Default Product Pages and Customization Cases
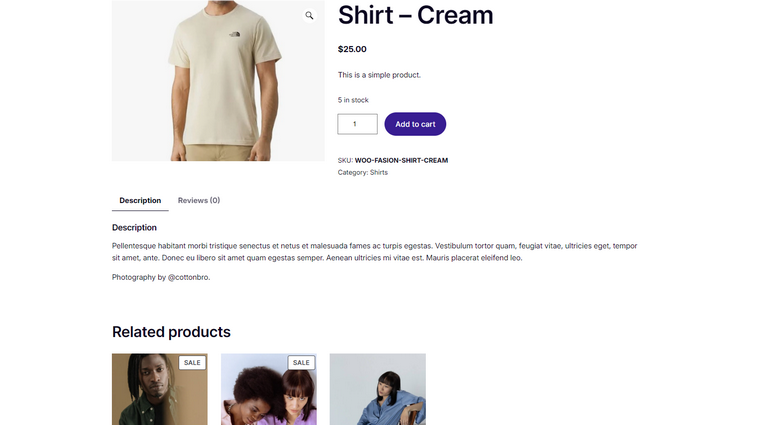
By default, WooCommerce has all the important elements for showcasing products, such as:
- product title;
- product price;
- “Add to cart” button;
- main image;
- gallery;
- short description;
- long description;
- product meta (categories, tags);
- SKU;
- reviews;
- related products (if they are selected).
If it’s a variable product, there can also be product variations.
Much of the product’s appearance is subject to theme styles: fonts, paddings, margins, colors, buttons, etc. But the structure is pretty much the same everywhere: an image, a short description next to it, and a long description inside the tab.
That’s why if you want to change only styling, you can customize the theme’s default styles or use some CSS for the specific elements.
However, real customization comes when we change the page layout, add or remove certain fields, or add some extra functionality.
There are a couple of ways to do it, but first, let’s see the most popular reasons for tweaking WooCommerce templates.
Popular cases for customizing a WooCommerce product page
- Turning a store into a product catalog.
This is what wholesalers or manufacturers do, as their role is not to sell directly but to provide information about products, while retailers do the rest of the job. The product catalog doesn’t have the “Add to Cart” or “Buy now” button; instead, there can be a button with a link to an inquiry fo.
Customizations: removing the “Add to Cart” button and cart functionality. - Displaying products that have a lot of technical information.
In order to place a lot of information about the product, e.g., technical specifications, drawings, instructions, extra tabs, and custom fields are required.
Customizations: adding and reorganizing tabs and custom fields. - Enhancing the visual appeal of the products.
For many goods, a good photo or video of the product is more important than thousands of words. That’s why custom galleries, photo- and video sliders are so important.
Customizations: custom galleries, zoom, and hover effects. - Encouraging impulsive purchases.
There are a lot of ways to grab customers’ attention, but Sale or Discount badges are the classic way to get someone to buy.
Customizations: adding badges and “Buy now” buttons with a simplified purchasing process.
Why WooCommerce Page Customization Is Challenging
WooCommerce product is a custom post type (CPT). But while other CPTs require a dedicated template to be created or to inherit the existing one, WooCommerce templates are provided by the plugin, have a modular structure, and heavily rely on action and filter hooks. In other words, their page structure is quite complex, and you can’t just open a page and move blocks, remove a line by just deleting it, etc.
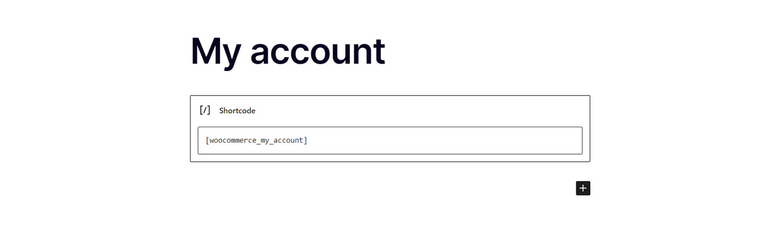
For example, if you open any of the WooCommerce-specific pages, such as My Account, you will see nothing but one shortcode, so you can’t drag and drop something to edit the template this way. The full list of all the shortcodes can be found here.
Customizing WooCommerce Product Pages Using Plugins
This is probably one of the most obvious ways for many users. What also seems obvious is searching for plugins in the official WooCommerce.com marketplace, especially considering the fact that they are advertised right in the plugin’s interface. However, so many of them have very bad reviews, very limited functionality, and quite high prices (around $70 a year each).
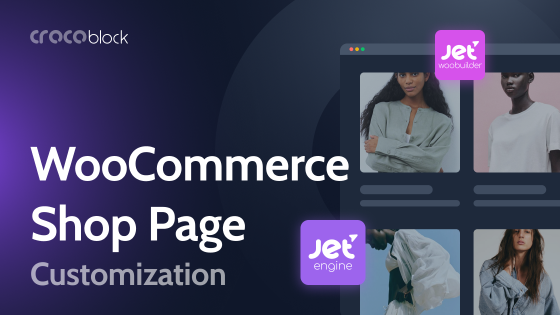
So, it would be great to have a plugin with a lot of tools for customizing all kinds of Woo pages. If you use Elementor for your websites, a good solution would be JetWooBuilder. It’s a completely visual editor with plenty of widgets and useful features to create your custom WooCommerce pages.
This is how it works:
To see examples of the product pages you can create with JetWooBuilder, check this demo.
Using the plugin, you can edit any WooCommerce template, be it a shop page, archive, or cart.
In case you want to add custom fields to the product page, check the Product Addons plugin, for making them without any coding.
Customizing WooCommerce Templates Using Hooks
As I’ve already mentioned, WooCommerce heavily relies on hooks. Using them, you can add, replace, and remove various blocks of the Product page.
📚 To learn more about hooks and how to use them, read this article.
In short, hooks are small code snippets that are triggered at a certain point. Action hooks are great for adding or removing some functionality, while filter hooks let you change text and output values. You should put them in your child theme’s functions.php file to ensure they stay put after theme updates. Here’s the hook and template reference. Also, you can use a plugin like this to see hooks on a particular page.
Another way to do it is to go to the Plugins Editor, choose WooCommerce in the templates folder, and open the file you want (if you are not familiar with the WordPress template hierarchy, it’s better to check it out before doing that).
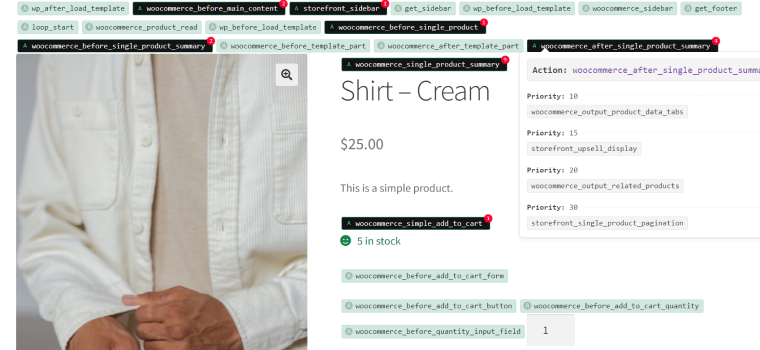
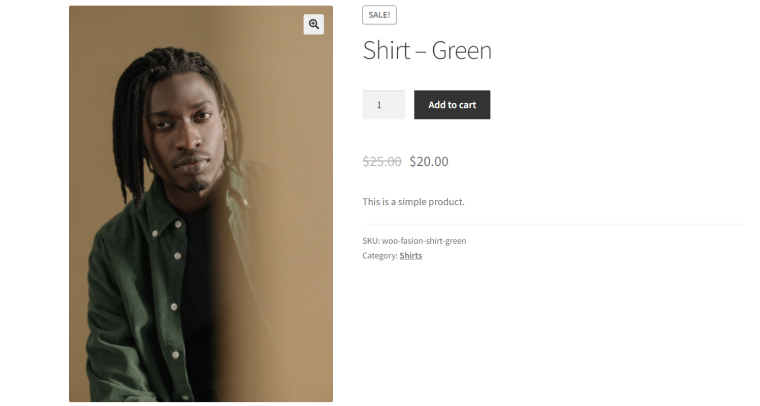
Let’s say I want to modify the Single Product page template because, in my theme, I have the Add to Cart block after the description and the price, but I want to add it right after the Title:
In the Single Product template code, I see this nice and clear list of actions inside the hook and their priorities displayed in numbers:
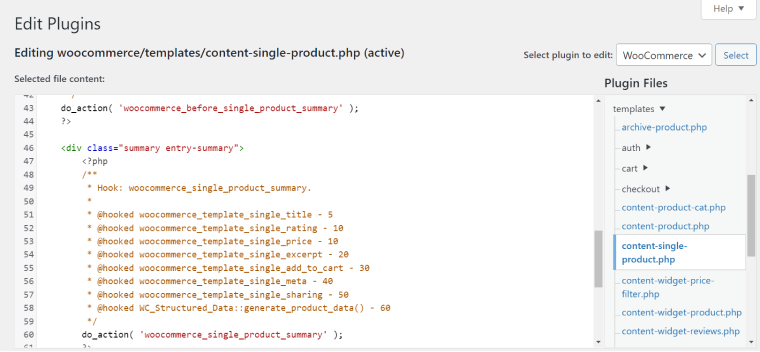
In my example, the Title’s priority is 5, then comes more elements with priorities 10 and 20, and Add to Cart is 30. What I have to do is to move it up by assigning a higher priority. But before that, I should remove the old one. So, this is what I will add to my functions.php file:
/* Unassign the old priority */
remove_action( 'woocommerce_single_product_summary', 'woocommerce_template_single_add_to_cart', 30 );

/* Assign the new priority */
add_action( 'woocommerce_single_product_summary', 'woocommerce_template_single_add_to_cart', 6 );
And this is the result:
NOTE
Always use a Child Theme’s functions.php file because you can lose all the jobs done after the theme’s update. Also, if you are not familiar with PHP, don’t change the functions.php file but use one of the Code snippet plugins instead. Thus, your site will not break once you make a mistake in a code or write it in the wrong place.
And don’t forget about backups before tweaking the code.
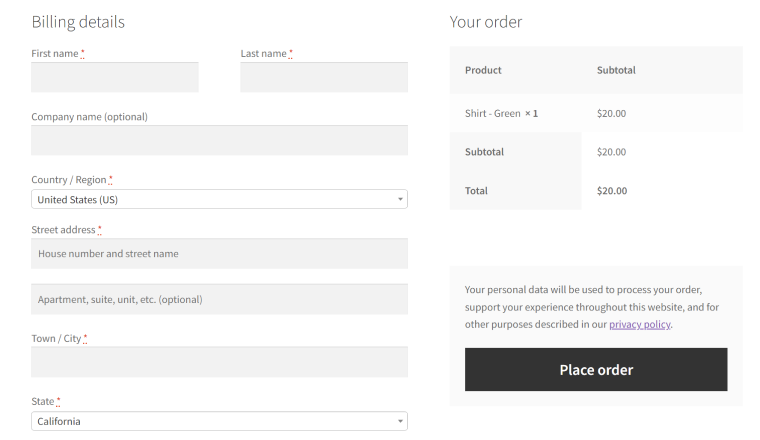
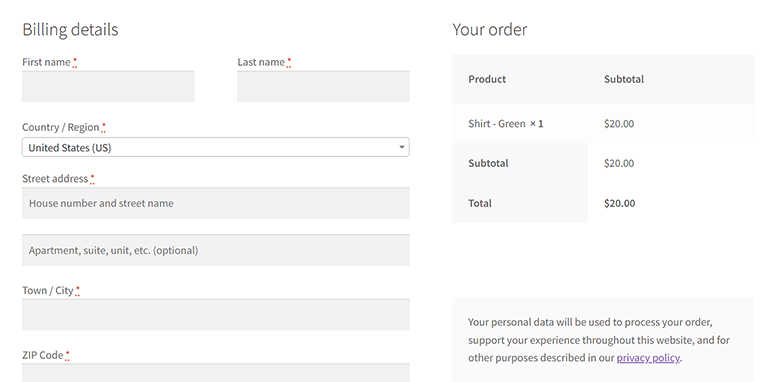
This is the most basic and frequently used example of how hooks can be used. Another very demanded case is when you don’t need some fields on the checkout page. Let’s say I want to remove State and Company from here (and from the shipping section, too):
So, let’s add this filter for the arrays [billing] and [shipping]:
add_filter( 'woocommerce_checkout_fields', 'croco_remove_extra_fields' );
function croco_remove_extra_fields( $fields ){
	unset( $fields['billing']['billing_state'] );
	unset( $fields['shipping']['shipping_state'] );
	unset( $fields['billing']['billing_company'] );
	unset( $fields['shipping']['shipping_company'] );
	return $fields;
}
And this is the result:
To change the fields’ order, assign them priority within the array like this:
add_filter('woocommerce_checkout_fields', 'croco_sort_fields_billing');
function croco_sort_fields_billing($fields) {
	$fields['billing']['billing_first_name']['priority'] = 1;
	$fields['billing']['billing_last_name']['priority'] = 5;
	$fields['billing']['billing_address_1']['priority'] = 10;
	$fields['billing']['billing_address_2']['priority'] = 9;
	$fields['billing']['billing_city']['priority'] = 7;
	$fields['billing']['billing_postcode']['priority'] = 9;
	$fields['billing']['billing_country']['priority'] = 15;
	$fields['billing']['billing_email']['priority'] = 8;
	$fields['billing']['billing_phone']['priority'] = 6;

	return $fields;
}
You can combine using hooks with modifying the WooCommerce templates. But first, you should copy the desired template file from /wp-content/plugins/woocommerce/templates/ to your theme’s WooCommerce folder (/wp-content/themes/your-theme/woocommerce/). If you don’t do it, the template may be overwritten after the plugin update.
FAQ
There are many reasons for that, including customization of the store functionality for your particular needs or enhancing users’ experience.
You can use some CSS for minor style changes, but if you need to add, remove, or replace elements, consider using plugins or hooks.
Takeaway
When creating an eCommerce site, be ready to customize a lot of things so the website looks great and put together to attract customers and make them buy the products. If you are a beginner or a seasoned developer who uses Elementor, the JetWooBuilder plugin is a great asset for creating custom WooCommerce templates fast and without effort.
But if you prefer coding, plenty of hooks will help you create a custom template and functionality for your online store.