How to Apply Filters to the Products Grid Widget
Explore how to apply the JetSmartFilters filters to the Products Grid widget of the JetWooBuilder plugin to filter WooCommerce products on your WordPress site.
Before you start, check the tutorial requirements:
- Elementor (Free version)
- WooCommerce plugin installed and activated
- JetSmartFilters plugin installed and activated
- JetWooBuilder plugin installed and activated
The JetSmartFilters plugin allows you to sort the WooCommerce products by different parameters, such as product categories. Also, the plugin uses the AJAX method, which allows filtering without reloading the page every time you apply a new filter.
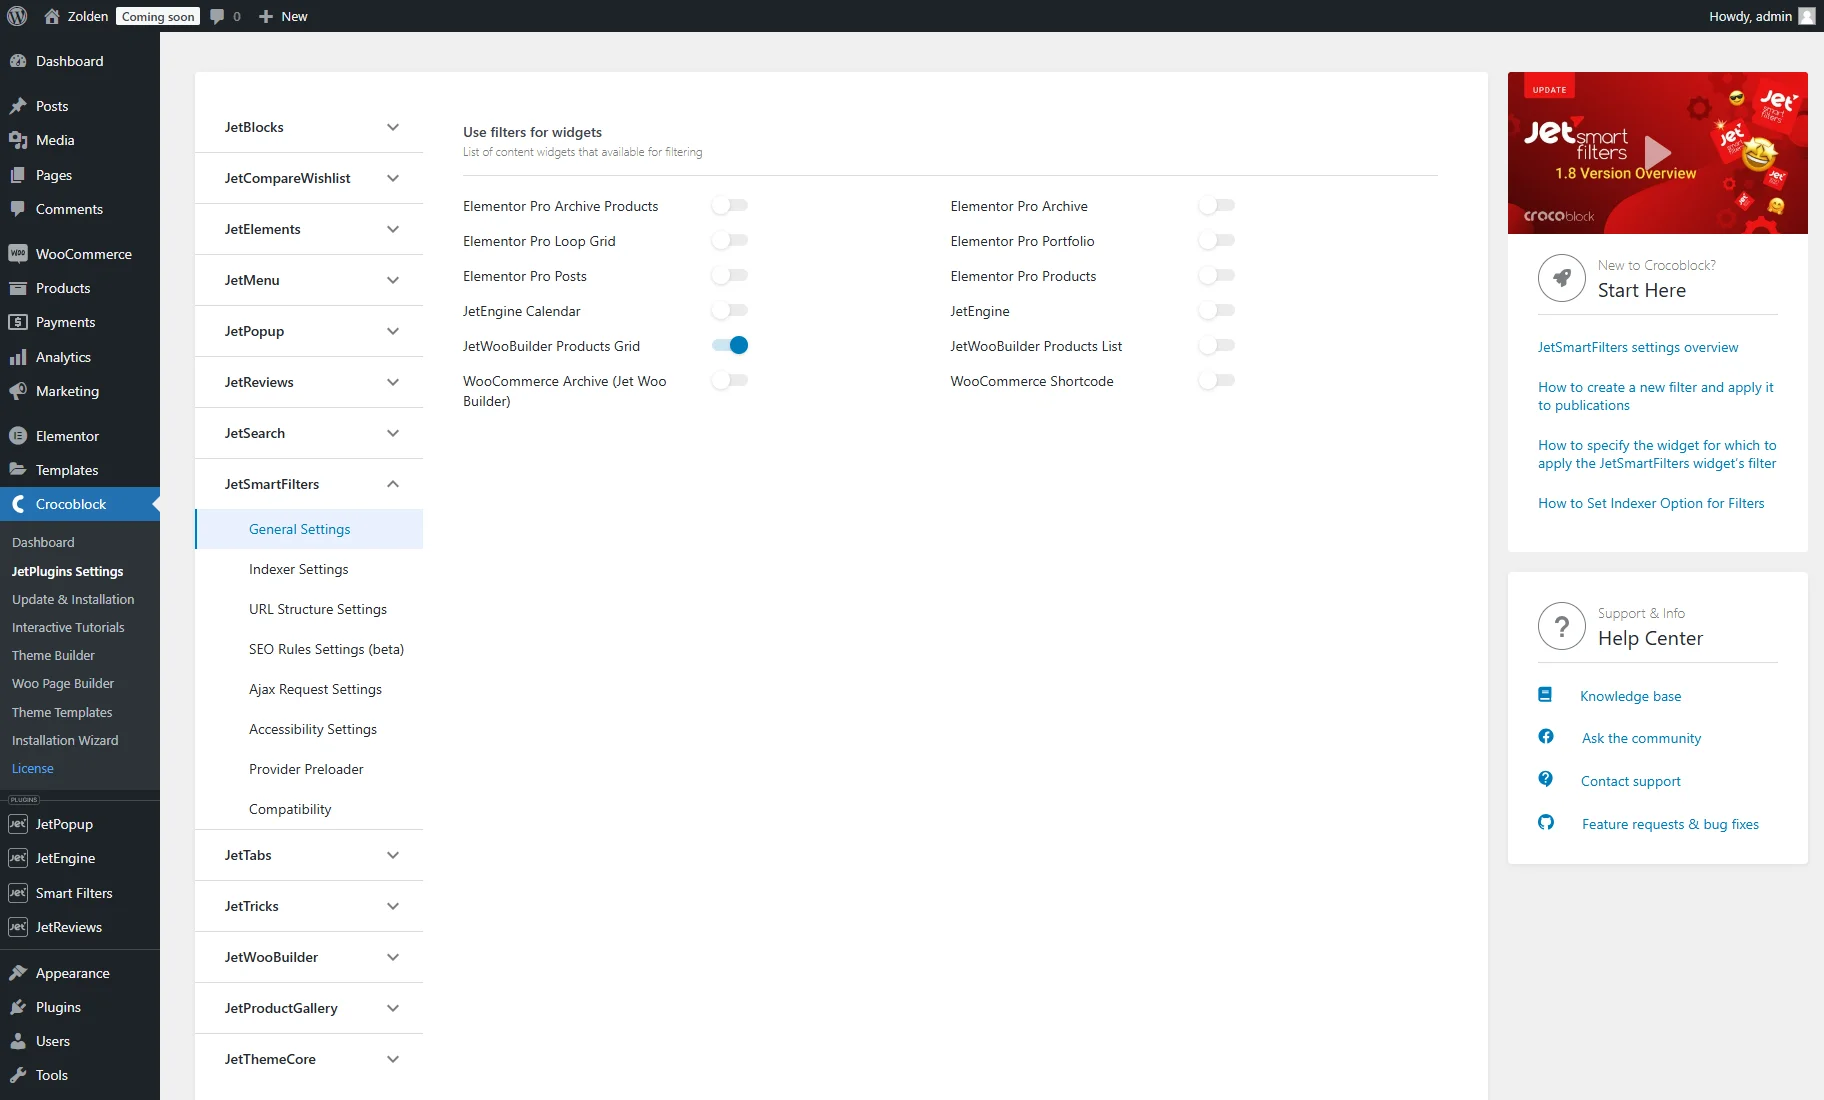
Before you start, go to WordPress Dashboard > Crocoblock > JetPlugins Settings > JetSmartFilters > General Settings and ensure that the JetWooBuilder Products Grid toggle is activated.
Other filter providers can be turned off if you don’t need them to improve the website speed.
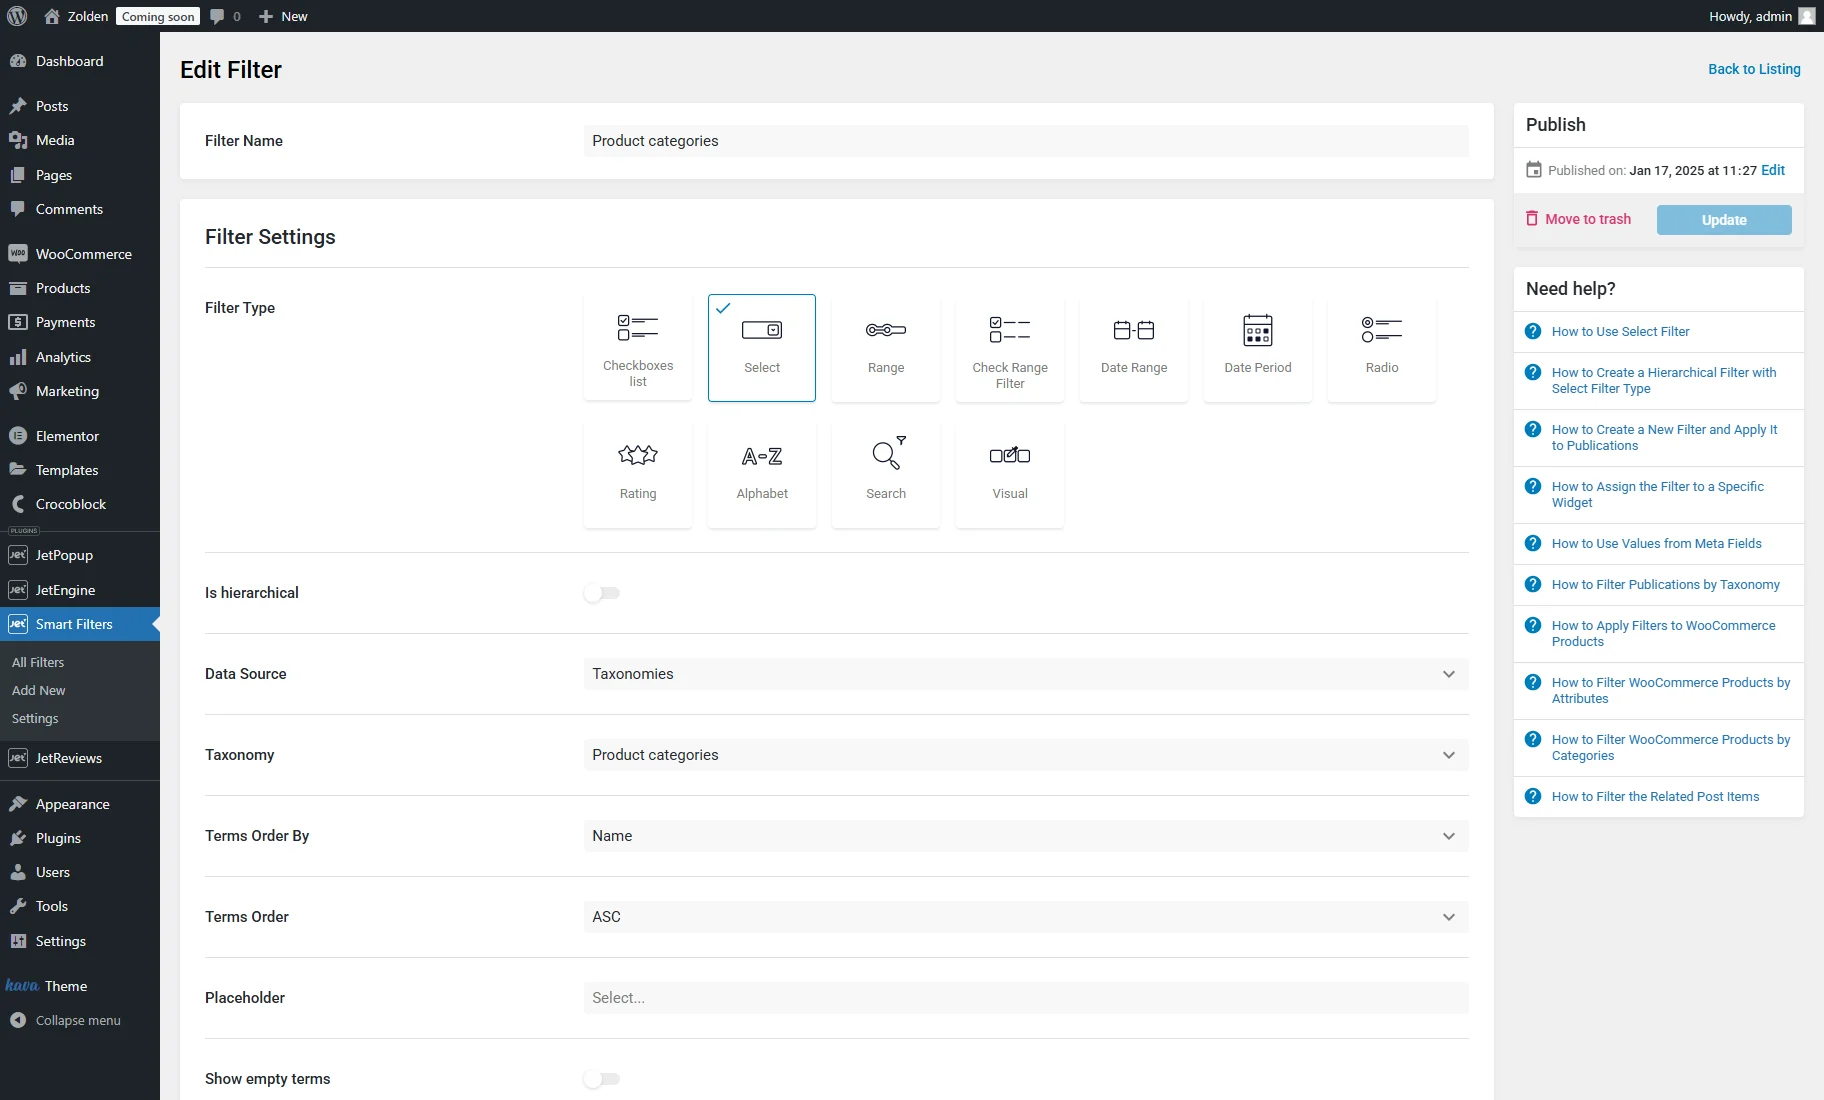
Create a Filter
Go to WordPress Dashboard > Smart Filters > Add New tab. Enter the Filter Name and choose any filter that fits your needs.
In this case, we add the “Select” filter. In the Data Source dropdown menu, we choose the “Taxonomies” option, and in the Taxonomy field, we select “Product categories.”
After adjusting the filter settings, click the “Publish” button to save the changes.
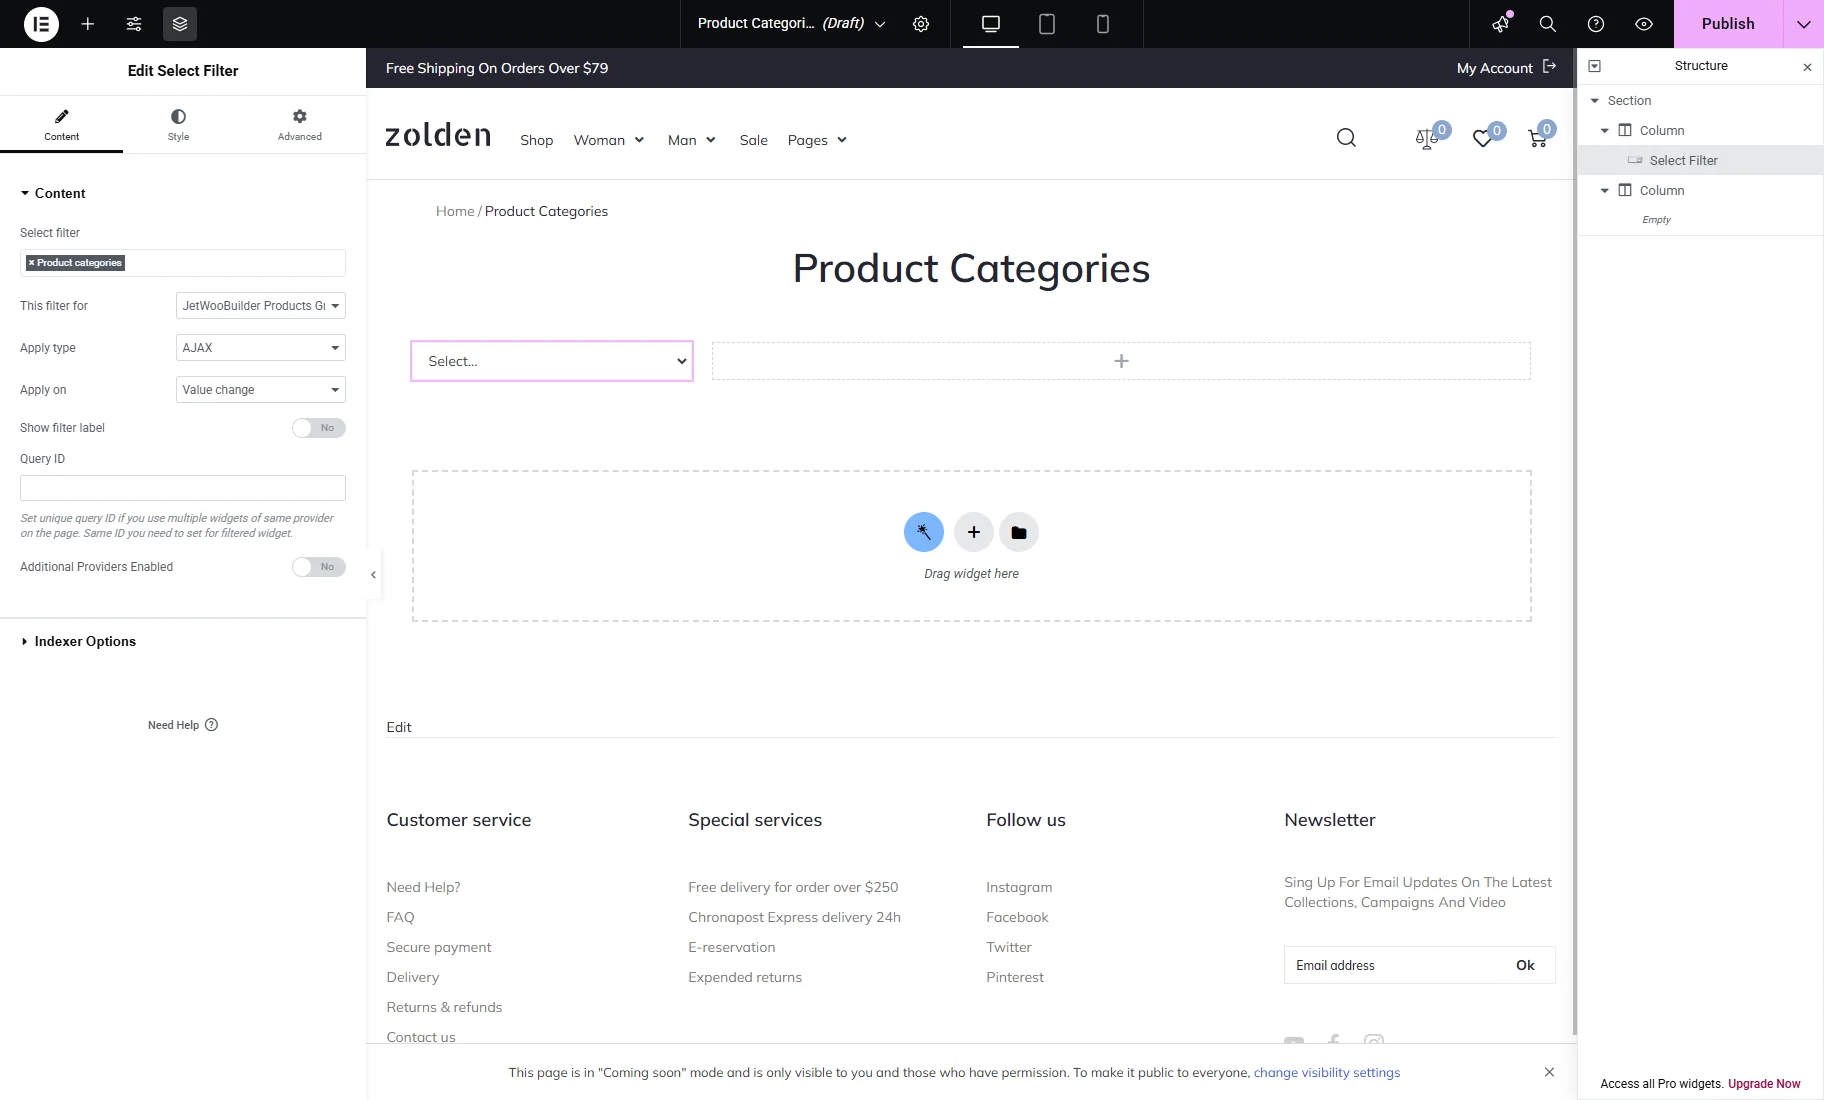
Add the Filter to Page
Open a page or template where you want to place a filter in the Elementor editor.
In our case, we add two columns to the editing page.
In the first column, we drag-n-drop the filter widget that corresponds to the filter type (Select Filter in this case).
Select the recently created filter and set the “JetWooBuilder Products Grid” provider in the This filter for dropdown menu.
Other settings can be customized as required.
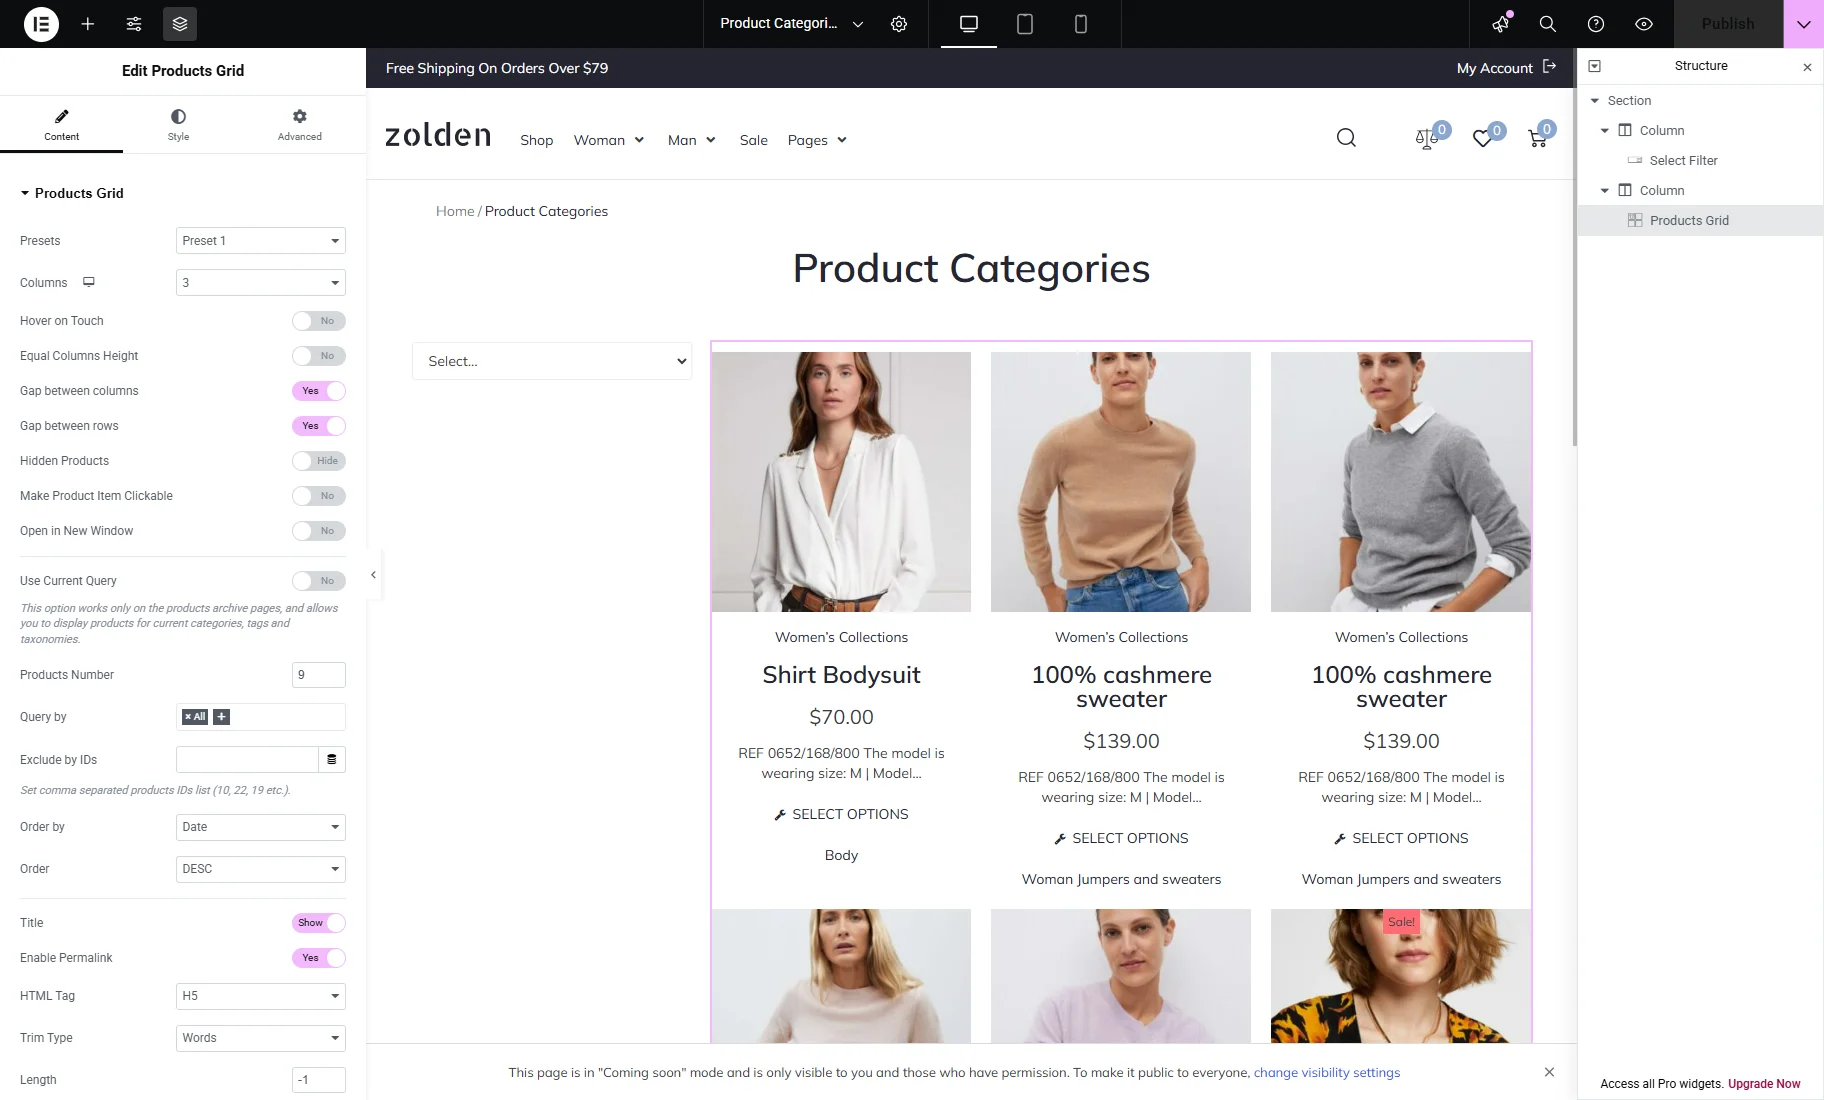
In the second column, place a Products Grid widget.
Customize it and click the “Publish” button.
Check the Results
Open the page on the front end and check how the filter works.

Note that you can choose different filter types, such as “Checkboxes,” “Radio,” “Range,” and “Search.”
Also, you’re able to filter products by different criteria, such as “Categories,” “Tags,” “Attributes,” and “Taxonomies.”
That’s all. Now you know how to apply the JetSmartFilters filters to the Products Grid widget of the JetWooBuilder to filter WooCommerce products on your WordPress site.