How to Create a Custom WooCommerce Single Product Page with JetEngine
Learn how to create a Custom Product Page for WooCommerce-Based Booking with the WordPress JetBooking plugin, utilizing JetThemeCore and JetEngine.
Before you start, check the tutorial requirements:
- WooCommerce plugin installed and activated
- Elementor (Free version)
- JetBooking plugin installed and activated
- JetEngine plugin installed and activated
- JetThemeCore plugin installed and activated
This tutorial focuses on creating a custom Single Product page for the WooCommerce-based booking for JetBooking using the JetEngine WordPress plugin. This layout lets you display detailed booking information and interactive forms tailored to each product.
Creating the Single Page Template
In this tutorial, we will show you how to set up a Single Product Page template using the JetThemeCore plugin.
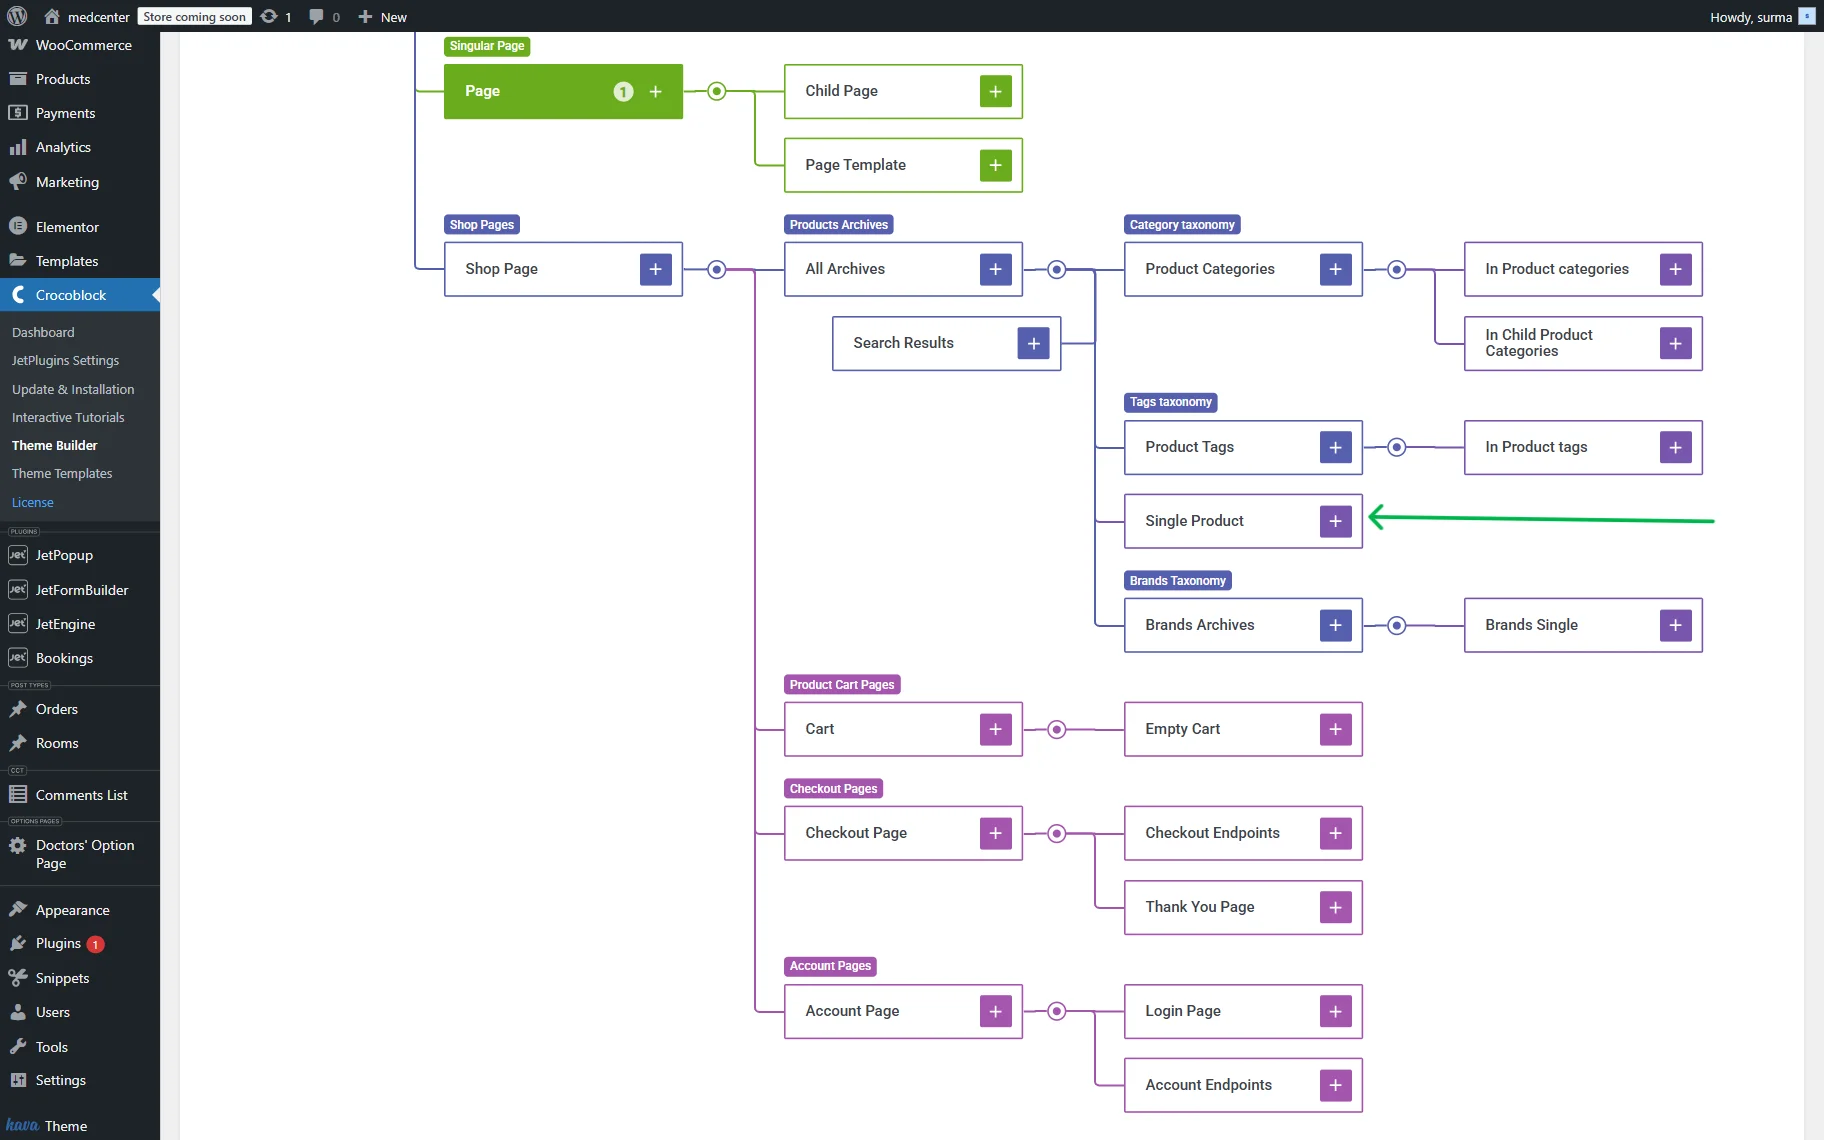
So, navigate to WordPress Dashboard > Crocoblock > Theme Builder > scroll down to the “Single Product” section, and click the “plus” icon.
In the newly opened pop-up, the conditions for the template should be set up.
Choose “Include”, “WooCommerce”, and the “Single Product” options in the drop-downs. In the “Select” field type “All”.
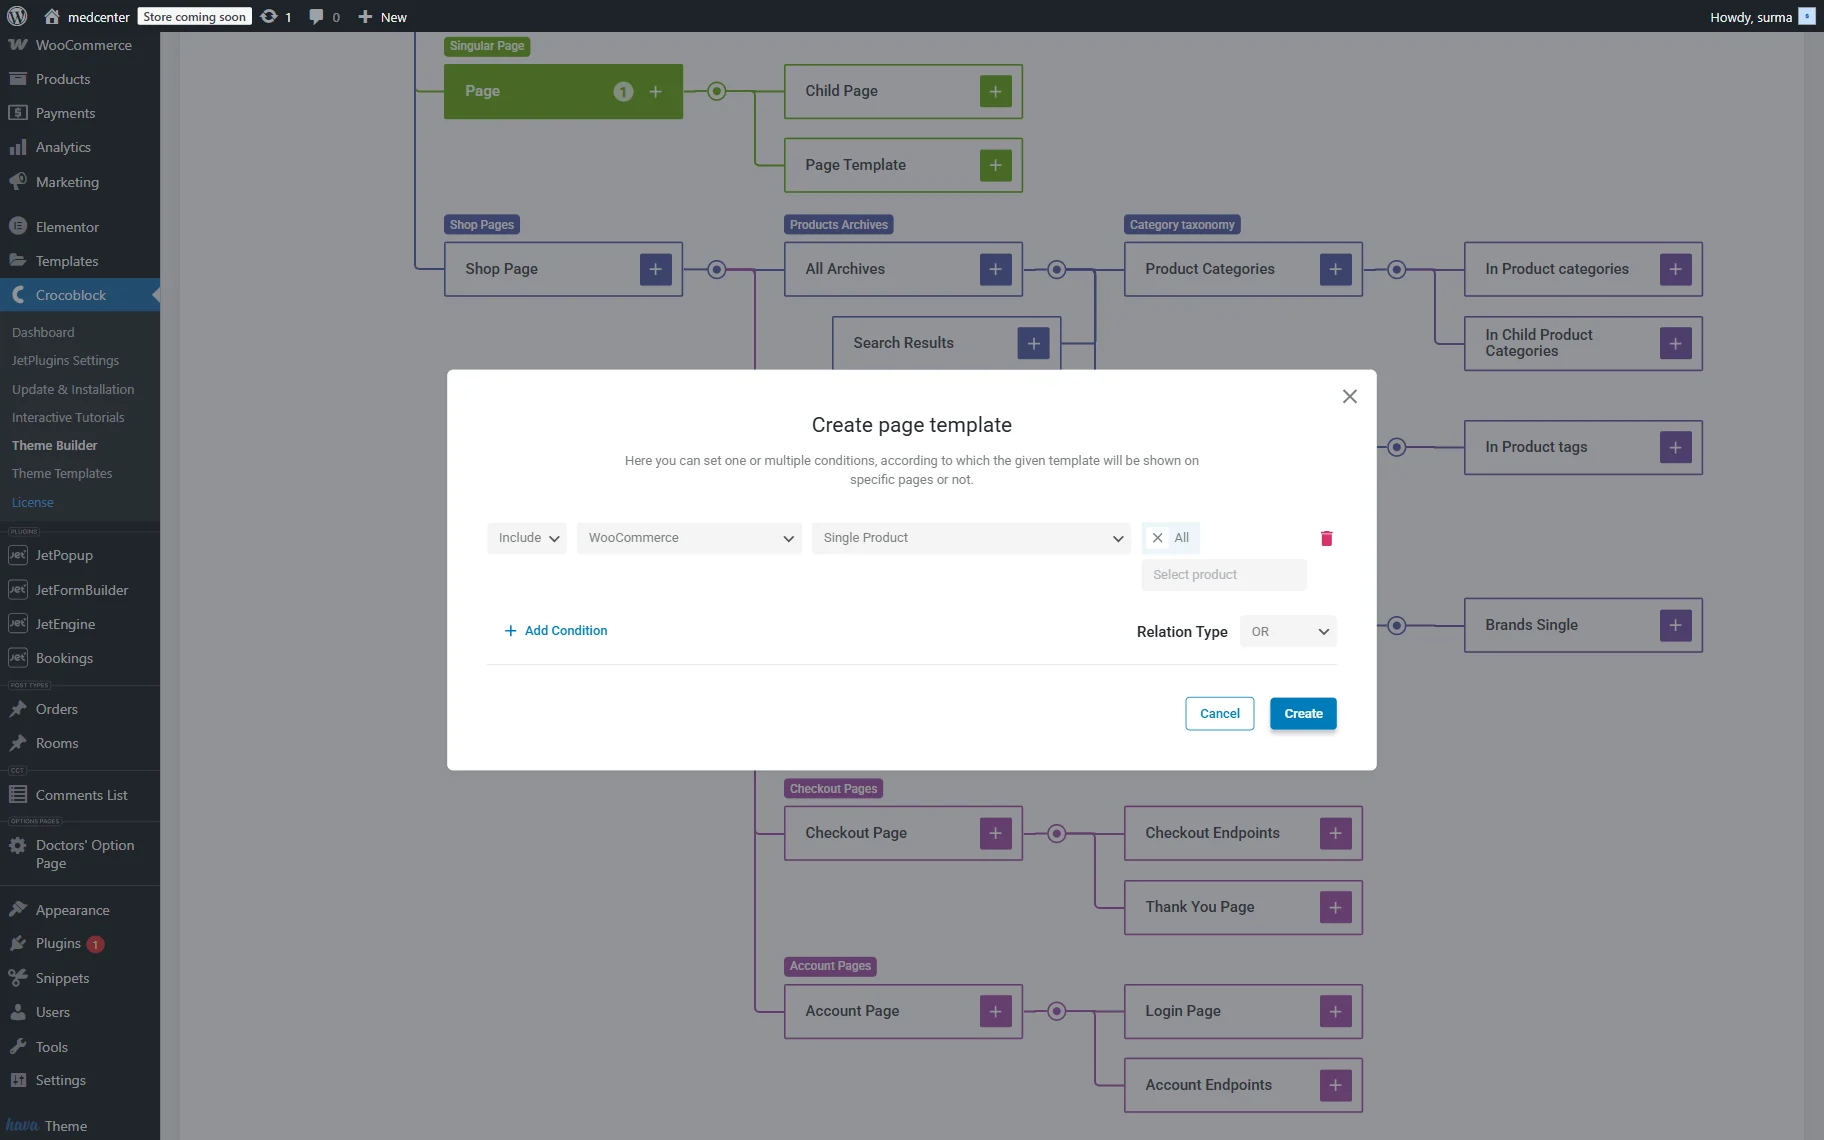
Click the “Create” button.
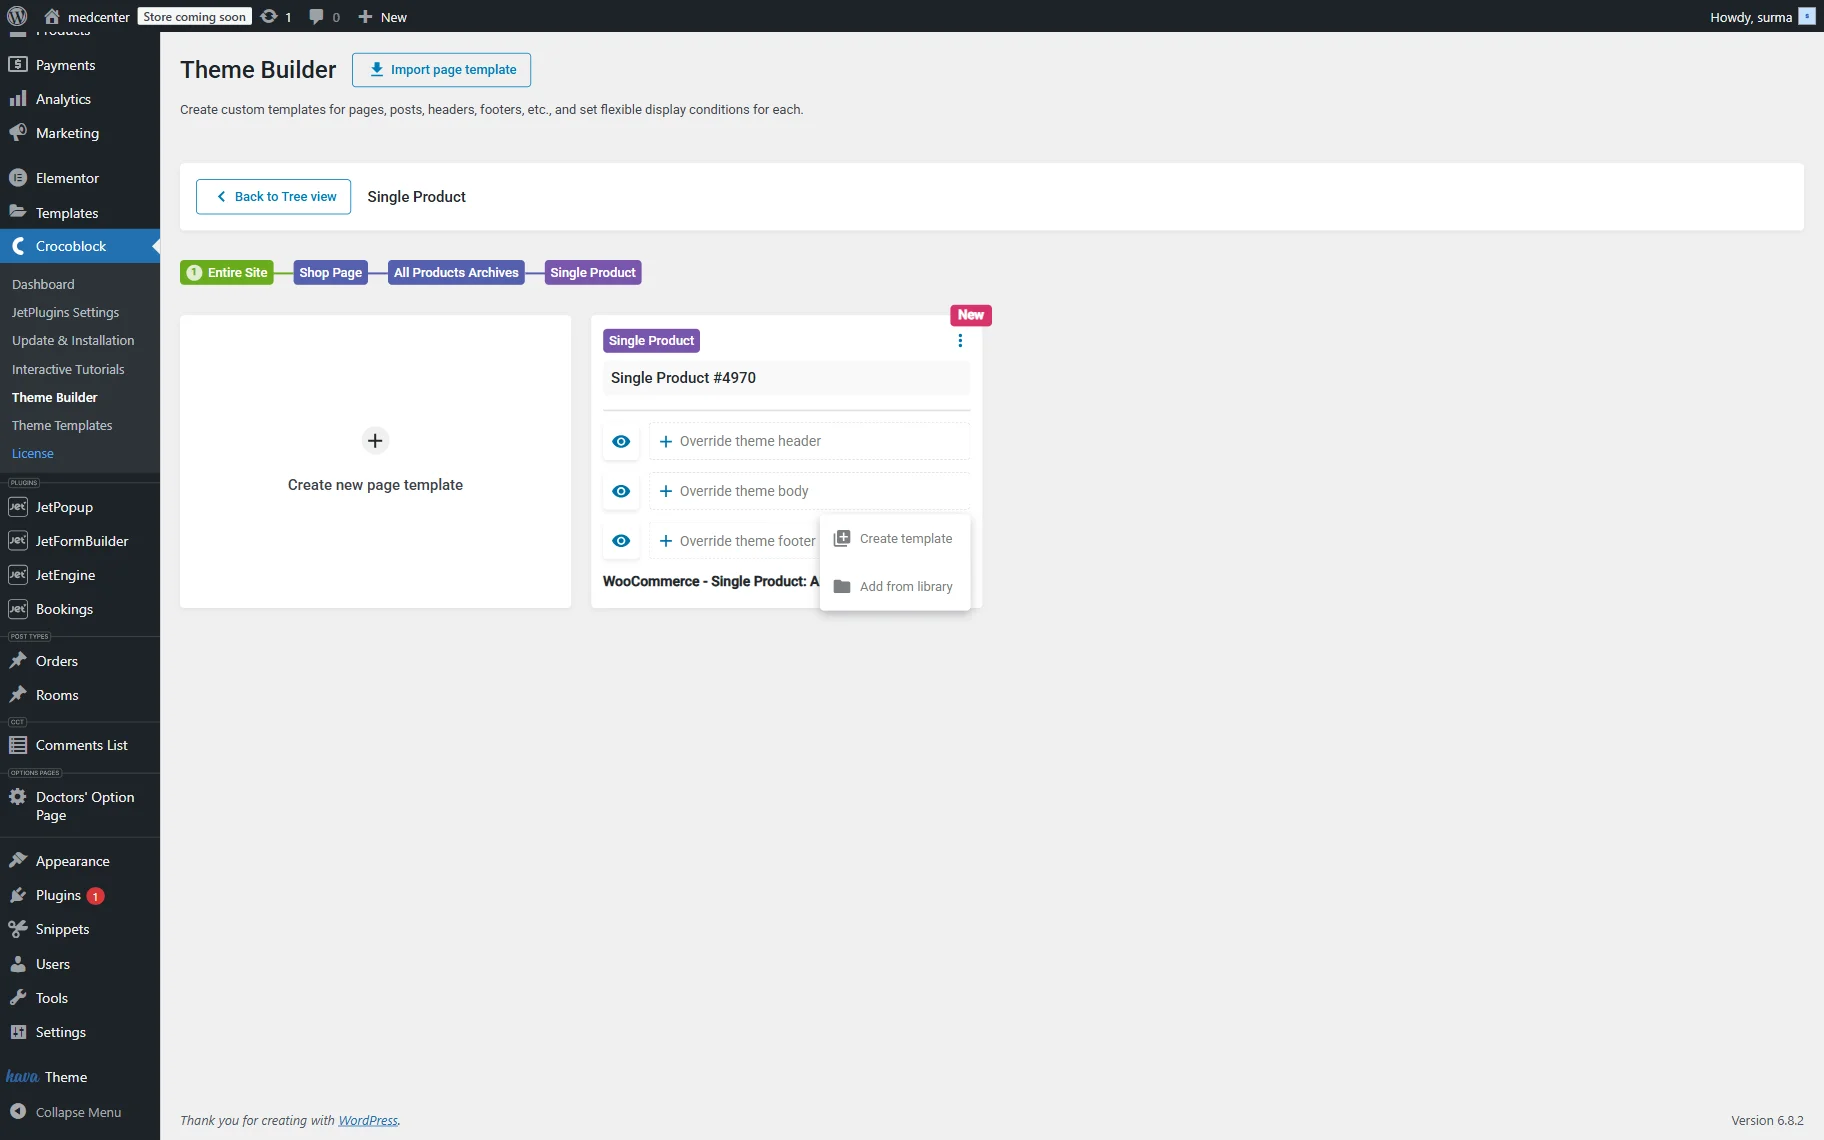
Then, we are redirected to the page with the newly created template. Type the name for the template. Then click the “+” icon next to the “Overwrite theme body” input and select the “Create Template” option. You can choose a template from the library if you have one, but we will guide you through a step-by-step template creation process.
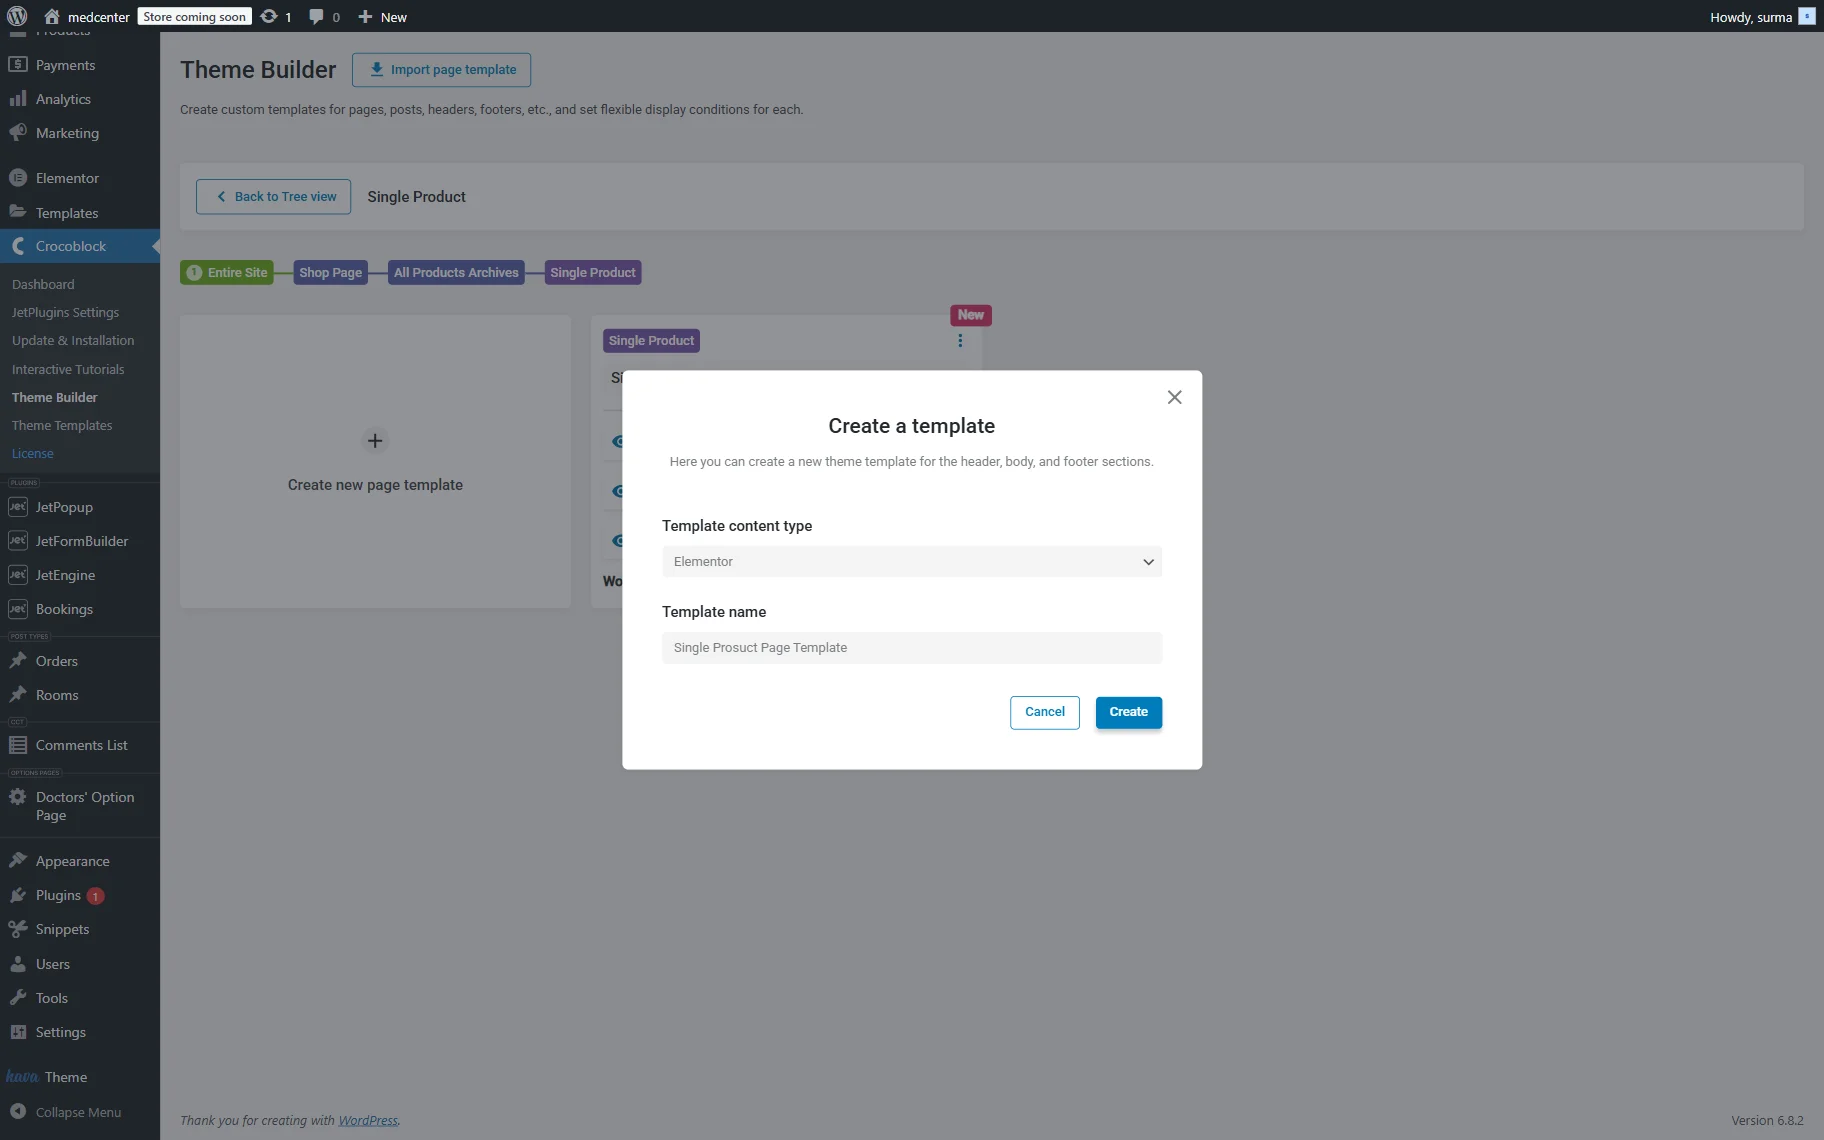
In the newly appeared pop-up, choose the Template Content Type (“Elementor” in this case), and enter the Template Name. Then, click the “Create” button.
Displaying the Data about the Service
As the Elementor editor opens, you will be able to add all the needed widgets and style the template according to your needs. You can use JetEngine widgets to display dynamic content, such as meta fields or repeaters, on the Single Post page.
Let’s take a closer look at how we display information about the service.
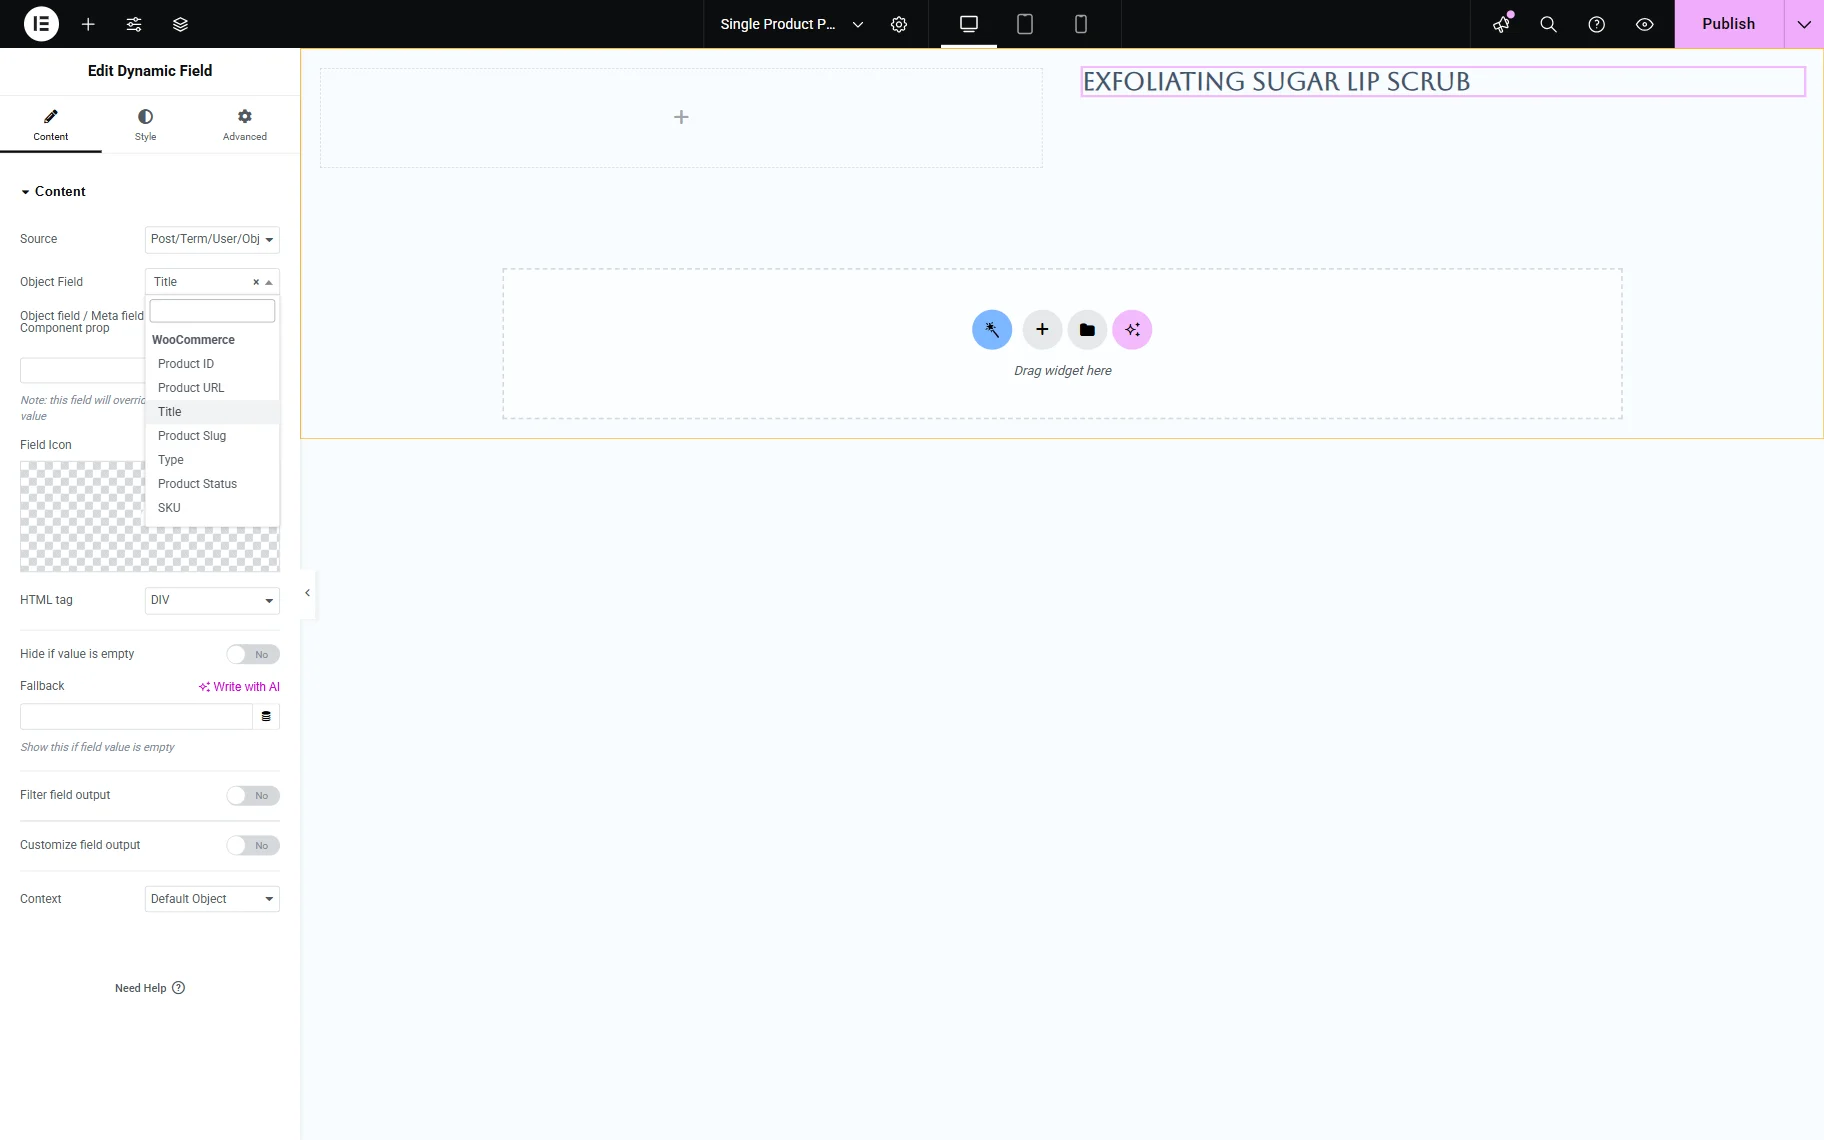
First of all, we will display the title of the service.
To do this, add the Dynamic Field widget to the page. Keep the “Post/Term/User/Object” option for the Source. Then, in the Object Field dropdown, scroll down to the WooCommerce section and select the “Title” option.
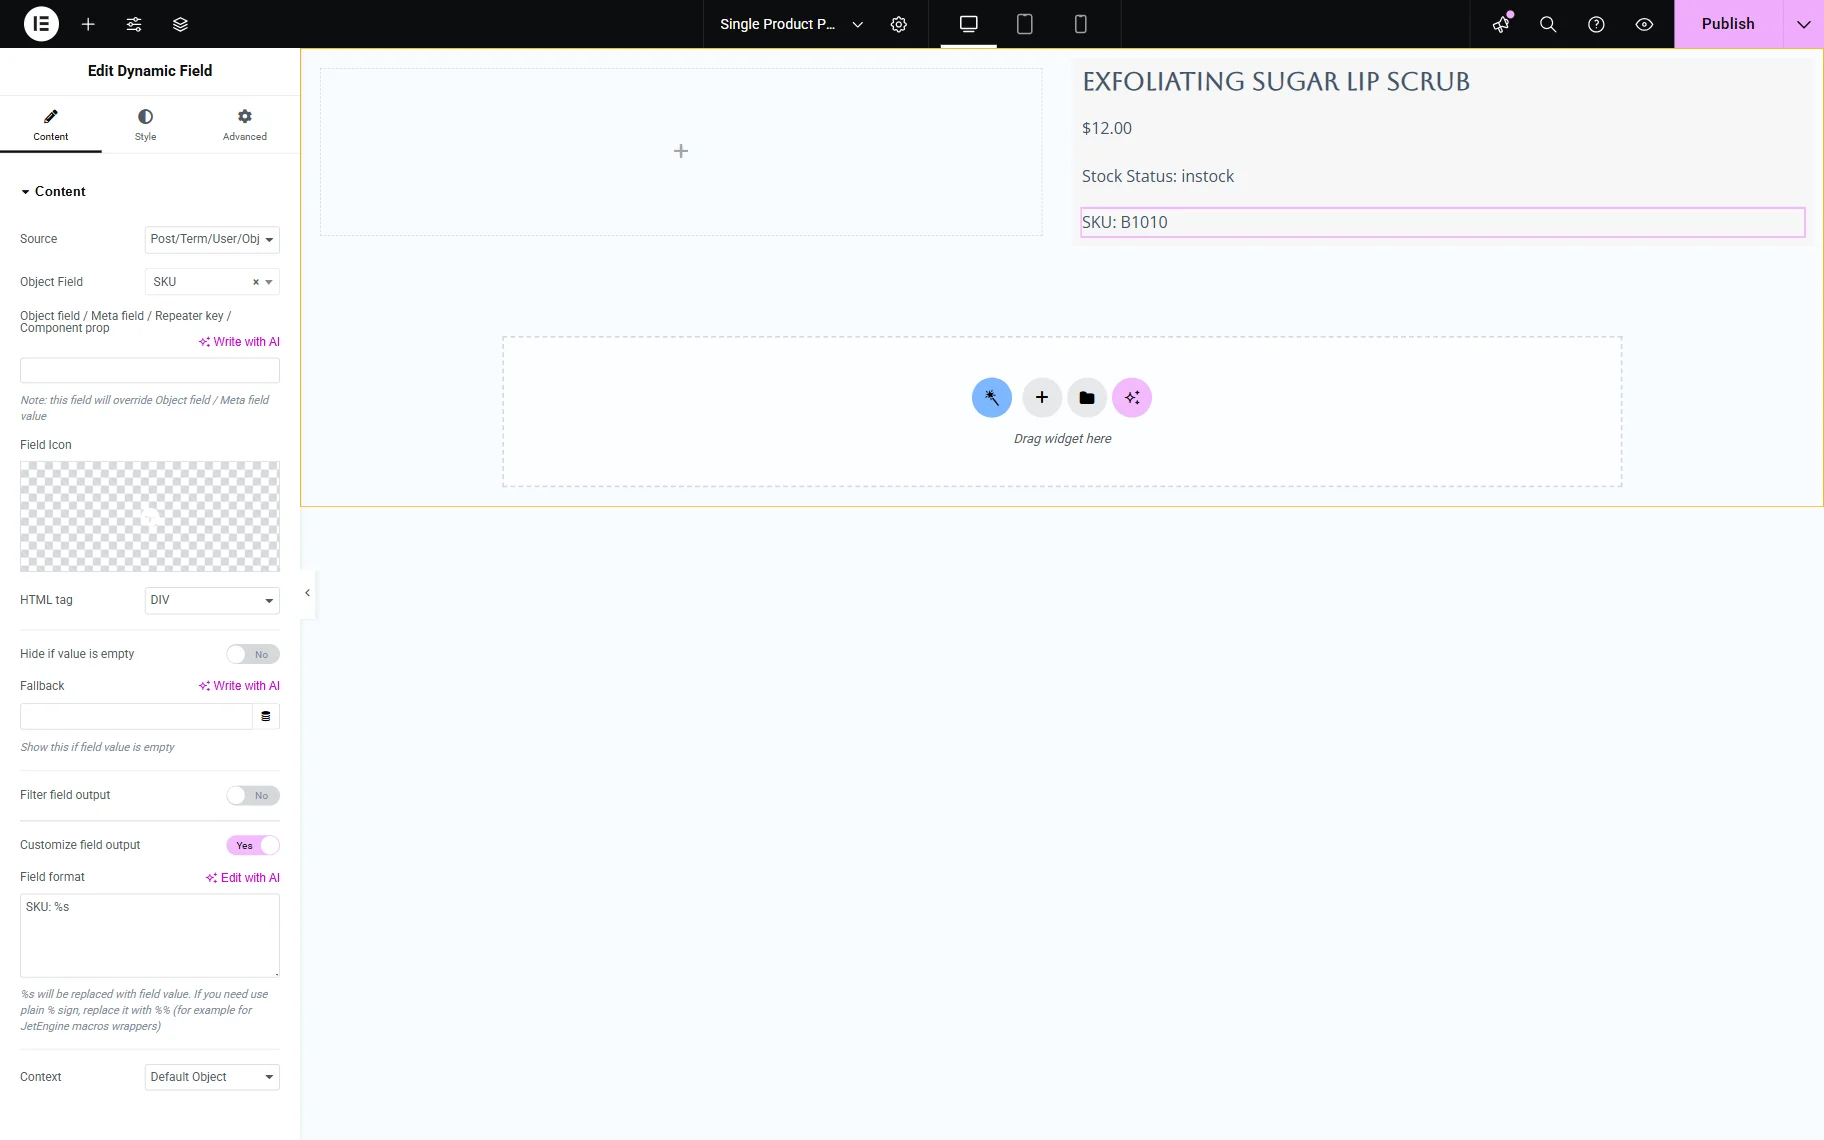
To display the product’s price, the Dynamic Field widget can also be used. Keep the “Post/Term/User/Object” option for the Source. In the Object Field dropdown, select the “Plain Regular Price” option from the WooCommerce section.

If you need some extra text, you can enable the Customize field output toggle and add the required text to the newly appeared field. Ensure that the “%s” value is kept as it replaces the value of the field.
In the same way, we can display other WooCommerce fields, such as “Stock Status” and “SKU”.
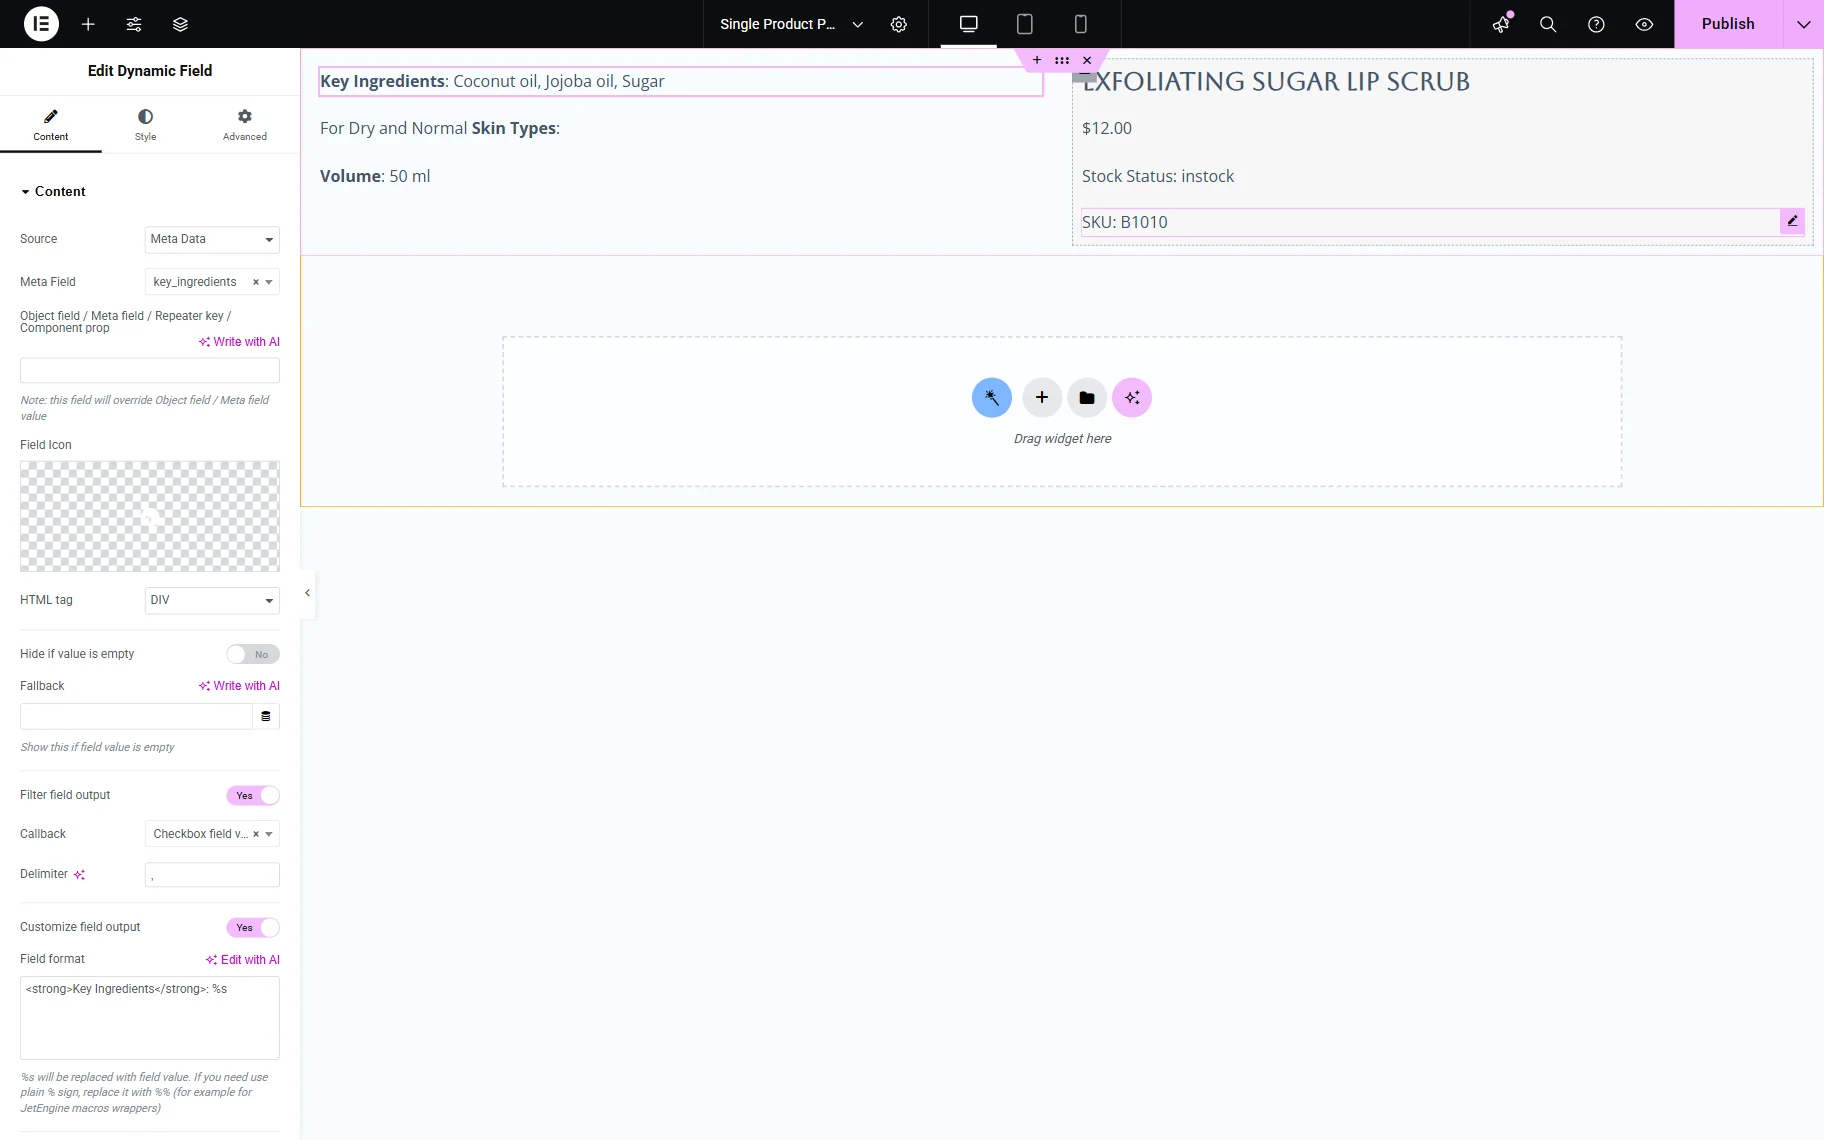
To display custom meta fields from the product, add another Dynamic Field widget.
Choose the “Meta Data” for the Source and select the needed Meta Field from the dropdown.
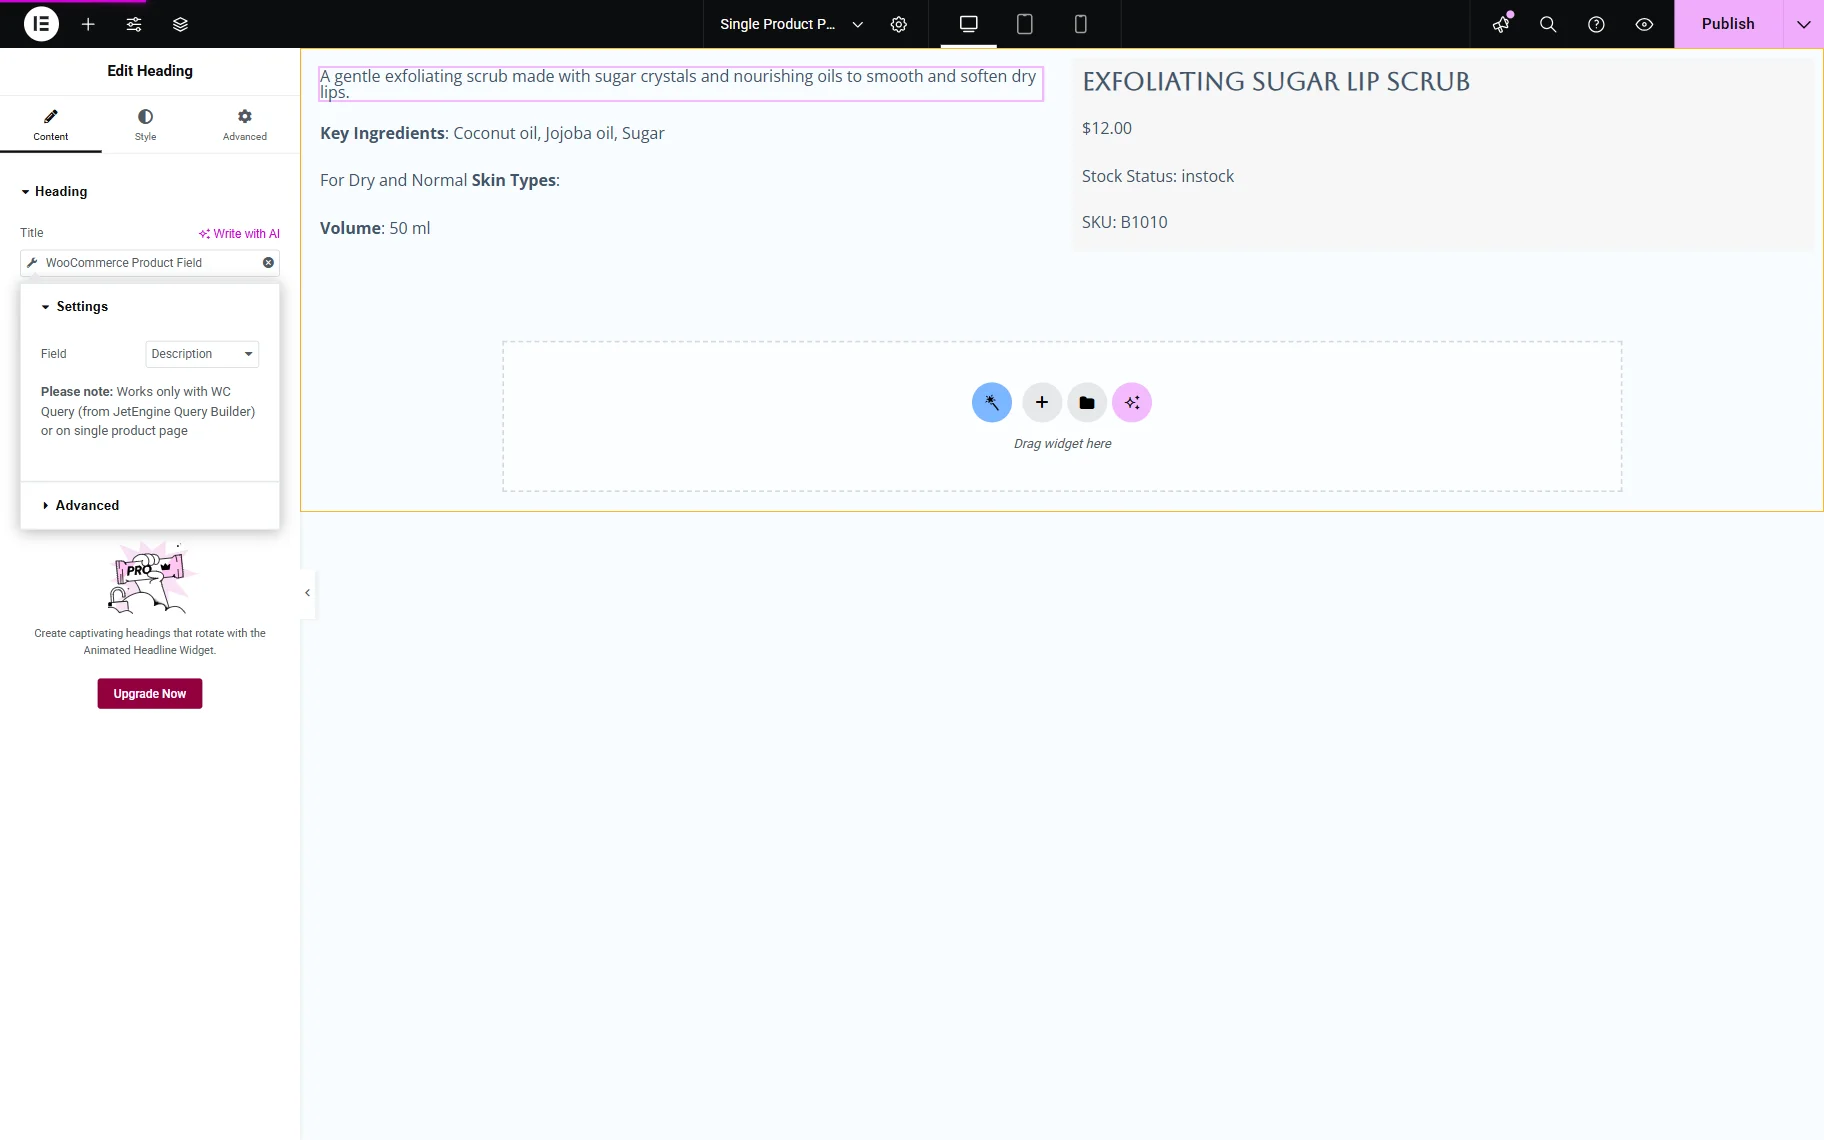
You can also use a Headline, Heading, or Text Editor widget with the Dynamic Tag to display the meta fields’ values. We utilized the Heading widget with the Dynamic Tag to input the “Product description”.
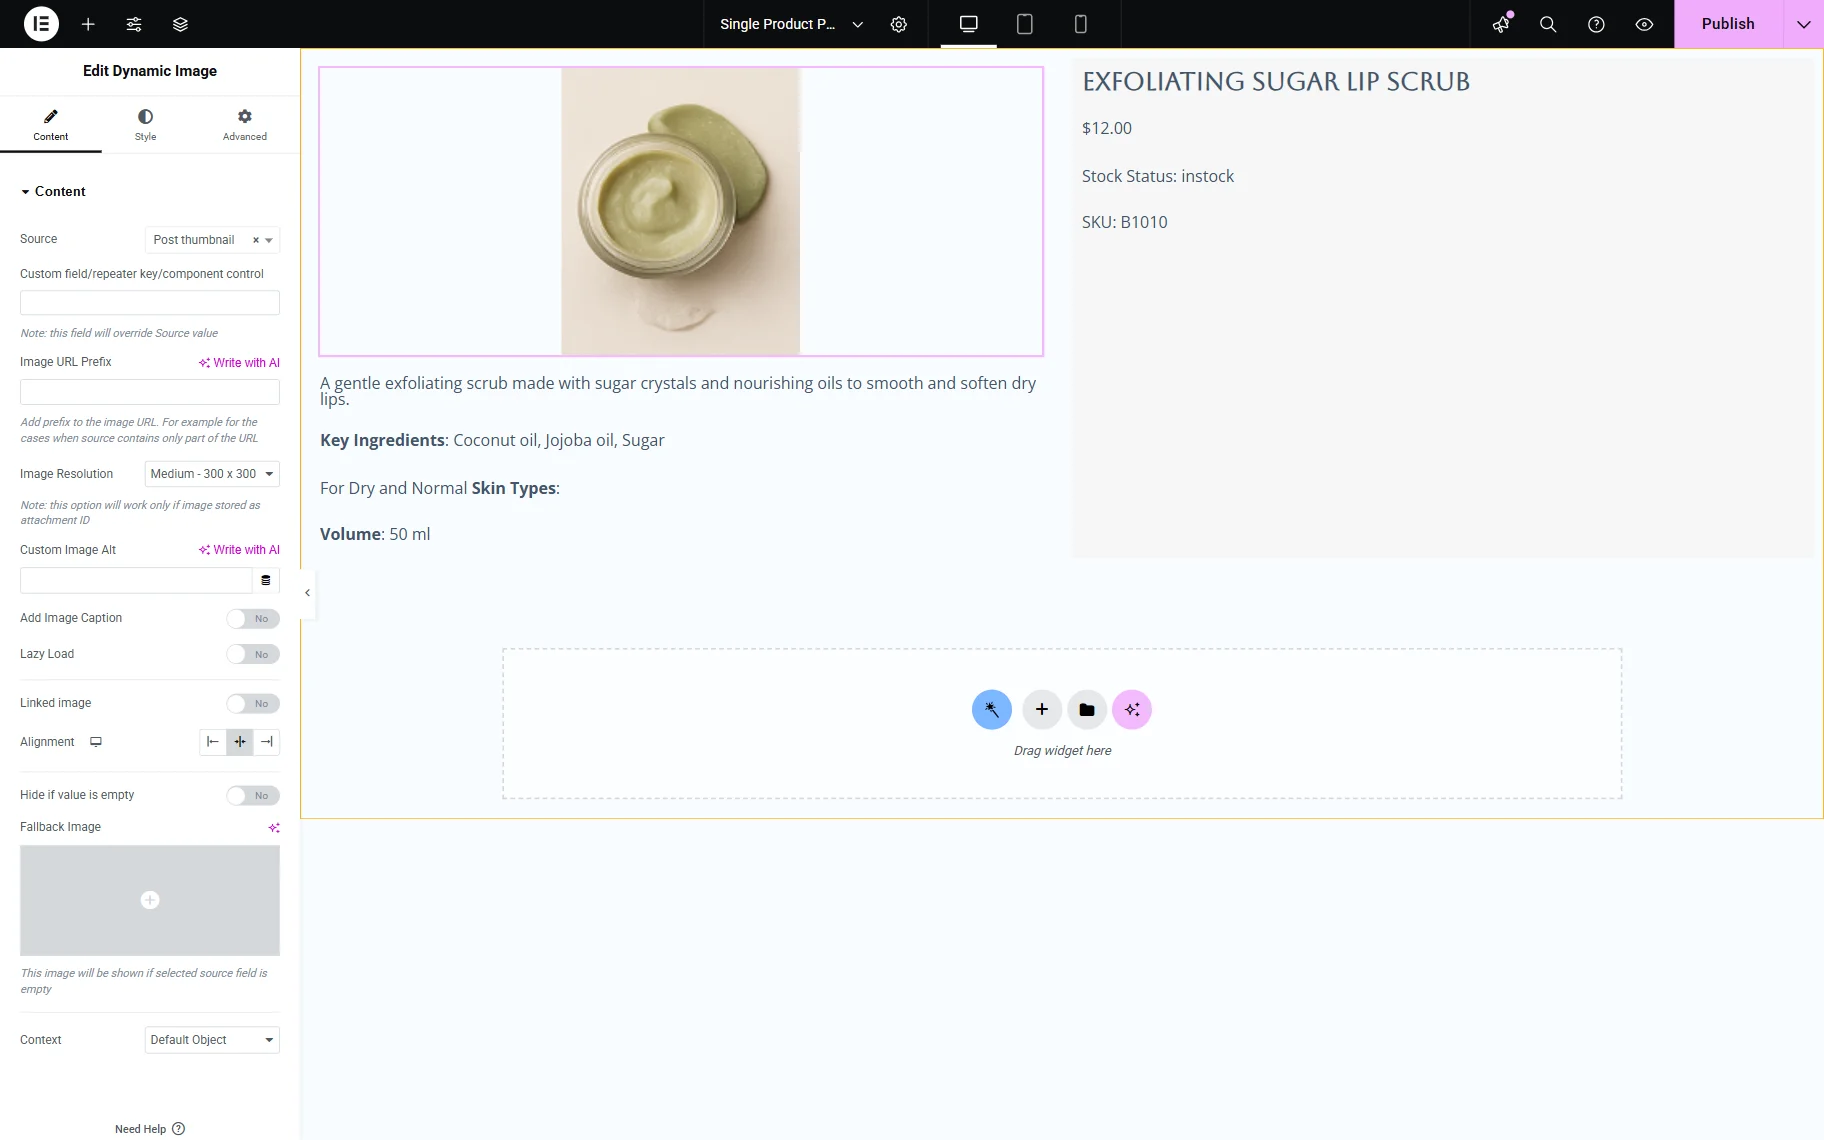
Now, let’s add the post’s thumbnail using the Dynamic Image widget. By default, the “Post thumbnail” is chosen as a Source. If you need to display the thumbnail, keep the settings as they are. To display an image from the custom meta field, click the dropdown and select the field name you need.
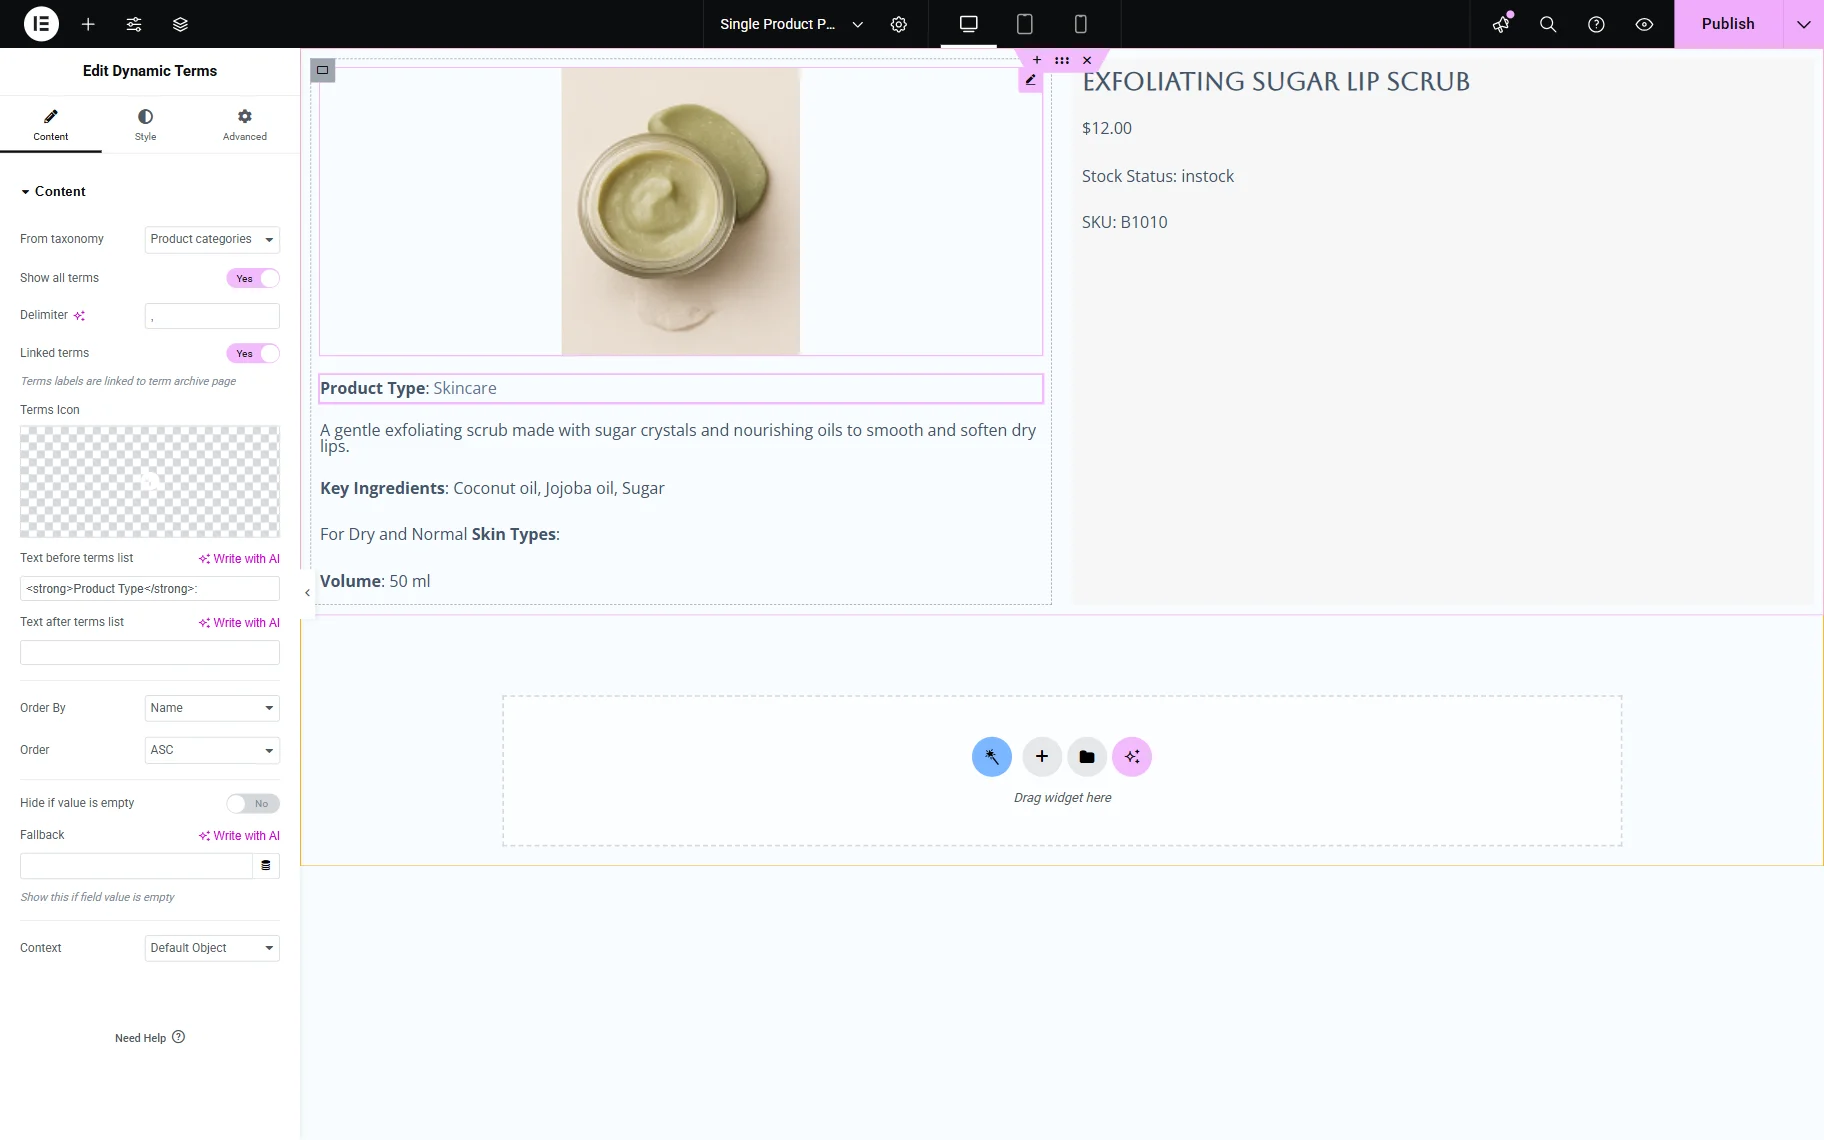
To display the categories of the products, the Dynamic Terms widget can be used. We also added custom text to the Text before terms list input.
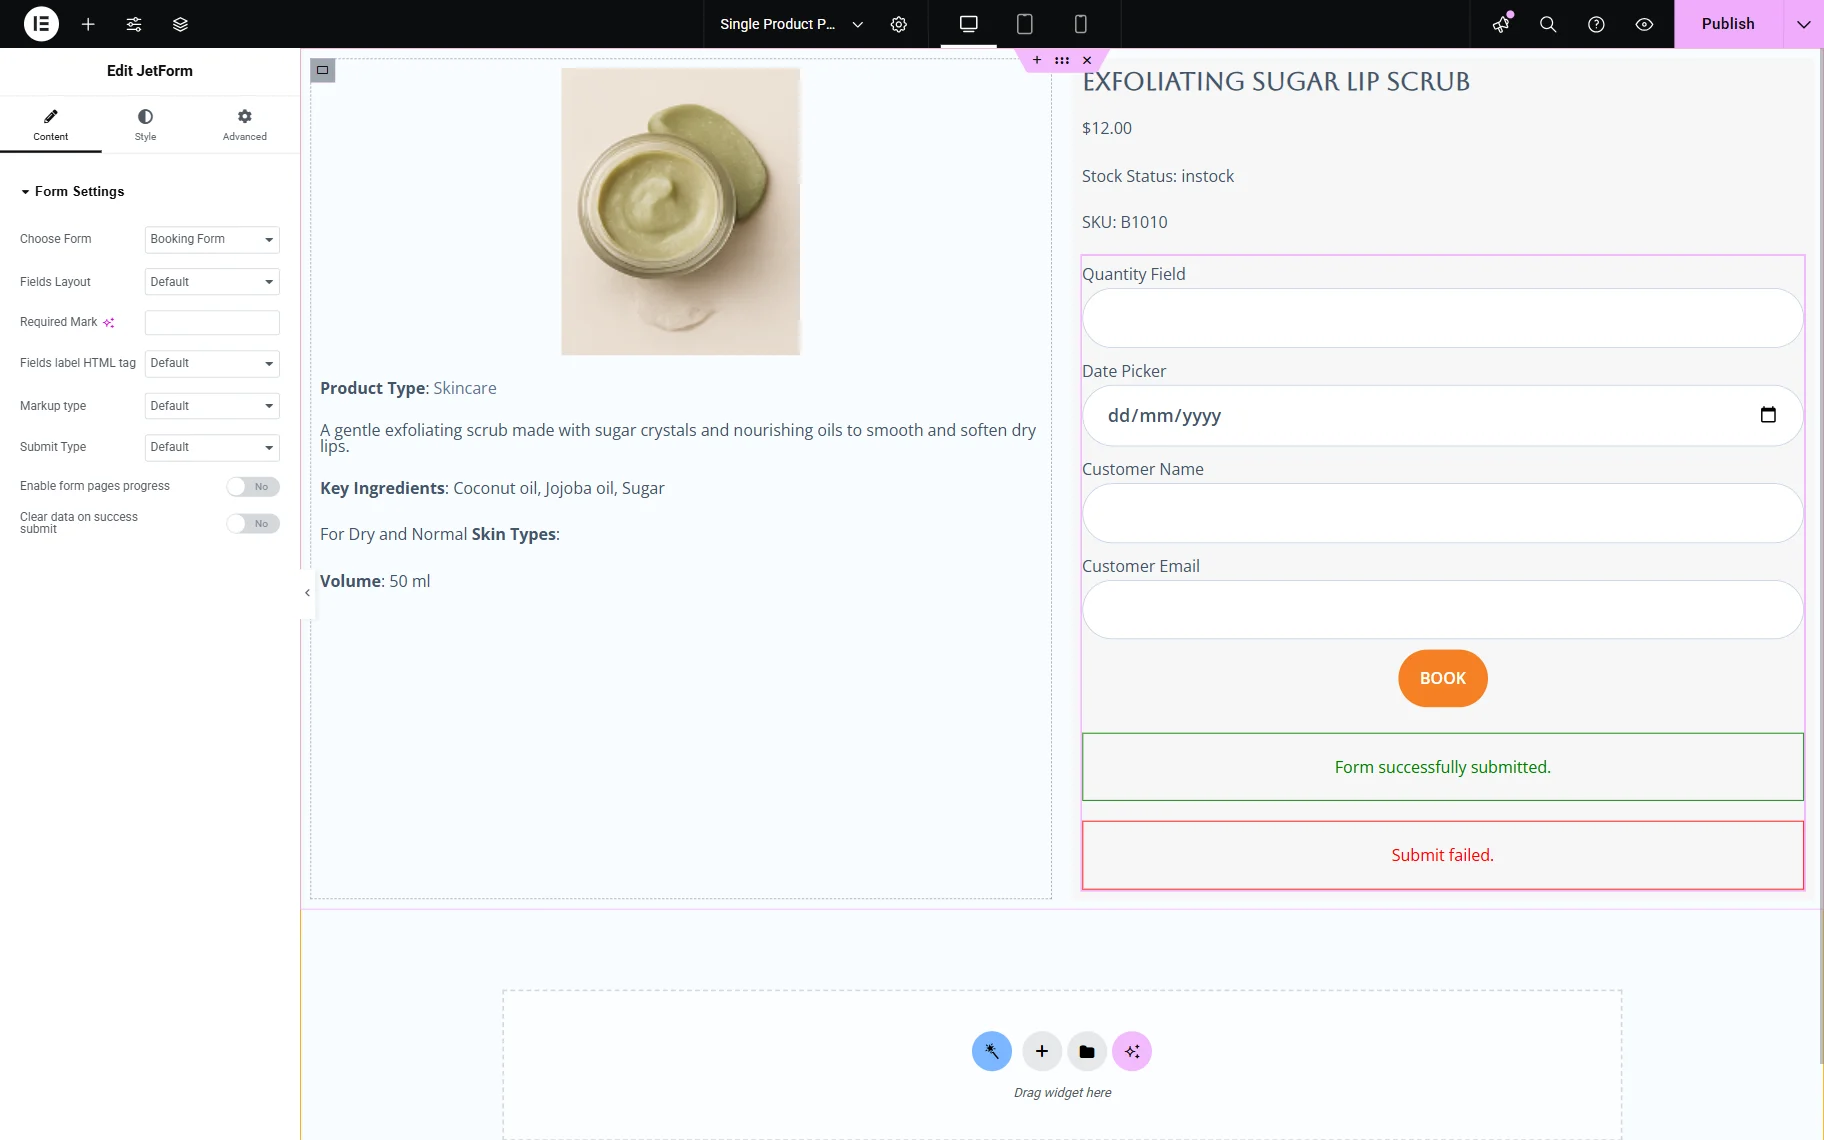
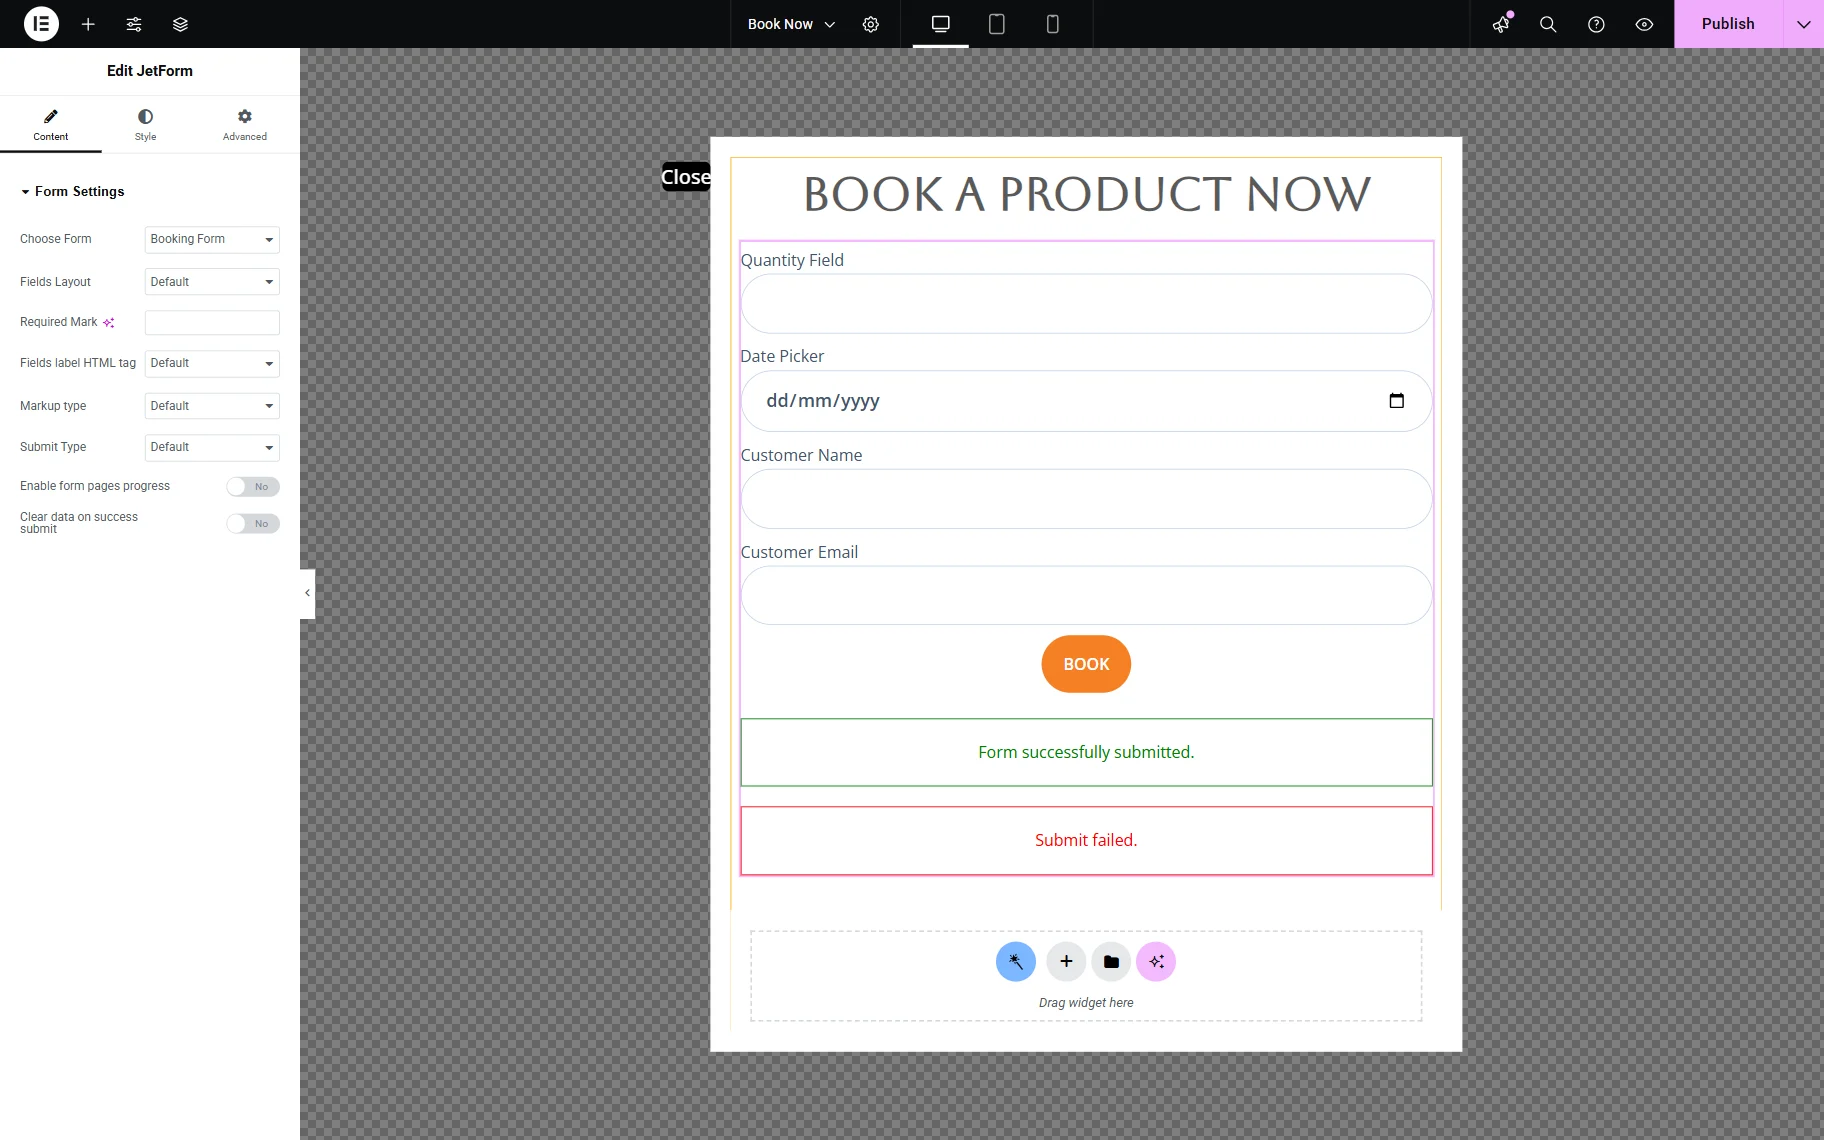
The Booking Form should also be added to the single page. You can do it using the JetForm widget. Once the widget is added, select the needed form from the Choose Form input.
Displaying the booking form in the pop-up
However, in this case, we add a “Book Now” button to the page, which displays the form inside a pop-up and opens it when the button is clicked.
For this, some preparation is needed. Ensure you click the “Publish” button to avoid losing all the settings.
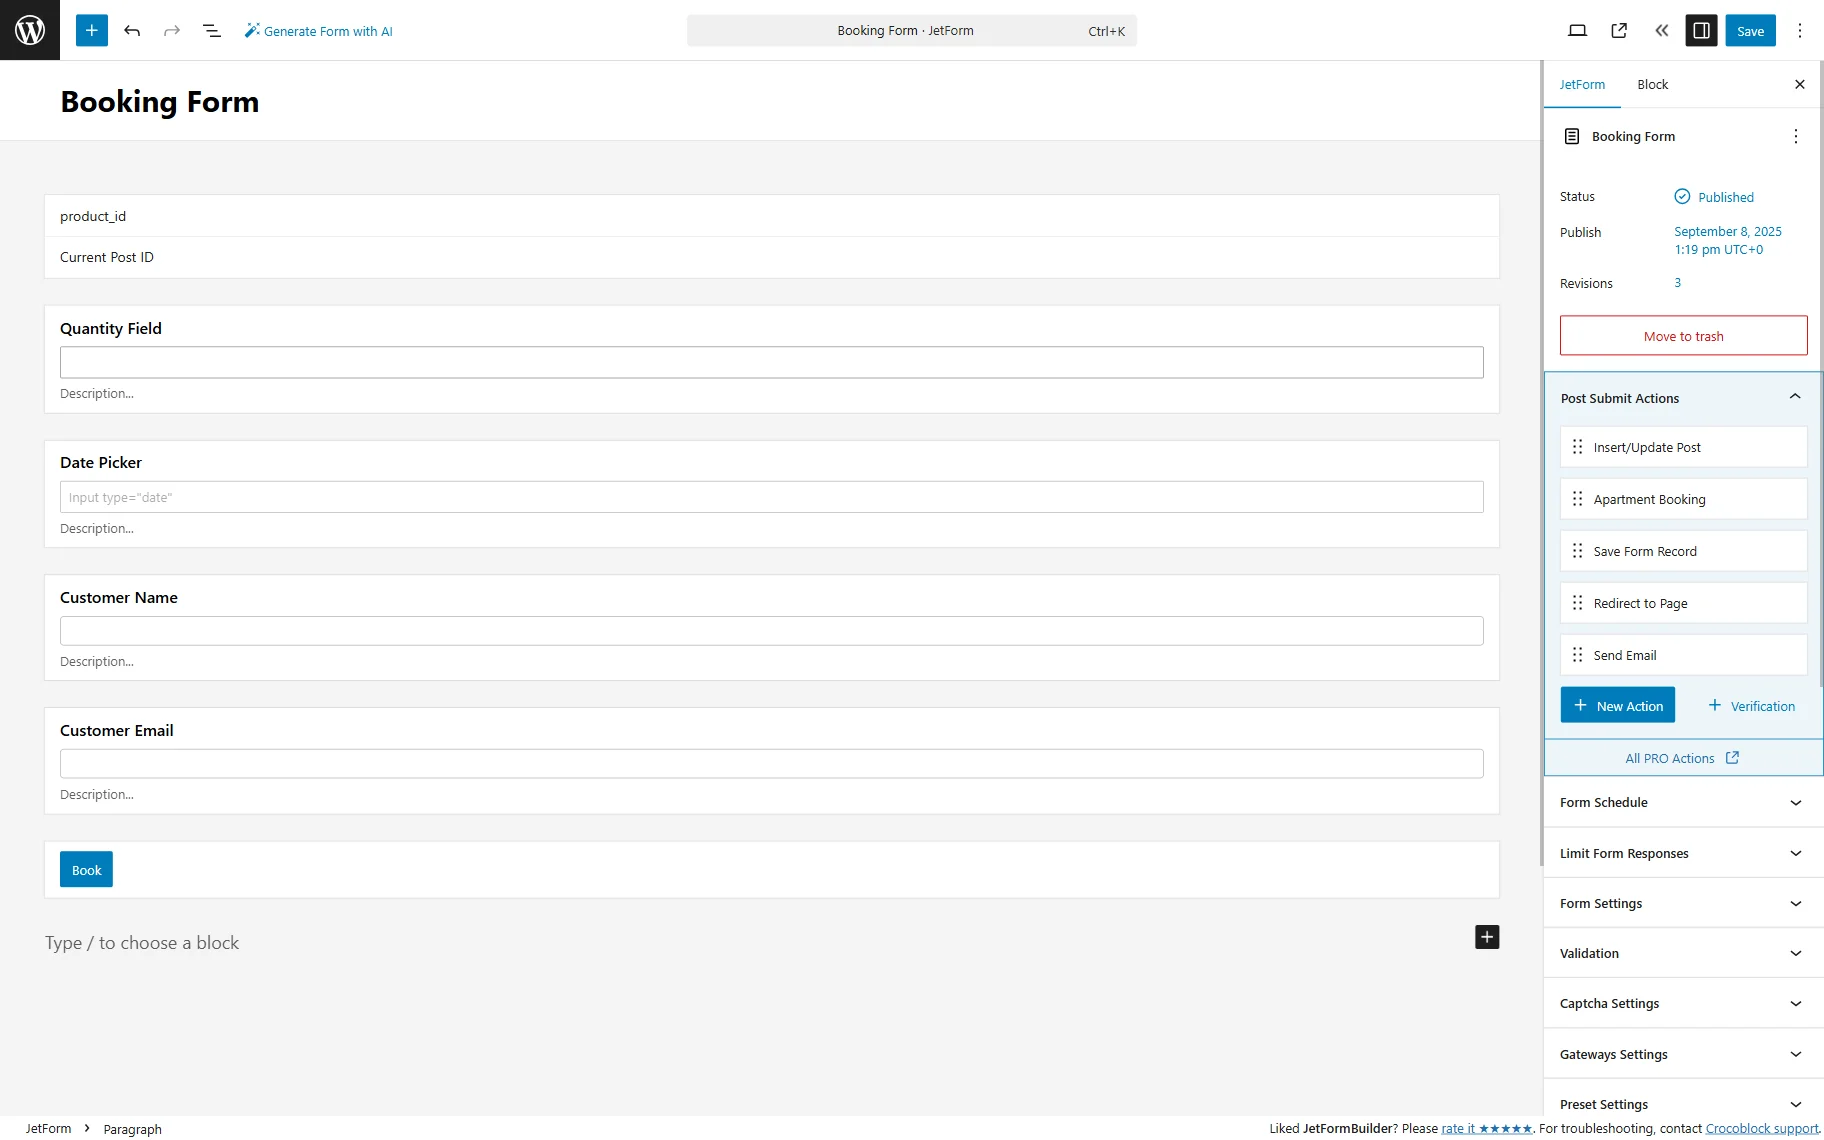
So, ensure that the booking form is set up.
Next, navigate to the WordPress Dashboard > JetPopup > All Popups and click the “Create New Popup” button. In the newly appeared pop-up, choose the Content Type, enter the Name, and choose the Preset. Then, click the “Create” button.
When the Elementor edit page is opened, add the JetForm widget and select the booking form you created.
Click “Publish” once you are ready.
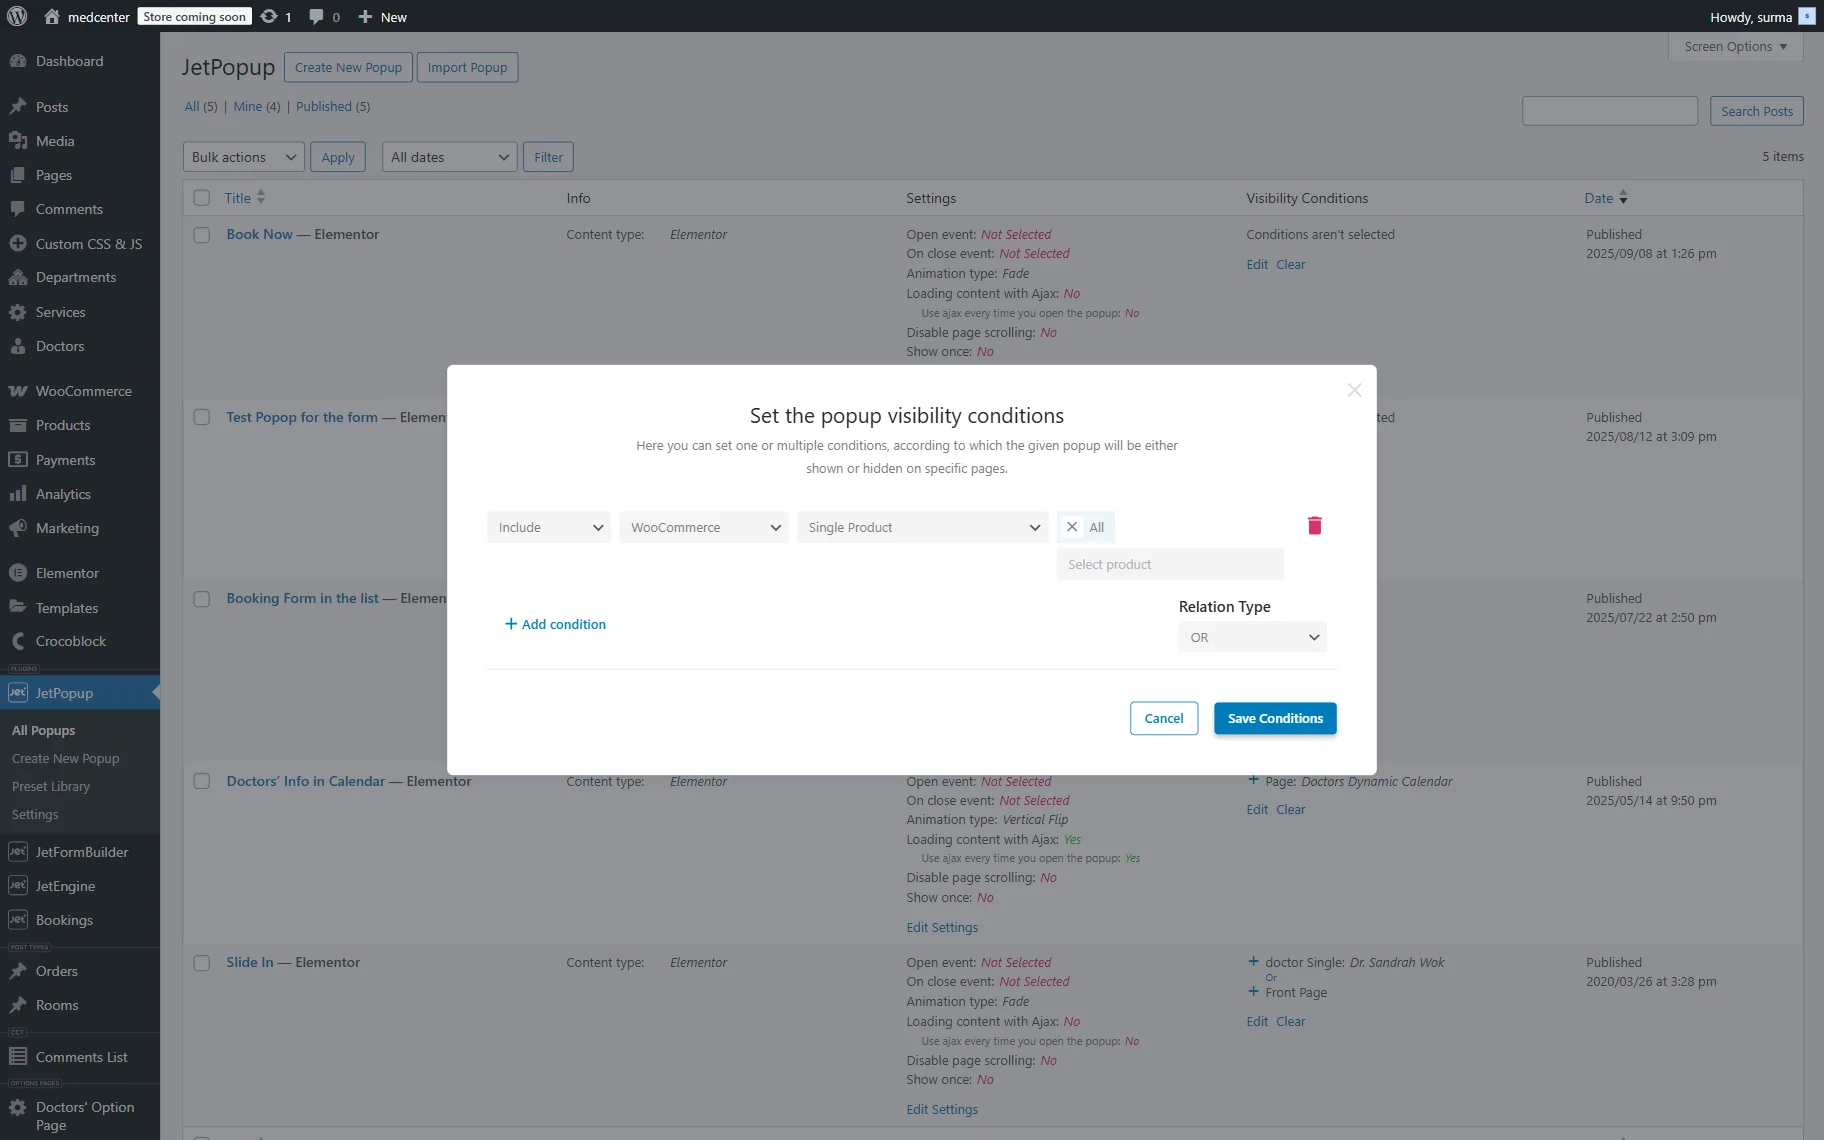
Then, let’s move back to the single product page template. Open the Button’s settings, proceed to the Advanced tab, and then open the JetPopup section.
Select the Attached Popup you created, and in the Trigger Type, choose the “Click on Widget” option.

Setting up the related services
Additionally, we add a list of similar related products to ameliorate the user experience on the site.
Creating the listing
Following the How to Build WooCommerce Products Listings with the Dynamic Tag tutorial, we created a listing for the WooCommerce products.
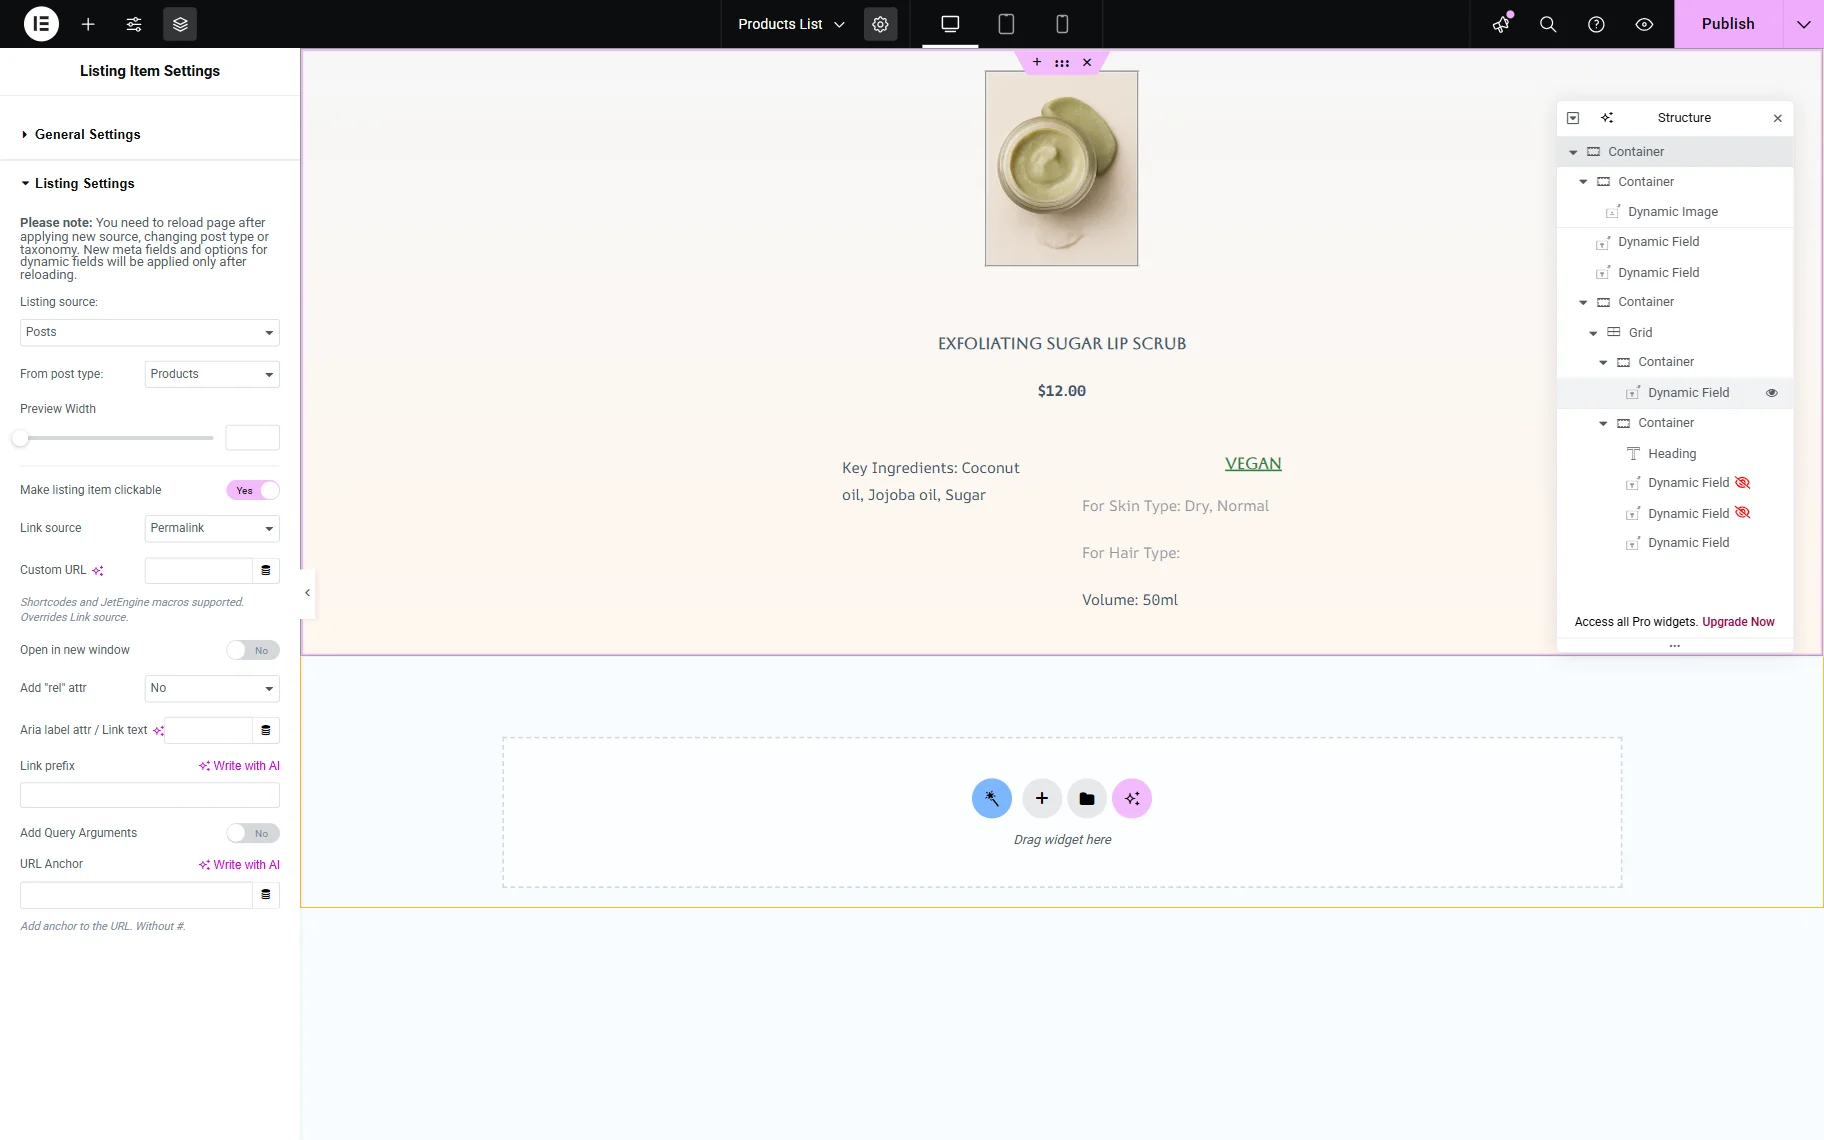
We added the Dynamic Widgets to display short information about the products.
Click the “Publish” button once you are ready.
Setting up a custom query
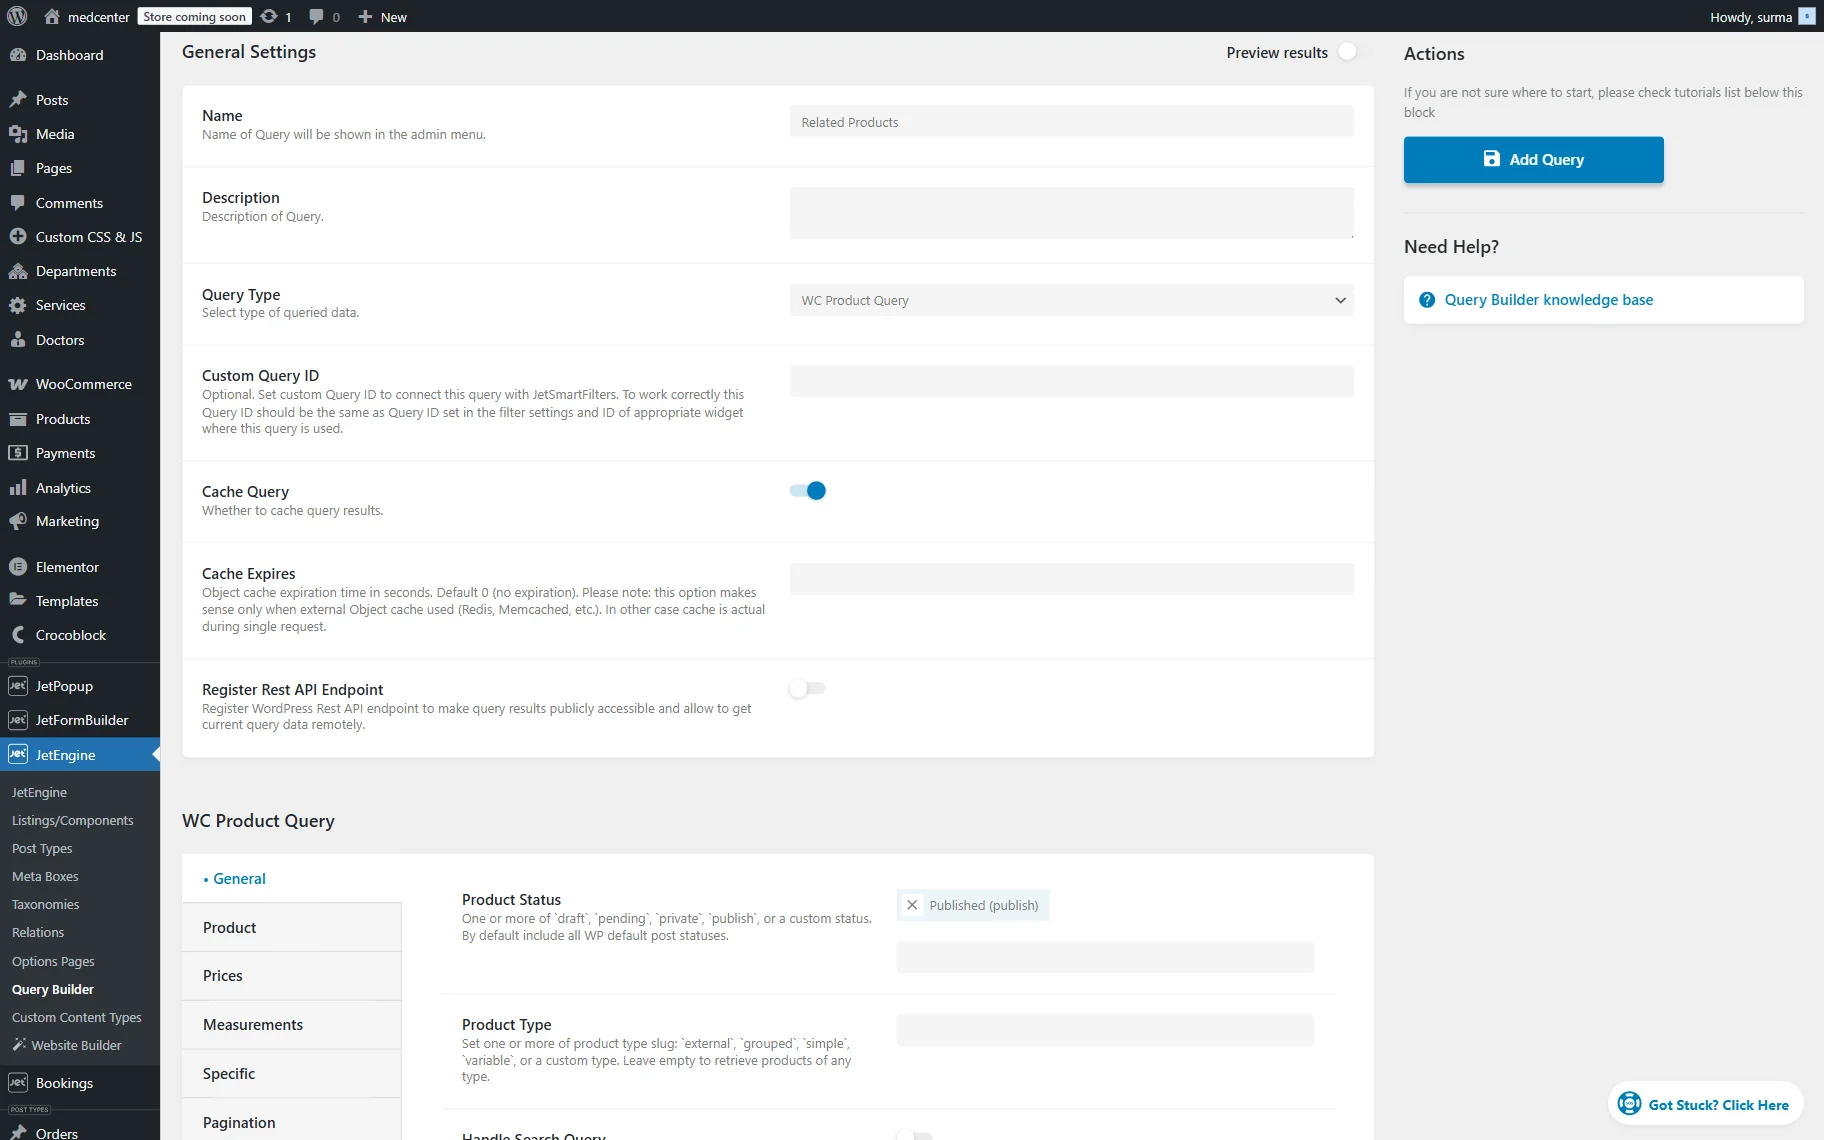
Following the Macros for Query Builder tutorial, we set up the WC Product Query.
Navigate to WordPress Dashboard > JetEngine > Query Builder, then click the “Add New” button.
Enter the Query Name and select the “WC Product Query” Query Type. Scroll down to the General tab and select the “Published (publish)” option in the Product Status field.
Then, in the Tax Query tab, apply the following settings to get the products related by terms on the single product page.
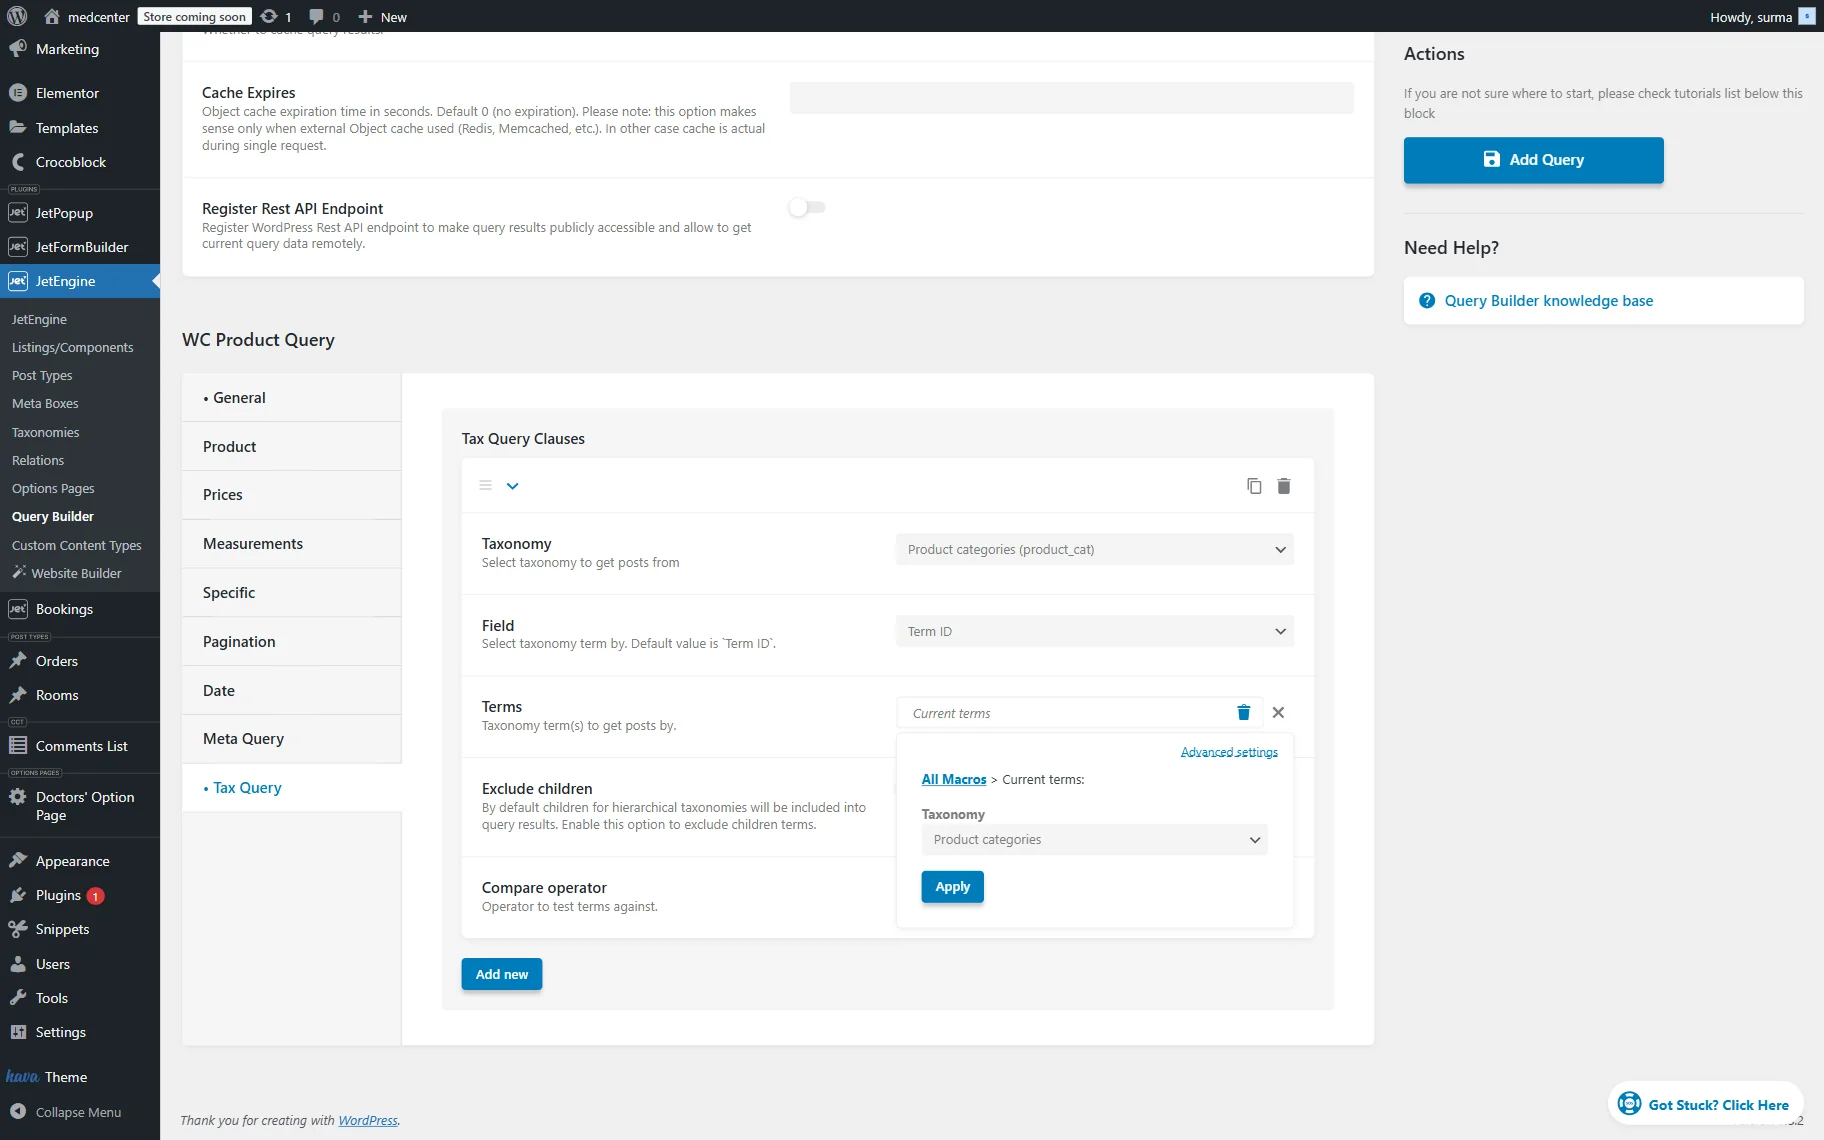
Click the “Add Query” button once you are ready.
Displaying the related services on a single page
Move back to the single product page template and add the Listing Grid widget. Select the listing you created in the Listing input.
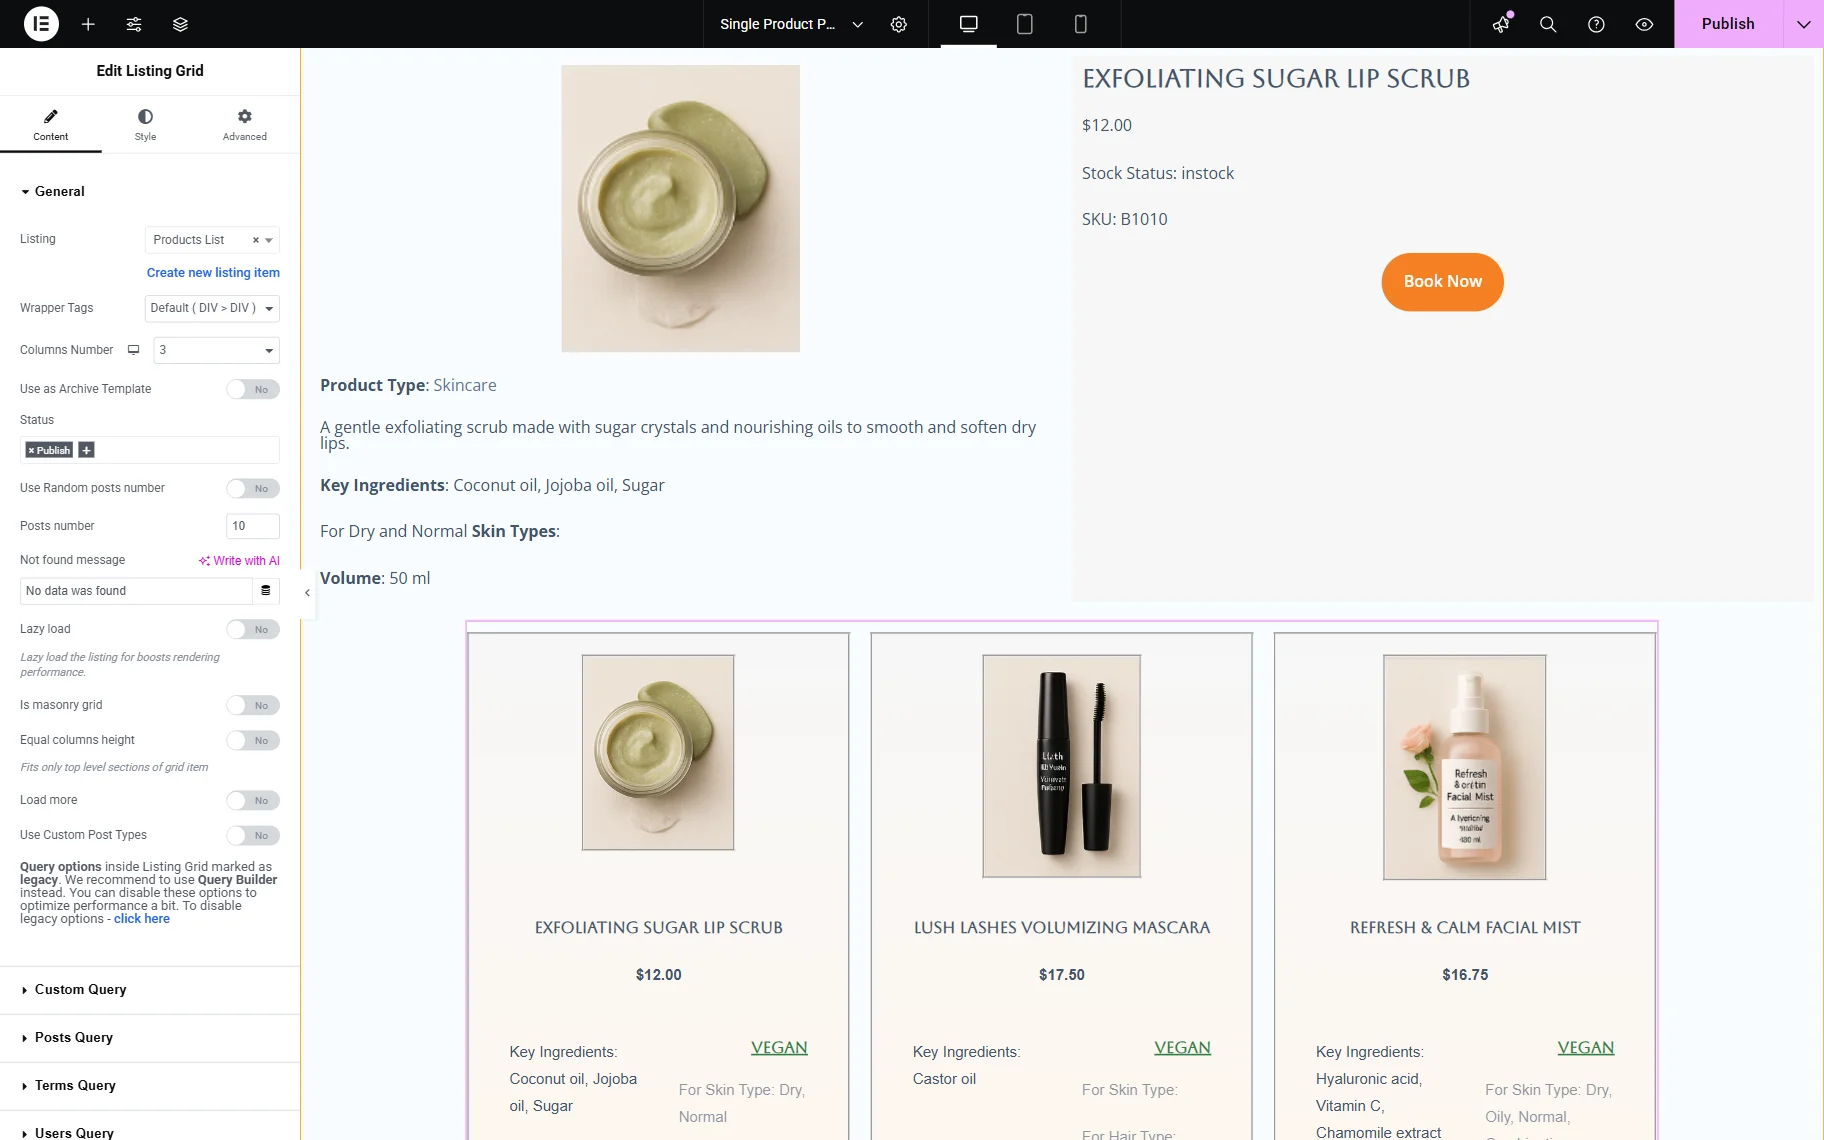
Then open the Custom Query tab and enable the toggle. In the newly appeared field, select the query you created.
Once you are ready, click the “Publish” button.
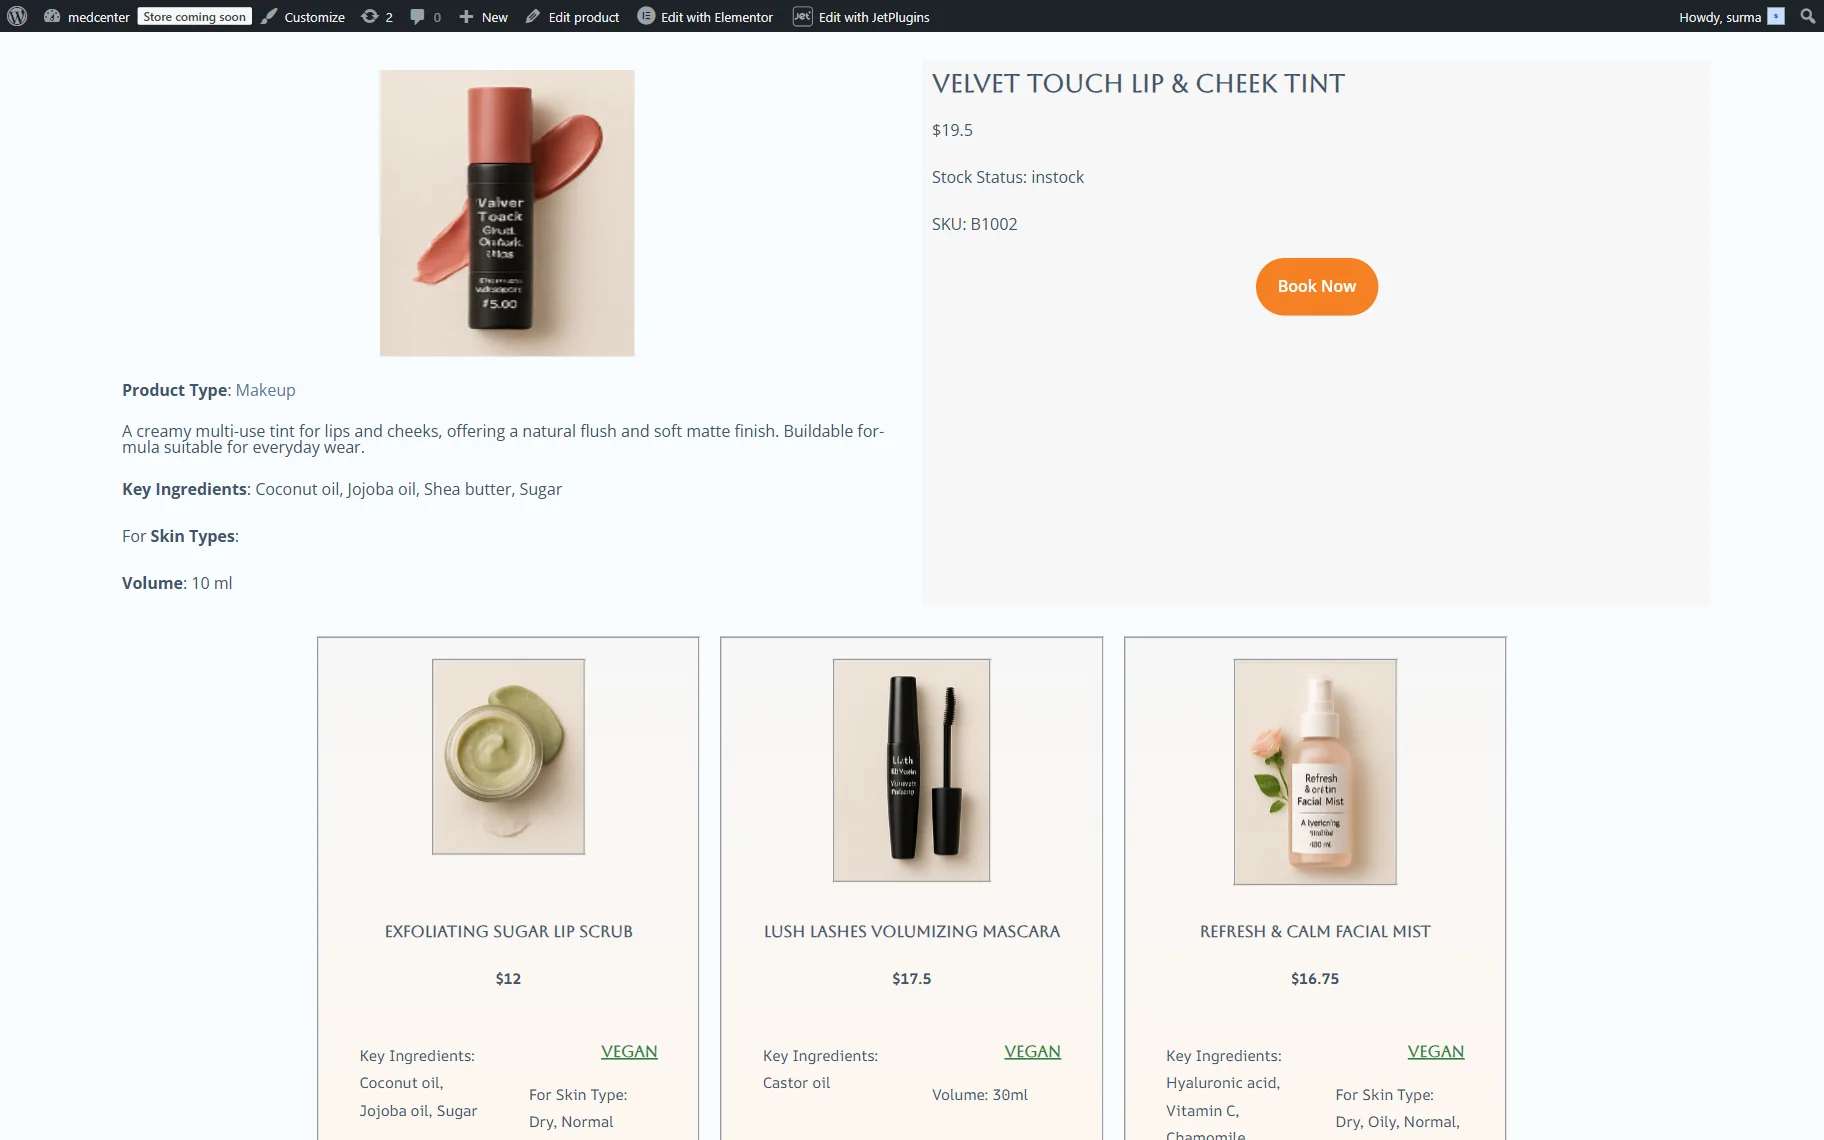
Check the Result
Now, proceed to the front end of any product page. Here, the template we created is applied.
That’s it. Now you know how to create a custom WooCommerce single product page for JetBooking with the WooCommerce-Based Mode using the JetThemeCore WordPress plugin.