How to Connect Categories and Custom Taxonomies with Users
Learn how to connect custom WordPress categories with the users and display the needed terms and related data on the front end.
Before you start, check the tutorial requirements:
- Elementor (Free version) or Block editor (Gutenberg), or Bricks
- JetEngine plugin installed and activated with Custom Post Type created and custom taxonomy, and glossary built
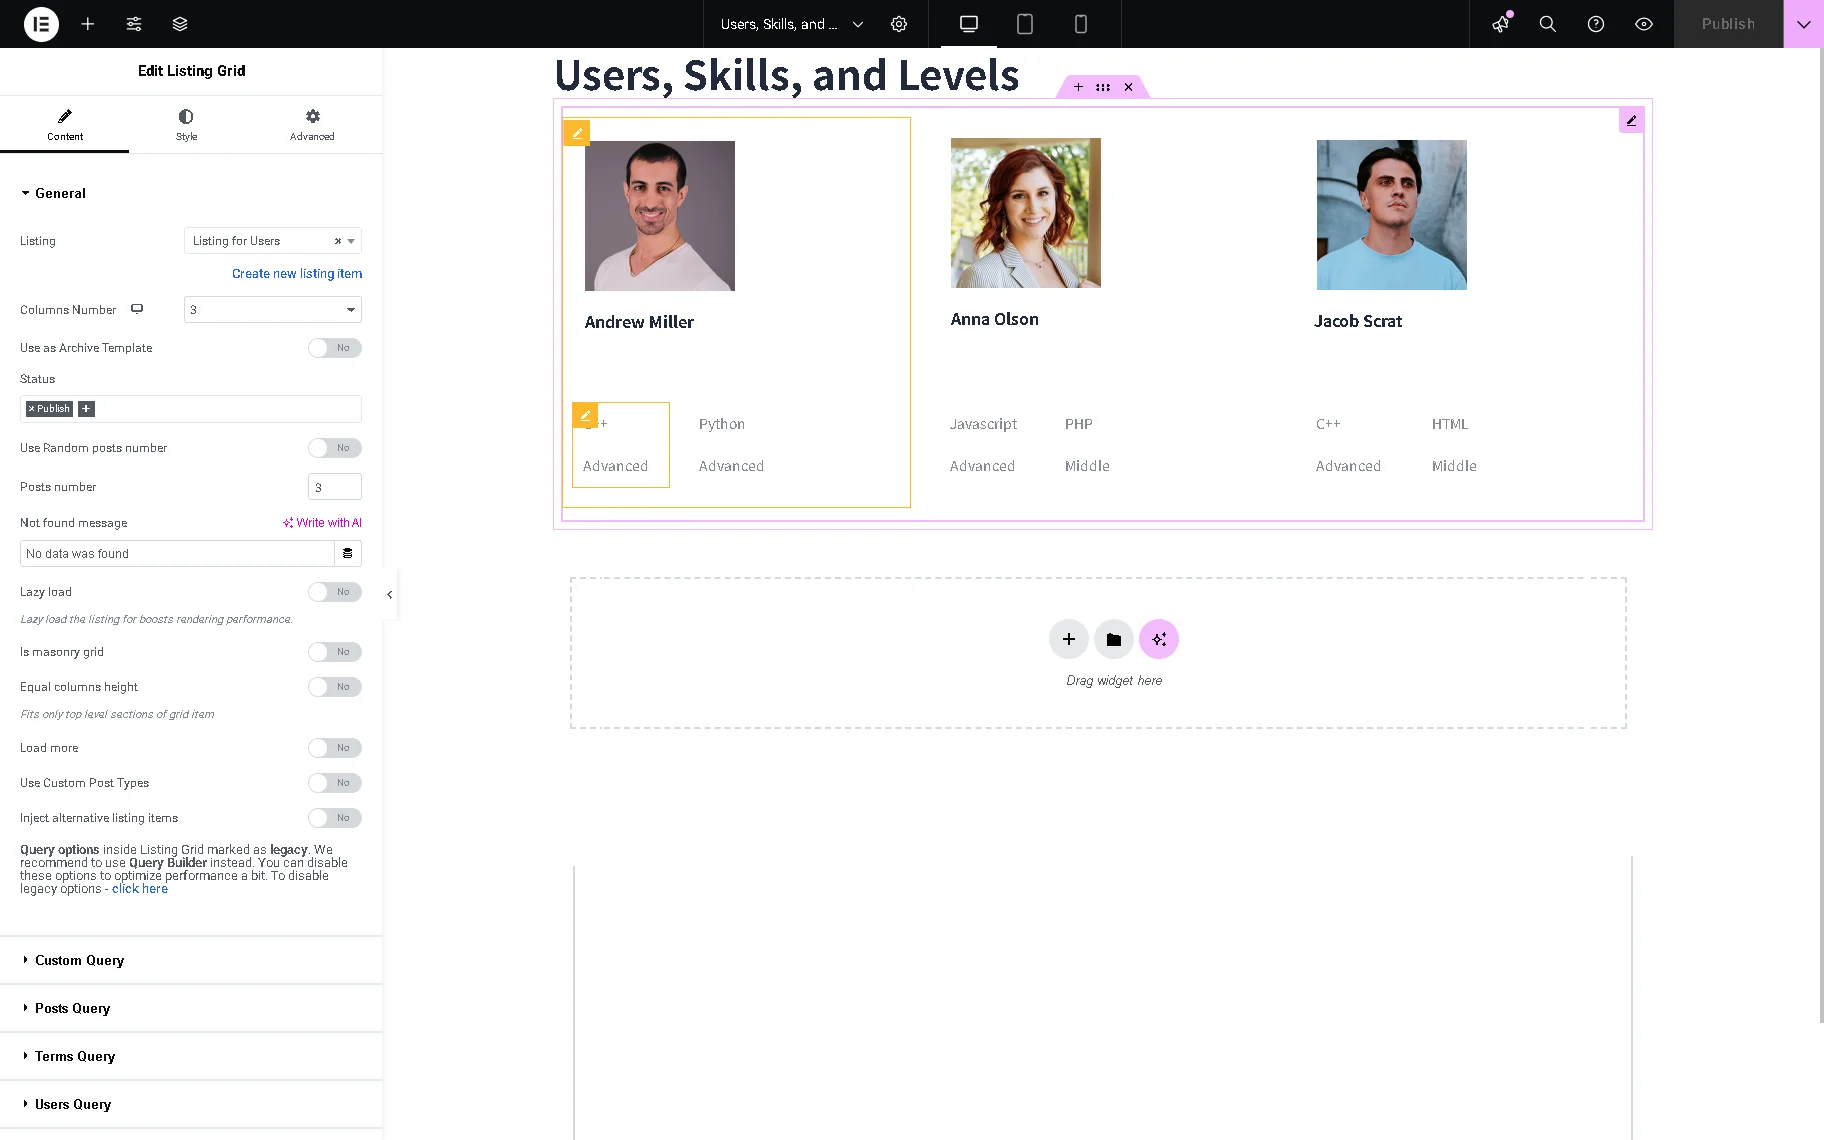
Here, we consider adjusting a user-based listing to display custom taxonomy and glossary data as relation meta data. In particular, the listing will showcase WordPress users and their skills (from the “Skills” taxonomy with the “Python,” “PHP,” “SQL,” and more terms) and levels (the “Levels” glossary with the “Basic,” “Advanced,” “Middle,” etc.).
Create a Relation
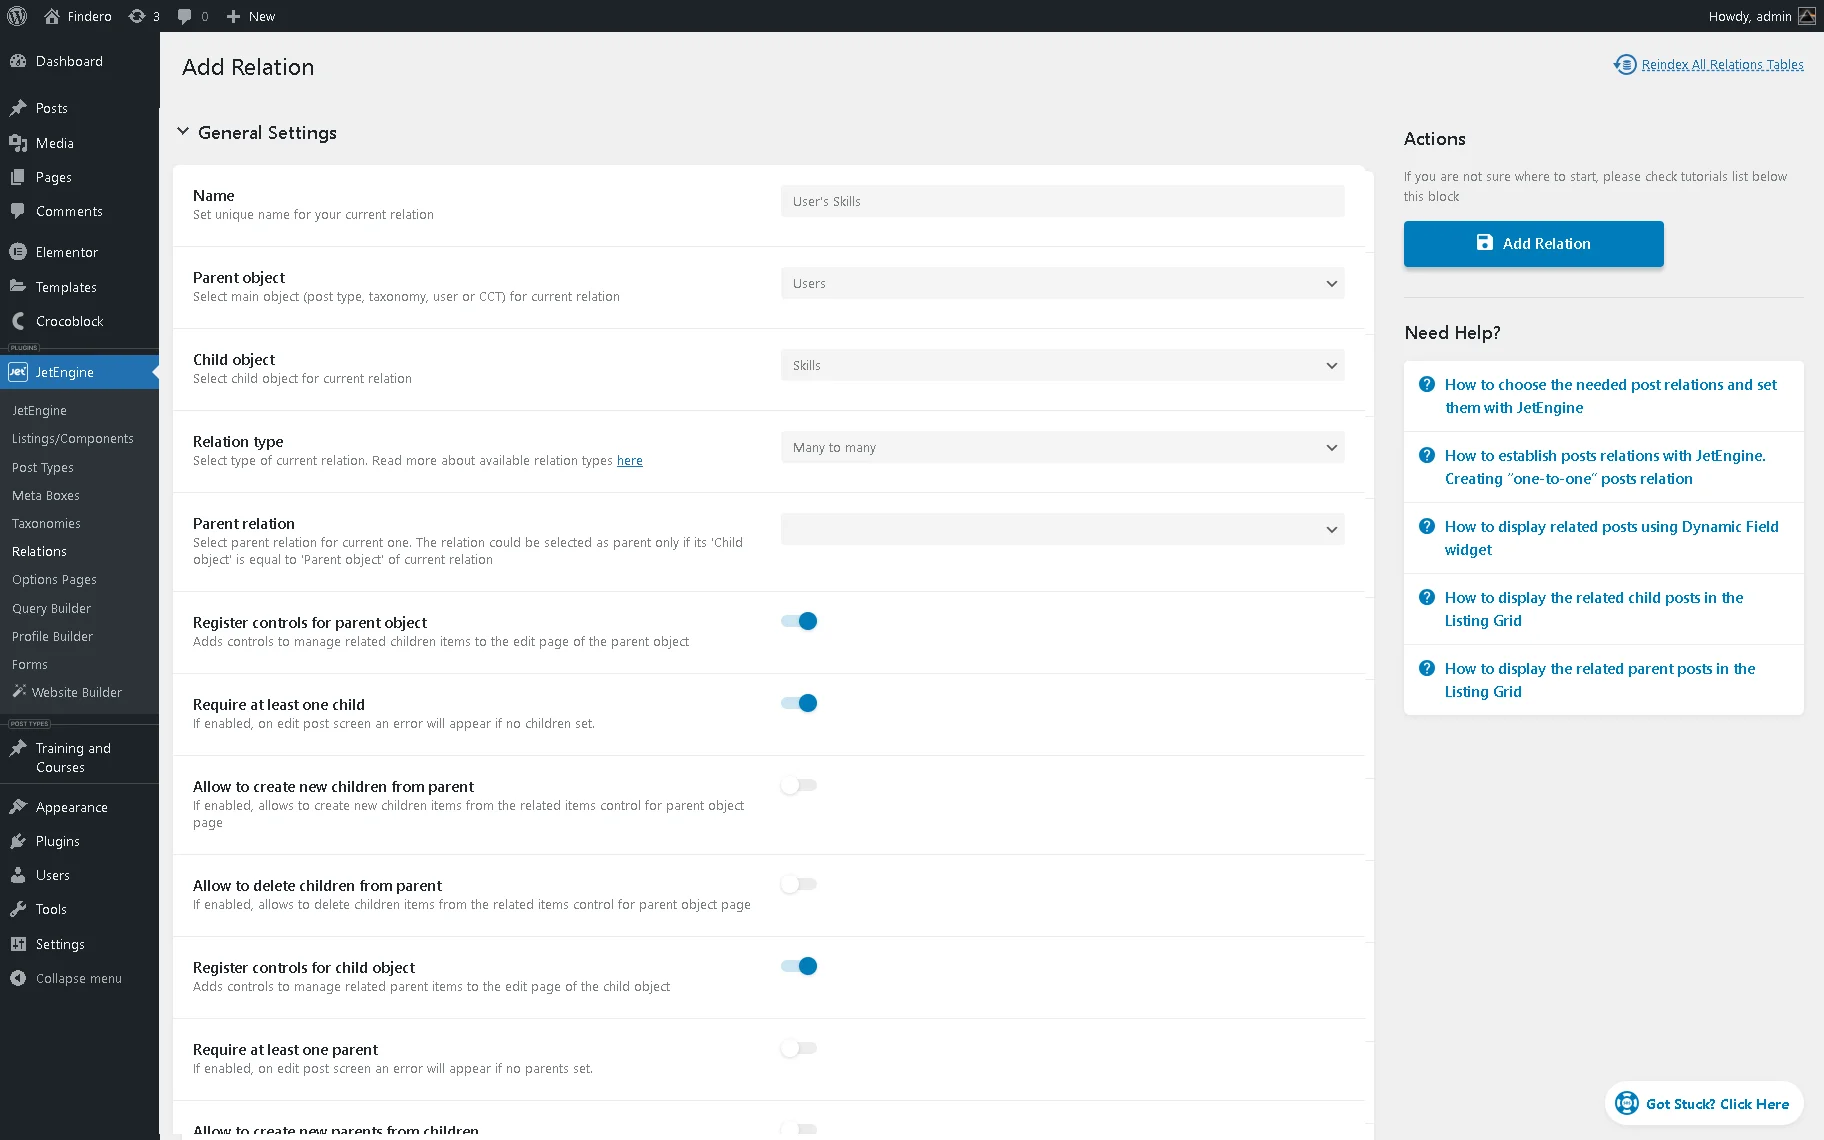
Let’s add a WordPress relation. Head to WordPress Dashboard > JetEngine > Relations and click on the “Add New” button. Give a Name to the relation (the “User’s Skills”, in this case) and set the Parent object and Child object. Now, “Users” will be the parent, and “Skills” taxonomy is the child object. Also, select the “Many to Many” Relation type.
We also enable the Require at least one child toggle to make it mandatory to have at least one child item.
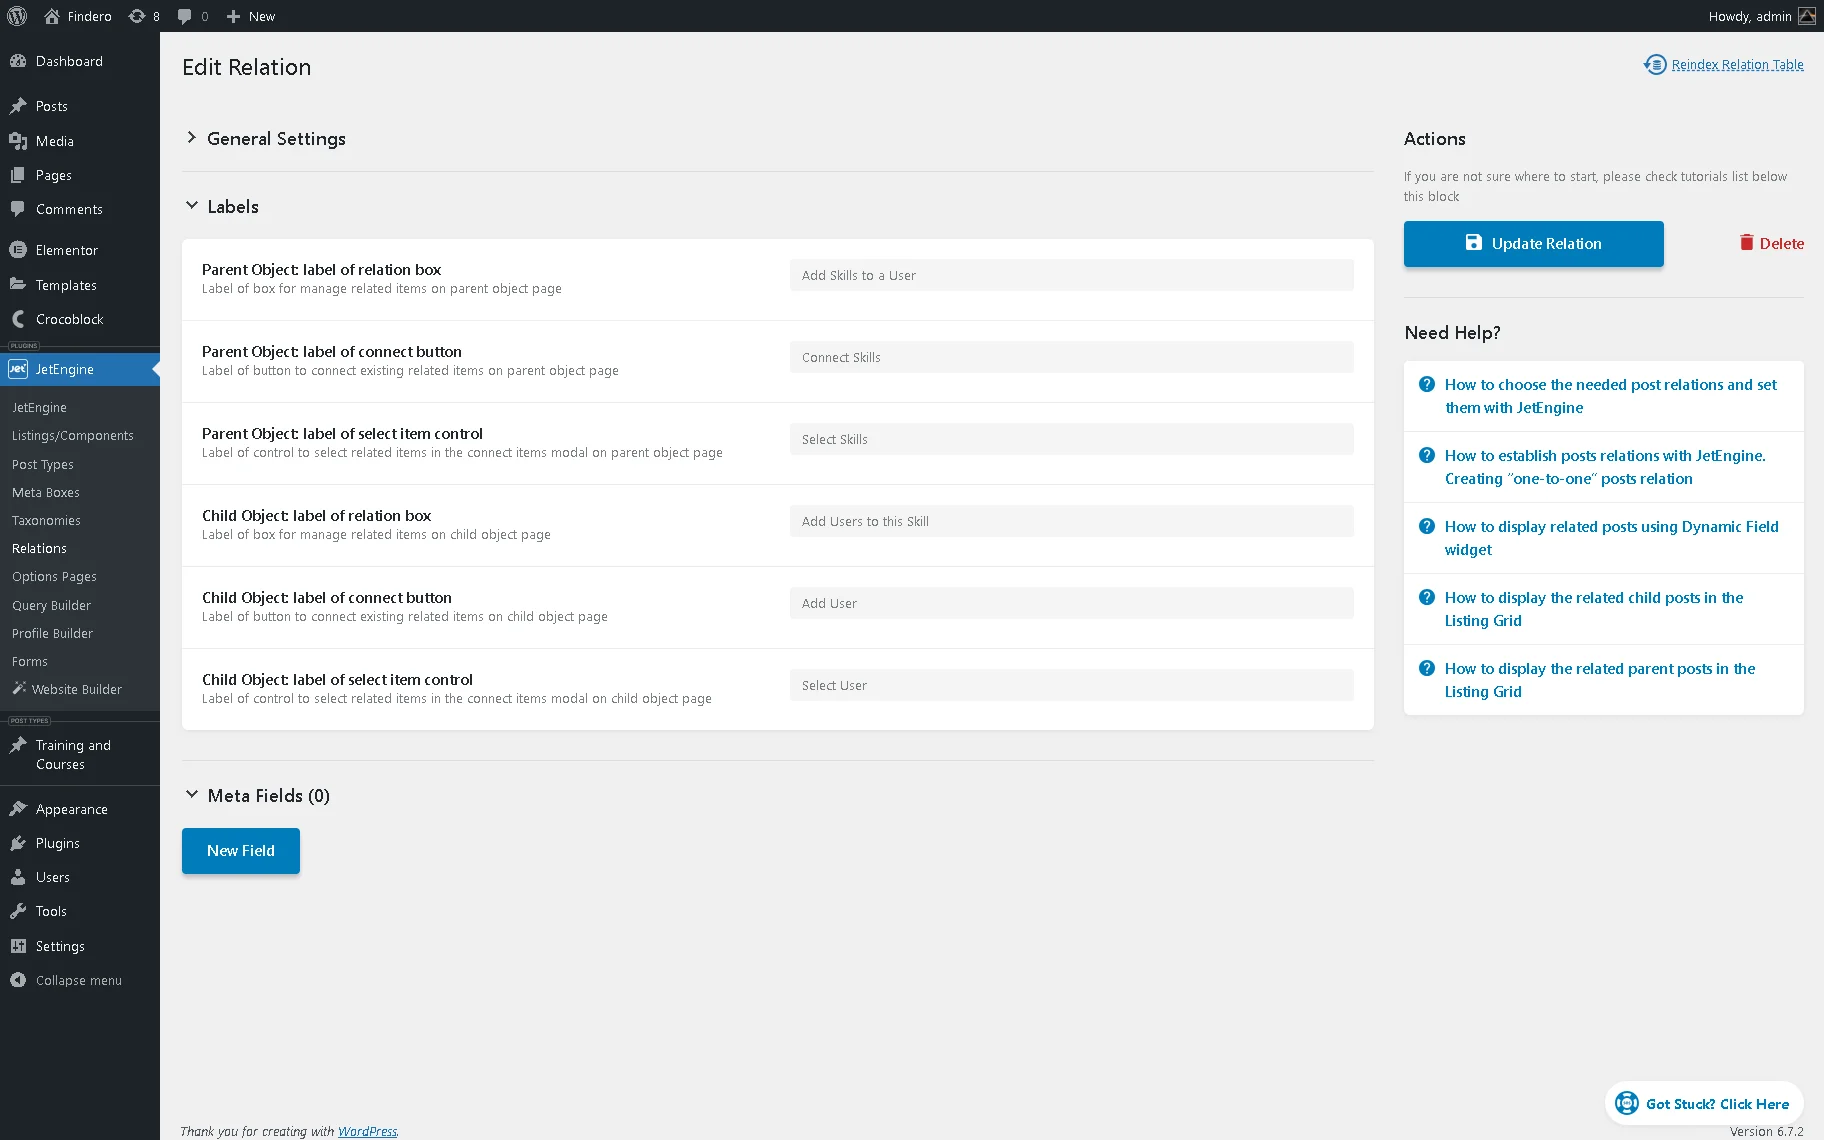
Then we move to the Labels section and, to provide better usability, we add a specific value to each field, although you can leave them without changes.
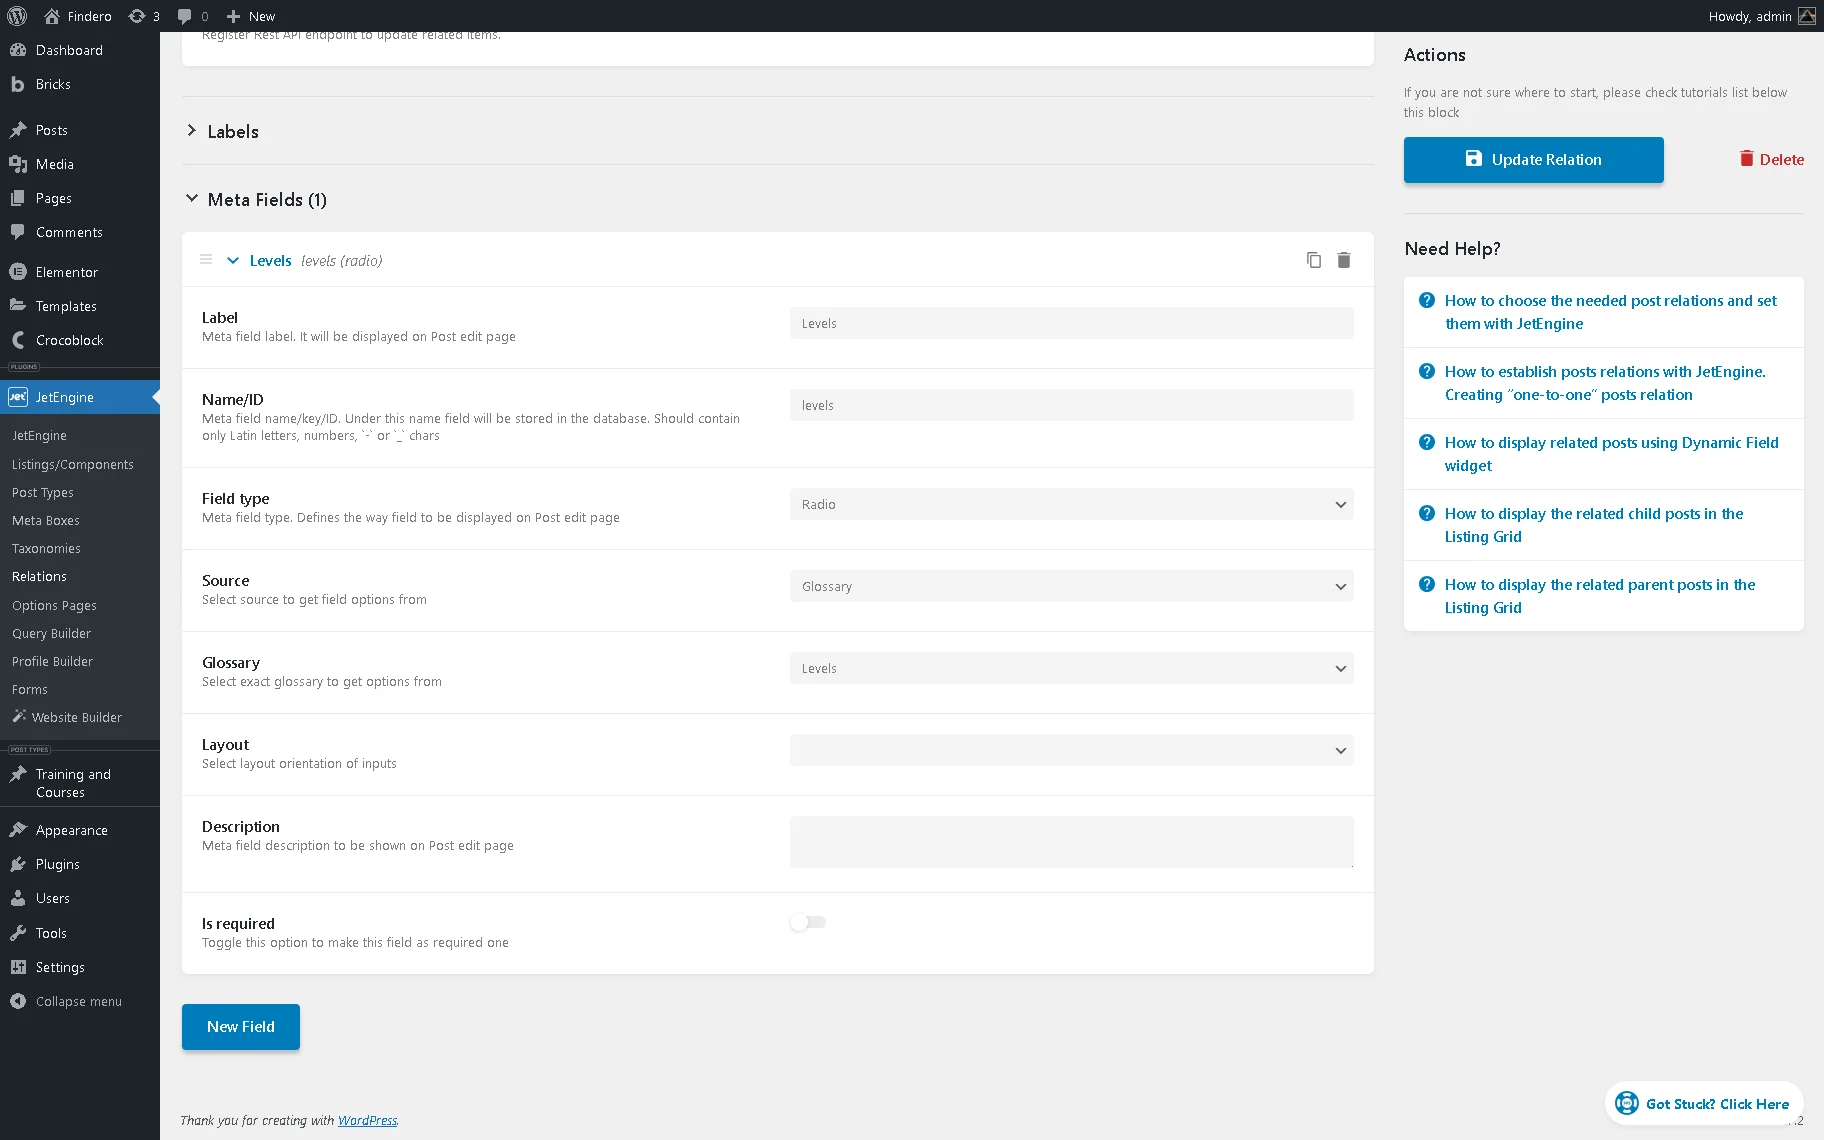
In the next step, we need to add a meta field to the relation in the same-named section by pressing the “New Field” button. Then, we type the meta field’s Label (“Levels”, in this case), and after that, the Name/ID field fills out automatically.
We create a “Radio” Field type meta field with the “Glossary” as the Source and select the pre-built Glossary (“Levels” in this case). Once the adjustments are made, scroll the page up and press the “Add Relation / Update Relation” button.
Add Info to Users
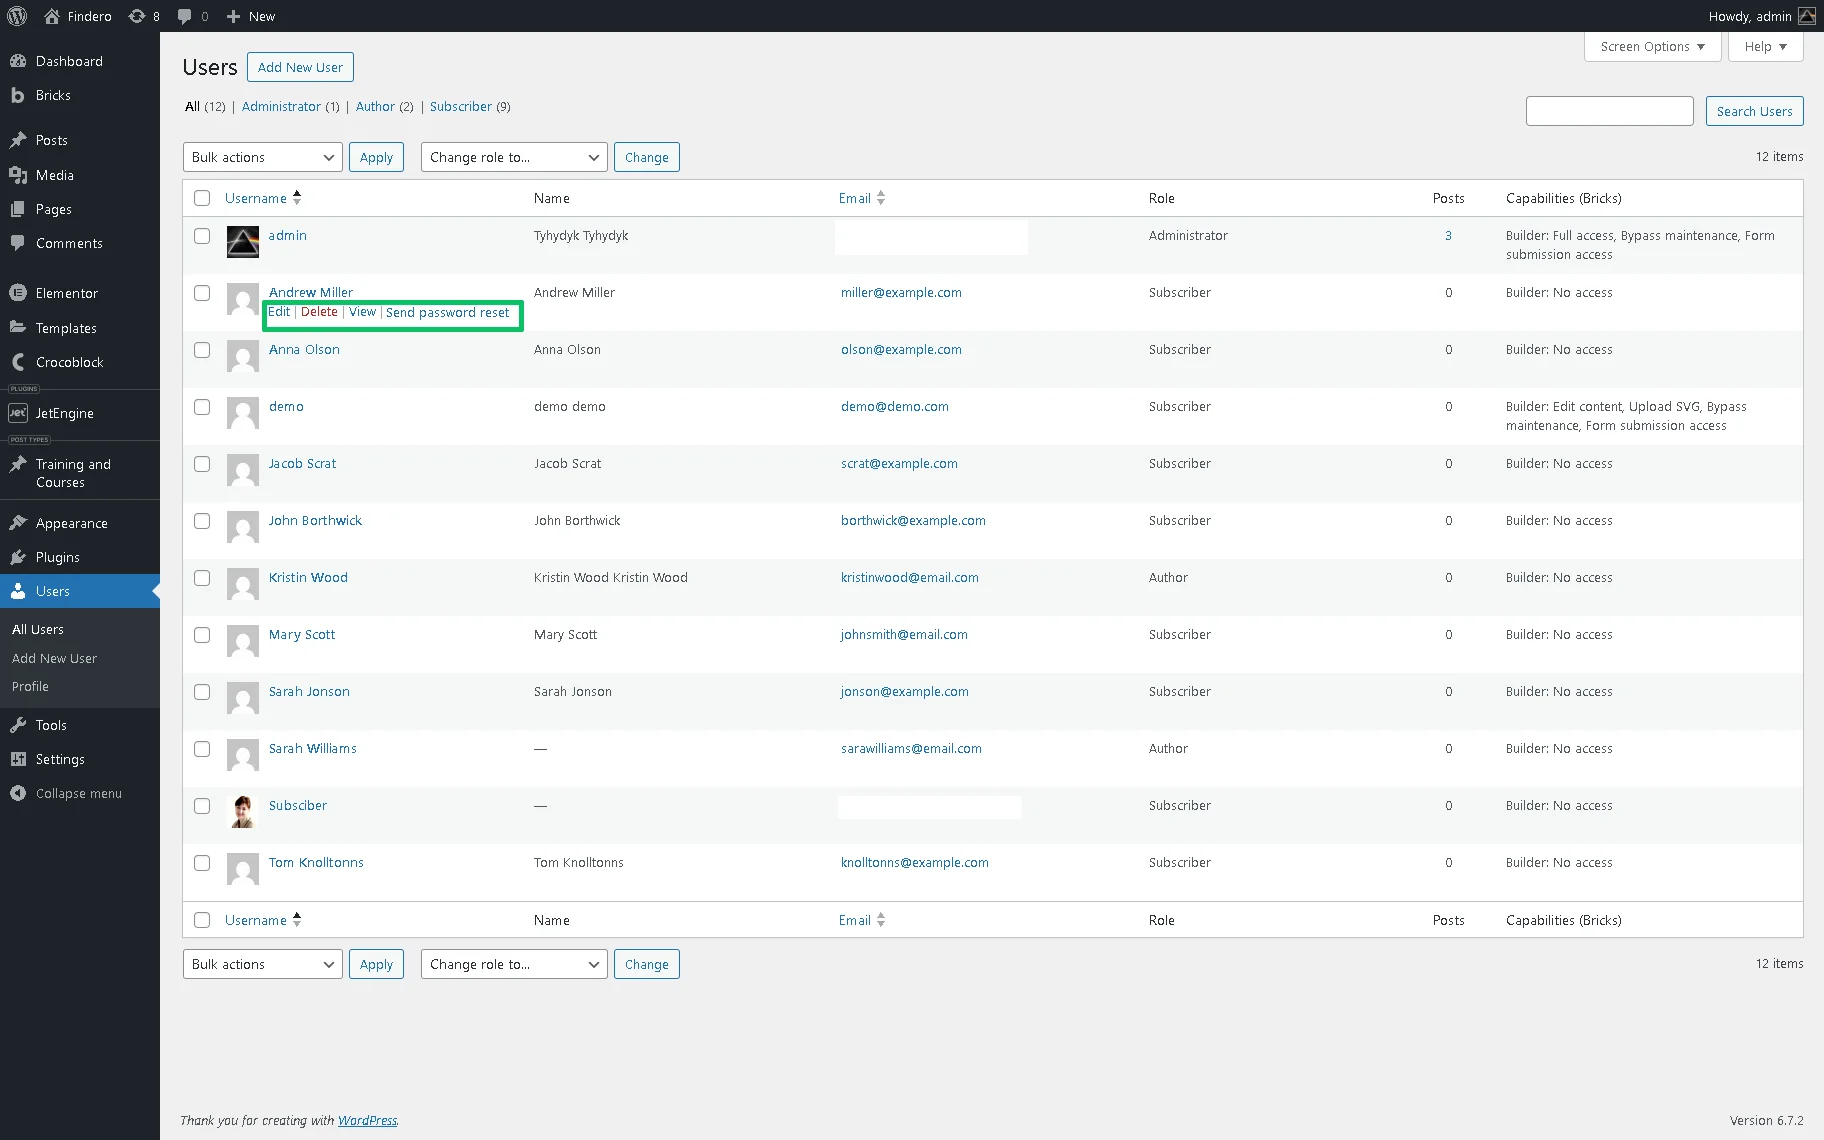
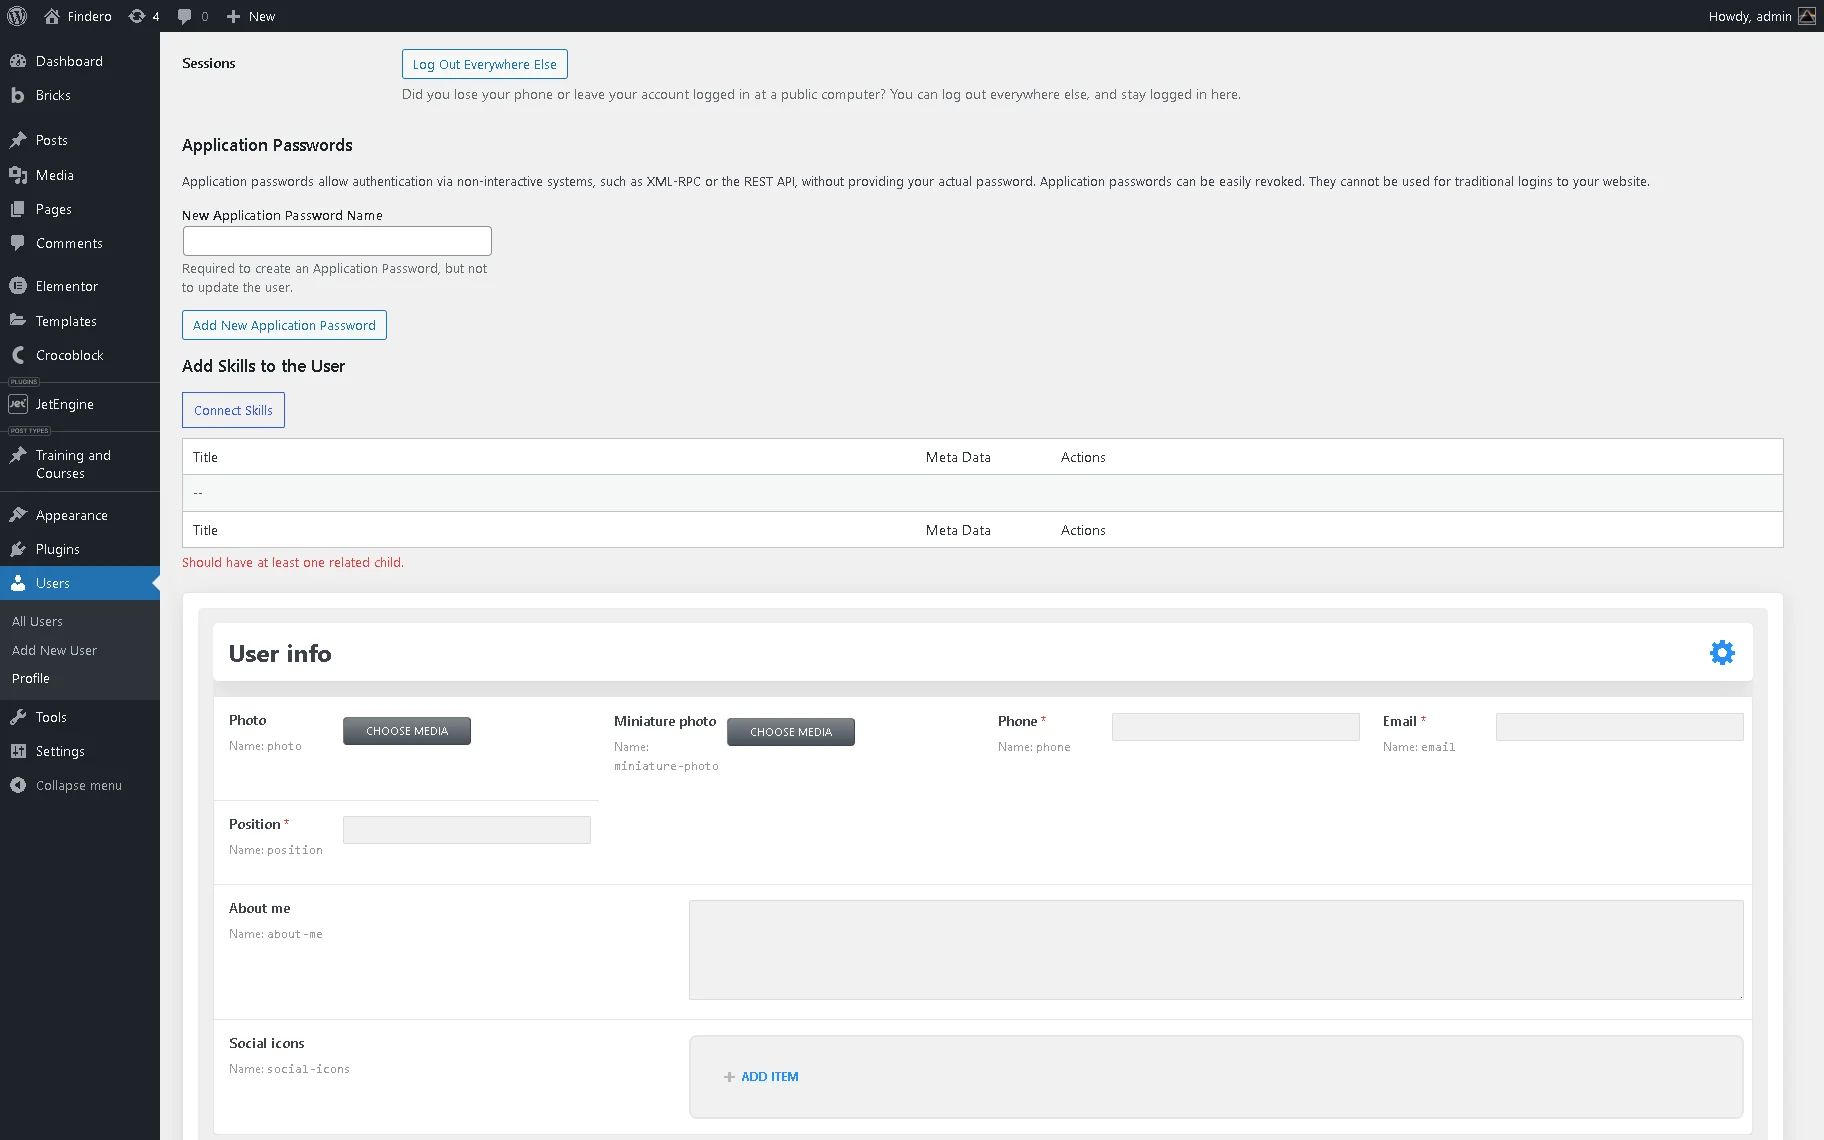
Go to WordPress Dashboard > Users and press the “Edit” button next to the desired user.
Scroll down to the section with the needed relation (below the “Add Skills to the User” text, in this case). Since we enabled the Require at least one child toggle, the “Should have at least one related child.” text will be displayed.
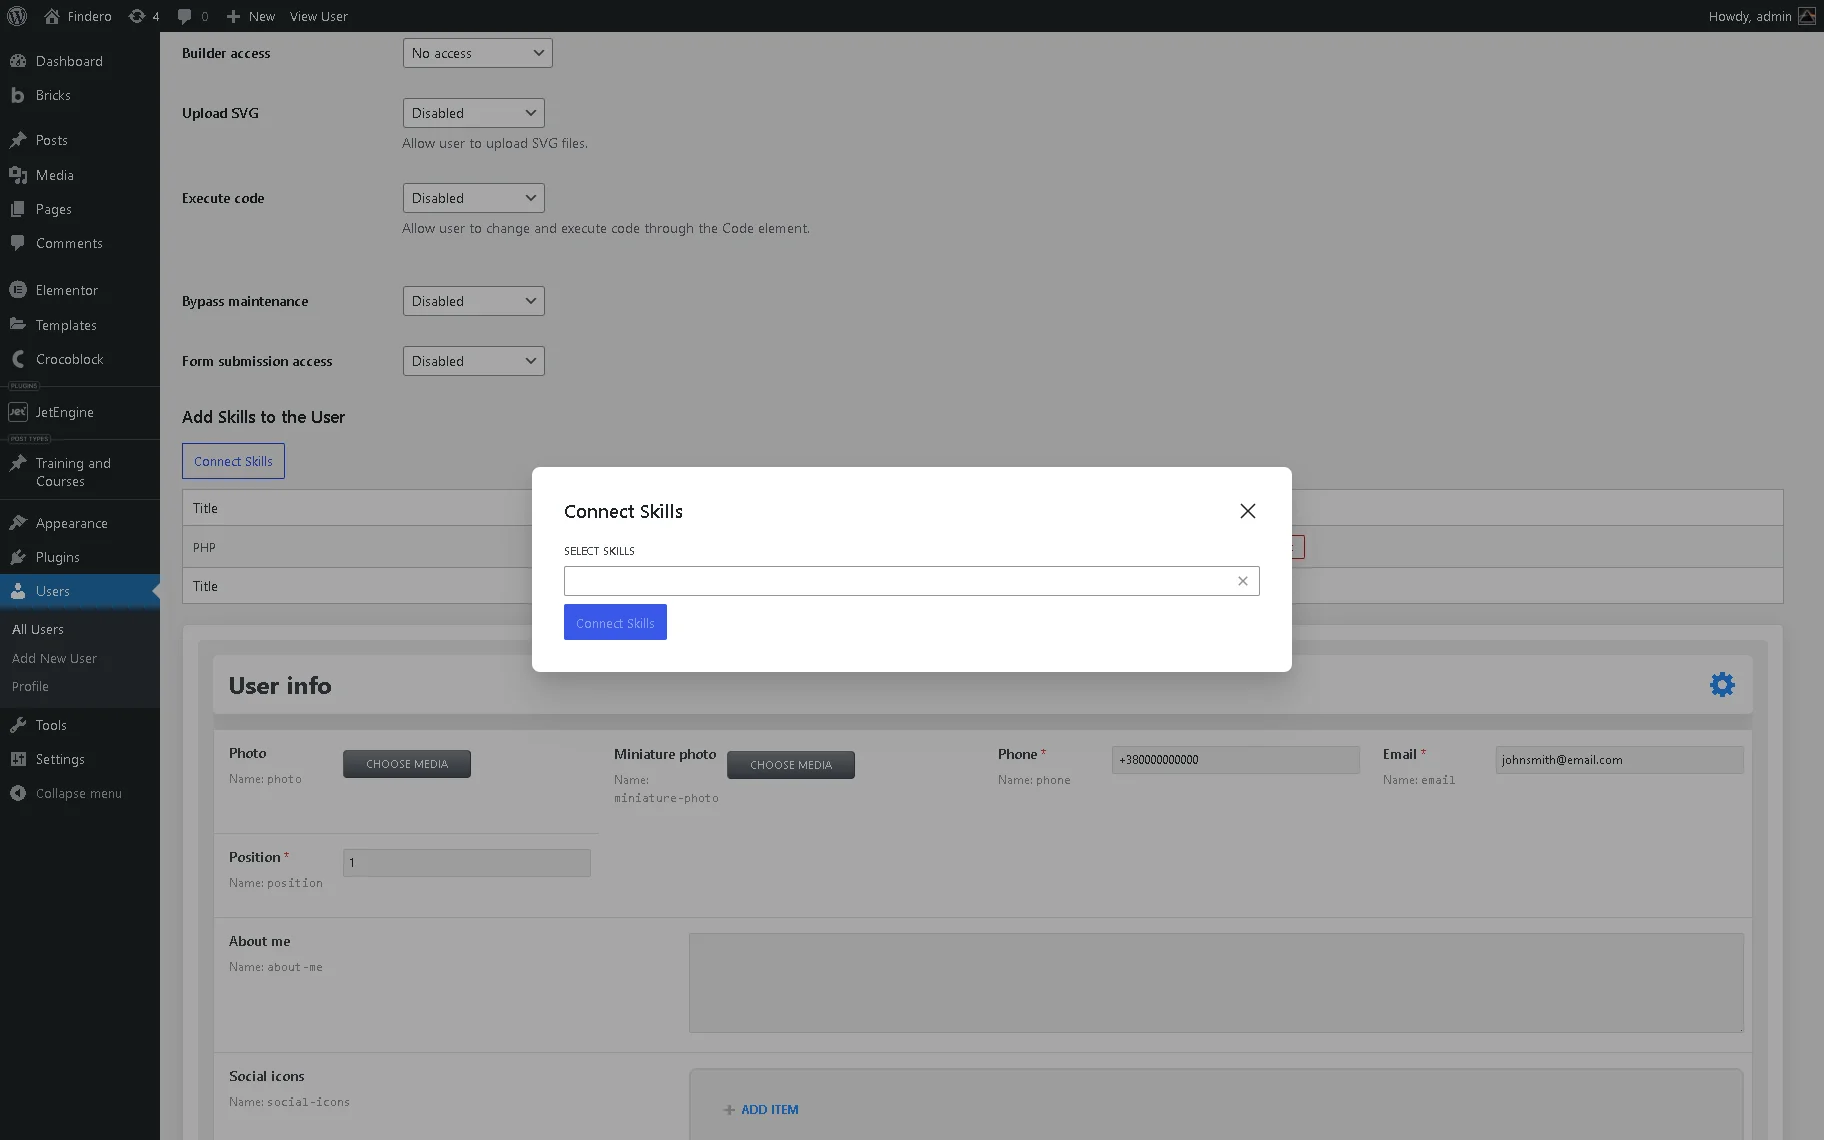
Hit the “Connect Skills” button (name changes depending on the child object name and relation labels). Now, pick the needed option from the available drop-down list and click the “Connect Skills” button.
Next, set the meta data for the previously selected skill (term).
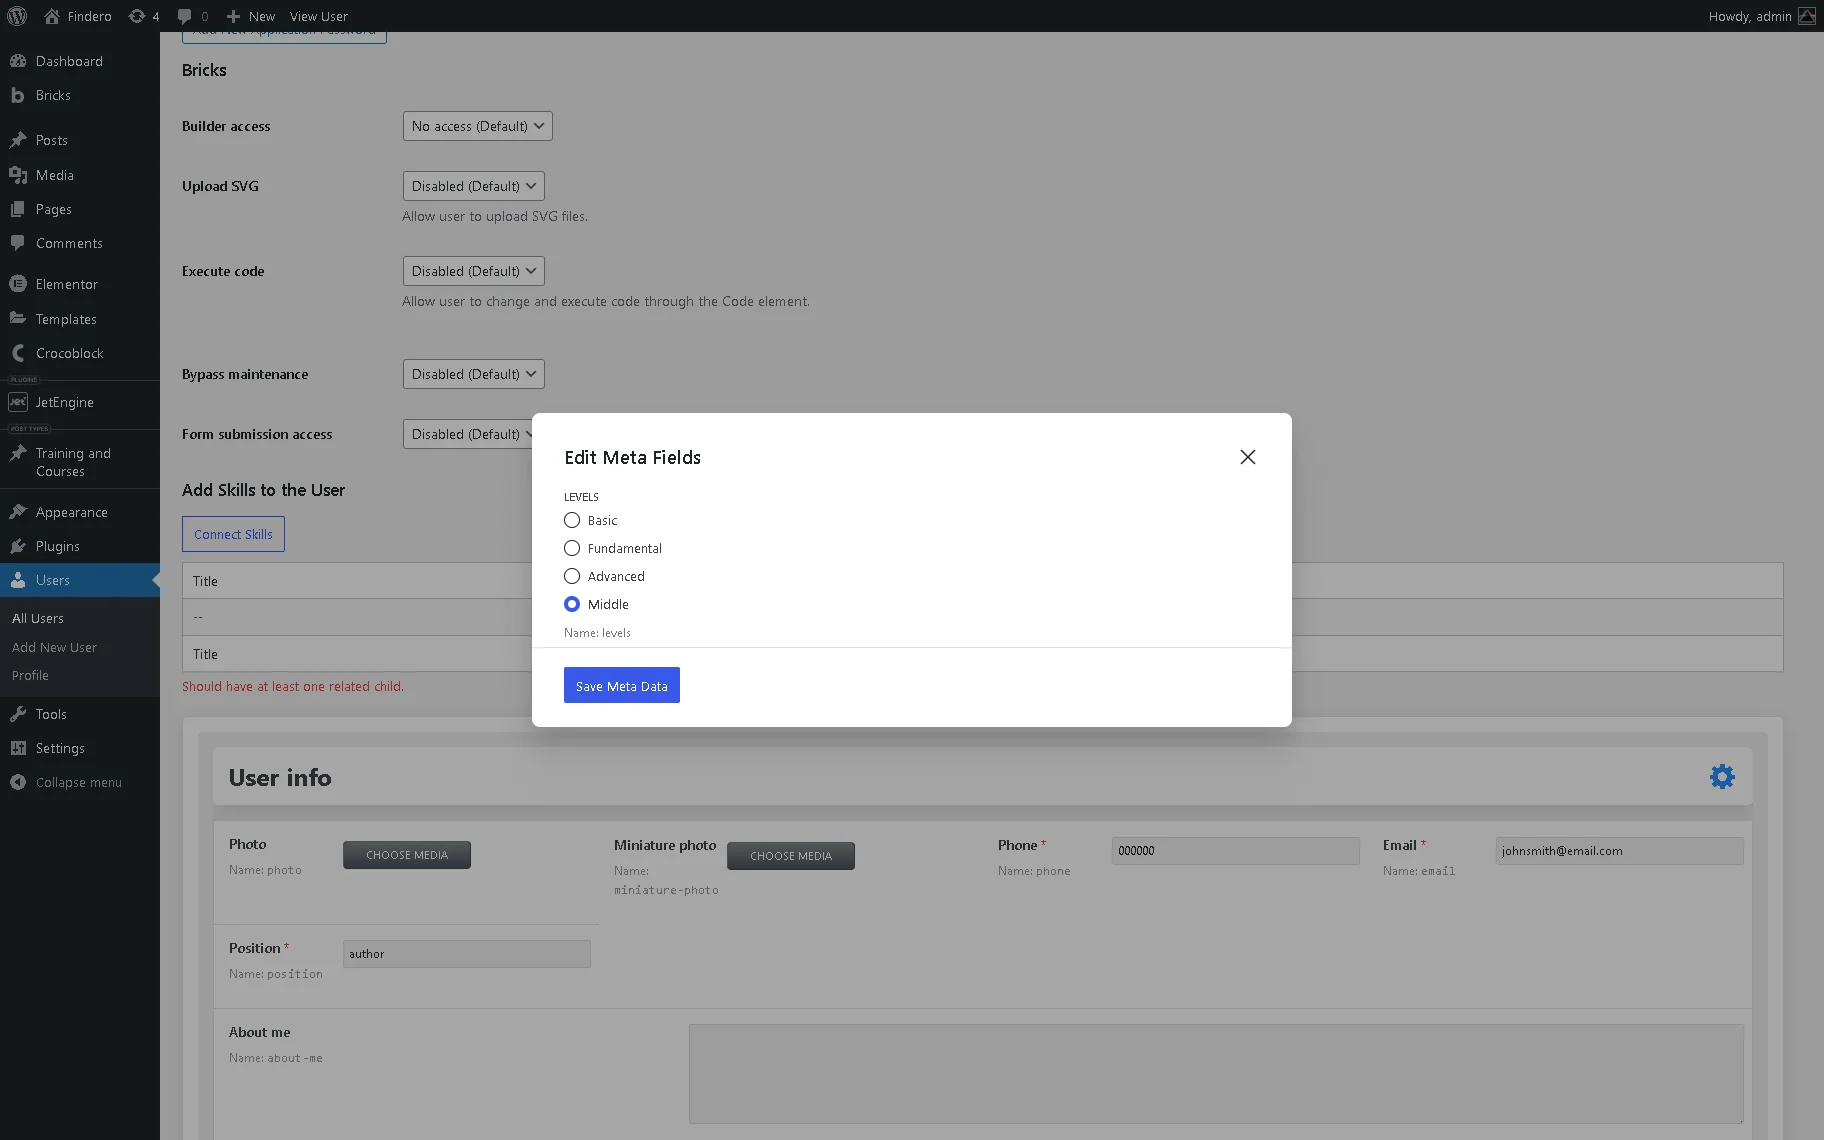
Don’t forget to press the “Save Meta Data” button. Then, the inserted data will be displayed in the user’s profile. Also, you can add other skills and levels.
Work on other fields if needed. Read the User Profile Builder Overview to learn how to manage the profile’s settings and configure fields. Once completed, click the “Update User” button at the end of the page.
Finally, add meta data to all needed users by taking the steps described above.
Create a Query
Open the WordPress Dashboard > JetEngine > Query Builder directory to build a new query.
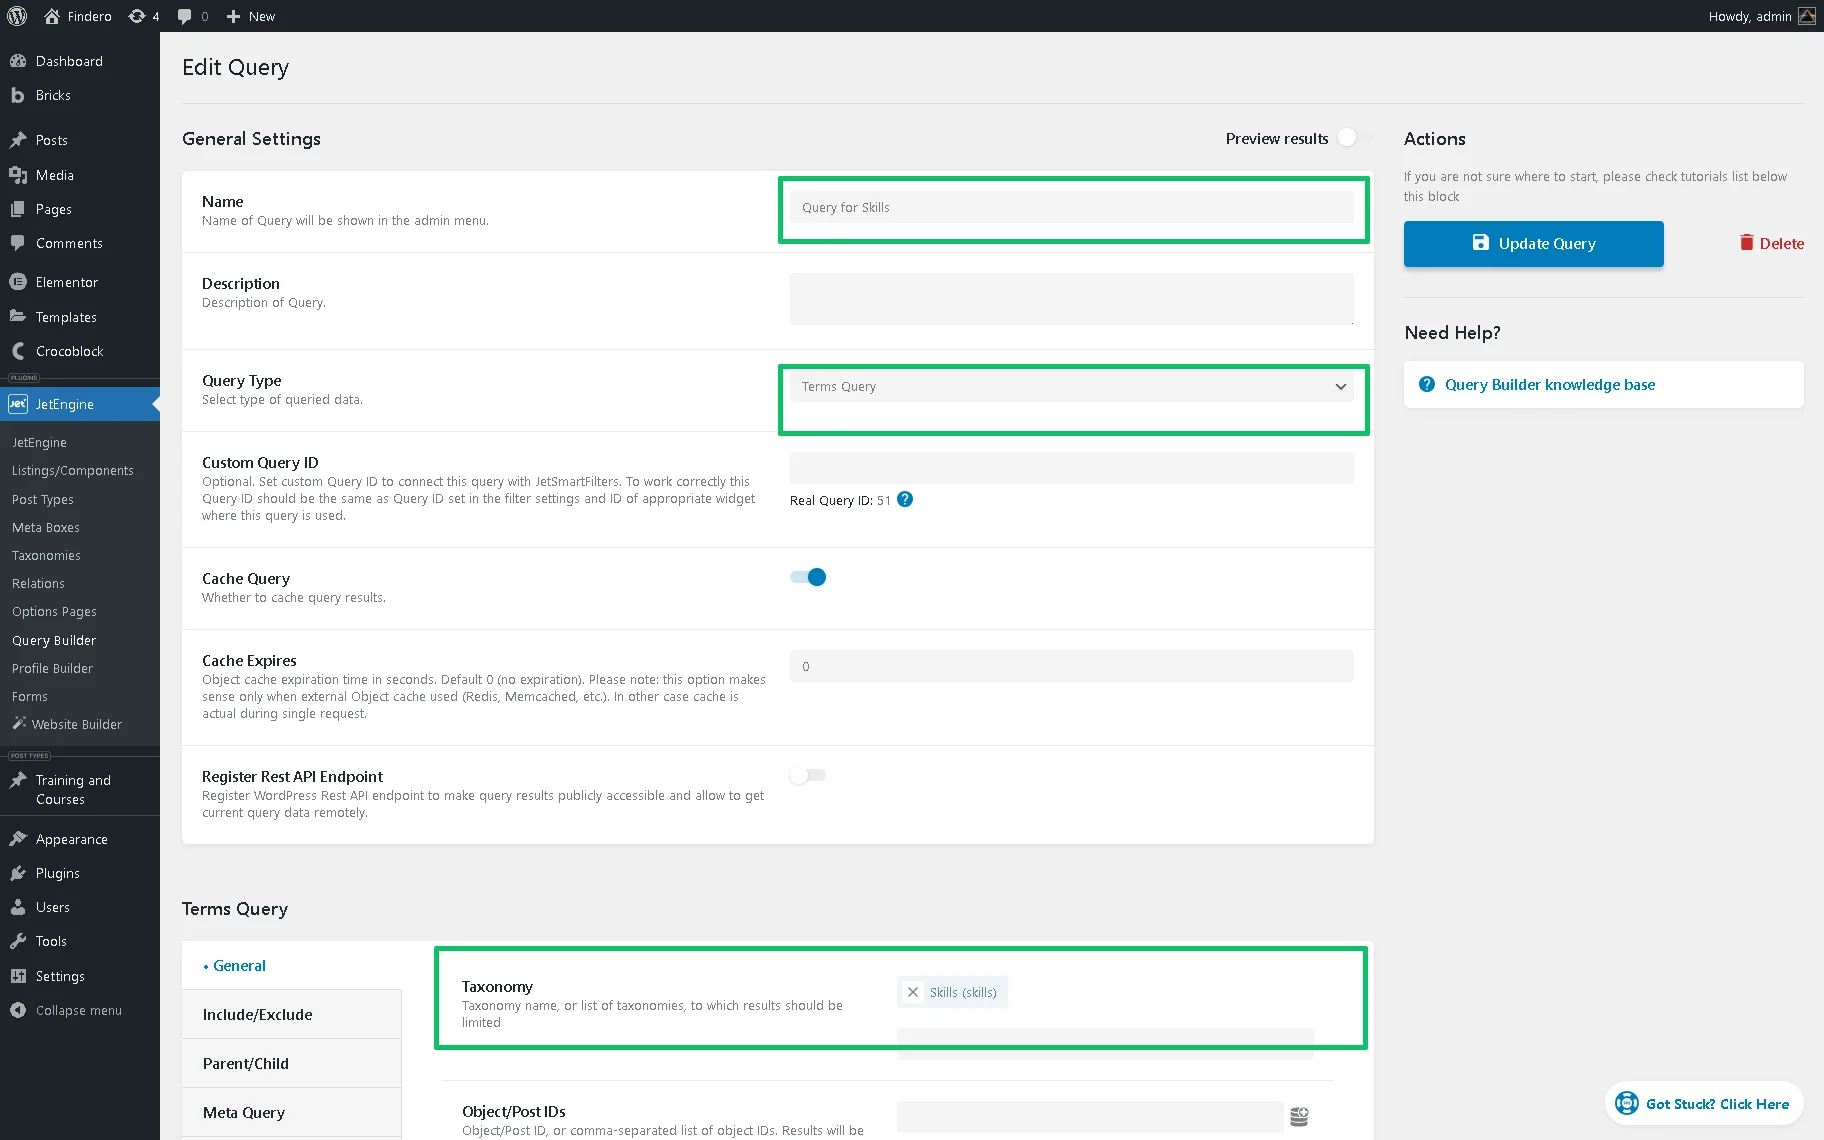
Complete the Name field (here, we type the “Query for Skills” text) and select “Terms Query” as the Query Type. Scroll down to the General tab and select the Taxonomy (the “Skills” taxonomy, in this case).
After that, open the following Include/Exclude tab, move to the Include field, and press the “Dynamic Tag” button to set the “Related Items” macro. Then, adjust the following info: select the needed item as the From Relation option (“User’s Skills” in our case), “Child Object” as From Object, and “Current Object ID” as Initial Object ID From (get initial ID here).
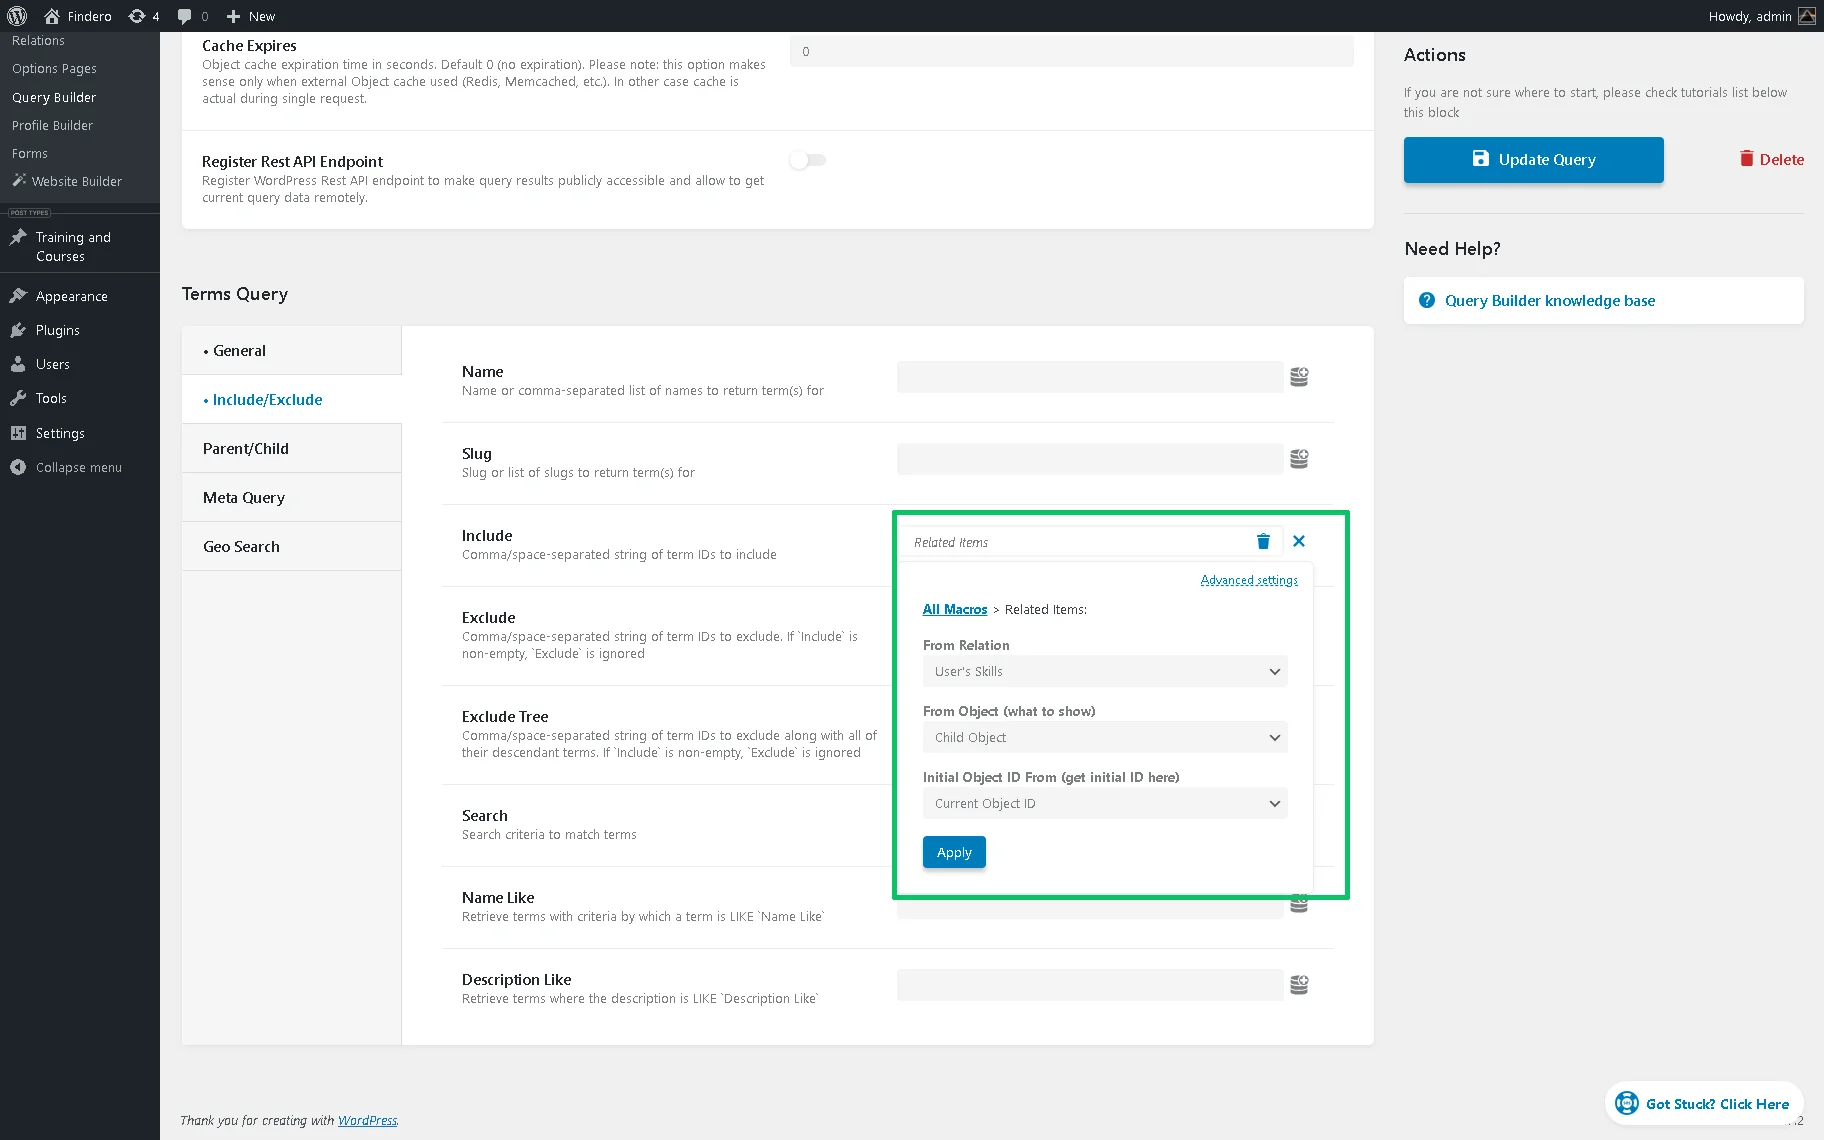
Once completed, hit the “Apply” button. Finally, save the changes by pushing the “Add Query / Update Query” button.
Display Data in the Listings
Create a listing item for terms
Initially, create a Listing Item for CPT.
Now, we need to create a terms listing to display users’ skills. Navigate to the WordPress Dashboard > JetEngine > Listings/Components directory. Pick the already-built listing for editing or create a new one by clicking the “Add New Item” button. Here, we create a new listing for the terms as a source.
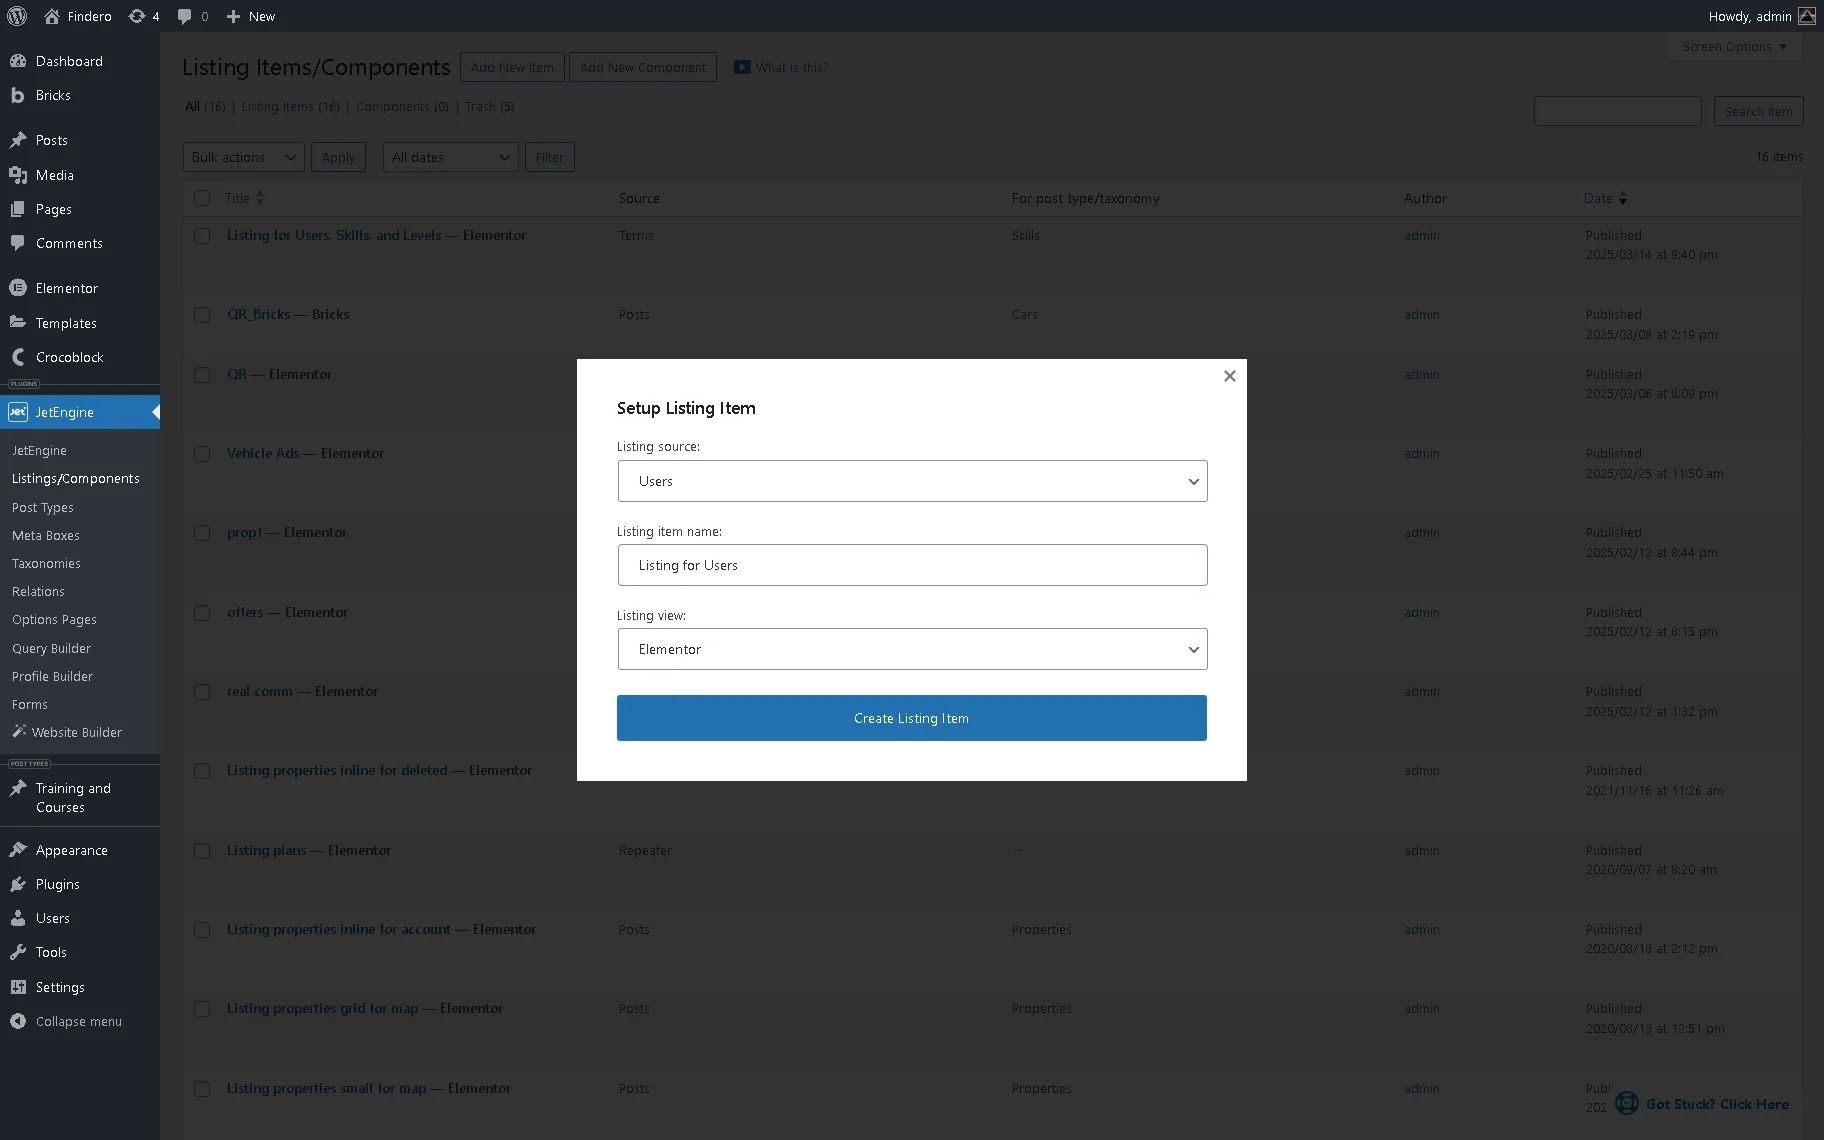
In the newly-appeared pop-up, select the “Terms” in the Listing source dropdown menu. After that, select the needed taxonomy in the From taxonomy dropdown (“Skills” in this tutorial), add the Listing item name (we type “Listing for Users, Skills, and Levels”), and pick the needed Listing view (we select the “Elementor” option, but “Blocks (Gutenberg)” and “Bricks” editors are also available).
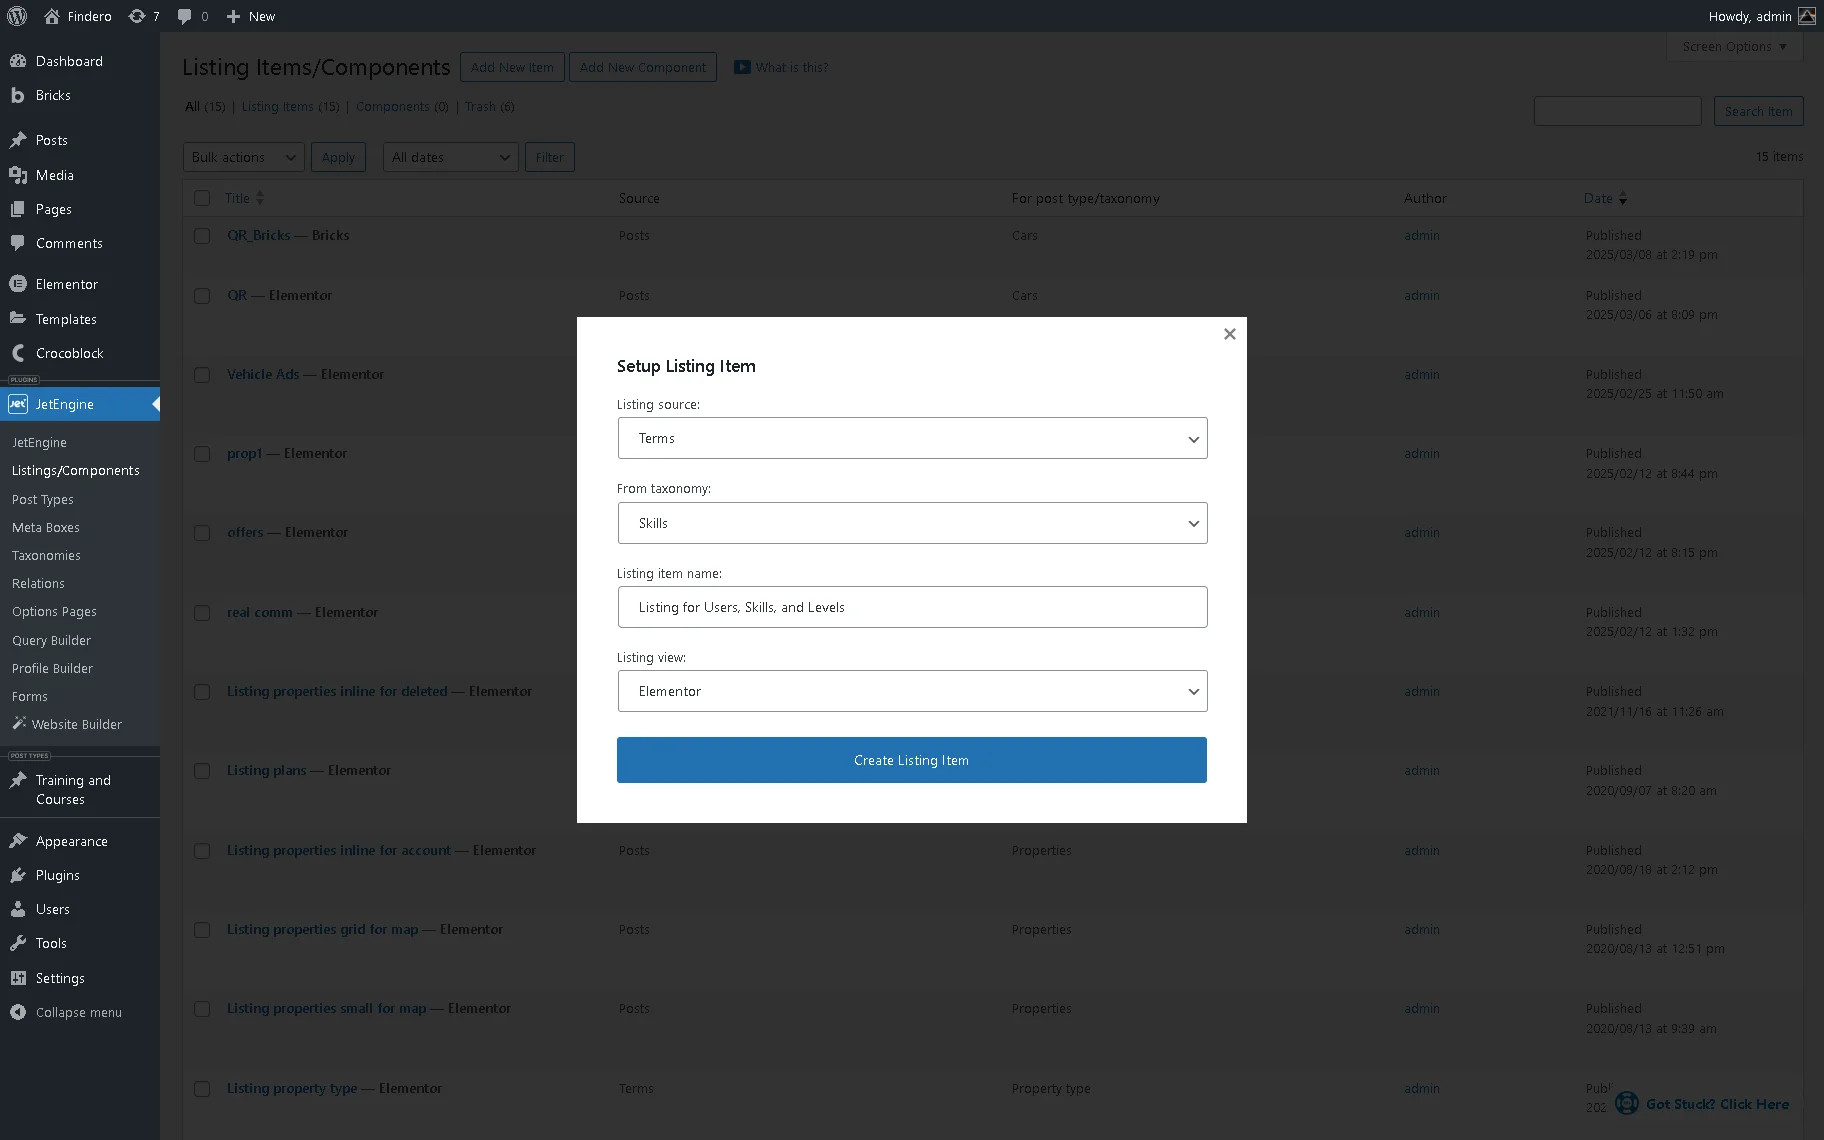
Press the “Create Listing Item” button to open the editor.
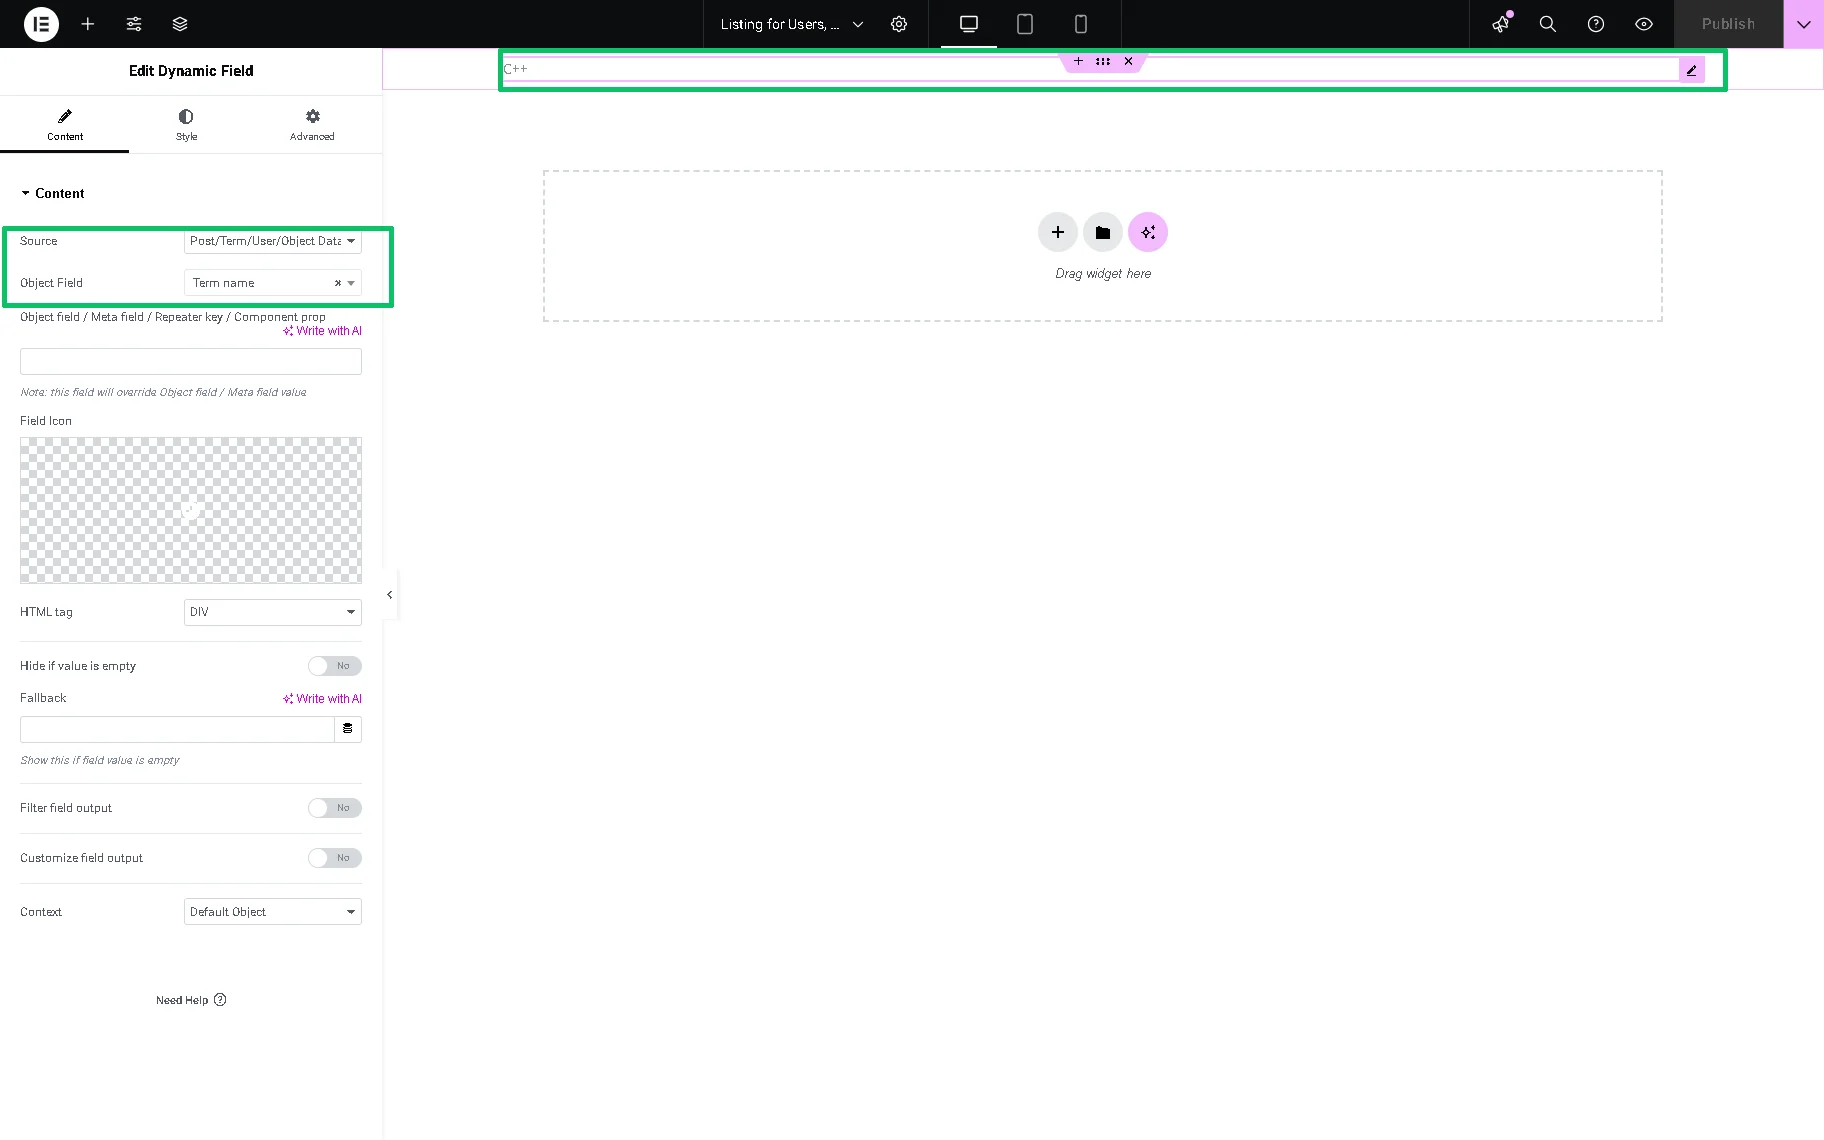
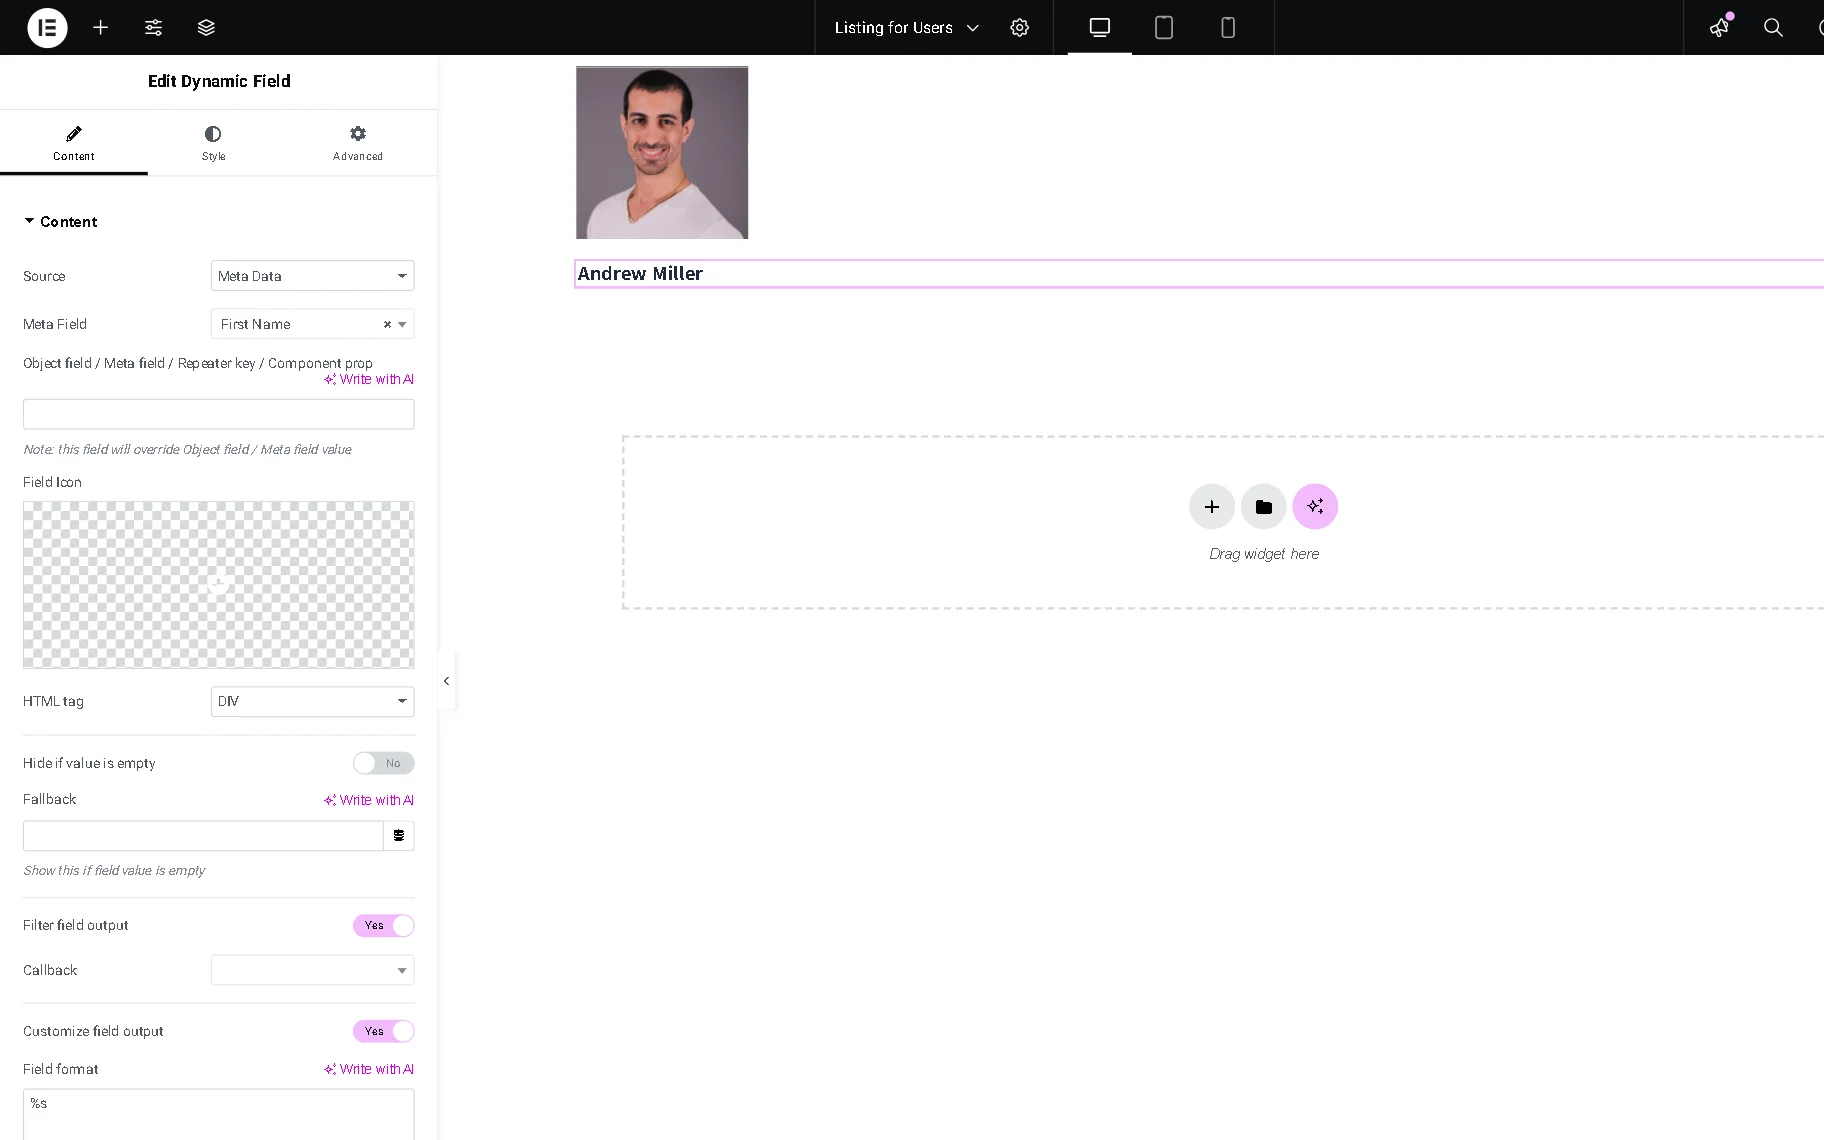
Add the Dynamic Field widget to display the name of the term related to the user. We choose the “Post/Term/User/Object Data” Source and “Term name” Object Field this time.
Add one more Dynamic Field. This widget will show the user level (metadata). Pick the “Relation Meta Data” Source and find the “Level” option, which is the name of the relation Meta Field (“Levels”, in this tutorial).
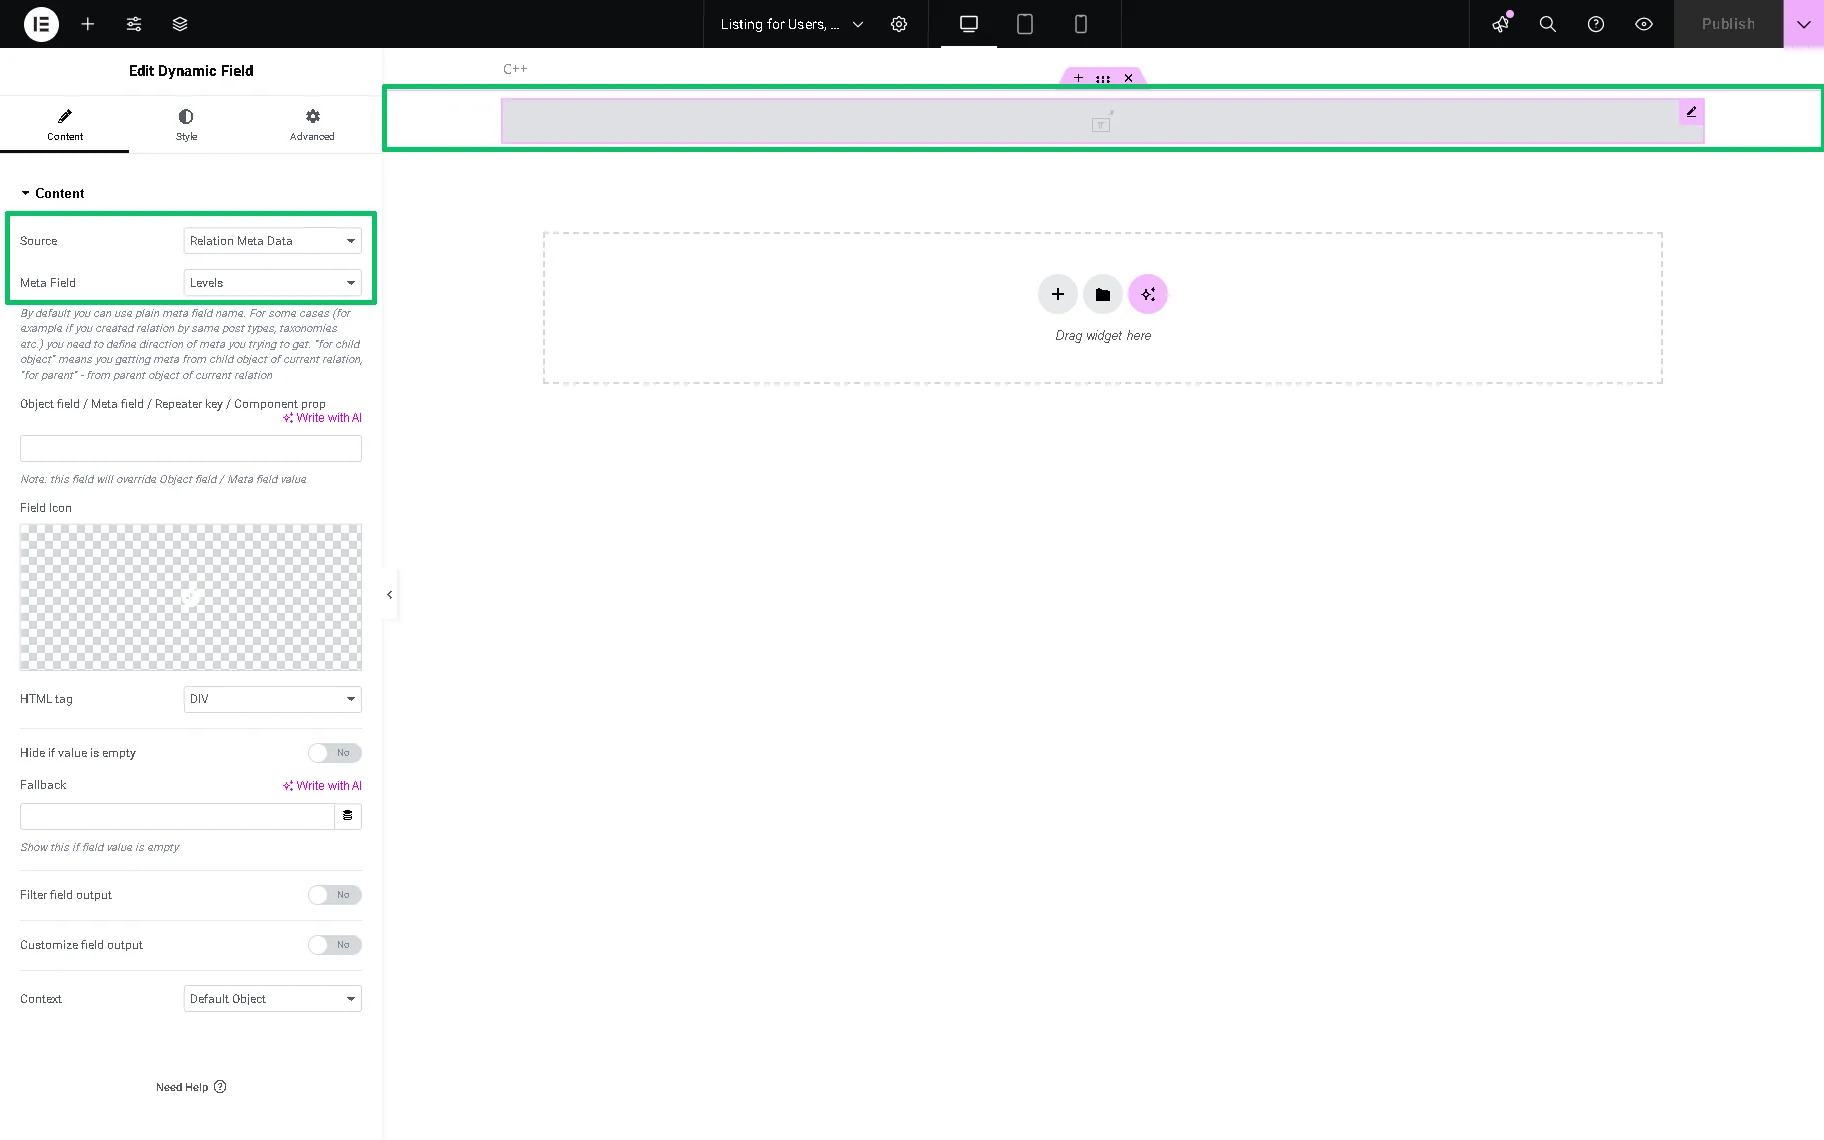
Now, you can work on other settings and press the “Publish” button once you finish.
Create a listing item for Users
Then, head to WordPress Dashboard > JetEngine > Listings/Components again and create one more listing, with the “Users” Listing source this time.
Add desired widgets for display. For instance, we add a Dynamic Image widget to show the user’s picture and a Dynamic Field for the user’s name.
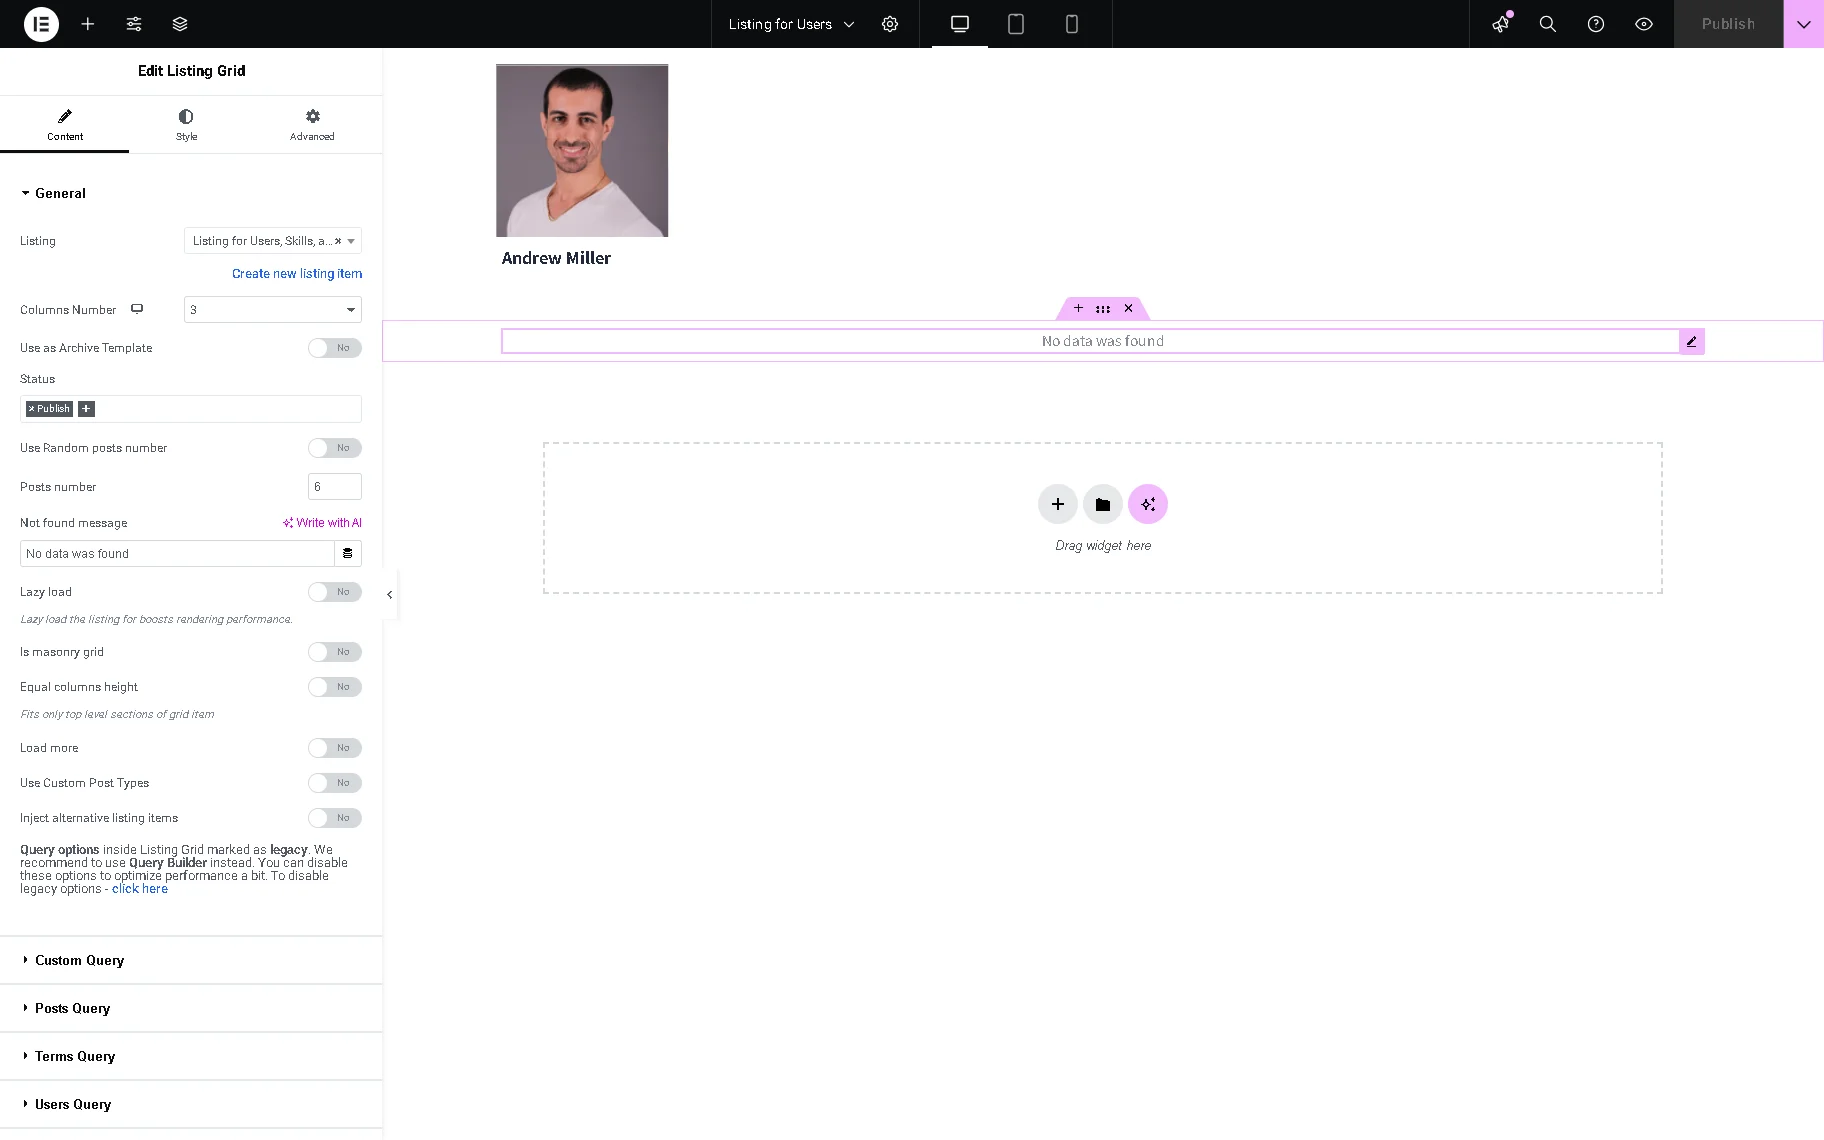
Then, find a Listing Grid widget and place it on the page. Select the previously built Listing intended to display terms (“Listing for Users, Skills, and Levels” in this case). It will be empty till you set a query.
Now, head to the Custom Query section. Here, enable the Use Custom Query toggle and choose the built Custom Query item.
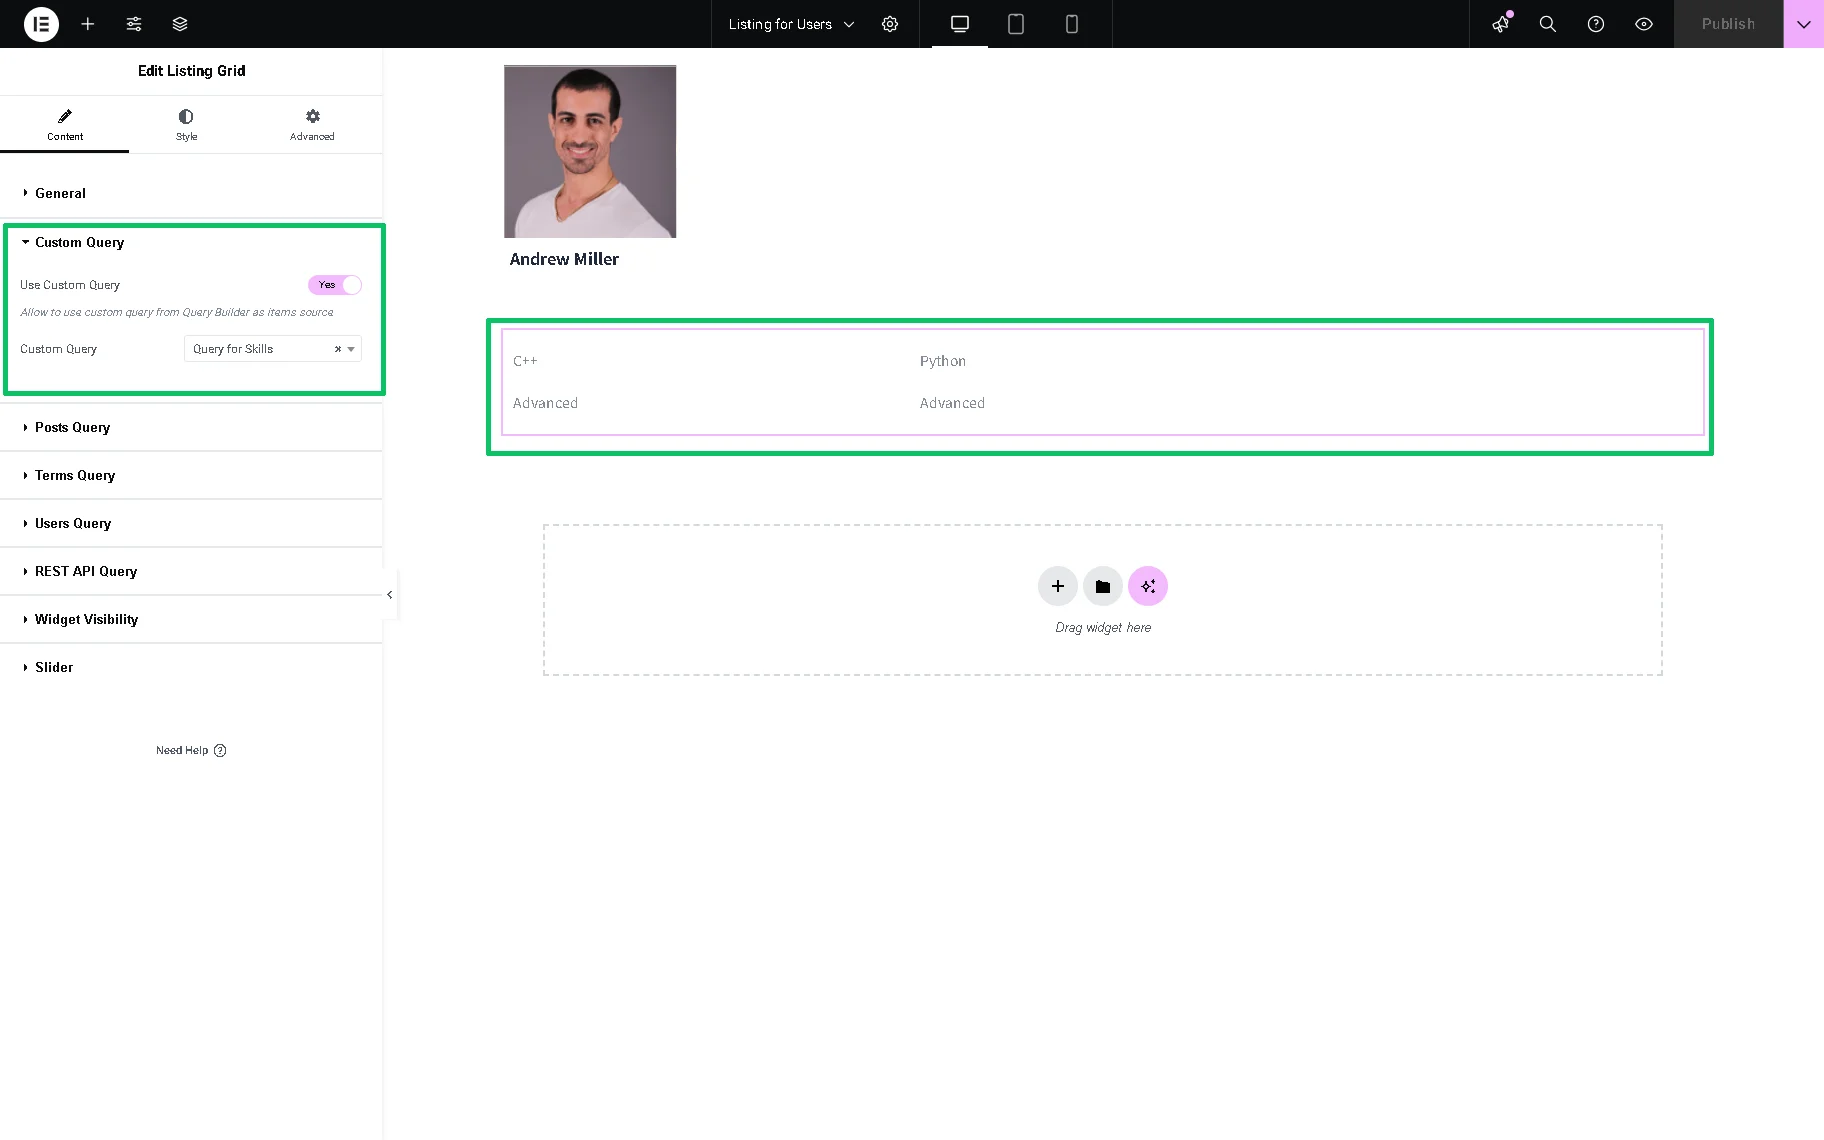
Everything will be displayed now. Adjust the listing as desired and press the “Publish” button.
Place Listing on the Page
Open WordPress Dashboard > Pages and select the page for editing or create a new one by clicking the “Add New” button. The new page can also be built with the editor you prefer. Here, we use Elementor.
Drag and drop the Listing Grid widget onto the page. Choose the created listing in the Listing field.
Now everything is displayed, you can save the changes by clicking the “Publish” button.That’s it; now you know how to connect custom categories and meta data with users and show it with the Listing Grid from the JetEngine plugin for WordPress.