How to Display Distance Between Users/Terms/CCT
In this guide, you will find out how to display the distance between WordPress users/terms/CCT items in the JetEngine’s Dynamic Field.
Before you start, check the tutorial requirements:
- Elementor (Free version), Block editor (Gutenberg), or Bricks
- JetEngine plugin installed and activated with the Map Module activated
- JetSmartFilters plugin installed and activated
Users
Initially, we will show how to display the distance between the WordPress users and the set address in the JetEngine’s Listing Grid with the Dynamic Field widget/block/element.
Add a code snippet
First, you should add a code snippet to the functions.php file of your child theme or the snippet plugin. For example, we will use the Code Snippets plugin.
Fill in the snippet’s name (in our case, “Geo Distance (Users)”) and paste the following code snippet into the corresponding area:
add_filter( 'jet-engine/maps-listings/add-distance-field/users', '__return_true' );Press the “Save Changes and Activate” button.

Build a query
Next, we should build a query for the future listing so it shows only the items within the set Geo Query parameters.
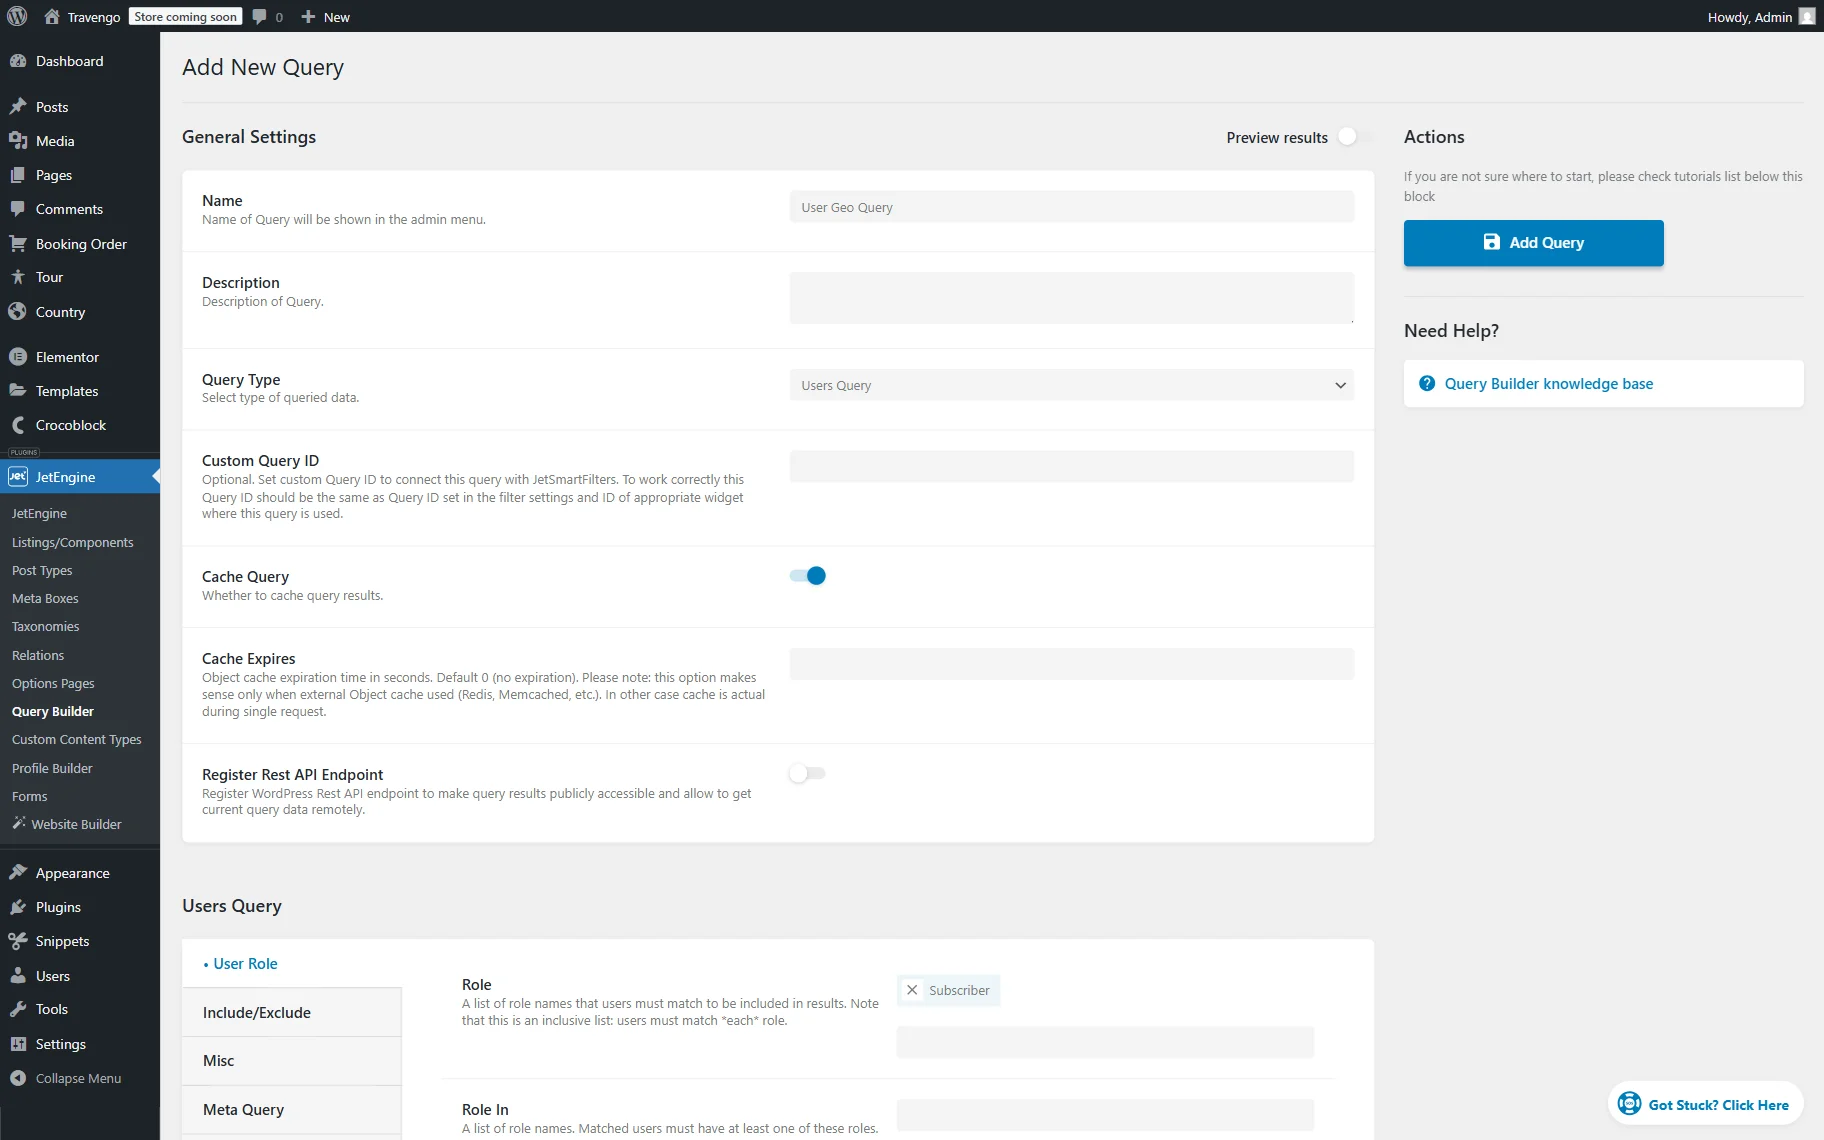
To do so, go to WordPress Dashboard > JetEngine > Query Builder and press the “Add New” button.
Complete the Name of the query. In our case, “User Geo Query.”
Then, set the “Users Query” Query Type.
Scroll down to the Users Query section and adjust the User Role tab if needed. For instance, we select the “Subscriber” Role so that only users with this role will be shown in the listing.
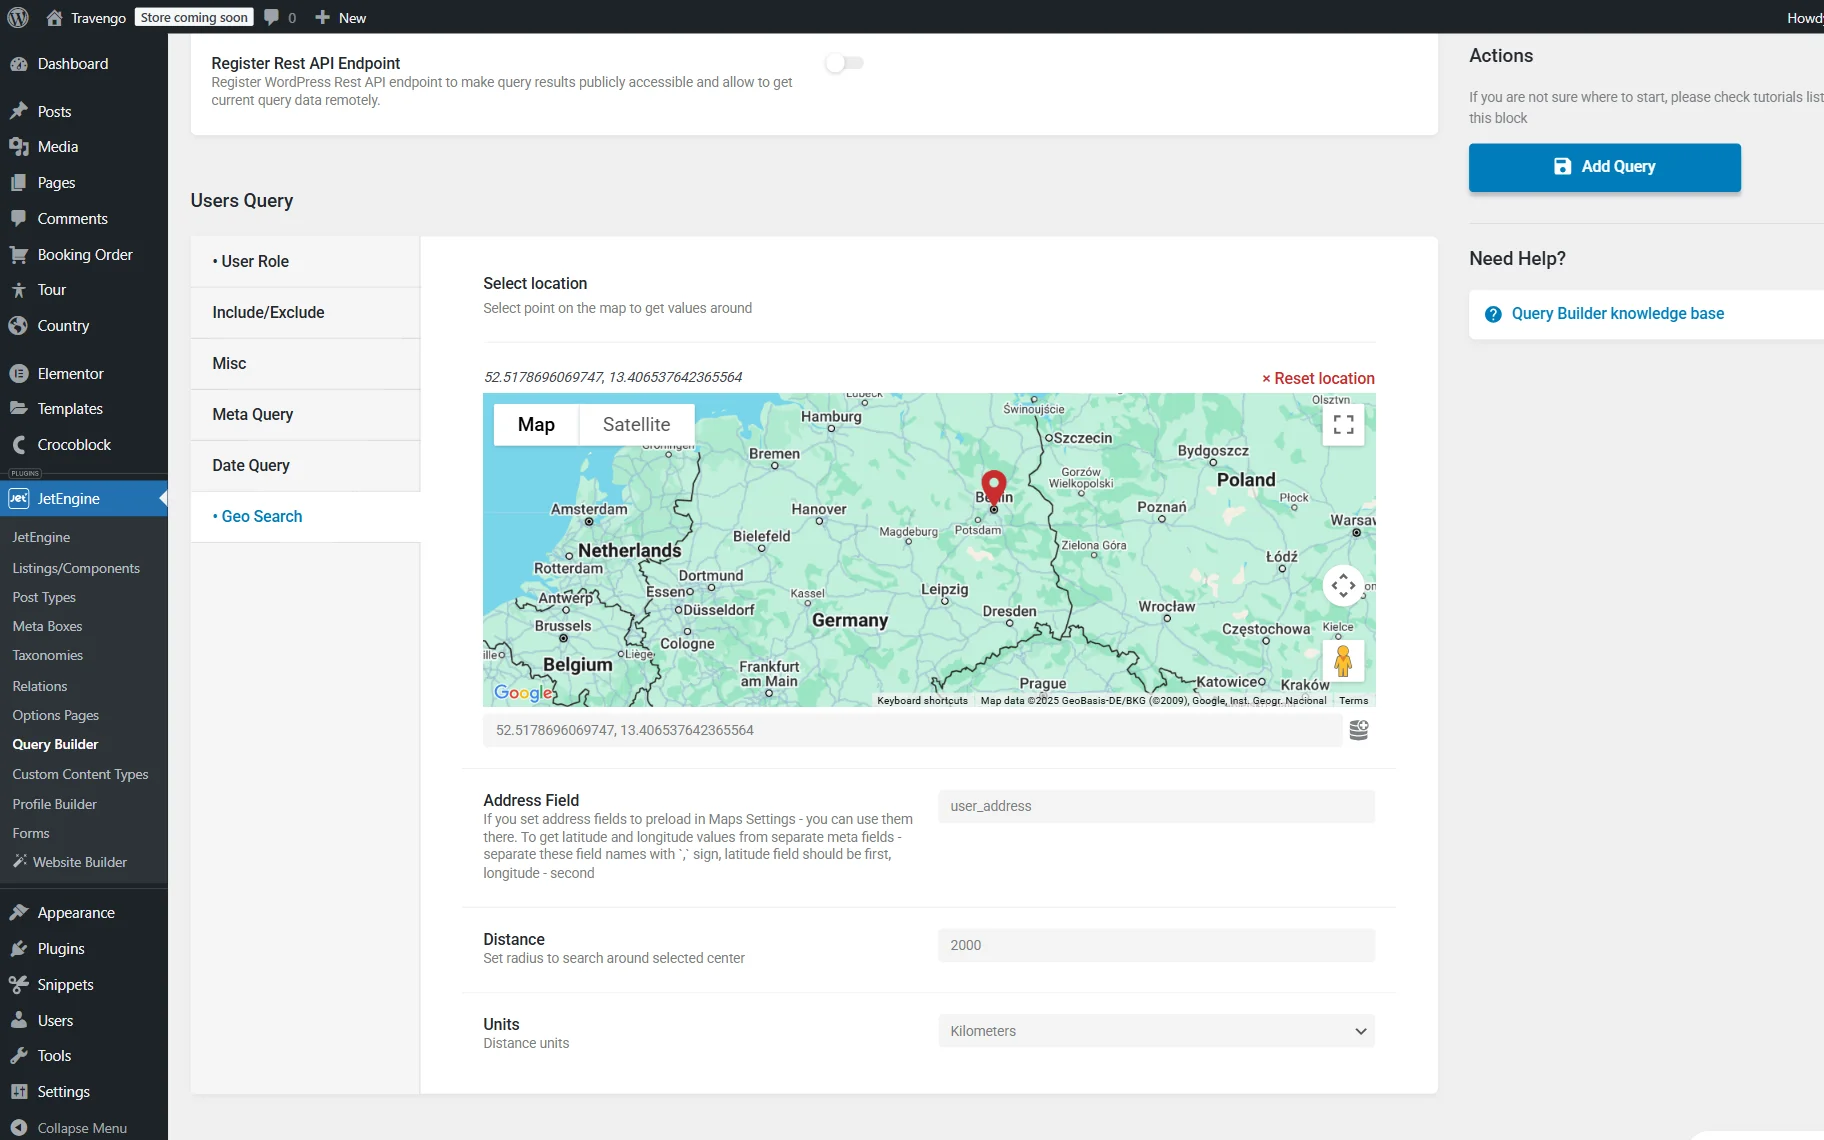
Proceed to the Geo Search tab.
Here, pick the center to search around on the presented map or complete the field below it with the coordinates.
Next, complete the Address Field with the name of the meta field where the address is stored (or two fields if latitude and longitude are stored in different fields). It can be either a “Text” field(s) or a “Map” field. In our case, a “Map” meta field’s Name/ID is “user_address.”
Specify the Distance that will be used as a radius to search around the set center and select Units—“Miles” or “Kilometers.”
You can also activate the Preview results toggle at the top of the page and check if there is a “geo_query_distance” value presented in the list. If the preview includes results with “geo_query_distance”, the query works correctly.

Make other changes to the query if needed and press the “Add Query” button.
Build a filter
Now, we should build a JetSmartFilters filter that will be used on the front end to set the needed address.
Proceed to the WordPress Dashboard > Smart Filters > Add New directory.
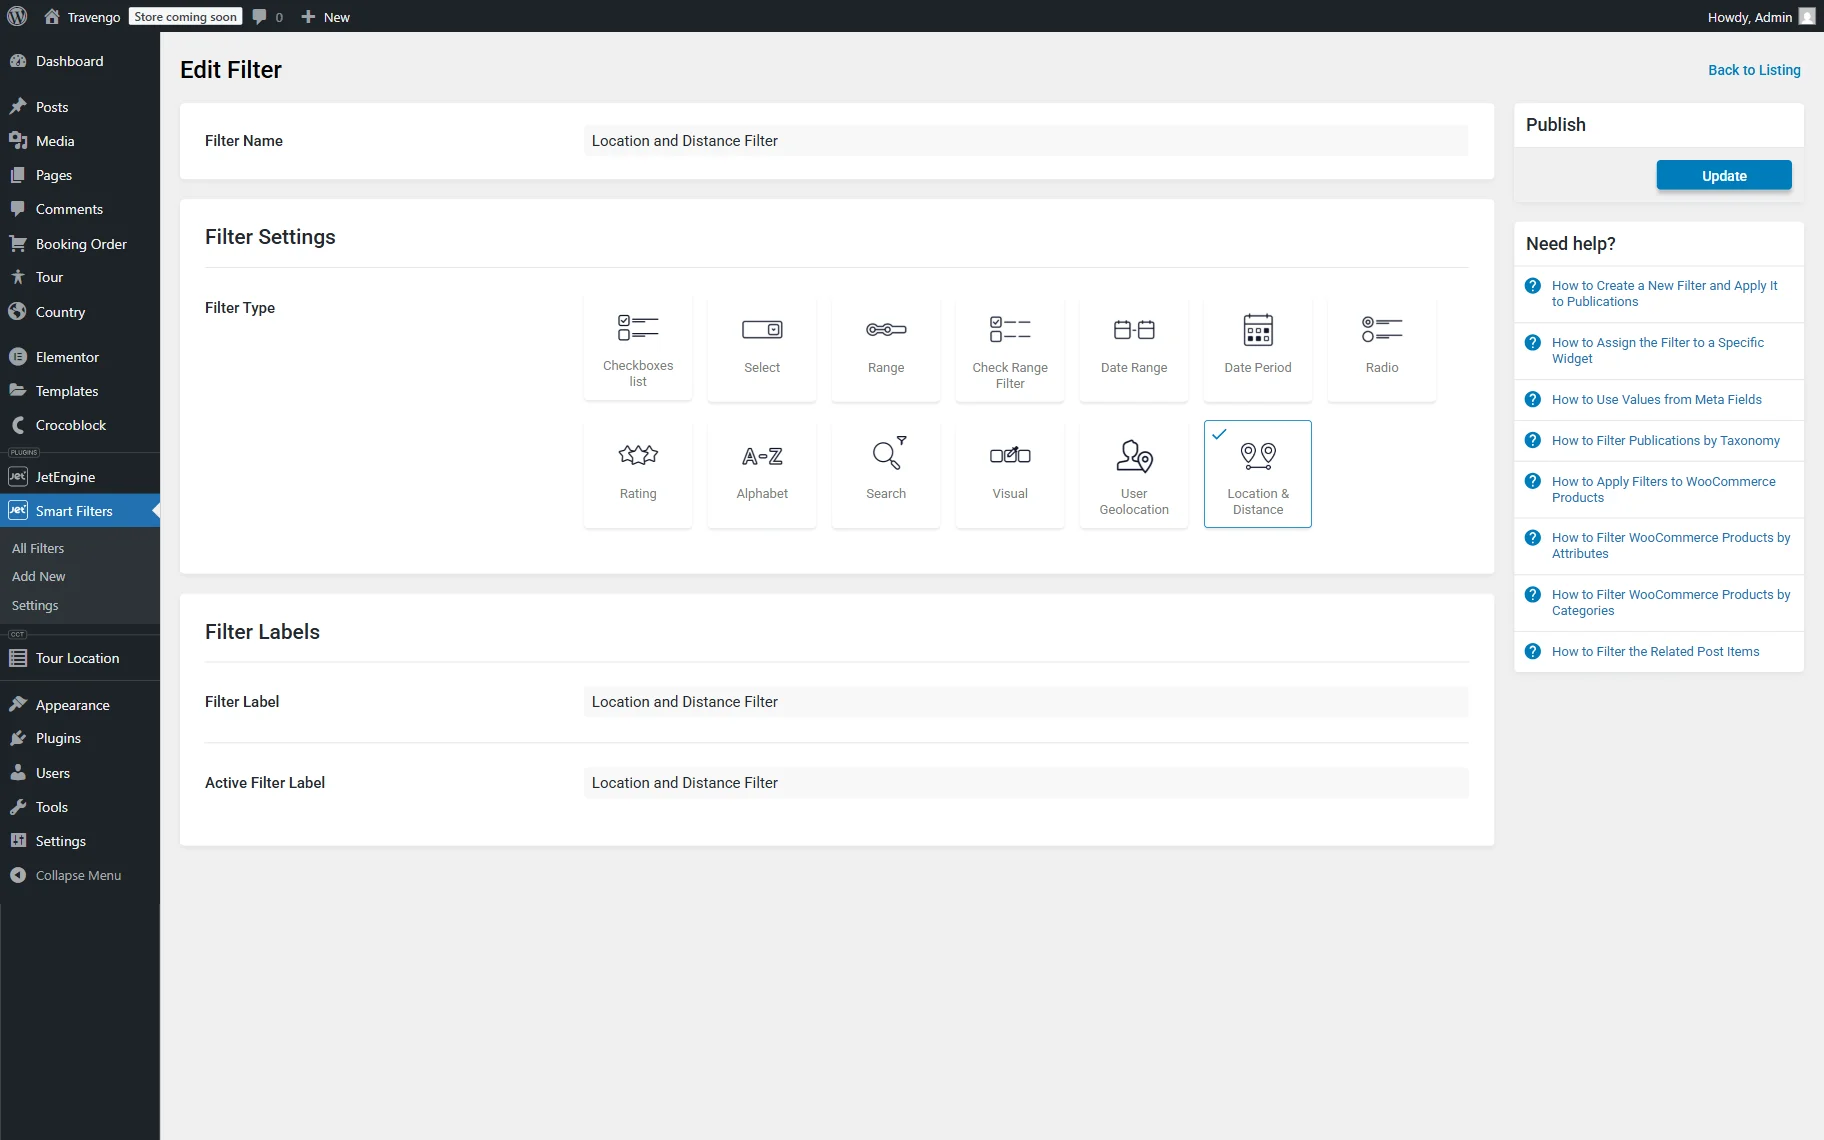
Name a filter (here, “Location and Distance Filter.”)
Go to the Filter Settings section and select the Filter Type: it can be either the “User Geolocation” or the “Location & Distance” option. In our case, we select the “Location & Distance” option so the user can manually type in the needed address and select the radius.
Next, we also complete the Filter Labels section and press the “Update” button to save the filter.
Create a listing item
Now, we should create a listing with the users. To do so, head to the WordPress Dashboard > JetEngine > Listings/Components directory.
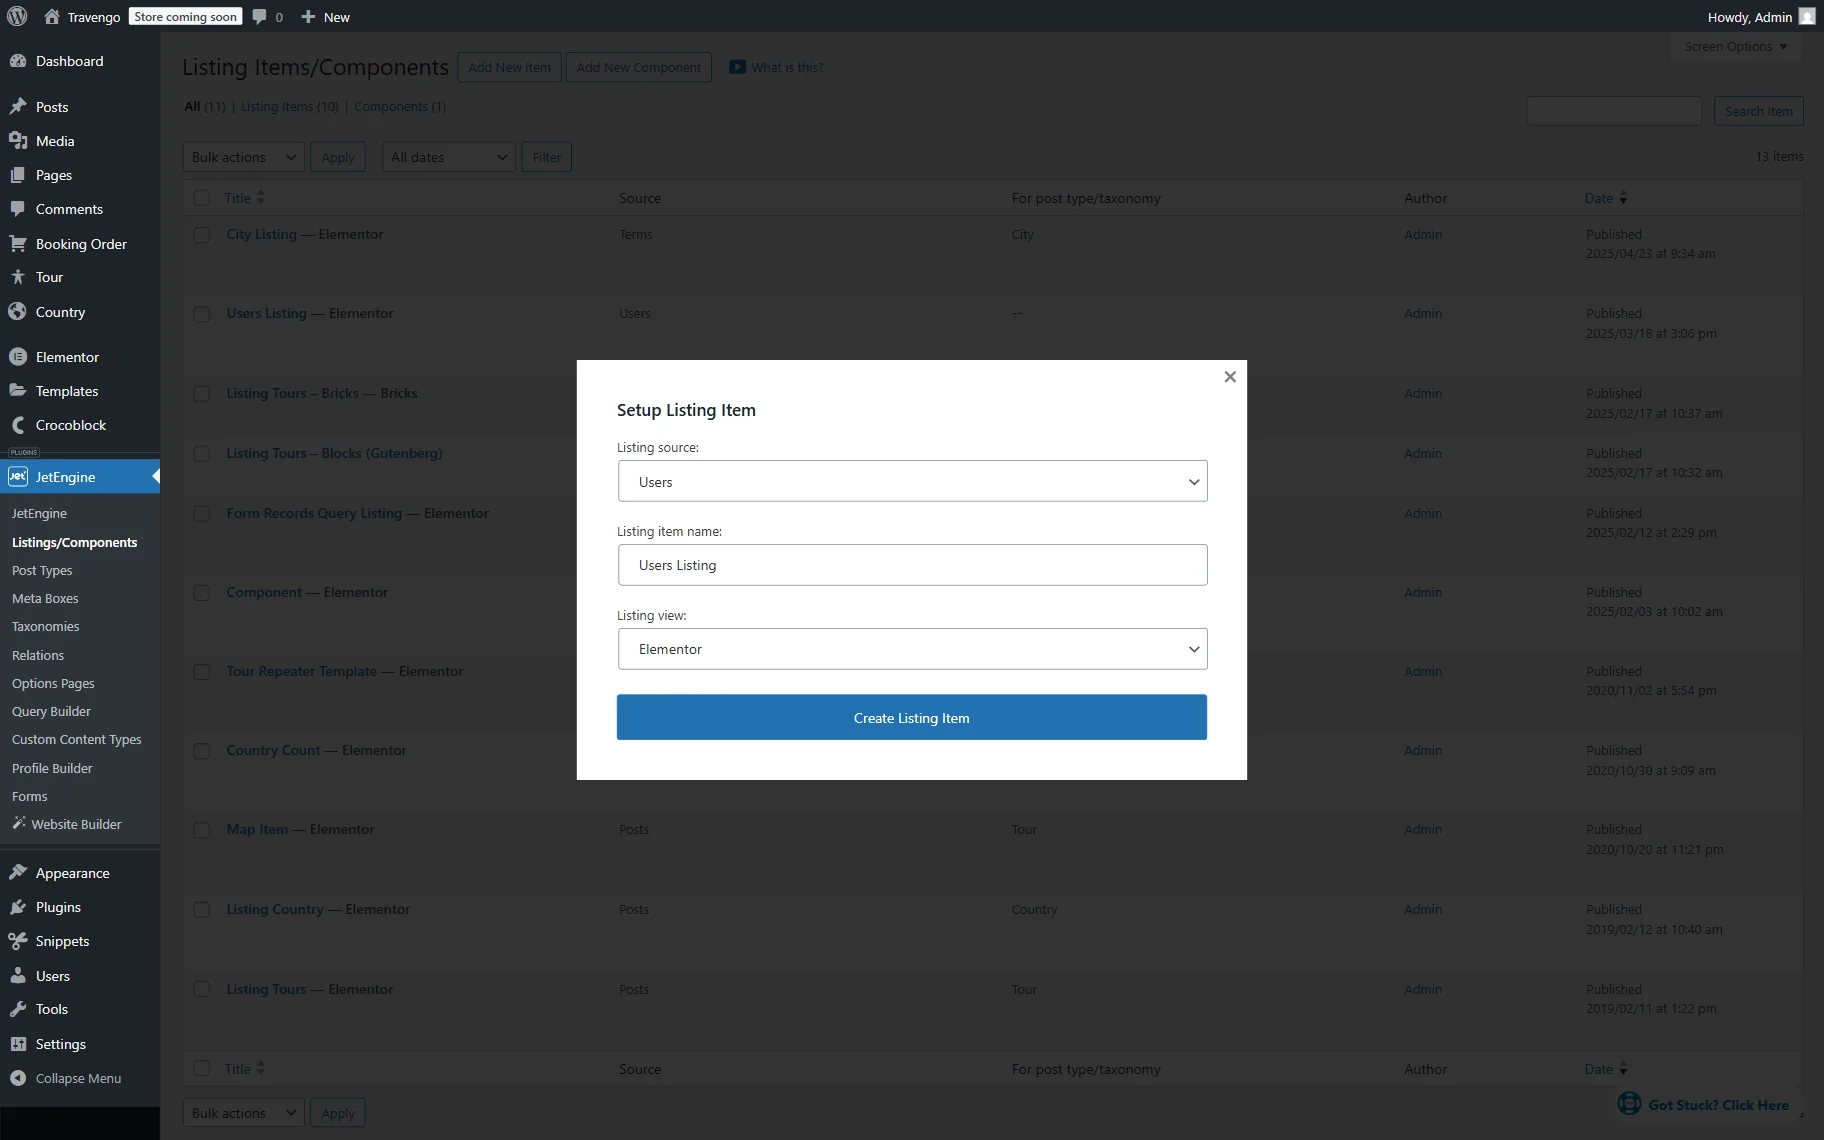
Here, press the “Add New Item” button to open the pre-editing pop-up.
Select the “Users” option as the Listing source and set the Listing item name.
Then, pick any preferred Listing view. For example, we select the “Elementor” option.
Push the “Create Listing Item” button to open the editor.
In the editor, you can display the needed information with the help of the JetEngine’s dynamic widgets/blocks/elements. For instance, first, we add a Dynamic Field widget that will display the user’s name.
Next, add one more Dynamic Field to the page.
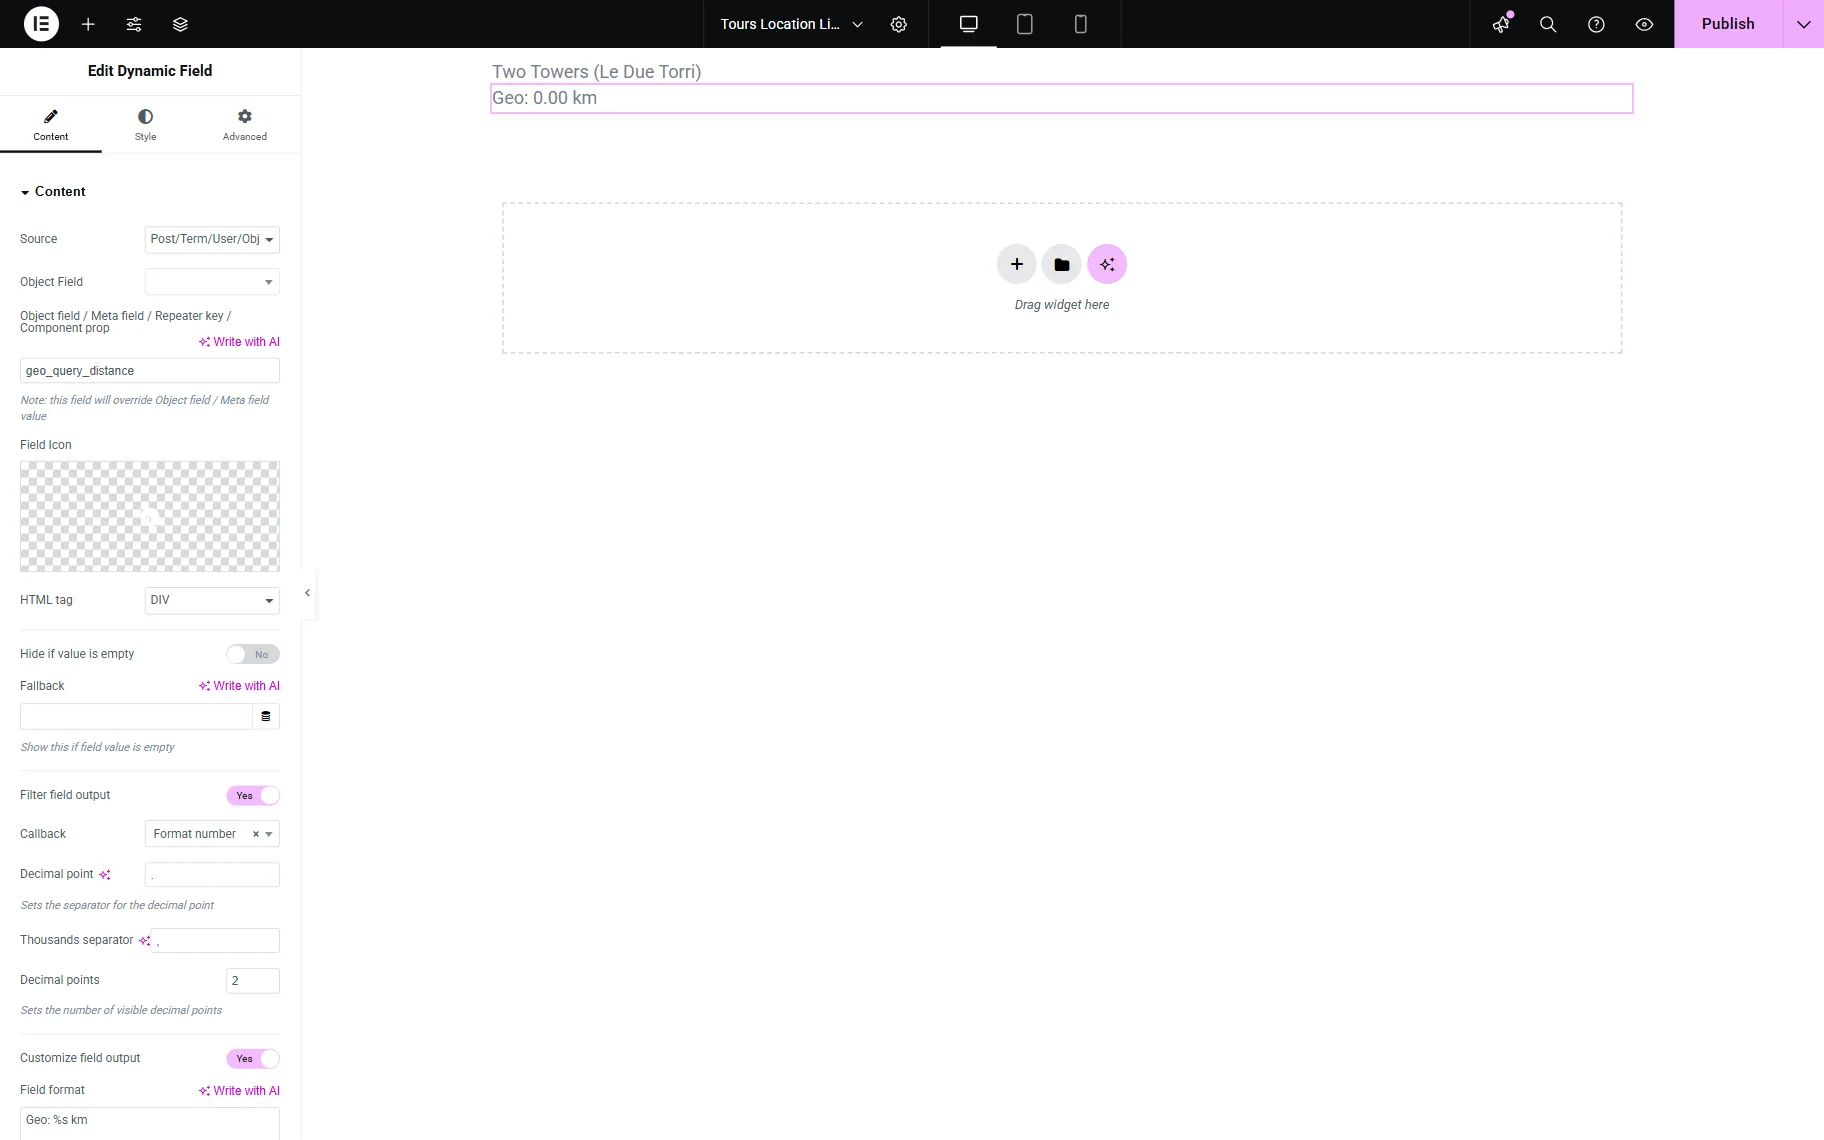
Leave the default “Post/Term/User/Object Data” Source and paste the “geo_query_distance” value in the Object field / Meta field / Repeater key / Component prop field.
Next, we activate the Filter field output toggle and select the “Format number” option in the Callback field. We do this so the decimal points of the distance number shorten to two (the “2” value is set by default in the Decimal points field).
Then, we also activate the Customize field output toggle and paste the “Geo: %s km” value into the Field format field, where “%s” is the dynamic number value.

Customize the page further if needed and press the “Publish” button.
Add a listing to the page
Next, go to WordPress Dashboard > Pages and add a new page or select the already created one and open it in the editor. For instance, we open the page in Elementor.
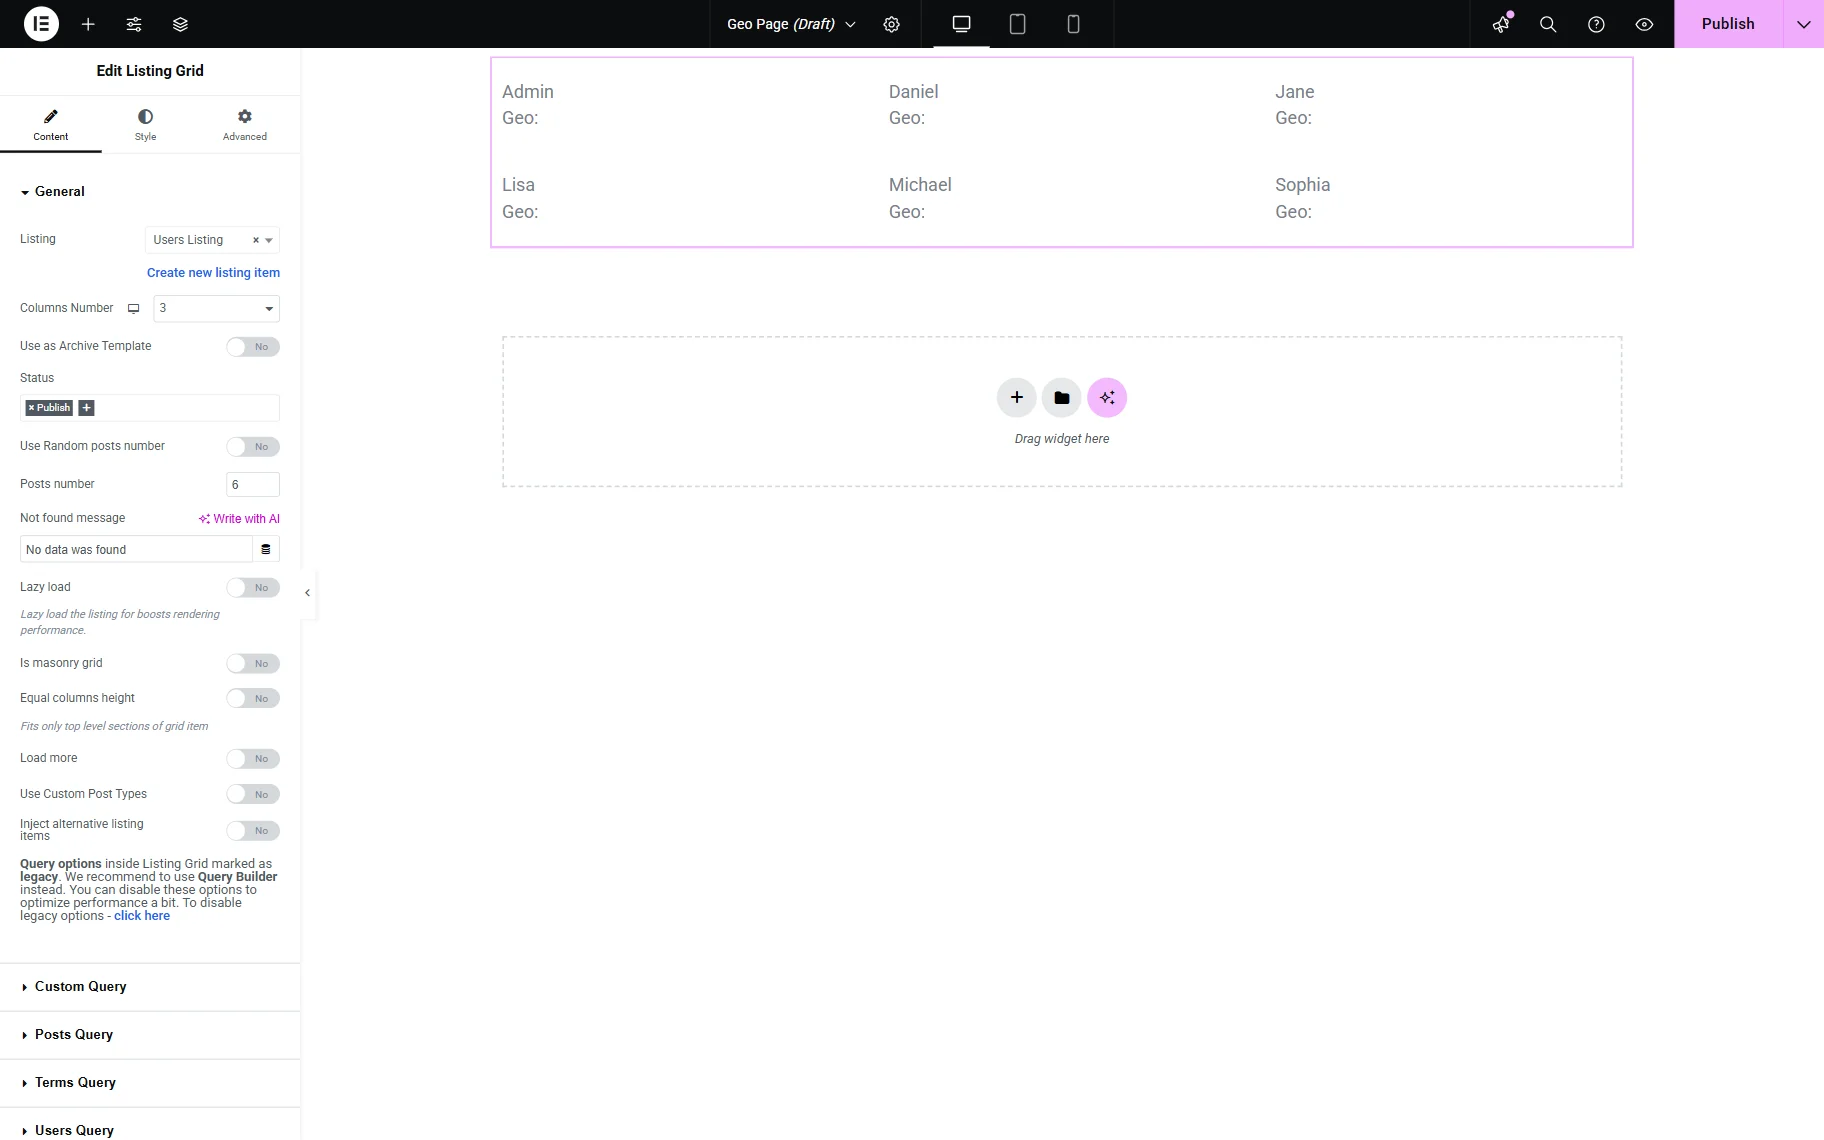
Add a Listing Grid or Map Listing to the page to display a recently built user’s listing. Now, we add a Listing Grid widget.
Select the previously created Listing in the General tab.
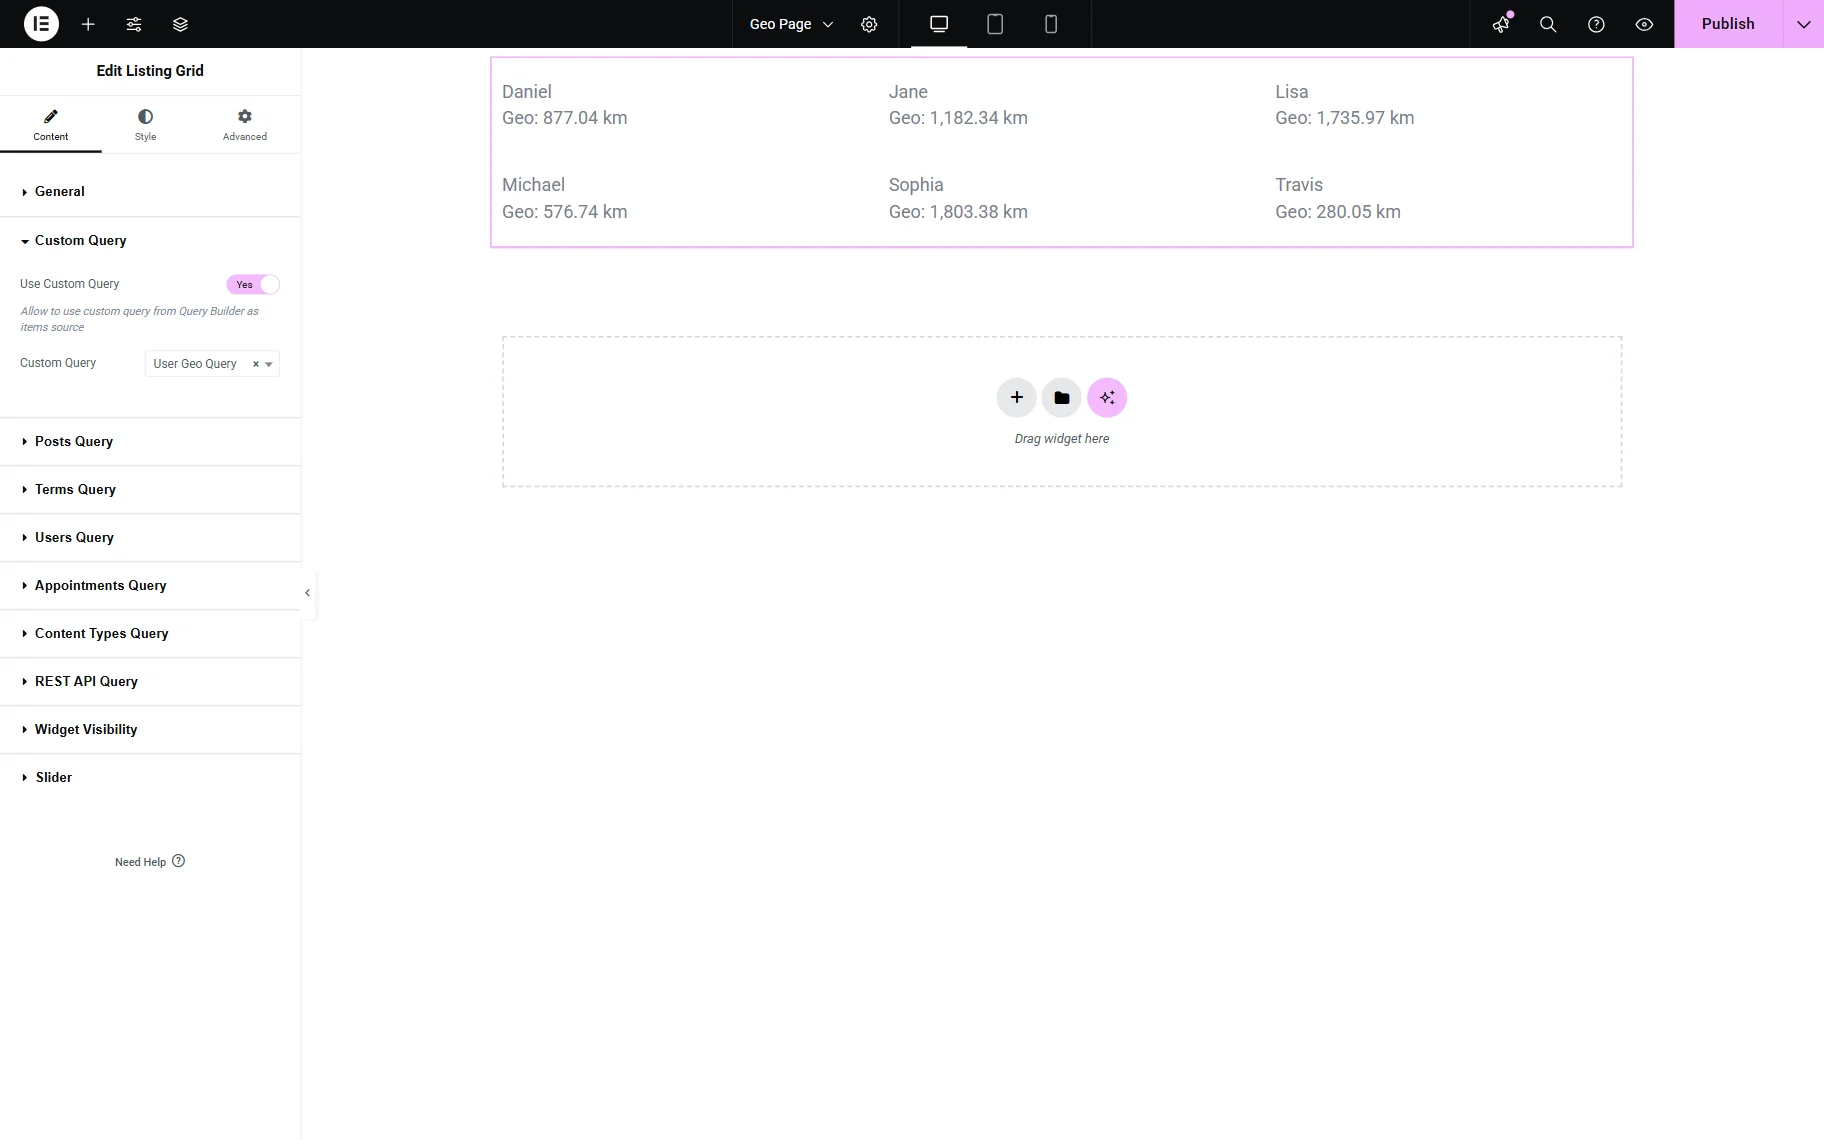
Open the Custom Query tab and activate the Use Custom Query toggle.
Select the built query in the Custom Query field.
Next, add a Location and distance or User Geolocation widget to the page to define the point that will be taken for listing filtering. As we have created the “Location & Distance” filter beforehand, we add a Location and distance widget.
Pick a previously built filter in the Select filter field and select the “JetEngine” option as a provider in the This filter for field.

Also, optionally, proceed to the Distance List to change the distance values displayed in the filter. For example, we set the “100” km, “200” km, and “500” km values.

Adjust the following settings if needed and click the “Publish” button to save the result.
Check the result
Proceed to the front-end to check the result.
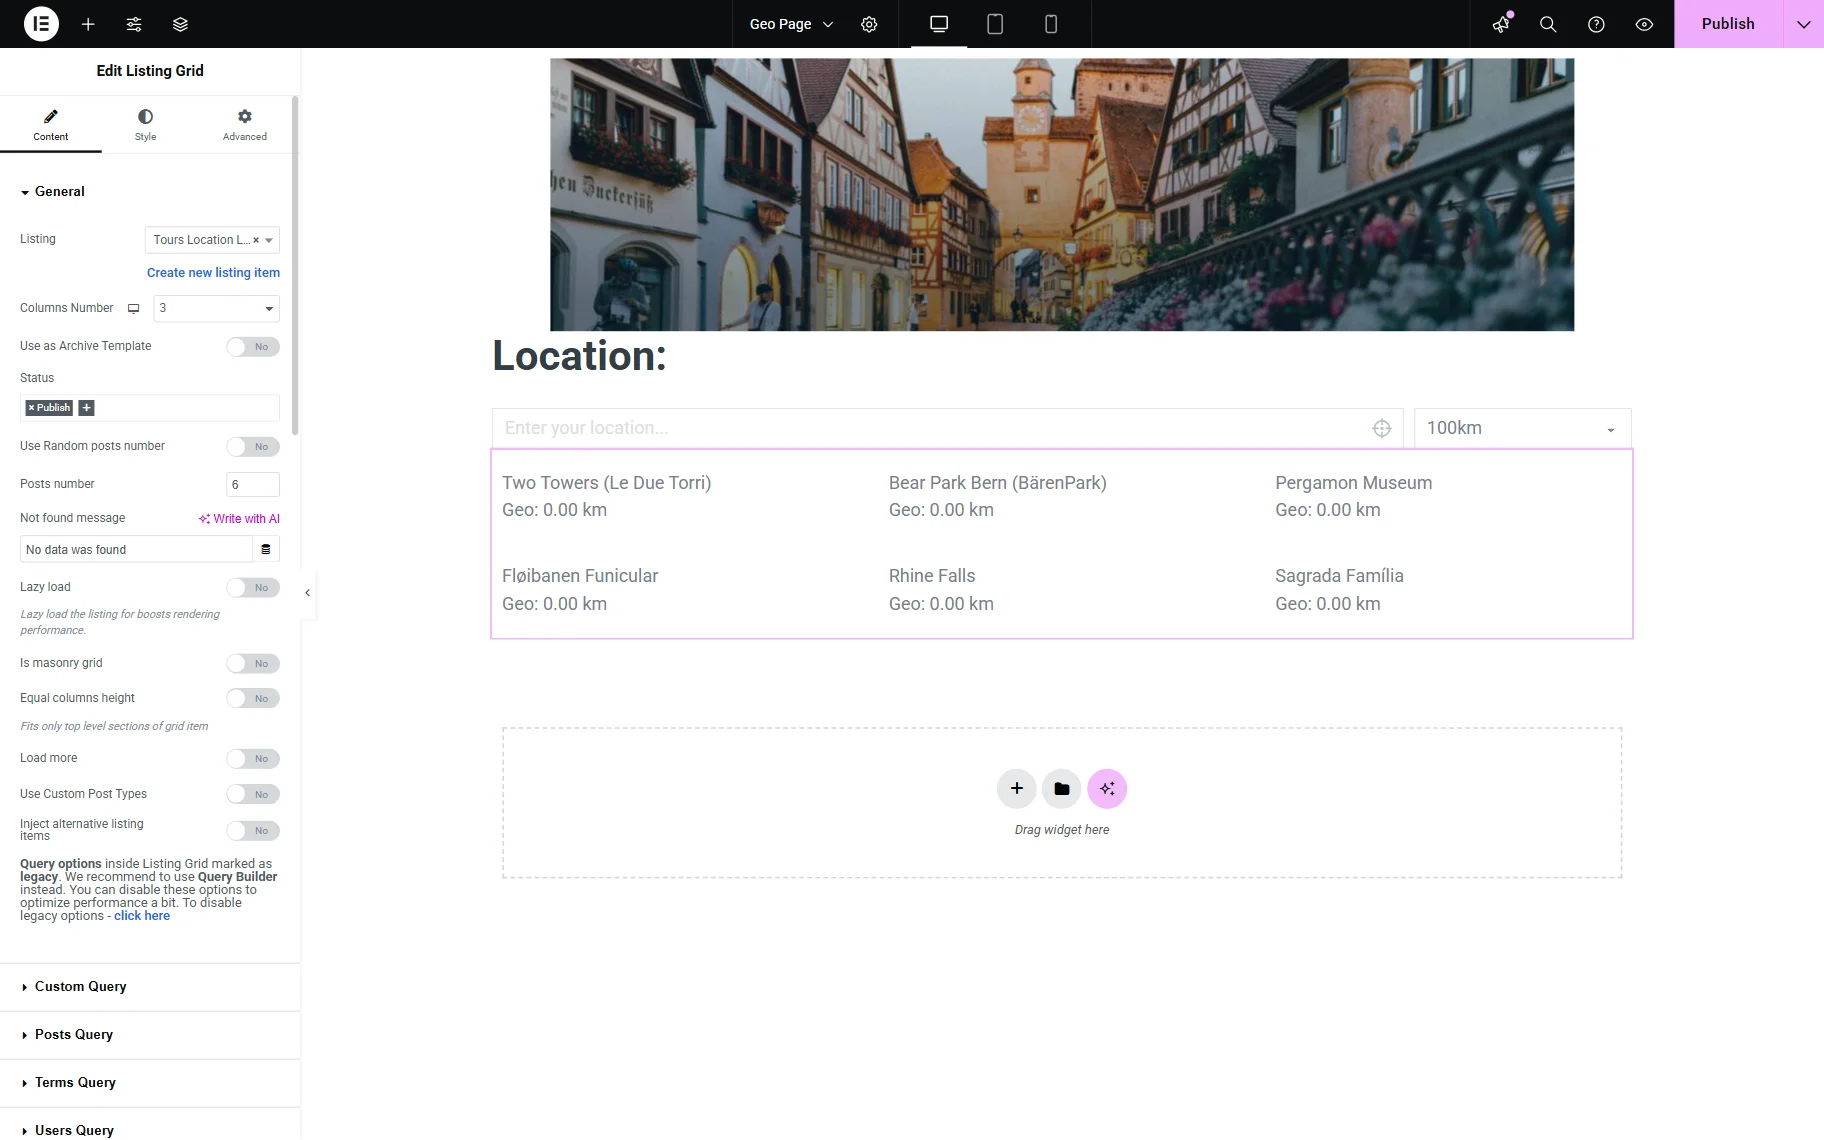
First, you will observe the filter and a listing. As we have the Location and distance filter, we paste the address in the corresponding text field and select the distance radius in the dropdown near the field.
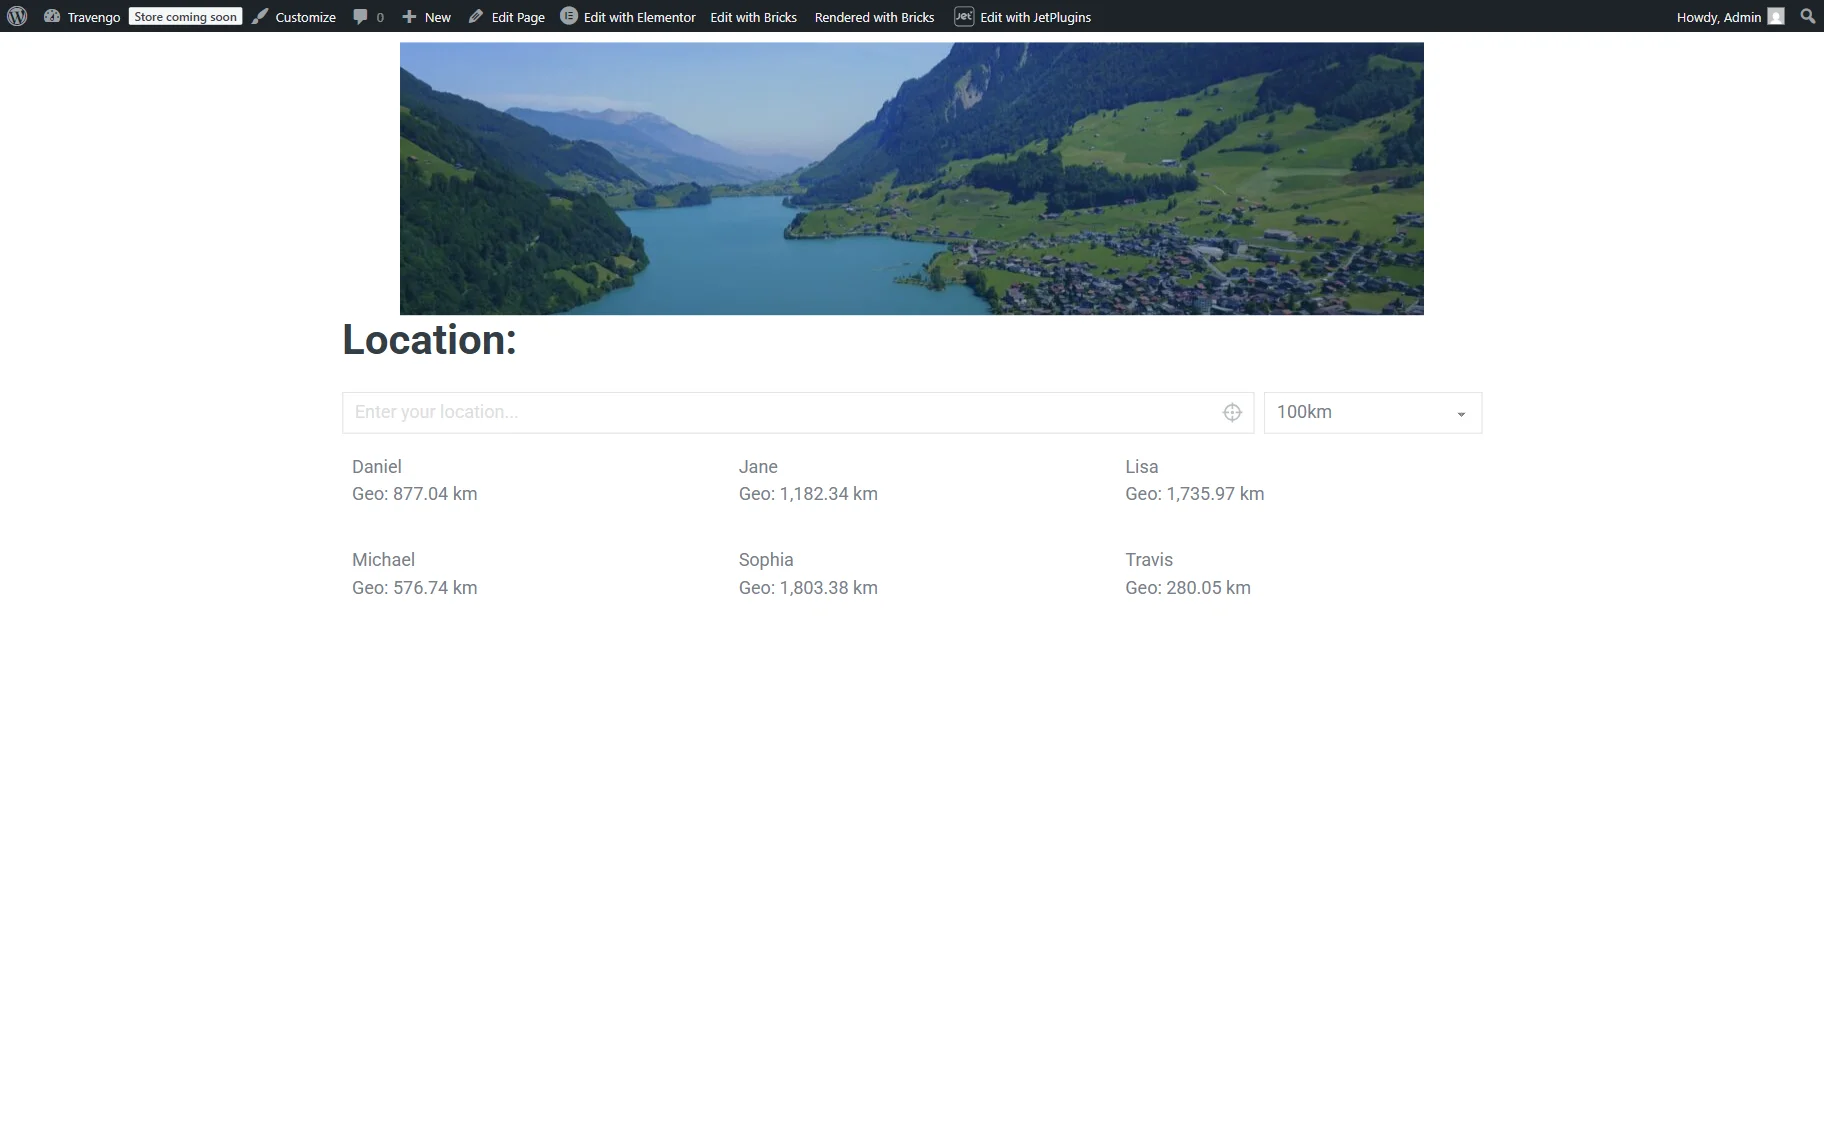
Once done, the listing is filtered, and the user(s) within the set radius of the entered address will be shown.

Terms
Next, we will show how to display the distance between WordPress terms and the set address with the help of the JetEngine’s Listing template and Dynamic Field widget/block/element.
Add a code snippet
First, you should add a code snippet to the functions.php file of your child theme or the snippet plugin. For example, we will use the Code Snippets plugin.
Fill in the snippet’s name (here, “Geo Distance (Terms)”) and paste the following code snippet into the corresponding area:
add_filter( 'jet-engine/maps-listings/add-distance-field/terms', '__return_true' );Press the “Save Changes and Activate” button.

Build a query
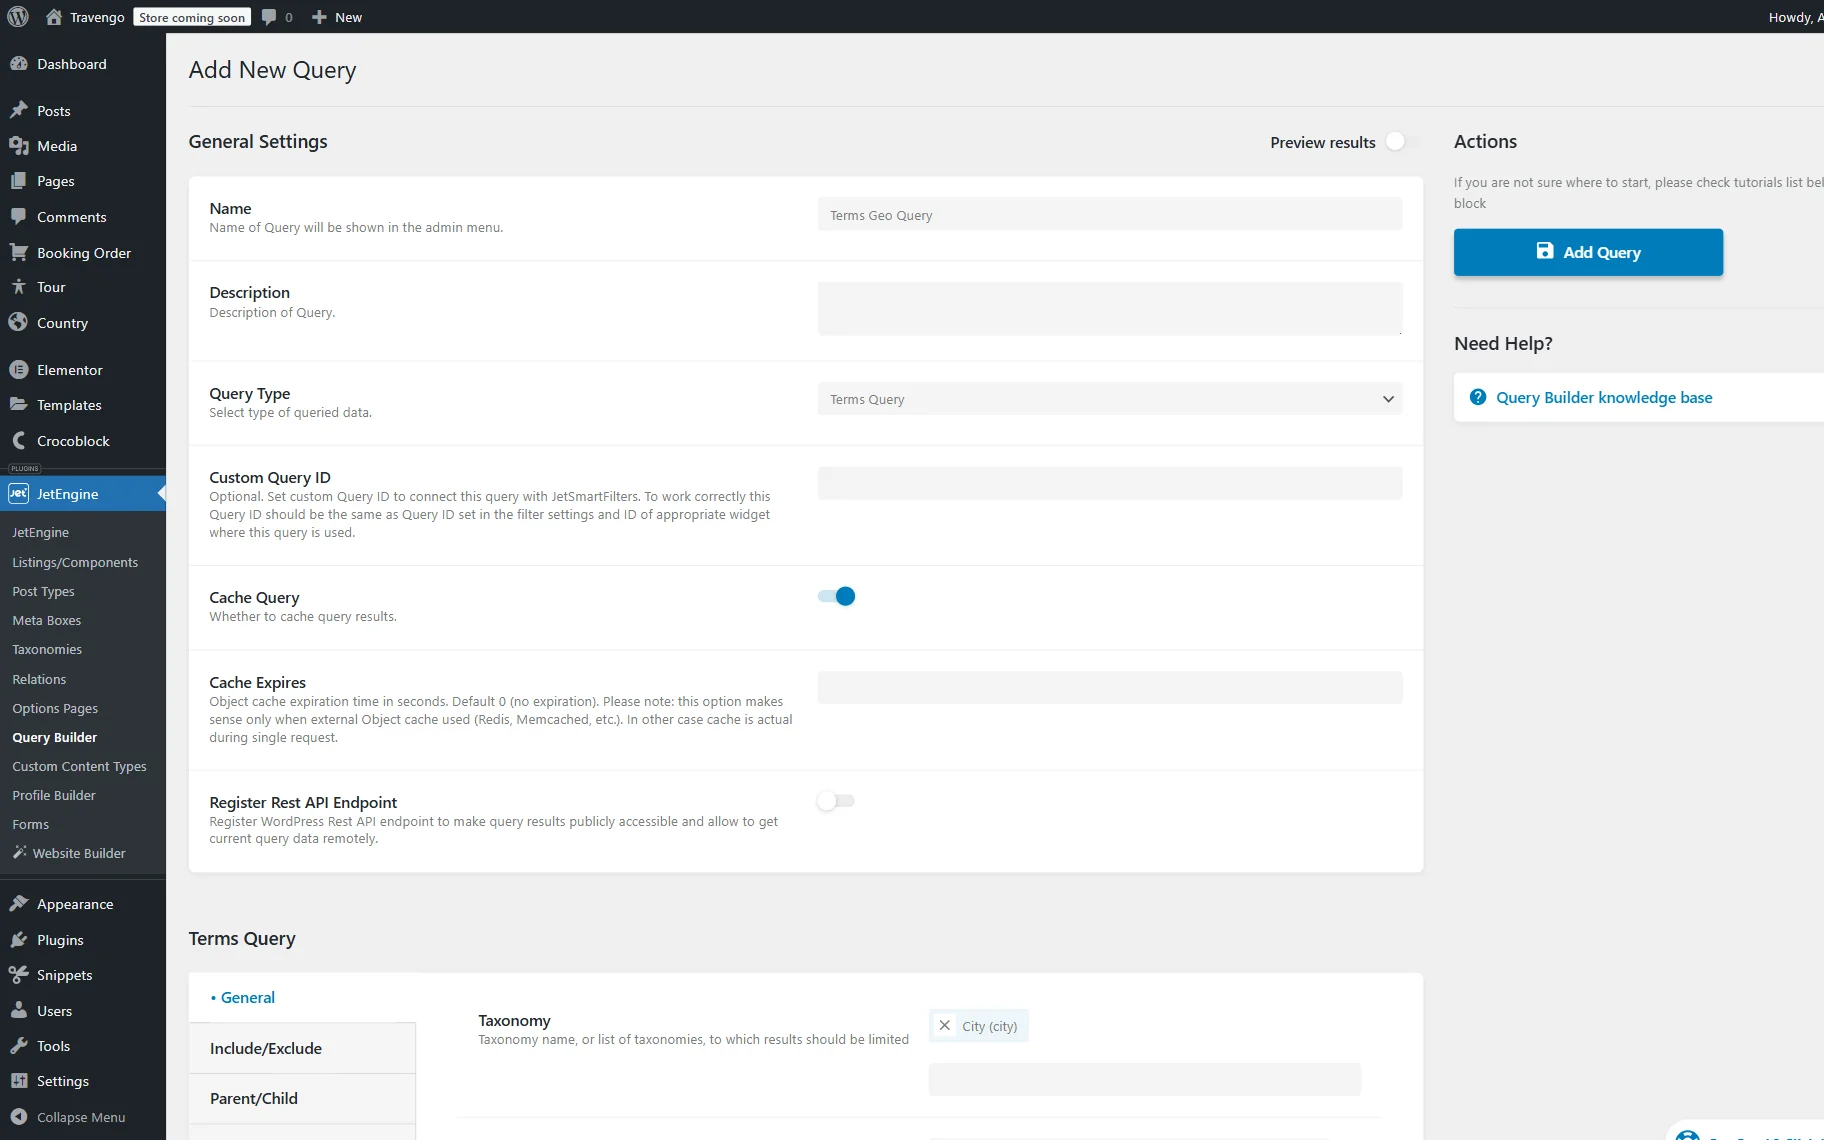
Go to WordPress Dashboard > JetEngine > Query Builder and press the “Add New” button.
Complete the Name of the query. In our case, “Terms Geo.”
Then, set the “Terms Query” Query Type.
Scroll down to the Terms Query section and select the Taxonomy in the opened General tab.
Proceed to the Geo Search tab.
Here, pick the center to search around on the presented map or complete the field below it with the coordinates.
Next, complete the Address Field with the name of the meta field where the address is stored (or two fields if latitude and longitude are stored in different fields). In our case, “address_city.”
Specify the Distance that will be set as a radius to search around the set center and select Units—“Miles” or “Kilometers.”
You can also activate the Preview results toggle at the top of the page and check if there is a “geo_query_distance” value presented in the list. If so, the query works correctly.
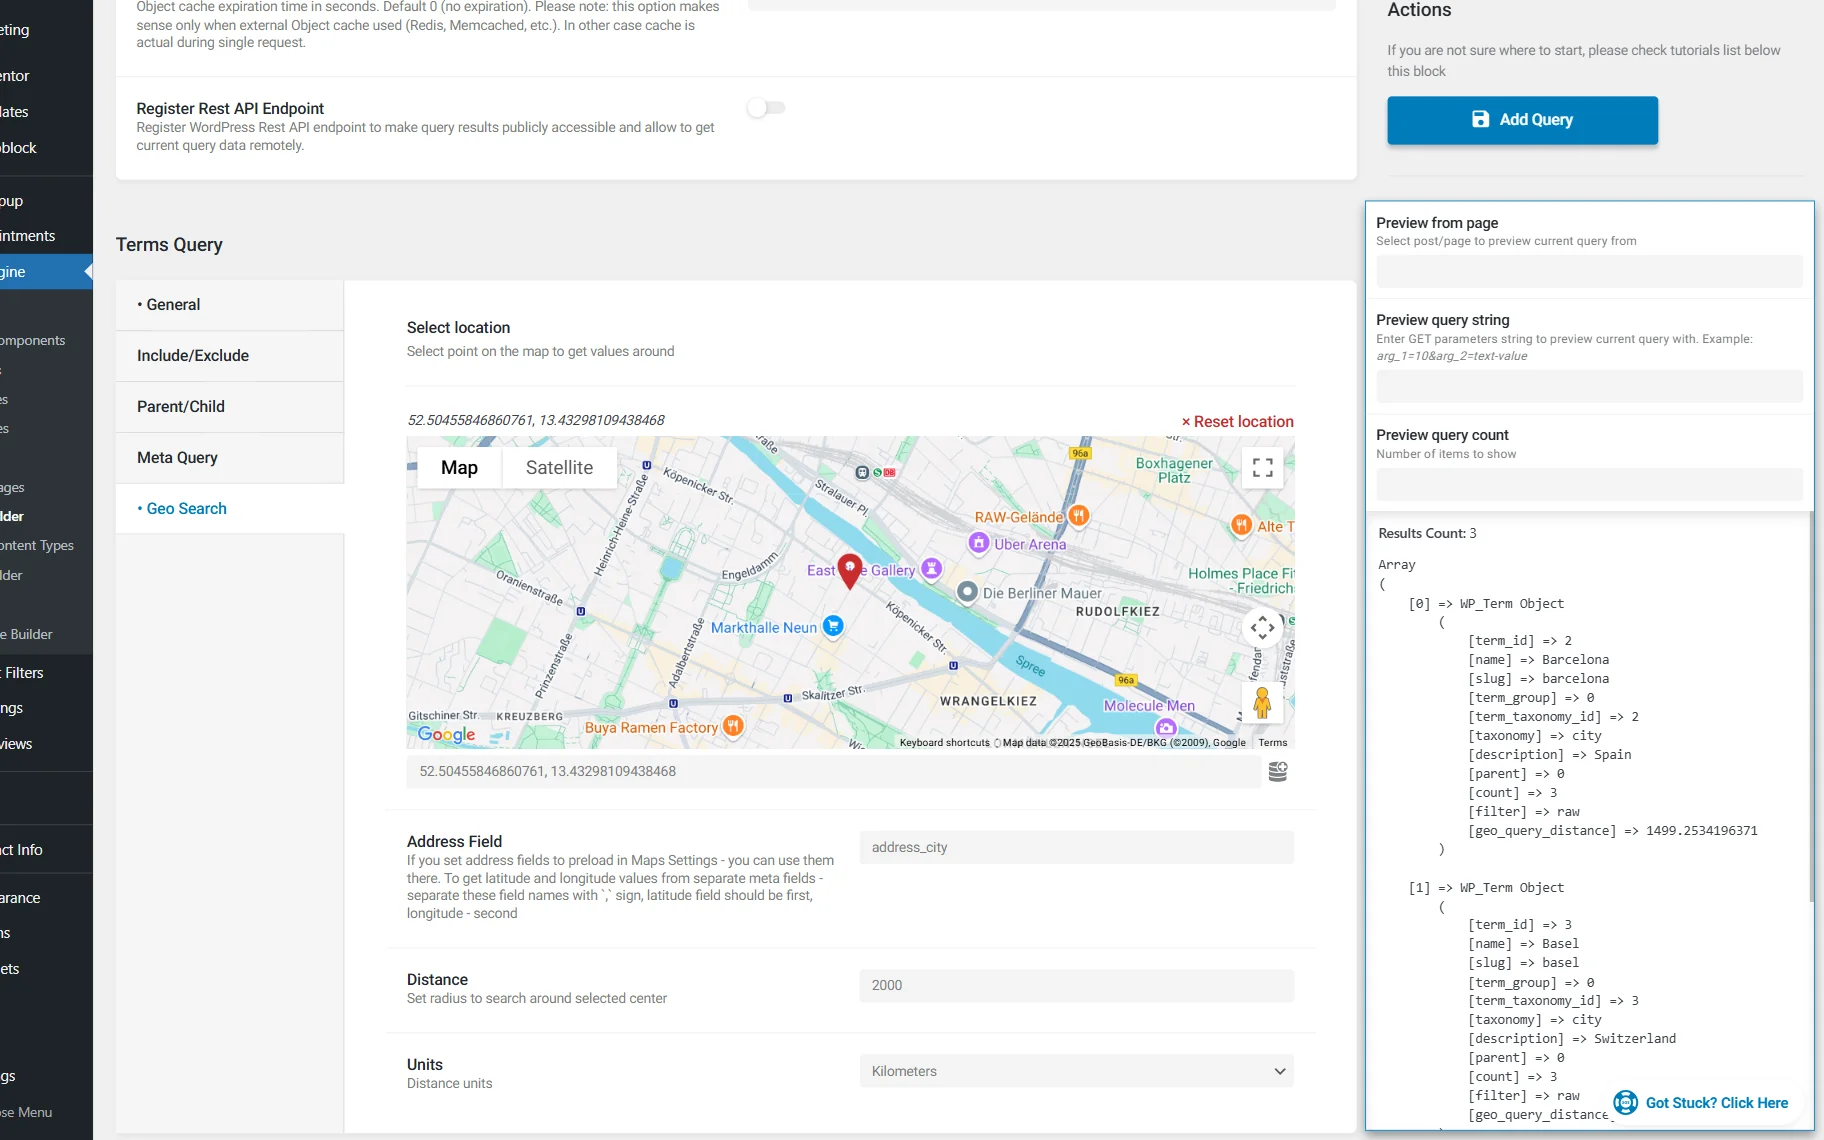
Make other changes to the query if needed and press the “Add Query” button.
Build a filter
Now, we should build a filter that will be used on the front end to set the needed address.
Proceed to the WordPress Dashboard > Smart Filters > Add New directory.
Name a filter (here, “Location and Distance Filter.”)
Go to the Filter Settings section and select the Filter Type: it can be either the “User Geolocation” or the “Location & Distance” option. In our case, we select the “Location & Distance” option so the user can manually type in the needed address and select the radius.
Next, we also complete the Filter Labels section and press the “Update” button to save the filter.

Create a listing item
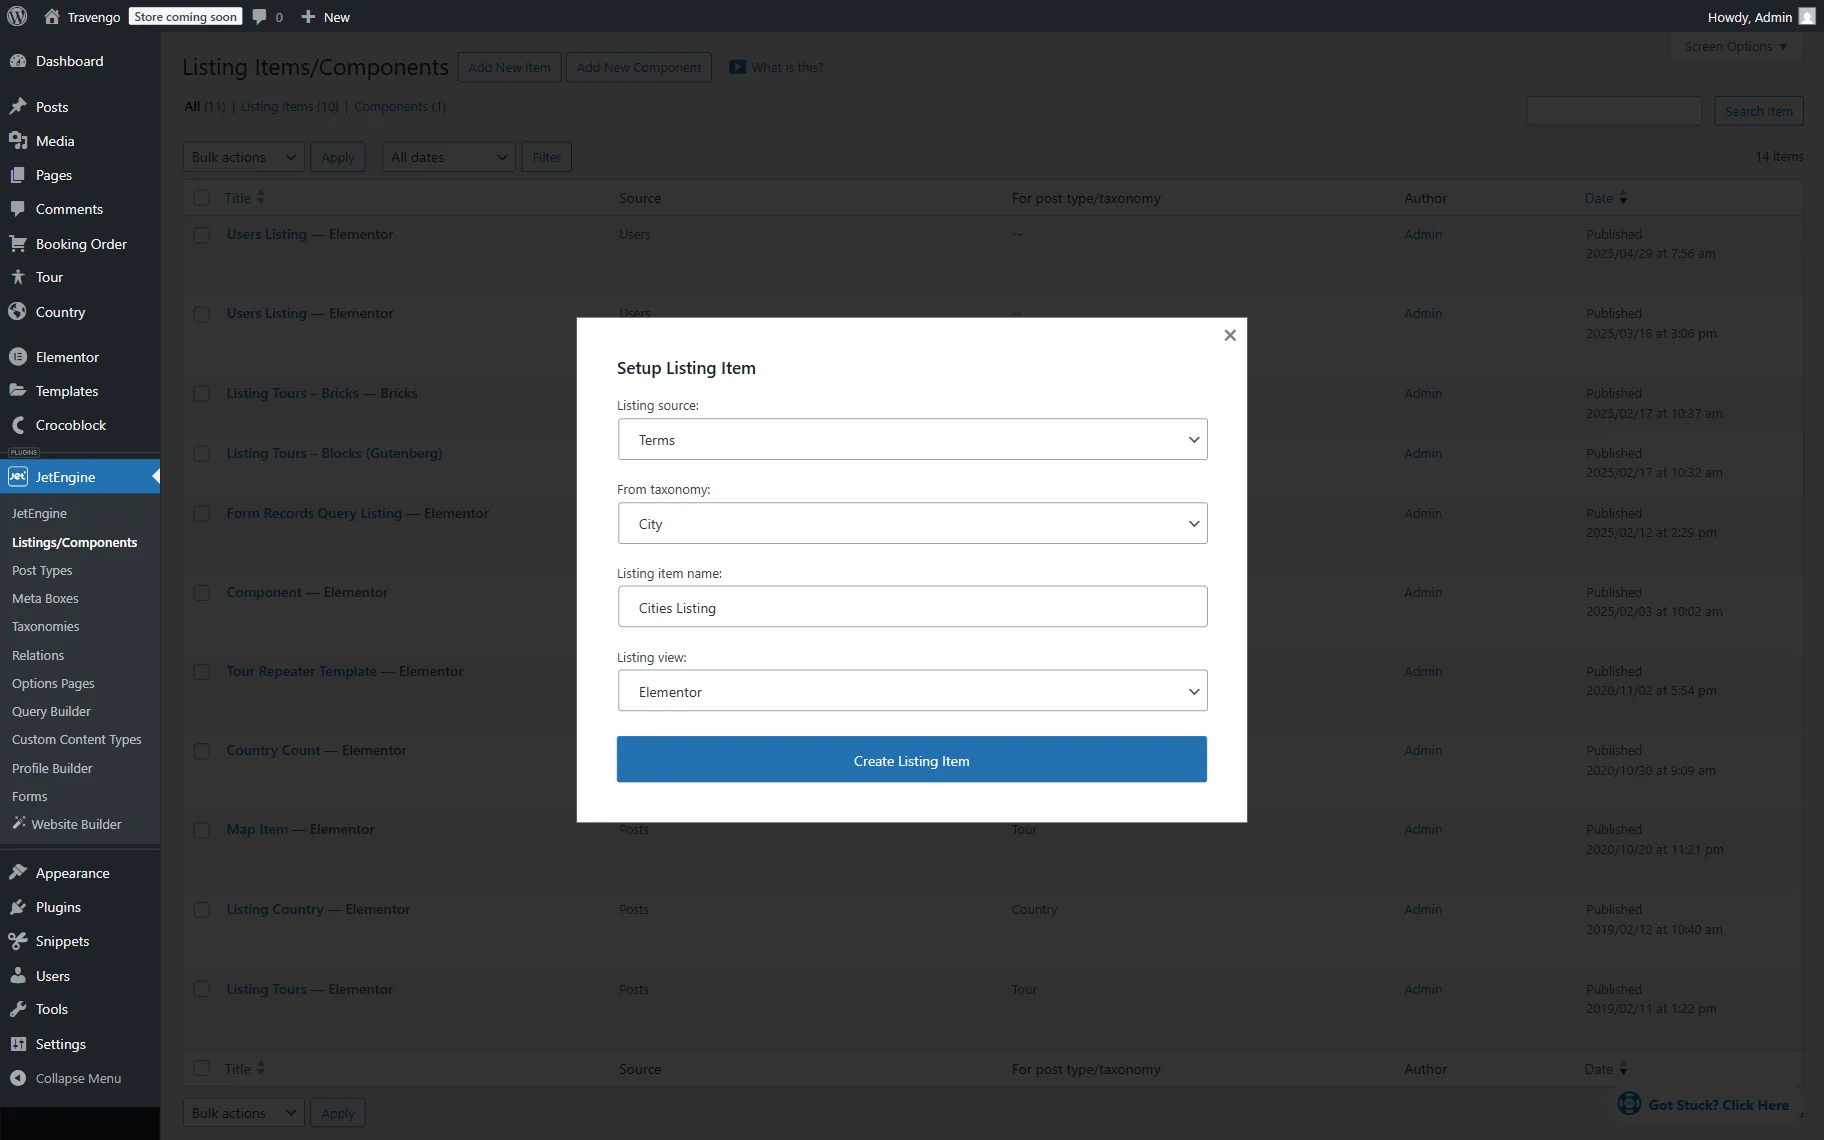
Now, head to the WordPress Dashboard > JetEngine > Listings/Components directory.
Here, press the “Add New Item” button to open the pre-editing pop-up.
Select the “Terms” option as the Listing source, pick the needed option in the From taxonomy field, and set the Listing item name.
Then, pick any preferred Listing view. For example, we select the “Elementor” option.
Push the “Create Listing Item” button to open the editor.
In the editor, you can display the needed information with the help of the JetEngine’s dynamic widgets/blocks/elements.
Next, add a Dynamic Field to the page.
Leave the default “Post/Term/User/Object Data” Source and paste the “geo_query_distance” value in the Object field / Meta field / Repeater key / Component prop field.
Next, we activate the Filter field output toggle and select the “Format number” option in the Callback field. We do this so the decimal points of the distance number shorten to two (the “2” value is set by default in the Decimal points field).
Then, we also activate the Customize field output toggle and paste the “Geo: %s km” value into the Field format field, where “%s” is the dynamic number value.

Customize the page further if needed and press the “Publish” button.
Add a listing to the page
Next, go to WordPress Dashboard > Pages and add a new page or select the already edited one and open it in the editor. For instance, we open the page in Elementor.
Add a Location and distance or User Geolocation widget to the page. For example, we add a Location and distance widget as we built the filter for this type earlier.
Pick a previously built filter in the Select filter field and select the “JetEngine” option as a provider in the This filter for field.
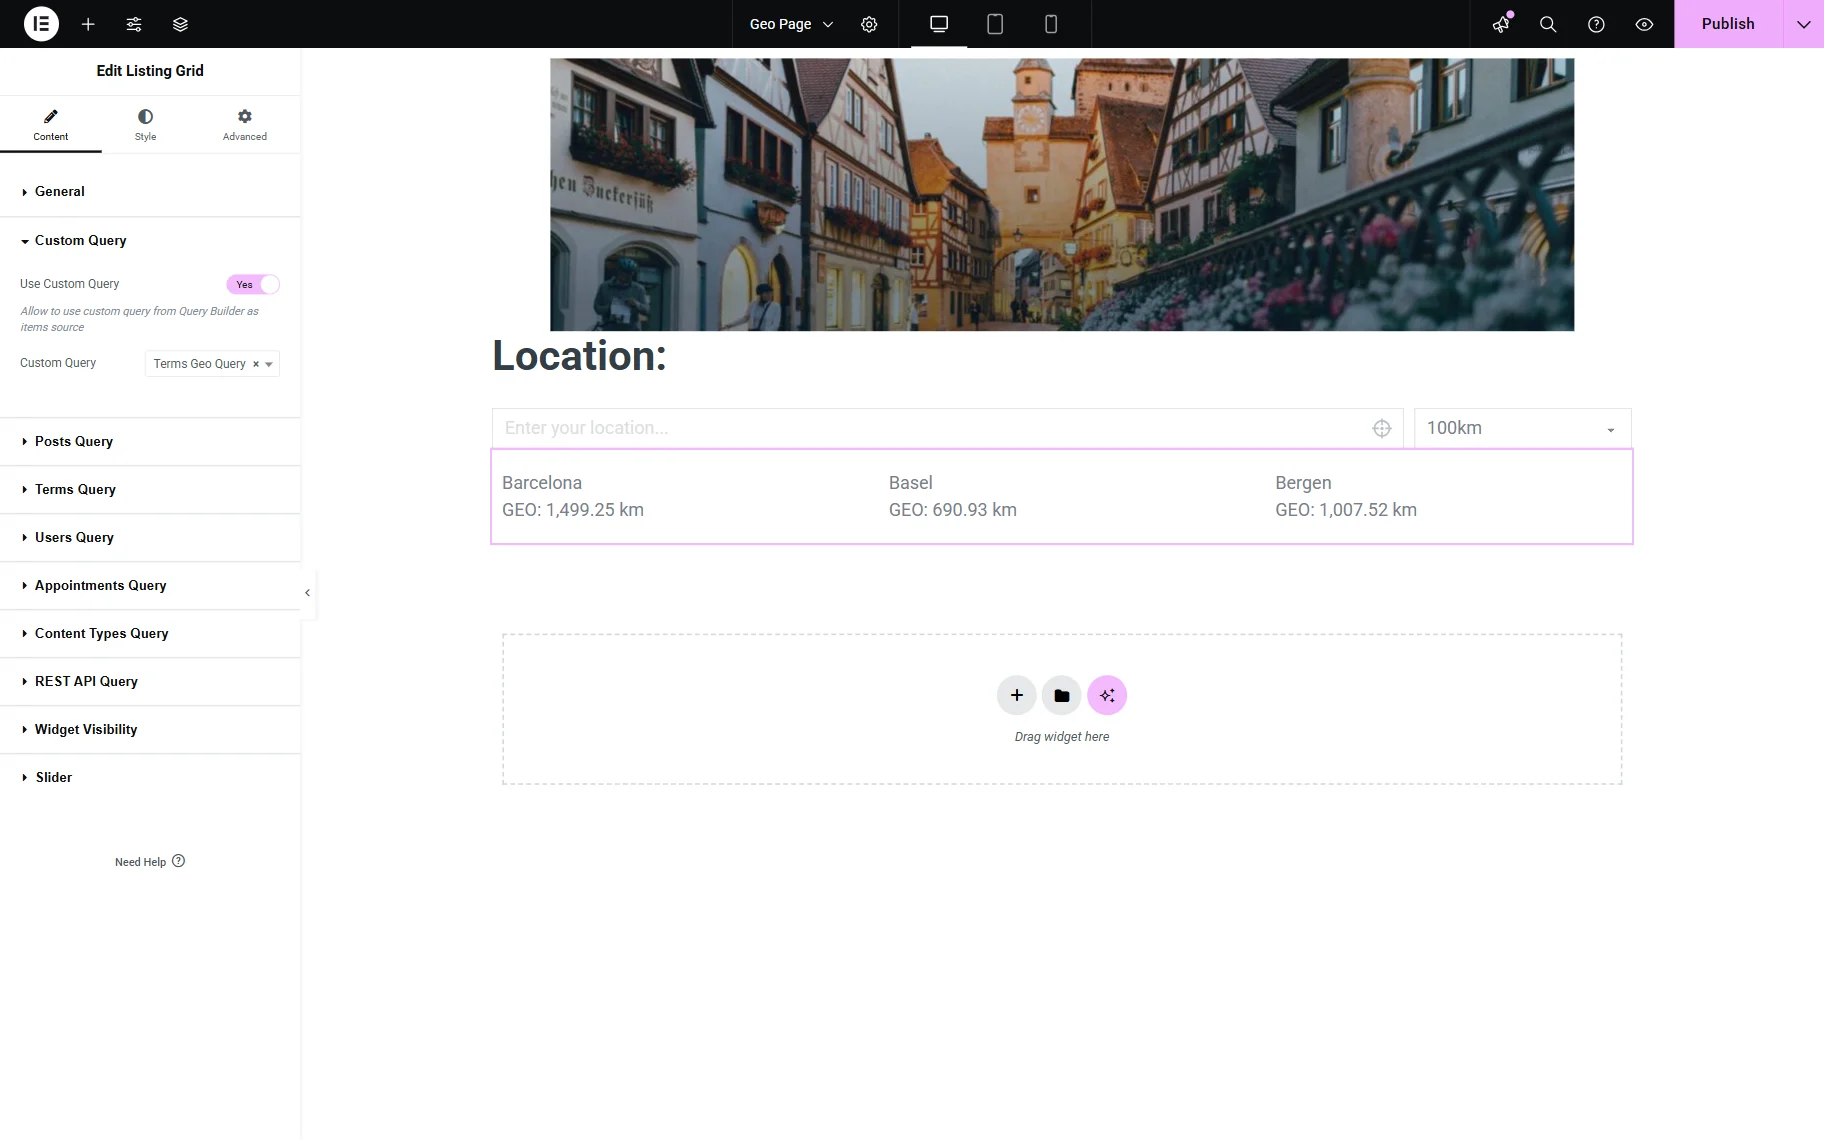
Next, add a Listing Grid or Map Listing to the page. For example, we add a Listing Grid widget.
Select the previously created Listing in the General tab.

Open the Custom Query tab and activate the Use Custom Query toggle.
Select the built query in the Custom Query field.
Adjust the following settings if needed and click the “Publish” button to save the result.
Check the result
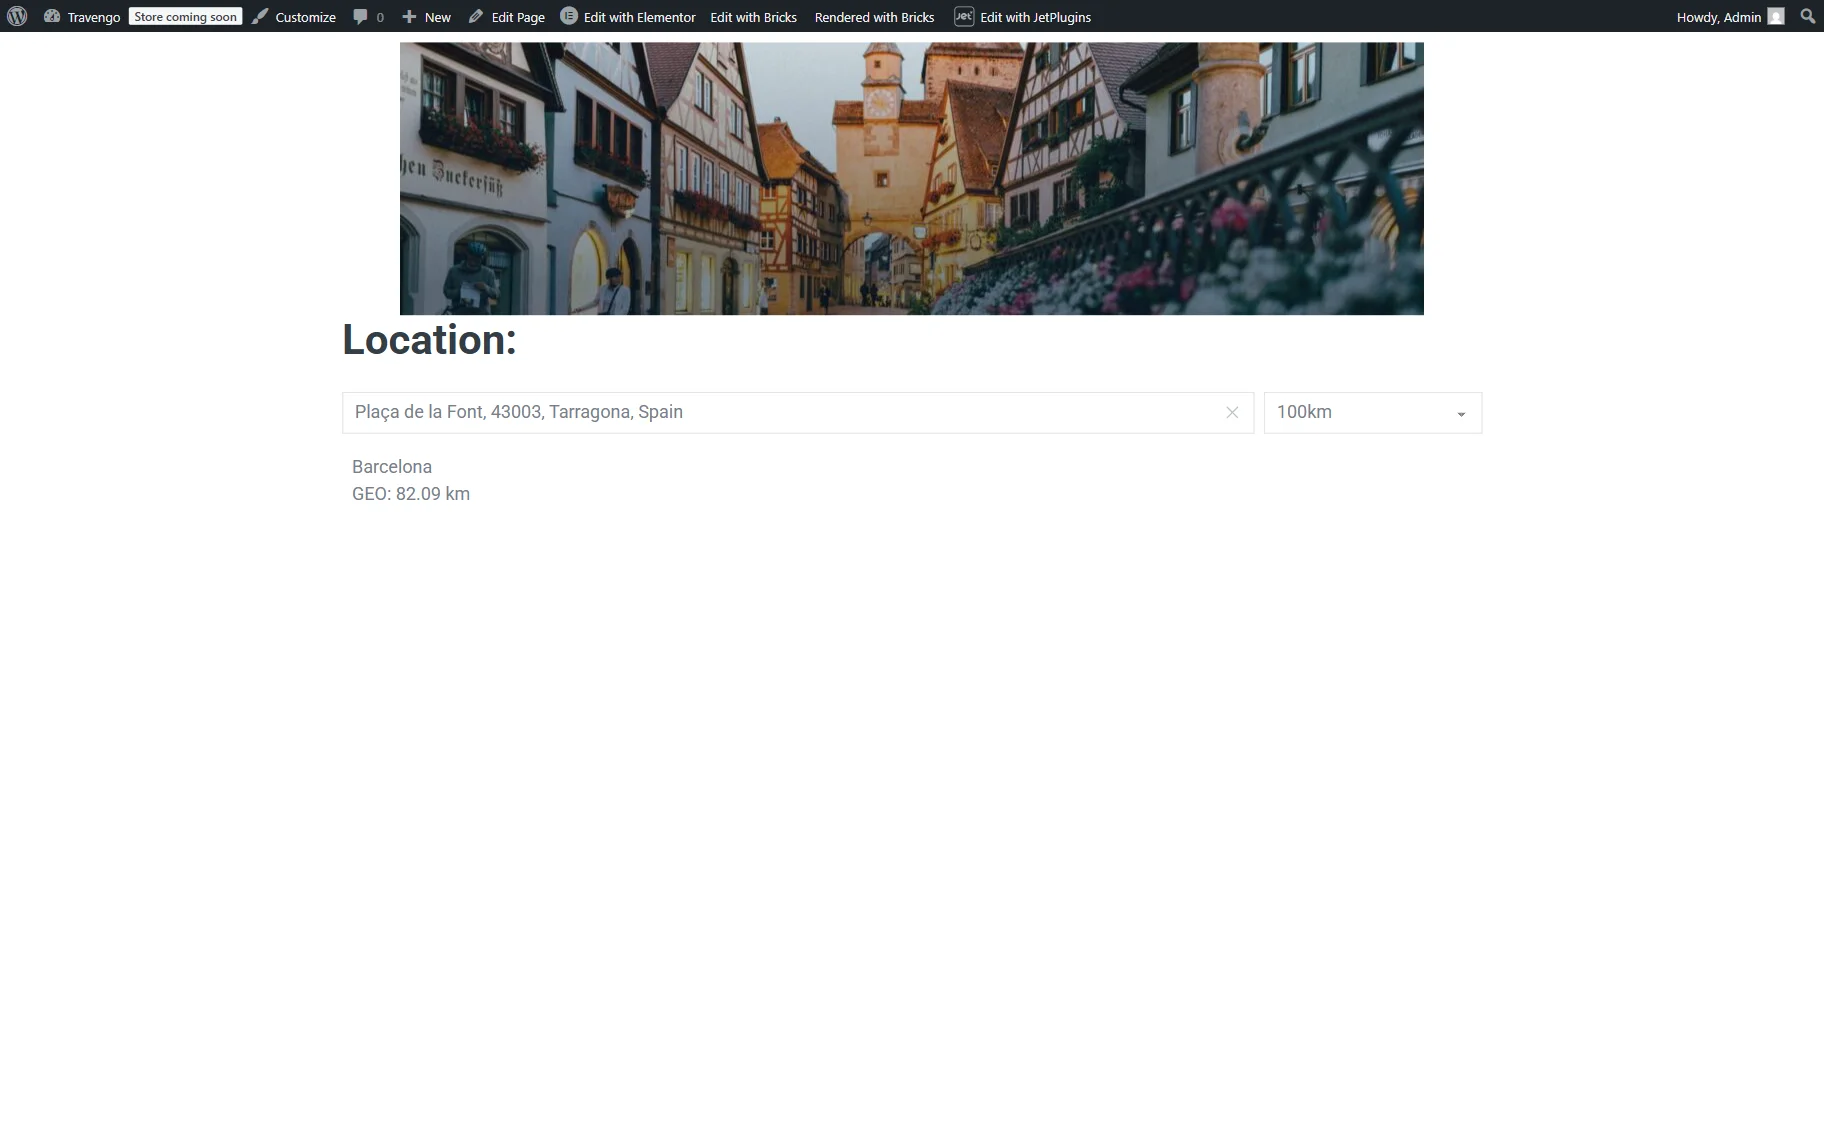
Proceed to the front-end to check the result.
Paste the address in the filter and select the radius in the dropdown. If everything is set correctly, you will see the filtered terms.
CCT
Now, we will show how to display the distance between the Custom Content Type (CCT) items and the set address in the JetEngine’s listing with the Dynamic Field widget/block/element.
Add a code snippet
First, you should add a code snippet to the functions.php file of your child theme or the snippet plugin. For example, we will use the Code Snippets plugin.
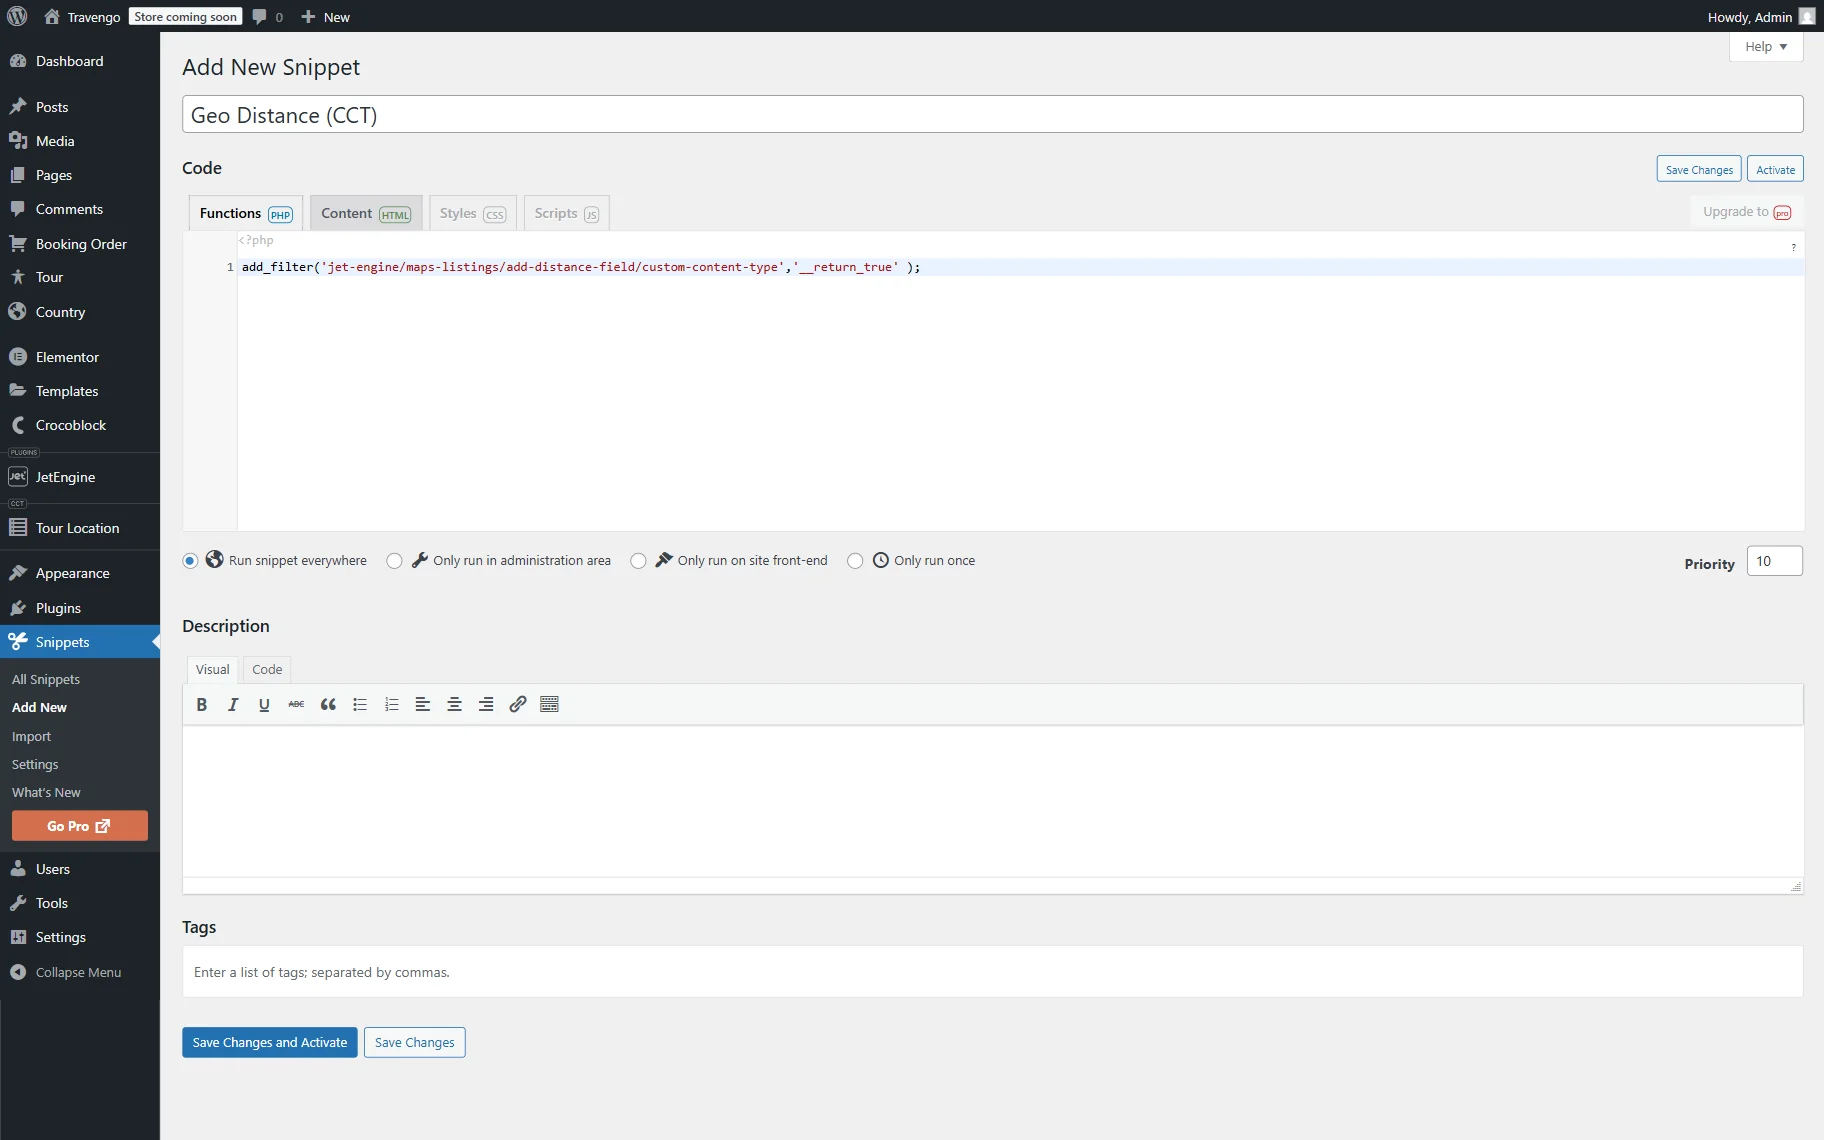
Fill in the snippet’s name (here, “Geo Distance (CCT)”) and paste the following code snippet into the corresponding area:
add_filter('jet-engine/maps-listings/add-distance-field/custom-content-type','__return_true' );Press the “Save Changes and Activate” button.
Build a query
Now, go to WordPress Dashboard > JetEngine > Query Builder and press the “Add New” button.
Complete the Name of the query. In our case, “CCT Geo.”
Then, set the “Custom Content Type Query” Query Type.
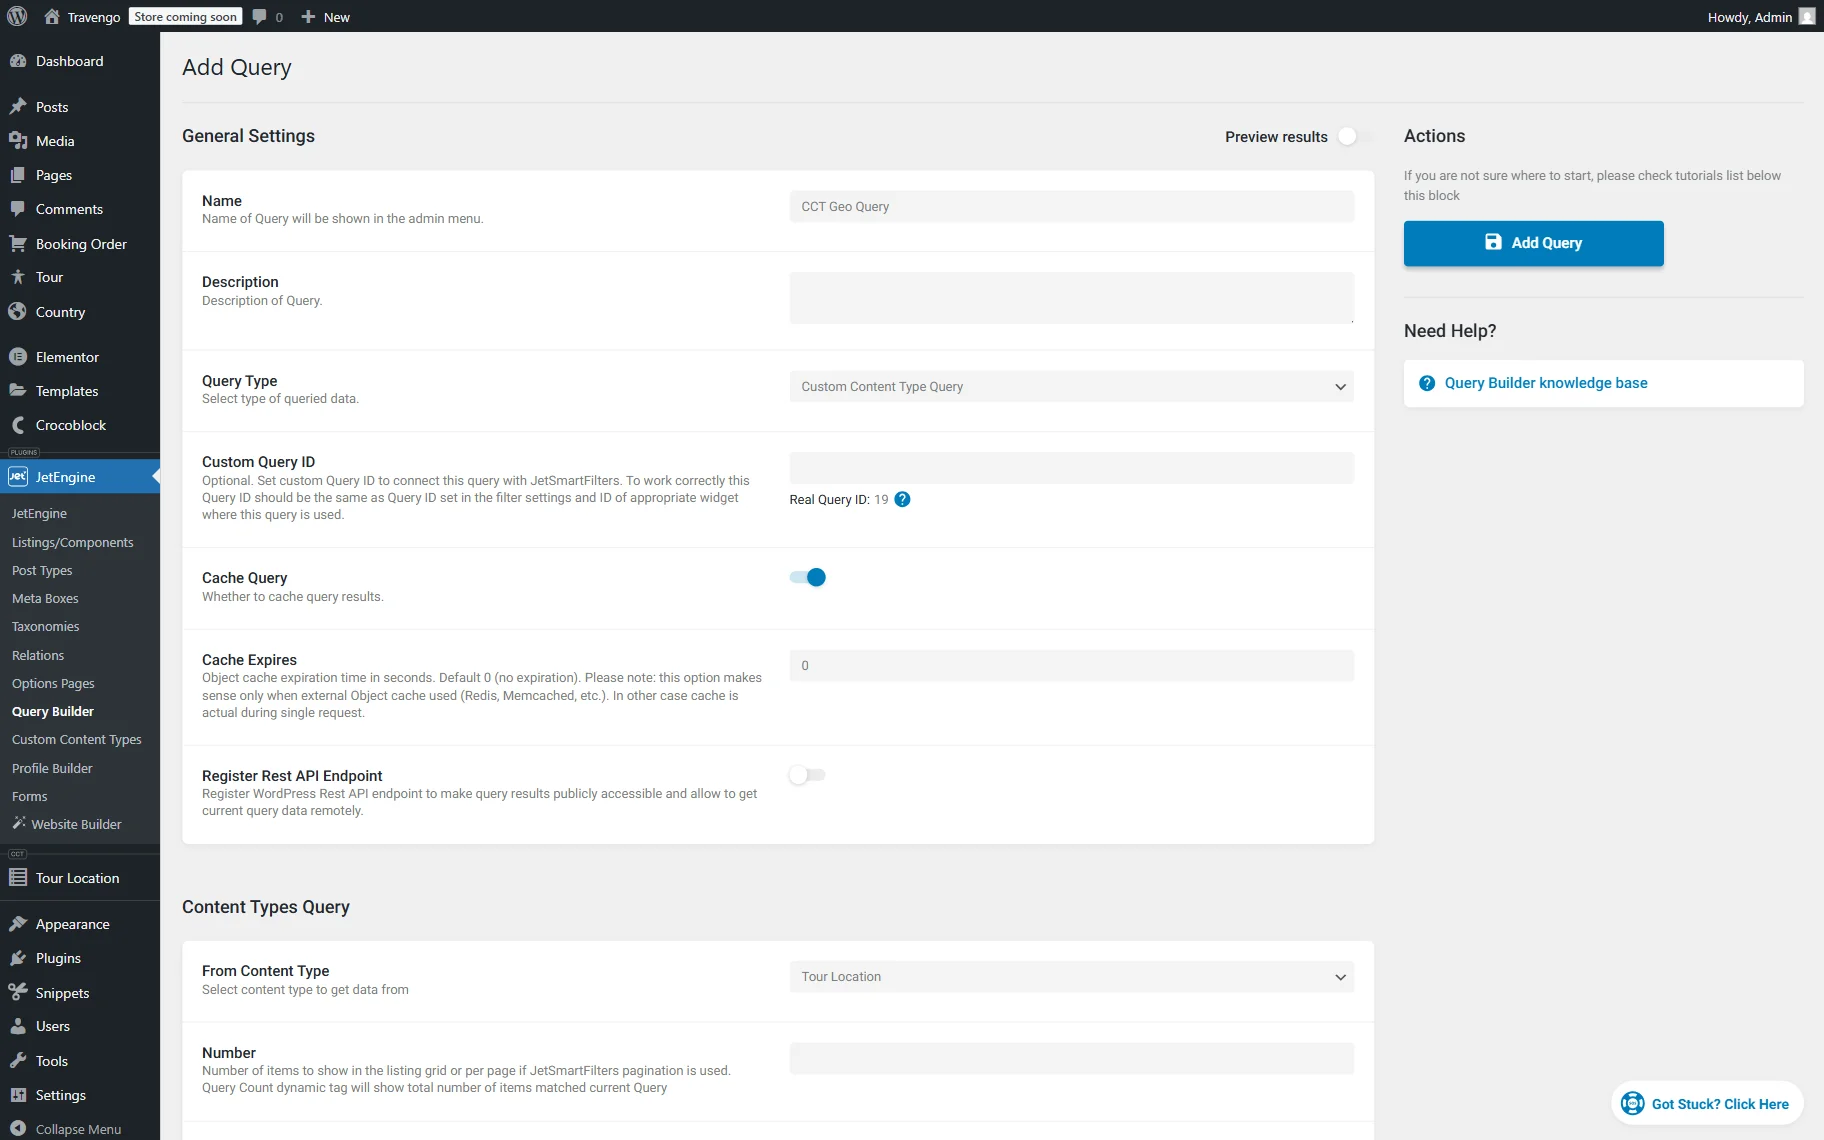
Proceed to the Content Types Query section and select the CCT you want to work with in the From Content Type selector.
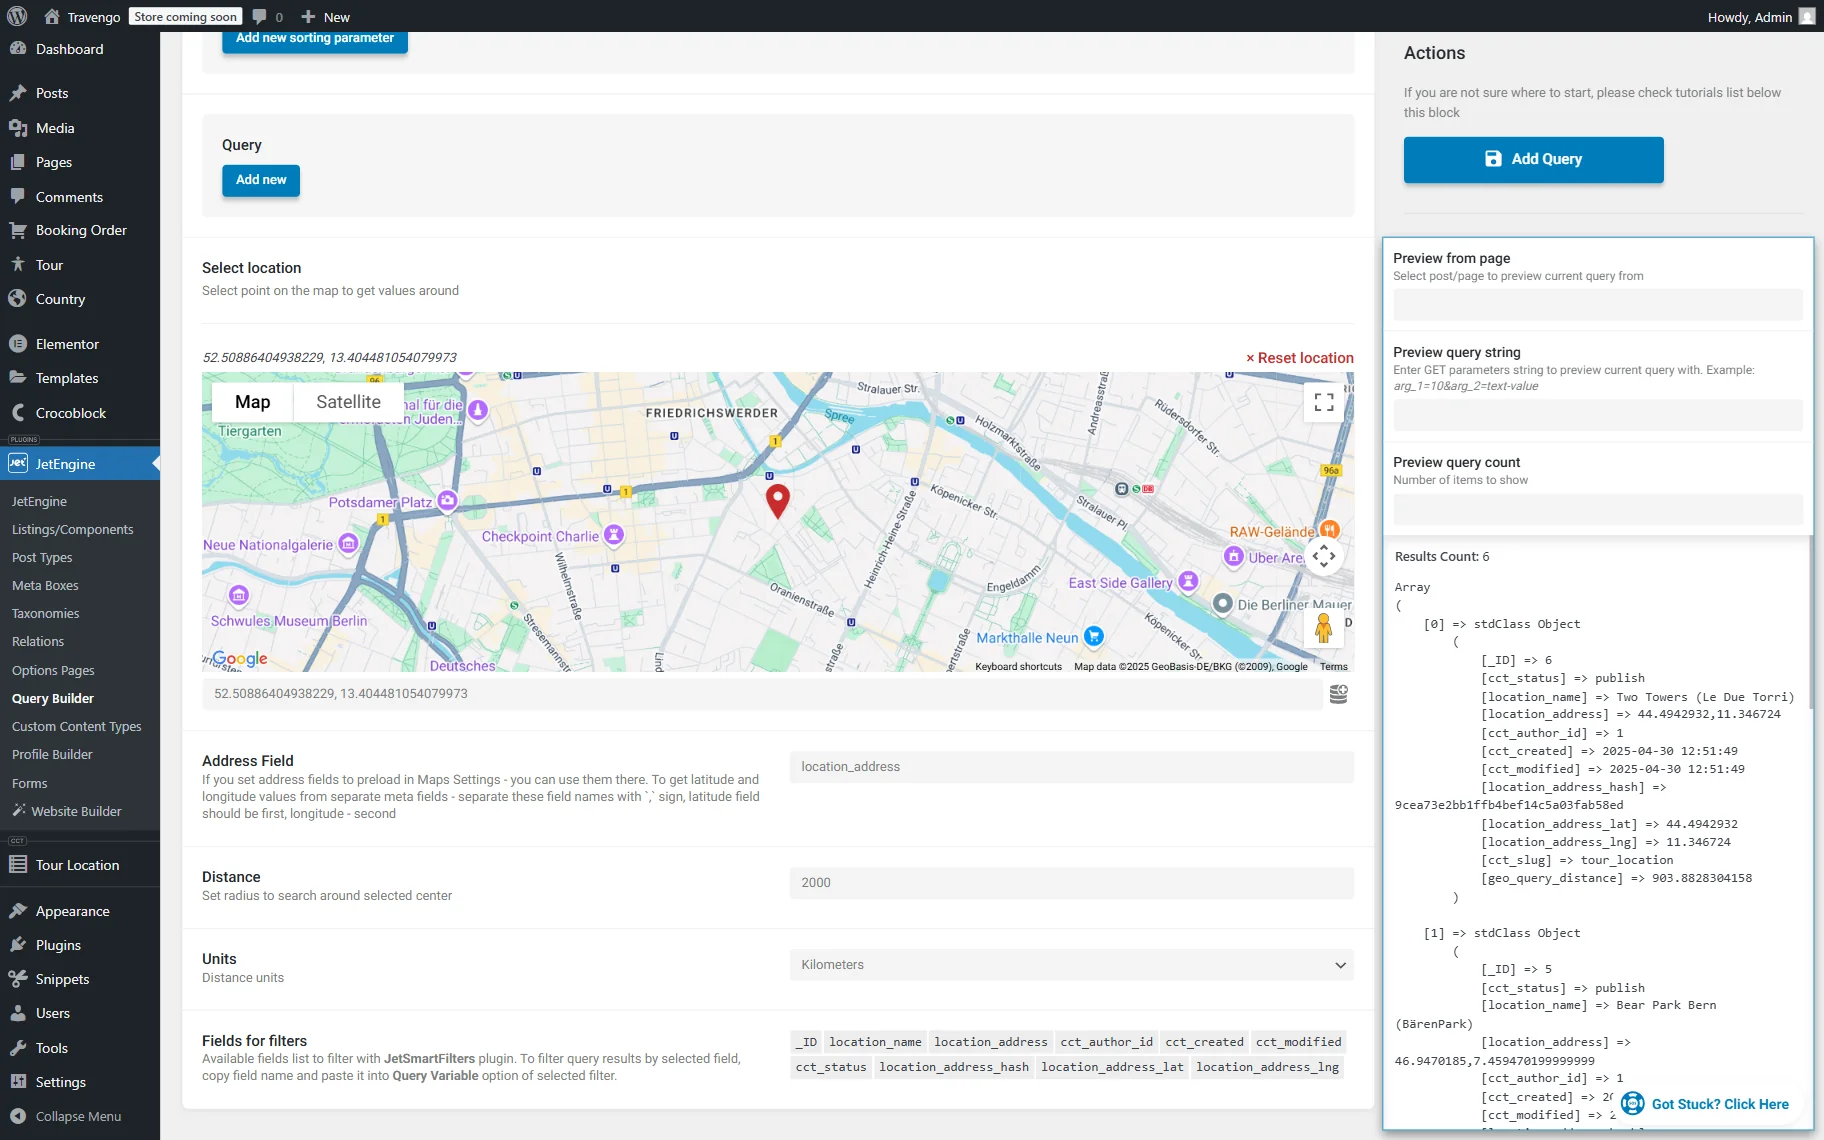
Here, pick the center to search around on the presented map or complete the field below it with the coordinates.
Next, complete the Address Field with the name of the meta field where the address is stored (or two fields if latitude and longitude are stored in different fields). In our case, “location_address.”
Specify the Distance that will be set as a radius to search around the set center and select Units—“Miles” or “Kilometers.”
You can also activate the Preview results toggle at the top of the page and check if there is a “geo_query_distance” value presented in the list. If so, the query works correctly.
Make other changes to the query if needed and press the “Add Query” button.
Build a filter
Now, we should build a filter that will be used on the front end to set the needed address.
To do so, proceed to the WordPress Dashboard > Smart Filters > Add New directory.
Name a filter (here, “Location and Distance Filter.”)
Head to the Filter Settings section and select the Filter Type: it can be either the “User Geolocation” or the “Location & Distance” option. In our case, we select the “Location & Distance” option so the user can manually type in the needed address and select the radius.
Next, we also complete the Filter Labels section and press the “Update” button to save the filter.

Create a listing item
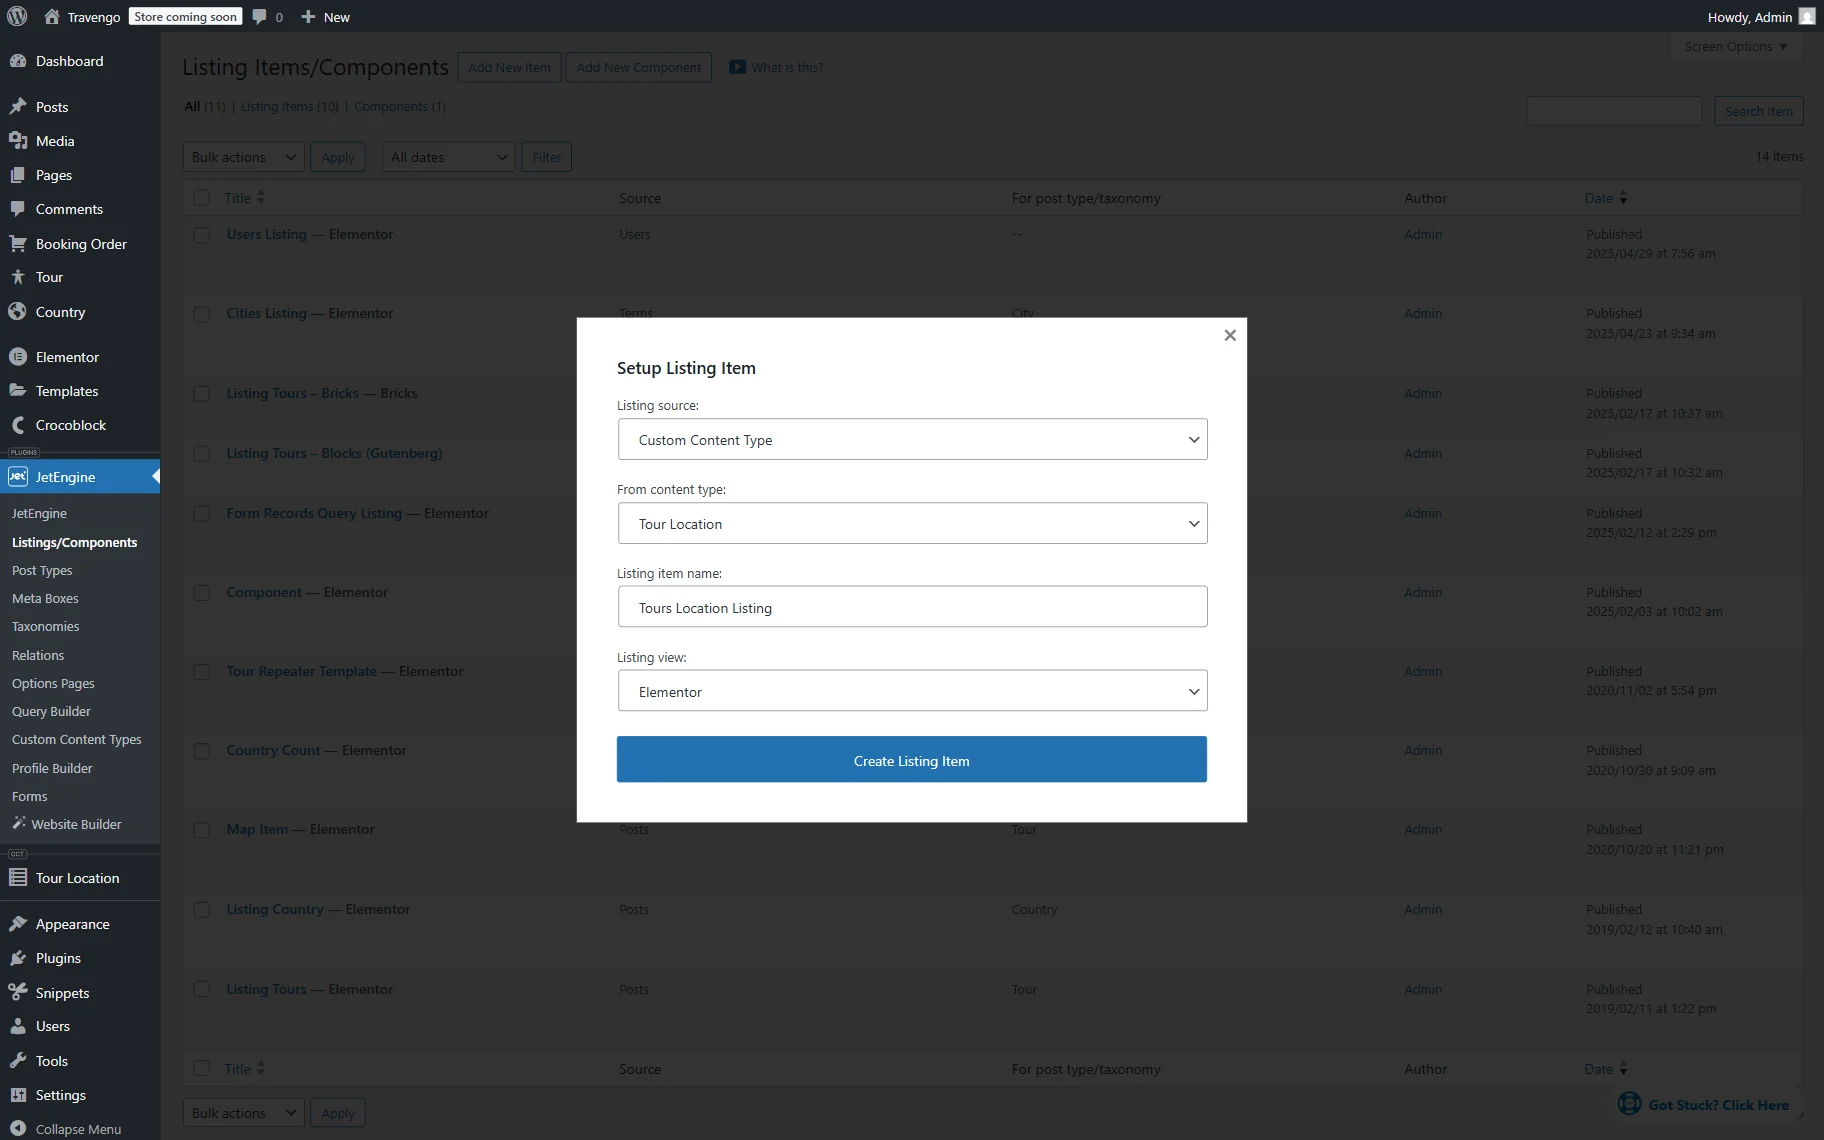
Now, head to the WordPress Dashboard > JetEngine > Listings/Components directory.
Here, press the “Add New Item” button to open the pre-editing pop-up.
Select the “Custom Content Type” option as the Listing source, pick the needed option in the From taxonomy field, and set the Listing item name.
Then, pick any preferred Listing view. For example, we select the “Elementor” option.
Push the “Create Listing Item” button to open the editor.
In the editor, you can display the needed information with the help of the JetEngine’s dynamic widgets/blocks/elements.
Next, add a Dynamic Field to the page.
Leave the default “Post/Term/User/Object Data” Source and paste the “geo_query_distance” value in the Object field / Meta field / Repeater key / Component prop field.
Next, we activate the Filter field output toggle and select the “Format number” option in the Callback field. We do this so the decimal points of the distance number shorten to two (the “2” value is set by default in the Decimal points field).
Then, we also activate the Customize field output toggle and paste the “Geo: %s km” value into the Field format field, where “%s” is the dynamic number value.
Customize the page further if needed and press the “Publish” button.
Add a listing to the page
Next, go to WordPress Dashboard > Pages and add a new page or select the already edited one and open it in the editor. For instance, we open the page in Elementor.
Add a Location and distance or User Geolocation widget to the page. For example, we add a Location and distance widget as we built the filter for this type earlier.
Pick a previously built filter in the Select filter field and select the “JetEngine” option as a provider in the This filter for field.
Add a Listing Grid or Map Listing to the page. For example, we add a Listing Grid widget.
Select the previously created Listing in the General tab.
Open the Custom Query tab and activate the Use Custom Query toggle.
Select the built query in the Custom Query field.

Adjust the following settings if needed and click the “Publish” button to save the result.
Check the result
Proceed to the front-end to check the result.
If the Location and distance filter is used, paste the address in the corresponding text field and specify the radius next to it in the selector.
If everything is set correctly, the listing will show only the filtered CCT items.

That’s all about displaying the distance between WordPress users/terms/CCT items and the set address in the JetEngine’s listing with the help of the Dynamic Field.